DIY

Cash me outside

If you follow me on instagram, you probably noticed I was spending A LOT of time out in our backyard this spring.

urban outdoor space | Brooklyn Homemakerurban outdoor space | Brooklyn Homemakerurban outdoor space | Brooklyn Homemaker urban outdoor space | Brooklyn Homemaker

As soon as the weather turned warm and things started turning green, I was out there every night. You may have even been sick of all the pictures and videos of our yard, usually with smoke pouring out of my charcoal grill and string lights hanging overhead. Sorry not sorry.

I grew up in cow and corn country in Upstate New York, so I was always outdoors in nice weather, and even though I live in Brooklyn now my love for the outdoors is just as strong. We were lucky enough to find an apartment with outdoor space years ago, but if you’ve been reading for a long while now, you’ll remember that the space out back was a little, well, rough around the edges when we first moved in.
A few years back I posted about the progress we’d made so far, which felt monumental at the time, but looking back at pictures seems pretty meager compared to how things look now. Up until that point we’d spent every Summer clearing out debris and weeds and sick unhealthy plants. It took a long time to get everything clean and tidy before we could even begin planting anything new or making the space livable and attractive.

That post was basically the beginning of when we were able to finally start planting, and since then things have changed quite a bit so I thought you might enjoy a little update.  I’ve planted plenty in the past few years, figured out what plants do well and which ones don’t, and added some fancy-pants new outdoor furniture to boot.

urban outdoor space | Brooklyn Homemakerurban outdoor space | Brooklyn Homemakerurban outdoor space | Brooklyn Homemakerurban outdoor space | Brooklyn Homemaker

I know I also mentioned this in my last gardening post too, but just to refresh your memory, we have a big evil mulberry tree out there that makes the yard a disgusting unusable mess for anywhere from 4 to 6 weeks out of every summer. The tree is too tall and the berries fall too far to make collecting them possible, so instead they just splatter into a juicy mulberry paste that attracts flies and ants and birds (and bird poo) and eventually turns moldy and stinky and awful. And guess what. We’re in the midst of berry season proper right now, so I haven’t been back there for a good three weeks. The photos in this post were taken a few weeks ago, just before it started.
Even when the tree isn’t dropping the got-damned berries, instead it’s shading most of the yard and sucking up all the moisture in the soil. As if the berries weren’t enough to deal with, that tree is the source of two little words that have made my life very difficult over the past few years.
Dry.
Shade.

It’s incredibly difficult to find plants that thrive in dry shade. Most shade plants are moisture lovers, and most drought-tolerant plants love lots of sunshine. So, after years of experimenting, I’ve basically learned that Hostas are my best friend if I want the yard to look green and lush. I know they’re kind of boring, but there are so many different colors and shapes and sizes available these days that even a yard filled with Hostas can look interesting and modern. I’d actually already figured this out before my last yard post, but at that point I’d only gotten around to planting few of them. These days they’re all over the place.

Bleeding Hearts and Coral Bells seem to do well back there too, so I’ve started mixing them in between the Hostas. There’s one little corner of the yard that gets a few hours of decent light, so I have some orange day lilies planted there, but they haven’t flowered yet and so far they just look like overgrown grass. Because I like to live dangerously, this spring I also decided to test the limits of the sunshine back there, and planted a sun-loving Forsythia against the fence. Fingers crossed!

urban outdoor space | Brooklyn Homemakerurban outdoor space | Brooklyn Homemaker

To mix in some color and texture, I like to fill pots with hardy annuals like wax begonias and I always do a few herbs in one of the big galvanized buckets we added a few years ago too. Sometimes they don’t get enough sun and don’t last the whole summer, but they’re nice while they last and so far they seem to be doing well this year.
Early in the spring I usually try some pansies too for some color and life while the hostas are just barely poking out of the ground, but they don’t really last once the weather turns hot and I’ll need to replace them with something else mid-summer. They looked great in the photo below, but they’re already starting to look pretty scraggly.

For the first time ever this year, I mulched a good portion of the beds to try to keep them moist and healthy during the hot dry spells we always seem to get in Brooklyn summers. Not only do I hope it’ll keep the plants happier, it also went a long way in making the yard feel so much more “finished” and attractive. We went with brown mulch so it doesn’t really “read” in photos all that well, but I promise it looks great in person, especially compared to bare dirt. Getting the heavy, wet, stinky bags of mulch out there meant carrying them all by hand through our apartment and out our bedroom window, and we needed about 30 bags for the area we mulched, but it was well worth the effort in the end and I really wish we’d done it sooner!

urban outdoor space | Brooklyn Homemakerurban outdoor space | Brooklyn Homemakerurban outdoor space | Brooklyn Homemaker

When we first moved in there was an old swing in the yard, and a rotting old wooden table left by one of the previous tenants. We moved the swing into the back of the yard this spring, and the table has since fallen apart. I re-used the legs to build the red coffee table you’ll notice in some of these photos, but I don’t know how much longer that old wood will hold out. The paint is peeling pretty badly so I’m hoping new paint will protect it and help it last a few more years.
I just need to decide on a color…
Any suggestions?

Almost half of the yard space is covered in concrete and works as a patio area for us. When we first moved in I was disappointed that there wasn’t more space for planting, but now that I know how challenging it is to get plants to thrive in our dry shade conditions, I’m actually relieved that we have more space for entertaining and lounging.
That’s why we decided to make a pretty serious investment in outdoor furniture this year. Russell got me an outdoor sectional for my birthday, and it all kind of snowballed from there. Upgrading from the old two-seater swing made me suddenly realize how much more comfortable our outdoor space could be if we were willing to put the time and money into it, so I kind of went a little overboard with the online shopping. We’d gotten the dining table a few years ago but never really got around to finding chairs to go with it, so that was my next mission. Then came the throw pillows, and a deck box to store all the cushions and pillows in. Then we just stumbled on those black and grey club chairs one day and we had to have them! Luckily everything was (relatively) reasonably priced.
In case you’re interested, the sectional, dining chairs, and deck box are from Wayfair. Unfortunately the sectional and chairs don’t seem to be available right now. The outdoor throw pillows and big grey club chairs are from Target, and the dining table and lanterns are from Ikea.

urban outdoor space | Brooklyn Homemakerurban outdoor space | Brooklyn Homemakerurban outdoor space | Brooklyn Homemaker urban outdoor space | Brooklyn Homemakerurban outdoor space | Brooklyn Homemaker urban outdoor space | Brooklyn Homemaker urban outdoor space | Brooklyn Homemakerurban outdoor space | Brooklyn Homemakerurban outdoor space | Brooklyn Homemaker
Things are looking a little more full and lush since I’ve taken these photos because we’ve had a lot of rain lately, so once the berries stop dropping I’ll get out there to clean up the mess and start barbecuing again! You’re more than welcome to live vicariously through my instagram stories, but my life really isn’t all that exciting so I’d suggest trying to find someone a little more interesting to follow!

Who knows, if things look different enough maybe I’ll give you another glimpse into our yard in another couple years.

Maxwell’s for Hair

Alright friends! Here we are again! I promise you that this time you’ll get to see how it all turned out though!!!

The last time we were here we were just wrapping up our tiling job and I’d finally gotten the hang of mixing the grout and spreading it on in small patches so it wouldn’t dry too fast.
The next step was to finally start making the shop look pretty! Yay!

Maxwell's for Hair | Brooklyn Homemaker

I’ve always loved interior design and home decor, so when it came down to figuring out a layout and design for the shop, we decided we’d forgo an fancy pants designer and just do the work ourselves. Based on his experience and expertise, Russell helped me figure all the practical details like the layout, the spacing between the stations, and how high to hang mirrors and fixtures, but for the most part, the pretty-ification of the space was up to me.

I’m sure that I’ve mentioned this before, but I consider Pinterest to be an incredibly useful tool when it comes to organizing thoughts, ideas, and inspirations, as well as a great place to store information on specific products and even DIY projects I want to be able to easily find when I’m ready for them. I used Pinterest in this way when planning my own wedding, and I honestly don’t think it would have gone so smoothly and turned out so beautifully if I hadn’t had such a well organized and easily navigable place to “pin” everything I had floating around in my head. So, when it came time to come up about a modern, cohesive, and inviting concept for Maxwell’s, I knew just where to start.

We already knew we were working with a base of white subway tile, so we decided to go for a kind of classic black and white scheme with lots of warm wood accents. Everything was being done on a tight budget, so I did A LOT of comparison shopping and bargain hunting online, and every time I’d find something I liked, I’d “pin” it and then look around for similar, cheaper options. Sometimes I found them, sometimes I didn’t. If not, we’d talk it out and decide whether it was worth a splurge or not. Our biggest splurges, the barber chairs and the huge round mirrors, ended up being the pieces that have the biggest visual impact in the pace, which is why we decided they were worth the money.

To make up for those splurges though, I tried really hard to find ways of using basic inexpensive items in unexpected ways to make them look more interesting, impressive, and “expensive”.

To that end, I found some basic builder-grade vanity bars online that were available in a matte black finish rather than the standard brass or nickel. To make them look even more “custom” I mounted them vertically to flank the mirrors, rather than horizontally above them. It’s a simple touch, but I think it makes a big impact.

Maxwell's for Hair | Brooklyn Homemaker Maxwell's for Hair | Brooklyn Homemaker

The shop has no closets or storage at all, so we knew we’d need to put in some cabinets or something. Originally we were thinking about buying some kind of second hand armoire or freestanding cabinet, but after a quick trip to Ikea we decided to just put up some inexpensive pine wall cabinets instead. To make them feel a little warmer and a lot less “Ikea-y” we decided to stain them and add some hardware.

Since our mirrors are framed in a rich, warm acacia, we decided to mix two store bought stain colors together to make one that would help make our pine cabinets look like they matched, or at least complimented, the mirrors.

While the shop was still under construction we kept the mirrors in their original boxes, and when we tried matching the stain we only opened the box enough to reveal a section of the frame. After the cabinets and stations were stained and the mirrors were hung, we realized that the mirror’s frames are made up of many smaller pieces of wood all with their own varying tones and colors, most of which aren’t quite as red as the small section we originally used to choose our stain color. The frames overall feel a little warmer and more yellow/brown than the reddish stain we went with, but in the end the stations and cabinets still look amazing and compliment the acacia really well, so who cares?

I mean, I do.
But only a little.

Maxwell's for Hair | Brooklyn HomemakerMaxwell's for Hair | Brooklyn Homemaker

When it came to the stations themselves, we decided that some floating box shelves would add a clean, custom touch with plenty of storage. They were really simple to build, thanks to mom and her handy dandy miter saw, and we used pine again to save a few bucks.

Russell requested that we find a way to add a hole in the stations to hold a hair dryer, and thankfully, there’s a drill bit for that! Easy Peasy!

Maxwell's for Hair | Brooklyn HomemakerMaxwell's for Hair | Brooklyn HomemakerMaxwell's for Hair | Brooklyn Homemaker

Next up: Paint!
With an entire wall of bright windows and tons of white tile going so far up the walls, we decided that we could afford to add a touch of bold dark color at the top of the wall without making the space feel cramped or dim.

After testing some colors on the walls and comparing them against the larger pieces in the room, we decided on a rich, deep, dark foresty green to compliment the gold tones in the chandelier and the warm red tones in all the wood. It looks almost black in many of the pictures here, but please just trust me that in person it’s a rich modern forest green.

Maxwell's for Hair | Brooklyn Homemaker Maxwell's for Hair | Brooklyn Homemaker

From the very first day, one of the most confusing areas to design around was the electrical panel door toward the front of the shop. I tossed several ideas around with Russell, but we just couldn’t agree on anything. We talked about hanging his licenses from it, or using it as a service and price list, or mounting a long mirror on it, or even just painting something on it, but nothing really seemed right to either of us.

When the solution finally came to me, it was so simple that I almost felt stupid for not coming up with it sooner.

Maxwell's for Hair | Brooklyn Homemaker

Chalkboard paint dummy!!!!

Maxwell's for Hair | Brooklyn Homemaker

Now that we’ve tiled around it and painted the frame white, it actually looks like an intentional design piece rather than an annoying feature we were forced to design around.

Maxwell's for Hair | Brooklyn Homemaker

Another that thing we knew would be a thorn in our sides from day one was the front wall of the shop.
When we first saw the space we noticed that the entire front wall was strangely slapped together and incredibly poorly insulated. It consisted of little more than wood framing holding up single panes of glass above, with thin single panels of wood covering the facade below.

We eventually decided that the most cost effective option would be to leave the wood panels in place on the outside, and just put in some insulation inside with more wood covering it up on the interior. We didn’t consider exactly how we’d make that happen, but were just taking one thing at a time and figured we’d worry about that when the time came.
Well, the time came, and our plan ended up being much more of a pain in the ass than we anticipated.

We didn’t have a table saw so we weren’t able to cut our own panels of wood to size, our contractor was already finished and long gone, and all the hardware stores we spoke to refused to cut the panels to the exact size we needed. The Home Depot in Brooklyn even has a big sign at the wood cutting station that says “No precision cuts”, which we assumed meant they couldn’t guarantee cuts to an exact 1/16th of an inch measurement, but what it really meant was that all they’re really willing to do is cut a board in half for you so it’ll fit in your car.

I played with a ton of different options in my head, but none of them ever turned out to be plausible. Once the tiling was done and we had no choice but just figure it out, we took a trip to hardware store to see what we could come up with. We were just about at our wit’s end after spending waaaay too much time wandering the aisles and coming up with zilch, when suddenly I spotted these packs of tongue and groove wainscoting panels. They were just about the right height and could easily be fit to the width we needed. Score!

Maxwell's for Hair | Brooklyn Homemaker

All I had to do was staple-gun them in place, trim them out, and paint them glossy white to match the rest of the woodwork on the facade. I only sliced the tip of my finger off once while installing them too, so that’s good. Right?

Maxwell's for Hair | Brooklyn Homemaker

Here’s the before, during, & after; all rolled into one!
(sorry the photos don’t exactly match up right, but you get the idea)

Maxwell's for Hair | Brooklyn Homemaker

With the lower part of the wall well insulated, we planned to just live with the single pane windows above for the first year or so. Unfortunately, a few days into the buildout we noticed that one of them was actually cracked and we hadn’t noticed. The people who had the space before us had so much tape and crud and gunk on the windows that we didn’t even notice that they’d “sealed” the crack in the window with cheap packing tape.

So, we ended up having to replace the windows with fancy dual pane insulated ones, but now it’s done and we won’t have to worry about it again.

With work beginning to wrap up on the interior of the shop, I figured it was finally about time to go ahead and paint the exterior too.
After caulking and sanding the facade, I opted for some matte black paint for a simple, understated look that would let the interior view really pop through the oversized windows.

We also added some wood panels to the little awning above the shop in the photo below, and painted that all black as well. Eventually we’ll be mounting our logo to the the panel, but that’s a work in progress so for now the entire exterior is just a simple flat black.

Maxwell's for Hair | Brooklyn Homemakerhttps://brooklynhomemaker.com/2016/10/21/maxwells-for-hair-getting-there/

With all that out of the way we were almost ready to open, but it was still really warm out and we still hadn’t sorted out the whole issue with the weird electrical work and the non-functional AC.
We had called in a work order with the utility company, but these things take time…

A lot of time…

So much time…

.

With the finish line drawing nearer and nearer, Russell decided to put in another call to see if there was anything we could do to speed things along. Long story short, Russell used his ability to make people fall in love with him to his advantage, and forged a friendship with someone in the customer service department.

I won’t go into all the details about everything that had to happen, but it took several appointments to figure out what was wrong, and even more to fix it. They actually ended up having to bring in a crew to dig a hole in the street outside to run new wires in to our electrical panel, and believe me, the whole process could have (and would have) taken several months if Russell hadn’t made that friend.

Lucky for us, because the source of the problem wasn’t inside the building, it was the utility company’s responsibility to fix it and pay for it, and not ours! Finally, something worked out in our favor! Imagine that!

Maxwell's for Hair | Brooklyn Homemaker

You can’t imagine what a relief it was when it was finally fixed, but it also felt kind of weird and anticlimactic, like oh, it’s just working like normal #NBD.
But then, when the shop was suddenly cool and comfortable after so many months of being stiflingly sweaty and unbearable, we definitely did plenty of jumping up and down with joy. And we didn’t even break a sweat!

Around that same time, I suddenly looked around the shop and realized that after months and months of hard work and countless to-do lists, there wasn’t really much of anything left for me to do!

The only problem with all of our sparkly white tile was that even with the warm wood tones and custom accents the space ultimately ended up feeling a little cold and sterile.
We’d always known that we wanted to bring in a couple of plants to add some life and color and texture to the room, but once we were about ready to open, it quickly became clear that we needed more than just a couple. The next thing we knew we were amassing a small jungle, and the bright greens and mix of tones and textures instantly brought a welcome warmth and vibrance to the space! We’ve actually added even more since these photos were taken, and I still have my eye out for more yet!

Maxwell's for Hair | Brooklyn Homemaker Maxwell's for Hair | Brooklyn Homemaker Maxwell's for Hair | Brooklyn HomemakerMaxwell's for Hair | Brooklyn Homemaker Maxwell's for Hair | Brooklyn Homemaker

So, there you have it folks! After months and months of hard work and gallons of sweat, Maxwell’s is open for business!

If you live in Brooklyn, or ever find yourself in Bushwick in need of a haircut and some sparkling conversation, please stop by Maxwell’s at 274 Troutman St. Russell specializes in barbering and short hair, but his staff can do short hair, long hair, straight hair, curly hair, men’s hair, women’s hair, you name it! This place is the total package folks, so come check it out!!!

Maxwell’s for Hair, getting there…

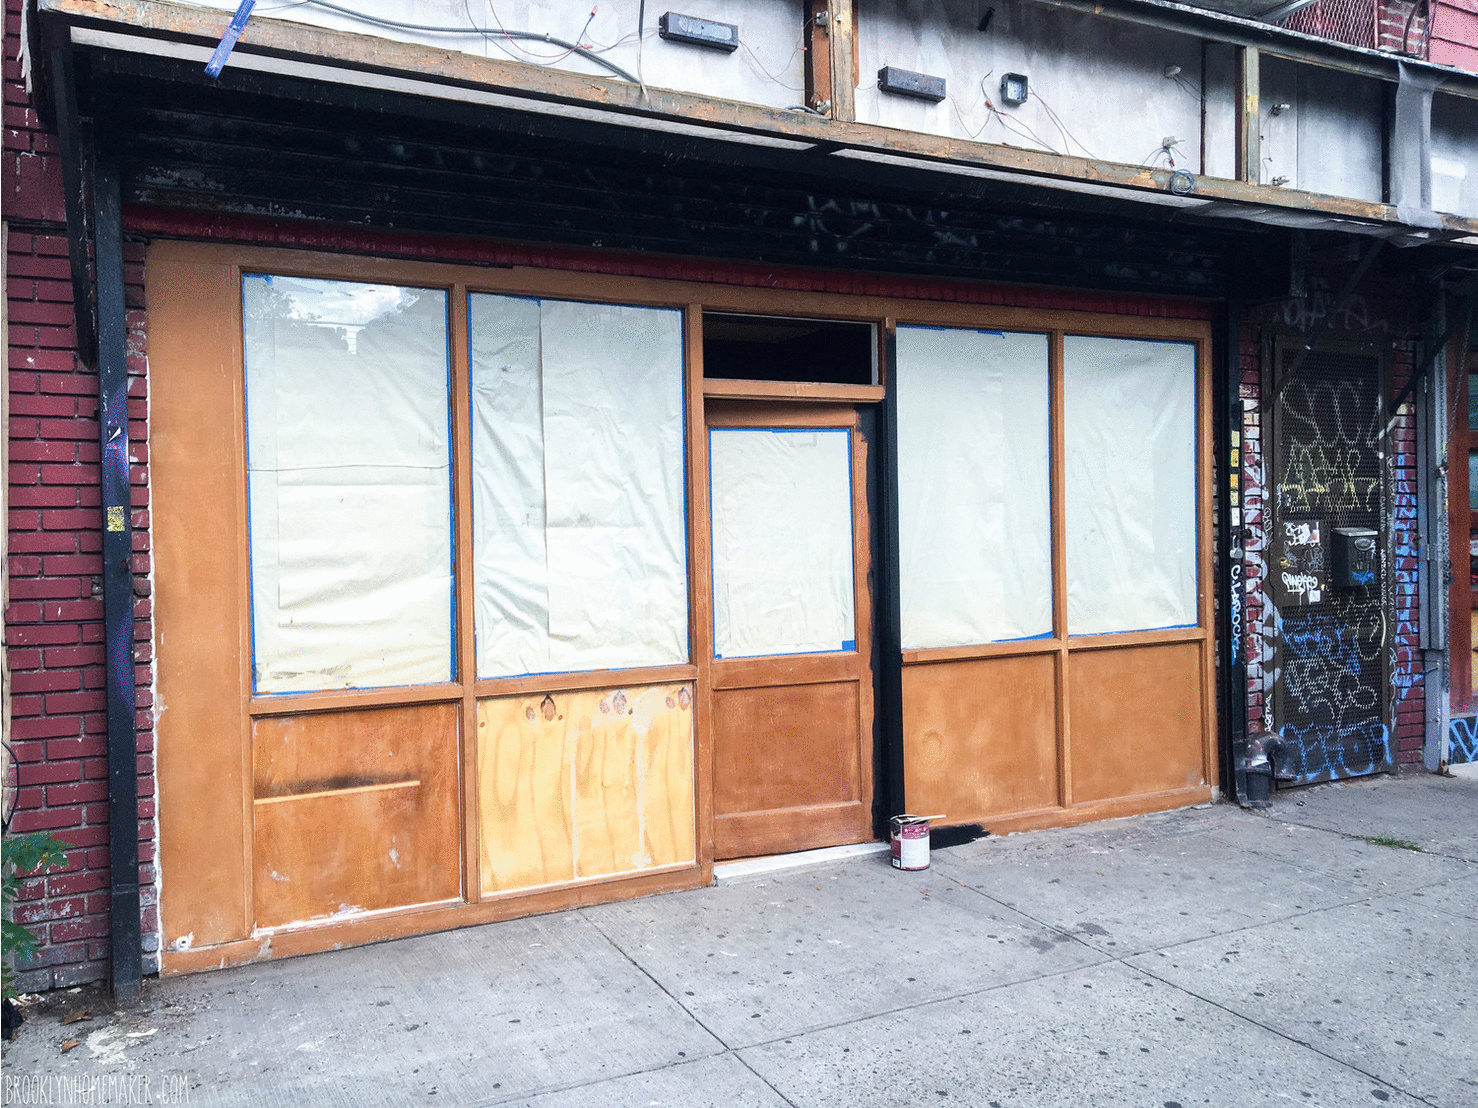
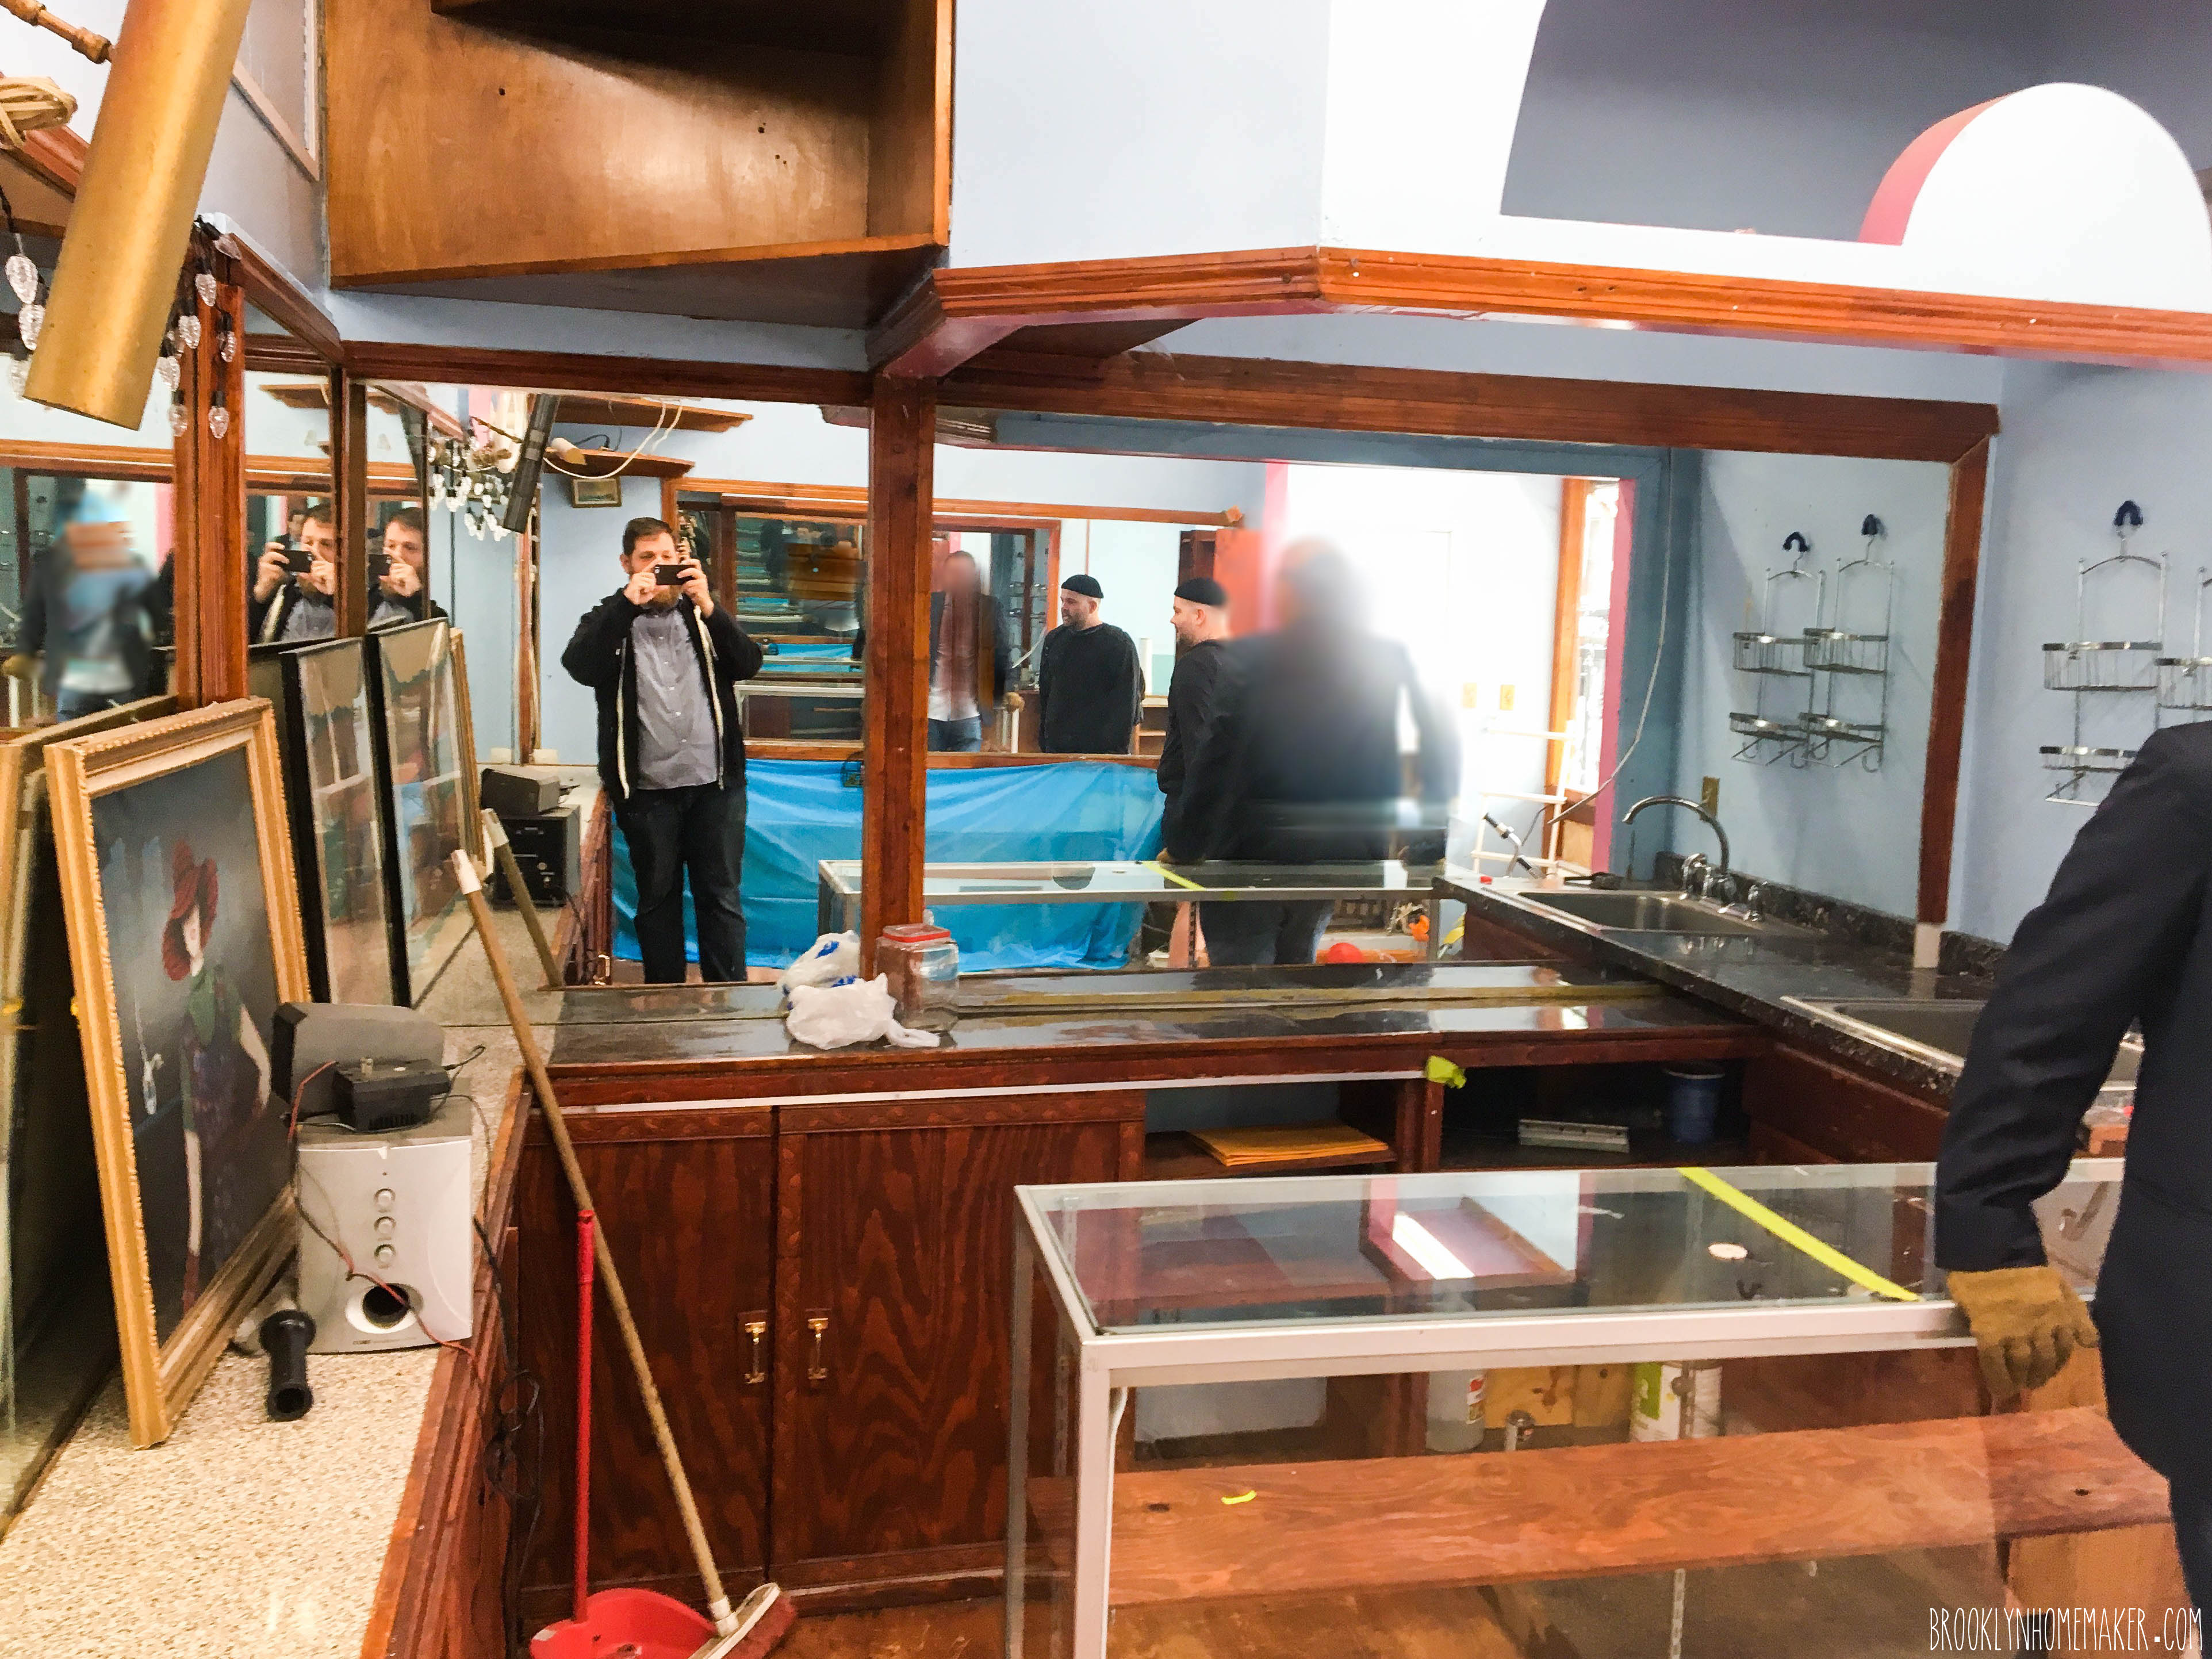
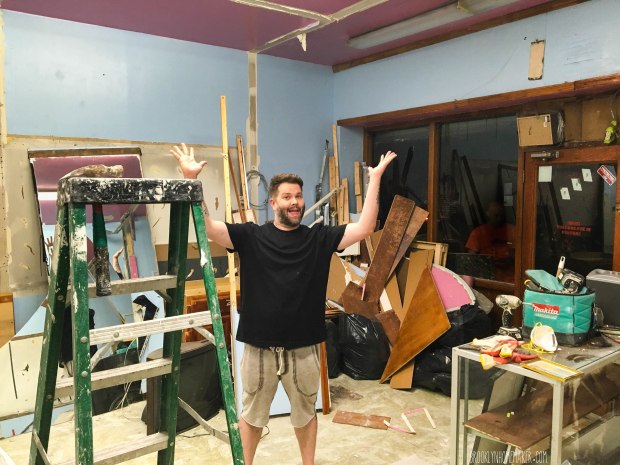
Okay, so where were we? When we left off, Russell was standing with his hands in the air, a grin on his face, and a giant pile of rubble and mess behind him. Our contractor had just started demo, and the the shop was a frightful glorious mess.

Maxwell's for Hair | Brooklyn Homemaker

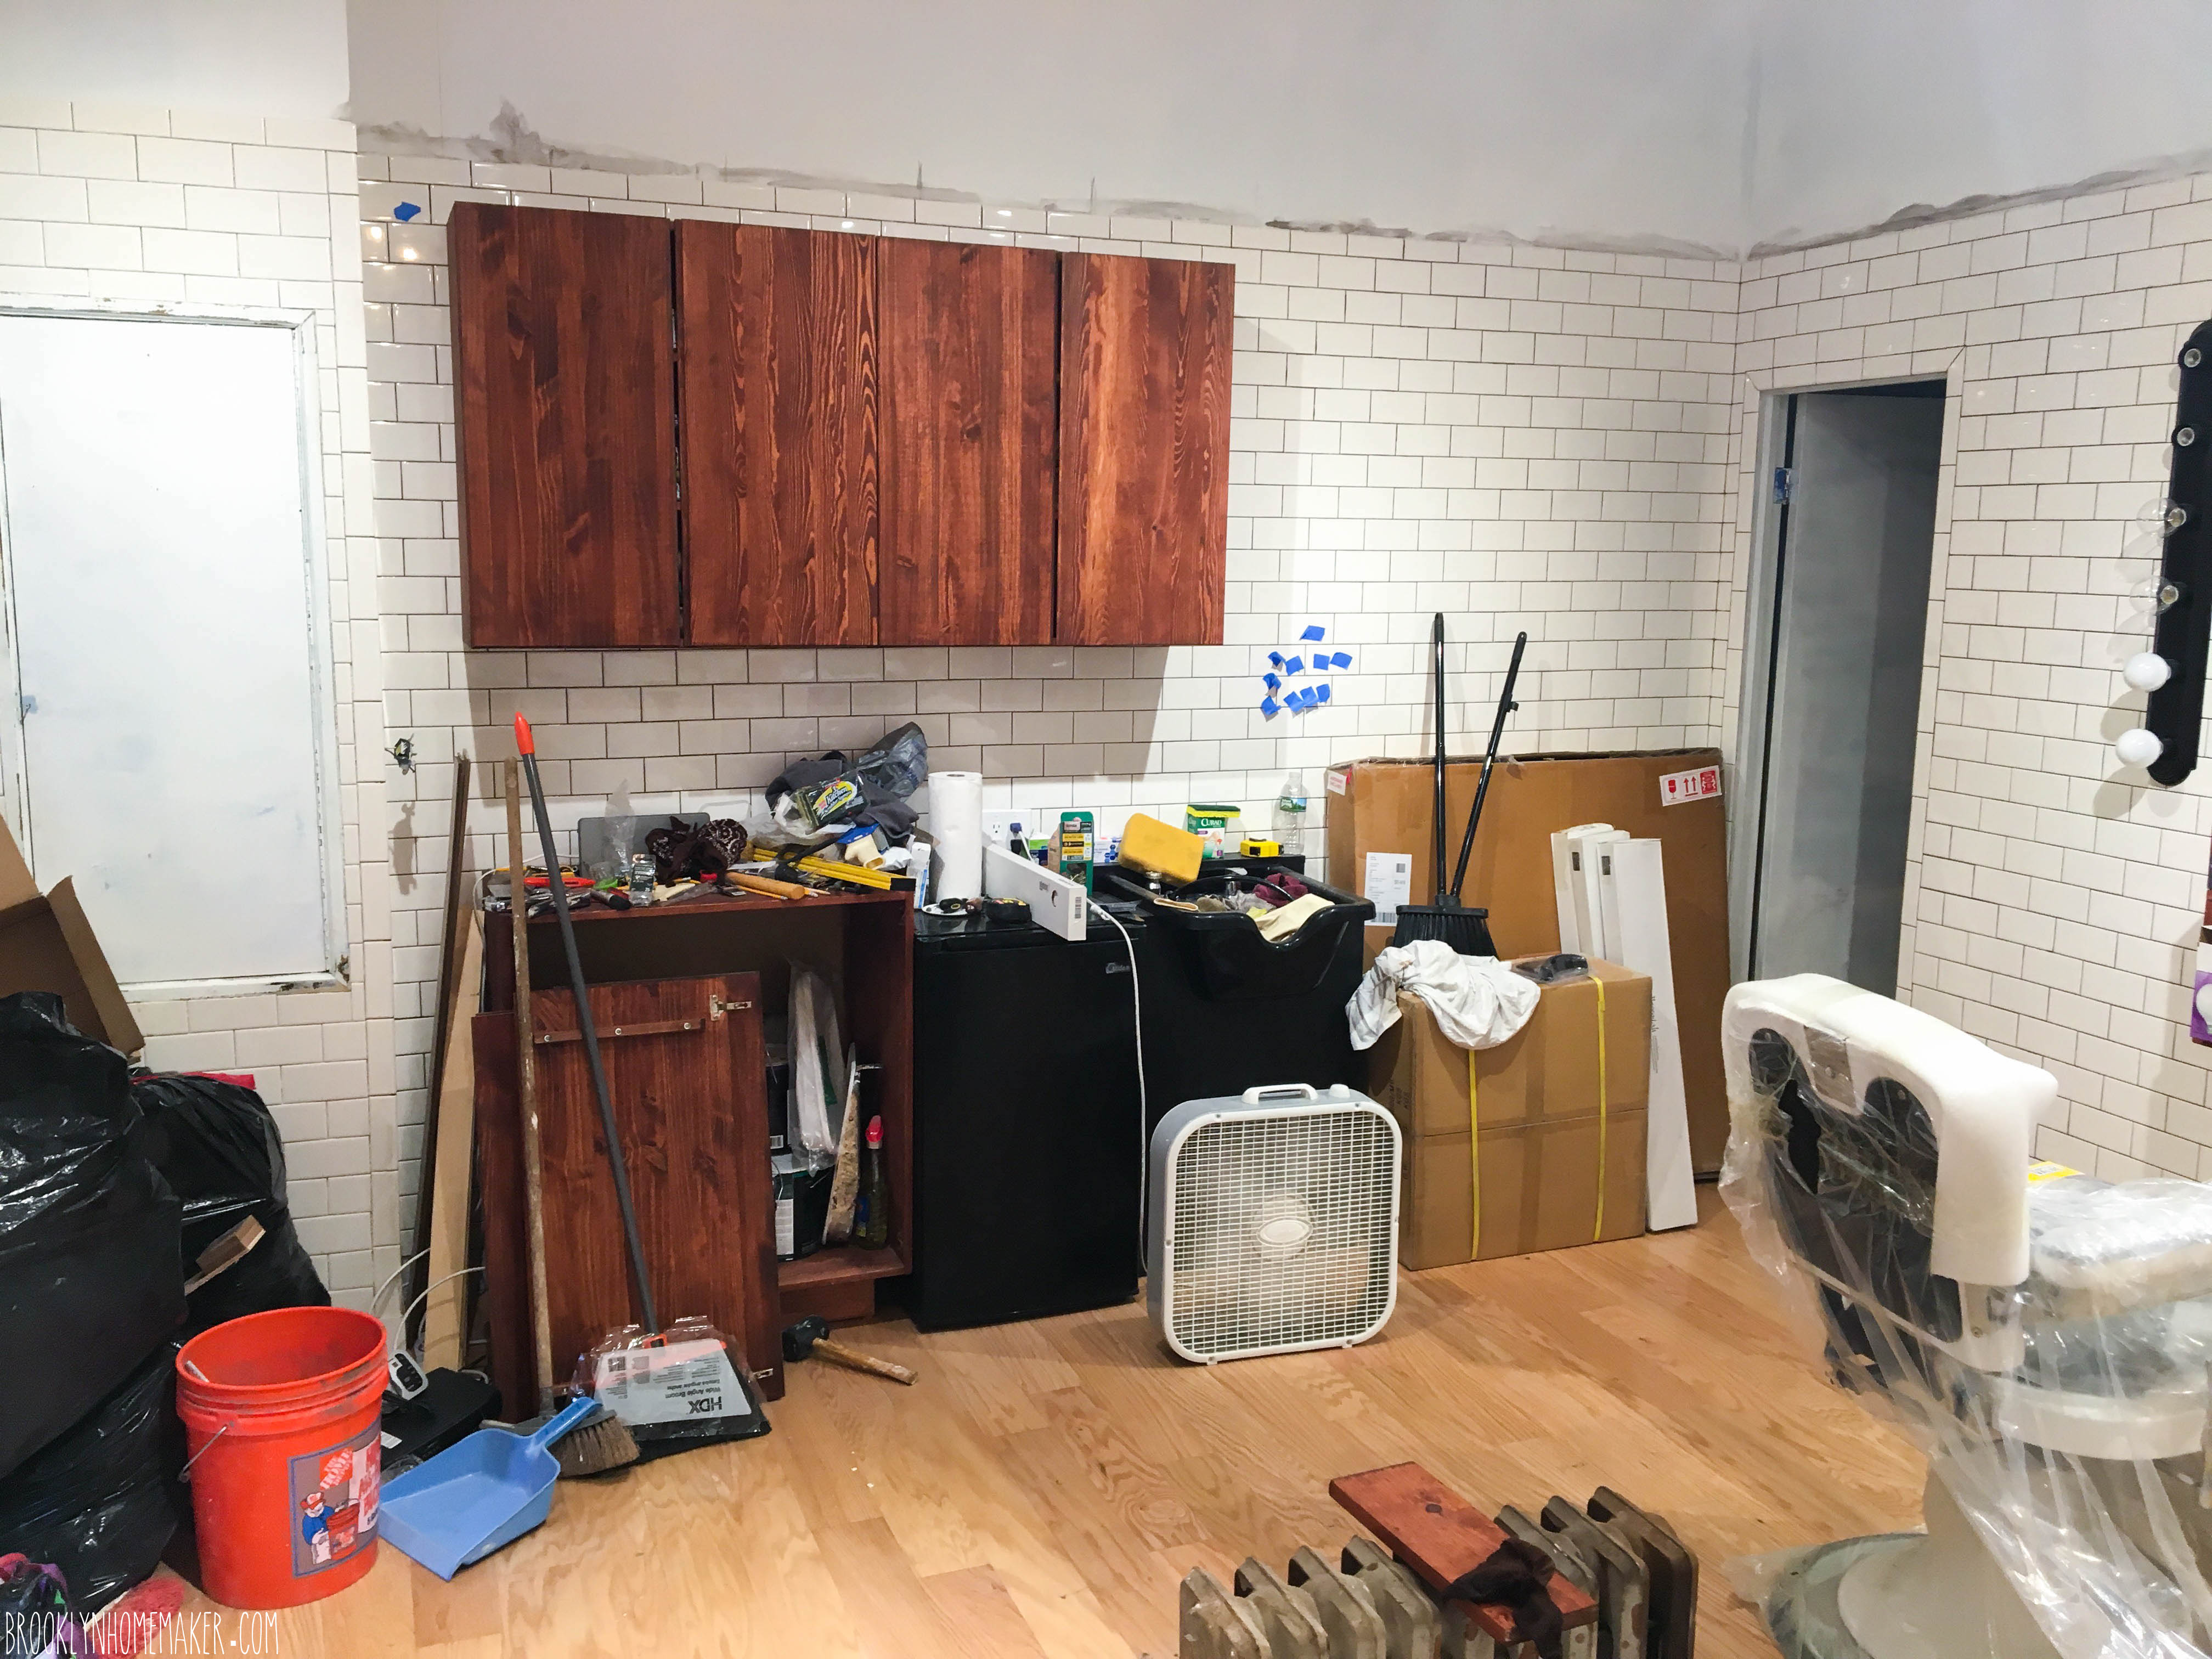
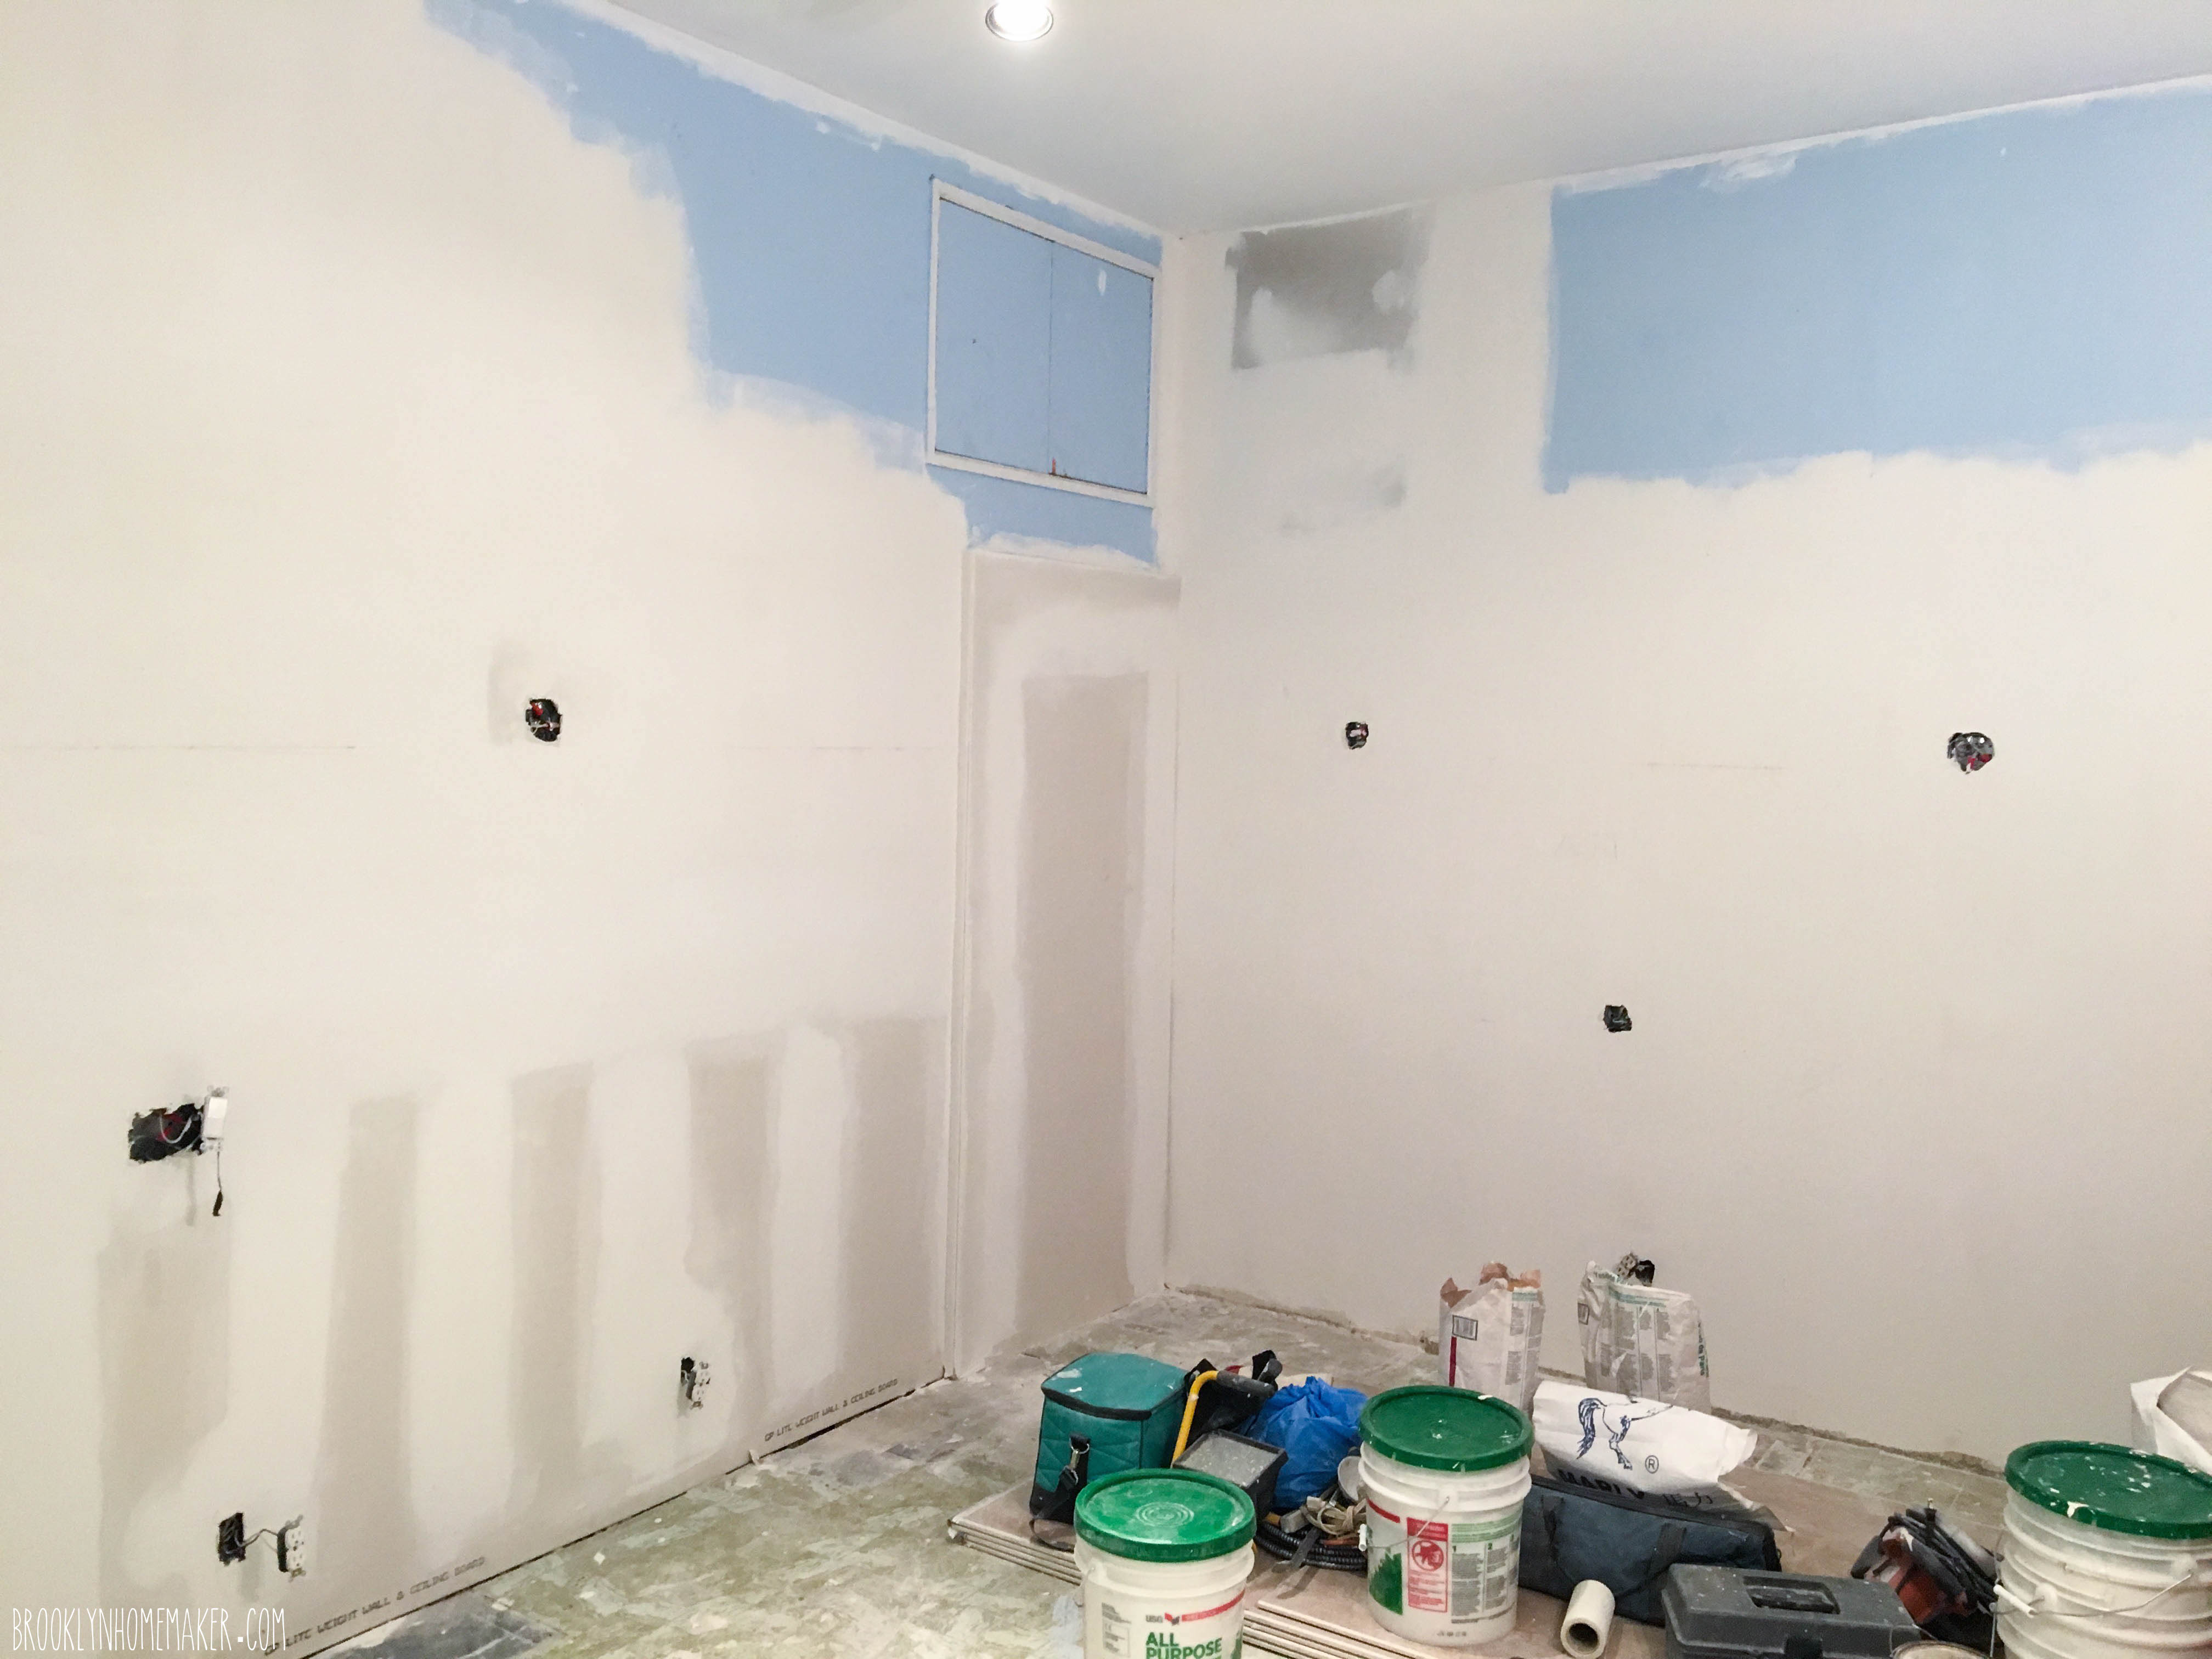
I have to admit, we really lucked out with a contractor who worked quickly and efficiently, and things (mostly) went nice and smooth all through his work. The demo went well, new drywall went up, things were patched and beginning to take form. To help save a little money I would go in after the crew left to prime and paint the patched up walls and ceilings myself.

Maxwell's for Hair | Brooklyn Homemaker Maxwell's for Hair | Brooklyn Homemaker Maxwell's for Hair | Brooklyn Homemaker Maxwell's for Hair | Brooklyn Homemaker

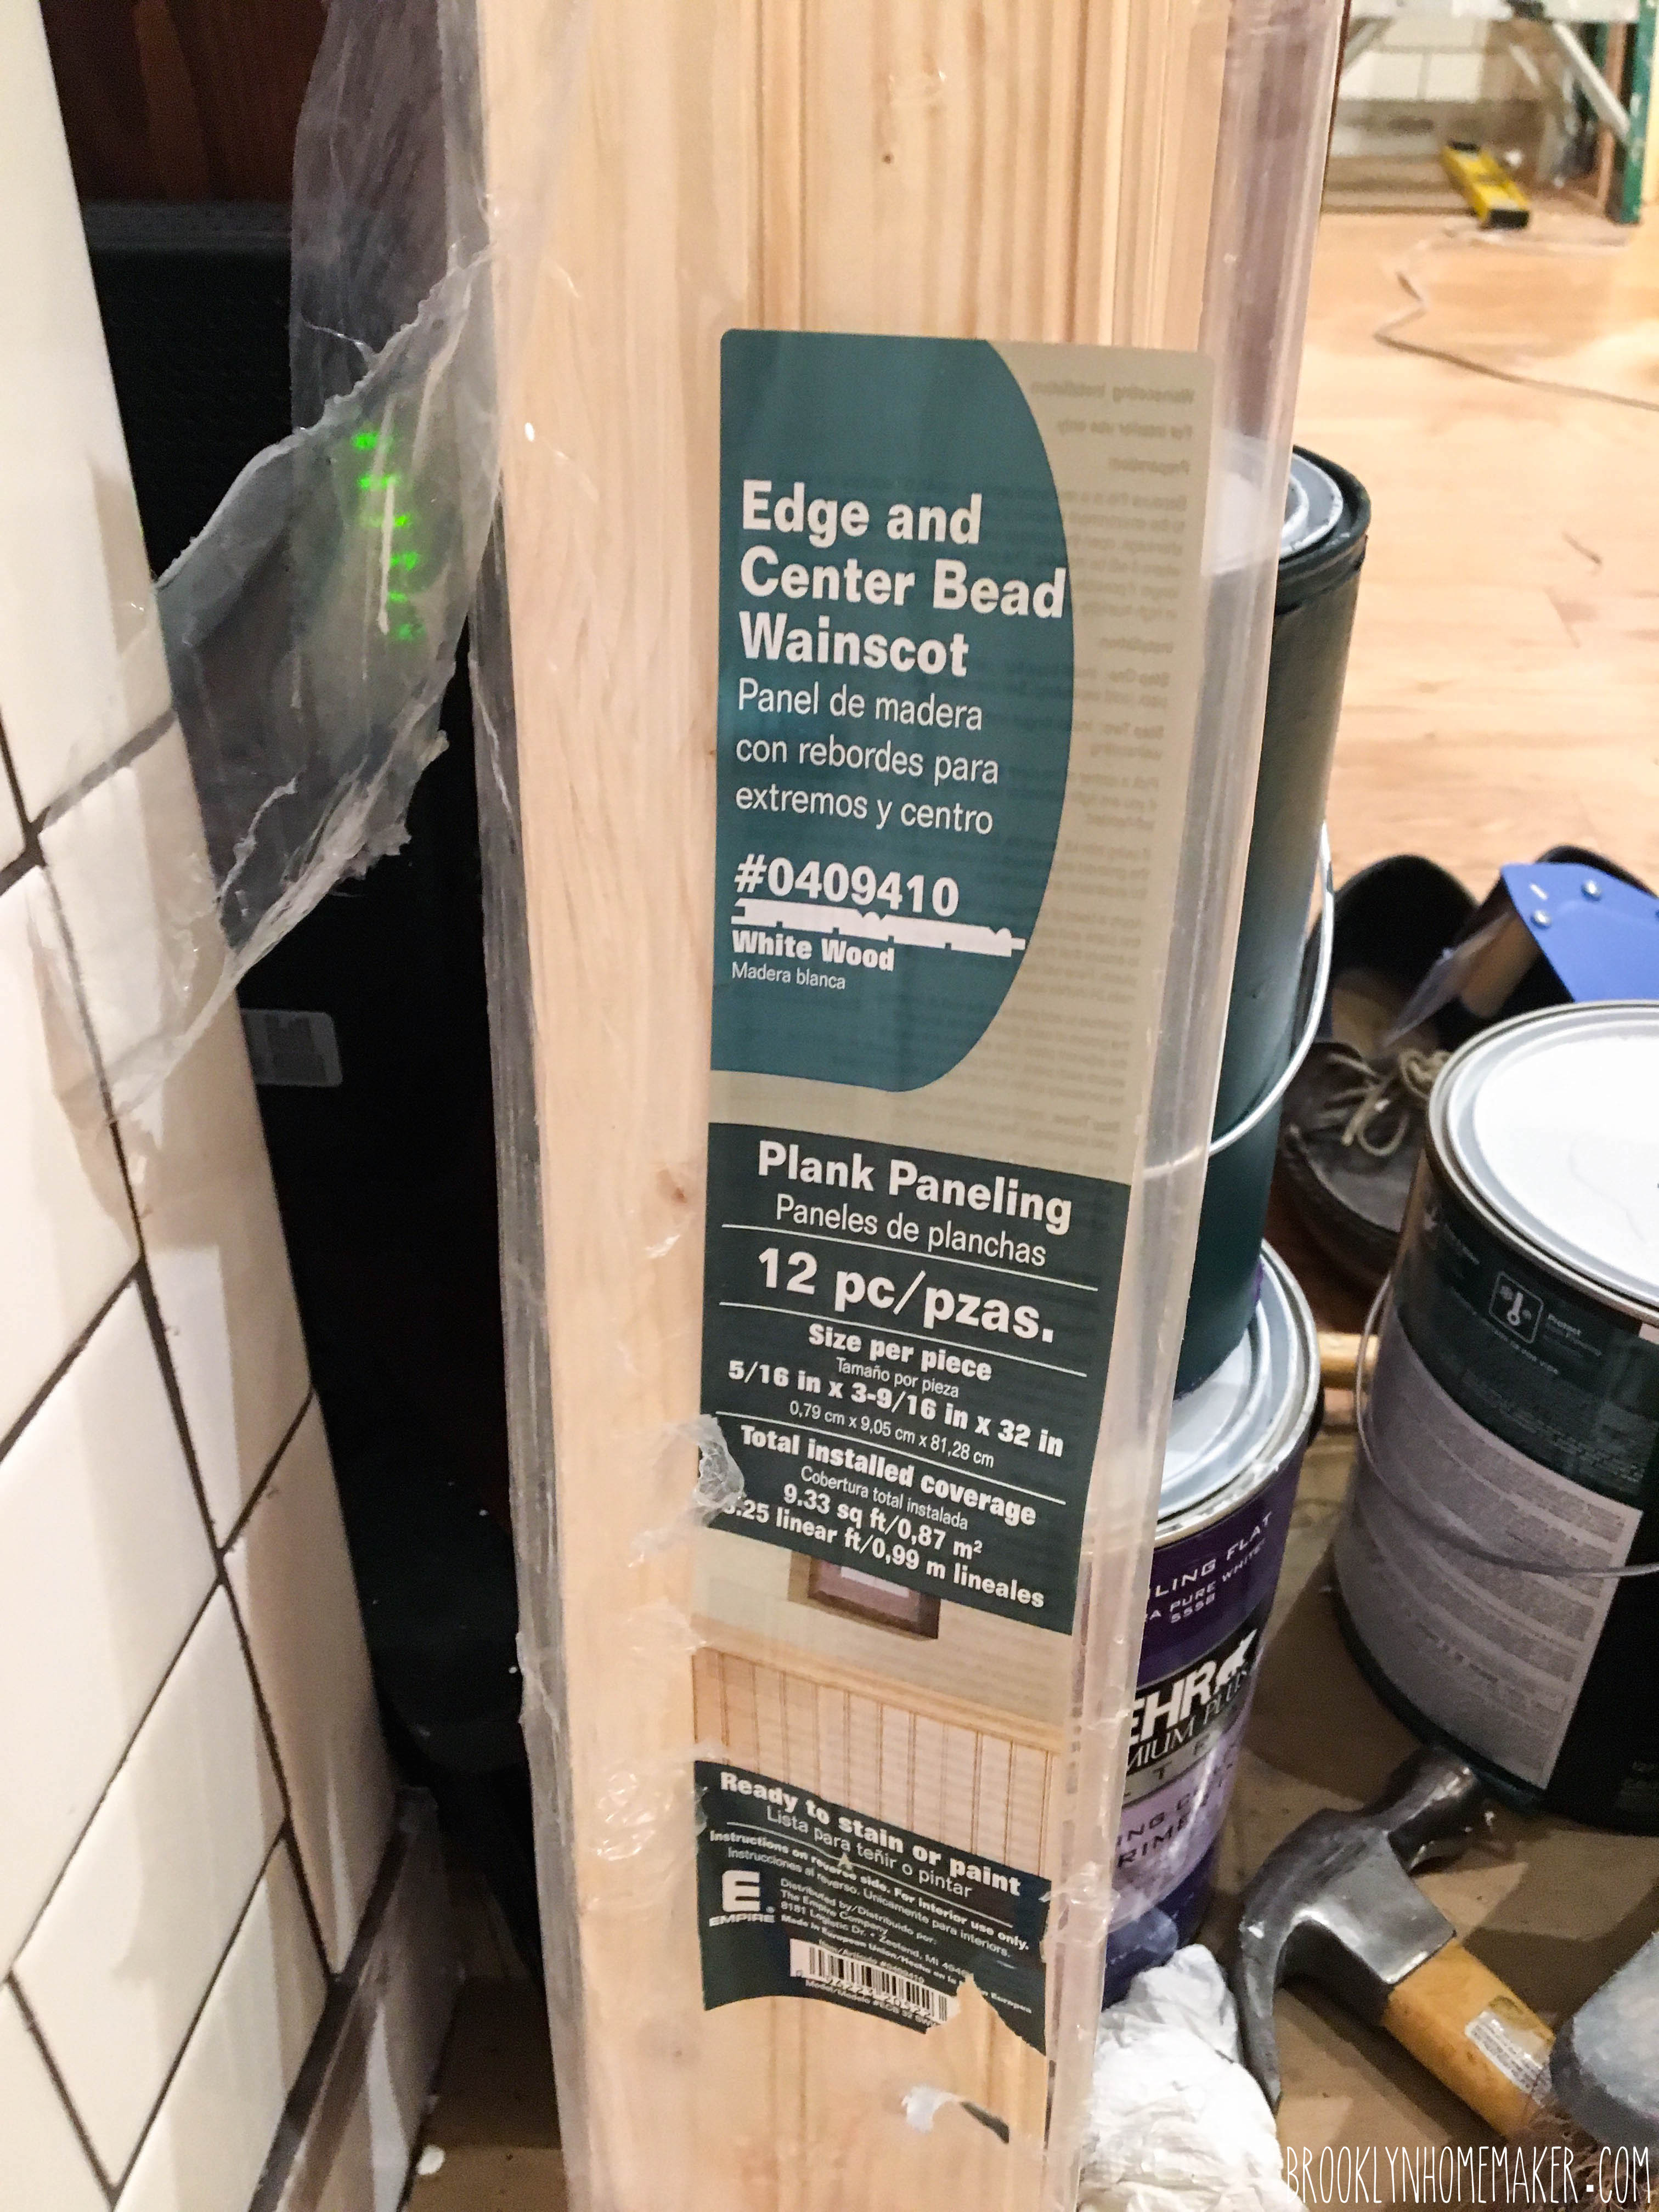
We did run into a little hiccup with the floors, but it wasn’t his fault. We knew there was a concrete slab under the layers of laminate and tile, and we hoped that, best case scenario, we could just clean and polish them up and we’d be good to go. We should have known better! Once the old flooring came up and we saw what shape the concrete was in, we knew we had to find some extra money for new flooring. We did some quick hunting around online and found a sale on engineered hardwood so that’s what we decided to go with. We’d have the contractor install it, but we’d be in charge of picking it up and getting it to the space.

Of course, that was all easier said than done. Russell had to leave for a trip to London that he’d planned and paid for well before the shop was even a glimmer in our eyes, and the flooring order took longer than expected and wasn’t ready until after he left.  Since we don’t have a vehicle, I decided to take the subway to a neighborhood in Queens I’ve never been to before, google maps my way to the warehouse, and once the order was ready and brought out to me, call a taxi service to pick me up and carry me and my 11 cases of wood flooring back to Bushwick. You can’t imagine the looks I got from the warehouse guys when they asked if I wanted help putting my order in my truck and I had to explain that I was calling a car service! It also just happened to be a crazy hot day, and I was so embarrassed that I waited outside in the sun the whole time. Then, of course the driver got stuck in traffic on his way to me, and I sat there sweating my ass off for over 30 minutes!
This whole experience has been just one giant exercise in firsts! Hahahaha!

Anyways, in retrospect I kind of wish we’d shelled out a little bit more for solid hardwood. The engineered wood looks great, and in theory it’s supposed to hold up well to water and wear and tear, but the planks are super thin and the flooring feels a little flimsy underfoot. Since the concrete subfloor isn’t perfectly level (and we couldn’t afford having a new subfloor installed), I’m a little worried that we’re going to have to replace it a few years down the line. Hopefully I’m wrong and I’m sweating it for nothing. I guess only time will tell.

Maxwell's for Hair | Brooklyn Homemaker Maxwell's for Hair | Brooklyn Homemaker

It does look great though. And it all went in the day after I lugged it back to Bushwick.

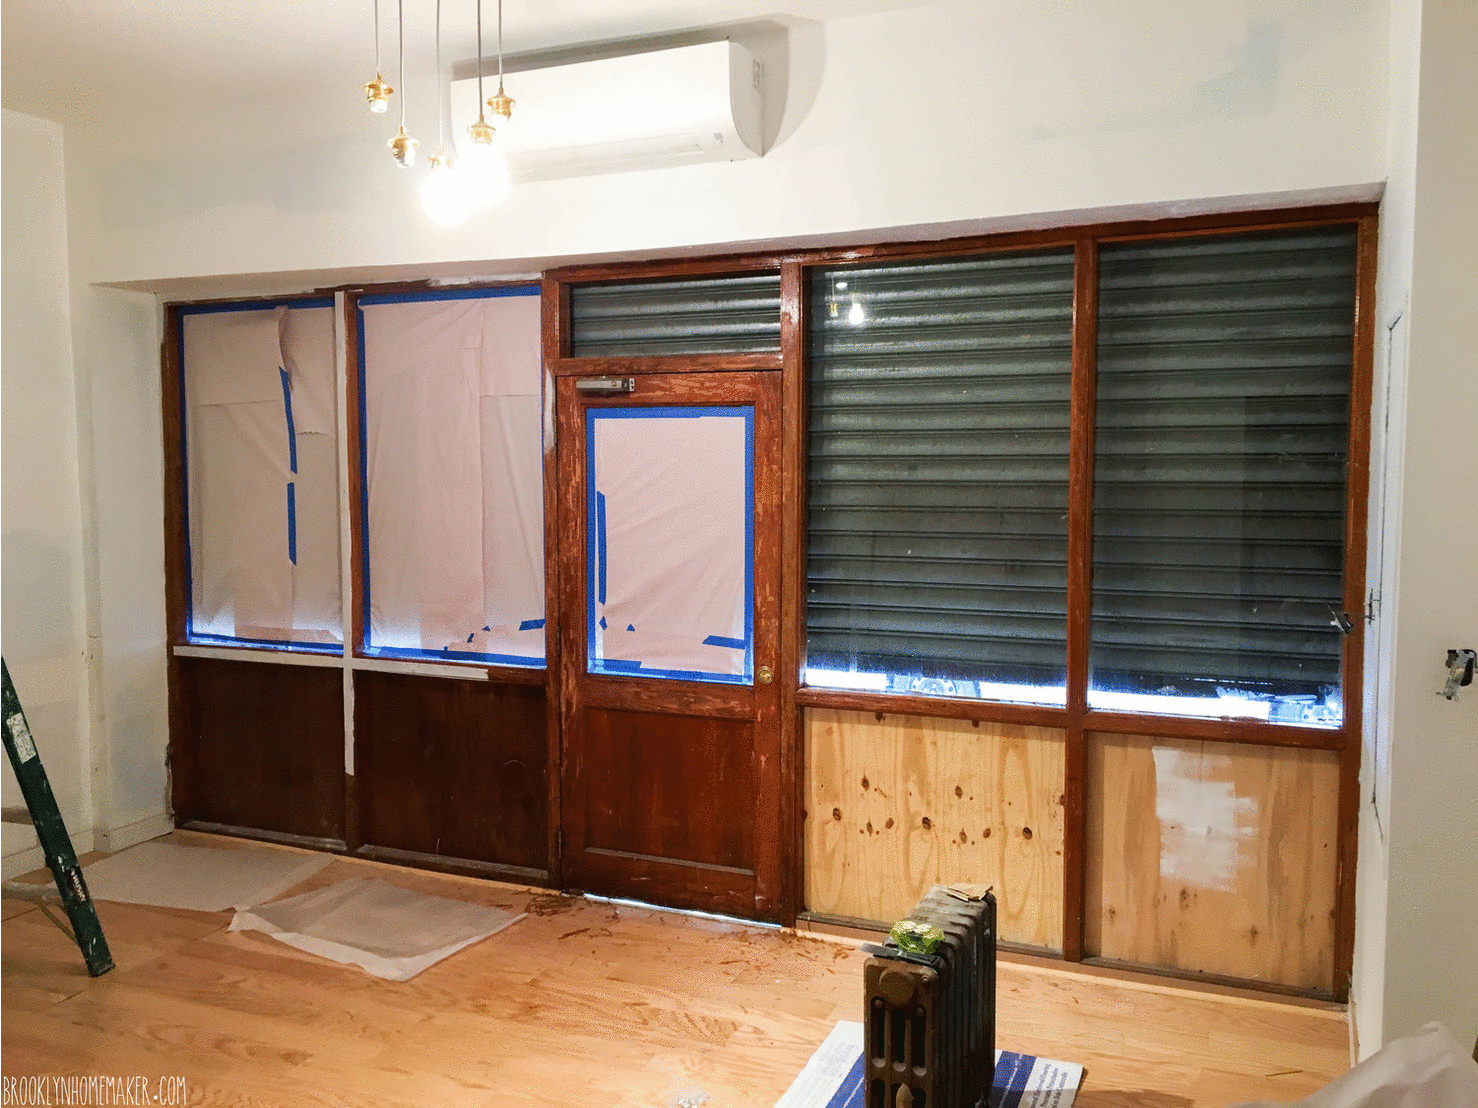
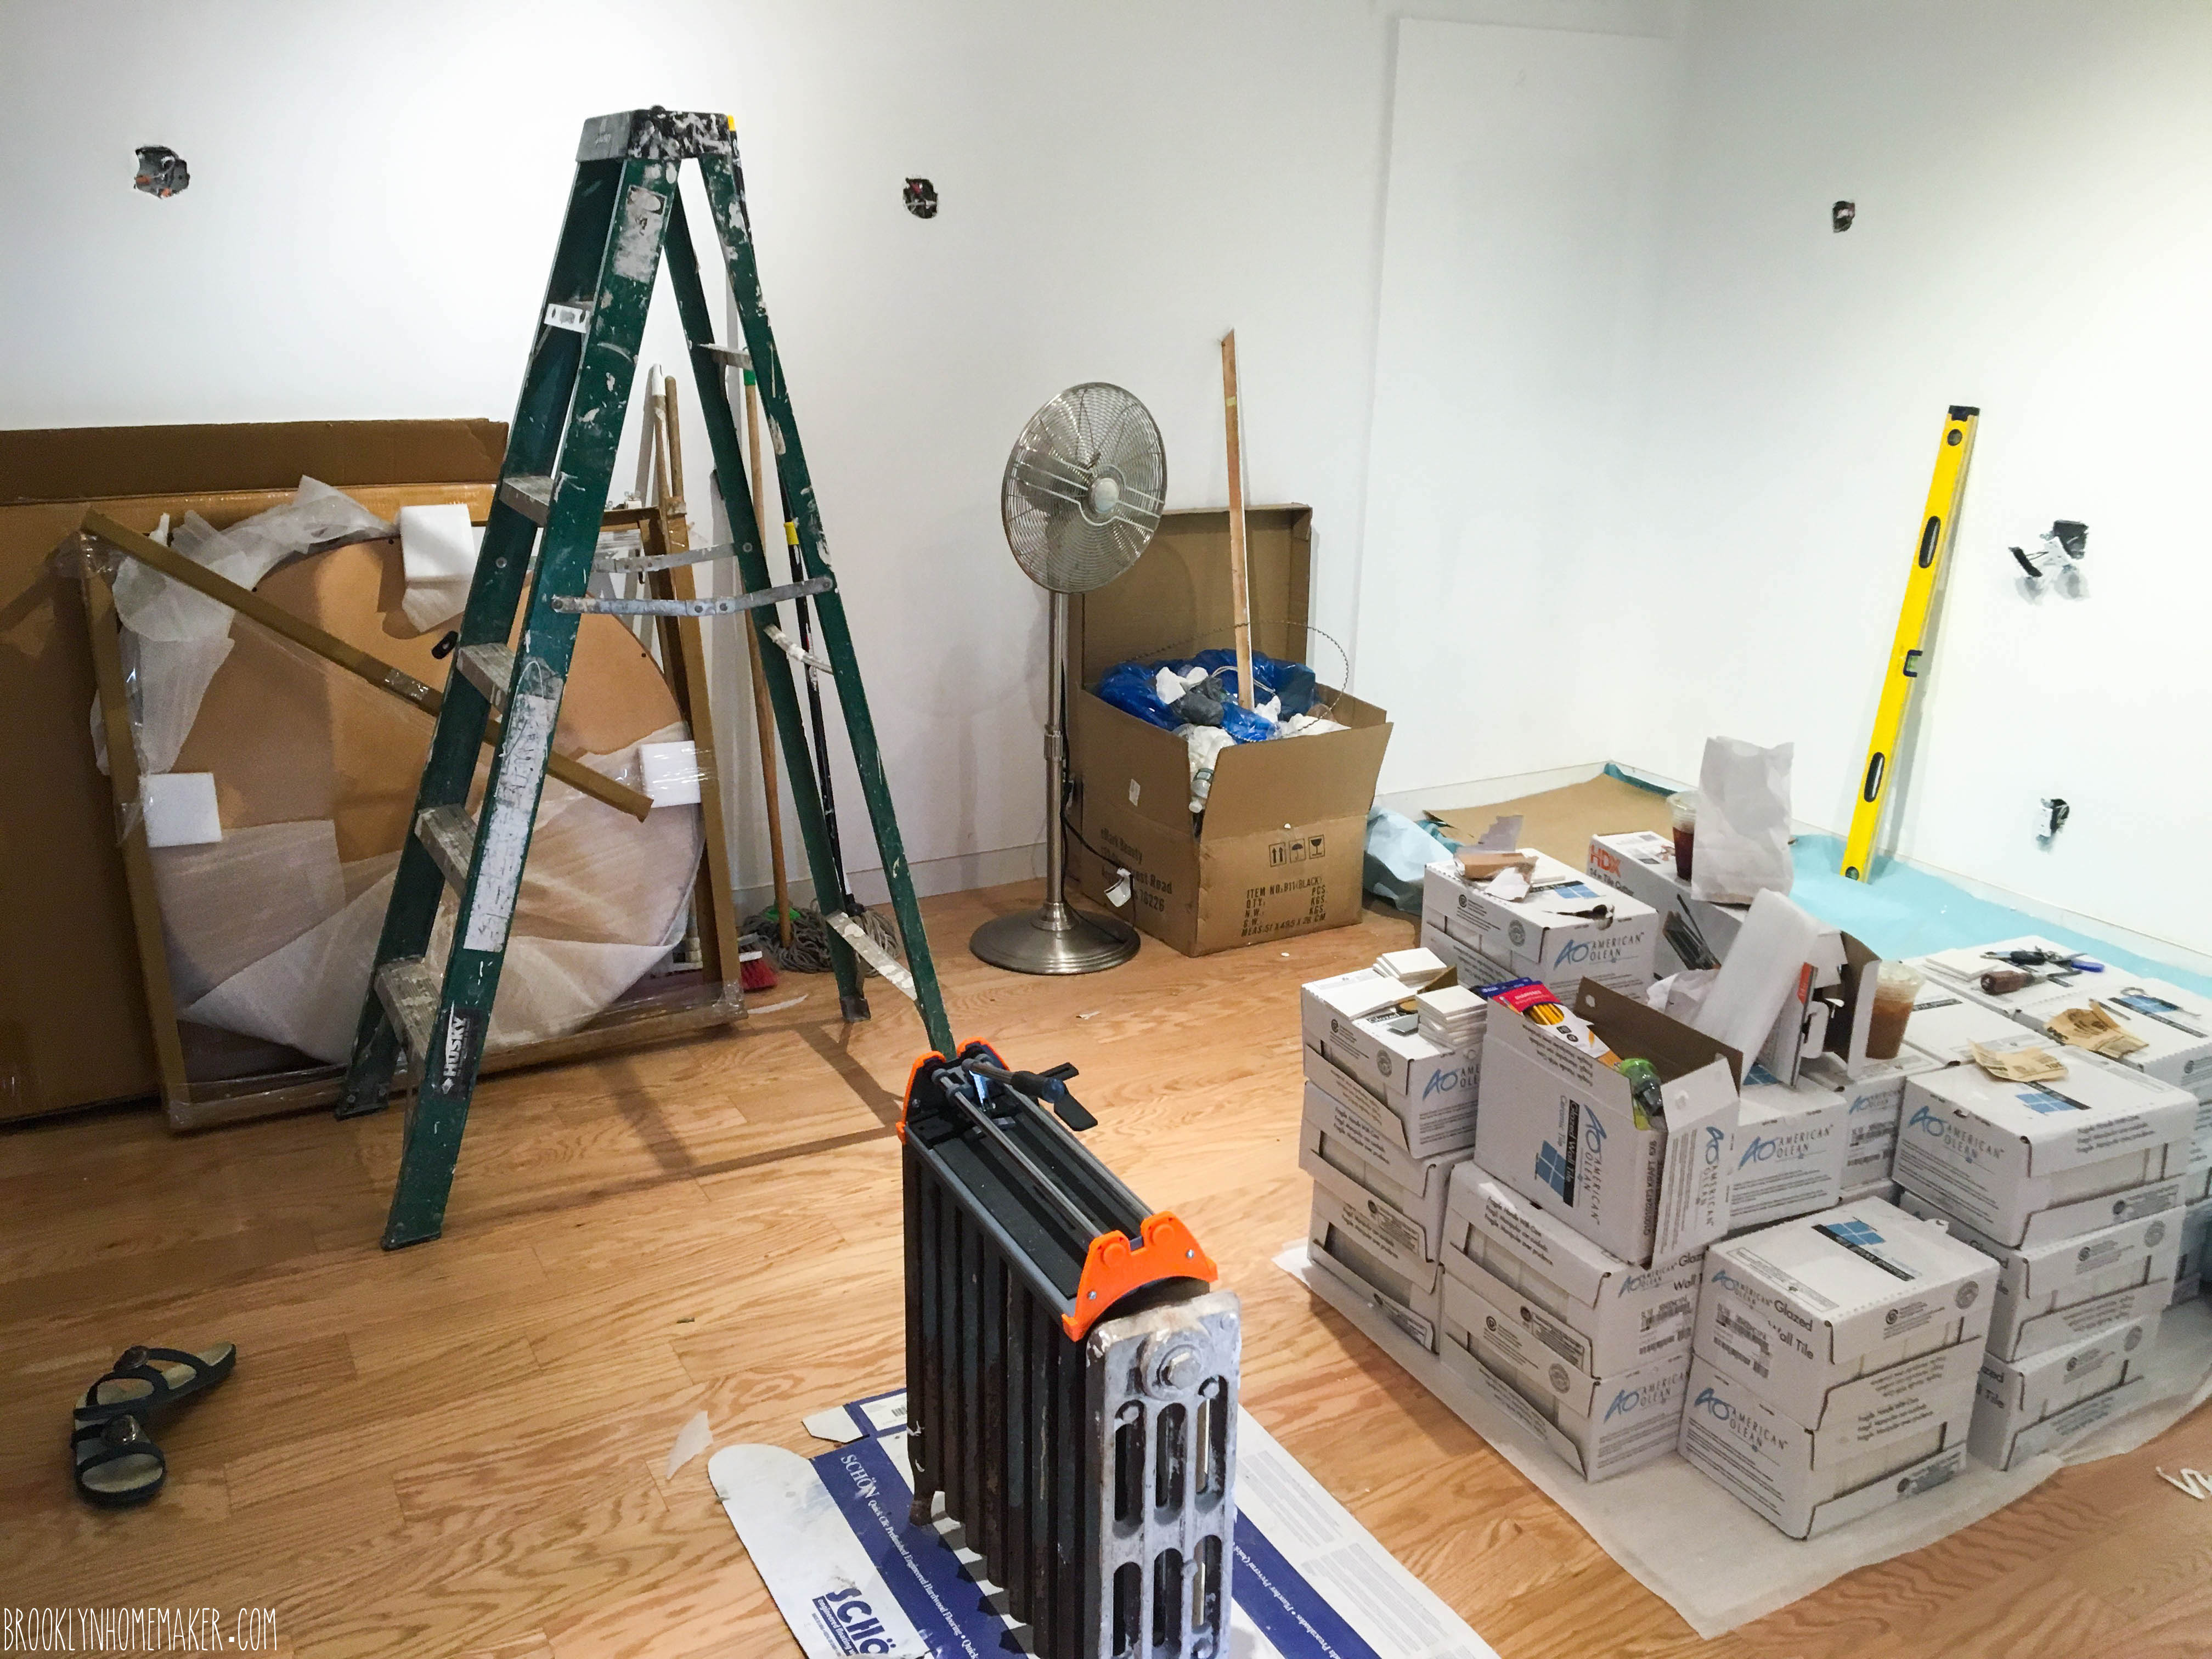
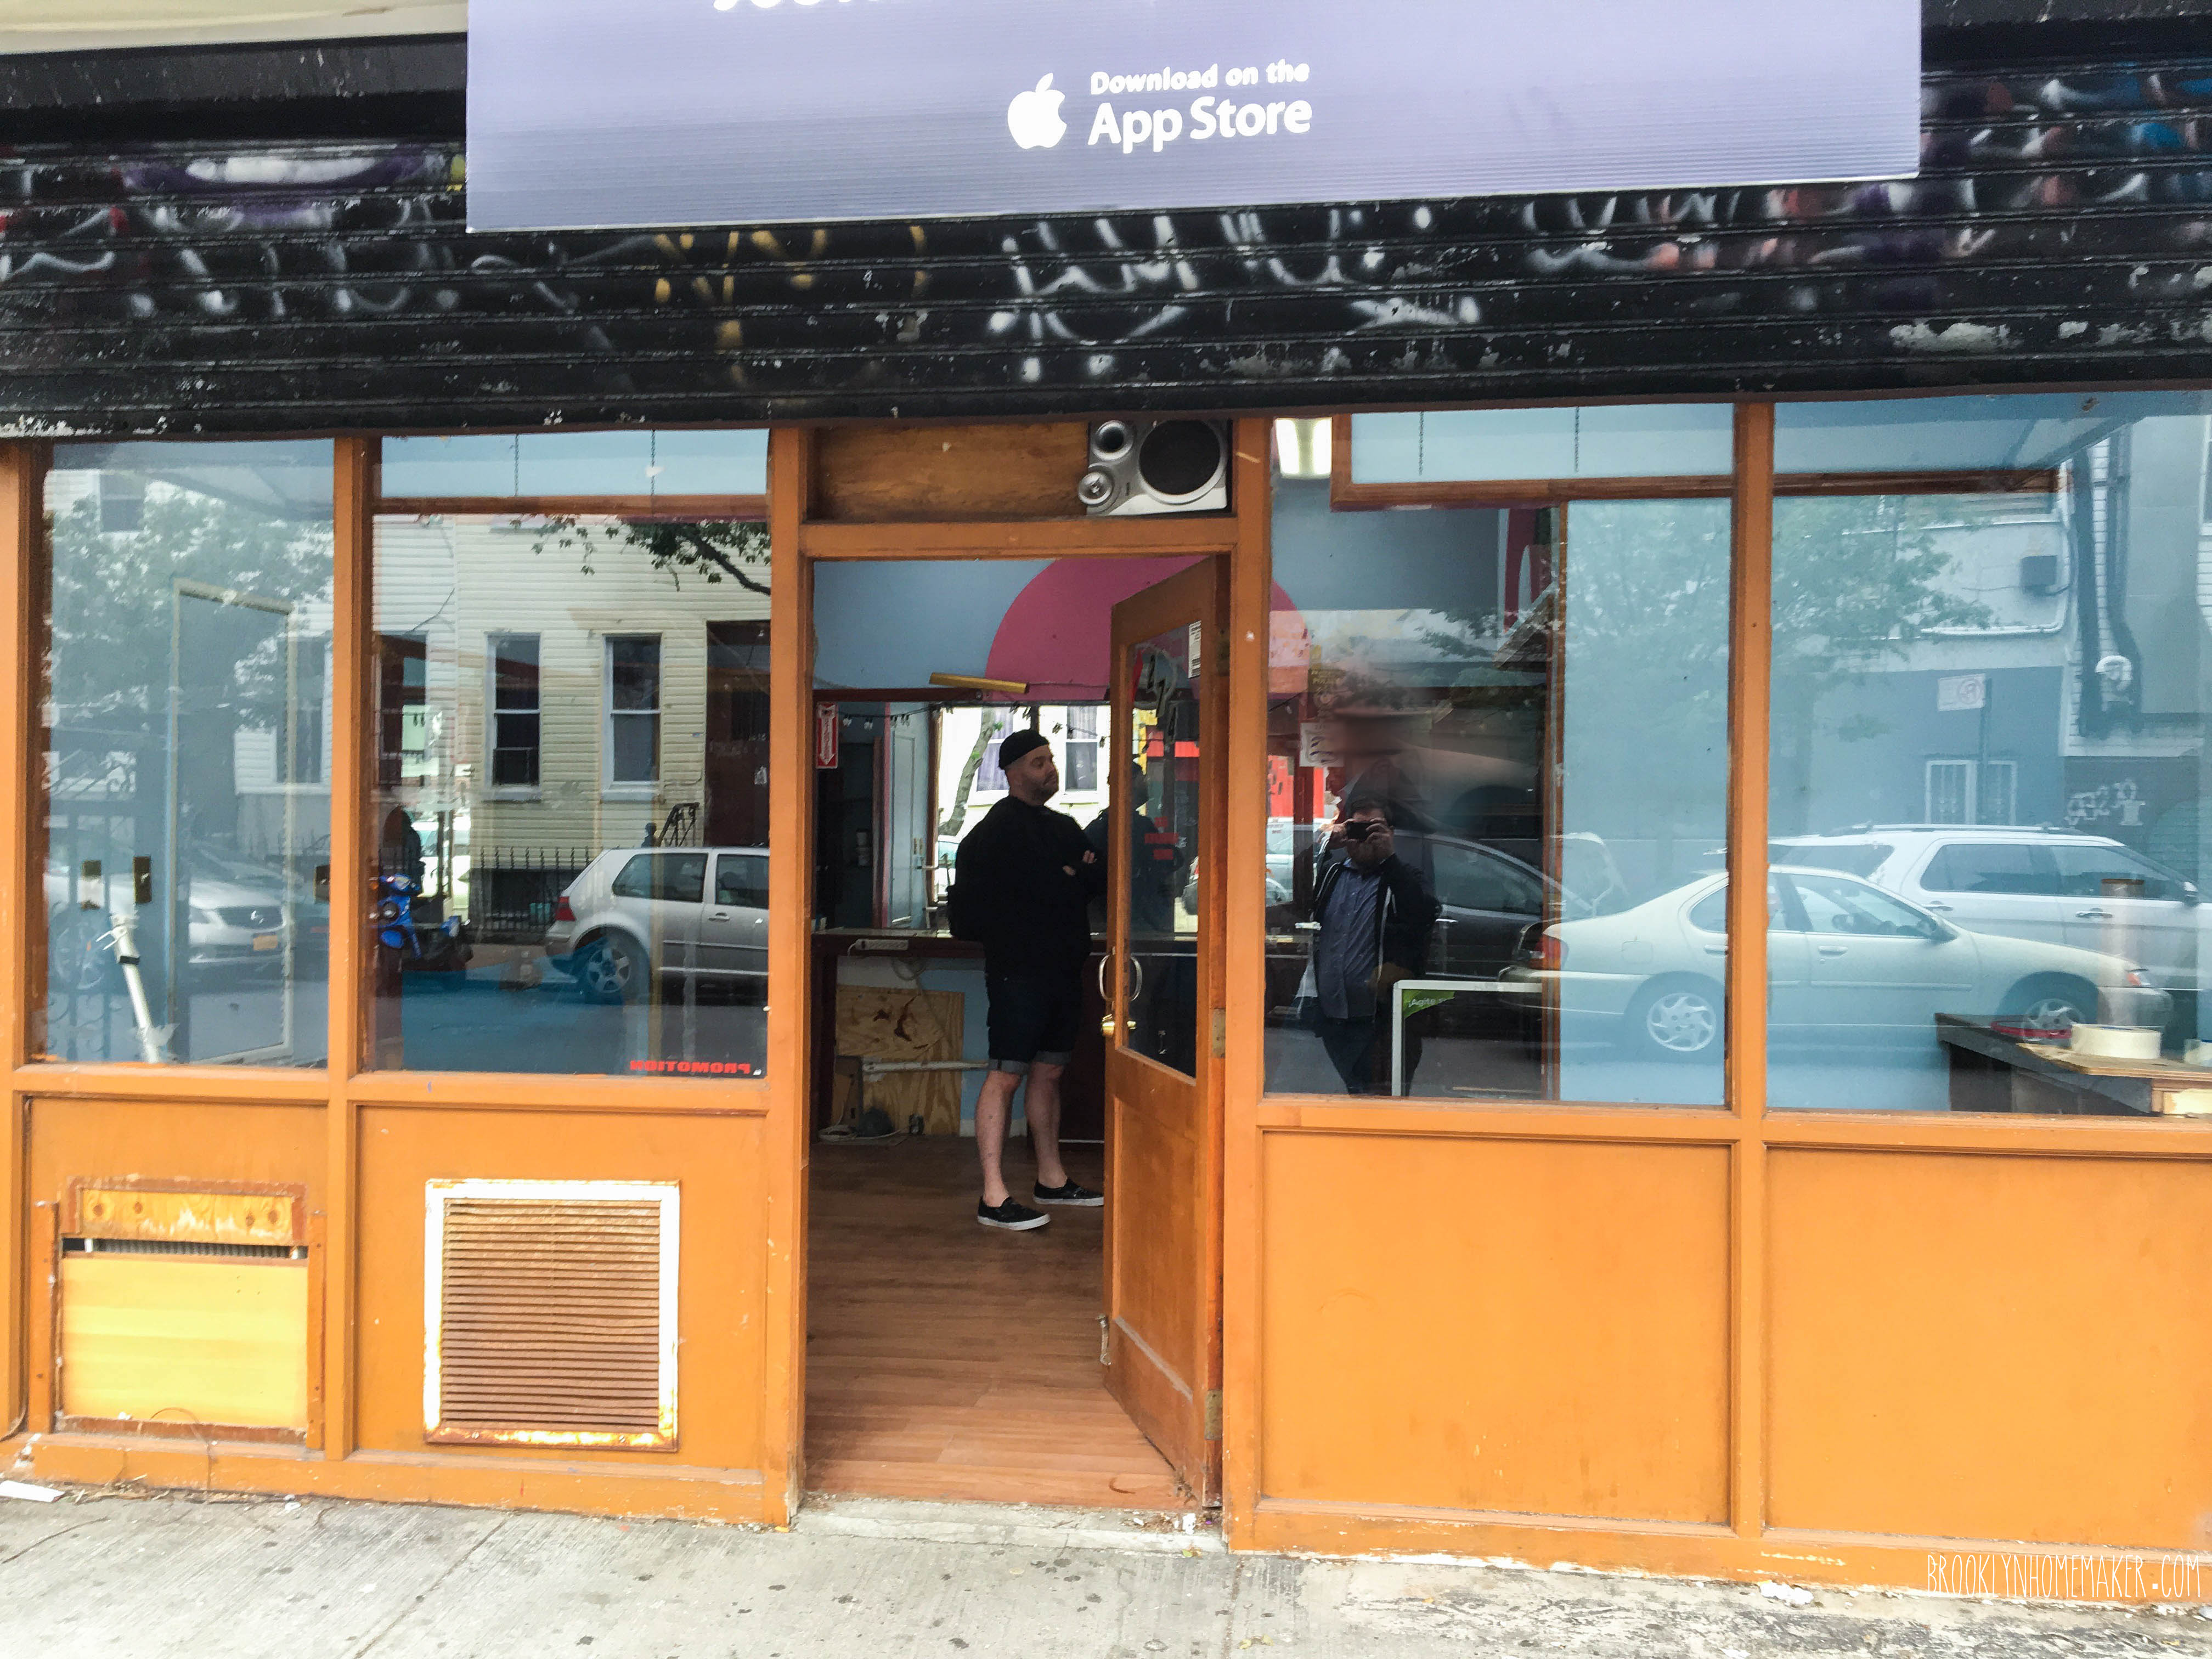
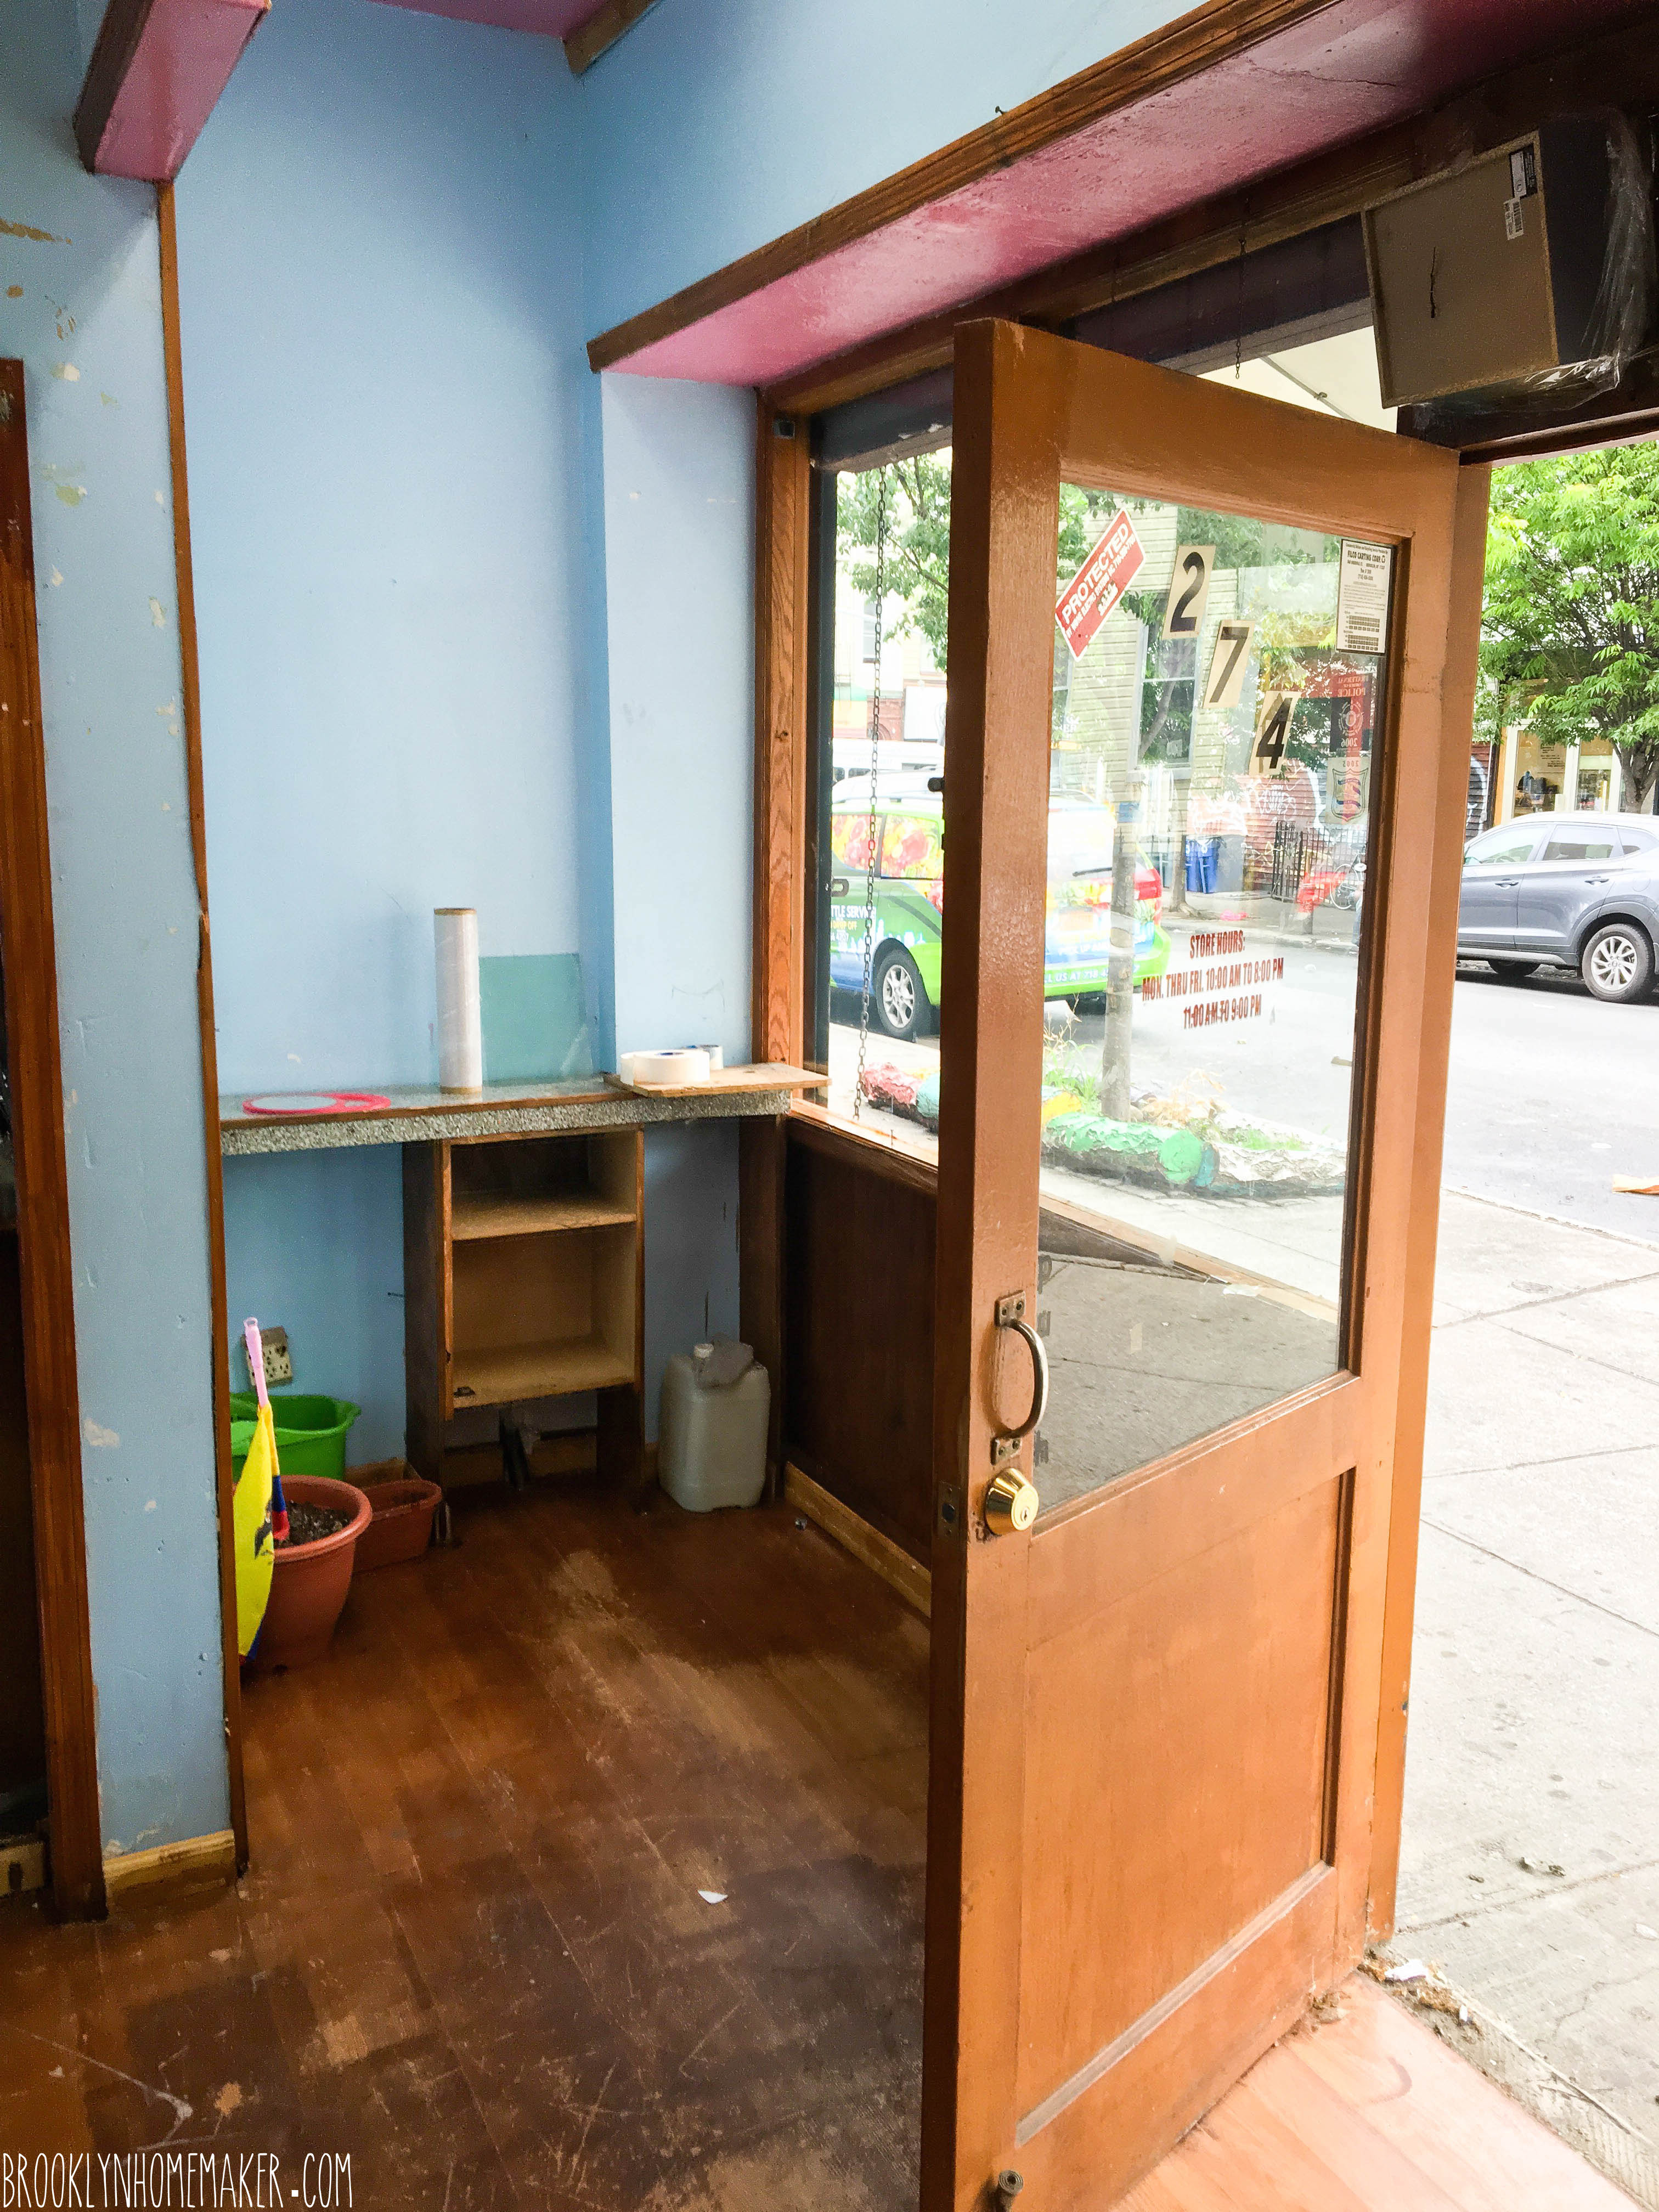
Before we knew it, the contractor was nearing the finish line and the place was just about ready for tile. Almost everything had gone seamlessly and Russell and I couldn’t wait to get started on our end of the work.

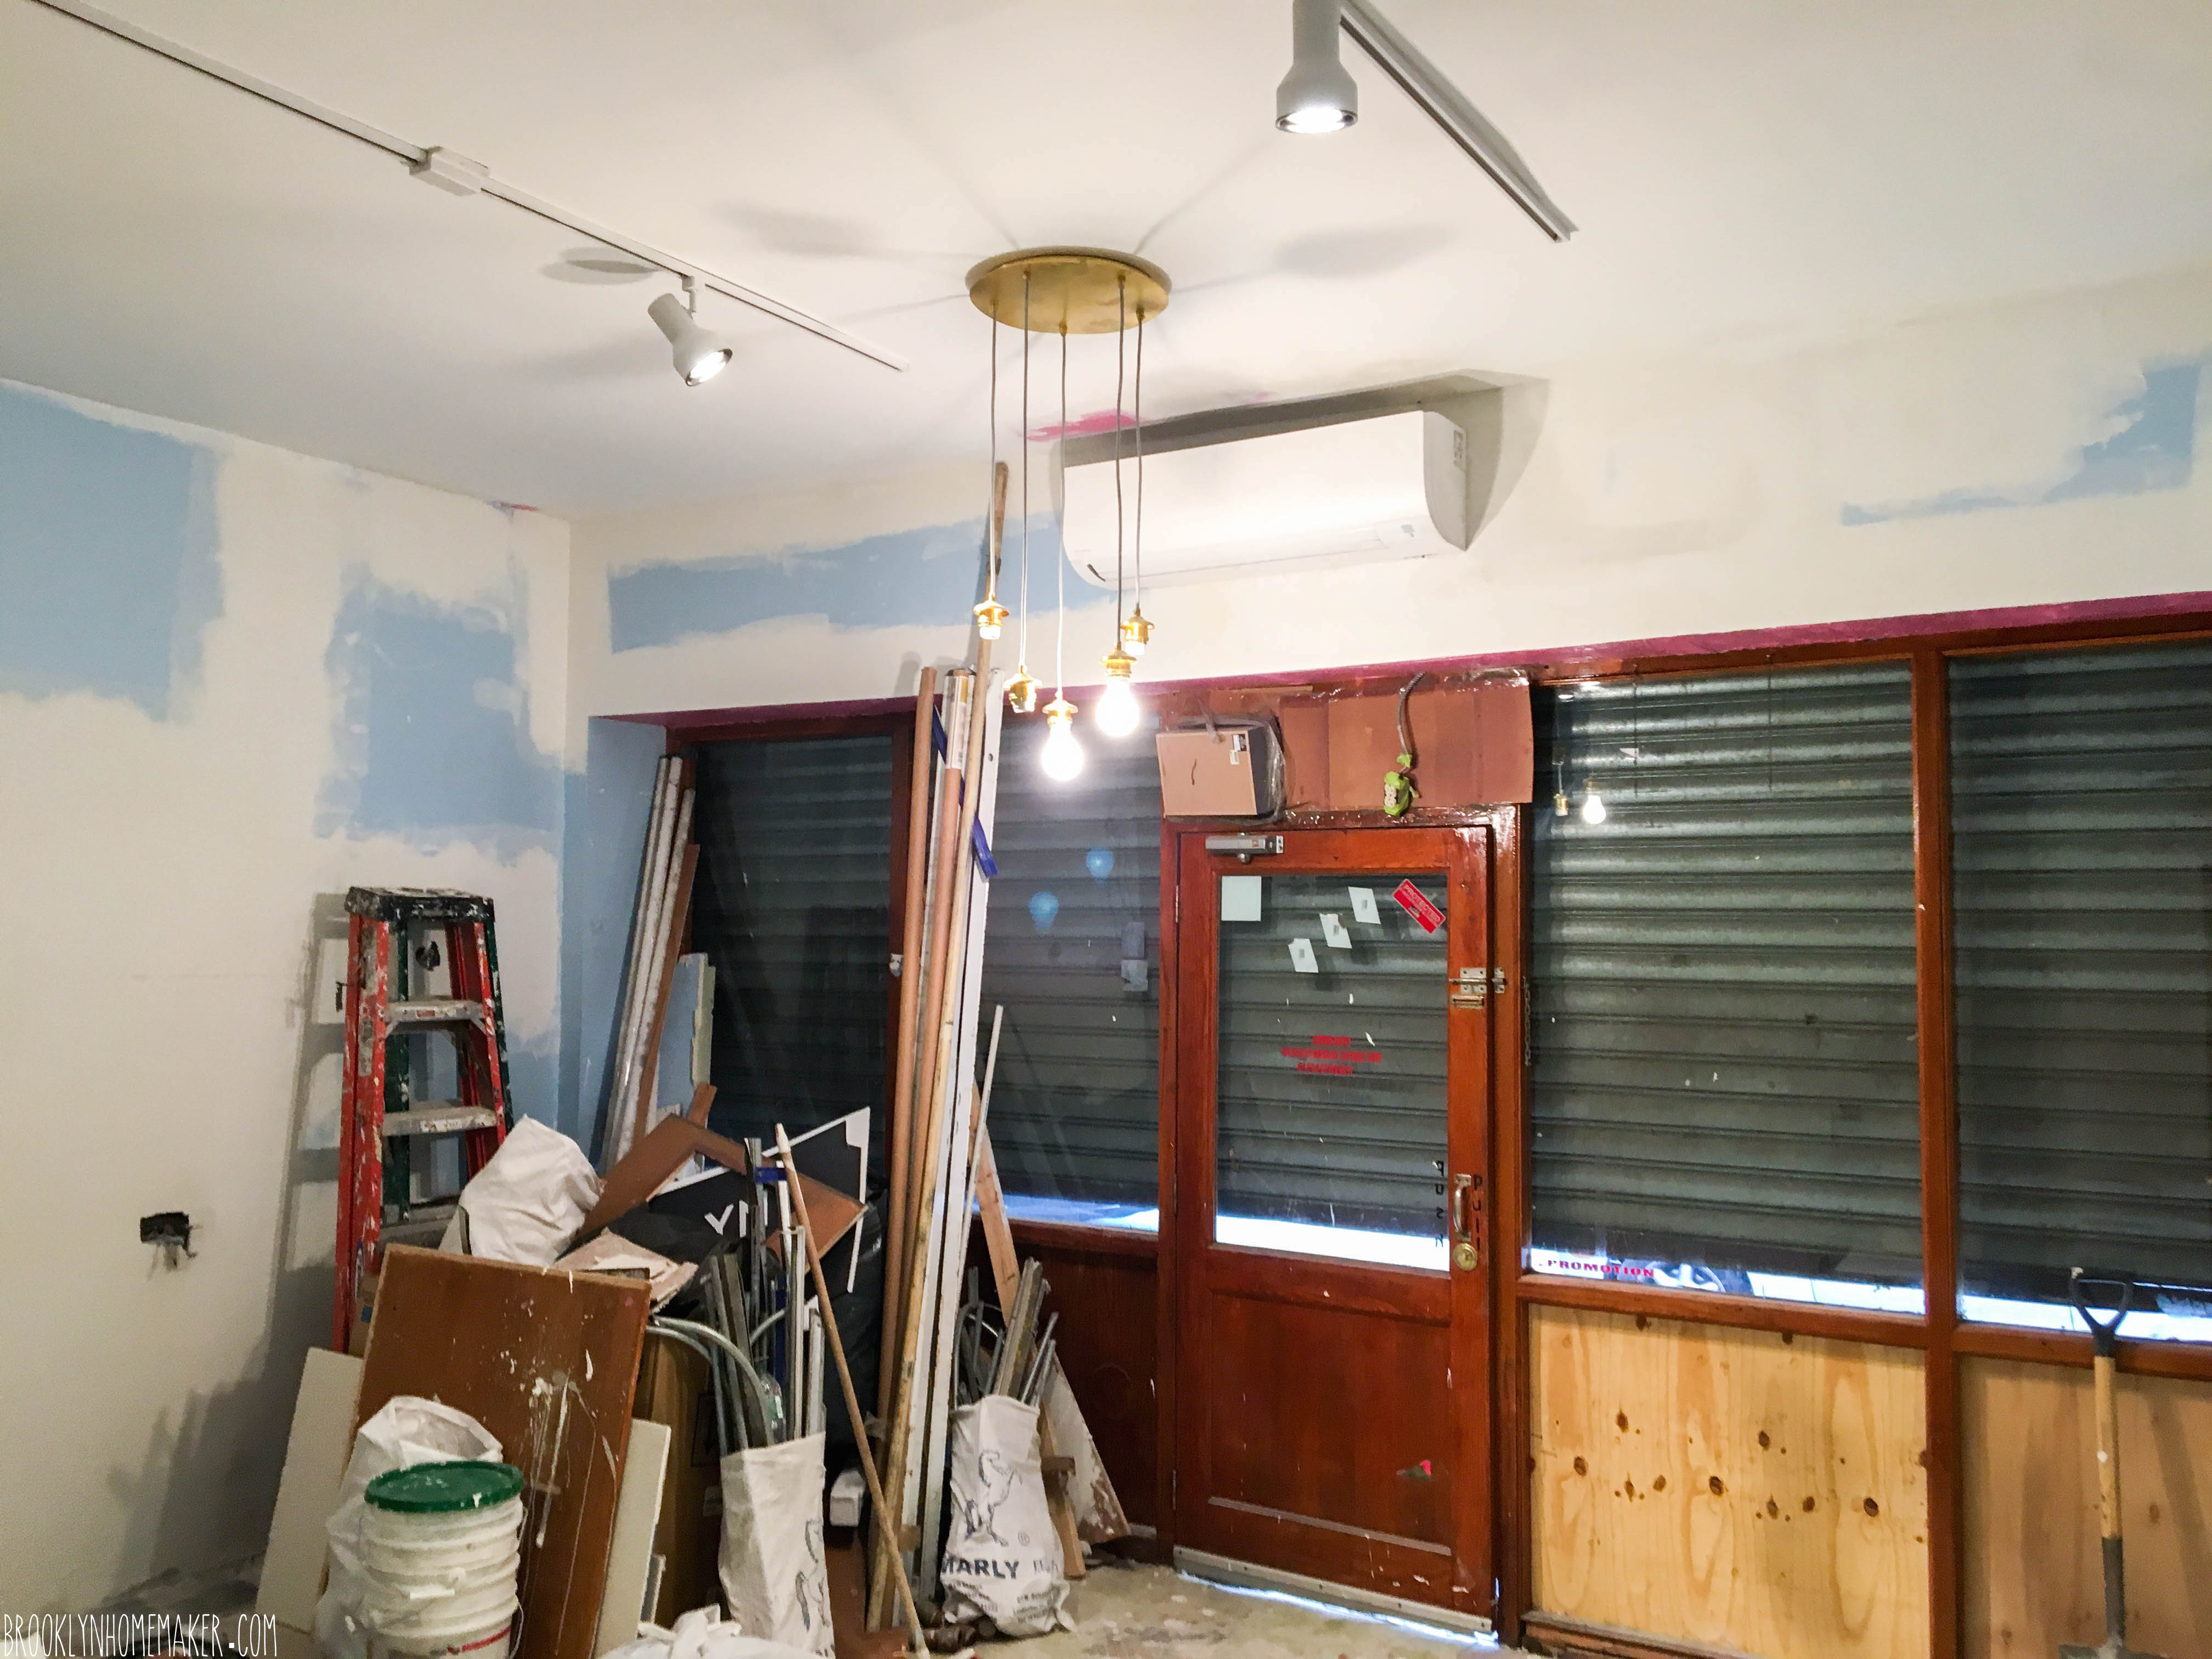
Of course, as you may have guessed, the key word there was almost. I was at work and Russell was still in London the day I got a call from our contractor. Apparently while trying to get the AC unit working, they’d realized there was a BIG problem that he wasn’t going to be able to fix. I totally freaked out and left work early to run over to the shop and see what was going on. It turned out that the someone, at some point, had done some really really weird and confusing work on the electrical panel in the shop. Unfortunately, the way it was done was difficult to see if you weren’t actually looking for it, which is why it hadn’t come to light until then.
Essentially, they had disconnected one of the electrical input wires coming into the space from outside, and split the other one and bridged it to connect to the panel. What that boiled down to was that the space no longer had the 220 volt power that it was supposed to, and while that didn’t affect the function of the outlets and lights, the AC and heating system in the space didn’t have enough current to actually work.

At this point in the game, we’d already spent a good chunk of our in-case-of-emergencies money, and the idea of needing to have some major electrical work done just made me want to curl up in a ball and cry.

After some incredibly stressful days and a bit of further investigation, it came to light that the disconnected wiring coming into the building wasn’t live, which is probably why it had been disconnected in the first place. We put in a call to our utility company with the help of our landlord and his electrician, and had no other choice but to move forward without any AC and hope we’d get to the bottom of it eventually.

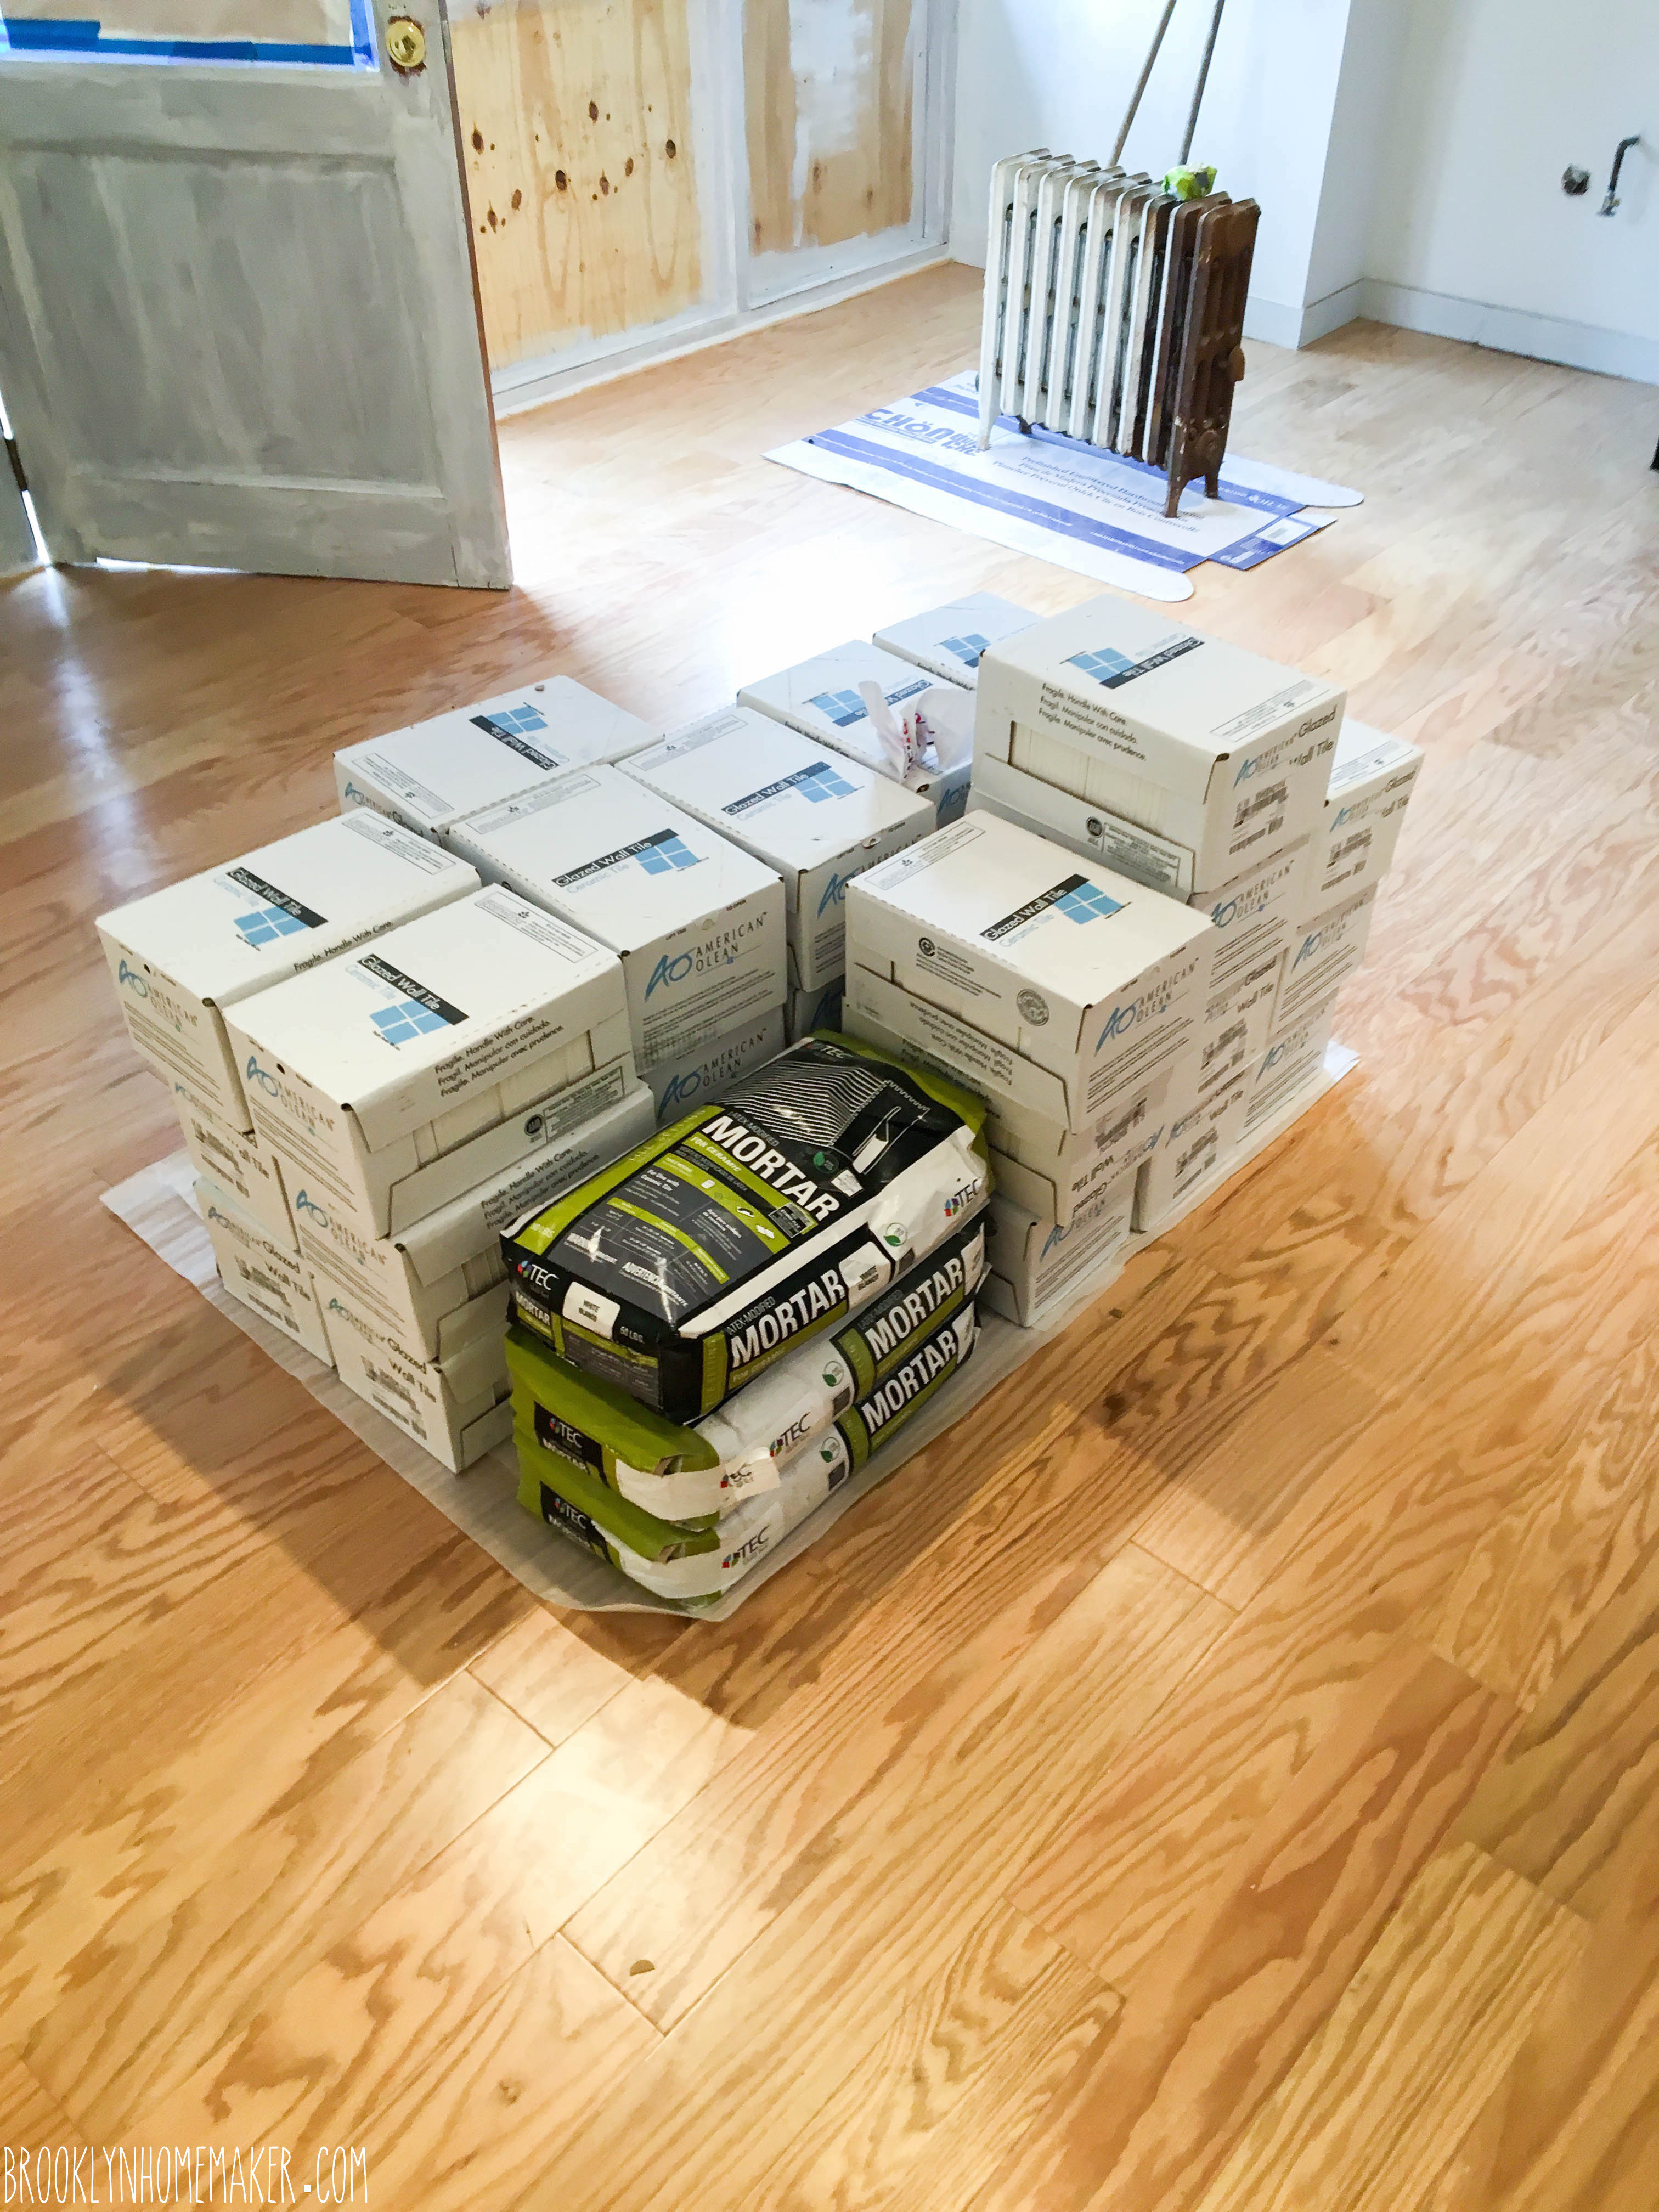
So, onward and upward, and off to pick up our tile and supplies in a rental car!

Maxwell's for Hair | Brooklyn Homemaker

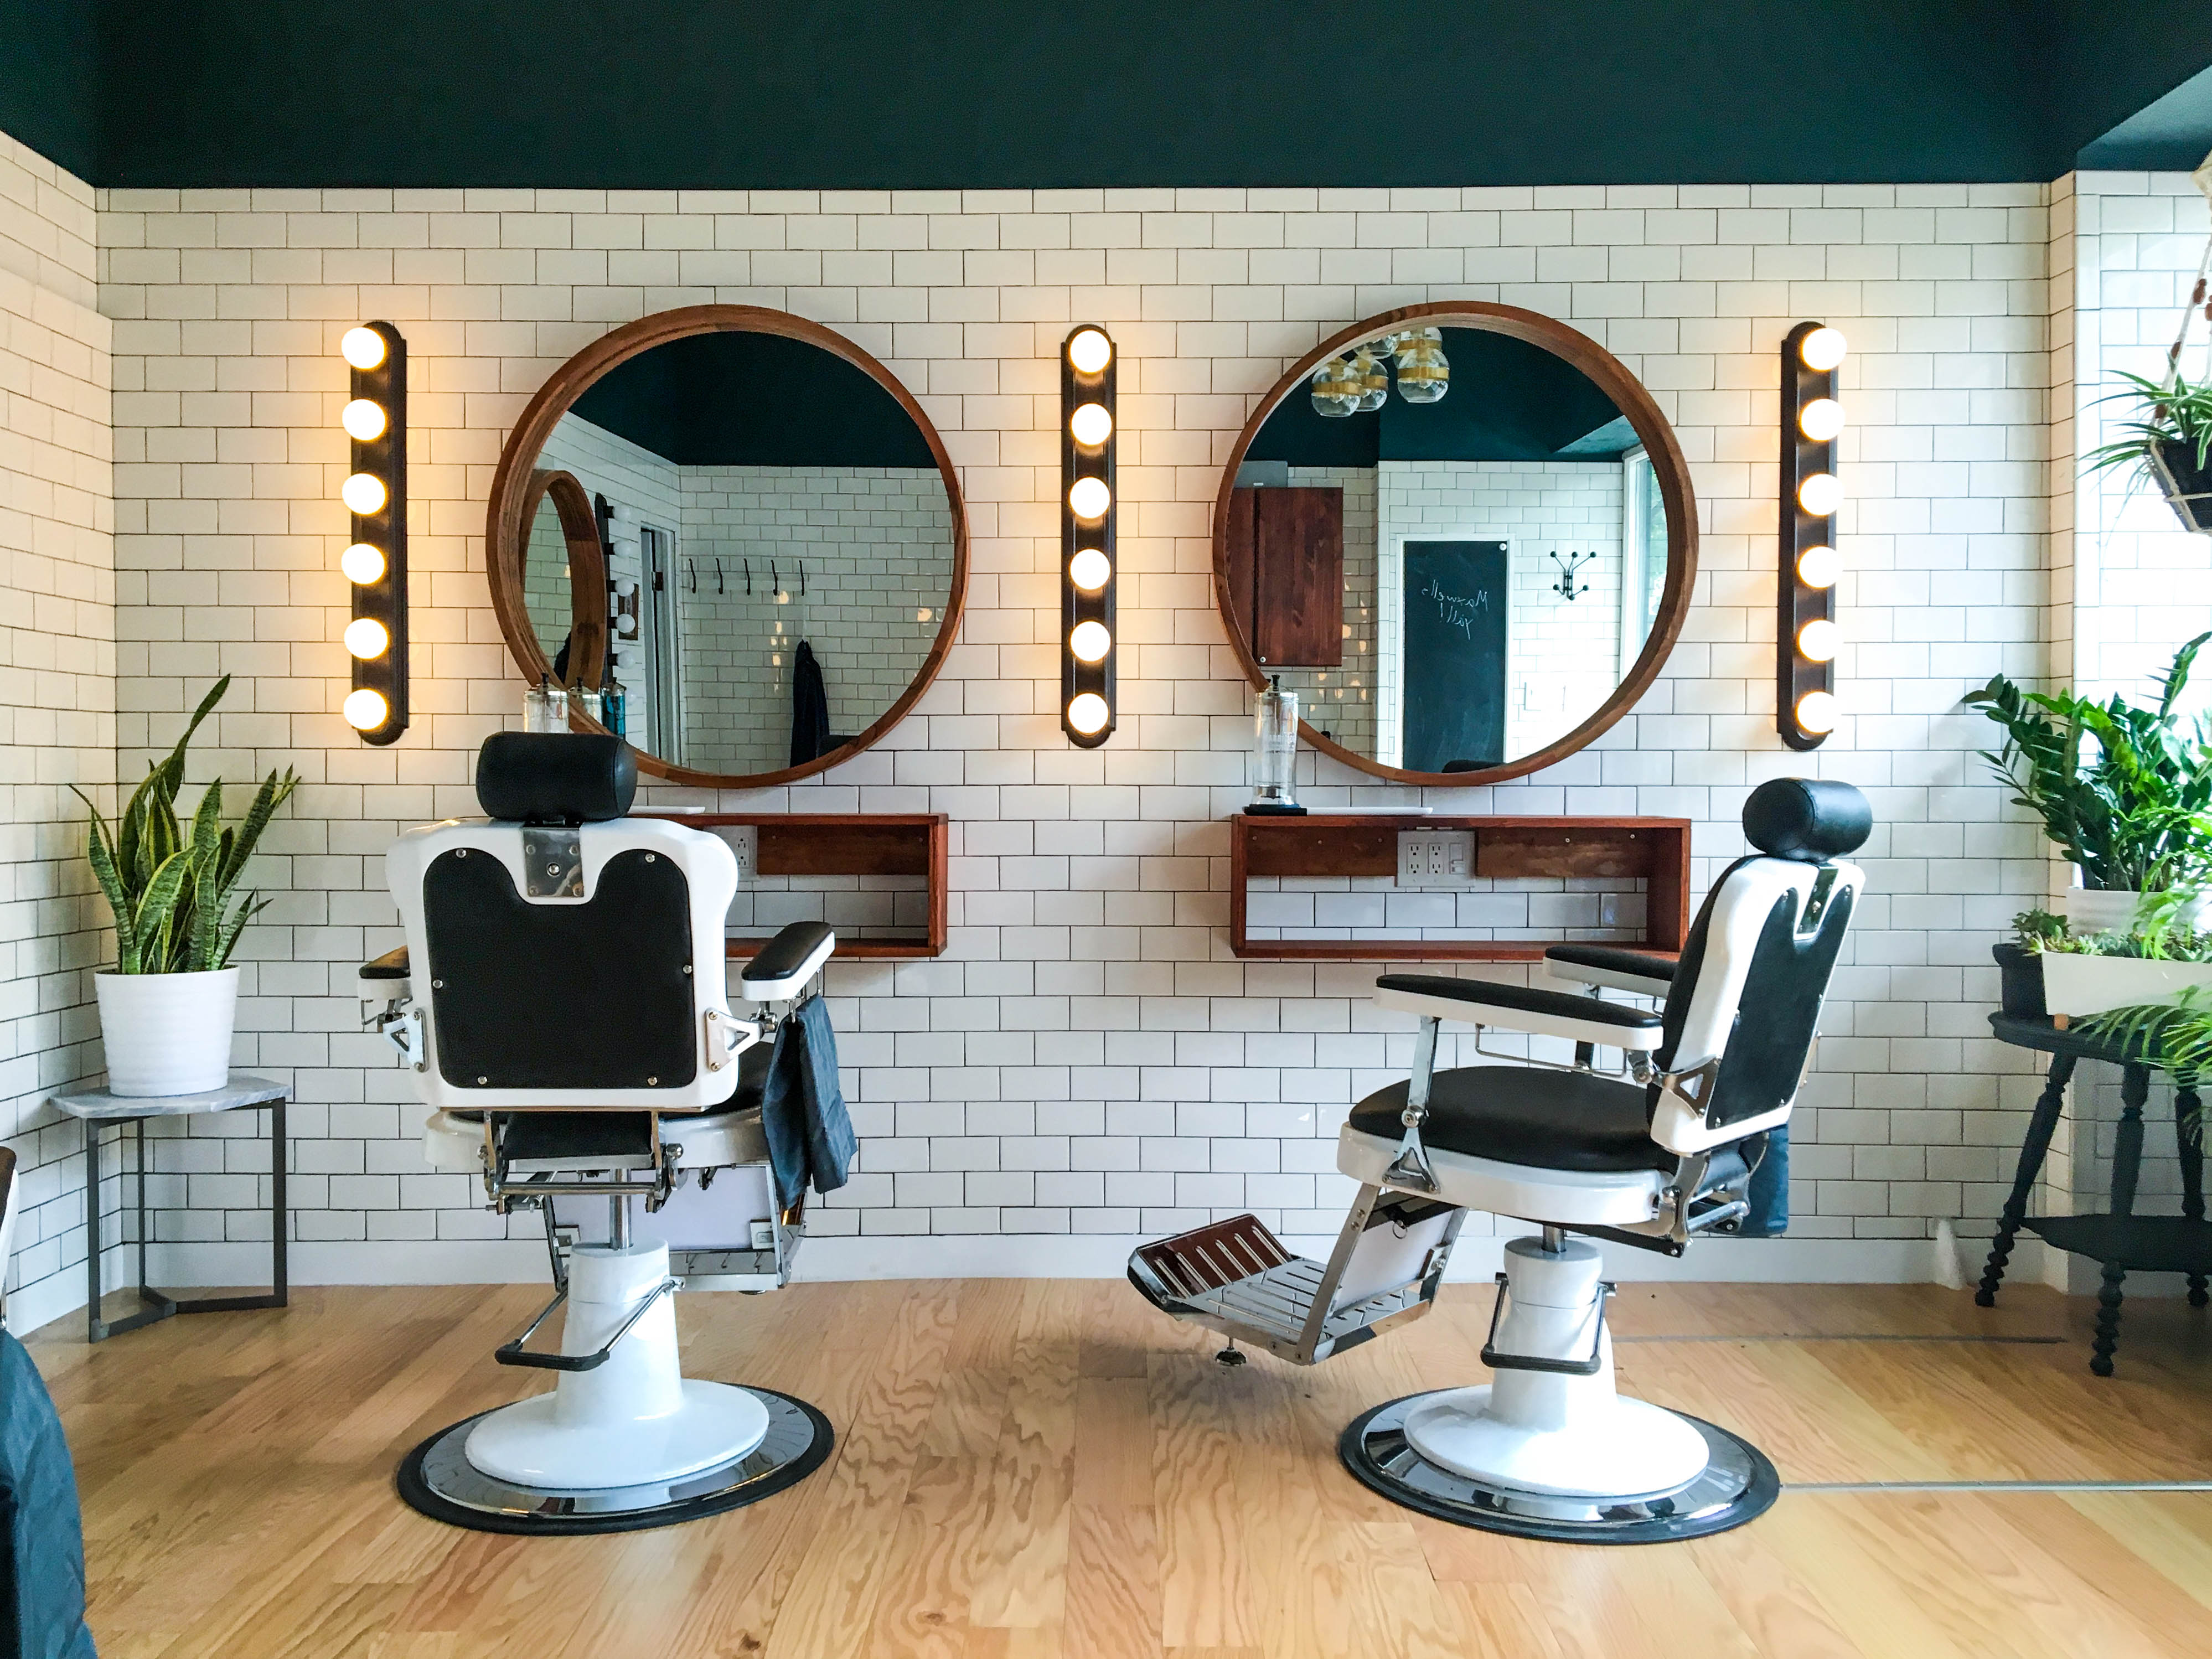
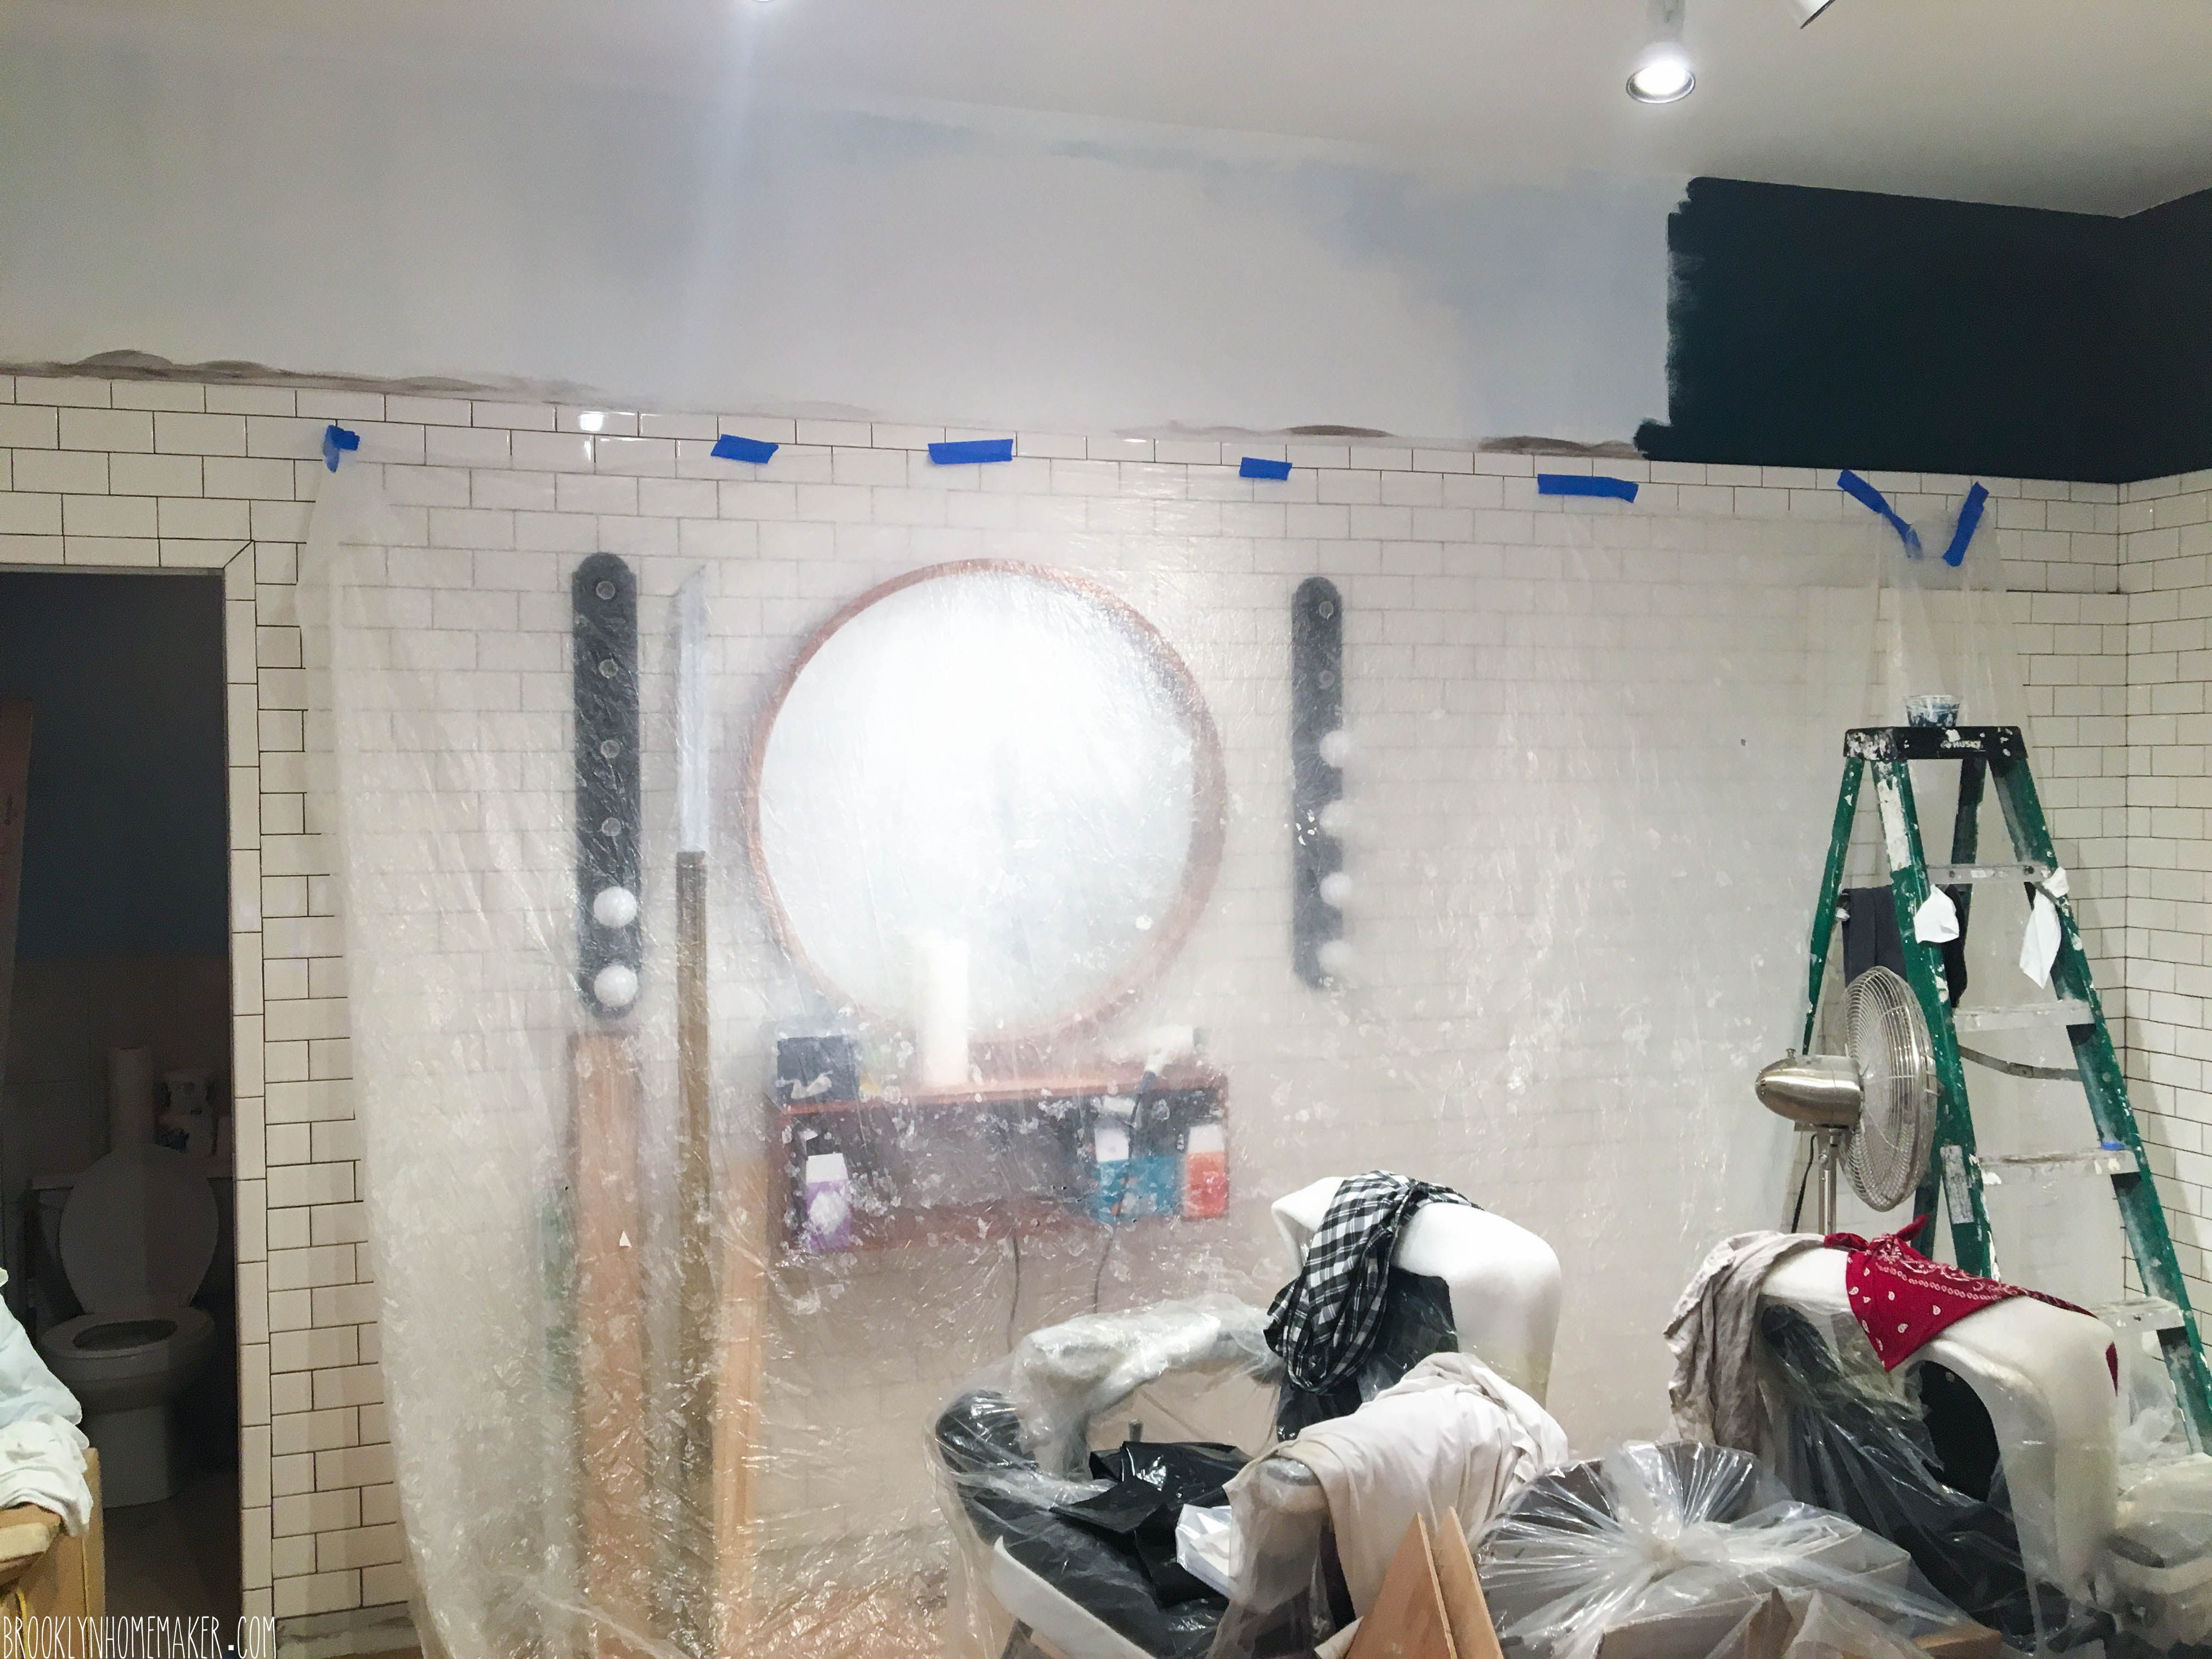
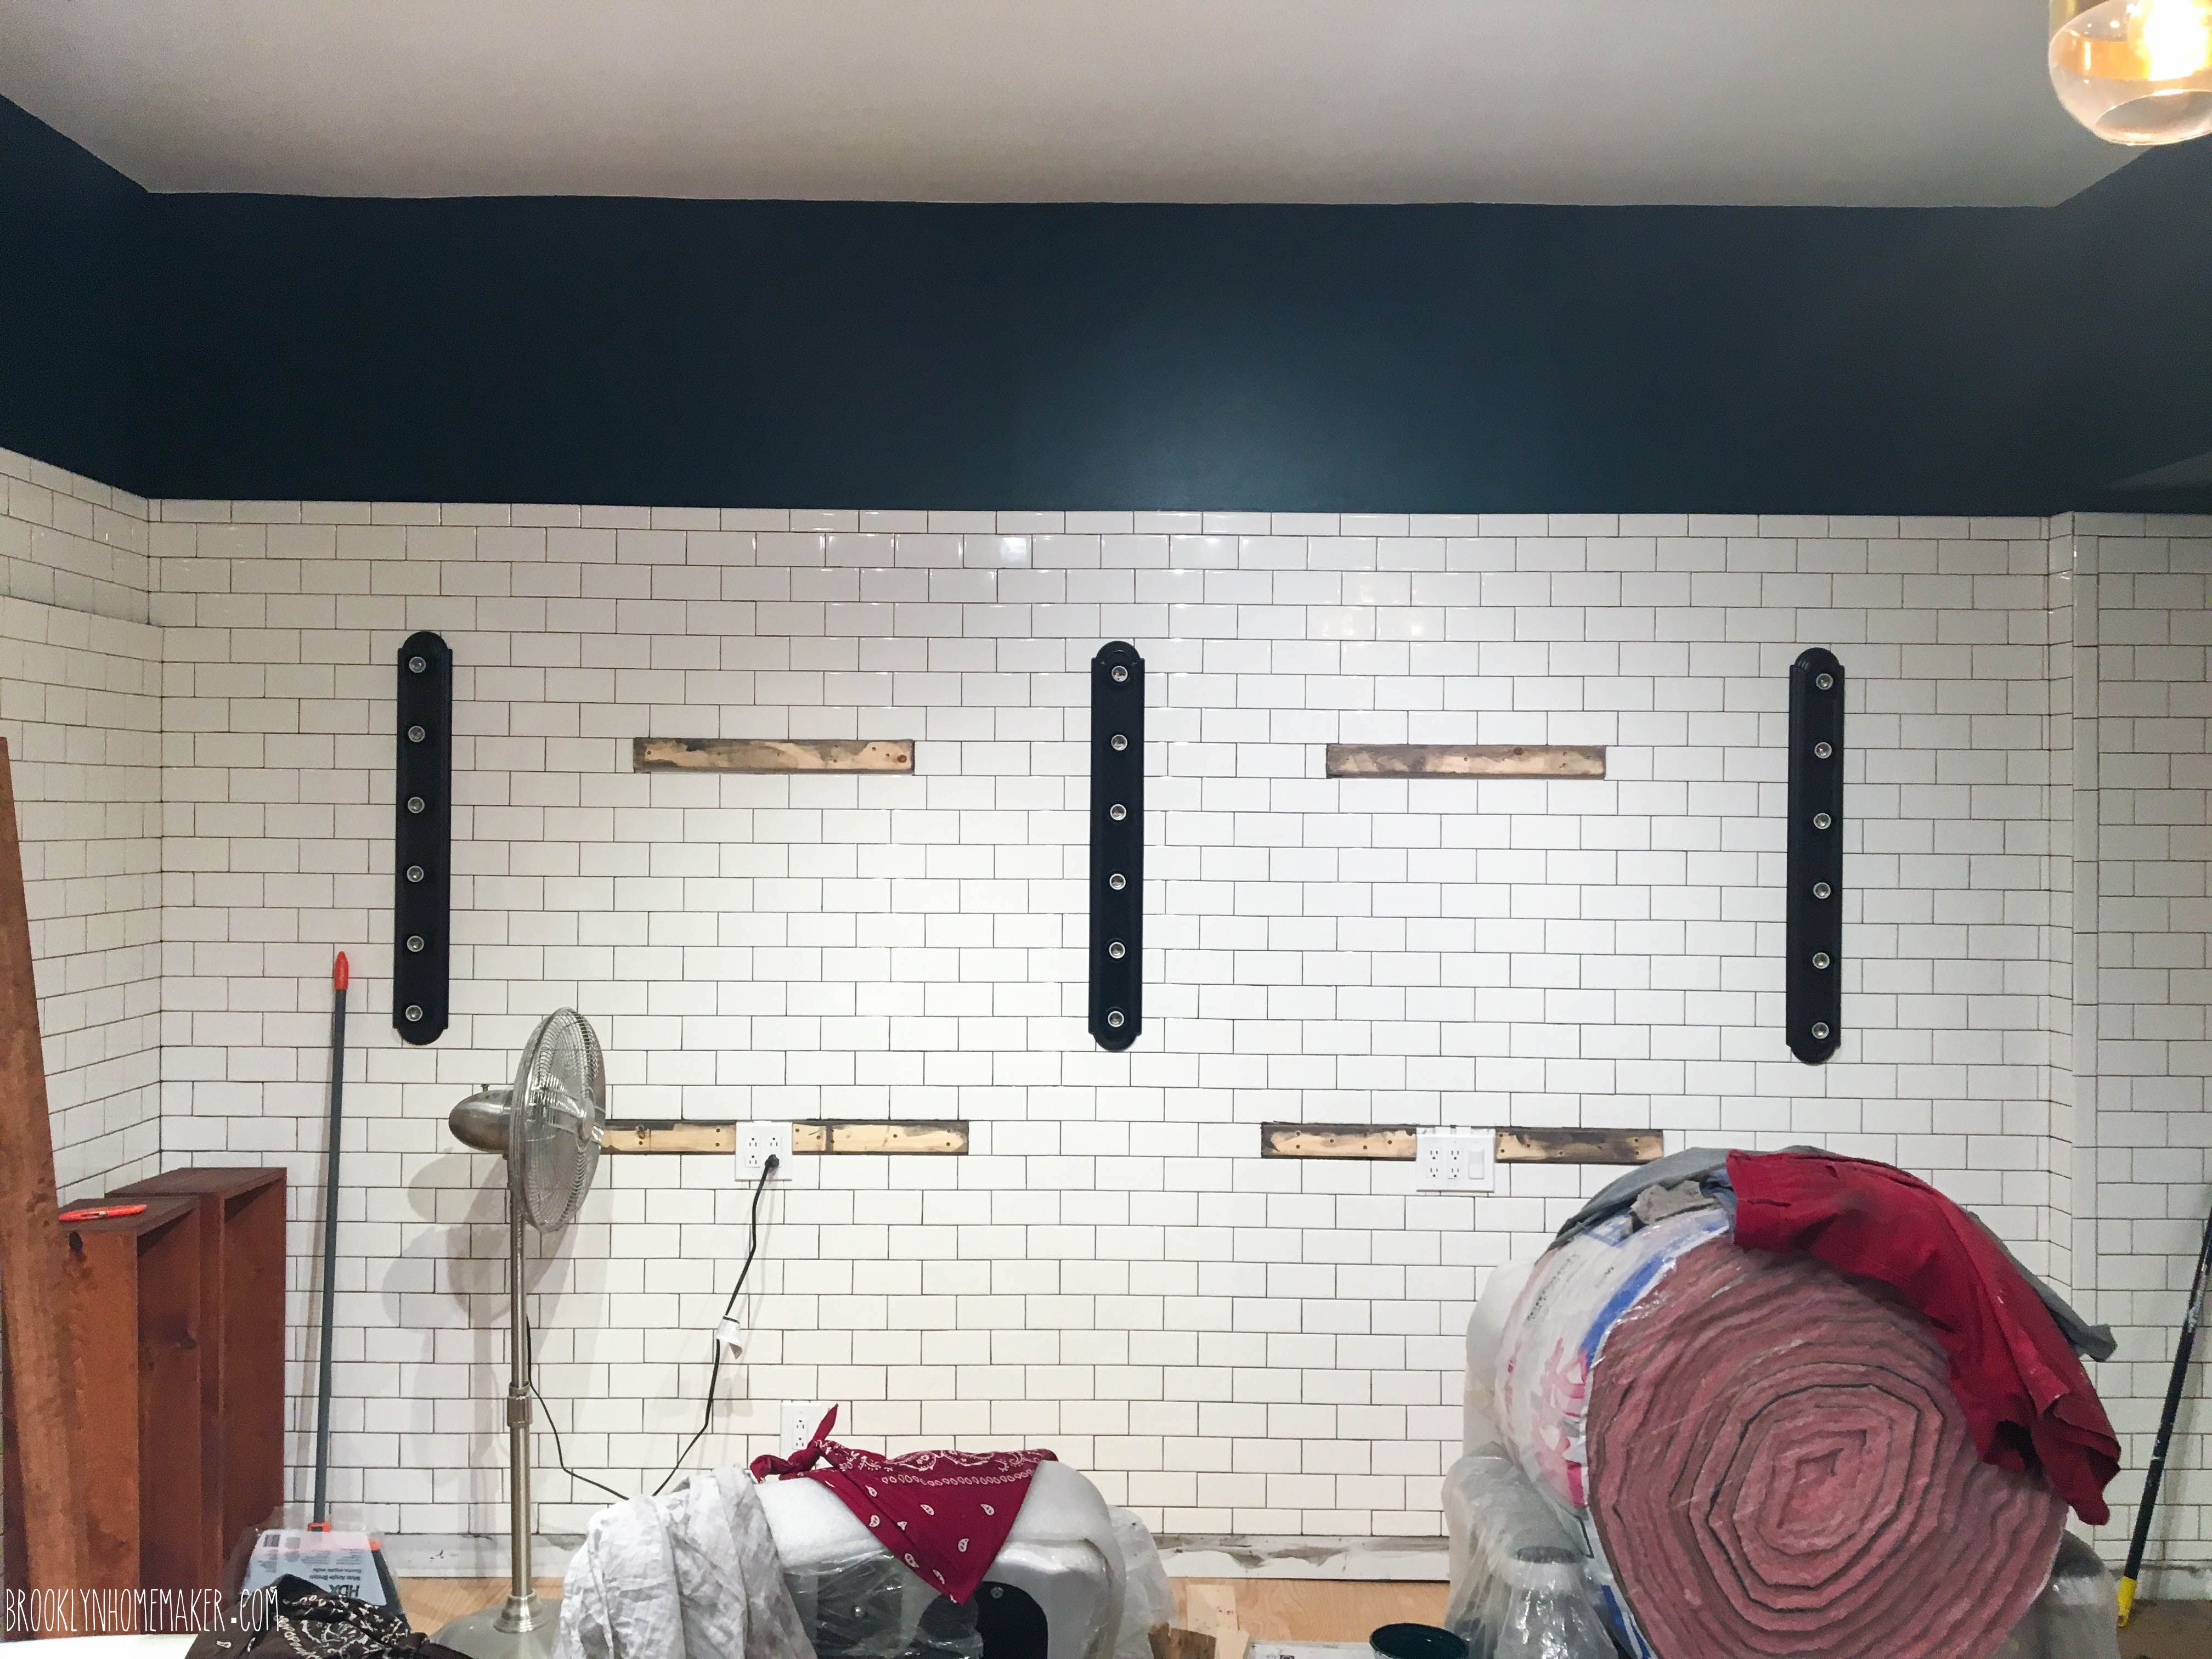
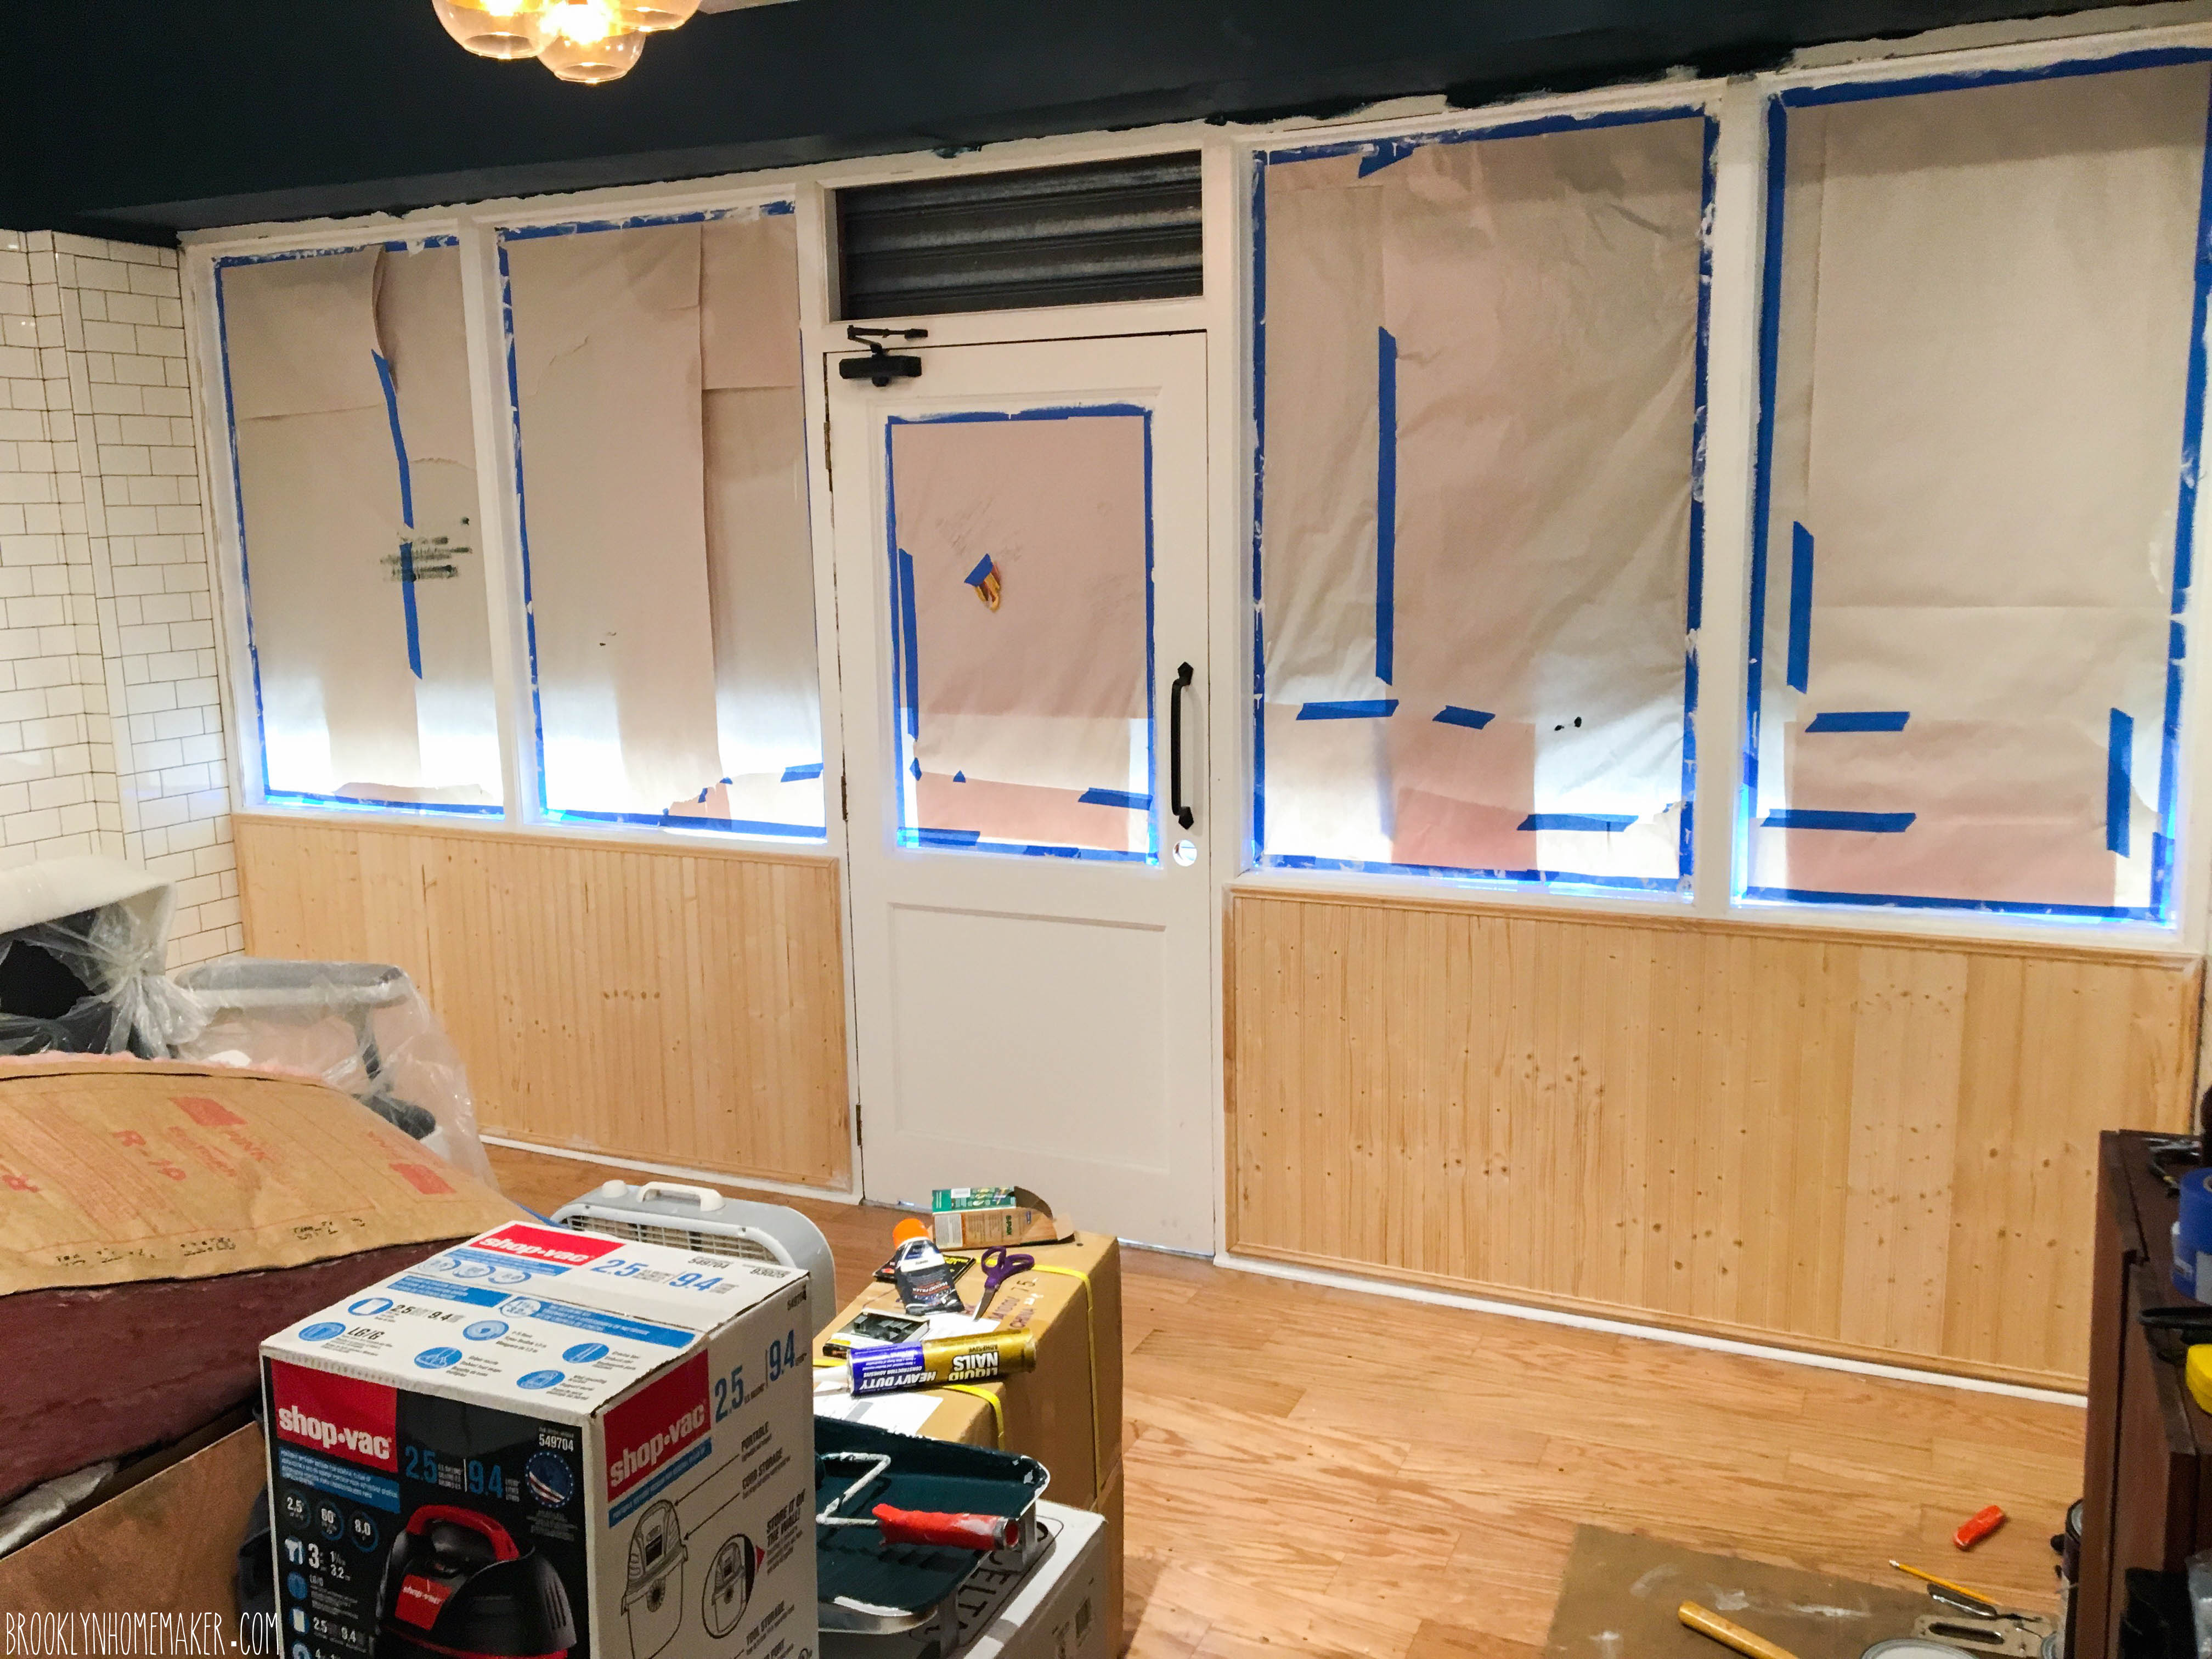
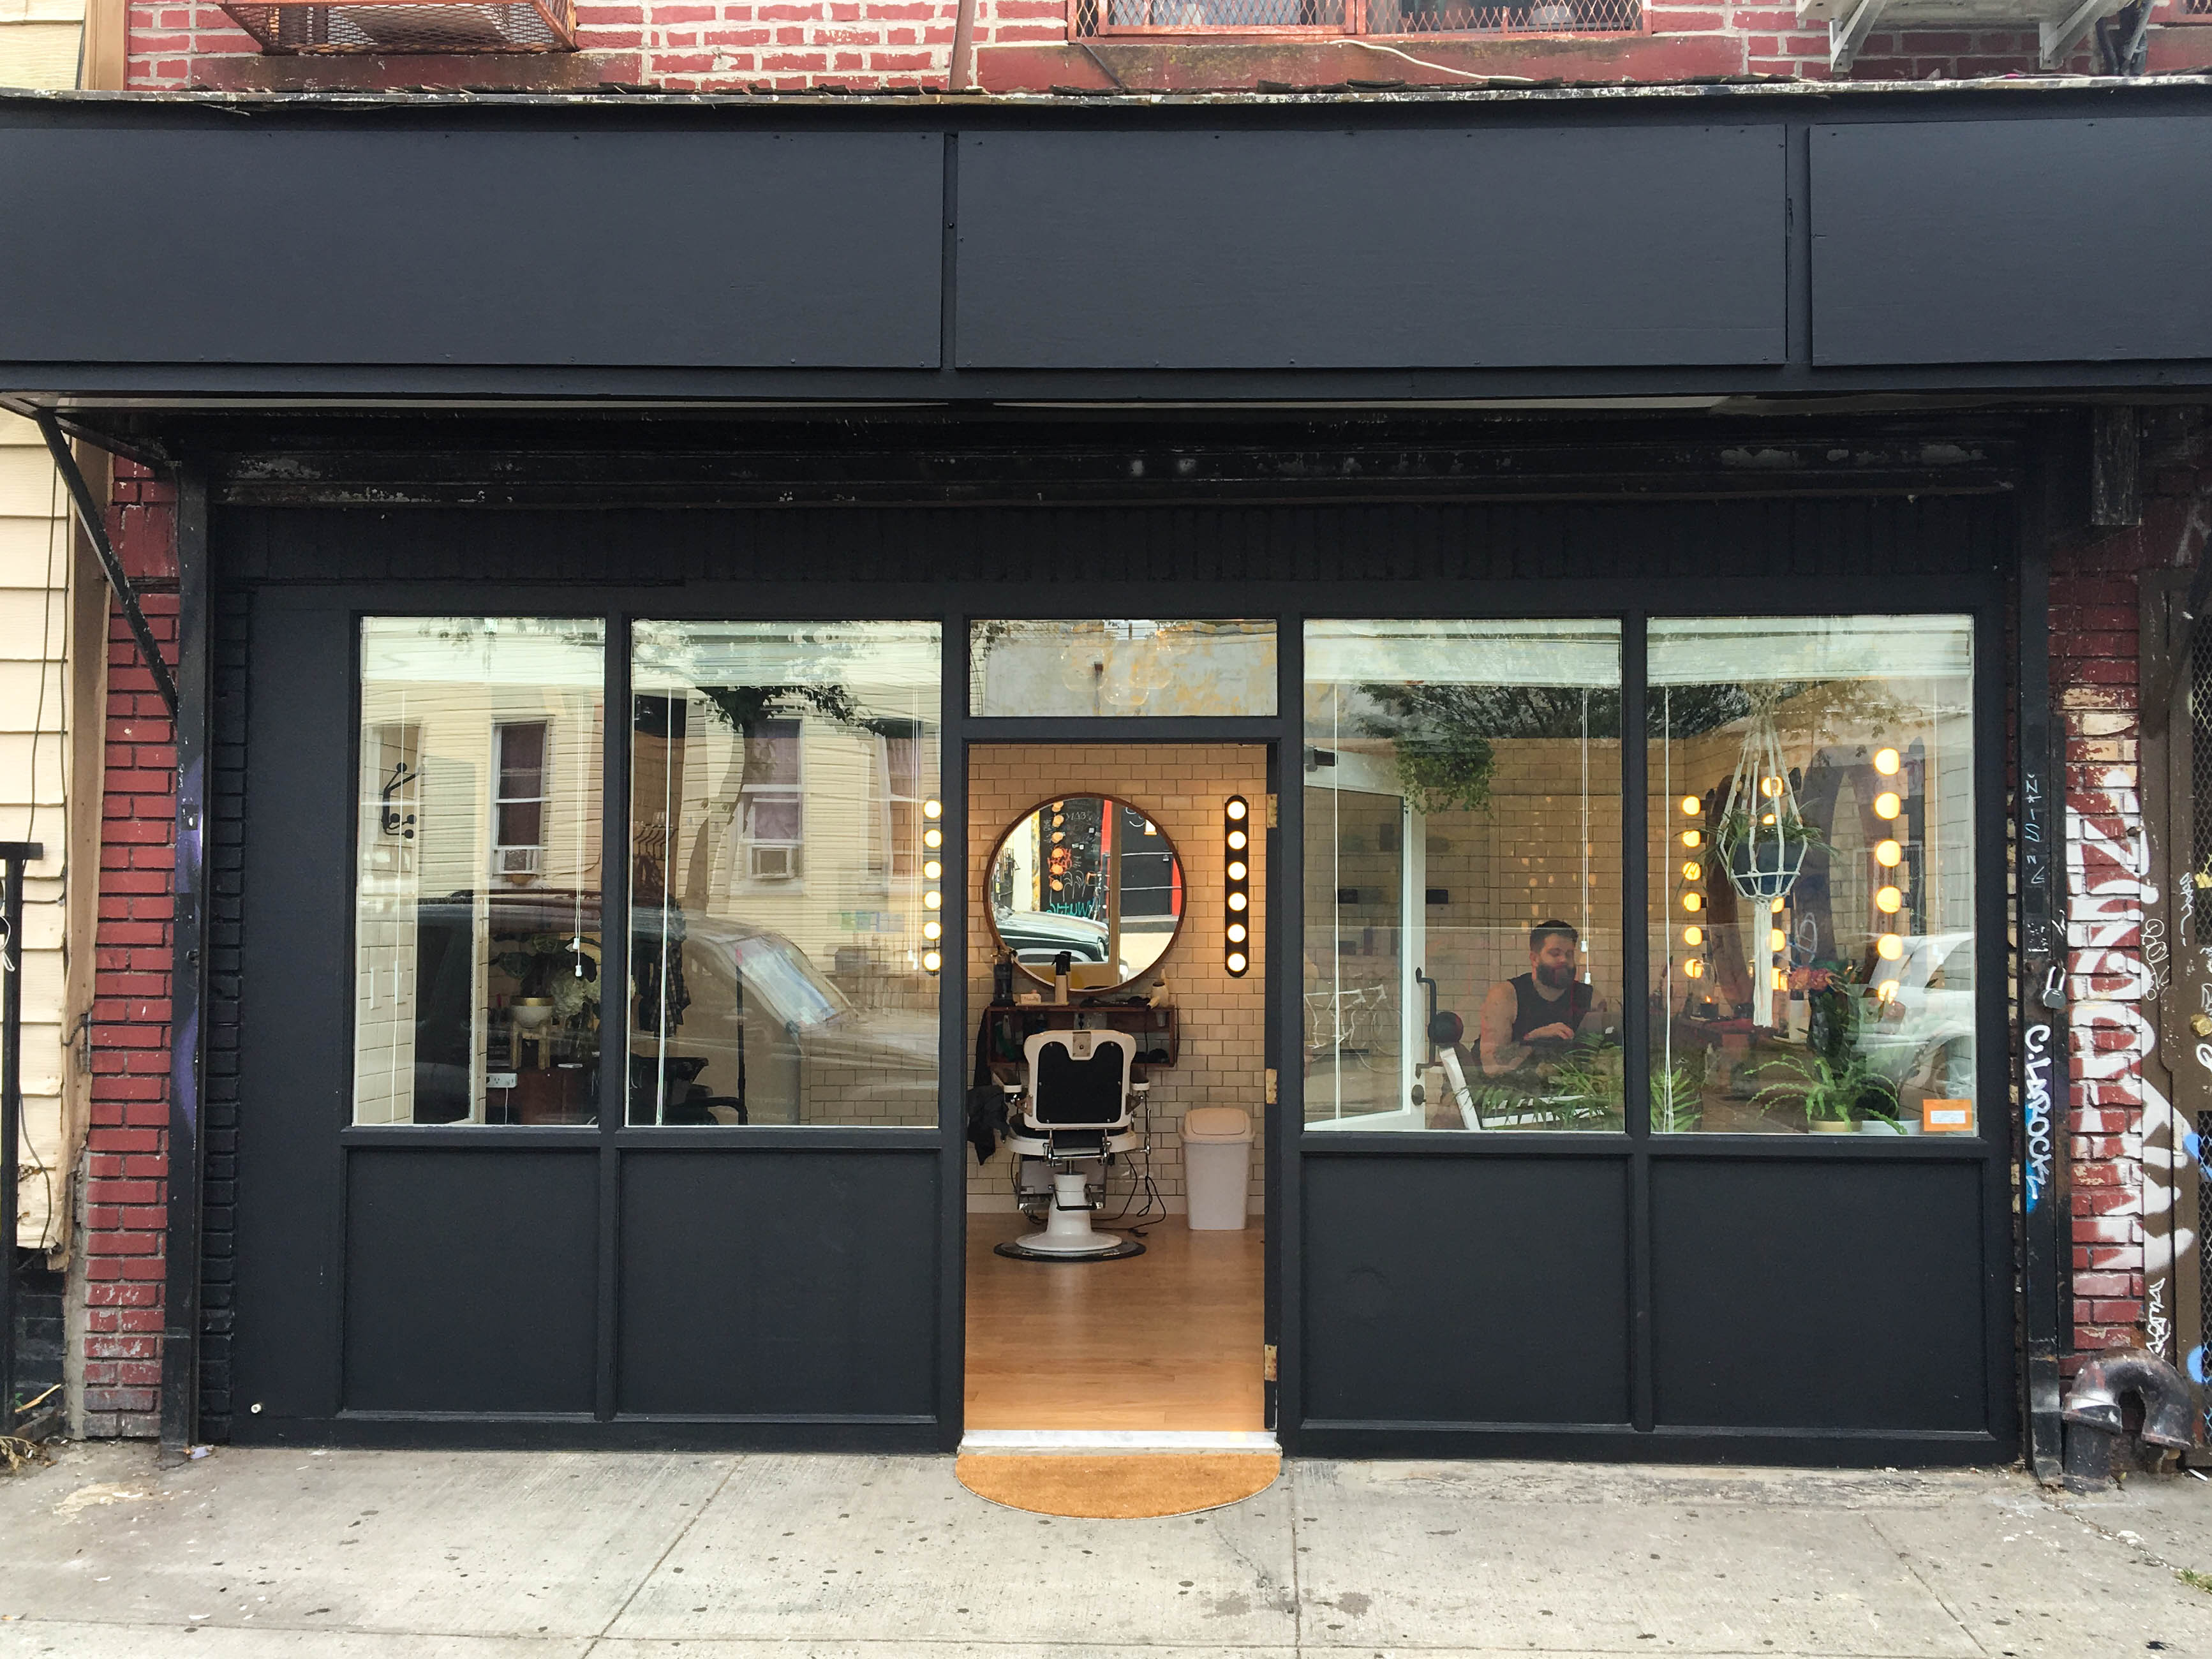
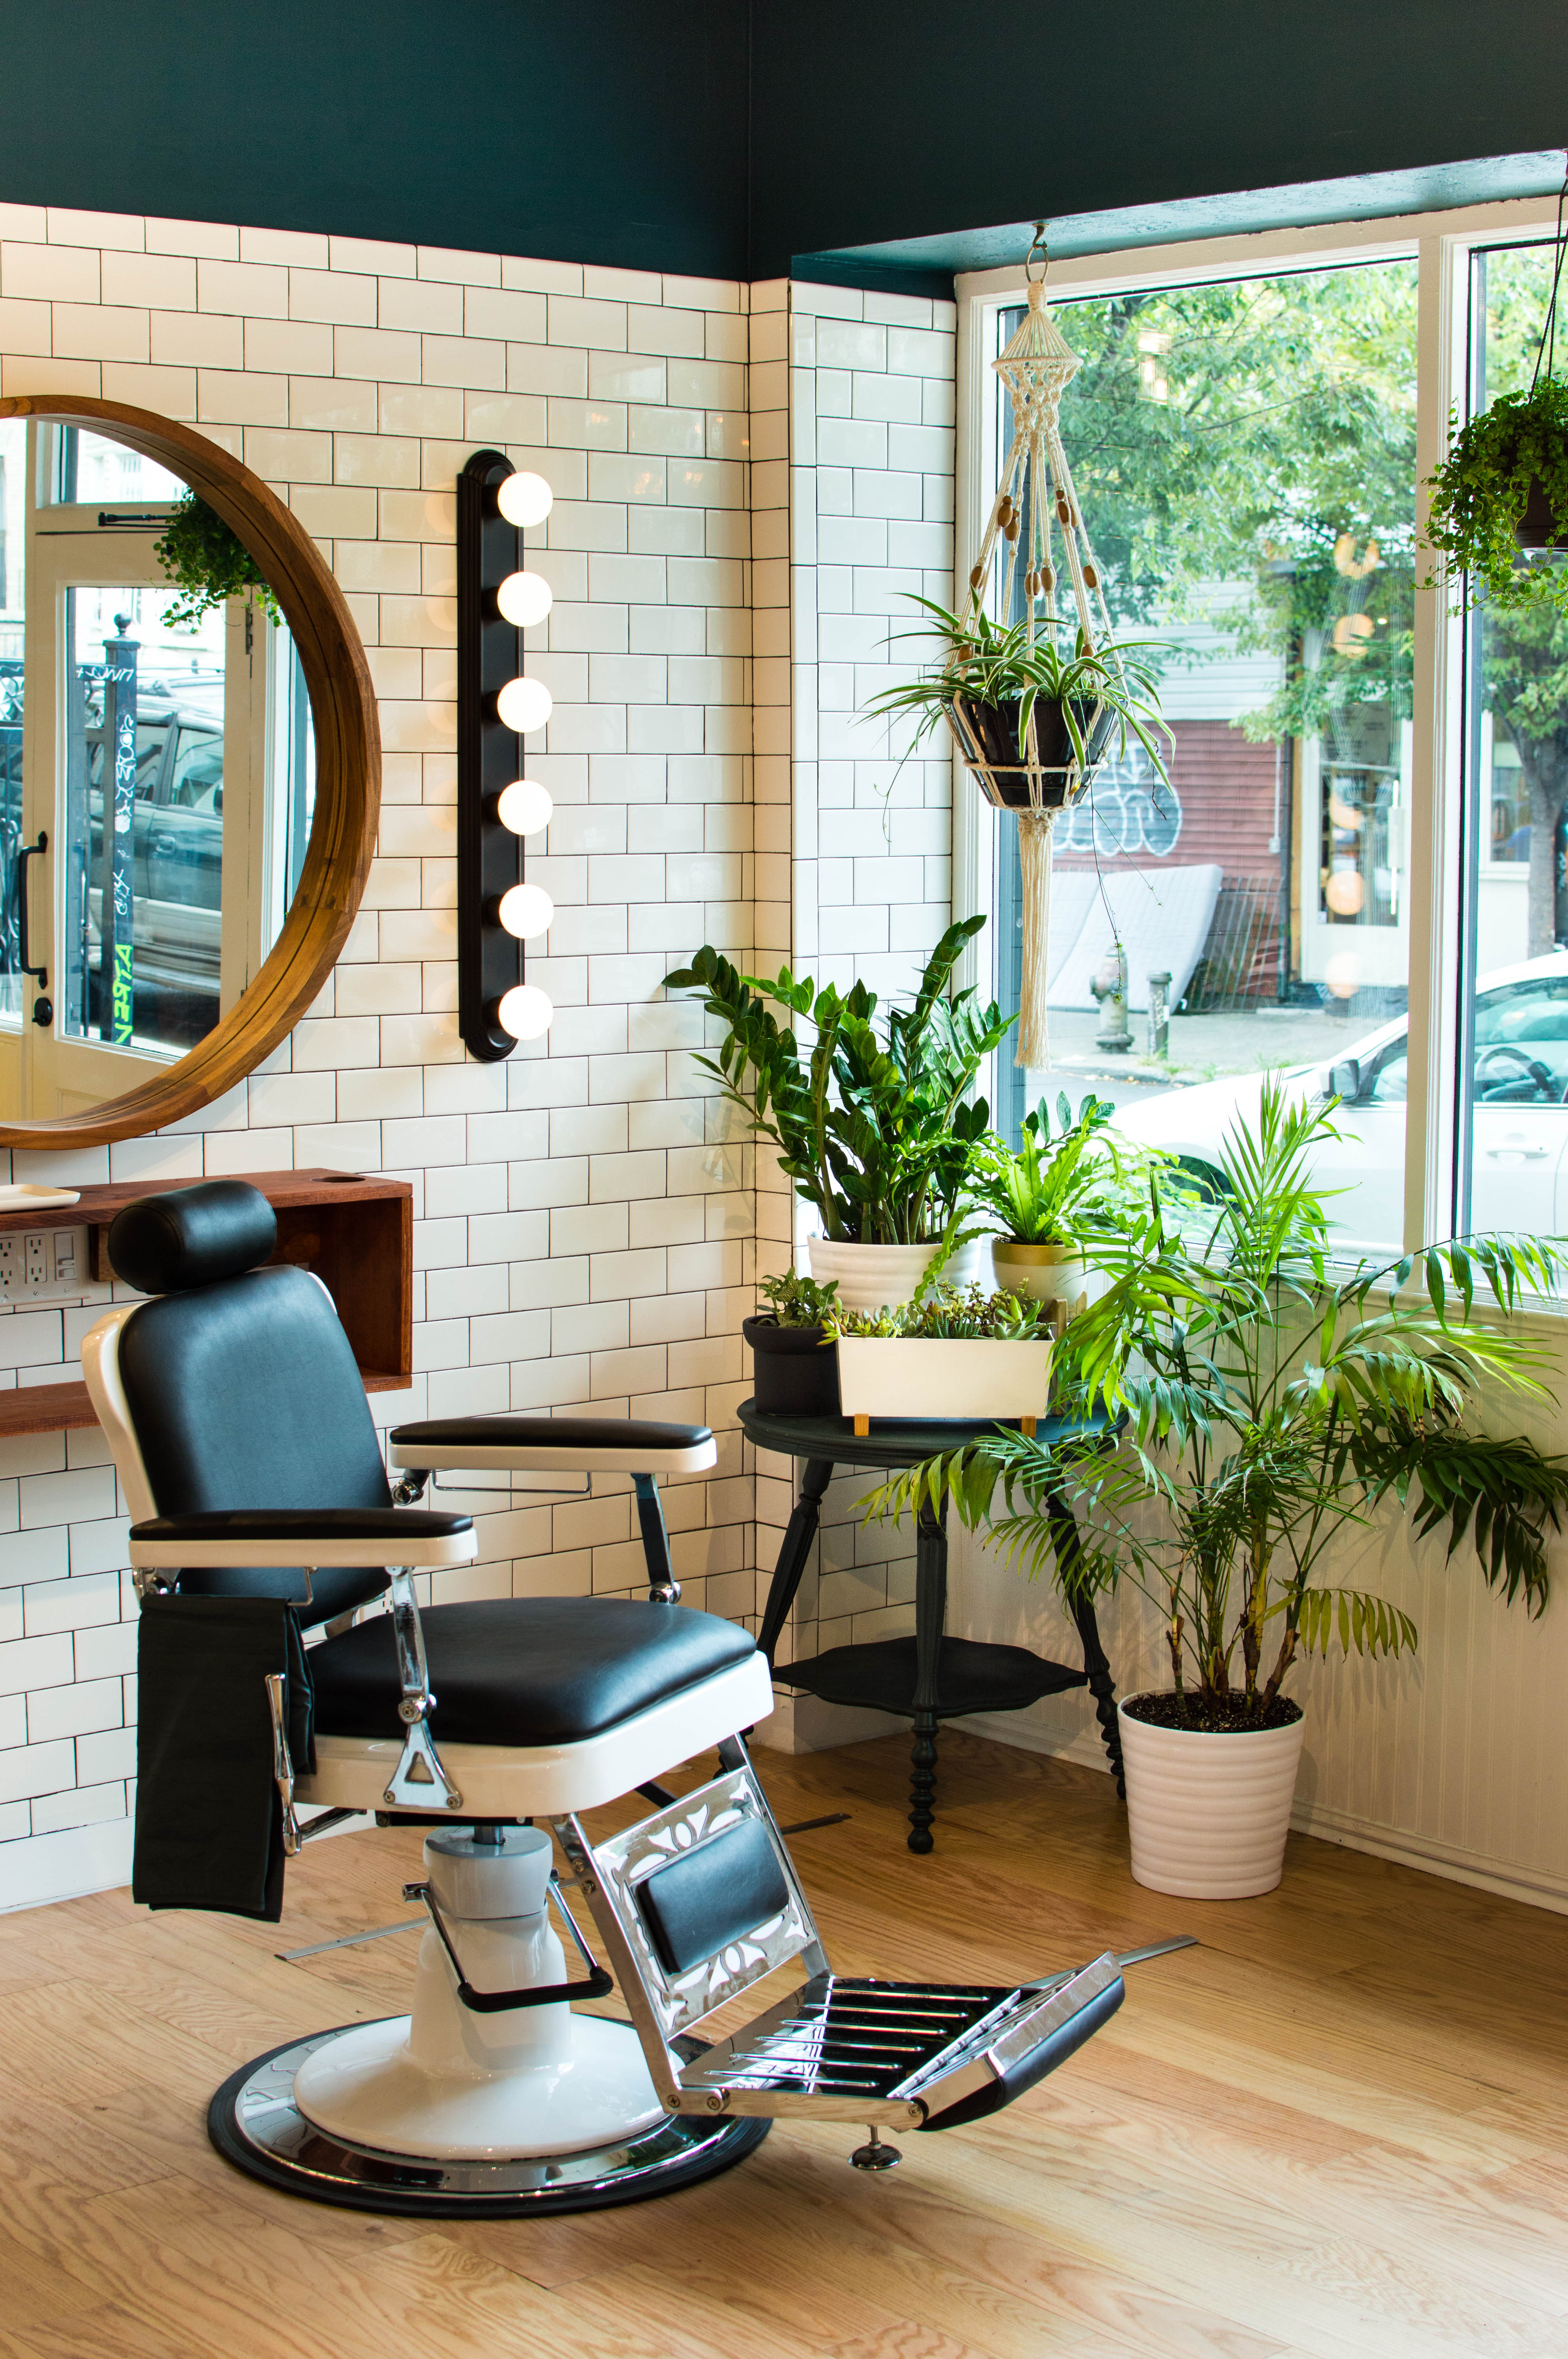
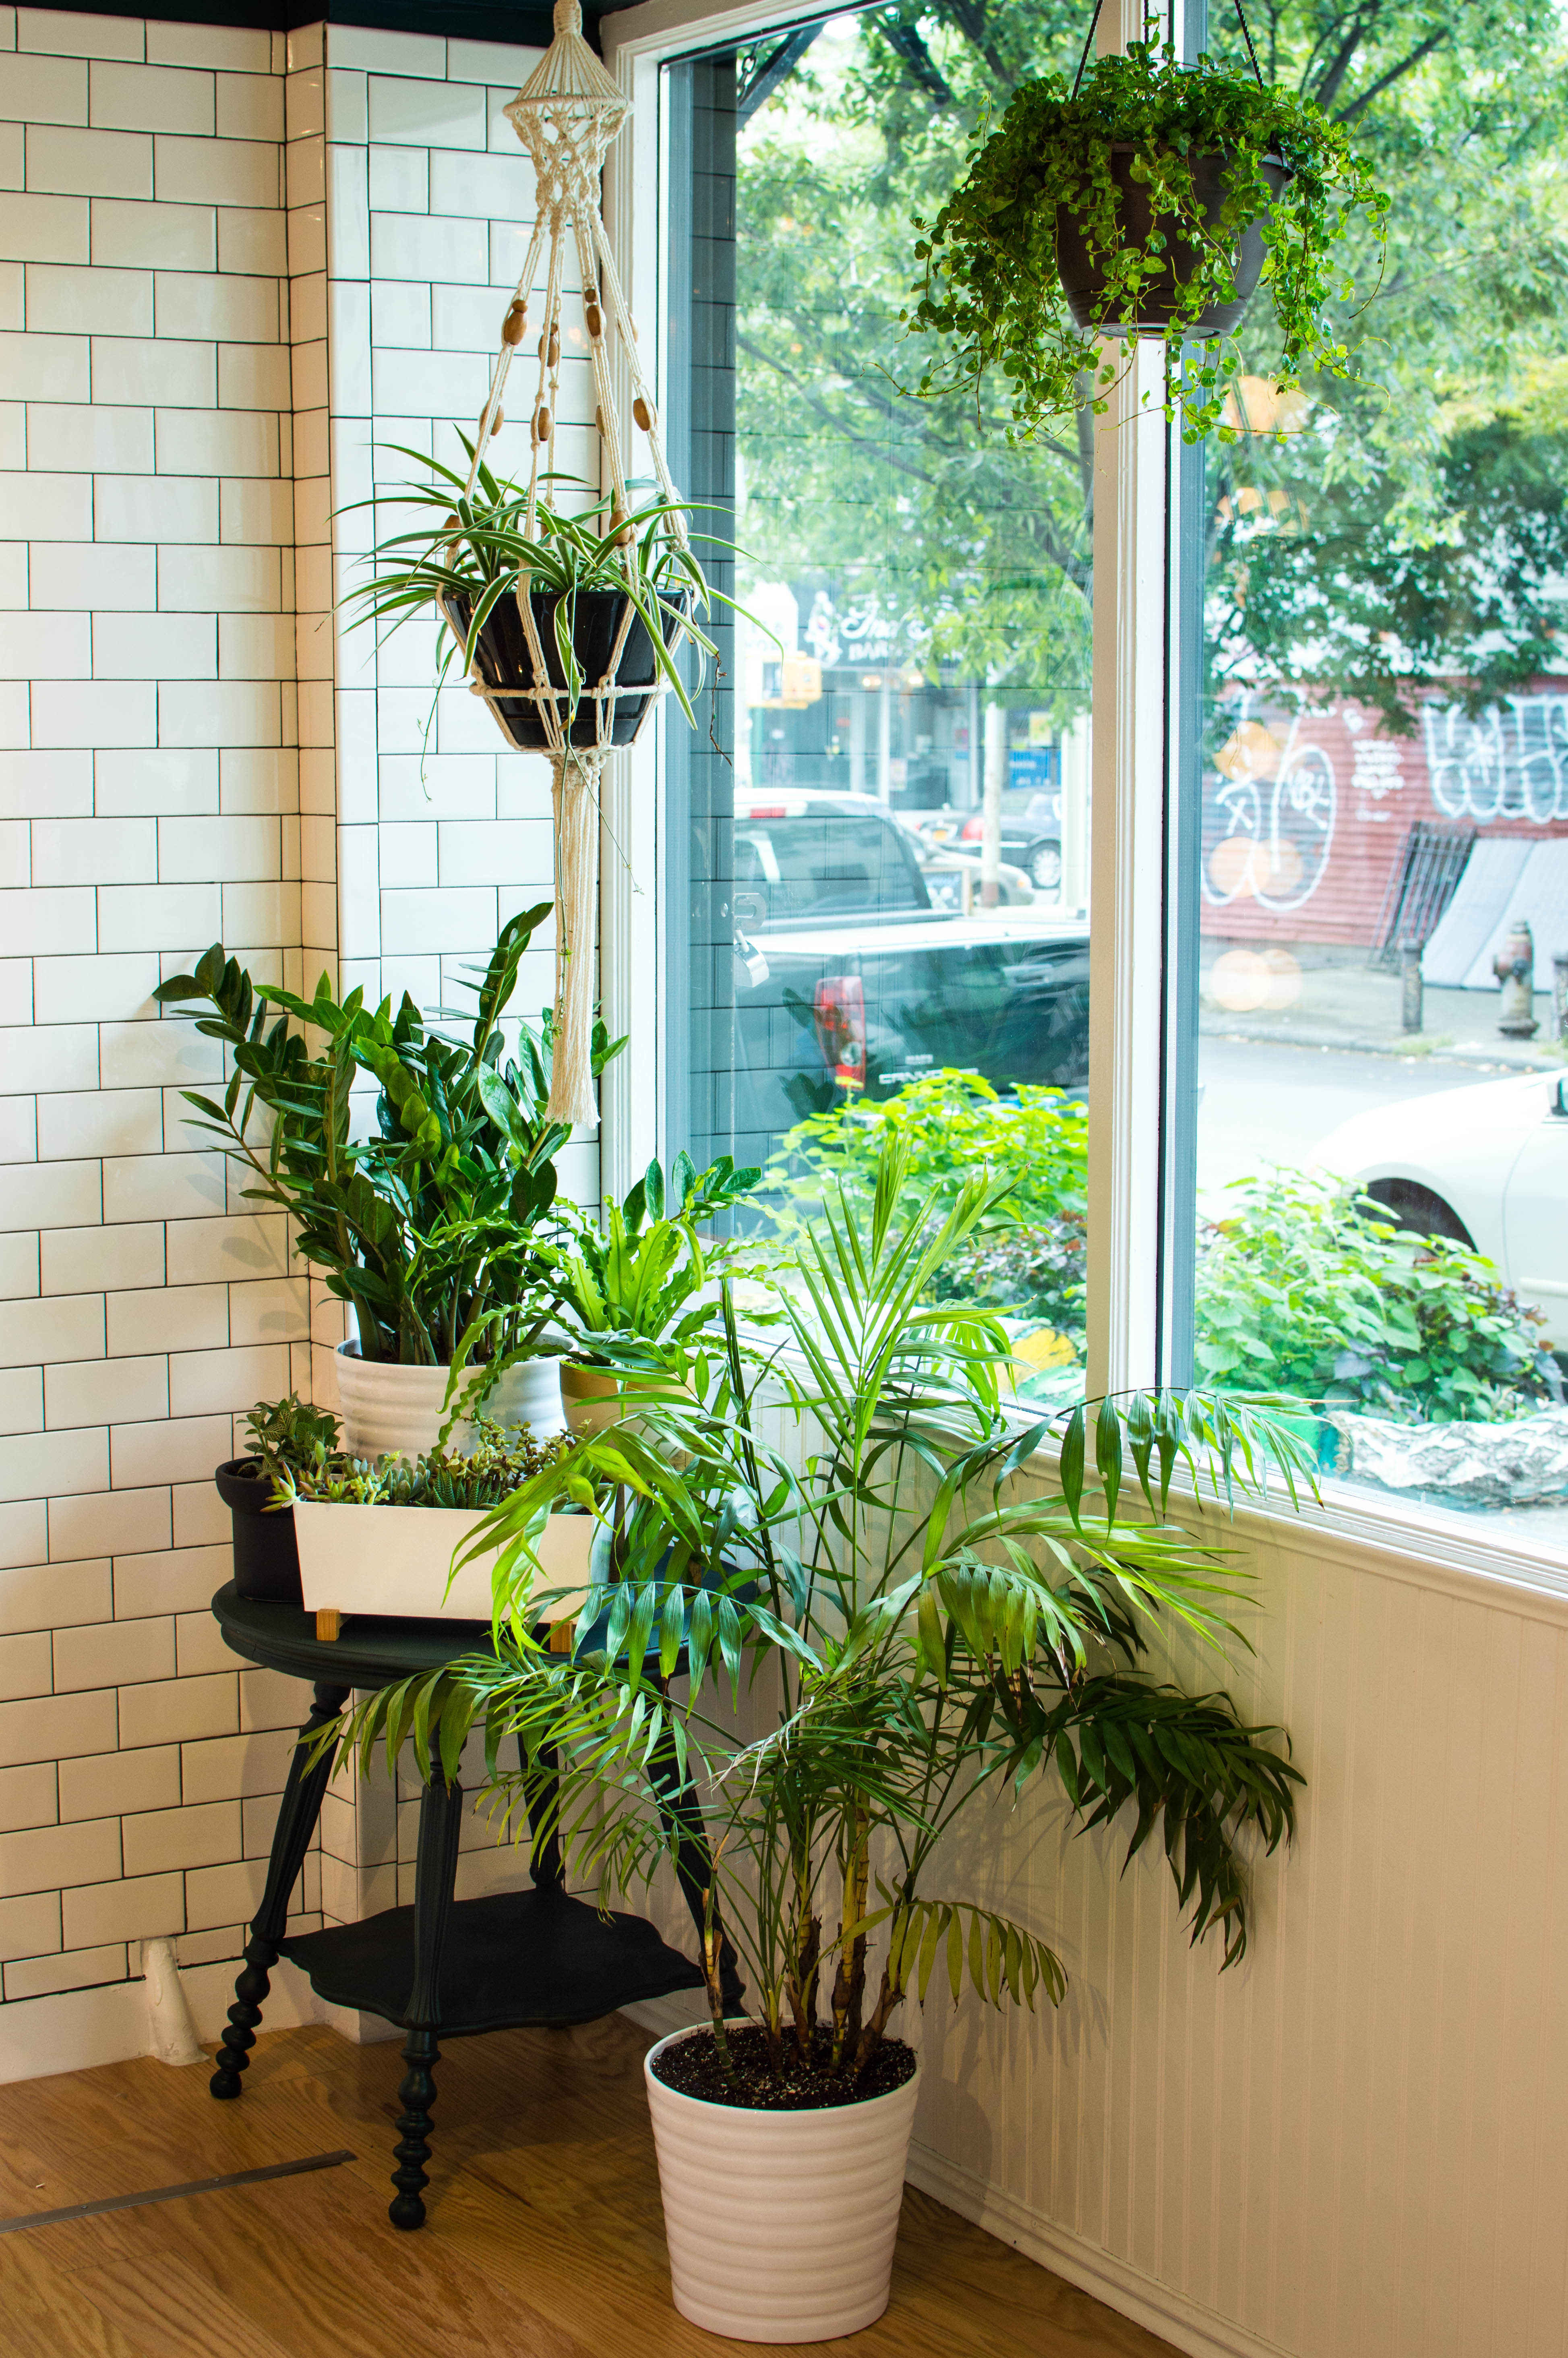
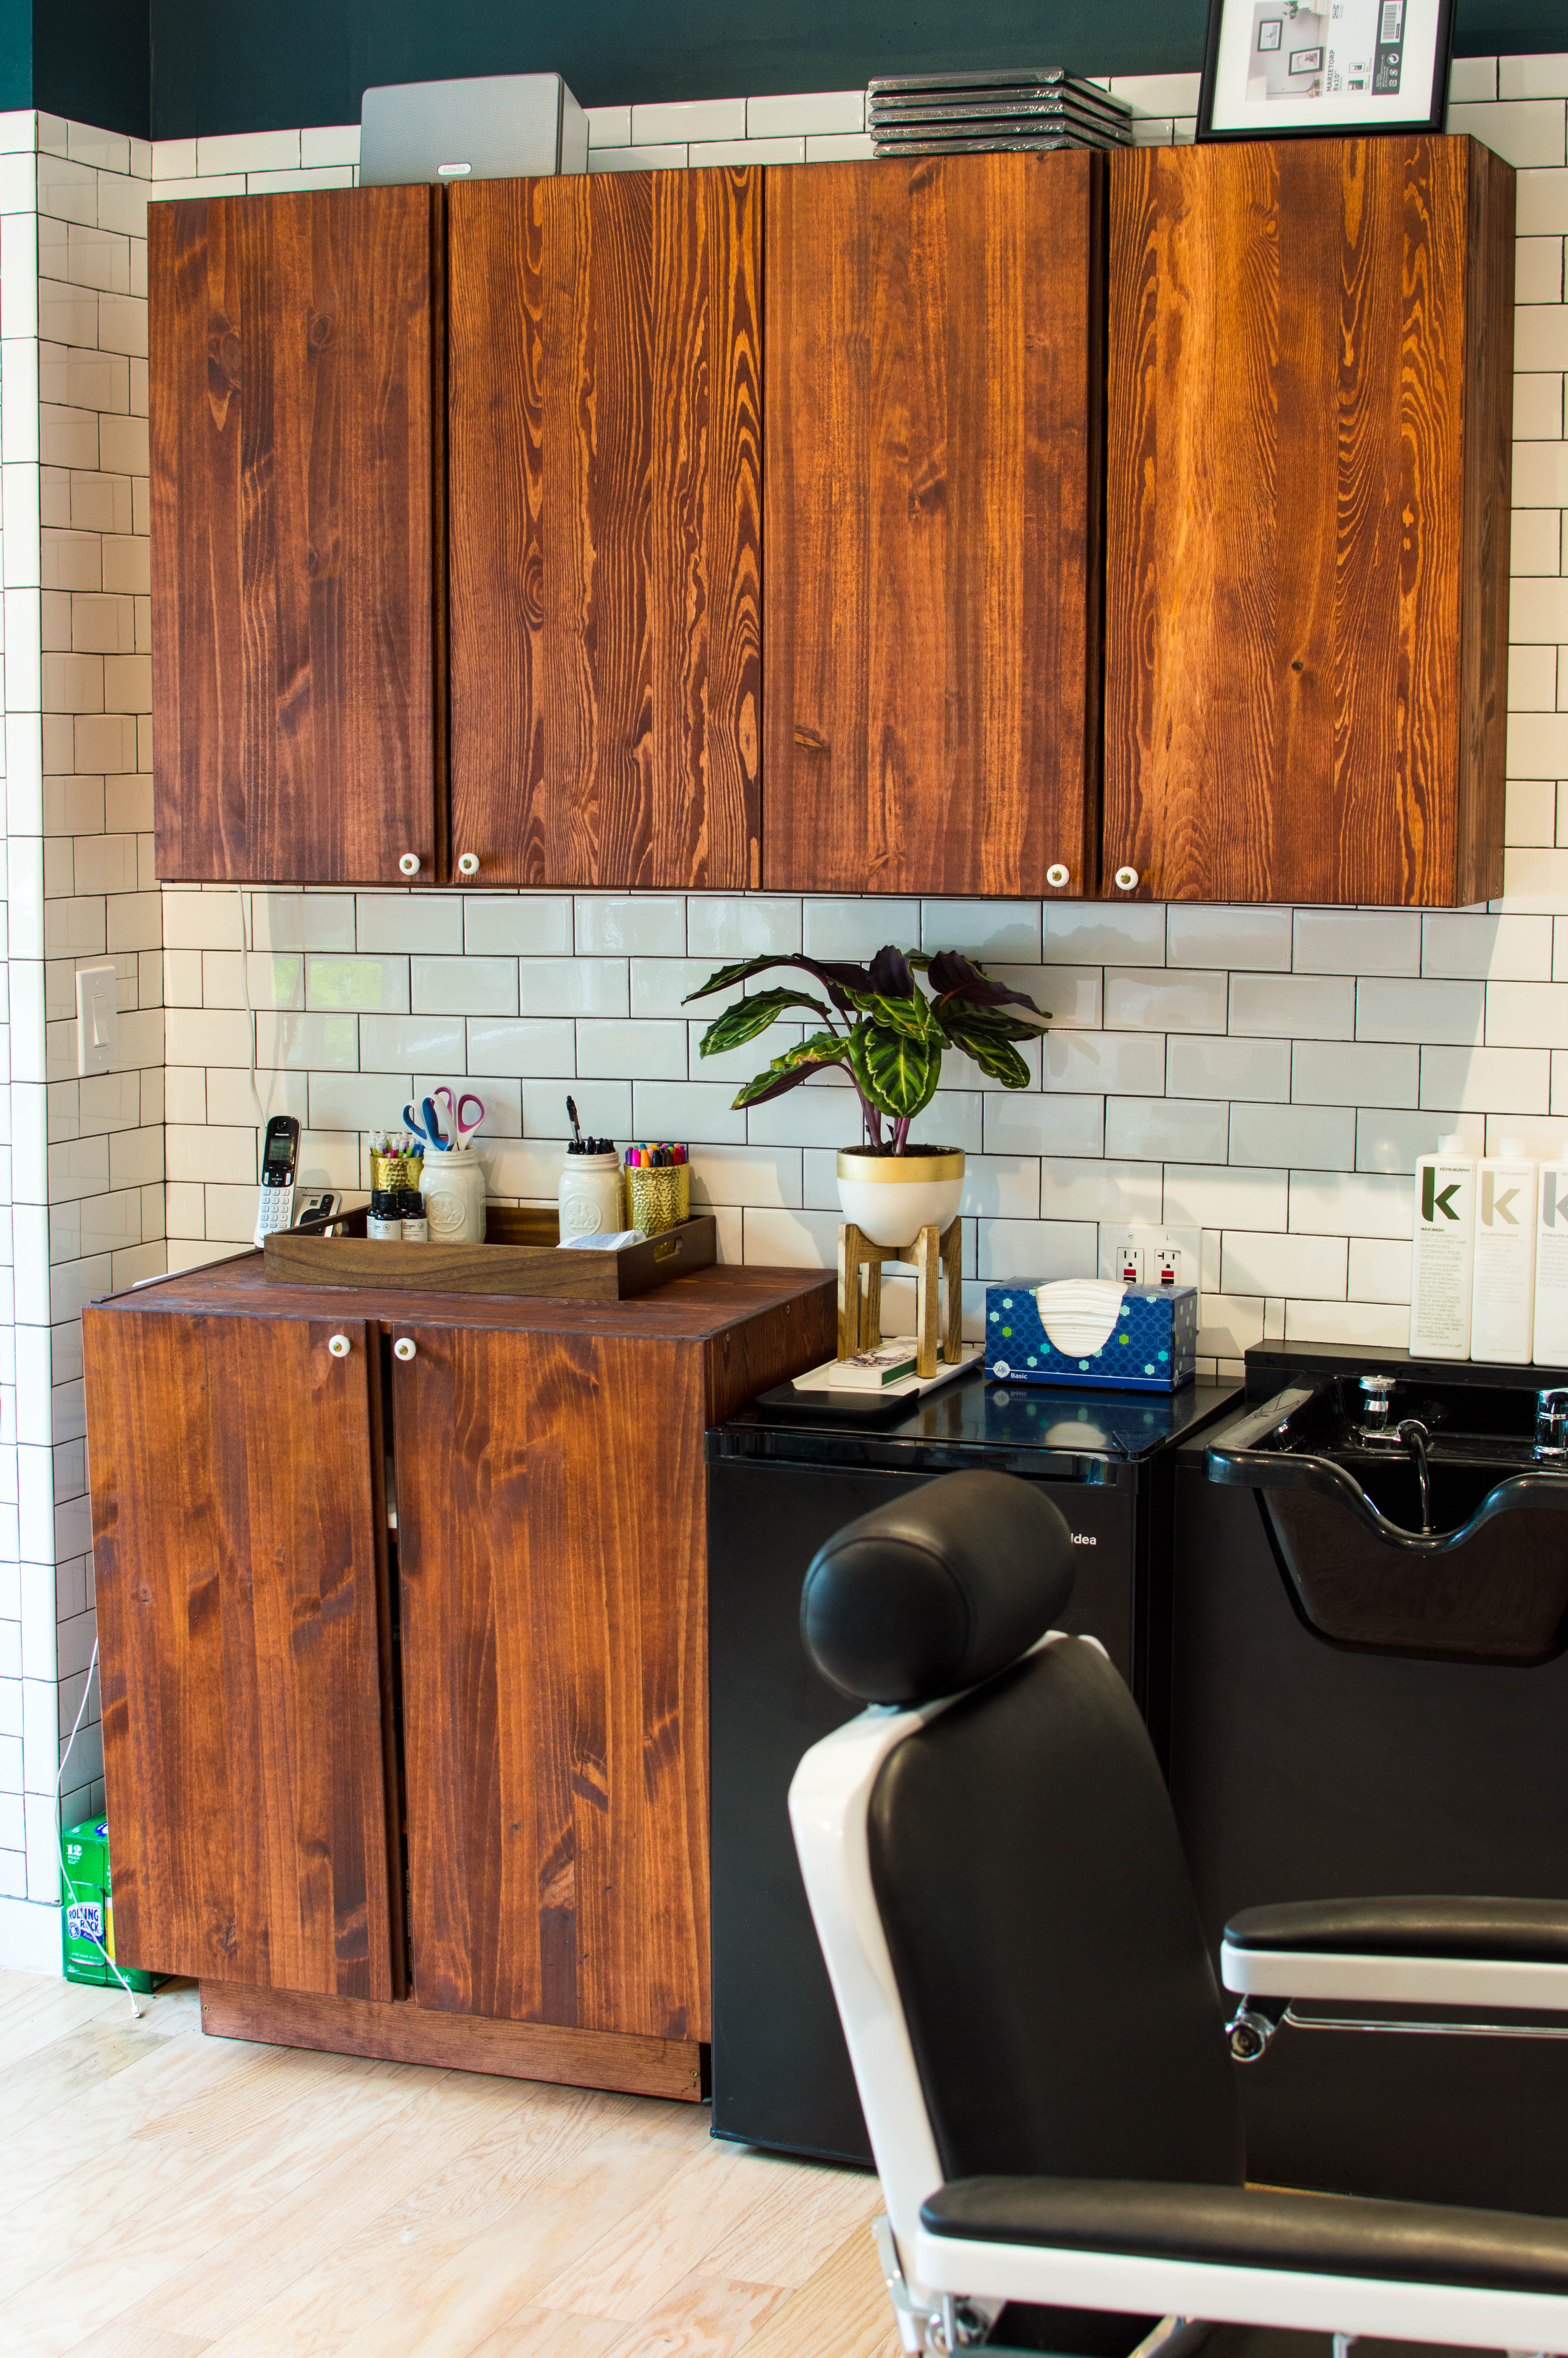
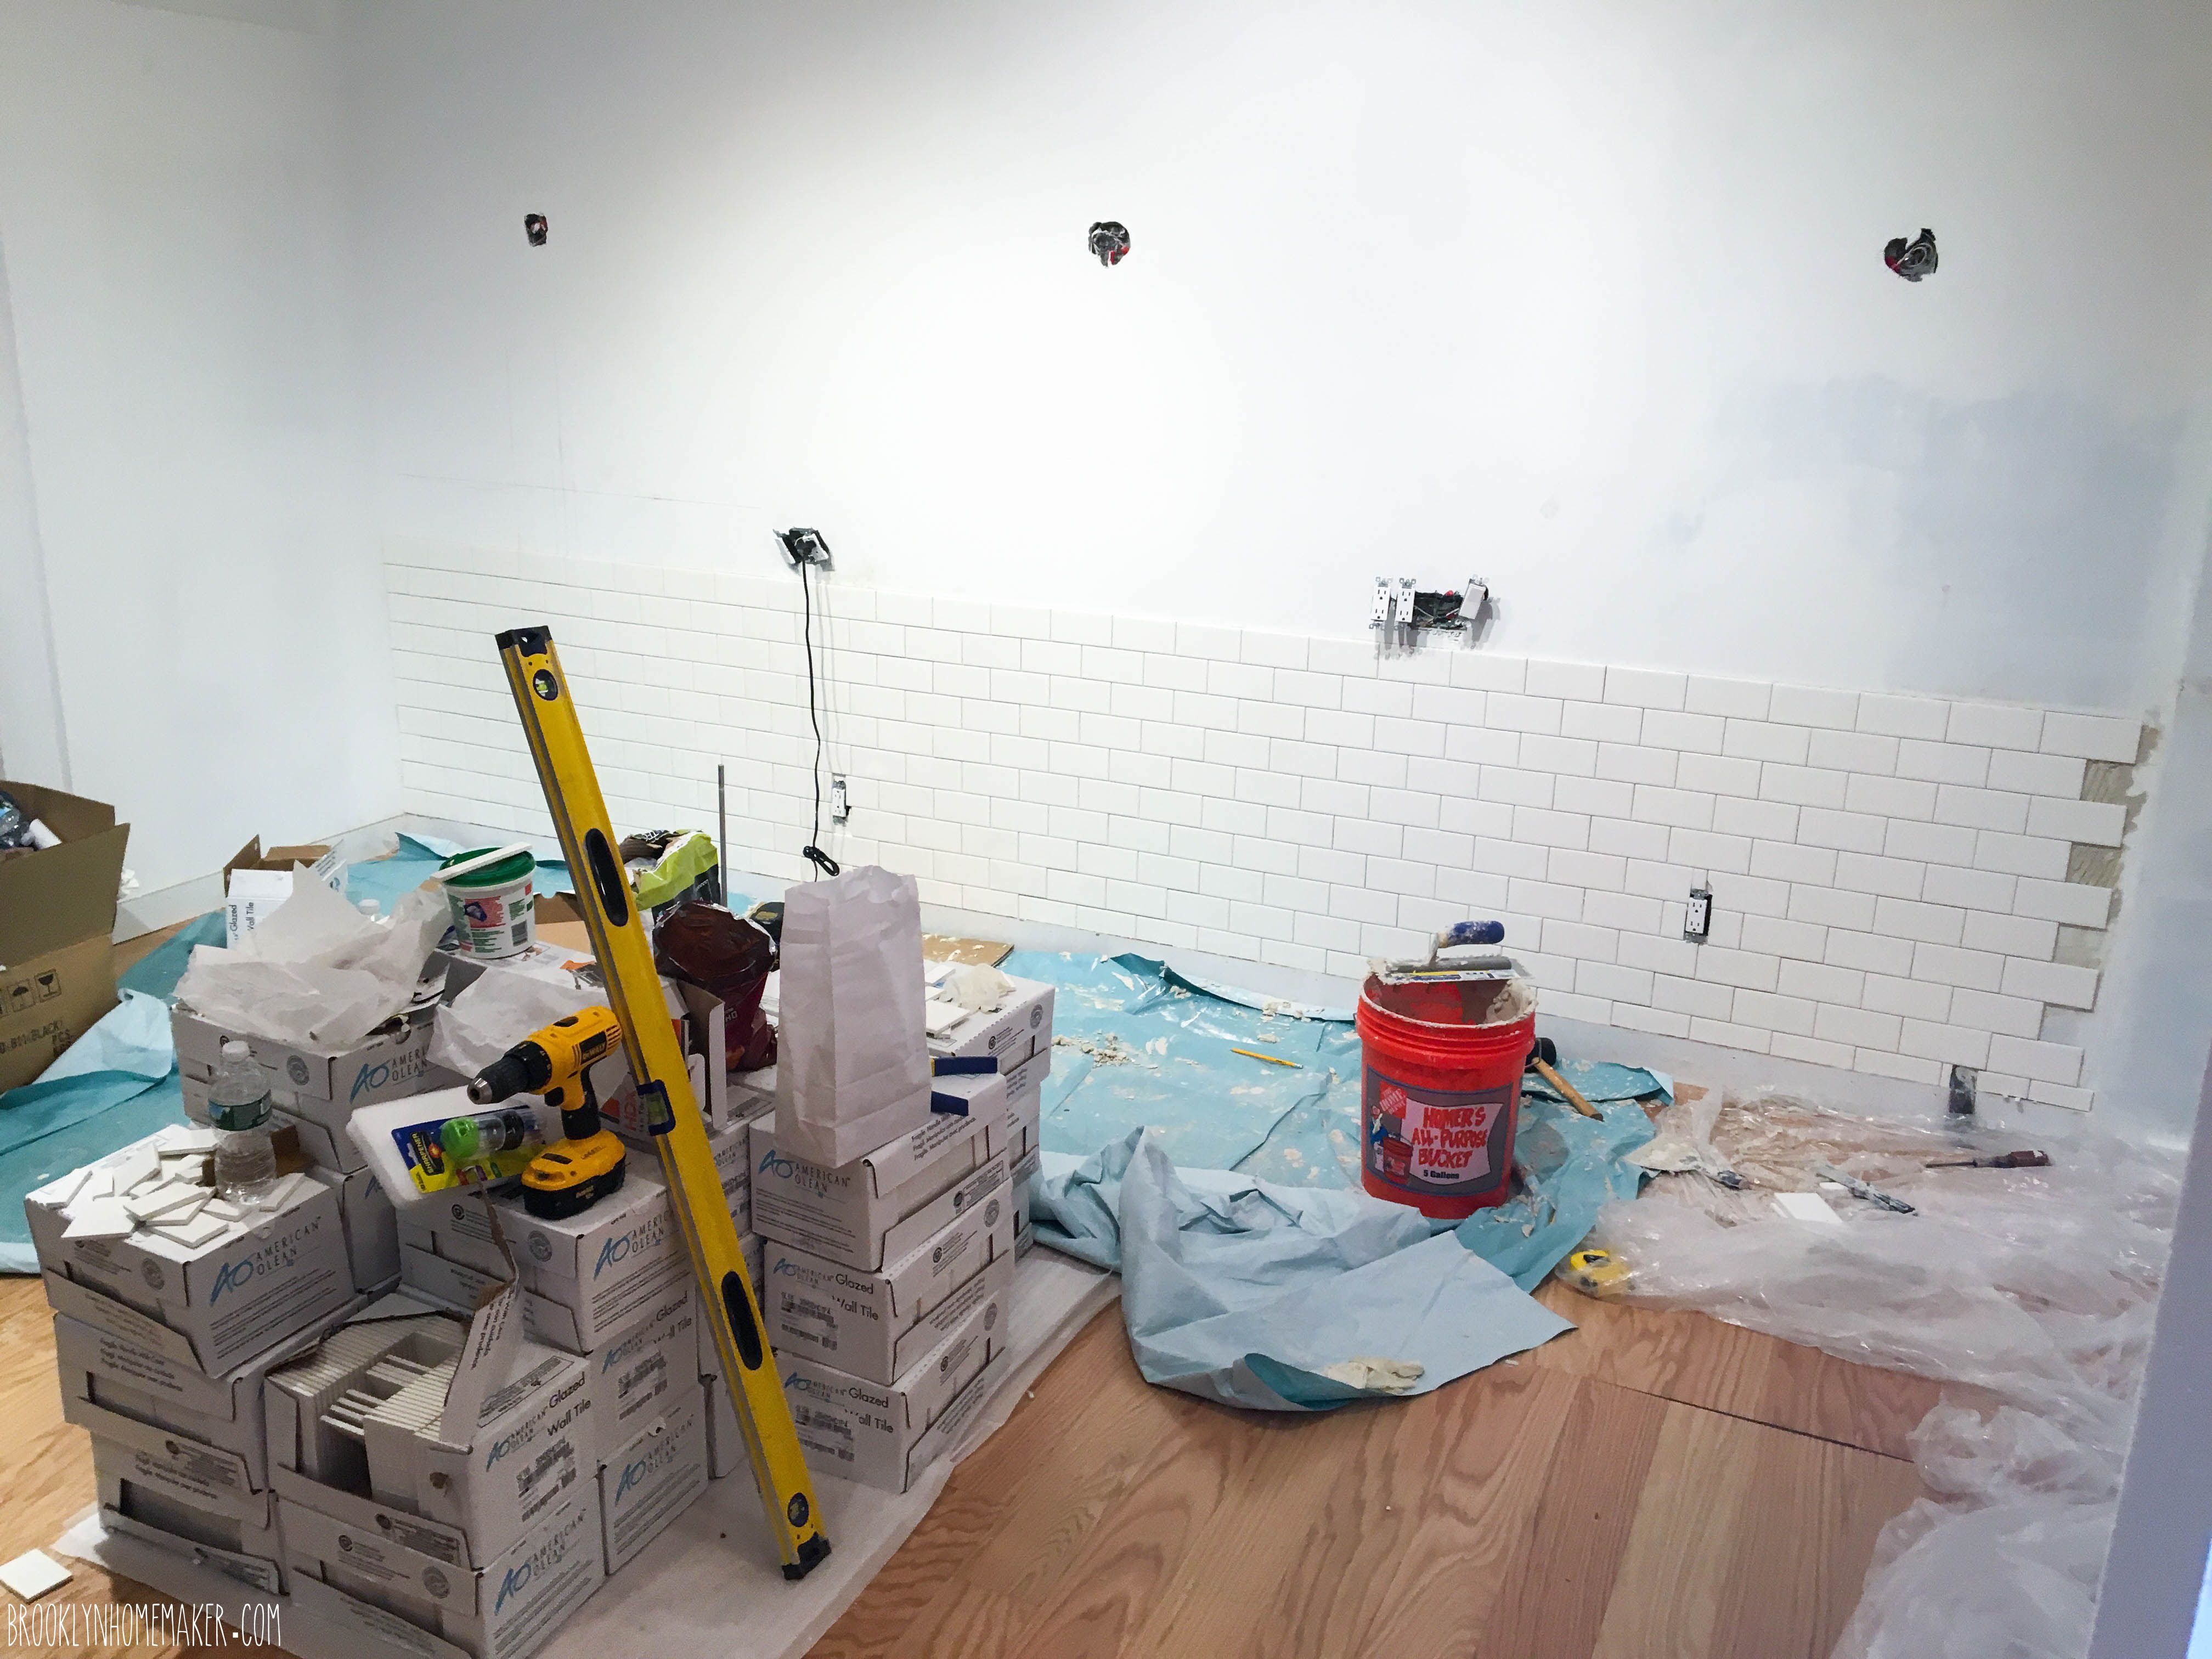
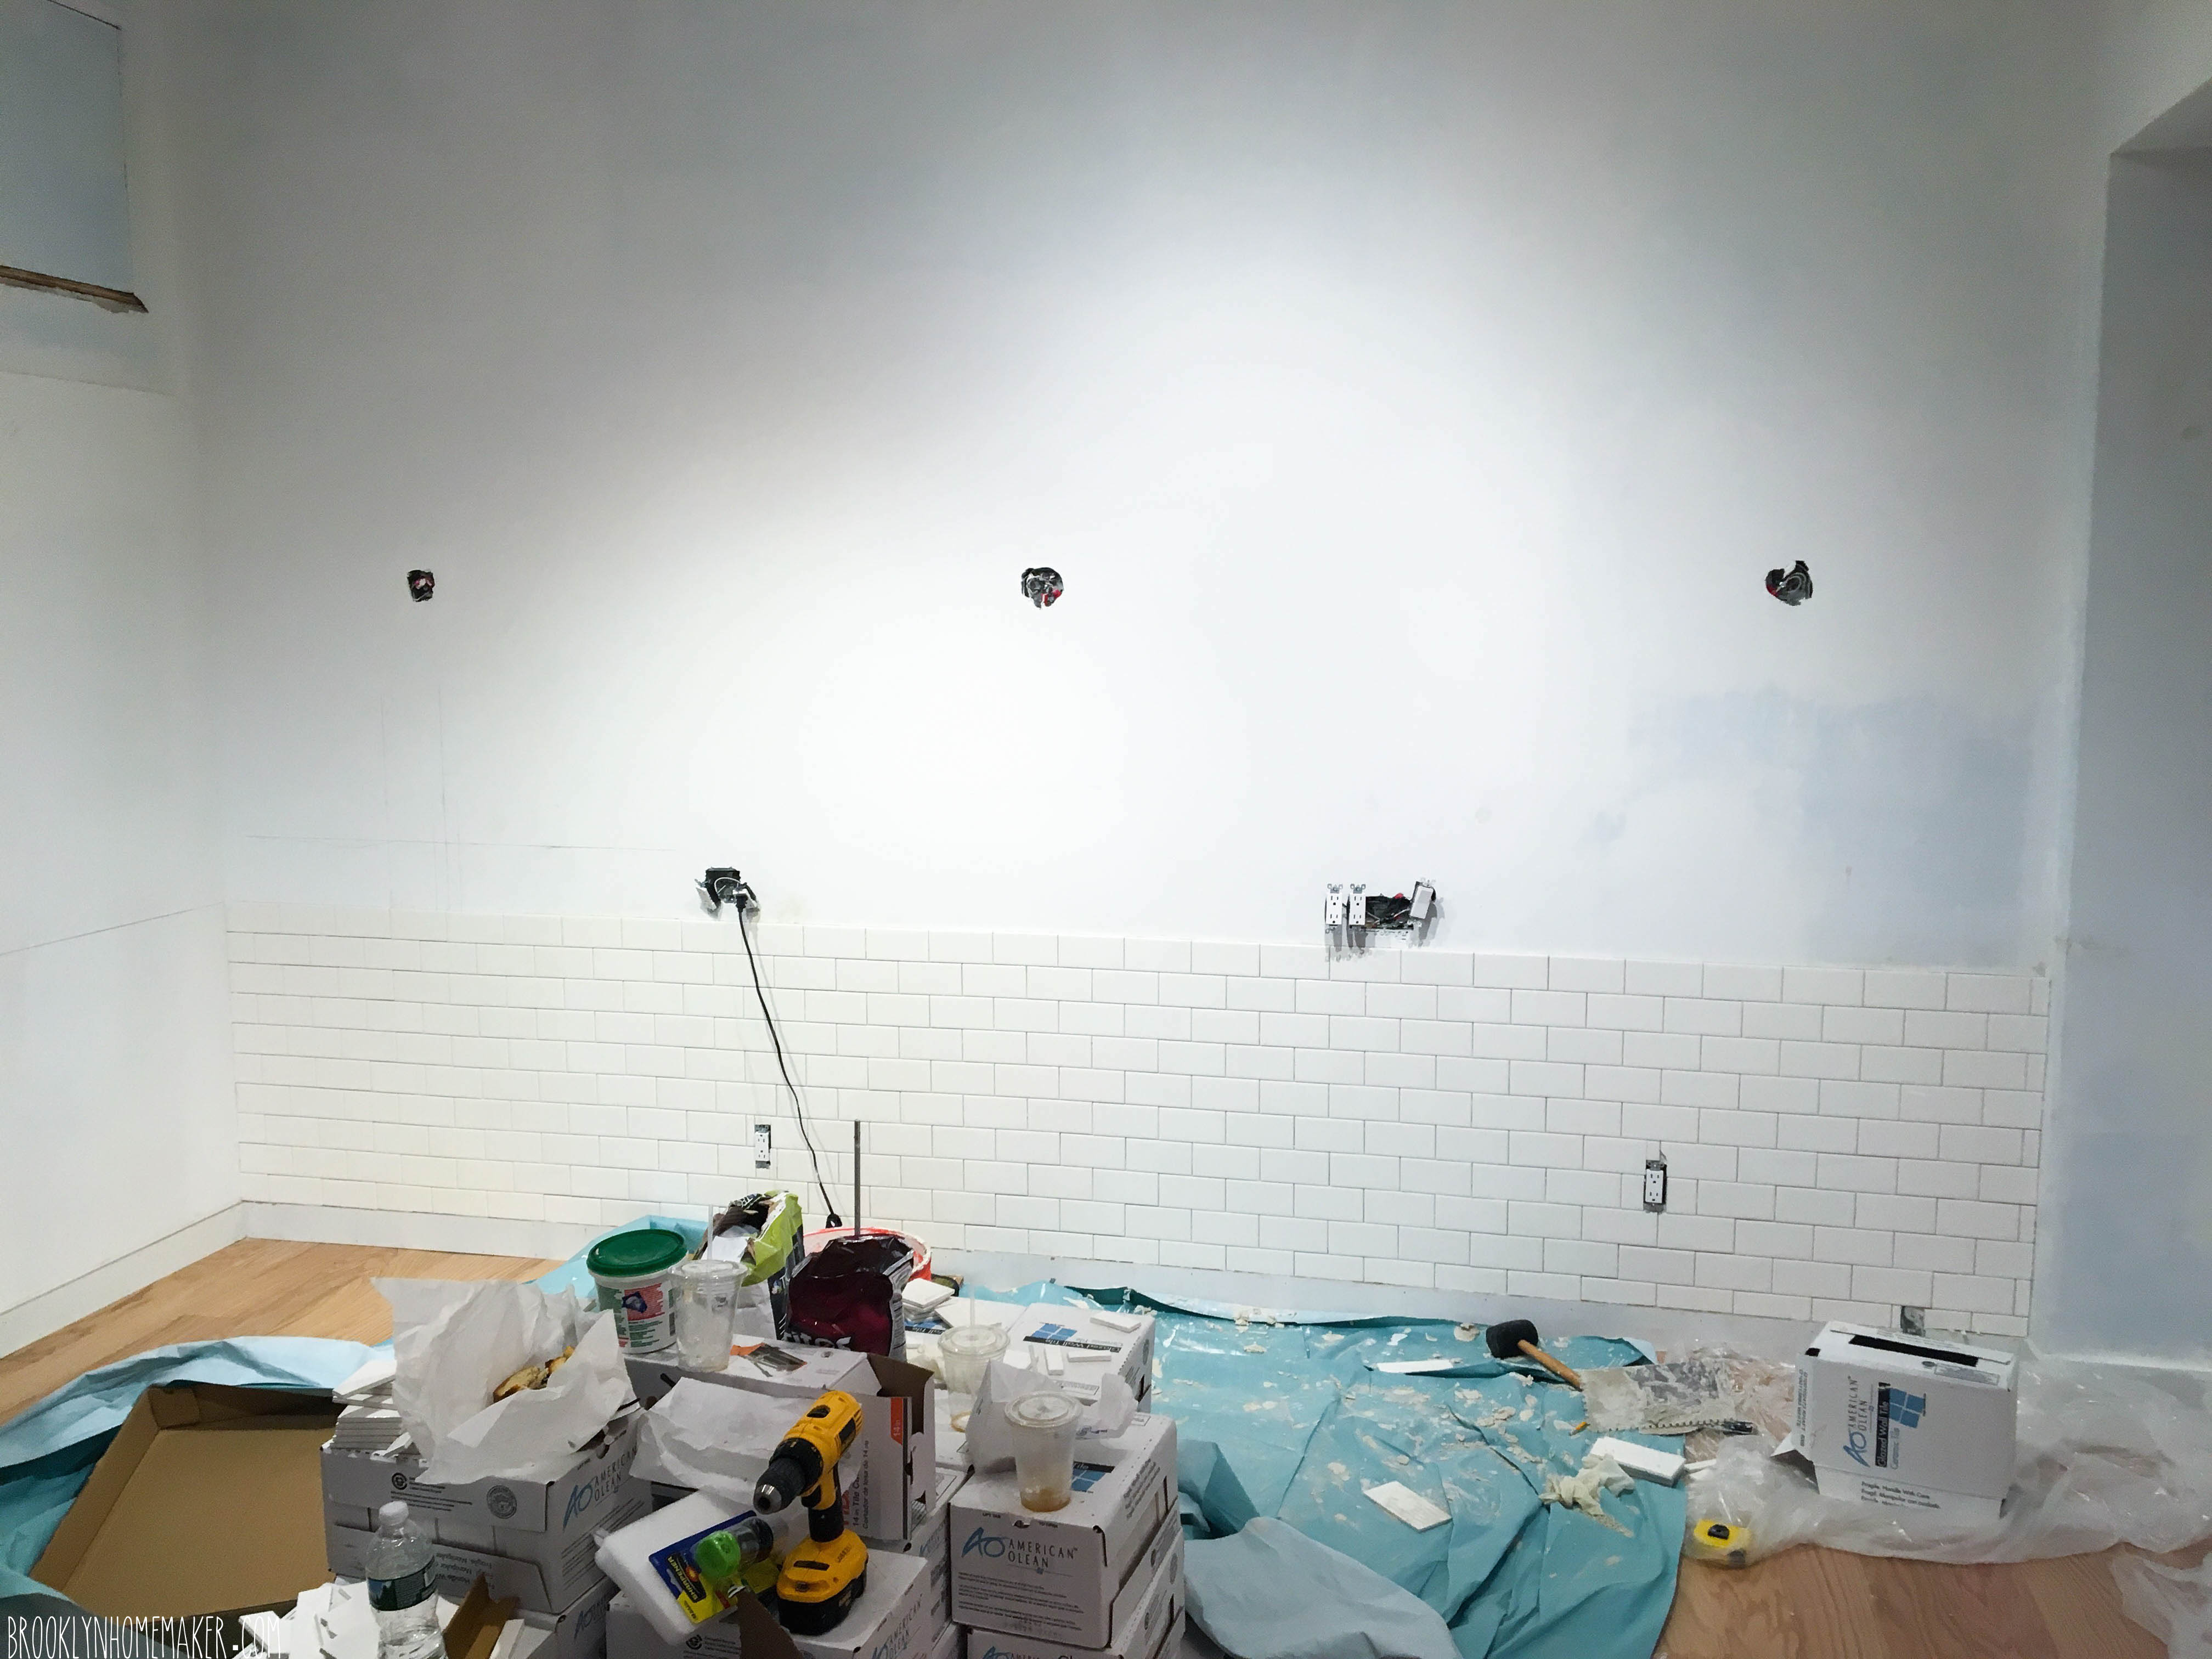
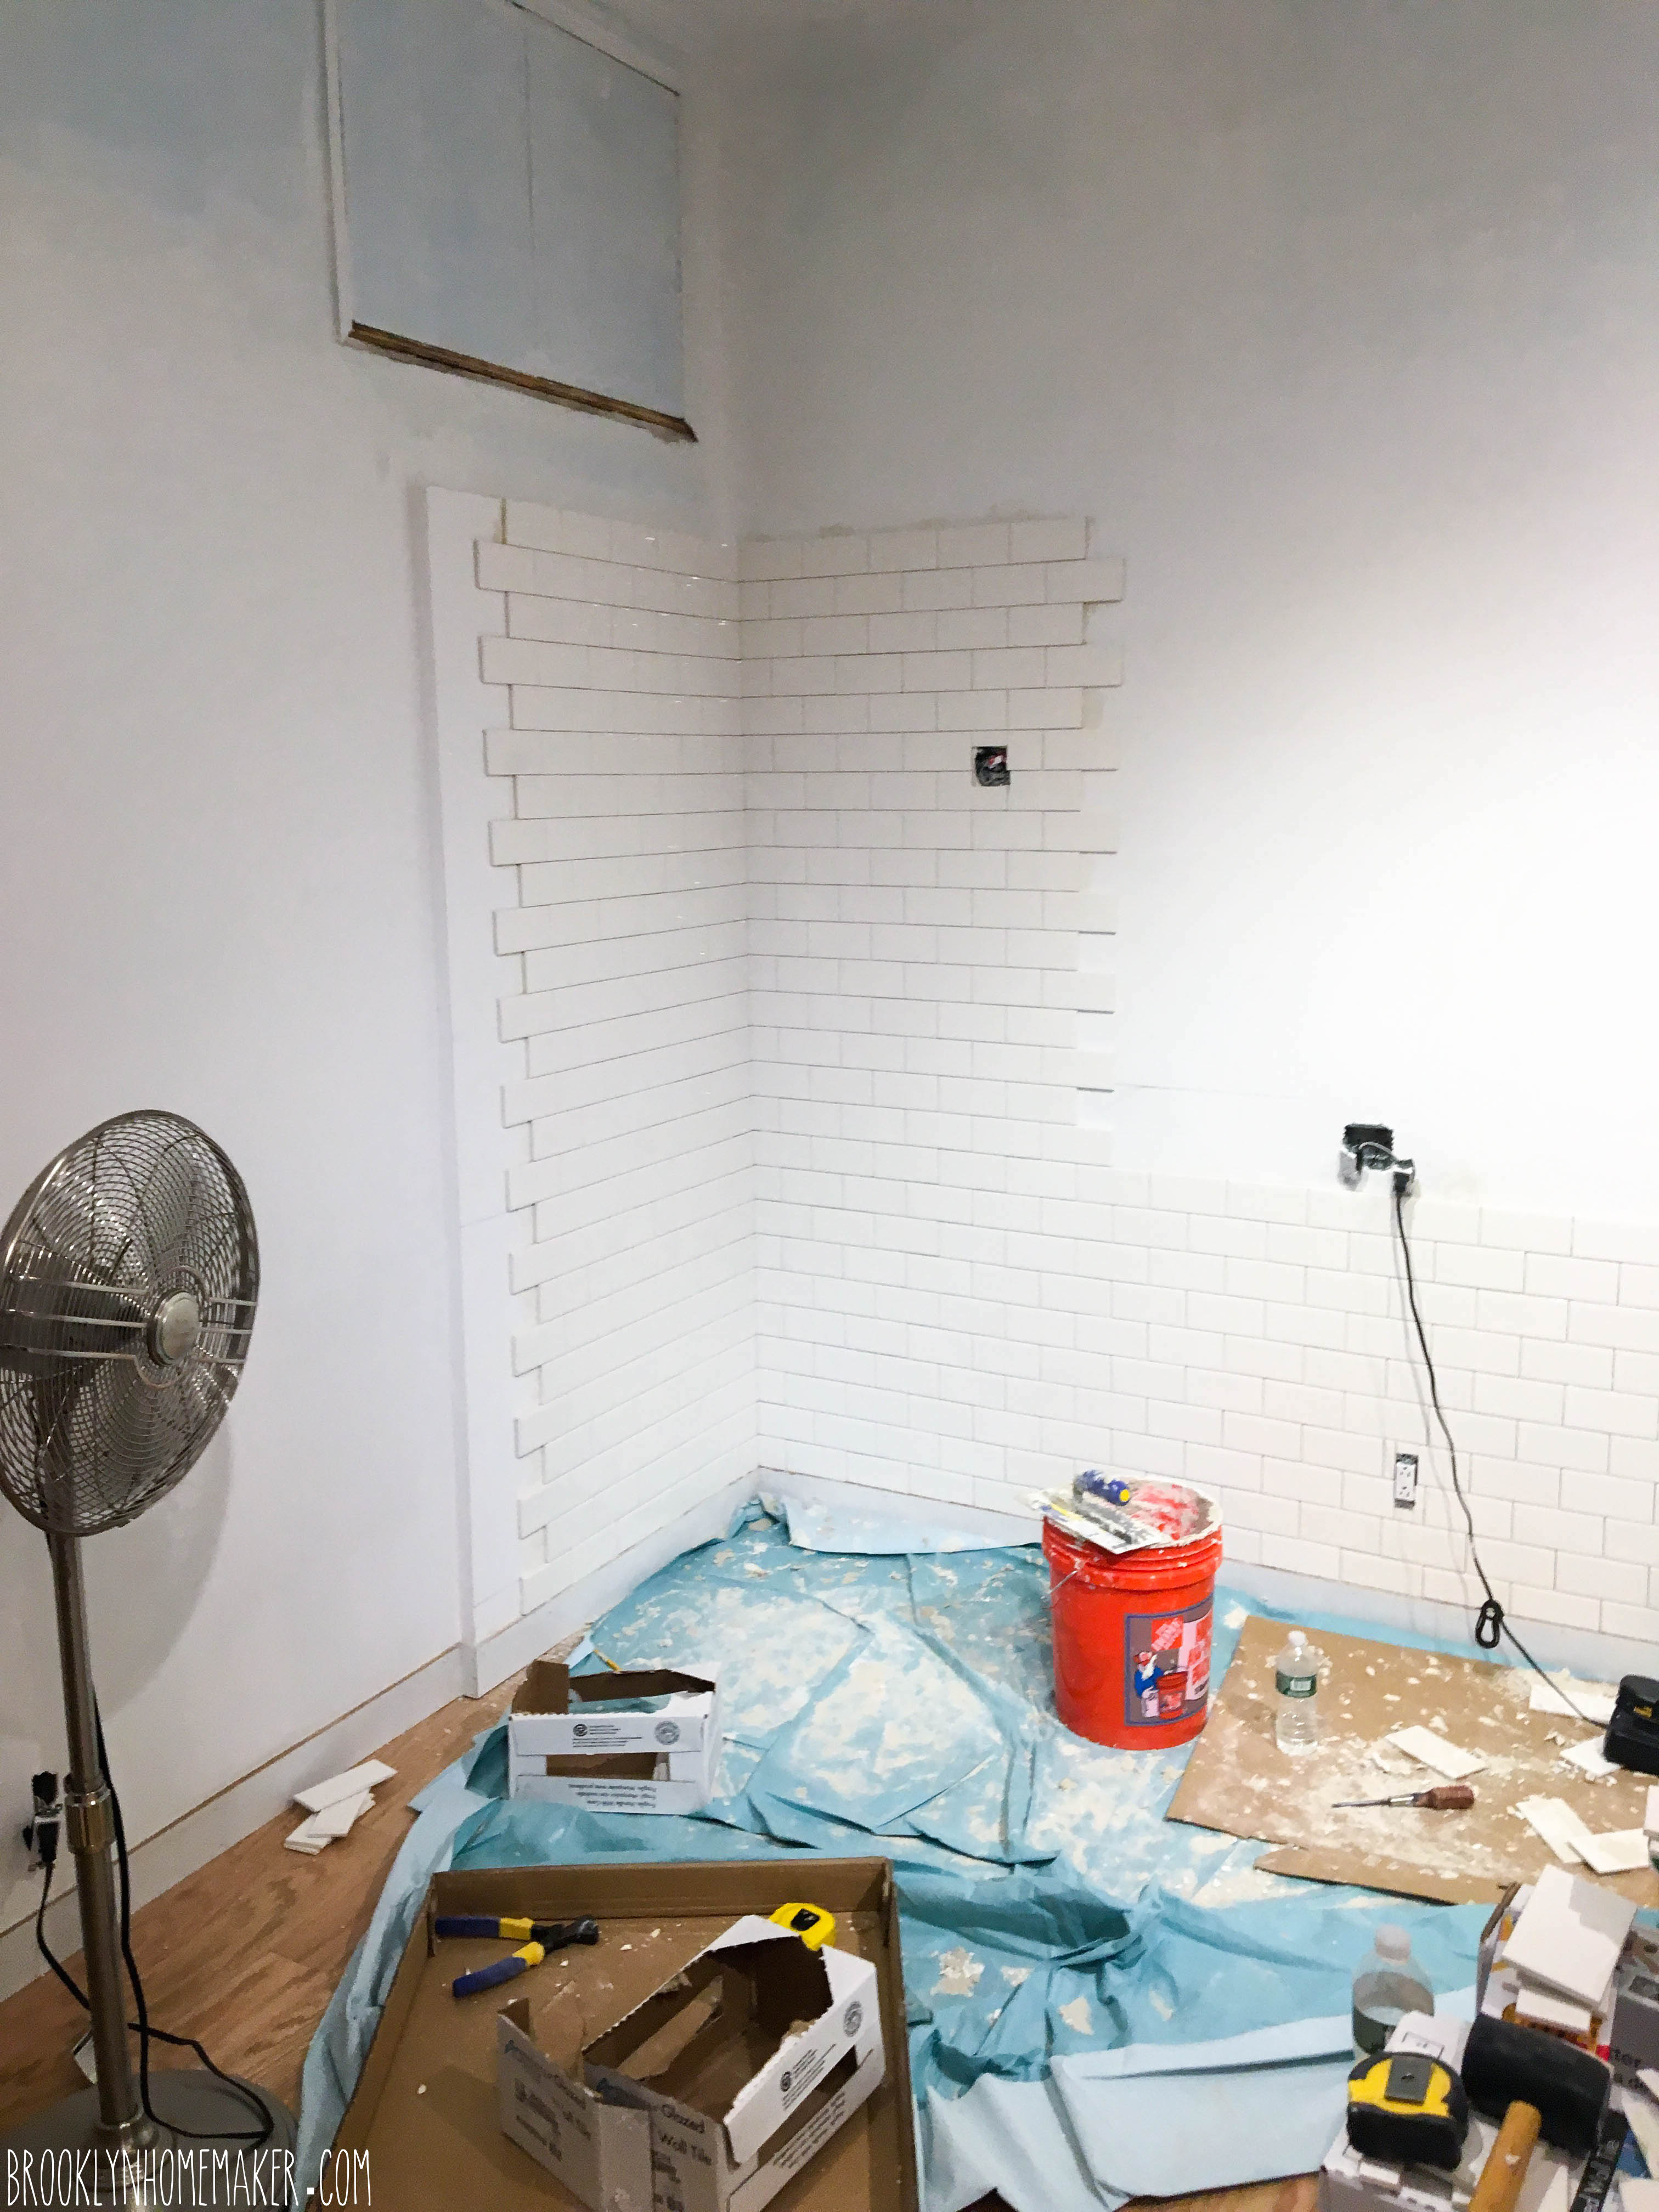
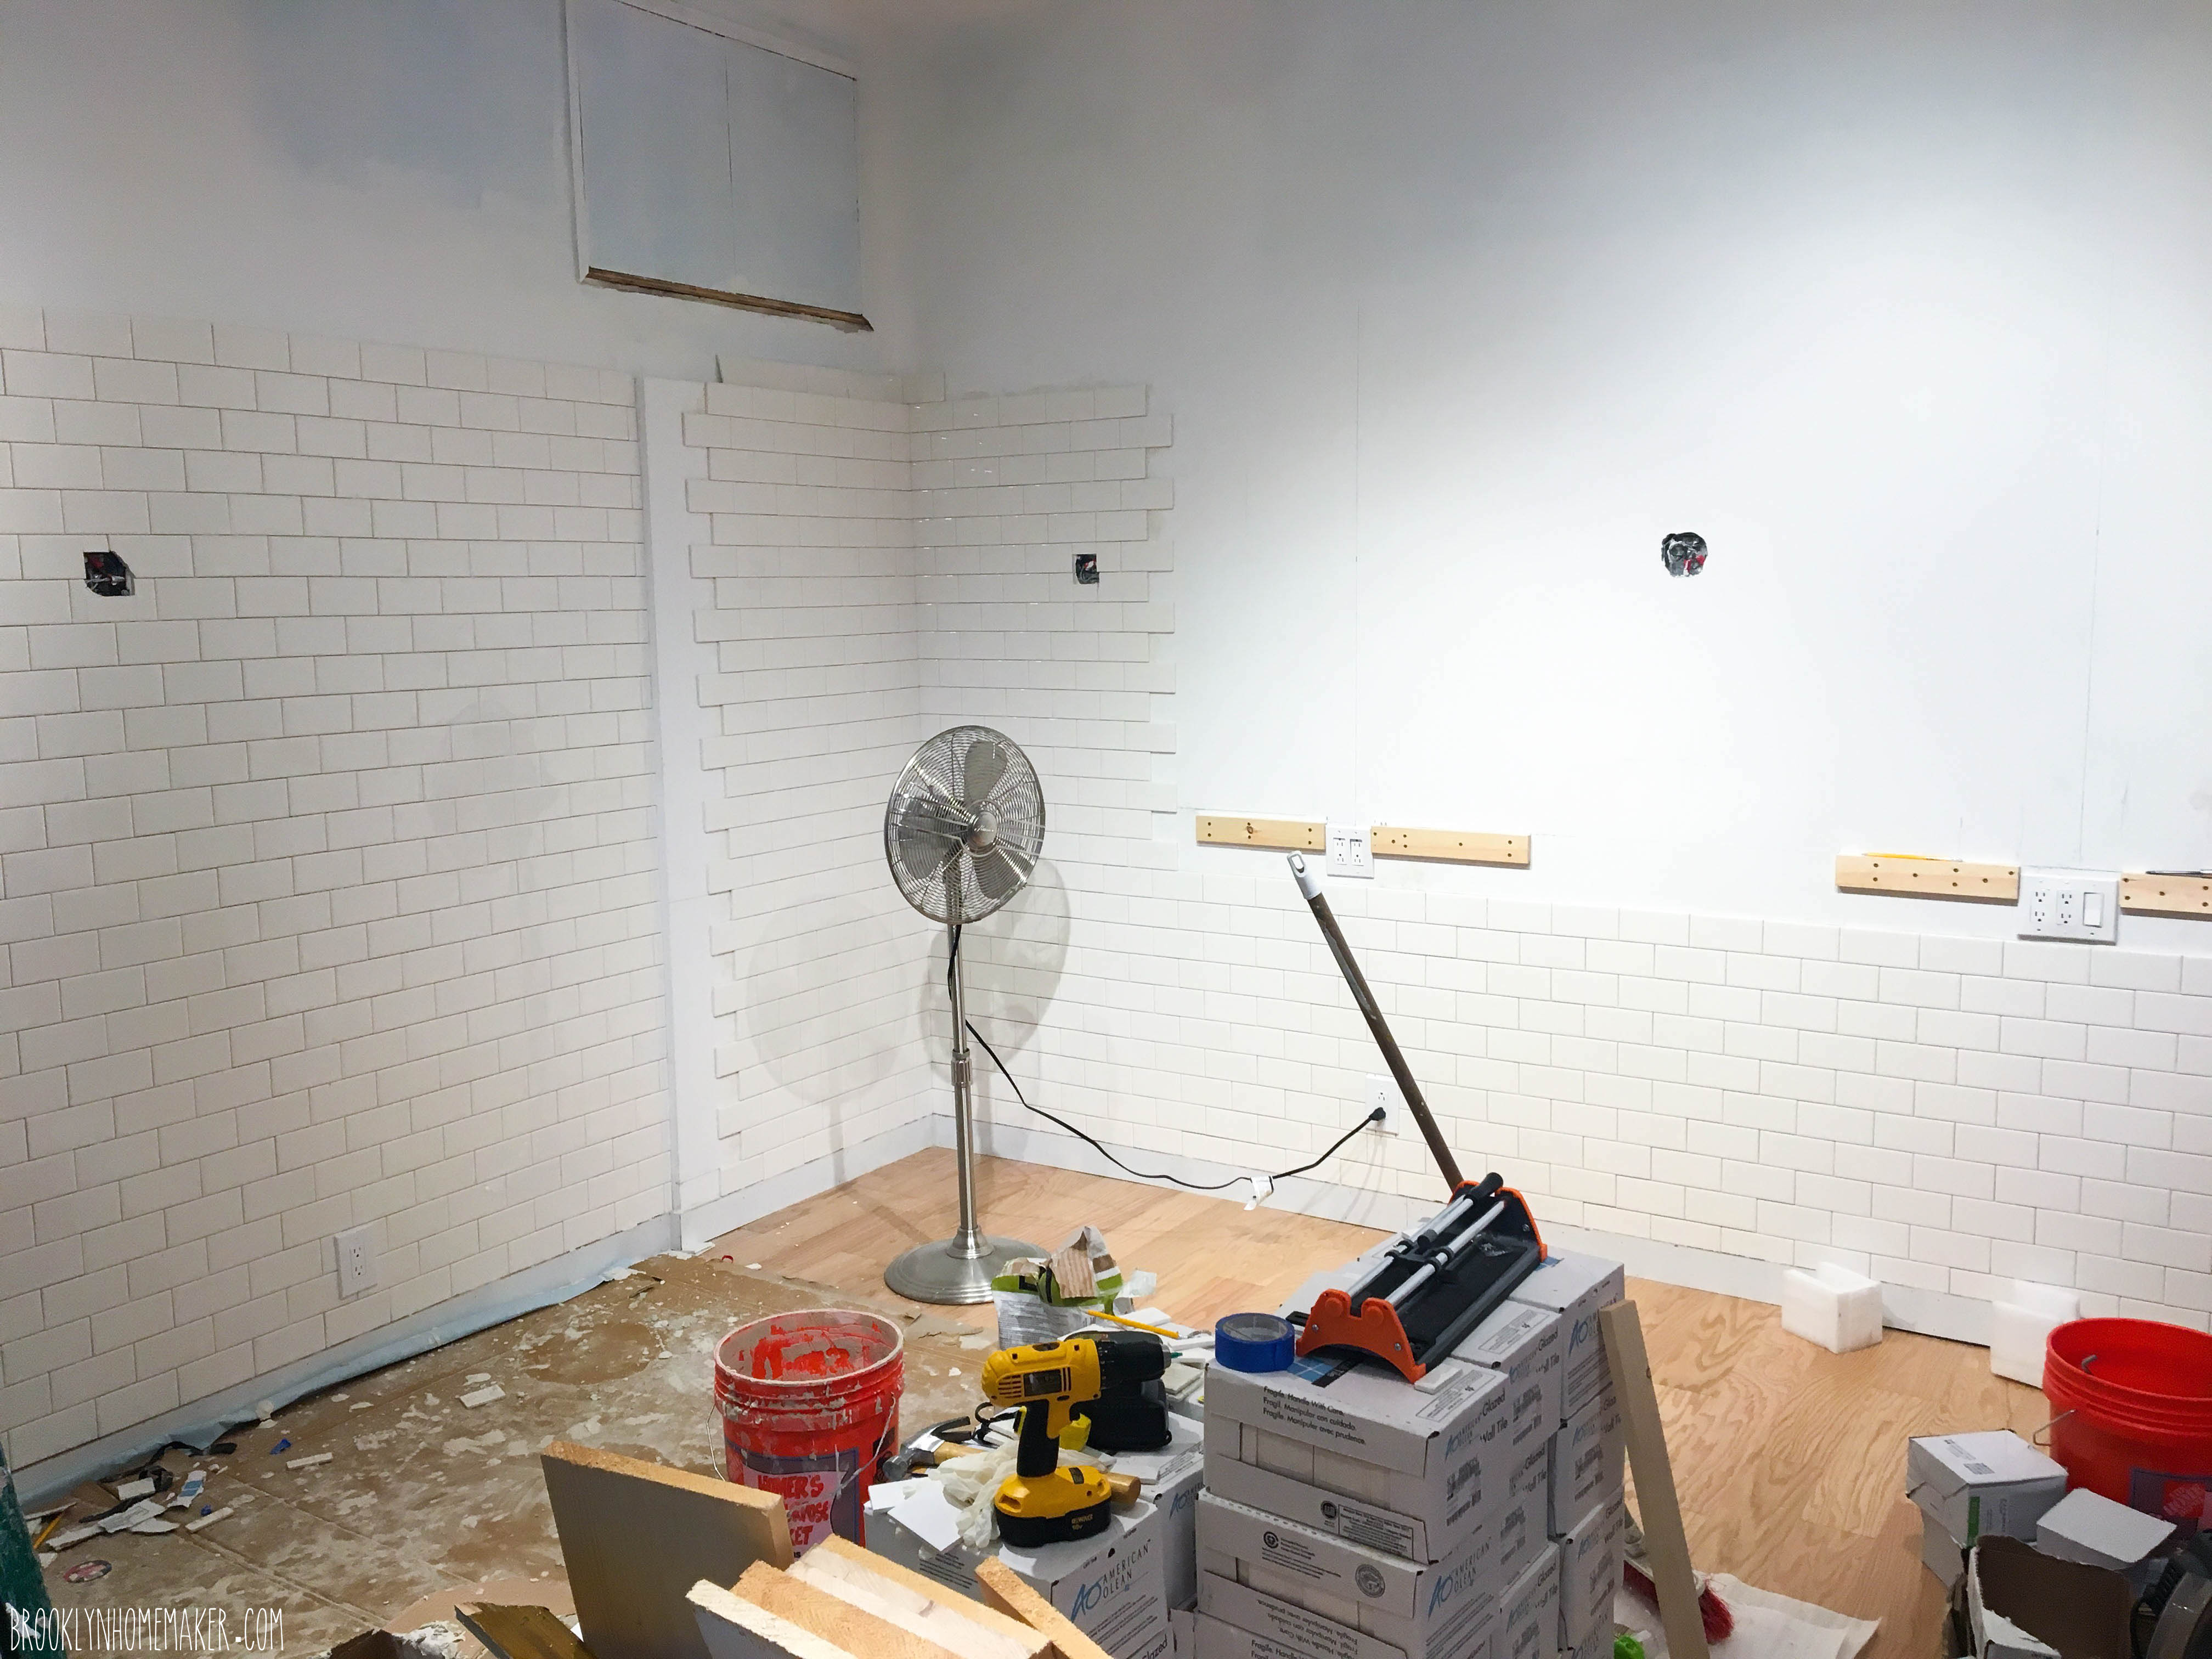
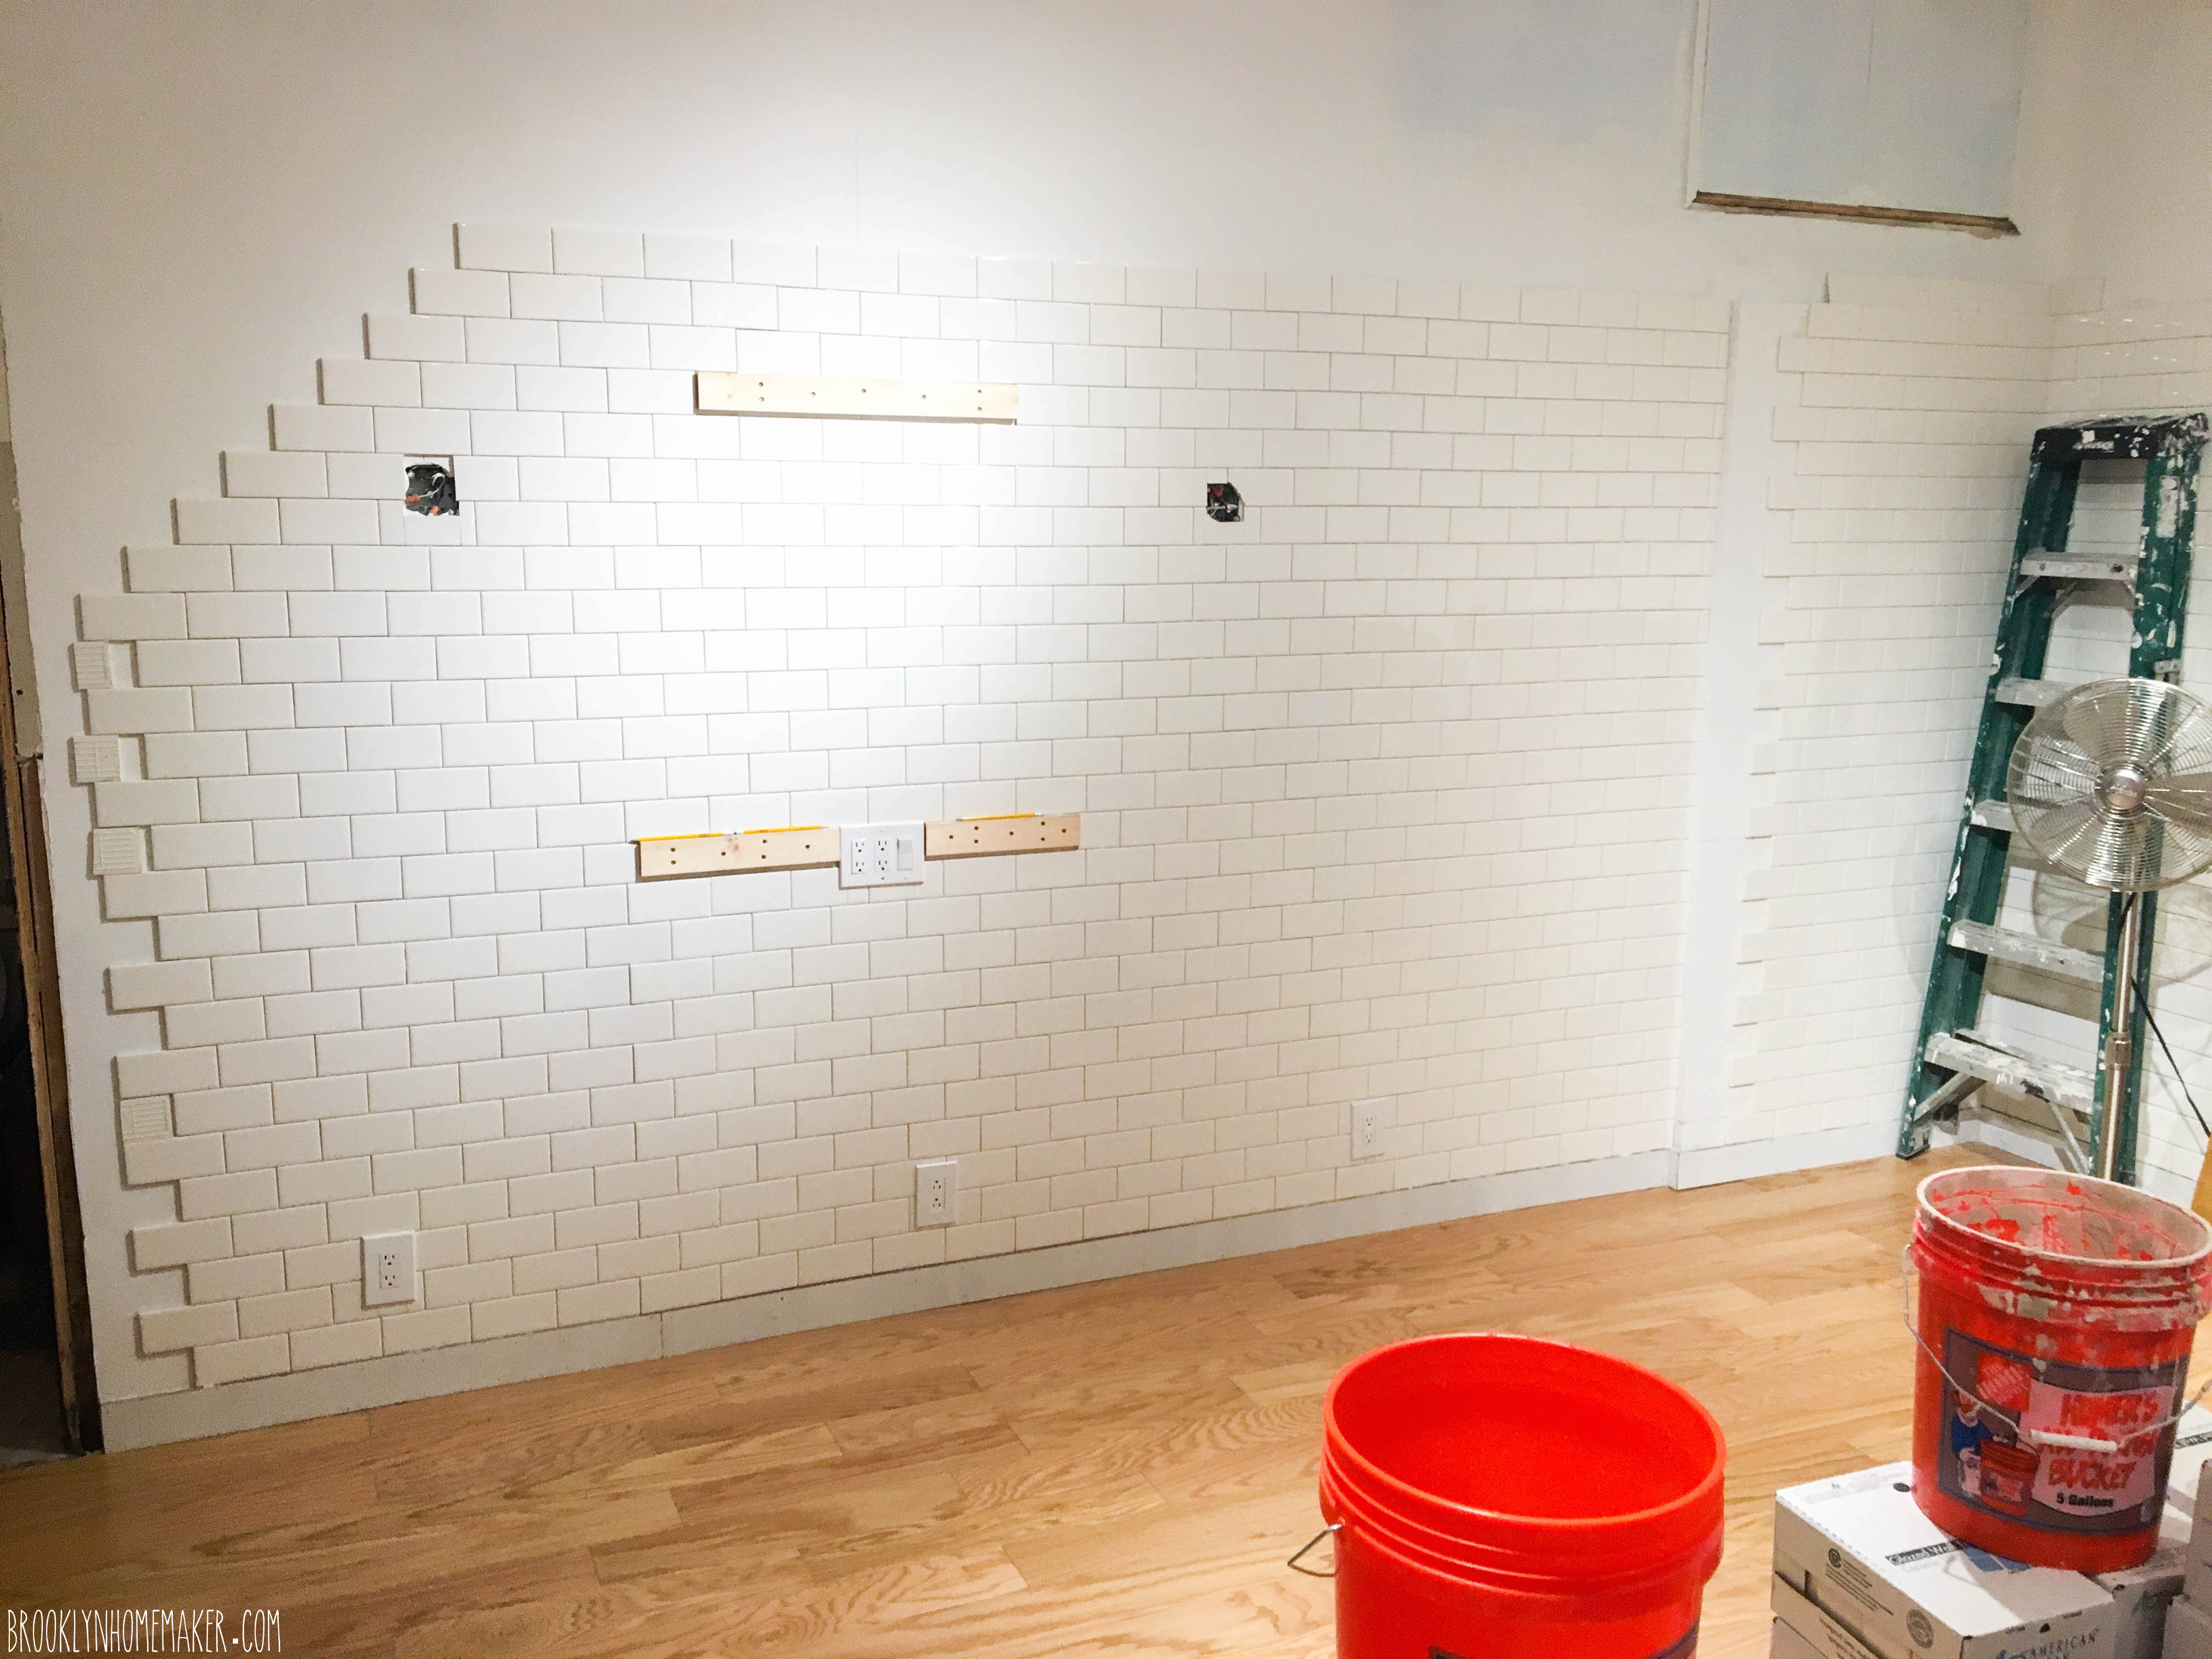
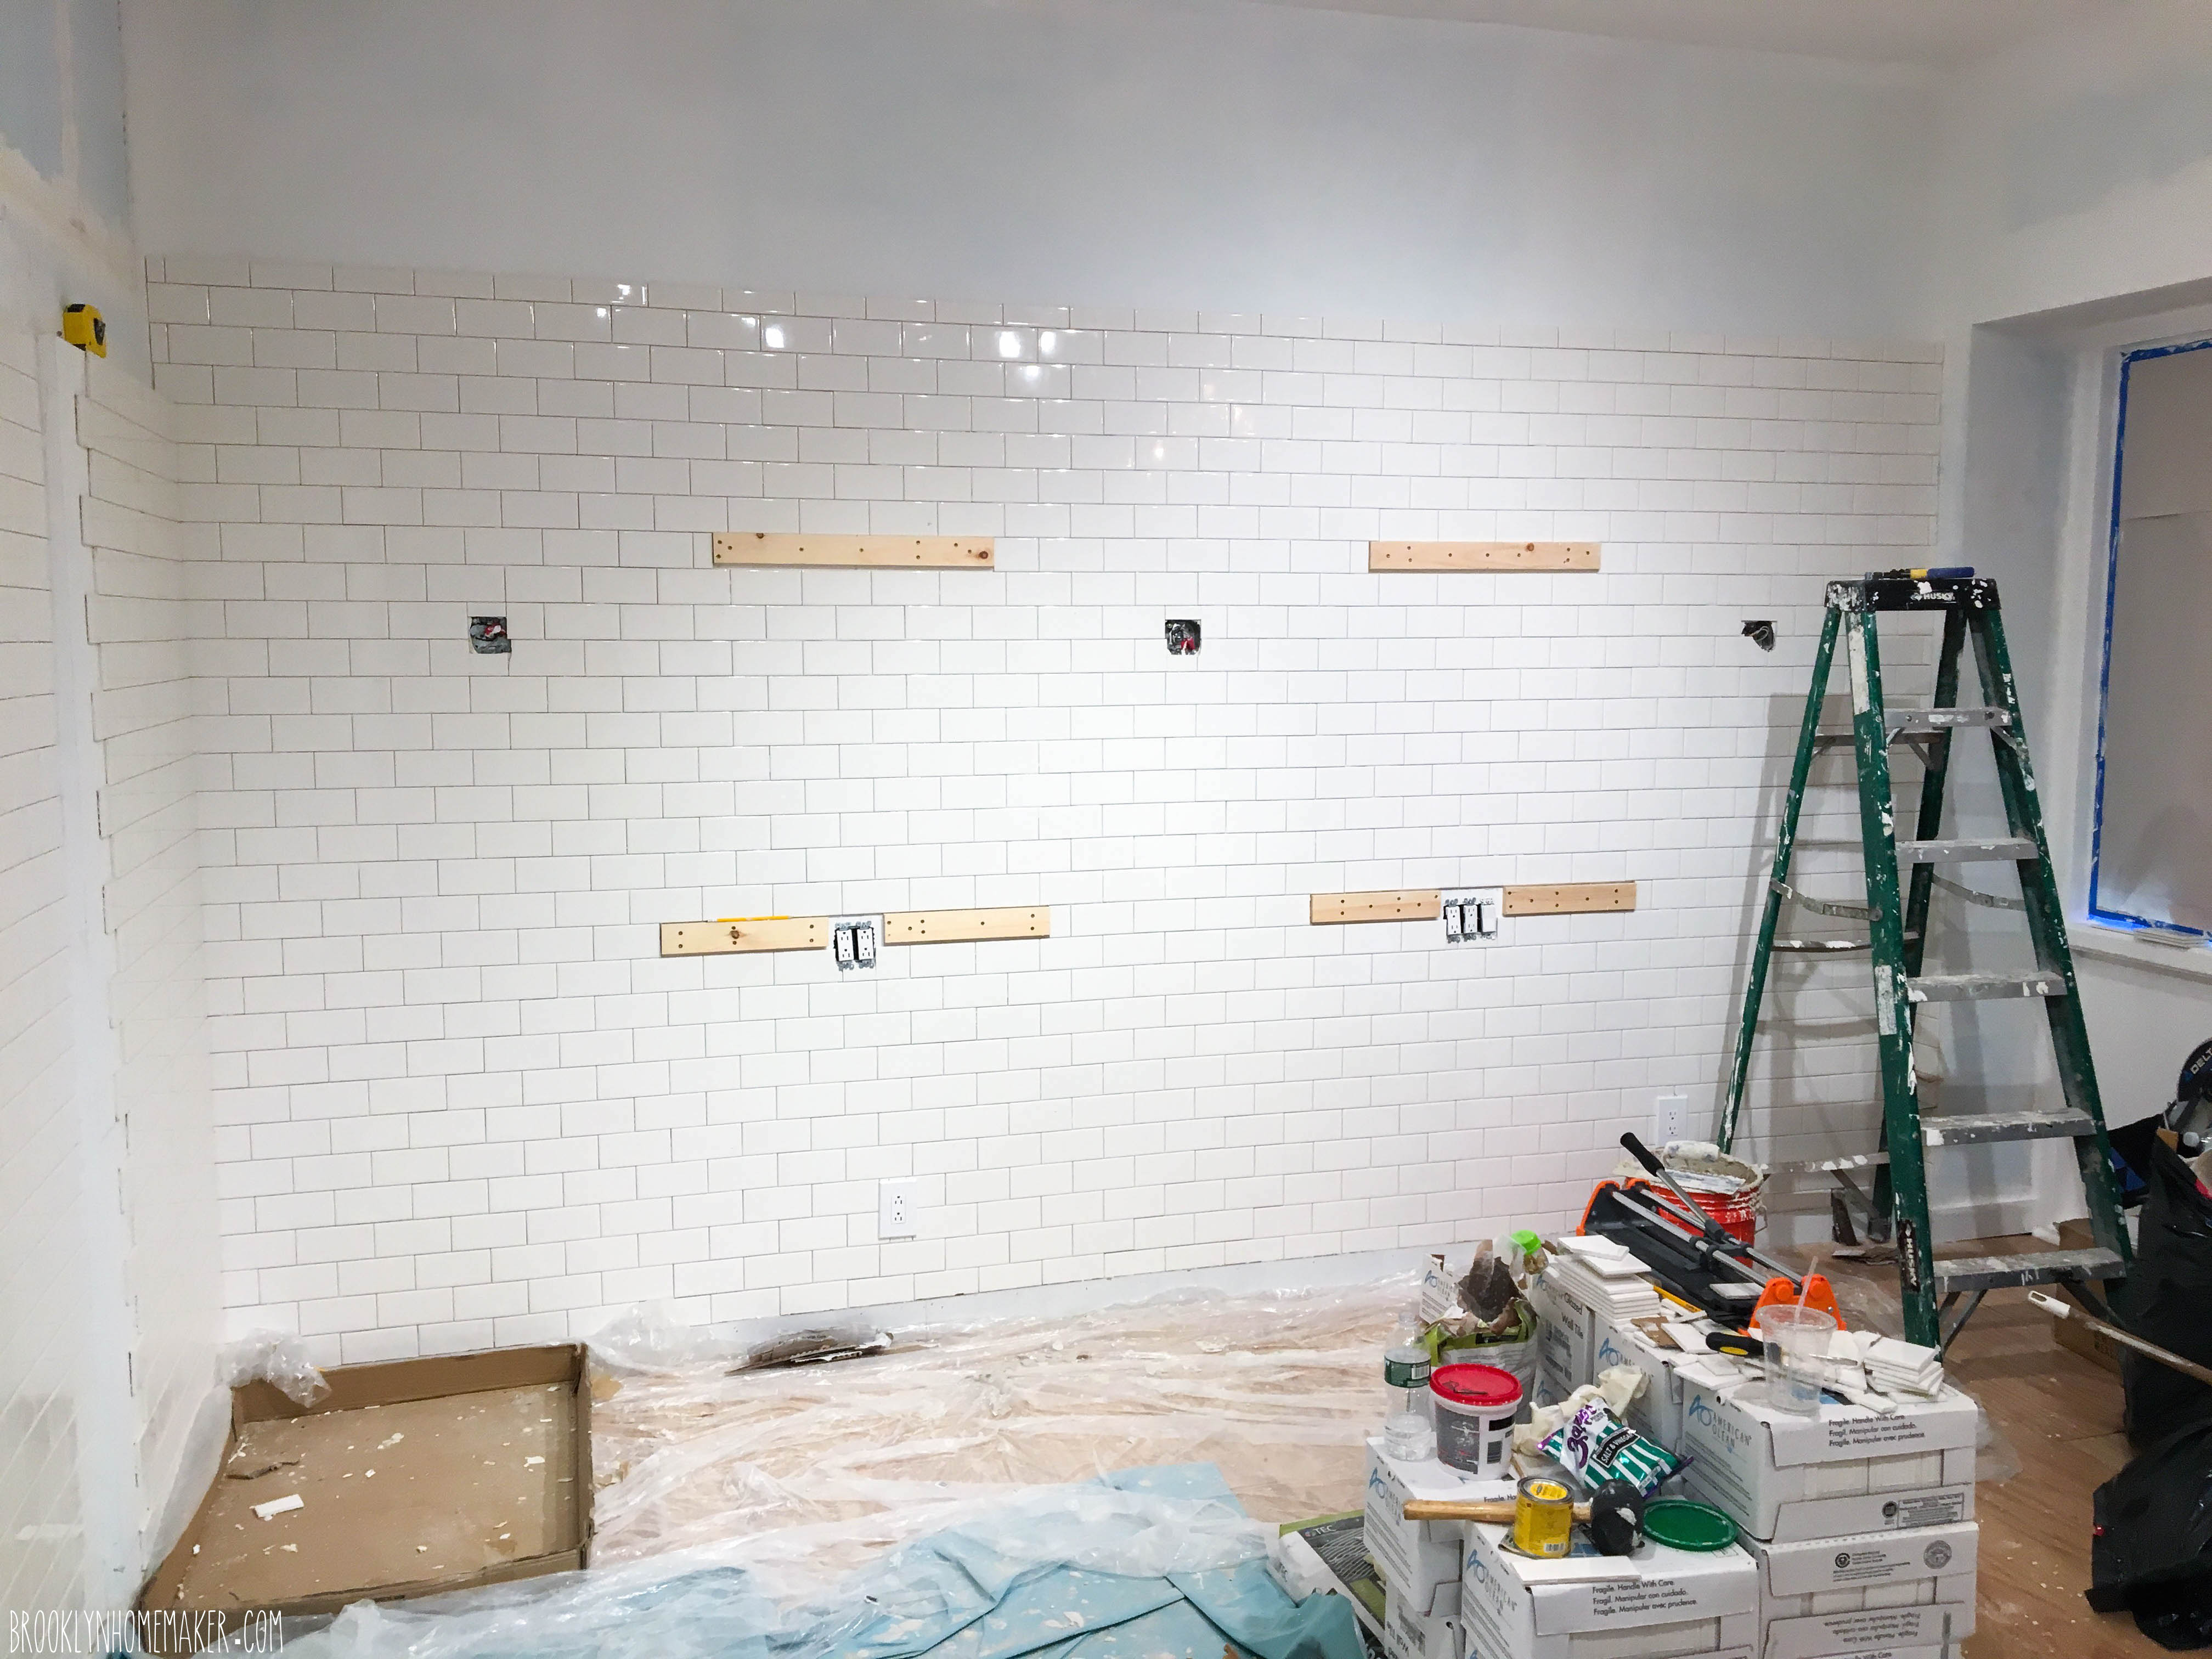
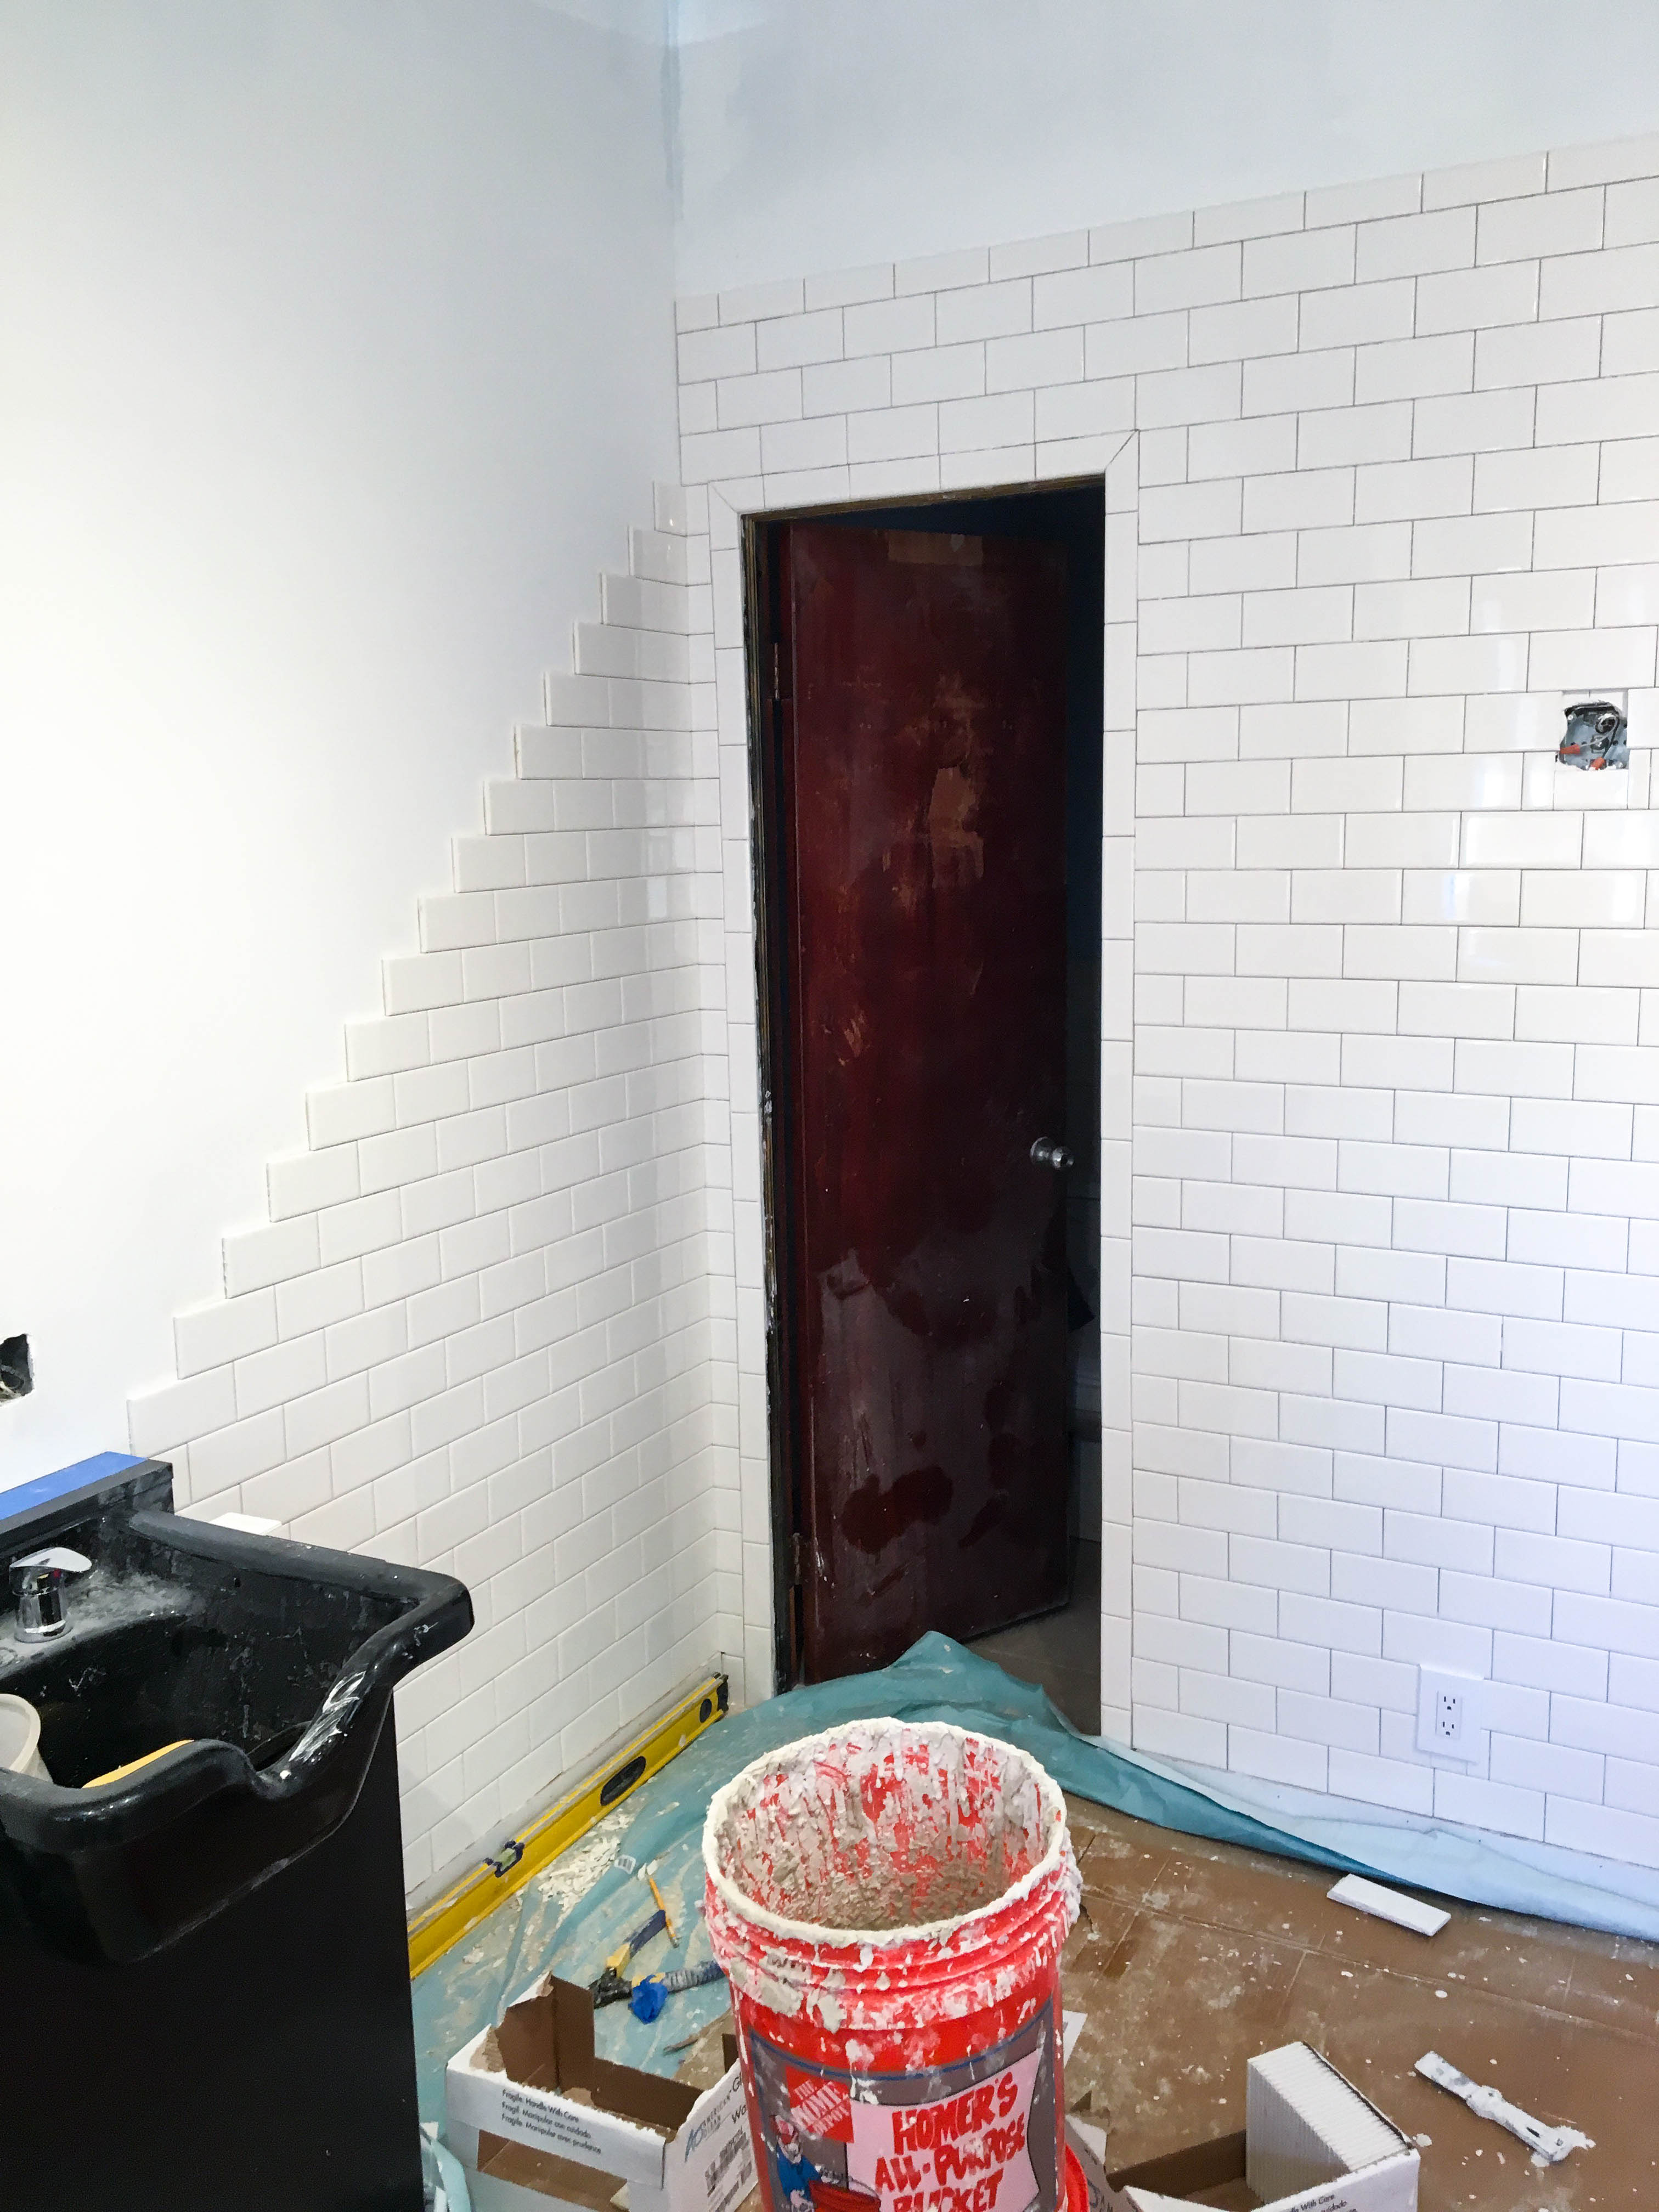
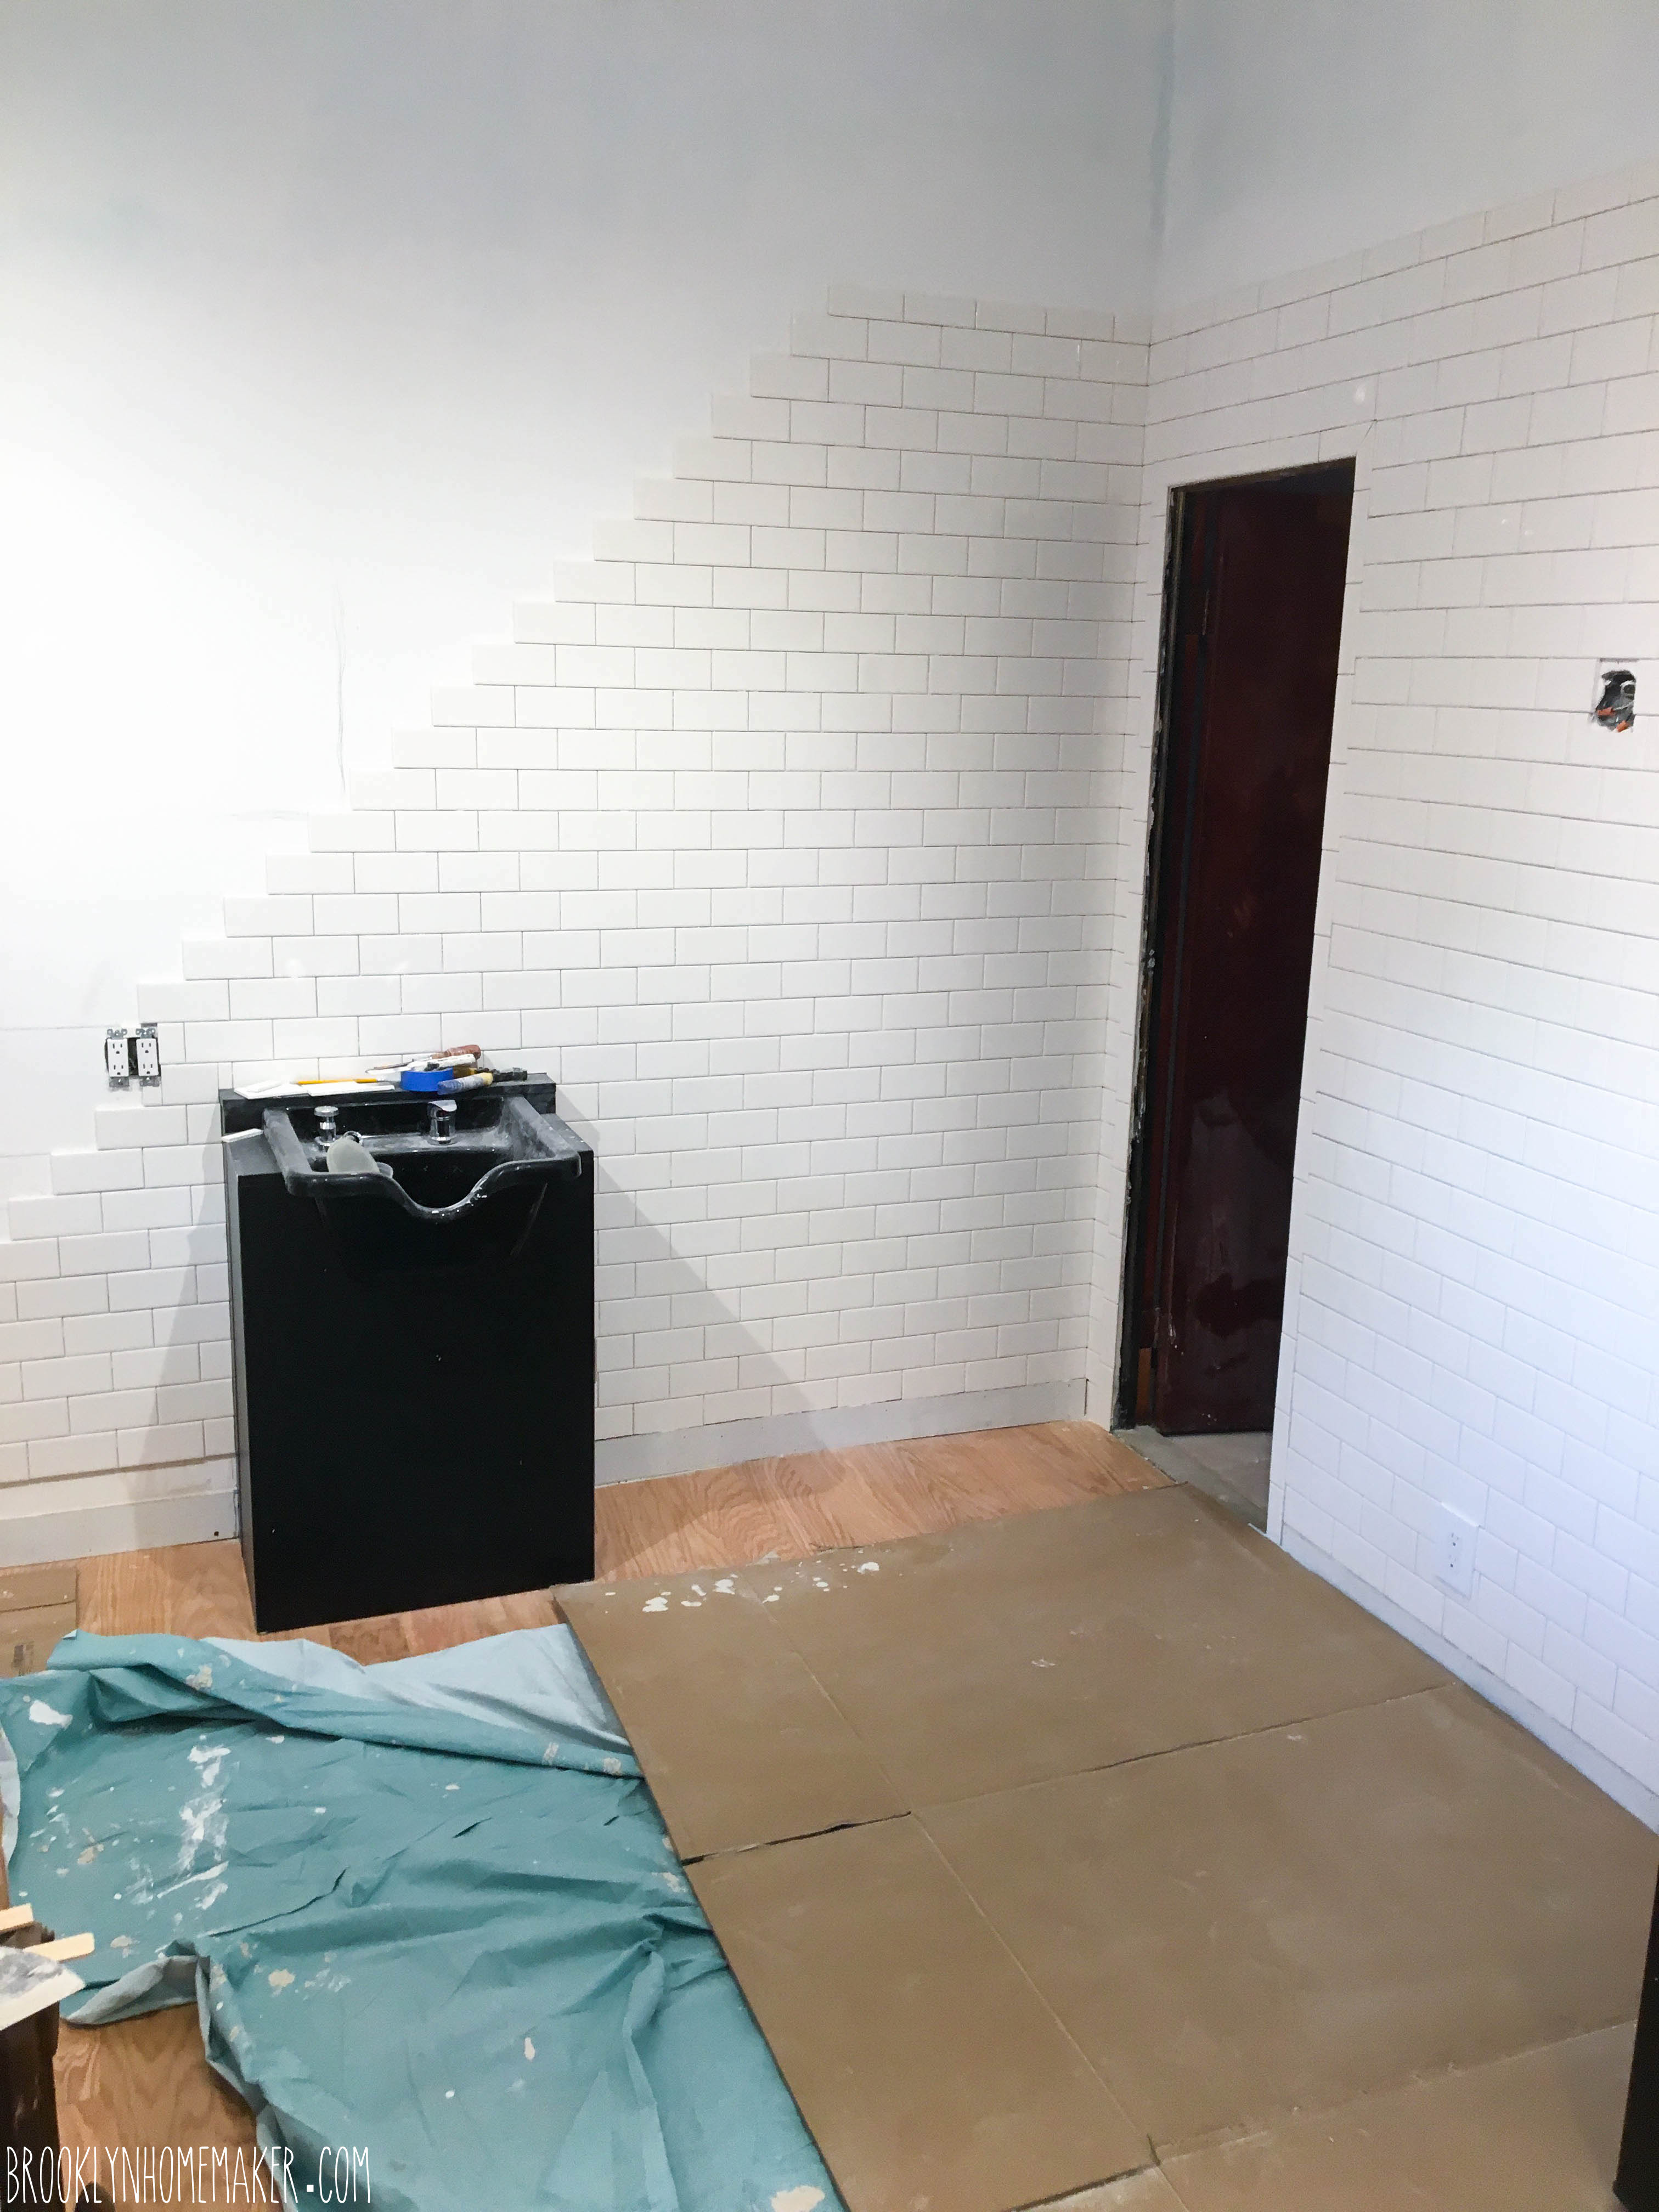
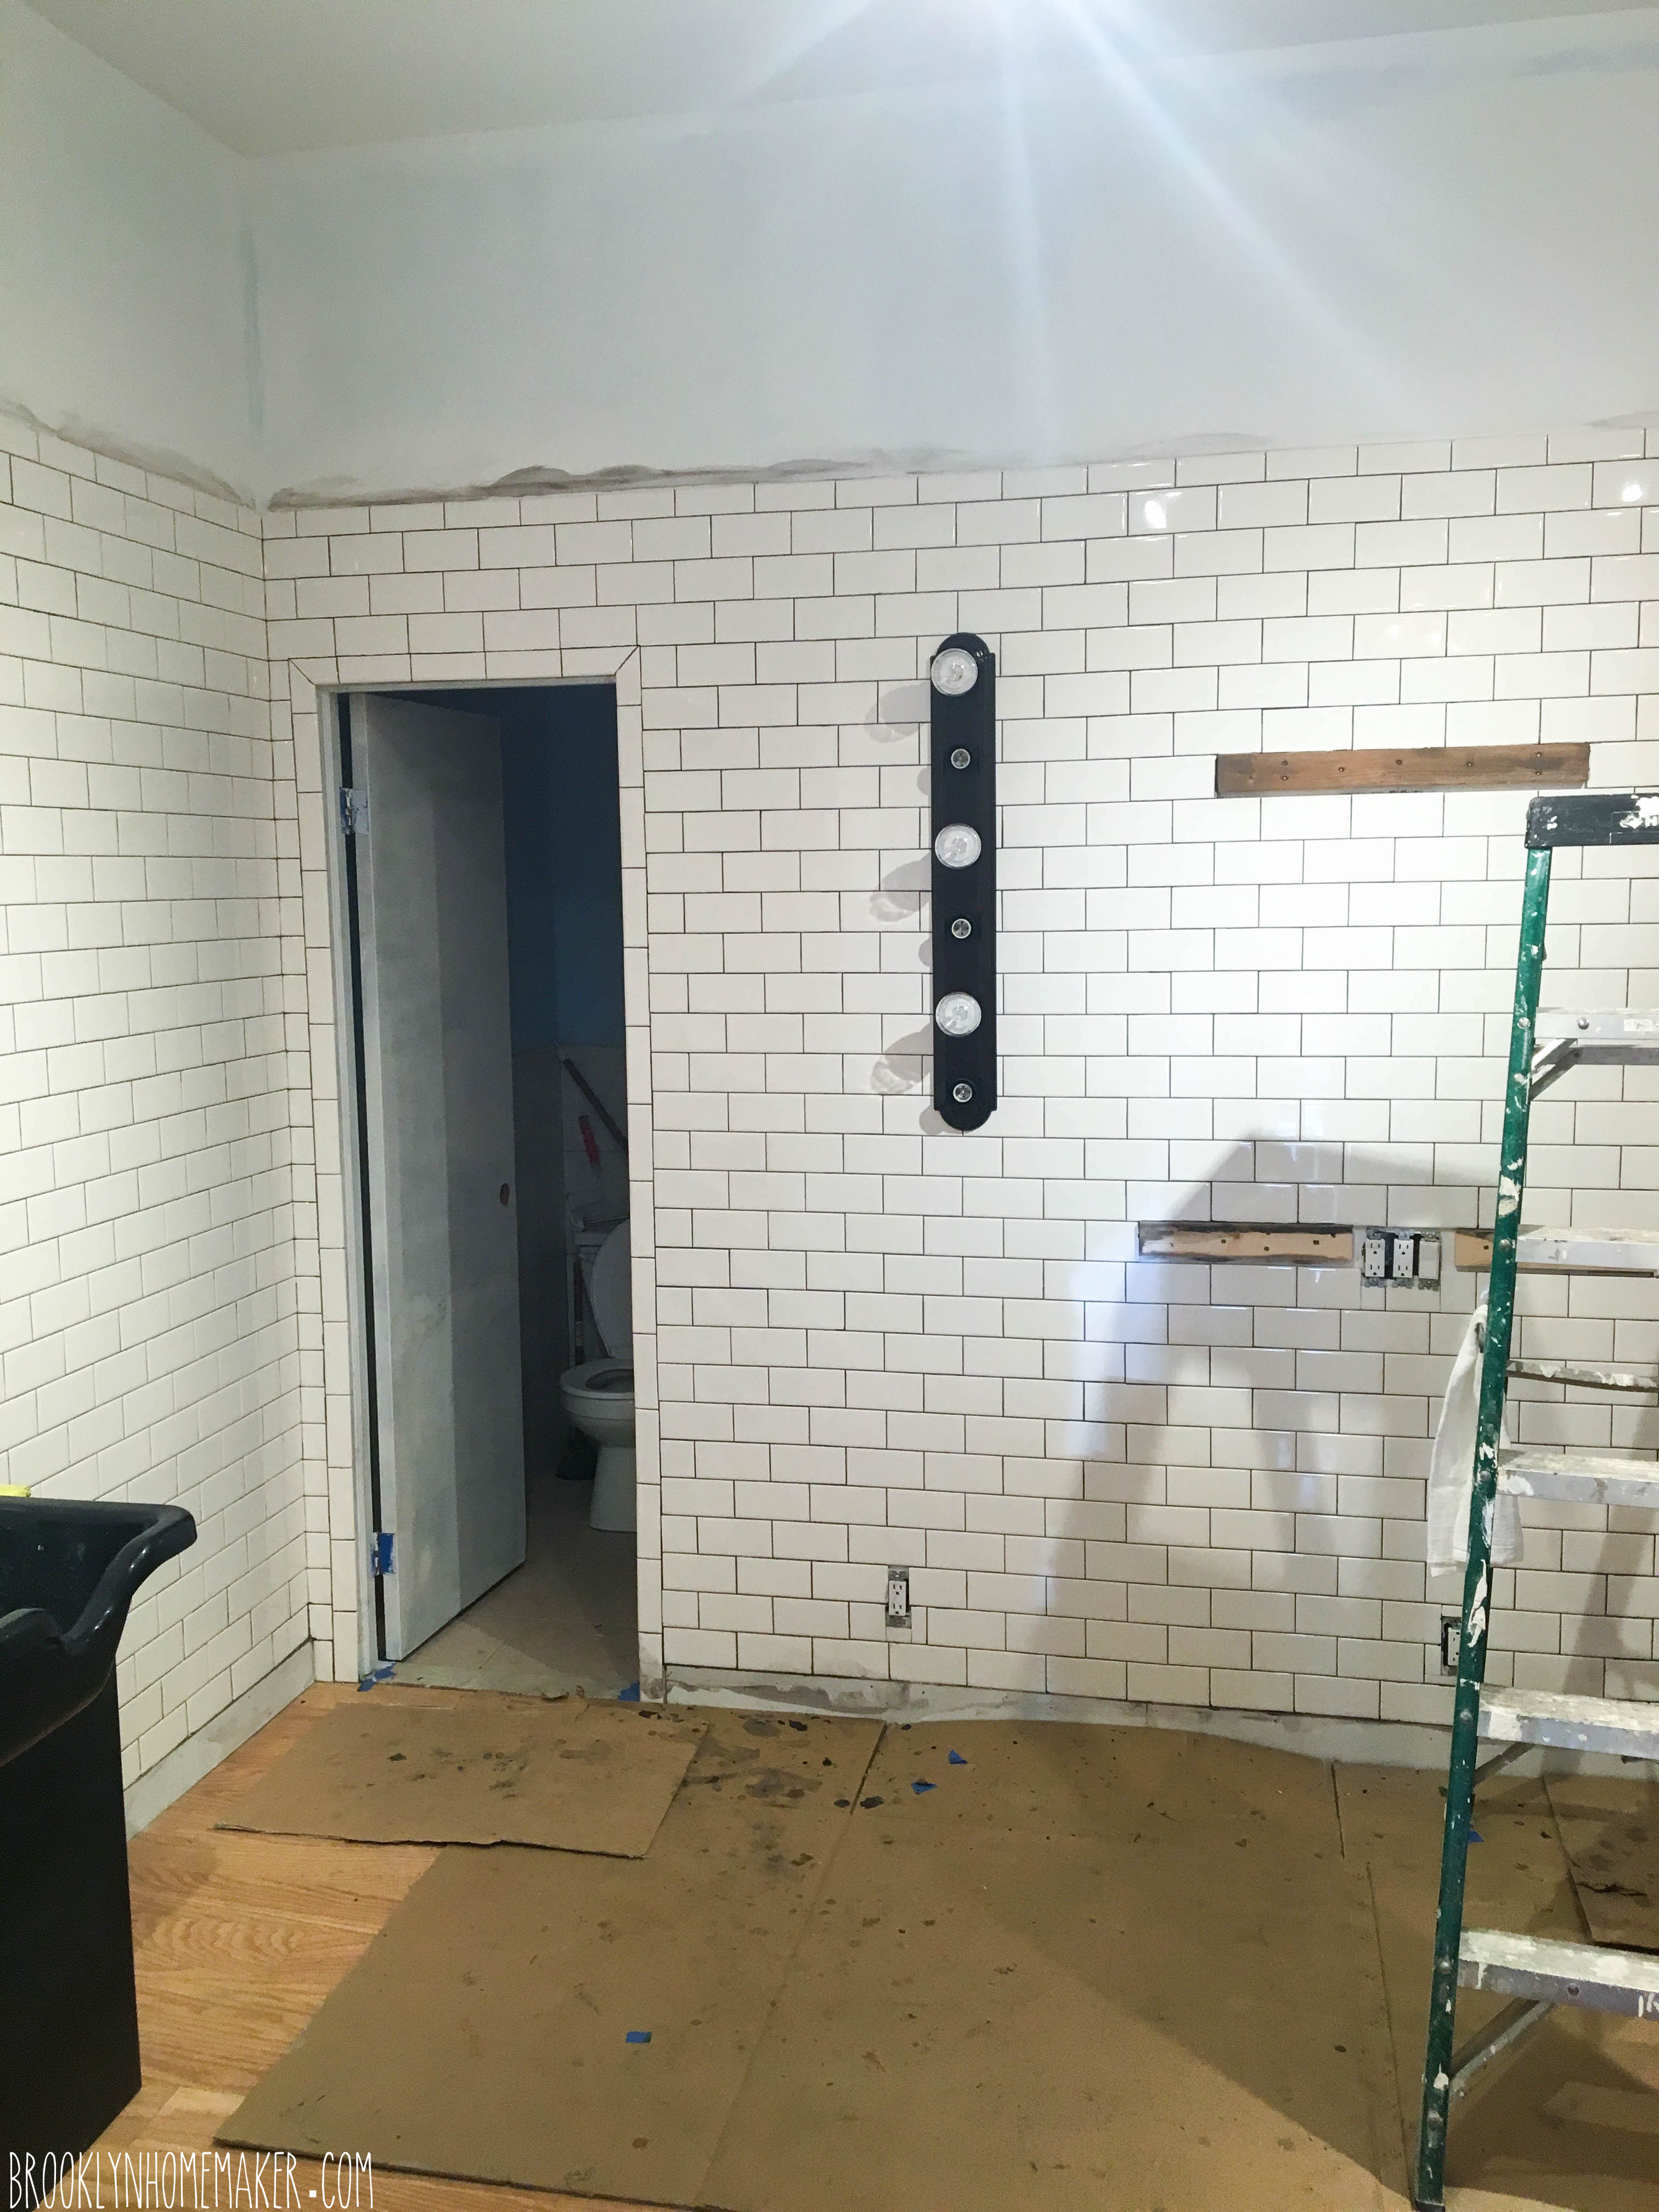
We knew from the very beginning that we wanted to cover most of the walls with simple white 3×6 subway tile. I know it’s sort of ubiquitous and “hipster-y”, especially here in Brooklyn, but there’s a reason it’s used so often and in so many applications. It’s attractive, timeless, compliments lots of different design styles, is relatively easy to install, and is even easier to keep clean. Also, most importantly to us, it’s freakin’ CHEAP! $0.22 a tile for American Olean subway tiles from Lowes meant that our whole shop was tiled from floor almost to ceiling on three walls for under $1,000 including the cost of mortar, grout, and all the tools.

I literally have no clue what this job would have cost if we’d paid a professional to do it, but I’m sure it would have been waaaaay more than we would have been willing or able to spend.

Maxwell's for Hair | Brooklyn HomemakerMaxwell's for Hair | Brooklyn Homemaker

Anyway, well before this whole hair shop adventure, my sister and I were discussing a bluegrass music festival we to go to together when my mom said she’d like to join us this year. We bought our tickets well in advance (they’re cheaper that way) and started planning our family camping adventure. Long story short, they have a weird system for taking time off where my mom works, and even though she only needed off from Wednesday to Monday, she ended up having to take two full weeks off in the middle of the summer. When she first put in the request she figured she’d just use that extra time for some R&R, but as fate would have it she got the exciting opportunity to come down to Brooklyn and spend quality time with me and Russell, doing manual labor in the middle of a heat wave, in a tiny room with no air conditioner! GOOD TIMES!

Neither of us had ever tiled before. I’ve always wanted to tile the backsplash in my kitchen, but every time I think about it I decide after weighing the options that it’s not worth the effort. In this case though, it was absolutely worth the effort if it meant having a gleaming showcase for Russell and his hair shop. And hey, I read Manhattan Nest. How hard could it really be?

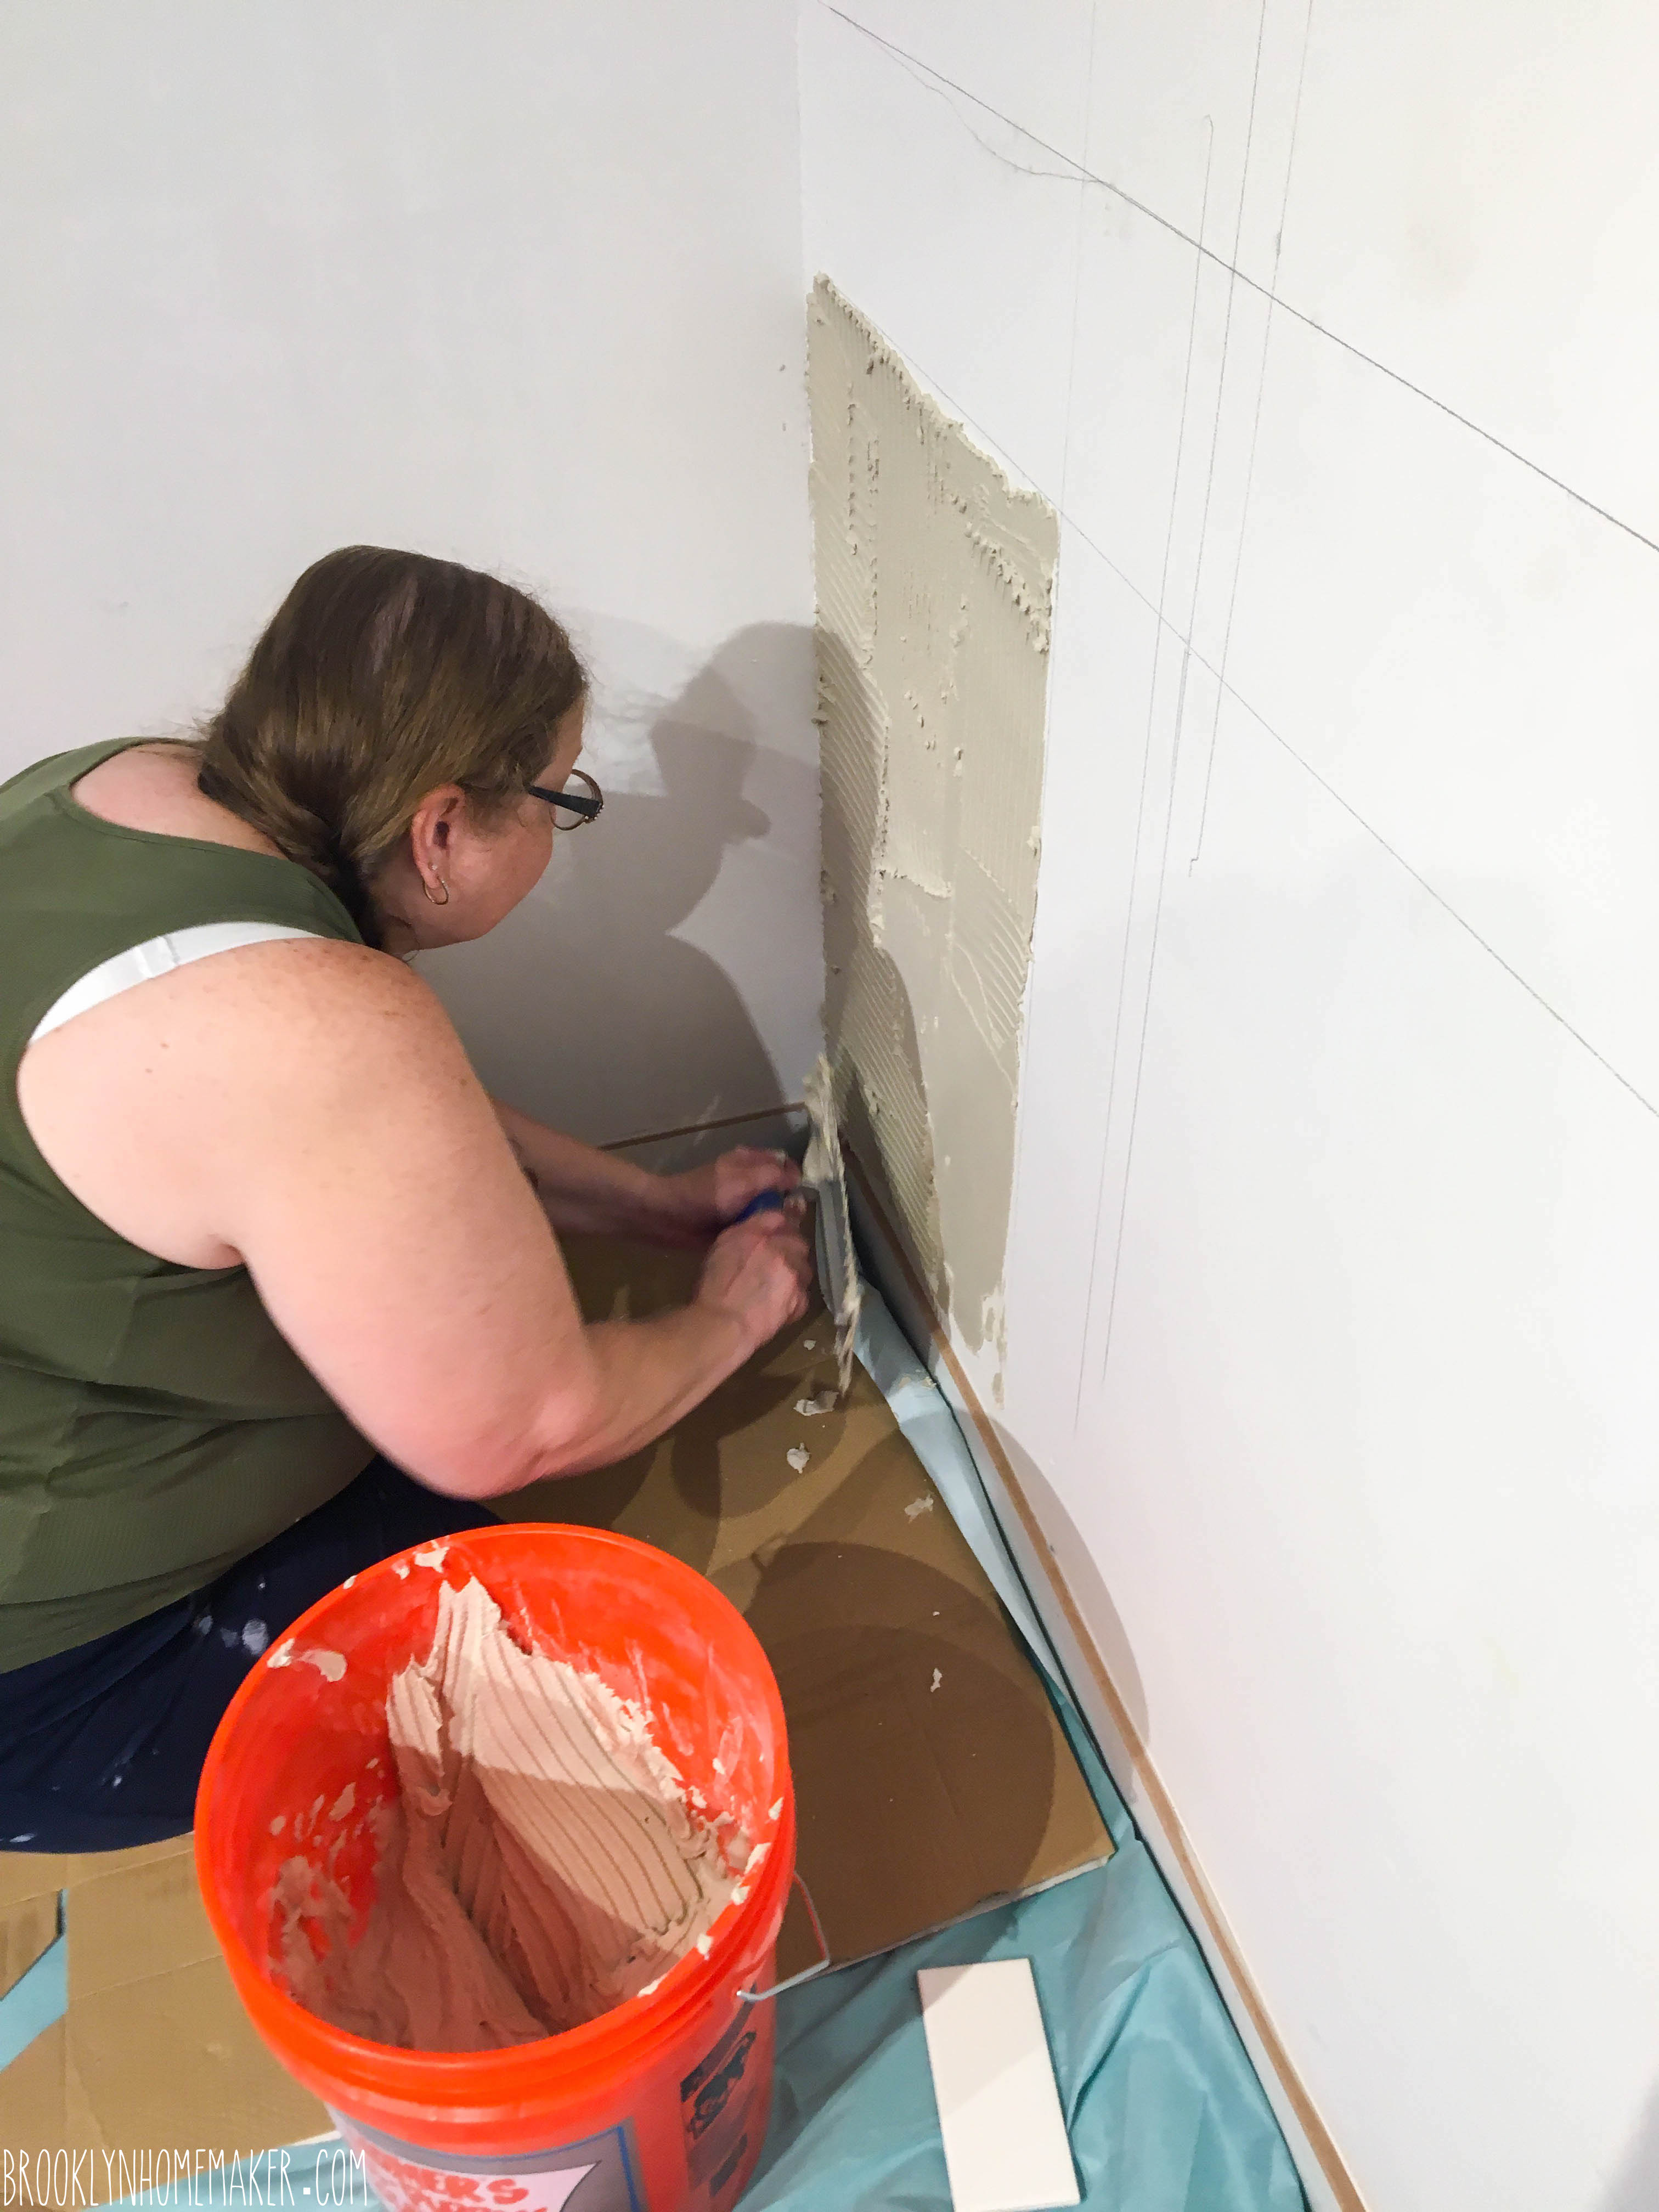
So, there we were, my mom and I (from proud, cold-weather German stock), sweating our asses off in 90 degree heat with no AC, learning by trial and error how to tile walls from floor almost to ceiling. We were also trying to keep the whole thing under wraps until we were closer to opening, so we couldn’t even open the door for air!

Maxwell's for Hair | Brooklyn Homemaker Maxwell's for Hair | Brooklyn Homemaker Maxwell's for Hair | Brooklyn Homemaker Maxwell's for Hair | Brooklyn Homemaker

At first the whole thing took a little getting used to. We started by making a level line above the baseboard, (which of course wasn’t even close to level) and then cutting each tile lengthwise to ensure our first row would have a completely level top line that all the other rows of tile could build off of. Then we had to figure out the best texture for the thinset, the best way to apply it, whether we preferred to schmear it on the wall or back butter each tile as they went up. (mom’s into the schmear btw, but I prefer to back butter each tile)

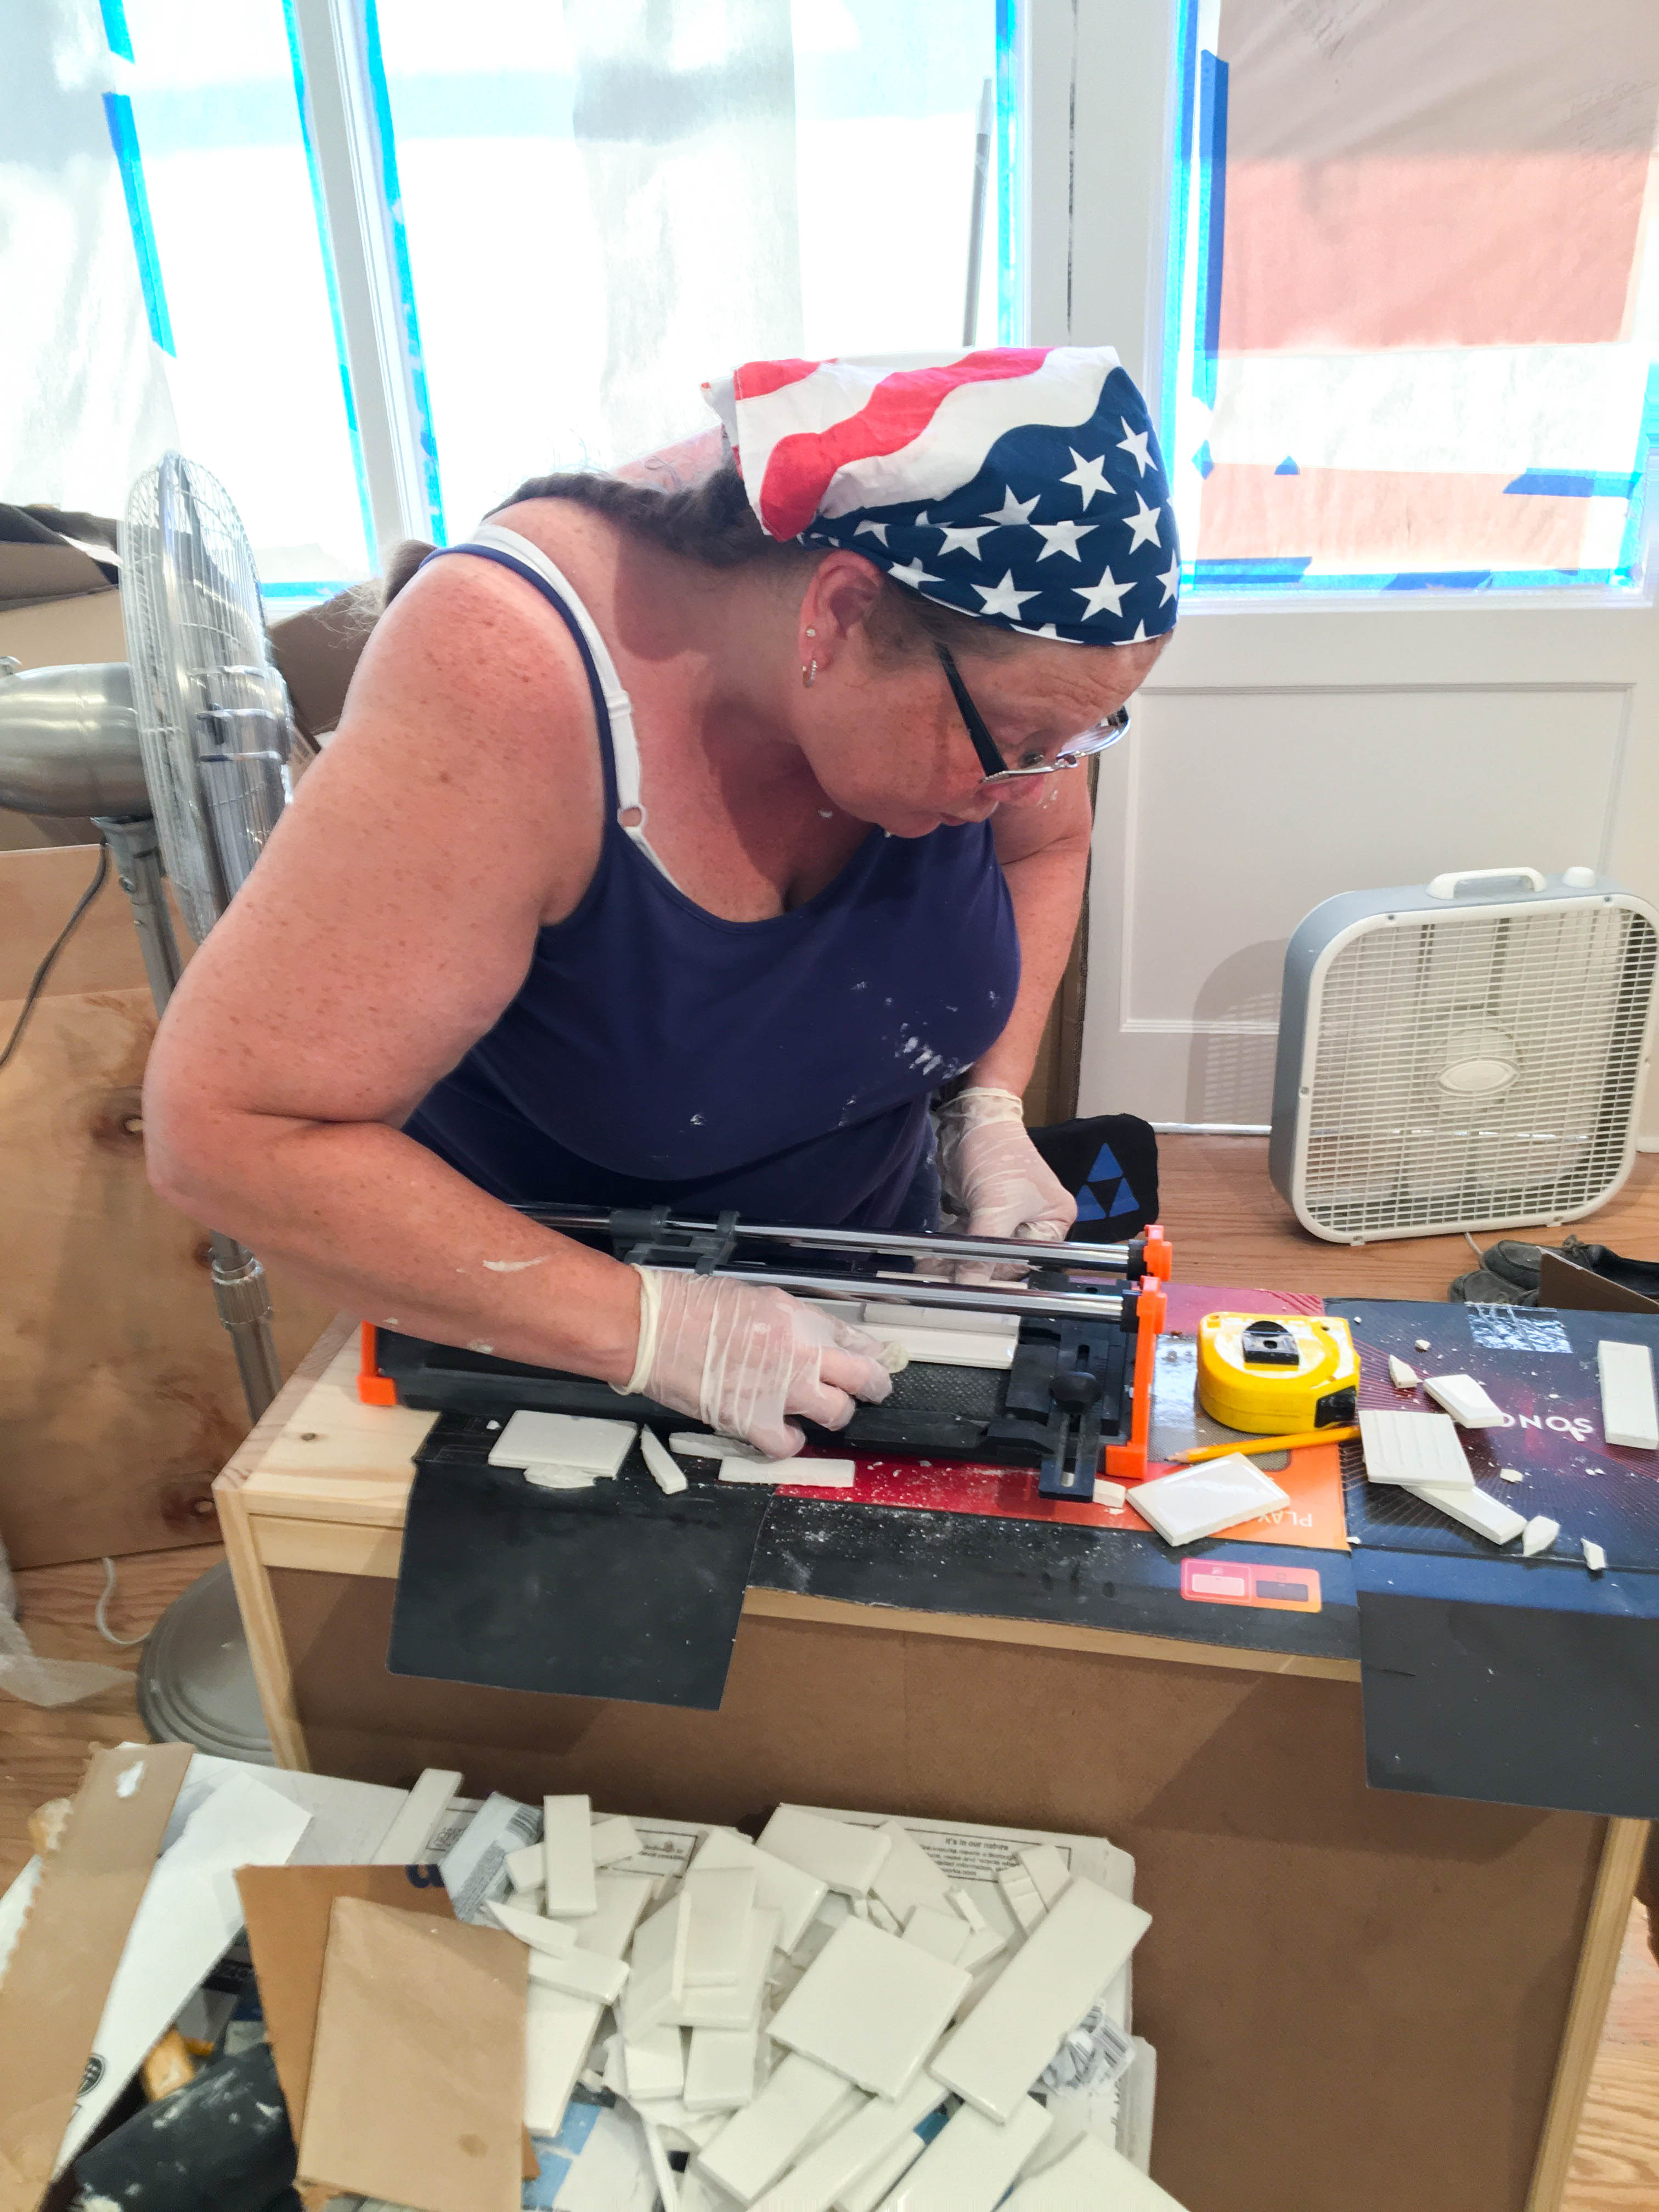
We started on one wall to get the hang of the process and slowly started creeping upwards and to the left. Once we got the first row level, the rest was actually surprisingly smooth sailing. By the time you get the hang of mixing and applying the mortar and arranging the tiles, things move along *relatively* quickly. That’s not to say there weren’t any frustrating moments or times I wanted to did throw a fit and/or cry, but for the most part the hardest thing was keeping our lines level, keeping straight rows on wonky 0ld walls, and measuring and cutting corner pieces. Mom and I worked out a pretty good system in the first few days though. She manned the tile cutter while I was in charge of mixing mortar and applying tiles. Of course we took turns and alternated duties sometimes, but we definitely figured out where our strengths and weaknesses lay, and thankfully they were mostly complementary.

Since we were just working with small inexpensive ceramic tiles, we decided we didn’t need to splurge on a wet saw to cut them, and just went for an inexpensive score and snap tile cutter, and a pair of tile nippers for more detailed cuts. There were a few places where a wet saw may have come in handy, but we were fine for about 95% of what we did, and we found ways to make it work everywhere else.

Maxwell's for Hair | Brooklyn Homemaker Maxwell's for Hair | Brooklyn Homemaker Maxwell's for Hair | Brooklyn Homemaker Maxwell's for Hair | Brooklyn Homemaker

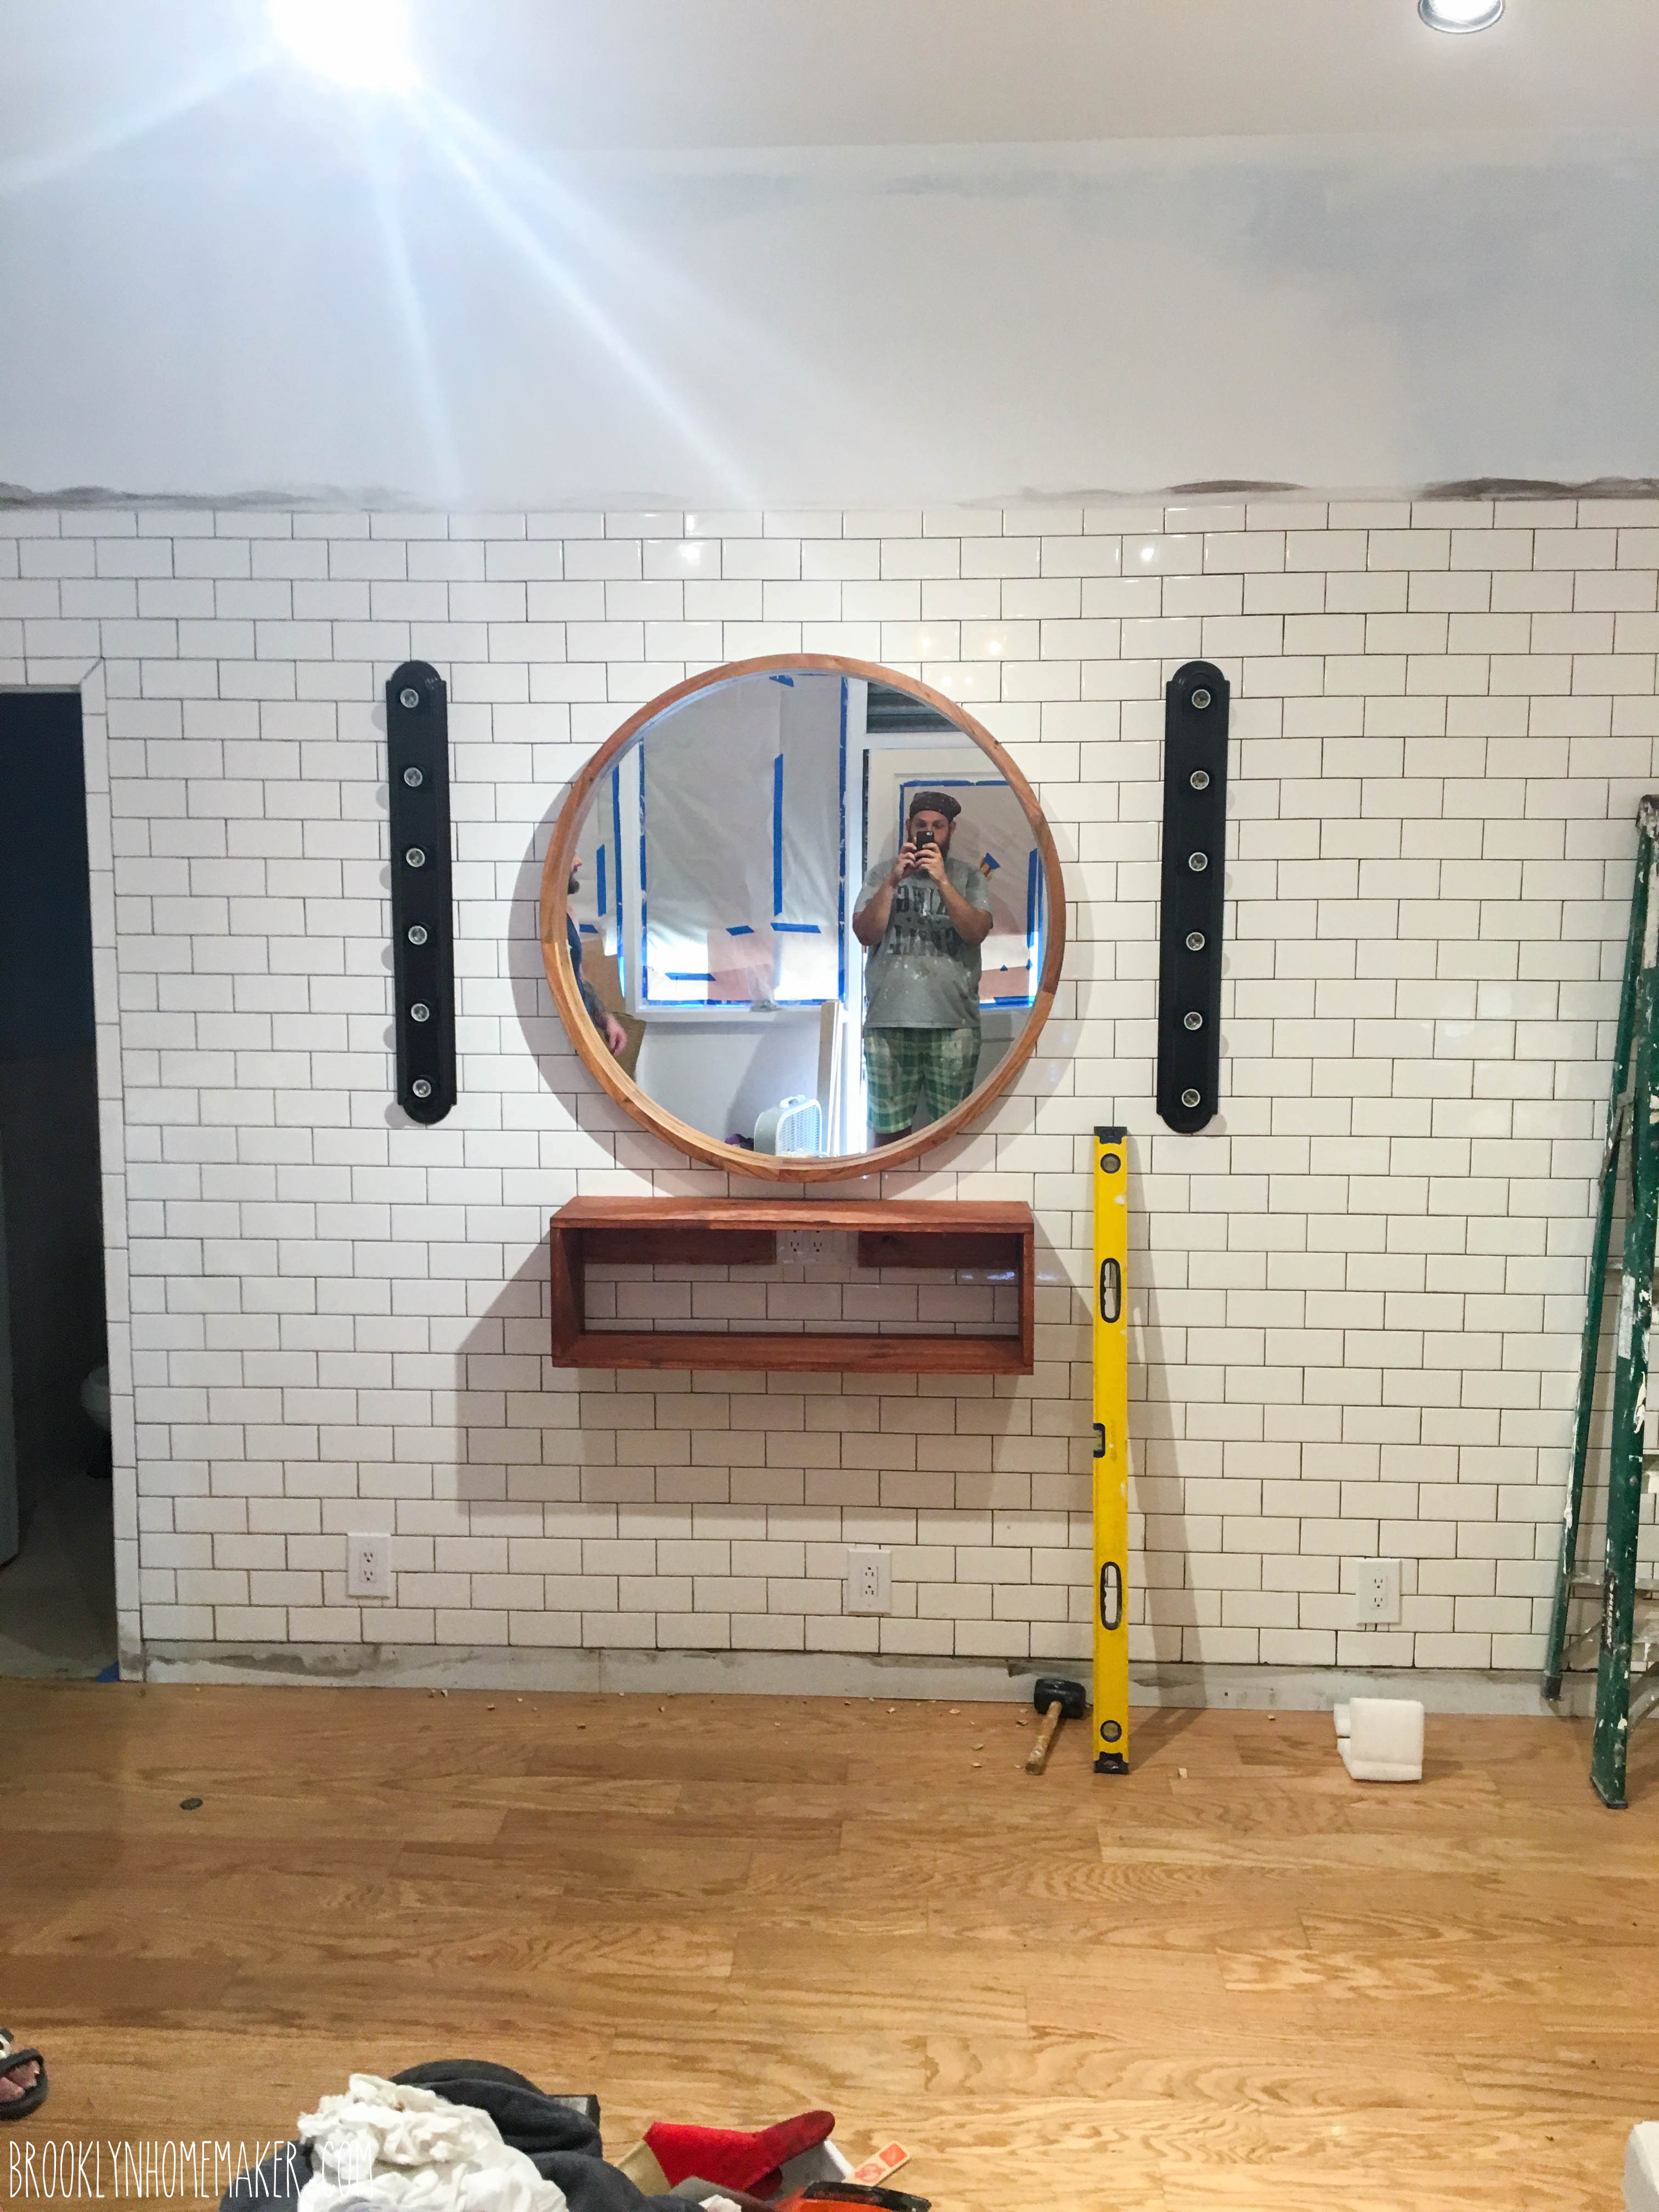
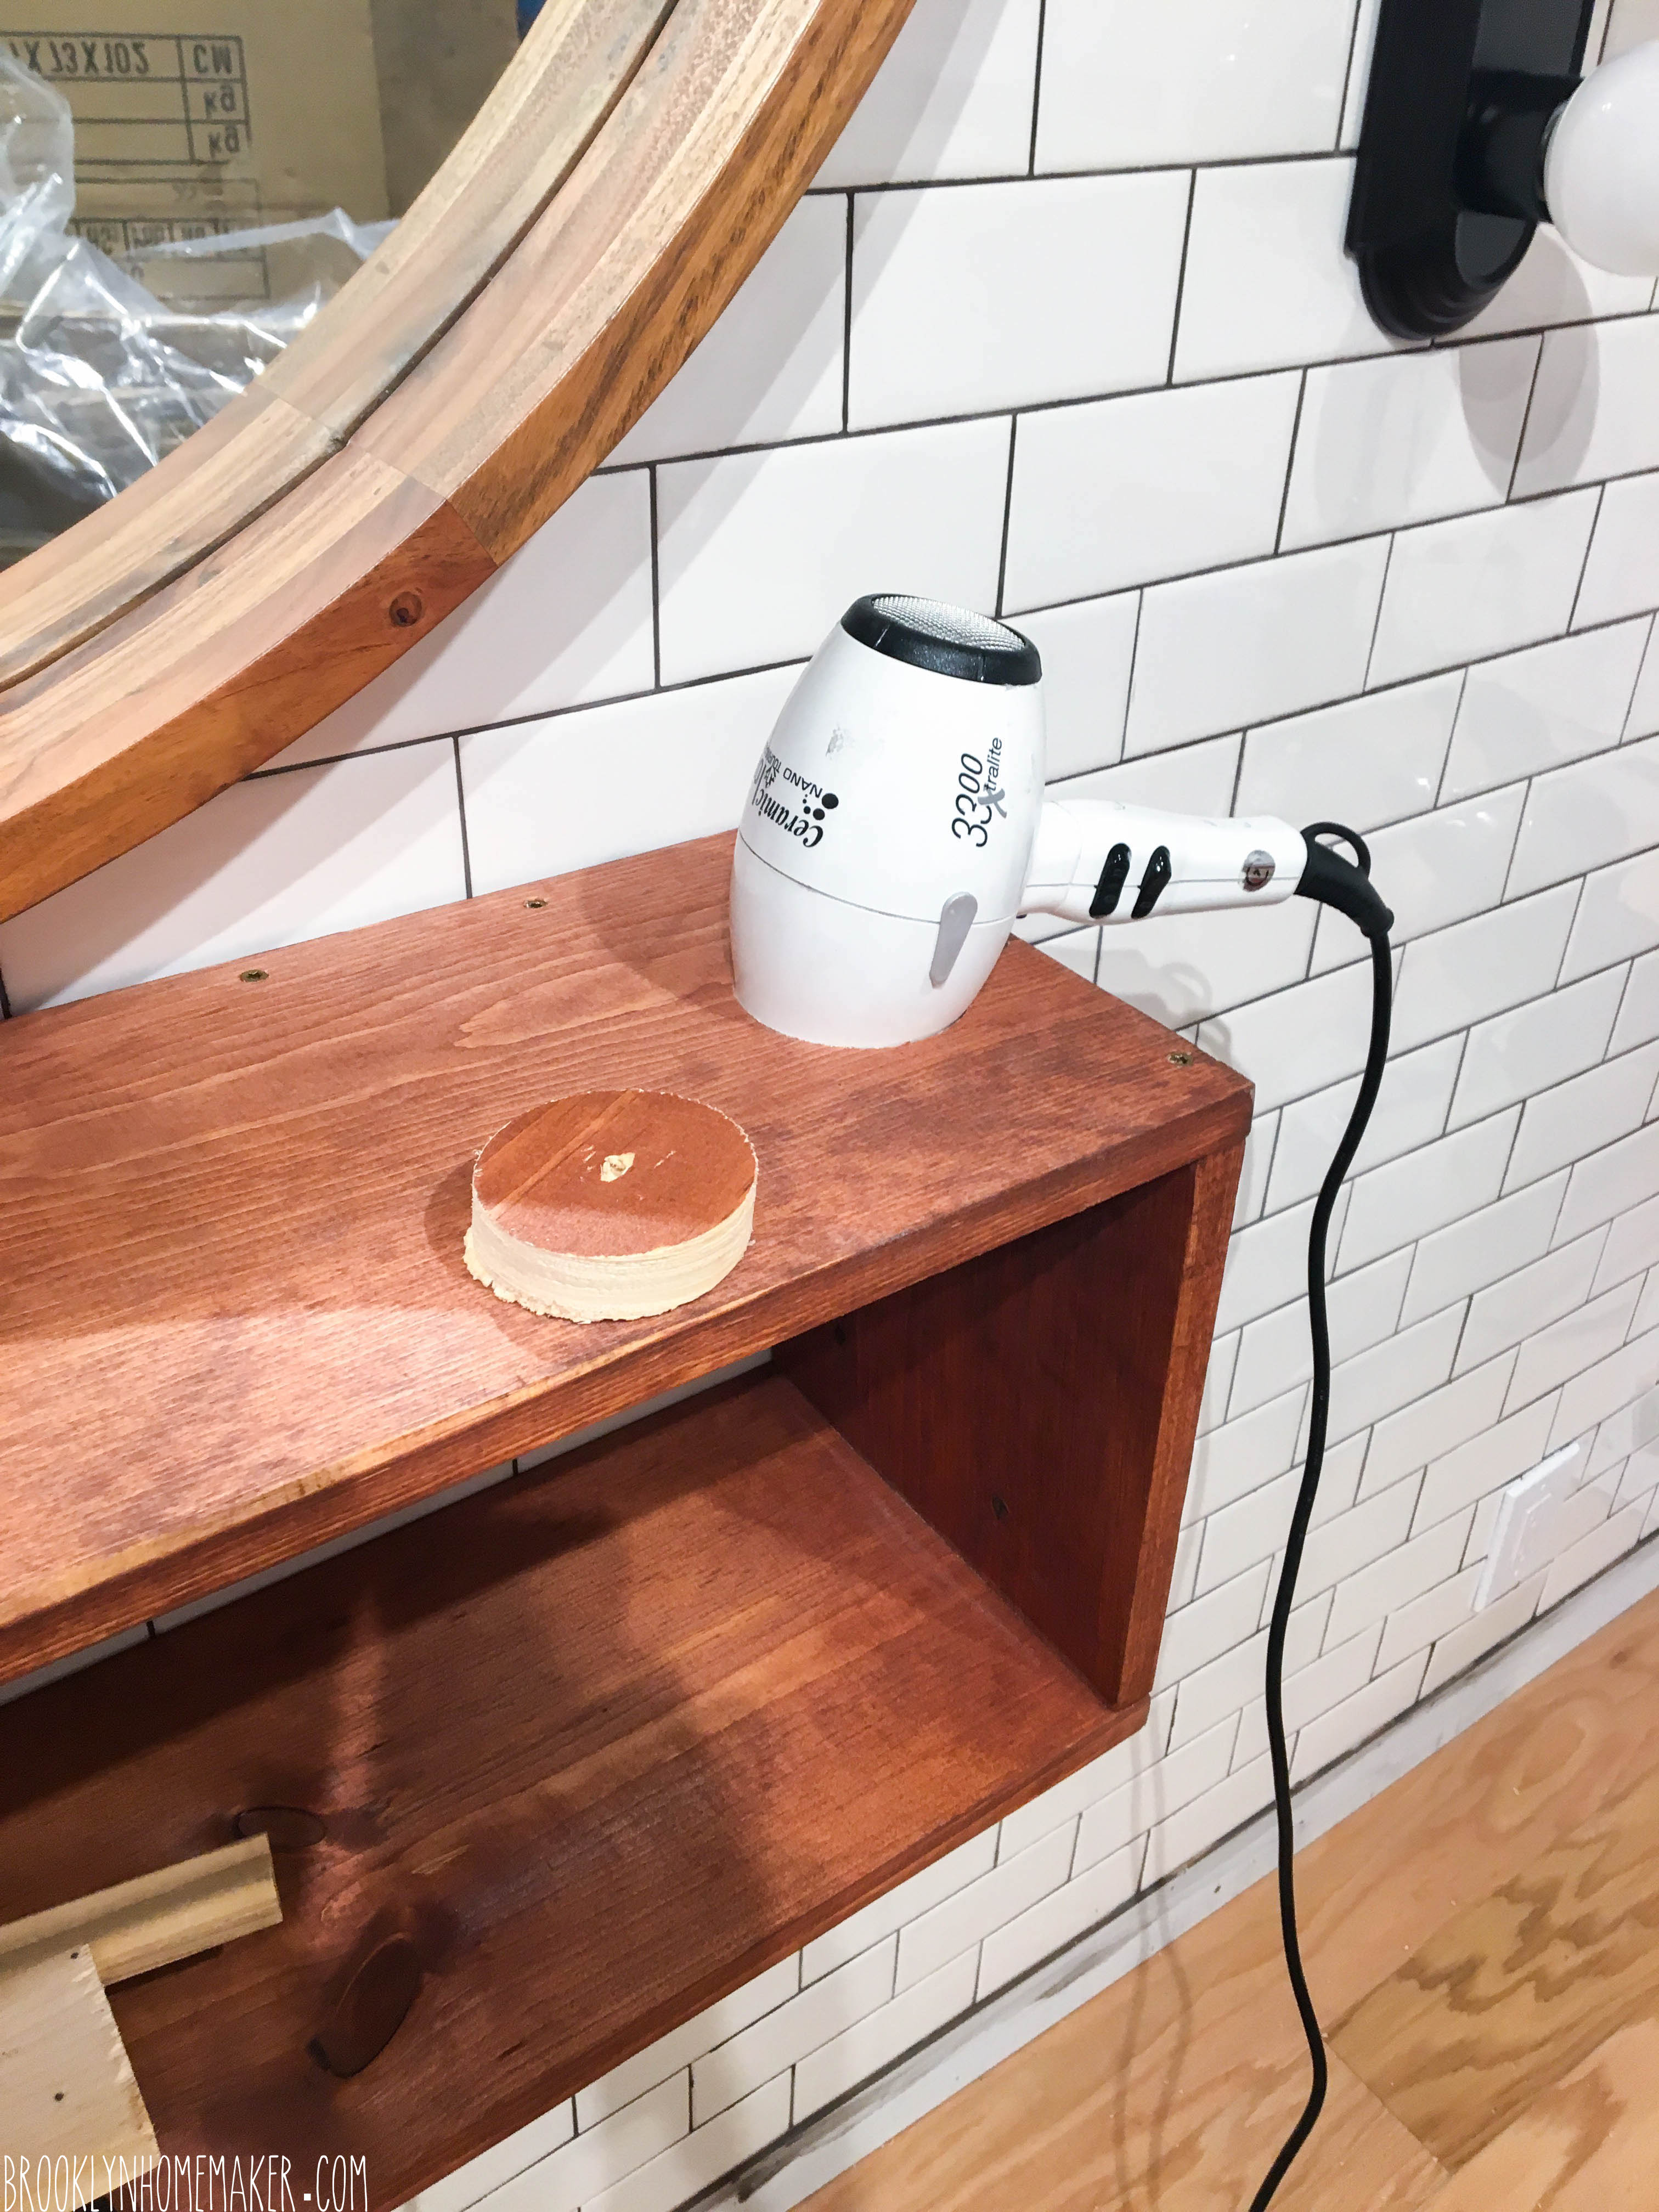
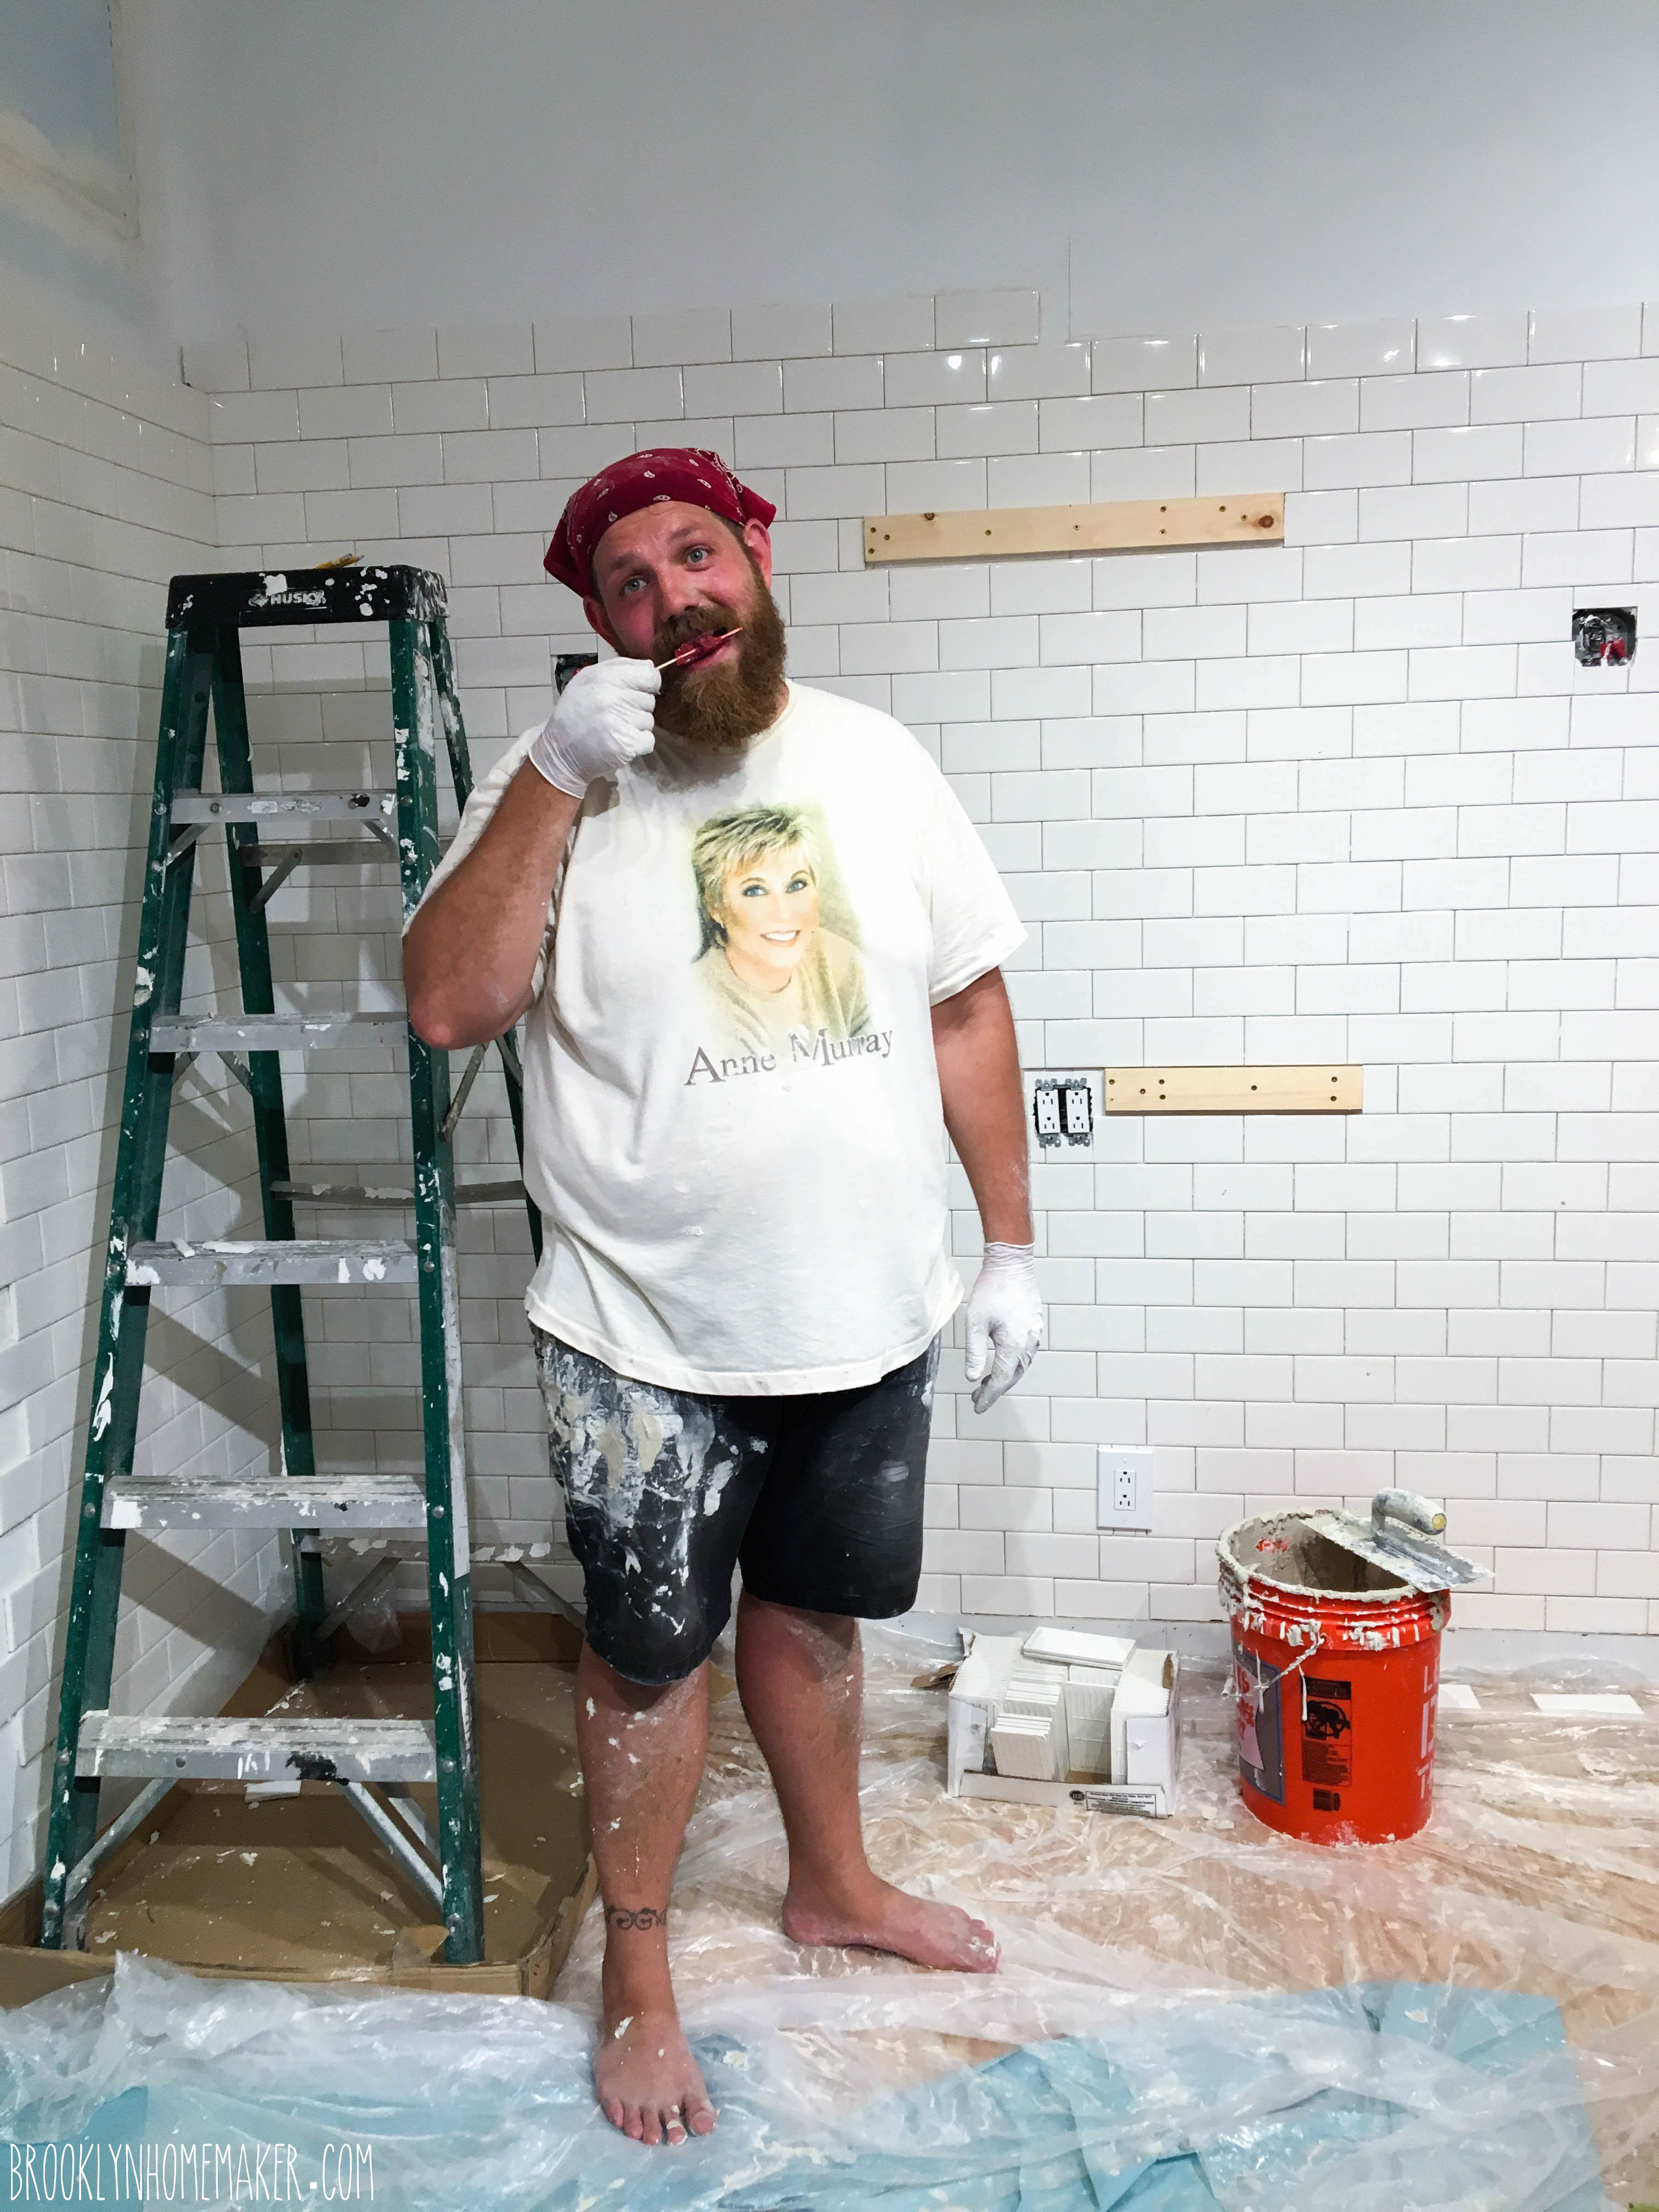
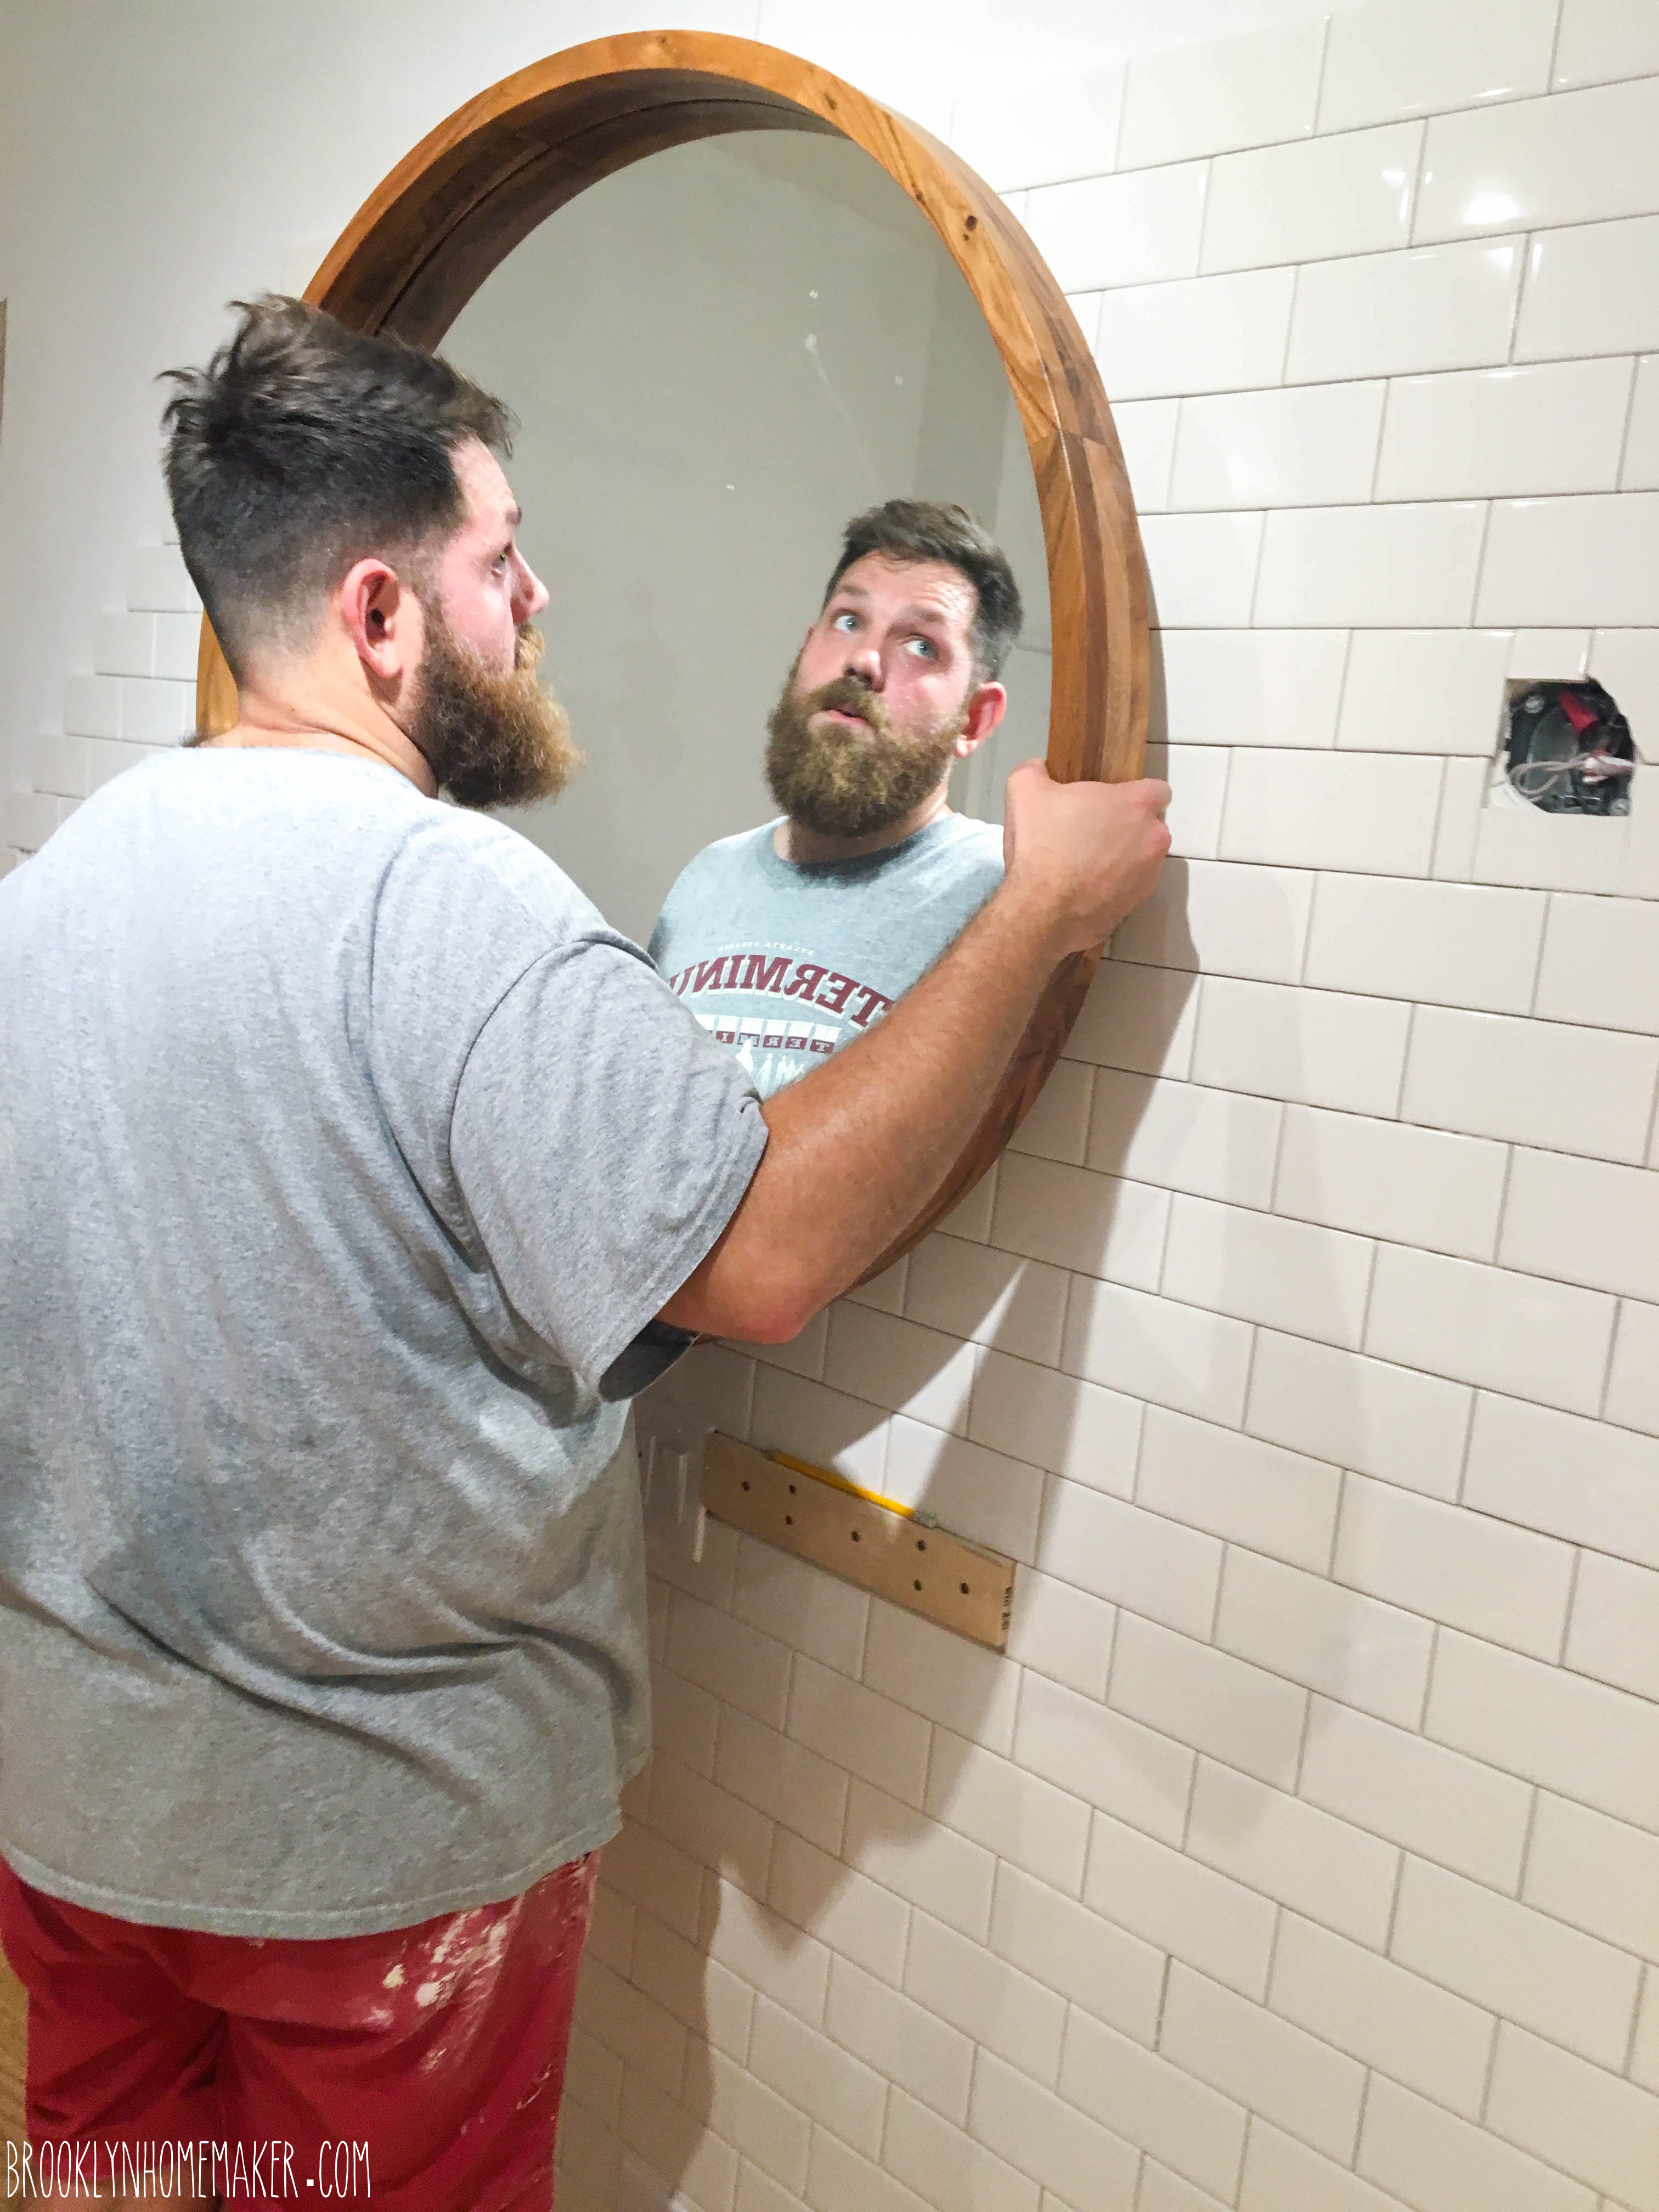
Before we got too far up the walls with the tile, we took some time to plan out where we wanted the shelves and mirrors for the stations to be hung, and mounted pine cleats (not sure if that’s the right word for what we did btw, so if you know, please share the knowledge!) attached to studs in the walls. That way we wouldn’t have to worry about trying find studs through a layer of ceramic tile, and then having to drill holes through the tiles we just put so much effort into putting up. It looked kind of weird and cheap and crappy while we were in the process, but once we were done and were able to actually attach the stations it all made sense and we were SOOO glad we did it.

Maxwell's for Hair | Brooklyn Homemaker Maxwell's for Hair | Brooklyn HomemakerMaxwell's for Hair | Brooklyn Homemaker Maxwell's for Hair | Brooklyn Homemaker Maxwell's for Hair | Brooklyn Homemaker Maxwell's for Hair | Brooklyn Homemaker

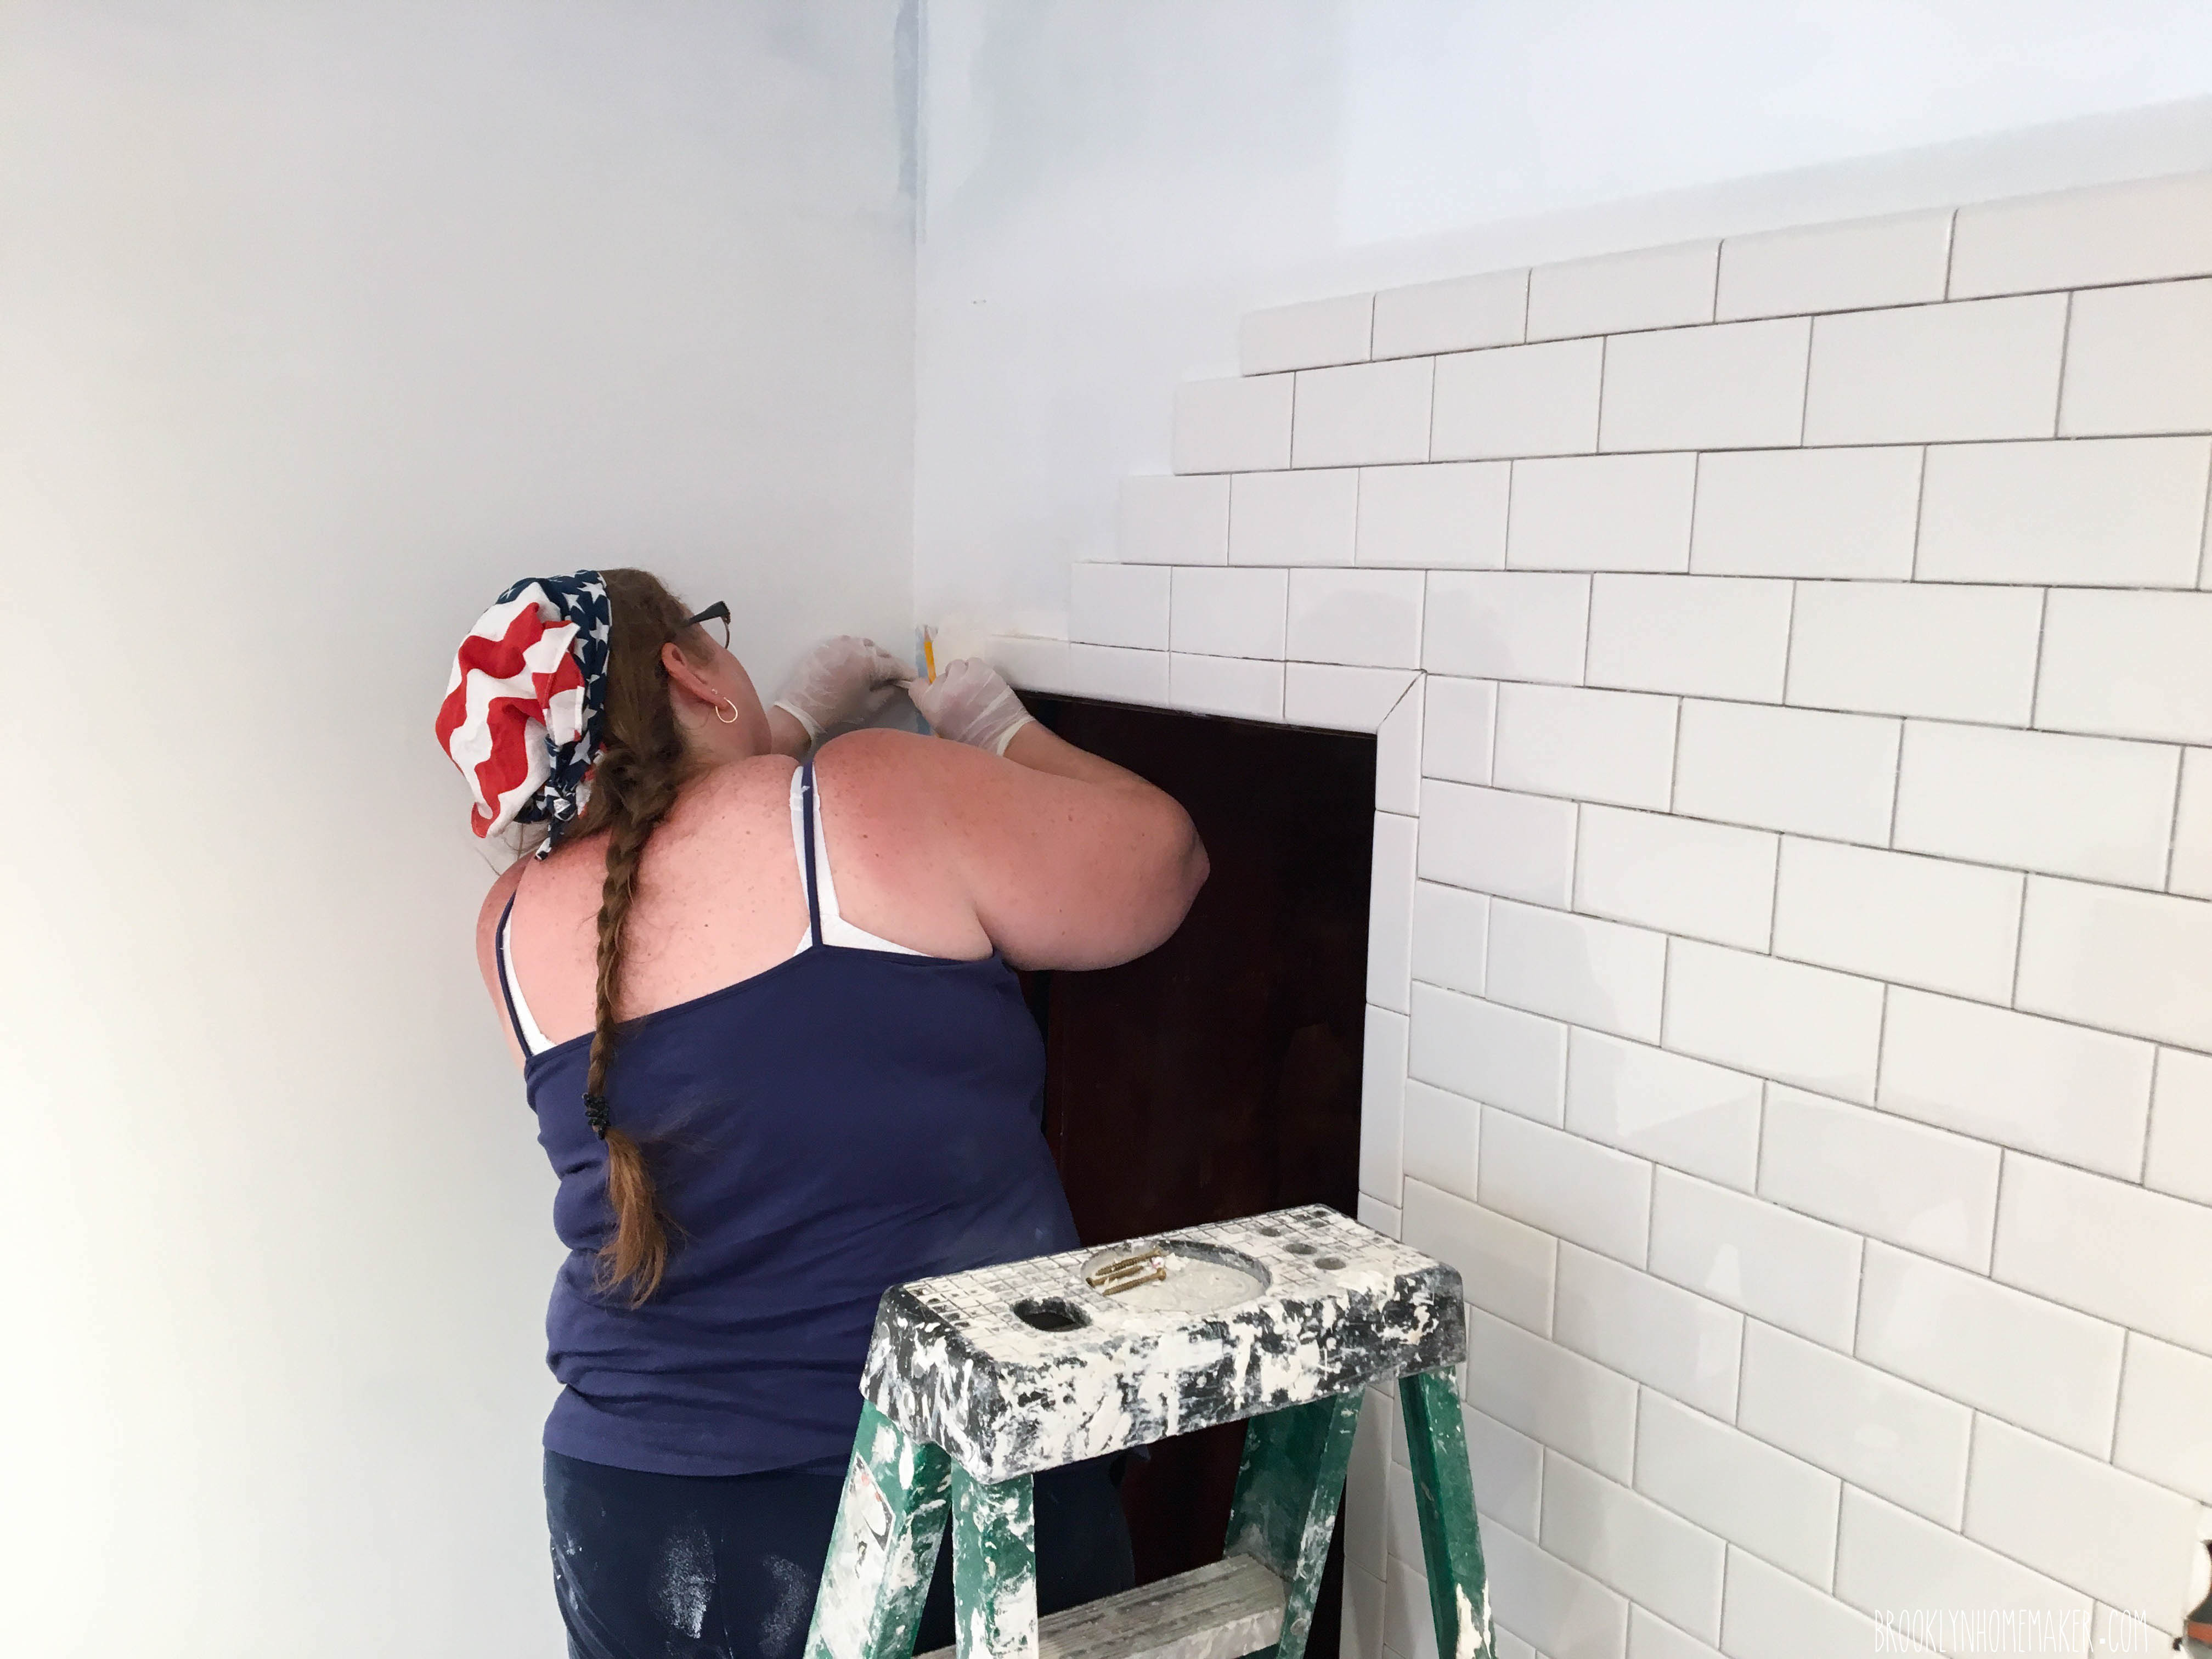
I wasn’t originally planning for this, but mom also insisted that we use bullnose tile for a nice clean finished look at the tops of the walls and on the edges and corners. One day when Russell and I were at work she even took it upon herself to pull the (admittedly crappy) trim off from around the bathroom door and then informed us that we were going to do bullnose trim around the door instead. At the time it just seemed like extra work to me, but in the end looked amazing and I’m so glad she made us do it! Always do what your mama says folks!

Maxwell's for Hair | Brooklyn Homemaker Maxwell's for Hair | Brooklyn HomemakerMaxwell's for Hair | Brooklyn Homemaker Maxwell's for Hair | Brooklyn Homemaker Maxwell's for Hair | Brooklyn Homemaker Maxwell's for Hair | Brooklyn Homemaker

I am so SO glad I got to do this whole project with my mother. Some of it was fun, and some of it was grueling and exhausting and sweaty and disgusting, but most of the time it all overlapped! I know some people might not want to spend so much time in such close quarters with their mother, but I loved every minute of it. I won’t lie and say we didn’t snap at each other a couple times. We were in cramped quarters, exhausted and dripping sweat, and I have a tendency to get snippy when I’m hungry and/or tired and/or frustrated…

Mom, you’re a very patient woman, and we literally would never have gotten this all done, not nearly as perfectly and professionally as we did, without your labor, skill, input, and patience!

Now, sorry friends but I’m not going to go through a whole step-by-step, how-to instructional thing here because, as I’ve already made perfectly clear, we are absolutely not professionals and had no idea what we were doing until we figured it out along the way. We had a little lot of help from the internet, so if you’re interested in taking on a project like this for yourself, I’d suggest you start by looking here, and here, and here.

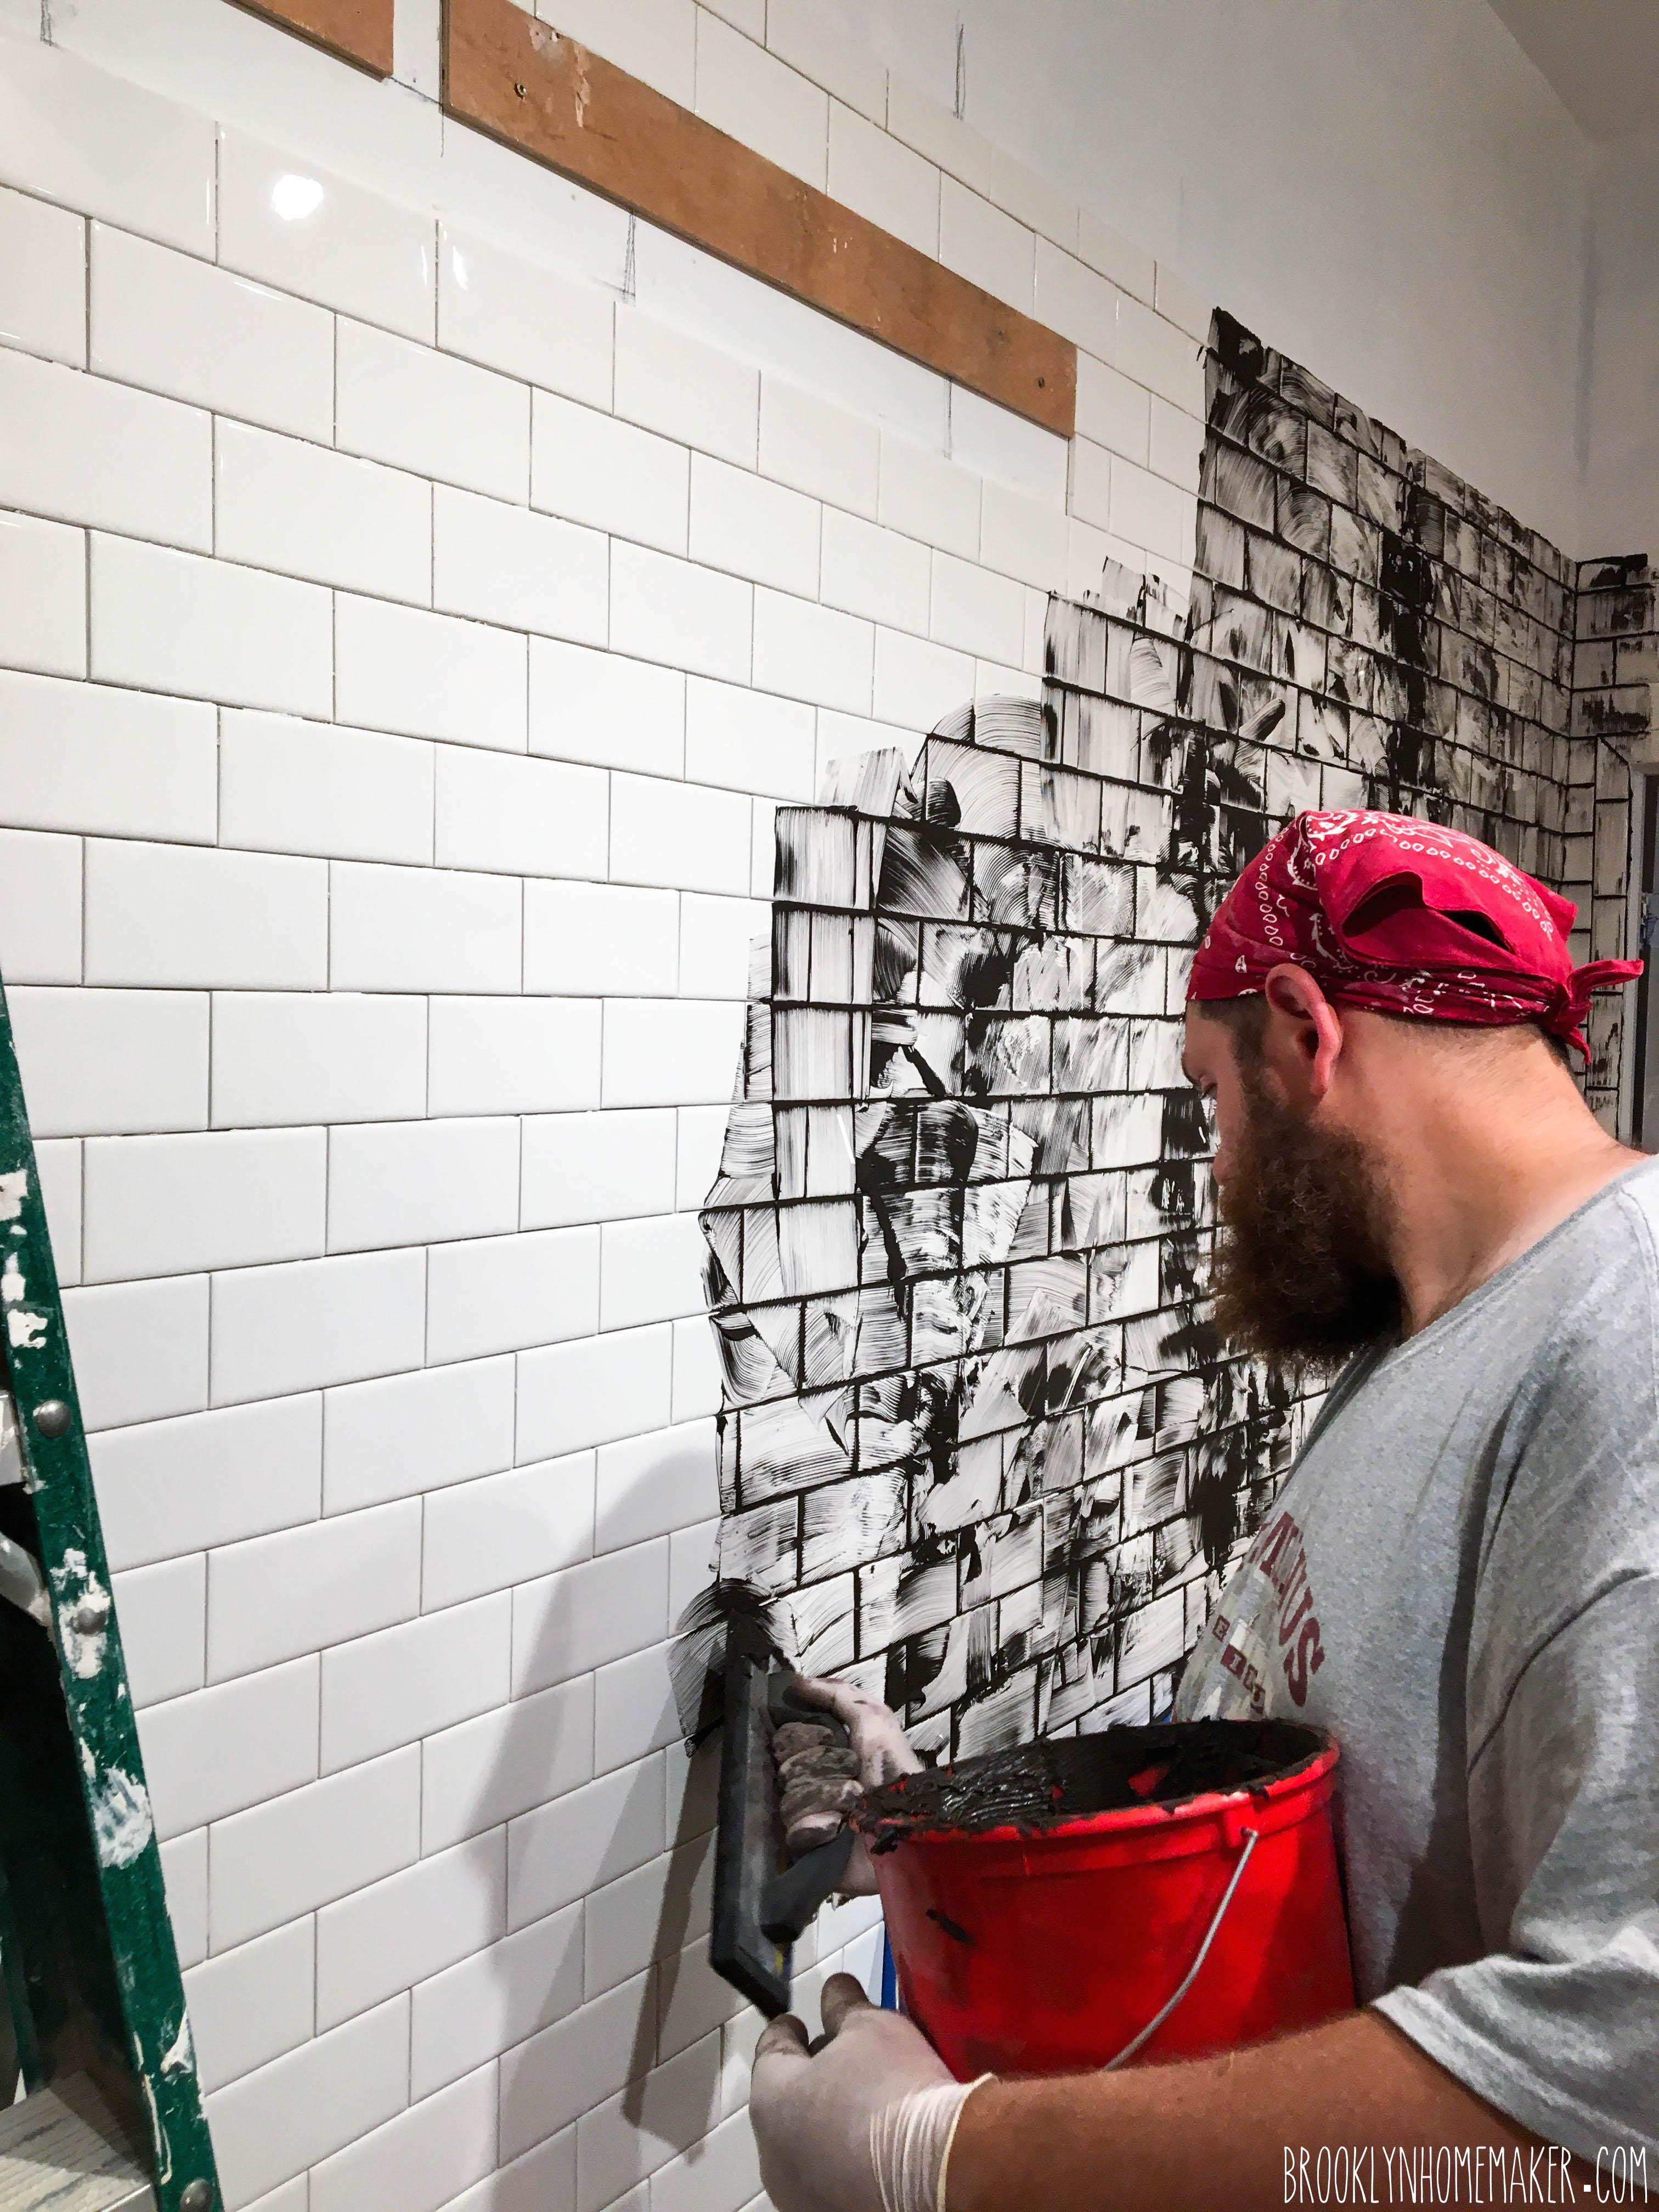
On the very last day when we hung the very last tile, we finished our work a little earlier than expected so we decided to try our hand at grouting just for fun. (SO DUMB).
The tiling went smoothly, but it was HARD work, so we figured the grouting process couldn’t be any harder right?

Maxwell's for Hair | Brooklyn Homemaker

WRONG!

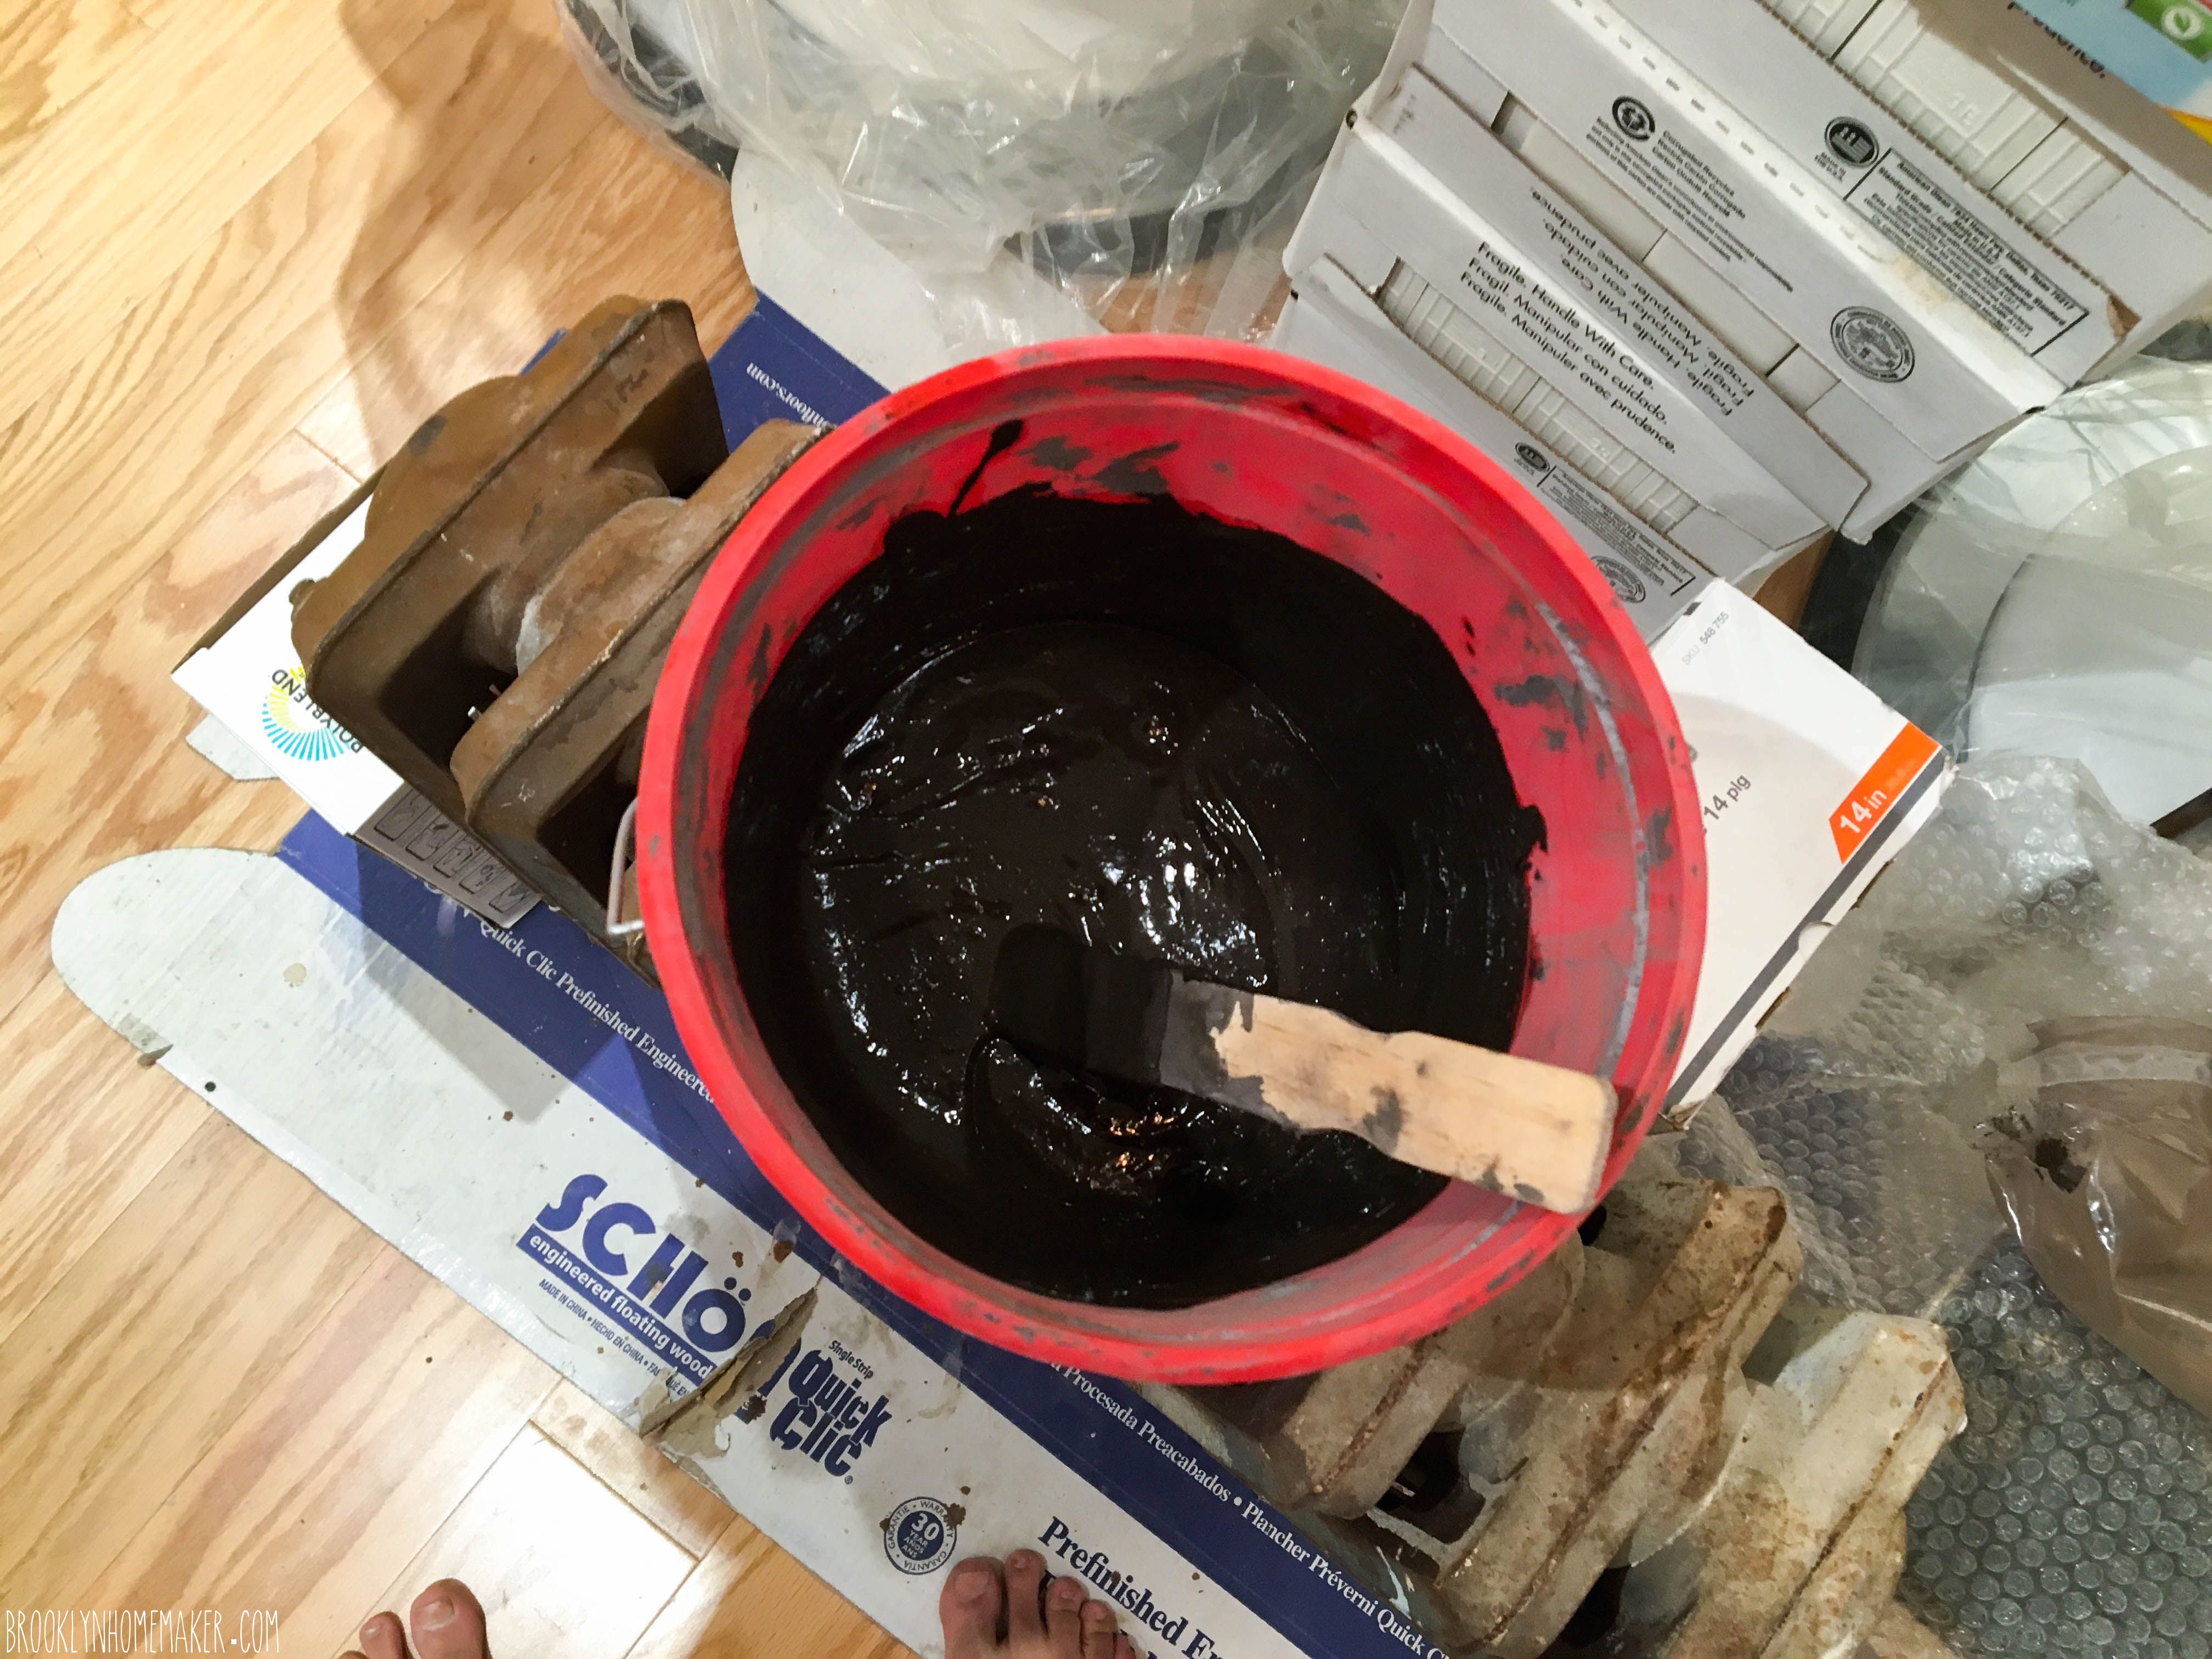
The first batch of grout I mixed up was too thick and it was too hot and we were too tired after working all day. I spread the grout over too big an area, and because it was so thick it dried faster than we were able to clean it off and it wouldn’t come off with the soft sponges I’d purchased for the job. It started off okay, but within an hour or two things went downhill fast.

Maxwell's for Hair | Brooklyn Homemaker Maxwell's for Hair | Brooklyn Homemaker

After hours and hours of wiping and scrubbing to get the dried grout off the walls, I literally laid on the floor and had an honest to goodness temper tantrum, right there in front of my poor mom. I was hot and sleep deprived and hungry and completely depleted and my arms felt like jelly and I was sure that the grout was going to set and permanently ruin our beautiful tile and all I could think about was how stupid I was and how we were going to have to rip out the ruined tile and re-do it.
In a panic I called Russell to come help us, but at that point there wasn’t much he could do either. He did his best to get as much off as he could, but in the end we had to just leave for the day and hope we’d find a better solution to get the grout off when I got home from work the next day.

While I was at work I did a little online research and found that as long as the grout hadn’t been set for too long, it should be possible with to scrub it off with some little nylon scrubby pads and a good bit of elbow grease.

I crossed every piece of my body that I was able to cross, and when I got to the shop I literally did a little dance of joy when the nylon scrubbies worked out and angels sang and rainbows and unicorns shot out of my ears.

Maxwell's for Hair | Brooklyn Homemaker

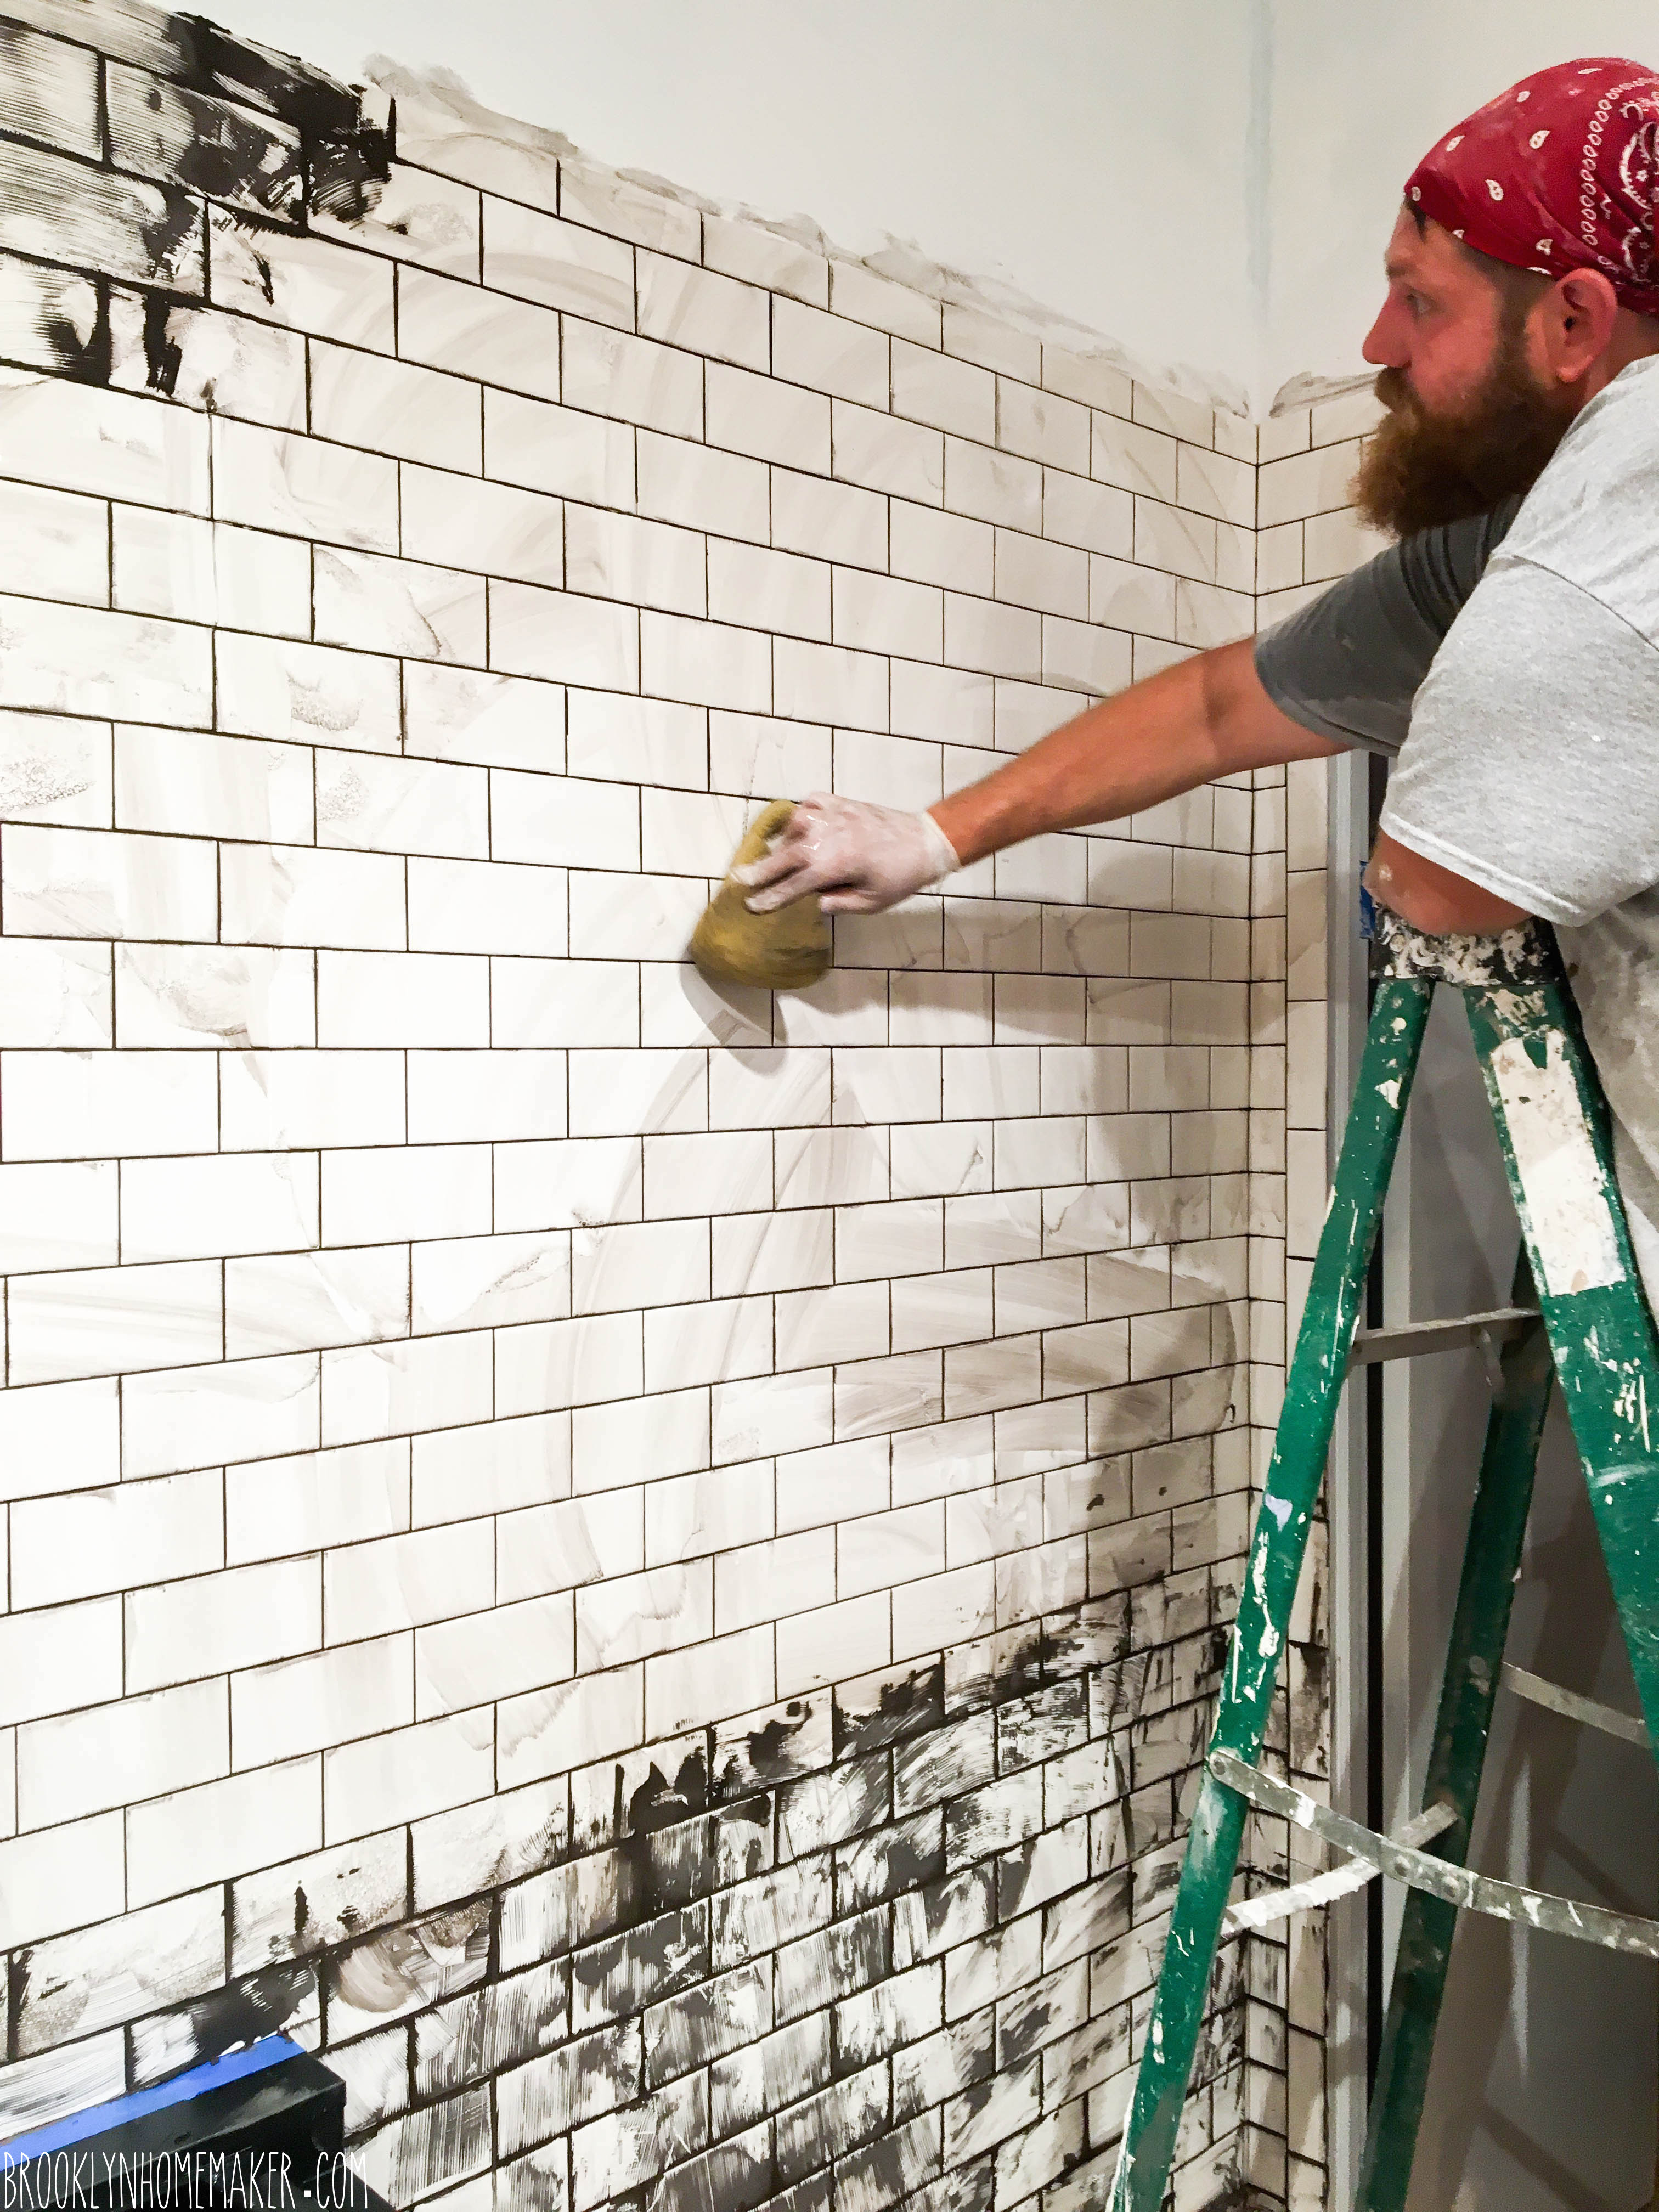
As you can imagine, the next batches of grout I mixed were much thinner and were spread on in much smaller patches at a time. We worked out a system where I’d spread it on and Mom and Russell would come behind me and wipe it off.

Maxwell's for Hair | Brooklyn Homemaker

Everything I’d read online said to wipe and wipe and wipe with clean damp sponges until the tile looked completely clean, then to let it dry overnight and come back and wipe it again to remove any film.

The thing is though, that everything I was reading was talking about white or light colored sanded grout, and not only was I using dark grout for contrast, I was also using un-sanded grout to avoid scratching the glossy surface of my tiles.
No matter how much I wiped, the tile never looked “clean”, and if I just kept wiping and wiping and wiping, after a certain point I was just wiping the grout out from where I wanted it to actually stay. So again, thanks to a little trial and error, we learned that with dark, un-sanded grout you just have to wipe until you have a very thin hazy grey layer of grout and you’ll be fine. Then once it dries you can just wipe it off with a clean dry rag to reveal the beautiful shiny tiles beneath.

Maxwell's for Hair | Brooklyn Homemaker Maxwell's for Hair | Brooklyn HomemakerMaxwell's for Hair | Brooklyn Homemaker

Unfortunately, in the middle of the grouting process mom’s vacation was up and she had to head home and leave me and Russell to finish up on our own. After pouring so much of her blood, sweat, and tears into our shop (especially sweat), she was never even able to see the finished product. Poor mom. :(

And sorry friends, but poor you too. Yet again I’ve been blathering and blathering and blathering and I’m pretty sure no one’s even reading this anymore…

I promise you’ll get to see the end results of all our work soon though.
Really!

Maxwell’s for hair, the beginning

I was at work about two and a half years ago when I felt my phone vibrating in my pocket. It was my beloved husband Russell, so I stepped outside to take the call.

“I think I just quit my job.”…

“WHAT?!?!?!?!?”

I picked my jaw up off the sidewalk, dusted it off, and resisted the urge to reach through the phone and smack some sense into my darling spouse.

I don’t remember exactly what words were exchanged in the minutes that followed, but along with plenty of colorful language that I shouldn’t repeat here, I can assure you that our conversation was filled with pointed questions such as, “What on earth are you thinking?”, “What are we supposed to do now?”, and “Are you out of your #@*%-ing mind?”

Maxwell's for Hair | Brooklyn Homemaker

When Russell and I first met, he was working in a doctor’s office that specialized in ophthalmology and cosmetic surgery. He was great at his job, and had a way of making customers feel welcome and completely comfortable in spite of whatever procedure they were having done. He’s always had a special gift, the ability to make people fall in love with him from the moment they meet.

While he was good at his job, his job wasn’t necessarily good for him. The pay was okay and it could be fun sometimes, but it didn’t particularly interest him and they didn’t treat their employees with nearly as much kindness and respect as they deserved. (I know, it probably sounds like just about everyone’s job.) It wasn’t his dream job by any stretch, but he was comfortable and it was easier to stay than to start over.

Little by little though, for many reasons I won’t get into here, he became more and more unhappy. I knew that he wanted to find something else, but by that point we were newlyweds with two dogs, no savings, and plenty of wedding-related debt. I wanted to be rational and realistic about it. Of course I wanted him to be happy, but I also wanted a roof over our heads and plenty flour, sugar, and cocoa in the cupboard.

Maxwell's for Hair | Brooklyn Homemaker

About a year earlier, Russell had found us a new barber after our former barber (and dear friend) moved away, and it didn’t take her long to recognize what an outgoing and friendly personality Russell had. One day he mentioned that he was unhappy at work and she said she’d be willing to train him in her shop if he ever left. Ever the enterprising business owner, she knew that anyone could learn how to cut hair, but the real skill was knowing how to talk to people and get them to come back to you again and and again. She already owned two shops, was opening a third, and was always on the lookout for new people, so she tried to help cement the deal by mentioning how much money he could be making.

We discussed it for a bit and as tempting as it sounded, we decided that an apprenticeship would take too long, and the faster option of going to barber school was just out of financial reach for us. Russell wasn’t sure he’d like it any more than where he already was, and while she promised easy money, we had no idea what the reality would be.
So, level heads prevailed and he decided to keep pushing along where he was and try to find something in a line of work he was already trained to do.

Maxwell's for Hair | Brooklyn Homemaker

Then, on that fateful day, there was a great big heavy straw and a frail old camel with an overloaded back.

I was furious (and absolutely terrified) at first but I knew why Russell had to quit and what a relief it was to him. I also knew hoped that everything would work out in the end and we’d be just fine when the dust settled.

Finding ourselves between a rock and a hard place, we reached out to some friends and family to borrow a little money. Within a few days, Russell enrolled in barber school and we were off to the races. He got his license, started learning the ropes and building up his clientele, and before I knew it he’d paid back all the money we’d borrowed in those scary first days. In less than a year he was one of the busiest and most requested barbers in the company.

Even since that fateful phone call, Russell’s been happier and better off than he’d been for all the time that I’d known him. Things have been going just swell for over two years now, but you’ve probably guessed by now that that’s not where the story ends.

Maxwell's for Hair | Brooklyn Homemaker

Earlier this summer Russell mentioned that he’d like to start considering, one day in the distant and unknown future, opening a shop of his very own. While we were definitely better off than we’d been two years earlier, we still had very little money in savings and hadn’t really ever considered the idea before, so this discussion was entirely hypothetical. We ultimately decided to start putting away a little extra money here and there and open ourselves up to the possibility that this might, just might, eventually happen way down the line.

Just to get an idea of what it might take to make this dream a financial reality, he started looking at commercial real estate online. He wanted to see what kind of spaces were available where, and for how much. About a week later he found a listing that was so close to our house, and so reasonably priced, that he couldn’t get it out of his head. Mind you, this wasn’t supposed to happen for another year or two at least, and we were in no way prepared for what we were about to get ourselves in to, but once he knew the address there was no stopping him. He started by walking by just to see what the foot traffic was like and what else was around it, and within a few days he contacted the listing agent.

Maxwell's for Hair | Brooklyn Homemaker

The day we saw the space was a complete emotional whirlwind. We saw it in the morning and even though the agent was there the whole time and we couldn’t speak privately, thanks to a few excited glances we knew exactly what was going through one another’s minds.

First, the space was much smaller in person than we imagined from the photos. Second, it was absolutely disgusting beyond belief and needed a ton of work. Third, it had an obvious pest problem that the listing agent tried to cover up in the most hilarious way ever. Fourth, it was barely over a block from our house, in a great location, and really well priced.

Maxwell's for Hair | Brooklyn Homemaker

We saw it, took some photos, and told the agent we’d get back to him if we were still interested. We tried to play it cool but we were both wrecks. The space required soooo much more work than we had originally anticipated and we didn’t know if we could afford it or handle making it happen. Holes in the front facade, big chunks of missing drywall, weird blue plastic covering where the drywall had once been, and piles of whole acorns inside the framing behind said missing drywall. When we casually mentioned the acorns, the listing agent, with a completely straight face, said that they were probably just left there by the previous tenants who were probably just eating a lot of nuts before vacating the space.

Like….
What????

Yes.
Sure.
After ripping out an entire panel of drywall exposing the framing and exterior brick for some reason, then covering the hole with thin blue plastic, the previous tenants decide to sit down for a nut break in the vacant space and toss (whole) acorns inside the wall cavity exactly behind the framing.
There were more holes in his explanation than there were in the walls, and I had to bite my tongue not to laugh in his face.
Cool story Bro, but civilized human beings don’t eat raw acorns…

But I digress.

Maxwell's for Hair | Brooklyn Homemaker

In the following 24 hours we both flipped positions for and against the idea multiple times. Ever the realist, I was against it at first. It was too much work, it would be too expensive, and we had no significant savings to speak of. Russell was all for it. It was so close, so affordable, and was such a perfect (small) size for his first shop on his own. He called a friend of his who specializes in commercial real estate in Manhattan, told her about the shape the space was in, and I could sense that he was beginning to realize that we might be in over our heads with this place. Oddly enough, as reality was setting in for Russell, my imagination was beginning to run wild. I’m a handy guy. I love DIY projects, and this would (eventually) be the ultimate blank slate for me to put my touch on. What was left of the drywall was in rough shape under the crappy crumbling cabinets and cheap chippy mirrors, but that wasn’t anything a little white subway tile and a splash of hutzpah couldn’t fix. Was it?

By the end of the day me and my imagination had talked him back into it.

The next step was to get an estimate from a contractor to help us with the things I couldn’t do myself. To our novice eyes, this was a daunting job, but our contractor actually said differently. The space had previously been set up as a nail salon, so much of the plumbing and electrical we’d need was already in place (or so we thought…). A bit of demo, a bit of drywall, and figuring out what to do with the floor. Everything else we planned to do ourselves.
We ran some numbers, figured some figures, and started considering our options. Our situation definitely wasn’t ideal, but we could put some of it on credit cards, and between family and friends we hoped we could scare up the rest.

Of course there was also the uncomfortable task of actually asking for money, but once we’d figured that out we were off to the races. Thank you thank you thank you to everyone who believed in us enough to help us out, especially you Mom! Seriously, there aren’t enough words in the English language for us to thank you properly.

And then things really got moving…

Brooklyn Homemaker

Once we’d finished with the lease negotiations (UGH!), it was time to finalize our plans with the contractor and figure out a timeline.

To our extreme surprise (and delight), he was able to start the day we got the keys! It all happened so fast in fact, that I never even had a chance to take any official “before” photos, besides the quick iPhone snaps I took the first day we saw the space. (SORRY FRIENDS.) After that, there was so much dust and debris and commotion that I was afraid to bring my camera over until it was all done. So, unfortunately, the only evidence I have of this whole crazy process exists in the form of grainy, poorly lit iPhone photos taken at bizarre angles.

Maxwell's for Hair | Brooklyn Homemaker

I know things look totally crazytown in these pictures, but to us, this was progress. Sweet, chaotic, tangible progress. There was no turning back, and every piece of debris pulled from down from the walls, and every heap of rubble piled in the corner, was one step closer to independence. The weeks and months that followed were some of the longest, most hectic, and most stressful of my life, but now that it’s all behind us it seems like it came and went in a flash!

I know this is one hell of a place to end things, but there’s still soooo much more ground to cover and I’ve been rambling for way too long already.
Sorry friends! But I promise I’ll be back in the next couple weeks to show you some actual progress and pretty stuff!

………………………………………………………………………

Click here to see the next post!