kitchen

kitchen facelift project- big reveal

Here it is friends, the big reveal! The overhaul of our poor sad ugly little kitchen is finally (mostly) finished!!! (for now…)

Brooklyn Homemaker ugly kitchen facelift project - big reveal

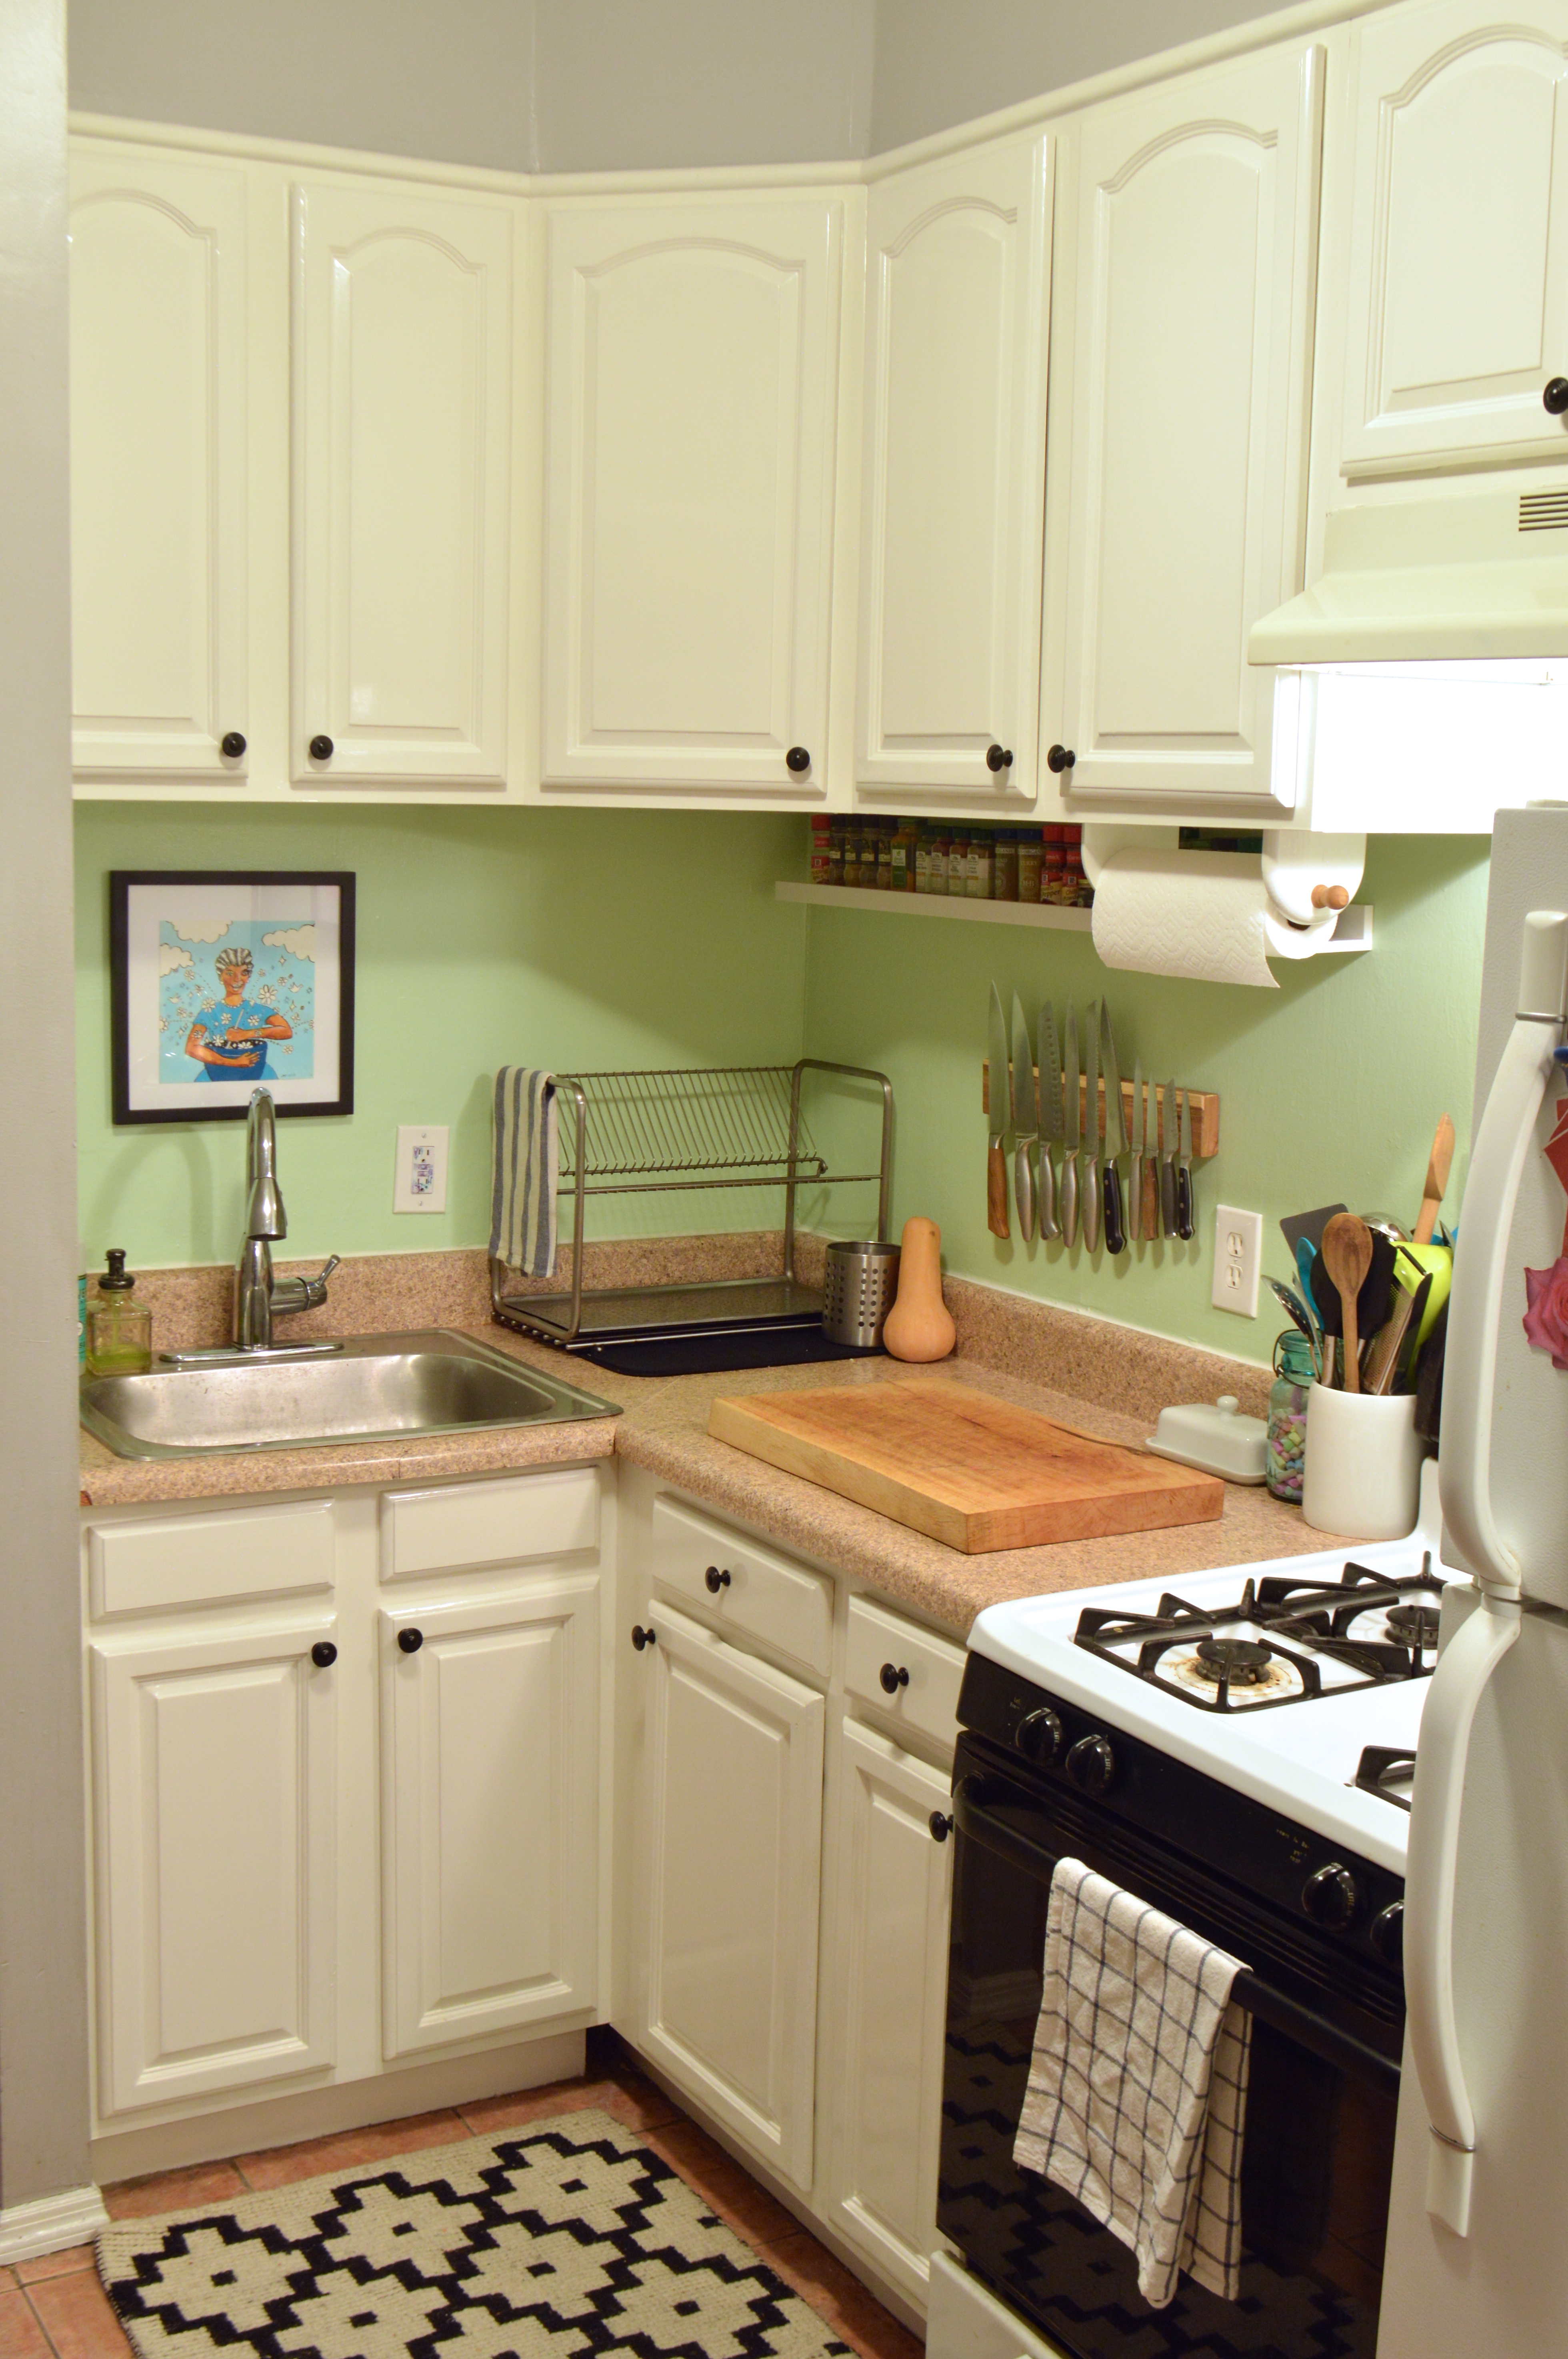
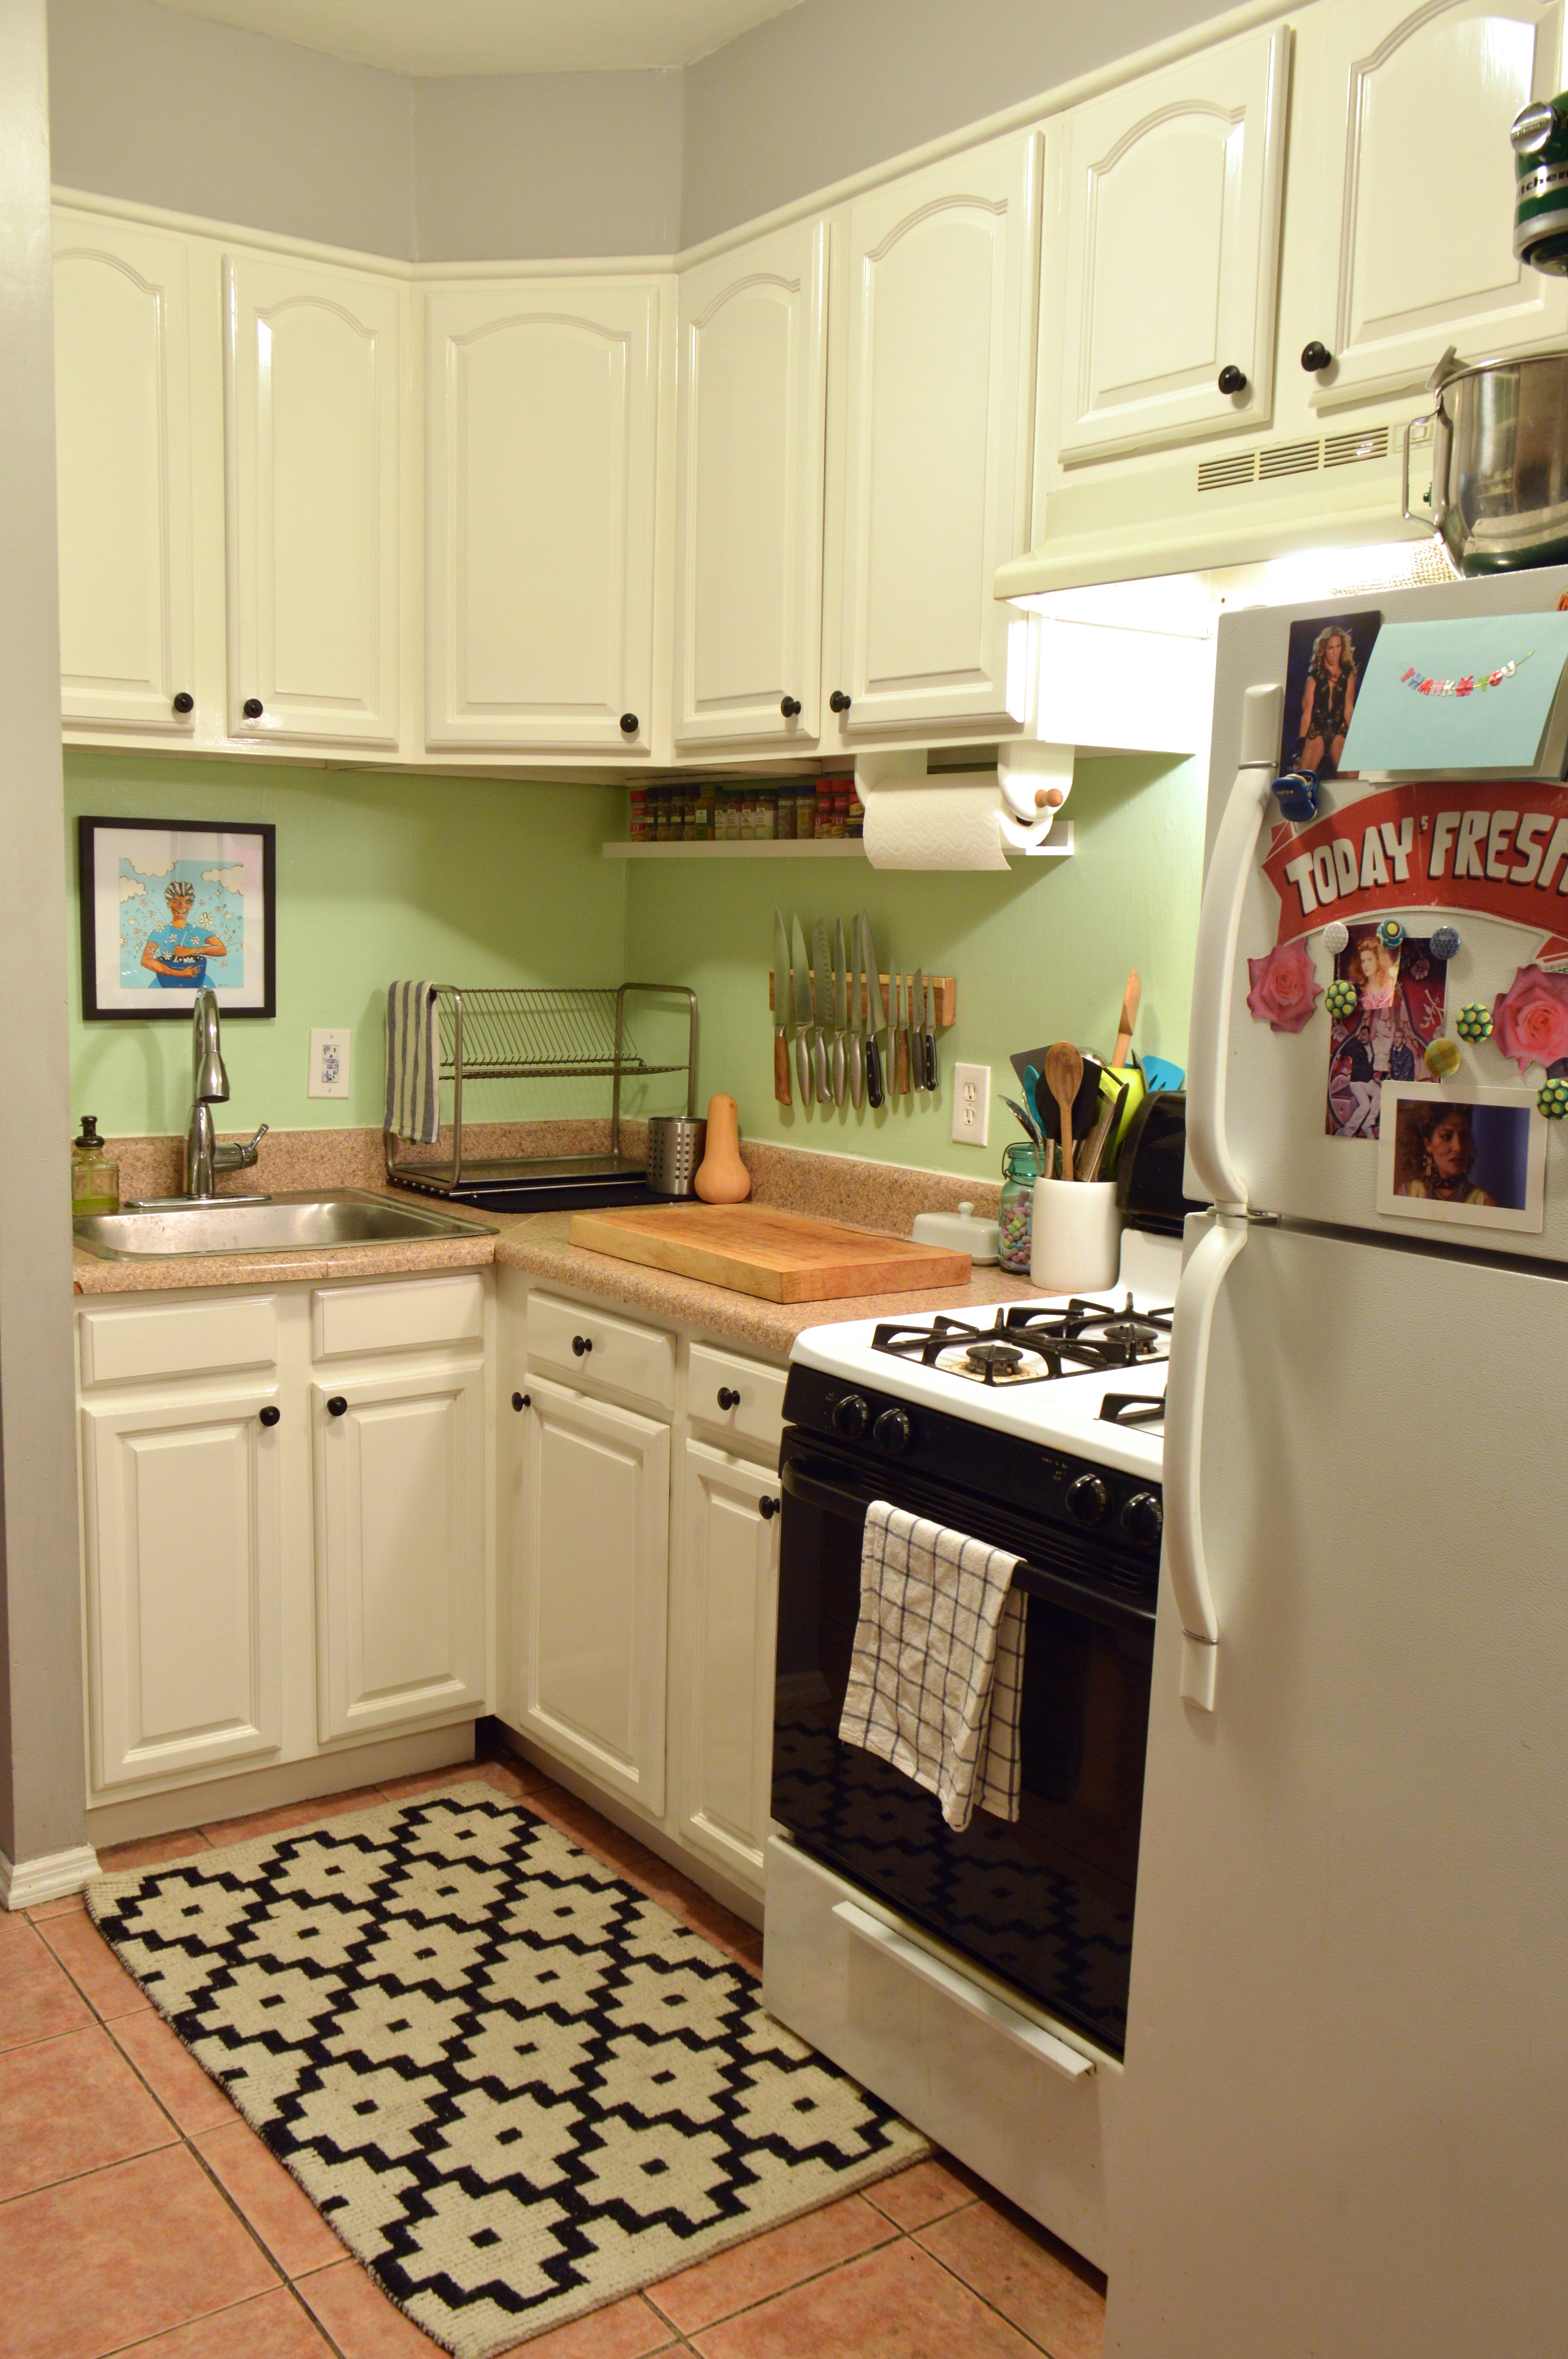
Tada!!! It’s amazing what a little oil based high gloss white paint can do for a room.

Brooklyn Homemaker ugly kitchen facelift project - big reveal

I say it’s mostly finished for now because there are a few additional things I may eventually go back in and revisit, but right now I couldn’t be happier with the changes I’ve made and I don’t plan on doing any more work any time soon. We’ll get to that though.

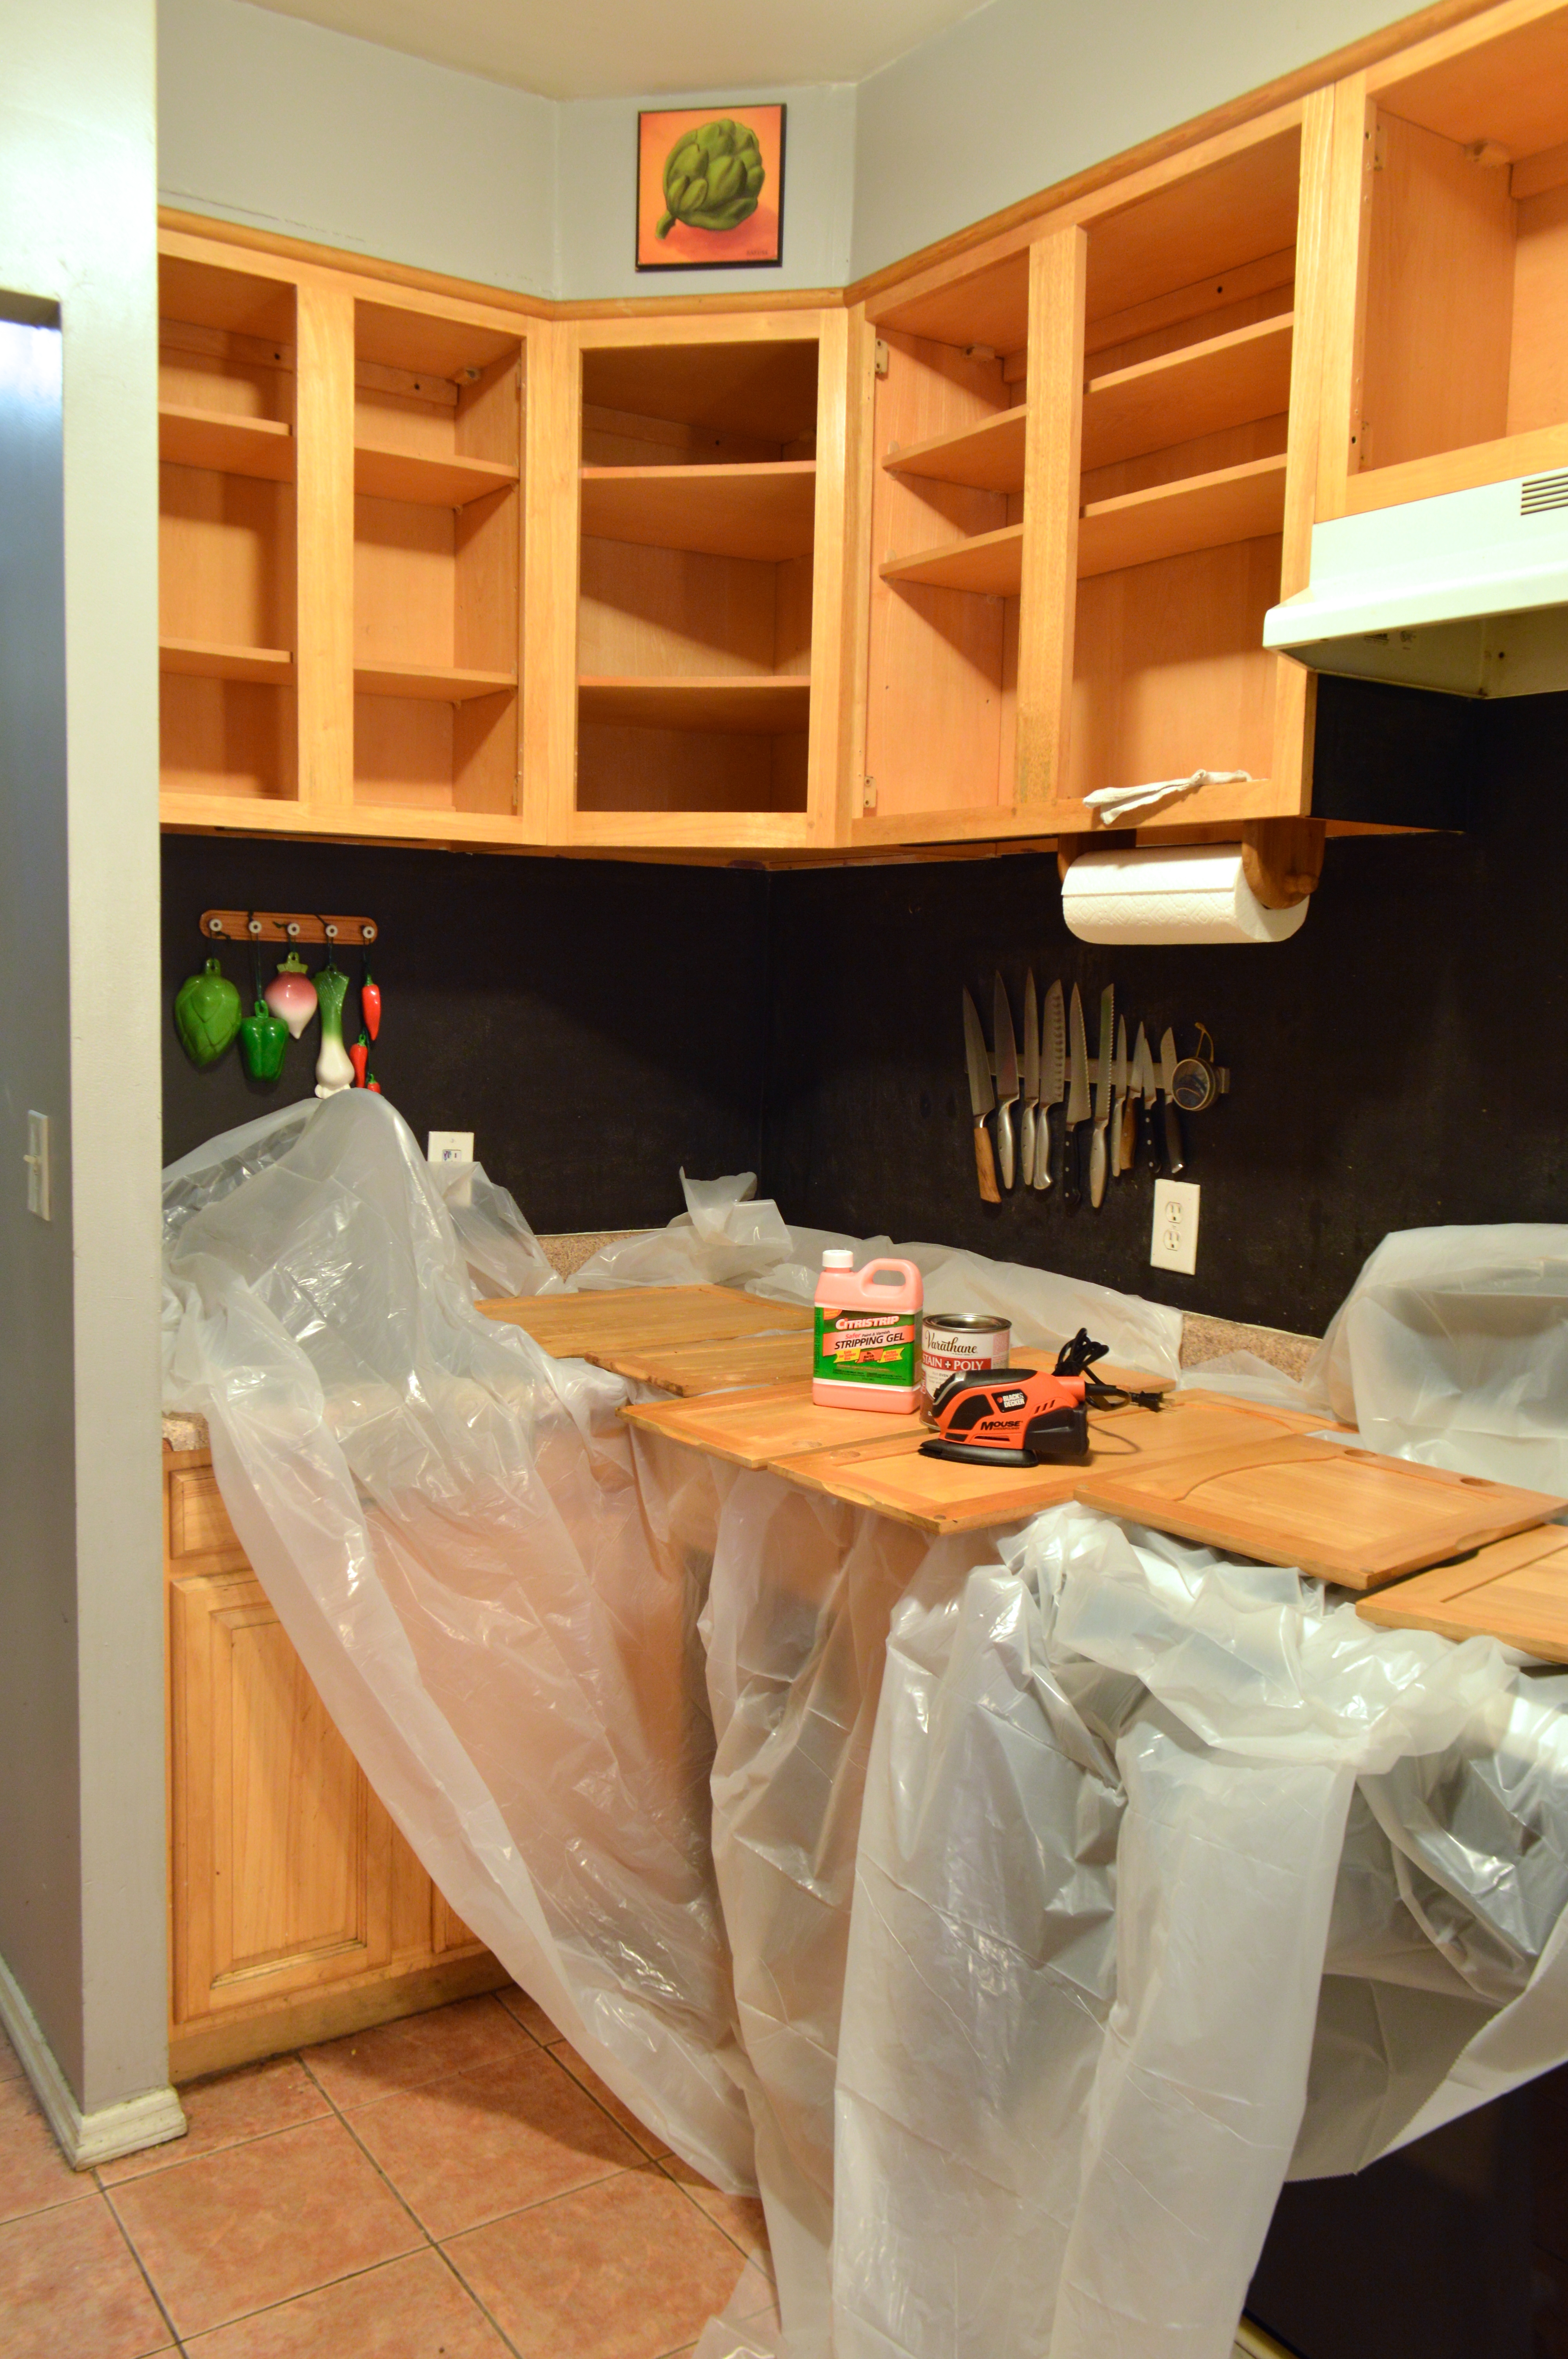
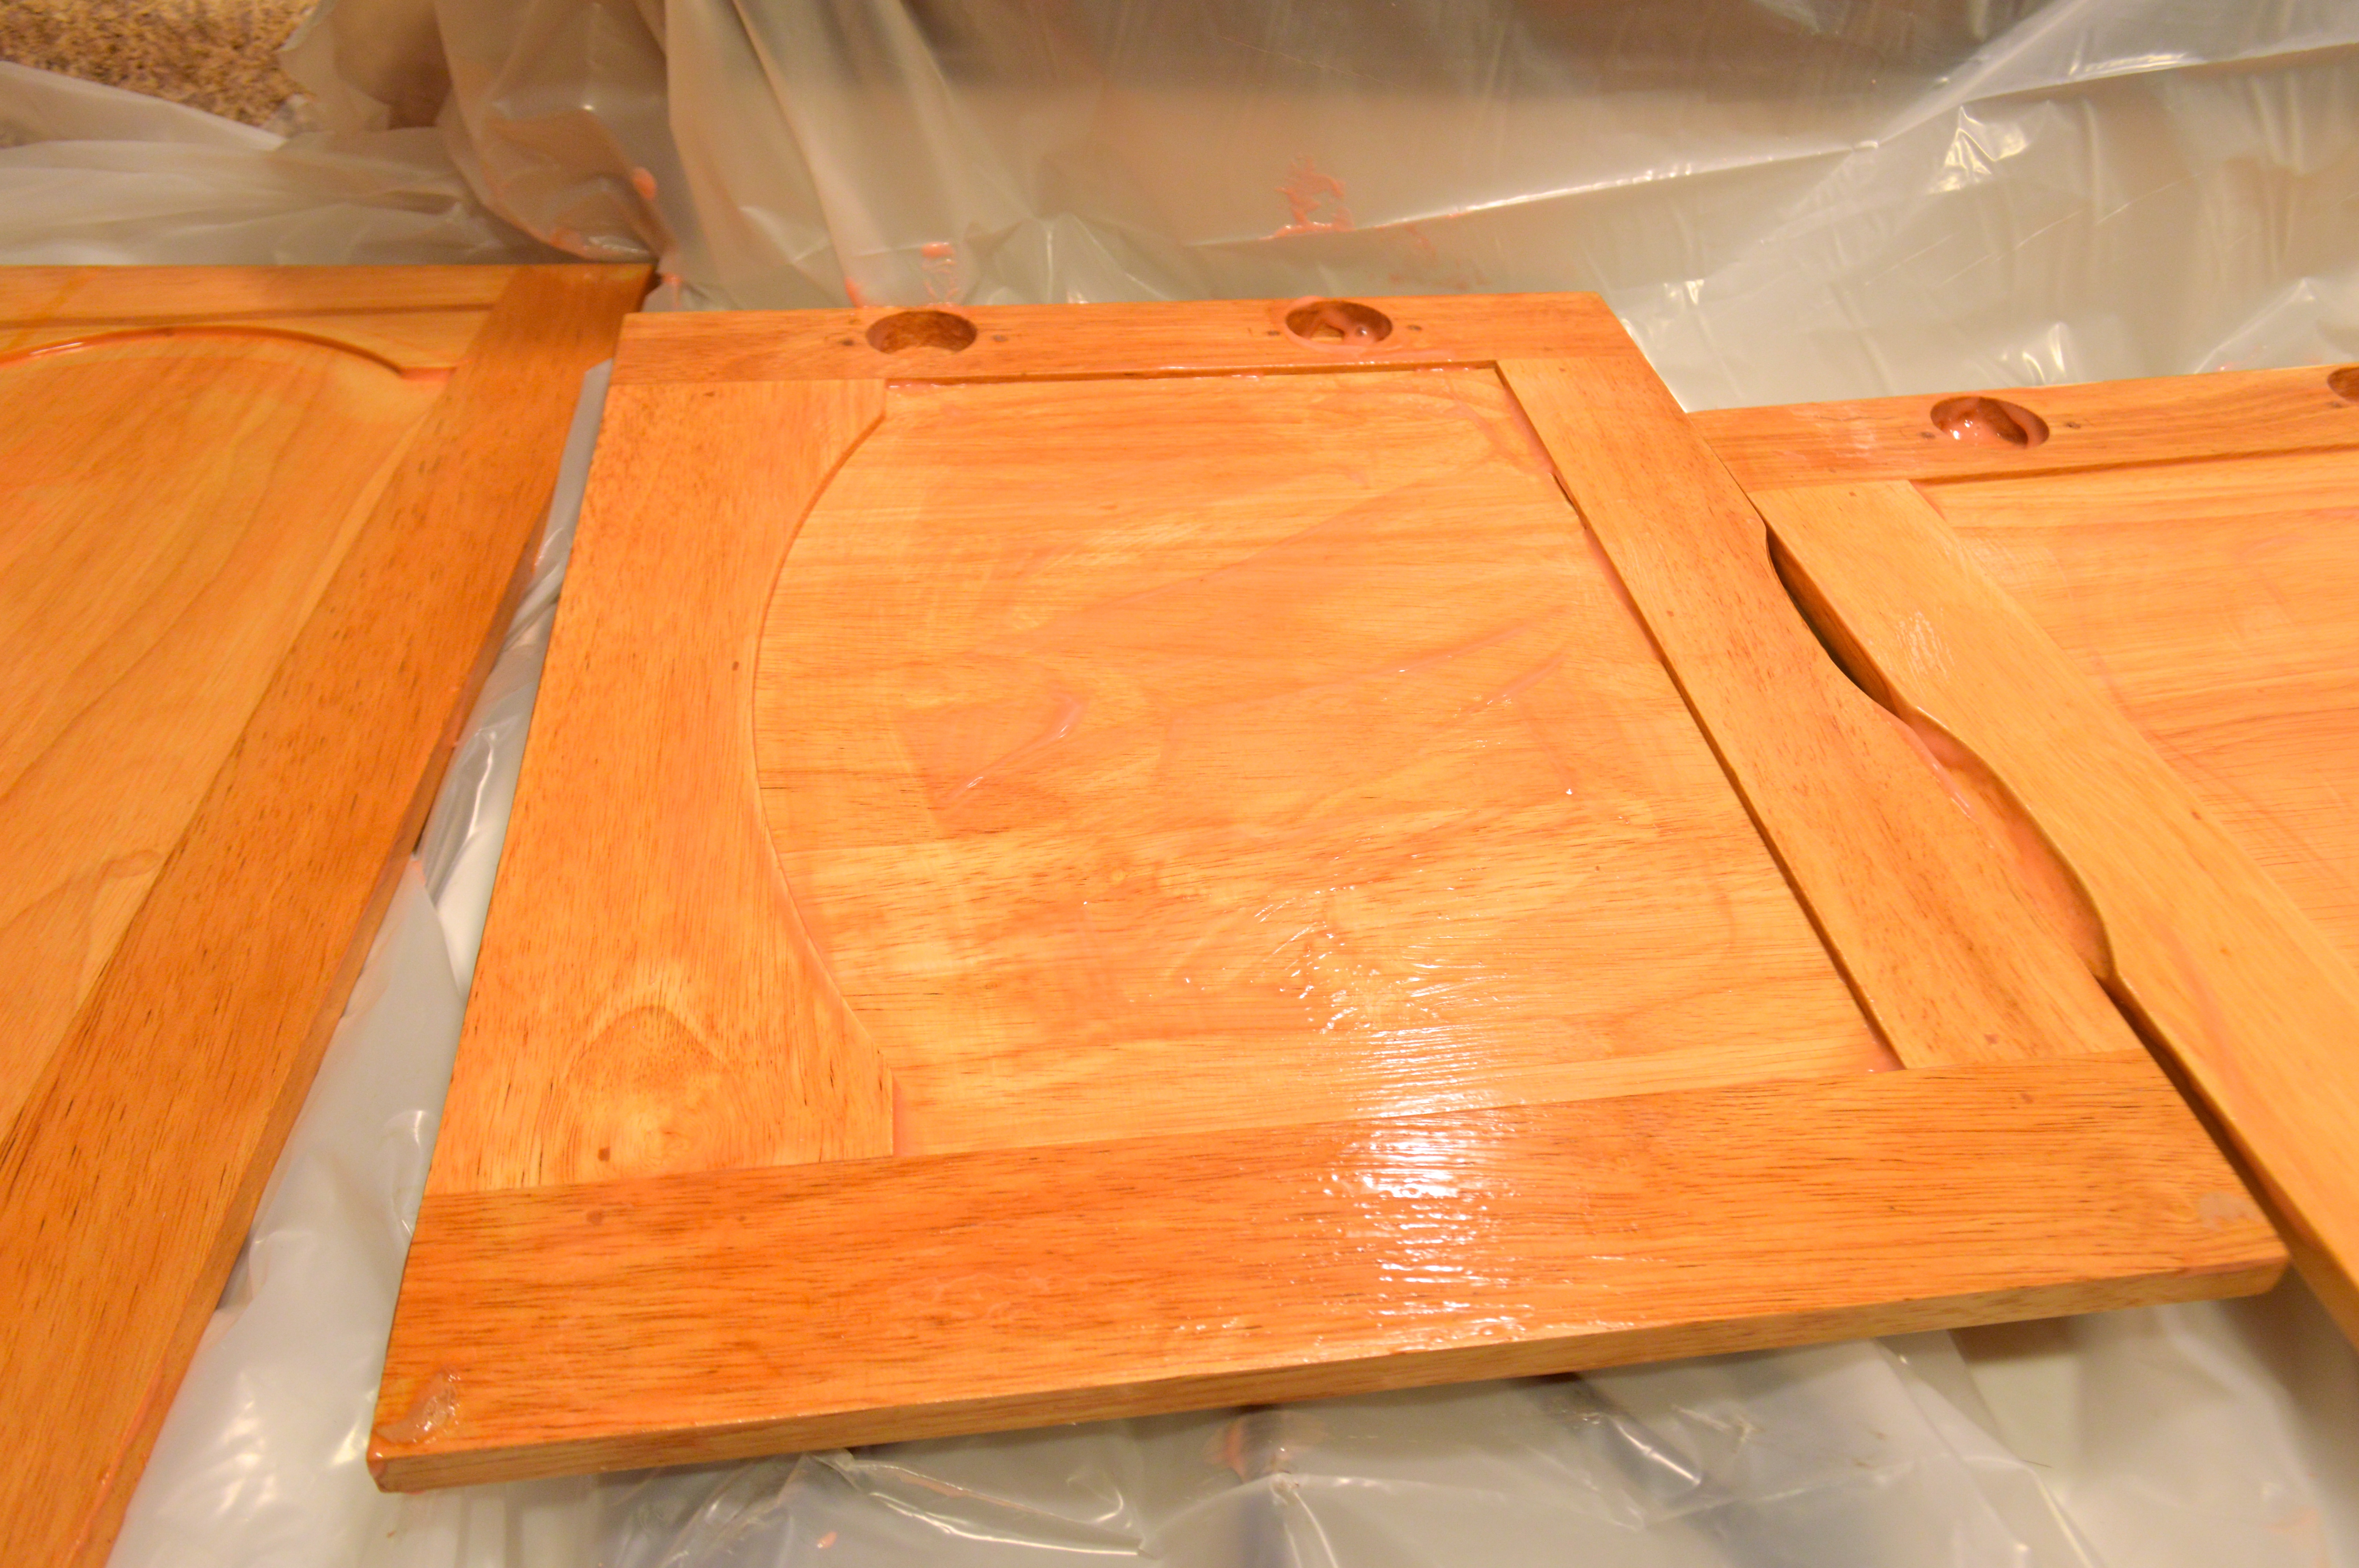
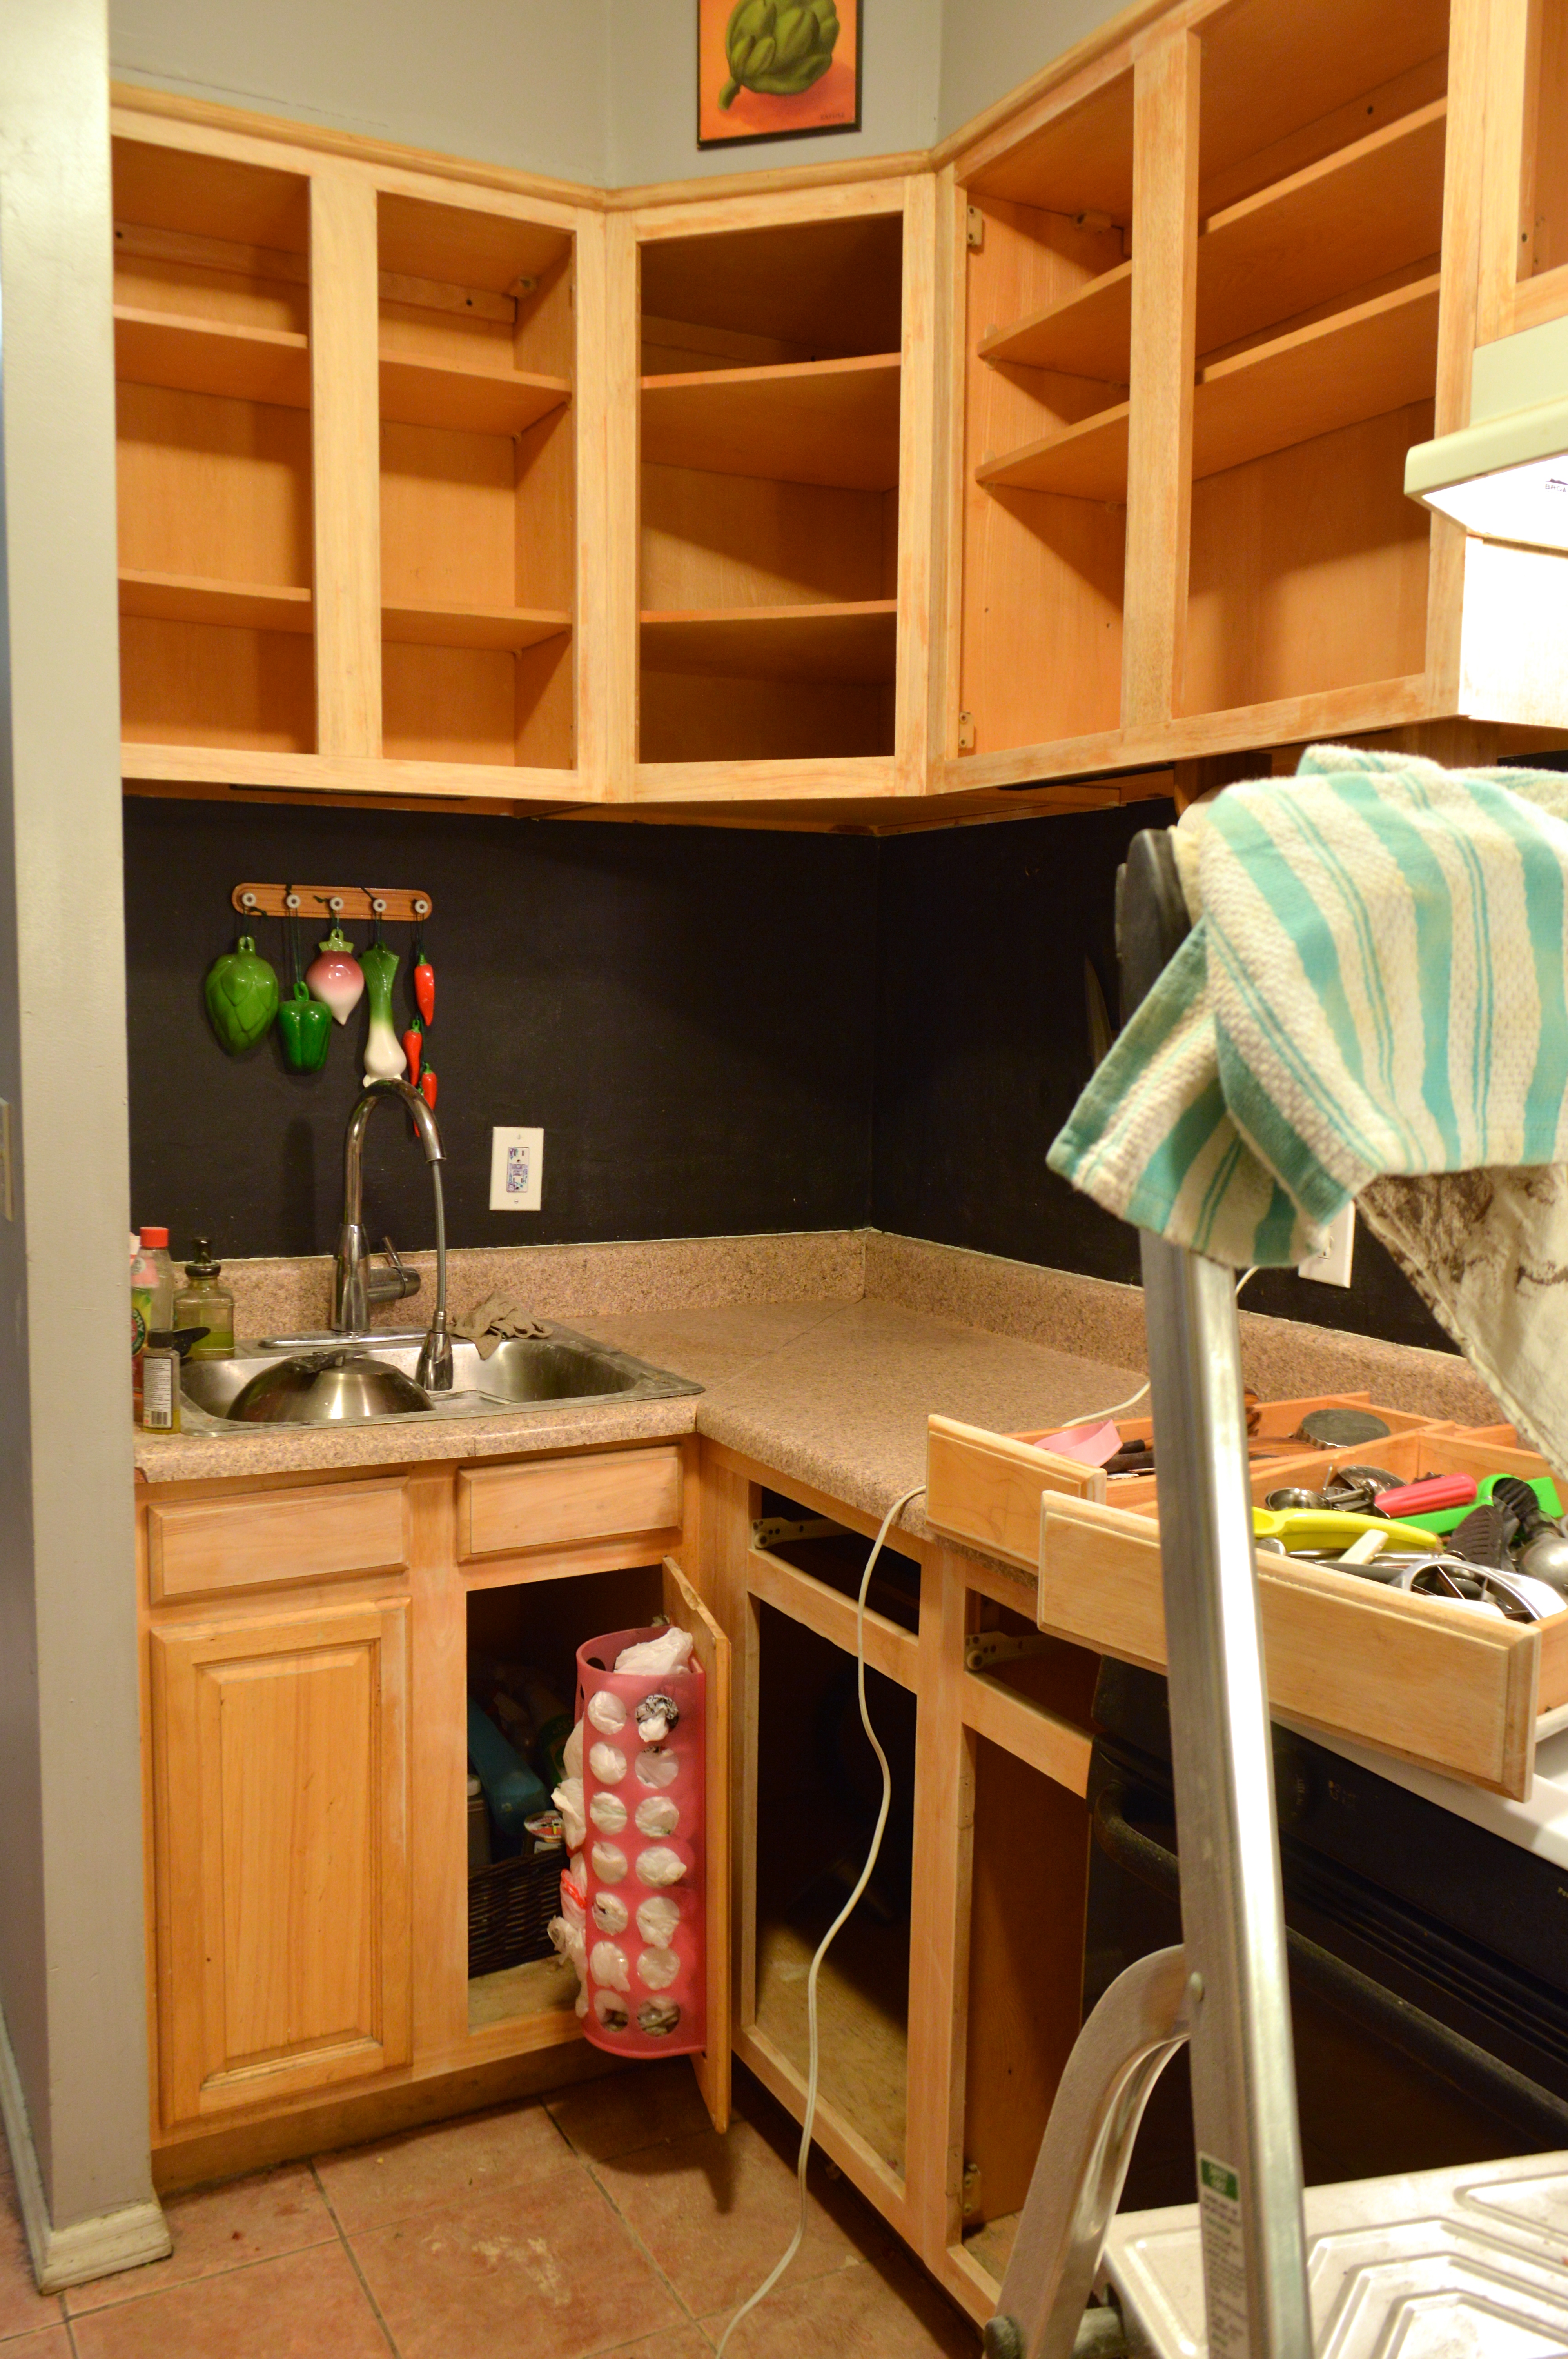
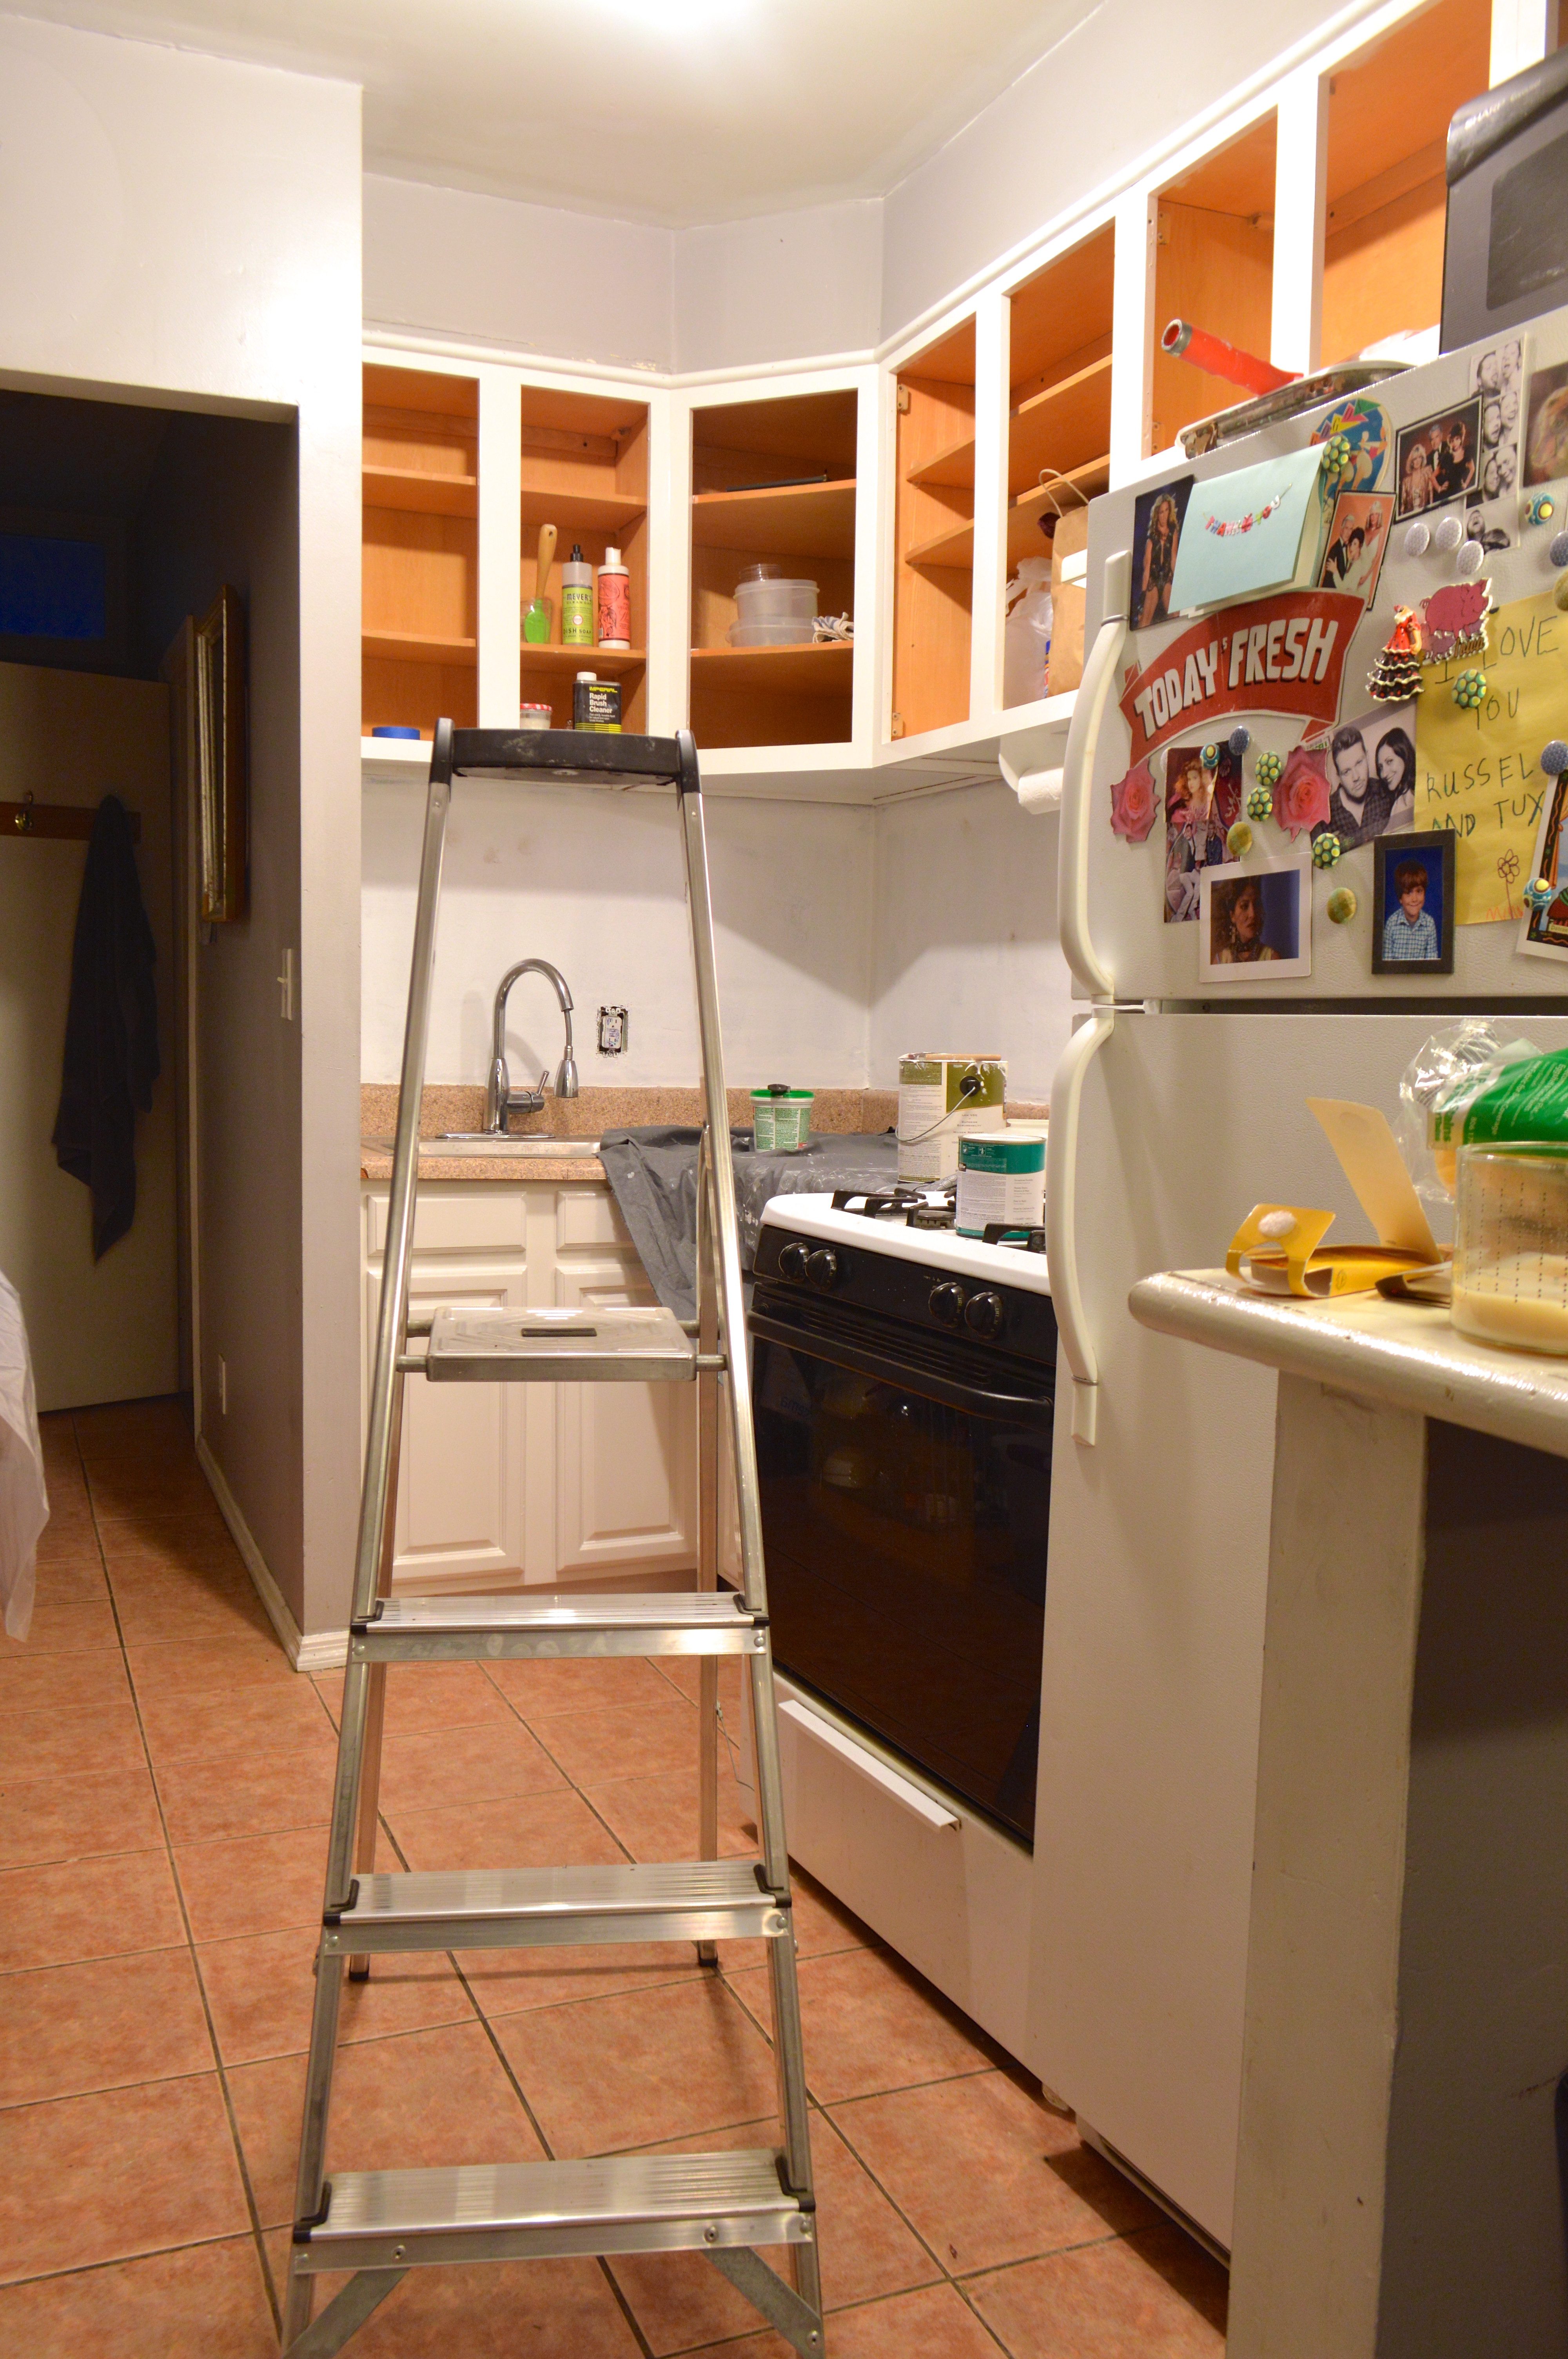
When I last left off, I’d just painted the backsplash, the lower cabinets had their doors back on, and the uppers were still a work in progress. I was beginning to put their contents back in the cabinets so my living room would look a little less like a canned food drive and the space was finally beginning to feel functional again. The doors for the uppers were slowly coming along in the guest room (paint, dry, flip, paint, dry, flip, one day at a time), but I was still being wishy washy about the shelves on the opposite wall. I hadn’t yet taken the plunge on the base cabinet for under the shelves, but I was definitely sure that that’s what I wanted to do. Or so I thought.

Brooklyn Homemaker ugly kitchen facelift project - big reveal

One day while I was waiting for the paint to dry I called my mom to talk about the progress in her new house and I had a big bright idea! The kitchen in her house was too far gone for a simple coat of paint so she’s had all new cabinets installed. One of the features she’s most excited about in her fancy new kitchen is the deep wide drawers she’s put in in most of the lowers rather than traditional cabinets. Drawers are supposed to be easier for storing things like pots and pans and tupperware, rather than having them all heaped into a pile in the back of your cabinets. Since the drawers can be pulled all the way out it’s also easier to find things rather than digging around on your hands and knees to find whatever might be pushed to the back.

Jealous of such a bright new trend in modern cabinet making, I wished that I could share the same benefits without the same made-to-order price tag. Then it hit me!

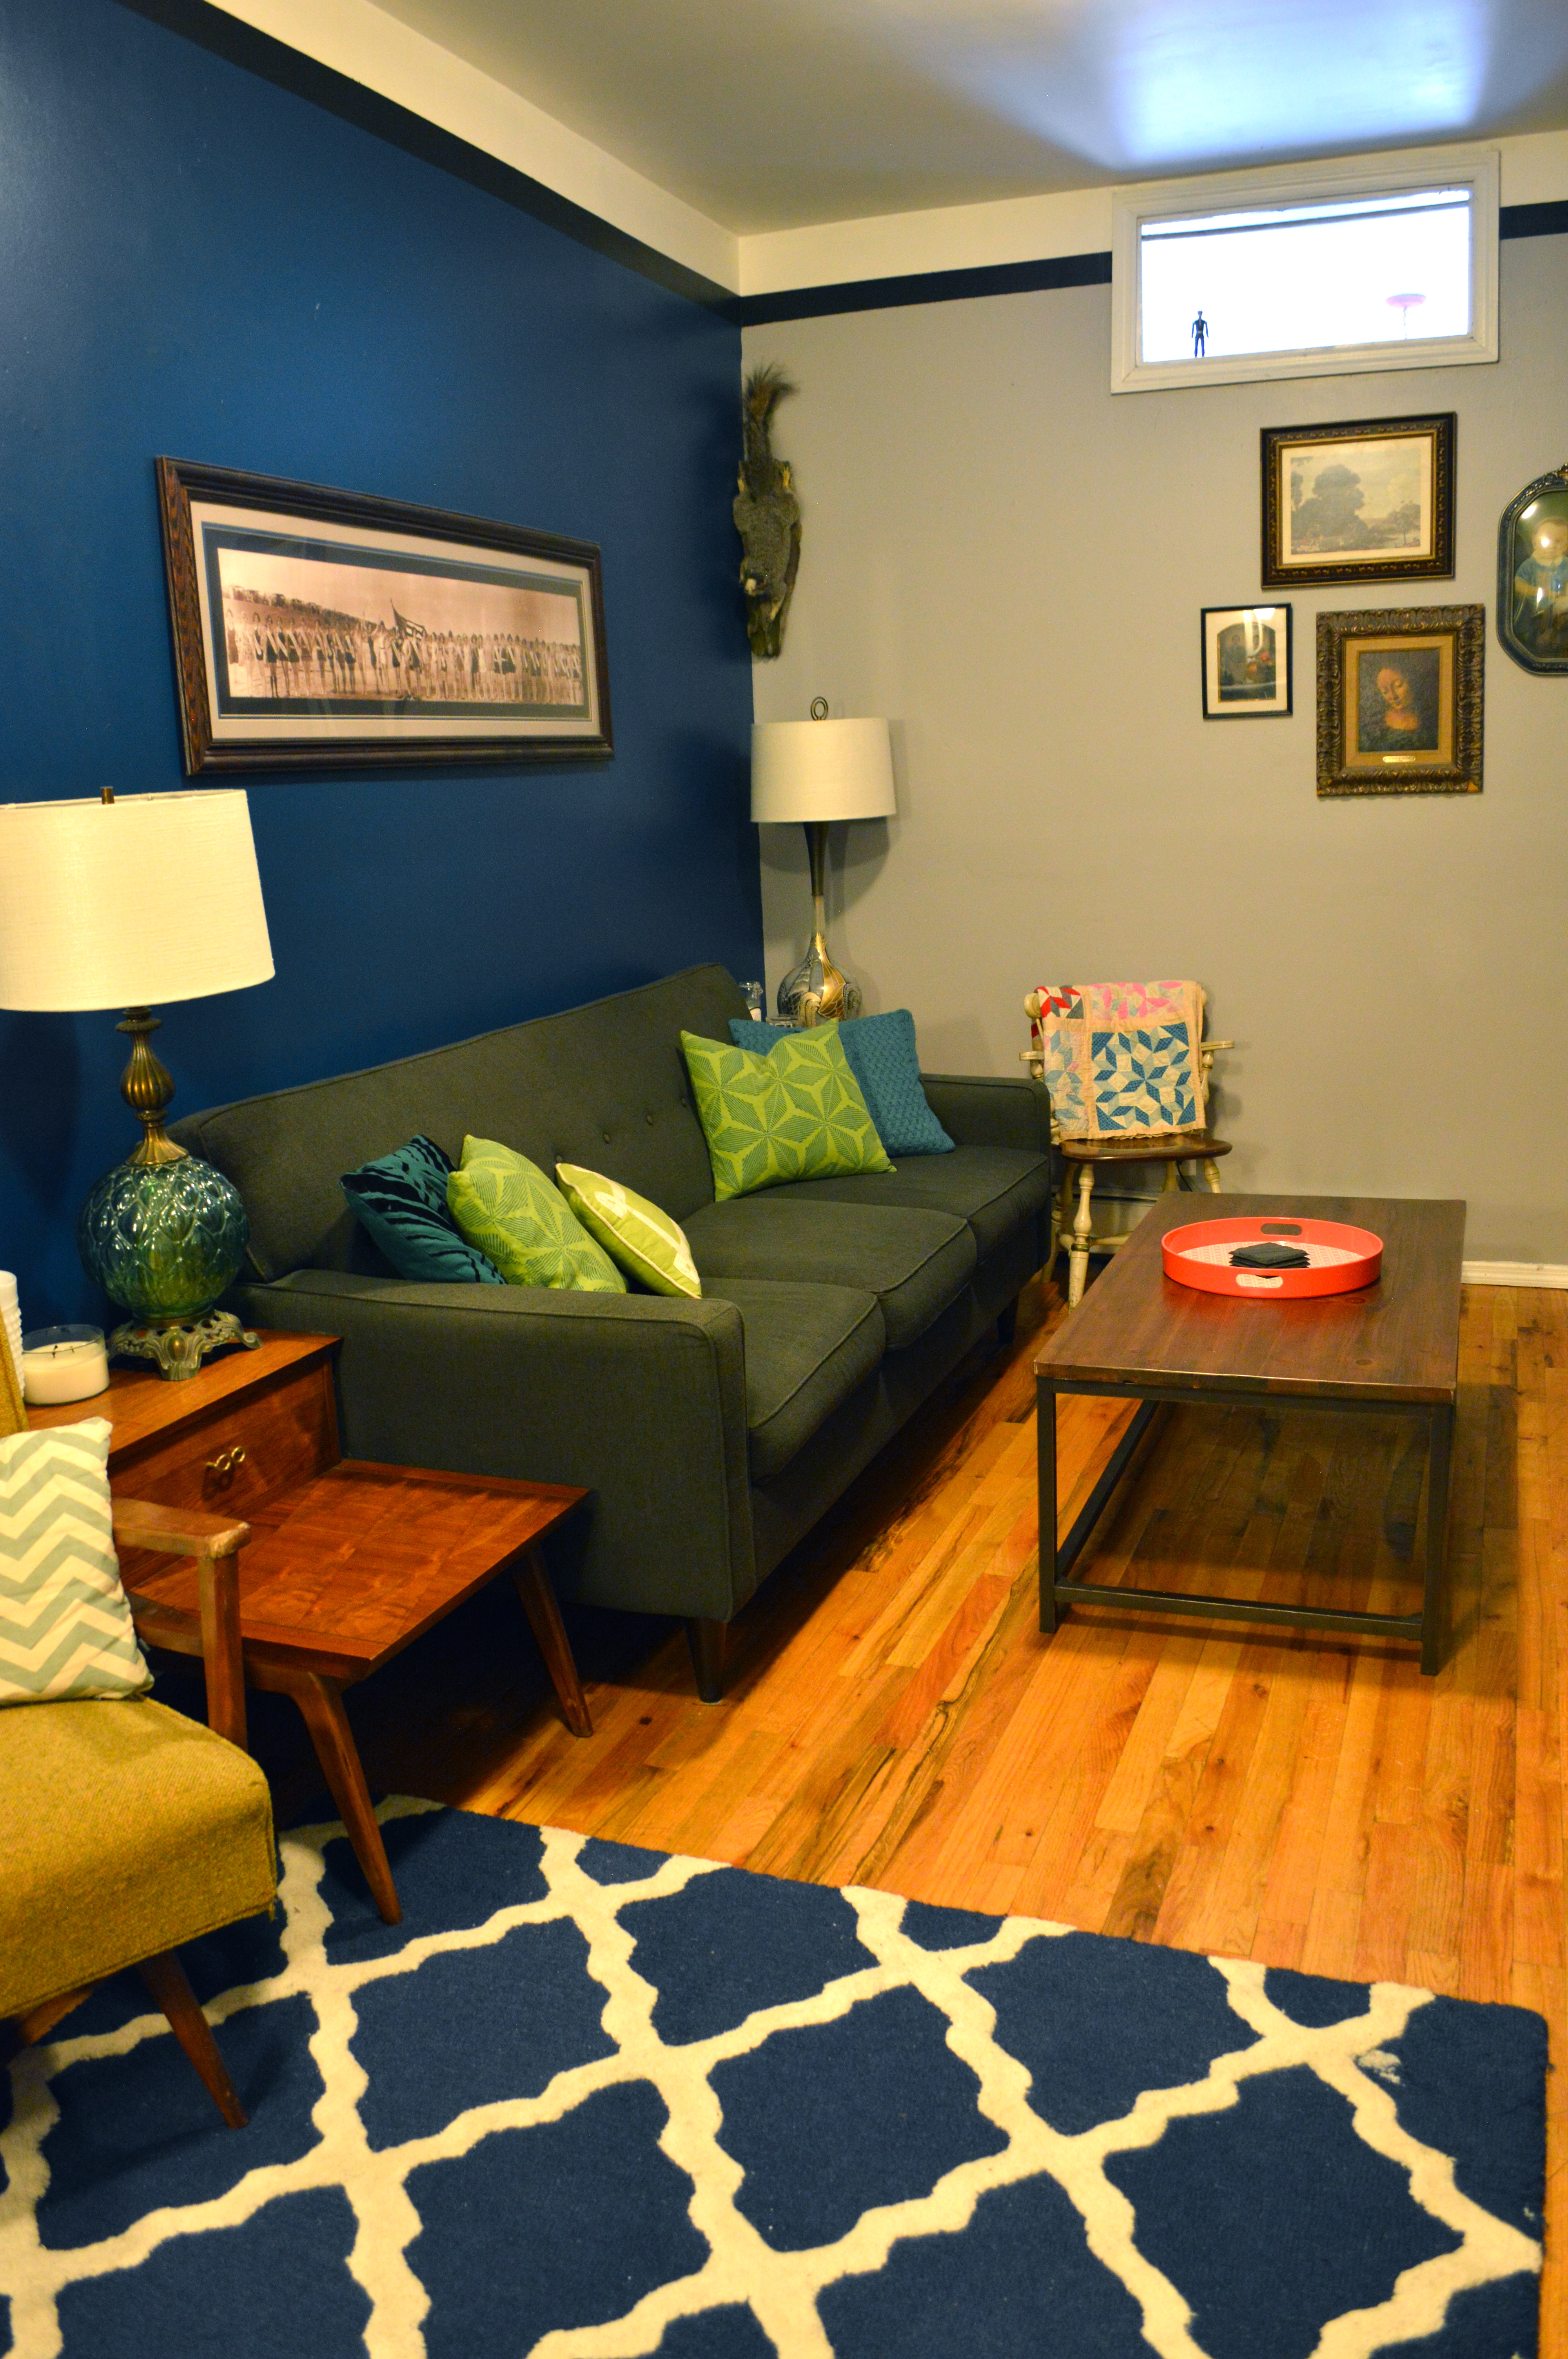
You know what has nice wide drawers that slide all the way out for easy access to the contents stored within? A dresser! A plain old ordinary dresser that already has it’s own top and wouldn’t need to have a countertop added afterward! In a bank of cabinets in a large kitchen a plain old dresser wouldn’t work because you’d need several of them all the same shape and size and color. For the space I was trying to fill though, it would be easy to find a dresser that was the right(ish) size and would already be finished and ready to use. The tops of normal dressers don’t really make ideal counter surfaces, but in this case I only need something that could be used to rest the occasional bowl of ingredients or tray of cookies, nothing that would ever be used as an actual work surface.

While this solution might not work in most kitchens for primary storage or counter space, I think it’s a great way to add a bit of character along with some extra storage to a blank wall in a kitchen where you don’t mind if everything doesn’t match perfectly. After snooping around on pinterest a bit, I also realized an attractive old dresser also makes a great coffee bar in a kitchen or a dry bar or buffet in a dining room. If you do change out the top for something like a butcher block, a dresser can even make a great kitchen island!

I didn’t want (and didn’t have the budget for) a brand new dresser so I took to the for-sale ads of craigslist to look for something with nice mid-century clean lines. After a few days of looking I found something that looked like it would fit well in the space and was practically being given away for a song. I carted it home in a cab after work and haven’t looked back since. It’s a few inches shy of counter height and about 10 or so inches shorter than I thought it should be to fill the space, but functionally I’m MUCH happier with it than the storage cart that was there before. I also love the looks of it to boot!

Brooklyn Homemaker ugly kitchen facelift project - big reveal

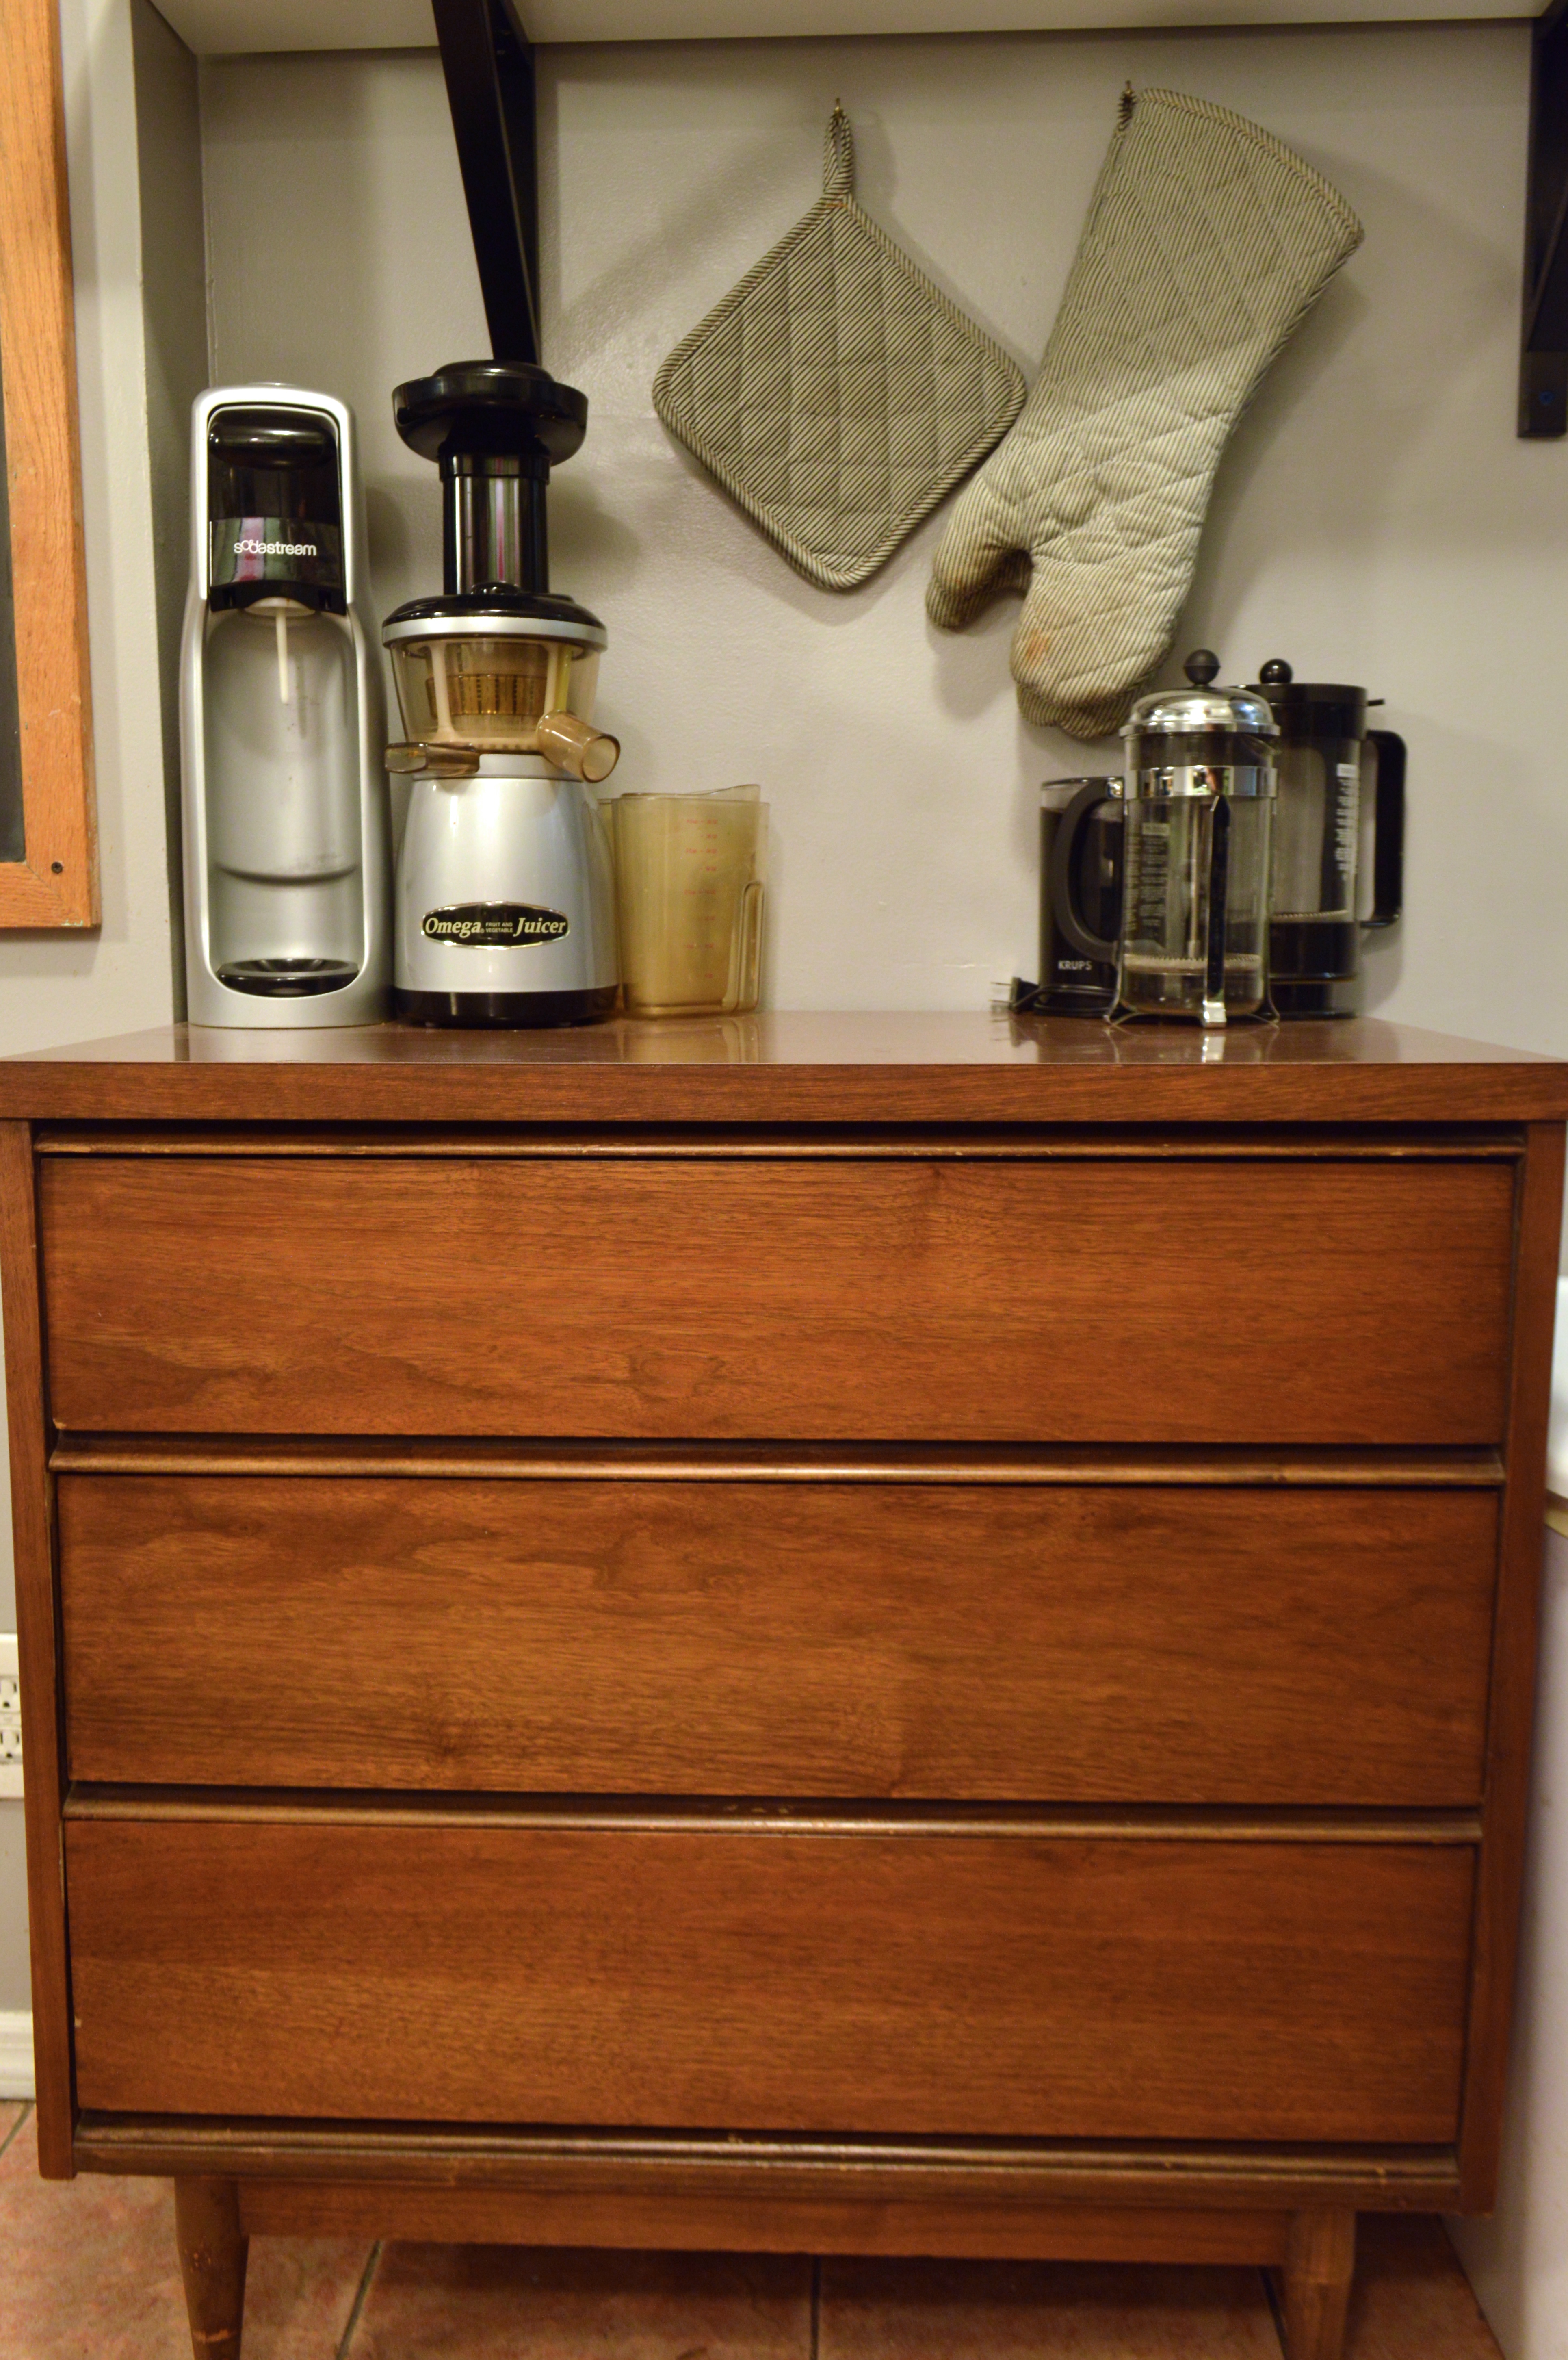
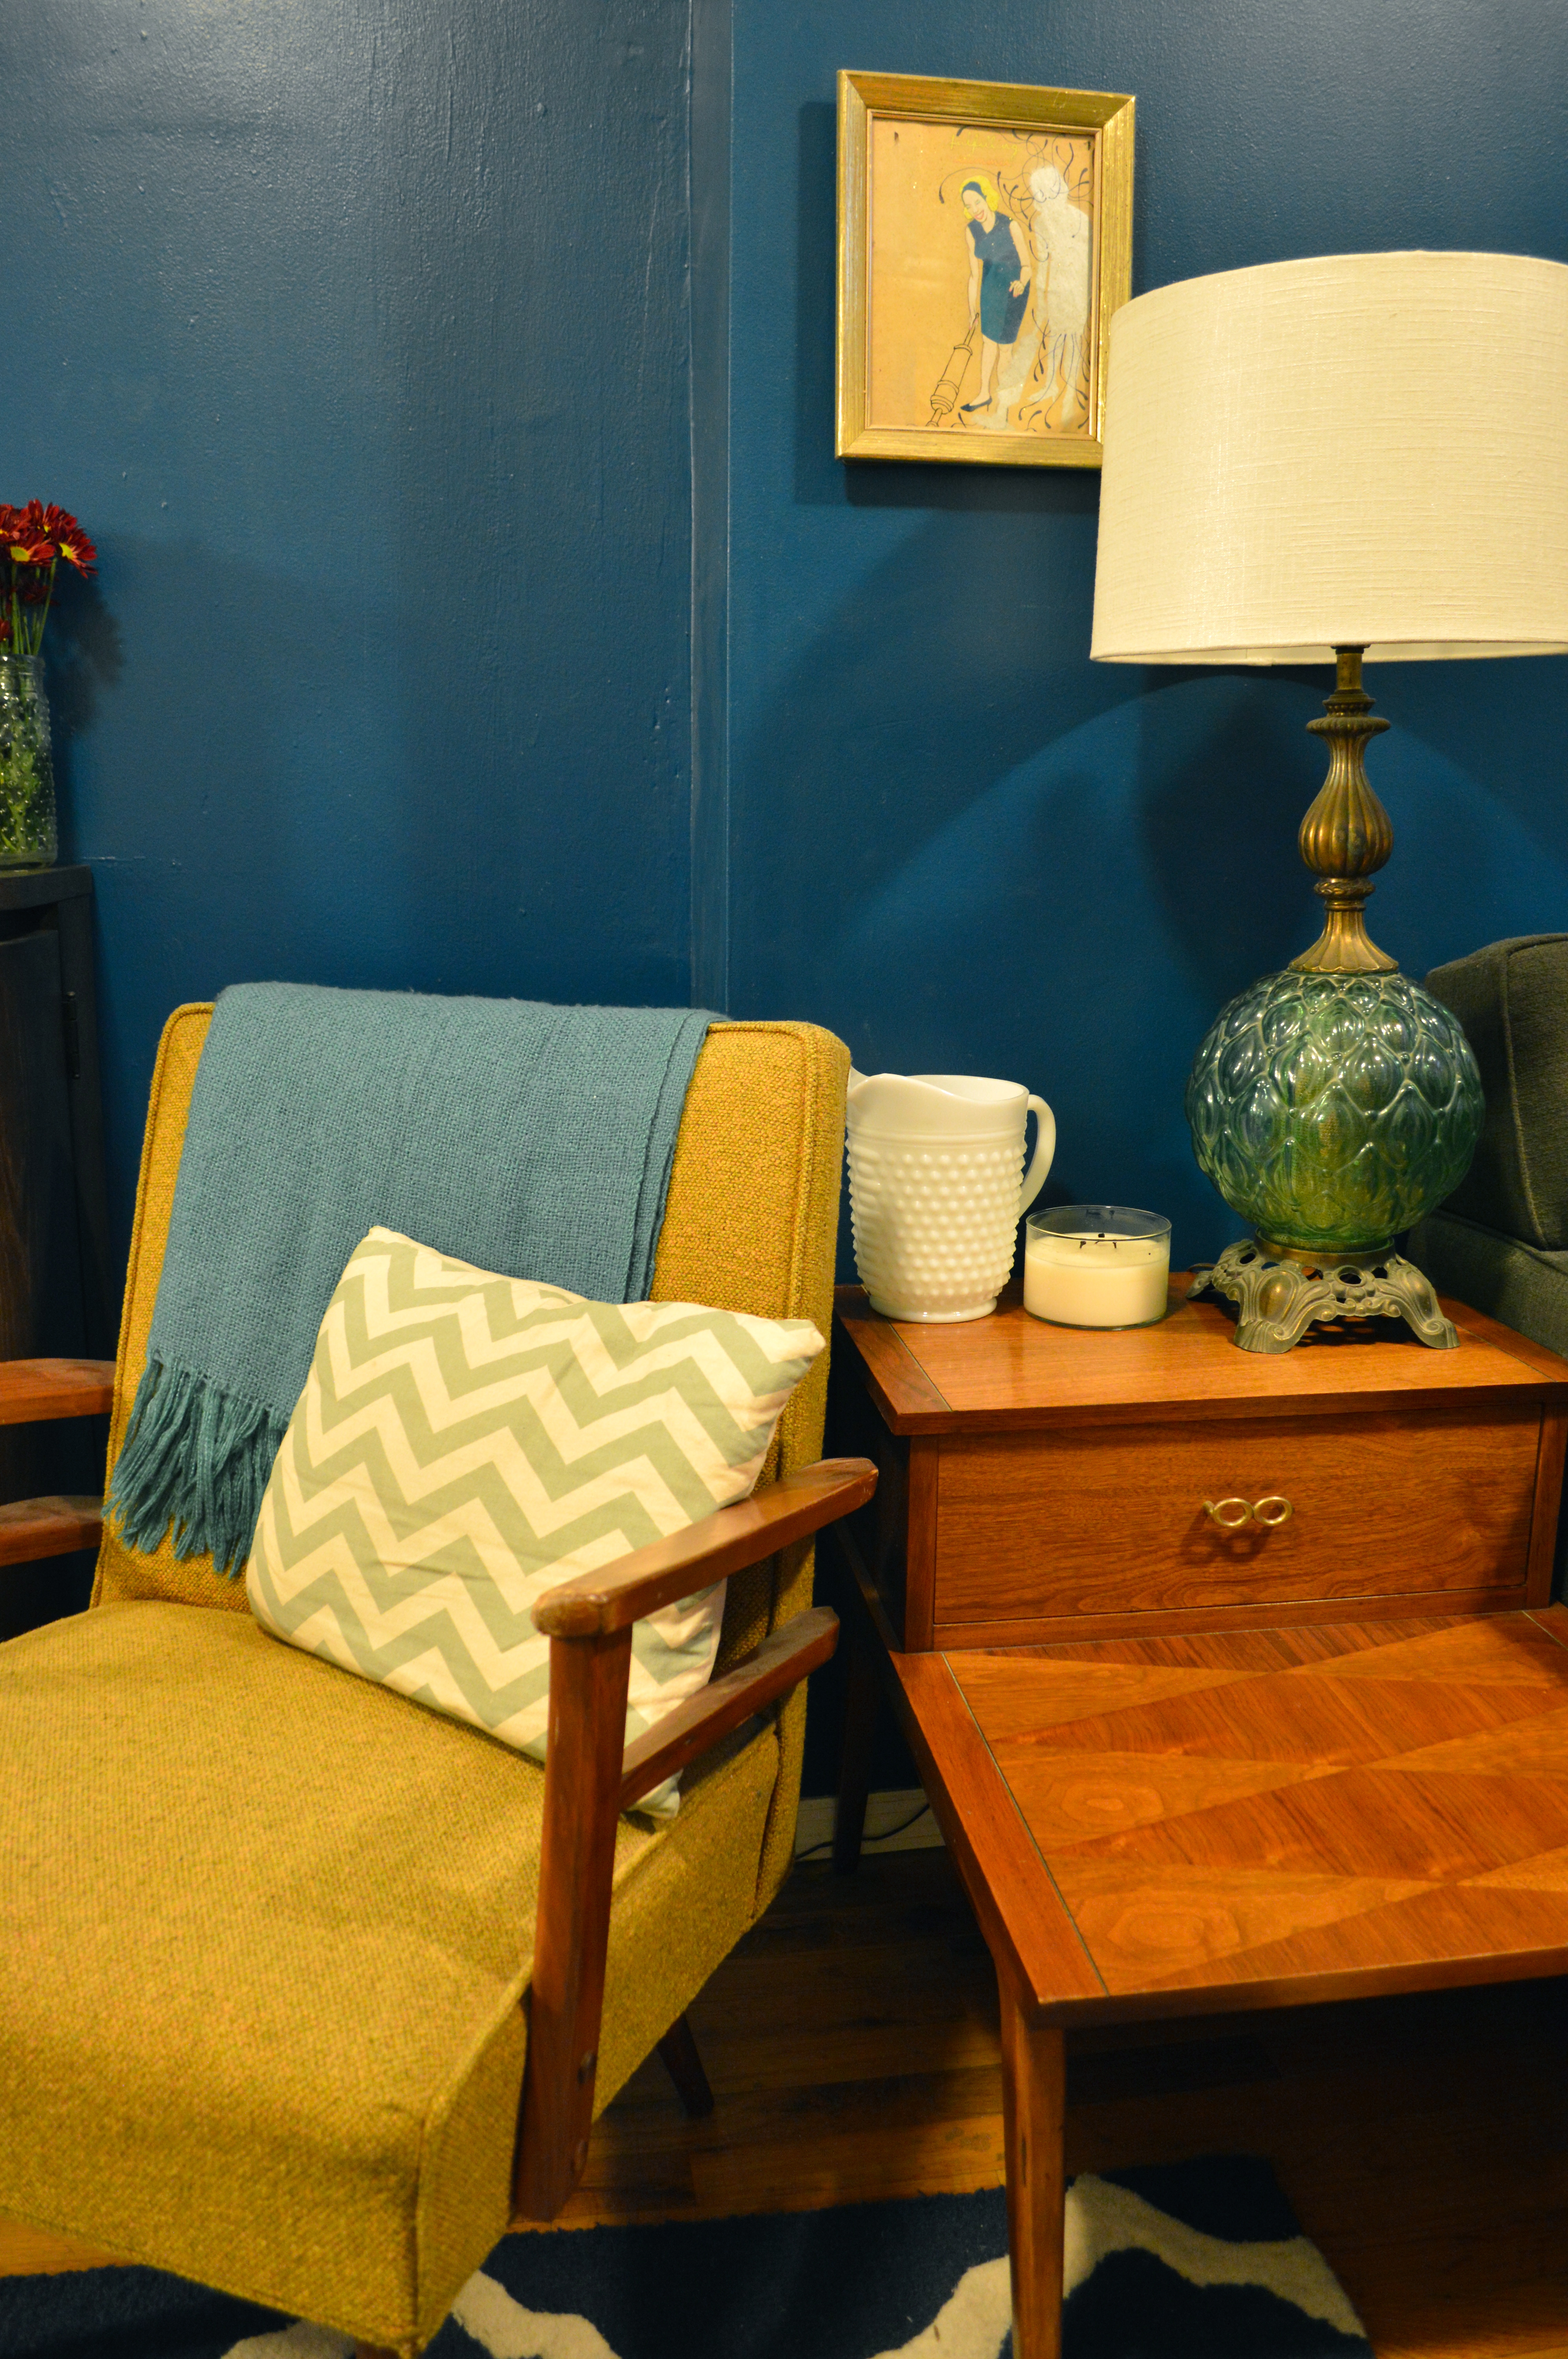
While it does have some dings and scratches, it’s in really great shape and I was able to warm up the wood and make it shine using the oil soap, steel wool, wood oil method from Manhattan Nest.

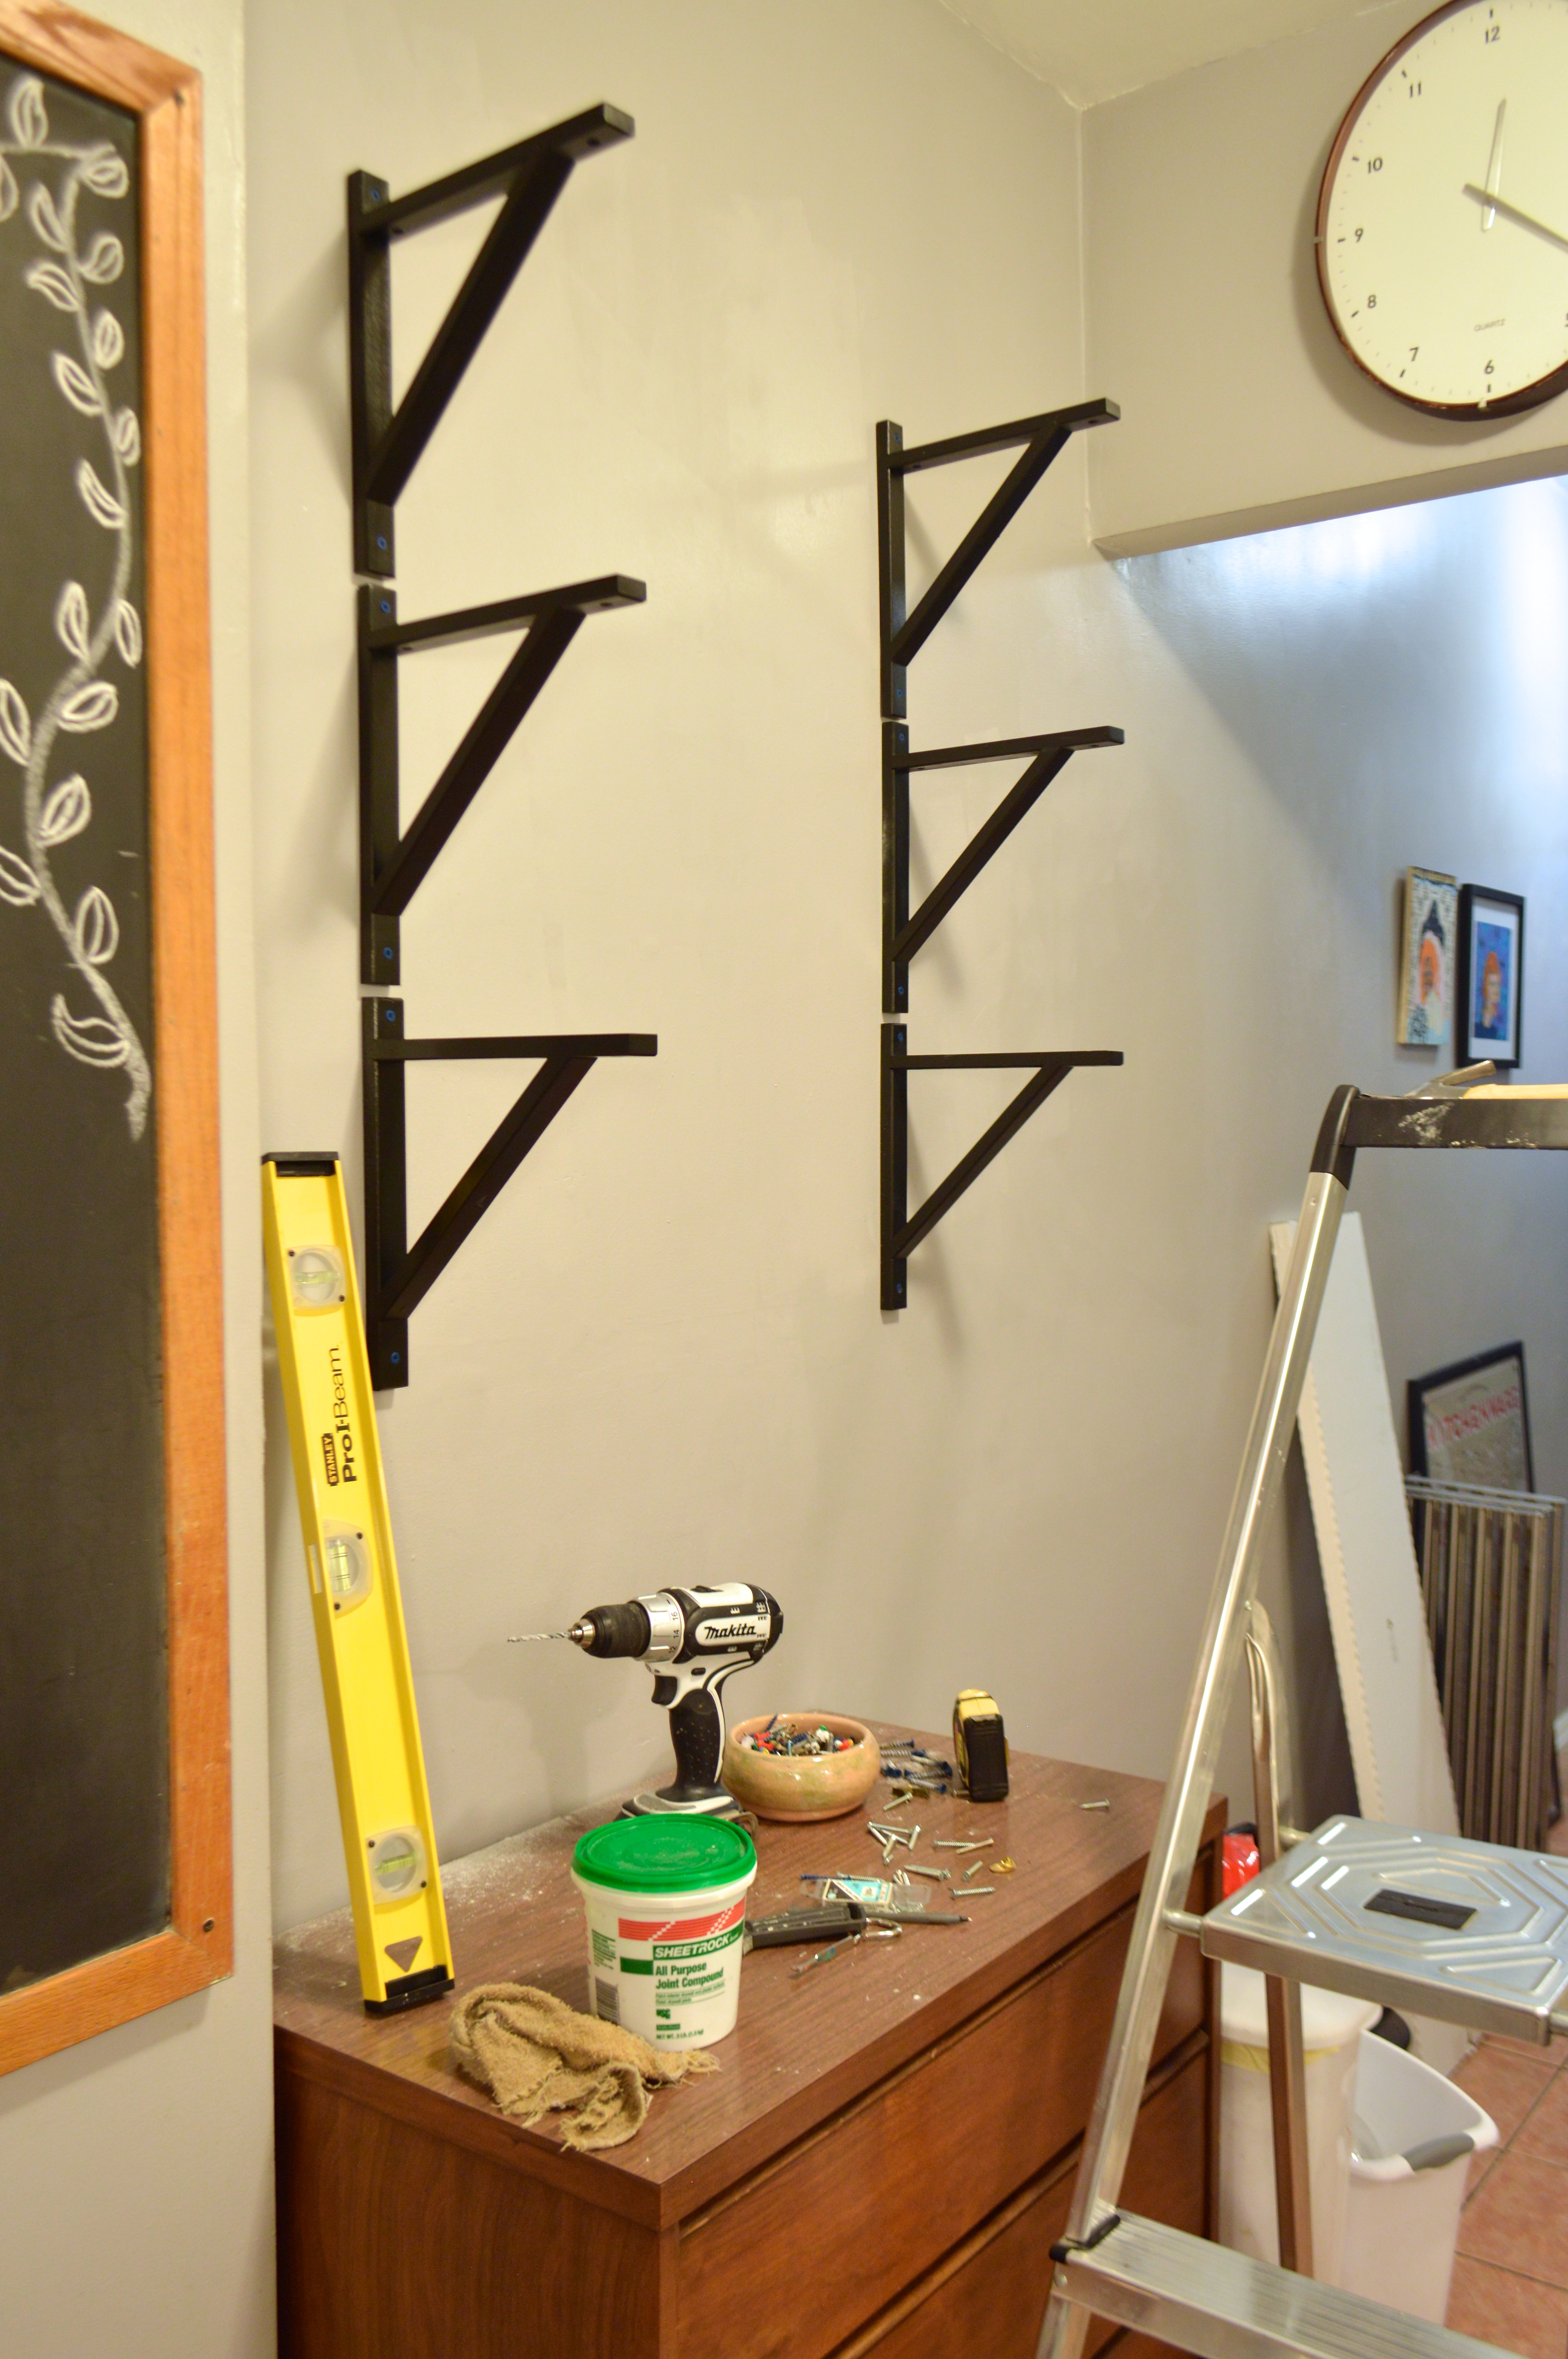
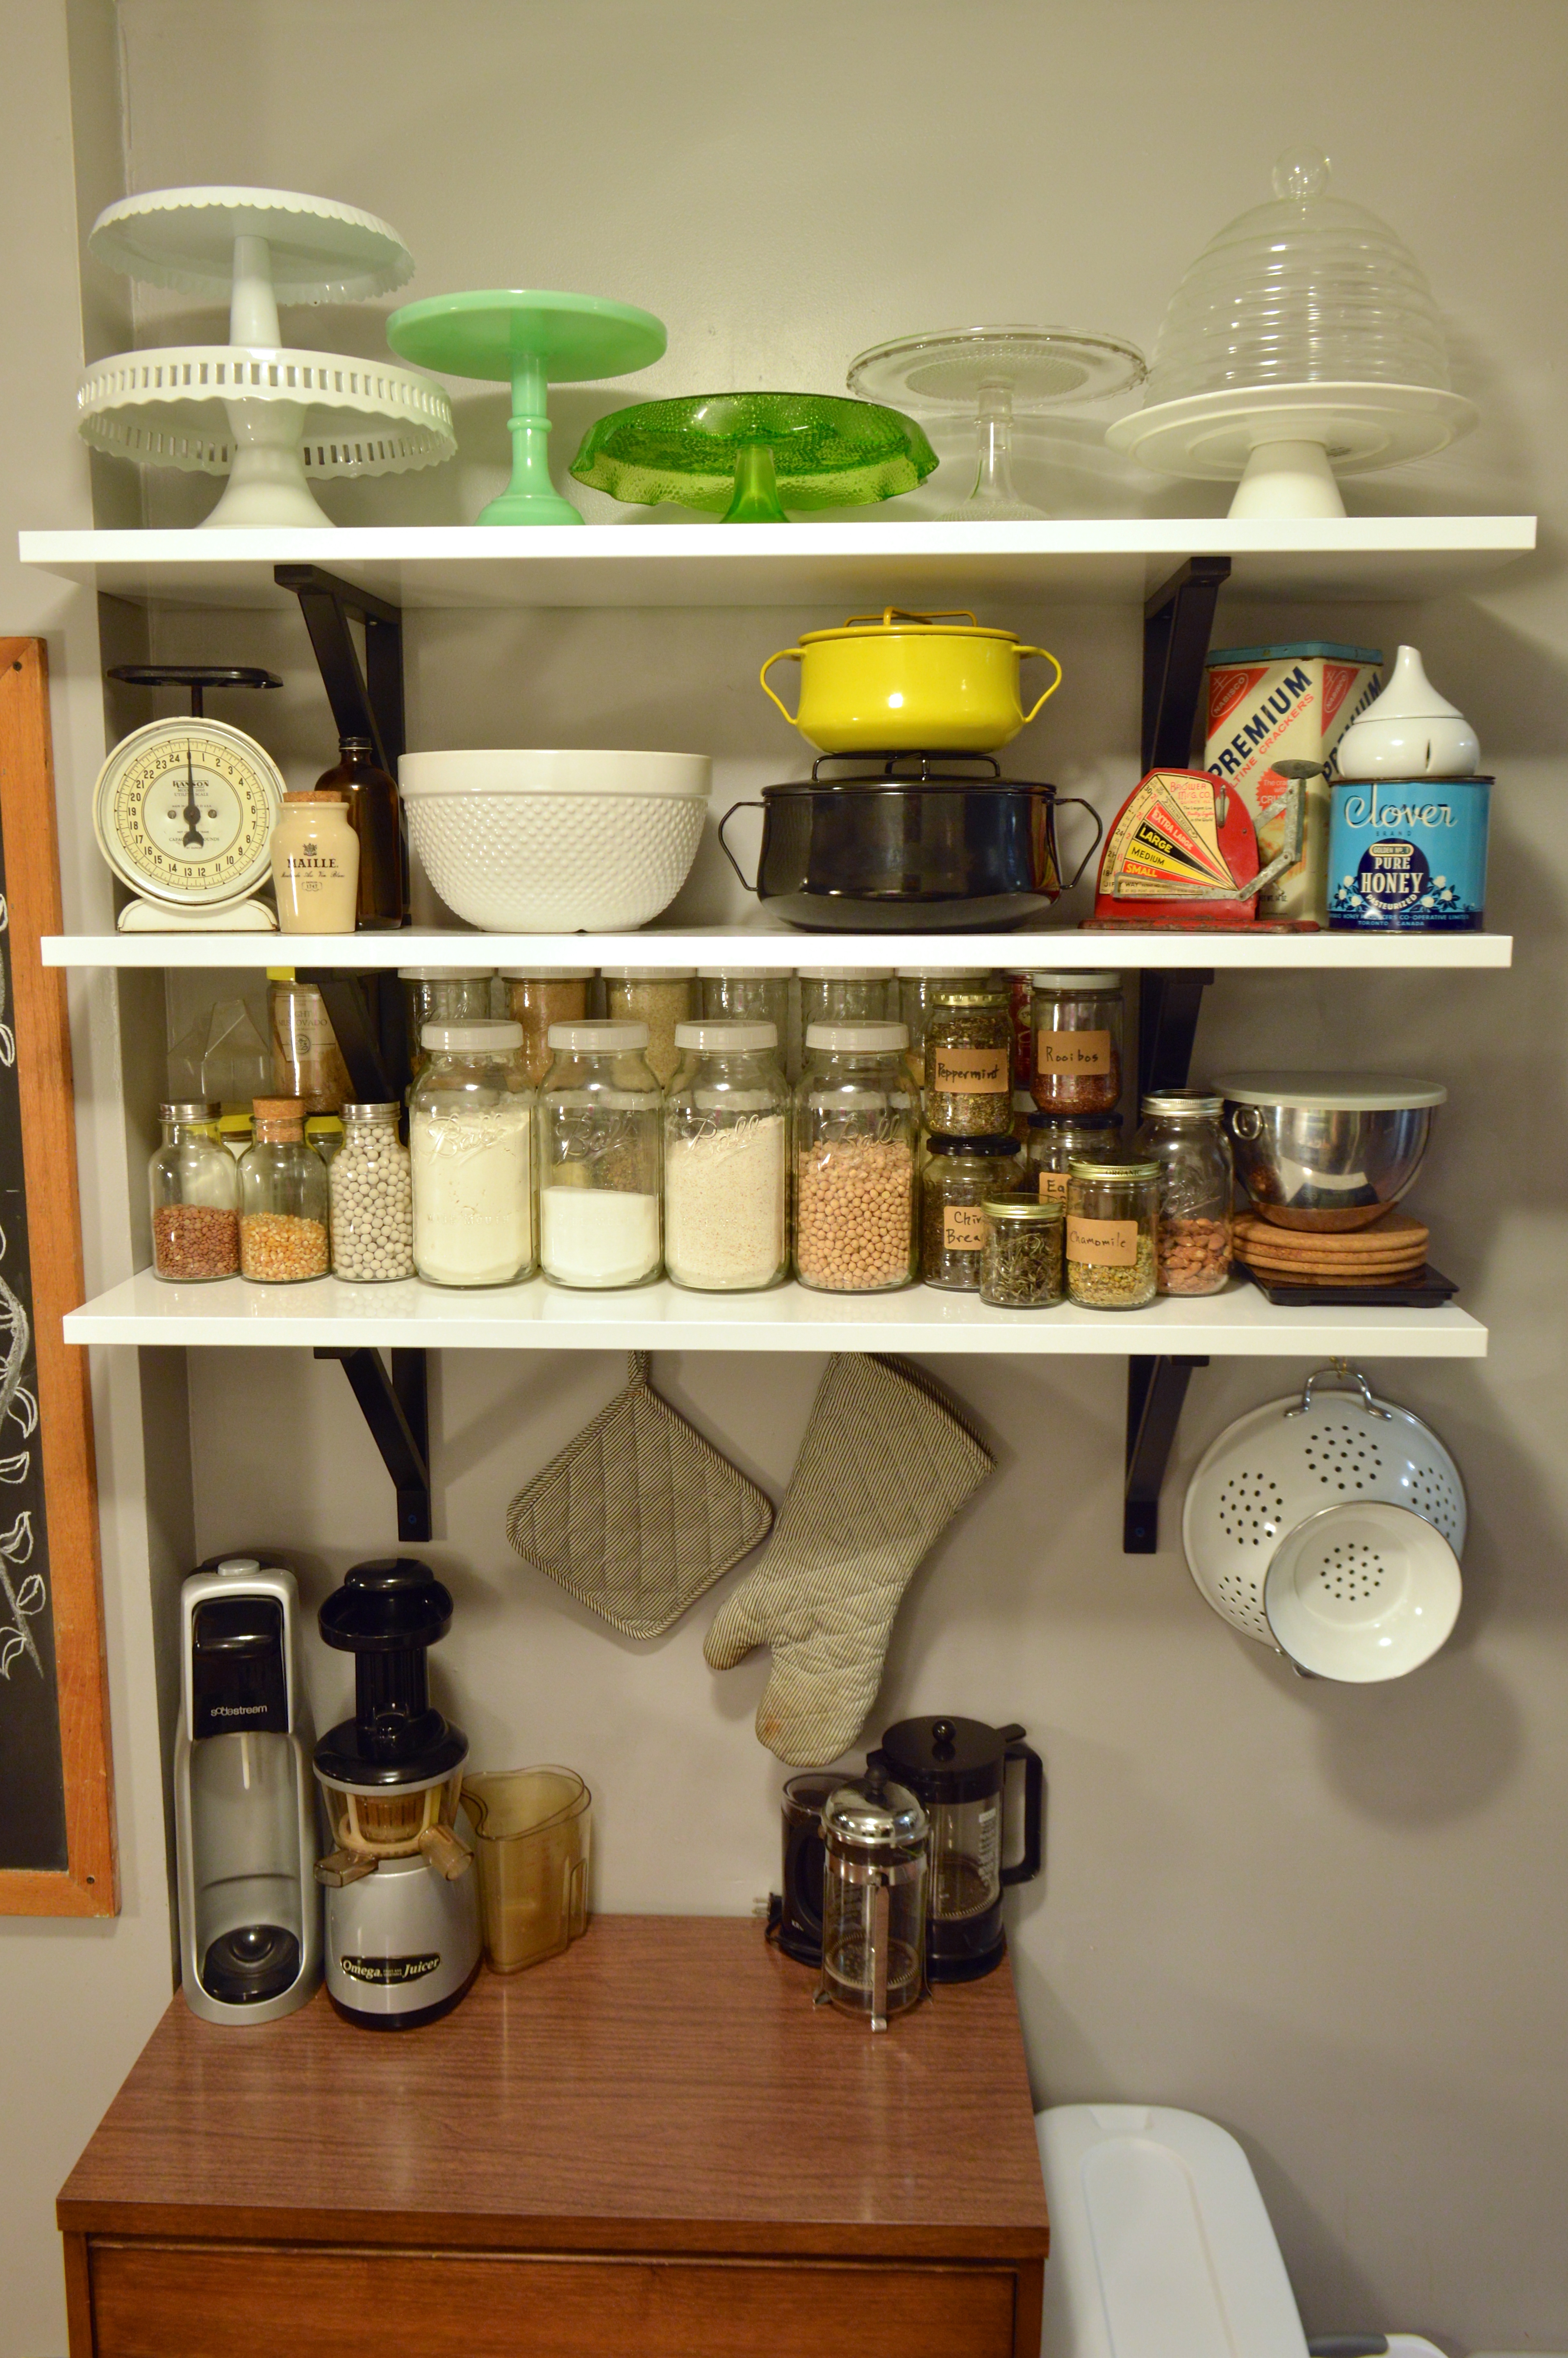
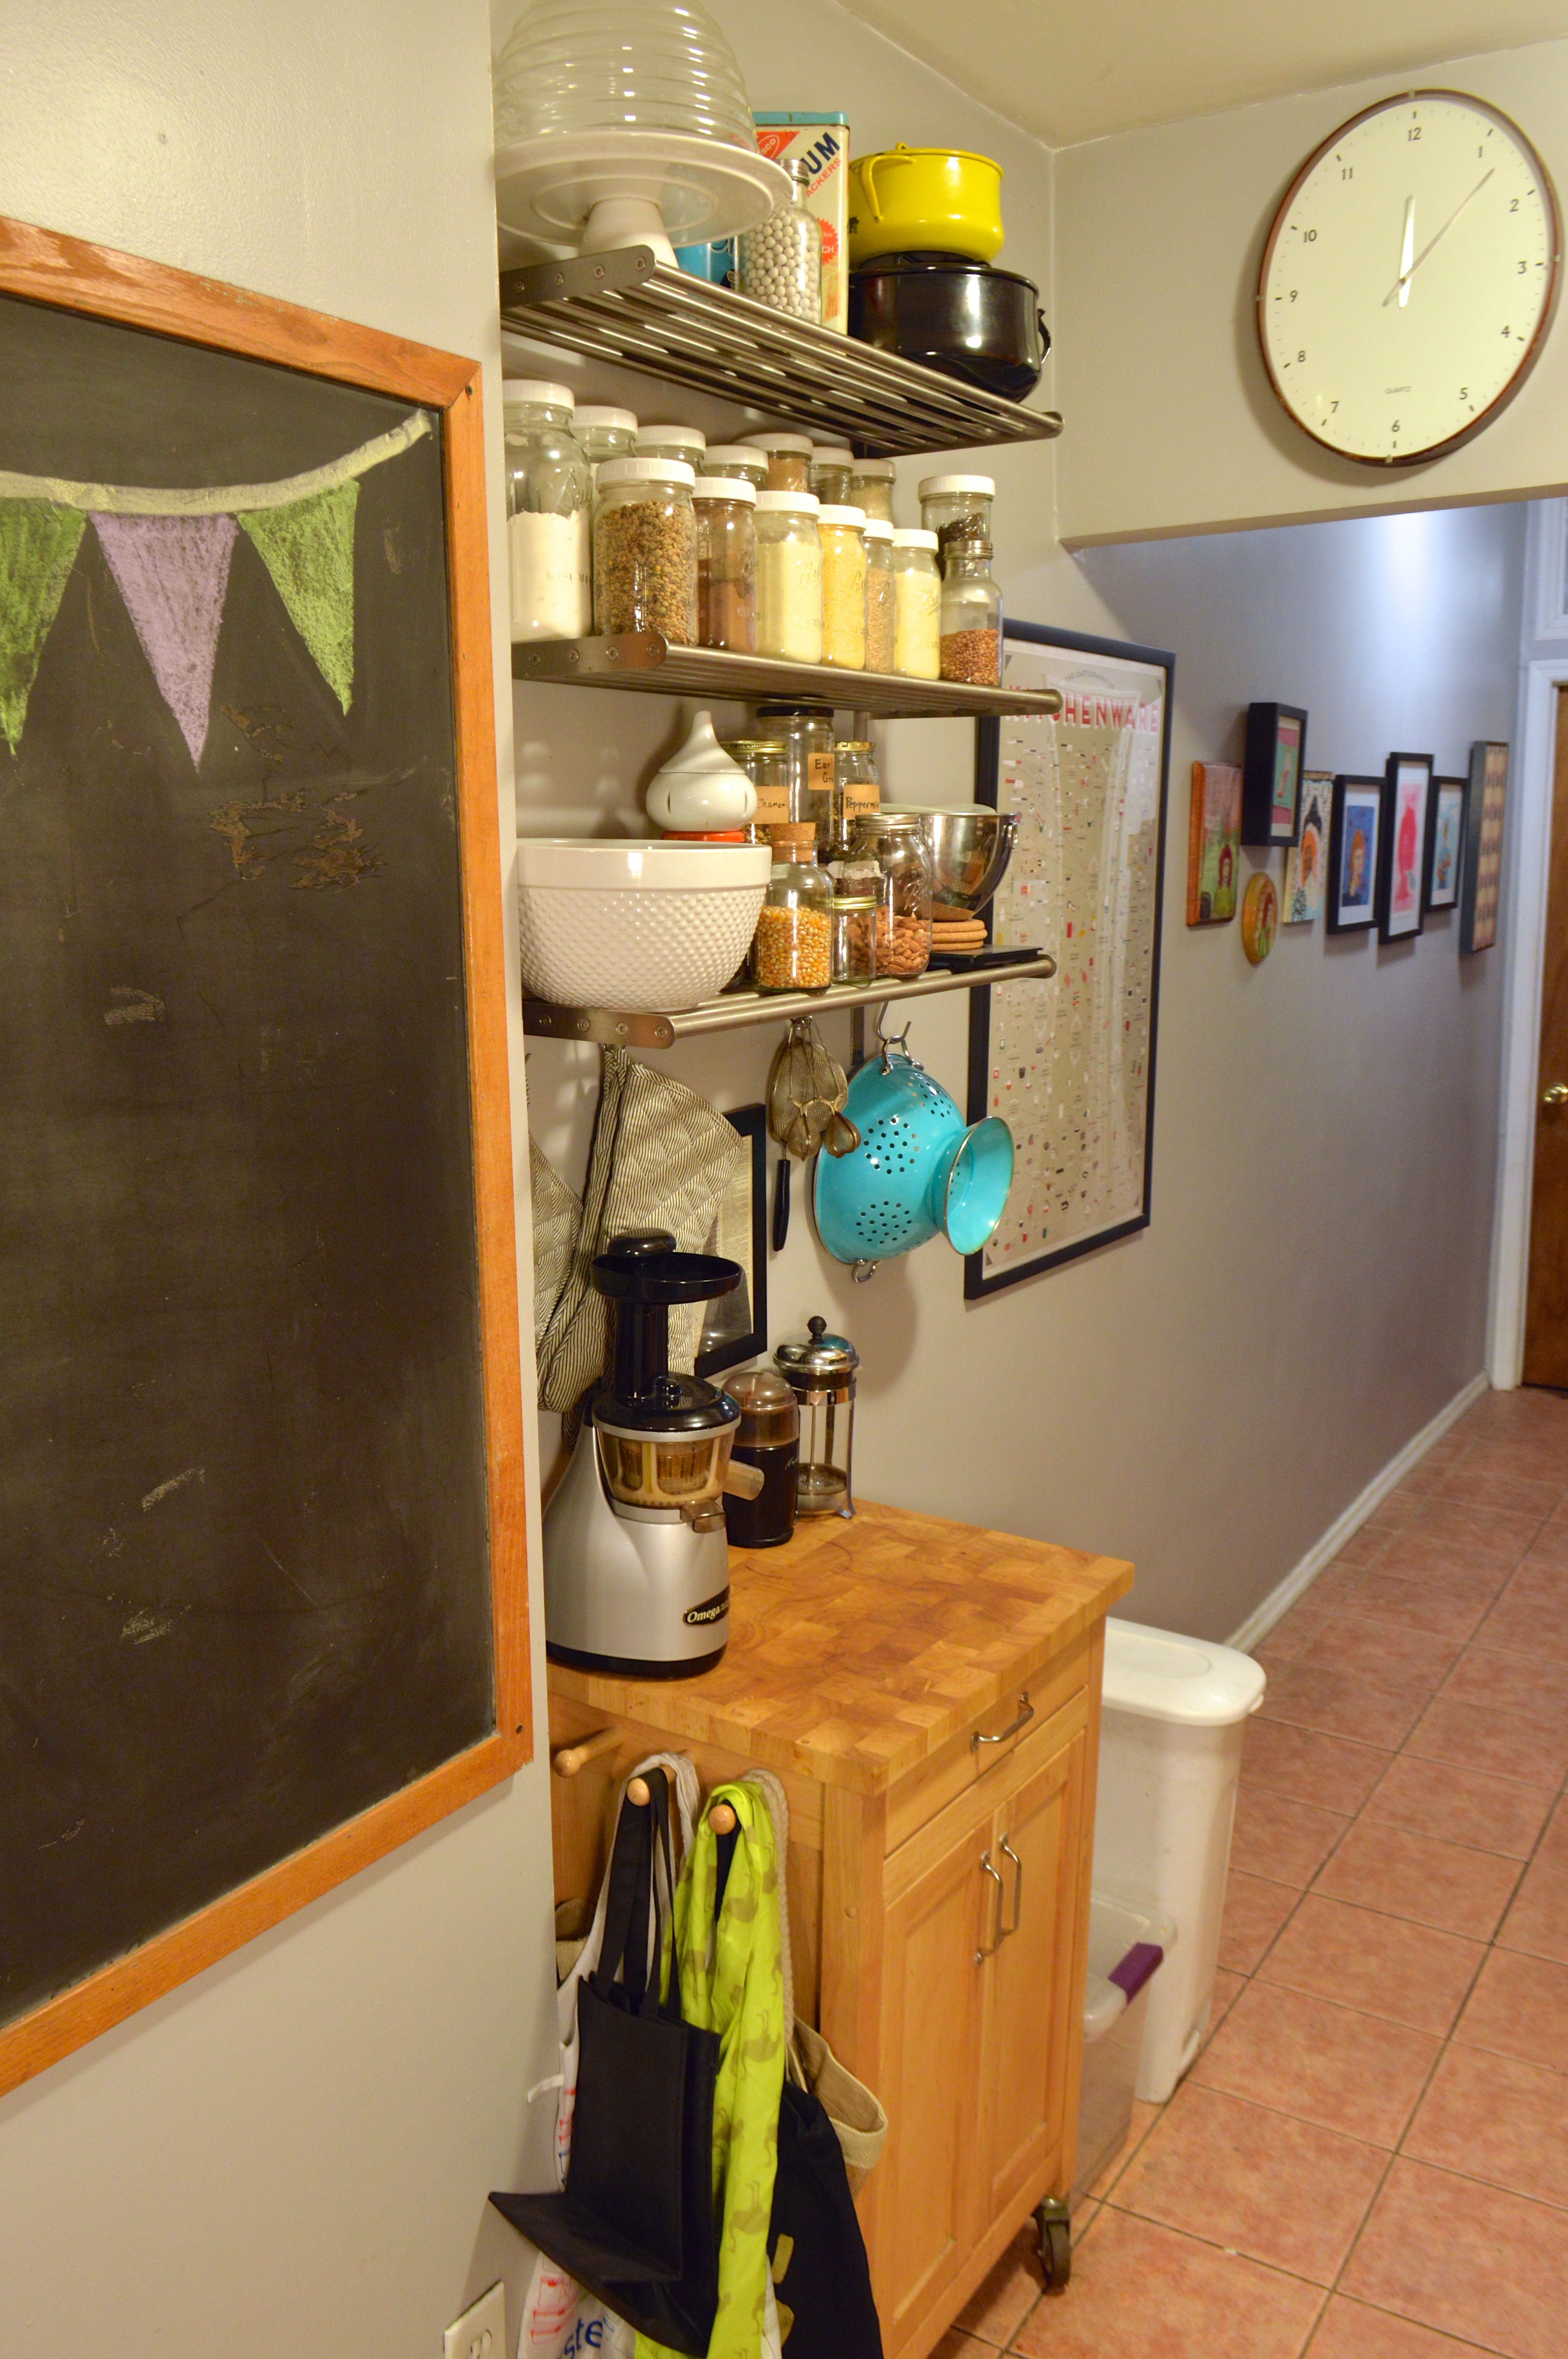
Next it was time to finally make a decision on replacing the uneven metal rod shelves that I hung when we moved in. I thought changing the shelves would be the first (and easiest) project I’d take on in the kitchen, but the options for shelving materials and brackets was overwhelming and crippled my decision making. Most of the bracket options I was coming across in my budget were either too small to support the size and weight load of the shelves I wanted to install, or were too utilitarian and unattractive for me to feel like they were much of an improvement over what I already had.

After much googling I sort of accidentally came across some simple black wooden brackets from Ikea that were just what I wanted for about half the price of most of the other ones I’d seen. I don’t know how I’d missed them before, but they were seriously perfect and couldn’t have come at a better price.

Brooklyn Homemaker ugly kitchen facelift project - big reveal

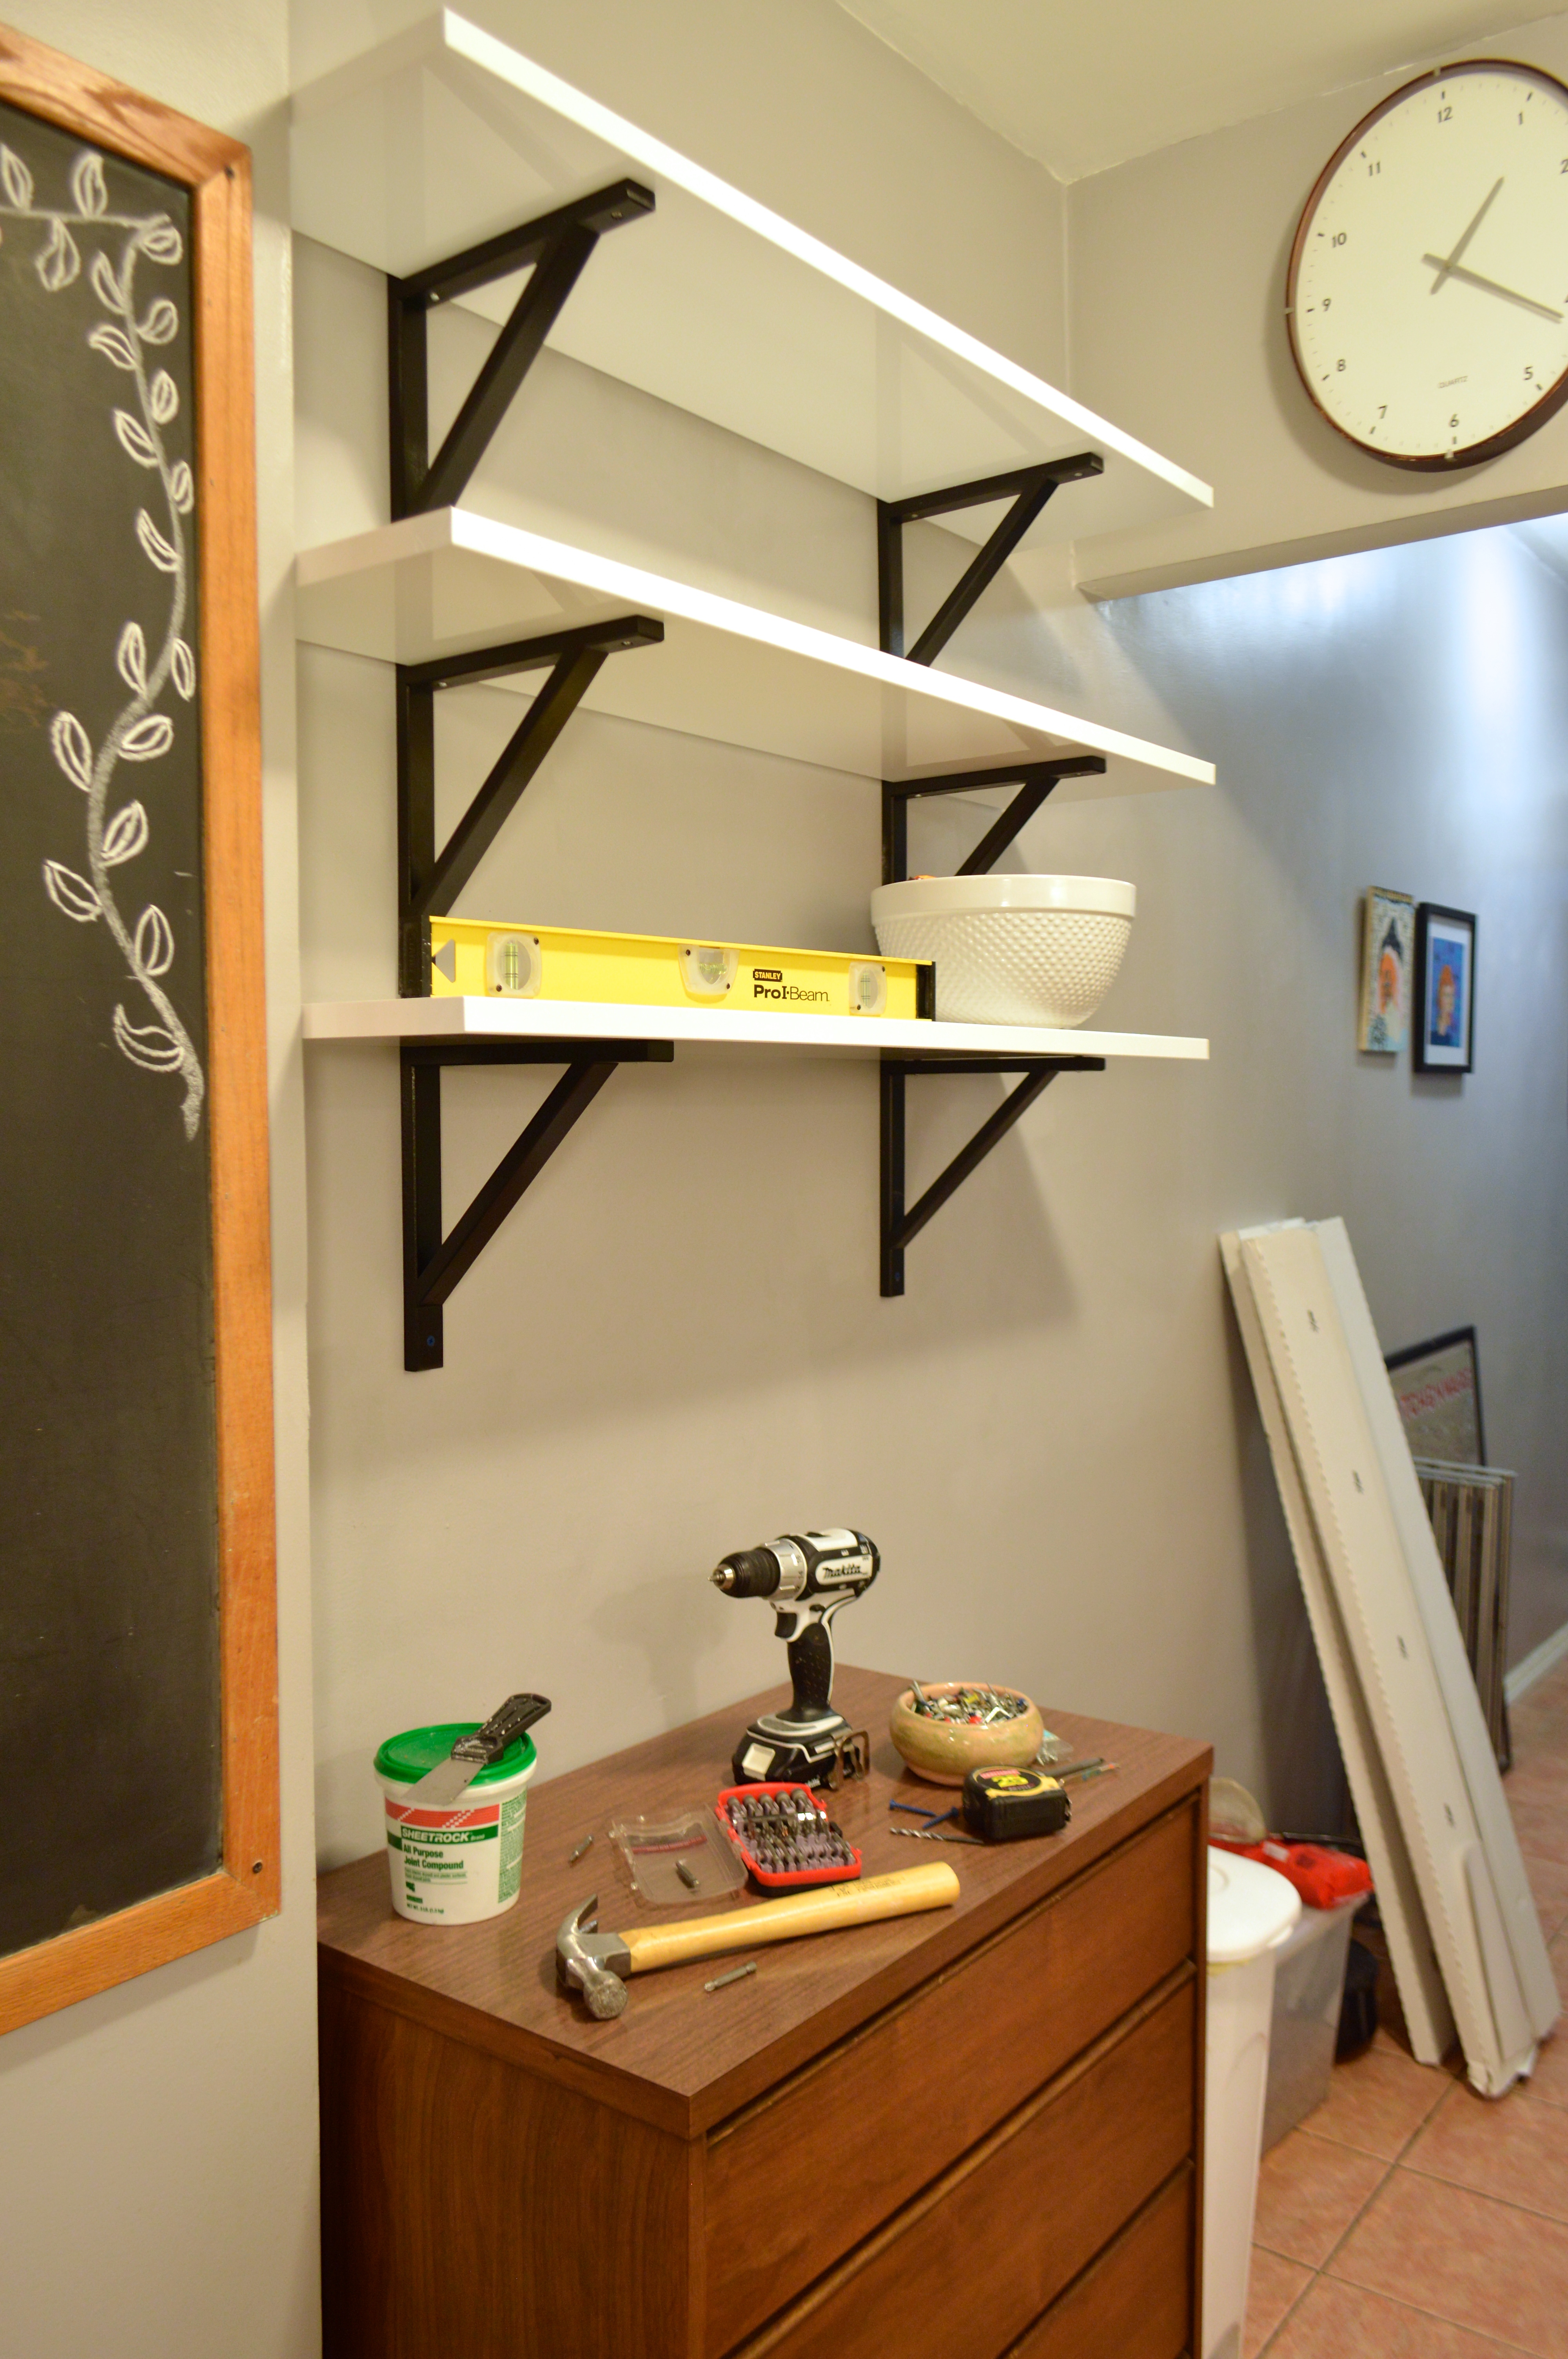
As for the shelving material, for a while I was thinking of trying to find a nice warm wood to match with the dresser I’d found. I even thought that the stain I’d originally bought (and didn’t use) for the cabinets would match the dresser perfectly. The more I thought of it though, the more I worried that the color would be just off enough to make them look strange against the dresser, and just dark enough to make that side of the room feel dark and heavy and distinctly separate from the other side of the kitchen.

So I decided white was the way to go, and I planned to get some wood from the hardware store that I’d paint with the same paint as the cabinets. When I went to Ikea to pick up the brackets though, I realized that they also had great shelves I could buy already finished without having to inhale any more paint fumes.

Brooklyn Homemaker ugly kitchen facelift project - big reveal

Another thing I stumbled on while meandering through the labyrinth that is Ikea, is a simple white picture rail that I thought I could repurpose as something entirely different. I’d been looking for a very plain and unassuming spice rack that I could mount on the wall just below the cabinets, but most of what I’d come across so far was either too ugly or too expensive or had too many shelves or was meant to sit on a countertop or inside a cabinet, rather than being mounted on the wall.

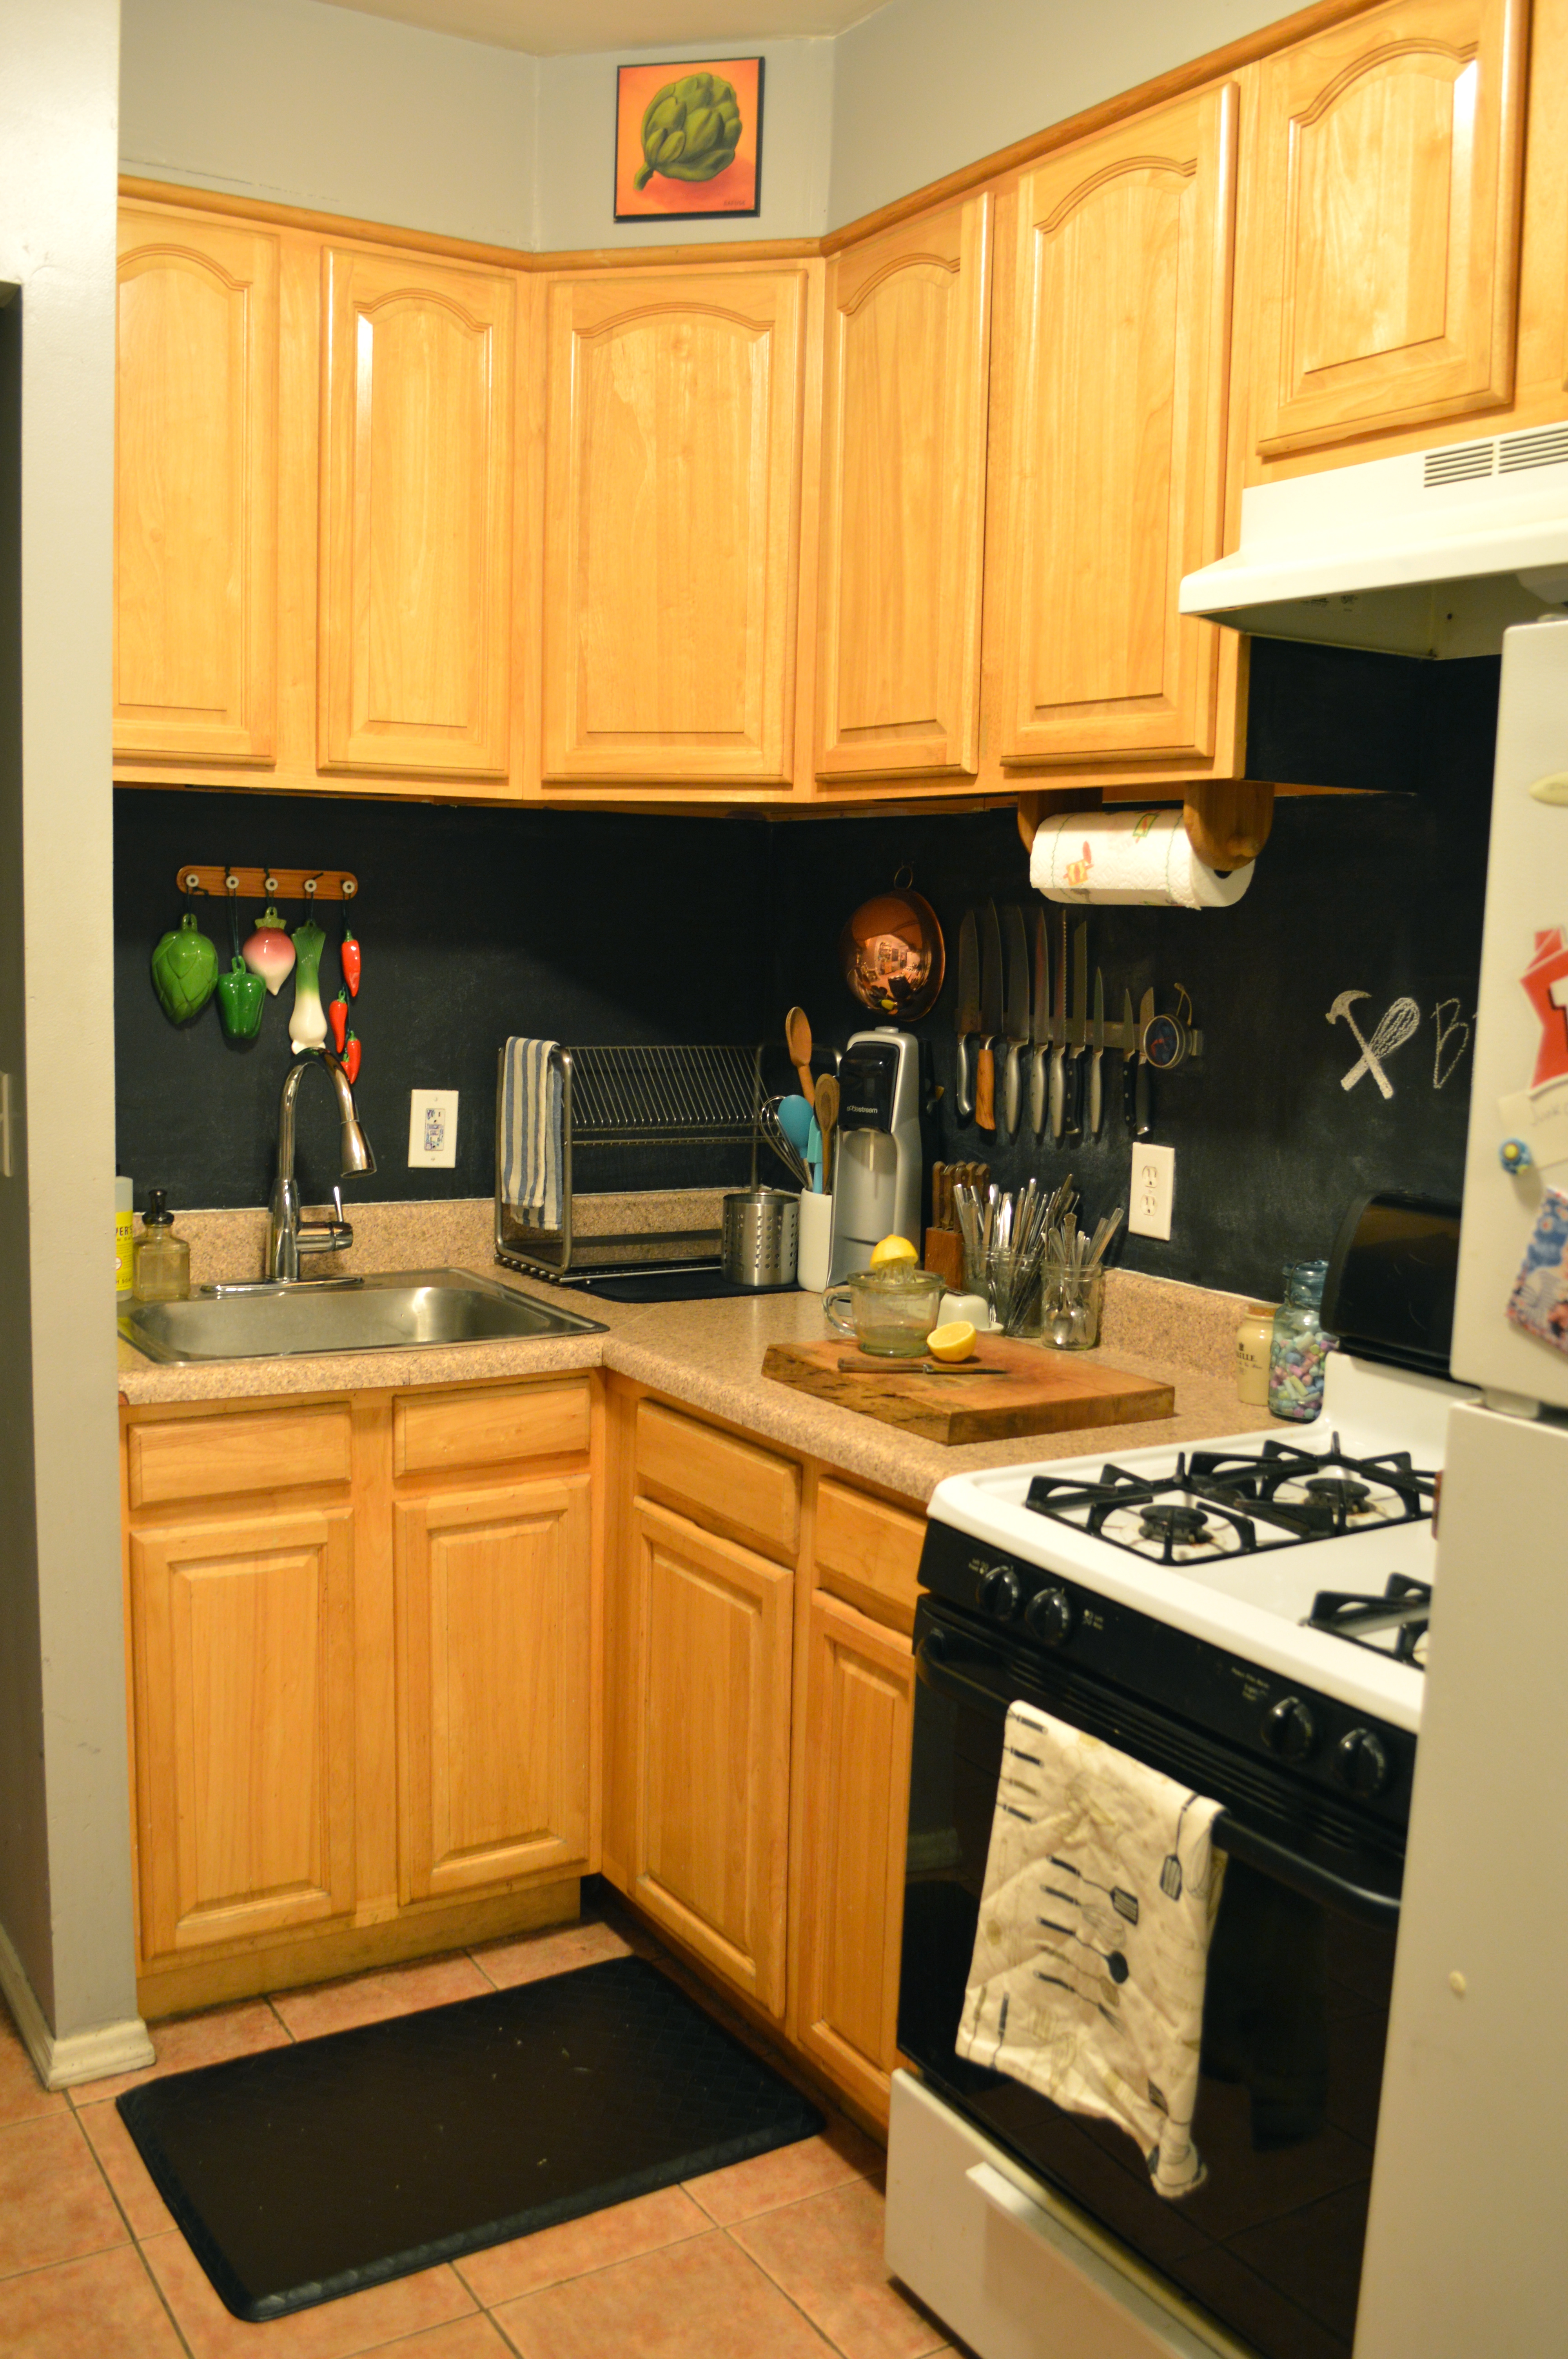
I’ve mentioned before that the upper cabinets in my kitchen are hung absurdly high, so the very bottom of the uppers hits me right at eye level. This means that the top shelves in the cabinets can only be used for things I don’t need to access easily, and the wall space below the cabinets feel like wasted space and missed opportunity.

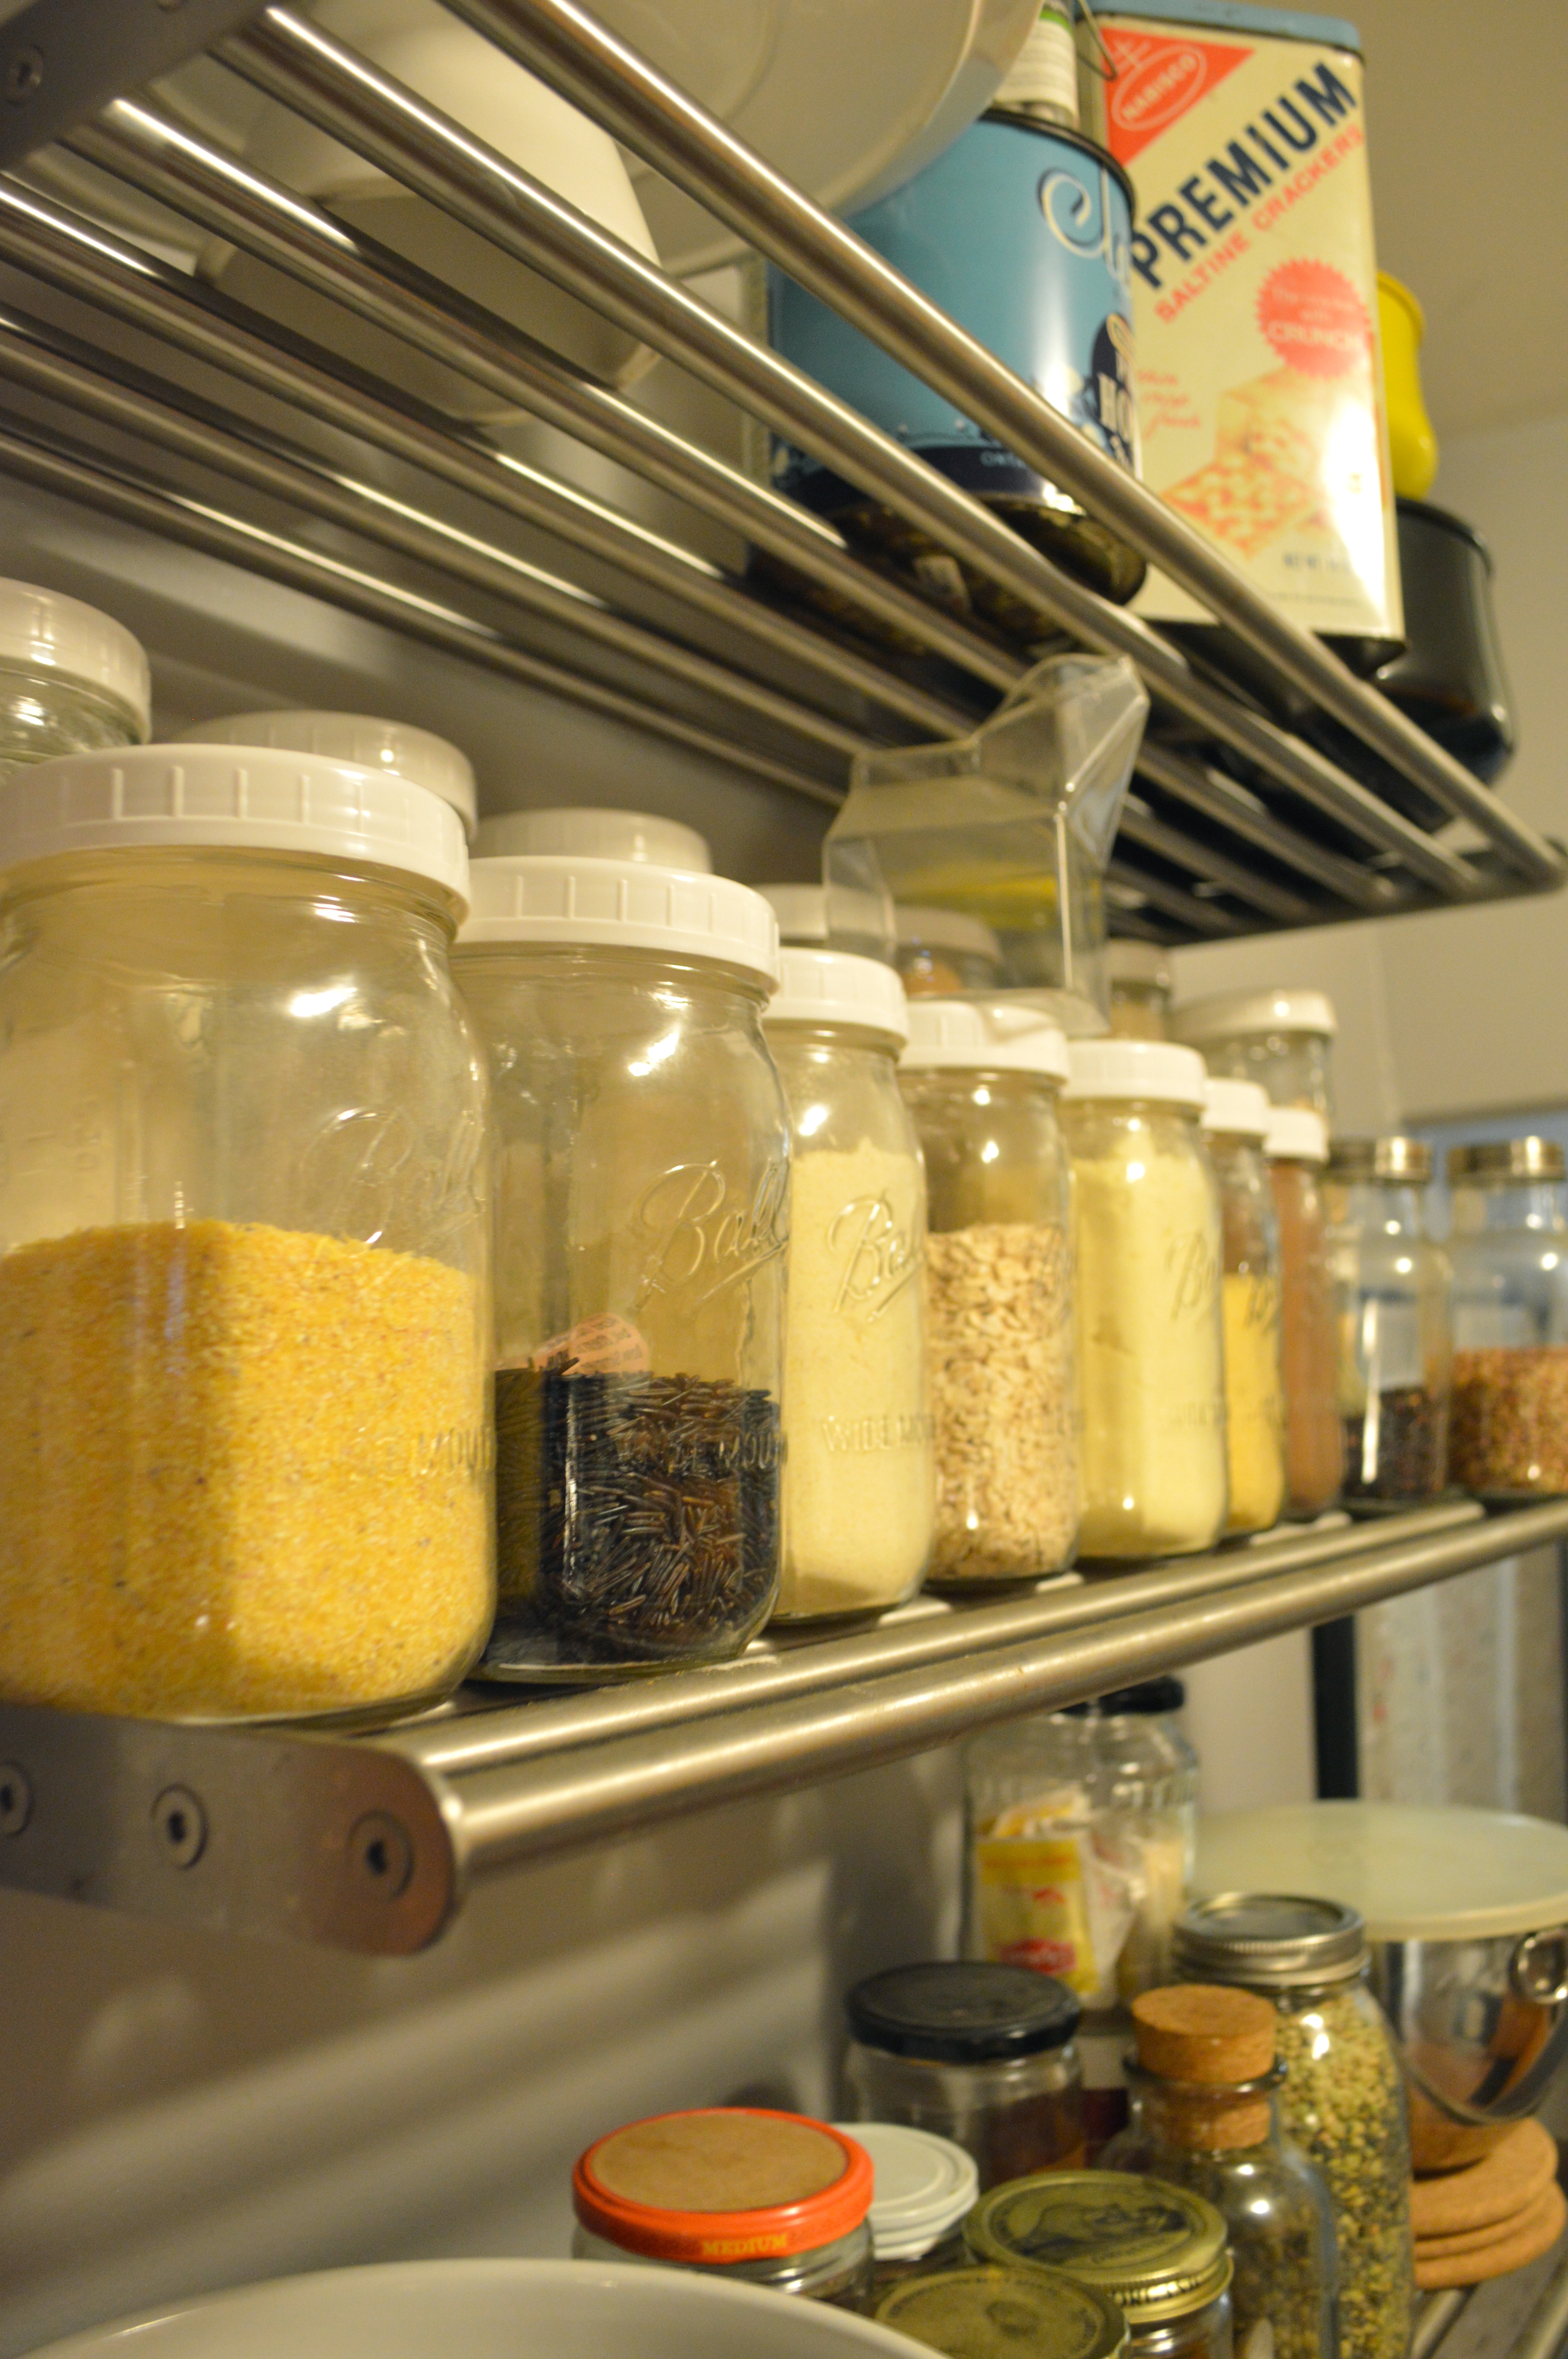
That’s why I wanted to hang a single spice shelf in one long row under the cabinets, and from the halls of Ikea this picture rail called out to me. It’s just the right color (white, duh), with nice straight clean lines. It may be a little too long for some kitchens, but the length was perfect for my purposes. They make these in shorter spans too if you’d like to try this for yourself.

Brooklyn Homemaker ugly kitchen facelift project - big reveal

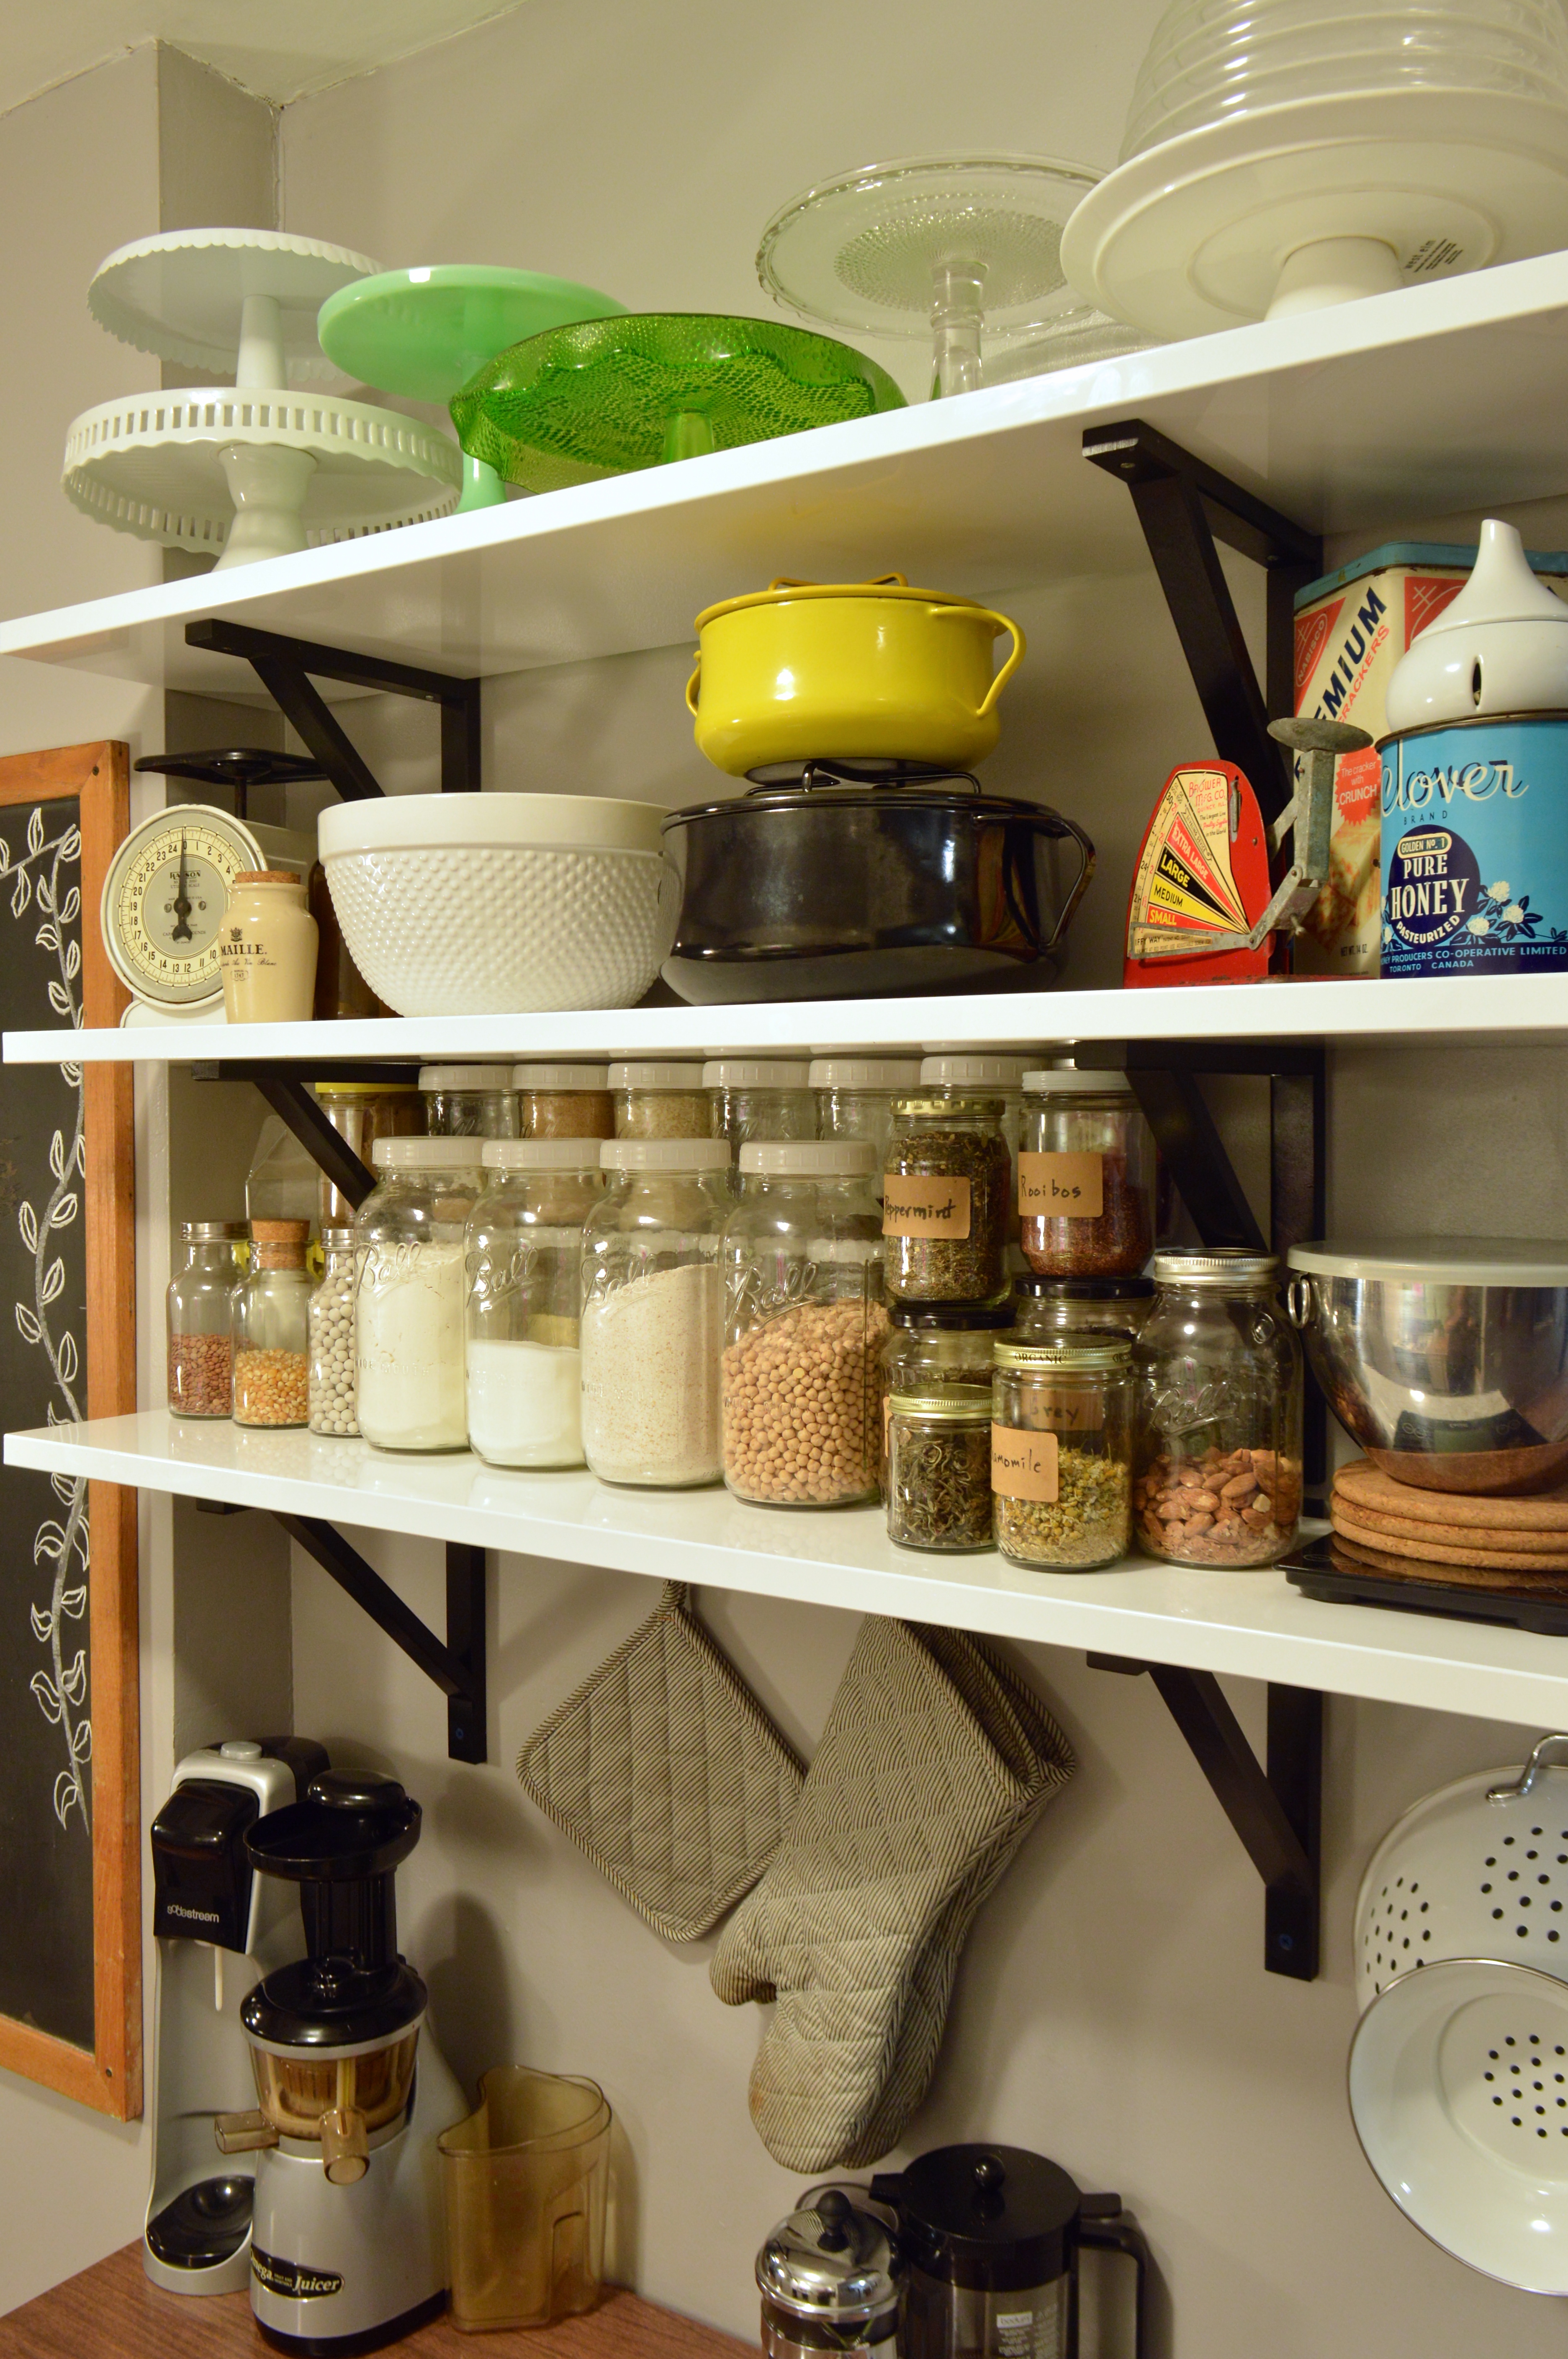
I hung it nice and high, with just enough clearance beneath the cabinets to fit some of my taller jars of spices. This way they’re sort of visually out of the way and inconspicuous, and they don’t see any bright direct light that could otherwise affect the freshness my spices.

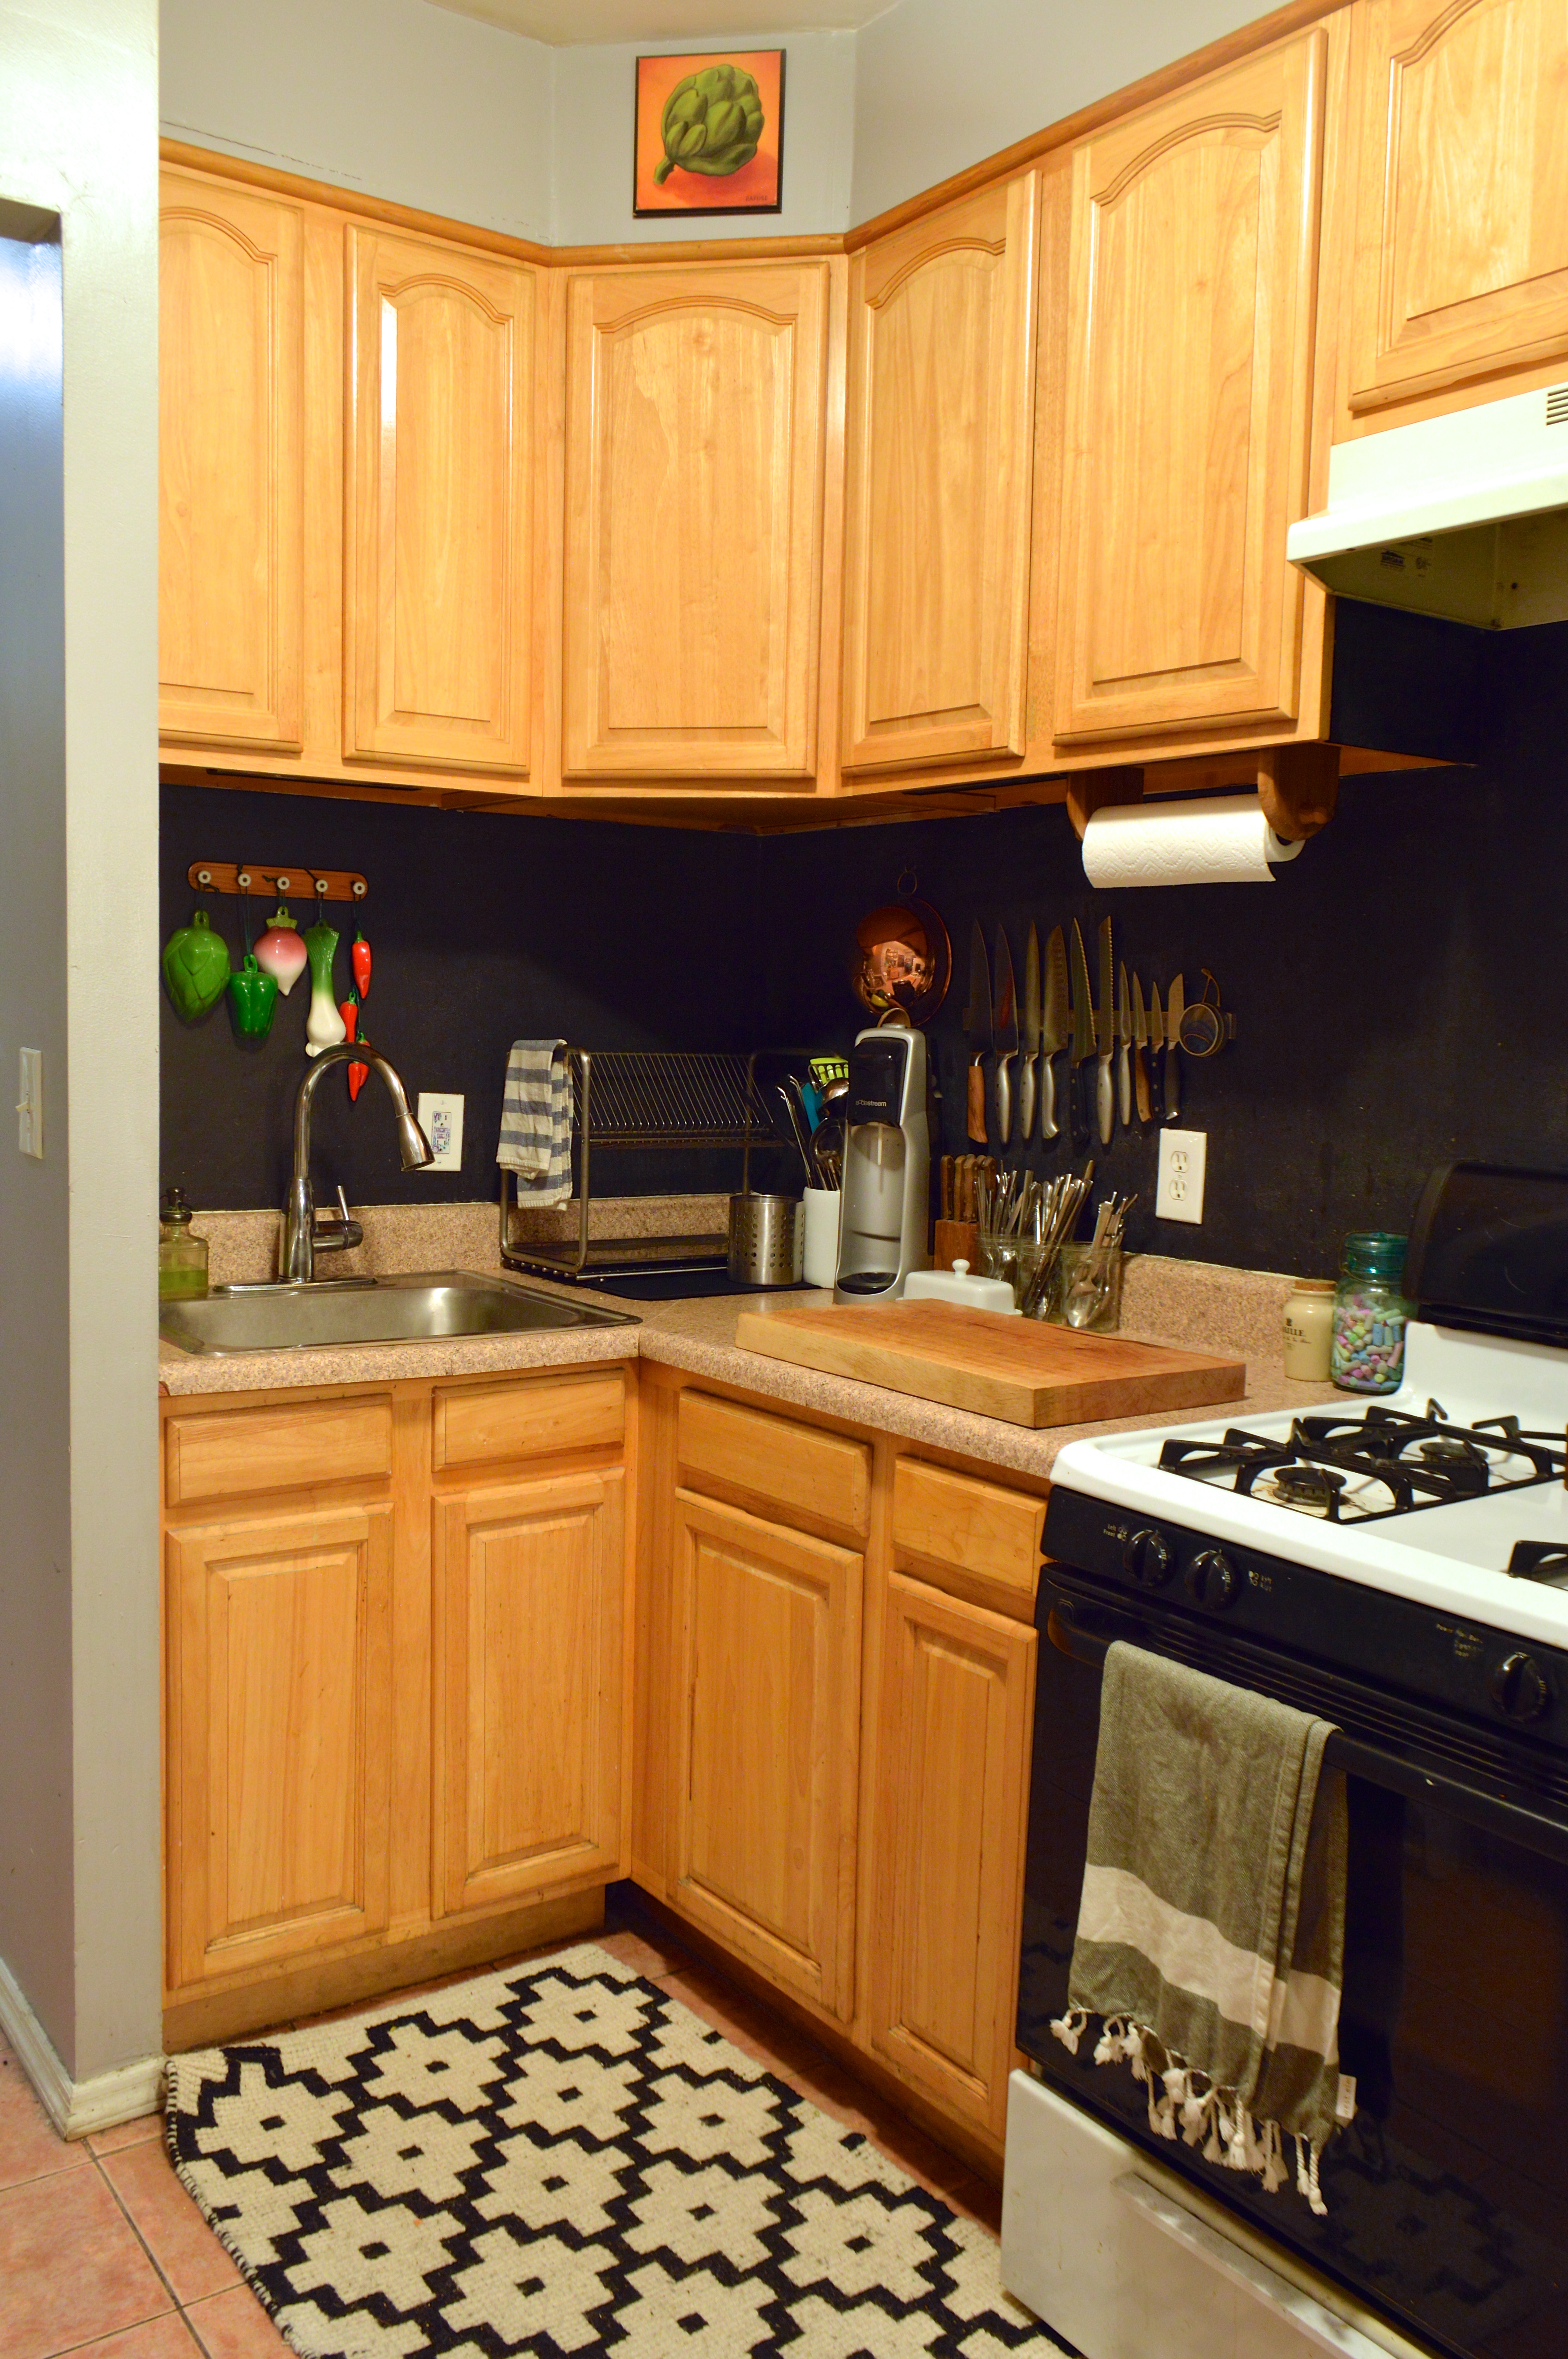
I also changed out my knife magnet for this more attractive one made of a wood veneer with super strong magnets underneath. This was a purely unnecessary aesthetic change, and I probably spent too much on it, but I really love the way it looks and I refuse to apologize for that.

After that, the last order of business was finding a nice simple knob to put on the newly painted cabinet doors. They were all finished and hung by this point, but I knew I wanted to add knobs to make sure the white cabinets stayed as white as possible rather than being covered in smudges and dirty fingerprints. It took another couple of trips to the hardware store and plenty of time spent on the old googler before I found something I really liked, but when I did I lucked out again, finding something that was both attractive and very affordable. My favorite part is that with the white cabinets these unassuming black knobs help to make the white shelves and black brackets on the opposite wall feel cohesive with the rest of the kitchen.

With the shelves up and the new knobs installed, all that was left to do was put everything away and and start styling and making things look right purdy!

Brooklyn Homemaker ugly kitchen facelift project - big revealBrooklyn Homemaker ugly kitchen facelift project - big revealBrooklyn Homemaker ugly kitchen facelift project - big revealBrooklyn Homemaker ugly kitchen facelift project - big reveal

Just in case you were having a hard time remembering what things looked like before, let me remind you…

Brooklyn Homemaker ugly kitchen tour

And now…

Brooklyn Homemaker ugly kitchen facelift project - big reveal

aaaaahhh… much better.

Brooklyn Homemaker ugly kitchen tourBrooklyn Homemaker ugly kitchen facelift project - big reveal

There are still a few projects I may want to go back in and do later, but right now I’m considering the kitchen to be finished. If, in a few months, I get bored and want to make even more changes to the space I’m considering adding some under-cabinet lighting, tiling the backsplash with real ceramic tile, and maybe even eventually changing out the dresser for something larger.

Even with the kitchen feeling so much lighter and brighter, I do think that I’d like more direct light over the counters for washing dishes and doing all my chopping and prepping. I mentioned before that I’d love to tile the backsplash, both for aesthetic and functional reasons, but I still keep going back and forth trying to decide it’s worth my time and money investing in someone else’s property. I also really love the dresser I found, but the new shelves came longer than I originally intended and they make it feel a little undersized visually (though functionally I still think it’s perfect and I don’t think changing it is really necessary).

I may even change out the overhead light fixture for something larger with an additional (third) bulb. Something that looks a little more attractive and a little less… landlordy.

Brooklyn Homemaker ugly kitchen tourBrooklyn Homemaker ugly kitchen facelift project - big revealBrooklyn Homemaker ugly kitchen tourBrooklyn Homemaker ugly kitchen facelift project - big reveal

All in all, I’m happier with the results than I could ever have imagined.

I still can’t believe what a huge change a little paint and some hard work made. It’s only a little over a month now, and I still find myself just standing in the kitchen in silence, turning slowly as I take it all in. The space feels so much bigger and brighter and more efficient and more comfortable. You already know I spent plenty of time in the kitchen before, but I have a feeling that I’ll want to be in there even more now!

Kitchen facelift project – progress

Remember when I asked what you thought about me sharing more home apartment improvement projects here along with my recipes?

Brooklyn Homemaker ugly kitchen facelift project

Remember when I said I couldn’t wait to get started giving my kitchen a facelift and that I would hopefully be back in a week or two with some progress and updates? Yeah. Well. It’s officially been over a month since that happened, but in that month A LOT has happened in my ugly duckling little kitchen.

Oh, and remember when I said I’d most likely kick off the whole project by changing out the shelving with something bigger and… flatter? Well that didn’t exactly work out the way I’d planned either.

Brooklyn Homemaker ugly kitchen tour

After reading all the comments and encouragement on that post I was brimming with confidence and enthusiasm and eager to get started. Unfortunately, I was also really confused about what to do and how to do it. While the whole reason I wrote that post was to ask for advice and ideas, the advice I received was so varied that I started second guessing myself. Originally I wanted to paint the cabinets white, change out the shelves, buy a base cabinet and find a countertop for it, and possibly tile the backsplash. While I thought changing the shelving would be the quickest, cheapest, and easiest way to get the project started, I ended up tripping up when faced with all the options for shelving materials and bracket options. When it came to the decision to paint the cabinets, a few readers said they’d had bad luck with painted cabinets chipping and wearing badly, and another (hey Julie!) sung the praises of gel stain. After much hemming and hawing I ordered a small electric sander online and Russell and I were off to the hardware store for some sandpaper and gel stain. We figured that we’d try staining them, and that if we weren’t happy with the results we could always go back and paint them white.

What I (foolishly) didn’t realize was that gel stain comes in a very limited selection of colors, most of them very dark. I wanted to rid my kitchen of the horrible yellow oak, but since the kitchen is pretty tiny and never sees a single beam of natural light, I also didn’t want to go too dark for fear of making the space feel claustrophobic and depressing. Since we were already at the hardware store and I was still riding the comment-driven enthusiasm high, I decided to make a last minute change to the plan and go with regular wood stain in medium walnut tone. Not using gel stain though, meant that the cabinets would need to be completely stripped and sanded before the stain could go on, so we added some “odorless” natural citrus based stripper to our list of supplies.

On my next day off I set to work with high hopes and a heart full of foolhardy hubris.
By about 1 pm I was cursing, crying, and having a completely adult and totally mature temper tantrum.

Brooklyn Homemaker ugly kitchen facelift project

I started by cleaning and removing all the doors from my cabinets, removing all the hardware from the doors, emptying and cleaning out all of the cabinet boxes, and covering my counters with a plastic drop cloth. Since my counter space is limited, I could only start with a few doors at a time, so I got to work brushing the “natural” stipper on the first few doors and waiting for it to do it’s “magic”.

Brooklyn Homemaker ugly kitchen facelift project

In my excitement at the hardware store I somehow neglected to notice where it said that a stripper remover would be needed to take the stripper off of detailed woodwork that couldn’t easily be scraped. When I went to scrape the stuff off the doors, I quickly realized that it was nearly impossible to get the stripper off of any surface that wasn’t completely flat. Maybe I’m missing something, but what’s the point of a stripper if you need stripper stripper to remove it? I also don’t think it did a very good job of evenly and efficiently removing all of the old stain and poly anyway, though honestly that may have been my fault somehow.

I was super frustrated by the stripper but I wanted to keep things moving forward and stay calm and positive so I went to get out my new sander. More bad news. As it turns out, the sander I bought requires proprietary velcro-backed sanding pads and isn’t compatible with just any sheets of sandpaper (like the sheets I bought for instance). Silly me for thinking my sander would use sandpaper. Of course the sander only came with one velcro pad, which lasted all of three minutes on one of my cabinet doors.

Another deep breath. Another “calm down, it’ll be okay” moment.

I took a few minutes to chill out and went back in to see what the stain would look like on the one cabinet that I’d been able to semi-successfully strip/sand. On the back side of the door I brushed some stain on a small section and noticed two things. A) Even though I thought I’d gotten all of the old stain and poly off, the stain wouldn’t soak in in some places, and B) I hated the god damned color.

Aaaand that’s when I had my full grown adult temper tantrum.
Even the dogs were judging me.

I decided it was time to eat lunch and regroup.

Just when I was about to throw in the towel and admit defeat, I remembered that I had a can of adhesive spray-mount in a drawer somewhere. I wasn’t sure if it’d work, but I had to sand my cabinets somehow and didn’t have anything to lose. I cut a few pieces of sandpaper into the same shape as the now dull and useless velcro pad, and sprayed the back of the cutouts with spray-mount. I pressed the new sandpaper onto the used pad and fired up the sander. To my shock and great relief, the sandpaper stayed put and totally did the trick. Angels sang as fairies flittered about my kitchen and there may have been a unicorn.

Brooklyn Homemaker ugly kitchen facelift project

I still wasn’t completely sure what I was going to do, but with my cabinets half stripped I knew I just had to keep moving forward so I just kept sanding and hoped I’d have a plan by the time I finished.

Brooklyn Homemaker ugly kitchen facelift project

With all the doors and boxes sanded up real good, off I went again to the hardware store, this time for paint, primer, brushes, and paint thinner. I already suspected that oil based paint was probably a better, more durable way to go than latex, but I made sure to confirm that with the man at the hardware store and was finally able to feel like I knew what I was doing again.

Now, I’m not going to go into all the details of the exact technique I used to paint the cabinets because (as I think we’ve already established) I’m no expert, and I’m sure there are already plenty of places on the internets with better tutorials than I can provide.

What I will say though is this: If you want your paint to look professional and last years, it’s important that you use a primer before painting to make sure that the old stain doesn’t bleed through and the new paint completely adheres to the surface and doesn’t chip or crack in the future. Sand well before starting, and lightly sand after each coat dries. Oh, and don’t put the paint on too thick or it could look gloppy and drip easily.

Brooklyn Homemaker ugly kitchen facelift project

I applied my paint with brushes, and while I do think a paint sprayer probably would have given me an even more smooth and professional look, I’m actually really happy with my results. To make sure there weren’t drips I tried to keep doors flat as possible and did a few thin coats. I started with the lower doors laid out on the counters, and since each side of the doors needed to dry before they could be flipped to paint the other side, the whole thing took several days. Paint, dry, flip, paint, dry, flip. Meanwhile my pantry was in grocery bags on the living room floor, and the upper doors hadn’t even been touched.

Once the cabinet boxes and lower doors were done, I was ready to get my kitchen back into a state of semi-normalcy so I put everything back into my doorless cabinets. Then I decided to move the next phase of the project into my guest room (for lack of any other space to work in). I stripped the bed down to the sheets, covered it with a thick plastic drop cloth, and used disposable cups to lift the doors up off the bed so the paint could dry more evenly.

 Brooklyn Homemaker ugly kitchen facelift project

I should mention that this is not a job that should be done indoors in the winter. I tried to keep all of my windows open for as long as I could stand, but we’ve been having lots of fun single-digit temperature days here in Brooklyn so that presented it’s own special challenges. If you can do this kind of thing in a garage or a room with big windows and doors that can be opened completely, do that.

I am not that smart, and now thanks to the help of lots of paint fumes, I’m even more not that smart.

Brooklyn Homemaker ugly kitchen facelift project

Back in the kitchen, I’d set my sites on the backsplash. As much as I loved the look of the chalkboard paint in the kitchen, I have to admit that it was kind of hard to keep clean, and I felt like I should change it while the kitchen was already torn apart. While we still may eventually tile the backsplash, our budget is already tapped out by everything else we’ve done, so tiling will have to wait if it happens at all.  Since that particular wall surface sees so many spills and splashes I decided to go with an easy-to-clean semi-gloss paint. So, in the midst of all this chaos we were off to the hardware store yet again to choose a paint color for the backsplash.

We stared at a few of those paint color sample strips for a couple days before deciding on a pale pistachio/mint green. Those little strips of color just aren’t big enough to help you make a really well informed decision though, so if you can afford it, buy the little sample jars of tinted paint and try test patches.

When the color first went on the walls we both kind of hated it and I thought I’d screwed everything up yet again. I was really hoping for a mature pale green/grey but when it first went up it was reading more as “gender neutral nursery” or “baby’s first backsplash”. It was much more minty and much less grey than I had in mind, and I was totally bummed.

Brooklyn Homemaker ugly kitchen facelift project

Now that the kitchen is coming back together though, and we have art hung and things on the counter to break up all that solid color, we’re both feeling much better about it and I think it’s growing on us both. If I had to do it over again I’d choose a shade with a bit more grey in it, but I don’t think it’s worth repainting (not yet anyway) for such a small and subtle difference in color.

So, now that I’ve written one bajillion words on almost nothing, I’m sorry but that’s where we have to leave off for today. While I do have much more to share, I’m still not entirely finished so you’ll just have to wait to see the final results. I’m sorry to do you like that, I know you’re ready for the big reveal after all that drama, but in the words of some wise grandmother somewhere, “Good things come to those who wait”.

See you real soon y’all!

Whisk & Hammer

I want to do something a little different today.
There will be no recipe in this post. No mouthwatering food photos.

I recently made a little change to my logo, maybe you noticed? (up top ^^^)
Anyway, it got me to thinking about what my humble little logo is meant to represent. Brace yourself. I’m about to start rambling.

When I started Brooklyn Homemaker I knew that I wanted to talk about food, like, a lot, because I love food and I’ve always spent a lot of my time cooking food and eating food and thinking about food and talking about food.

Food isn’t my only love though. I also love good interior (and exterior) design, home decor, home restoration projects, and DIY. I spend more hours than I’d like to admit reading home improvement blogs and building my dream home on Pinterest. I’ve put a significant investment in time and money fixing up our current space, and I’ve spent even more time dreaming about what more I could do. Nothing would make me happier than eventually buying and fixing up my own home somewhere, but that’s likely a long way off.

Brooklyn Homemaker ugly kitchen tour

When I was just getting started with this blog, I wanted my interest in design and DIY to play a part in the subject matter here right along with the recipes and food porn. Way back when, I did publish a handful of posts talking about our apartment and our garden, but for the most part, the bulk of my time and energy has gone into the food aspect of this “lifestyle” blog.

I’m incredibly self critical, and when I first started doing this whole blogging thing my photography had an amateurish quality that I just couldn’t deal with, even though I knew that I was in fact an amateur and just needed time to learn the ropes. With self improvement in mind, I focused most of my energy on food photography and teaching myself about my camera settings, white balance, photo editing, lighting, food styling, prop collecting, blah blah blah. While I know I still have a lot to learn and a long way to go, I’m finally pretty happy with the way things have been looking around here.

While food will likely always be the main focus of Brooklyn Homemaker, I think I might be ready to bring just a little bit more hammer into the experience.

Brooklyn Homemaker ugly kitchen tour

I’ve said this before, but the bulk of the work needed in our apartment was done in the first few weeks after (and even before) we moved in, back before I called myself a blogger. We painted every surface in the joint back then, because just before we moved in the landlord found the least expensive, most incapable numbskulls he could, to do the worst paint job I’ve ever seen in my life. I’m actually pretty certain that they didn’t even use actual paint, but only primer, to slap up a patchy uneven coat without bothering to first remove any thumbtacks or patch any nail holes. We arranged the lease so that we could get our keys two weeks before moving in, just to give ourselves time to scrape the primer splatters off the hardwood floors, patch the swiss cheese drywall, and put some actual paint on the walls and ceilings.

Even with all the work we’ve already done, one space that I’ve never really been happy with is our kitchen. Over a year ago I repainted the backsplash with chalkboard paint in an attempt to make the space feel a little more chic and modern, and for a while I was happy with the change, but it wasn’t enough and I still kind of hate that room.

Brooklyn Homemaker ugly kitchen tour

As tiny as it is, space isn’t really the issue. I actually kind of like a tight kitchen because everything is within reach. The real issue in there (for me) is cosmetic. I hate the cabinets. The finish on them is super yellow, and they take up so much of the wall surface that they tend to cast a yellow tint on everything else. The countertops are also horrible, made of a cheap faux granite laminate that has swelled and warped at the seams near the sink where water has gotten underneath them. I’d also love to have a real tile backsplash instead of the chalkboard painted surface that looks okay but as an actual backsplash isn’t really all that functional or easily cleaned.

Brooklyn Homemaker ugly kitchen tour

Our landlord truly doesn’t give half a crap what we do in here as long as we pay rent every month, so I’m fortunate enough to be able to realistically dream about doing more. Whatever I do in there will be done to a much higher standard than he would do himself anyway, because I care much more about the quality and longevity of our living space than he does or ever will. The only thing that’s stopped me so far is the thought of putting time and equity into someone else’s property.

We’ve lived here for about four years, and since our apartment is rent stabilized, we’re realistically not going anywhere for a good long time. In the name of comfort and standard of living, I think I’ve finally accepted that putting a few more bucks into our apartment is worth it to me to make us feel more at home.

While my plans are still unclear and I’m not actually tackling any projects just yet, I wanted to discuss my thoughts with all of you today.

Brooklyn Homemaker ugly kitchen tour

The first thing, and probably the cheapest and easiest, I’d like to do is replace the cheap Ikea shelves we installed when we moved in with something more solid. The current metal rod shelves have an uneven surface that’s resulted in more than a few broken jars. There’s also plenty of room to the right for them to extend at least another foot.

I’m also thinking about trying to find an actual base cabinet to put in instead of the small rolling cart under the shelves. I’m hoping I might be able to find something sturdy and cheap on craigslist or something, but Home Depot has unfinished options that I consider to be in my price range too so I may just go that route.

Brooklyn Homemaker ugly kitchen tour

I’d also really like to paint our kitchen cabinets. It’d be a a lot of work because I’d want to do it right and wash, strip, sand, prime, and paint them with an oil based lacquer that would wear well, clean easily, and be water and stain resistant. I cannot decide if I’d want to paint them all white or if I might go two tone with grey cabinets on the bottom and white uppers. I think all white could look more classic and potentially less “trendy”, but I think grey base cabinets look very stylish and would probably be easier to keep looking clean. I think some decent under cabinet lighting would probably be a good idea at some point too.

I also think I would like to tile my backsplash and cover up the chalkboard paint. White subway tiles are timeless and classic, easy to install, and can be bought for a song. My only worry is that they’d look out of place butted up against our horrible countertops.

Oh the countertops. This is where I’m totally freaking clueless. What I’d like to do, vs. what I actually feel comfortable spending on someone else’s property are two entirely different things. Even the tiny amount of counter space we have works out to several hundreds of dollars to replace if we went with solid surface stone, so I think that’s definitely out. But what should I do? Just deal with them as is? Replacing them with wood is more affordable than stone, but I worry about how it’d hold up around the sink. I’ve thought about doing some kind of DIY stainless steel or copper countertops, but I don’t have the right tools and they’d be just as significant an investment as the countertop materials themselves. I’ve also seen some great DIY concrete skim-coated countertop tutorials that look easy enough but I question their durability. These countertops are definitely the biggest mental stumbling block I run into when I try to reimagine our kitchen as it’s best possible self.

Brooklyn Homemaker ugly kitchen tour

What do you think about all this?

Should I quit worrying about the hammer and stick with the whisk? Would you like to see more DIY and decor projects, or do you think they’d muddy your idea of what Brooklyn Homemaker is supposed to be?

Should I just stop whining and live with the ugly kitchen as is? Or do you also think the kitchen would look nicer with painted cabinets? Should I go all white or two toned? Do you have any ideas on how best to deal with my horrible and past-their-prime countertops? Do you think new crisp white subway tiles would look chic, or would they be out of place and ridiculous sitting against the ugly laminate? Am I just rambling on like a crazy person who should just leave well enough alone? I desperately need your help!

at home with Brooklyn Homemaker

I’ve been saying since the beginning that Brooklyn Homemaker is not a food blog, but a blog highlighting all of my interests and activities. As much as I love cooking (and eating) I also want to share my interests and abilities beyond my skills in the kitchen. Looking back, I realize that about 95% of what I’ve posted so far have been recipes and stories about food and how it relates to my life, but I promise that every once in a while you’ll see something else from me.

The truth is that unless we move to a new apartment, I will probably always post more recipes than other topics. I cook every day, but after three plus years in this apartment I’ve done most of what needs doing here. It’s (mostly) at a point where we’re happy with it and don’t need or plan to change much. I am the kind of person who doesn’t stop at perfection though, so odds are that there will continue to be the occasional changes and updates to our humble little palace and the decor and furnishings within.

Today though, I thought it might be a fun departure to let you into my home and give you the grand tour.

First, the before photos:

apartment before | Brooklyn Homemaker

Our apartment is what’s referred to in New York, and most large old cities, as a “converted railroad.” For those of you non-New Yorkers, a railroad apartment is long and narrow, like a train car, with windows on either end. There are no interior windows because the building is sandwiched up against other buildings, so the only exterior walls face the front and back of the building. When most railroad apartments were built over a century ago they usually had two bedrooms at one end, with a living space in the interior, and the kitchens and bathrooms on the other end. They were built as tenement housing for low-income families, and the bedrooms were set up so that you had to walk through one to access the other. Today though, most of these apartments are rented to young people with roommates that don’t want to have to walk through one another’s bedrooms to access the rest of the apartment. Many have been renovated to move the bedrooms to either end, with the living space moving into the interior. Hence the term “converted railroad”. Our apartment was most likely converted in the mid 90s, based on the materials used for flooring and fixtures.

apartment before | Brooklyn Homemaker

When we moved into this place it was a real mess. These photos are terrible and don’t do the level of UGLY justice at all. I’m really really sorry about these photos, btw. We never planned to share them with anyone other than each other, but here we are. It never occurred to us that I might someday want to share them on the internets, but at this point I’m just glad we thought to take any before photos at all.

apartment before | Brooklyn Homemaker

We signed the lease after the first of the month and negotiated to not start our lease until the 15th. Our lease at our previous apartment didn’t end until the end of the month so that gave us 15 days to get in and do what we could before moving in. We painted practically every surface; walls, ceilings, baseboards, you name it, in every room but the guest room. Sorry, but you won’t be seeing the guest room today, but if we ever do decide to paint in there you’ll get very familiar with that space.

Before we moved in the place had been “freshly painted” with the cheapest ugliest white paint money can buy, with no effort to take tacks or nails out of walls or patch any holes before breaking out the rollers. They also didn’t bother to put down drop-cloth before painting and we spent plenty of time on our knees trying to clean off all the paint splattered on our hardwood floors. The kitchen was especially disgusting and took two full days of scrubbing and bleaching and scouring and crying to get it to a place that didn’t make us want to vom. Don’t even get me started on the backyard. Words can’t describe the level of gross that was happening back there, but I’m going to save that for another post.

apartment before | Brooklyn Homemaker

The thing is, we knew this apartment was going to be a project when we took it. The part of Brooklyn we live in is still (relatively) affordable but we knew that any place we were going to find in our price range was going to be a project. We knew we wanted a first floor apartment with access to a backyard because we knew a puppy was in our future, and even with all the work this place needed, it was worth it to us. If this place were in a different neighborhood or was in the state it’s in currently, it easily could have gone for twice what it did when we signed the lease. And, let’s be honest, I actually love a project. As much as I love complaining about it now, I enjoyed every minute of the torture involved in making our apartment what it is today. I only wish I were putting this sweat equity into my own home instead of improving someone else’s property.

So, without further ado, our apartment:

living room | at home with Brooklyn Homemaker | Brooklyn Homemakerliving room | at home with Brooklyn Homemaker | Brooklyn Homemaker

This is our living room. We chose a pale grey paint for three of our walls, and decided to break it up with a dark turquoise, if that’s a thing. It reads as navy in photos, but I promise it’s a dark blue/green. We also painted a black faux picture rail about a foot below our ceiling to visually break up the space and add interest to the walls. We did the same thing in our bedroom, btw.

Our sofa was the first piece of furniture we bought for this apartment. We picked it out and arranged for delivery from Macy’s before we even moved in. Down the line we might want a sectional, but I like the style of it and it looks nice in the room.

living room | at home with Brooklyn Homemaker | Brooklyn Homemaker

The mid-century end tables were found at Junk in Williamsburg. They were in kind of rough shape when we found them but were cheap so we didn’t mind giving them a little love to bring them back to life. Refurbishing them could have been another post, but this happened before Brooklyn Homemaker and I didn’t think to get any good photos of that process. I basically followed the steps as laid out over at Manhattan Nest, and once I had the materials it was actually fairly easy and made such a difference in making those old tables shine. The one decent photo I did manage to get was of the brass handles, and what they looked like before and after cleaning them with Brasso. It turns out that the main ingredient in Brasso is magic. Behold:

mid century brass hardware| before and after Brasso | Brooklyn Homemaker

While I was cleaning the tables I noticed they were made by the Lane furniture company and, after some research on their serial numbers, I discovered they were made in 1960. They’re in such great shape for their age and they were such an amazing score for the price.

living room | photo gallery wall |Brooklyn Homemakerliving room | photo gallery wall |Brooklyn Homemaker

This gallery wall is made up of old black and white photos of our families and it continues to grow as we find cool new frames and ask our parents and grandparents for more photos.

bar cabinet and seating | living room | Brooklyn Homemakerbar cabinet and seating | living room | Brooklyn Homemaker

We used to have a dining table and chairs in this space but we never used it and it usually wound up as a place to collect coats and bags and mail and crap. We probably sat and ate at the table once or twice in the whole time we had it, and the rest of the time it was just a placeholder that always looked like hell. The seating area that’s there now is so much more comfortable and attractive and wonderful. It’s really wonderful. Really.

The yellow chair on the right is a vintage mid-century platform rocker we bought at a yard sale upstate, and the blue chair was a wedding gift we bought each other from West Elm. Also from West Elm is the bar cabinet between the chairs. We just got this and we totally love it. It fits perfectly in the space and ties the room together in a way we’ve never been able to do before we found it. It also houses all our wine and cocktail glassware and gave us an excuse to start hoarding bottles of fancy booze. Woot woot.

ball jar dry storage in the kitchen | Brooklyn Homemakershelving and storage cart in the kitchen | Brooklyn Homemaker

Since moving in we’ve added this storage cart and metal Ikea shelving in the kitchen. This kitchen has a serious lack of counter space and storage for anyone who cooks regularly, and especially for someone who likes to cook the way I do. The shelving and cart have helped alleviate both those issues, but haven’t cured the storage problem completely. A lot of our serving ware and specialty gadgets have ended up hiding in our guest room.

chalkboard backsplash in kitchen | Brooklyn Homemakerchalkboard backsplash in kitchen | Brooklyn Homemaker chalkboard backsplash in kitchen | Brooklyn Homemaker

You’re already familiar with the chalkboard backsplash, but I thought you’d be happy to see it again.

kitchen and living room view | Brooklyn Homemakervintage spring scales on fridge | Brooklyn Homemaker

I like to collect vintage kitchen spring scales. The most recent addition is this beautiful rusty old egg scale Russell gave me for Christmas. It was used to weigh eggs to determine their size for sale. So cool.

Bedroom and schnauzers | at home with Brooklyn Homemaker | Brooklyn Homemaker

Here’s our boudoir. Oooooh.

Hunting is big in my family and, while I’m not a hunter myself, I do enjoy some taxidermy. Say hello to Barnard. Doris and Betty also wanted to say hi, so say hello to them too. The chandelier was painted white when I bought it but I thought our bedroom could use some color so I picked up a can of spray paint and went to town. Hot pink town.

bedding, side tables and lamps | Brooklyn Homemaker
bedroom side table lamp | Brooklyn Homemaker|

Those lamps by the way, here’s what they used to look like:

bedside lamps before | at home with Brooklyn Homemaker | Brooklyn Homemaker

When Russell saw them at the Salvation Army we actually had an argument about whether he could take them home or not. I refused to let him buy them, and we left without them, but about an hour later he won and made me go back. I refused to let them into our bedroom until he let me paint them, and he was reluctant but eventually agreed. He took a trip to see family in LA one weekend and one can of glossy white spray paint with primer later, they look like fancy white porcelain and we get compliments on them all the time.
God they used to be ugly though. Russell still insists they looked better before. He’s out of his mind. So ug.

taxidermy over bed | Brooklyn Homemaker
at home with Brooklyn Homemaker | Brooklyn Homemaker

That black skull is actually a piggie bank, and I love it more that you’ll ever know. The dresser was given to us by a friend when we moved in. It was painted white by someone who gave it to her, but when it came to us it was looking a bit too chabby chic for our taste. I painted it with some black lacquer oil paint and I think it makes our room look really chic.

antique dresser painted black | Brooklyn Homemaker

So, that’s our place. Thanks for visiting!

I’d like to invite you into our bathroom soon too, but I’m saving that for another post. You’ll just have to wait to find out why.