chicken

zucchini “pasta” with chicken, white wine, & tomatoes

You probably haven’t noticed this yet, but I’m not super big on “health food”.

zucchini "pasta" with chicken, white wine, & tomatoes | Brooklyn Homemaker

I mean, don’t get me wrong. I actually do try to eat healthy. In fact, when you bake as many treats as I do, you don’t really have a choice. You definitely need to balance the (delicious) unhealthy stuff with something light and green every once in a while. We try to make a green juice every morning before work, we (almost) never eat fast food, very rarely eat junk food (unless we’ve made it ourselves), and try to eat only whole foods (rather than heavily processed prepared ones). That doesn’t necessarily mean we’re in great shape or anything because, again, we also eat lots of sweets and homemade treats. It also doesn’t mean that we would ever consider ourselves “health nuts” or ever say we prescribe to any fad diets or trends in nutrition.
And then this weird thing happened.

zucchini "pasta" with chicken, white wine, & tomatoes | Brooklyn Homemaker

At work we started getting all of these requests for a hand-held spiral slicer, and everyone asking for it said they wanted to make “noodles” out of zucchini. We had two options for spiral slicers at the time, but both of them are a significant investment, and neither of them are even close to being hand-held. Some people would go with those options, others would choose something else we’d recommend, but most would sullenly walk out empty-handed, after begging that we bring in their requested item. I always assumed these poor souls were on some annoying fad diet that forced them to eat soggy squash “noodles” when they’d rather be eating pasta, but the number of requests we were getting in such a short period made us take notice. After a long search, we finally found one we liked and a few weeks ago we started carrying it. The one we have now is called the “Spirelli” by Gefu, and can it be found here.

zucchini "pasta" with chicken, white wine, & tomatoes | Brooklyn Homemaker

Even after we brought it in, and it started selling really well, I was still a total skeptic. Then one of my co-workers bought one and started raving about it. So, I decided I should probably give it a shot.

zucchini "pasta" with chicken, white wine, & tomatoes | Brooklyn Homemaker

The other night I tried it out for the first time and was shocked at how easy (and kind of fun) it was, and Russell actually requested I make zucchini “pasta” again the next night. I honestly can’t believe I’m saying this, but it’s pretty great.  The texture of the “noodles” is way better than I expected, not soggy at all, a bit like an al dente pasta. Since zucchini has such a neutral flavor, it absorbs the flavor of whatever else you’re cooking, and doesn’t end up tasting at all “health-food-y”.

zucchini "pasta" with chicken, white wine, & tomatoes | Brooklyn Homemaker

The one problem I had the first night was that when cooked, the zucchini gave off a ton of liquid and made the sauce really runny. I had to take the “noodles” out to reduce the sauce and then add them back in at the end. The next night I decided to try salting the “noodles” beforehand to get them to give off their liquid before cooking. Worked like a charm!
Some recipes I found recommend that you peel the zucchini for a more “noodle-y” appearance, but I don’t think the skins do anything negative to the texture, and the dark green skins have a lot of nutrients that you’d lose if you peeled them. I say leave ’em!

zucchini "pasta" with chicken, white wine, & tomatoes | Brooklyn Homemaker

This method is actually super quick and easy too! You just cut the end off the zucchini and push and twist it through the slicer like a giant pencil sharpener. If you don’t have this tool you could also use a mandoline slicer or another spiral slicer, or even a julienne peeler, to make zucchini “noodles”. The only time consuming step is letting the zucchini absorb the salt and release its moisture, which takes about 30 minutes, but that can be done while you prepare the rest of the dish. If you time it right and work efficiently, the whole meal including prep time can be on your plate and in your belly in well under an hour. Even with frequent pauses to photograph the whole process, it only took me about an hour.

zucchini "pasta" with chicken, white wine, & tomatoes | Brooklyn Homemaker

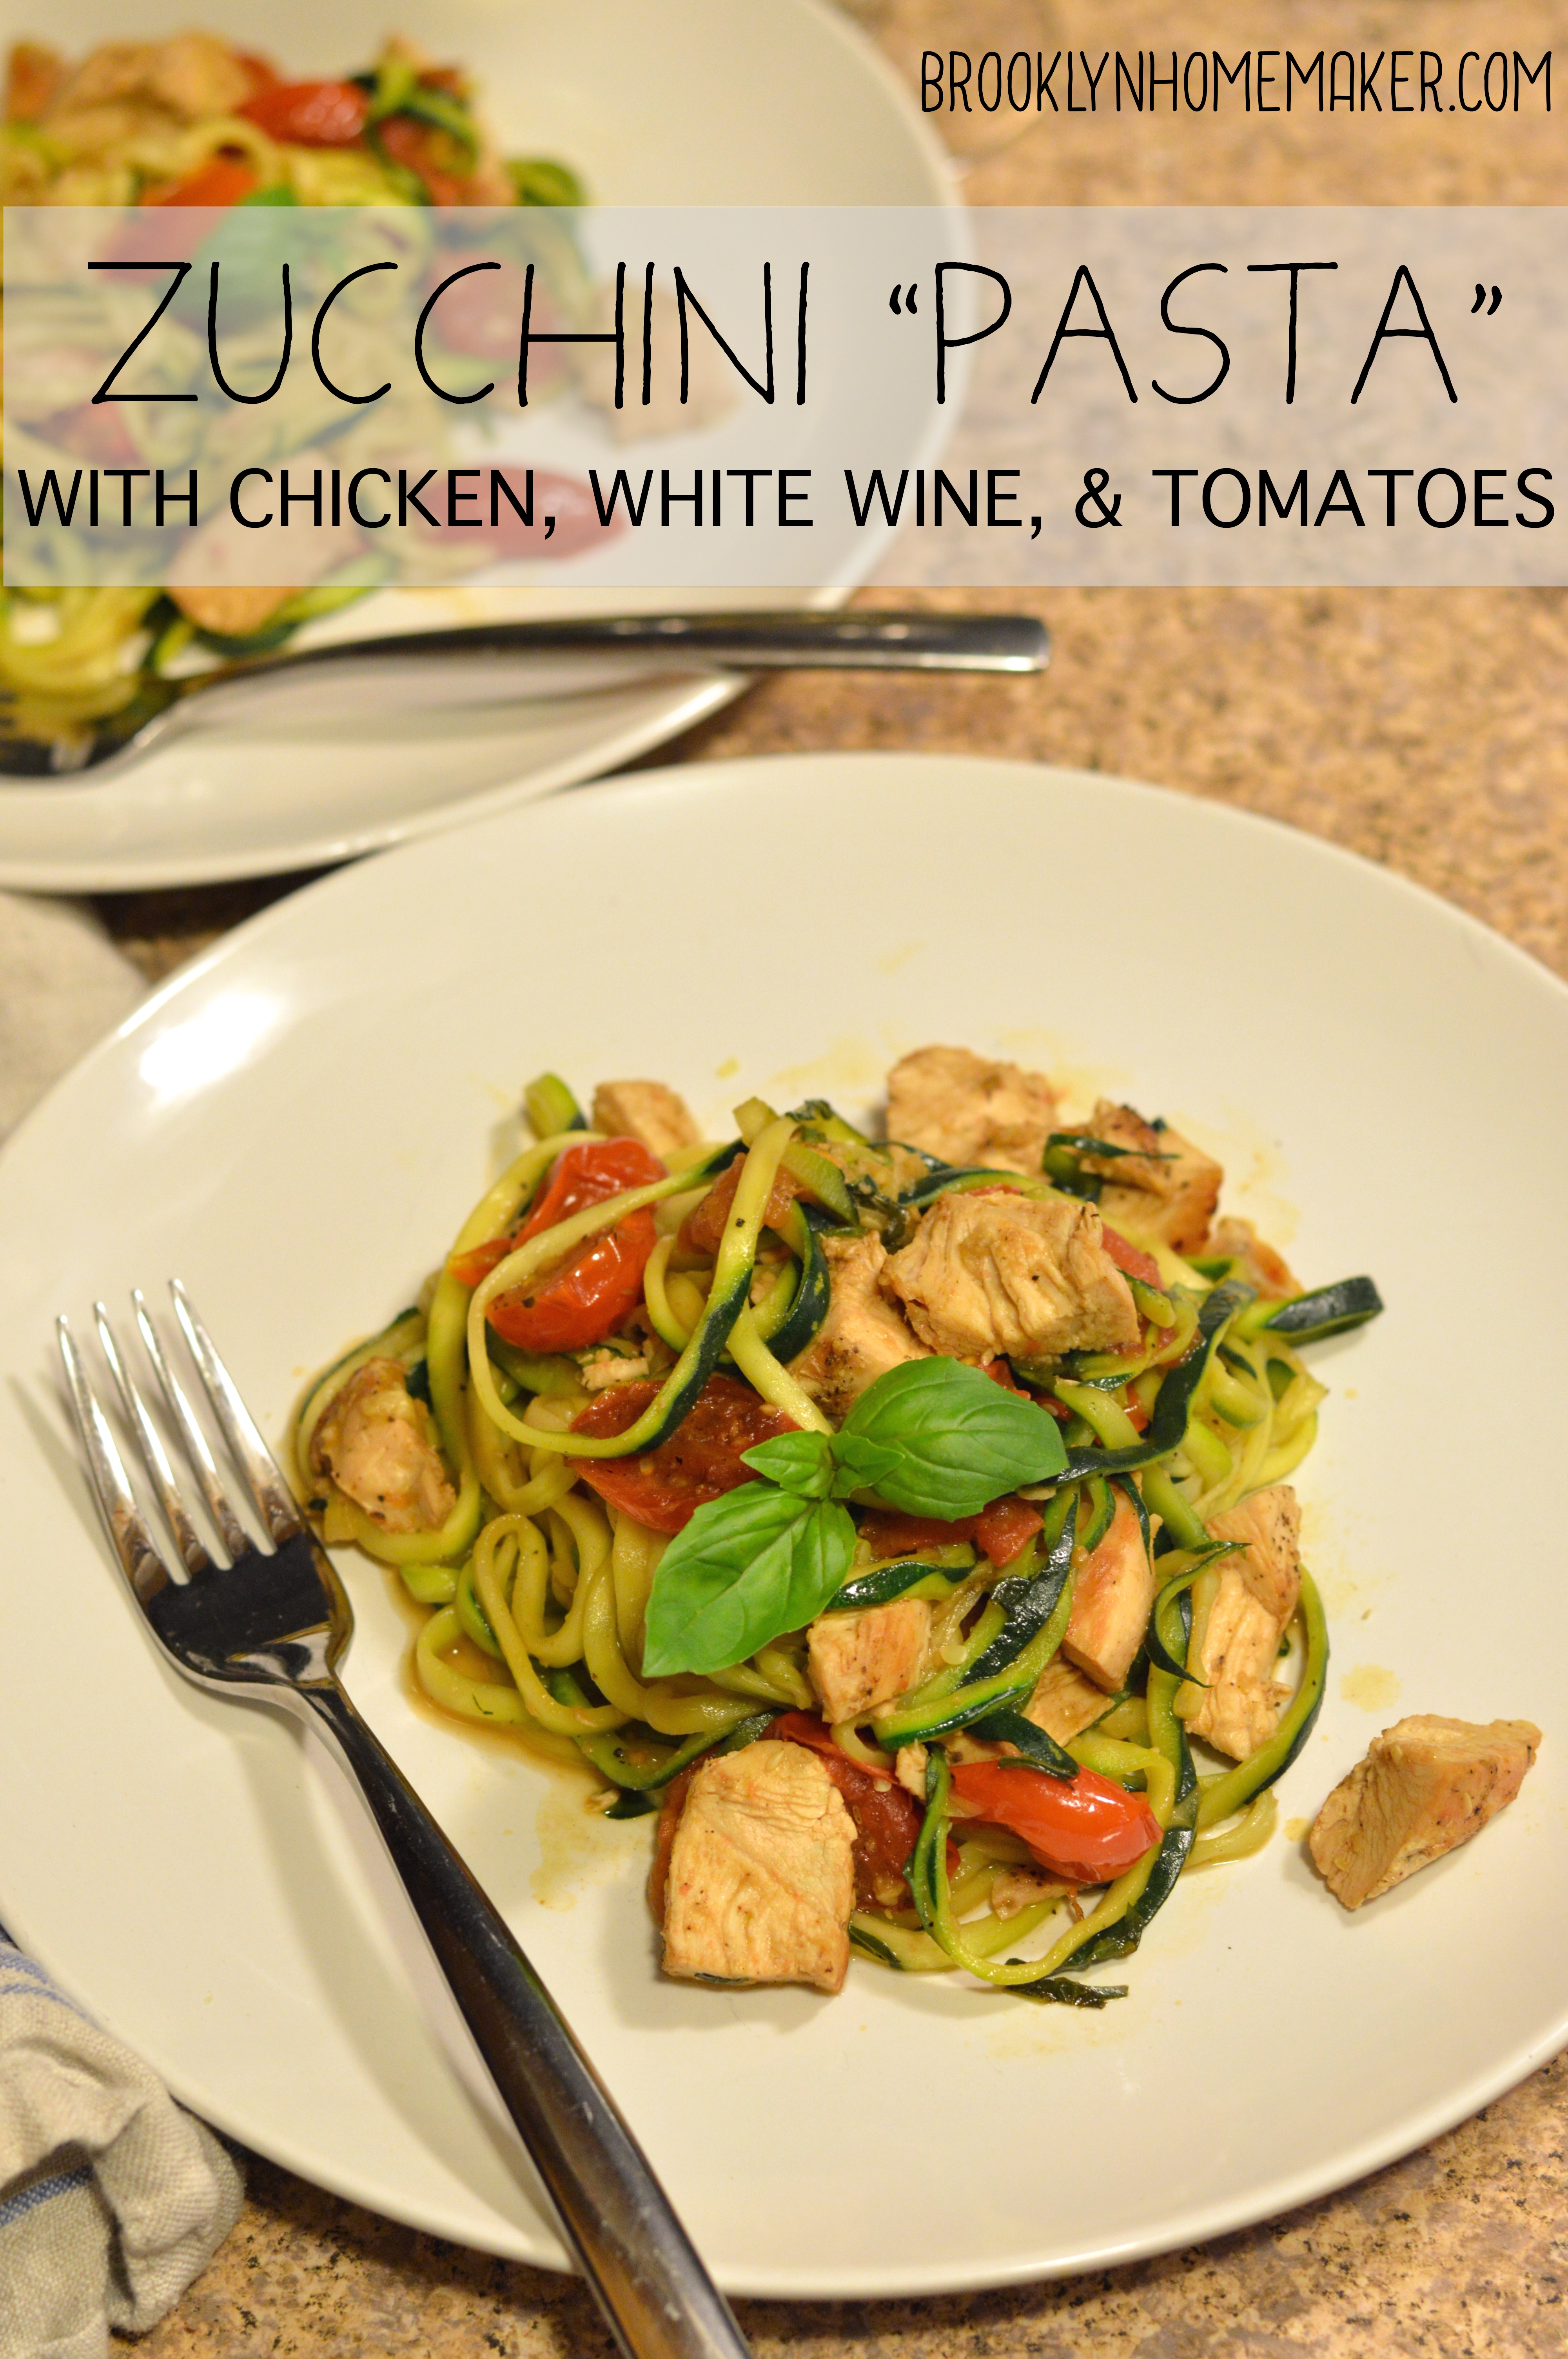
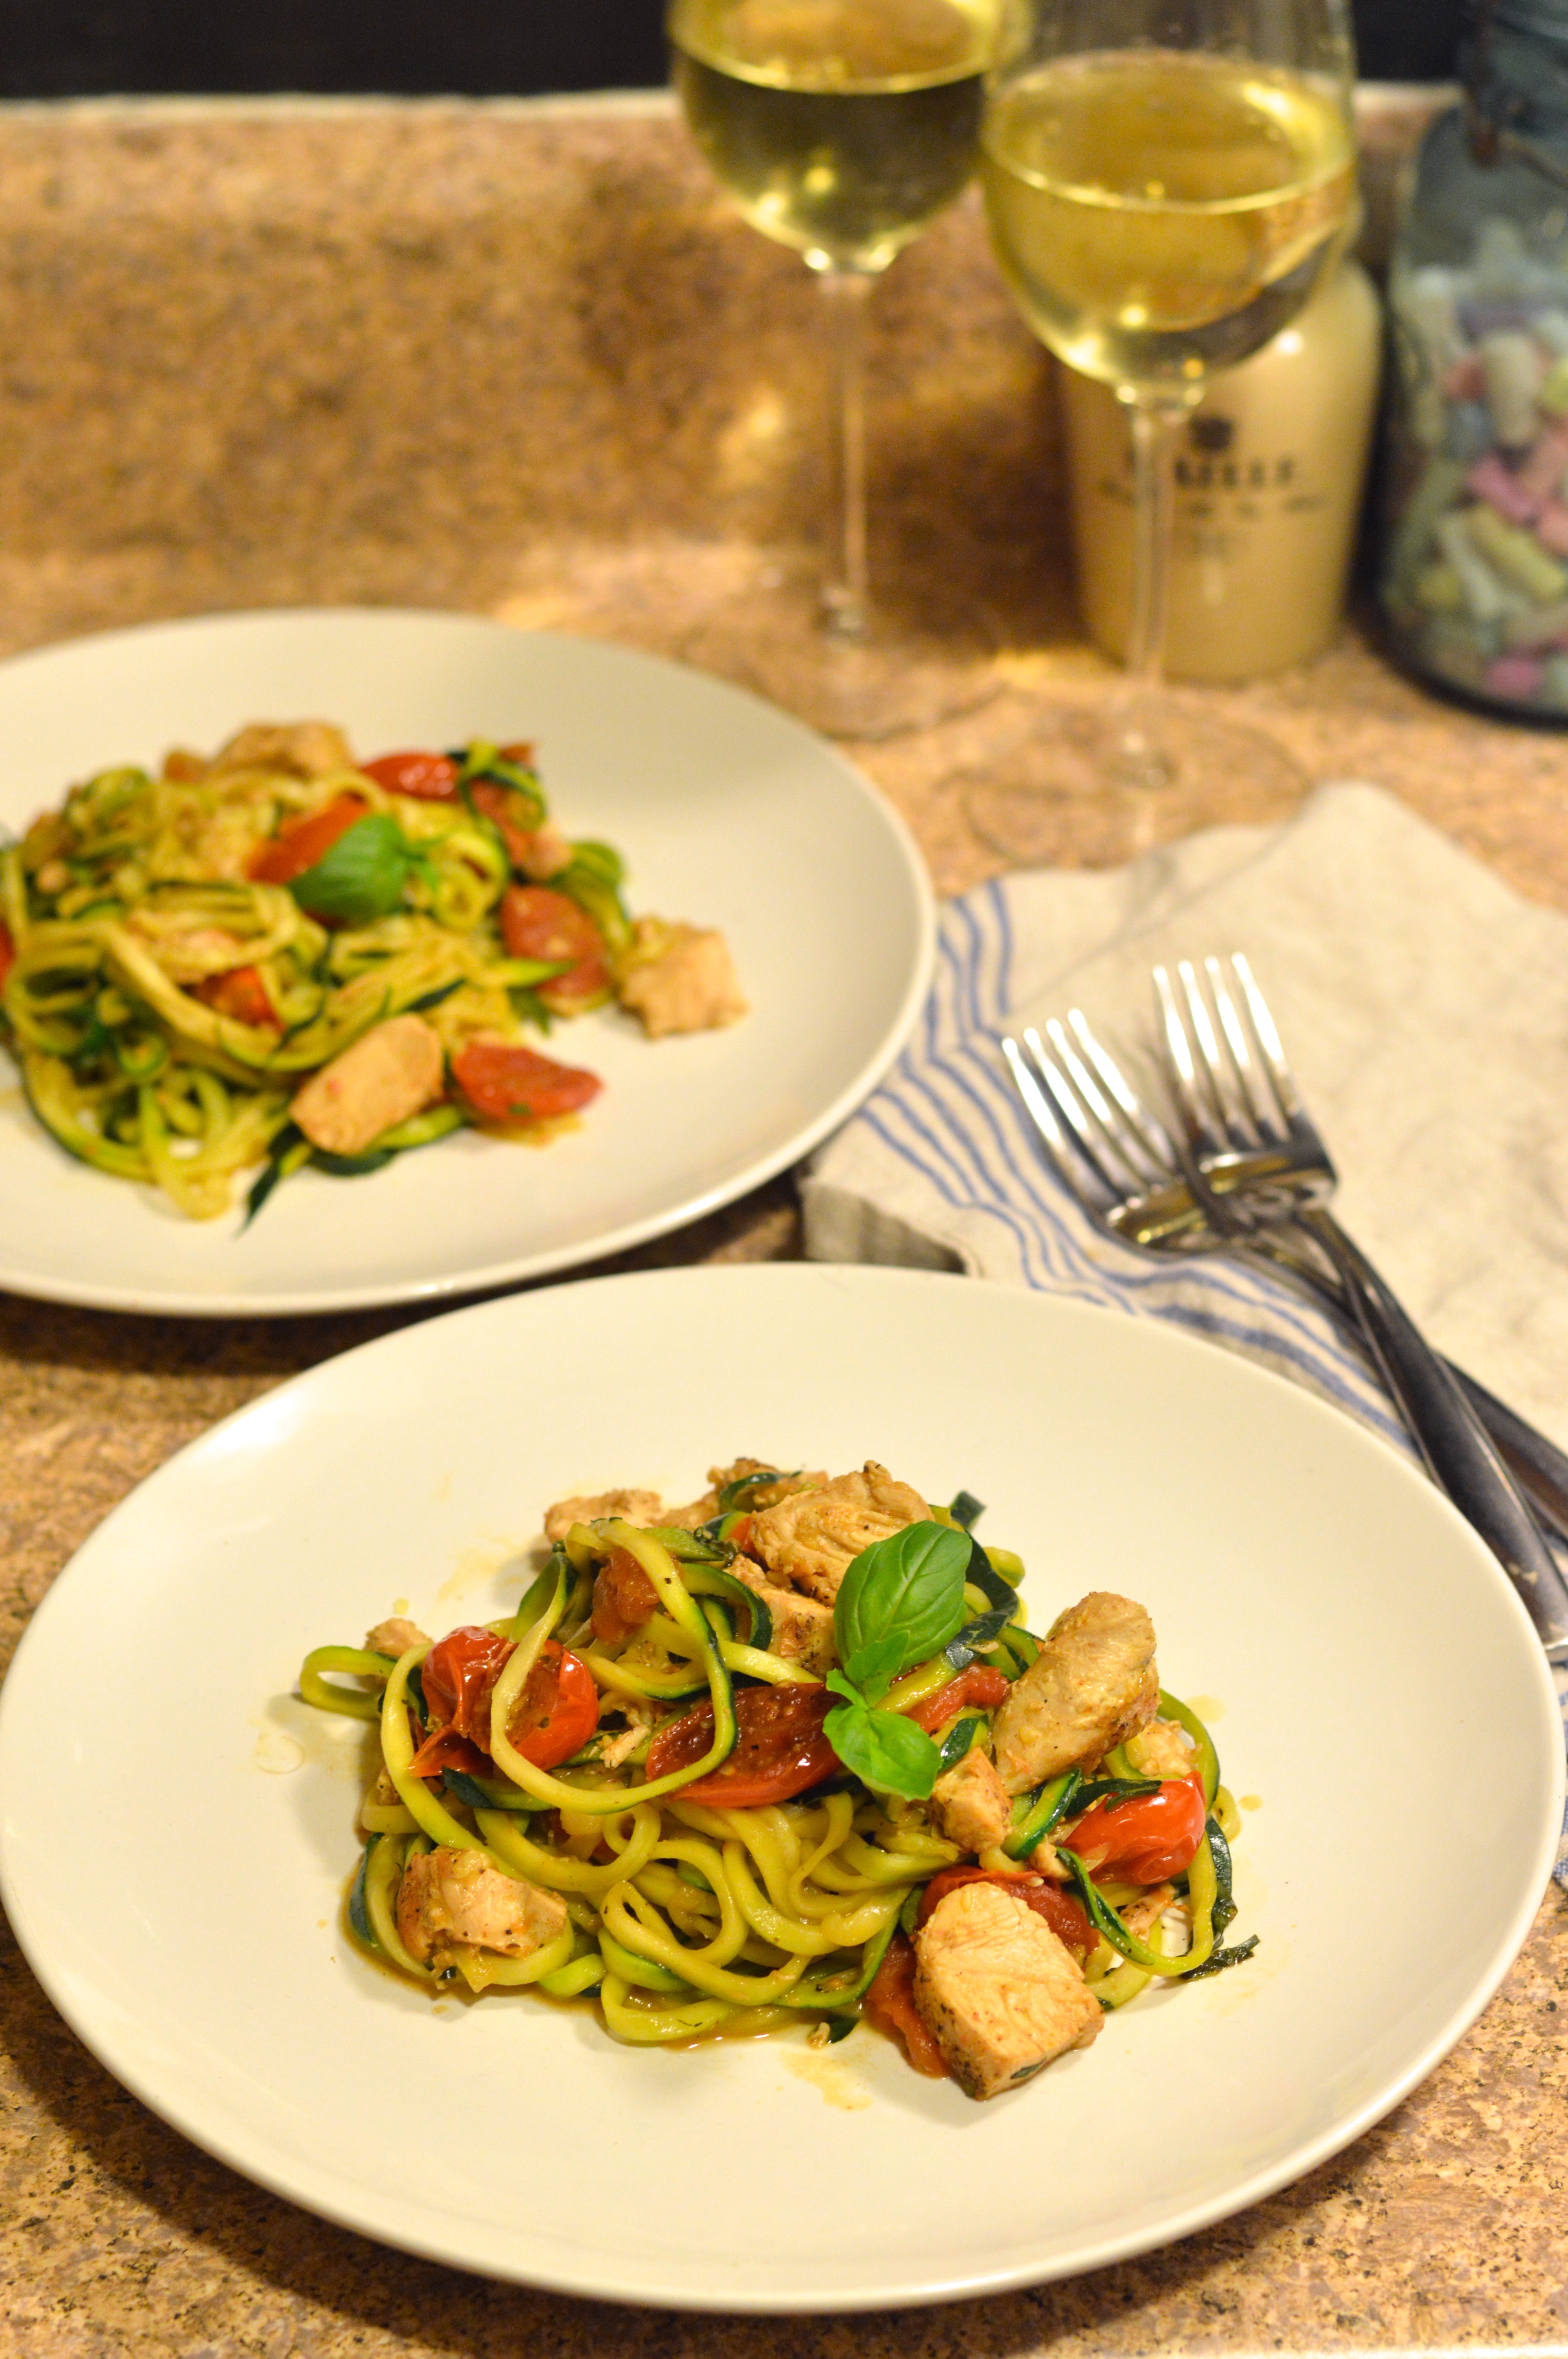
For this dish I paired the “noodles” with seared chicken and a white wine and blistered tomato sauce. Obviously this recipe could be adapted to be as healthy, or as rich, as you like. As is, it has little more than protein, vegetables, and a little seasoning and olive oil. I can’t believe I’m pushing zucchini noodles on my blog. I never thought this day would come. But they’re so GOOD!!!

zucchini "pasta" with chicken, white wine, & tomatoes | Brooklyn Homemaker

Tender “al dente” noodles, sweet blistered tomatoes, tender perfectly browned chicken, sweet garlicy wine sauce, bright fresh basil… It doesn’t get any better than that!

zucchini "pasta" with chicken, white wine, & tomatoes | Brooklyn Homemaker

Zucchini 'Pasta' with Chicken, Tomatoes, & White Wine

4 medium zucchini
3 Tablespoons good olive oil, divided
2 skinless, boneless chicken breasts
salt and pepper to taste
1 pint ripe grape tomatoes
3 large cloves garlic, crushed or finely minced
1/2 cup white wine
handful fresh basil leaves

Wash zucchini and use a spiral slicer (like this one), julienne slicer, or mandolin to create spaghetti style “noodles”. Place “pasta” in a mesh strainer and sprinkle with about 2 teaspoons salt. Toss well and allow to sit for at least 30 minutes. Gently squeeze out any remaining liquid and discard.
Meanwhile, heat large cast iron or stainless steel skillet over high heat. Season your chicken breasts on both sides with salt and pepper. Add 1 tablespoon olive oil to pan and sear chicken for 5-7 minutes on either side, or until nicely browned and cooked through. Set aside to rest.

Wash tomatoes and slice each in half, lengthwise. Add remaining olive oil to pan, add tomatoes, and season with salt and pepper. Cook tomatoes, stirring occasionally for 7 to 10 minutes until they are browning and starting to fall apart. Add garlic and wine, stir well, and cook down until wine is reduced by at least half, about 5 minutes.
Slice your chicken up into bite sized pieces. Arrange basil leaves in a flat pile, roll up into a “cigar” and slice into very thin strips. (this is called a chiffonade)
Add chicken and basil to pan with sauce. Add zucchini and toss to combine. I find this works best with long silicone tipped tongs. Cook until noodles are heated through, about 5 minutes.
Adjust seasoning if necessary, and top with a little fresh basil.

fully loaded stovetop mac & cheese

This Easter Sunday was a beautiful warm sunny day here in New York so Russell and I spent the bulk of our day enjoying the outdoors.

fully loaded stovetop mac & cheese | Brooklyn Homemaker

We woke up bright and early (thanks to our little dog Betty) and decided to go for breakfast a few subway stops away and to take a quiet leisurely walk home. When we got back we took the pups out to the dog park for a while, and then came home and spent most of the rest of the day in our back yarden (combination yard/ garden, just indulge me).  Once the sun started to go down and the air turned a little chilly, we decided it was time to come up with a plan for dinner.

fully loaded stovetop mac & cheese | Brooklyn Homemaker

Since it was a holiday I thought we deserved something a bit rich and indulgent even though we weren’t celebrating with family or friends. Considering that most of the day was behind us, I also wanted it to be something that I could have on the table and in our bellies in just about an hour or so. I thought a nice hearty pasta dish would be the ideal thing to round out the day, but since I wanted it to be indulgent and creamy, I knew cheese would be the prefect addition. The more I thought about it, the more I knew I should let the cheese take center stage, while still loading it up with all the other hearty tasty things I wanted to add.

fully loaded stovetop mac & cheese | Brooklyn Homemaker

I often like to make a quick “healthy-ish” pasta dinner with chicken and broccoli and whatever else sounds good, but after the addition of some bacon and loads of cheese, this dish seemed to stray out of that category. Since it doesn’t have a crunchy crumbly baked topping, it also doesn’t quite feel like a traditional homemade mac & cheese. It seems to fall somewhere in between the two, but since it does have a rich and creamy béchamel cheese sauce, I think that “fully loaded” stovetop mac & cheese is the perfect name for it.  Whatever you want to call it, it is definitely less than healthy, and completely delicious.

fully loaded stovetop mac & cheese | Brooklyn Homemaker

Crisping the bacon on its own allows you to render the fat to later make the béchamel. Cubing the uncooked chicken helps it cook faster while remaining flavorful and tender. Roasting the broccoli in the oven instead of, say, boiling it with the pasta, keeps it from tasting waterlogged and soggy and helps it absorb as much of the creamy sauce as possible. Slicing open and roasting the grape tomatoes concentrates their flavor and sweetness and gives them an almost sun-dried quality. Of course, if you wanted to save some time and avoid turning on the oven, you could boil the broccoli with the pasta or steam it while the pasta cooked, and you could use chopped sun-dried tomatoes in place of the roasted fresh ones. Either way, if you work smartly and efficiently you can finish this dish in just about an hour. It does require a bit of work but none of the steps are overly complicated or time-consuming, so I think it would be an excellent weeknight meal.

fully loaded stovetop mac & cheese | Brooklyn Homemaker

I wasn’t sure that the chicken or the tomatoes would marry well with the sharp cheddar cheese, but my concerns were totally for nothing. This meal is totally delicious and really hearty and filing, and was the perfect way to finish of our lazy Easter Sunday. The creamy sharp cheese gives it an almost tangy quality that combines really well with the sweetness of the tomatoes and the umami saltiness of the bacon. If you cook the pasta to be al dente this dish has a really nice variety of textures as well as flavors. The chicken is tender but with some substance, the pasta has just a bit of bite, the roasted broccoli has a little bit of crunch, the bacon adds some welcome crispiness, and the perfect creaminess of the cheese sauce rounds the whole meal out.

Now if you’ll excuse me, there are some leftovers that seem to be calling my name.

fully loaded stovetop mac & cheese | Brooklyn Homemaker

Fully Loaded Stovetop Mac & Cheese

1 pint washed grape tomatoes, sliced in half lengthwise
1 large bunch broccoli, chopped into bite size florets
1 tbsp olive oil
salt and pepper
4 oz bacon
1 lb skinless boneless chicken breasts
1 small onion, diced
2 tablespoons flour
2 cups milk
8 oz white cheddar cheese, grated
1 lb (16 oz) shell pasta (or another shape if you want)

Preheat oven to 400 and bring a large pot of salted water to a boil. On a parchment lined sheet pan, arrange halved tomatoes cut side up, and sprinkle with salt and pepper. Toss broccoli with olive oil, salt and pepper to taste, and arrange on another parchment lined sheet. Roast both for 20 to 25 minutes, until cooked and brown but not burnt or dried out.

While the vegetables roast, slice your bacon against the grain into small thin strips and cook in a heavy skillet over medium high heat until browned and crispy, probably about 15 to 20 minutes. Remove with a slotted spoon and drain on a paper towel lined plate. Drain most of the grease off into a glass measuring cup, leaving about a tablespoon to cook your chicken. Cut the chicken into bite sized cubes, season with salt and pepper, and sauté until just cooked through, about 10 minutes. Remove and transfer to paper towel lined plate with bacon.

Cook pasta until al dente according to package directions. Drain and return to pasta pot along with cooked tomatoes, broccoli, chicken and bacon. If desired, reserve about a tablespoon or two of bacon to garnish.

Meanwhile, measure out 2 tablespoons of bacon fat and return to the pan, discarding anything left (or save for later use). If you don’t have enough, make up the difference with butter. Add onion and cook until just beginning to brown. Add the flour, whisk until well combined, and cook over medium heat for 2 or 3 minutes. Slowly add milk, a little at a time, whisking out any lumps. Cook until thick and bubbly, probably 5 to 8 minutes or so, whisking regularly to prevent lumps. Once the sauce is thick, turn the heat off and add the cheese. Stir in until fully melted and well combined. Pour sauce over pasta and stir stir stir until everything is well combined. Plate and garnish with a little crumbled bacon if desired.

grilled lemon herb chicken thighs

So, in case you haven’t already noticed, it’s starting to warm up outside and things are starting to turn green. I’m so into it.

grilled lemon herb chicken thighs | Brooklyn Homemaker

On Sunday we decided it was warm enough to have our first cookout of the year. It wasn’t really, but we were drinking so no one seemed to notice. We gathered some friends, fed them some cocktails, and cooked up a bunch of food over an open flame. We also tried to overlook the fact that I was standing over the grill with a camera while everyone else was enjoying the outdoors for the first time since 2013. In case you were wondering, photographing a grill while smoke pours out can be an awkward task, especially when the wind can’t decide which direction it wants to blow.

grilled lemon herb chicken thighs | Brooklyn Homemaker

I thought the perfect thing for a warm(ish) spring day would be some lemony grilled chicken thighs with plenty of fresh green herbs. I know, chicken thighs again. I’ve already said this, but beyond being affordable, chicken thighs are also really juicy, tender, and flavorful. They also happen to lend themselves perfectly to grilling. I love white meat too, but I sometimes find that breast meat can dry out on the grill if you’re not a really experience griller. Chicken thighs are much more forgiving if you forget them while you’re sipping your drink and accidentally leave them on just a bit too long, or if you’re afraid of undercooking and intentionally leave them on just a bit too long. Either way, they’re going to come out moist and delicious and all your friends will tell you how skilled you are at cooking with fire.

To go along with our chicken, I also grilled some marinated veggie kabobs. A nice mix of grape tomatoes, onions, bell peppers, and mushrooms was just what the doctor ordered. I LOVE the way grape tomatoes get all hot and juicy and just barely hold their shape when you grill them. You can definitely play with other veggies too, but it’s important to keep in mind that they’ll all cook for the same amount of time. Simply cut up your veggies into bite sized chunks (l left my mushrooms and tomatoes whole), marinate for an hour or two, arrange on skewers, and cover until you’re ready to grill. If you’re using wooden skewers you should soak them in water while your veggies marinate so they don’t burn on the grill. As for marinades, I think vinaigrettes work really well for grilled vegetables, but you can really use whatever you like. In this case, I just made a little extra lemon herb marinade and used that.

grilled lemon herb chicken thighs | Brooklyn Homemaker

When it comes to cooking outdoors, I’m a firm believer that charcoal grills give your food MUCH more flavor. Gas grills cook your food, and you’ll be standing outside while it happens, but you’re really not going to get any of that smokey “grilled” flavor. If you have a gas grill at home and want to try to get that smokiness, I’d suggest trying some hardwood smoking chips. Smoking chips usually come in a few different flavors like hickory or applewood, and can be found online or at many grocery or hardware stores. Before using them you need to soak the chips in water so they don’t just burn up. To contain the ash and prevent them from burning too quickly, you can make a pouch for your chips out of aluminum foil, or get one of these handy smoke boxes.

grilled lemon herb chicken thighs | Brooklyn Homemaker

This chicken is seriously phenomenal. So good in fact, that one of our friends who usually doesn’t eat meat went back in for seconds. The skin gets all crispy and golden brown, while the meat stays moist and full of flavor. The marinade completely permeates the meat without being overpowering. It’s savory, aromatic, and earthy thanks to two fresh herbs and a healthy dose of garlic, and the olive oil and lemon juice make it tangy, sweet and bright. These fresh clean flavors are an ideal pairing with the smokiness that comes from cooking with charcoal or hardwood chips. You might not see another grilling recipe for the rest of year, because I’m just going to make this over and over and over. Just kidding! I promise!

grilled lemon herb chicken thighs | Brooklyn Homemaker

Grilled Lemon Herb Chicken Thighs

  • Servings: 5-10ish *see cook's note
  • Print

8-10 chicken thighs
1/2 cup olive oil
1/2 cup lemon juice
zest of 3 lemons
4-5 garlic cloves, crushed
1 tablespoon rosemary (finely chopped)
2 teaspoons thyme (finely chopped)
1 1/2 teaspoons coarse Kosher salt
1 1/2 teaspoons ground black pepper

Wash and dry chicken thighs and place in a shallow dish. Combine all remaining ingredients, mix well, and pour over the chicken thighs. Turn the pieces over and over until they’re all well coated in marinade. Press the chicken down into the dish so it’s as submerged as possible. Cover the dish with plastic wrap and refrigerate for 4-8 hours, turning the chicken a few times so it’s all well coated.

Once marinated, prepare your grill. A gas grill should be on low heat, or a charcoal grill should be prepared so one side has fewer coals than the other. Place the chicken on the cooler side of the grill, skin side up, and cook for 10 to 12 minutes, until the underside is golden brown. Resist the urge to pour the marinade over the chicken. Turn each piece over once, cooking for another 10 to 12 minutes, or until the skin is golden brown and the chicken is cooked through. Remove from the grill and let rest, covered with foil, for 5 minutes before serving.

*cook’s note:
You can definitely increase (or decrease) this recipe to accommodate the number of guests you’re cooking for. I’d recommend one to two pieces per person, depending on the size of your thighs, what else you’re serving, and how hungry you think your guests might be.

braised chicken thighs with creamy greens and beans

So, as much as everyone in New York is trying to convince themselves otherwise, it’s still winter… UGH.

braised chicken thighs with creamy greens and beans | Brooklyn Homemaker

It’s a strange thing to be able to literally smell spring around the corner, but to have it still remain painfully out of reach. After this long hard winter, people want to bust out the short shorts and tank tops the minute the sun comes out and temperatures rise above freezing. Unfortunately, mother nature has other plans for us poor ol’ city folk. One day birds are chirping, the sun is shining, and temperatures are soaring (SOARING!!!) into low sixties, but it’s just lady nature messing with our heads, and the next day the wind is reaching gail force and the temperatures barely reach the high teens. One day I’m dreaming of barbecues and watermelon margaritas, and the next day the heat’s cranking and I’m back in front of the stove trying to trick myself with citrus, garlic and greens.

braised chicken thighs with creamy greens and beans | Brooklyn Homemaker

Hopefully I’ll be out in the garden planting annuals and watching the crocus’ bloom very soon, but for now I’m back in the kitchen braising chicken thighs again. This recipe is kind of similar to the last braised chicken recipe I posted, but with some pretty major changes. I guess I’m a creature of habit. What can I say? I used chicken thighs again because, like I said before, they’re a great way to make a meal taste like it cooked all day when it really took about an hour and a half. I also used thyme, lemon, and white wine again, because, well… because those flavors are killer together with braised chicken thighs. Deal with it.
After that though, things went in a very different, very delicious direction.

braised chicken thighs with creamy greens and beans | Brooklyn Homemaker  braised chicken thighs with creamy greens and beans | Brooklyn Homemaker

The sauce for this is so rich and creamy and garlicy and wonderful. After the chicken gets all cozy and relaxed in the oven, it comes out and rests a bit while the sauce reduces and some fresh greens and white beans go in to soak up all that deliciousness. I chose to make this with red chard, but if you’d prefer spinach or something similar, knock yourself out. If you’d like to try this with kale or another braising green, I’d suggest cooking the greens for an extra five or ten minutes, and waiting to add the beans until the greens are almost fully cooked. I think the chard was the perfect choice though, and it adds a bit of bitterness and bite while still being fresh and green and tender. The beans add a bit of texture and interest, along with just enough starch to make this feel like a complete meal.

braised chicken thighs with creamy greens and beans | Brooklyn Homemaker

This dish came out better than I ever imagined. Like sooooooooo good. First of all, thyme and chicken are amazing together. Definitely one of my favorite combinations. Then when you add white wine, cream, and garlic, and just let it all get happy together in the oven… Heaven. The chicken is perfectly rich and falling off the bone, and the tender wilted greens and soft starchy beans make this meal one perfect wonderful dish. After one bite Russell was planning dinner parties and deciding which of our friends should have the privilege of tasting this. If it wasn’t amazing enough already, on top of everything this meal is also really simple to make and is all made in the same pot! I mean. Can it get any better? Actually, yes it can. With a glass of white wine and a big thick slice of nice crusty bread to sop up the sauce. You’re welcome.

braised chicken thighs with creamy greens and beans | Brooklyn Homemaker

Braised Chicken Thighs with Creamy Greens and Beans

  • Servings: 4-8 (depending on the size of your chicken thighs)
  • Print

8 chicken thighs (skin-on & bone-in)
salt and pepper for seasoning
3 tablespoons flour
2 tablespoons olive oil
2 shallots, chopped
7 or 8 garlic cloves, peeled
1 cup dry white wine
2 cups chicken stock
1 cup heavy cream
zest of 1 lemon (peeled in strips with a vegetable peeler, avoiding the white pith)
6 or 7 fresh thyme sprigs
1 (28 oz) can cannellini beans
1 or 2 bunches of swiss chard, washed and torn into bite sized shreds *see note

Preheat your oven to 375.
Season your chicken thighs with salt and pepper and dust with flour, on both sides. Heat olive oil in a dutch oven or braising pan (not raw cast iron) and add chicken skin side down. Brown for 5 to 8 minutes on each side. Remove the chicken to a plate, leaving the remaining oil. Saute the shallots and garlic for 5 minutes until the shallots are tender and translucent. Add the wine and thyme, turn the heat up to high, and boil until reduced by half, about 5 minutes. Stir frequently with a wooden spoon or silicone spatula, scraping the bottom of the pan to loosen up any browned bits. Add the lemon, stock, and cream to the pan, bring back to a boil, and add the chicken skin side up.  Transfer the pan, uncovered, to the oven to braise for 45 minutes or until meat is fork tender.

Remove the pan from the oven, transfer the chicken to a plate, and tent with foil. Move the pan back to the stovetop and boil over high heat until the sauce is slightly reduced, for about 10 minutes. Remove and discard the thyme and lemon zest. Add the chard and beans, and cook on high for 5 minutes more, or until the greens are completely wilted. Adjust seasoning with salt and pepper if necessary, and serve the chicken over a bed of the beans and greens.

*cook’s note- if you have large chicken thighs or want to serve a lot of greens use 2 bunches, otherwise one is fine. It cooks down A LOT, so 2 bunches will be perfect if you’re serving more than 4 people, or if you really like chard!