white wine

braised chicken with kale and white beans

It’s the most wonderful time…. of the year!

braised chicken with kale and white beans | Brooklyn Homemaker

No not Christmas time silly! I work in retail.

It’s Fall!

Less than a week ago I was wearing shorts to work, and then overnight temperatures dipped and suddenly Autumn weather was upon us. This is and always has been my favorite season, and while a lot of people are lamenting the end of summer, I’m over the moon that Fall is finally here.

Maybe it’s because I grew up upstate in a region dripping in corn fields, pumpkin patches, and apple orchards. Maybe it’s the mild temperatures and the fact that I can finally turn off the damned air conditioner and open the windows. Maybe it’s the warm colors and fall foliage, or maybe it’s the smell of the air. Maybe it’s the outdoor activities like hay rides, apple picking, and last chance hiking. Maybe it’s those quintessential Fall foods like apple cider doughnuts, pumpkin pie, and roasted turkey. Maybe it’s the fact that I can finally put something other than shorts on without breaking into a sweat. Or maybe it’s the fact that I can turn the oven back on and start making rich, hearty, slow cooked meals…

Even one of my coworkers, who’s admittedly more of a Summer person, just confessed that she’s really enjoying spending time in the kitchen without the boob sweat.

braised chicken with kale and white beans | Brooklyn Homemaker

The minute the weather dips below 73 degrees I’m ready for soups and stews and braises. Over the weekend it was cold and rainy here in Brooklyn and I was craving soup something fierce. On my lunch break I sat pondering the possibilities and planning my grocery list. My first thought was a white bean and kale soup with sausage and tomatoes, but the colder and rainier it got, the more my cravings started to lean toward some type of braised chicken. Rather than choosing one over the other, I decided to combine the two in to one perfect Fall meal.

braised chicken with kale and white beans | Brooklyn Homemaker

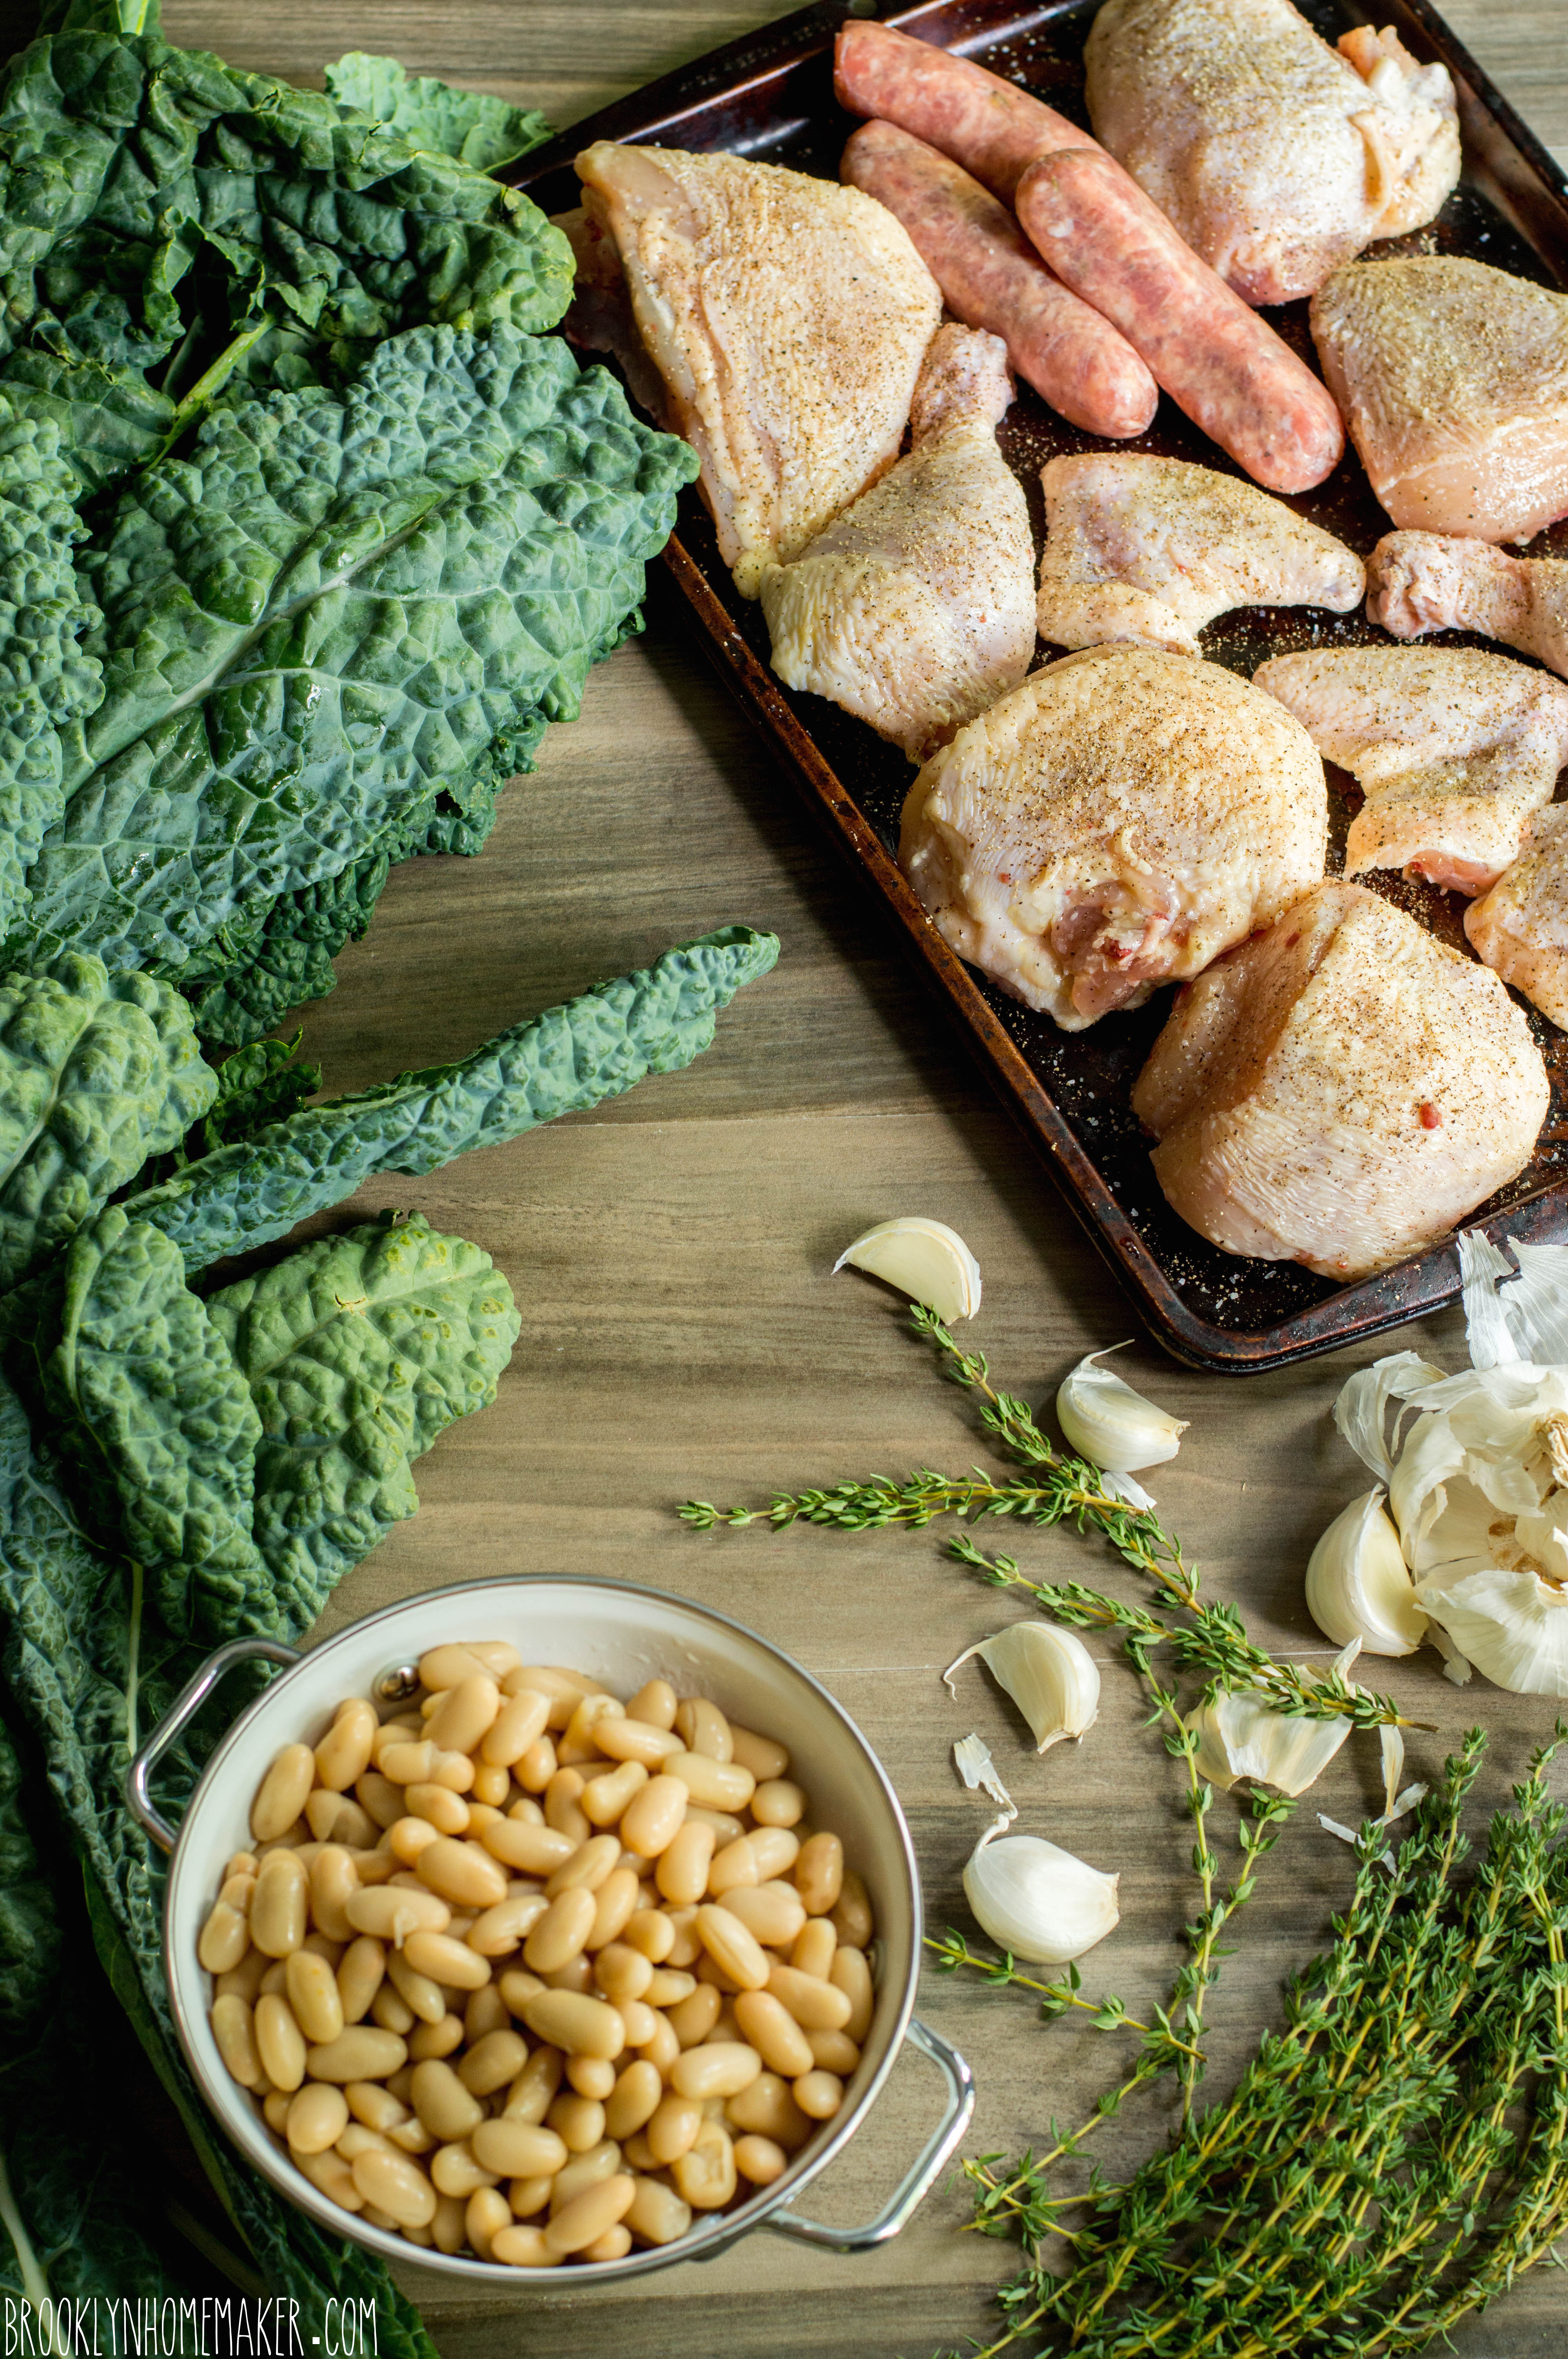
I bought a whole air-chilled chicken and cut it into pieces myself. I think for this recipe it works best to cut your chicken into 10 pieces, including wings, drumsticks, thighs, and quartered breasts.

You can definitely substitute all breasts or all thighs, or a mix of both, but I enjoy the mix of textures and flavors you get from using a whole chicken. I also like the fact that it’s generally cheaper to buy a whole chicken and butcher it yourself than it is to buy an equal amount of pre-butchered pieces and parts. You’ll need to cut store-bought breasts pieces in half anyway, so why not just go for the whole shebang?

I promise that it’s not as scary as you think. You just need a sharp knife, some self-confidence, and a little bit of patience with yourself. If you have no idea what you’re doing and want a reference, just ask Martha.
The best part is that the more you do it the better, and faster, you’ll get at it. The first time I ever tried was the night I proposed to Russell. I wanted to make fried chicken from scratch, and while the chicken turned out kind of greasy, the night turned out wonderful!
That first try taught me that it didn’t need to feel so intimidating, and since then I’ve learned to really enjoy the process. I think it can be just a little too easy to forget where your dinner comes from when you buy it wrapped in cellophane and styrofoam, and getting your hands dirty and doing some of the work yourself gives you a greater respect and understanding for exactly what it is that you’re eating.

braised chicken with kale and white beans | Brooklyn Homemaker

When I was in high school we actually raised chickens in our garage, so maybe that experience also gave me a greater appreciation for knowing where my food comes from. We’d moved from the center of town to a larger house on some land out in the country, and sort of out of nowhere I decided I wanted some chickens. My grandfather had a handful of older laying hens and a couple roosters on his farm that he was getting a little sick of caring for, and I really just wanted them for the experience so their advanced age didn’t bother me. They didn’t produce a ton of eggs, but it was usually enough that we didn’t have to buy them and never really had a surplus either.

There was a large storage room in the garage so we sectioned off part of that with chicken wire, laid down some straw, took some of Grandpa’s equipment off his hands, and we were in business. The one thing I wasn’t really expecting is how mean and sort of territorial chickens can be, especially when there are roosters involved. I also learned never to go into their cage in sandals. It turns out that exposed toes are fare game in the eyes of a chicken…
I understand that the situation probably would have been a bit different without the roosters, but to this day I’m a little bit uncomfortable around birds.

Despite all that I still fantasize about having chickens again some day. Especially with all the baking I do I’d love to have a good source for delicious fresh eggs! Russell and I constantly dream about the day we can buy a cute old farmhouse in the Hudson Valley and build a chicken coop and maybe a pen for some pygmy goats. We even have names in mind already! The plan is to name them after the female characters from Dallas starting with Pam, Sue Ellen, Lucy, & Miss Ellie, and depending on how many we get, maybe branching out into the satellite characters like Donna, Valene, or Kristen. We probably won’t get any roosters, but it might be fun to have a cranky old J.R. chasing the poor hens around. I’d just be afraid somebody might shoot him!

braised chicken with kale and white beans | Brooklyn Homemaker

We never ate any of our old hens back then, and if Russell and I do end up getting any in the future they’d probably just be for egg laying too. When it comes to buying chicken to eat though, I’m actually pretty picky.

I know it’s not my job as a food photographer or recipe developer to tell you to eat organic, or local, or free-range, or hormone free, or whatever the buzz word du jour is. If you’re reading this you’re (probably) an adult and (probably) can make those decisions without my help. I will however remind you that spending a few extra dollars on your food doesn’t just mean you’re voting with your wallet for a healthier environment, better local economy, and more sustainable food system; it also means your food will probably taste better and be more nutritious! In my experience the biggest indicator for higher quality, better tasting chicken is the label “air chilled”. I won’t get into the gory details of how chickens are processed, but I will say that since air chilled chickens aren’t processed in water baths they usually have a meatier, chicken-ier flavor and crispier, less flabby skin. They also have a higher meat to weight ratio and better texture since they’re not absorbing any water during processing.

Since it is a slower, more labor intensive process, air chilled chicken does cost more at the grocery store. Based on flavor and texture alone though, I really do believe it’s worth the extra couple bucks.

braised chicken with kale and white beans | Brooklyn Homemaker

Knowing what I now know, it’d be pretty hard for me to go back to conventionally processed chicken. I know I promised not to get into the details, but the conventional way is pretty gross, and the air chilled method is much less so. If you’re interested in learning more, there’s a ton of information out there on the world wide web, but I learned from reading Johnathan Safran Foer’s Eating Animals. If you care about food politics and the sustainability and environmental impact of our food system I think it’s a really interesting and informative read.

braised chicken with kale and white beans | Brooklyn Homemaker

Whatever type of chicken you find in your basket while you wander the grocery aisles, this recipe is sure to please.

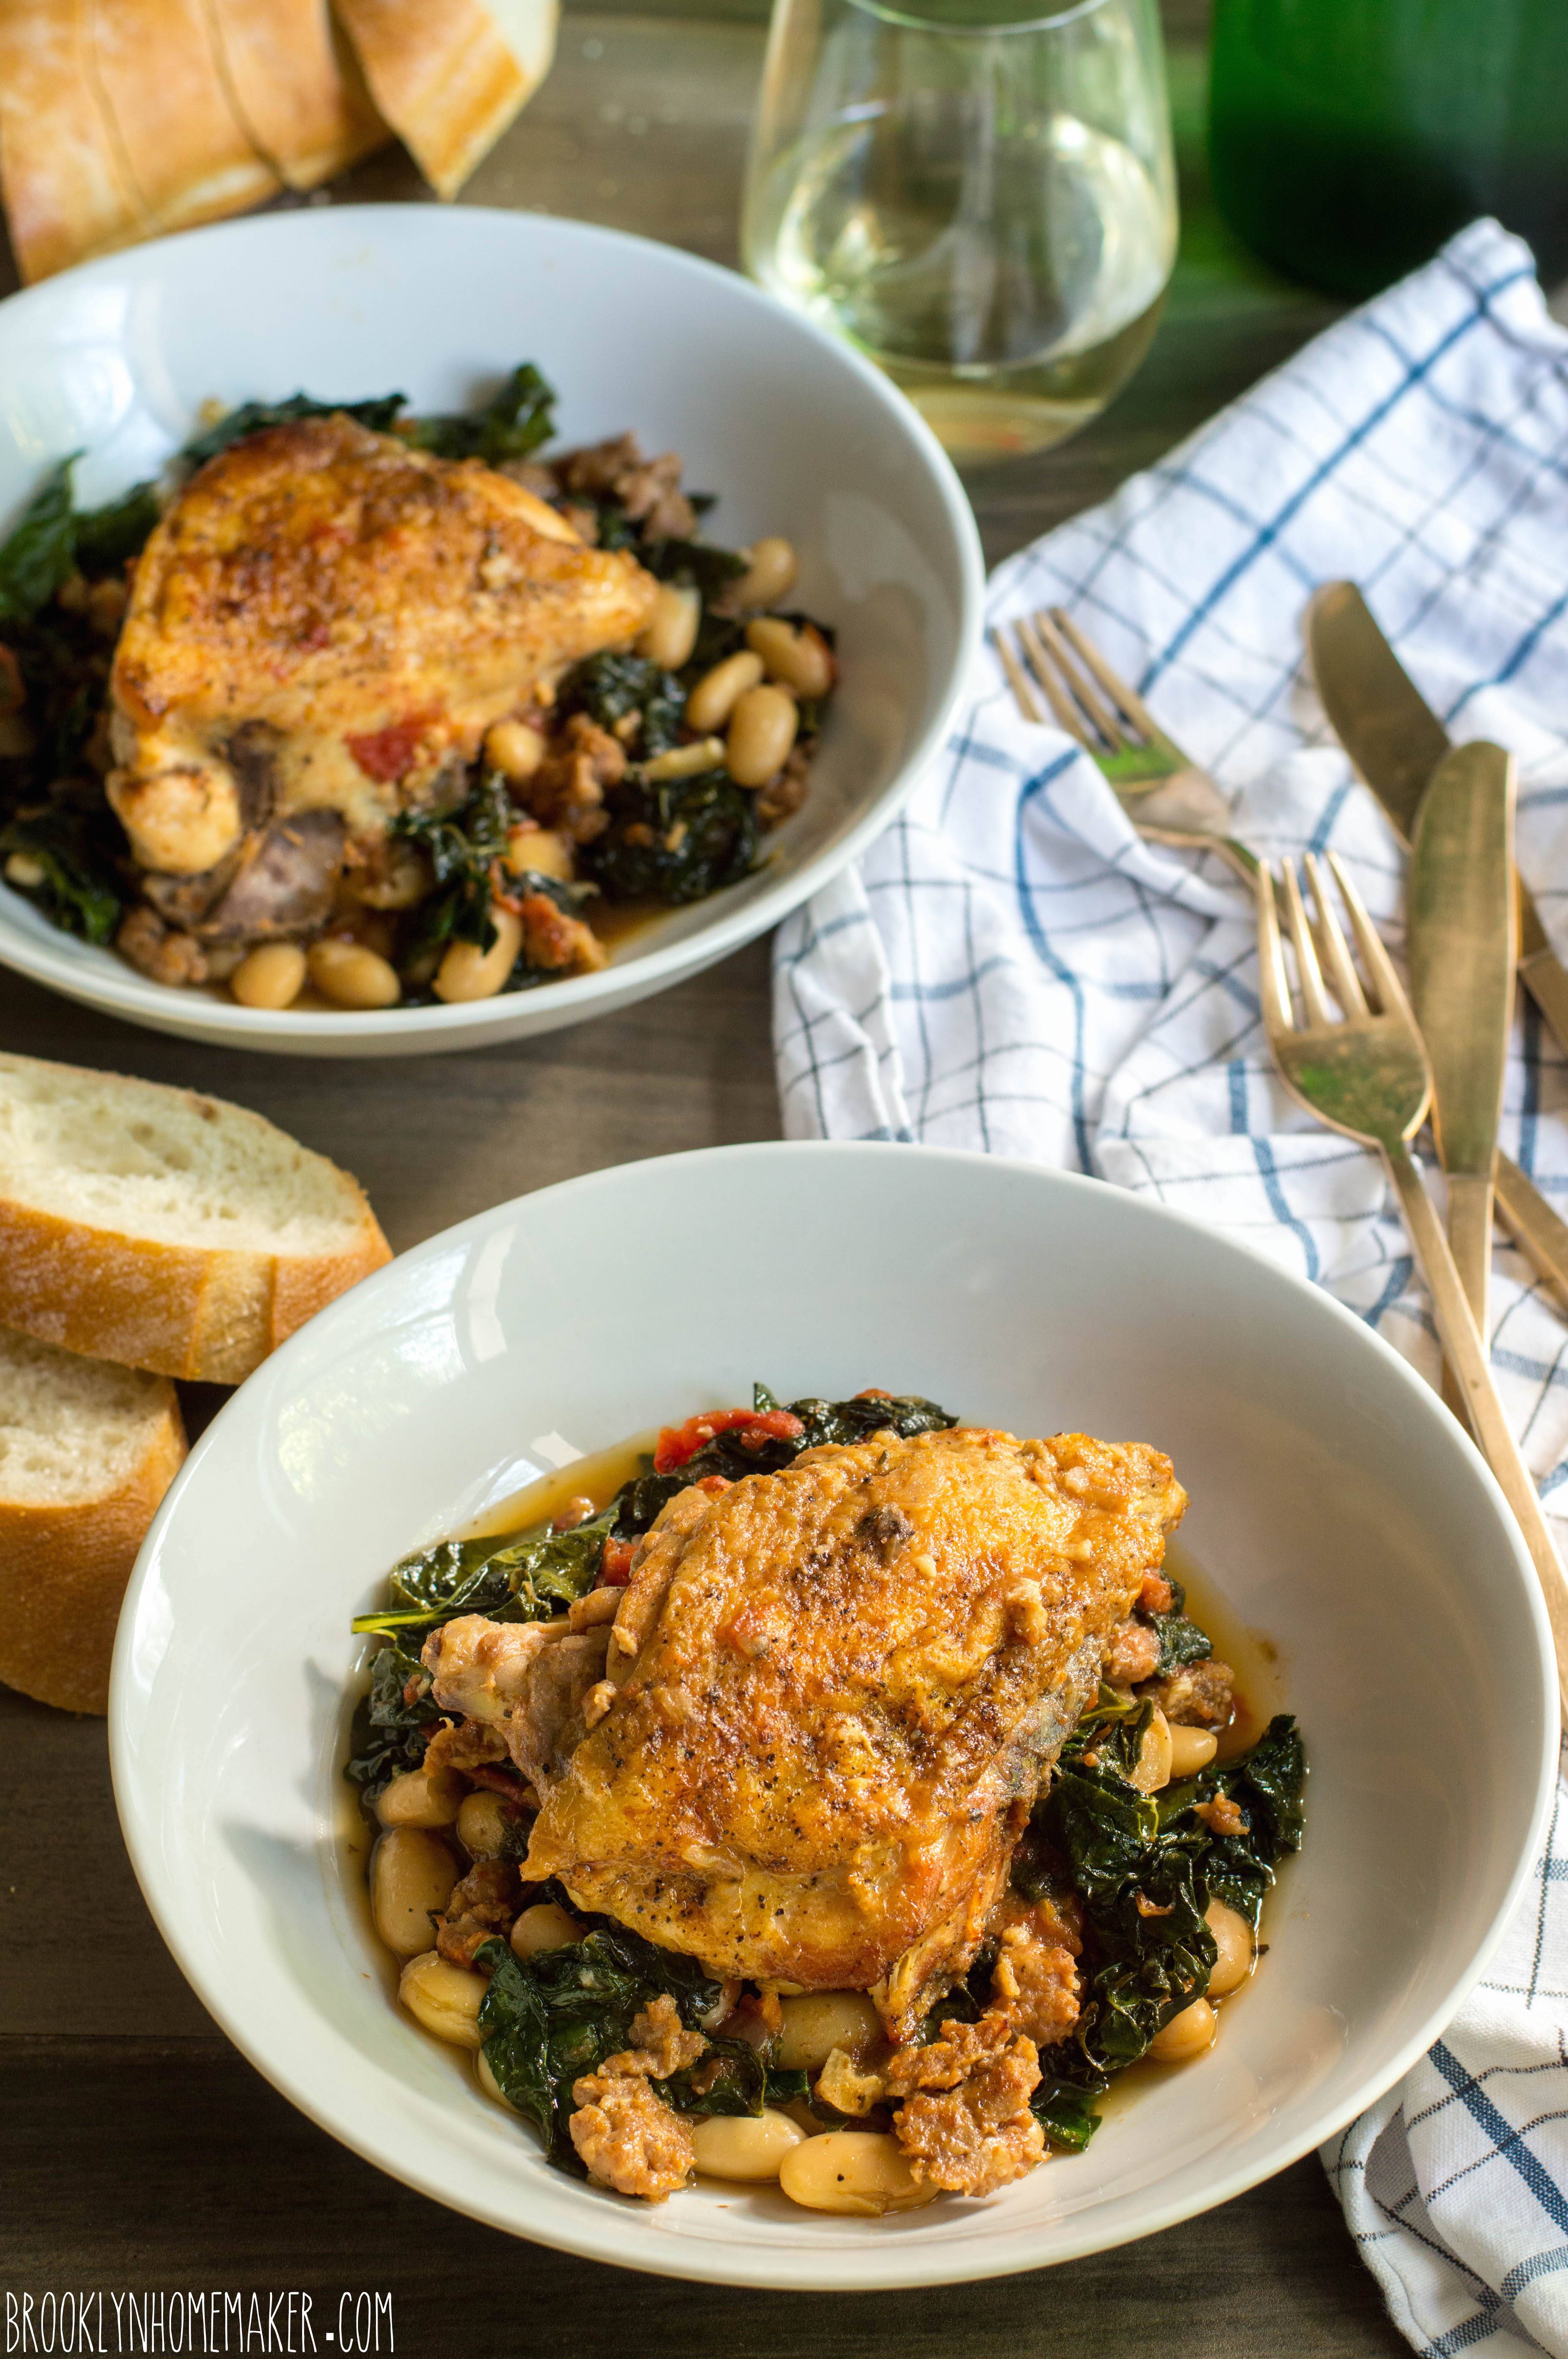
Browning the meat on the stovetop and then braising it in the oven gives it a rich and roasty flavor and a mouthwateringly tender texture. The touch of acidity and subtle sweetness from the white wine and tomatoes balances perfectly with the richness of the chicken and sausage and slight bitterness of the kale. The fresh pungent garlic and woodsy thyme add layers of earthy flavor, and the beans add a nice tender texture and just enough starch to make this a hearty filling meal all on it’s own.

Is your mouth watering yet?

braised chicken with kale and white beans | Brooklyn Homemaker

Braised Chicken with Kale and White Beans

one 4 to 5 lb chicken, cut into 10 pieces (you can substitute an equal amount of skin-on, bone-in breasts and/or thighs)
Coarse Kosher salt and ground pepper to taste
1 tablespoon olive oil
1/2 lb sweet Italian sausage (about 3 sausages)
1 medium to large onion, chopped
6 cloves garlic, peeled and thinly sliced
6 to 7 sprigs of fresh thyme
1 cup dry white wine
2 cups low sodium chicken stock
one 15 oz can diced tomatoes (drained)
two 15 oz cans white beans (I used Cannellini)
1 lb Lacinato kale (about 2 bunches) *see note

Preheat oven to 375.

Generously season your chicken pieces with salt and pepper. If using store-bought breasts you’ll want to cut them each in half with a very sharp knife.

Heat olive oil in a large dutch oven or braising pan over high heat. Working in batches, brown chicken pieces on all sides (about 4 to 5 minutes per side), and transfer to a plate to rest. Drain off all but about 1 tablespoon of any grease from the chicken, and brown the sausage and onions over medium high heat. Try to break up and crumble the sausage as it browns. Cook about 5 minutes, or until sausage is mostly cooked through and onions are starting to soften and get some color. Toss in garlic and cook one minute more. Add thyme and white wine, and simmer until wine has reduced by about half, about 5 or 10 minutes. Add chicken stock and drained tomatoes and bring just back to a simmer. Arrange chicken, skin side up, in a single layer and transfer to the oven to braise, uncovered, for 35-40 minutes.

While chicken is in the oven; remove the ribs, roughly chop, and thoroughly wash the kale. Dry well with a kitchen towel or salad spinner.

Once cooked through and tender, transfer chicken pieces to a plate and tent with foil. Turn the oven off and transfer the chicken back to the oven with the door slightly open to keep warm. Move the pan back to the stove and reduce the braising liquid over high heat for about 10 minutes. Add kale and beans, toss, and cook until all the kale is completely wilted, about 5 minutes more. Taste the sauce and adjust seasoning with salt and pepper if necessary. Add the chicken back to the pan and serve.

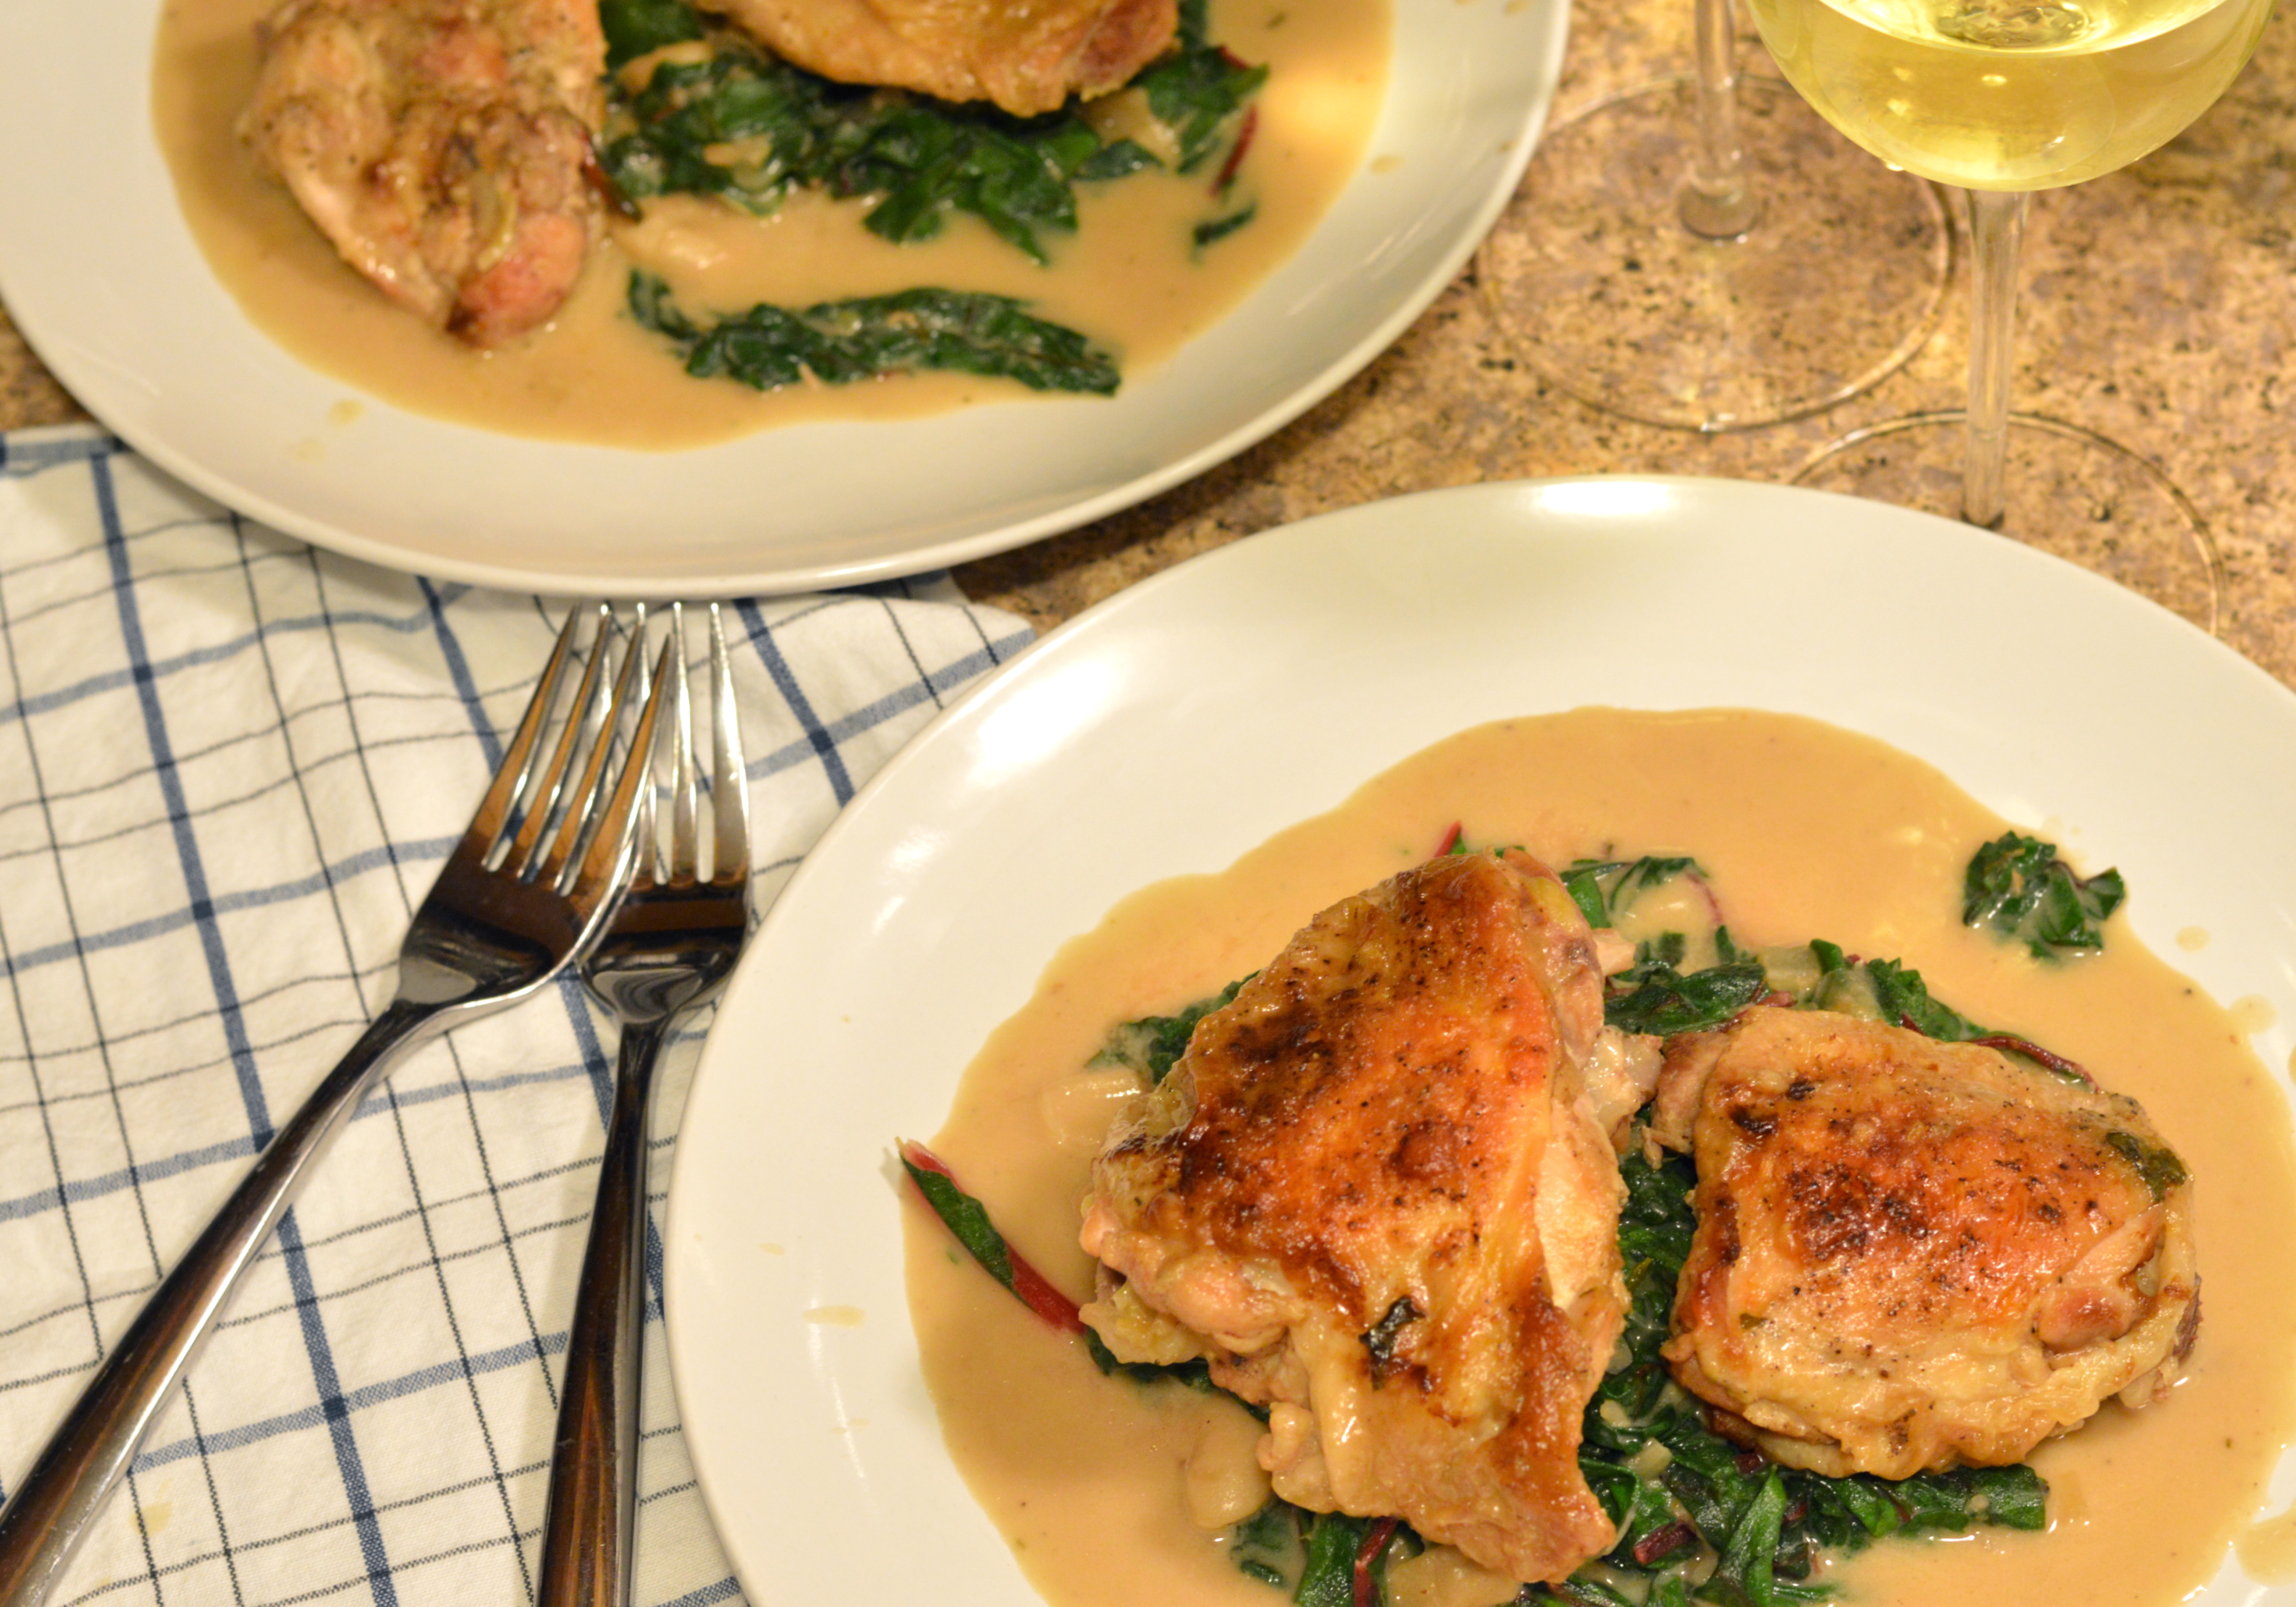
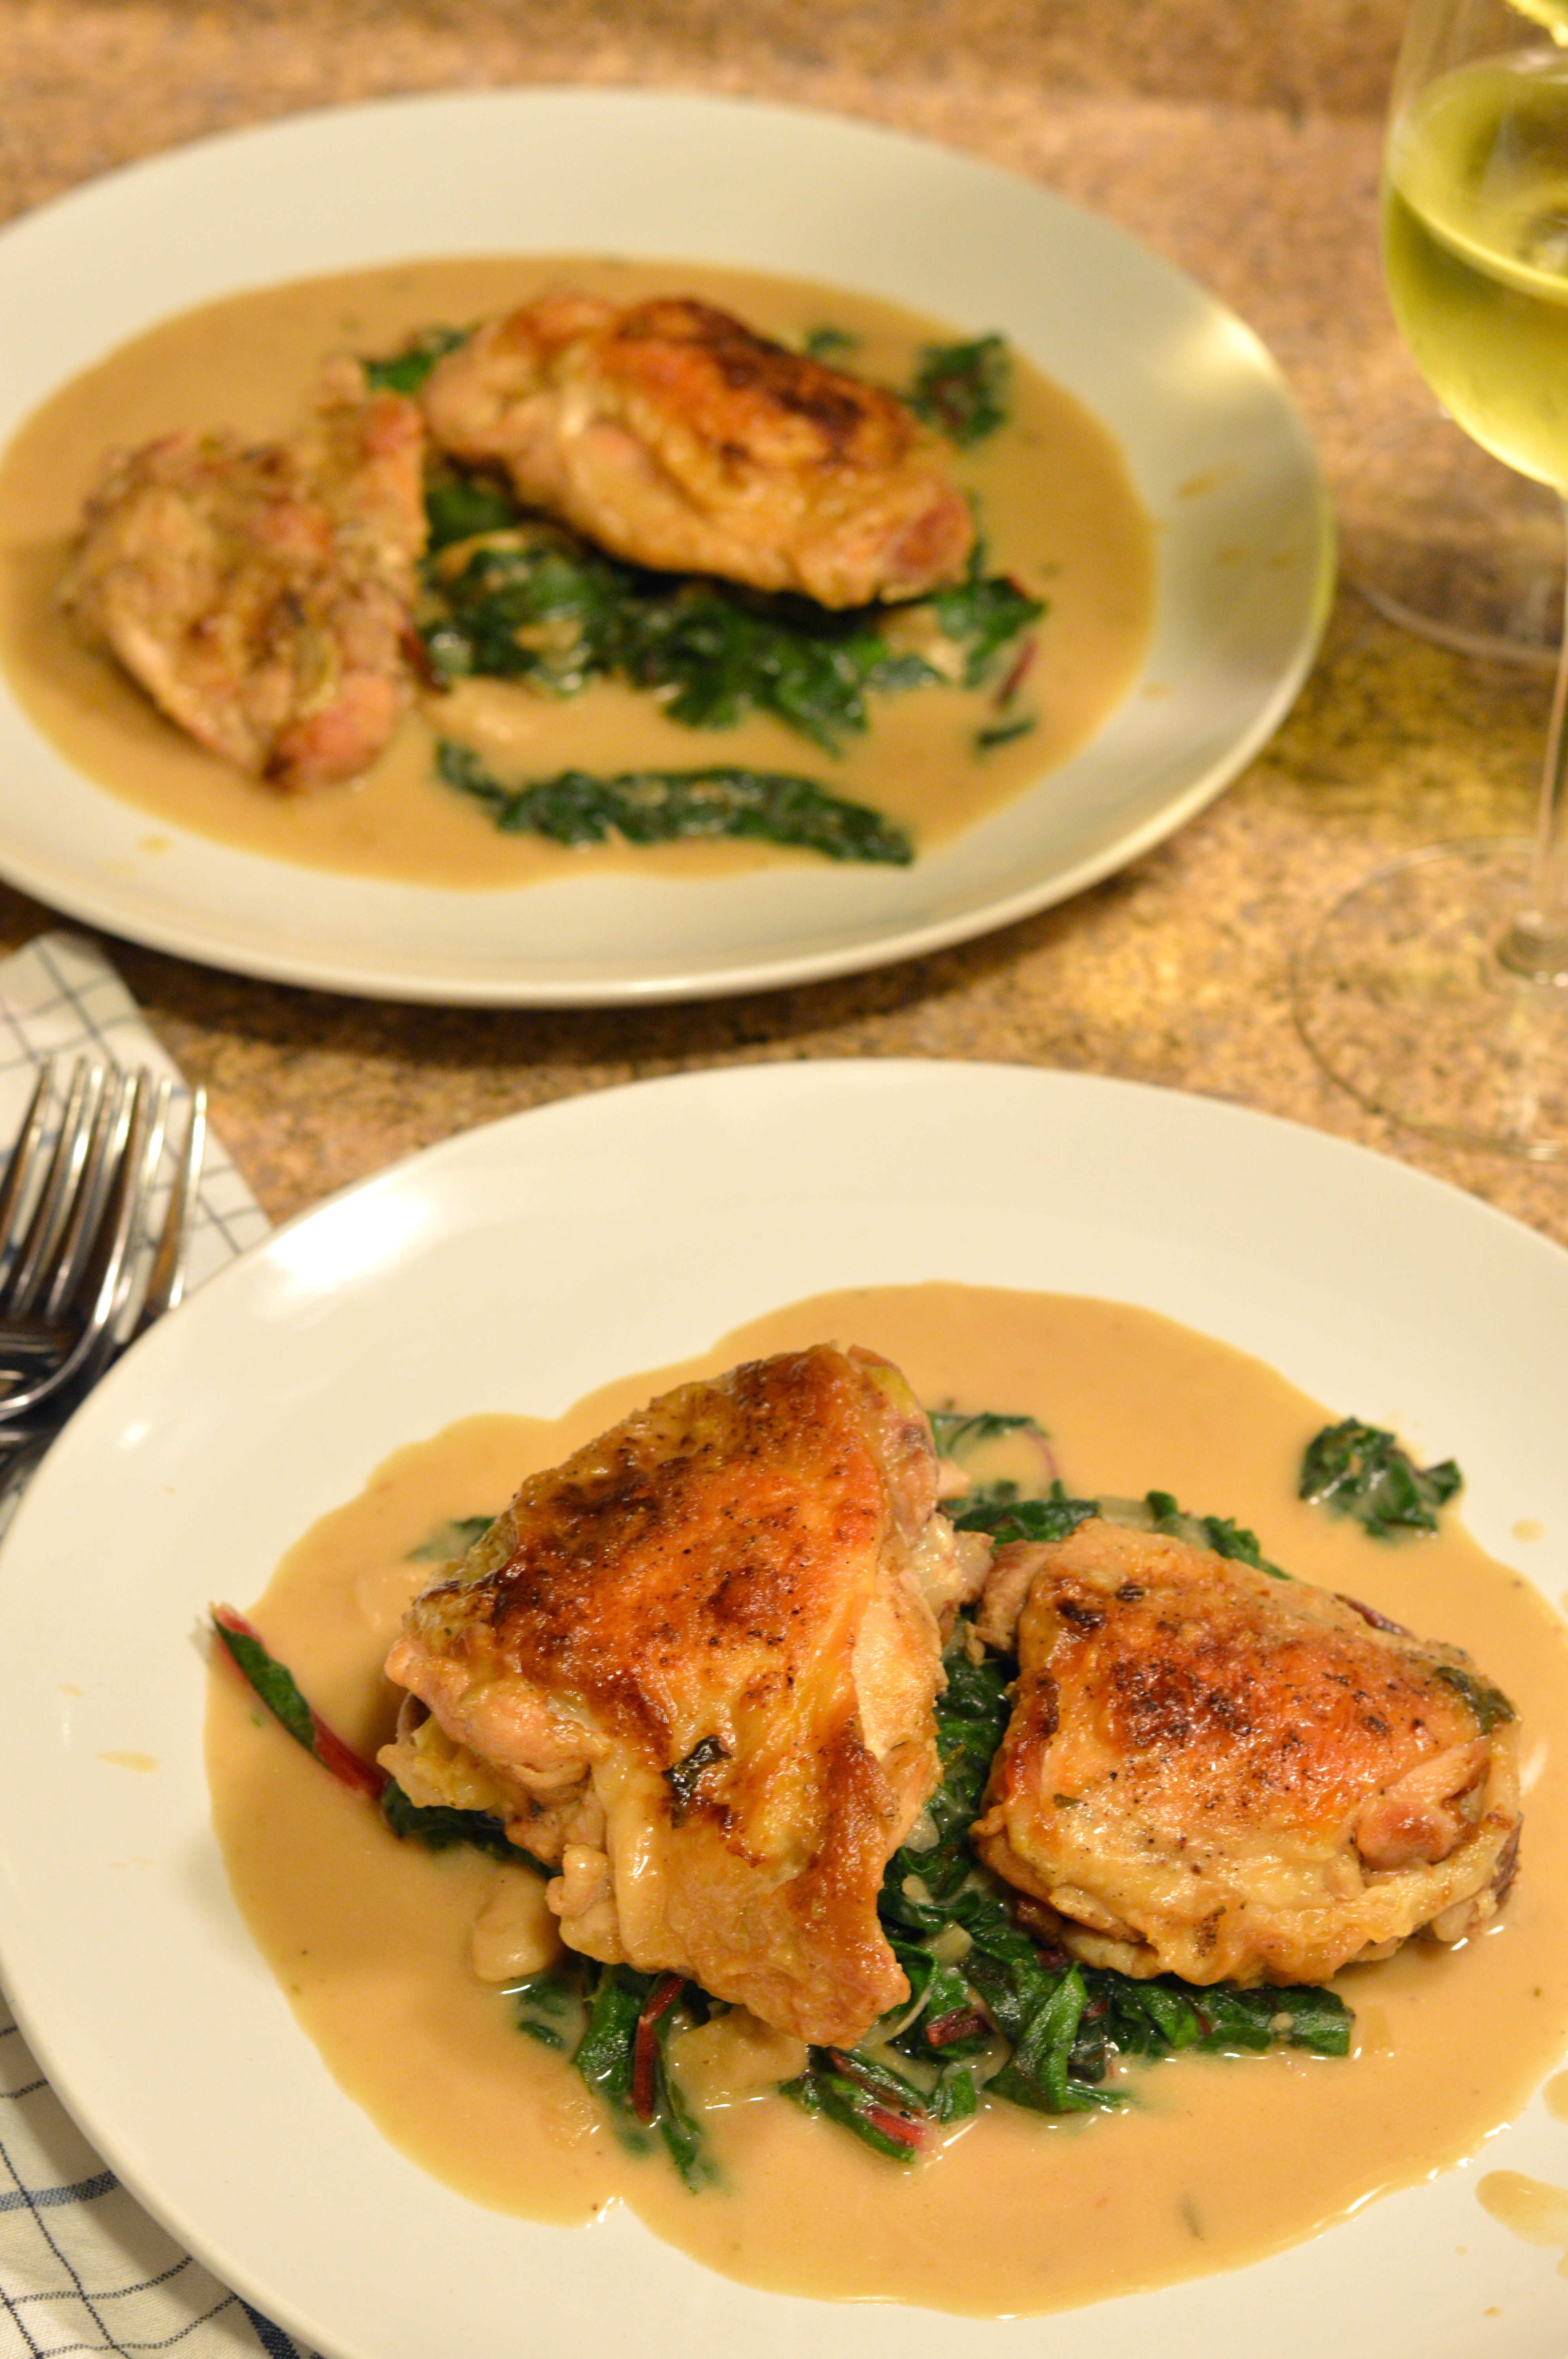
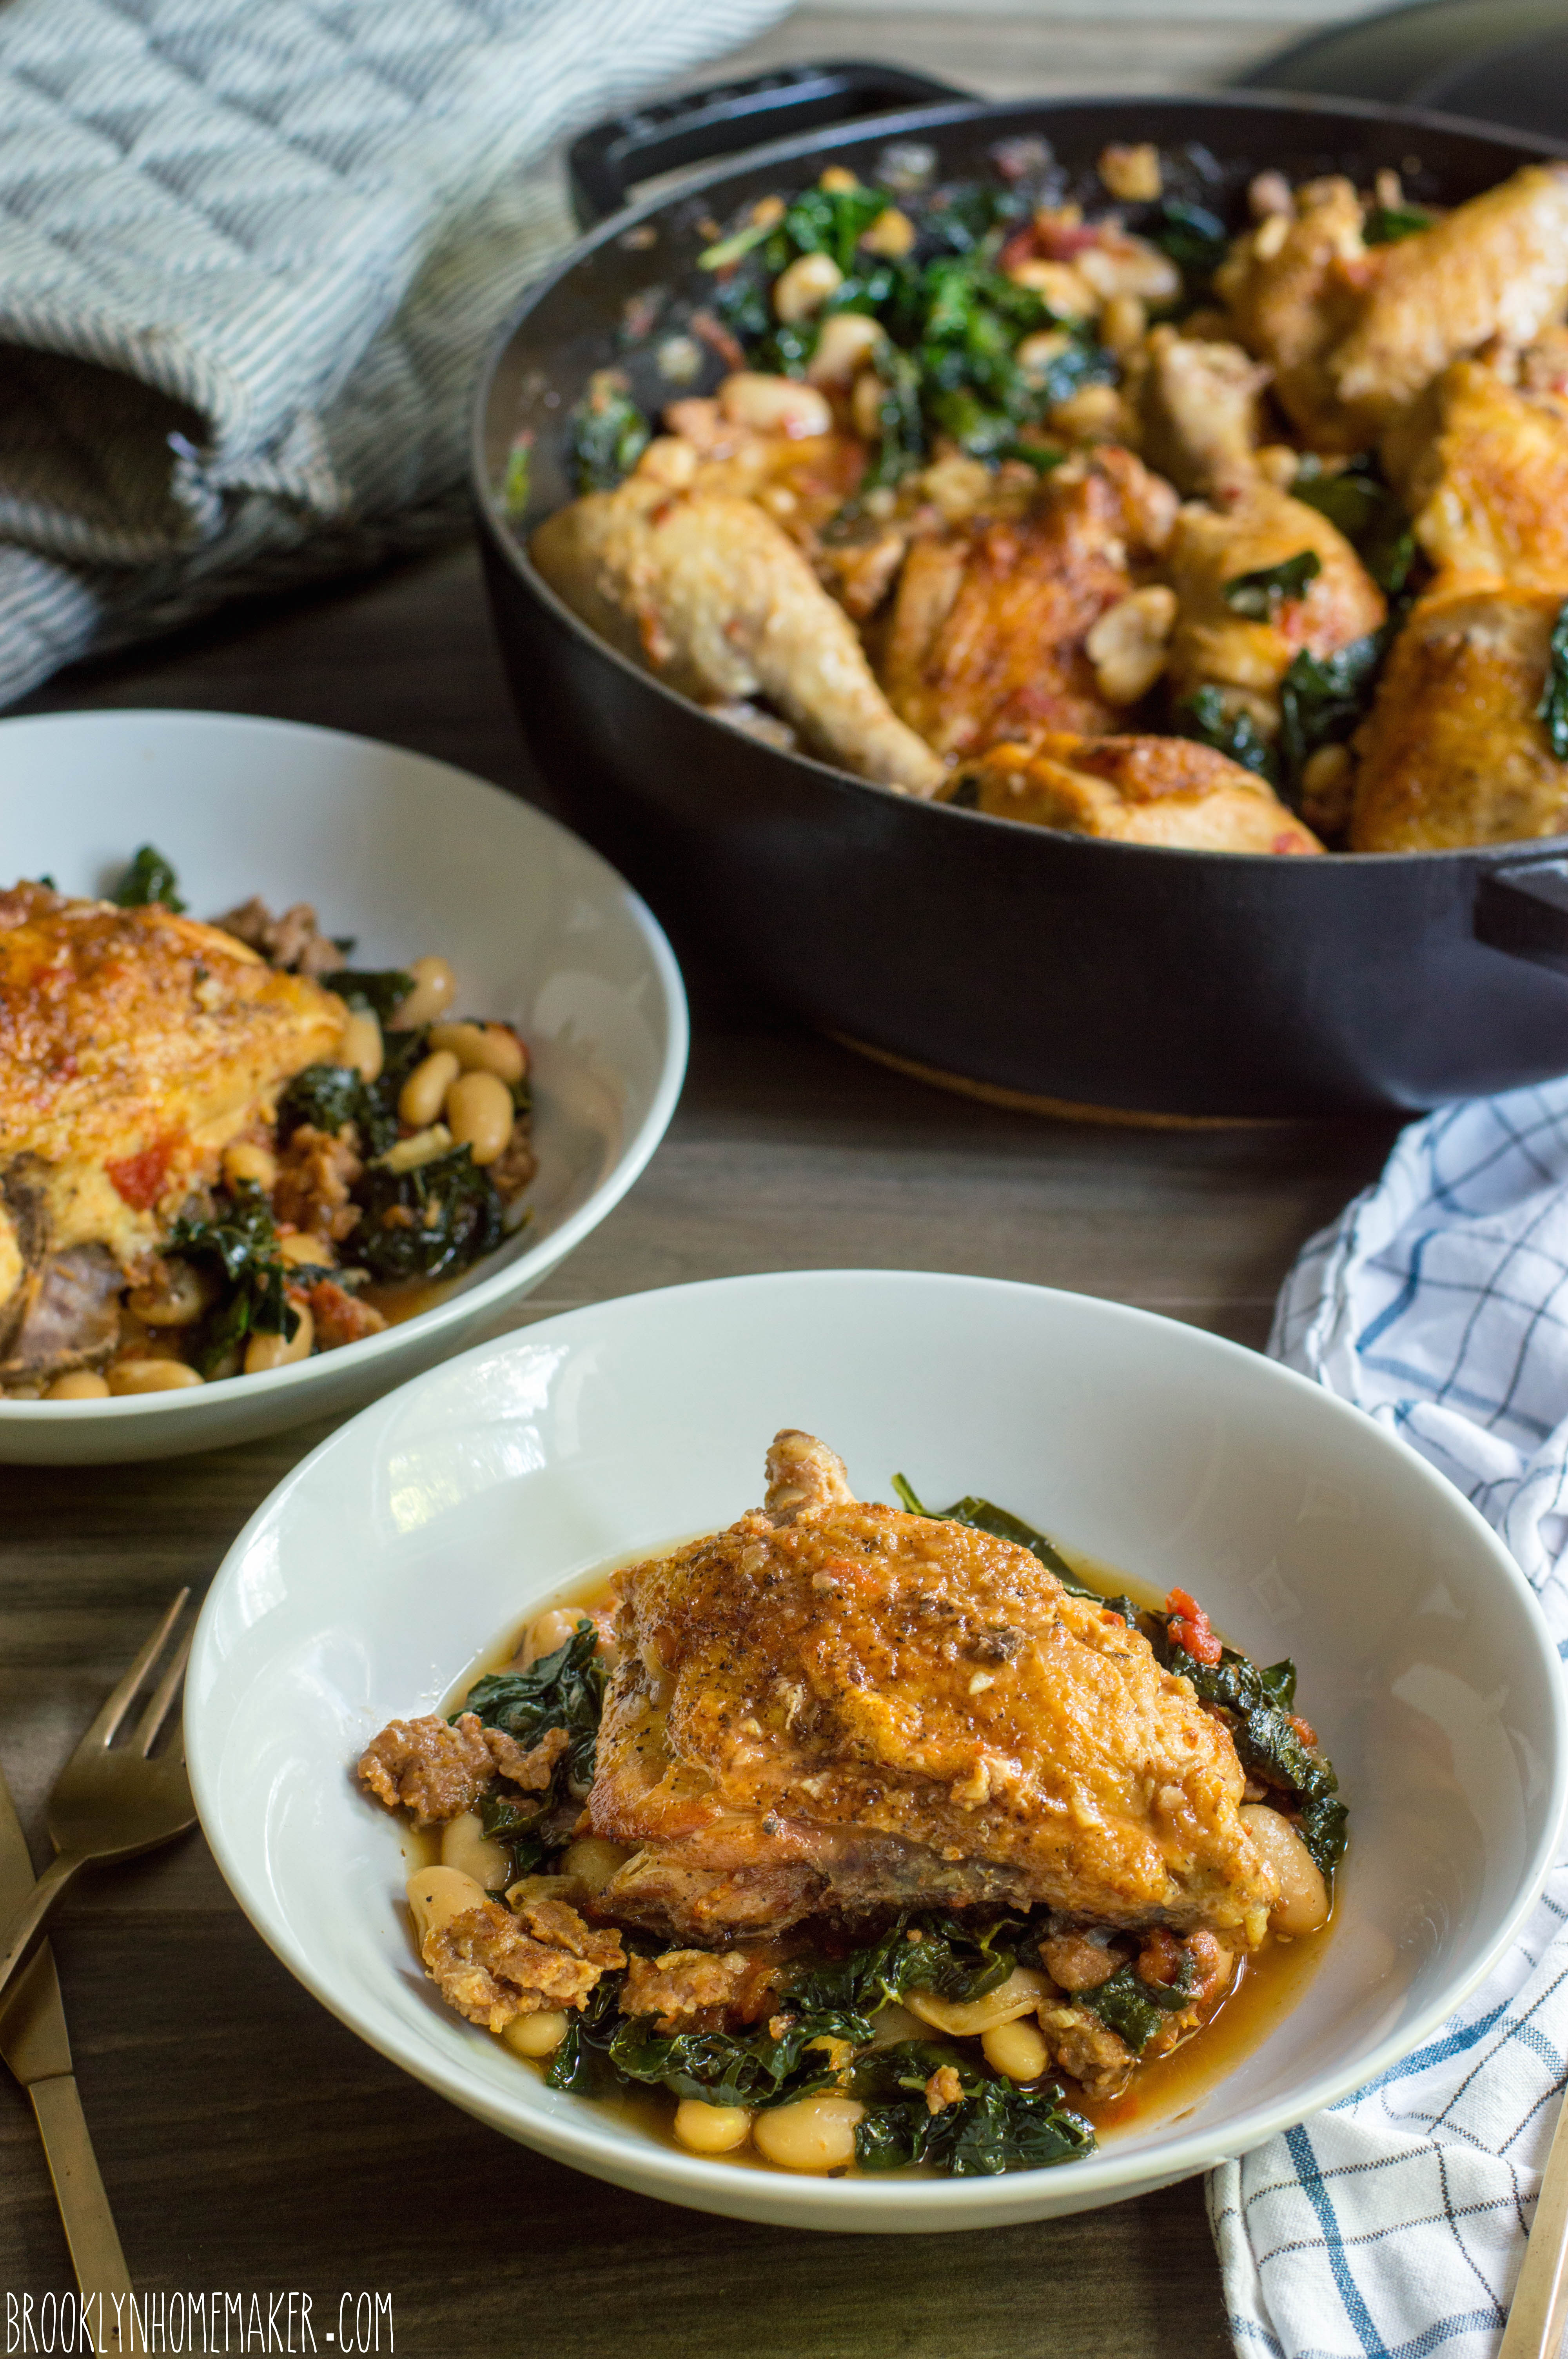
Serve the chicken in shallow bowl over a bed of beans and kale. Spoon some of the liquid over the top just before serving.

*note:
You can use other types of kale if you can’t find Lacinato, but I think it has the best flavor and texture for this dish, and holds up to best to braising and reheating.

Advertisement

roasted cauliflower and cheddar soup

Spring is finally in full swing and the dogs and I are over the freaking moon.

roasted cauliflower and cheddar soup | Brooklyn Homemaker

While the trees are bursting with buds and daffodils are blooming like it’s their job, local produce hasn’t seemed to catch up just yet. New York’s farmers markets boast plenty of local meat and dairy, and tables overflowing with brightly colored annual flowers, but sweet juicy berries and bright green vegetables still need a few weeks to soak up the warm sunshine.

roasted cauliflower and cheddar soup | Brooklyn Homemaker

True to form, this spring has been toying with me and my frail emotions. Temperatures one day are soaring into the 70s, and the next they’re dipping back into the 40s. One day we have ample sunshine, the next it’s pouring rain.

roasted cauliflower and cheddar soup | Brooklyn Homemaker

On one of the cold and rainy days I was craving soup, as one does. With no local produce to choose from, I was off to the grocery store to try to find something fresh-ish and hopefully organic that I could turn into a warm satisfying soup. I also had a healthy stash of amazing Irish cheddar that was leftover after a book signing event at work, so I wanted to try to incorporate some of that cheesy goodness.

roasted cauliflower and cheddar soup | Brooklyn Homemaker

It didn’t take me long in the produce aisle to come up with a plan. What better vegetable for a thick warm filling soup than cauliflower? It’s available year round, goes great with cheddar and warm flavors, and is perfect for a rich and roasty soup.

roasted cauliflower and cheddar soup | Brooklyn Homemaker

This soup is really simple to make and definitely hits the spot on a rainy day, no matter what time of year. The fresh woodsy thyme adds a touch of green herbal freshness, and the white wine adds a crisp brightness that feels very appropriate for spring or summer. Roasting the cauliflower before pureeing it deepens and concentrates its earthy flavor, and the sharp cheddar adds a nice zippy tang without feeling heavy or overwhelming.

Pull up a bowl, tear into a nice crusty loaf of bread, and park yourself in front of the window and watch the rain come down.

roasted cauliflower and cheddar soup | Brooklyn Homemaker

Roasted Cauliflower and Cheddar Soup

  • Servings: 6 to 8 -ish
  • Print
2 heads of cauliflower
2 tablespoons olive oil
salt and pepper, to taste
2 tablespoons butter
1 medium to large onion, chopped
1/8 teaspoon cayenne pepper (optional)
1/8 teaspoon smoked paprika
5 to 6 sprigs of fresh thyme
1 cup dry white wine
6 cups low sodium chicken stock
8 oz sharp cheddar, grated

Preheat oven to 400. Chop cauliflower into rough large florets. Toss in olive oil, season with salt and pepper, and arrange in a single layer on a parchment lined baking sheet. Roast until brown and golden, about 30 or 40 minutes.

Preheat a stockpot over medium high heat and bring butter to a sizzle. Add onion, cayenne, paprika, thyme, and salt and pepper to taste. Sauté until tender and translucent, 5 to 10 minutes. Add white wine and reduce by at least half. Add chicken stock and bring to a boil. Add roasted cauliflower, bring back to a boil, and cook for 10 minutes. Remove from heat and remove thyme sprigs. Add cheddar and puree until silky smooth, using either an immersion blender or working in batches in a standing blender. Taste and adjust seasoning if necessary.

Serve with a drizzle of olive oil, a small handful of grated cheddar, and a big hunk of crusty bread.

zucchini “pasta” with chicken, white wine, & tomatoes

You probably haven’t noticed this yet, but I’m not super big on “health food”.

zucchini "pasta" with chicken, white wine, & tomatoes | Brooklyn Homemaker

I mean, don’t get me wrong. I actually do try to eat healthy. In fact, when you bake as many treats as I do, you don’t really have a choice. You definitely need to balance the (delicious) unhealthy stuff with something light and green every once in a while. We try to make a green juice every morning before work, we (almost) never eat fast food, very rarely eat junk food (unless we’ve made it ourselves), and try to eat only whole foods (rather than heavily processed prepared ones). That doesn’t necessarily mean we’re in great shape or anything because, again, we also eat lots of sweets and homemade treats. It also doesn’t mean that we would ever consider ourselves “health nuts” or ever say we prescribe to any fad diets or trends in nutrition.
And then this weird thing happened.

zucchini "pasta" with chicken, white wine, & tomatoes | Brooklyn Homemaker

At work we started getting all of these requests for a hand-held spiral slicer, and everyone asking for it said they wanted to make “noodles” out of zucchini. We had two options for spiral slicers at the time, but both of them are a significant investment, and neither of them are even close to being hand-held. Some people would go with those options, others would choose something else we’d recommend, but most would sullenly walk out empty-handed, after begging that we bring in their requested item. I always assumed these poor souls were on some annoying fad diet that forced them to eat soggy squash “noodles” when they’d rather be eating pasta, but the number of requests we were getting in such a short period made us take notice. After a long search, we finally found one we liked and a few weeks ago we started carrying it. The one we have now is called the “Spirelli” by Gefu, and can it be found here.

zucchini "pasta" with chicken, white wine, & tomatoes | Brooklyn Homemaker

Even after we brought it in, and it started selling really well, I was still a total skeptic. Then one of my co-workers bought one and started raving about it. So, I decided I should probably give it a shot.

zucchini "pasta" with chicken, white wine, & tomatoes | Brooklyn Homemaker

The other night I tried it out for the first time and was shocked at how easy (and kind of fun) it was, and Russell actually requested I make zucchini “pasta” again the next night. I honestly can’t believe I’m saying this, but it’s pretty great.  The texture of the “noodles” is way better than I expected, not soggy at all, a bit like an al dente pasta. Since zucchini has such a neutral flavor, it absorbs the flavor of whatever else you’re cooking, and doesn’t end up tasting at all “health-food-y”.

zucchini "pasta" with chicken, white wine, & tomatoes | Brooklyn Homemaker

The one problem I had the first night was that when cooked, the zucchini gave off a ton of liquid and made the sauce really runny. I had to take the “noodles” out to reduce the sauce and then add them back in at the end. The next night I decided to try salting the “noodles” beforehand to get them to give off their liquid before cooking. Worked like a charm!
Some recipes I found recommend that you peel the zucchini for a more “noodle-y” appearance, but I don’t think the skins do anything negative to the texture, and the dark green skins have a lot of nutrients that you’d lose if you peeled them. I say leave ’em!

zucchini "pasta" with chicken, white wine, & tomatoes | Brooklyn Homemaker

This method is actually super quick and easy too! You just cut the end off the zucchini and push and twist it through the slicer like a giant pencil sharpener. If you don’t have this tool you could also use a mandoline slicer or another spiral slicer, or even a julienne peeler, to make zucchini “noodles”. The only time consuming step is letting the zucchini absorb the salt and release its moisture, which takes about 30 minutes, but that can be done while you prepare the rest of the dish. If you time it right and work efficiently, the whole meal including prep time can be on your plate and in your belly in well under an hour. Even with frequent pauses to photograph the whole process, it only took me about an hour.

zucchini "pasta" with chicken, white wine, & tomatoes | Brooklyn Homemaker

For this dish I paired the “noodles” with seared chicken and a white wine and blistered tomato sauce. Obviously this recipe could be adapted to be as healthy, or as rich, as you like. As is, it has little more than protein, vegetables, and a little seasoning and olive oil. I can’t believe I’m pushing zucchini noodles on my blog. I never thought this day would come. But they’re so GOOD!!!

zucchini "pasta" with chicken, white wine, & tomatoes | Brooklyn Homemaker

Tender “al dente” noodles, sweet blistered tomatoes, tender perfectly browned chicken, sweet garlicy wine sauce, bright fresh basil… It doesn’t get any better than that!

zucchini "pasta" with chicken, white wine, & tomatoes | Brooklyn Homemaker

Zucchini 'Pasta' with Chicken, Tomatoes, & White Wine

4 medium zucchini
3 Tablespoons good olive oil, divided
2 skinless, boneless chicken breasts
salt and pepper to taste
1 pint ripe grape tomatoes
3 large cloves garlic, crushed or finely minced
1/2 cup white wine
handful fresh basil leaves

Wash zucchini and use a spiral slicer (like this one), julienne slicer, or mandolin to create spaghetti style “noodles”. Place “pasta” in a mesh strainer and sprinkle with about 2 teaspoons salt. Toss well and allow to sit for at least 30 minutes. Gently squeeze out any remaining liquid and discard.
Meanwhile, heat large cast iron or stainless steel skillet over high heat. Season your chicken breasts on both sides with salt and pepper. Add 1 tablespoon olive oil to pan and sear chicken for 5-7 minutes on either side, or until nicely browned and cooked through. Set aside to rest.

Wash tomatoes and slice each in half, lengthwise. Add remaining olive oil to pan, add tomatoes, and season with salt and pepper. Cook tomatoes, stirring occasionally for 7 to 10 minutes until they are browning and starting to fall apart. Add garlic and wine, stir well, and cook down until wine is reduced by at least half, about 5 minutes.
Slice your chicken up into bite sized pieces. Arrange basil leaves in a flat pile, roll up into a “cigar” and slice into very thin strips. (this is called a chiffonade)
Add chicken and basil to pan with sauce. Add zucchini and toss to combine. I find this works best with long silicone tipped tongs. Cook until noodles are heated through, about 5 minutes.
Adjust seasoning if necessary, and top with a little fresh basil.

braised chicken thighs with creamy greens and beans

So, as much as everyone in New York is trying to convince themselves otherwise, it’s still winter… UGH.

braised chicken thighs with creamy greens and beans | Brooklyn Homemaker

It’s a strange thing to be able to literally smell spring around the corner, but to have it still remain painfully out of reach. After this long hard winter, people want to bust out the short shorts and tank tops the minute the sun comes out and temperatures rise above freezing. Unfortunately, mother nature has other plans for us poor ol’ city folk. One day birds are chirping, the sun is shining, and temperatures are soaring (SOARING!!!) into low sixties, but it’s just lady nature messing with our heads, and the next day the wind is reaching gail force and the temperatures barely reach the high teens. One day I’m dreaming of barbecues and watermelon margaritas, and the next day the heat’s cranking and I’m back in front of the stove trying to trick myself with citrus, garlic and greens.

braised chicken thighs with creamy greens and beans | Brooklyn Homemaker

Hopefully I’ll be out in the garden planting annuals and watching the crocus’ bloom very soon, but for now I’m back in the kitchen braising chicken thighs again. This recipe is kind of similar to the last braised chicken recipe I posted, but with some pretty major changes. I guess I’m a creature of habit. What can I say? I used chicken thighs again because, like I said before, they’re a great way to make a meal taste like it cooked all day when it really took about an hour and a half. I also used thyme, lemon, and white wine again, because, well… because those flavors are killer together with braised chicken thighs. Deal with it.
After that though, things went in a very different, very delicious direction.

braised chicken thighs with creamy greens and beans | Brooklyn Homemaker  braised chicken thighs with creamy greens and beans | Brooklyn Homemaker

The sauce for this is so rich and creamy and garlicy and wonderful. After the chicken gets all cozy and relaxed in the oven, it comes out and rests a bit while the sauce reduces and some fresh greens and white beans go in to soak up all that deliciousness. I chose to make this with red chard, but if you’d prefer spinach or something similar, knock yourself out. If you’d like to try this with kale or another braising green, I’d suggest cooking the greens for an extra five or ten minutes, and waiting to add the beans until the greens are almost fully cooked. I think the chard was the perfect choice though, and it adds a bit of bitterness and bite while still being fresh and green and tender. The beans add a bit of texture and interest, along with just enough starch to make this feel like a complete meal.

braised chicken thighs with creamy greens and beans | Brooklyn Homemaker

This dish came out better than I ever imagined. Like sooooooooo good. First of all, thyme and chicken are amazing together. Definitely one of my favorite combinations. Then when you add white wine, cream, and garlic, and just let it all get happy together in the oven… Heaven. The chicken is perfectly rich and falling off the bone, and the tender wilted greens and soft starchy beans make this meal one perfect wonderful dish. After one bite Russell was planning dinner parties and deciding which of our friends should have the privilege of tasting this. If it wasn’t amazing enough already, on top of everything this meal is also really simple to make and is all made in the same pot! I mean. Can it get any better? Actually, yes it can. With a glass of white wine and a big thick slice of nice crusty bread to sop up the sauce. You’re welcome.

braised chicken thighs with creamy greens and beans | Brooklyn Homemaker

Braised Chicken Thighs with Creamy Greens and Beans

  • Servings: 4-8 (depending on the size of your chicken thighs)
  • Print

8 chicken thighs (skin-on & bone-in)
salt and pepper for seasoning
3 tablespoons flour
2 tablespoons olive oil
2 shallots, chopped
7 or 8 garlic cloves, peeled
1 cup dry white wine
2 cups chicken stock
1 cup heavy cream
zest of 1 lemon (peeled in strips with a vegetable peeler, avoiding the white pith)
6 or 7 fresh thyme sprigs
1 (28 oz) can cannellini beans
1 or 2 bunches of swiss chard, washed and torn into bite sized shreds *see note

Preheat your oven to 375.
Season your chicken thighs with salt and pepper and dust with flour, on both sides. Heat olive oil in a dutch oven or braising pan (not raw cast iron) and add chicken skin side down. Brown for 5 to 8 minutes on each side. Remove the chicken to a plate, leaving the remaining oil. Saute the shallots and garlic for 5 minutes until the shallots are tender and translucent. Add the wine and thyme, turn the heat up to high, and boil until reduced by half, about 5 minutes. Stir frequently with a wooden spoon or silicone spatula, scraping the bottom of the pan to loosen up any browned bits. Add the lemon, stock, and cream to the pan, bring back to a boil, and add the chicken skin side up.  Transfer the pan, uncovered, to the oven to braise for 45 minutes or until meat is fork tender.

Remove the pan from the oven, transfer the chicken to a plate, and tent with foil. Move the pan back to the stovetop and boil over high heat until the sauce is slightly reduced, for about 10 minutes. Remove and discard the thyme and lemon zest. Add the chard and beans, and cook on high for 5 minutes more, or until the greens are completely wilted. Adjust seasoning with salt and pepper if necessary, and serve the chicken over a bed of the beans and greens.

*cook’s note- if you have large chicken thighs or want to serve a lot of greens use 2 bunches, otherwise one is fine. It cooks down A LOT, so 2 bunches will be perfect if you’re serving more than 4 people, or if you really like chard!