Main Dishes

maple bacon bundt cake with bacon pecan streusel swirl #bundtbakers

Do you like bacon? Of course you do.

maple bacon bundt cake with bacon pecan streusel swirl | Brooklyn Homemaker

Sorry. I guess that was a dumb question. The real question is, can you get down with the sweet and salty bacon trend? If you spend any time in Brooklyn, or probably any other urban area, I’m sure you’ve come across at least one (if not many) of these sugary bacon treats. Candied bacon, bacon cupcakes, bacon brownies, chocolate covered bacon, bacon lollipops, even bacon infused cocktails! If you can dream it up, it’s probably out there somewhere.

maple bacon bundt cake with bacon pecan streusel swirl | Brooklyn Homemaker

Up until recently, I’ve managed to resist the urge to jump on the bacon bandwagon. That all changed though last week, when I stumbled upon a group of food bloggers who share a fondness for an intense love of mine.

No, not bacon… Bundt Cakes! It’s no secret that I’m obsessed.

maple bacon bundt cake with bacon pecan streusel swirl | Brooklyn Homemaker

This bundt loving bunch call themselves, appropriately enough, the #BundtBakers, and as soon as I read about them I knew I needed to be involved.

maple bacon bundt cake with bacon pecan streusel swirl | Brooklyn Homemaker

The basic premise is this: A theme is picked in advance for each month, all the bloggers who’d like to participate bake a bundt fitting that theme, and one devoted blogger hosts the event (meaning they help compile all the information and the links to all the posts). I was very excited about getting in on the action, but didn’t think I’d have the time until next month. That was, until I saw that May’s theme was “Breakfast” and instantly decided to drop everything and get planning!

maple bacon bundt cake with bacon pecan streusel swirl | Brooklyn Homemaker

Some of the themes can be pretty wild (I mean… breakfast!?!), so these events are not just limited to sweet cakes. Anything goes, as long as it’s baked in a bundt pan. This months group came up with some pretty amazing ideas, and any one of them is sure to be a hit at your next brunch. Some made breads, others did baked egg dishes, but many kept it sweet and made a cake. I had a plan hatching and I was definitely going sweet.

maple bacon bundt cake with bacon pecan streusel swirl | Brooklyn Homemaker

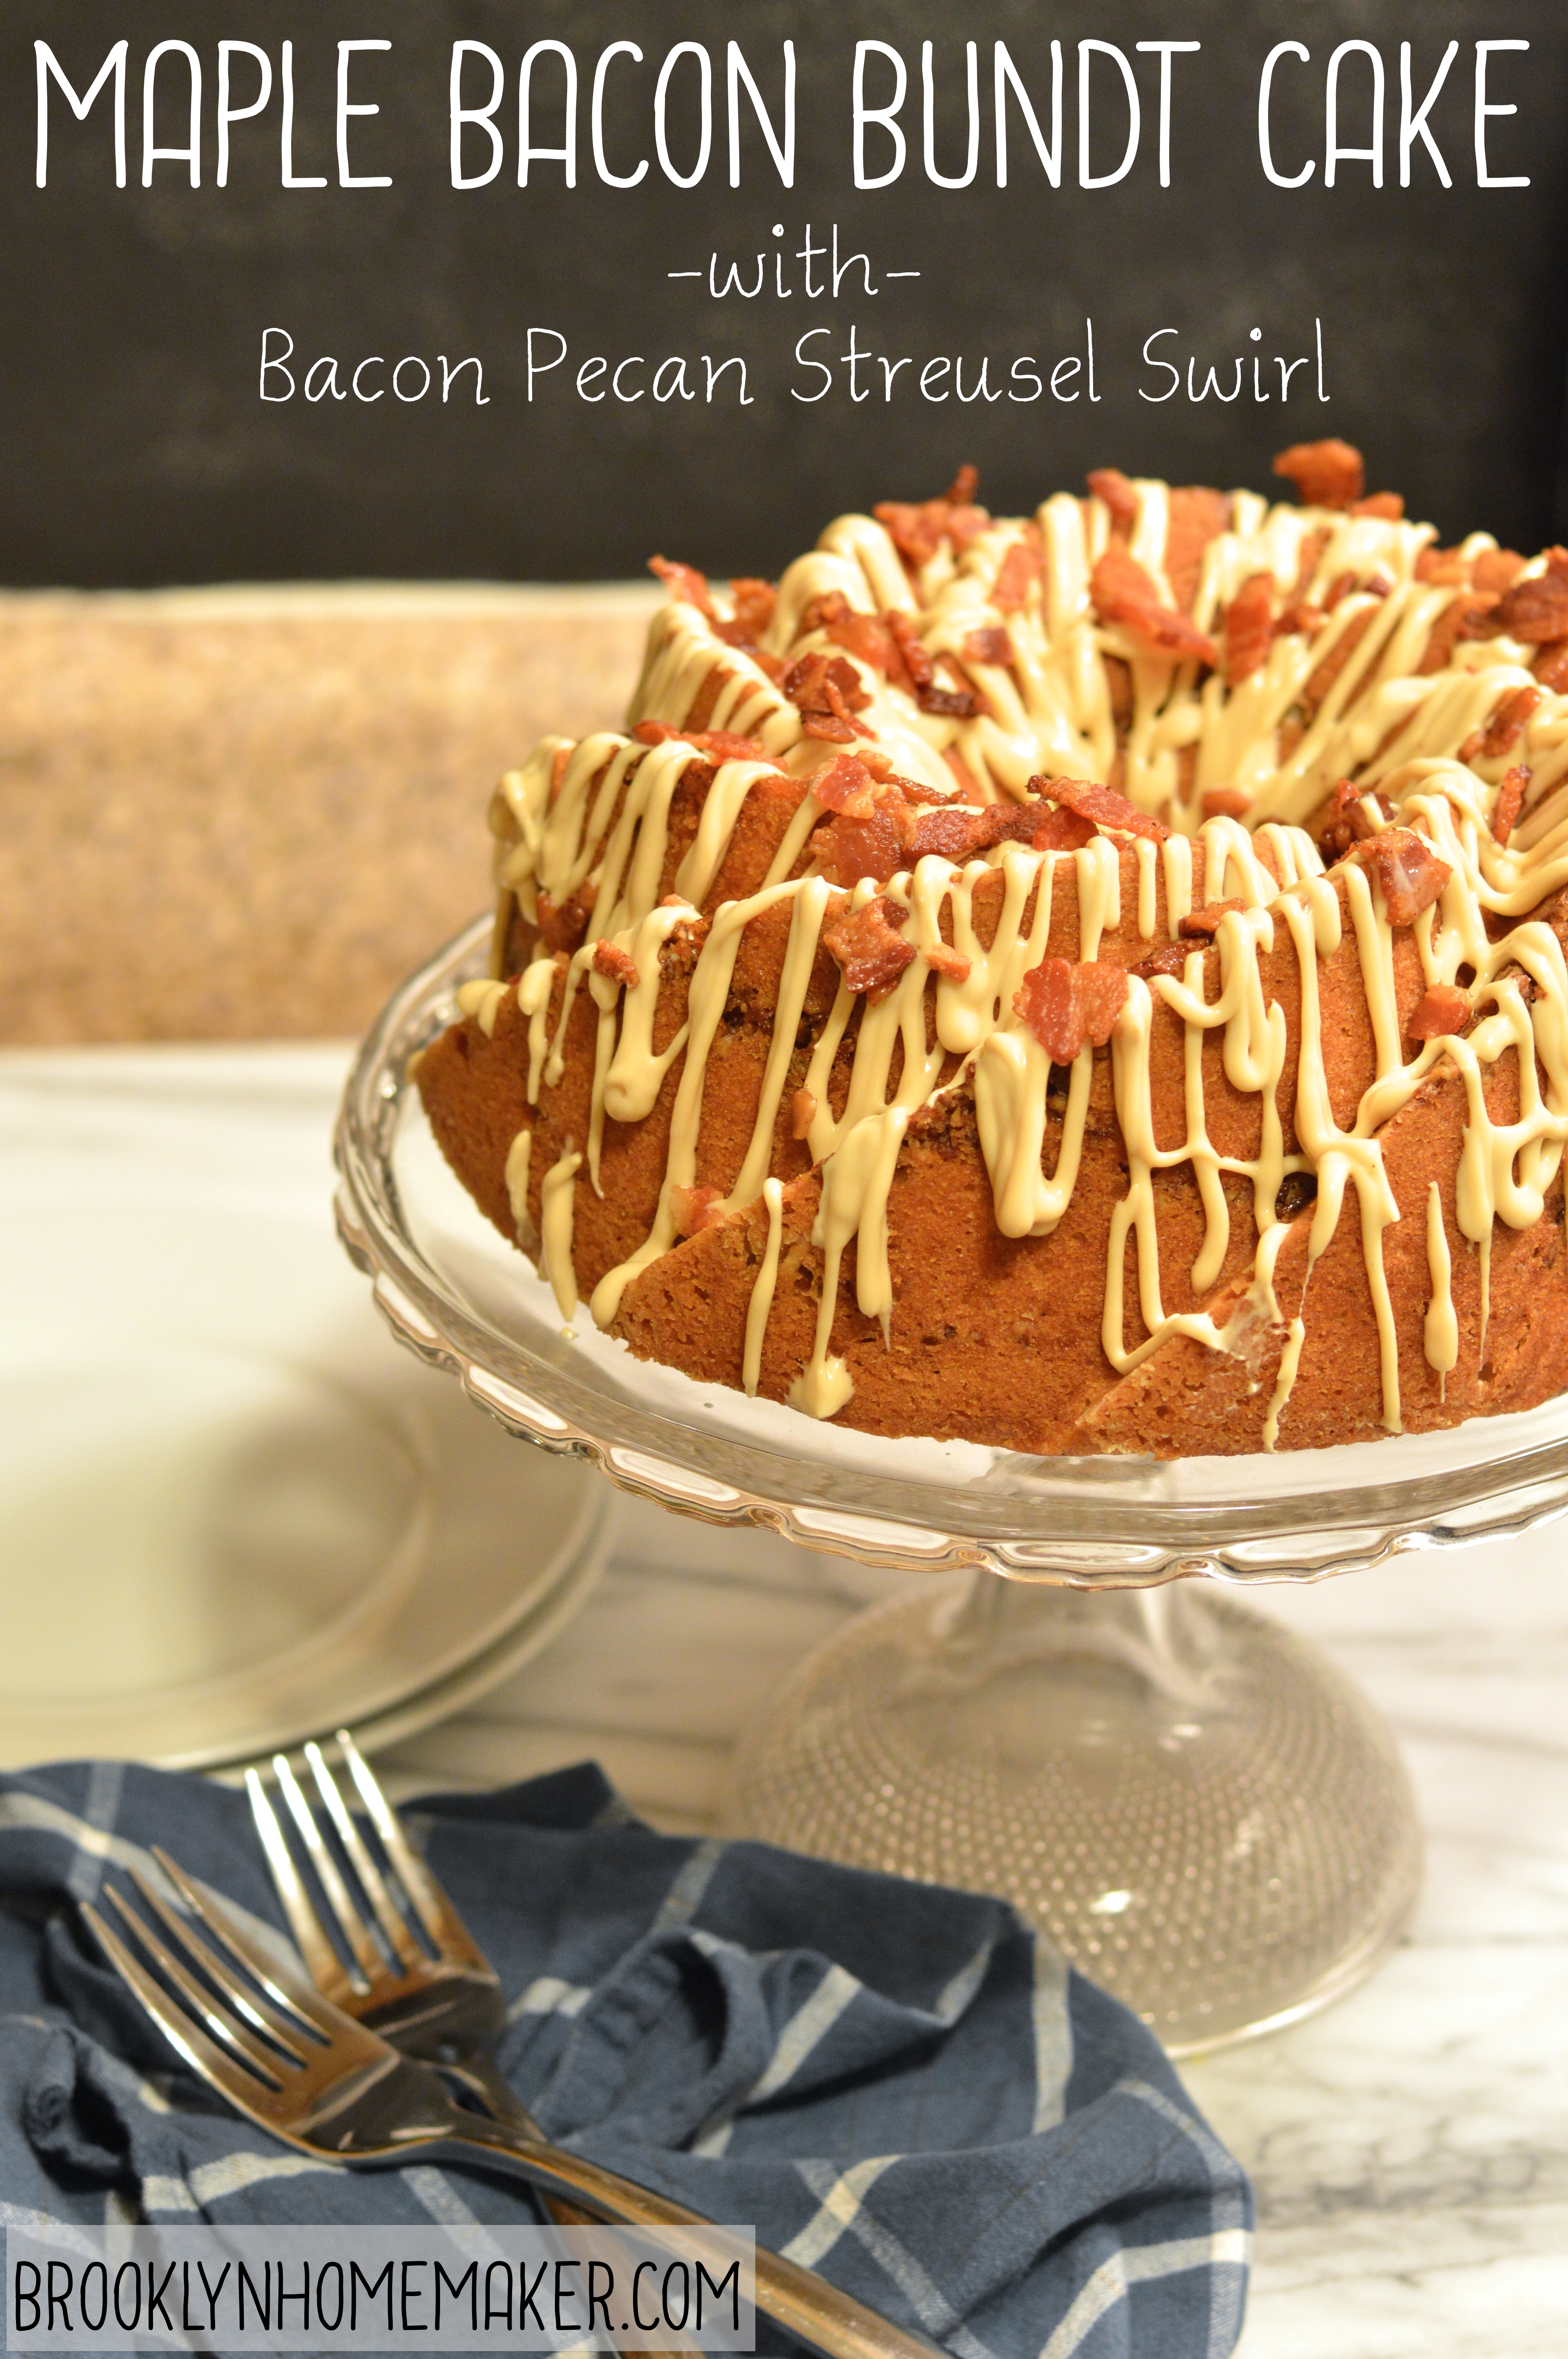
Thus was born the maple bacon bundt cake. This was a bit of an experiment, but boy did it work out! I was a little afraid that I might have used too much bacon (like that’s actually a thing), but once I tasted it I knew it was perfect. I brought it in to work to share for a bacon loving co-worker’s birthday, and everyone absolutely went crazy for it! I think I had everyone a little freaked out at first because I kept referring to it as the “experimental bacon cake”, but after one bite everyone was hooked and assuring me I’d definitely done something right.

maple bacon bundt cake with bacon pecan streusel swirl | Brooklyn Homemaker

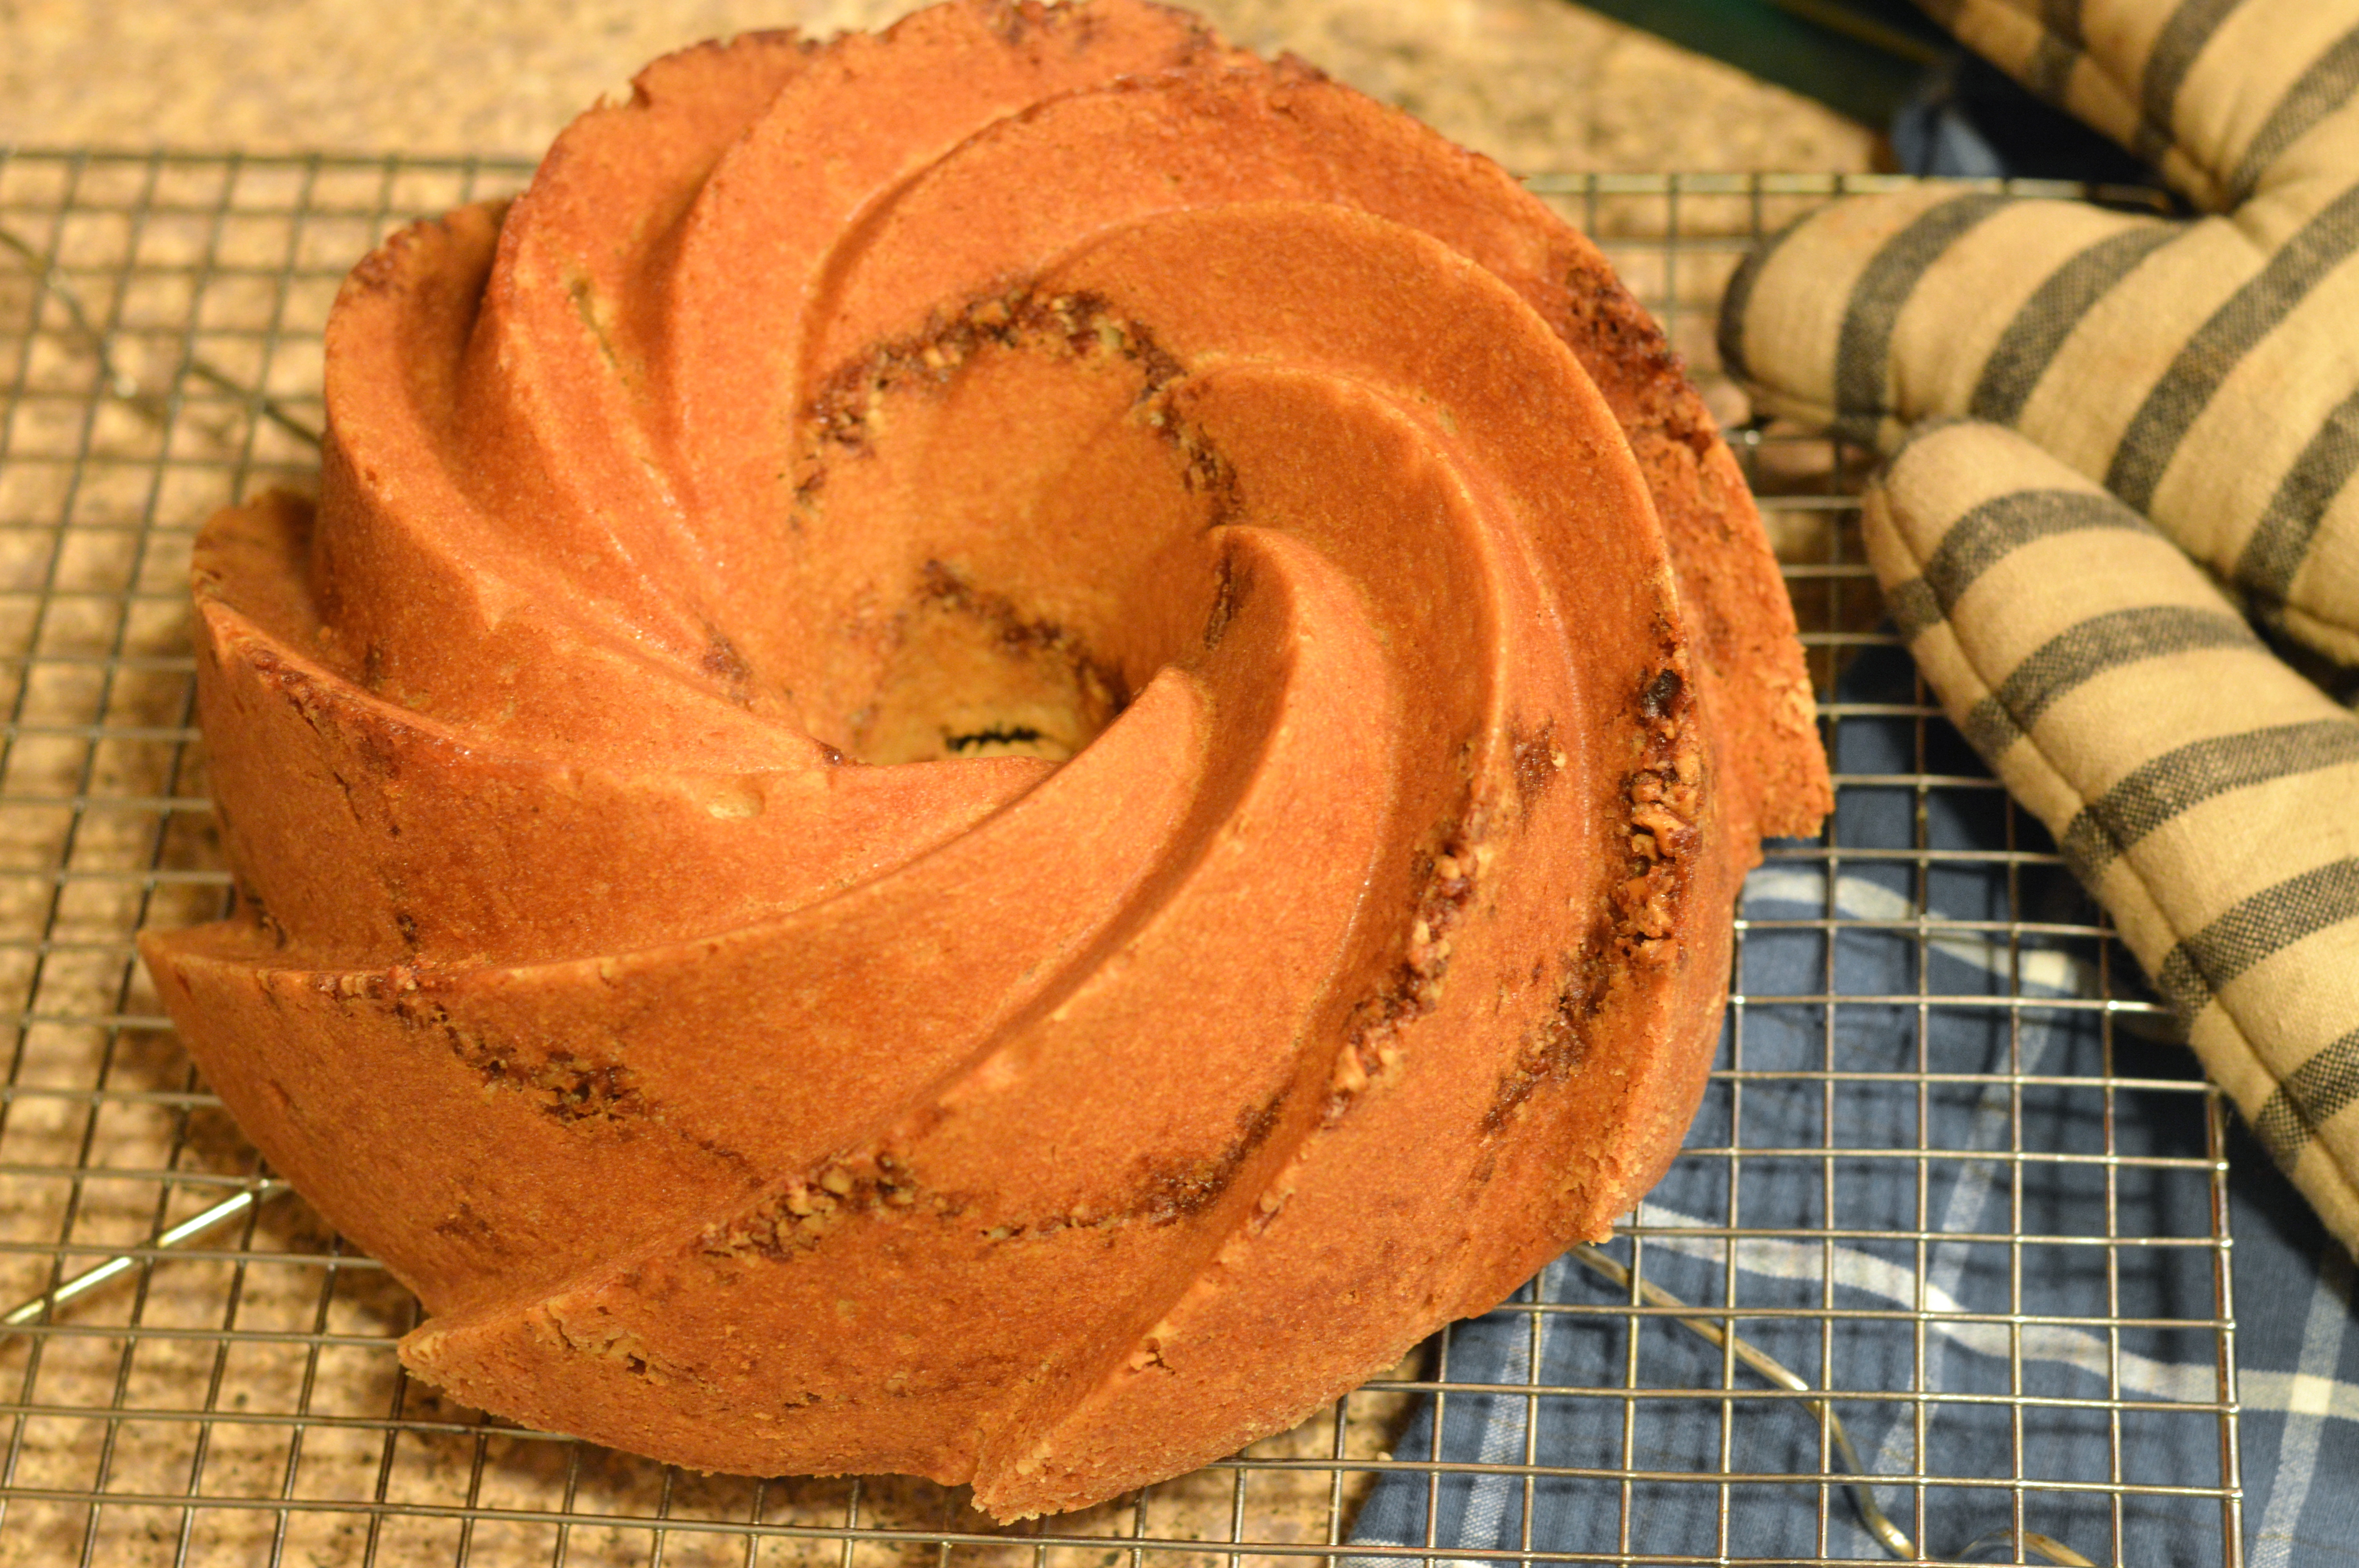
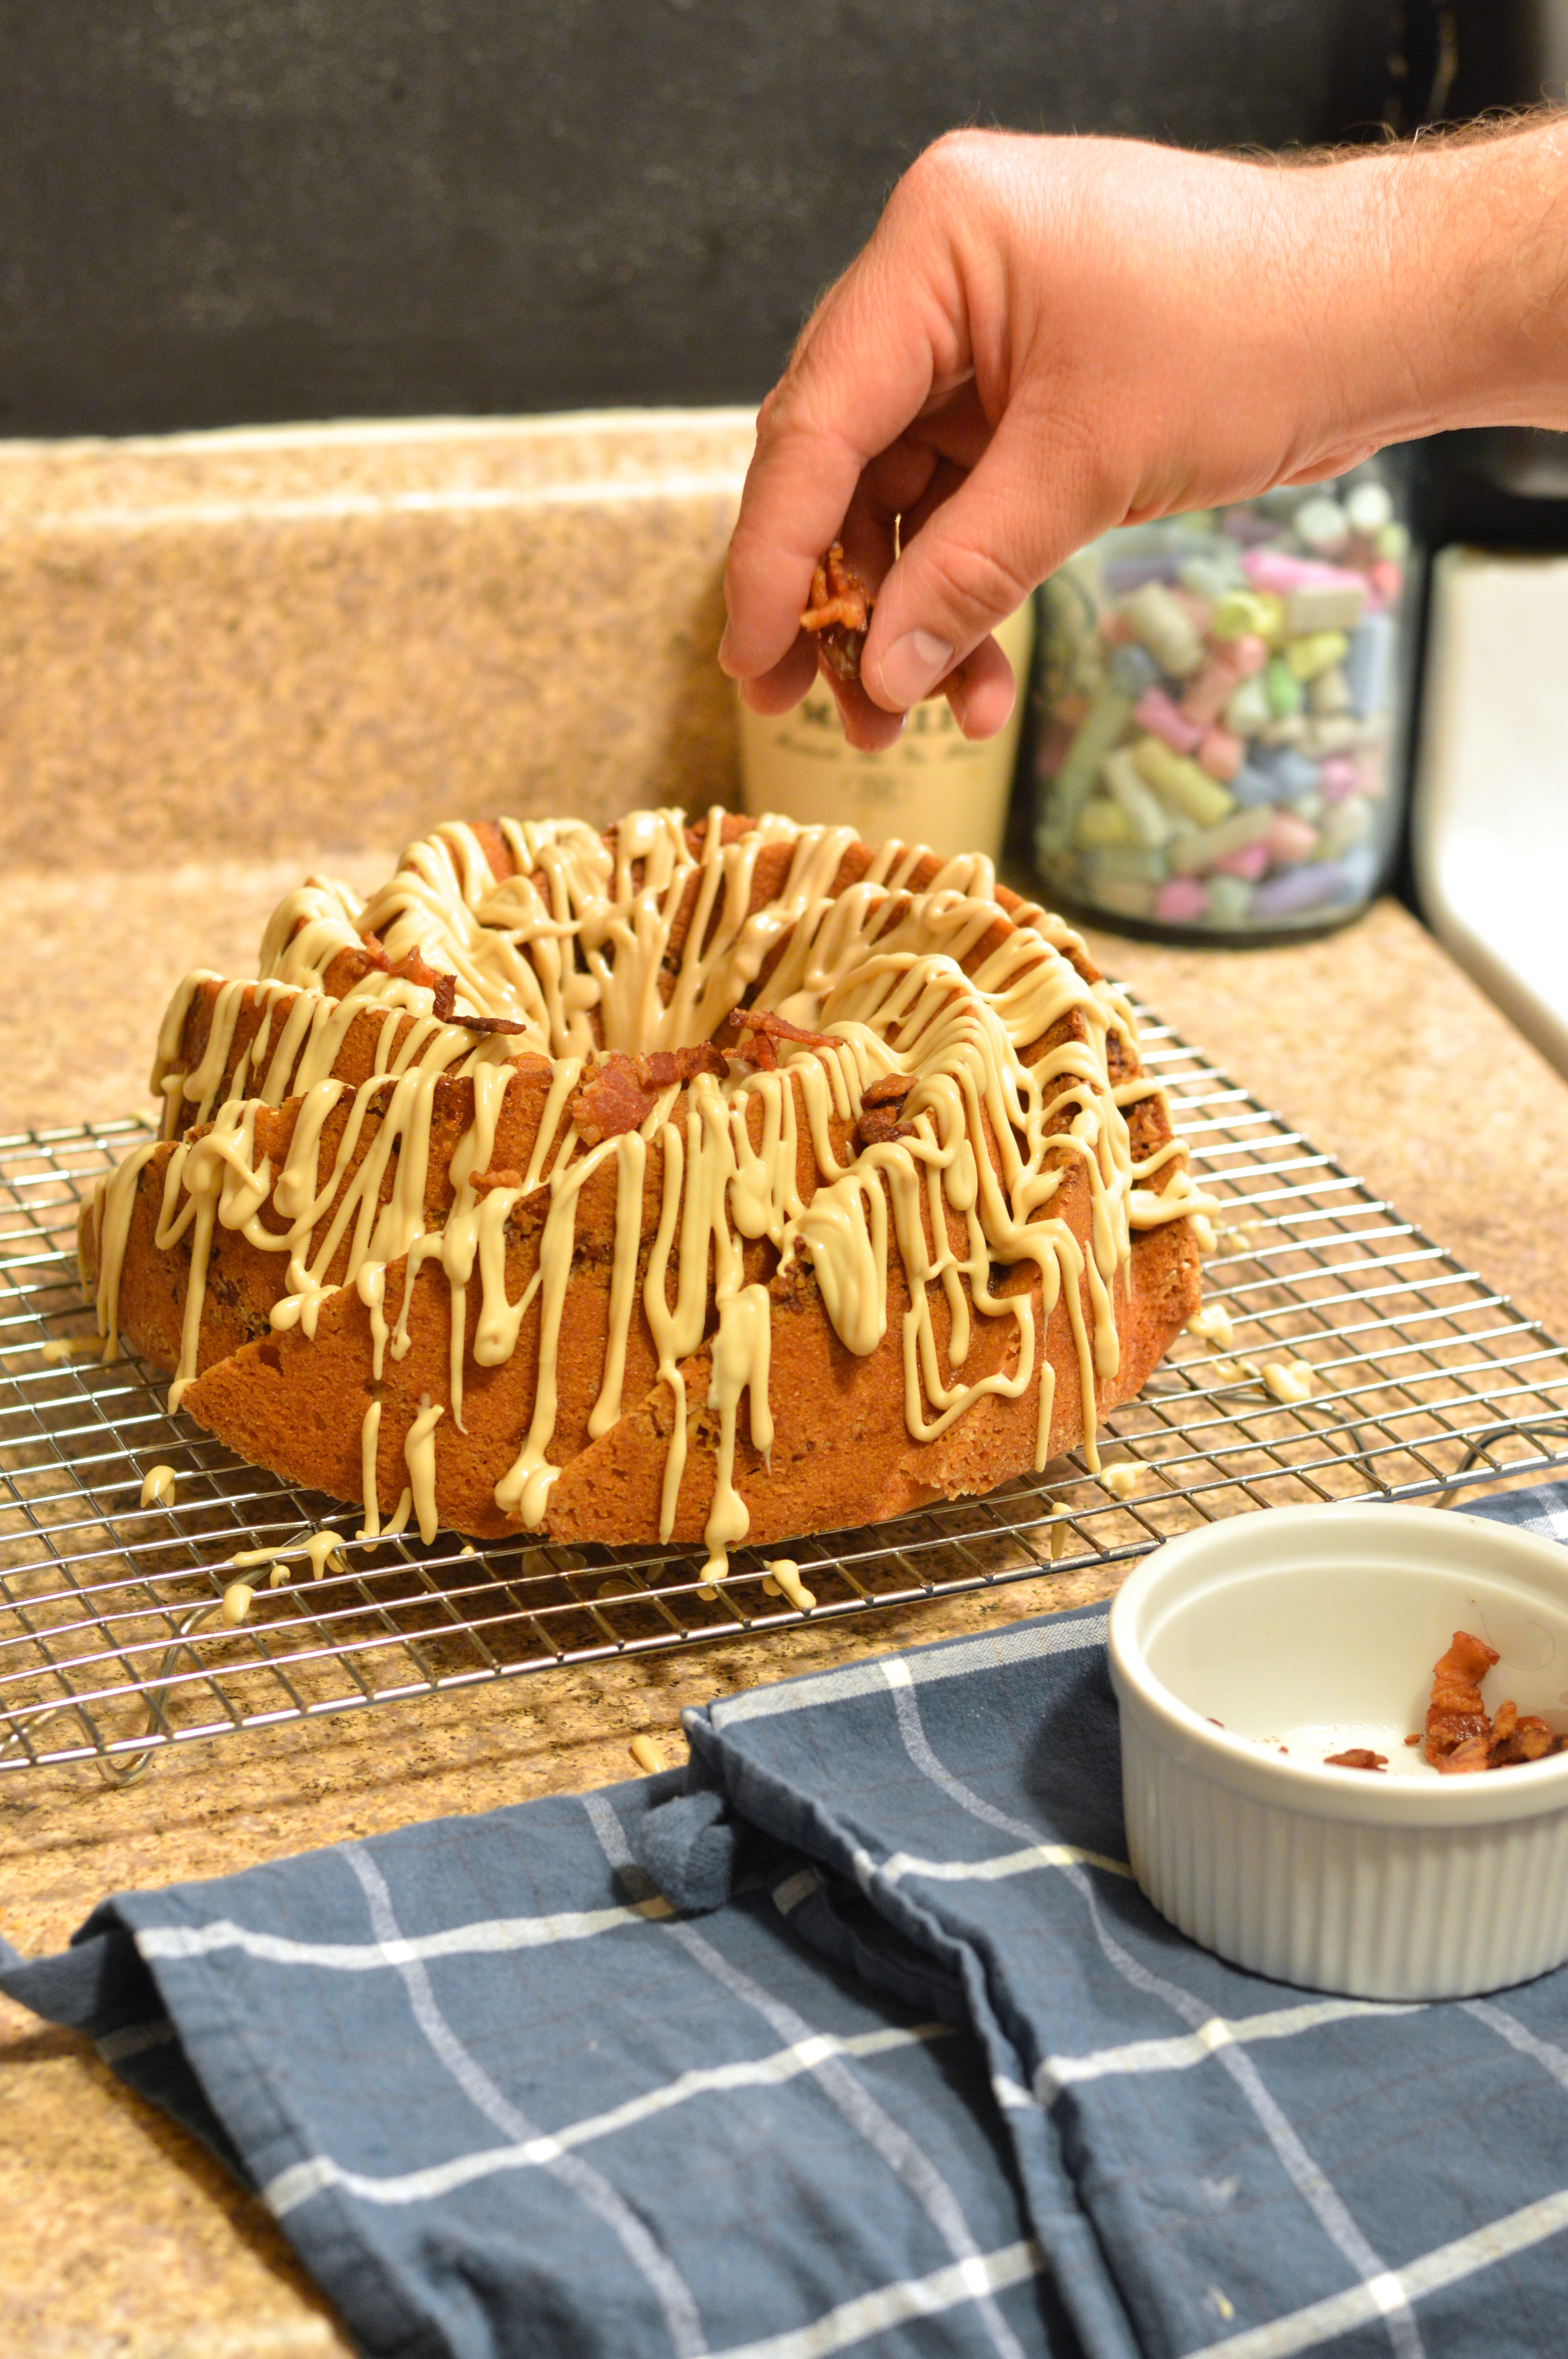
I started with a really moist buttermilk bundt recipe for the base of the cake, but substituted some bacon fat for some of the butter, and grade B maple syrup for some of the sugar. I definitely wanted pieces of bacon mixed into the cake too, rather than just crumbled on top, but I was afraid that just mixing bacon into the batter would make the bacon flabby and unappetizing. I decided to experiment with a sort of streusel to distribute between layers of batter right before baking, and it worked out really well. I crumbled some of the bacon up with a nut grinder along with some pecans for extra crunch, and added some brown sugar and spice to make it feel like a true streusel. After the cake cooled I topped the whole thing off with an amazing maple & cream cheese drizzle and even more bacon.

maple bacon bundt cake with bacon pecan streusel swirl | Brooklyn Homemaker

I’m not gonna lie. This cake is anything but traditional, and it’s definitely not for everyone. Seriously though, it’s freakin’ AMAZING! It’s kinda weird. But good weird. Like REALLY good weird. If you love bacon, especially if you love bacon in a sweet and salty platform, you gotta try this.

It’s got the perfect amount of warm sweet maple-y goodness from the syrup and just a tiny hit of spice from the cinnamon. The bacon fat adds a really faint hint smokiness to the cake, and the bacon pecan streusel gives it a wonderful texture and interest. The glaze is delicious, sweet and tangy, and the crumbled bacon on top not only gives every bite a salty touch of baconiness (that’s a word now, FYI), but also announces BACON! to anyone looking at this delicious (not to mention gorgeous) cake.

maple bacon bundt cake with bacon pecan streusel swirl | Brooklyn Homemaker

Before we get to the recipe, I really want to give a big big thank you to Kelly of Passion Kneaded, for hosting this month.  I also want to urge you to please make sure you scroll down below the recipe to check out all the amazing and beautiful breakfast themed bundts everyone came up with. Every single entry looks totally delicious and you should really take some time to explore the links. You’re probably going to need an excuse to host a brunch now, amiright?

I’m so lucky to have found this group of bundt loving kindred spirits!

maple bacon bundt cake with bacon pecan streusel swirl | Brooklyn Homemaker

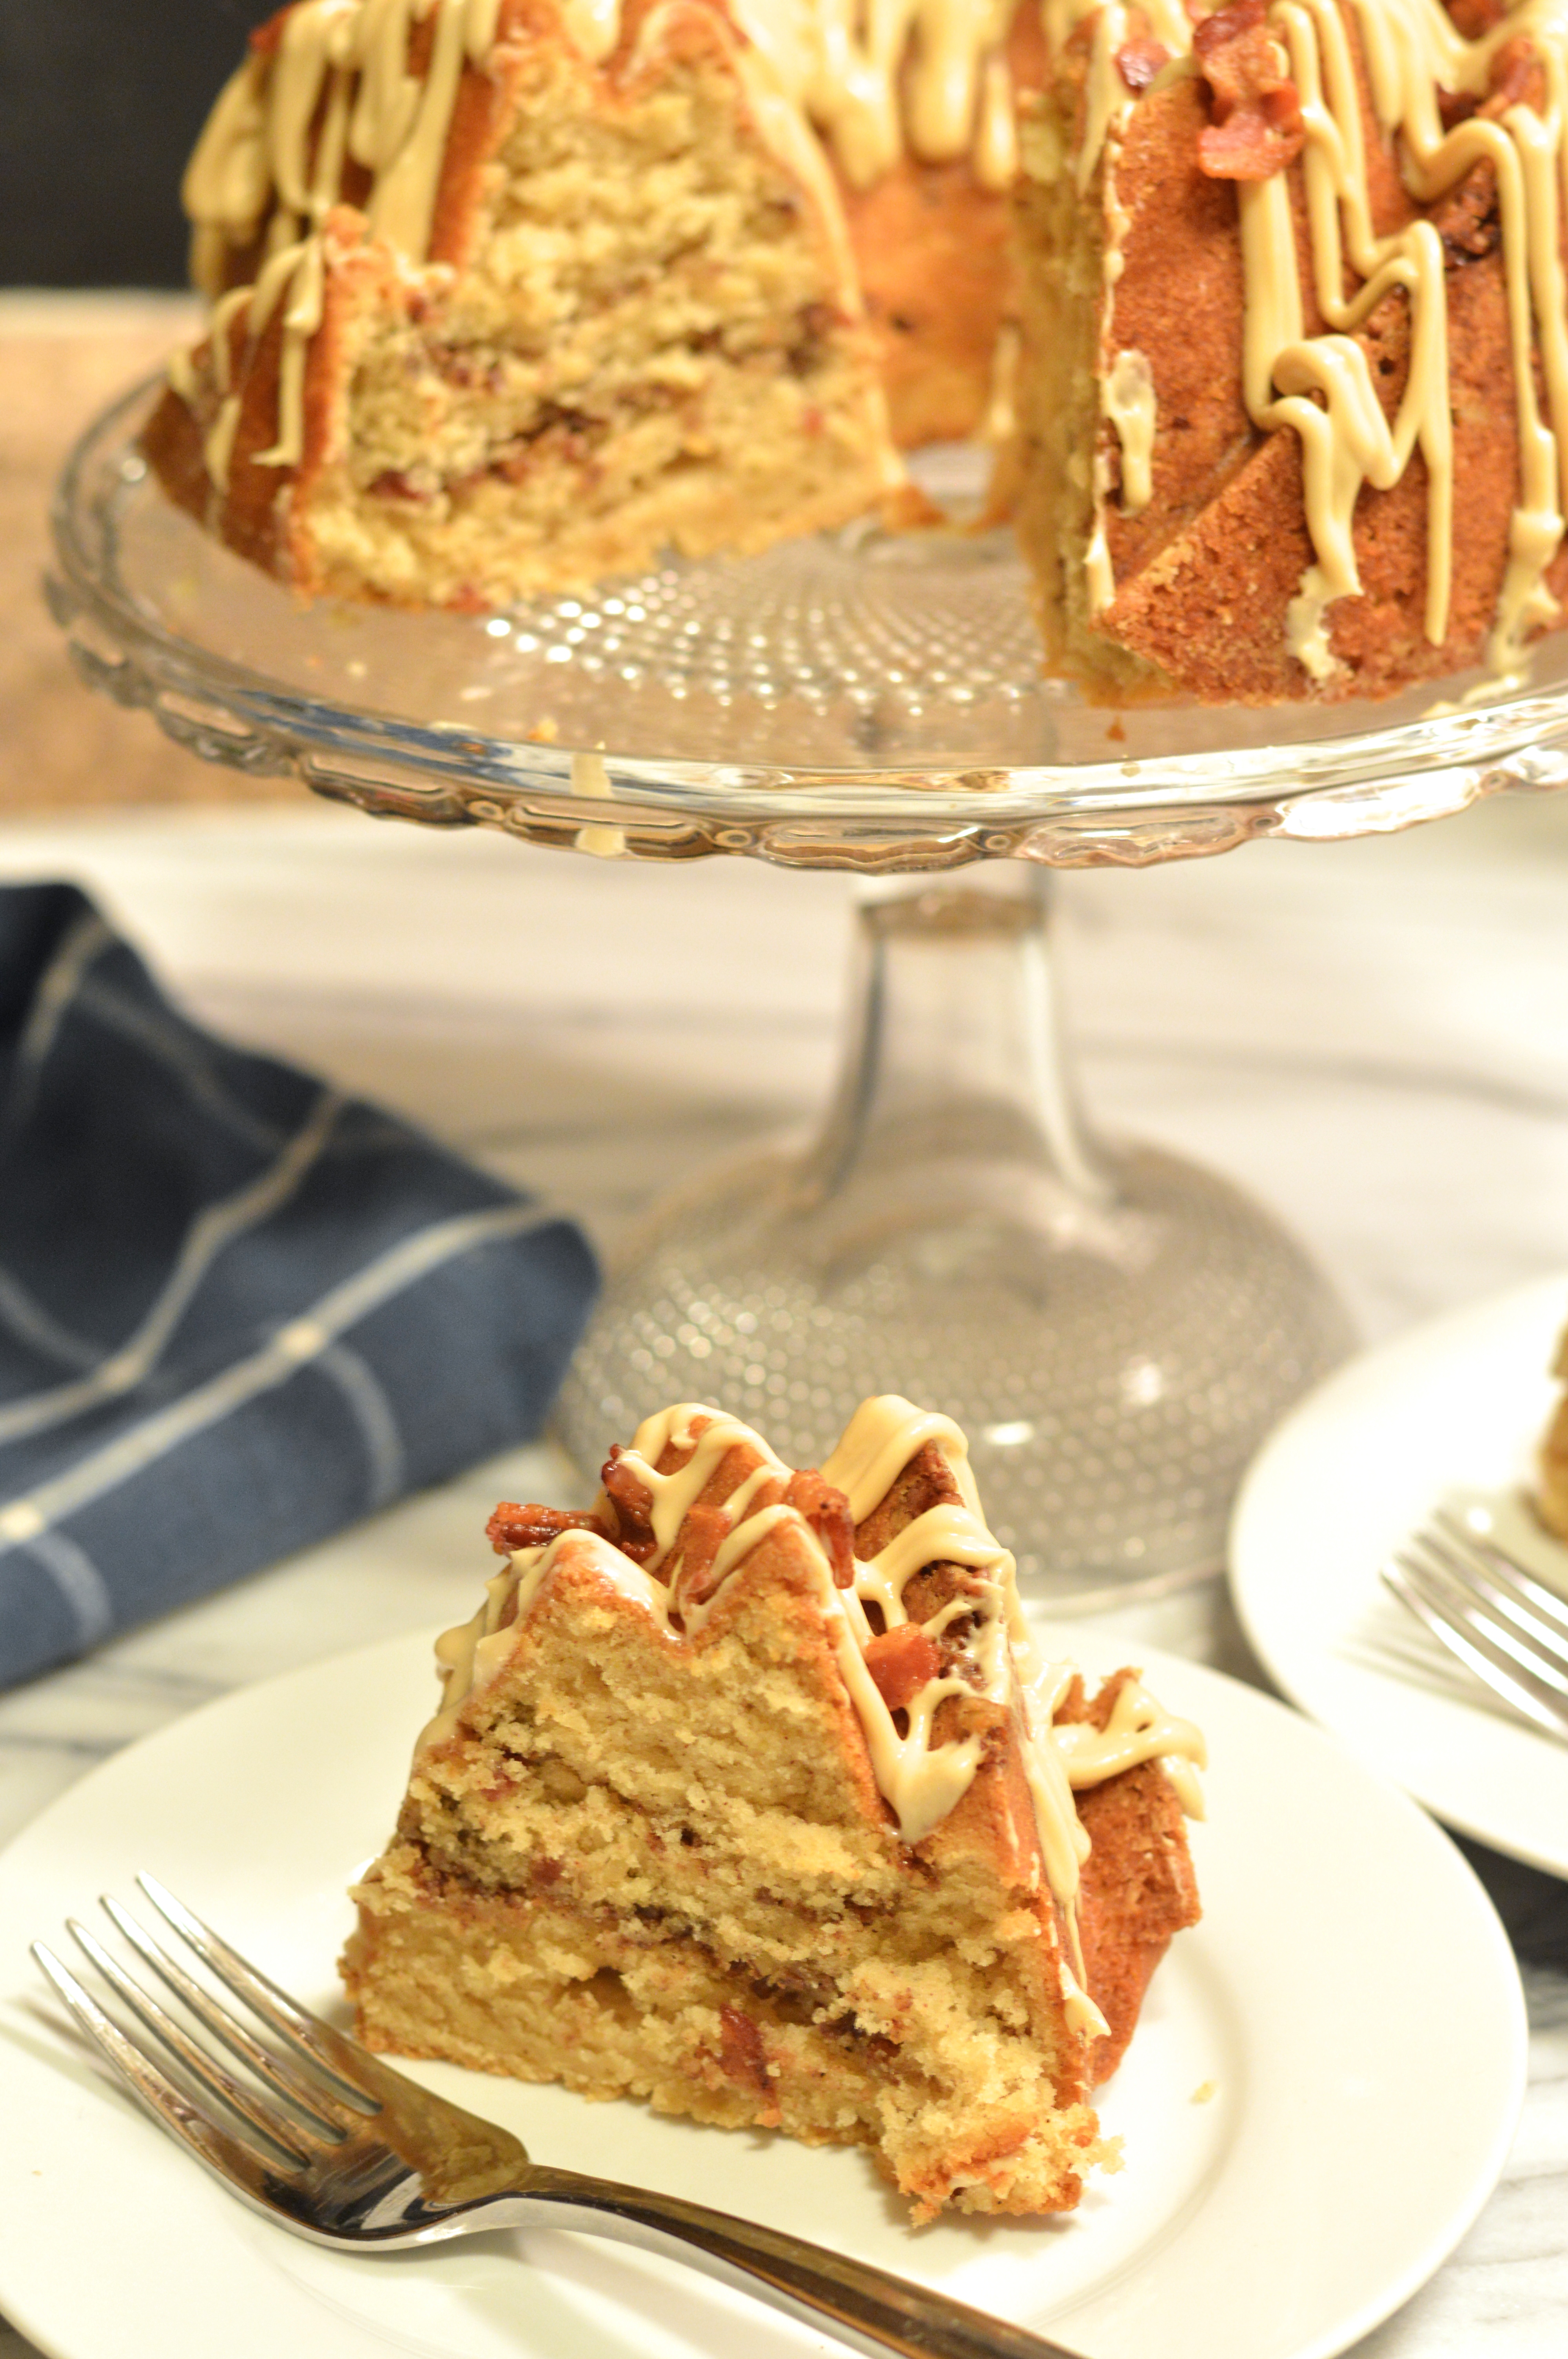
Maple Bacon Bundt Cake with Bacon Pecan Streusel Swirl


8 oz thick cut bacon (to be used throughout recipe)

Cake:
2 1/2 cups all-purpose flour, plus extra for dusting pan
2 teaspoons baking powder
1/2 teaspoon fine sea salt or table salt
1 teaspoon cinnamon
3/4 cup (1 1/2 sticks) unsalted butter, at room temperature
1/4 cup cooled bacon fat
1 1/4 cups granulated sugar
1/2 teaspoon vanilla extract
1/2 cup grade B maple syrup
3 large eggs, at room temperature
3/4 cup buttermilk

Streusel:
2/3 cooked bacon
1/2 cup pecans
2 teaspoons flour
1/4 cup brown sugar
1/2 teaspoon cinnamon

Glaze:
4 oz cream cheese, softened
1 tablespoon unsalted butter, softened
1/4 cup firmly packed brown sugar
2 tablespoons maple syrup
1 tablespoon buttermilk
1/3 crumbled cooked bacon

Preheat oven to 350°F. Generously butter and flour a 10-cup Bundt pan.*see note.
Remove the bacon from the package but do not separate the slices. With a sharp knife, cut thin strips across the slices, then break up while cooking. Cook in a heavy skillet over medium heat, stirring frequently, until well browned and crispy. Remove bacon to drain on a paper towel, and reserve bacon fat and let cool. Set aside.
In a medium bowl, whisk or sift flour, 1 tsp cinnamon, baking powder and salt together and set aside.
Finely chop pecans and 2/3 of your cooked bacon and combine with brown sugar, 1/2 teaspoon cinnamon, and 2 teaspoons flour. Mix well and set aside.
In the bowl of a stand mixer, beat butter, bacon fat and sugar until light and fluffy, about 3 to 5 minutes. If you don’t have enough bacon fat, you can use more butter. You want 1 cup of fat total. Then, with the mixer on low speed, add vanilla and maple syrup and mix until combined. Then add your eggs one at a time, scraping down the bowl between each addition. Add 1/3 flour mixture to batter, beating until just combined, followed by half the buttermilk, another 1/3 of the flour mixture, the remaining buttermilk and remaining flour. Scrape down from time to time and don’t mix any more than you need to.
Spread 1/3 cake batter in the pan and spread the top smooth. Add 1/2 streusel mix evenly over batter. Top another 1/3 cake batter, smooth again and repeat until all streusel and batter are in the pan. Bake for 55 to 60 minutes, rotating the cake once after 30 (to make sure it browns evenly). The cake is done as soon as a tester comes out clean of batter. Set cake pan on a wire rack to cool for 30 minutes, and invert cake onto rack to cool the rest of the way.

When the cake is completely cool, prepare the glaze. In the bowl of a stand mixer, combine cream cheese, butter, sugar, maple syrup and buttermilk. Beat vigorously until completely smooth with no visibly specks of cream cheese left in the glaze. If glaze is too thick, add more buttermilk, 1 teaspoon at a time.
Place cooling rack and cake into a clean jelly roll pan or baking sheet to catch any glaze that drips off the sides. Pour or pipe glaze over cake, letting it trickle and drip down the sides. I used a squeeze bottle to help distribute glaze evenly. Sprinkle remaining bacon over the cake making sure it sticks in the glaze.
Cake can be stored, covered, at room temperature for 3 to 4 days.

*To prevent sticking, make sure every little nook and cranny is well-coated with butter, and then dust the inside with flour. If you’re really nervous, refrigerating your pan while you prepare the cake will help firm the butter for extra insurance.

BundtBakers

This month, the Bundt Bakers are baking up breakfast. We have 15 beautiful Bundts (both sweet and savory) that would be perfect for your breakfast or brunch table.

#BundtBakers is a group of Bundt loving bakers who get together once a month to bake Bundts with a common ingredient or theme. We take turns hosting each month and choosing the theme/ingredient. You can see all our of lovely Bundts by following our Pinterest board right here. Links are also updated after each event on the BundtBaker home page here.

If you are a food blogger and would like to join us, just send an email with your blog URL to foodlustpeoplelove@gmail.comIf you are just a lover of Bundt baking, you can find all of our recipe links by clicking our badge above or on our group Pinterest board.

zucchini “pasta” with chicken, white wine, & tomatoes

You probably haven’t noticed this yet, but I’m not super big on “health food”.

zucchini "pasta" with chicken, white wine, & tomatoes | Brooklyn Homemaker

I mean, don’t get me wrong. I actually do try to eat healthy. In fact, when you bake as many treats as I do, you don’t really have a choice. You definitely need to balance the (delicious) unhealthy stuff with something light and green every once in a while. We try to make a green juice every morning before work, we (almost) never eat fast food, very rarely eat junk food (unless we’ve made it ourselves), and try to eat only whole foods (rather than heavily processed prepared ones). That doesn’t necessarily mean we’re in great shape or anything because, again, we also eat lots of sweets and homemade treats. It also doesn’t mean that we would ever consider ourselves “health nuts” or ever say we prescribe to any fad diets or trends in nutrition.
And then this weird thing happened.

zucchini "pasta" with chicken, white wine, & tomatoes | Brooklyn Homemaker

At work we started getting all of these requests for a hand-held spiral slicer, and everyone asking for it said they wanted to make “noodles” out of zucchini. We had two options for spiral slicers at the time, but both of them are a significant investment, and neither of them are even close to being hand-held. Some people would go with those options, others would choose something else we’d recommend, but most would sullenly walk out empty-handed, after begging that we bring in their requested item. I always assumed these poor souls were on some annoying fad diet that forced them to eat soggy squash “noodles” when they’d rather be eating pasta, but the number of requests we were getting in such a short period made us take notice. After a long search, we finally found one we liked and a few weeks ago we started carrying it. The one we have now is called the “Spirelli” by Gefu, and can it be found here.

zucchini "pasta" with chicken, white wine, & tomatoes | Brooklyn Homemaker

Even after we brought it in, and it started selling really well, I was still a total skeptic. Then one of my co-workers bought one and started raving about it. So, I decided I should probably give it a shot.

zucchini "pasta" with chicken, white wine, & tomatoes | Brooklyn Homemaker

The other night I tried it out for the first time and was shocked at how easy (and kind of fun) it was, and Russell actually requested I make zucchini “pasta” again the next night. I honestly can’t believe I’m saying this, but it’s pretty great.  The texture of the “noodles” is way better than I expected, not soggy at all, a bit like an al dente pasta. Since zucchini has such a neutral flavor, it absorbs the flavor of whatever else you’re cooking, and doesn’t end up tasting at all “health-food-y”.

zucchini "pasta" with chicken, white wine, & tomatoes | Brooklyn Homemaker

The one problem I had the first night was that when cooked, the zucchini gave off a ton of liquid and made the sauce really runny. I had to take the “noodles” out to reduce the sauce and then add them back in at the end. The next night I decided to try salting the “noodles” beforehand to get them to give off their liquid before cooking. Worked like a charm!
Some recipes I found recommend that you peel the zucchini for a more “noodle-y” appearance, but I don’t think the skins do anything negative to the texture, and the dark green skins have a lot of nutrients that you’d lose if you peeled them. I say leave ’em!

zucchini "pasta" with chicken, white wine, & tomatoes | Brooklyn Homemaker

This method is actually super quick and easy too! You just cut the end off the zucchini and push and twist it through the slicer like a giant pencil sharpener. If you don’t have this tool you could also use a mandoline slicer or another spiral slicer, or even a julienne peeler, to make zucchini “noodles”. The only time consuming step is letting the zucchini absorb the salt and release its moisture, which takes about 30 minutes, but that can be done while you prepare the rest of the dish. If you time it right and work efficiently, the whole meal including prep time can be on your plate and in your belly in well under an hour. Even with frequent pauses to photograph the whole process, it only took me about an hour.

zucchini "pasta" with chicken, white wine, & tomatoes | Brooklyn Homemaker

For this dish I paired the “noodles” with seared chicken and a white wine and blistered tomato sauce. Obviously this recipe could be adapted to be as healthy, or as rich, as you like. As is, it has little more than protein, vegetables, and a little seasoning and olive oil. I can’t believe I’m pushing zucchini noodles on my blog. I never thought this day would come. But they’re so GOOD!!!

zucchini "pasta" with chicken, white wine, & tomatoes | Brooklyn Homemaker

Tender “al dente” noodles, sweet blistered tomatoes, tender perfectly browned chicken, sweet garlicy wine sauce, bright fresh basil… It doesn’t get any better than that!

zucchini "pasta" with chicken, white wine, & tomatoes | Brooklyn Homemaker

Zucchini 'Pasta' with Chicken, Tomatoes, & White Wine

4 medium zucchini
3 Tablespoons good olive oil, divided
2 skinless, boneless chicken breasts
salt and pepper to taste
1 pint ripe grape tomatoes
3 large cloves garlic, crushed or finely minced
1/2 cup white wine
handful fresh basil leaves

Wash zucchini and use a spiral slicer (like this one), julienne slicer, or mandolin to create spaghetti style “noodles”. Place “pasta” in a mesh strainer and sprinkle with about 2 teaspoons salt. Toss well and allow to sit for at least 30 minutes. Gently squeeze out any remaining liquid and discard.
Meanwhile, heat large cast iron or stainless steel skillet over high heat. Season your chicken breasts on both sides with salt and pepper. Add 1 tablespoon olive oil to pan and sear chicken for 5-7 minutes on either side, or until nicely browned and cooked through. Set aside to rest.

Wash tomatoes and slice each in half, lengthwise. Add remaining olive oil to pan, add tomatoes, and season with salt and pepper. Cook tomatoes, stirring occasionally for 7 to 10 minutes until they are browning and starting to fall apart. Add garlic and wine, stir well, and cook down until wine is reduced by at least half, about 5 minutes.
Slice your chicken up into bite sized pieces. Arrange basil leaves in a flat pile, roll up into a “cigar” and slice into very thin strips. (this is called a chiffonade)
Add chicken and basil to pan with sauce. Add zucchini and toss to combine. I find this works best with long silicone tipped tongs. Cook until noodles are heated through, about 5 minutes.
Adjust seasoning if necessary, and top with a little fresh basil.

favorite roasted broccoli

So, when it comes to meal planning, I’m kind of old fashioned.

favorite roasted broccoli | Brooklyn Homemaker

I’m not quite sure why, but I often feel like a balanced meal should have three components. You gotta have your protein, your starch, and your veg. I don’t know exactly when or where I picked up this way of thinking about my dinner plate, but it’s deeply ingrained.  Maybe it was from my mother, or maybe my grandmother. When I was studying abroad in France, a chef once told me that plates should always feature odd numbers because odd numbers are more “beautiful” than even ones. Maybe that’s why I’m partial to having three different things on my plate.

favorite roasted broccoli | Brooklyn Homemaker

I really like to experiment with new recipes, but when it comes to filling those three little voids I keep an arsenal of quick and easy go-to recipes for when I’m feeling uninspired or in a rush. One of my favorite vegetable preparations is oven-roasted broccoli. It’s super simple, super healthy, and super delicious!

favorite roasted broccoli | Brooklyn Homemaker

I’m sorry that I waited this long to share this recipe with you, but for a long time I actually thought it was too simple to necessitate a full post of it’s own. It’s not really very original or innovative, and it requires so little work or thought that I assumed it wasn’t worth writing about. A few weeks ago I made this for my mother and she mentioned that she’d never thought to make broccoli this way, and I realized that some of you might enjoy trying a new technique too!

favorite roasted broccoli | Brooklyn Homemaker

I know a lot of people like to steam or boil their broccoli, so I thought it’d be nice to share another idea that’s just as easy and happens to be (in my opinion) more flavorful. Cooking broccoli with water can make it taste, well, watery. Rather than losing any flavor, roasting your broccoli concentrates and intensifies it. It requires little more work than chopping fresh broccoli into large bite-sized florets, tossing with some olive oil and salt & pepper, and sliding into the oven just long enough to give it a bit of color.

favorite roasted broccoli | Brooklyn Homemaker

This preparation pairs really well with any number of meals. I’ve even used this method to pre-cook broccoli for pasta dishes or salads. It can also easily be tweaked or gussied up to fit the flavors of whatever you’ll be serving it with. If you wanted to add a little extra flavor before roasting, you could toss the broccoli in a little soy sauce, balsamic vinegar, or hot sauce along with the olive oil. My favorite way to prepare it though is to roast it first and then squeeze a little fresh lemon juice over the top to bring out the fresh bright green flavor without overpowering or covering it up.

 favorite roasted broccoli | Brooklyn Homemaker

This will work with other vegetables too, but cooking time may need to be adjusted. I just made some fresh local asparagus (Yay!! Asparagus season!!), roasted it for a few minutes less, and boy was it wonderful! I don’t think this would work very well with frozen vegetables though, because they’d likely end up mushy and overcooked. Part of the appeal of this technique is that vegetables maintain a little bit of their crisp texture and bite, which frozen vegetables have already lost.

favorite roasted broccoli | Brooklyn Homemaker

Cutting up your own head of fresh broccoli is super easy and worth the little (tiny) bit of effort. I usually turn the head over stem-side-up (or on it’s side) and work around the head with a sharp knife cutting the florets off where they branch out naturally, rotating the head as I work my way in. If some of the florets are especially large you can cut them in half or in quarters, from top to bottom. Simple. Easy. Healthy. Delicious.

favorite roasted broccoli | Brooklyn Homemaker

roasted broccoli

1 large head broccoli

1/4-1/2 tsp coarse kosher salt (to taste)
1/4 tsp freshly ground pepper
1 tbsp olive oil
1 lemon, cut into wedges (optional)

Preheat oven to 425. Cut broccoli into large bite sized florets and place in a large bowl. Add salt, pepper, & olive oil and toss toss toss until well coated. Spread evenly over a parchment lined baking sheet and roast for 20 minutes or until just starting to brown. Serve with a squeeze of fresh lemon juice if desired.

fully loaded stovetop mac & cheese

This Easter Sunday was a beautiful warm sunny day here in New York so Russell and I spent the bulk of our day enjoying the outdoors.

fully loaded stovetop mac & cheese | Brooklyn Homemaker

We woke up bright and early (thanks to our little dog Betty) and decided to go for breakfast a few subway stops away and to take a quiet leisurely walk home. When we got back we took the pups out to the dog park for a while, and then came home and spent most of the rest of the day in our back yarden (combination yard/ garden, just indulge me).  Once the sun started to go down and the air turned a little chilly, we decided it was time to come up with a plan for dinner.

fully loaded stovetop mac & cheese | Brooklyn Homemaker

Since it was a holiday I thought we deserved something a bit rich and indulgent even though we weren’t celebrating with family or friends. Considering that most of the day was behind us, I also wanted it to be something that I could have on the table and in our bellies in just about an hour or so. I thought a nice hearty pasta dish would be the ideal thing to round out the day, but since I wanted it to be indulgent and creamy, I knew cheese would be the prefect addition. The more I thought about it, the more I knew I should let the cheese take center stage, while still loading it up with all the other hearty tasty things I wanted to add.

fully loaded stovetop mac & cheese | Brooklyn Homemaker

I often like to make a quick “healthy-ish” pasta dinner with chicken and broccoli and whatever else sounds good, but after the addition of some bacon and loads of cheese, this dish seemed to stray out of that category. Since it doesn’t have a crunchy crumbly baked topping, it also doesn’t quite feel like a traditional homemade mac & cheese. It seems to fall somewhere in between the two, but since it does have a rich and creamy béchamel cheese sauce, I think that “fully loaded” stovetop mac & cheese is the perfect name for it.  Whatever you want to call it, it is definitely less than healthy, and completely delicious.

fully loaded stovetop mac & cheese | Brooklyn Homemaker

Crisping the bacon on its own allows you to render the fat to later make the béchamel. Cubing the uncooked chicken helps it cook faster while remaining flavorful and tender. Roasting the broccoli in the oven instead of, say, boiling it with the pasta, keeps it from tasting waterlogged and soggy and helps it absorb as much of the creamy sauce as possible. Slicing open and roasting the grape tomatoes concentrates their flavor and sweetness and gives them an almost sun-dried quality. Of course, if you wanted to save some time and avoid turning on the oven, you could boil the broccoli with the pasta or steam it while the pasta cooked, and you could use chopped sun-dried tomatoes in place of the roasted fresh ones. Either way, if you work smartly and efficiently you can finish this dish in just about an hour. It does require a bit of work but none of the steps are overly complicated or time-consuming, so I think it would be an excellent weeknight meal.

fully loaded stovetop mac & cheese | Brooklyn Homemaker

I wasn’t sure that the chicken or the tomatoes would marry well with the sharp cheddar cheese, but my concerns were totally for nothing. This meal is totally delicious and really hearty and filing, and was the perfect way to finish of our lazy Easter Sunday. The creamy sharp cheese gives it an almost tangy quality that combines really well with the sweetness of the tomatoes and the umami saltiness of the bacon. If you cook the pasta to be al dente this dish has a really nice variety of textures as well as flavors. The chicken is tender but with some substance, the pasta has just a bit of bite, the roasted broccoli has a little bit of crunch, the bacon adds some welcome crispiness, and the perfect creaminess of the cheese sauce rounds the whole meal out.

Now if you’ll excuse me, there are some leftovers that seem to be calling my name.

fully loaded stovetop mac & cheese | Brooklyn Homemaker

Fully Loaded Stovetop Mac & Cheese

1 pint washed grape tomatoes, sliced in half lengthwise
1 large bunch broccoli, chopped into bite size florets
1 tbsp olive oil
salt and pepper
4 oz bacon
1 lb skinless boneless chicken breasts
1 small onion, diced
2 tablespoons flour
2 cups milk
8 oz white cheddar cheese, grated
1 lb (16 oz) shell pasta (or another shape if you want)

Preheat oven to 400 and bring a large pot of salted water to a boil. On a parchment lined sheet pan, arrange halved tomatoes cut side up, and sprinkle with salt and pepper. Toss broccoli with olive oil, salt and pepper to taste, and arrange on another parchment lined sheet. Roast both for 20 to 25 minutes, until cooked and brown but not burnt or dried out.

While the vegetables roast, slice your bacon against the grain into small thin strips and cook in a heavy skillet over medium high heat until browned and crispy, probably about 15 to 20 minutes. Remove with a slotted spoon and drain on a paper towel lined plate. Drain most of the grease off into a glass measuring cup, leaving about a tablespoon to cook your chicken. Cut the chicken into bite sized cubes, season with salt and pepper, and sauté until just cooked through, about 10 minutes. Remove and transfer to paper towel lined plate with bacon.

Cook pasta until al dente according to package directions. Drain and return to pasta pot along with cooked tomatoes, broccoli, chicken and bacon. If desired, reserve about a tablespoon or two of bacon to garnish.

Meanwhile, measure out 2 tablespoons of bacon fat and return to the pan, discarding anything left (or save for later use). If you don’t have enough, make up the difference with butter. Add onion and cook until just beginning to brown. Add the flour, whisk until well combined, and cook over medium heat for 2 or 3 minutes. Slowly add milk, a little at a time, whisking out any lumps. Cook until thick and bubbly, probably 5 to 8 minutes or so, whisking regularly to prevent lumps. Once the sauce is thick, turn the heat off and add the cheese. Stir in until fully melted and well combined. Pour sauce over pasta and stir stir stir until everything is well combined. Plate and garnish with a little crumbled bacon if desired.