Main Dishes

maple dijon roasted carrots

When I was growing up I absolutely loved carrots, and could plow through a bag of baby carrots (with a tub of ranch dip) in under an hour.

maple dijon roasted carrots | Brooklyn Homemaker

There’s just something so refreshing and satisfying about the fresh sweet crunch of a fresh carrot. Cooked carrots though, were another story.

I hated them so much I can’t tell you. I think it was probably a textural thing as soft and mushy were the exact opposite of everything I thought a carrot was supposed to be. I also think I may have been traumatized by an abundance of rubbery flavorless frozen ripple cut carrot disks.

maple dijon roasted carrots | Brooklyn Homemaker

Either way, it all began to change a few years ago when a roommate made me some baby carrots in an orange juice glaze with tons of butter. Despite my hatred I ate a few of them to be polite, but after one bite my whole world changed. They were sweet and buttery and slightly salty and tender and delicate and wonderful in a way I’d never experienced. A love of cooked carrots blossomed from that moment on.

maple dijon roasted carrots | Brooklyn Homemaker

While we’re on the subject of food likes and dislikes, let’s talk about my husband for a moment shall we?

When we were first dating he confidently announced one night that he was “allergic” a laundry list of foods including eggs and mushrooms, two of my favorite things in the world. I also learned that beyond his “allergies” he was also a picky eater in general, never used condiments on sandwiches or burgers, and especially hated all forms of mustard, another one of my favorite things.

To someone who used culinary prowess as a way to bring all the boys to the yard, a beau with food allergies and picky eating habits was completely devastating.

maple dijon roasted carrots | Brooklyn Homemaker

Eventually I built up the courage to sneak some of these alleged “allergens” into a meal to witness his reaction, or lack thereof, first hand. Now, before you recoil in horror and call me a monster, rest assured that I had spoken with him in great depth about his “symptoms” and knew with 110% certainty that his “allergies” were not life threatening or even harmful in any way other than a vague irritation. I realize still that this was an irresponsible and potentially dangerous way of calling him on his bull, but I was young and my judgement was clouded by the emotional rollercoaster of having my love of food and my growing love for my future husband pitted against one another.

So anyway, one night I mixed a few finely diced mushrooms into a pasta dish just to see how he’d react, and just as I suspected, he didn’t react at all. After we’d finished our meal and had another glass of wine or two, I explained what I had done and had a long and boozey conversation with him about his food issues. The conversation finally culminated in a tearful realization and admission that he just didn’t like these foods and that his “allergies” were all in his head.

maple dijon roasted carrots | Brooklyn Homemaker

To this day he still won’t even come into the kitchen when I’m making myself an egg for breakfast, but mushrooms have actually become one of his absolute favorite foods. Armed with the knowledge that he can be swayed, I’ve also made it my mission to get him to like, or at least not hate, my beloved mustard.

I don’t ever expect that he’ll reach for a knife and slather some brown deli mustard on his sandwich, but I really really REALLY want to be able to at least cook with mustard again. Dijon has always been one of my secret weapons in the kitchen. A tablespoon or two added to a sauce adds just enough sharp tangy acidity to brighten up any dish. I especially miss being able to cook with mustard in the fall, when I could and would be pairing it with apples and pork, maple syrup, brussels sprouts, salad dressings, and the like, but haven’t been able to for years.

maple dijon roasted carrots | Brooklyn Homemaker

Being a truly devious man on a mission, a while back I started sneaking small amounts of mustard into sauces and dressings just to see if he’d notice or complain. Slow and steady wins the race, as they say, and I’m finally reaching a point where he can actually taste the mustard in certain dishes and doesn’t seem to mind anymore.

The flavor still needs to be subtle for him to be okay with it, but we’re getting there.

maple dijon roasted carrots | Brooklyn Homemaker

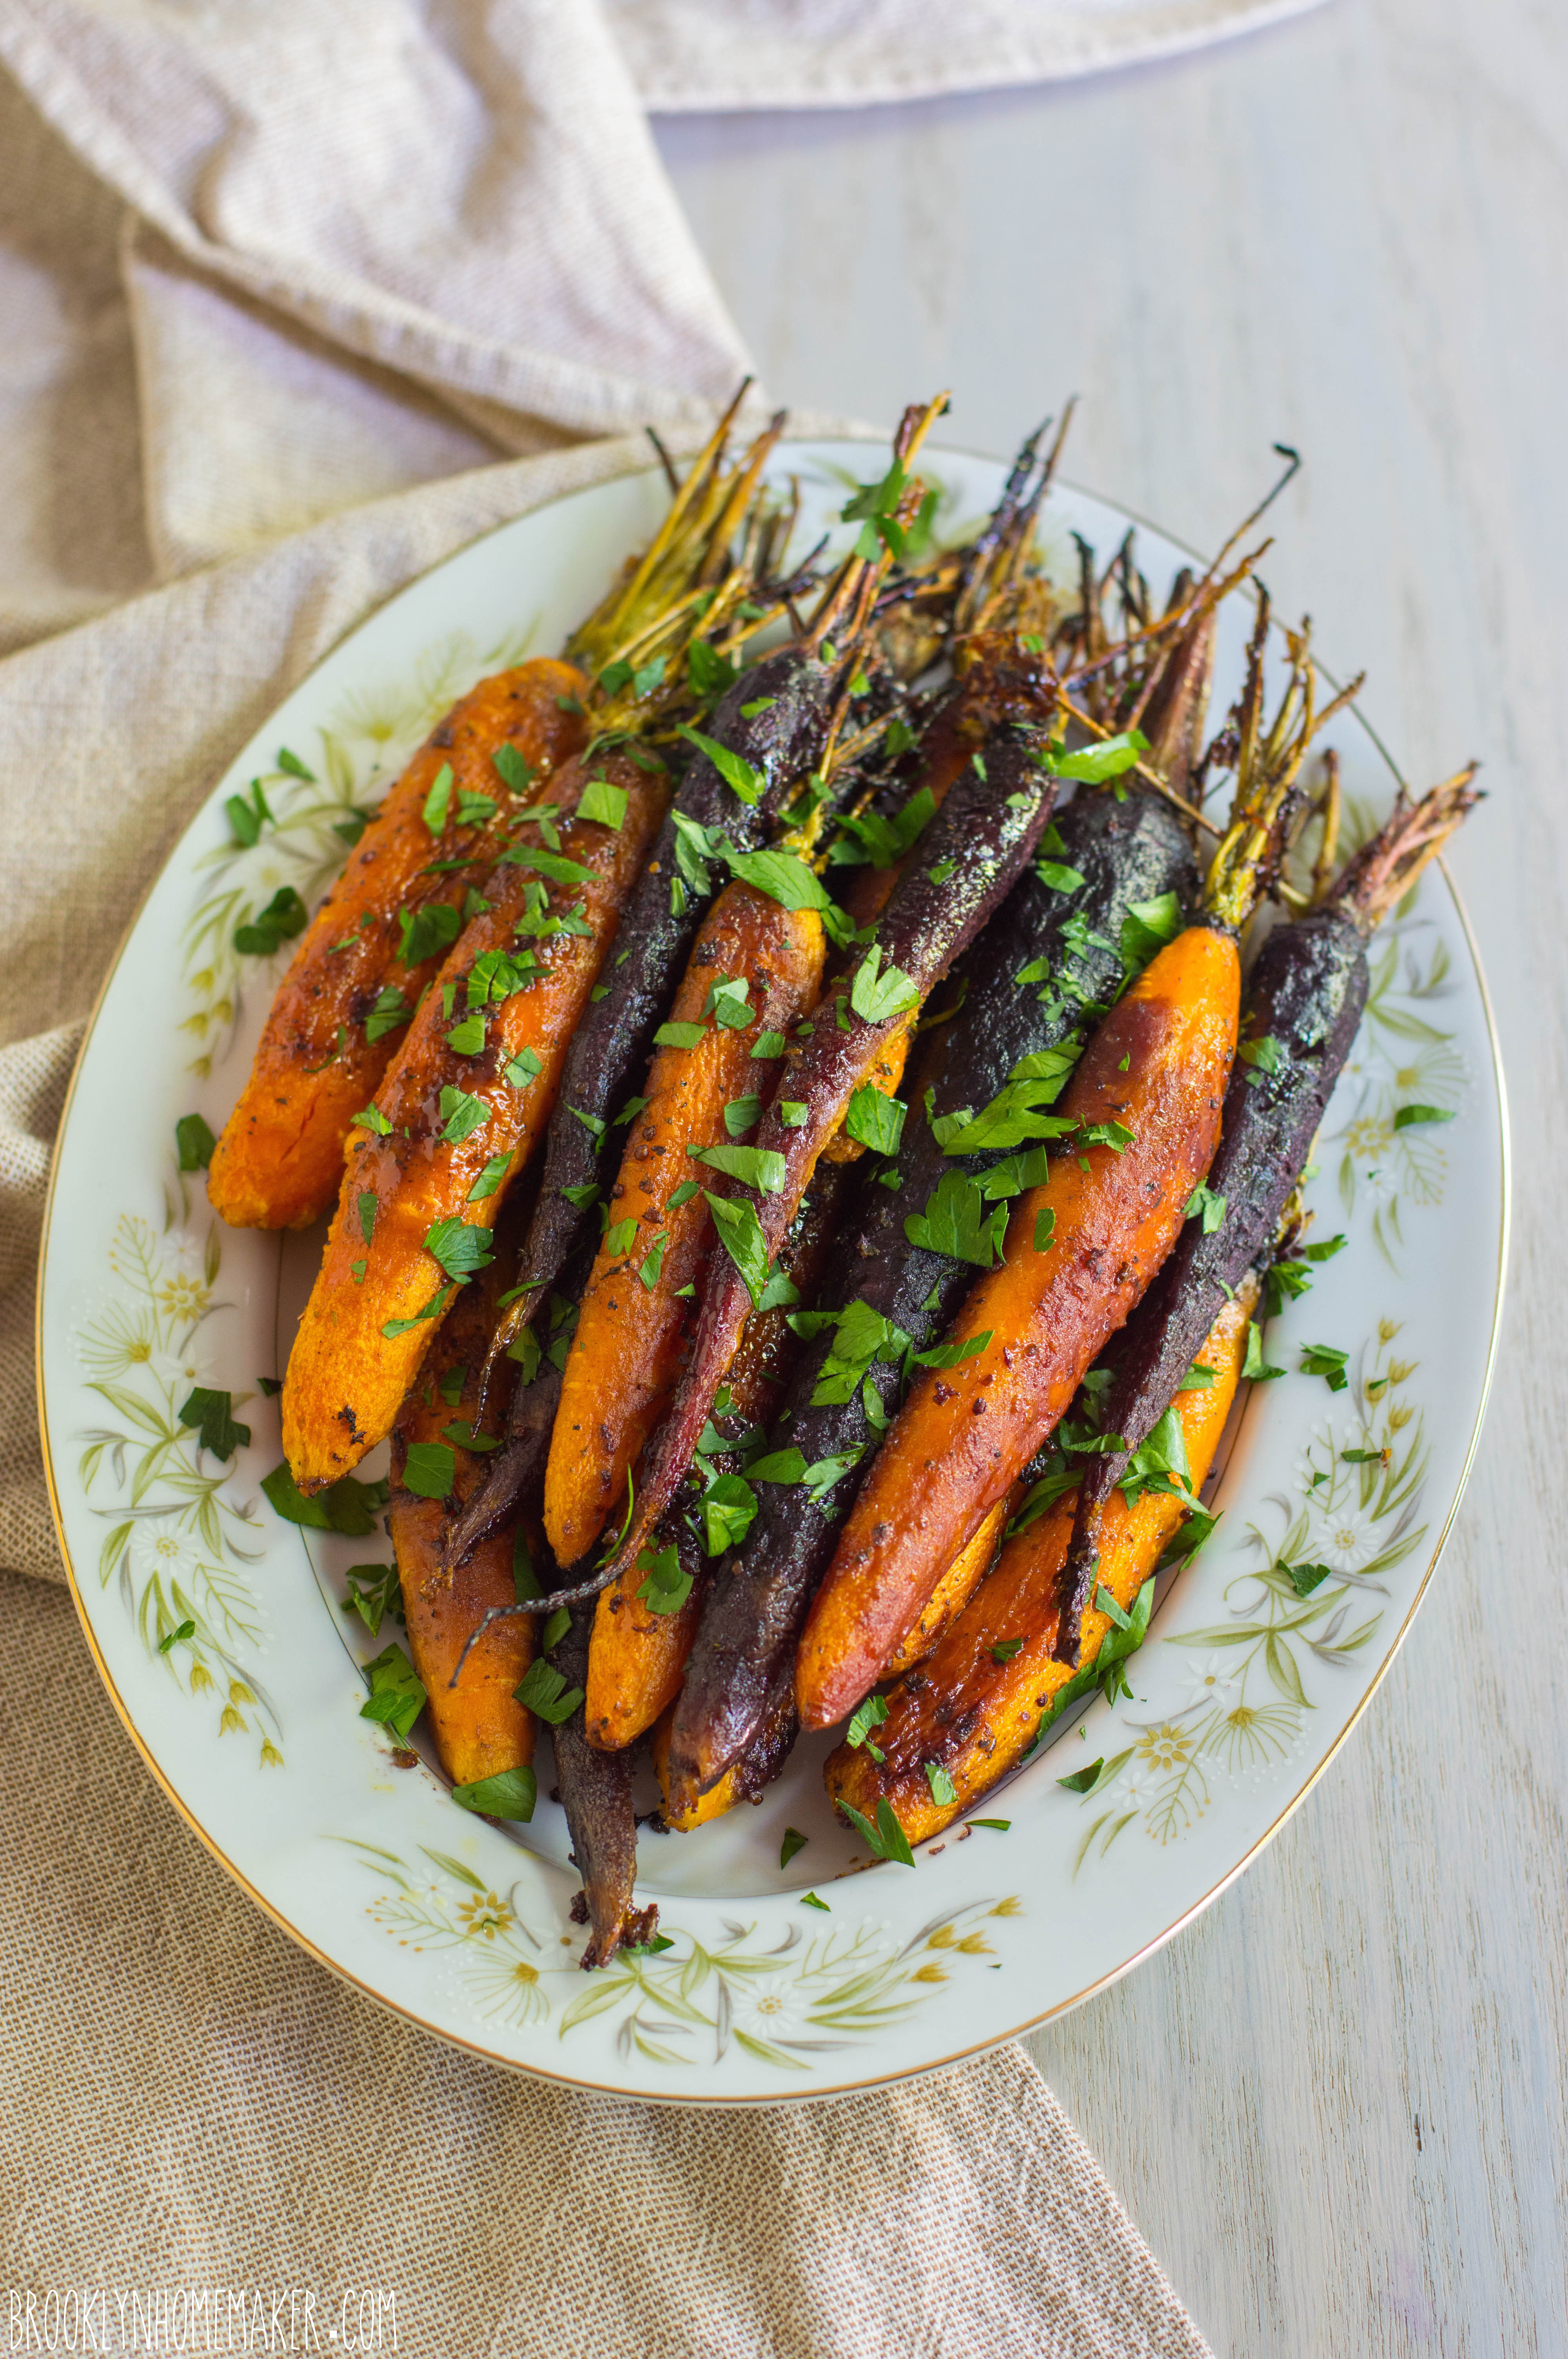
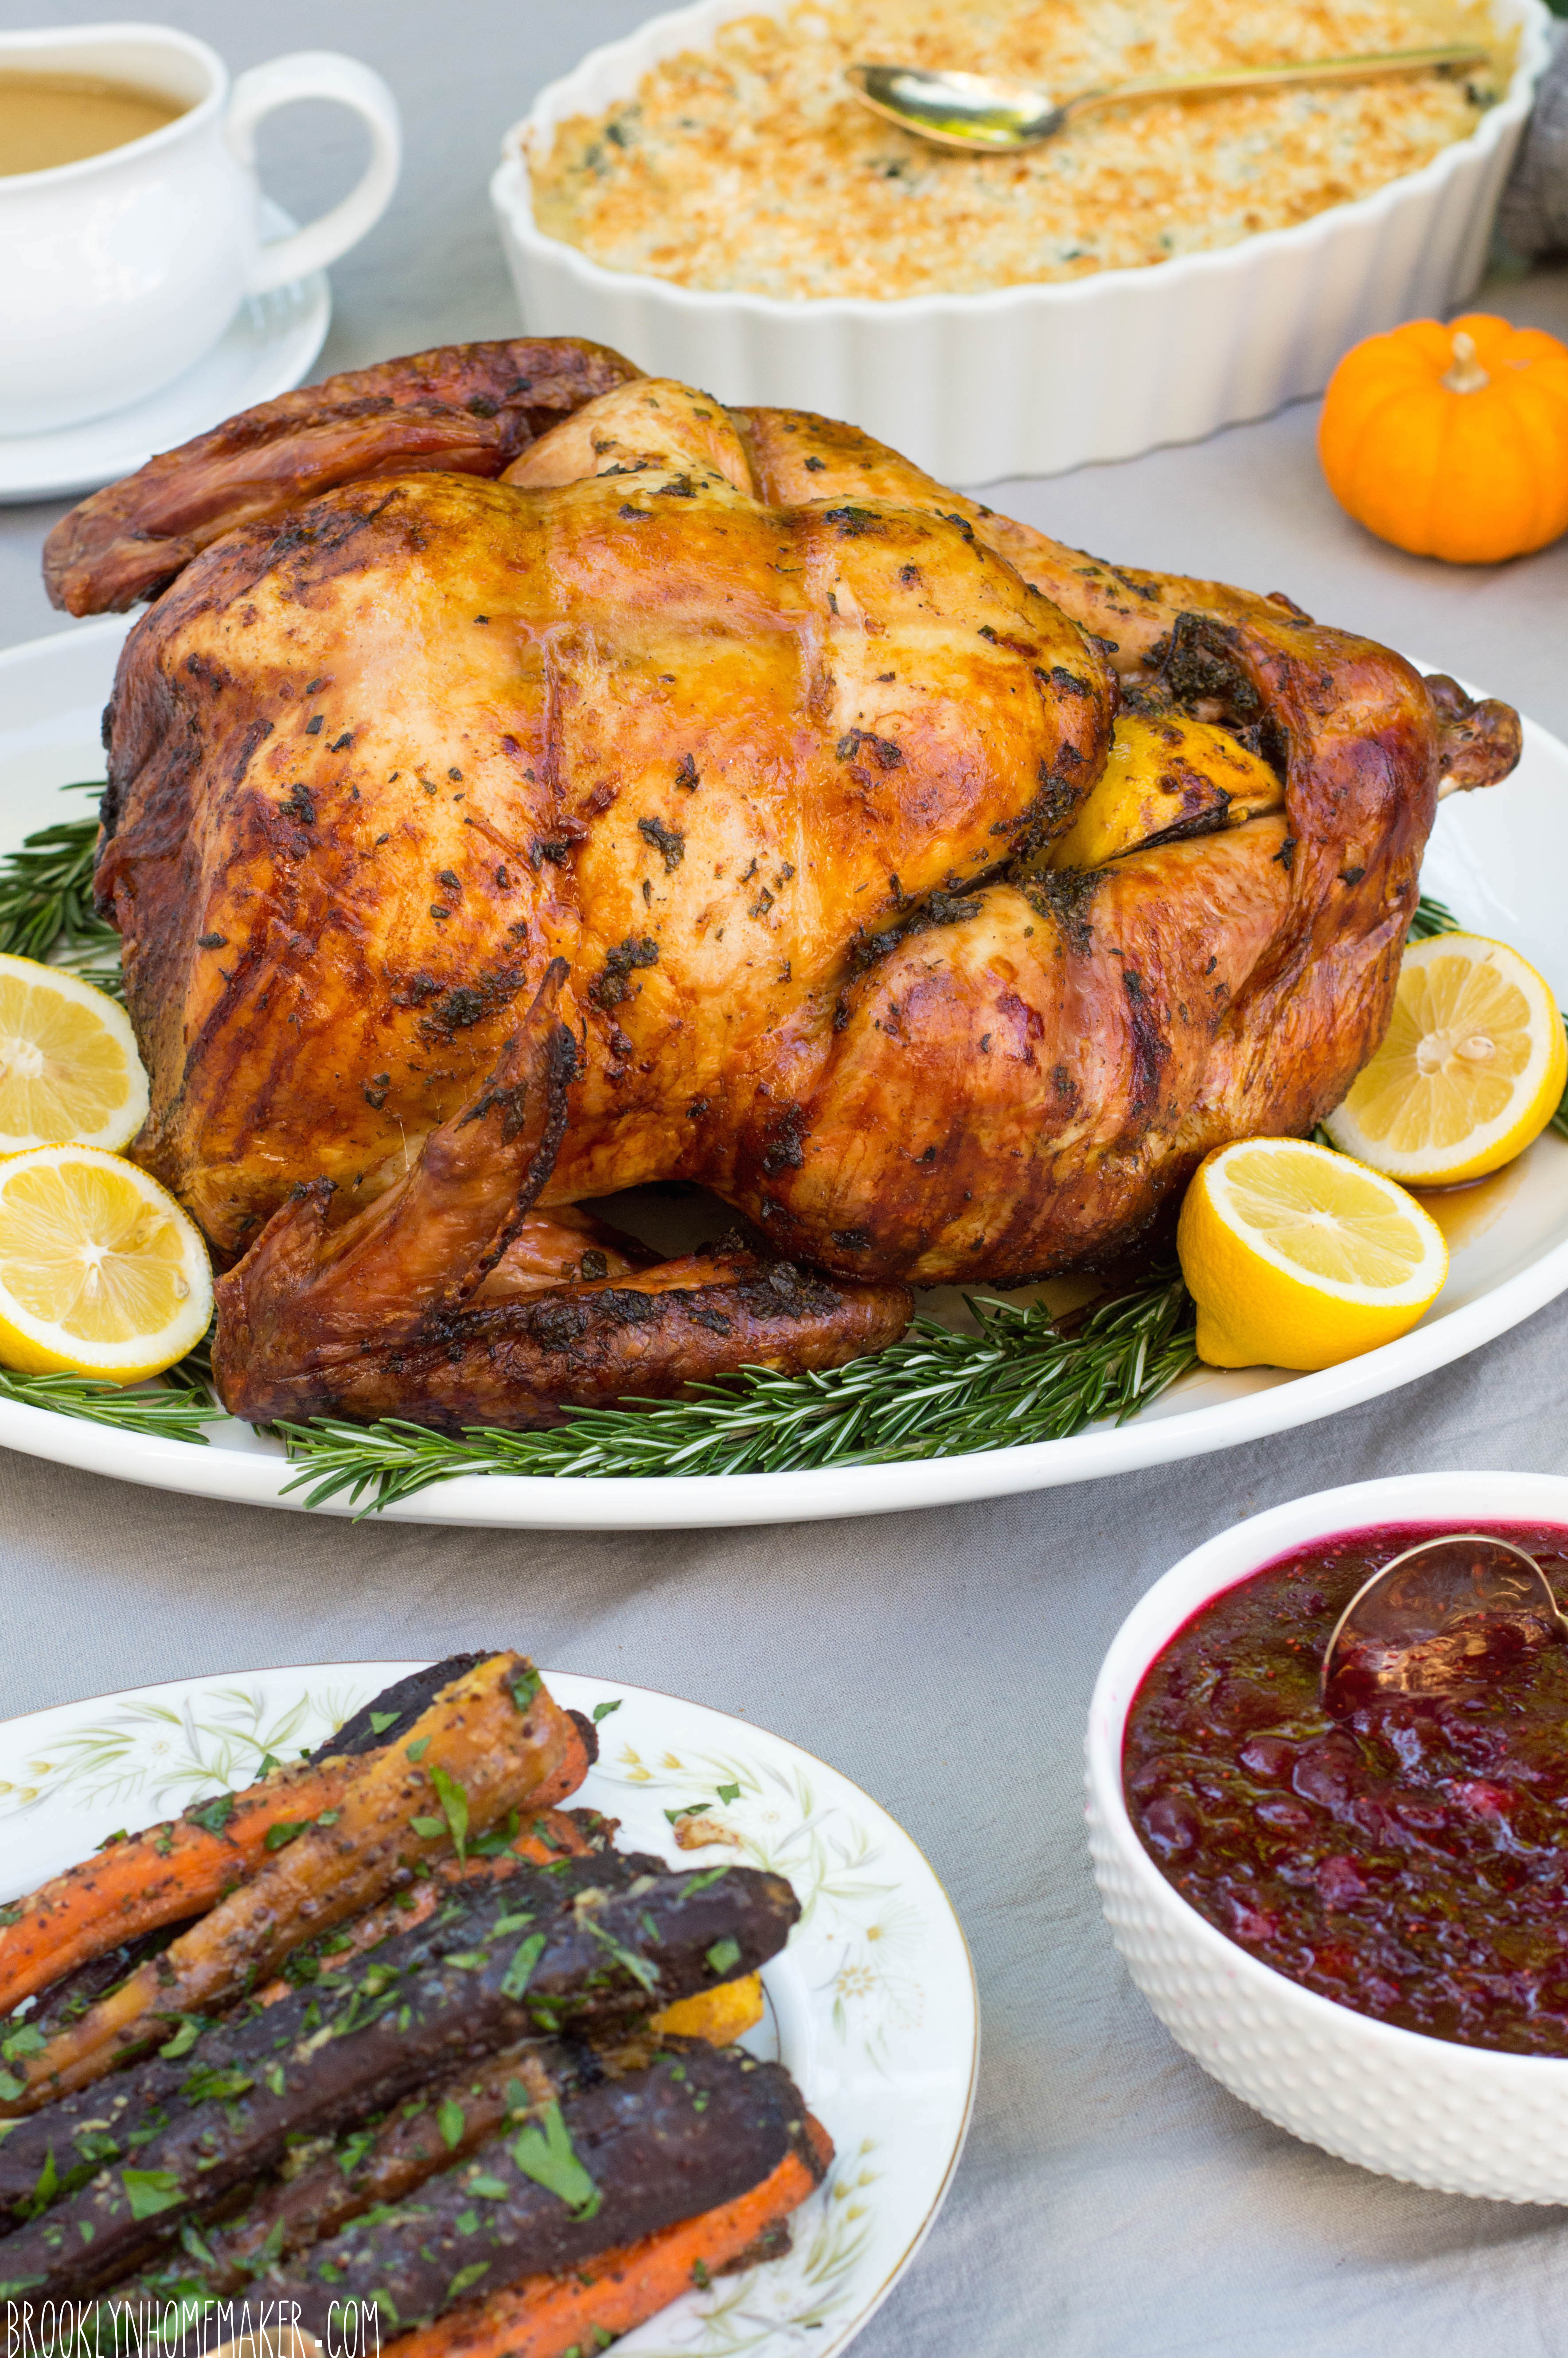
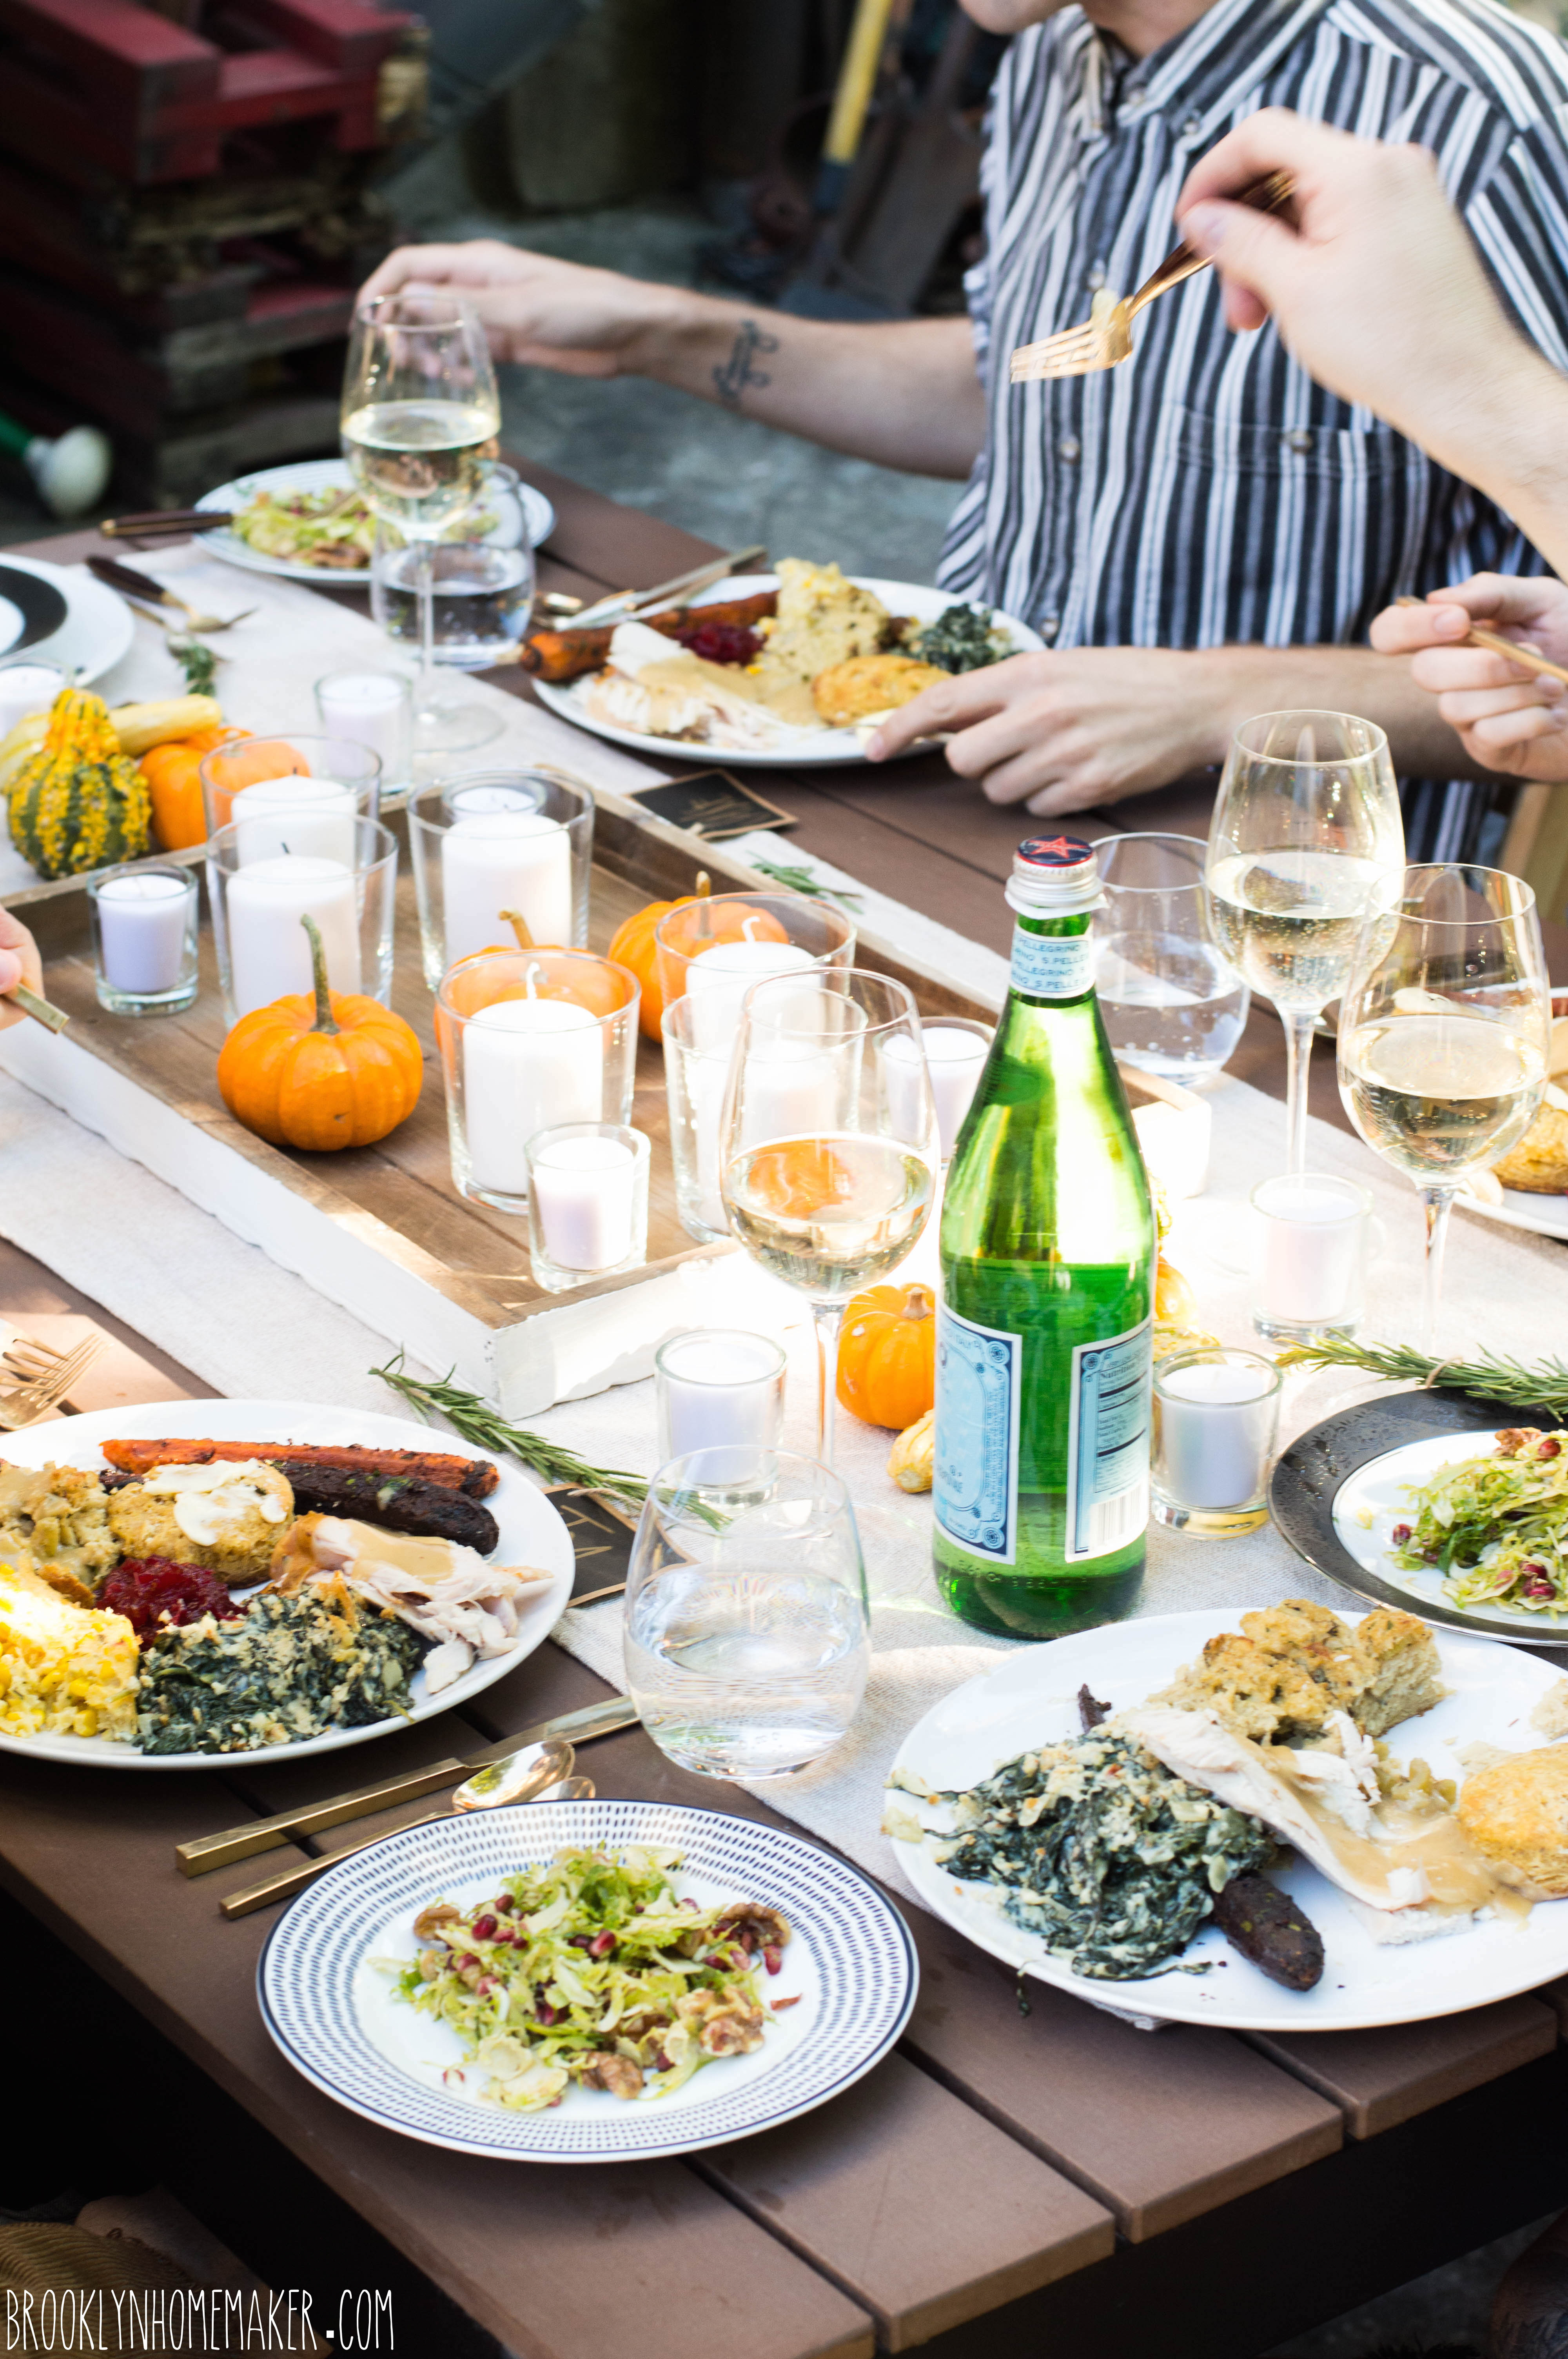
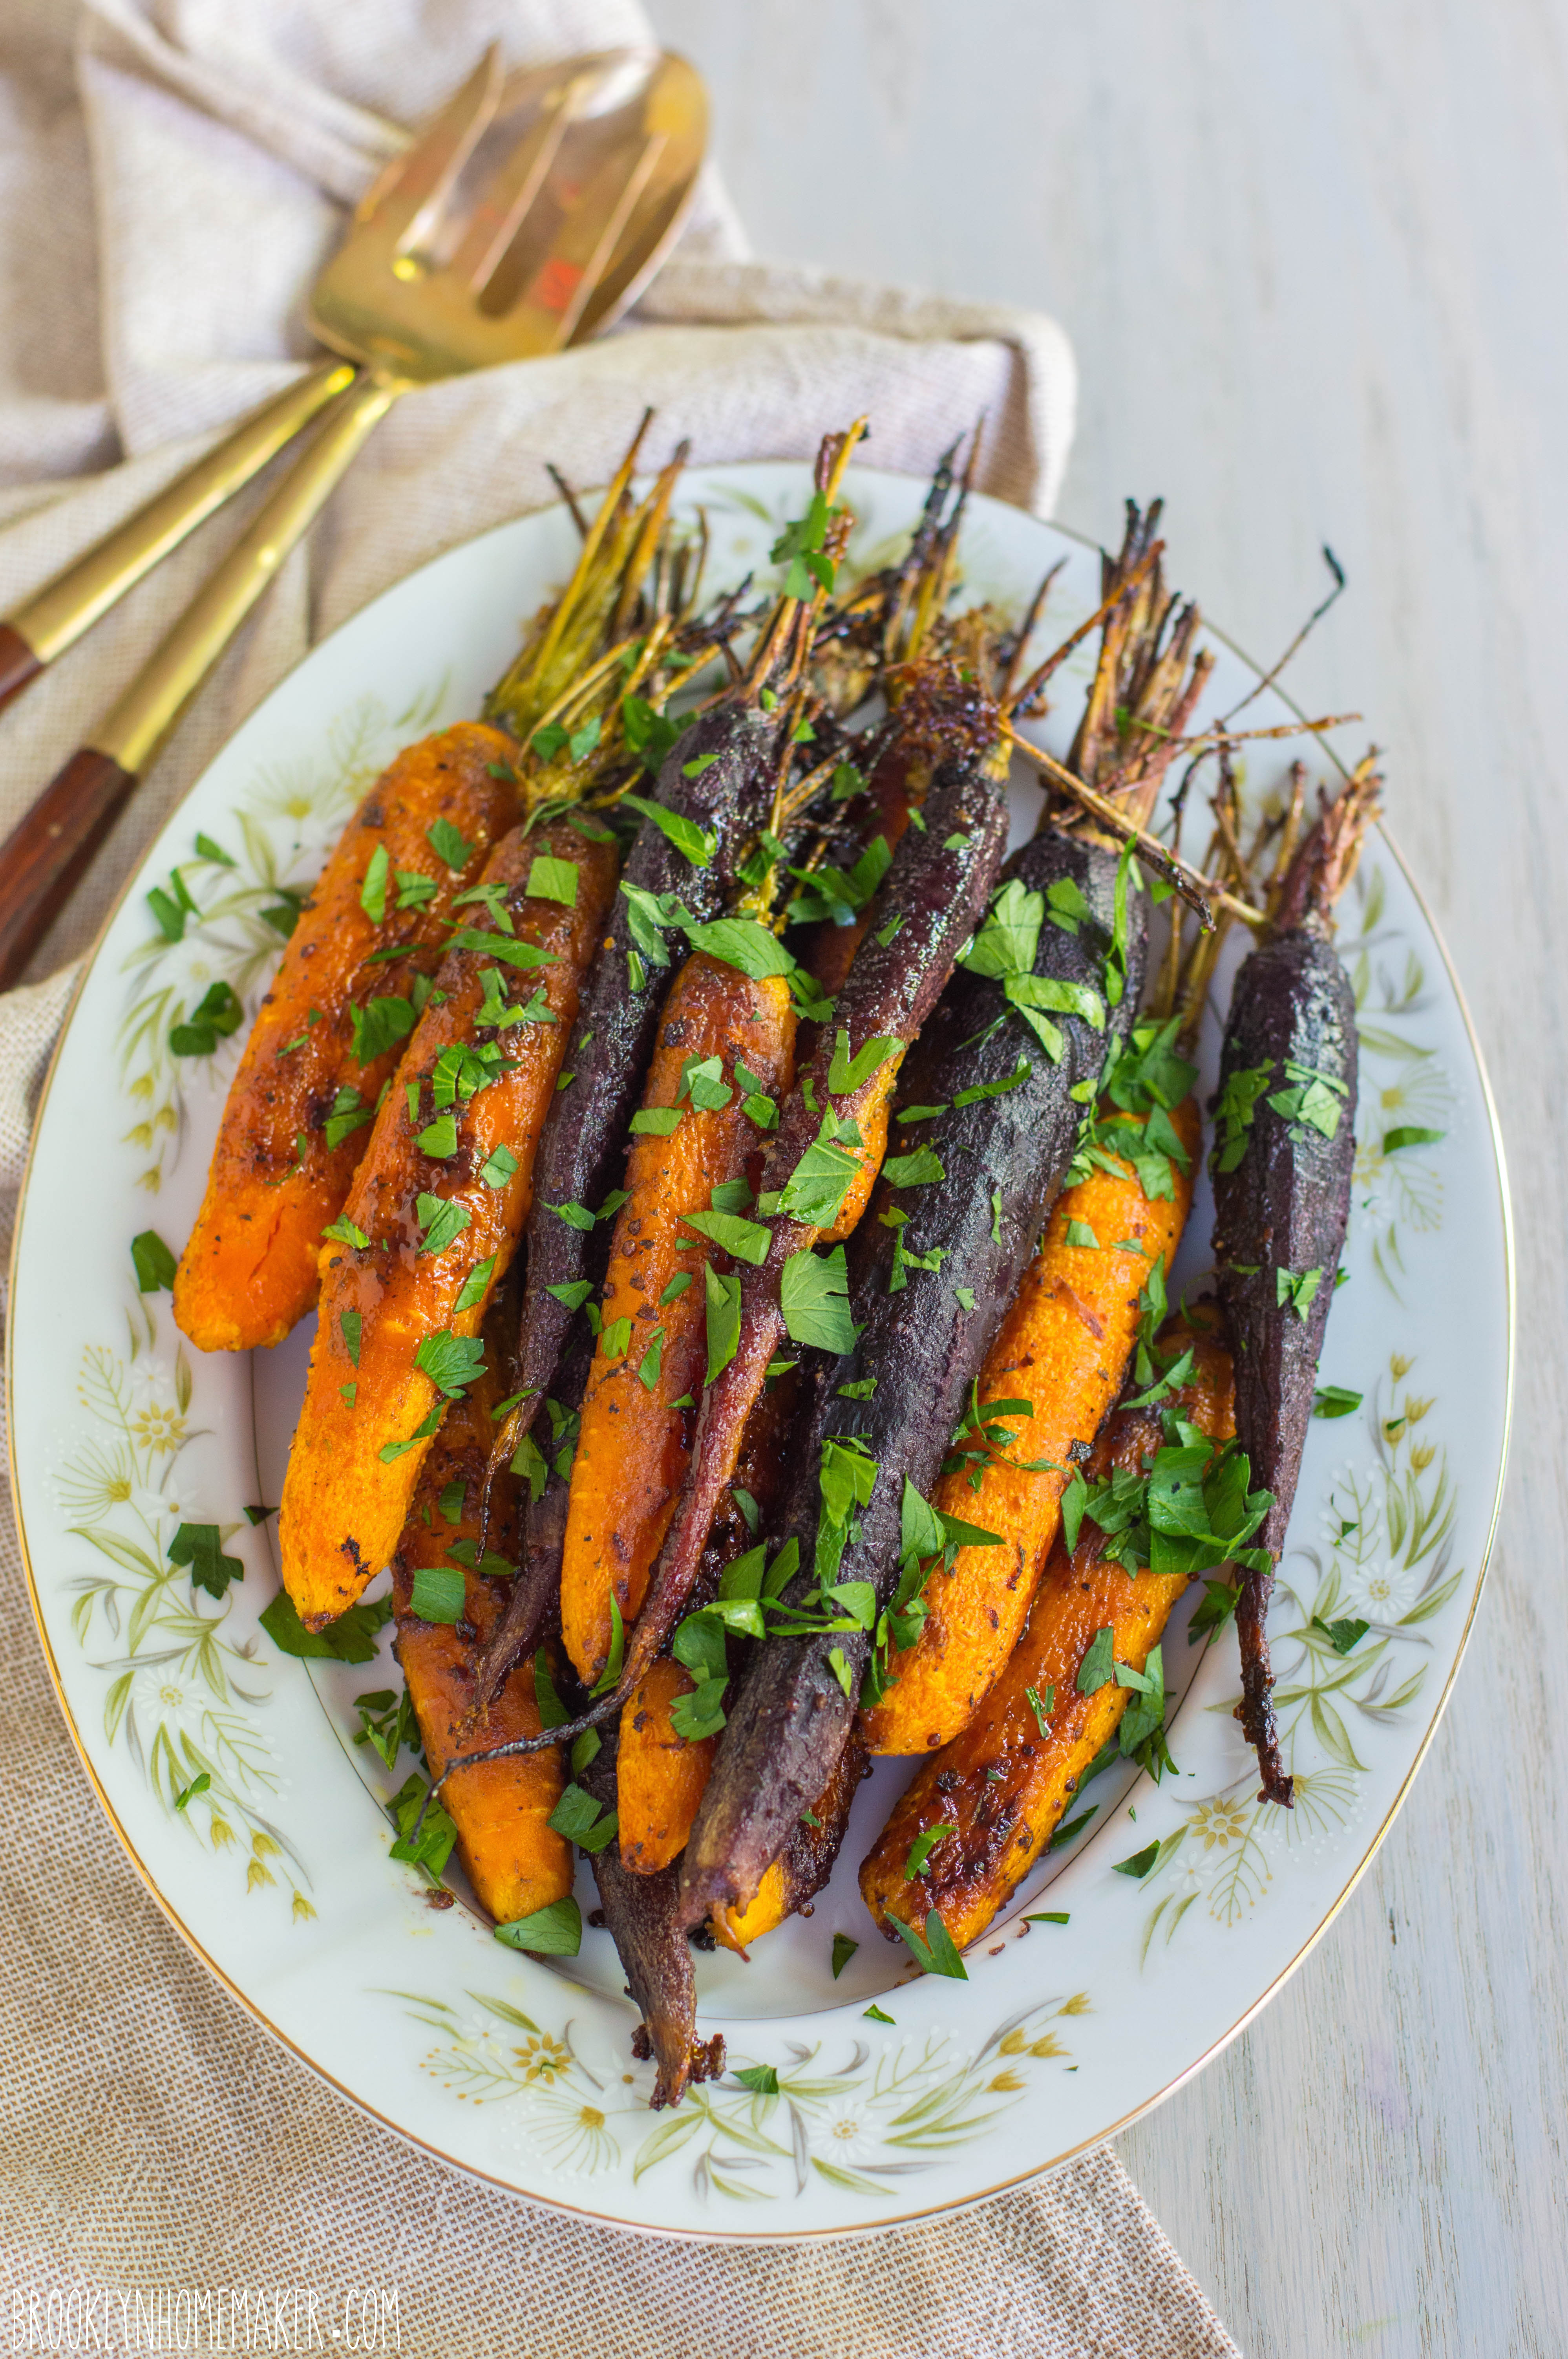
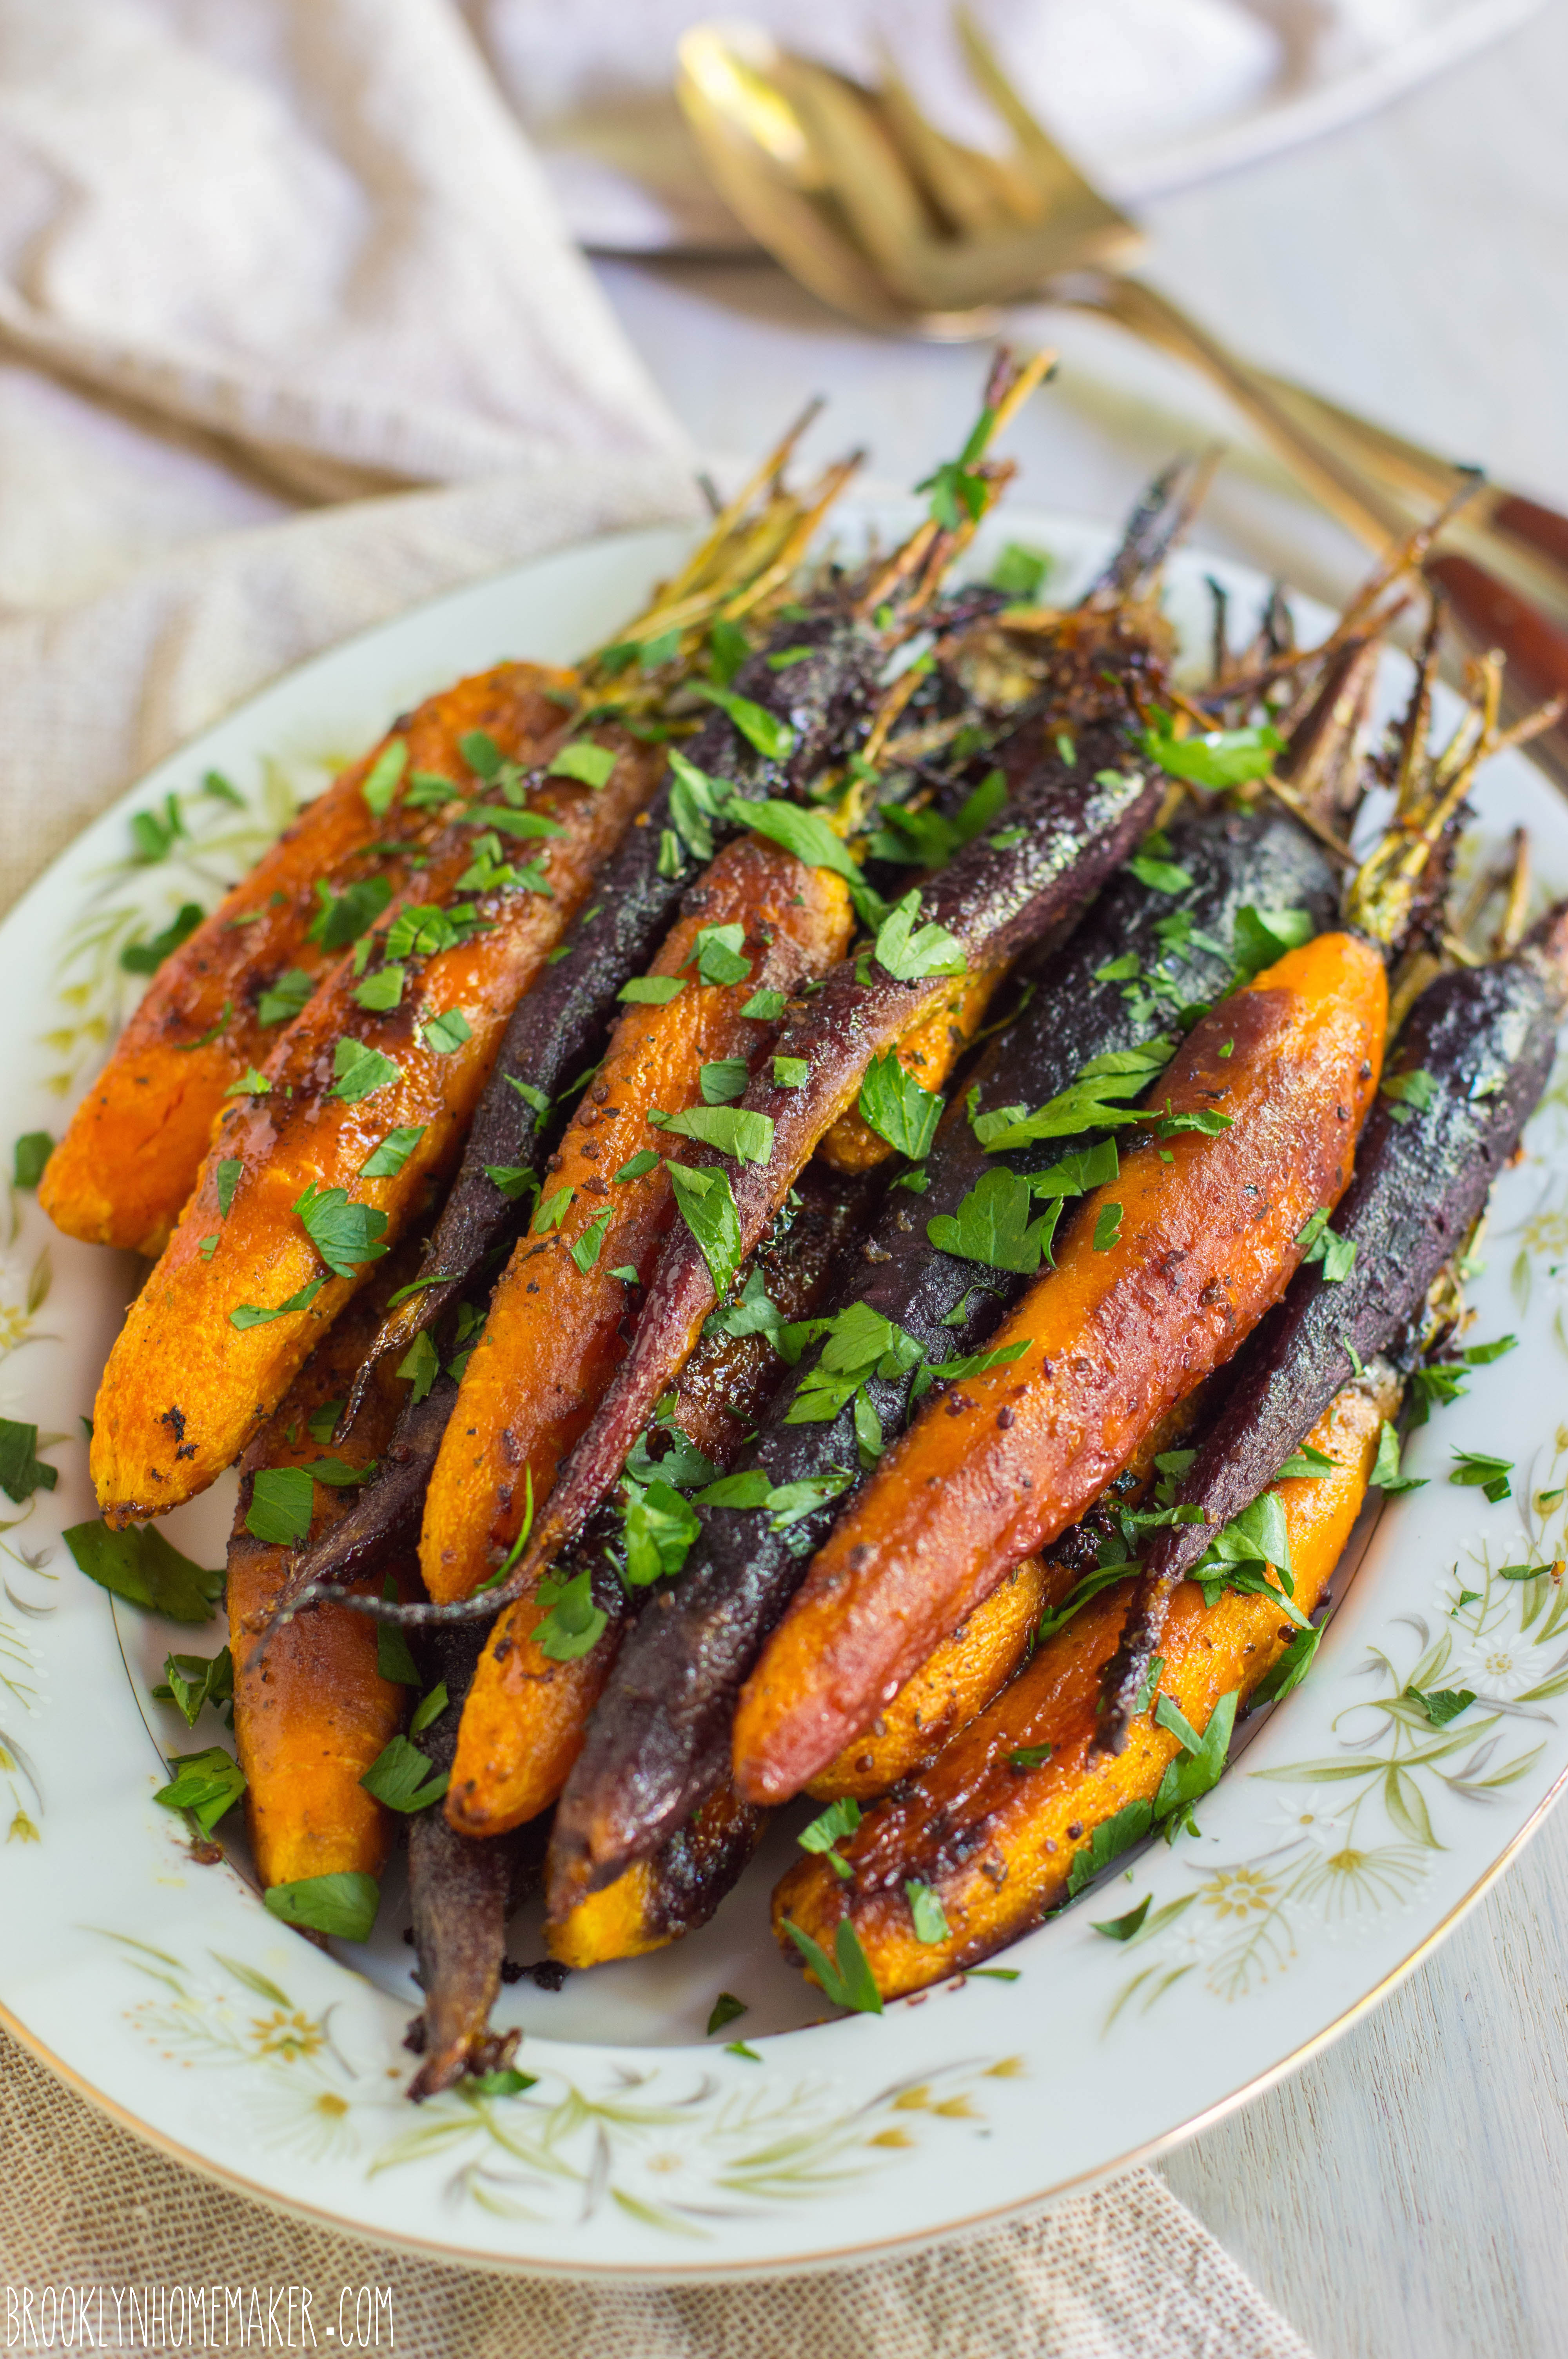
This beautiful dish from our Fakesgiving dinner is the perfect balance of bright vinegary dijon mustard, sweet caramely maple syrup, rich salty butter, fresh woodsy green thyme and parsley, and tender earthy sweet carrots. Since the carrots are roasted not boiled, they are packed with flavor and wonderfully tender with a subtle crispness on the ends and edges. The sauce seems loose initially, but in the oven the butter, maple, and mustard caramelize and thicken and coat the carrots perfectly and give them an elegant autumnal flavor that’s perfect for Thanksgiving.

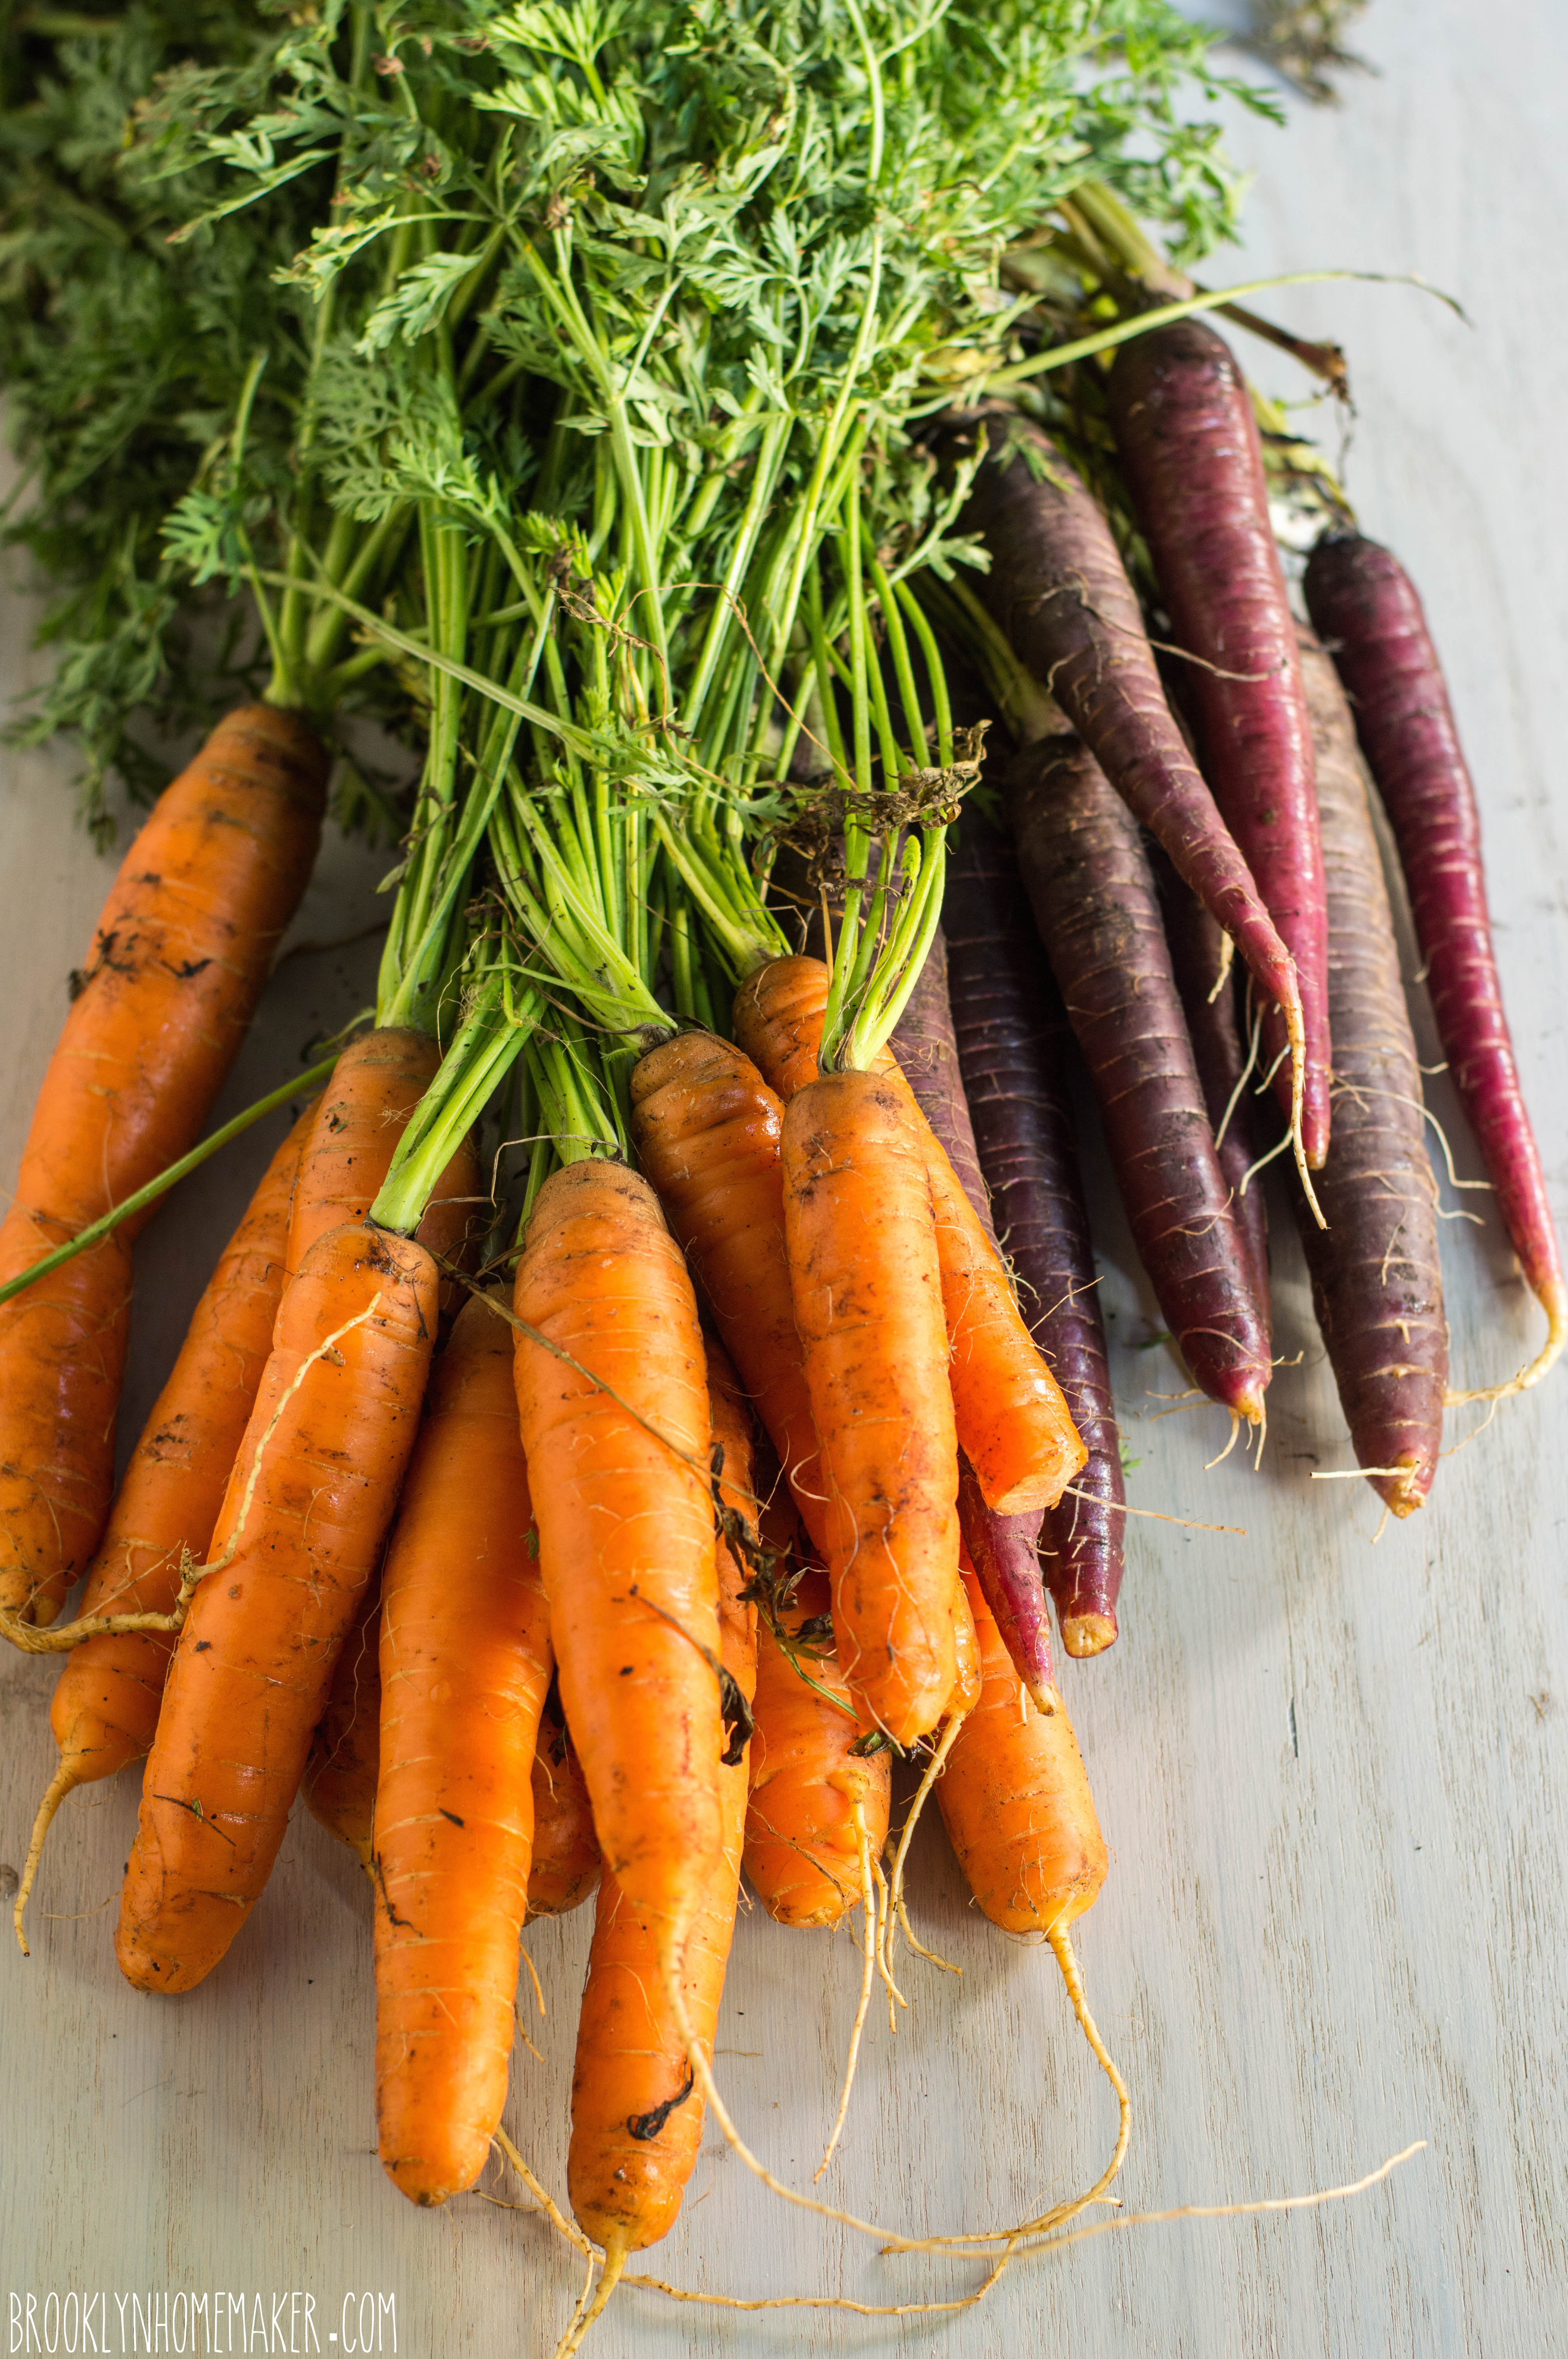
I recommend using multiple colors of carrots if you can find them. Not only do they make for a more beautiful, dramatic presentation, but they also offer slight variations in flavor and sweetness. My local grocery store carries mixed bags of yellow, orange, and purple carrots and these days I don’t believe they’re difficult to find in most parts of the country. Standard orange carrots would work just fine though in a pinch.

I like to think that this is one of those gateway dishes that will convert even the most avid cooked carrot, or mustard, hater and guide them on the path toward food love.

maple dijon roasted carrots | Brooklyn Homemaker

Maple Dijon Roasted Carrots

  • Servings: about 6-ish
  • Print
2 lbs carrots (multiple colors if possible)
4 tablespoons butter
2 to 3 teaspoons finely chopped fresh thyme leaves
1/4 cup dark amber (real) maple syrup
1 tablespoon dijon mustard
2 teaspoons whole grain mustard (optional)
1/4 teaspoon grated nutmeg
salt and pepper to taste
3 to 4 tablespoons chopped flat leaf parsley

Preheat oven to 400F.
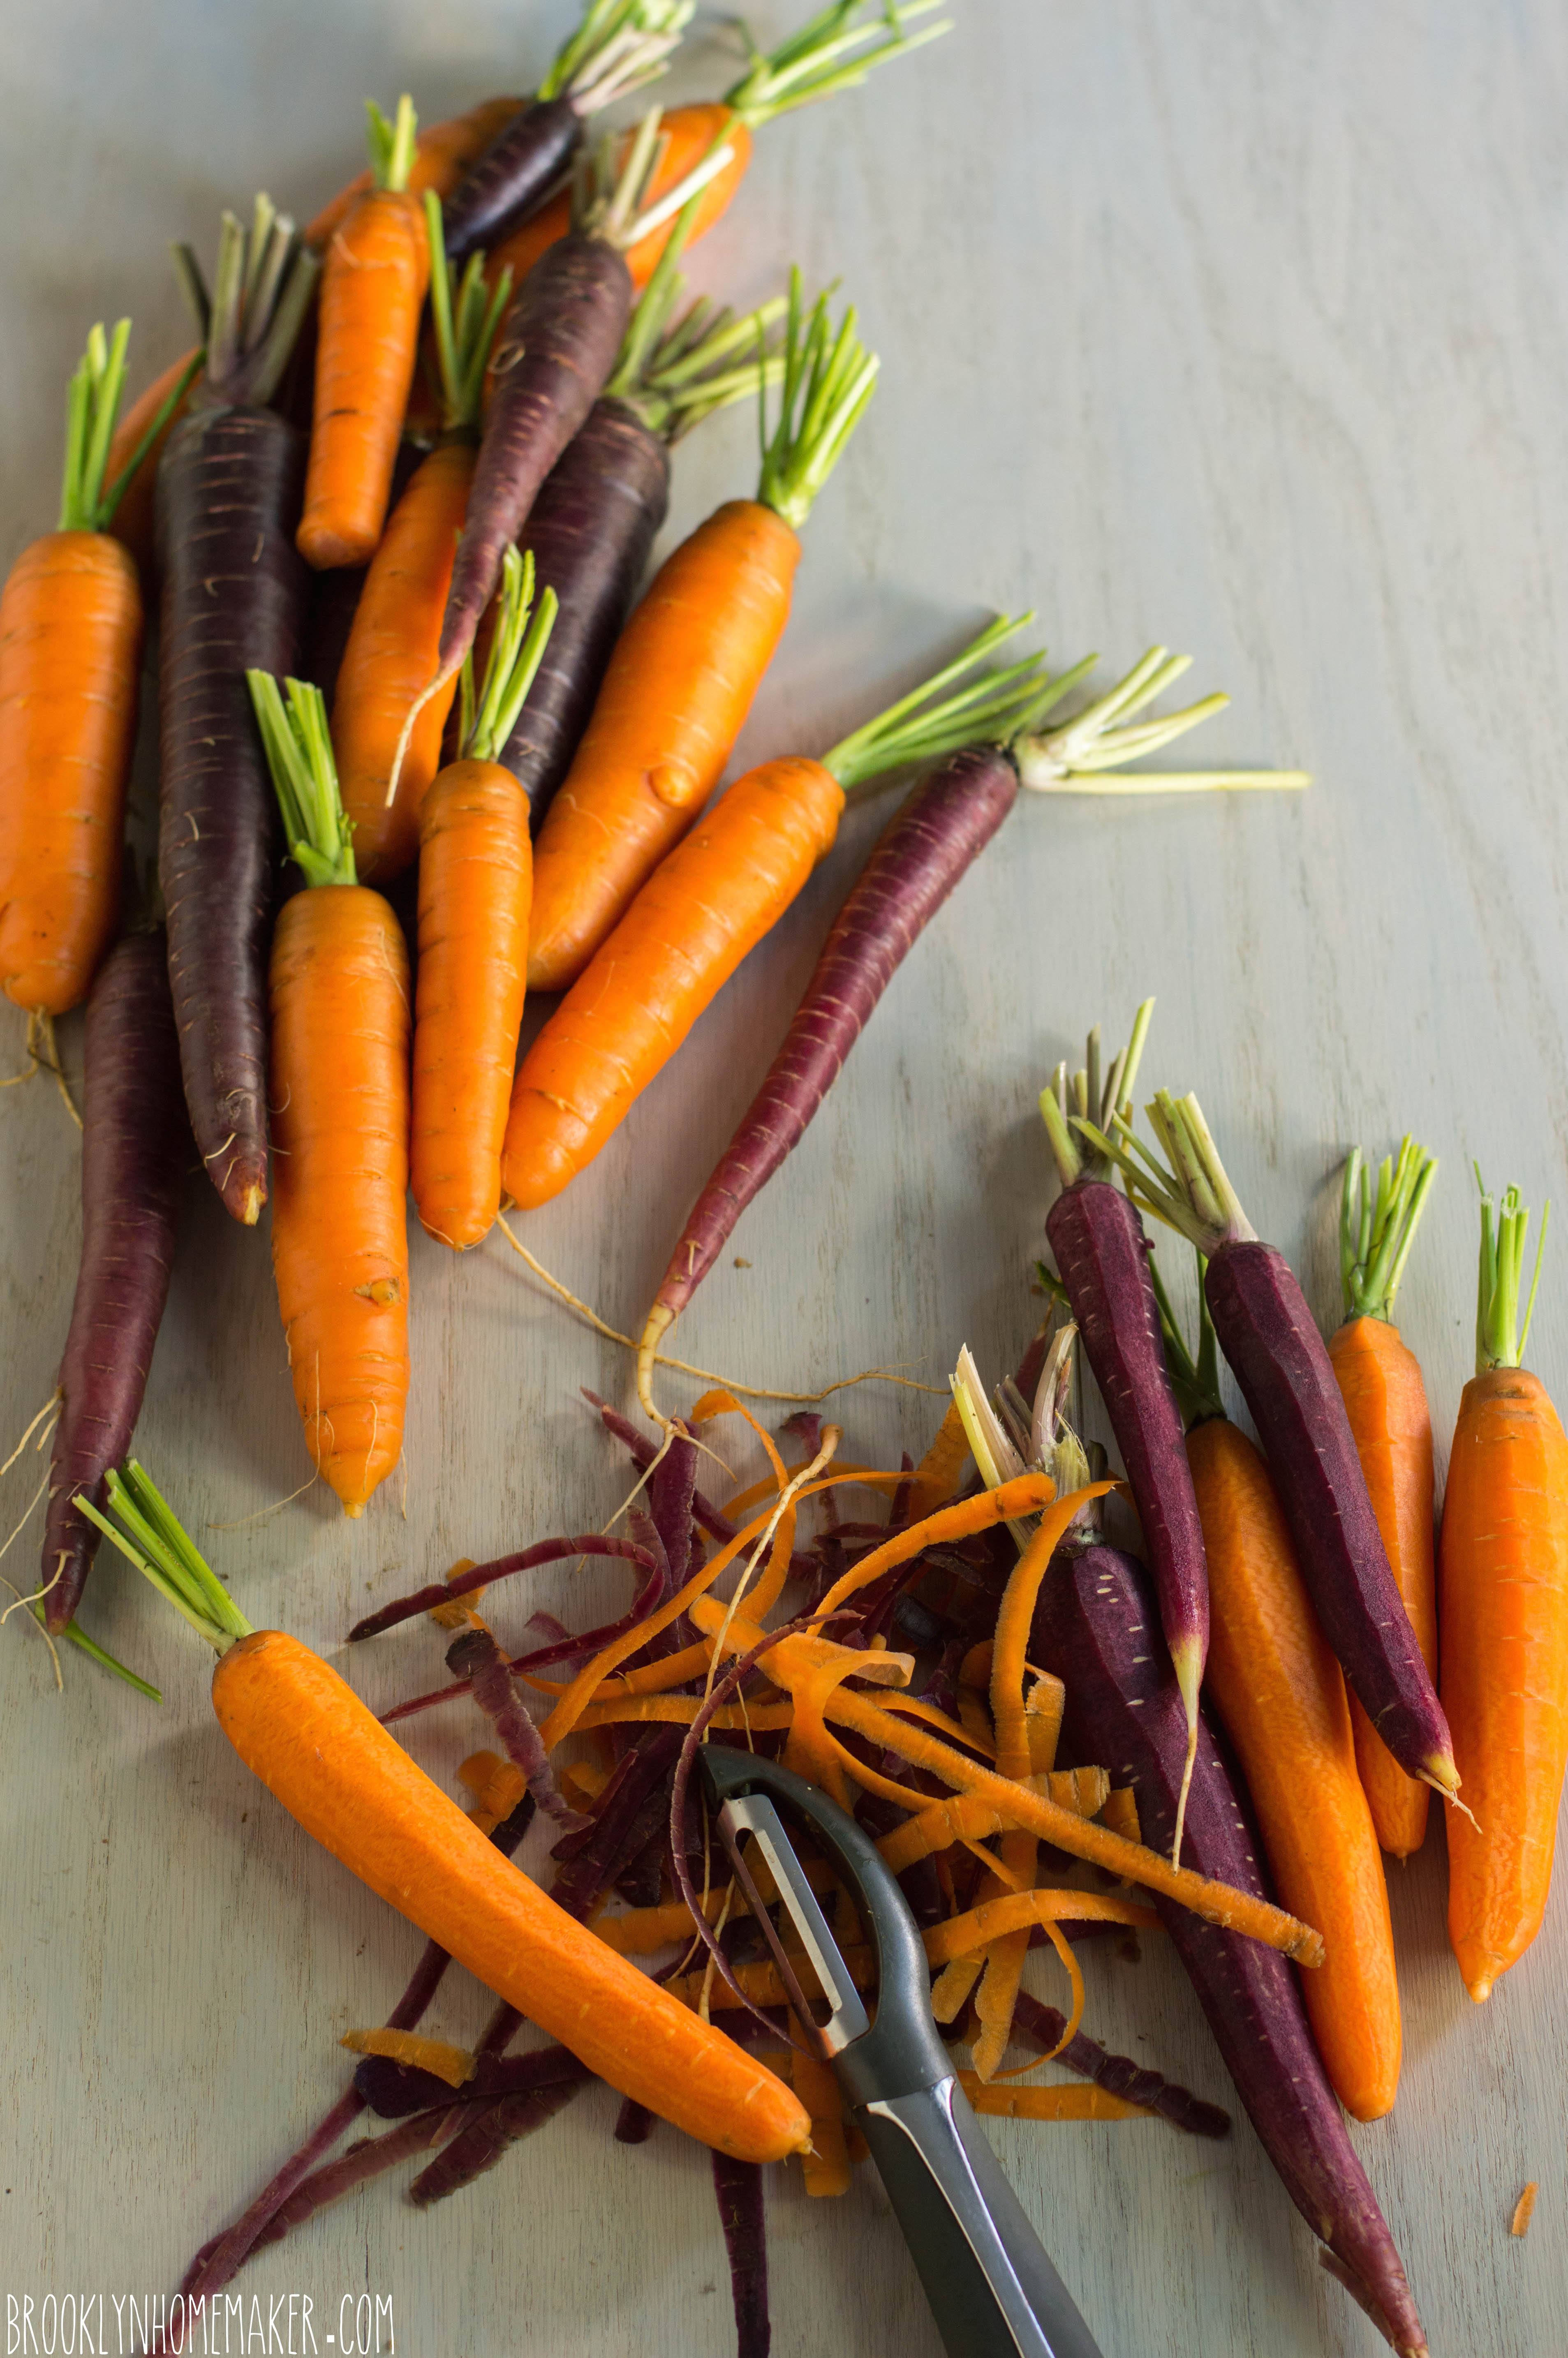
Wash, dry, and peel carrots and place in a shallow dish long and wide enough to fit them all.

Add butter and thyme to a small saucepan and heat over a medium flame to melt butter. Continue to warm the butter for 1 to 2 minutes. The butter should take on a green-ish tint from the thyme leaves. Remove from heat and cool for a few minutes. In a small bowl combine maple syrup, mustards, nutmeg, and salt and pepper. Whisk in butter until smooth and well combined.

Pour the butter/syrup mixture over the carrots and toss to coat. Arrange the carrots on a parchment lined baking sheet, and use a spatula to scrape any remaining butter/syrup mixture over them. You may want to use two sheets of parchment to make sure the whole pan is completely covered.  Roast until tender and brown, for about 45 minutes to 1 hour, using tongs to turn each carrot about 30 minutes in. Watching carefully that the sugar in the maple syrup doesn’t burn onto the parchment. Top with chopped parsley before serving.

creamed kale gratin

Thanksgiving is officially less than a week away, and I can barely handle the excitement.

creamed kale gratin | Brooklyn Homemaker

We’ve already done Fakesgiving, but now the real deal is coming up and the anticipation is killing me. Russell and I have been finalizing out our guest list, figuring out who’s bringing what, buying and stashing our wine (lots and lots of wine), cleaning the apartment, writing grocery lists, and planning our menu. While there’s definitely going to be some overlap from our Fakesgiving dinner, this time around we’re doing a potluck and not every dish will make it back onto the menu.

creamed kale gratin | Brooklyn Homemaker

There’s absolutely no doubt in our minds though, that this little creamed kale gratin will be making a comeback.

This shit is the jam. The bomb dot com. The cat’s pajamas. The bee’s knees. All that and a bag of (kale) chips.
(It’s really good)

creamed kale gratin | Brooklyn Homemaker

When I was developing the recipe a few months ago I brought it to a work party and it disappeared faster than anything else on the table. People were still talking about it and asking for the recipe days after the party.

Out of every dish on our fakesgiving table, I actually think this was probably my favorite. It was definitely a favorite among our guests, and while it was the one dish I was most looking forward to when I raided the leftovers the next day, there wasn’t anything left to raid.

creamed kale gratin | Brooklyn Homemaker

Okay. So, right about now you’re probably rolling your eyes and asking yourself, “Your favorite dish from the whole meal was kale? Really? Kale?”

I know. I know.
How insufferably hip and impossibly Brooklyn of me.

But it’s true.

creamed kale gratin | Brooklyn Homemaker

When I was doing my initial recipe testing and menu planning a while back, I knew I wanted something deeply green and healthy-ish on the menu. Thanksgiving dishes tend to be rather rich and heavy, which isn’t necessarily a bad thing, but I think they scream for something green to be served alongside them. Thanksgiving buffets also tend to be a bit heavy on the yellow and orange and brown, so again, having something green on your plate is probably a good thing.

Most people would likely opt for a green bean casserole, but for whatever reason, I don’t really enjoy making green bean casserole. Don’t get me wrong, I certainly love eating it, but when it comes to Thanksgiving I’d rather call it a potluck and keep my fingers crossed that someone else will bring the casserole along. Of course, when it comes to posting recipes on a food blog, a potluck doesn’t really tend to work.

So, I had some thinking to do. My head initially went to creamed spinach, but there’s something about the texture of creamed spinach that I thought could be improved upon. Spinach becomes so soft when cooked that it sort of becomes one mushy texture with the cream. My plan then, was to come up with another green that could offer a bit more texture while pairing well with a rich creamy sauce.

creamed kale gratin | Brooklyn Homemaker

Kale would be the natural next choice, but to be quite honest, I’ve never really enjoyed cooking with kale. Until recently, I’ve only had experience using the ubiquitous curly kale, which I’ve had much better luck with eating raw rather than cooked. I find that it tends to overcook easily and goes from vibrant green to muddy brown and mushy in a heartbeat. For that reason I (used to) avoid cooking with it.

I thought about going with swiss chard instead, but when I was digging around for inspiration I found a recipe that called for Lacinato kale and decided to give it a go. If you’re not familiar, Lacinato kale also goes by dinosaur kale or black kale and is much stiffer, smoother, and darker than curly kale. It can be a bit more expensive (depending on the store and the time of year) and can sometimes be a bit harder to find. When cooked though, it retains it’s texture much better than curly kale, stands up very well to braising, and is much more forgiving of overcooking. The very first time I cooked with it it was as if all the pieces suddenly fell into place and I finally understood why people like kale so much. Since then I find myself cooking with it all the time! Who knew?

creamed kale gratin | Brooklyn Homemaker

So yes, thanks to my new favorite variety of kale, this dish was indeed my favorite thing on our fakesgiving table.

The sauce is made with roux-thickened-milk rather than heavy cream, so while it is wonderfully rich and creamy, it manages not to feel too heavy. A bit of parmesan cheese adds a rich salty nuttiness, but there’s also loads of flavor thanks to some onions and plenty of garlic, a nice hint of spice from some pepper flakes, and a touch of brightness thanks to a bit of fresh lemon zest. The kale retains a nice, slightly al dente texture and pleasant green bitterness that compliments the creamy sauce perfectly, and the whole shebang is topped with a bit of crisp panko bread crumbs and parmesan that add a lovely bit of crunch.

creamed kale gratin | Brooklyn Homemaker

Creamed Kale Gratin

Adapted from thekitchn

2 to 3 pounds of Lacinato kale (or 3 one-pound bags of chopped curly kale)
8 tablespoons (1 stick) butter
1 small white onion, finely chopped
4 to 6 cloves garlic, minced or crushed
1/3 cup all-purpose flour
3 cups whole milk
1/2 to 3/4 cup finely grated Parmesan or Pecorino cheese
1/2 to 1 teaspoon crushed red pepper flakes
1/2 teaspoon grated nutmeg
2 teaspoons salt, or to taste
Freshly ground black pepper
zest of two lemons

topping:
1/2 cup panko bread crumbs
1/2 cup finely grated Parmesan or Pecorino cheese

If using whole kale leaves, remove the stalks and ribs and discard. Roughly chop and wash the leaves.

Set a large bowl of ice cold water in one half of the sink, and a large strainer or colander in the other. Bring a large pot of generously salted water to a boil. Add the chopped kale to the pot, stir, and simmer for 1 minute. Immediately drain and transfer to the bowl of ice water. Swirl and stir the kale around in the cold water, then drain again and wrap in a clean kitchen towel and squeeze dry. You may need to do this in batches.

Preheat the oven to 400.

Melt the butter in a deep skillet, sauté pan, or 3-quart saucepan over medium-high heat. Add the onion and garlic, and cook, stirring constantly, for 1 minute. Add red pepper flakes, nutmeg, salt and pepper, and sprinkle the flour over the onion mixture. Stir and cook for about 3 minutes. Turn the heat down if necessary; do not let the flour brown.

Whisk in the milk, a little bit at a time, until completely combined. Cook the mixture, stirring slowly and continuously, until the sauce comes to a boil and thickens, about 5 minutes. Remove from heat.

Use your fingers to break up any clumps of drained kale and sprinkle into the milk mixture. Stir in the cheese and lemon zest until everything is well combined. Transfer to a baking dish and top with panko and additional 1/2 cup of grated parmesan.

Bake at 400 for 20 minutes or until cheese begins to brown and the sauce is bubbly.

Recipe Notes:
You can make this 1 to 2 days ahead of serving. Cook the creamed kale on the stovetop, transfer to the baking dish, and allow to cool slightly. Do not add the panko and parmesan topping. Press plastic wrap or parchment paper directly onto the surface to prevent a skin from forming. Cool to room temperature and then refrigerate.
When ready to proceed, remove the plastic wrap and sprinkle the topping over the top. Let stand at room temperature for at least 30 minutes before baking at 400. Since the kale will be cool it may take a few more minutes to bubble.

flaky butternut squash & sage biscuits

I have a confession to make…

flaky butternut squash & sage biscuits | Brooklyn Homemaker

I’m a biscuit snob.

There.
I said it.

flaky butternut squash & sage biscuits | Brooklyn Homemaker

Over the past few years there has been a sudden explosion of “Southern” “Soul Food” restaurants in my little corner of North Brooklyn.

It would appear that fried chicken is the new cupcake. No, that’s not right. Gourmet doughnuts are the new cupcake.
Fried chicken is the new… burger?

Don’t get me wrong. I ain’t complainin’. I can’t fry chicken to save my life, and I LOVE fried chicken.
Every time I’ve tried to make it at home it’s come out under or over cooked, usually pretty greasy, and never as crispy as I’d like. There are very few recipes I’ve never been able to master, but I’d like to think I know when enough’s enough. At this point I’ve accepted defeat and decided it’s better to just leave the fried chicken to the professionals.

flaky butternut squash & sage biscuits | Brooklyn Homemaker

The problem though, is that for all of the fried chicken professionals we have running around, I haven’t yet found a place where their biscuits don’t feel like an afterthought. It’s as if they know they have to serve biscuits because, like, they’re a chicken joint, but they don’t actually care about making sure they’re just as good as the chicken.

flaky butternut squash & sage biscuits | Brooklyn Homemaker

Instead of light, tender, flaky, delicate, pillowy, buttery little clouds of biscuits, most of the these so called chicken joints serve dense, tough little hockey pucks. Most of the time they serve them with a big ramekin full of honey butter, hoping you’ll slather so much on that you won’t notice there’s anything wrong. It makes me sad, and it doesn’t need to be this way.

flaky butternut squash & sage biscuits | Brooklyn Homemaker

I know a lot of people are afraid of making biscuits at home. I know it’s easy to screw them up if you don’t know to use a delicate hand. I know a lot of people think of biscuits the way I think of fried chicken. I’m reminded of the words of wise old G. Dubya, “Fool me once, shame on… shame on you. Fool me… you can’t get fooled again.”

Here’s the thing though. Biscuits are not that hard to get right. I promise you that they’re easier than frying chicken. Whether you’re at home on a Sunday morning, or slinging chicken in a busy hipster soul food restaurant, if you want a tender delicate biscuit the only trick is to treat them tenderly and delicately. It’s really that simple.

flaky butternut squash & sage biscuits | Brooklyn Homemaker

It doesn’t matter how you get the butter into the flour, as long as it doesn’t melt in the process. You always want to keep that butter cold. I used to think a pastry blender was the only method gentle enough for a tender biscuit, but I’ve tried pulsing the butter in with a food processor, cutting it in with two knives, even mashing it in with a fork, and they all worked just fine.

I think the thing that really makes the biggest difference is how you mix the liquid into the flour. You want to gently stir and fold the liquid and dry ingredients together to moisten as much of the flour as possible without over mixing it. If a bit of the flour doesn’t want to mix in, don’t sweat it. To make sure you have super flaky layers you’ll want to fold the dough over on itself a few times, so you can mix that little bit of extra flour back in then.

flaky butternut squash & sage biscuits | Brooklyn Homemaker

To add some extra flavor and interest, I took my old standard biscuit recipe and substituted some pureed roasted butternut squash for a bit of the buttermilk. This is a perfect recipe if you already plan to serve butternut squash at your Thanksgiving dinner. If you don’t, and you don’t want to take the time to roast the squash just for the biscuits, you can use canned squash if you can find it, or canned pumpkin if you can’t.

I also wanted to add the flavor of fresh sage to compliment the squash, but I didn’t really want to have large visible chunks of sage in the dough. I decided that the best way to evenly distribute the sage, and it’s fragrant earthy flavor, all throughout the biscuits would be to pulse the sage together with some brown sugar in the food processor. If you don’t have a food processor though, just try to chop the sage as finely as you can.

The combination of fresh sage and roasted squash really adds wonderful earthy sweetness and depth that, to me at least, just screams fancy pants Thanksgiving dinner. Homemade biscuits are always a welcome addition to any meal, but this recipe is so quintessentially Autumnal that you’re guests are sure to be ooohing and aaahing over them all through dinner.

flaky butternut squash & sage biscuits | Brooklyn Homemaker

Flaky Butternut Squash & Sage Biscuits

  • Servings: 12-16 biscuits
  • Print
Roasted squash:
1 small butternut squash
1 tablespoon peanut oil or vegetable oil

Biscuits:
12 to 15 sage leaves
1/4 cup packed brown sugar
2 3/4 cups all purpose flour, plus more for dusting
4 teaspoons baking powder
1 1/2 teaspoons salt
3/4 teaspoon cream of tartar
1/2 teaspoon ground pepper
1/4 teaspoon cinnamon
3/4 cup butter (1 1/2 sticks)
1 cup butternut squash puree (or pumpkin puree)
1/2 cup buttermilk
2 tablespoons heavy cream or melted butter

Preheat oven to 400.

Slice the squash in half, lengthwise, and scoop out seeds with a spoon. Rub the cut side of the squash flesh with oil and place cut side down on a parchment lined baking sheet. Roast squash for about 40 minutes or until fork tender. Cool completely, remove the skin, and mash the flesh with a fork, or puree in a food mill or food processor.

Turn oven up to 450.

Combine the sage leaves and brown sugar in the bowl of a food processor and run until the sage is very finely chopped (you can also just chop the sage very very finely with a knife). Add flour, baking powder, salt, cram of tartar, ground pepper, and cinnamon and pulse to combine. Cut the cold butter into 1 inch chunks, add to flour, and pulse into small pea sized pieces (if you don’t have a food processor use a pastry blender). Transfer to a bowl, cover, and chill for at least 30 minutes (or overnight). Mix squash puree and buttermilk together, make a well in the center of the flour, and pour in buttermilk all at once. Gently stir and fold together with a fork until just moistened, and bring together in a ball with your hands. Do not try to mix the liquid into the flour in the food processor or your biscuits will be tough and dense.

Turn dough out onto a lightly floured surface. Gently push dough out into a flat disk using your hands (or a rolling pin). Dust lightly with flour, fold in half, and gently roll or press back out. Repeat 5 or 6 times to create layers in your biscuits that will separate when baked. Roll or pat dough out to about 3/4 inch thick and cut into circles using a 2.5 inch biscuit cutter. Remaining dough can be recombined once, but no more or it will get tough. Recombined biscuits will not be as pretty or as flaky as the first batch, but they’re still worth it. Transfer biscuits to parchment lined baking sheets and brush tops with cream or melted butter. Bake for 12-15 minutes, or until golden brown on top.

citrus herb roasted turkey

I’ve been keeping a little secret from you guys.

citrus herb roasted turkey | Brooklyn Homemaker

Ever since last Thanksgiving I’ve been considering the fact that Thanksgiving recipes need to be posted well in advance of the big day if they’ll actually be of any use to you guys. I love the idea that some of my recipes might make it on to your buffet and feed your family miles and miles away from Brooklyn, but if I wait until after Thanksgiving to post them, odds are that you’ll forget all about them by this time next year. So essentially I need to test, and make, and photograph, and eat an entire buffet’s worth of recipes in advance to make sure you have time to see them, drool over them, pin them, plan your grocery lists, and make your action plan for turkey day.

citrus herb roasted turkey | Brooklyn Homemaker

So, that’s exactly what I did.

At first I thought I’d just take my time, trying out one recipe at a time and collecting the posts slowly until I had everything I needed. It didn’t take me long to realize though, that eventually I’d need to roast a turkey. Not a chicken, an entire turkey. Russell and I are only two people, and we can only eat so much turkey ourselves without getting sick to death of the stuff.

So the slow and steady plan was tossed out the window and I decided to make an entire Thanksgiving dinner and invite some friends over to eat it with me. I also decided that if I was going to make the whole dinner, I might as well go all out and host one hell of a dinner party while I was at it.

citrus herb roasted turkey | Brooklyn Homemaker

We don’t have room for a dining table in our tiny Brooklyn apartment, so the bulk of our “dinner parties” usually involve our guests plopping their butts where ever they can find a seat, be it on the sofa, a chair, or the floor. However, since I was cooking and staging an entire fake Thanksgiving dinner for the blog, I wanted it to feel a little fancier and more formal than randomly plopped butts. Since we do have a table in our backyard, we decided Thanksgiving would have to come early enough that our guests wouldn’t be shivering between bites of turkey. A date was set late in September and we started planning the guest list.

With an actual table to sit at, I immediately started a mental inventory of our stemware, serving dishes, and flatware. If you asked Russell he’d probably tell you I went a little overboard looking for salad plates and linen napkins and searching ebay for vintage brass flatware. If you asked me instead though, I’d tell you it was worth it for the opportunity to host a real sit down dinner party with good food and great friends.

citrus herb roasted turkey | Brooklyn Homemakercitrus herb roasted turkey | Brooklyn Homemaker

A lot of other food blogs do a similar pre-Thanksgiving dinner and photoshoot, and many of them refer to their staged meal as Friendsgiving. Since I work in retail and don’t live close to family, my Thanksgivings are always spent with friends though, so I wanted to call it something else.

I was making a entire fake Thanksgiving spread two whole months ahead of time, so I decided to call it Fakesgiving.

citrus herb roasted turkey | Brooklyn Homemaker

When it came to menu planning, I wanted to try to cover the bases for a traditional menu but put my own twist on things. I wanted to keep the flavors simple and complimentary, while offering interesting, impressive, and totally delicious recipes. While I like to try to make as much from scratch as possible, roasting my own pumpkins and squash rather than using canned, I also didn’t want any of my recipes to be so fussy that they’d be unattainable or unrealistic for a meal that’s already so involved and time consuming to prepare. In the end, I think I did alright!

Thanksgiving pies |Brooklyn Homemaker

Our Fakesgiving Menu:

Shaved Brussels Sprouts Salad with Walnuts and Pomegranate
Citrus Herb Roasted Turkey (recipe below)
Mushroom, Leek, & Sourdough Dressing (from 2 years ago)
Herb and Cheddar Corn Pudding
Creamed Kale Gratin
Roasted Maple Dijon Carrots
Flaky Butternut Sage Biscuits

Bourbon Ginger Pumpkin Pie
Maple Walnut Pie
Classic Apple Pie (from last year)

fakegiving dinner spread| Brooklyn Homemaker

I talked a bit last year about how I like to get ready for Thanksgiving dinner, but I want to mention again that I think it’s really helpful to think ahead. This might seem a little neurotic, but I really like to sort of mentally pair each recipe I’ll serve with an appropriate serving dish and utensil, just to make sure I don’t realize that day that I don’t have a big enough salad bowl, or I don’t have enough serving spoons for everything on the table. I also like to write out timelines and grocery lists and to do lists (so many lists) for myself so there are no surprises. I’m sure that Russell got sick of hearing about my Fakesgiving planning but everything went off without a hitch so I think it was worth it.

citrus herb roasted turkey | Brooklyn Homemaker

With dinner served, photos snapped, and wine poured, it was time to chow down. Boy did we ever chow down.

citrus herb roasted turkey | Brooklyn Homemakercitrus herb roasted turkey | Brooklyn Homemakercitrus herb roasted turkey | Brooklyn Homemaker

Doris wanted to see what all the excitement was about and see if her puppy dog eyes could get her a bite or two of turkey.

citrus herb roasted turkey | Brooklyn Homemaker

Now that we’ve talked about the party, let’s talk turkey shall we?

I definitely have some more sharing to come, but one of the most important recipes when it comes to Thanksgiving is the ol’ turkey, so I thought now would be a good time to tell you how I like to do mine. I’ve been making this same recipe for years now, because after all the things I’ve tried in the past, this has produced the most consistent, moist, and delicious results. I’ve done the brine thing before, but this method is way less hassle and produces, hands down, the best turkey I’ve ever made. Year after year I’m showered with compliments.

The key to this recipe is that the turkey is roasted breast-side down for the first few hours. Even though flipping it back over can be tricky, doing it this way is the key to moist and flavorful breast meat. As the dark meat cooks the fat and juices run downward through the breast adding tons of fat and flavor. The only reason it’s flipped back up is to brown the skin on the breast for crispier skin and a prettier and more traditional presentation. I don’t have silicone or waterproof oven mitts, so I cover them in ziplock bags and lift the turkey up as Russell holds the roasting pan steady.

To avoid drying the breast meat I think it’s also really important to give the turkey a good long rest, between 30 and 45 minutes, for the juices to reabsorb into the meat before slicing. Luckily, this resting time also gives you a really cozy window for making gravy, reheating casseroles, and browning biscuits.

citrus herb roasted turkey | Brooklyn Homemaker

To add even more fat and flavor and make the bird as moist and flavorful as possible, a citrus and herb compound butter is rubbed all over the skin before it goes into the oven. I like to use super traditional poultry herbs like thyme, sage, and parsley to really compliment the rich flavor of the turkey. To brighten things up a little though, I love using a mix of lemon and orange zest for a bit of zip.

I’m telling you guys. I’ve made this recipe three years in a row and I’m planning on making it a second time this year in a few weeks. It’s a real winner, and many of my friends can attest to that.

citrus herb roasted turkey | Brooklyn Homemaker

Roasted Turkey with Citrus Herb Butter

  • Servings: Feeds many many people, depending on the size of your bird
  • Print

Citrus Herb Butter:
1 1/2 sticks of salted butter, softened
1 teaspoon coarse kosher salt
1 teaspoon fresh cracked pepper
1 teaspoon cayenne pepper
2 tablespoons finely chopped fresh sage
2 tablespoons finely chopped fresh parsley
2 tablespoons finely chopped fresh thyme
2 tablespoons brown sugar
zest of one large orange
zest of two lemons

Roasted Turkey:
1 15-20 lb fresh turkey *see note
citrus, herbs, onions and apples for filling
carrots, onions, celery (and apples if desired) for roasting to flavor gravy

chicken or turkey stock

To make the flavored butter, mash all ingredients into the softened butter with a fork (or with a mixer) and mix until well combined. Place in an air tight container and refrigerate. Remove from fridge and soften for an hour or two before you’re ready to use it. If you forget to do this you can soften it in your hands.

If possible, wash the turkey and remove the gizzards and neck the night before Thanksgiving. Pat dry, inside and out, with paper towels and season with salt and pepper. If you can’t do this the night before, do at least one hour before the turkey goes into the oven. Cover with foil or a lid and move to the refrigerator. Hold onto the gizzards and neck for gravy.

Preheat your oven to 325 degrees. Roughly chop a few pieces of celery, carrots, onions & apples and place in the bottom of a large roasting pan. You don’t need to peel the skin off the onion and you can use the leafy tops of the celery. Add a few sprigs of herbs and your reserved neck and gizzards, and add enough chicken or turkey stock to come about an inch up the side of the pan. Add a large roasting rack to the pan.

Rub the softened citrus herb butter completely over your turkey on all sides and some on the inside cavity. Reserve a few tablespoons to reapply later. Place your butter covered turkey, breast side down, on your roasting rack. Fill the cavity of the turkey with roughly chopped citrus, apples, onions and herbs, or whatever flavors you’d like. Leave some room for air to circulate in the cavity or the turkey will take longer to cook and could dry out.

Transfer Turkey to the oven, uncovered, and roast for 3 1/2 hours basting every 30 minutes. Remove from oven and flip the turkey breast side up. They make special turkey lifters to make this easier, or you can use large rigid spatulas, or oven mitts covered in plastic bags. You might want an extra set of hands to keep the roasting pan steady or help out. Rub the remaining citrus herb butter on the breast side of the turkey and return to oven for 1 1/2 to 2 more hours, or until a meat thermometer placed in the thigh meat reads 165 degrees. Continue basting every 30 minutes until done. Your total roasting time will depend on the size of the bird. Closer to 15 pounds should take about 4 1/2 to 5 hours, 20 pounds more like 5 1/2 hours.

When the turkey is done, remove from oven and transfer from roasting rack to a large carving board. Tent with aluminum foil and let rest for at least 30 minutes, up to 45 or 50. Strain the juices from the pan and use for gravy, adding more stock if necessary. You can use this resting time to reheat or finish any remaining sides in the oven. Carve and serve your bird and brace yourself for a barrage of compliments.

*Note: I like to say you want your about 1 1/2 to 2 pounds of turkey per person- this will ensure everyone is completely satisfied and you have some leftovers for sandwiches and something leftover to make soup or turkey pot pie.