seasonal

strawberry lemonade layer cake

And just like that, it was the end of August.

strawberry lemonade layer cake | Brooklyn Homemaker

I can’t believe it’s been so long since I posted, but I guess that’s just the kind of blogger I am now. The kind who can’t (and won’t) let go, but also can’t get their shit together enough to post more than once or twice a year.

strawberry lemonade layer cake | Brooklyn Homemaker

Looks like this is a two post year though, so I’m going to go ahead and give myself a nice little pat on the back.

strawberry lemonade layer cake | Brooklyn Homemaker

Anyway, one of my best friends in the whole wide world (who just happens to be my podcast co-host) just celebrated her birthday and I decided it was time to pull out the big guns. The big cake guns.

strawberry lemonade layer cake | Brooklyn Homemaker

Usually we just go to brunch, or to a nice dinner to celebrate our birthdays, but hers is at the end of August and I believe this is what the French call the “Dog days of Summer” so we decided a bbq was in order.

I decorated the back yard like an old school kid’s party with streamers and pennant bunting and the whole works. Even cute little party hats!

We grilled burgers, had potato salad, and a bartender friend of ours mixed an incredible citrusy spicy whiskey punch. In other words, we did it up right and proper.

strawberry lemonade layer cake | Brooklyn Homemaker

Since I’m telling you the whole story here, you’ve probably guessed by now that I also made a fancy pants birthday cake for her too. She loves all things lemon, so my first instinct was to go all out lemon on lemon on lemon. Then one night I was inspired and decided to throw some strawberries in the mix too, cuz why not? Since the party was going to be totally over the top, I figured the cake should be too, right?

I don’t usually go for frilly pink and girly decorations on my cakes, but if ever there was a time to go that direction, I figured this was it.

strawberry lemonade layer cake | Brooklyn Homemaker

Not only did this cake turn out to be a real show stopper, but it’s pretty damn tasty too!

All the elements totally come together in perfect pretty-in-pink, strawberry lemonade harmony. The homemade lemon curd is tart and sweet and super lemony. The frosting is rich and velvety with a gorgeous strawberry flavor (and color!), and the cake is delicate and fluffy and perfectly sweet without being too much. I hate it when a cake is super pretty and then just tastes like a cloying sugar bomb, you know?

strawberry lemonade layer cake | Brooklyn Homemaker

There’s only one small thing that I don’t think was as successful as I would have hoped. I adapted a lemon cake recipe I use all the time and added powdered freeze dried strawberries for a bright, fresh strawberry flavor without all the liquid of fresh berries that can sometimes make cakes dense and gummy. I decided to shoot for an ombre effect with the different layers of cake, so I added progressively more and more strawberry powder to each layer. I hoped there would be a beautiful gradient of different shades of pink when the cake was sliced, but looking back I realize I should have added a touch of food coloring too. The problem was that I’ve never used freeze dried strawberries in a cake like this before, and while the batter was a pretty pastel pink, it tuned a bit of a brownish hue when baked.

Womp womp. It tasted great so who cares.

Thankfully, you get to learn from my mistakes! I’d say that you should either A) skip the ombre gradient altogether and just add the strawberry powder to the batter all at once, B) leave it out entirely and just do lemon cake with strawberry icing, or, C) if you really want to go for the pink ombre effect, add a touch of red food coloring to the batters to make sure you keep that pretty pink color once the layers are baked.

strawberry lemonade layer cake | Brooklyn Homemaker

The recipe below is super lengthy and probably looks a bit daunting, but I’m including recipes for the cake, the lemon curd filling, the icing, and the yellow candy melt drip on top. Then I include tips on how to do the pink gradient in the cake layers, how to assemble the cake, and even decorating instructions! So yeah, this recipe is basically the War and Peace of cake recipes.

You can totally scale back the decorations, forget the ombre layers, skip the candy drip, and use store bought lemon curd if you want to simplify things a little. I certainly couldn’t blame you!

Either way, no matter how you slice it, this cake is sure to be a hit for the lemon lovers in your life!

strawberry lemonade layer cake | Brooklyn Homemaker

Strawberry Lemonade Layer Cake

  • Servings: 16 to 20-ish
  • Print
Lemon Curd:
Adapted from Life, Love, & Sugar
(You may also use store bought)

1/2 cup fresh lemon juice (about 3-4 lemons)
4 teaspoons finely grated lemon zest
2/3 cups sugar
1/4 teaspoon salt
8 egg yolks (reserve whites for icing)
6 tbsp unsalted butter

Combine all the ingredients in a double boiler (or in a non-reactive sauce pan with a heavy bottom). Heat over medium/low heat (or a light simmer in a double boiler). Whisk constantly until mixture thickens and reaches 170 degrees on a thermometer, or looks thick and pudding-like. Do not let it boil!
Strain curd through a fine mesh strainer into a heat proof bowl. Cover with plastic wrap pressed directly onto the the top of the curd to avoid a skin forming. Refrigerate until completely cold.
Any leftover curd is best when kept well covered and consumed within 1-2 weeks.

……..

Strawberry Lemon Cake
makes three 8-inch layers

3 1/3 cups all purpose flour
2 1/2 teaspoons baking powder
1/2 teaspoon baking soda
1 1/4 teaspoons salt
2 1/4 cup granulated sugar
2 tablespoons finely grated lemon zest (from about 3 to 4 lemons)
1/2 cup (1 stick) unsalted butter, room temperature
3/4 cup peanut oil or vegetable oil
4 large eggs
2 teaspoons vanilla extract
1 cup buttermilk
1/4 lemon juice
3/4 cups (approximately) powdered freeze-dried strawberries (optional) *see note
pink or red food color (if desired)

Preheat oven to 350 degrees.
Line the bottoms of three 8″ cake pans with parchment paper. No need to butter and flour the sides pans. **see note
In a medium bowl, whisk flour, baking powder, soda, and salt until well combined.
In the bowl of a stand mixer with the paddle attachment, combine lemon zest and sugar and mix for 30 seconds or so. Add butter to sugar mixture and cream them together on high for about 3 minutes, or until pale and fluffy. Reduce speed and add oil, then the eggs, one at a time, fully incorporating after each addition. Add vanilla until just combined.
Combine lemon juice and buttermilk in a small bowl or measuring cup.
Alternate adding flour mixture and buttermilk mixture, beginning and ending with flour (3 additions of flour and 2 of milk), fully incorporating after each addition.

At this point, if you’re using it, you can either add the strawberry powder all at once and mix just until combined, or if you want to, you can try to go for an ombre effect as follows:
Mix about 1/4 cup of the powdered strawberry into the batter and mix to combine. Pour out 1/3 of the batter into one of the prepared pans. Add another 1/4 cup of strawberry powder to the remaining batter, mix, and fill one more pan. Add remaining strawberry to remaining batter, mix again, and fill the the last pan.
For a nicer, brighter pink, you may want to add a few small drops of food color with each addition of strawberry, because the powder tends to brown a bit when baked.

Bake for 30-35 minutes or until a toothpick or cake tester inserted into the center comes out clean.
If using bake-even strips, they will likely need a few additional minutes.

Transfer pans to a wire rack to cool for 30 minutes.
Invert cakes onto rack, peel off parchment, and let cool completely.
If the cakes domed in the oven, you’ll want to slice the very tops of the cakes off to make each layer completely flat and level for a more professional look. You can do this using a very sharp bread knife, or a cake leveler.
If you’re not assembling cakes right away, individually wrap each layer tightly in plastic wrap to prevent drying. Layers can be stored in the refrigerator for a day or two, or frozen (wrapped in plastic wrap first, then aluminum foil) for up to two weeks. You may want to consider brushing the layers with simple syrup if you’re freezing them.

Baker’s notes:
* I used 2x (1.2 oz) bags of freeze dried strawberries from the grocery store and pulverized them in the food processor, but you can also buy pre-powdered freeze dried fruit and skip the extra work. If you wanted to just go for a lemon flavor cake, you could leave this out.
** Not buttering or flouring your cake pans actually helps the cakes keep their shape better when cooling and helps prevent the outer edges of the cakes from overcooking. The parchment will allow the bottoms to release from the pans easily, but you will need to run a knife or a toothpick around the outside edge before turning out of the pans.

……..

Strawberry Swiss Meringue Buttercream Icing:
Adapted from “Layered” by Tessa Huff

1 1/4 cup fresh egg whites (not pasteurized egg whites)
2 1/2 cups sugar
1/4 teaspoon salt
3 cups (6 sticks) unsalted butter, at room temperature (cut into 1 tablespoon slices)
4 teaspoons pure vanilla extract
3/4 cups (approximately) powdered freeze-dried strawberries *see note

Place the egg whites, sugar, & salt in a very clean bowl of a stand mixer and whisk them together by hand to combine. Fill a medium saucepan with an inch or two of water and bring to a simmer over medium to medium-high heat. Place the mixer bowl over the saucepan to create a double boiler. Be sure that the bottom of the bowl doesn’t directly touch the water, and that the water doesn’t reach a full boil.
Heat the egg whites until they register 160F on a candy thermometer, whisking regularly to avoid cooking the whites. As soon as they’re at the correct temperature, carefully attach the mixer bowl to the stand mixer and add the whisk attachment.
Beat the egg whites on high speed for 8 to 10 minutes until they hold stiff peaks and the outside of the bowl is cooled to room temperature. Stop the mixer and swap the whisk attachment for the paddle.
On low speed, add the butter, a few tablespoons at a time, waiting for it to incorporate before adding more. Once all the butter is mixed in, add the vanilla extract and strawberry powder and mix in to incorporate. Turn the mixer up to medium-high and beat until the buttercream is smooth and silky, about 3 to 5 minutes.
If the mixture starts to look curdled, just keep beating. It’ll come together.
If the whites were still too warm when the butter was added and the buttercream is too thin and soupy, refrigerate the bowl in 10 or 15 minute bursts until it’s cool (but not cold) and beat again until smooth.

* Baker’s note: I used 2x (1.2 oz) bags of freeze dried strawberries from the grocery store and pulverized them in the food processor, but you can also buy pre-powdered freeze dried fruit and skip the extra work.

……..

Assemble cake:
Place the first cake layer on an 8″ cardboard cake round, serving plate, or cake stand. Using a cake round will make it easier to ice and decorate, especially if you have a revolving turntable for decorating (I use a lazy suzan, but you can also just spin your plate or cake stand while you work).

Fit a piping bag with a large star tip and fill with a two or three cups of the Strawberry Buttercream. Pipe a thick dam of icing around the outside of the cake to contain the curd filling. This will ensure that the filling stays in place and doesn’t squish out when the layers are stacked.

Place about 3/4 to 1 cup or so of the curd in the center of the cake and spread it smooth and even using an icing spatula. Add the next layer of cake, looking from directly over the top and from eye level at the cake to make sure each layer is directly one above the other, rotating the cake to be certain. Repeat the same procedure with the buttercream dam and another cup of the curd, then add the third and final layer of cake and check for straightness again. Reserve about a cup or so of icing in the piping bag for additional decorations later.

Using about a third or so of the remaining icing, crumb coat your cake. Starting with the top of the cake, spread the icing thin and work some of it down the sides of the cake to completely cover the whole thing in a thin, smooth, even coat of icing. This first layer of icing seals the cake and keeps crumbs from being visible in the outer layer of icing. It may seem like unnecessary trouble, but it really is worth it to get a smooth professional finish on the icing.

Place the cake in the refrigerator for about 30 minutes to an hour to help set the icing and firm up the cake.
Spread another layer of the remaining buttercream over the whole cake the same way you did the crumb coat. Start by smoothing the top and slowly working the icing down the sides to cover the cake completely. Try to get the icing as completely smooth as possible with straight sides and a flat, level top. I use a long offset icing spatula and an icing smoother.

You may have a little icing left over but I thought it was better to have a bit more than you need to use for decorations just in case.

……..

Decoration:
(optional)
rainbow sprinkles
multicolor dragees
lemon head candies (small)

Candy Drip: 
6 oz yellow candy melts (or white with a few drops of yellow candy color)
1 to 2 tablespoons heavy cream

If desired you can add sprinkles to the lower half of the cake. Carefully lift the cake up and place the cake board on a bowl or container that is slightly smaller than the width of the cake, and then place the bowl on a rimmed baking sheet to collect falling sprinkles. Using clean hands, grab small handfuls of sprinkles and decorations and gently press into the icing on the lower half of the cake.

Refrigerate the cake again for at least another 30 minutes to set and chill the icing before adding the yellow candy drip. Once the cake is chilled, make the candy drip by microwaving the candy melts in a heat safe bowl or measuring cup in 30 second bursts until melted. Stir in heavy cream, a few teaspoons at a time, just until the drip is thin enough to pour from a spoon in a thin even stream, but don’t add too much or the drips won’t stay put and will pour right off the cake. It’s better to need to keep adding a little more, because you can’t take it out if you thin the drip out too much.

Starting at the outer edge of the top of the cake, start adding one drip at a time, rotating the cake until you’ve gone all the way around. I used a small squeeze bottle for extra control, but you can use a spoon as well. Once you’ve added drips all the way around the cake, fill in the center and smooth with a small spatula. Return the cake to the fridge for another 20 to 30 minutes to set the drips before proceeding.

Finish by piping small swirls of icing around the top of the cake, and top each swirl with a lemon head candy.

Cake will keep well covered in the refrigerator for up to 3 days.

If refrigerating, bring cake to room temperature at least two hours before serving.

basler brunsli | chocolate almond spice cookies

Hi there friends! It’s officially the holiday season.
When did that happen?

basler brunsli | chocolate almond spice cookie | Brooklyn Homemaker

I feel like it was mid-summer when I went to bed last night, and I woke up in early December.
Yeesh.

So, to try to force myself into the December/holiday spirit, I decided some holiday cookies were in order.

basler brunsli | chocolate almond spice cookie | Brooklyn Homemaker

I have a healthy cookbook collection, including some old historic cookbooks, but usually when I’m looking for recipe inspiration I tend to leave the cookbooks on the shelves to collect dust and look to the world wide web instead.

When I was trying to find a new cookie recipe for the holidays this year, I started poking around online at first, but then I remembered a book my mom gave me for Christmas a couple years ago. I’m sure that by now you know this about me already, but when it comes to holiday baked goods, I friggin love an old school German recipe, especially one with a healthy dose of spice in it. The book is titled, appropriately enough, Classic German Baking. There’s even a “Christmas Favorites” section, so this was a no brainer.

basler brunsli | chocolate almond spice cookie | Brooklyn Homemaker

I can’t tell you how much I love this book. I could just flip through the pages and drool for hours. I did, in fact, just a few days ago!

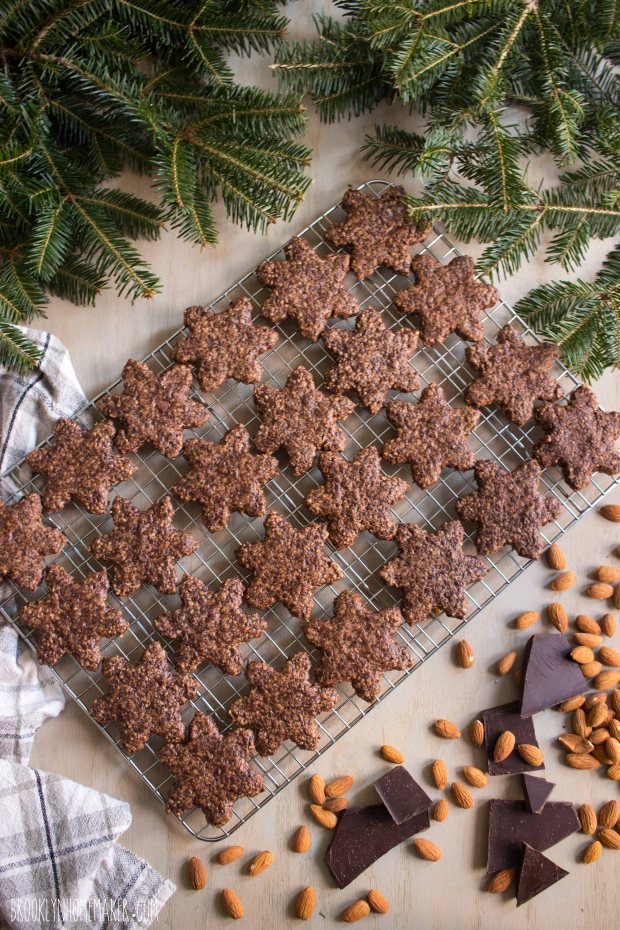
The recipe I chose actually originates from Switzerland, but is very traditional and well loved in Germany. The main ingredients in these cookies are finely ground raw almonds and dark chocolate, with a few additions to bind the dough together and add a bit of flavor. The dough is surprisingly simple to bring together if you have a food processor, but without one, I think it’d be pretty difficult to grind the almonds & chocolate finely enough.

By the way, while raw almonds and dark chocolate aren’t exactly difficult to find, they can be pretty pricey depending on where you go. I just want to mention that Trader Joes is a really great source for affordable nuts and chocolate. Three cheers for the Pound Plus bar! You’re welcome.

basler brunsli | chocolate almond spice cookie | Brooklyn Homemaker

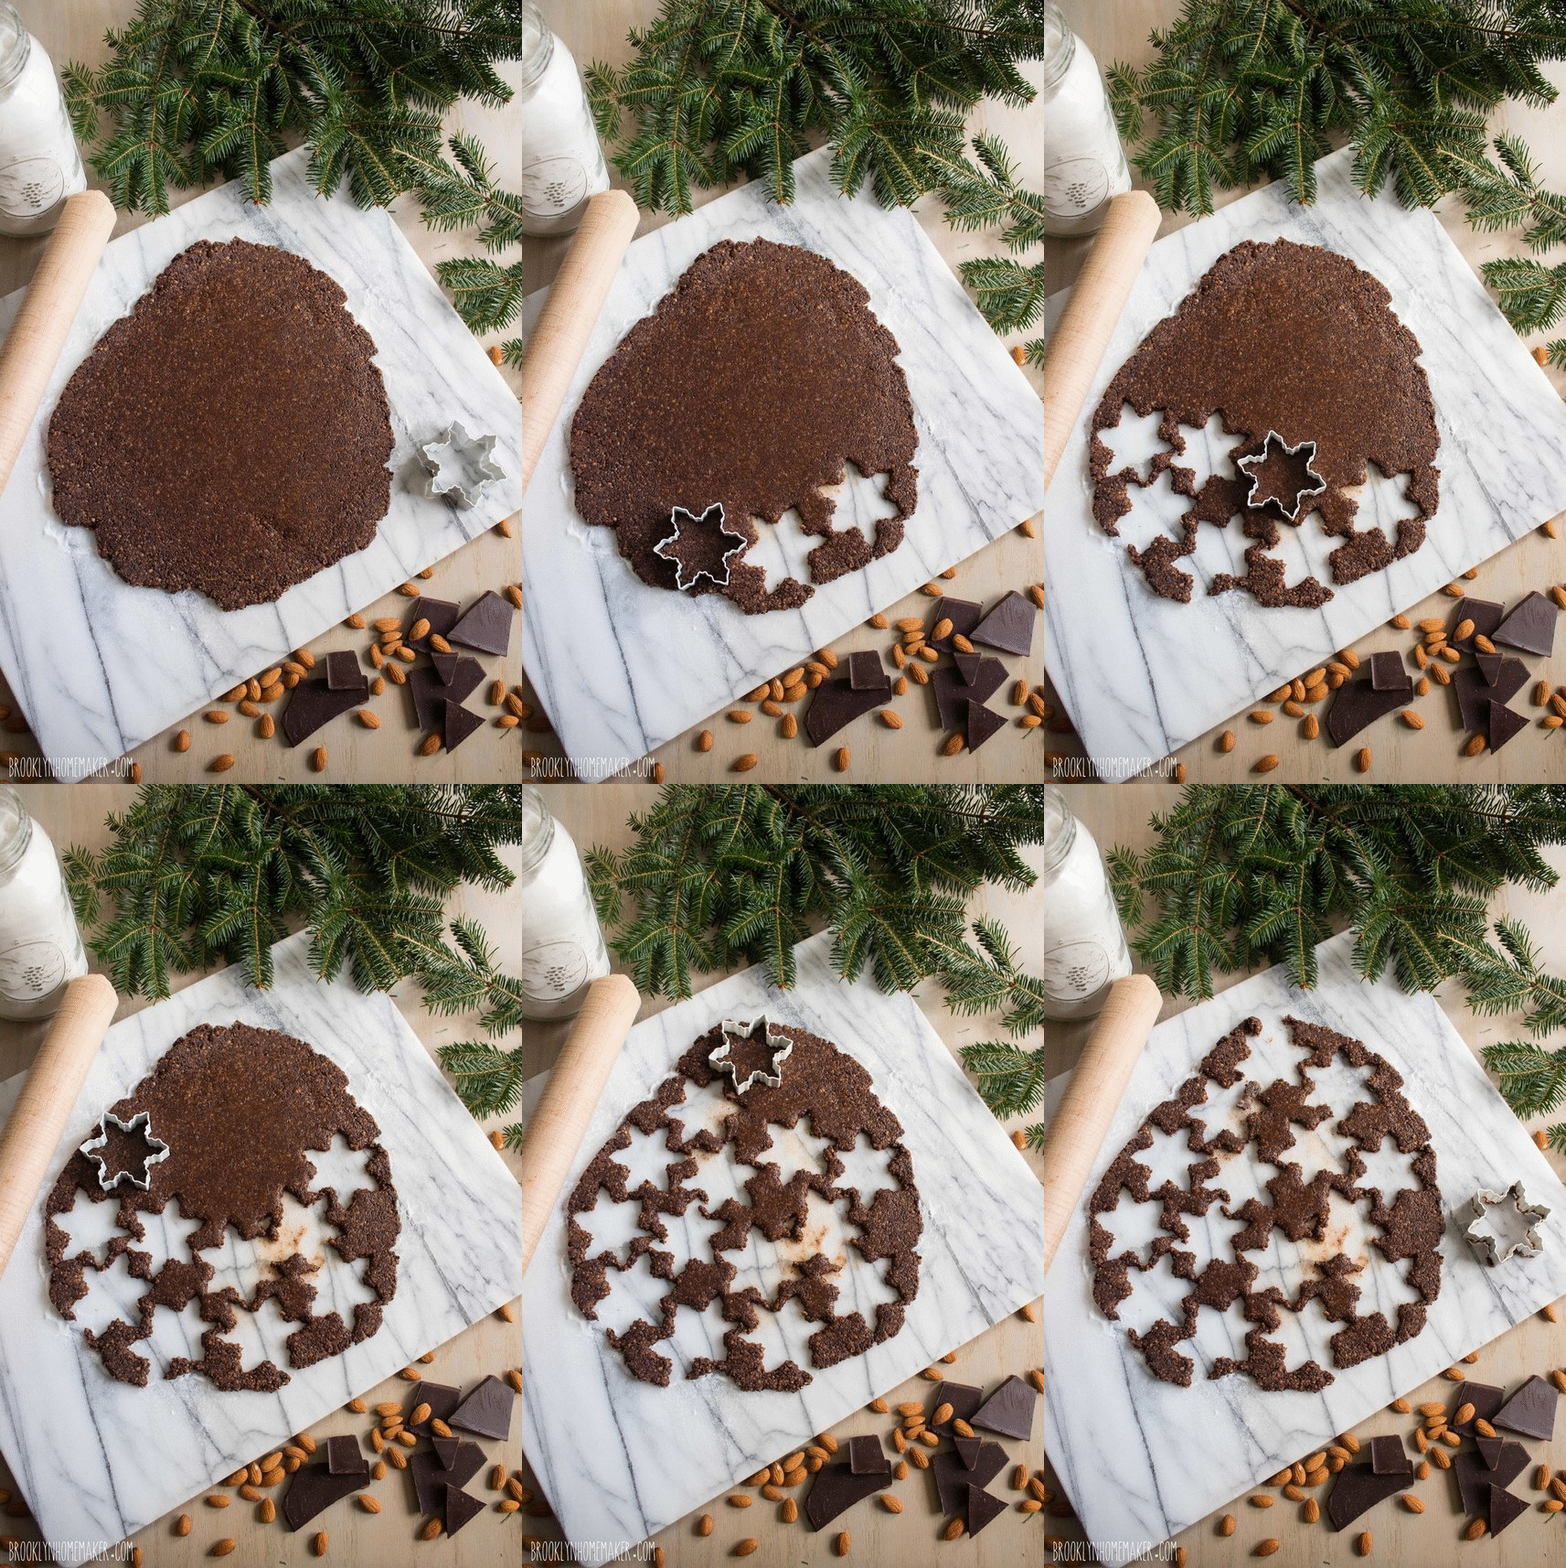
Rolling the dough out and cutting out the shapes is a little more challenging than making the dough, but no more difficult than any other rolled cutout cookies.

This is a pretty sticky dough though, so my biggest piece of advice here is to be generous with the sugar you’ll use to keep the dough from sticking to your work surface. If the dough is sticking to your counter, it’ll be almost impossible to pick up your cutouts and transfer them to your baking sheet without messing up their shape. I used plenty of sugar before rolling out the dough, and once it was rolled out to the thickness I wanted, I gently lifted the dough to make sure it wasn’t sticking anywhere before I started cutting out my shapes. If it does stick in places, try to gently release it from the counter and add more sugar before you start cutting out your shapes.

Sugar is used to prevent sticking rather than flour because, oddly enough for an old world European recipe, these cookies are actually gluten free! Woot woot.

basler brunsli | chocolate almond spice cookie | Brooklyn Homemaker

Once you’ve finished cutting out your shapes you can totally recombine the dough and re-roll it, but it will get sweeter every time since you are using sugar to keep it from sticking. I noticed that by the time I’d recombined and rerolled a third or fourth time, the cookies started to spread a little more in the oven from the extra sugar.

When it comes to the cookie cutters you’ll use, the author says that they’re traditionally cut into heart shapes, but if you want to do something else you should try to avoid any shapes with a lot of fine detail because the dough is too coarse and sticky to hold a detailed shape. The dough doesn’t really spread very much in the oven, but it’s just too hard to get this coarse sticky dough out of a cookie cutter with a lot of fine detail without messing it up. Even the snowflake cutter I used was a little fussy and I did find that some of the detail got slightly muddled.

basler brunsli | chocolate almond spice cookie | Brooklyn Homemaker

No matter what shape you decide on, these cookies are crazy delicious. They almost taste like a nutty, subtly spiced brownie. It has the perfect balance of deep chocolate, warm spice, and chewy ground almonds. Heaven.

Since this recipe was so unfamiliar to me with the lack of flour and the addition of ground chocolate rather than melted chocolate or cocoa powder, I was really worried that the chocolate would just melt and turn into a mess in the oven, but my cookies kept their shape really well, so never fear y’all!

They’re soft and tender and delightfully chocolatey. Russell said they taste like a candy bar.
Better yet, they keep for up to a month, so they can be made well in advance and stored, making your holiday season a little less stressful. Just don’t store them with other, crisper cookies, or the crisp cookies will absorb their moisture and get soft.

Happy baking, and happy holidays!

basler brunsli | chocolate almond spice cookie | Brooklyn Homemaker

Basler Brunsli

  • Servings: makes about 30 cookies
  • Print
adapted, just barely, from Classic German Baking by Luisa Weiss

1 2/3 cups raw almonds
9 oz dark or bittersweet chocolate (60% to 72% cocoa)
1 1/2 cups confectioners (powdered) sugar
1/4 teaspoon salt
1/4 teaspoon cinnamon
1/8 teaspoon cloves
3 egg whites, lightly beaten
2 tablespoons dark rum (or Kirsch if you have it)
Granulated sugar, for rolling

Add the almonds to the bowl of a food processor and grind until they’re very very fine, but be sure not to go too far and let them turn into almond butter. If they start to bind together, stop!
Transfer them to a separate bowl and break the chocolate up into the food processor. Pulse until finely ground, but don’t let it melt. If it’s warm in your kitchen you may want to refrigerate your chocolate first.
Add the almonds back in with the chocolate, along with the salt, spices, egg whites, and rum or Kirsch.
Pulse until the mixture comes together in a stiff, sticky dough. Transfer the dough to a bowl, cover with plastic wrap, and refrigerate for 12 to 24 hours.

Preheat your oven to 300F (150C), and line two sheet pans with parchment paper.

Sprinkle your clean work surface with a generous layer of granulated sugar to prevent the dough from sticking. Place the dough on the sugared surface and cover with a sheet of plastic wrap or parchment paper to prevent the dough from sticking to the rolling pin. Roll the dough out 1/3″ to 1/4″ thick, and check to see if the dough is stuck to the surface (*see note). Cut out shapes with a cookie cutter (**see note) and transfer the cutouts to the prepared baking sheets leaving 1/2″ space between them. Bake, one sheet at a time, for 18 minutes. The cookies should look dry to the touch, but soft. Repeat with remaining baking sheet. Cool cookies completely before trying to remove them from the parchment, or they’ll fall apart.

Cookies can be stored in an airtight container or cookie tin, for up to a month.

Cooks notes:
*If the dough sticks to the work surface in a few spots, I found that it was easier to gently lift the dough and add more sugar underneath before cutting, rather than trying to lift stuck-on cutouts. Otherwise the cookies will lose their shape when you try to pick them up. If all of the dough is entirely stuck to your work surface, you might want to ball it back up and start over with more sugar on the surface next time.

**This dough is coarse & sticky, so avoid shapes with too much detail. Hearts are the traditional shape for these, but any simple shape will work.

The Sherry Cobbler

The Sherry cobbler is a historic recipe, and when I say historic, I mean it!

sherry cobbler | Brooklyn Homemaker

I’m all too well aware that fancy speakeasies and prohibition era cocktail lounges are all the rage right now, but this drink pre-dates even those. While those cocktails were popular in the 1920s or 30s, the Sherry Cobbler most likely came of age sometime in the 1820 or 30s and really took off in the 1840s!

sherry cobbler | Brooklyn Homemaker

They say that like champagne was to the 1920s, or the Cosmo to the 1990s, The Sherry Cobbler was a quintessential part of American life and culture in the 1800s. In fact, when Charles Dickens visited the US, it was one of his favorite things about his trip and he talks about it in his 1844 book The Life and Adventures of Martin Chuzzlewit. “Martin took the glass with an astonished look; applied his lips to the reed; and cast up his eyes once in ecstasy. He paused no more until the goblet was drained to the last drop. ‘This wonderful invention, sir,’ said Mark, tenderly patting the empty glass, ‘is called a cobbler. Sherry Cobbler when you name it long; cobbler, when you name it short.’”

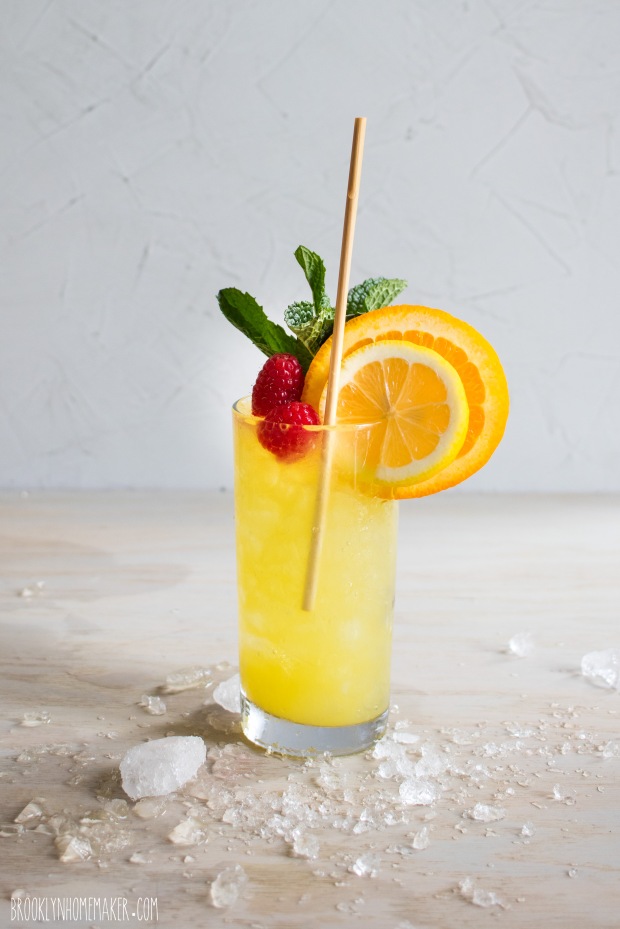
The “reed” mentioned in this passage refers to what we today call a straw. At the time this was written, a drinking straw was a total novelty, and people in bars would often need to be shown how to use one because it was so unfamiliar. The Sherry Cobbler is actually credited with introducing the straw to popular consciousness in America! These weren’t the demonized plastic straws of today though, but a rye or reed straw, a bi-product of the hay industry. Today similar straws are making a comeback as America tries to find alternatives to plastic straws, and in fact the straws you see pictured here are the very same!
I got them from a company called HAY! straws.

sherry cobbler | Brooklyn Homemaker

So- what is a Sherry Cobbler?
I’m glad you asked.
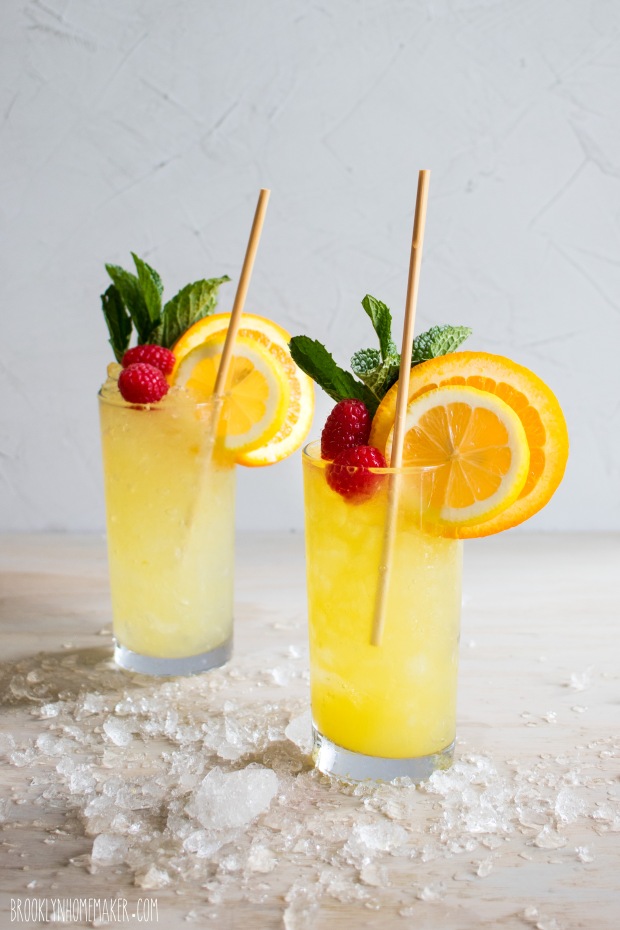
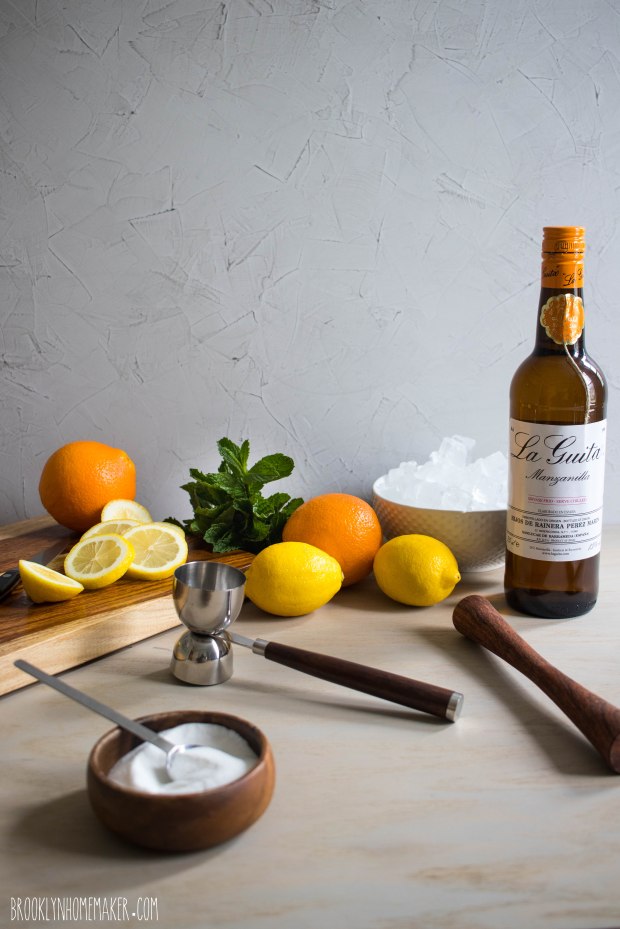
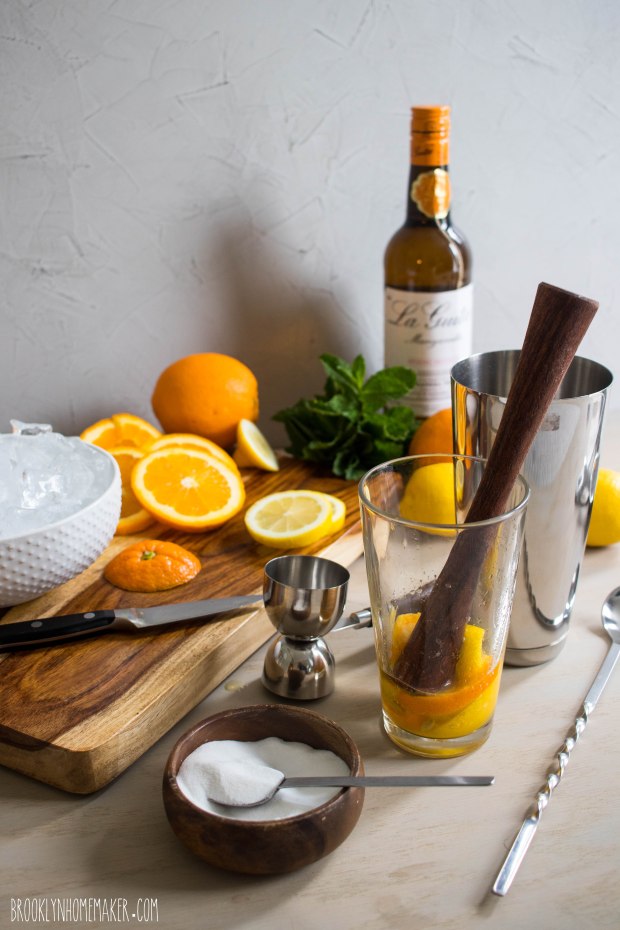
It’s essentially Sherry, shaken with muddled citrus & sugar, and strained and poured over crushed ice. It also happens to be super delicious and refreshing, especially on a hot day. It’s sweet and bright and citrusy in all the best possible ways, and not too boozy, so you can keep ’em comin’!

A few things made the popularity of the Sherry Cobbler possible at this specific time in American history.

Sherry, a fortified wine from Andalusia Spain, had recently started to find it’s way into America as trade increased and tariffs dropped. Nineteenth-century Americans saw sherry as foreign, fancy, and affordable all at once, and it became very popular.

Sugar and citrus were also making their way into American homes as trade increased and prices dropped. Suddenly even in Northern states, people were able to get fresh citrus at certain times of year when it had been extremely rare before. Cheap sugar meant that Americans developed a real sweet tooth though, so I actually scaled back the sugar in my recipe, because I found the original recipe a bit too sweet for modern tastes.

sherry cobbler | Brooklyn Homemaker

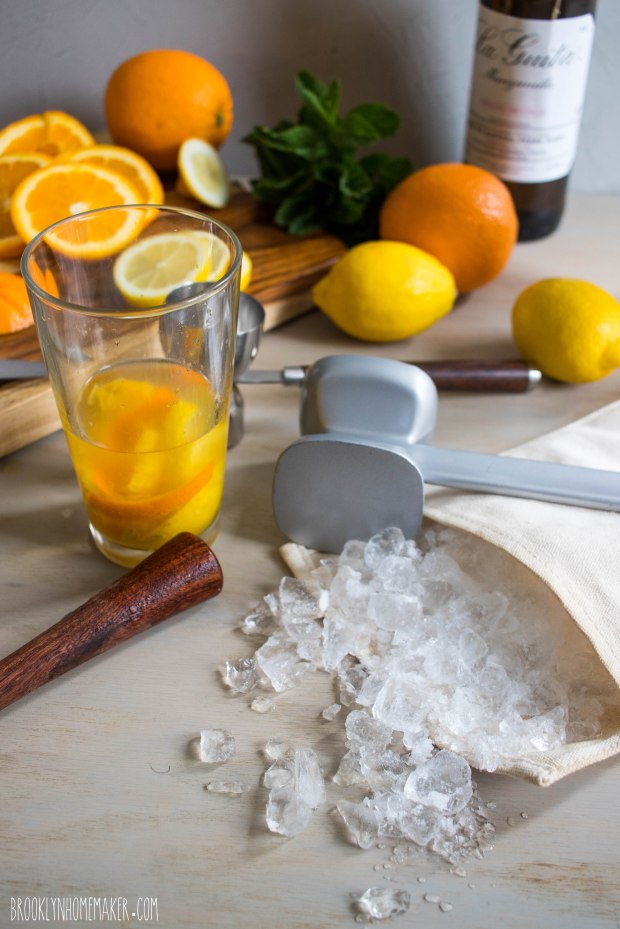
Perhaps the most important part of the drink though, was the ice! Before this point, most alcoholic beverages were served warm or hot, because ice was rare and expensive and refrigeration wasn’t yet a thing. At that point, ice had to be harvested by sawing huge blocks out of frozen lakes and storing them in ice houses. In the 1840s though, they began to industrialize the harvesting process, and suddenly ice was affordable and readily available, so it could be used on frivolous things like drinks. To me, the crushed ice in this drink makes it feel a bit like an adult snow-cone! It also means that if you tipped the glass toward your mouth, the ice would spill all over you, hence what I said before about this cocktails singlehandedly popularizing the drinking straw!
I used a canvass ice crushing bag called a Lewis Bag, along with a mallet (I used my CLEAN meat tenderizer) to get my finely crushed snowy ice!

sherry cobbler | Brooklyn Homemaker

I know this is a very summery cocktail to be sharing in October, but there’s a very good reason that I’ve waited until now to share it with you.
Over the past few months, I’ve been working on a special project with my good friend Stephanie…


We’re starting a podcast!!!

sherry cobbler | Brooklyn Homemaker

I hope this doesn’t break your hearts baking lovers, but food is not the theme of our show. There will be a cocktail featured in each episode though, if that softens the blow at all.

You already know I love history, but I also really love politics. Now, as a food blogger, discussing politics has always been a touchy subject because it’s such a personal thing and I don’t want to alienate anyone who just came here to look at bundt cakes. I’ve touched on a few specific topics over the years, when the issues at hand were incredibly important to me, but for the most part, I’ve left that part of my life out of Brooklyn Homemaker.

Don’t worry though, Stephanie and I will NOT be discussing current events on our show. There are plenty of voices out there already doing that. Our podcast will actually be about the politics of the past, specifically political scandals from American History! The show is called Beyond Reproach, because while we believe public servants should be squeaky clean upstanding citizens, history has shown us time and time again that they definitely ain’t. I know this topic may sound dull, but I promise it’s presented in a really fun way. Basically, we’ll be telling each other stories from America’s sordid past as we drink fancy cocktails, talk too much, interrupt each other, put our feet in our mouths, and go off on (sometimes totally unrelated) tangents. If cursing offends you, this probably isn’t the show for you, but I promise it’s hilarious, eye-opening, and educational all at once!

sherry cobbler | Brooklyn Homemaker

What does all this have to do with this old-timey cocktail recipe you ask?

Well, for each episode we choose a cocktail that was popular during the era of the first scandal we discuss. In our very first episode, Stephanie tells a story from the late 1800s, so this was the first cocktail we featured.
Not only that, but today also just happens to be the very day that we officially launched the show, and to celebrate I wanted to share my fun new project with all of you! Nothing would make me happier than to have you come over and check us out!
I won’t overwhelm you with all the social media and all that, but please click these links to find us on itunes, and check out our show’s website.

Please do check us out, and if you like us, don’t forget to subscribe to the show, and maybe even give us a rating or review on your favorite pod catcher!!!

Thanks y’all! I hope to see you over at Beyond Reproach!

sherry cobbler | Brooklyn Homemaker

The Sherry Cobbler

  • Servings: makes 1 cocktail
  • Print
Adapted from Bon Appetit

2 orange wheels (1 for garnish)
2 lemon wheels (1 for garnish)
2 teaspoons superfine sugar, (or 1/2 oz simple syrup)
3 ounces dry Sherry (amontillado or mazanilla)
mint sprig and raspberries for garnish

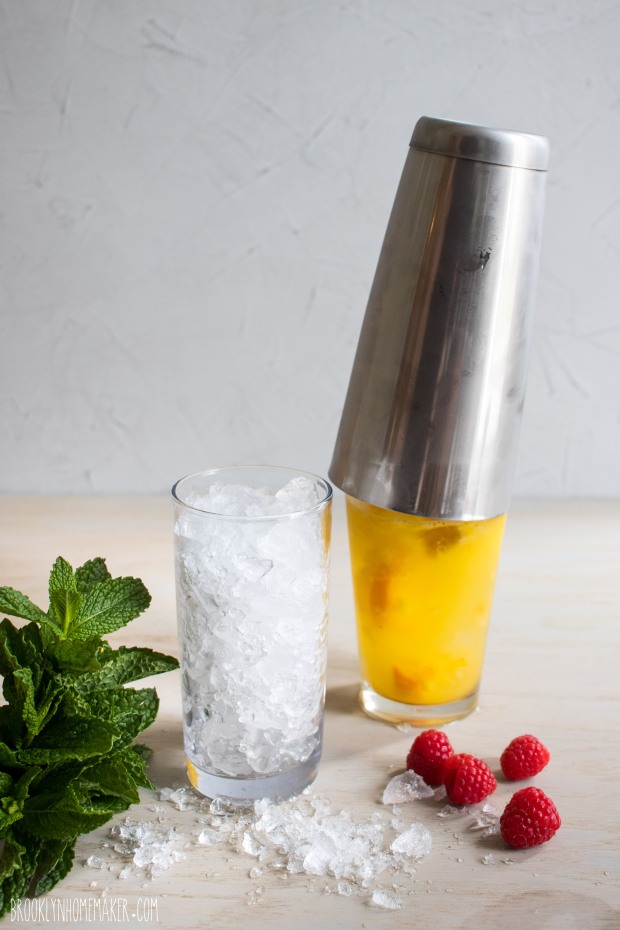
Muddle 1 orange wheel, 1 lemon wheel, and sugar or simple syrup together in a cocktail shaker. Add Sherry and plenty of ice, and shake vigorously until outside is frosty, about 30 seconds.
Strain into a collins or highball glass filled to the top with crushed ice. Add more crushed ice, packing into the glass and mounding above rim. Garnish with mint, raspberry, an orange wheel, and a lemon wheel. Drink with a straw, and enjoy!

triple blueberry layer cake

Well look at me, another fancy ass layer cake!

triple blueberry layer cake | Brooklyn Homemaker

I generally try to reserve these “celebration” cakes for special occasions, namely my blogging anniversary or my birthday or Russell’s, mostly because they’re a whole mess more complicated than bundts or simpler “everyday” cakes, but also because I really don’t need all this cake in my house on the regular.

triple blueberry layer cake | Brooklyn Homemaker

Only about a month after my own birthday though, another special occasion came up that was a huge deal and really called for a seriously fancy ass cake.

triple blueberry layer cake | Brooklyn Homemaker

Last week my grandfather turned 90 years old!!!

To celebrate, we had a little reunion with 4 generations of grandpa’s family and it could not have been a more perfect day. It was so great to see everyone, especially some cousins I hadn’t seen in maybe a decade or more. There was even a sidewalk snail race thanks to the tupperware full of snails my little nephew found in my sister’s garden the day before.

Of course, it being my family, we definitely overdid it with the food. We did a pot-luck style bbq with all the traditional sides; bratwurst, hot dogs & burgers, German potato salad, baked beans, pasta salad, veggies, cheese & crackers, deviled eggs, watermelon & a fruit tray. My grandma spent the better part of the day going around telling everyone to eat more because we’d never get through everything. I brought my favorite coleslaw, and of course, I was in charge of dessert.

triple blueberry layer cake | Brooklyn Homemaker

To be honest, I can’t even imagine living to 90 years old, especially looking as great and remaining as active as grandpa is at his age.

Although he definitely needs more help around the house than he used to, he and my grandma still live in the country on their own and he still keeps a garden and a small fruit orchard.

A few years ago he had to give up on the gigantic strawberry patch he used to have because he couldn’t bend down to pick them all, but since then he’s planted a couple dozen blueberry bushes, all different varieties so they ripen at different points in the summer, and now blueberries are his favorite!

triple blueberry layer cake | Brooklyn Homemaker

So, I knew blueberry cake was the way to go for grandpa’s 90th!

Grandpa loves blueberry pie, so I made a fresh blueberry jam/pie filling to use between the layers of cake, and then for a brighter, fresher blueberry flavor, I decided to use freeze dried blueberries in the actual cake recipe. When you use freeze dried fruit, it retains much of the freshness of actual fresh fruit, but it’s completely dry so it doesn’t water down your batter. I ground the berries into a powder in the food processor and then mixed that into part of the batter, swirling that in to the remaining plain batter like marble cake.

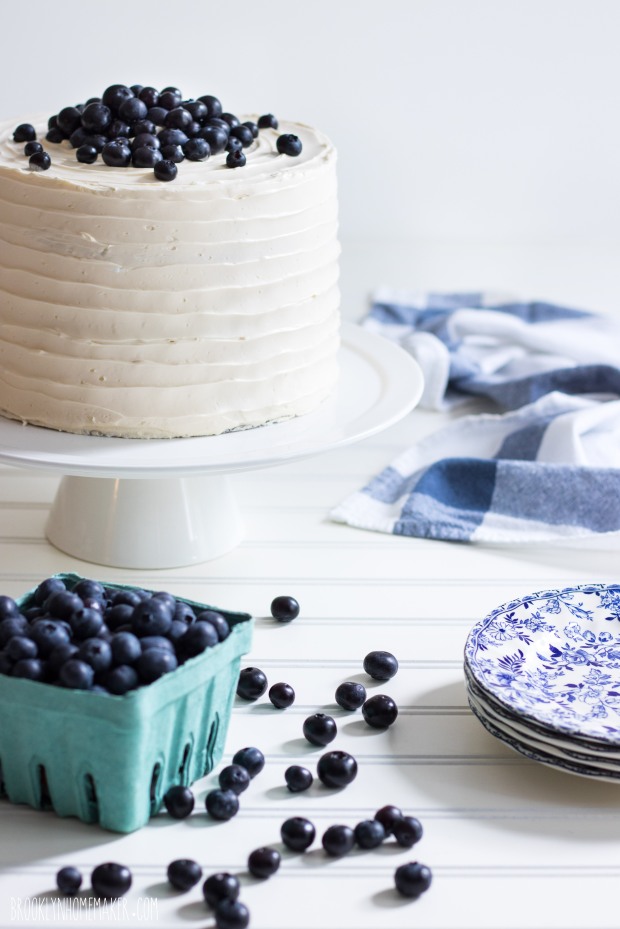
At first I considered adding lemon zest to the icing, but opted for simple vanilla to avoid competing with the blueberry flavor. Last but not least, the cake was topped with a mound of fresh blueberries, both for flavor, and so that people could tell it was a berry cake even though the icing was solid white.

triple blueberry layer cake | Brooklyn Homemaker

The cake was a HUGE hit. Usually a quiet, stoic German man, complements don’t come super easily from my grandpa, but he must have come over to compliment and thank me for this cake at least 5 times. Nice and moist and not to sweet. His cousin even came over to shake my hand because he liked it so much!

This cake is SUPER blueberry-y. The freeze dried blueberries really come through, and just like grandpa said, the cake is moist and tender and just sweet enough. The blueberry filling tastes just like blueberry pie filling or homemade jam, and the vanilla Swiss meringue buttercream is delicately sweet, smooth and silky, and definitely lets the blueberry filling shine without anything competing with it.

If you love blueberries, you HAVE to make this cake y’all!

triple blueberry layer cake | Brooklyn Homemaker

Triple Blueberry Layer Cake

  • Servings: 12 to 16-ish
  • Print
Blueberry Vanilla Swirl Yellow Cake
makes three 8-inch layers

3 1/3 cups all purpose flour (plus 1 tablespoon for blueberries)
1 1/4 teaspoons salt
1 tablespoon baking powder
1/2 cup (1 stick) unsalted butter, room temperature
3/4 cup peanut oil or vegetable oil
2 1/4 cup granulated sugar
4 large eggs
2 1/2 teaspoons vanilla extract
1 1/2 cups buttermilk
1.2 oz bag freeze dried blueberries (about 1 cup)

Preheat oven to 350 degrees.
Line the bottoms of three 8″ cake pans with parchment paper. No need to butter and flour the pans. *see note
In a medium bowl, whisk flour, baking powder, and salt until well combined.
In the bowl of a stand mixer with the paddle attachment, cream butter and sugar on high for about 3 minutes, or until pale and fluffy. Reduce speed and add oil, then the eggs, one at a time, fully incorporating after each addition. Add vanilla until just combined.
Alternate adding flour mixture and buttermilk, beginning and ending with flour (3 additions of flour and 2 of milk), fully incorporating after each addition.
Add 1 tablespoon of flour & freeze dried blueberries to a food processor and pulse into a fine powder. Its okay if there are a few small chunks left, but get it as fine as possible.
Divide about 1/2 to 2/3 of the batter evenly between the three pans. Mix the freeze dried blueberry powder into the remaining 1/3 to 1/2 of the batter and fold in to combine. Divide blueberry batter between the three pans by dotting the tops of the cakes, then use a small spatula or knife to swirl it in.
Bake for 30-35 minutes or until a toothpick or cake tester inserted into the center comes out clean. If using bake-even strips, they may need a few additional minutes.
Transfer pans to a wire rack to cool for 30 minutes. Invert cakes onto rack, peel off parchment, and let cool completely.
If the cakes domed in the oven, you’ll want to slice the very tops of the cakes off to make each layer completely flat and level for a more professional look. You can do this using a very sharp bread knife, or a cake leveler.
If you’re not assembling cakes right away, individually wrap each layer tightly in plastic wrap to prevent drying. Layers can be stored in the refrigerator for a day or two, or frozen (wrapped in plastic wrap first, then aluminum foil) for up to two weeks. You may want to consider brushing the layers with simple syrup if you’re refrigerating or freezing them.

*baker’s note: Not buttering or flouring your cake pans actually helps the cakes keep their shape better when cooling and helps prevent the outer edges of the cakes from overcooking. The parchment will allow the bottoms to release from the pans easily, but you may need to run a knife or a toothpick around the outside edge before turning out of the pans.

Blueberry “Jam” Filling:
(You may also use store bought blueberry jam)
18 oz Fresh Blueberries (about 4 cups)
2 cups sugar
pinch of salt
3 tablespoons corn starch

Reserve about 1/2 cup of the blueberries for the decoration/topping of the cake. Pulse the remaining 3 1/2 cups berries in a food processor just to break them up a bit. Don’t puree them. You can also mash them up with a potato masher instead.
Add the blueberries to a large heavy pot or sauce pan, and stir in the sugar, salt, & cornstarch. The mixture will boil up a lot so a large pot is important.
Bring the mixture to a rolling boil over medium-high to high heat, stirring occasionally, and boil for 15 minutes or until reduced and thickened.
Transfer to a heat safe bowl or container and refrigerate until ready for use. If it’s a bit thinner than normal jam, that’s fine.

Vanilla Swiss Meringue Buttercream Icing:
Adapted from “Layered” by Tessa Huff
3/4 cup fresh egg whites (not pasteurized egg whites)
1 1/2 cups sugar
pinch of salt
2 cups (4 sticks) unsalted butter, at room temperature (cut into 1 tablespoon slices)
2 1/2 teaspoons pure vanilla extract

Place the egg whites, sugar, & salt in a very clean bowl of a stand mixer and whisk them together by hand to combine. Fill a medium saucepan with an inch or two of water and bring to a simmer over medium to medium-high heat. Place the mixer bowl over the saucepan to create a double boiler. Be sure that the bottom of the bowl doesn’t directly touch the water, and that the water doesn’t reach a full boil.
Heat the egg whites until they register 160F on a candy thermometer, whisking regularly to avoid cooking the whites. As soon as they’re at the correct temperature, carefully attach the mixer bowl to the stand mixer and add the whisk attachment.
Beat the egg whites on high speed for 8 to 10 minutes until they hold stiff peaks and the outside of the bowl is cooled to room temperature. Stop the mixer and swap the whisk attachment for the paddle.
On low speed, add the butter, a few tablespoons at a time, waiting for it to incorporate before adding more. Once all the butter is mixed in, add the vanilla extract and mix in to incorporate. Turn the mixer up to medium-high and beat until the buttercream is smooth and silky, about 3 to 5 minutes.
If the mixture starts to look curdled, just keep beating. It’ll come together.
If the whites were still too warm when the butter was added and the buttercream is too thin and soupy, refrigerate the bowl in 10 minute bursts until it’s cool (but not cold) and beat again until smooth.

Assemble cake:
Place the first cake layer on an 8″ cardboard cake round, serving plate, or cake stand. Using a cake round will make it easier to ice and decorate, especially if you have a revolving turntable for decorating (I use a lazy suzan, but you can also just spin your plate or cake stand while you work).

Fit a piping bag with a large round or star tip and fill with a cup or two of the Swiss meringue buttercream. Pipe a thick dam of icing around the outside of the cake to contain the blueberry filling. This will ensure that the filling stays in place and doesn’t squish out when the layers are stacked.

Place about half of the filling in the center of the cake and spread it smooth and even using an icing spatula. Add the next layer of cake, looking from directly over the top and from eye level at the cake to make sure each layer is directly one above the other, rotating the cake to be certain. Repeat the same procedure with the buttercream dam and the other half of the filling, then add the third and final layer of cake and check for straightness again. Using about half of the remaining icing, crumb coat your cake (If you have any icing left in the piping bag, empty it out and use that too). Starting with the top of the cake, spread the icing thin and work some of it down the sides of the cake to completely cover the whole thing in a thin, smooth, even coat of icing. This first layer of icing seals the cake and keeps crumbs from being visible in the outer layer of icing. It may seem like unnecessary trouble, but it really is worth it to get a smooth professional finish on the icing.

Place the cake in the refrigerator for about 30 minutes to an hour to help set the icing and firm up the cake.
Reserve about 1/4 cup of icing for decorating (optional), and spread the remaining buttercream over the whole cake the same way you did the crumb coat. Start by smoothing the top and slowly working the icing down the sides to cover the cake completely. Try to get the icing as completely smooth as possible with straight sides and a flat, level top. I use a long offset icing spatula. If desired, once the icing is smooth, you can use the tip of a small icing spatula or butter knife to create a swirl in the top & sides. Make a small smooth mound in the center of the top of the cake with the reserved 1/4 cup of icing, and cover the mound as completely as possible with the reserved fresh blueberries so it looks like a heaping pile of blueberries. (If you tried to just make an actual heaping pile of blueberries, they’d roll off the top of the cake) If you have some blueberries left, dot them around the mound so they look like they spilled away.

Refrigerate the cake again for at least another 30 minutes to set the icing before covering or serving.

This cake will keep well in a cake saver at room temperature for a day or two if the weather is not too hot or humid. Otherwise, cover tightly and store in the refrigerator for up to 3 days.

If refrigerating, bring cake to room temperature at least two hours before serving.