homemade

kale cobb salad

So this is kind of a weird and personal post and it feels strange to be writing this, but lately I’ve been feeling kind of…

Off.

kale cobb salad with balsamic vinaigrette | Brooklyn Homemaker

My energy levels have been in the toilet and I’ve just felt run down and kind of crumby most of the time. Even blogging, which has always felt like an escape from the stresses and monotony of my life, has begun to feel like a chore.

kale cobb salad with balsamic vinaigrette | Brooklyn Homemaker

After months of denial, I’ve finally had to admit to myself that my weight is probably a major factor in how cruddy I’ve been feeling lately.

I’ve always been a little on the thick side, and haven’t been “beach ready” since I was probably 7 years old. Over the past few years though, I’ve packed on a little extra padding and recently it’s felt…

Uncomfortable.

kale cobb salad with balsamic vinaigrette | Brooklyn Homemaker

When Russell and I first met we were both much slimmer than we are now, though again, far from svelte. When we first started dating I used every trick in the book to woo him, and as you can probably imagine, most of the tricks in my book are food related. Once we moved in with each other and realized we were together for good, we just got comfortable and didn’t really notice as we gained a pound here and another there.

Shortly after we married I started this blog. Especially in the beginning, a lot of the dishes I was making were old family recipes that are near and dear to my heart, but also tend to be pretty heavy. These are dishes that are fine for special occasions, but I was making (and consuming) them much more often than I probably should have been.

As much as I love to cook, my true love has always been baking, so in addition to the heavy family recipes I also started baking even more than I used to. For whatever reason, I also really enjoy photographing the sweets and treats more than the savory dishes, so that was just one more contributing factor in the sudden explosion of cakes and pies and cookies pumping out of my oven. And then, of course, there are the bundts…

kale cobb salad with balsamic vinaigrette | Brooklyn Homemaker

I mean, not everything I post here is rich, heavy, and unhealthy. I actually think I have done a decent job of coming up with some pretty fun and creative (and delicious) healthy recipes every once in a while, but those recipes tend to be few and far between. That’s also not to say that I’m only eating the food that I post here on the (web) pages of Brooklyn Homemaker. Day to day, I think Russell and I do a pretty good job of trying to eat healthy “whole” foods and plenty of vegetables, but the less exciting recipes in my repertoire (or his) don’t ever show up here.

We really just need to focus on portion control, moderation, and keeping active. I don’t think it’s realistic to think I’ll ever look like an Olympic swimmer or track and field star, but I’m no spring chicken and I definitely need to start considering my health if I want to stick around for a good long time.

For the past week (I know, a whole week, woopty-freaking-doo) I’ve been eating healthy, avoiding carbs where I can, and trying to break myself of the habit of looking for something sweet after dinner every night. Fighting the sugar addiction has been especially hard for me but I’ve been strong so far. I’ve also been walking home from work every day (about a two and a half miles) and I’m in the process of looking for a gym that doesn’t cost a million dollars and isn’t totally disgusting.

kale cobb salad with balsamic vinaigrette | Brooklyn Homemaker

Aaaaanyway…

I’m not writing all this to say that I’m going to stop blogging, or to say that I’m suddenly turning Brooklyn Homemaker into a health food and fitness blog, espousing the health benefits of an all-bean-sprout diet. I’m just writing this to let you know that I’m going to try, just try, to focus a bit more on healthy dishes and a bit less on baking and sweets and the heavy hearty food I was brought up eating.

Honestly, I’m probably writing this more for myself than for you. I think I might be writing this as a way to hold myself accountable for my health. If I write it here, for all the world to see and read, I have to stick with it or I’ll look like a real dummy. A real overweight dummy.

Please don’t be too harsh if I end up failing…
Pretty please?

I’m not really sure how I’m going to go about all this going forward either. I’d really like to tell myself (and you) that I’m going to post super flavorful & creative healthy dishes all the time, and the baked goods and heavy dishes will be the ones to show up only every once in a while. Realistically though, I know I just love to bake, so maybe my “cheat day” recipes will end up showing up here just as often as my “don’t be such a fatty” recipes. I really don’t want to call this a “diet” (ugh). I just want to do what I can to teach myself how to cook, and eat, and blog, a little differently; in a way that will make me feel better and that I can stick to for years to come.
I guess only time will tell. Wish me luck!

kale cobb salad with balsamic vinaigrette | Brooklyn Homemaker

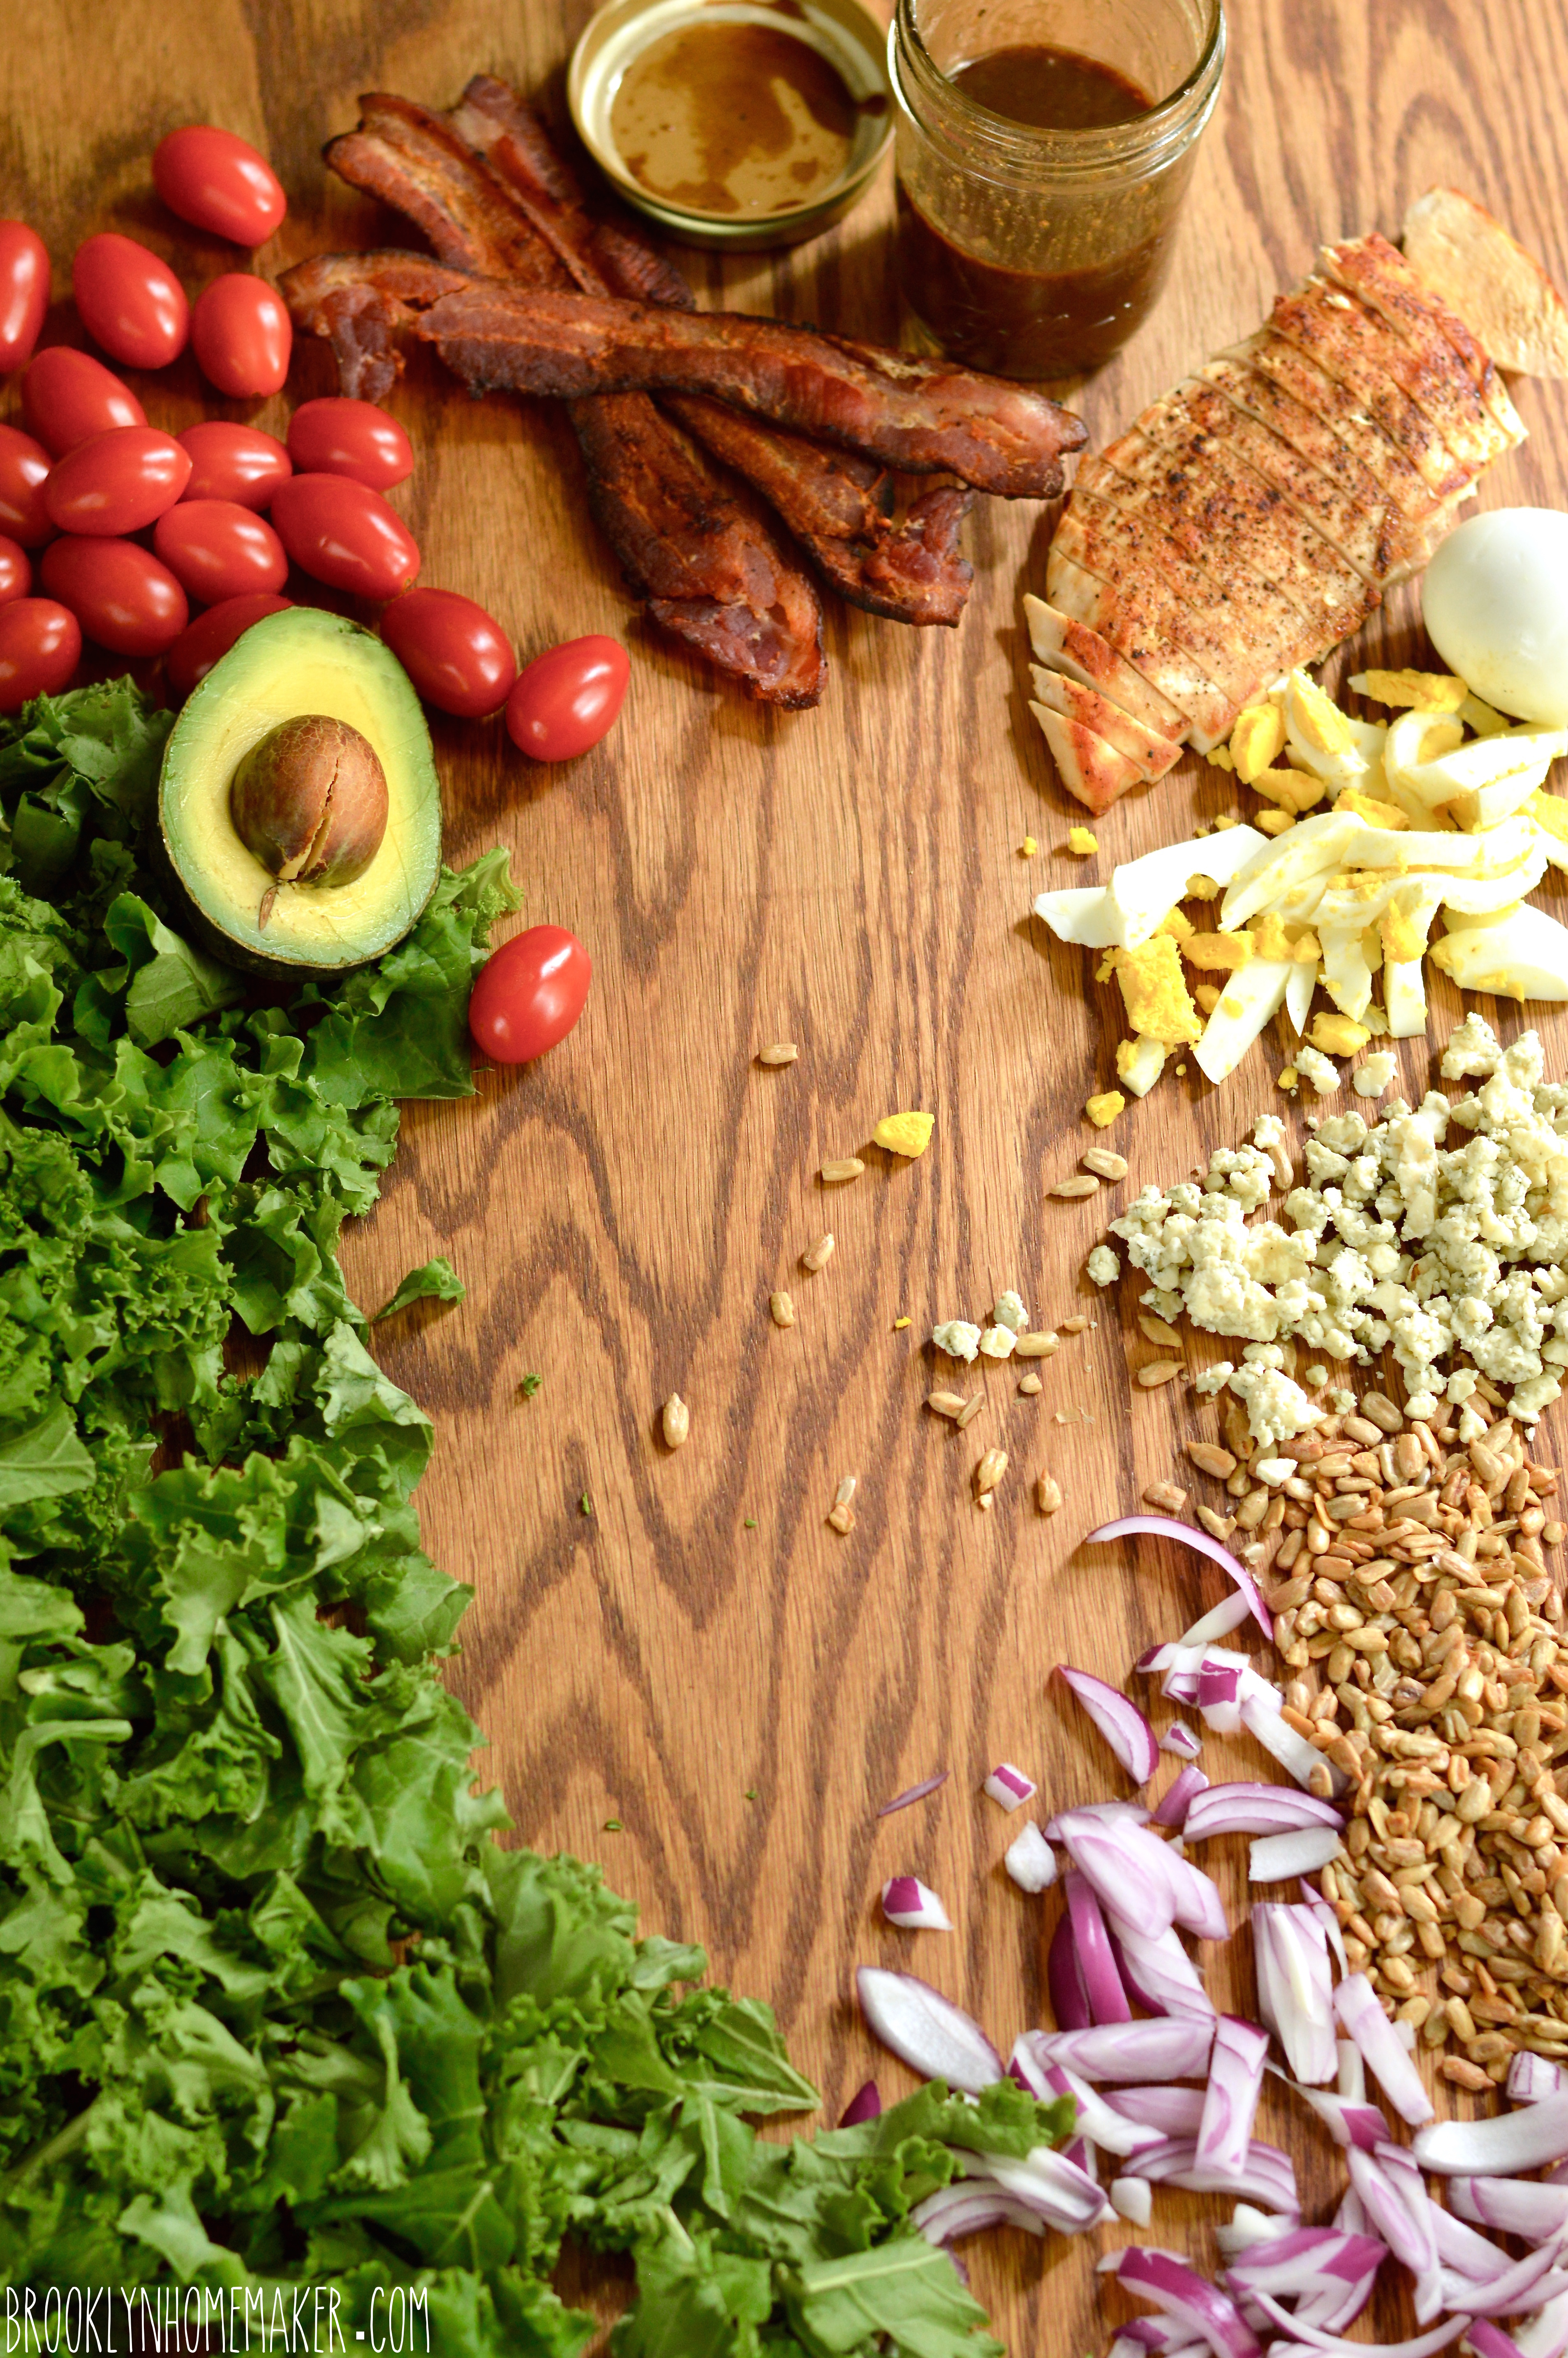
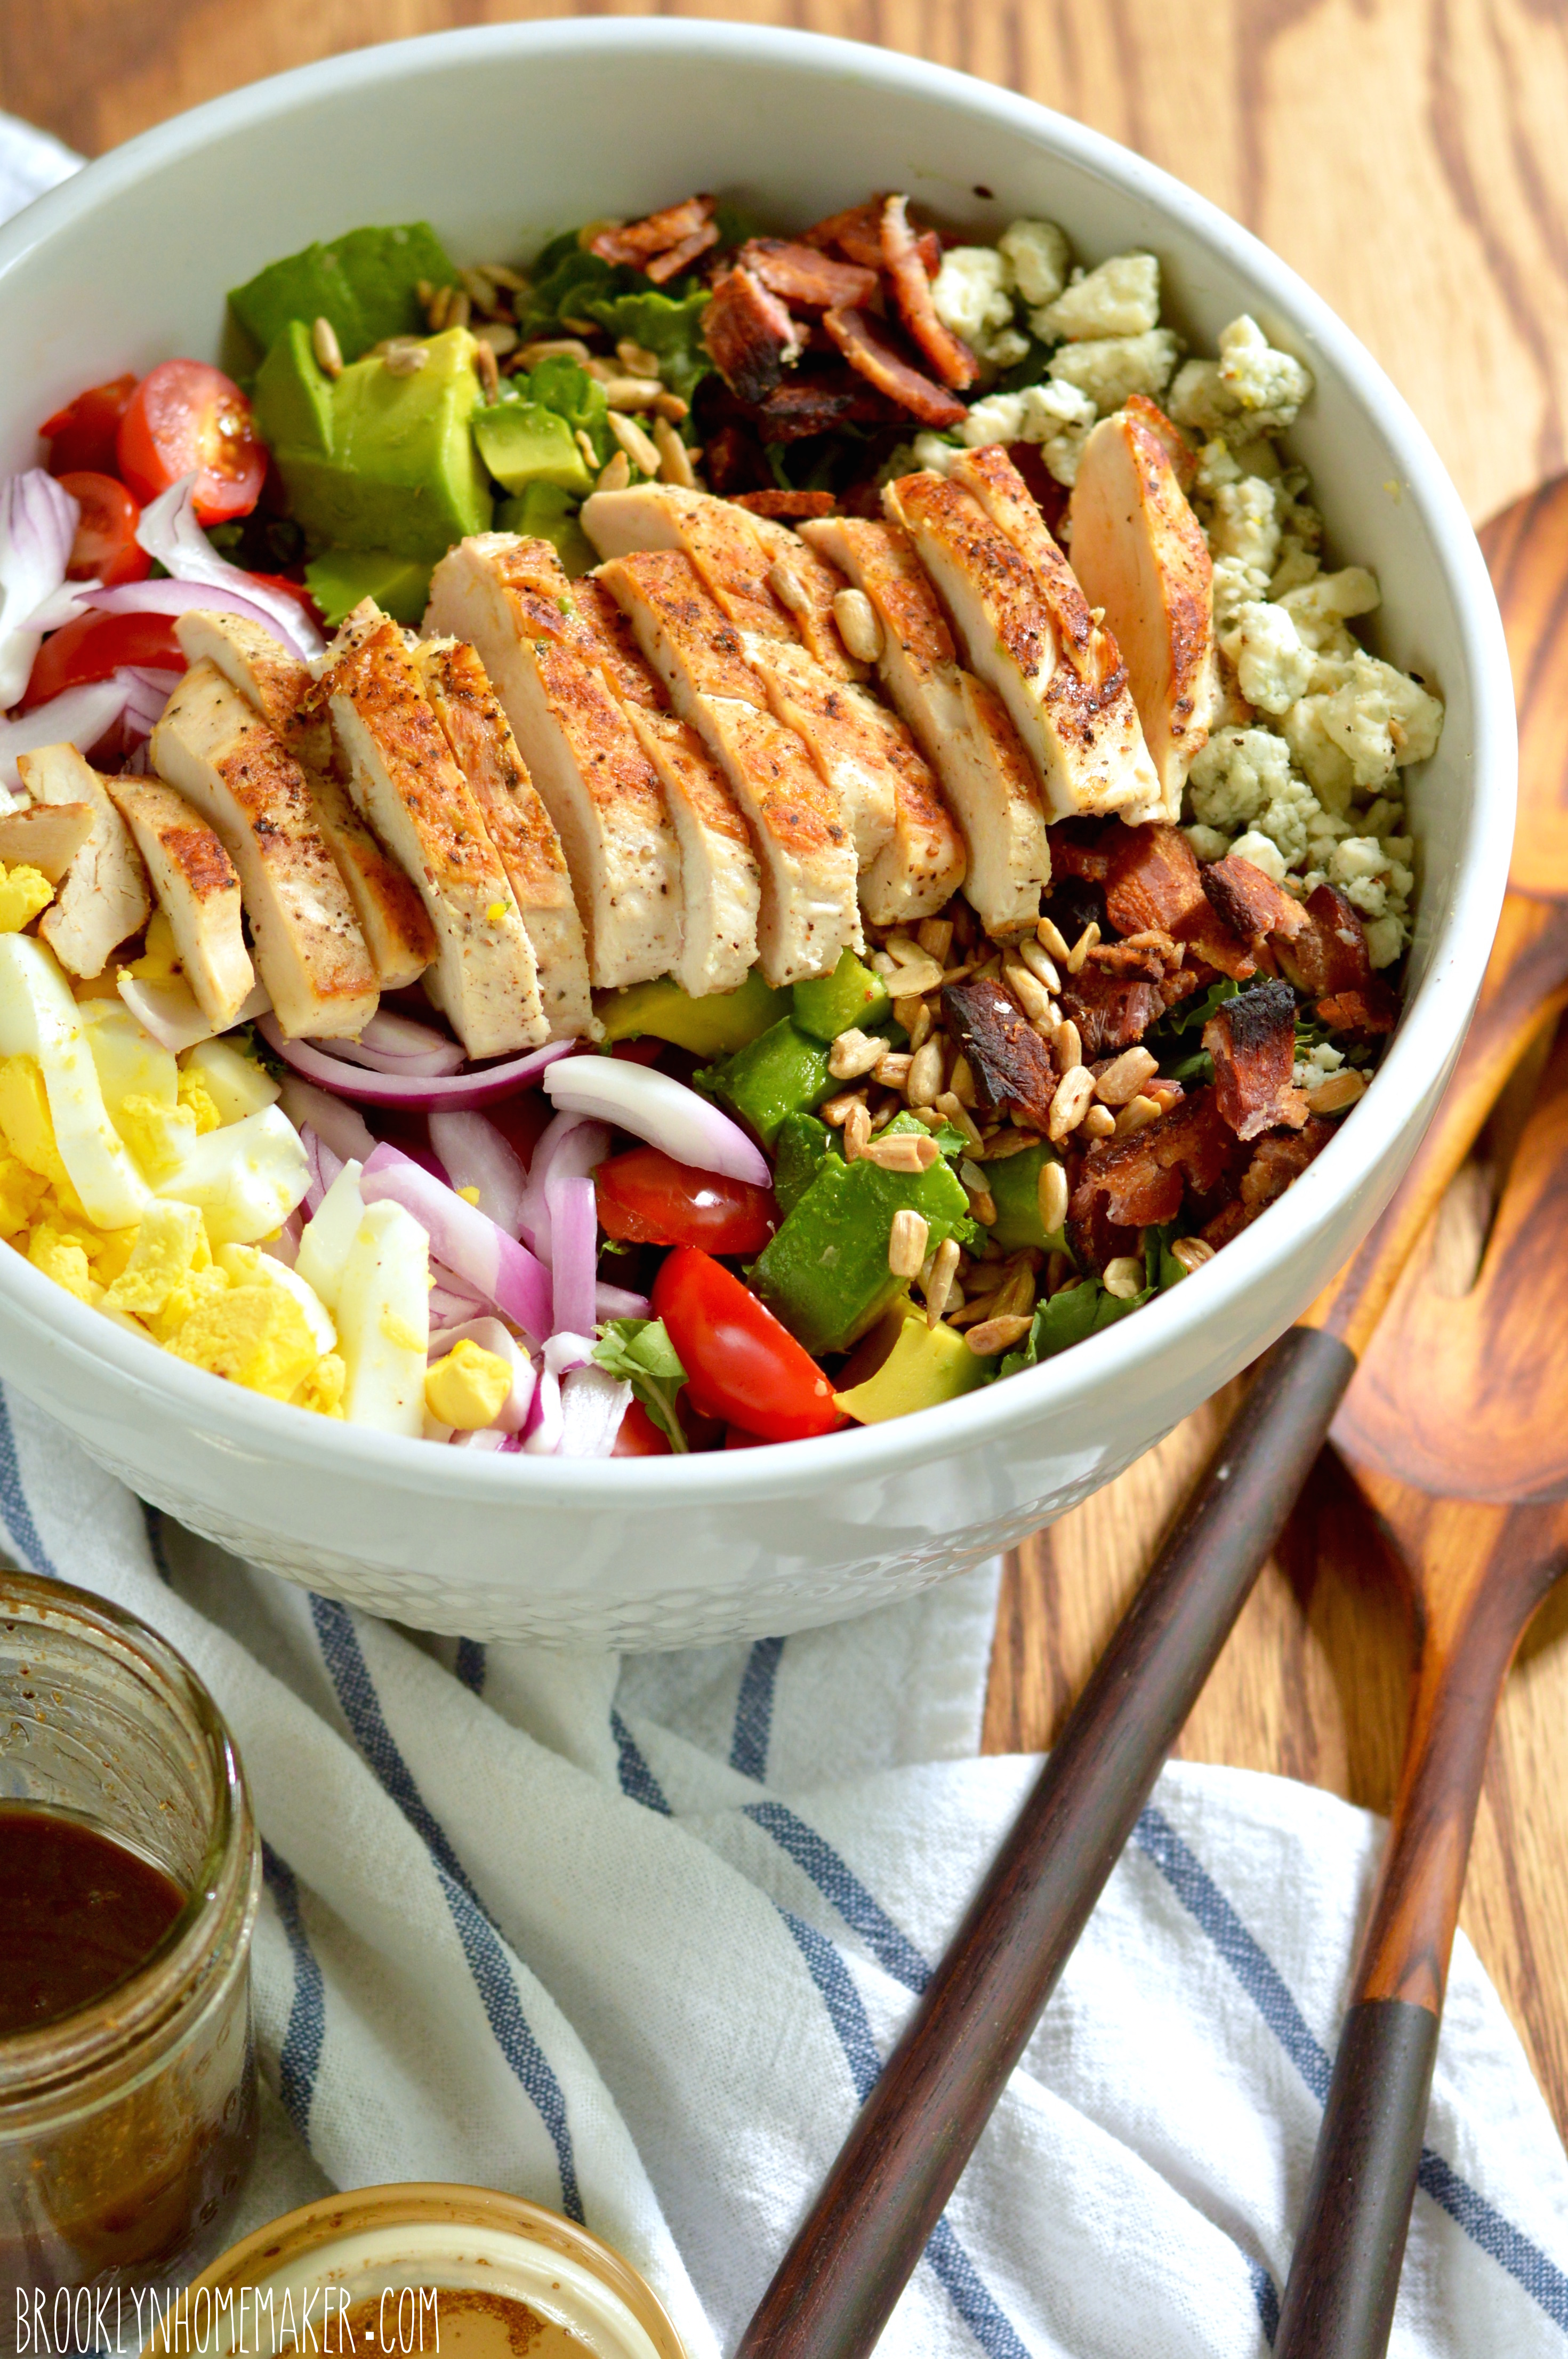
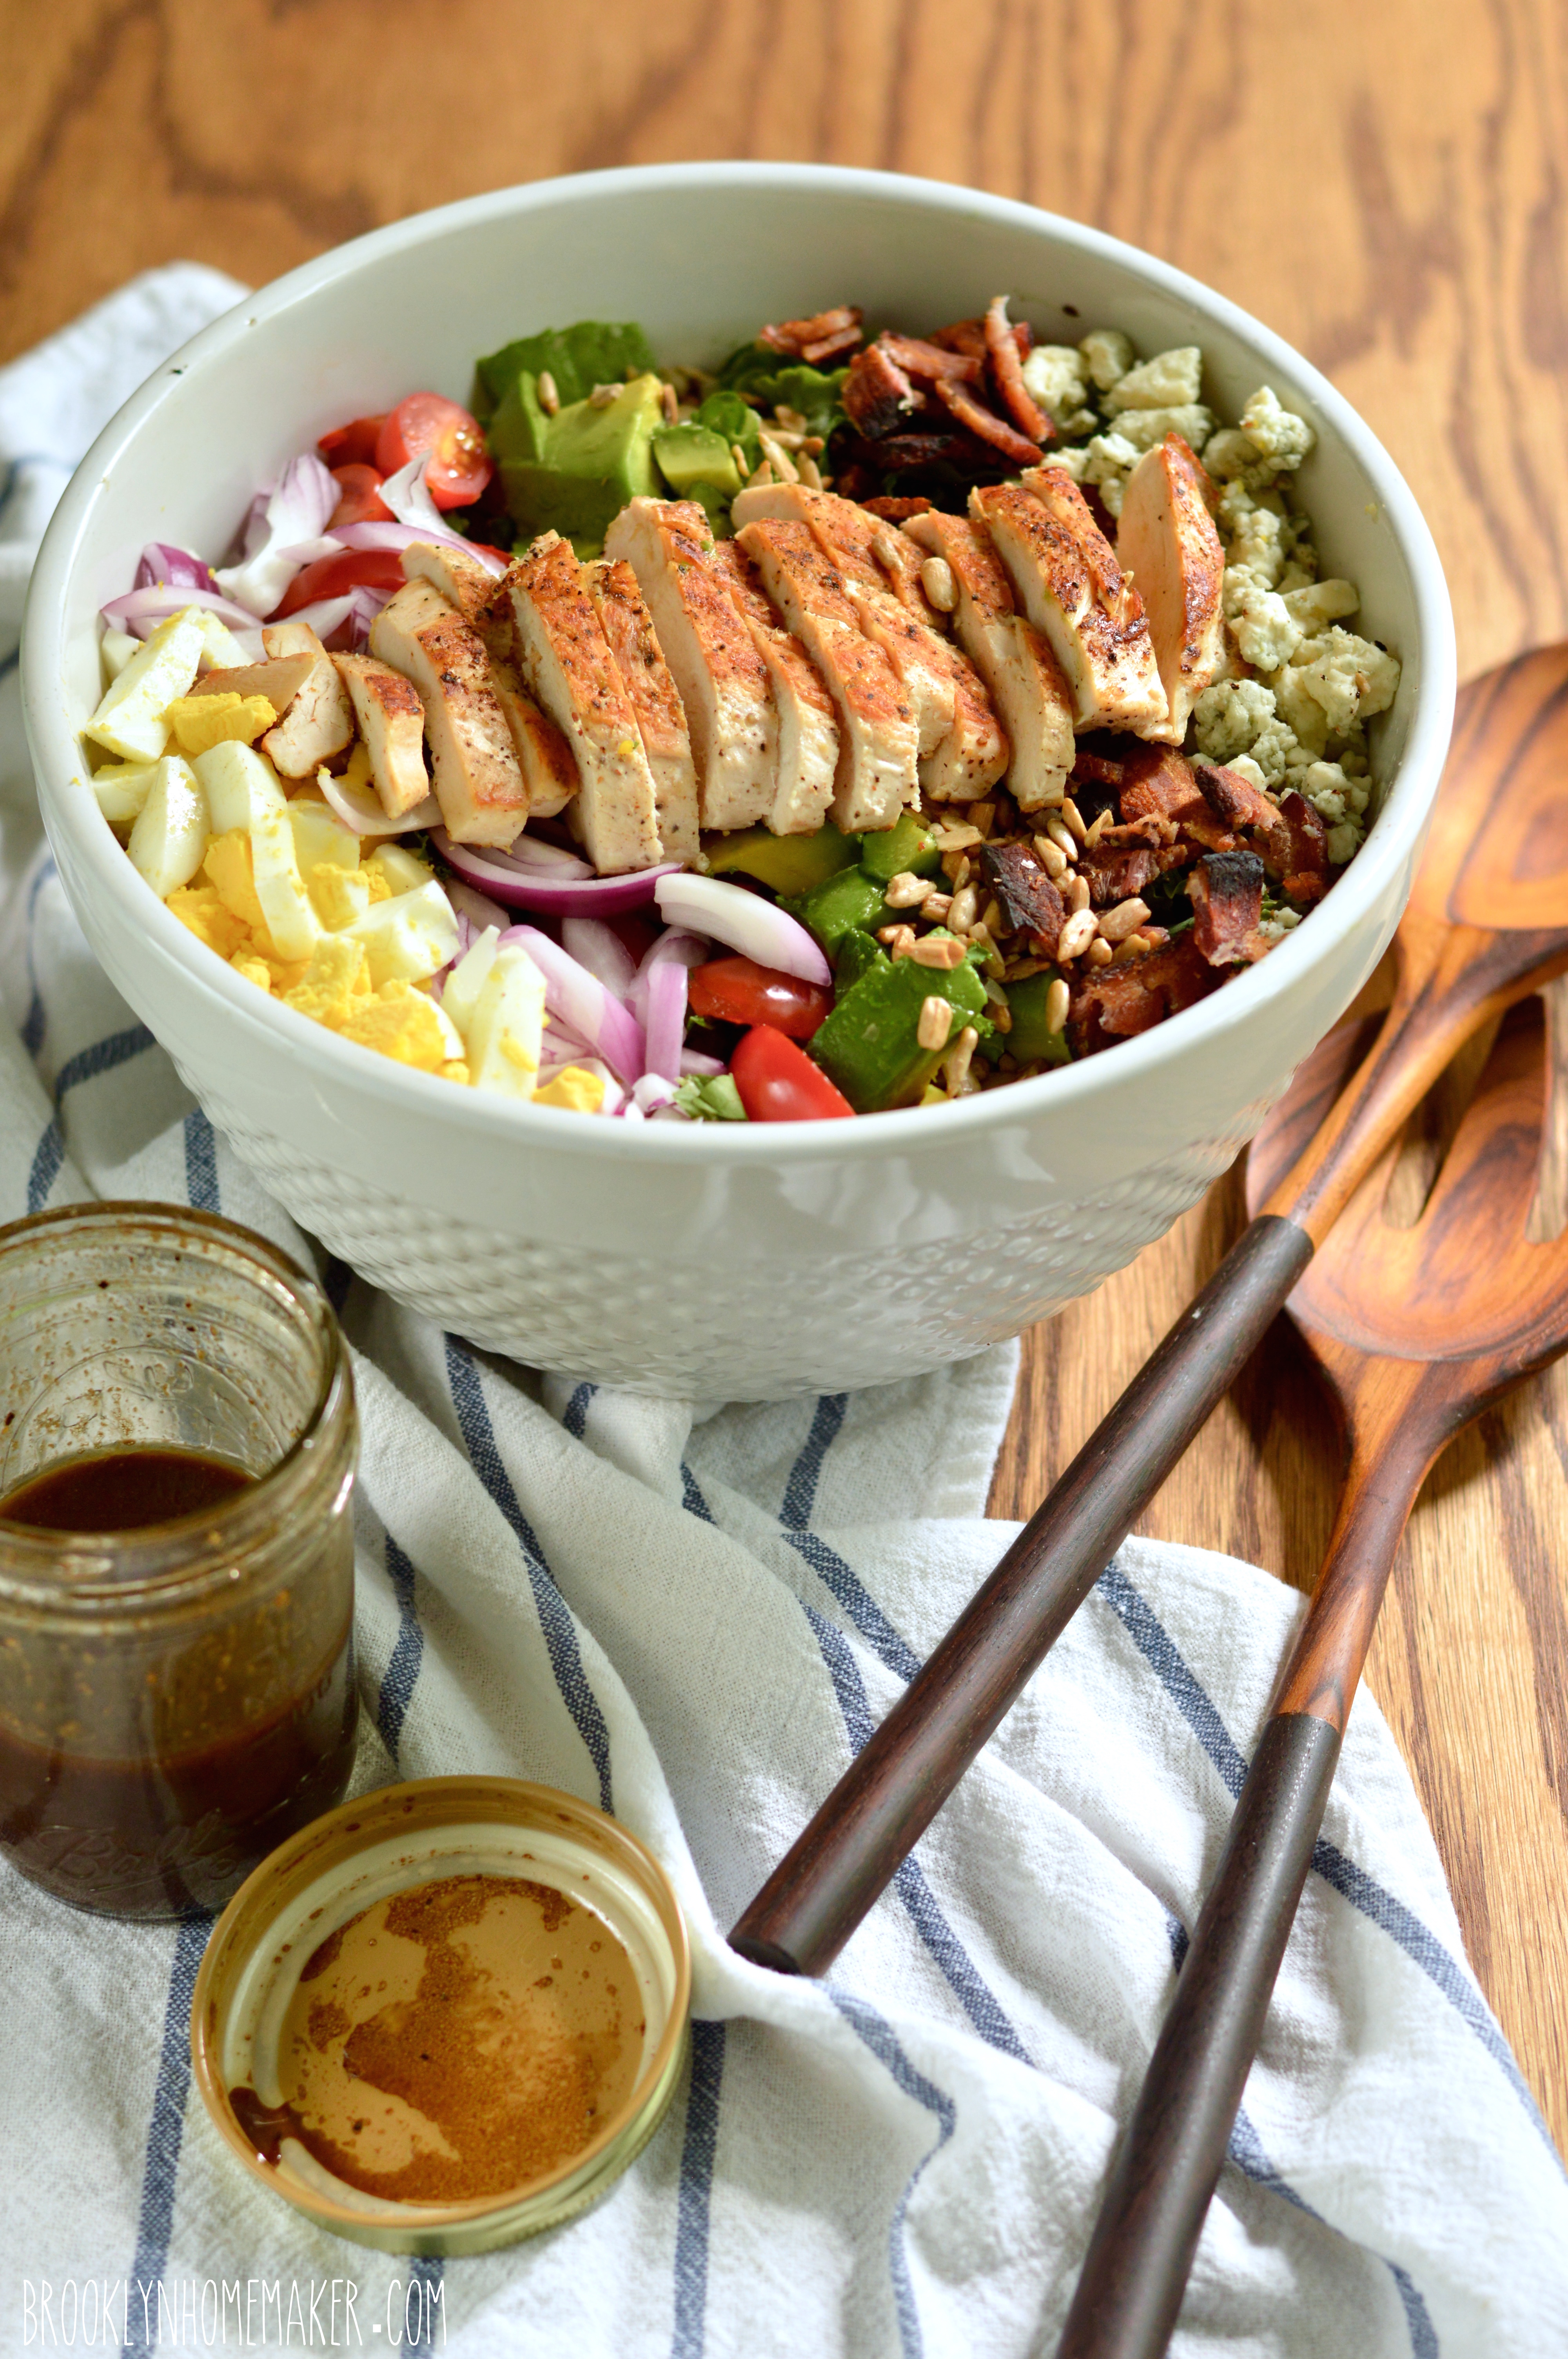
Okay, so let’s finally talk about this salad. I know that a cobb salad is not really the healthiest salad in the world. I promise that I know that adding bacon and blue cheese and eggs to a salad makes it less healthy than if I were to just munch on a bowl of lettuce with lemon juice.

BUT!!!
I’ve made some changes to the classic cobb recipe to try to healthy it up a little bit.

First of all, kale is like the king of all health foods right? It’s packed with vitamins and minerals and fiber and good stuff, and packs a lot more healthy punch than romaine does for sure.
Second, even though I kept the bacon and blue cheese (because it wouldn’t be a cobb without them) I did reduce the proportions of the bad ingredients vs the good ingredients. If you wanted to, you could leave them out, but I do think that they’re worth keeping around for flavor and contrast and to make the salad feel like a truly satisfying meal.
Third, while I did keep the crumbled blue cheese, I opted for an easy homemade balsamic vinaigrette rather than blue cheese dressing to gussy up my fancy pants dark green kale leaves.
Aaand, fourth and finally, I added some sunflower seeds for texture and crunch, and because I love sunflower seeds in a salad okay?

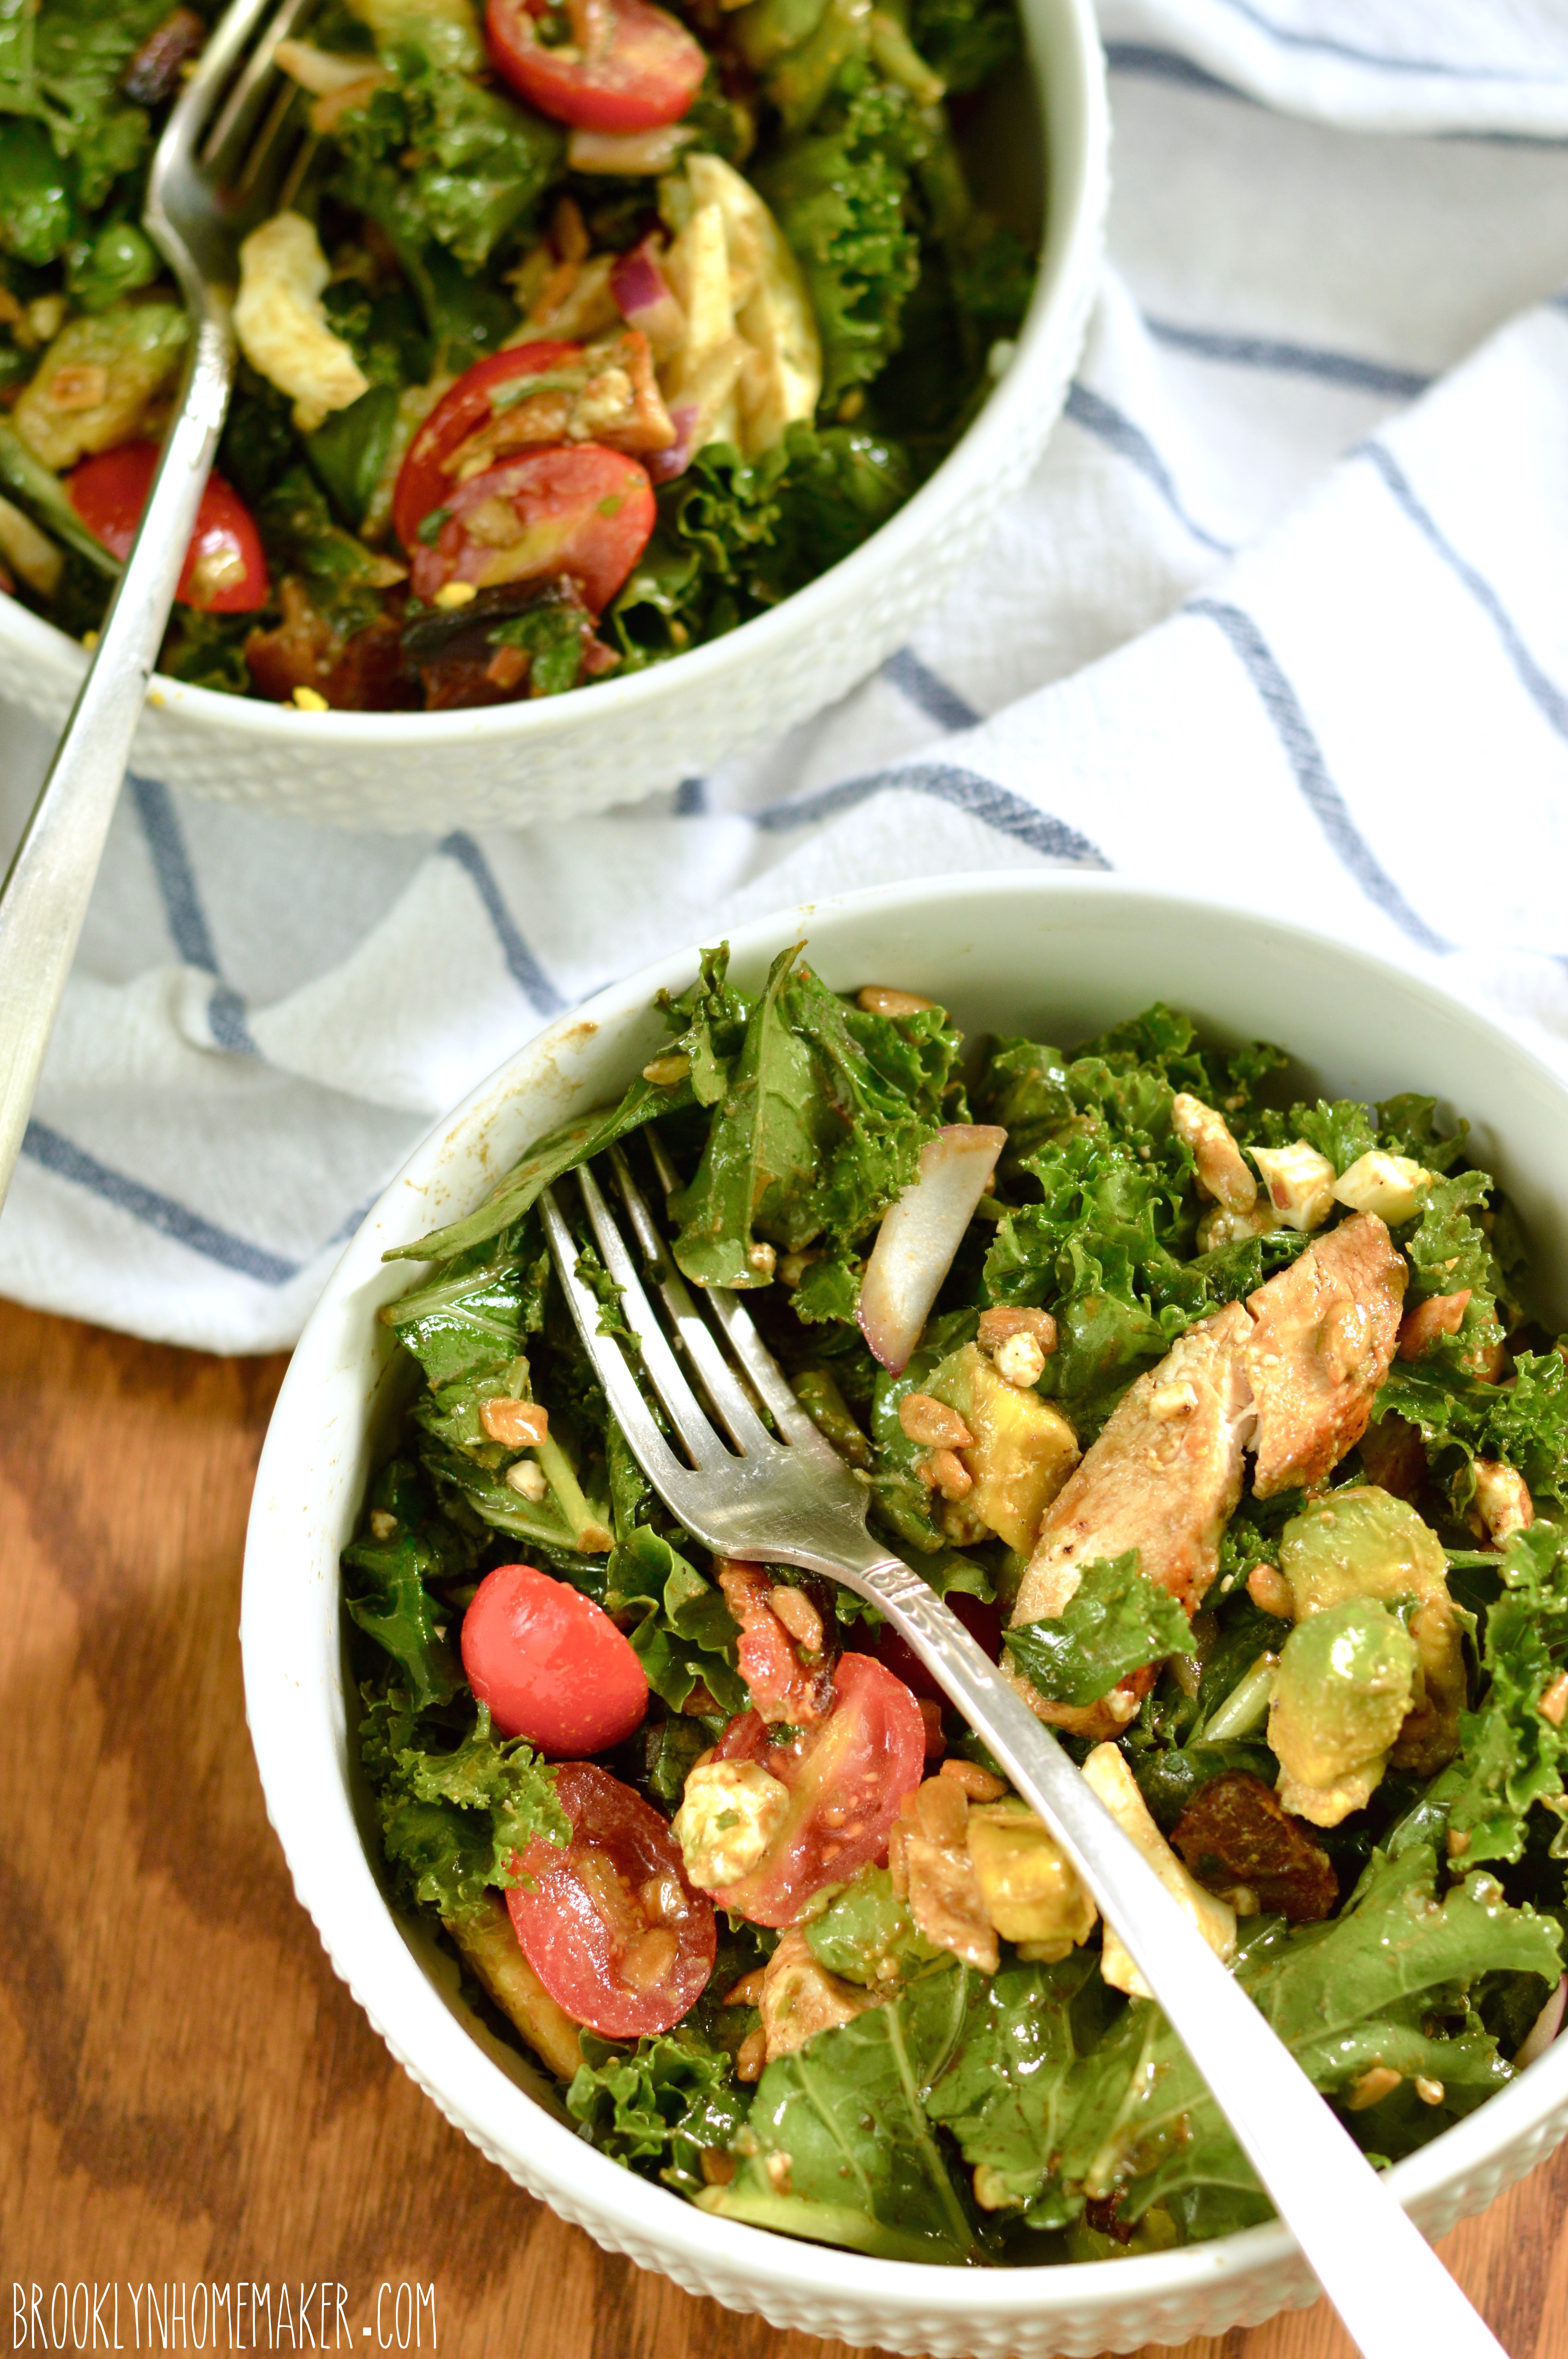
While this version of a cobb is healthier than one you might find in a restaurant, it doesn’t taste at all like “health food” and that’s definitely what I was going for! Here’s to our health!

kale cobb salad with balsamic vinaigrette | Brooklyn Homemaker

Kale Cobb Salad with Balsamic Vinaigrette

Dressing:
1/4 cup olive oil
2 tablespoons balsamic vinegar
1 teaspoon dijon mustard
Salt & Pepper to taste

Salad:
1 skinless boneless chicken breast
2 to 3 strips thick cut bacon
1/2 avocado, cut into bite sized cubes
1/2 cup grape tomatoes, cut in half lengthwise
1/4 cup crumbled gorgonzola or other blue cheese
2 boiled eggs, roughly chopped
1/4 cup sunflower seeds
1/4 cup thinly sliced red onion
3 to 4 cups chopped kale leaves

Combine all dressing ingredients in a small bowl or a small jar with a watertight lid. Whisk or shake dressing together until well combined and emulsified. Refrigerate until salad is ready to toss.

Season chicken breast with salt and pepper and sear or grill until cooked through. Let rest for 5 to 10 minutes before slicing thin or cubing.
Cook bacon over medium to medium high heat until fat is rendered and bacon is brown and crisp. Immediately remove to a paper towel to absorb some of the fat. Once cool, crumble bacon.

Assemble all salad ingredients, including the chicken and bacon, in a large bowl. Pour dressing over the top of salad and toss together using large tongs or salad servers.

Advertisement

garlicy lemony creamy classic hummus

When I was a teenager hummus was a unknown and totally exotic foreign food.

garlicy lemony creamy classic hummus | Brooklyn Homemaker

Those years were recent enough that I probably should have know what hummus was, but I grew up far enough upstate as to be rather isolated from the food trends and cultural open-mindedness of the big city.

garlicy lemony creamy classic hummus | Brooklyn Homemaker

In the 90s in Auburn, NY, the closest most people ever got to experiencing foods from other cultures was Chinese take out or one of the many MANY old school Italian restaurants.

Or maybe Taco Bell.

garlicy lemony creamy classic hummus | Brooklyn Homemaker

When I entered high school I met a whole new group of friends; among them were the punks, hippies, goths, skate boarders, hacky sackers, vegetarians, and vegans of the alterna-teen umbrella. Falling in with a different crowd meant hearing new music, having new adventures, and experiencing new foods.

Sushi! Indian! Falafel! So new! So Exciting!

garlicy lemony creamy classic hummus | Brooklyn Homemaker

One of my favorite discoveries was hummus.

Growing up with staunchly American cuisine and lots of convenience foods, Hummus was completely foreign and exotic to me. It was simply bursting with unfamiliar spices and bold flavors that I’d never encountered before my teen years. Even the texture was new to me, and I couldn’t get enough of the stuff.

I still remember the first time I tried to get my mom to buy some for me in the grocery store and she had no idea what the heck it was or why in the world I’d want to eat it.

garlicy lemony creamy classic hummus | Brooklyn Homemaker

One of my favorite things about hummus even today is how versatile it can be. It makes a great dip at parties, a delicious spread on a sandwich, and even works as a side dish or major part of a meal. One of our favorite things to do when we make our own hummus is to thinly slice, marinate, and broil some chicken breast and serve it alongside some sliced cucumbers, grilled pita wedges, and giant bowl of hummus for dipping.

garlicy lemony creamy classic hummus | Brooklyn Homemaker

There are many different ways to make hummus and just as many flavors you can blend into it. Personally, I prefer a classic approach with lemon, garlic, and cumin. I also like to take the extra step of soaking and boiling dried chickpeas rather than using canned. I think dried chickpeas have a slightly cleaner flavor and make it much easier to control the amount salt you add.

This recipe can be made thick and chunky, or creamy and smooth, depending on how long you process everything. I myself like to let the food processor whir and whir until the hummus is unbelievably smooth and silky. While it’s really traditional to serve hummus with a drizzle of olive oil, I like to add some extra in while it’s pureed for even more velvety creaminess.

While the flavors in this recipe are very traditional, I like to turn up the volume and add a little bit extra lemon and garlic to make sure they really shine through. If you’re not as big a fan of raw garlic, feel free to skip one or two of the cloves.

garlicy lemony creamy classic hummus | Brooklyn Homemaker

Classic Creamy Hummus

  • Servings: makes about 3 or 4 cups
  • Print
1 cup dried chickpeas
1 tablespoon plus 1/4 teaspoon baking soda
1/2 cup tahini
juice of 2 to 3 lemons
3 to 4 cloves of garlic (less if preferred)
1 teaspoon cumin
1 teaspoon salt
1 tablespoon olive oil, plus more for serving

Wash the chickpeas three or four times, or until they don’t cloud the water when submerged. Check for stones and other non-chickpea debris.

Soak the chickpeas in clean water with 1 tablespoon of baking soda for at least 8 hours or overnight. Wash and drain them, and soak again in new clean water for a two or three more hours. The grains should be almost double their original size.

Wash and drain the chickpeas once more and put them in a large pot. Cover with water and add remaining baking soda and NO salt. Bring to a boil, reduce heat to a gentle simmer, and cook until the grains are tender enough to be easily smooshed between two fingers. It should take about an hour to an hour and a half. As they cook some foam may form on the water and skins may rise to the top. Try your best to skim off as much of the foam and as many of the skins as possible. The fewer skins you have the creamier and smoother your hummus will be. Once finished, drain them and reserve some of the cooking liquid.

Let the chickpeas cool for a bit before adding to a food processor. Pulse them a few times before adding the remaining ingredients and processing until you get the desired texture. I like mine super smooth and creamy so I just let it go for a bit, but if you like yours chunkier just pulse it until it comes together in a thick chunky paste. If the Humus is too thick, add some of the cooking water or some more lemon juice or olive oil. Try to get it a bit thinner than the consistency you desire, as it will thicken a bit once it’s refrigerated. Check for seasoning, and if you’re happy with the levels of salt, cumin, garlic, and lemon, you’re done!

Serve with a drizzle of good olive oil and some chopped parsley if desired.

This recipe recipe doubles very easily, but you do not need to double the amount of baking soda used for either soaking or cooking.

flaky salt & pepper buttermilk biscuits

Remember that time that I promised you a buttermilk biscuit post? Like New Year’s day? Yeah. I’ve been a very naughty blogger.

flaky salt & pepper buttermilk biscuits | Brooklyn Homemaker

Biscuits shouldn’t be rushed though. Flaky, buttery, light-as-air, homemade buttermilk biscuits are representative of a bygone era, an era when people took their time on the things that matter, and didn’t give me guff for taking too long to talk to them about biscuits.

The thing about homemade buttermilk biscuits is, well, that they’re freakin’ amazing. Those dense doughy things that come in a can from the grocery store shouldn’t be allowed to go by the same name. If you can master making a buttermilk biscuit from scratch, you’ll pretty much own the world. People will do things for you. Things that you can’t even imagine. People really don’t understand the power of a good biscuit. Where I live in Brooklyn there are just as many Southern restaurants as in the actual South, and while the food is legitimately amazing, the biscuits are decidedly sub-par. I’m convinced that this is NOT because biscuits are too difficult for them to master, but instead because they don’t understand the importance (and power) of good biscuits. They think of biscuits as an after thought, a less than, and something not worth their while to make well. Their loss. Our gain. We’ll stay in and make our own biscuits!

flaky salt & pepper buttermilk biscuits | Brooklyn Homemaker

A few decades ago, everyone’s grandmother knew how to make biscuits, and make them well, but increasingly, it’s a dying art. I think that these days people don’t make them because they’re afraid or intimidated by the process. I promise you though that biscuits are not that difficult to get right if you can get over the fear. It can take some practice to get them perfectly light and fluffy, but as long as you’re gentle and respectful of the dough, and don’t manhandle them too much, they’ll come out better than you can imagine. As you make them more and more often, the process will get easier and easier, and they’ll come out better and better.

flaky salt & pepper buttermilk biscuits | Brooklyn Homemaker

The trick to giving your biscuits flaky layers is to roll the dough out to about 1/2 inch thick on a floured surface, very lightly dust the dough with flour, and fold it over on itself. If you repeat this about 5 or 6 times (gently) you’ll have a good bit of nice tender layering. Simple.

Another thing I like to use to help make my biscuits impossibly light and airy is cream of tartar. Cream of tartar has absolutely nothing to do with tartar sauce, but is actually a bi-product of the wine industry. It has many uses in the kitchen, from stabilizing whipped cream to preventing sugar syrups from crystalizing; but for my purposes, in combination with baking powder, it helps baked goods rise Rise RISE .

One more thing I like to do to add a little something extra to my biscuits is to brush a bit of fat on top before baking. You can use melted butter or heavy cream, but either way this helps add an extra crunch to the tops of your biscuits, and helps make them come out slightly shiny, golden brown, and beautiful.

For this recipe I also added a little fresh cracked pepper to the mix, and topped them with pepper and coarse kosher salt for a bit of interest. Trust me though, without the salt and pepper these biscuits are still phenomenal. They really don’t need it, but I thought it would be a nice touch with the sausage gravy I was serving with them. You can leave out the salt and pepper if you like, and if you wanted to get crazy you could toss in something else. I’ve seen chives mixed into biscuits with excellent results, and I’ve even seen people mix in lemon or citrus zest! Yum!

One last thing that I think really helps make biscuits really special is a pastry blender. If you don’t have one you could also use food processor, a fork, or even your hands, but I really think you have more control with a pastry blender. The point is to cut the fat, in this case the butter, into the flour, and to do it with as little fuss as possible. Working the dough too heavily can cause the butter to melt or the gluten to form and make your biscuits tough, so I think a traditional pastry blender is the perfect way to cut your butter up into super tiny pieces without overworking the dough.
A pastry blender is basically just a series or wires or blades held together with a handle. I’ve used a few of them in my day, and my absolute favorite is this lil’ guy. I swear this pastry blender was sent to earth from heaven, just for me.  Some pastry blenders I’ve worked with in the past were a bit too flimsy to stand up to the beating I put them through, so I was thrilled when I found this one. The blades are thick and strong and don’t budge against even the coldest butter. The main difference between this and other blenders is that the blades are flat and straight instead of curved, but I don’t miss the curved design one bit.

flaky salt & pepper buttermilk biscuits | Brooklyn Homemaker

If you have a pastry blender you can throw a batch of biscuits together in 20 minutes or less. When we hosted Thanksgiving last year I spent the whole day cooking and cleaning and getting ready for our friends to arrive, but when the first guest rang the bell I realized I’d forgotten to make my biscuits. At first I thought I’d accept defeat and just skip them for the night, but then I thought twice and started pulling out the flour and butter. Even with guests milling around the kitchen, I had those biscuits in the oven so fast that my friend Isobel couldn’t believe it, and every time someone picked one up that night she’d proudly brag that I tossed them together in a flash at the last-minute.

I’m really not trying to toot my own horn though, I’m just trying to let you know that once you get the hang of doing this, it becomes second nature. The recipe I use is not some fancy Martha Stewart creation, or some decades old family recipe passed down from someone’s Southern grandmother, but a recipe I found in my 90s copy of the Better Homes and Gardens cookbook. It couldn’t be more simple. I’ve been making it for years, and while I’ve made some tiny tweaks, I think it’s totally perfect. I promise you that giving this recipe a try will be completely worth your while. So go ahead, impress your friends, and make some homemade biscuits.

flaky salt & pepper buttermilk biscuits | Brooklyn Homemaker

Salt and Pepper Buttermilk Biscuits

adapted from the Better Homes & Gardens Cookbook

3 cups all purpose flour, plus more for dusting
2 teaspoons fresh ground pepper, divided
4 teaspoons baking powder
1 tablespoon sugar
1 teaspoon table salt
3/4 teaspoon cream of tartar
3/4 cup butter (1 1/2 sticks)
1 1/4 cups buttermilk
2 tablespoons heavy cream or melted butter
1 teaspoon coarse kosher salt

Preheat oven to 450. In a large bowl whisk together flour, 1 teaspoon pepper, baking powder, sugar, table salt, and cram of tartar. Cut the cold butter into 1 inch chunks and add to flour. Cut butter into small pea sized pieces using a pastry blender, fork, or food processor. Make a well in the center of the bowl, pour in buttermilk all at once, and stir together with a fork until just moistened.

Turn dough out onto a lightly floured surface. Gently push dough out into a flat disk using your hands or a rolling-pin. Dust very lightly with flour, fold in half, and gently press it back out. Repeat 5 or 6 times to create layers in your biscuits that will separate when baked. Roll or pat dough out to 1/2 inch thick and cut into circles using a biscuit cutter. Remaining dough can be recombined once, but no more or it will get tough. Transfer biscuits to a baking sheet and brush tops with cream or melted butter. Sprinkle with salt and remaining pepper. Bake for 10-12 minutes, or until golden brown on top.

homemade dog food

If you haven’t noticed already, Russell and I really love our dogs.
And they love each other too! This is Doris on the left, and Betty giving her a kiss on the right.

homemade dog food | Brooklyn Homemaker

Since we’re young and both have full-time jobs, children are not something we see happening anytime in the immediate future. And hey, who needs diapers and vomit and crying and bad report cards when we have Doris and Betty?

Make no bones about it (pun absolutely intended), these dogs are spoiled. Their biggest daily challenge is deciding where to nap while we’re at work. They have free run of the house and yard, their treat jar has become a part of our decor, and they have more toys than some children. They even have their own toy box. I wish I could train them to put their toys away, but Betty would prefer that her toys are spread evenly throughout the apartment. When I tidy up she usually disapproves and goes back into the box to return two or three things to where she intended them.

homemade dog food | Brooklyn Homemaker

Doris was our first and she’ll always have a super special place in my heart for that reason. When we took this apartment we knew a pup was in our future but didn’t know when it would actually happen. We talked about it endlessly, discussing which breeds we liked best and thinking up potential names. We did a lot of dog sitting for friends to help get us ready and help us decide which breeds we liked best, and we fell completely in love with our friend’s adorable mini schnauzer, Belle.

One day as I was walking up to the apartment after work, I got a call from Russell. He said he’d found our dog and he was bringing her home with him right away. At first I was kind of annoyed that he’d fallen in love with a dog without my meeting her first, but as soon as they got home I knew he’d done the right thing. We’d just gotten engaged a few days earlier, and Doris was the best engagement present I ever could have received.

At just about seven pounds, Doris is much smaller than most miniature schnauzers. We’re so used to her size now that when we see other schnauzers they look gigantic to us! She’s perfectly laid back and relaxed and is a total little snuggle machine. She’s never happier than when curled up in one of our laps watching television. She absolutely loves to give us kisses, and if we let her she would just sit and lick our faces for hours on end. She’s also very quiet for her breed, and barely ever barks, though sometimes she does  talk to us in a funny low grumble to get our attention. Once you get her outside her personality changes a bit, and she loves to run and jump and play. She’s super fast and we often have people at the dog park tell us they can’t believe how she keeps up with dogs five times her size.

homemade dog food | Brooklyn Homemaker

About a year after Doris came to live with us, we started wondering if she gets lonely while we’re at work. The more we discussed it, the more certain we were that we wanted to add another pup to our little family. We had a wedding coming up though so not only was money tight, but we had a lot on our plates and training and caring for a new little dog was out of the question. We agreed to start the search when we returned from our honeymoon, but as a wedding gift, Russell’s sister Shannon and her family gave us an IOU for a puppy!

Once again, best gift ever. Thank you guys!

The only issue was that Shannon lives in California, and we’re here in Brooklyn. We thought about finding a dog in our area and asking Shannon to help pay for the adoption, but before we knew it, she found a beautiful little schnauzer in need of a new home. She lived with a very nice family near Shannon who needed to give her up because of a family emergency.  She was still a puppy, but the family had her completely house trained already! Score! To our surprise, Betty is even smaller than Doris, weighing in at just under six pounds!  Shannon has dogs of her own, and loves having animals in the house so she fostered Betty for us until Russell and I were able to fly out and get her. She was such a good girl on the plane home and just sat quietly with Russell the whole time. There was a little bit of jealousy between Doris and Betty at first, but now they love each other completely, and they’re totally inseparable.

Though they’re so close in size, Betty has a very different personality from Doris. Betty is an adorable little ball of energy, and spends half her day running back and forth between the living room and our bedroom window. She loves to sit in the window and stare out at the yard, keeping it safe from intruders. If a bird lands in the yard or a cat jumps the fence, Betty will loudly tell them they’re not welcome and come tell us we need to let her out to take care of business. She has a voice and she’s not afraid to use it, especially when she’s keeping us safe from the threat of a few sparrows grazing in our yard. She loves to play with her sister and they chase each other around the house and play tug of war constantly. When Doris needs a nap break, Betty keeps herself entertained by carrying her toys around in her mouth, or by chewing on deer antlers and nyla-bones for hours. She thinks of me and Russell as her personal jungle gyms, but she also loves to snuggle just as much as Doris. She isn’t as much of a kisser as Doris, but she does the most adorable thing to show her love by putting her little paw up and touching your face.

homemade dog food | Brooklyn Homemaker

Since these two girls are so important to us, I make them their own homemade food. We’re totally those neurotic dog parents.

The thing is, medical expenses add up, even when it comes to animals. We’re going to do anything we can do to help make sure our dogs stay happy and healthy. These little dogs eat better and healthier than Russell and I do, and I like to think of it as preventative medicine.

When it comes to feeding dogs, you have to be careful what you give them. Certain foods are definitely not good for dogs, and many foods that are fine for humans can be toxic to animals. You should never ever feed dogs any grapes or raisins, onions or garlic, chocolate, or alcohol of any kind. All of these foods can be toxic to dogs and can be very damaging to their health. Raw yeast dough can also be very dangerous, so be careful not to feed your pups any raw scraps when baking bread.

Foods that are beneficial for dogs include sweet potatoes, blueberries, carrots, pumpkin, green beans, and leafy greens. It’s great to feed your dogs a variety of vegetables so they get different vitamins and nutrients from a few sources. Apples make a great healthy treat, but you have to be careful to remove the seeds, which contain cyanide. Lean meats, eggs, peanut butter, salmon, and unsweetened plain yogurt are great sources of protein.  Cooked unsweetend oatmeal is a perfect source of soluble fiber and is a nice grain alternative for dogs with wheat allergies. If you’re not sure if certain foods are okay for dogs, the internet is a wealth of knowledge, so google away before feeding your dog a food they’ve never had before.

homemade dog food | Brooklyn Homemaker

I especially like to use lean meats and a variety of vegetables and greens. My family is big on hunting, so I’m lucky enough to have a source for free venison that I love to use for Doris and Betty’s food. Venison is super lean, and since the deer came from the wild instead of a factory farm, I know they ate a natural diet and weren’t fed antibiotics and hormones and all that nasty stuff. When I run out of venison I usually use lean ground beef or turkey. I also throw in chicken hearts and livers for added vitamins and goodness. Brown rice and oats add nice body and fiber to the food and help keep it moist.

I basically like to cut everything up in big rough pieces and throw it into a big pot with some water. I bring it all to a boil and simmer it long enough to cook the brown rice. Once it’s all cooked I puree it in a food processor in batches, mix it all back together, and divide it up into freezer safe containers to store in the freezer.

If you want to make this for your dogs, you’ll need a food processor or food mill and a very large stockpot. It’s not at all difficult, and depending on how much your dog eats, one batch can last more than month in the freezer. For some reason, the texture of this food improves after freezing. After it’s pureed it’s basically just paste, but once it’s frozen and thawed it firms up and is easily pulled apart with a fork.  For our girls, we feed them about an 1/8th of a cup of this food mixed with an 1/8th of a cup of dry kibble, and they are fed twice a day.

homemade dog food | Brooklyn Homemaker

Homemade Wet Dog Food

  • Servings: depends on your dog(s), this will feed our 2 small dogs for about a month
  • Print
4 lbs lean meat, like beef, turkey, or venison
1 1/2 lbs chicken hearts and/or livers
2 lbs braising greens, like kale, spinach, chard, or collards
1 1/2 lbs sweet potatoes (approximately 3)
1 lb apples (approximately 3)
1/2 lb carrots (approximately 3)
1 cup brown rice
1 cup oats (steel cut or rolled)
3 cups water
1/4 cup olive oil (or flax oil)

Wash and dry all of your vegetables and fruit. Tear the leaves of your greens off the rough stems and place into a large heavy bottom stock pot (at least 8qts). Cut ends off and roughly chop carrots and sweet potatoes. Add to pot. Quarter and core apples and add to pot along with rice, oats & water. Stir contents of pot. If not already cut up or ground, cut your lean meat into large pieces and add to pot. Place over medium high heat and bring to a boil. Reduce heat to a simmer and cook for 30 minutes. Add chicken hearts and livers and cook 15 minutes more. Remove from heat and let cool enough that you can handle it. Add oil and mix well.
Puree mixture in batches in a food processor. After each batch is completely pureed, add to a large bowl. When entire recipe has been pureed, mix well and divide into freezer safe containers. Before serving, thaw completely.