So, I guess May is cake month here at Brooklyn Homemaker.
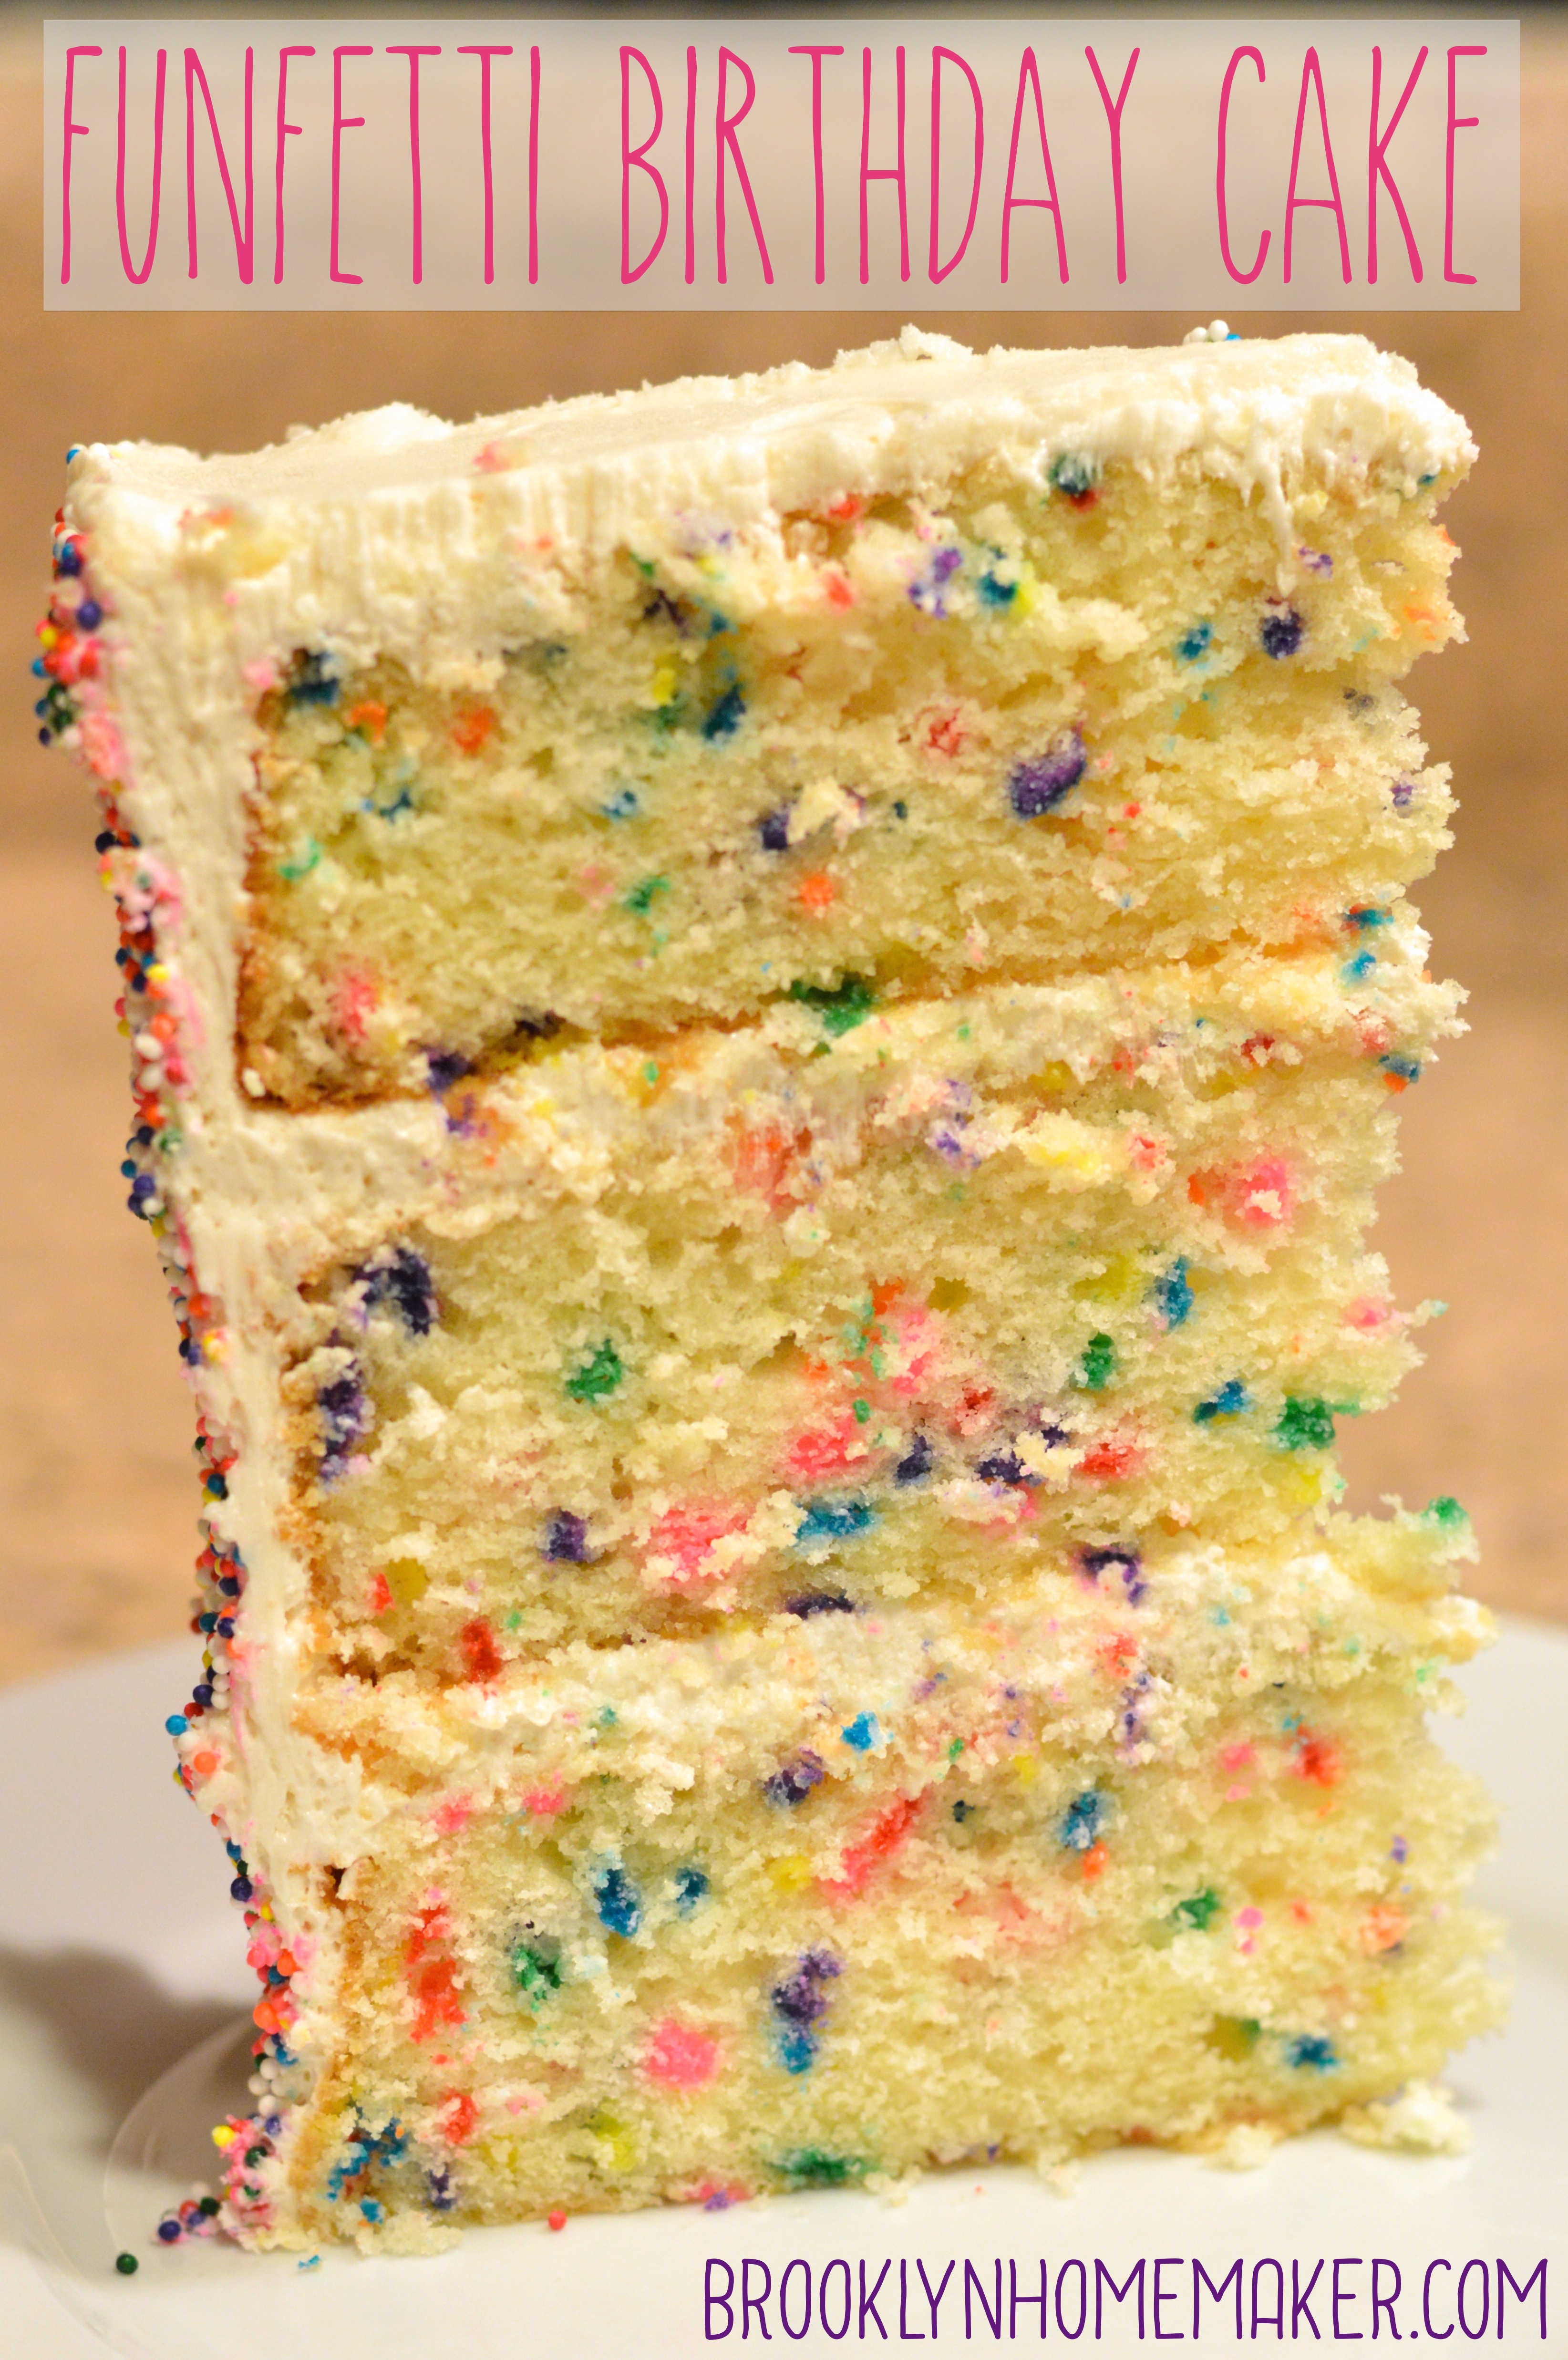
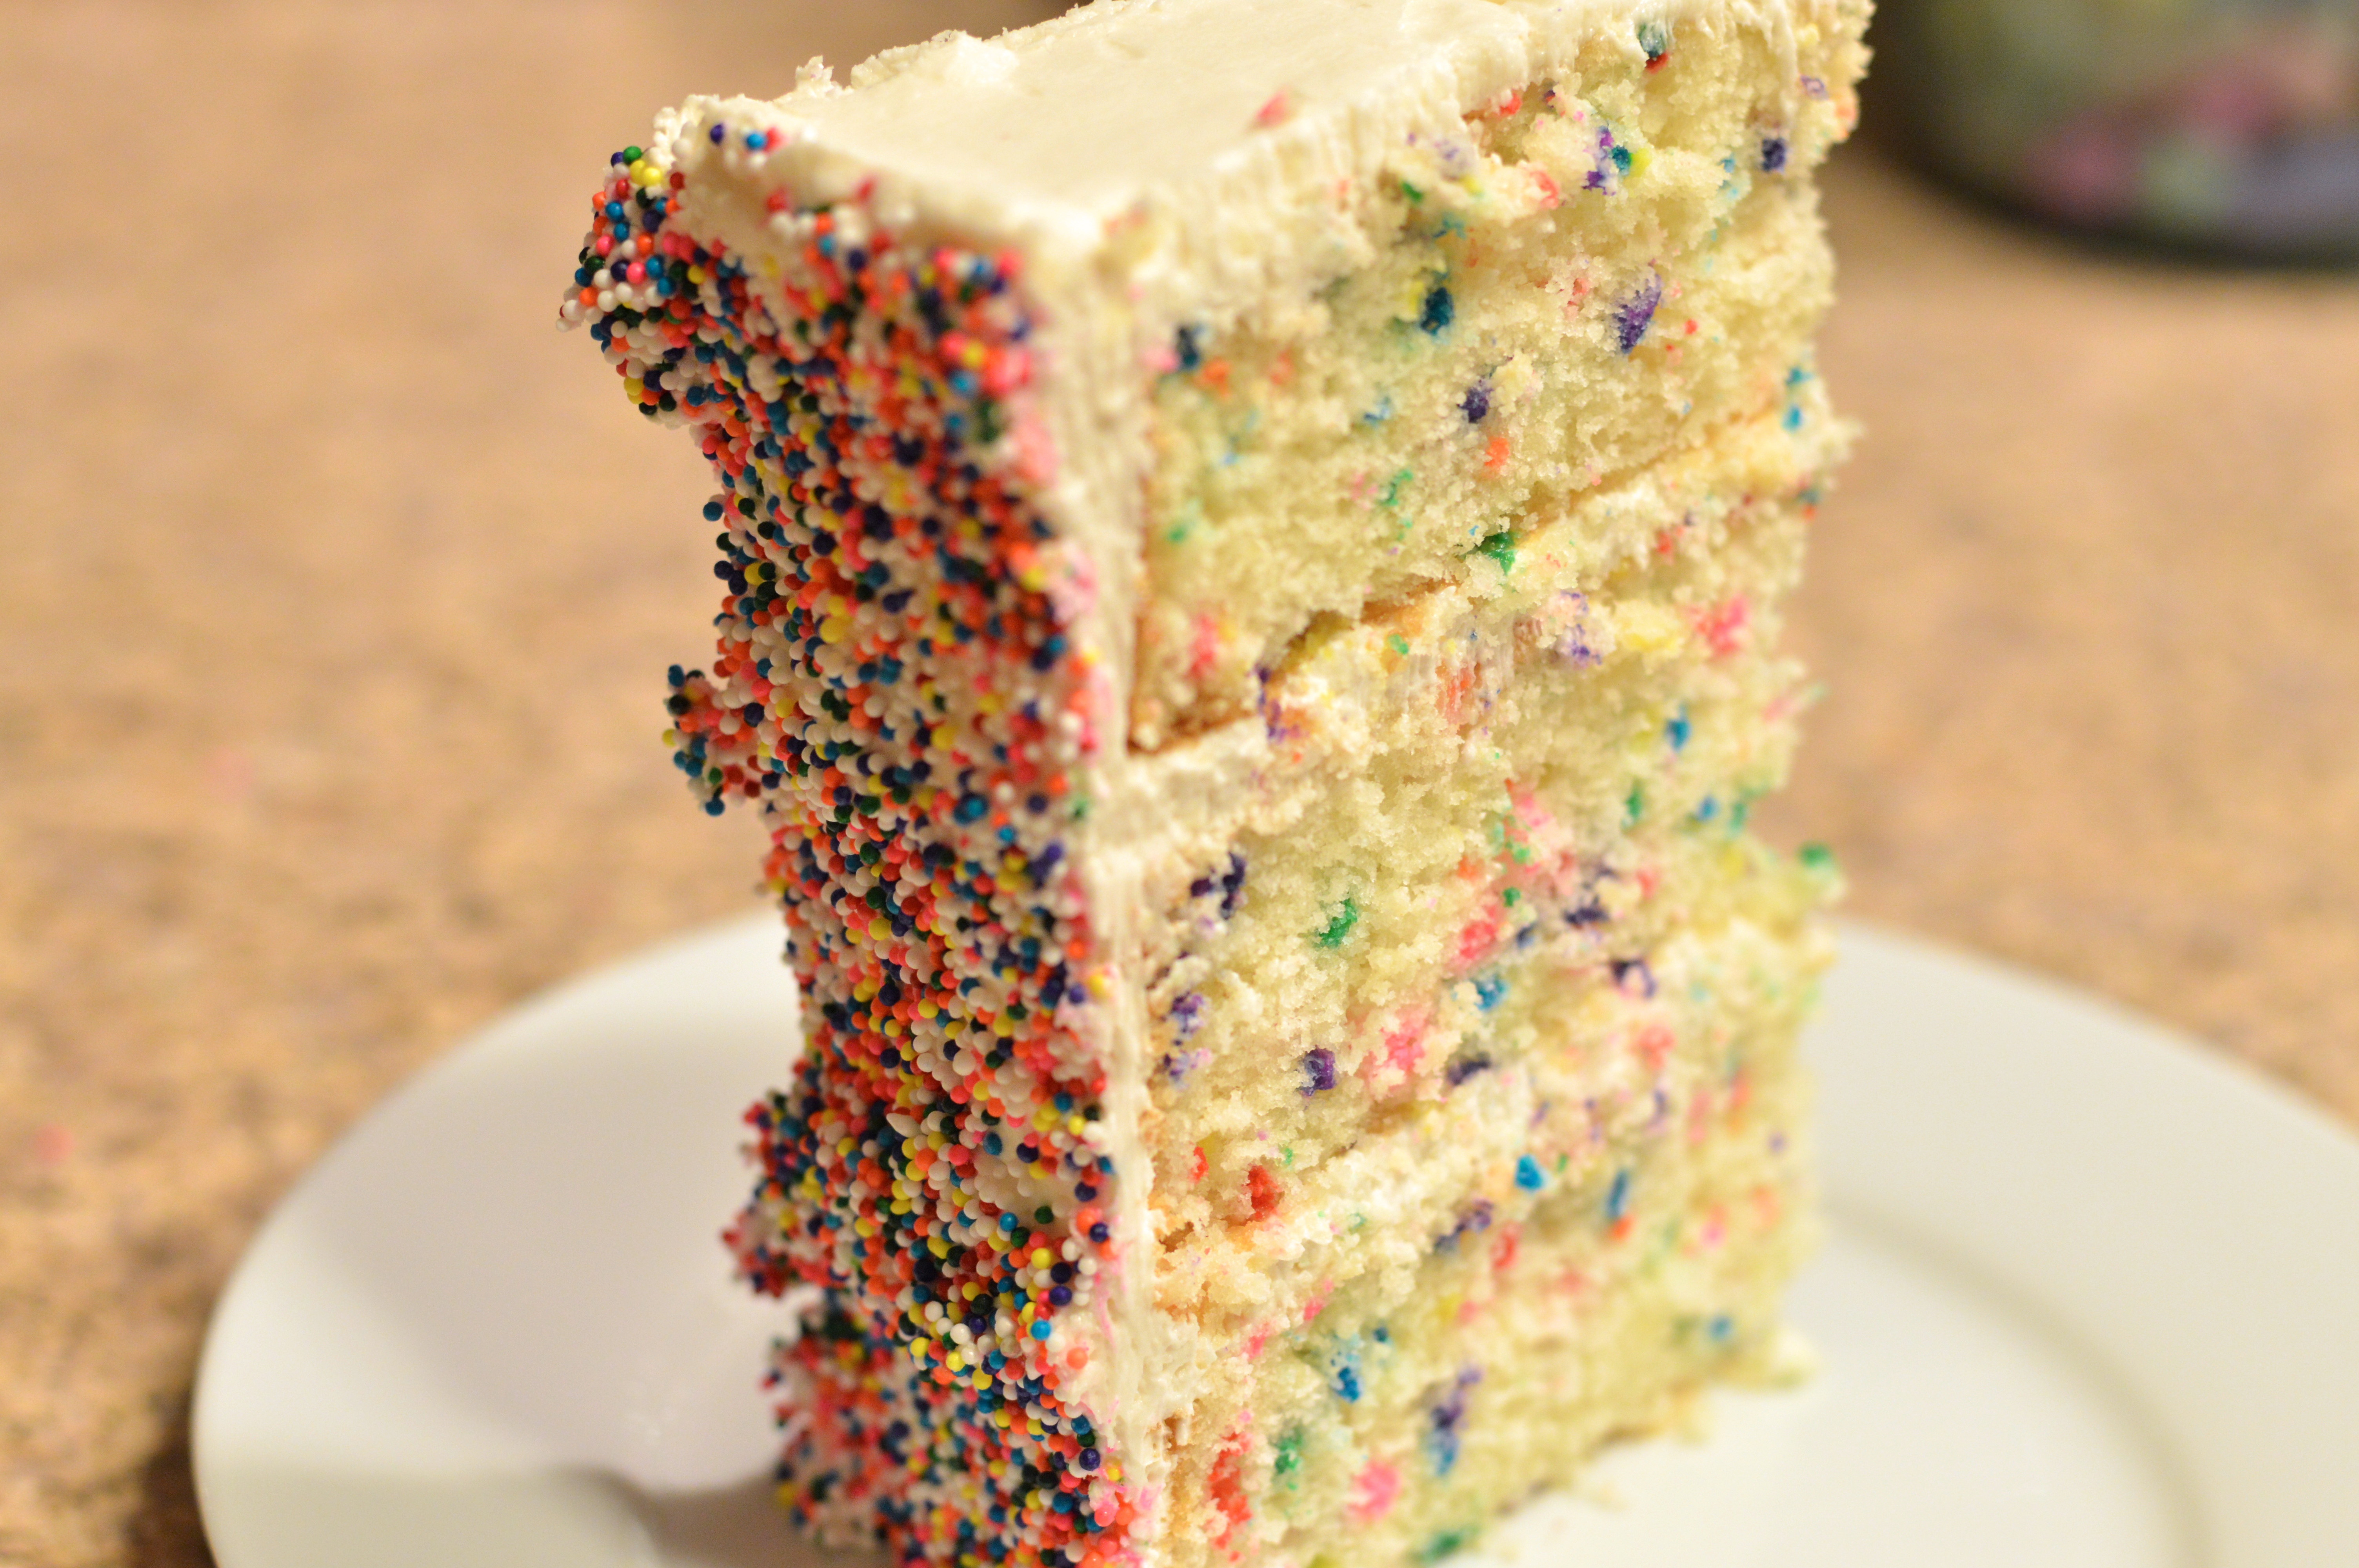
Sunday was my birthday. We had a cookout in the yarden with a bunch of friends and copious amounts of food and booze. Russell offered to buy me a cake, but I insisted on making my own. I know that you’re, like, “not supposed to” make your own birthday cake, but I love to bake, and I’m pretty good at it. Any cake he could find locally wouldn’t be half as good as what I could make myself, and anything he ordered from a fancy specialty bakery would cost a small fortune. So I won. I made my own birthday cake, and I went all out and did a super colorful funfetti cake with rainbow sprinkles inside and out.
The only weird part of making my own cake was that I wanted to share it with you here, so after candles and singing I rushed the cake back into the house to cut and photograph it before reemerging 20 minutes later to ask for help carrying the sliced cake back outside. It’s a funny thing to have to stop and remove yourself from a party to stage and photograph a cake, especially when it’s your party (and you’ve had a few cocktails).
I’m committed though. What can I say? You’re welcome.
A few friends and fans have been asking me lately about tips on constructing layer cakes, so I’m going to share some today. I’m really not a professional baker (more like a talented amateur), so I’m sure there might be easier or better ways of doing things, but these techniques have worked well for me over the years, and I think they’ll really help you up your cake baking game. If you really want even more in-depth training from a real professional, I’d suggest checking out this great “Modern Buttercream” class from Craftsy. It’s really helpful and informative, and free!
Anyway, one of my favorite things to do when baking a layer cake is to turn off the damned TV and put on some great music. I’m partial to Dolly Parton’s All I Can Do album, just in case you were wondering.

The first step in making a layer cake is choosing the size. If you visit the site regularly, you’ve probably already noticed that I’m very partial to three layer cakes. Two layer cakes already require more effort than bundt or sheet cakes, so I think adding that third layer makes a cake much more impressive without adding much more work. I think a three layer cake looks, I don’t know, fancier, because of its impressive height and multiple layers of cake and filling when sliced.
I also tend to lean toward 8 inch cakes rather than 9 inch because, again, I think they look fancier. The same amount of batter poured into a 9 inch pan will spread thinner, where an 8 inch layer will be thicker. If your goal is height, obviously the 8 inch pan will get you closer, but there’s also an optical illusion at work that makes a skinnier cake look taller. Obviously the difference is slight, and a 9 inch cake will still be pretty damned impressive and just as delicious, so if that’s all you have, go for it.
This may sound like a no brainer, but when you bake your layers, make sure you’re using 3 cake pans at once, not baking each layer individually. Cake batter has leavening agents in it that will weaken if they’re left sitting around too long, so if you want a 3 layer cake, you need 3 pans. If you only have 2 pans, another option would be to bake two layers and slice them in half to give you four layers. Extra fancy! Obviously baking times will need to be adjusted if you go this route.
To make sure my cakes release easily, I always butter my pans before baking, then add a pre-cut parchment round to the bottom of the pan. Then I butter that and dust the whole pan with flour. After baking I usually place my cake pans on wire racks to cool for 20 or 30 minutes, or until I can see that the sides of the cake are pulling away from the pan. A super hot cake will fall apart if you mess with it too early.
To get the layers out once they cool a bit, you can use an offset icing spatula to loosen them, but I have this weird little trick I use. I try to gently bounce the pan on one side, almost like the motion of tossing food in a sauté pan, to see if I can feel the layer lift off the bottom. Then I rotate the pan and do it a few times until I’m sure it’s going to release easily. To remove it I firmly but gently press one hand on the top of the cake, and flip the pan upside down with my other hand. Another way of doing this would be to press your cooling rack against the top of the pan and flip the cake directly onto the rack.
Once you have your layers out of the pan, it’s important that they’re completely cool, if not cold, before moving forward. Even barely warm cake layers will begin to melt and thin out your icing, and the filling can get slippery making the layers slide around when you’re trying to put on your crumb coat. It’s annoying and unnecessary and can make it difficult to get your icing smooth and professional looking. Don’t be impatient because you’ll just end up frustrated later.
For this cake I actually baked the layers at night the day before my party, let them cool most of the way, and then wrapped them tightly in Saran wrap and refrigerated them overnight before icing the next morning.
Another important step in building a beautiful and professional looking cake is making sure that your cake layers are flat and level. If your cake layers are each domed, and you stack three of them up, you’re going to have a big weird hump on the finished cake. I use this special cake leveling wire, which is also great for cutting layers in half for filling. If you’re careful about keeping your cuts level though, a sharp bread knife will do the trick just as well.
It’s also really helpful to use a turn table or lazy Susan to help get your cakes picture perfect. They have specialized cake decorating ones like this, but you can use any small lazy Susan if you have one. I actually have a marble lazy Susan for cheese serving that I received as a gift a while back, and it sees way more action for cake decorating than it ever has for cheese.
Before you start building your cake, you might also want to put down a cake board. This is especially helpful if you want to transport the cake or if you want to be able to pick the cake up for decorating.
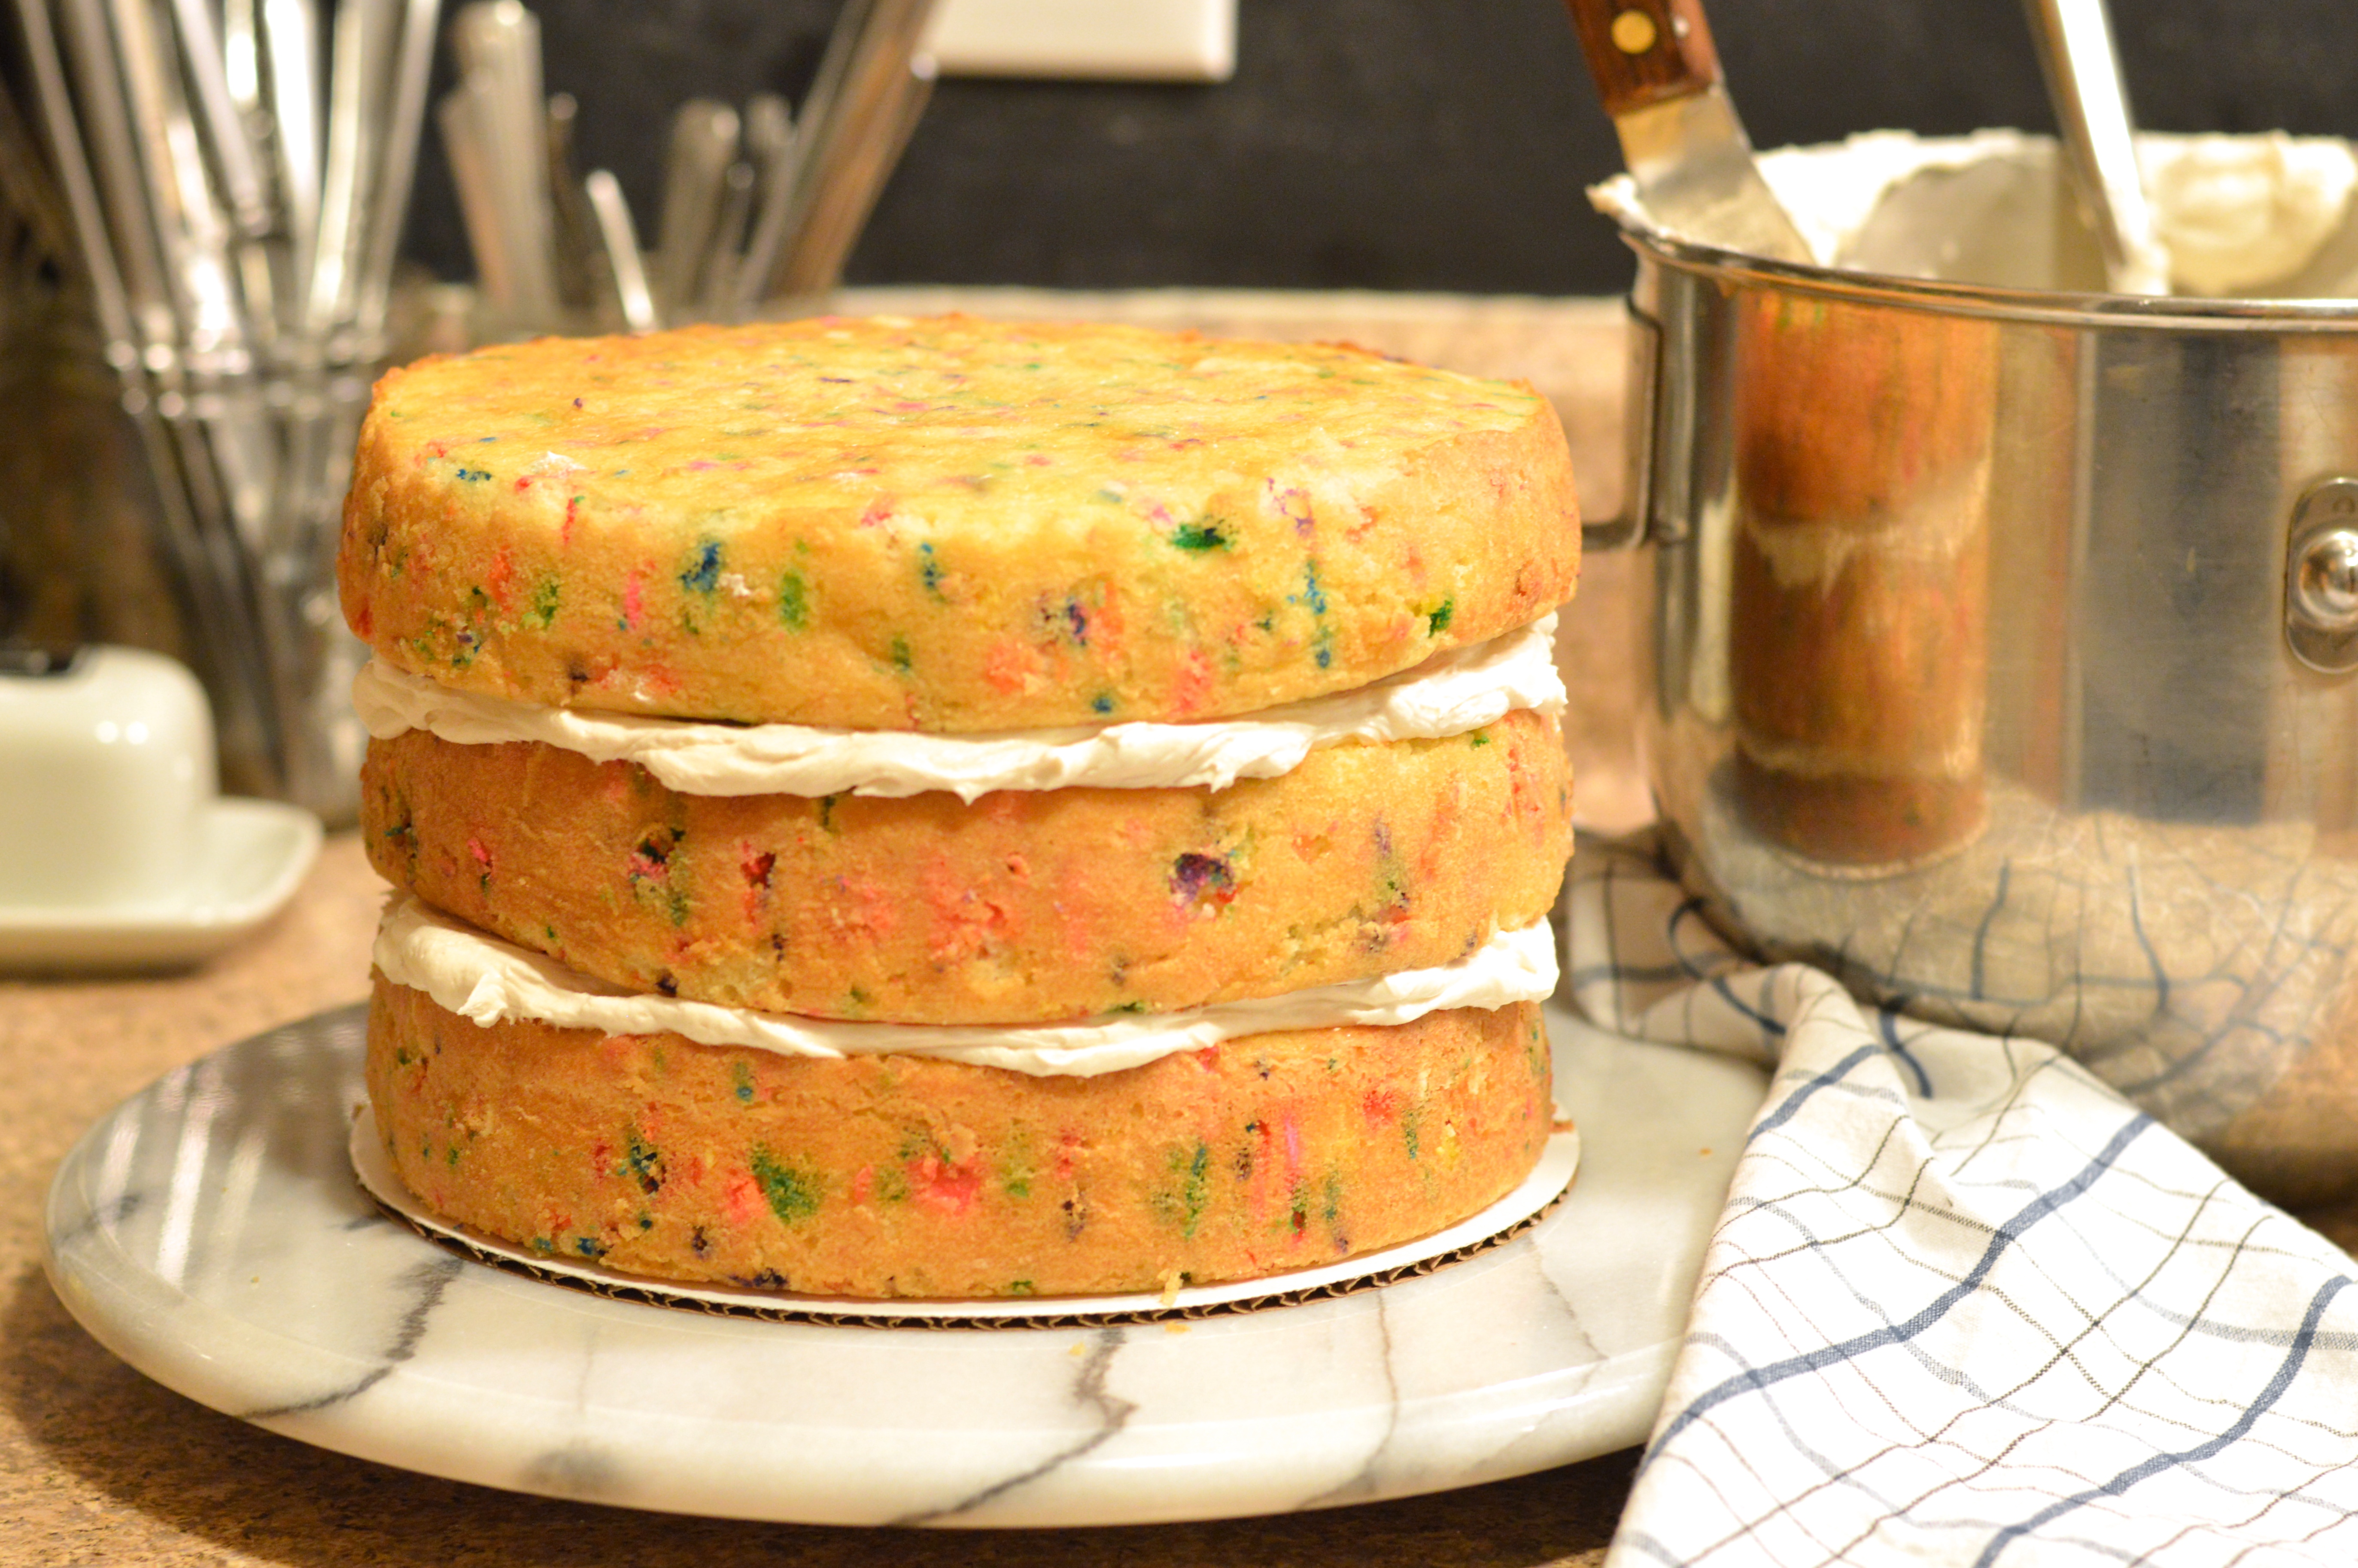
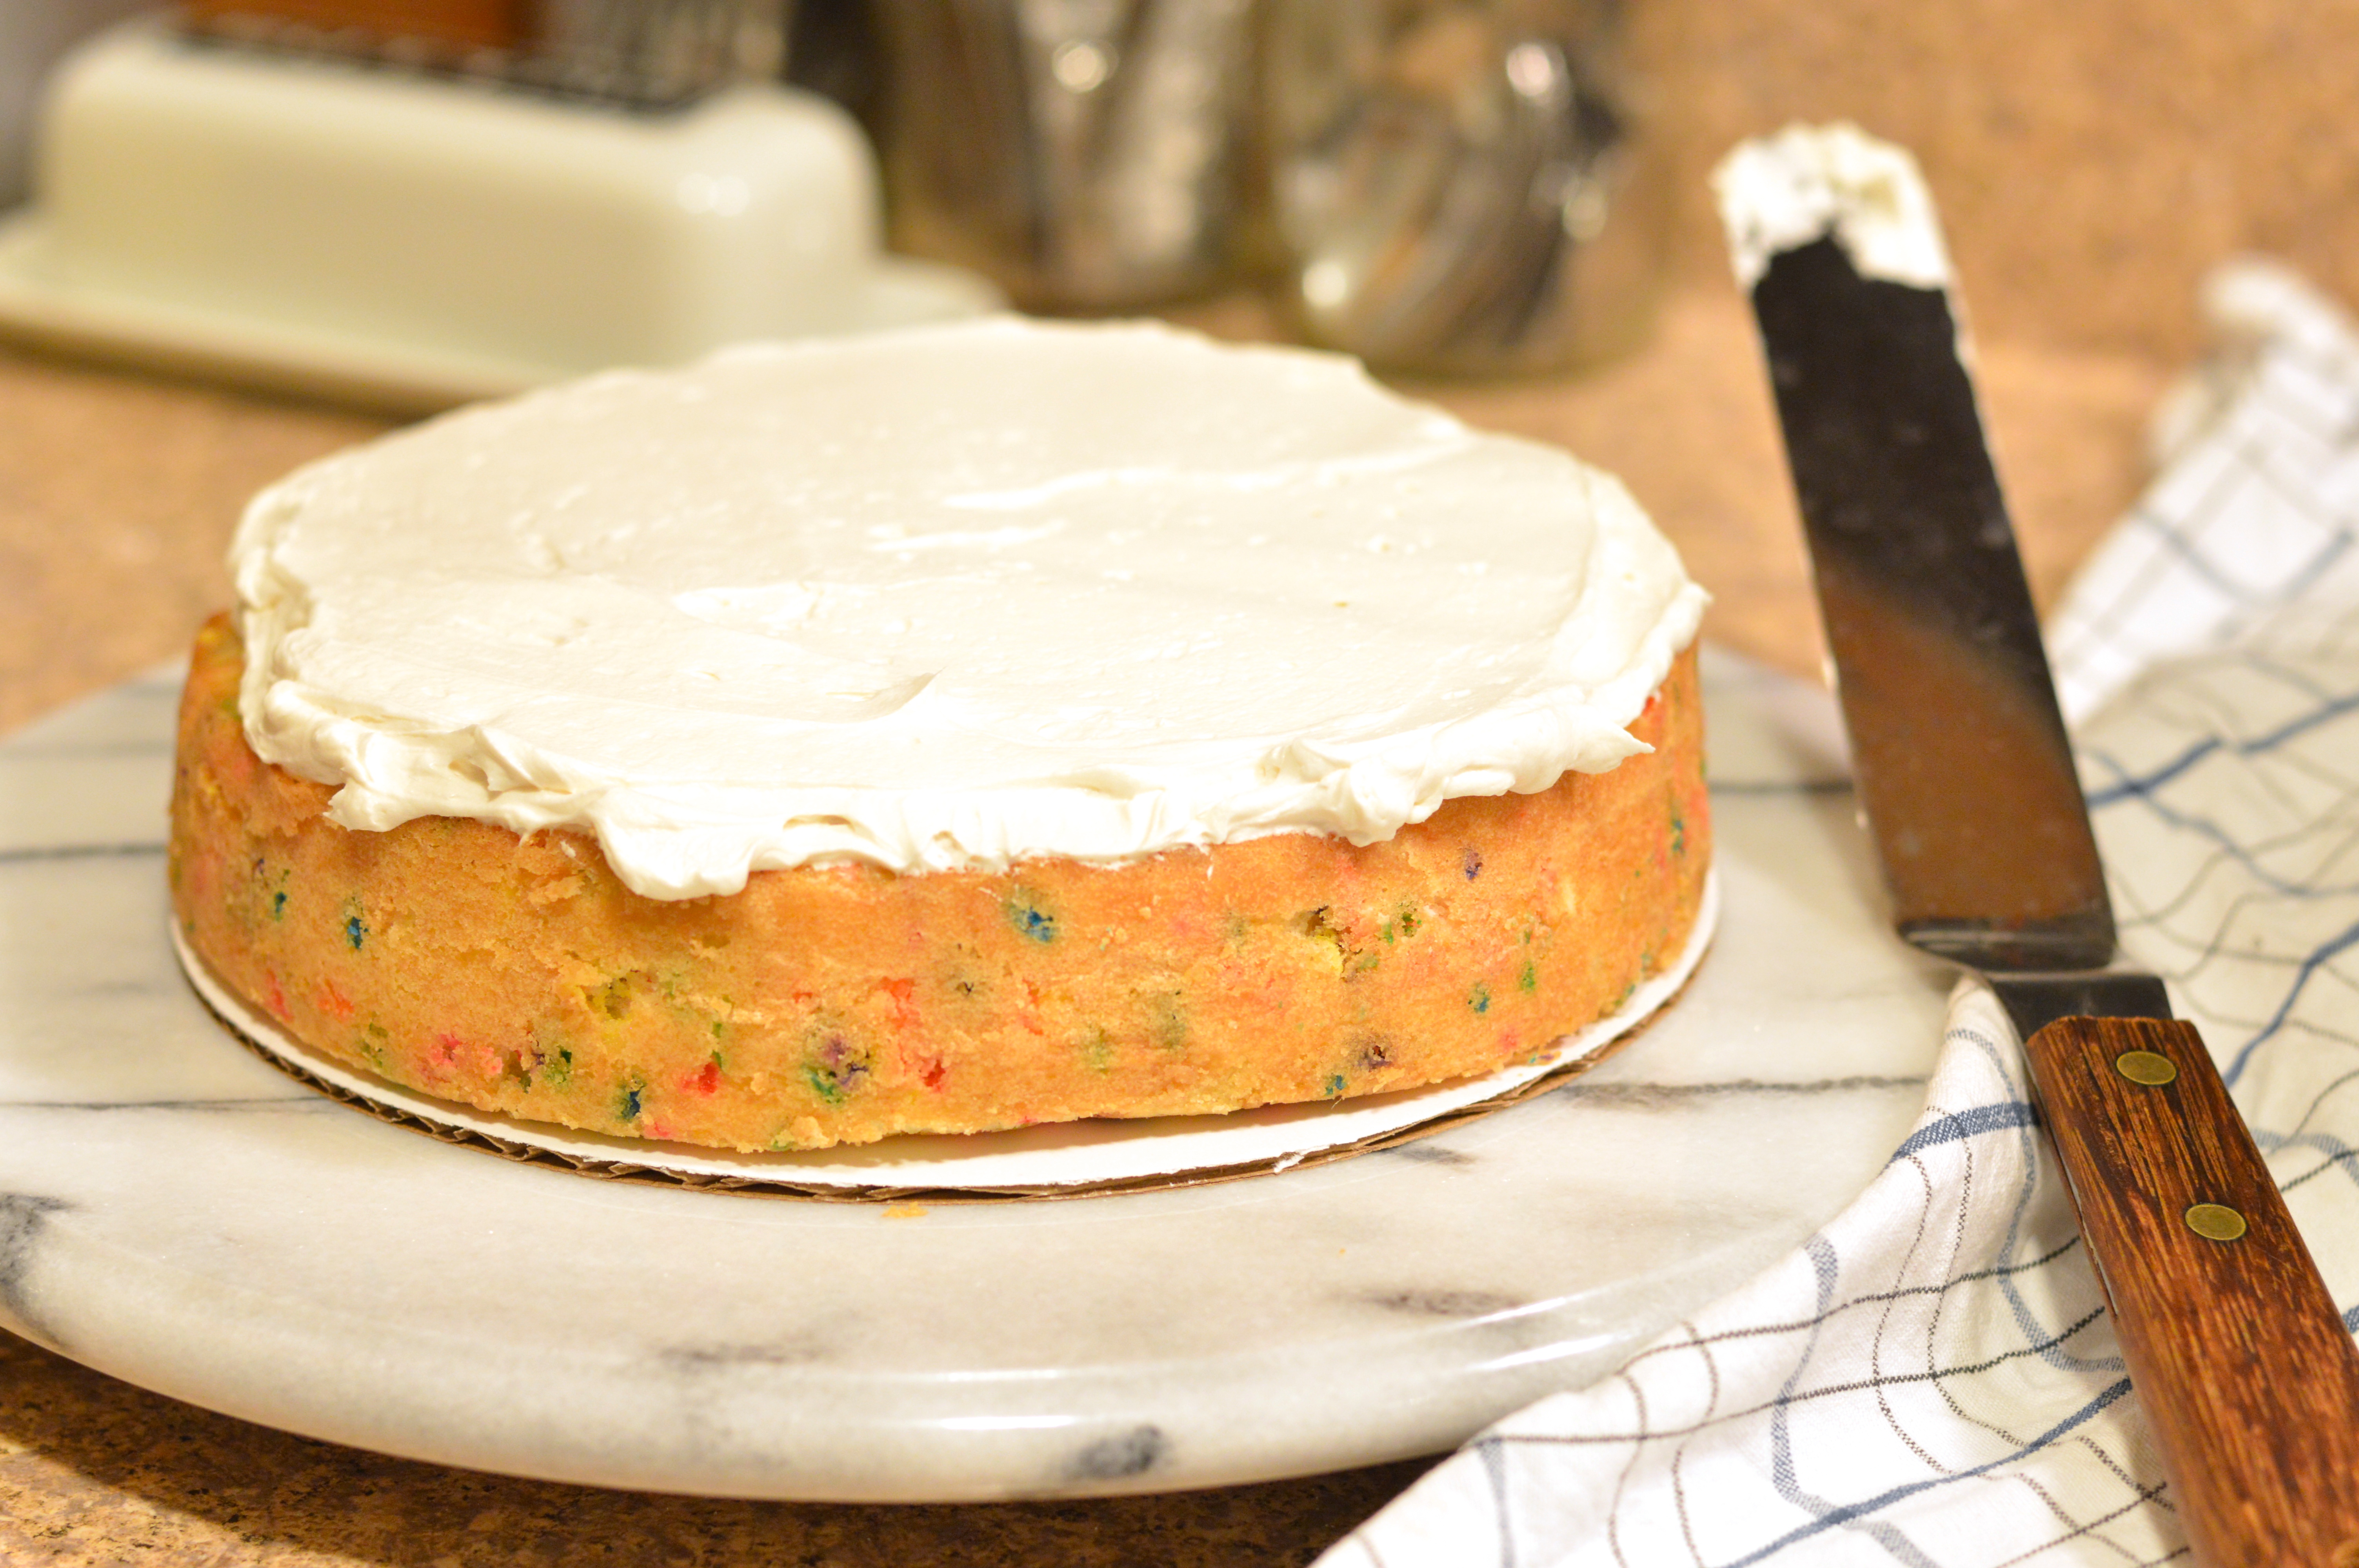
When choosing what filling to use between your cake layers, your options are limitless. The easiest option would be to fill with the same icing you’re using on the outside of your cake. For an 8 or 9 inch round cake I usually use about 3/4 of a cup to 1 cup of icing between each layer. You could also fill with another flavor of icing or a ganache, just be careful to seal it in with your crumb coat so it doesn’t show through on the outside. Another great option would be a softer filling like jam, pudding or fruit curd, but for this you’ll need to pipe a thick border or dam of icing around the outside edge of each layer to hold the filling in the center. This way it won’t smoosh out the sides when you add the next layer.
When you stack each layer of cake, try to look at if from a few different angles, just to be sure everything is level and evenly lined up before moving on. Once you have all the layers stacked up and everything looks good and level, you’ll want to spread a thin even layer of icing over the cake to seal in the crumbs or any filling that squishes out from the layers. This is referred to as the crumb coat. When I first started baking I thought this step was unnecessary and silly, but I make enough cakes now to realize it actually does make a big difference in getting a smooth professional icing job. I like to start at the top, pile up some icing and push it toward the outside edge, and pull the icing down the sides with an icing spatula, rotating the cake as I go. It doesn’t need to be a thick layer, and it’s fine if the cake shows through a little. I try to just make sure everything is coated, and then go back around and smooth it out.
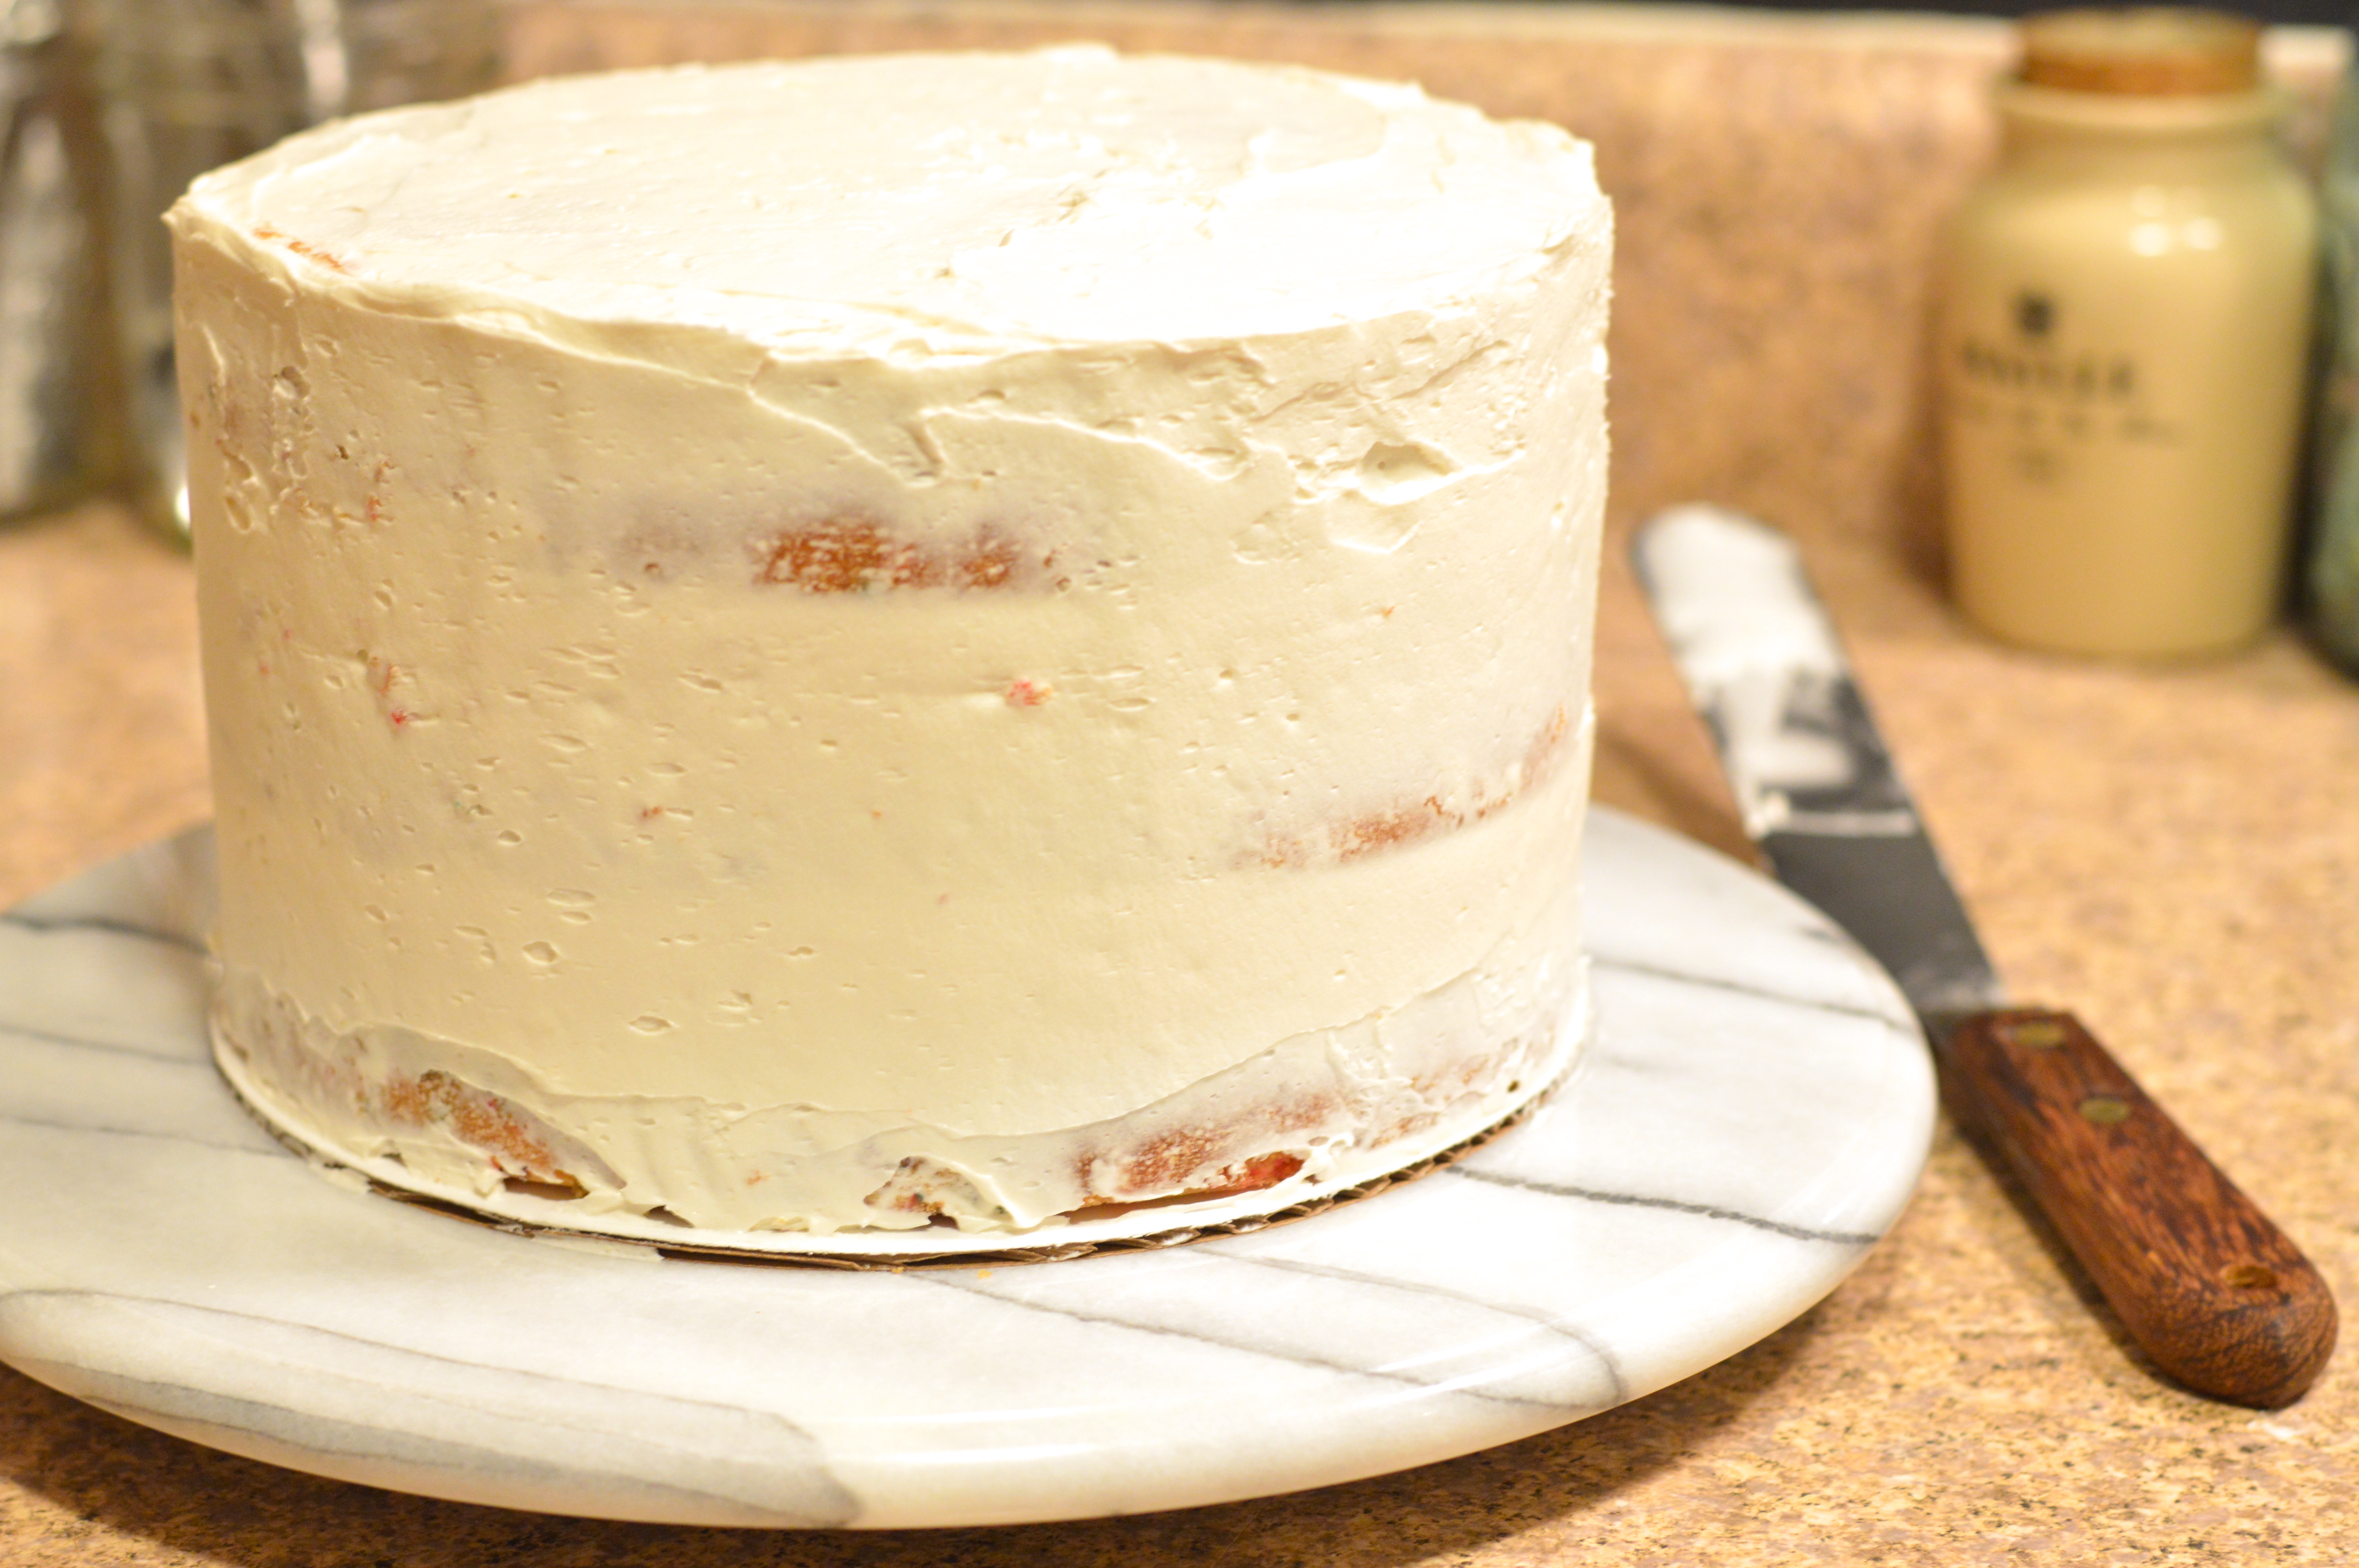
Once the crumb coat is smooth and even, you’ll want to refrigerate your cake for at least 30 minutes, or up to an hour, to firm up the icing and filling so the cake layers don’t slide and the crumb coat doesn’t mix with the next layer of icing. When you ice the cake, you basically just do the same thing you did with the crumb coat, just thicker. Then once your icing is smooth, you get to move on to the fun part.
I usually like to keep things simple and do a small border of sprinkles or nuts around the edge of the top of the cake. You could also do a piped border around the top edge and base of the cake, but you’ll obviously need to reserve some icing for that. The icing recipe below left me just enough for a piped border, but I decided to skip it and keep it simple. To do a swirled design like I did here, start in the center of the top of your cake, and slowly turn your turntable as you pull the spatula out trying to keep the swirl as evenly spaced as possible. If it doesn’t come out as pretty as you want, you can always smooth it out and try again.
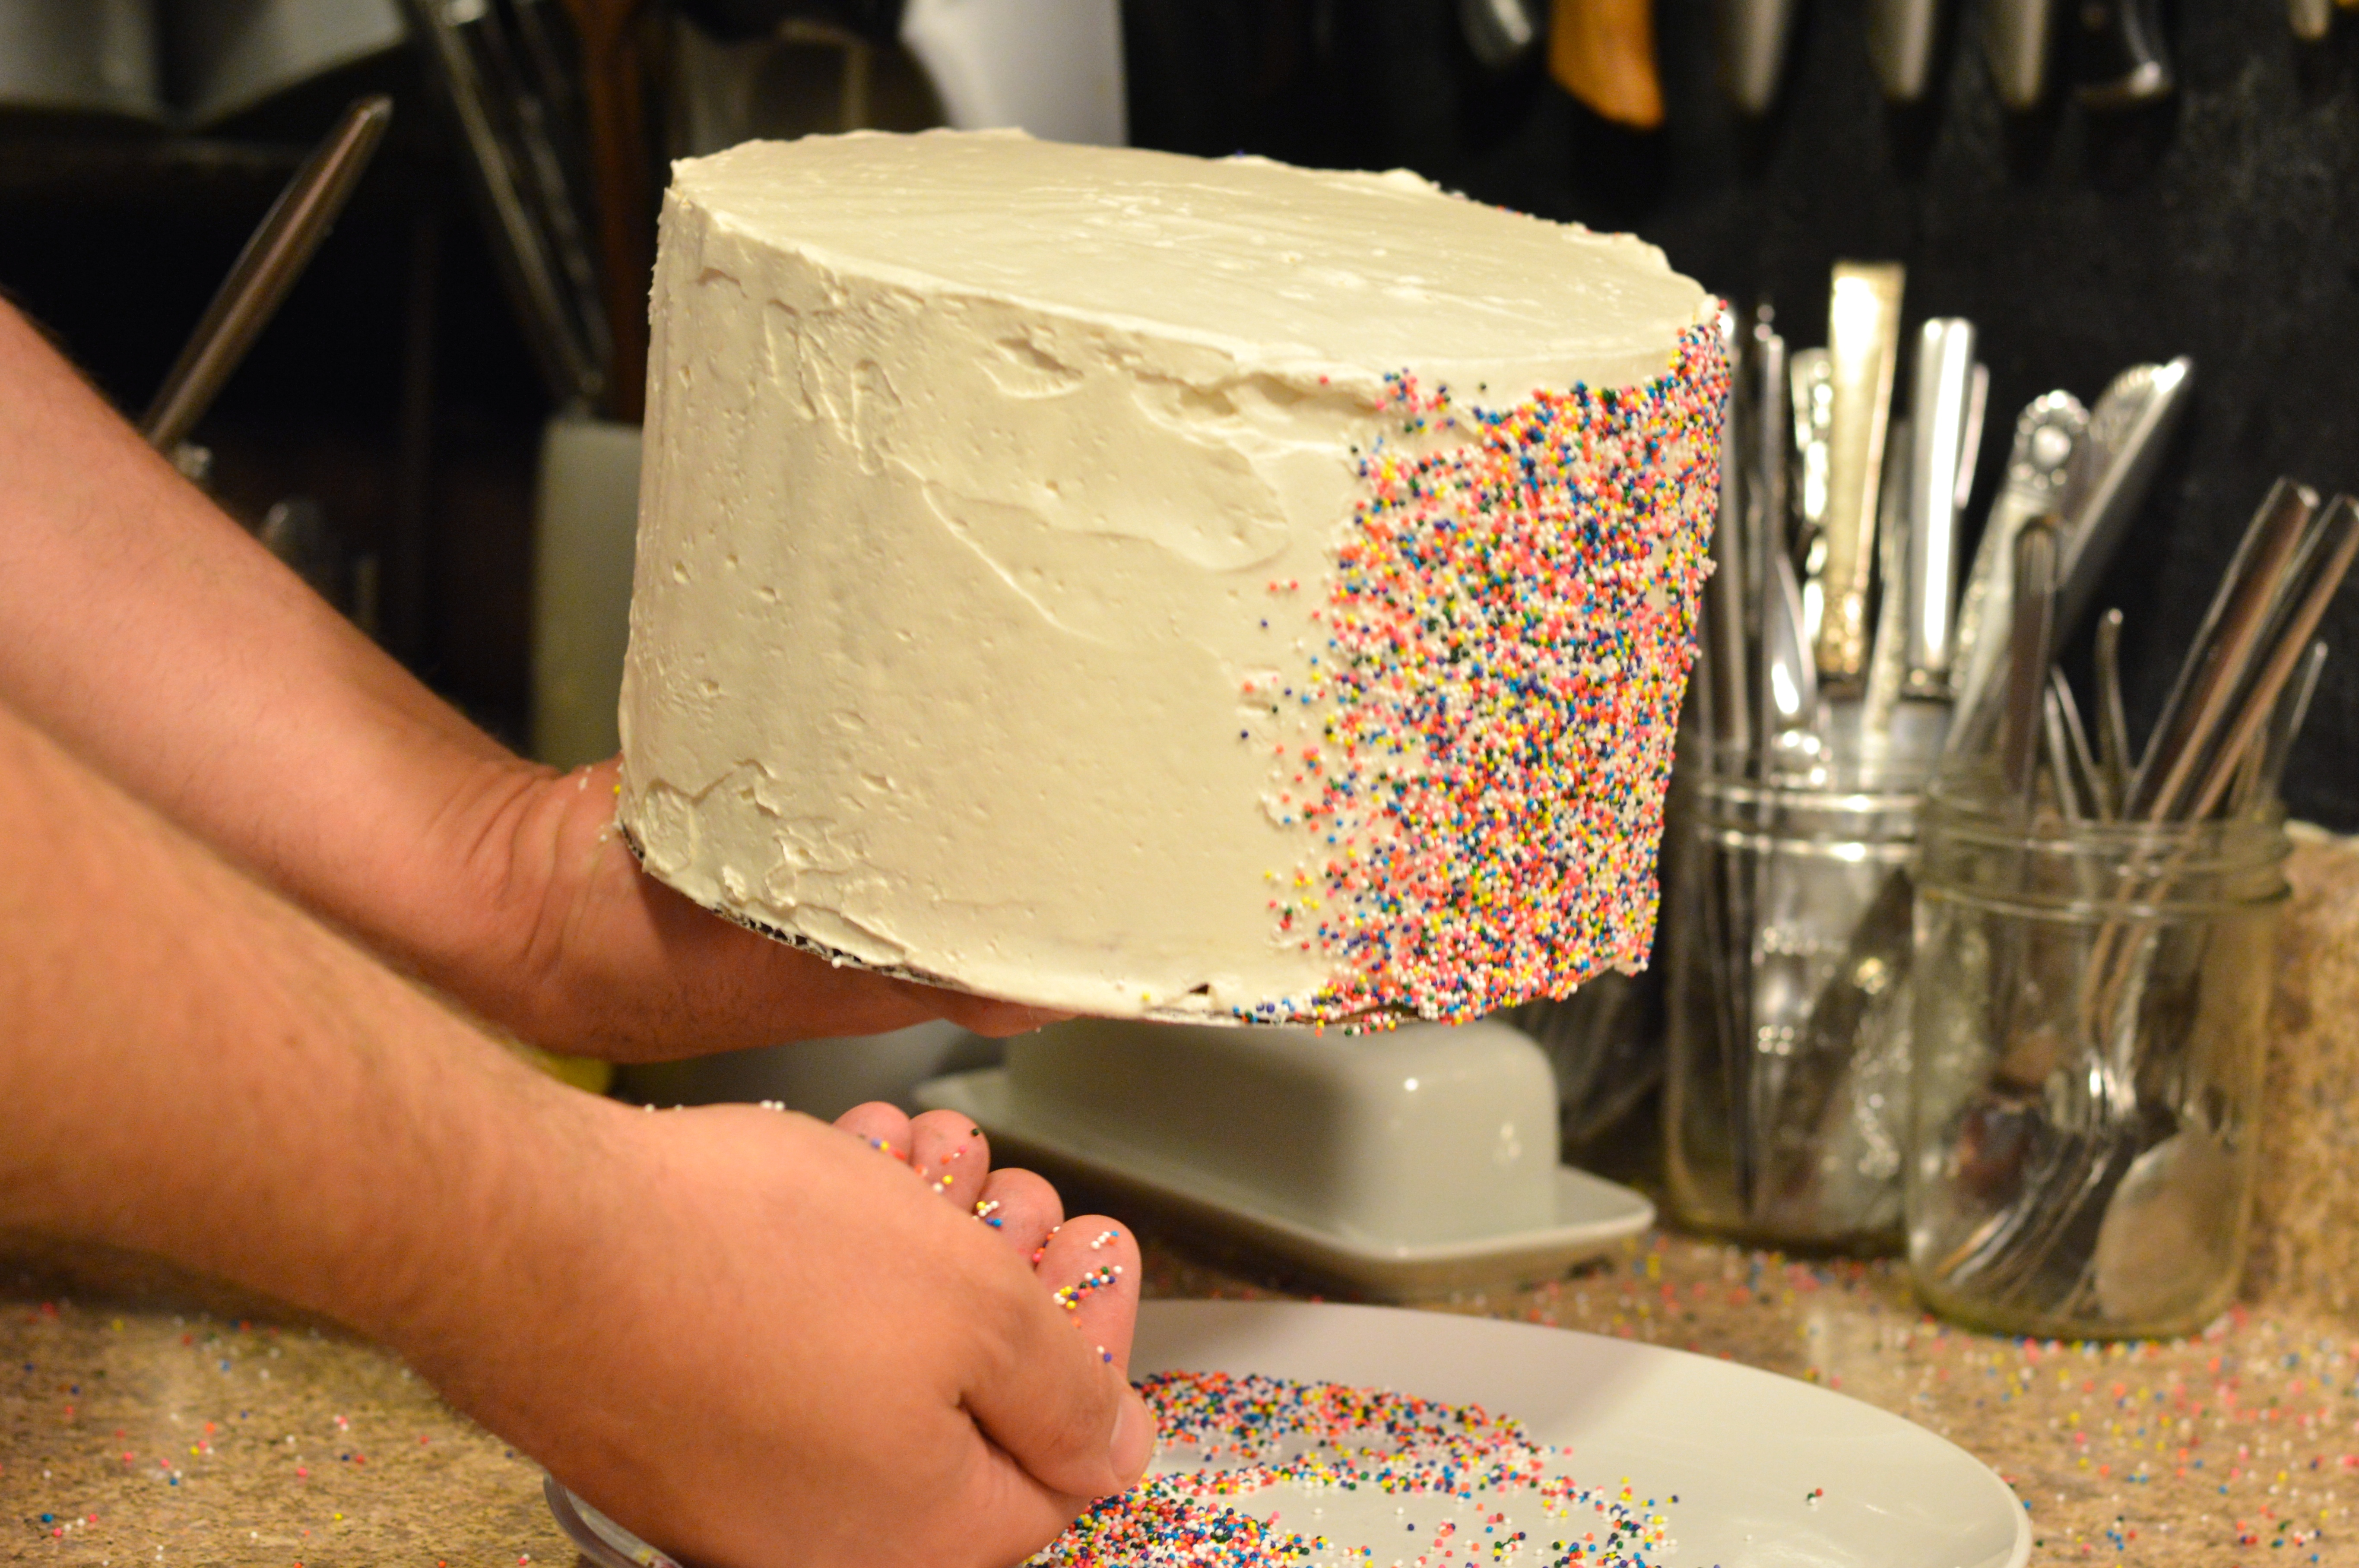
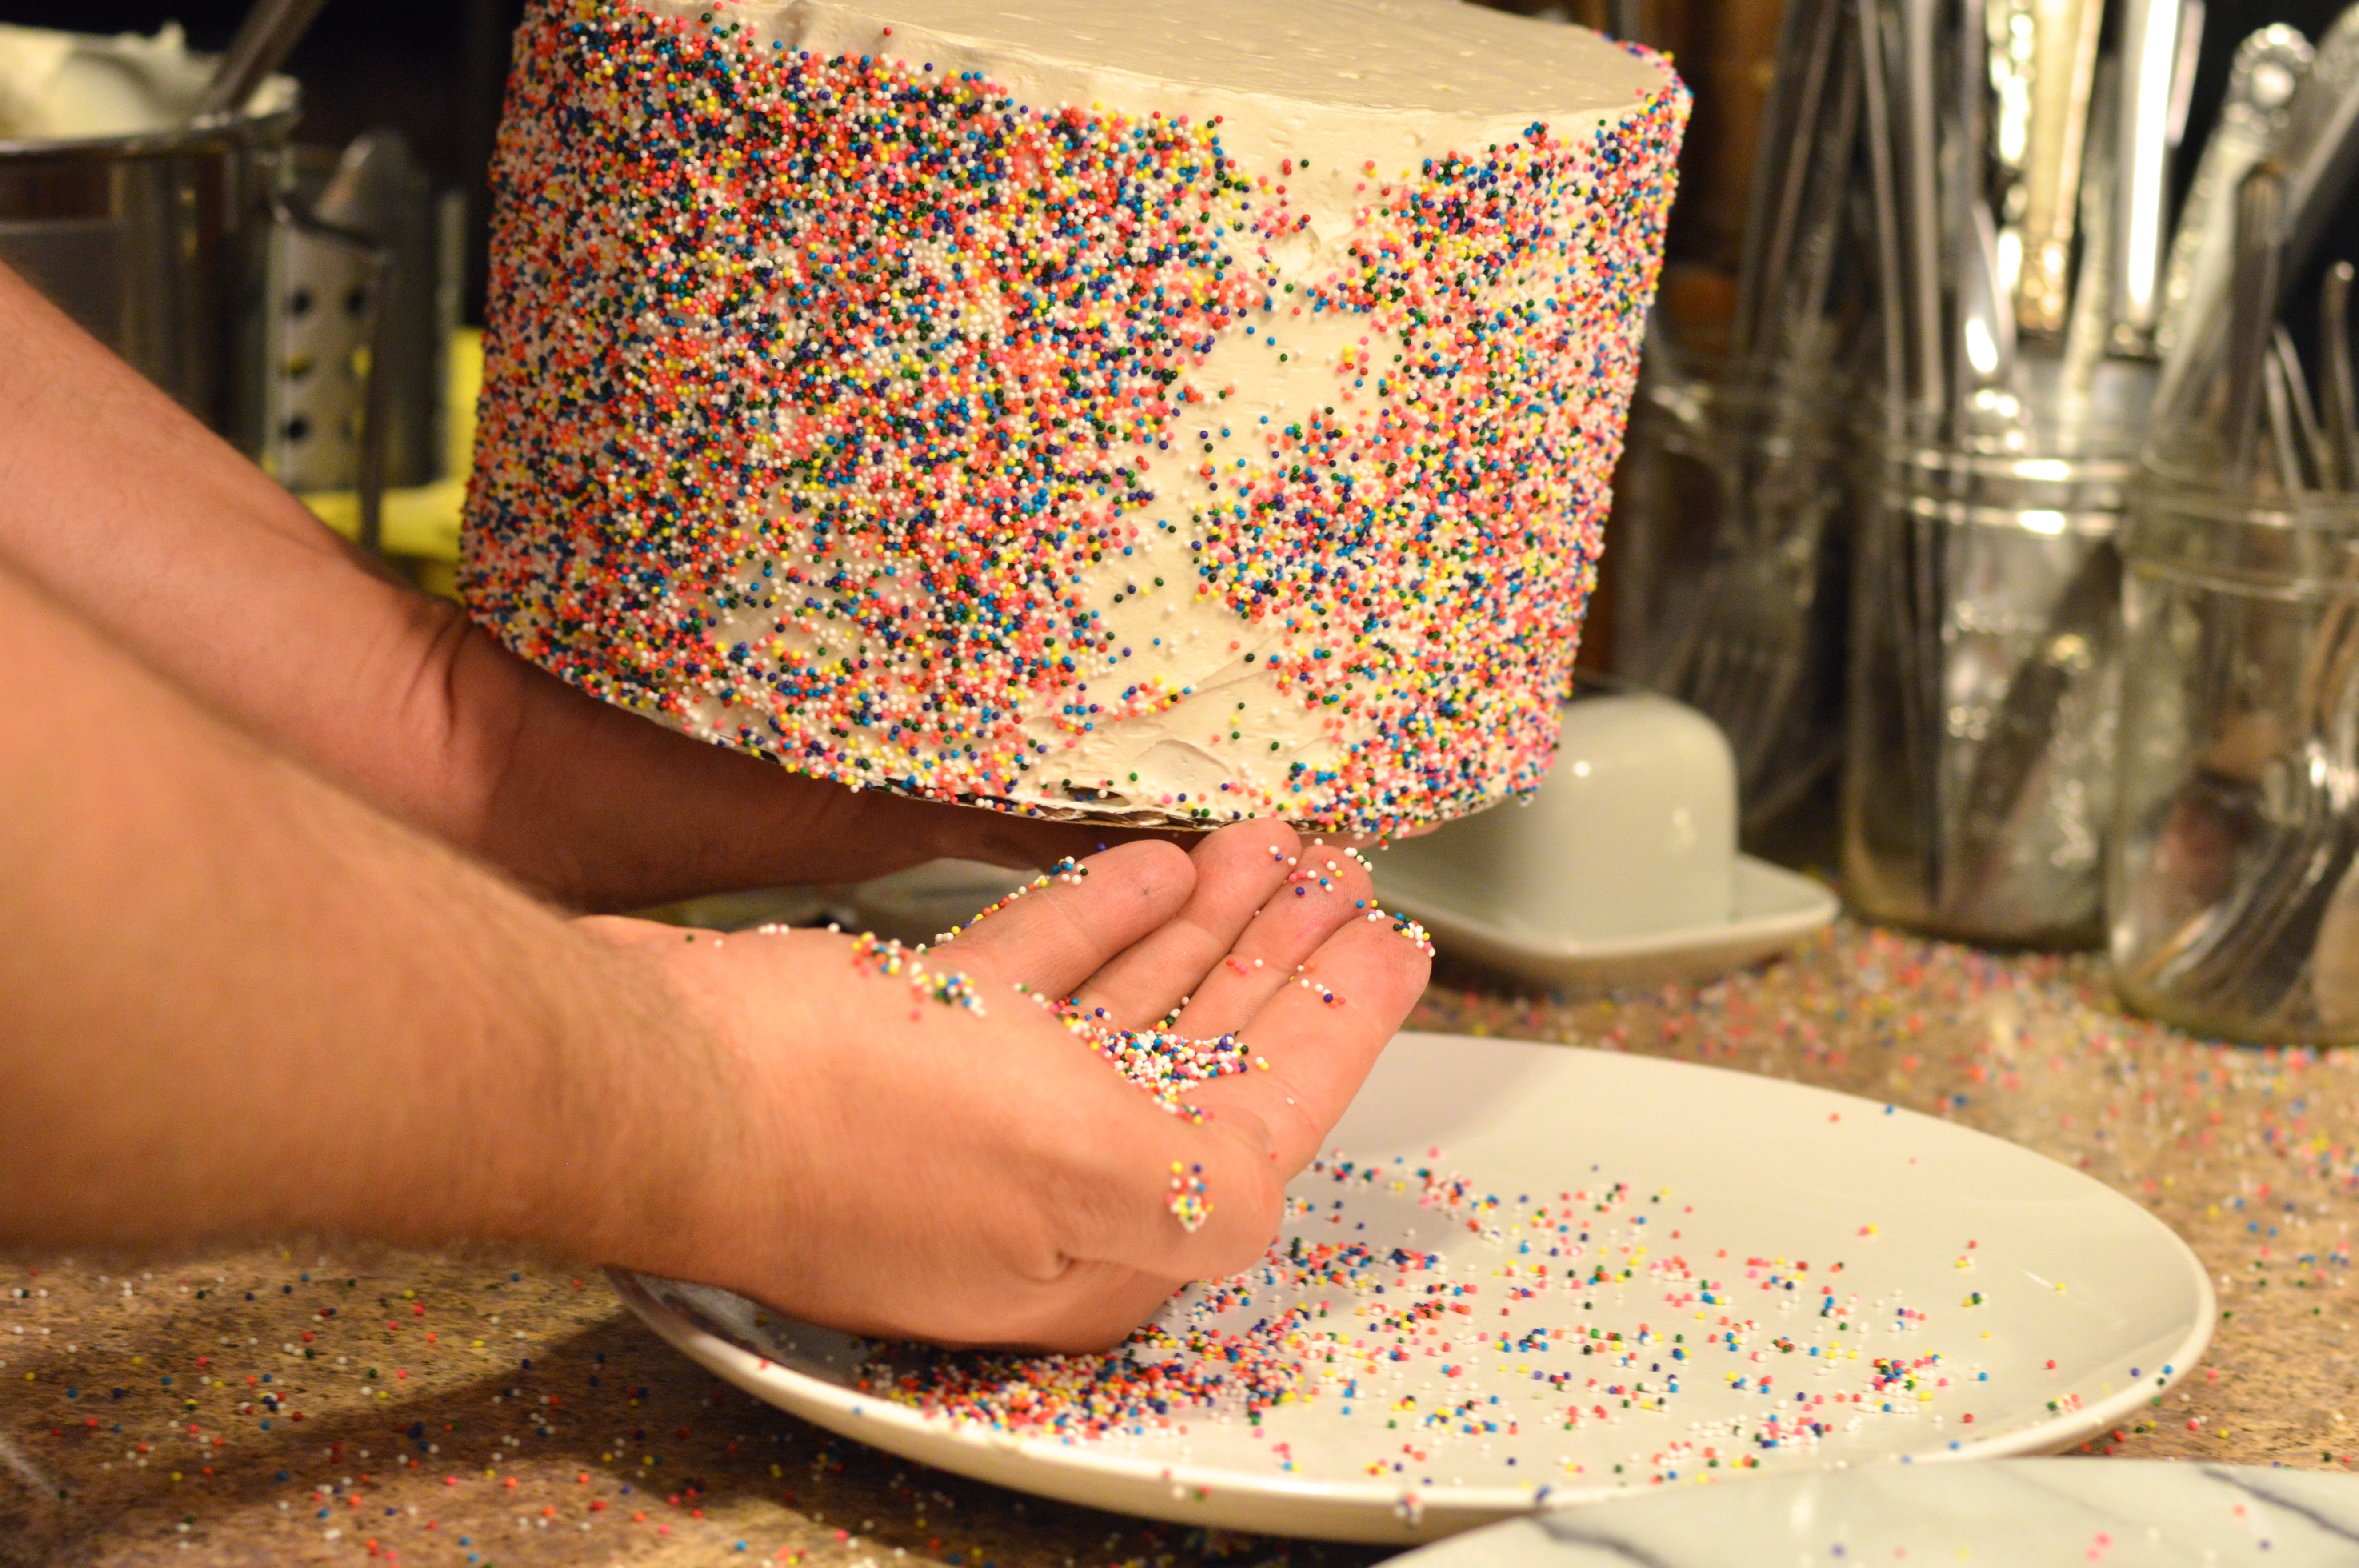
For this cake I completely covered the sides with rainbow nonpareils. Fair warning, this is a challenging technique for beginners. It’s best to use a cake board for this so you can pick the cake up, but the cake gets heavy in your hand after a while. Basically you pick the cake up with one hand and try your best to hold it over a plate and not make a mess (look closely, I still made a mess), while you gently press the decoration into the icing with the other hand. Just slowly work your way around the cake, rotating as you go, until you’re finished. It can be done without picking the cake up if you can’t get (or don’t have) a cake board, but it’s even messier.
You could also do this with cake crumbs as I did with the Brooklyn Blackout cake, which is actually a great way to use up any cut cake you have leftover from leveling the layers. That is, if you didn’t already eat it all.
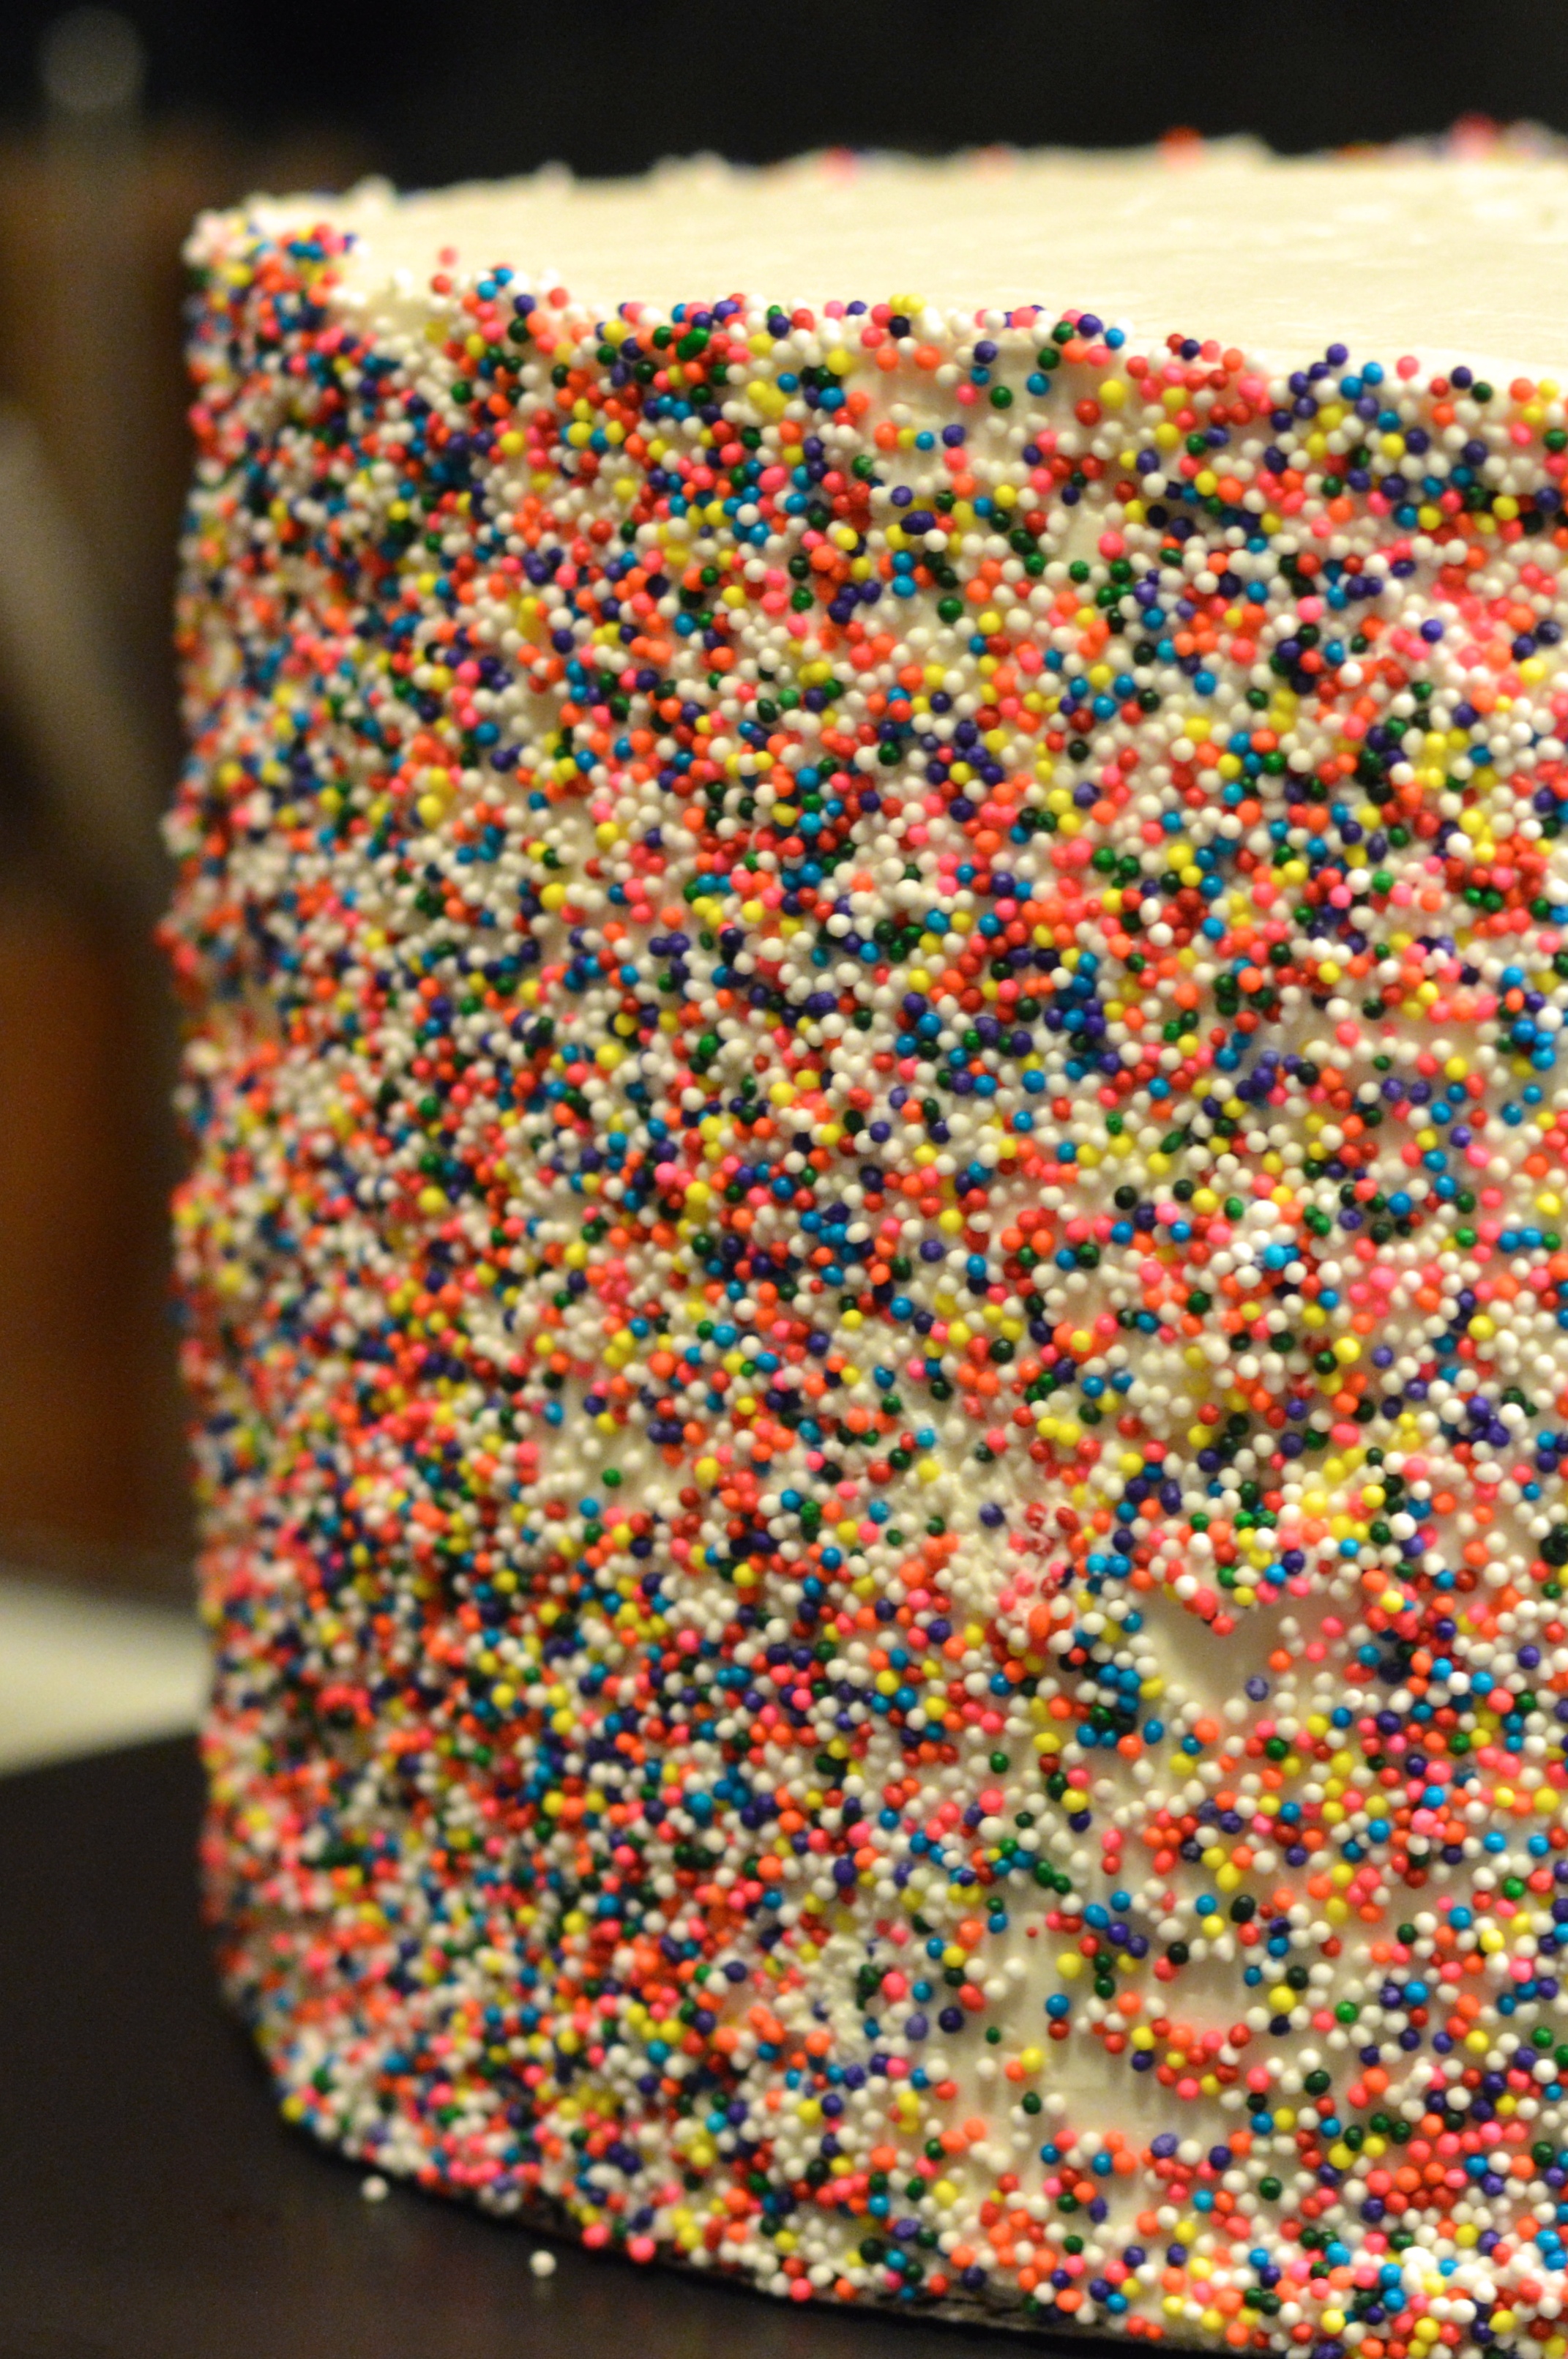
Look how pretty it came out though! It definitely was worth the extra effort, even if I am still finding those little nonpareils hiding behind my butter dish.
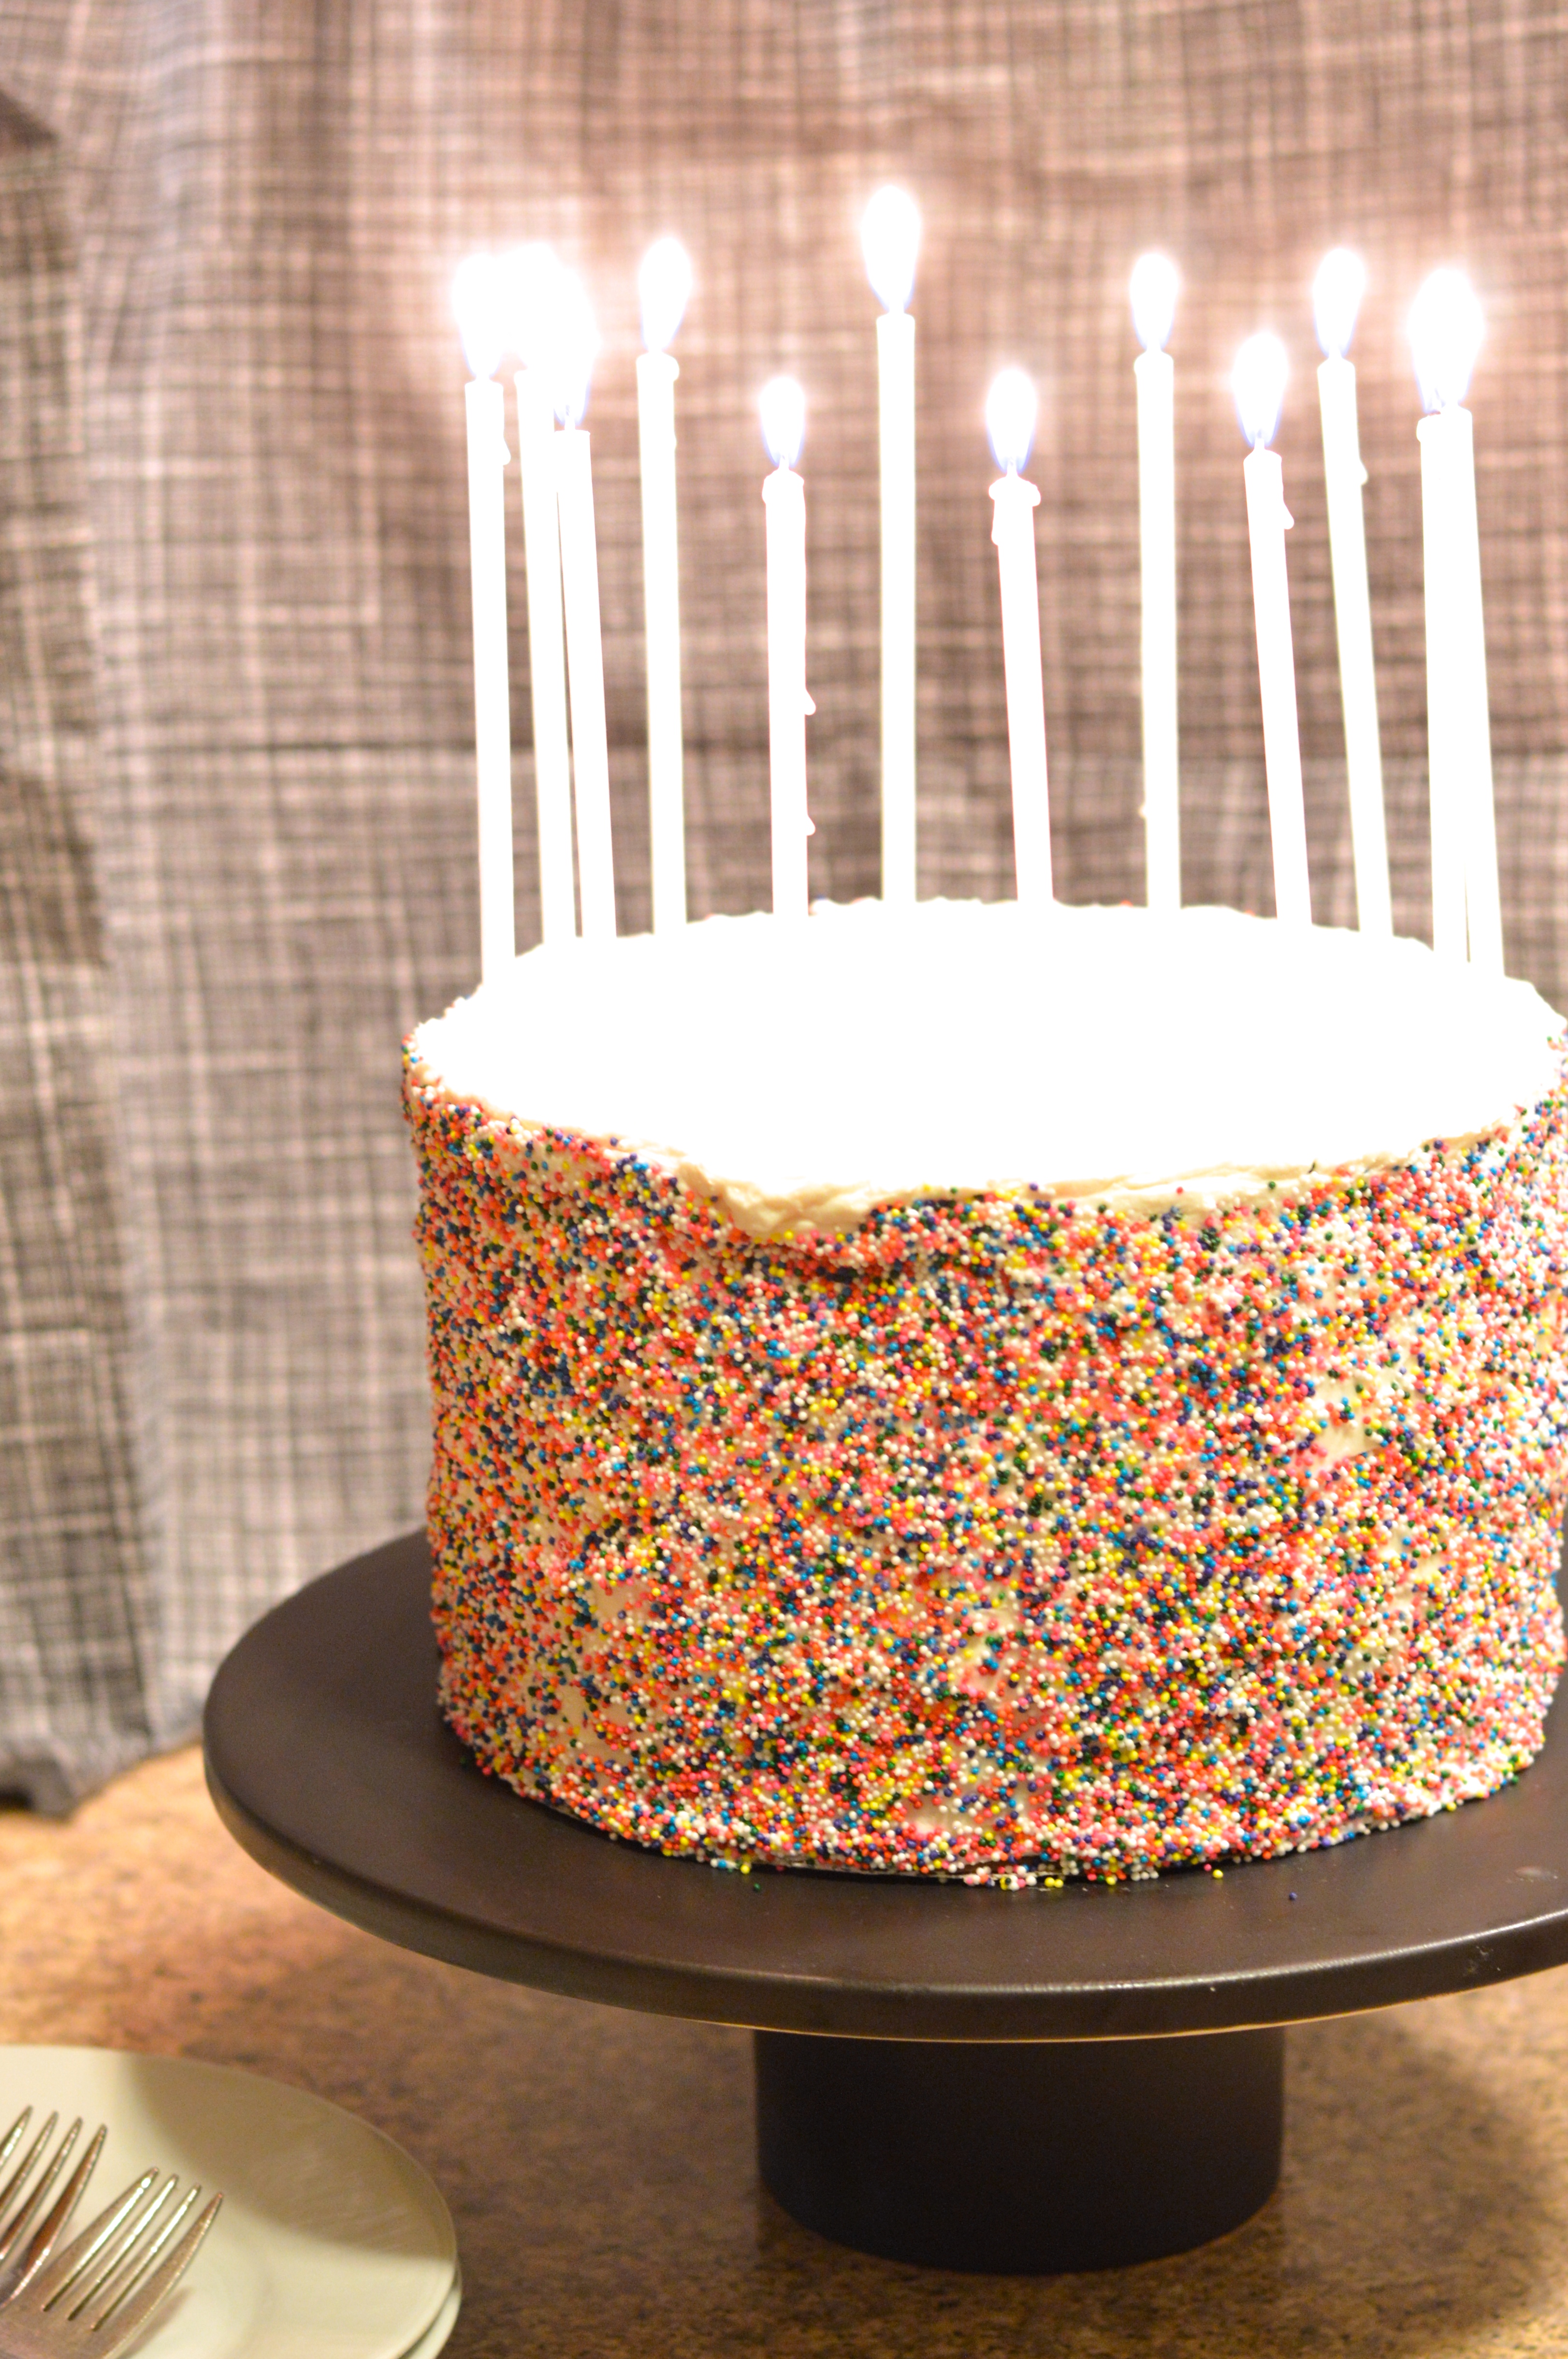
Happy birthday to me!
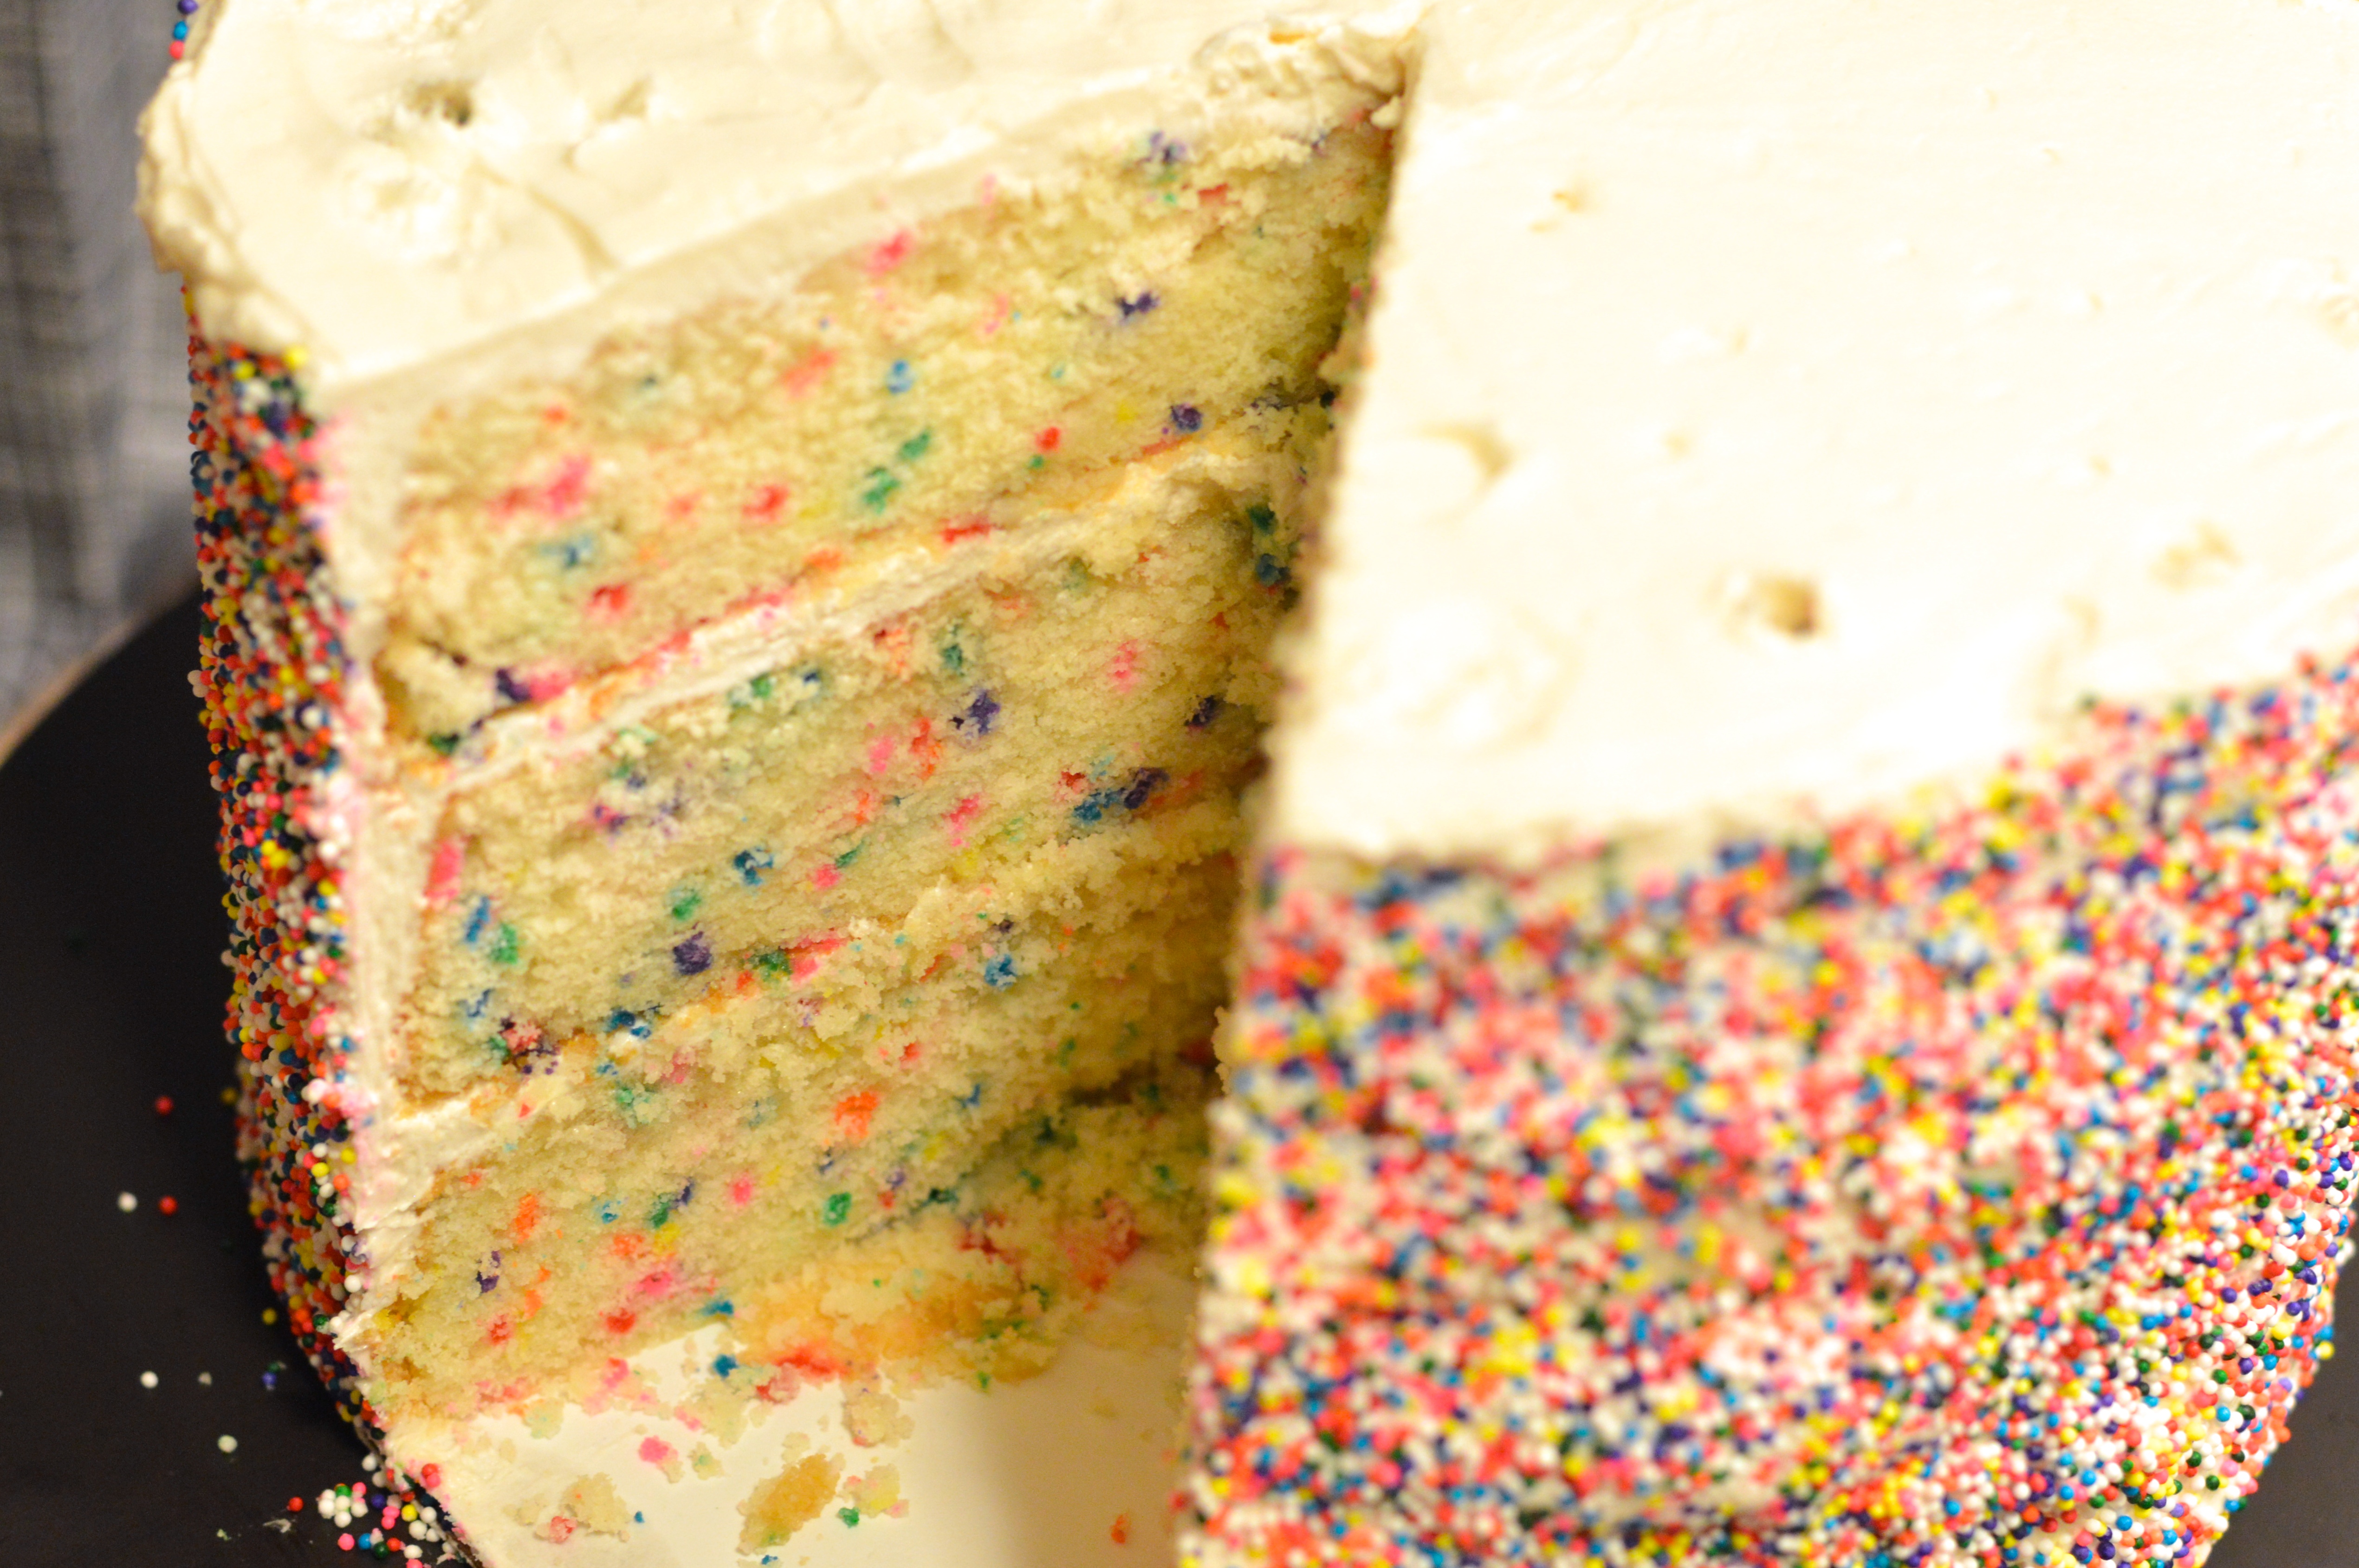
I hope you learned something new and you’re feeling brave enough to try a layer cake for yourself! You should definitely give this one a shot the next time you want to do something special for someone’s birthday. The funfetti cake is super moist and delicious, with tons of bright vibrant color, and the classic american buttercream is the perfect sweet and creamy compliment to a fun and festive birthday cake.
funfetti birthday cake
adapted from Sweetapolita
For the Cake:
3 cups cake flour
1 tablespoon plus 1/2 teaspoon baking powder
1/2 teaspoon salt
1 cup (2 sticks) unsalted butter, at room temperature
2 cups sugar
5 whole eggs, at room temperature
2 teaspoons vanilla extract
1/4 cup peanut (or vegetable) oil
1 1/4 cups buttermilk, at room temperature
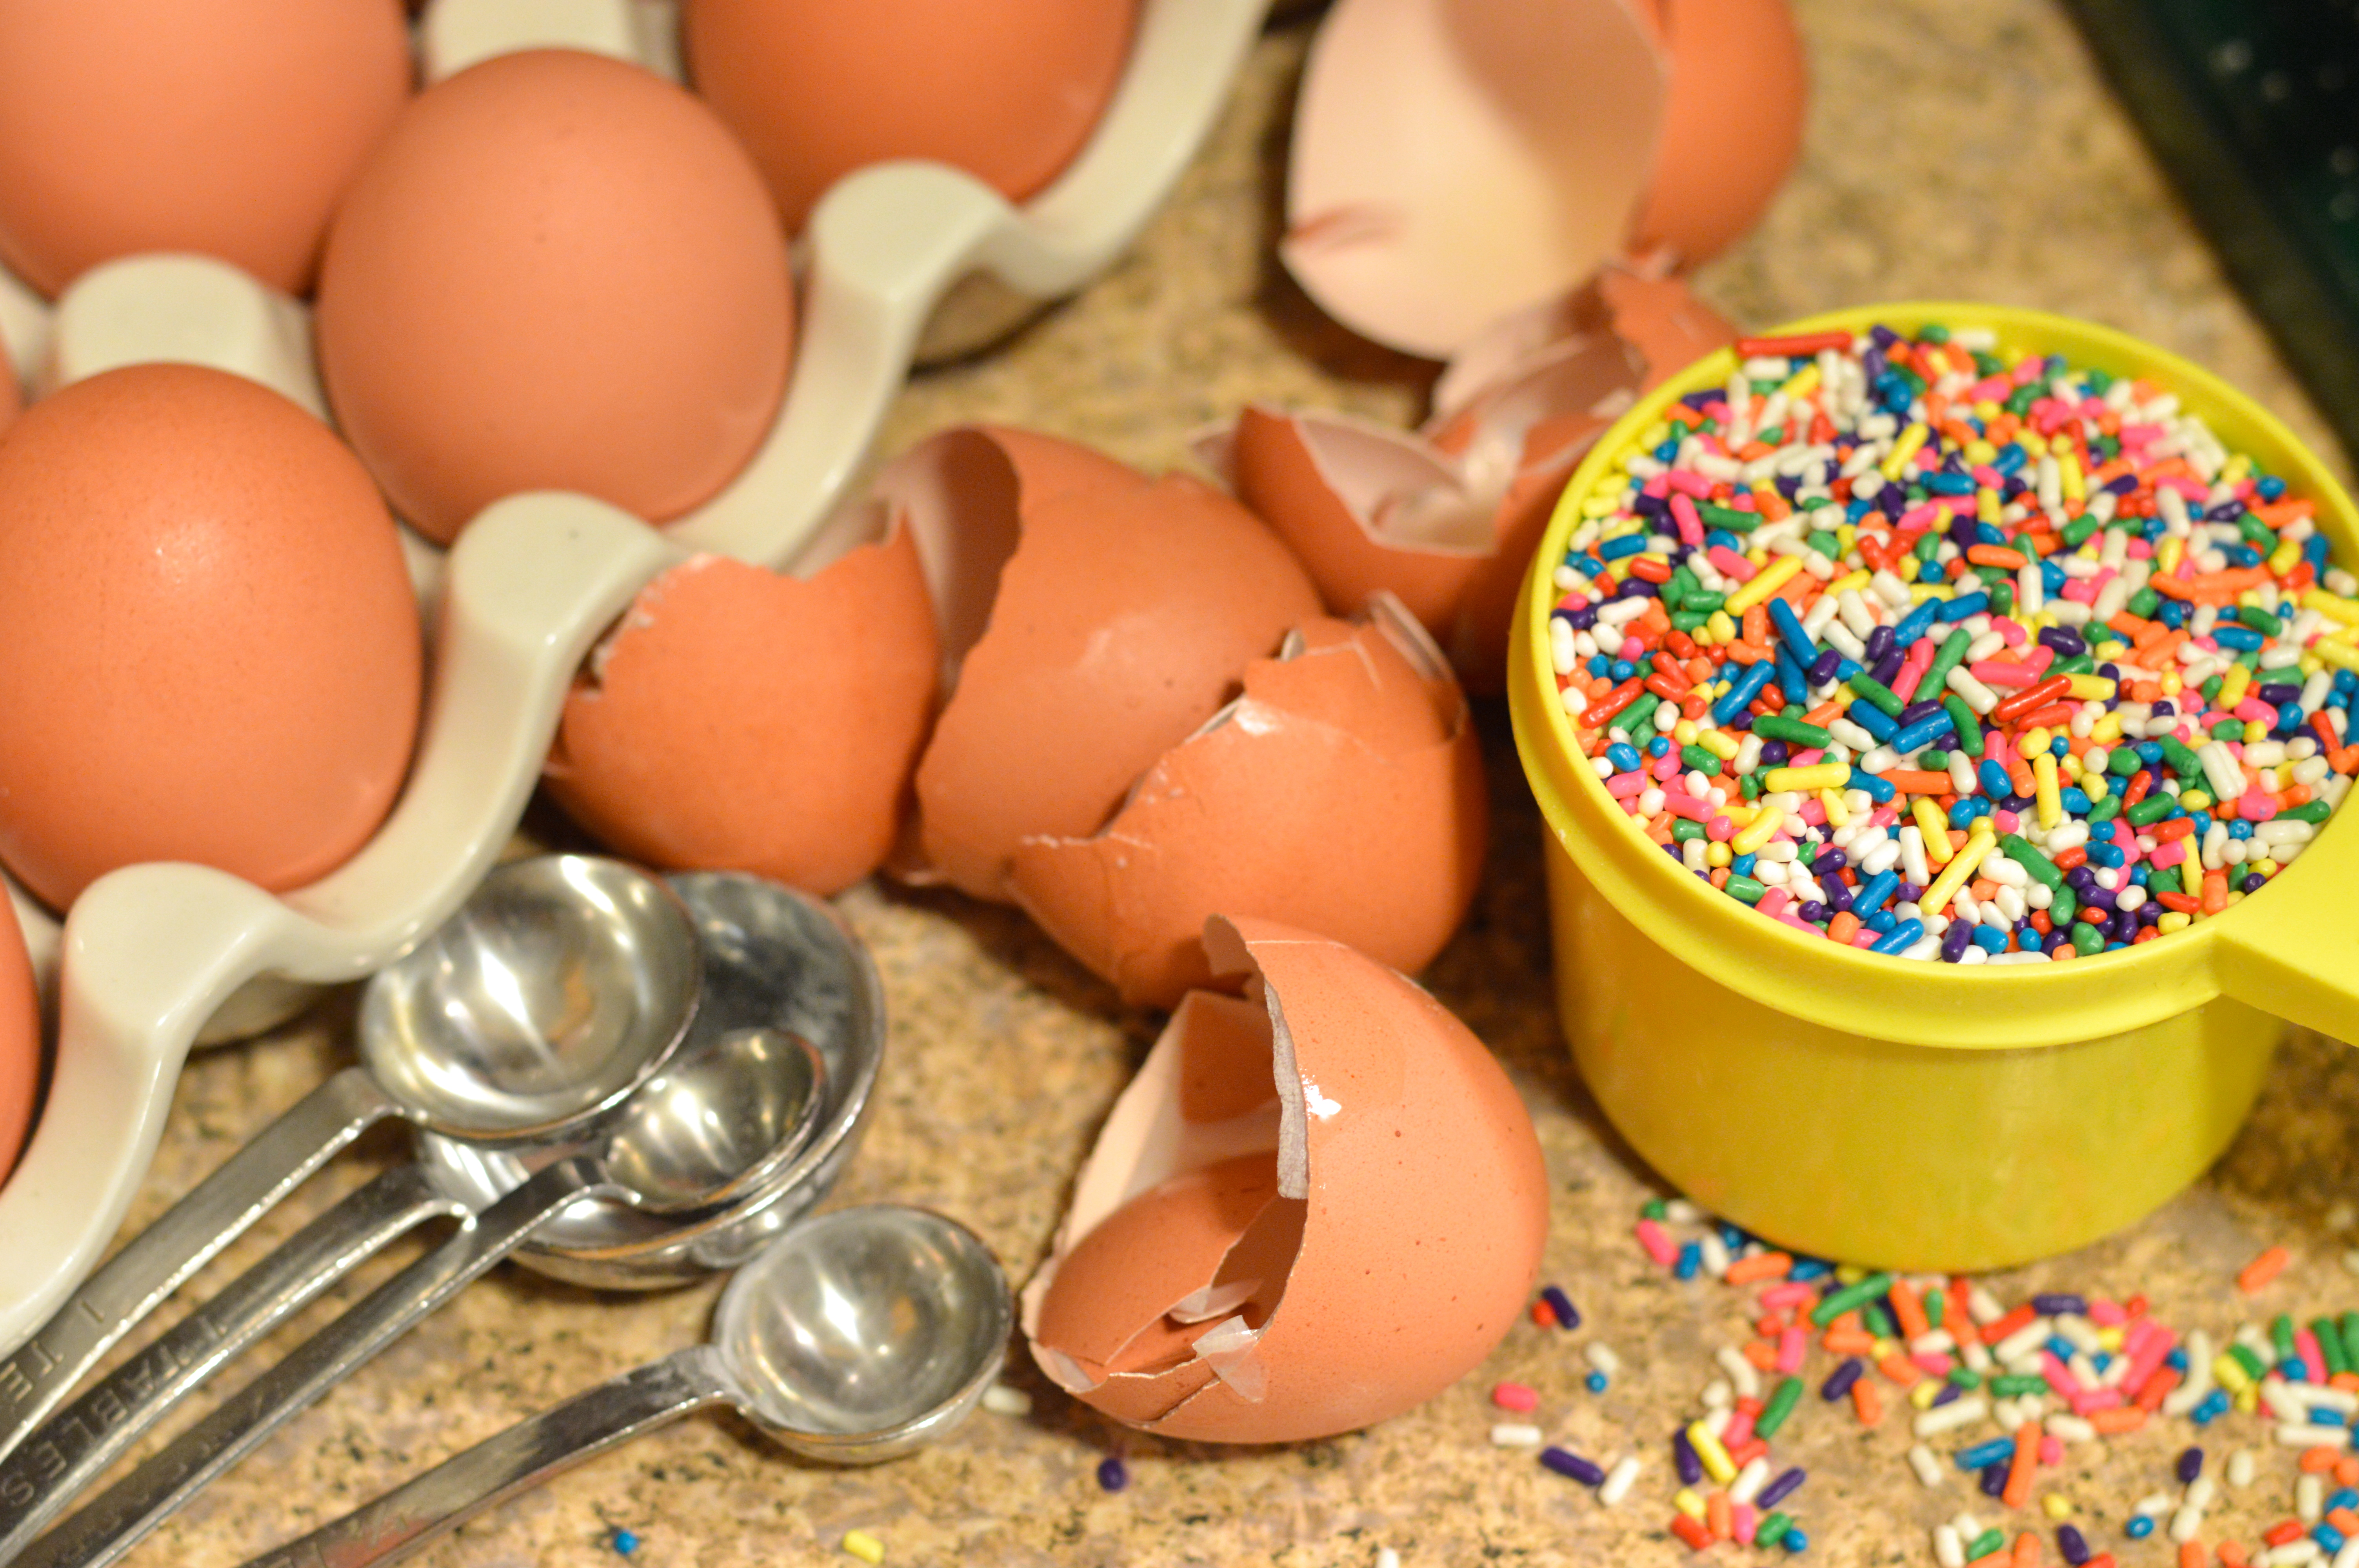
3/4 cups rainbow sprinkles (or jimmies)
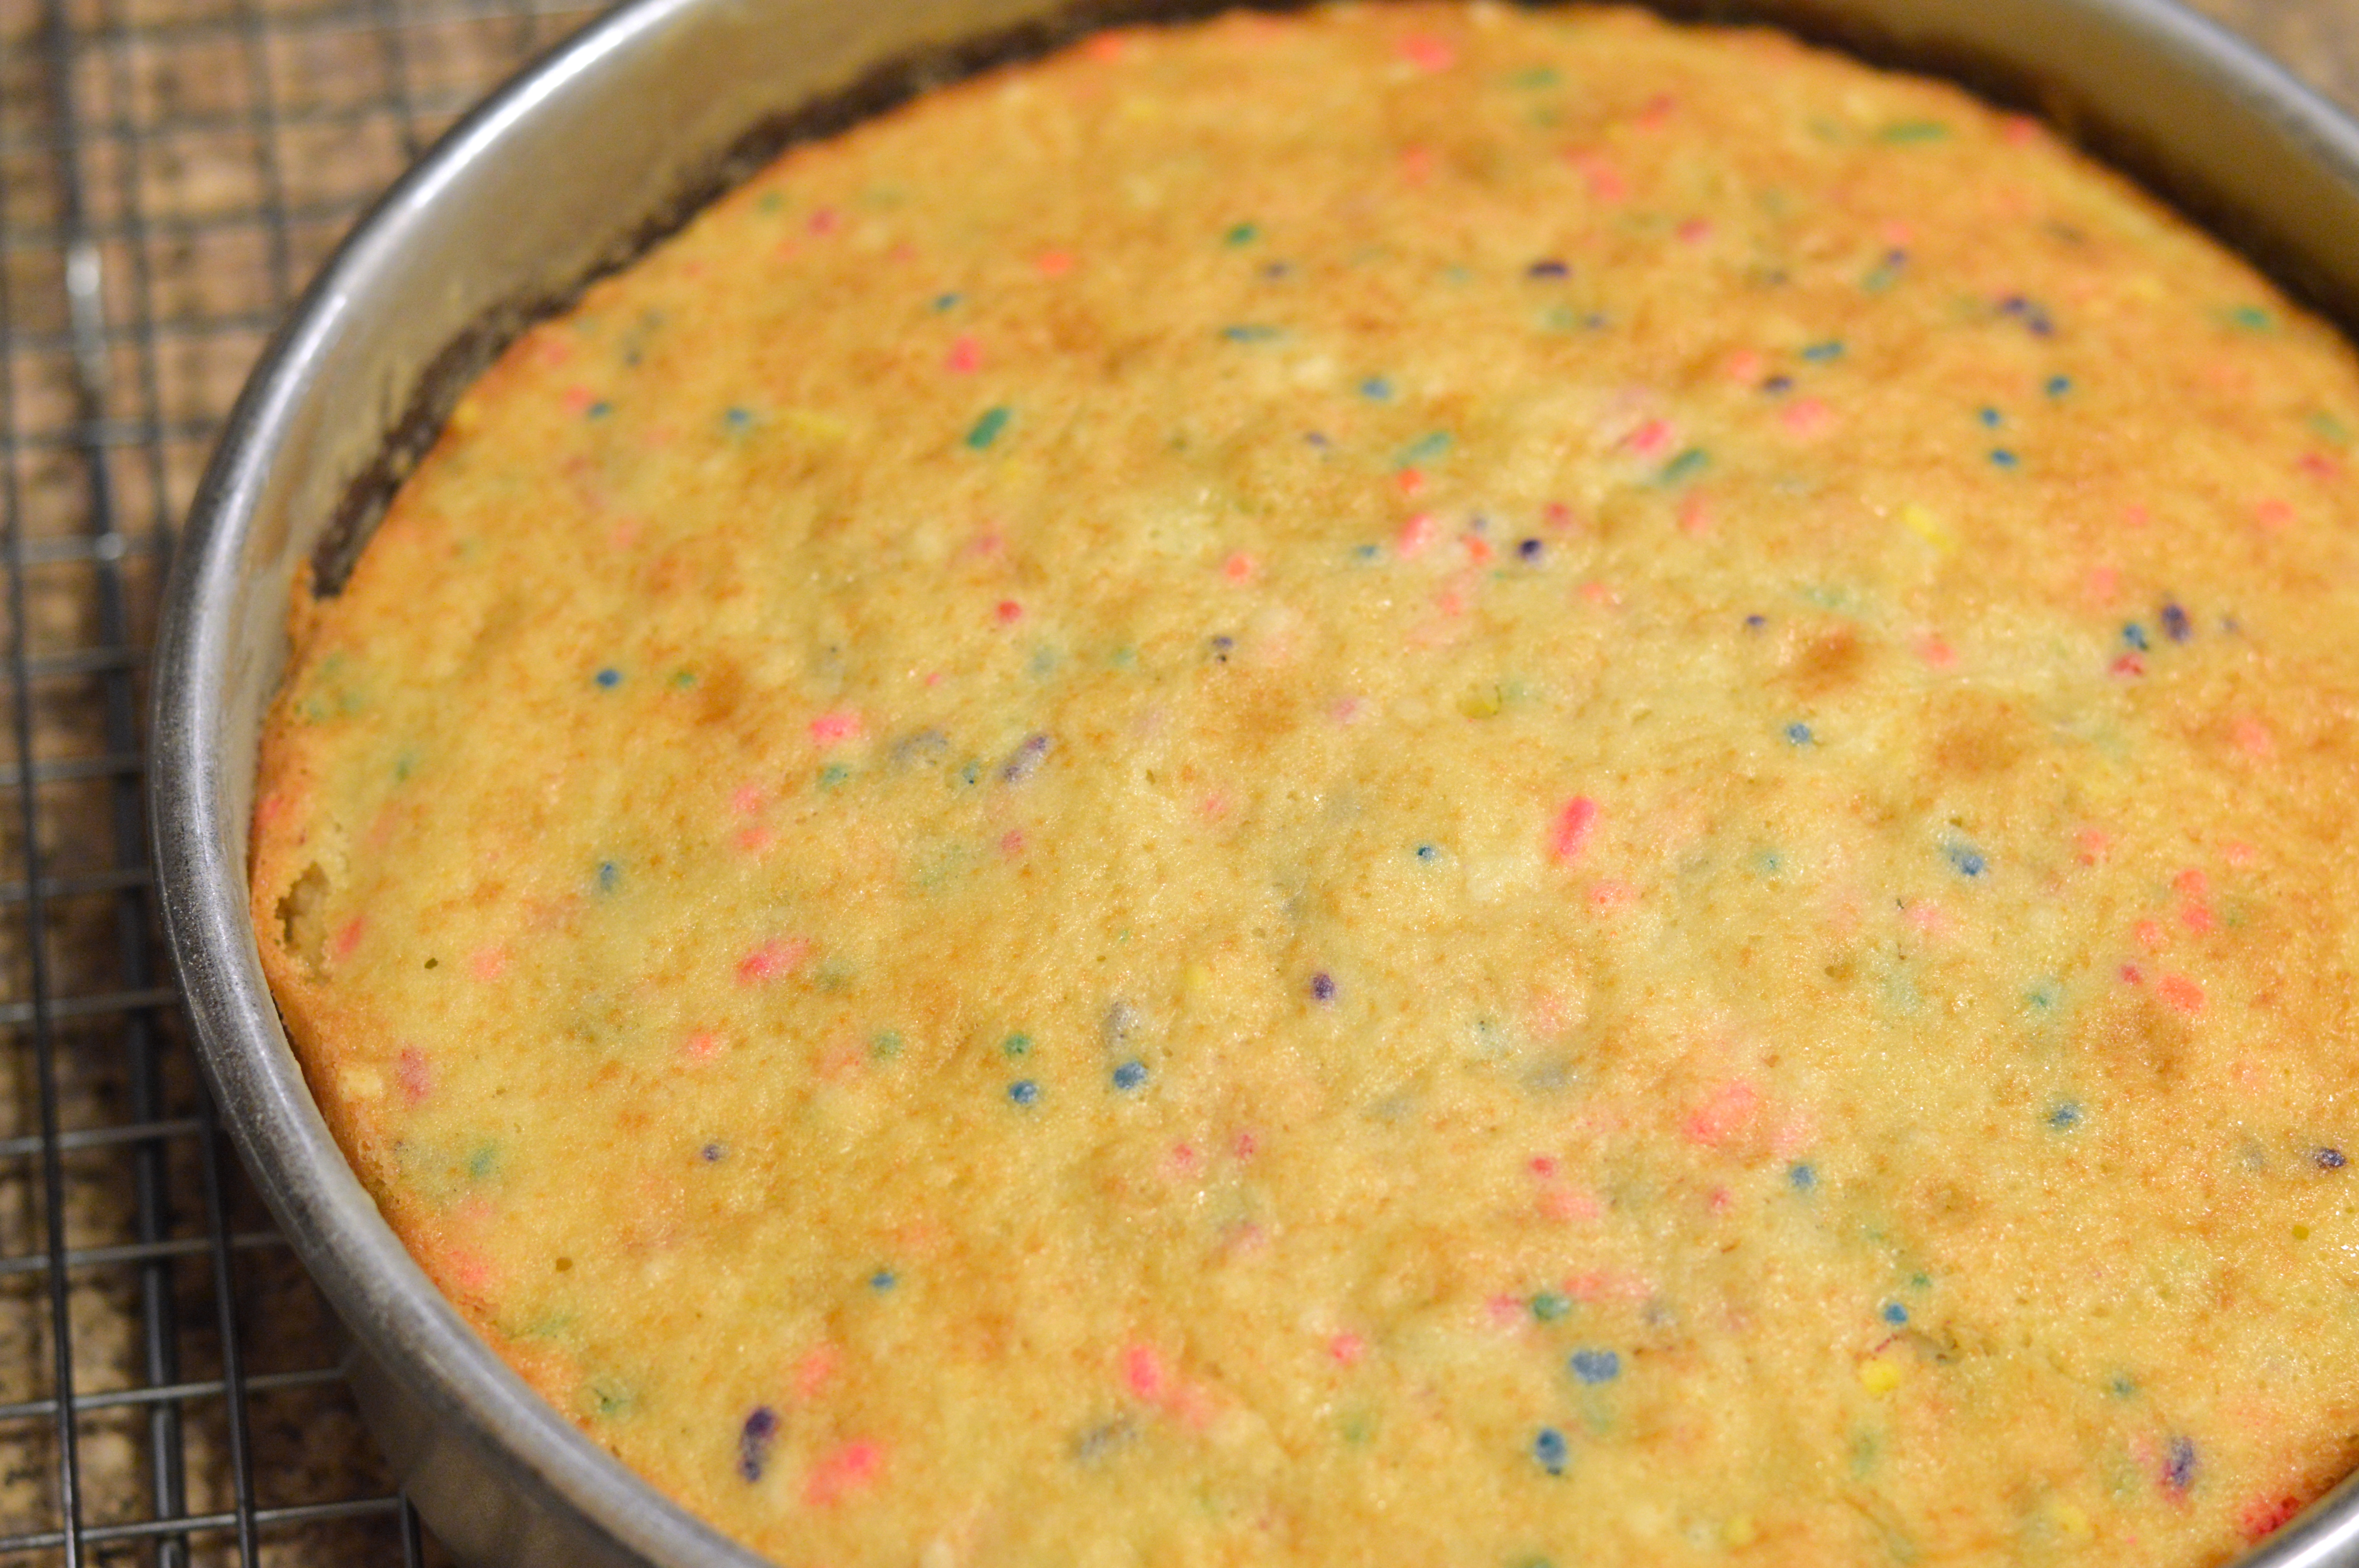
Preheat the oven to 350° F. Butter the bottoms and sides of three 8-inch round cake pans, line bottoms with parchment round, butter the rounds and dust with flour.
Sift together flour, baking powder, & salt. Set aside.
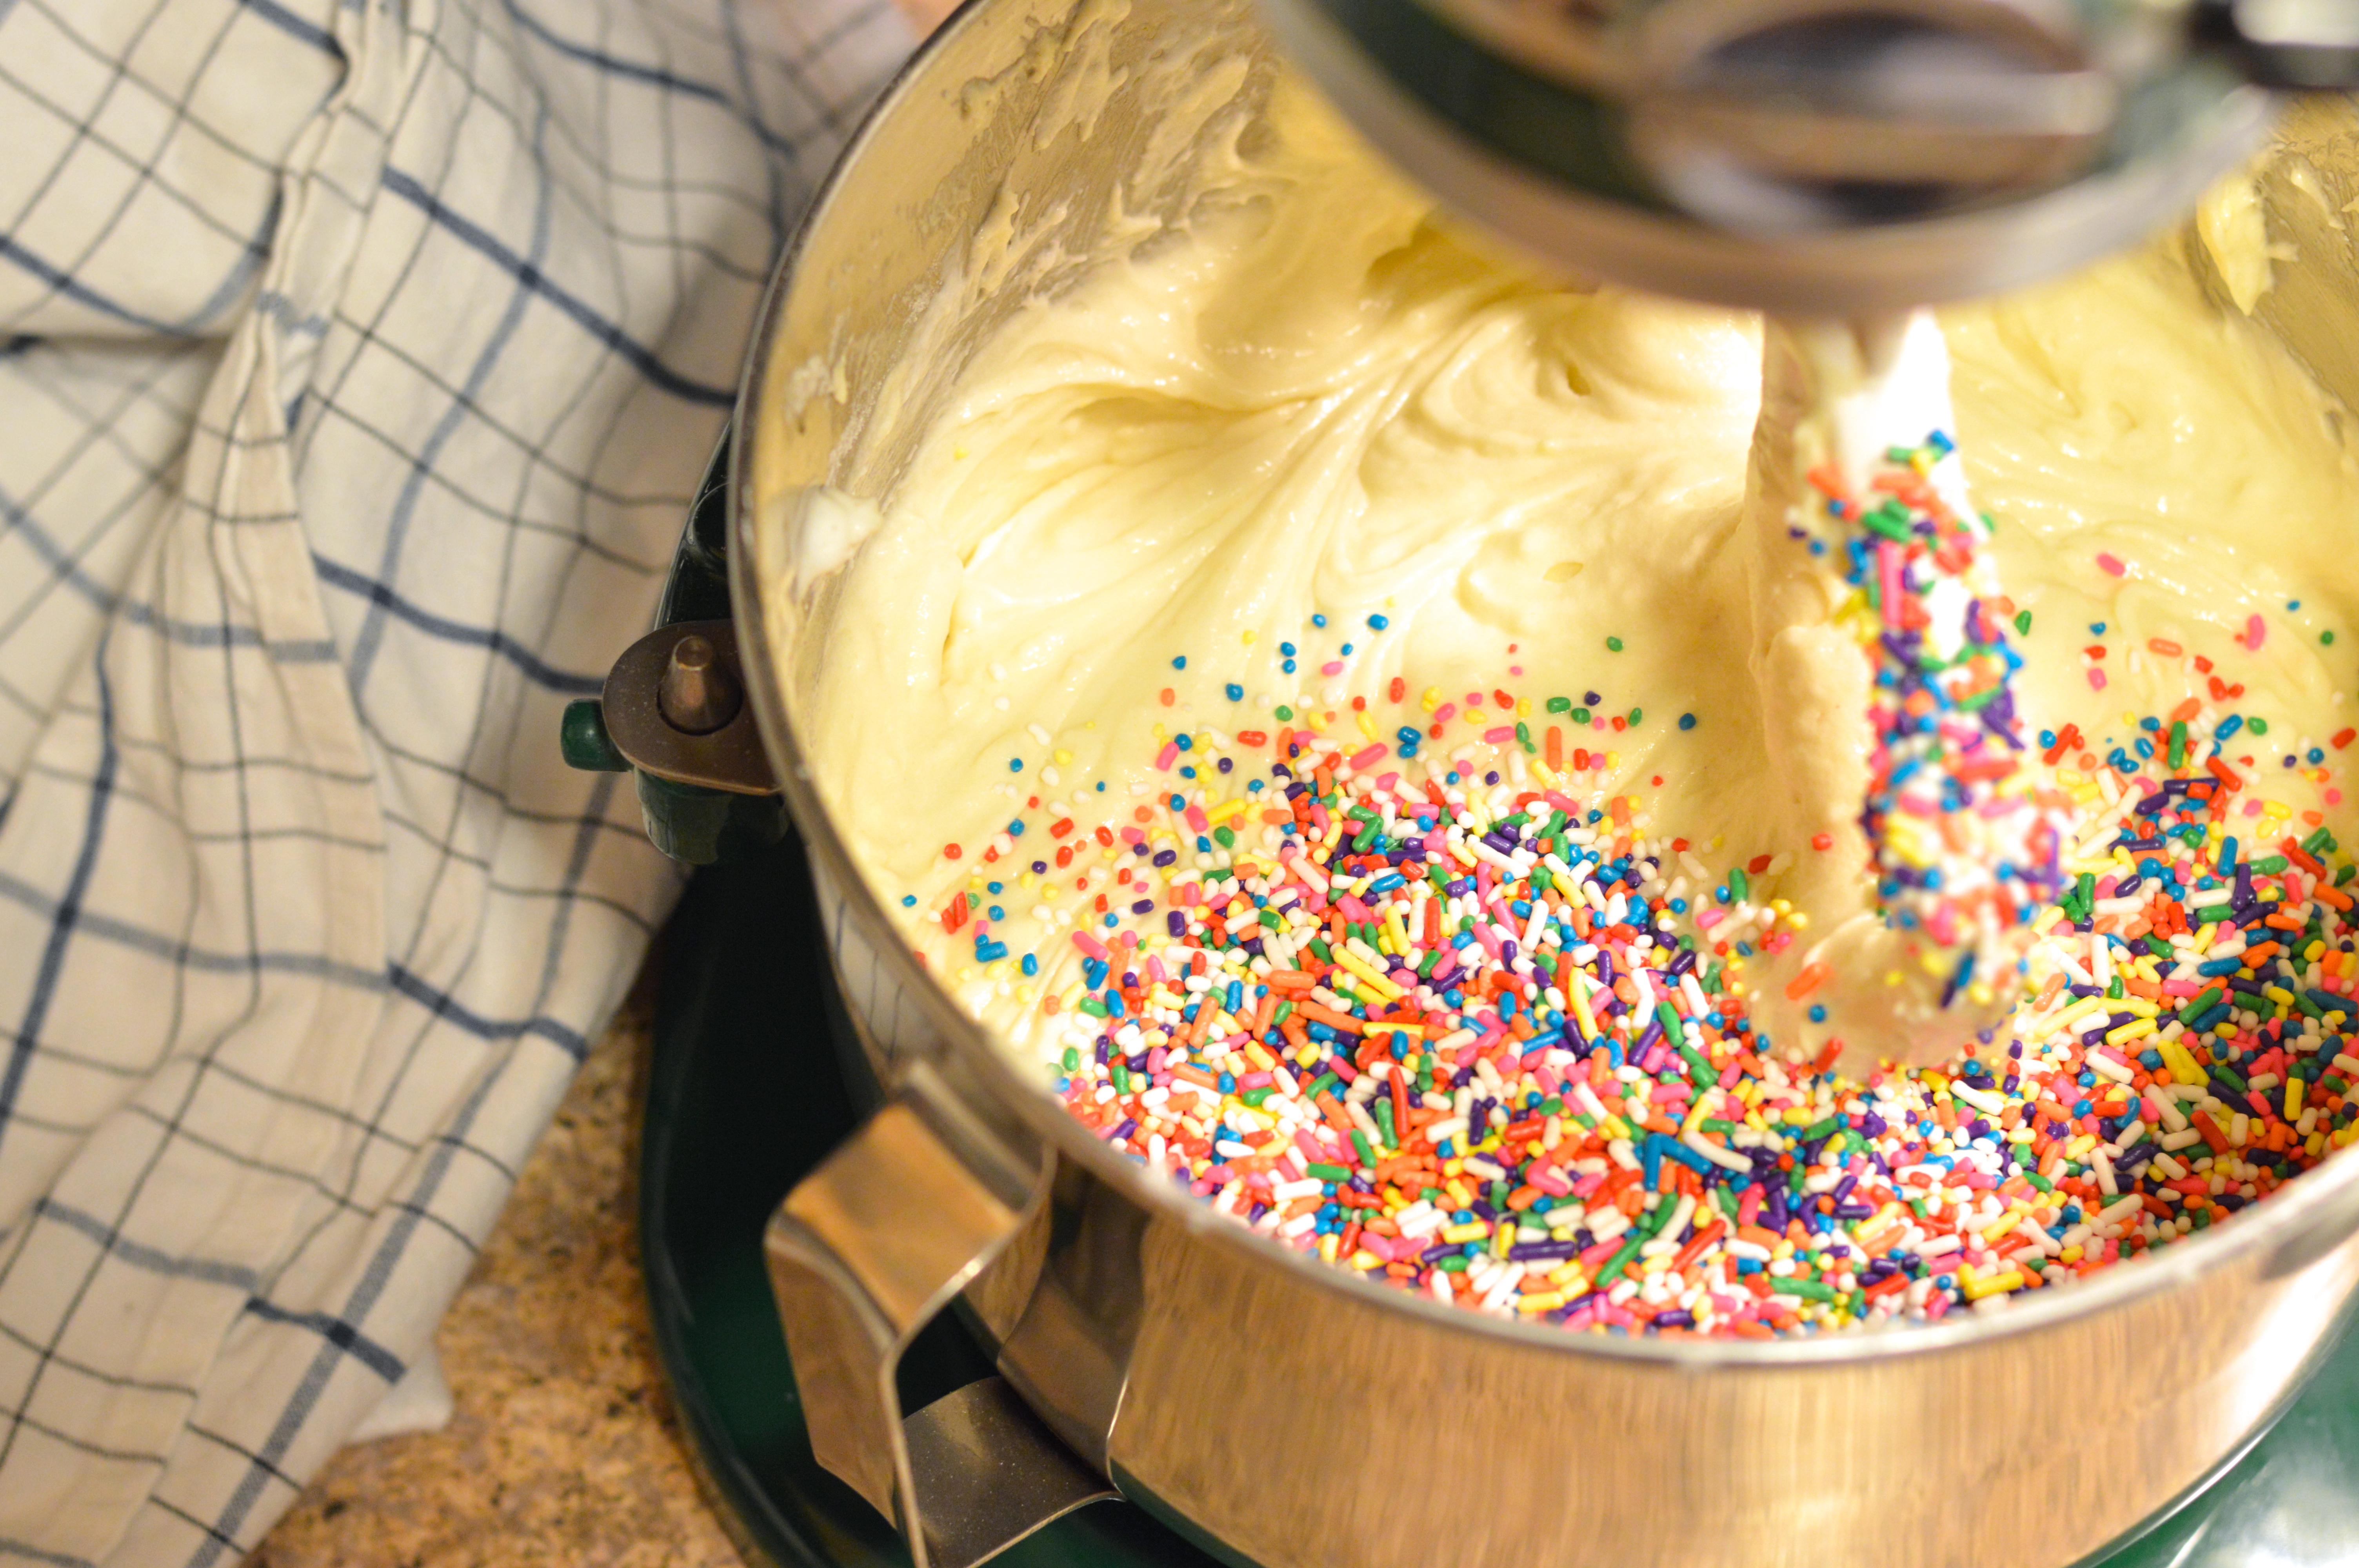
In the bowl of a stand mixer, cream the butter and sugar together at high speed until light and fluffy, 3 to 5 minutes. Beat in eggs until incorporated, one at a time, scraping sides of bowl between each addition. Add vanilla and oil and mix until thoroughly incorporated.
Add 1/3 of flour, and beat on low speed until just combined. Scrape bowl, mix in 1/2 of buttermilk, and scrape again. Repeat until all flour and buttermilk is mixed in. Gently stir in sprinkles until just combined. Do not over mix.
Divide batter evenly among the 3 prepared pan (I like to use a kitchen scale to ensure even layers). Bake for 28-32 minutes, or until a cake tester or toothpick inserted into the center comes clean and the cake begins to pull away from the sides of the pan. Let the layers cool in the pans for 10 minutes, then carefully turn out onto wire racks, peel of the paper liners, and let cool completely.
Classic American Buttercream:
adapted from Savory Sweet Life
2 cups (4 sticks) unsalted butter, softened and cut into cubes
6-8 cups confectioners’ sugar, sifted
3-6 tablespoons milk
2 tablespoons pure vanilla extract
1/4 teaspoon salt
rainbow non-pareils, or any sprinkles you like for decorating
In the bowl of an electric mixer fitted with the paddle attachment, whip butter for 5 minutes on medium speed. Butter will become very pale & creamy. Add 6 cups of powdered sugar and turn your mixer on the lowest speed until the sugar has been incorporated with the butter. Increase mixer speed to medium and add vanilla extract, salt, and 3 tablespoons of milk and beat for 5-7 minutes. If your frosting needs a more stiff consistency, add more sugar 1/2 cup at a time, until desired consistency is reached. If your frosting needs to be thinned out, add remaining milk 1 tablespoons at a time.
To assemble cake, make sure cake layers are cool or cold. If necessary, remove the domed tops of the layers with a cake leveler or sharp bread knife. Place one layer on a cake plate, serving plate, or cake board. Evenly spread about 3/4 cups of icing over the first layer. Top with another cake layer and another 3/4 cups of icing. Spread evenly and top with your final layer.
With an icing spatula, spread a thin layer of icing over top and sides of cake, Be sure to fill in any gaps between layers and make the sides and top smooth and flat as possible. This thin layer of icing is referred to as the “crumb coat” and is meant to seal in any crumbs so they’re not seen in your final layer of icing. Refrigerate cake for 30 minutes. Spread most (or all) of remaining icing evenly over top and sides of cake, trying to get as smooth a surface as possible. If desired, reserve some for piped decoration, otherwise, slather it all on. Decorate as desired.
This cake is at it’s best the day it’s baked, but can be covered and refrigerated for up to 2 days. If refrigerated, it will need to come up to room temperature before serving.
