Author: Tux | Brooklyn Homemaker

A food and lifestyle blog focused on gussied up american classics, baked goods with a history, and schnauzer babies.

frozen watermelon margarita

I know what everyone keeps saying, but you guys, it’s still summer!!! I swear it!

frozen watermelon margaritas | Brooklyn Homemaker.com

It seems like every year, come August, people start whining and mourning the end of summer, at least six weeks prematurely. I don’t know if you’ve been outside lately, but it’s freakin’ hot out there.
While everyone is lamenting the onset of cold weather, we’re smack dab in the middle of our second heatwave in less than a month. You can’t go outside without sweating through your clothes, and the farmer’s markets are exploding with gorgeous tomatoes and stone fruit.

frozen watermelon margaritas | Brooklyn Homemaker.com

Last week my mom had some vacation time and wanted to take a break from fixing up her new old house and get away for a few days. She piled in the car with my little sister and drove down to Brooklyn to hang out with me and Russell, and get in some snuggle time with Doris and Betty (she calls them her granddoggers!).

While she was here we drove down to Coney Island to ride the Cyclone and check out the freak show. There were also margaritas involved. Later that night, safely back in Bushwick with dinner tucked into our bellies, mom suggested we pick up some tequila and have a few more.

frozen watermelon margaritas | Brooklyn Homemaker.com

Mom isn’t really a big drinker, but as far back as I can remember, she’s always been a big fan of frozen drinks. She usually makes them a bit on the weak side, just strong enough to have a little fun without getting messy, but either way she likes them just the same. When I was growing up whenever mom had a party she’d dust off the blender and stock the freezer with those frozen cocktail mixers they keep next to the OJ in the frozen food aisle. She’d usually even make an extra batch without the booze just for us kids.

To this day, it isn’t a party at mom’s house without an frosty pitcher of margaritas, daiquiris, or piña coladas. In fact, the last time I was home we decided to have a little family cookout and I swear my Aunt D wasn’t even out of her car before she was asking where her piña colada was!

frozen watermelon margaritas | Brooklyn Homemaker.com

Given my mom’s inclination to imbibe the icy stuff, I picked up a bag of ice along with my liquor and limes. Since mom sometimes likes her drinks sweet and fruity, I grabbed a bag of frozen strawberries too.

Not really fond of store bought mixes, I knew I wanted to make my margaritas from scratch, but I’ve never found a frozen margarita recipe that I loved (until now). Off I went to google, and on the pages of Serious Eats I found what I believe is seriously the world’s greatest and most perfect frozen margarita recipe ever. I’ve had MANY mediocre margaritas in my day, so I really wasn’t expecting much. I knew mom would love them either way, so I gave this recipe a whirl (literally). The only change I made was to substitute about half of the ice cubes with frozen strawberries. I was floored by how good they were, and we ended up making a second pitcher before the night was through, and another two pitchers the next night! They’re not too sweet, not too sour, not too strong, not too weak. Literally perfect. I cannot sing enough praises for this recipe.

frozen watermelon margaritas | Brooklyn Homemaker.com

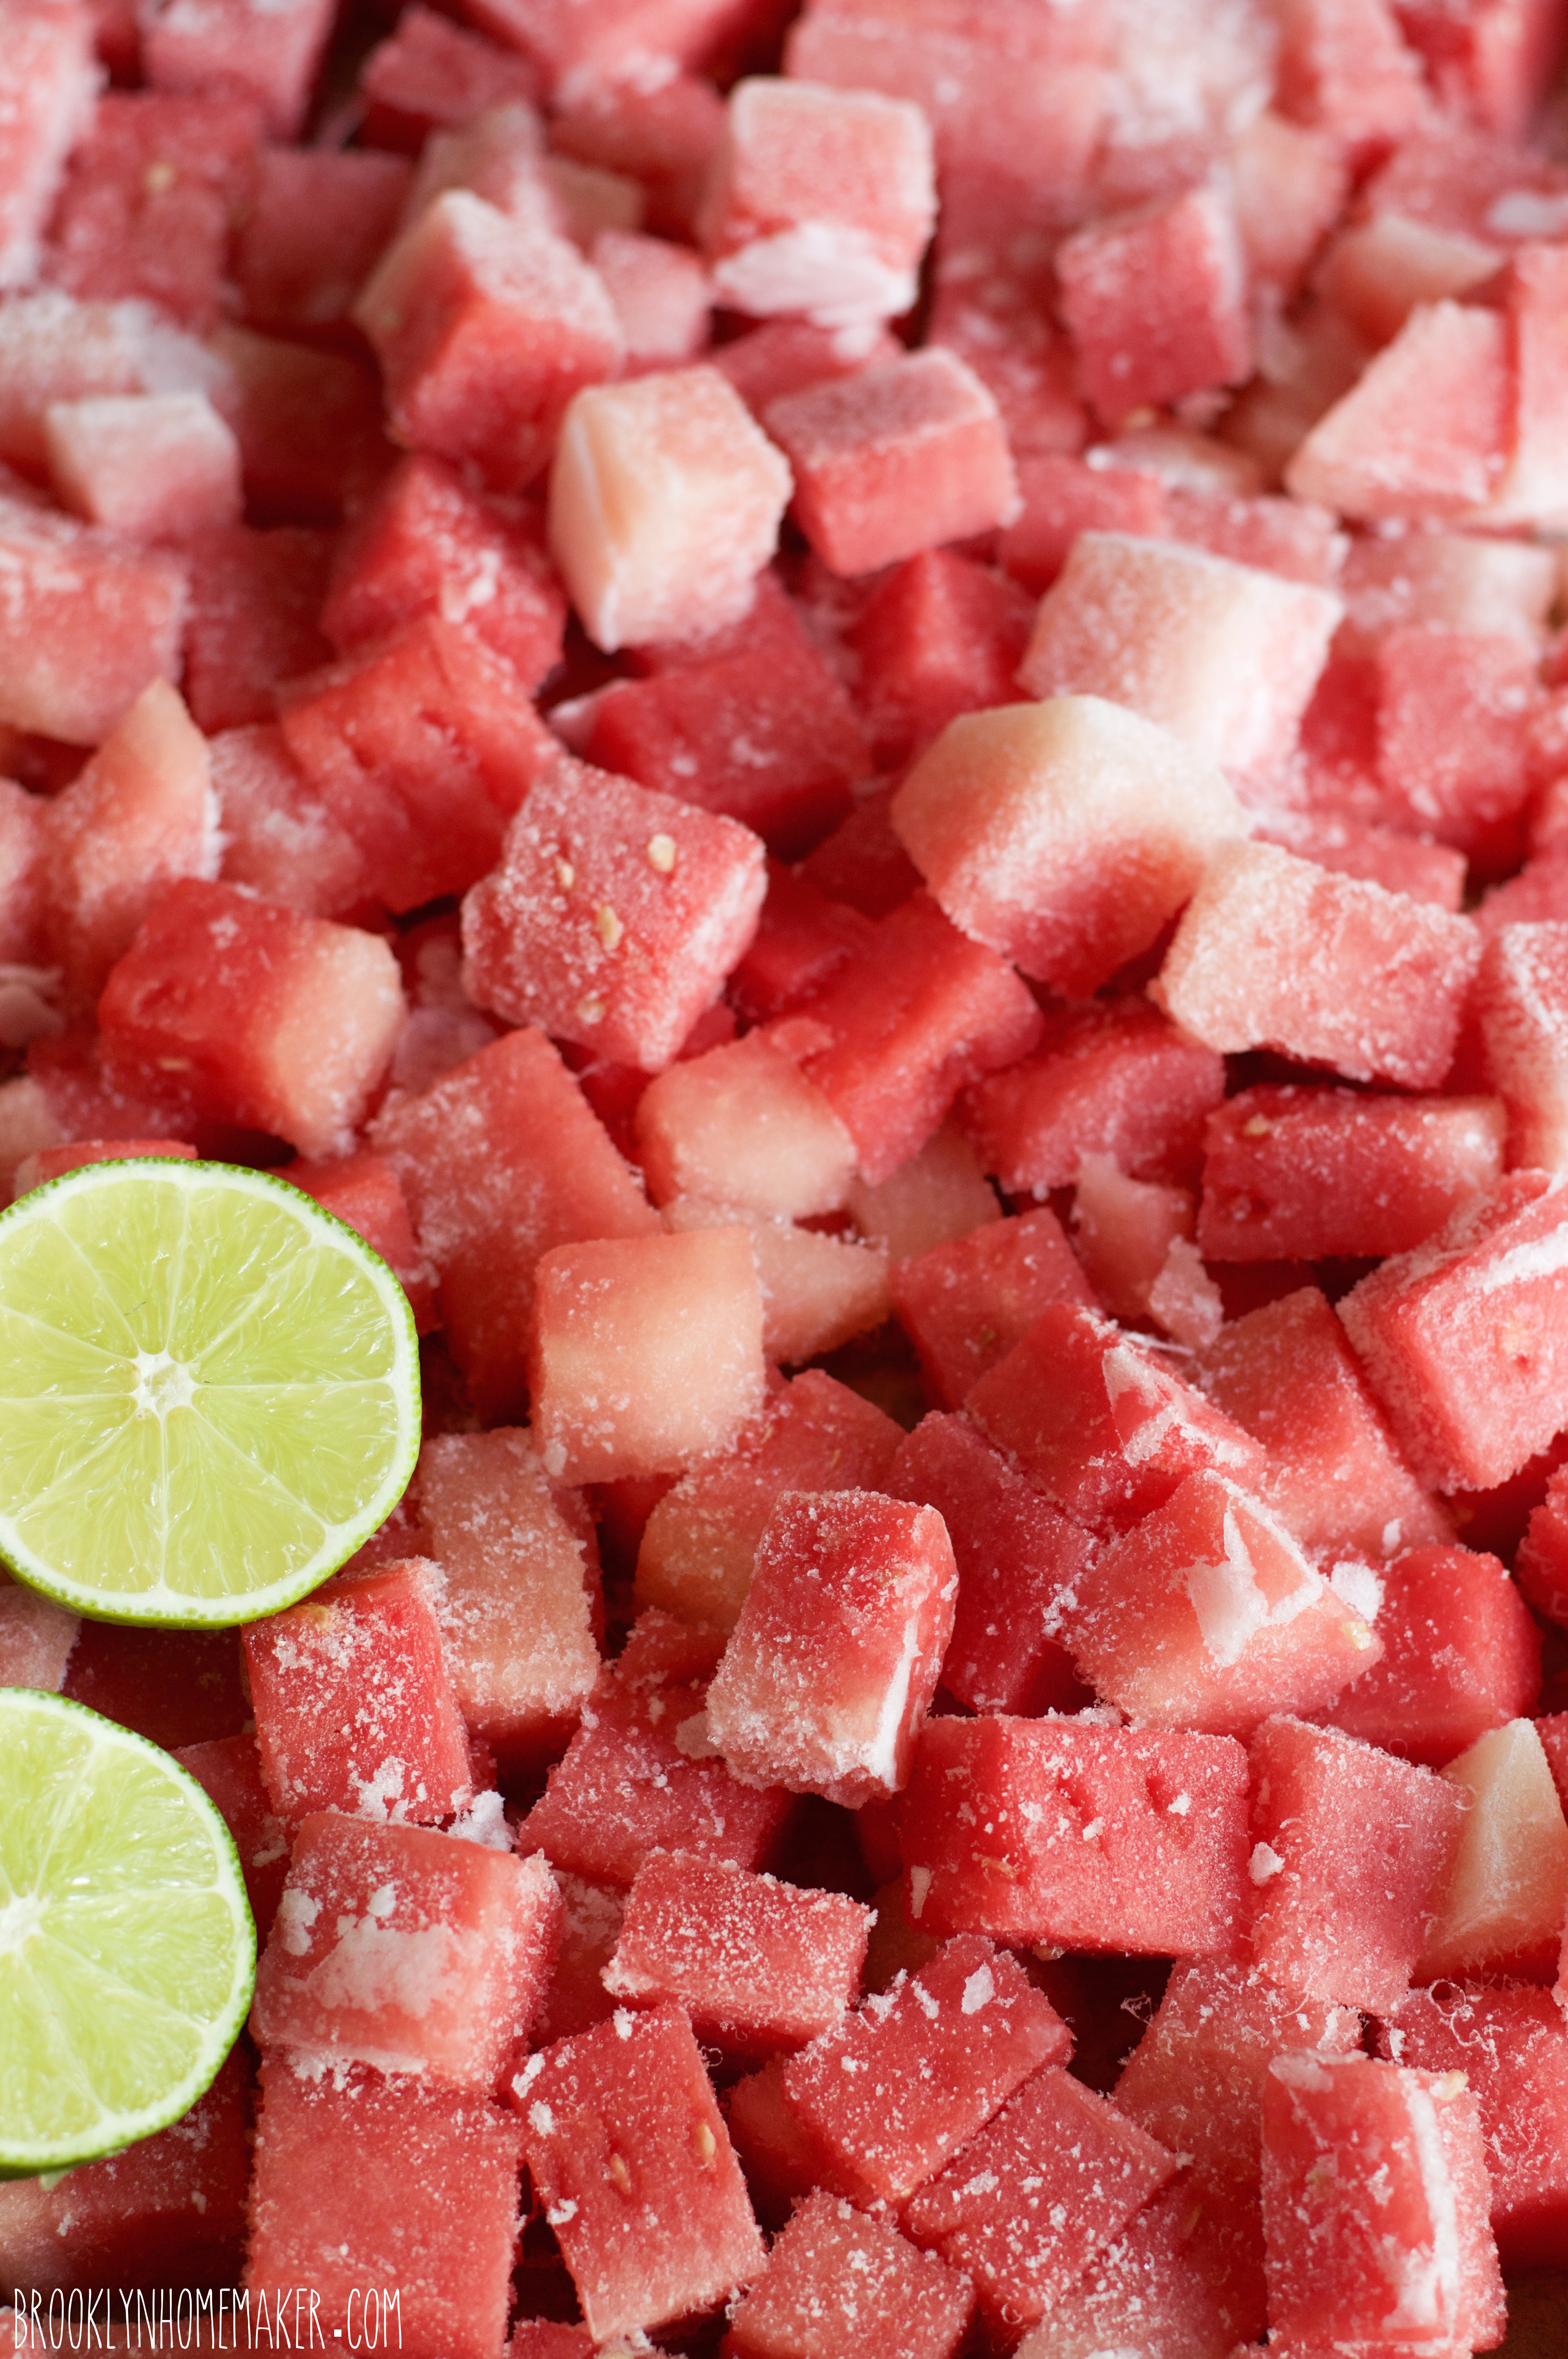
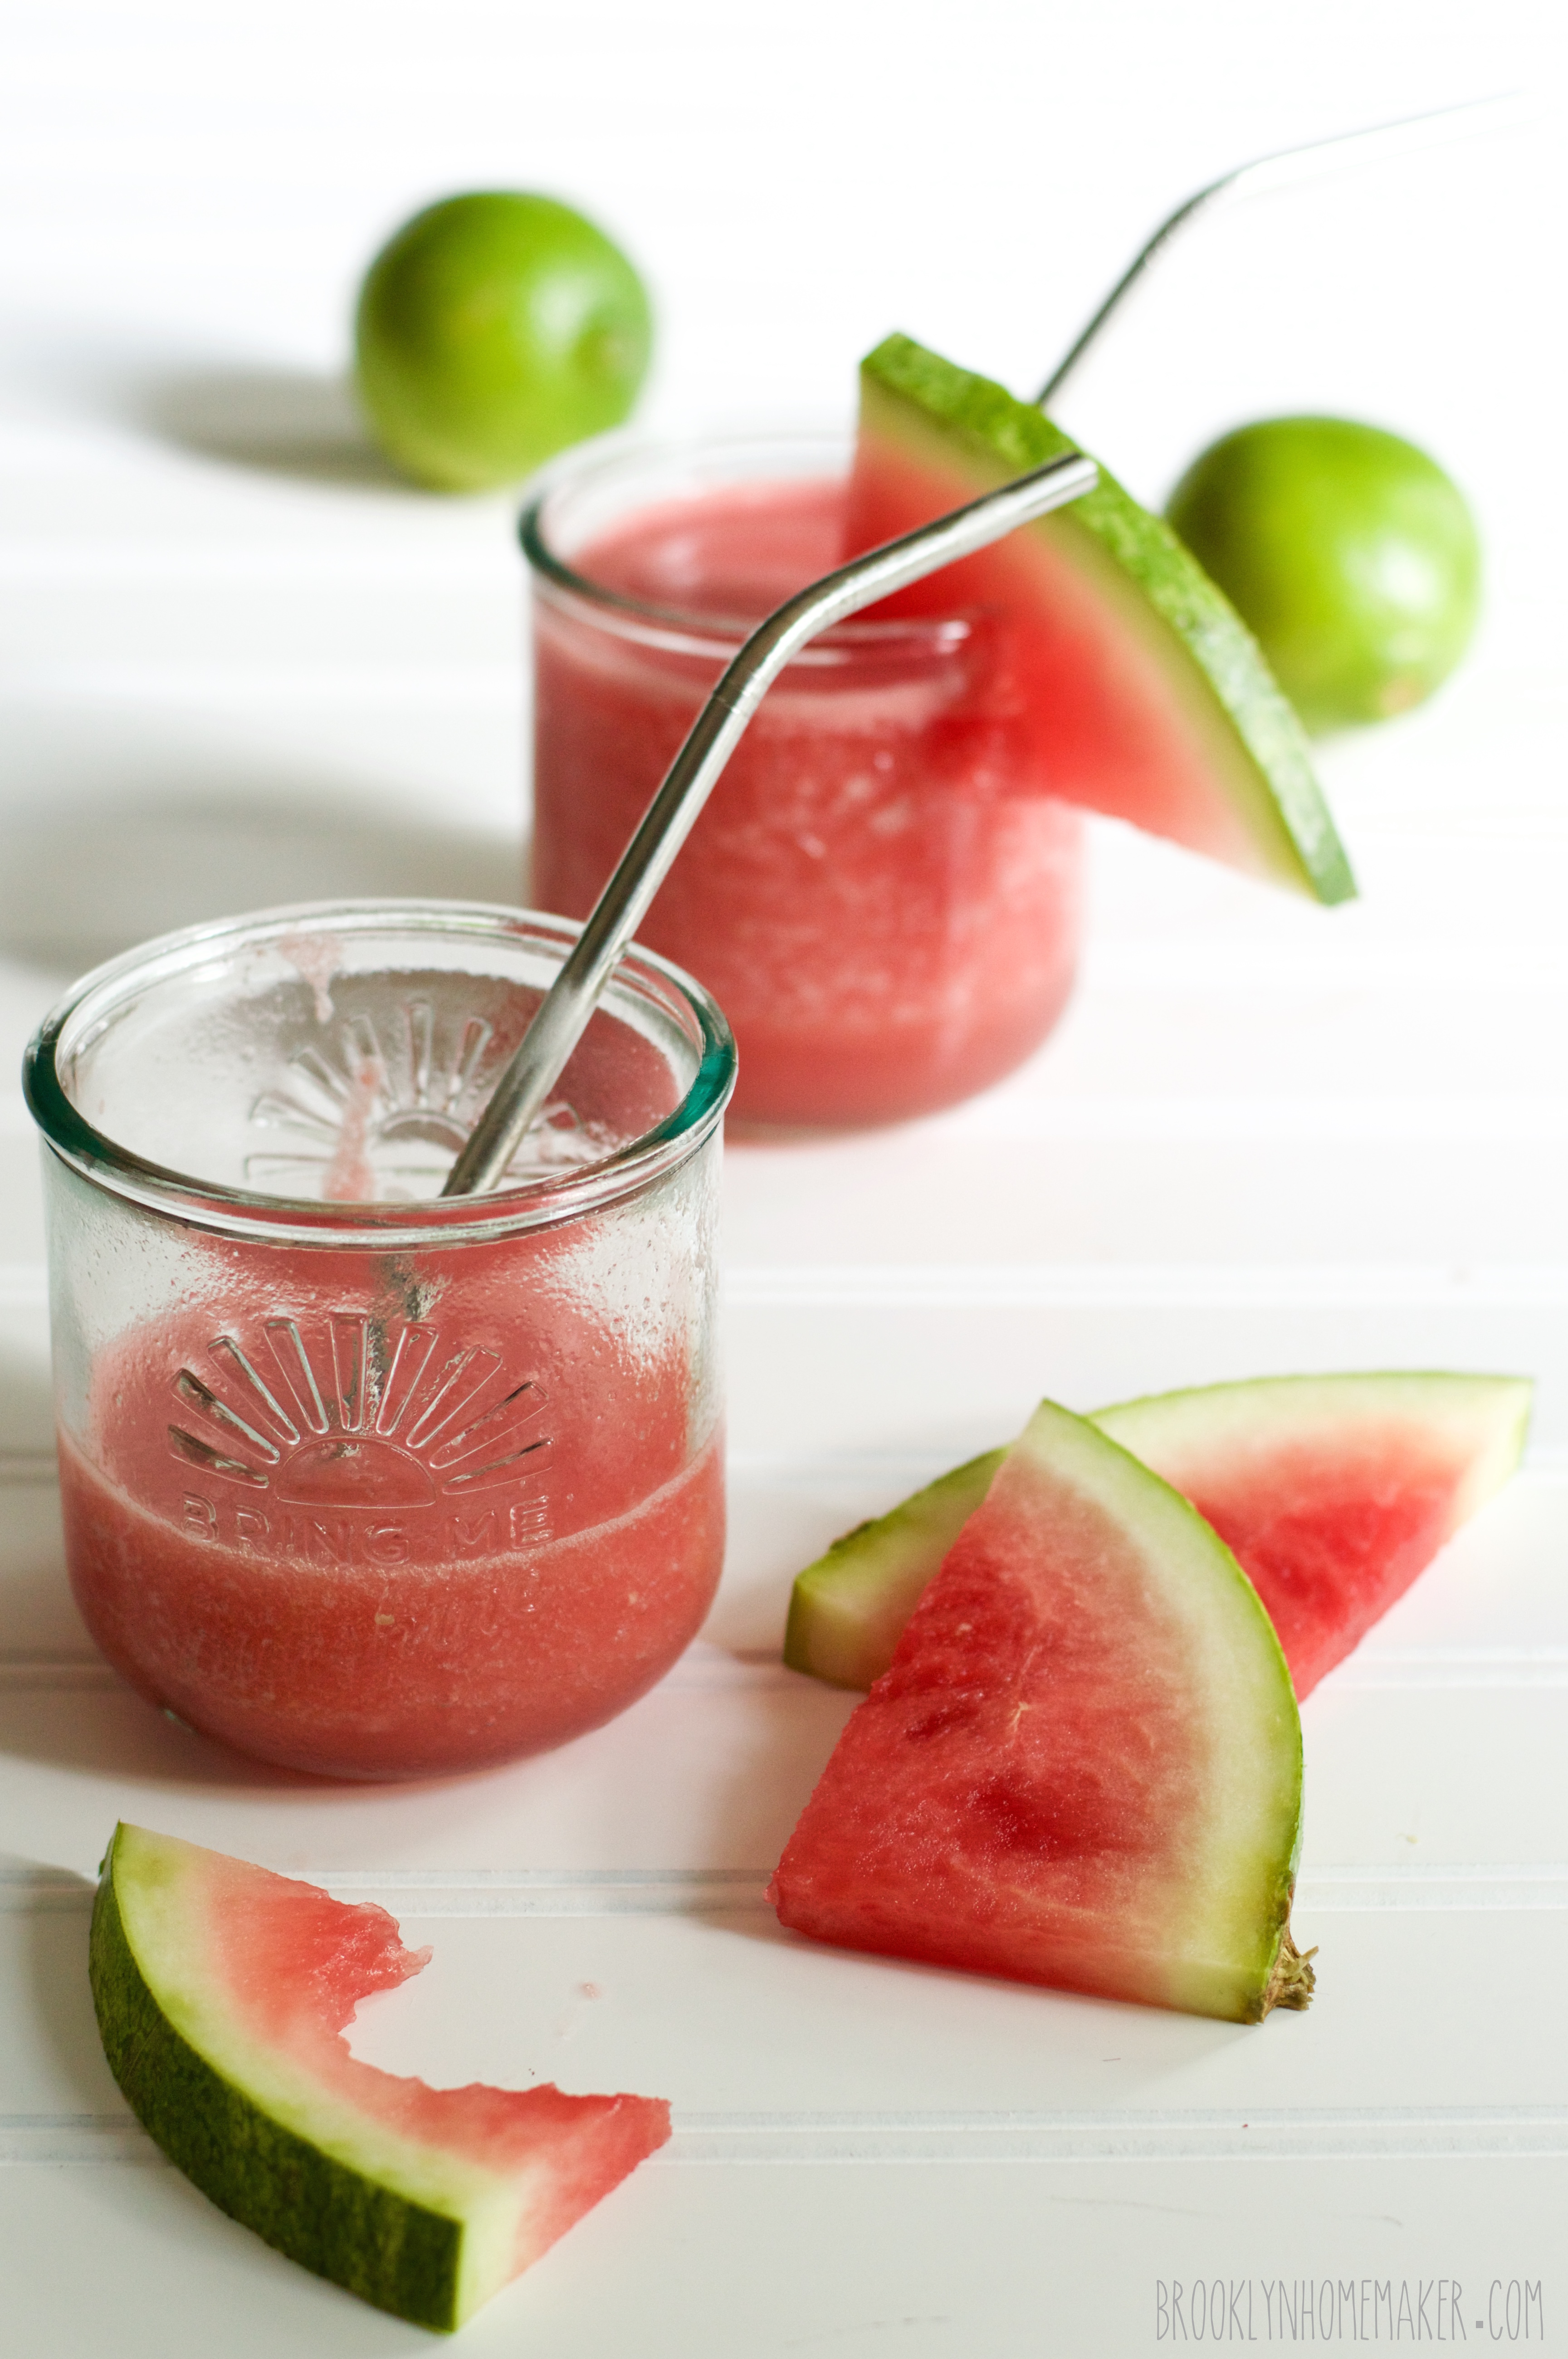
When we decided to have some friends over in the backyard this past weekend, I decided to revisit the recipe, this time with just a few small changes. Rather than using (somewhat flavorless) frozen strawberries, I decided to celebrate what’s left of summer with fresh watermelon instead. I picked up a whole seedless watermelon, removed the rind, cut the fruit into cubes, and froze them in a single layer on a sheet pan. Instead of half fruit, half ice, this time I used no ice.
All watermelon, all the time.

The only thing about adding so much fruit to the recipe was that they ended up a little too sweet for my taste, so I decided to make a few (tiny) changes to the next batch; namely reducing the simple syrup and increasing the booze (cuz that’s how I roll).

frozen watermelon margaritas | Brooklyn Homemaker.com

You’ll want to get started on these a day (or two) ahead so you have time to freeze the watermelon, but once you get everything prepped these puppies are a breeze to make with a good strong blender. To make sure your drinks are as icy as possible, it’s best to mix the tequila base together and put it in the freezer ahead of time too. The tequila and triple sec will keep the lime juice and simple syrup from freezing solid, but while still liquid, your mixer with be as icy cold as can be. A whole watermelon is enough for several pitchers, so I put a half dozen containers of mixer in the freezer at the same time.

It was a party, how dare you judge me!

As you may have guessed, these suckers were met with rave reviews. They’re so perfectly summery, so perfectly refreshing, so perfectly delicious, so perfectly perfect; that I still can hardly believe it. Man I could go for another one right about now…

frozen watermelon margaritas | Brooklyn Homemaker.com

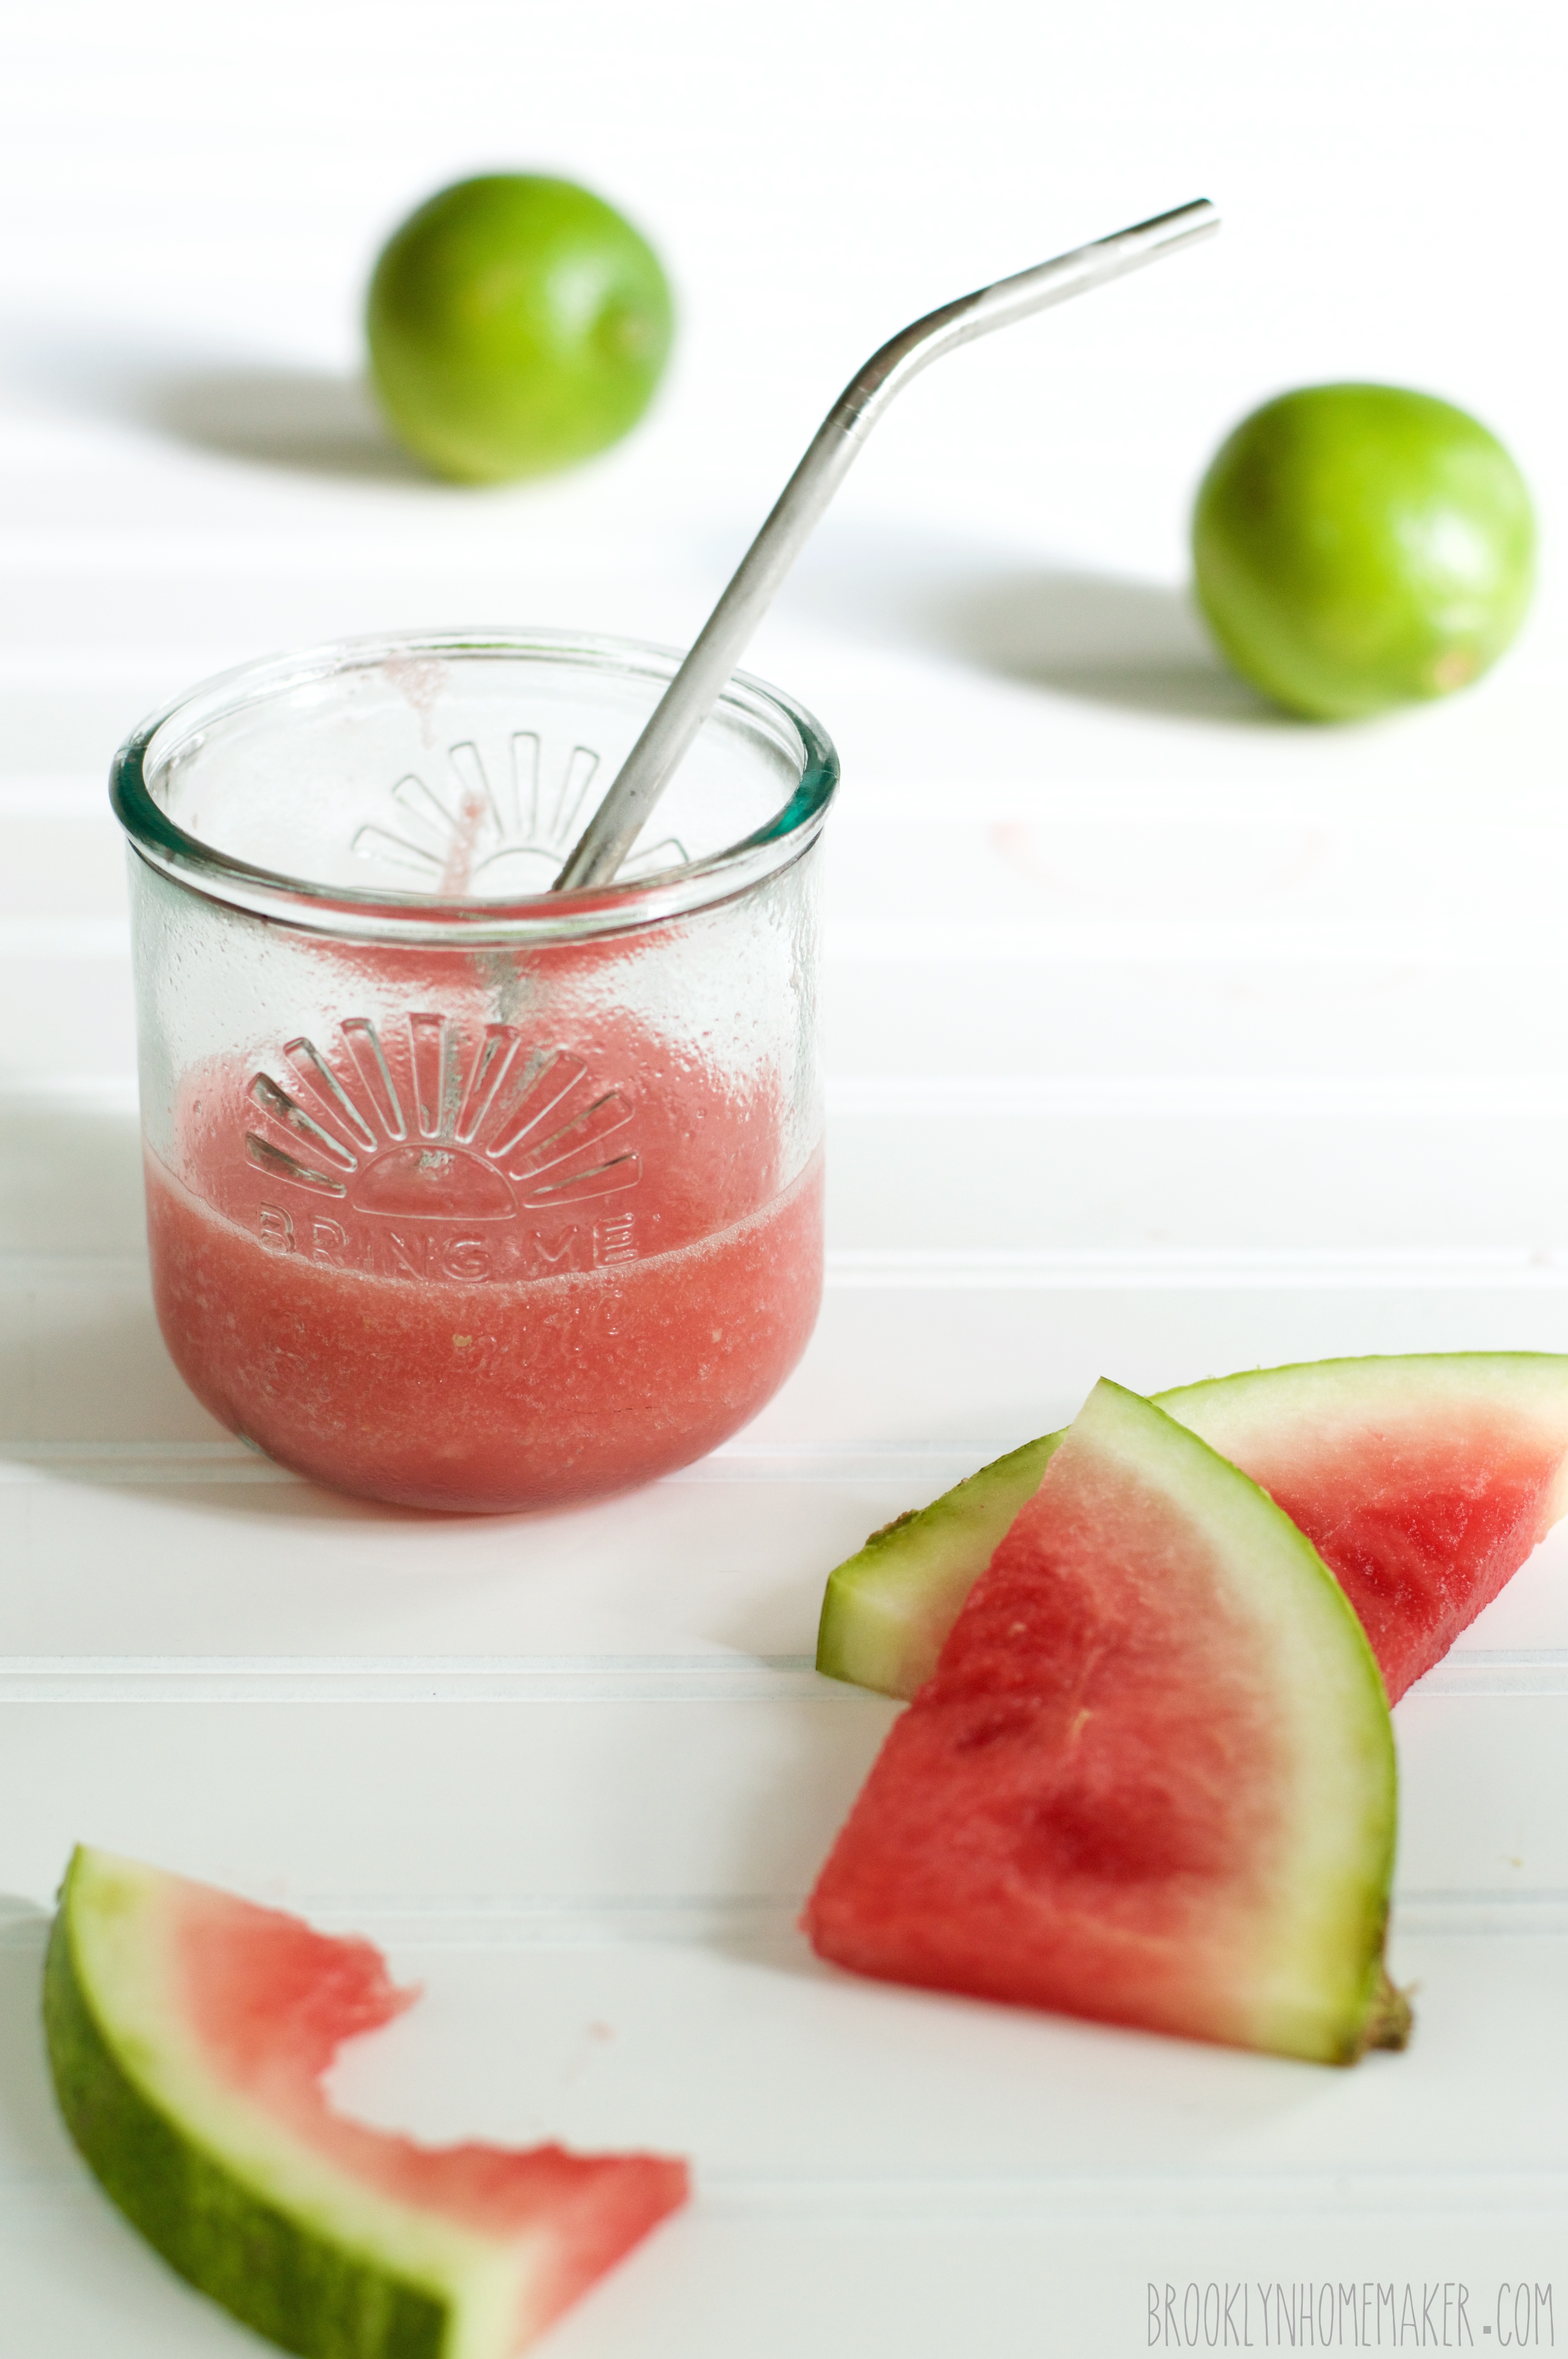
Frozen Watermelon Margaritas

adapted (just barely) from Serious Eats

5 ounces (1/2 cup + 2 tablespoons) silver tequila (100% agave is best)
2 ounces (1/4 cup) good quality Triple Sec or orange liqueur
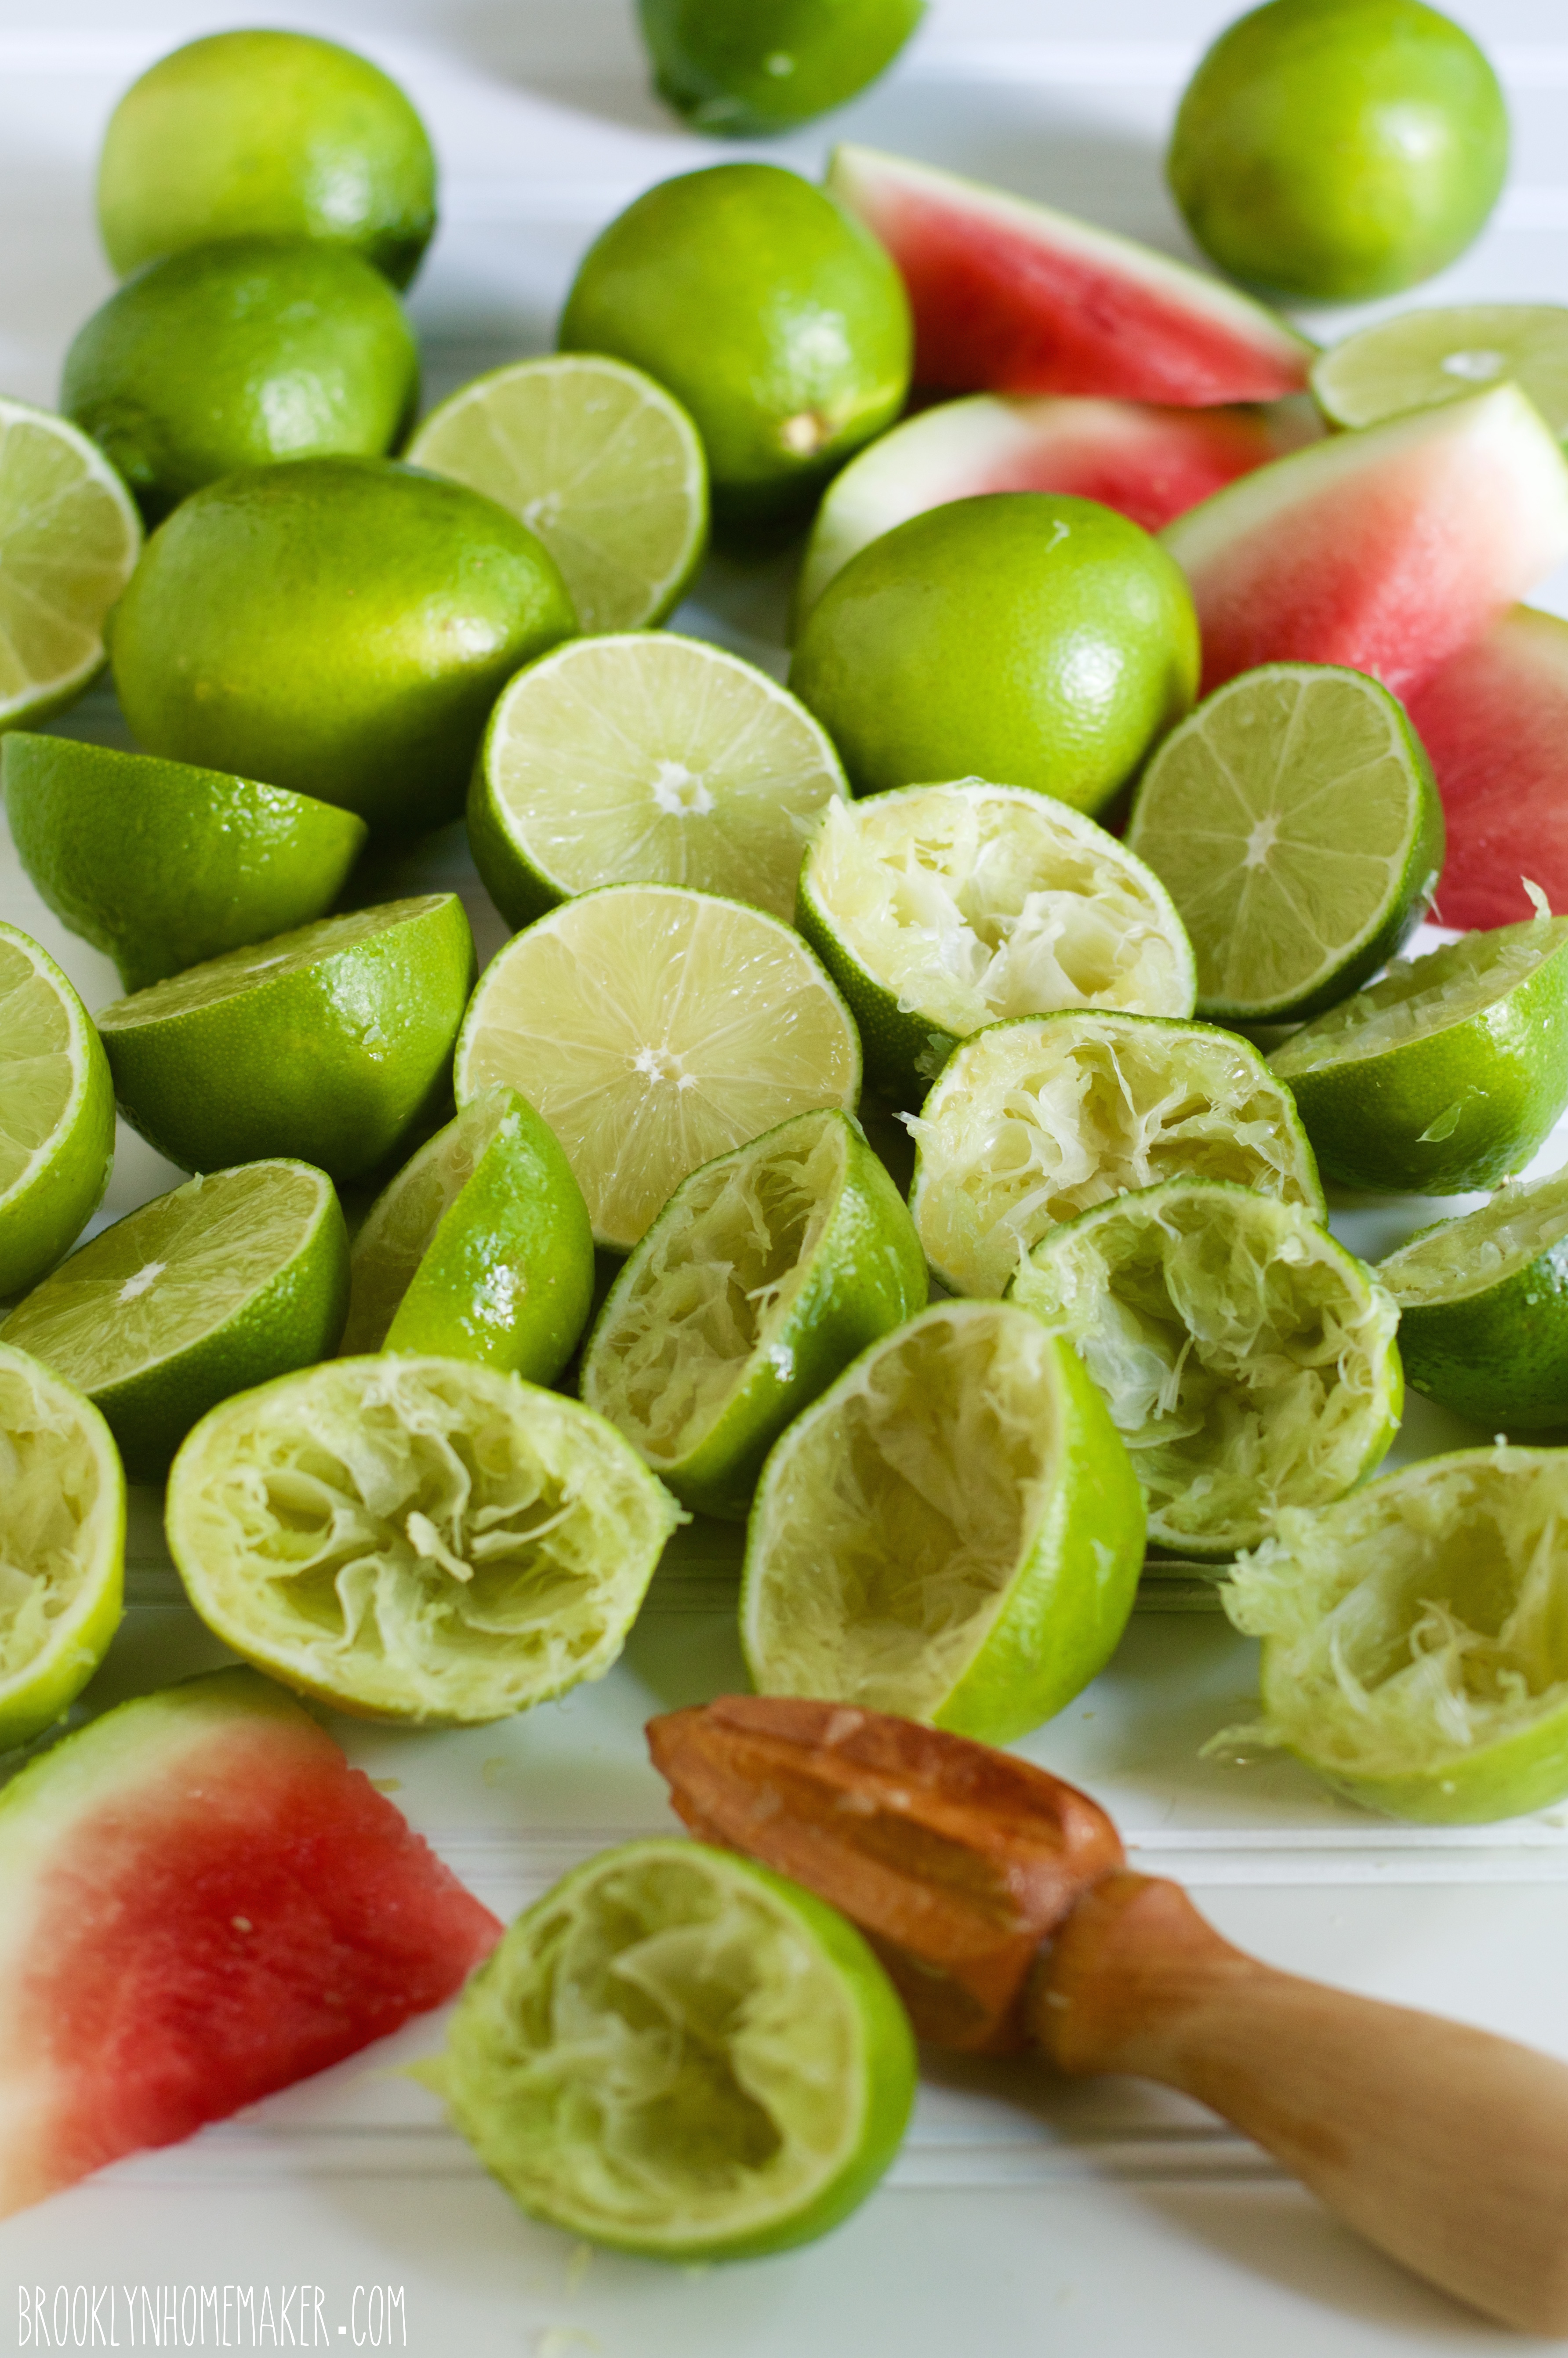
3 ounces (6 tablespoons) fresh lime juice (from 4 to 5 limes)
2 ounces (1/4 cup) simple syrup (see notes below)
4 cups cubed seedless watermelon (rind removed)

At least 8 hours ahead:
Arrange the cubed watermelon on a parchment lined sheet pan and place in the freezer for several hours or until completely frozen. The parchment will make it easier to remove the frozen cubes. Once frozen, transfer to an air-tight container or zip-top freezer bag.

In another air-tight container, combine tequila, triple sec, lime juice, and simple syrup and freeze for at least 8 hours or up to one week (mixture will remain liquid). You can mix several batches ahead, but freeze each one in a separate container because a standard blender will only fit one recipe at a time.

When you’re ready to party:
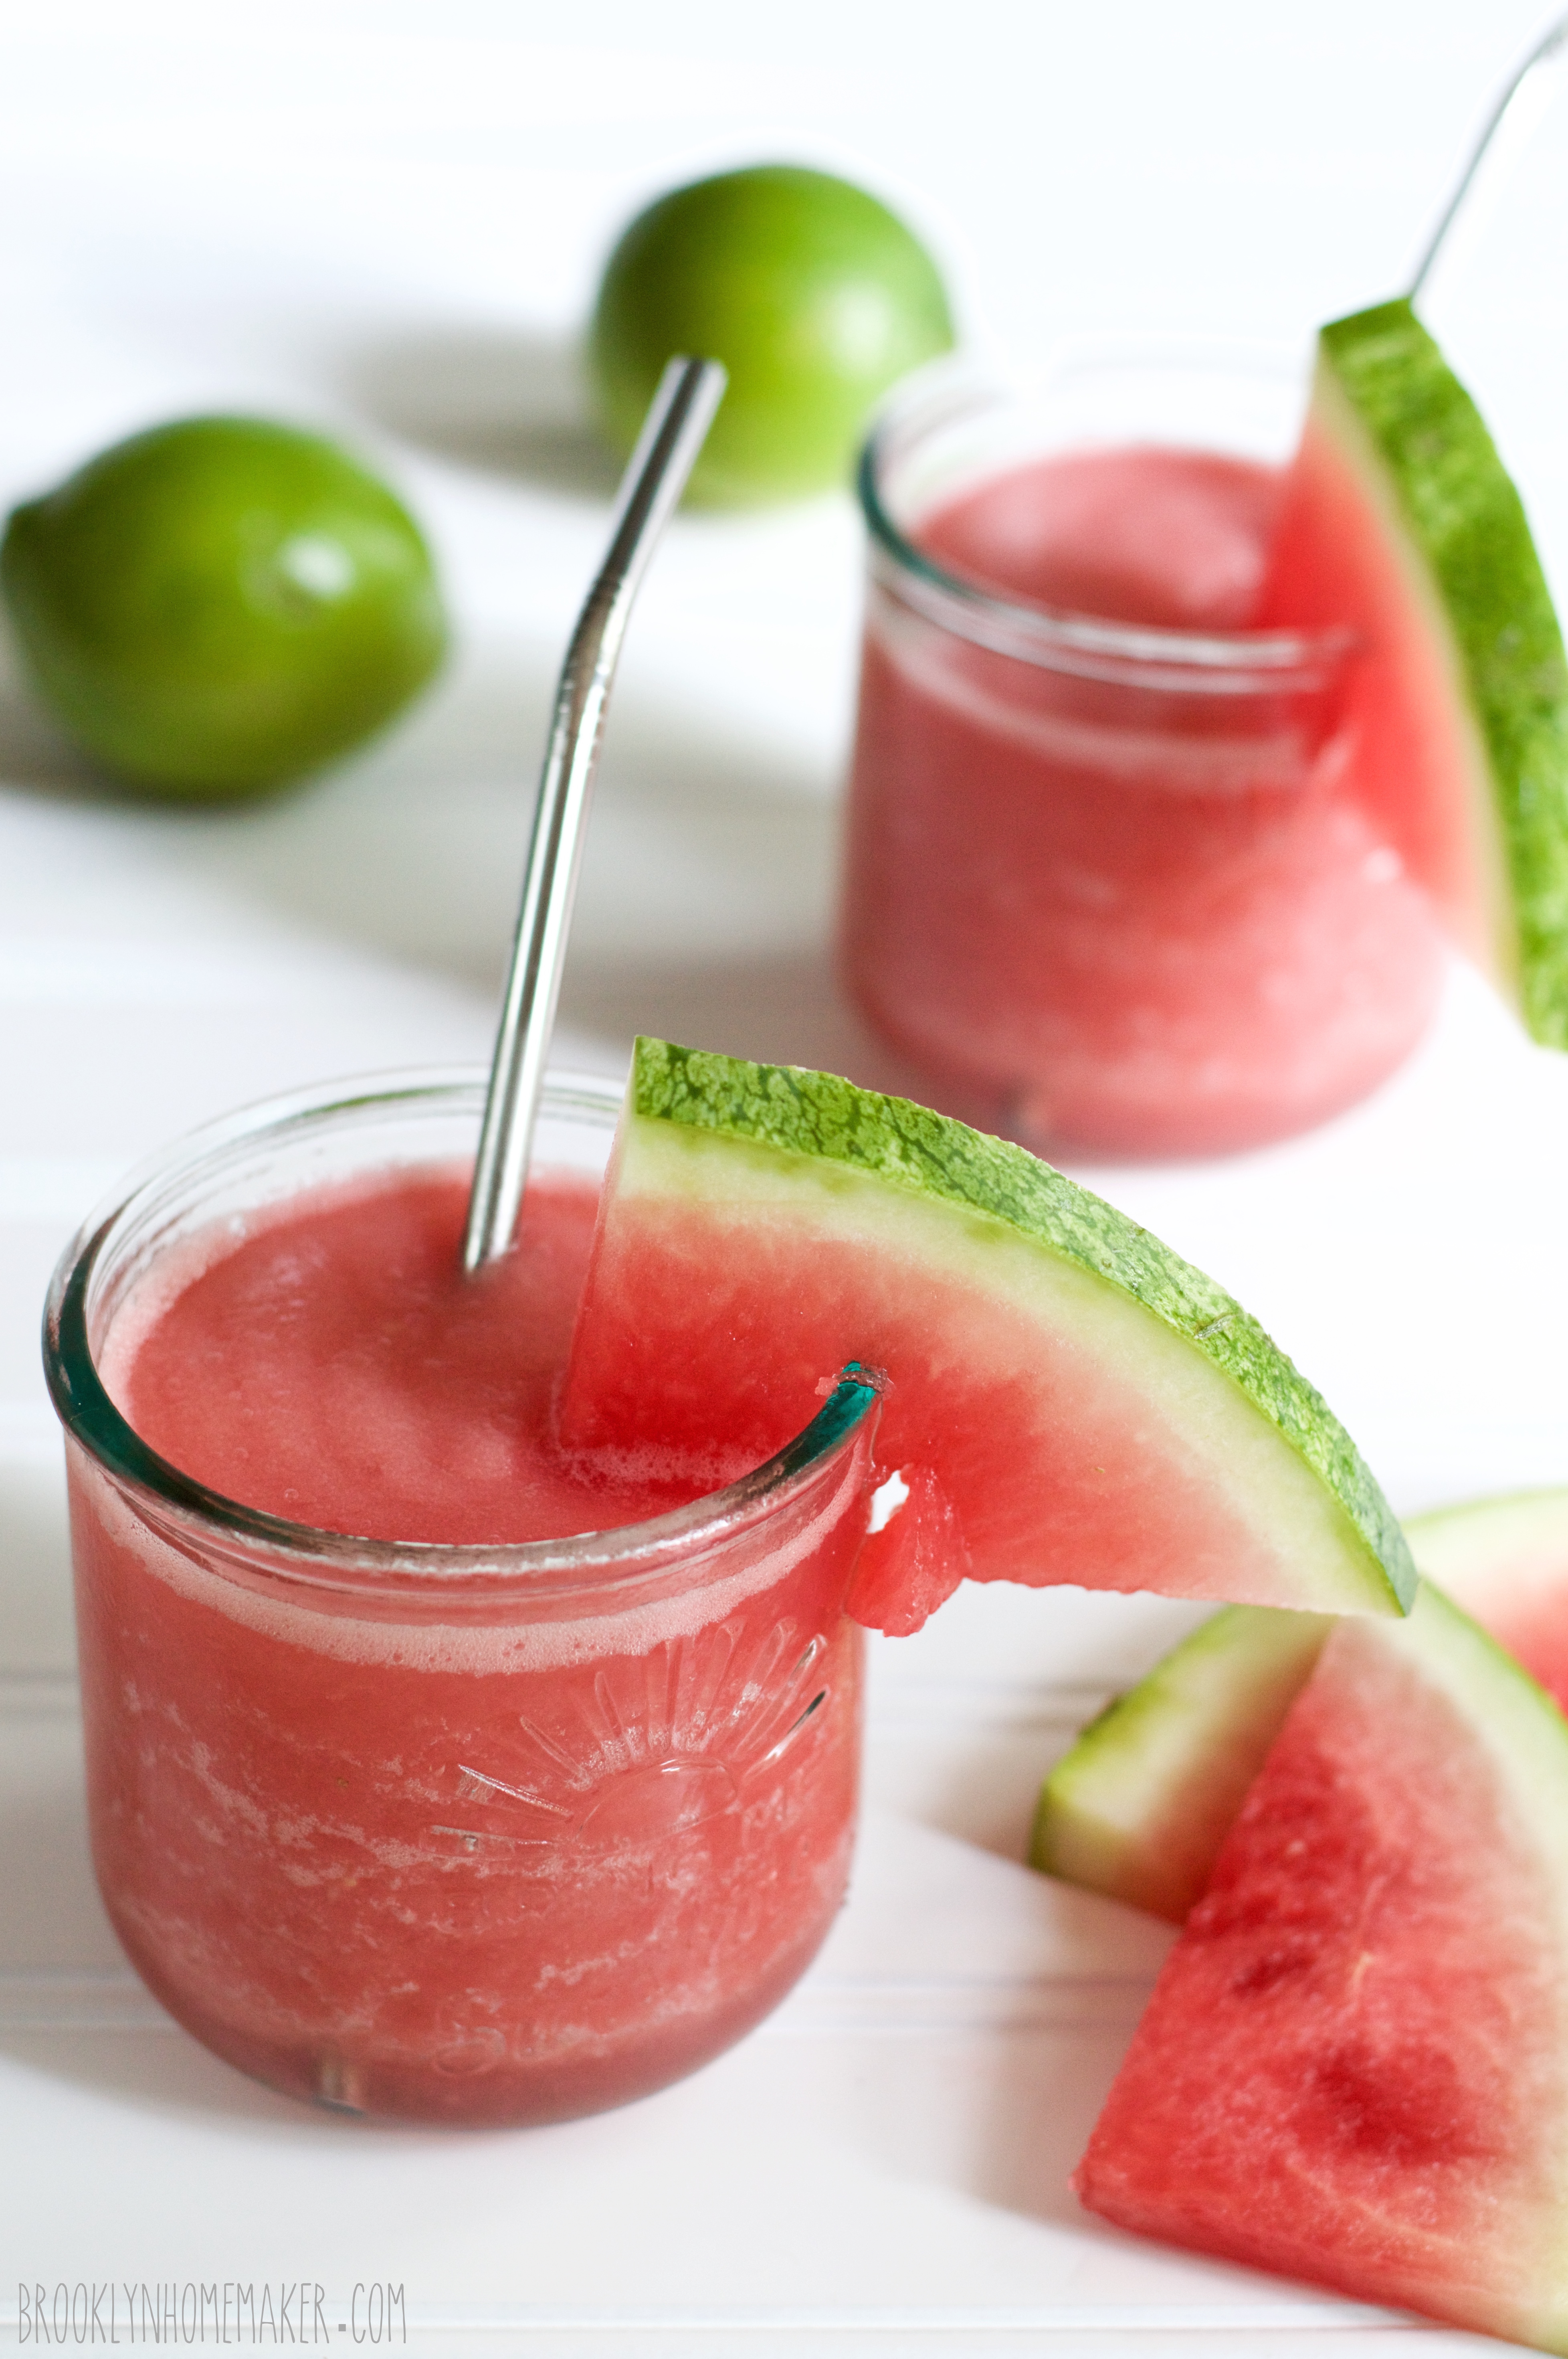
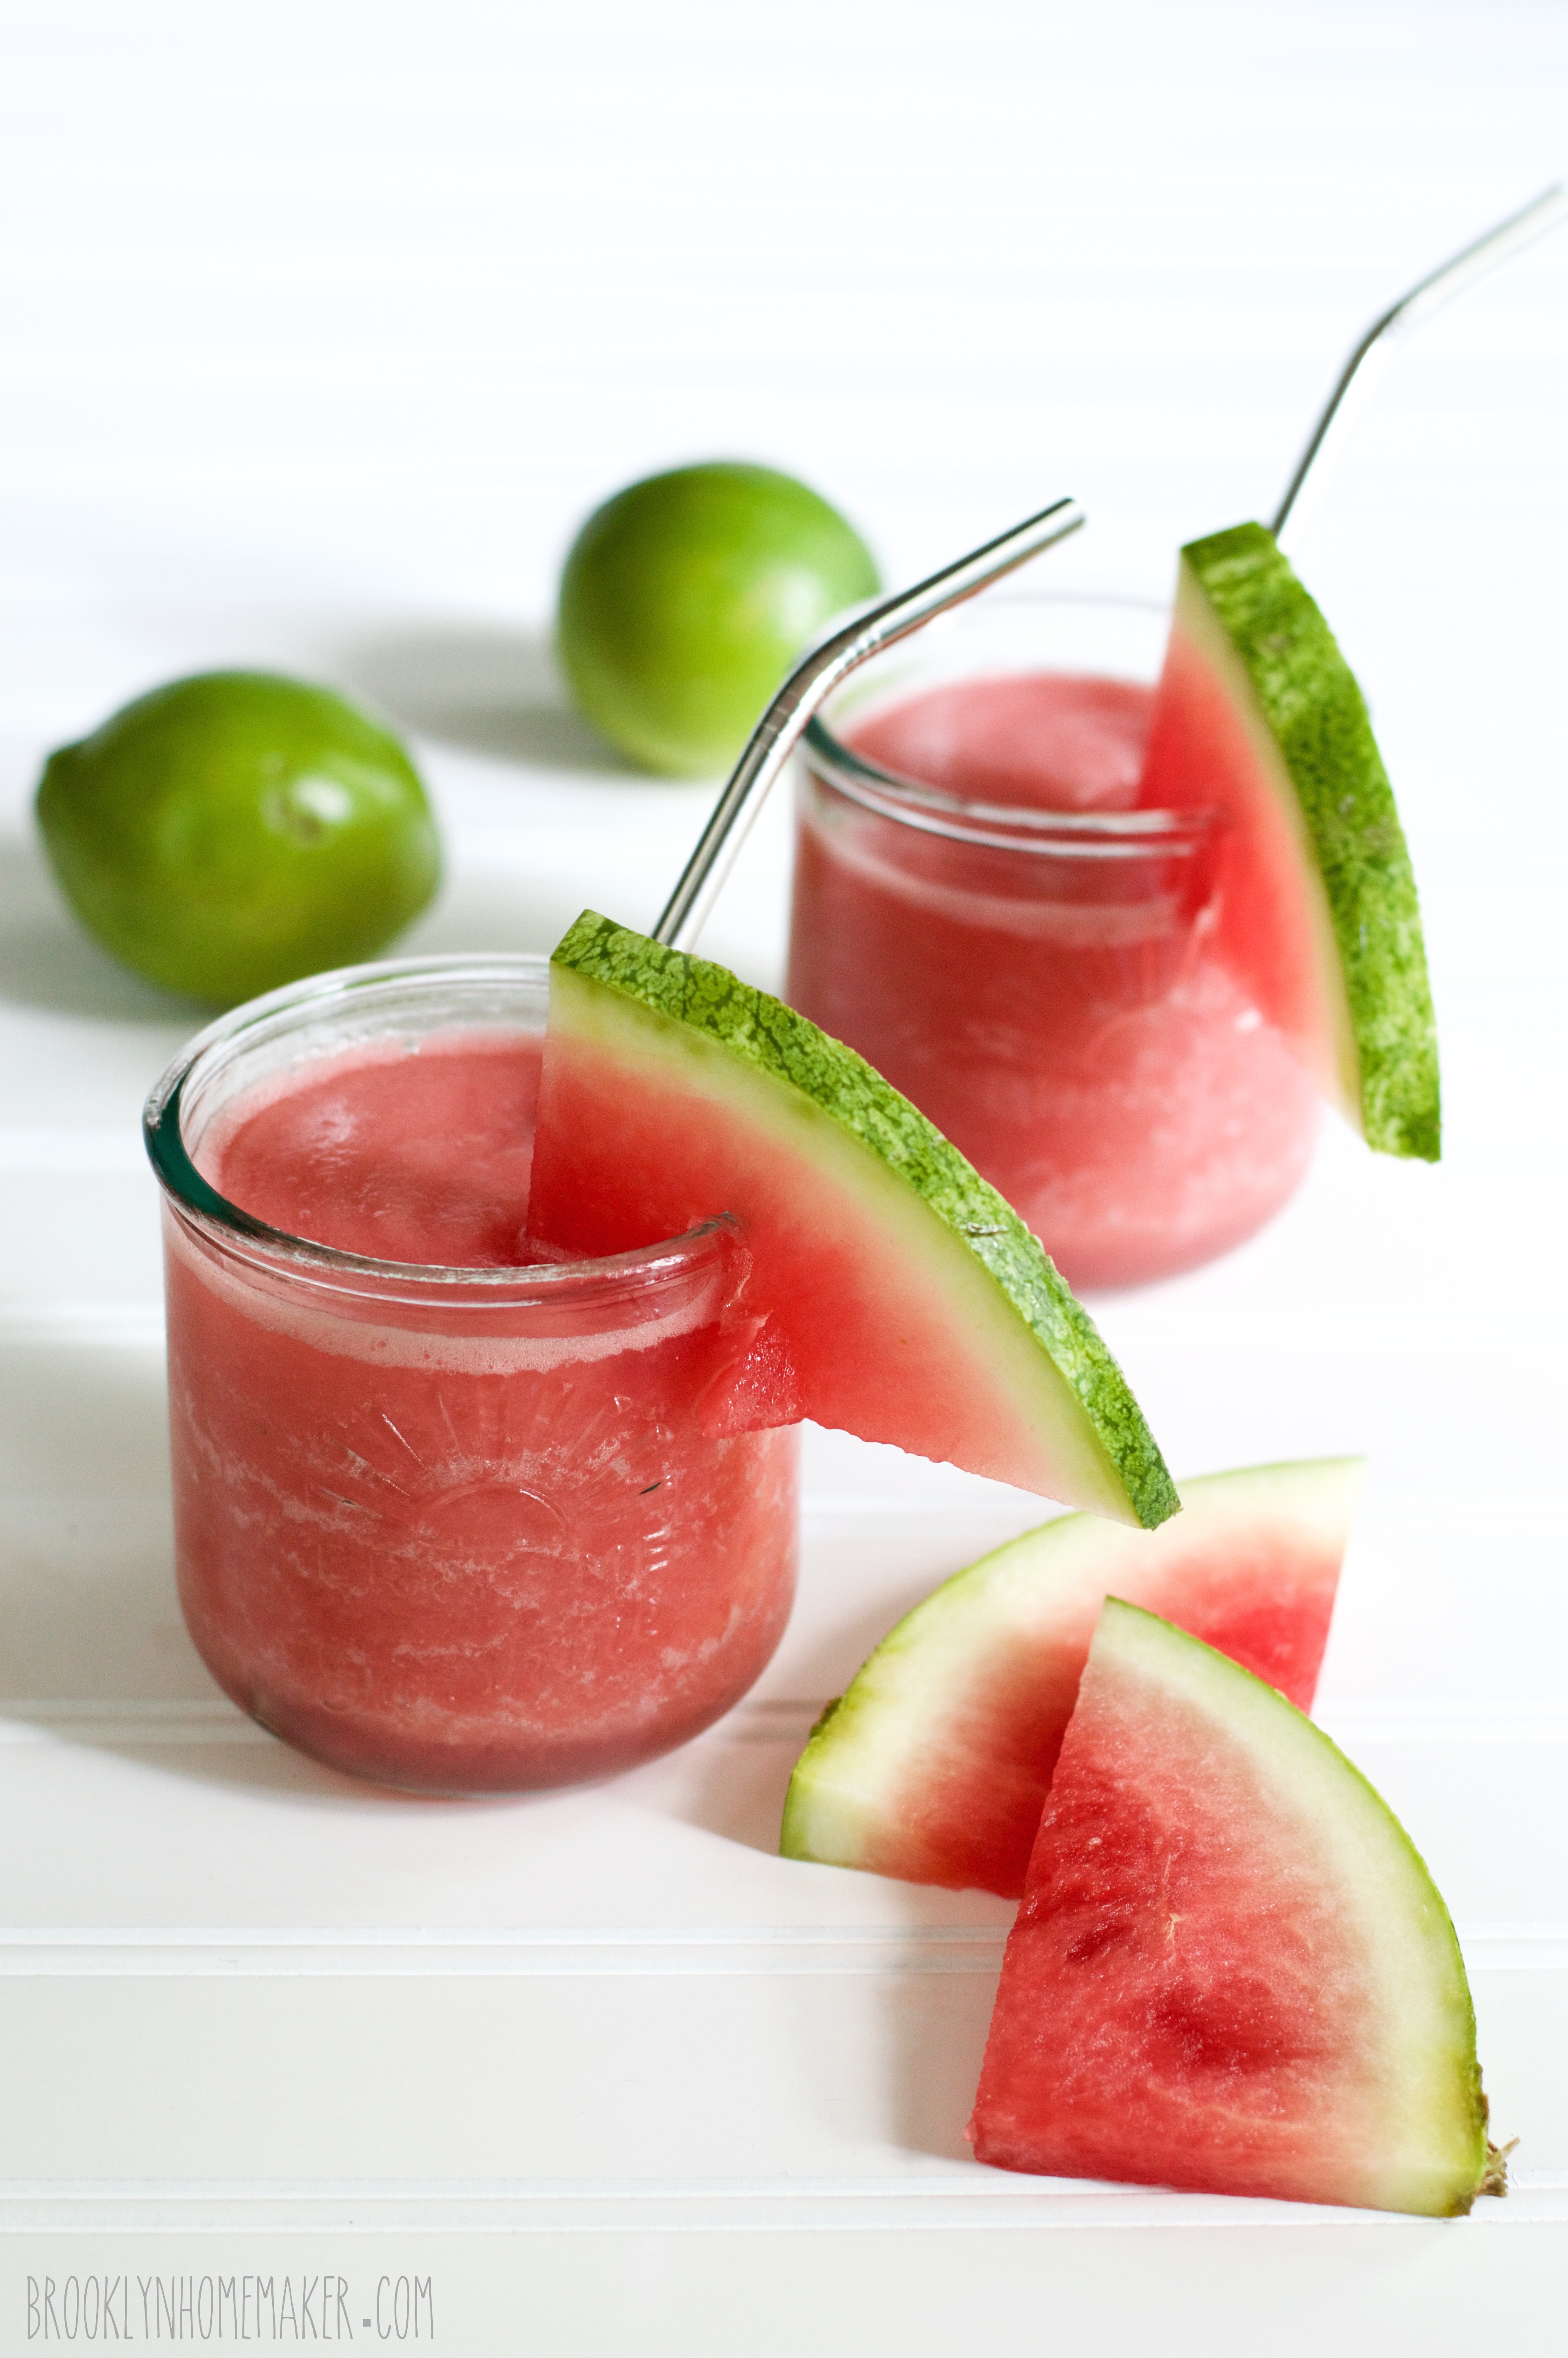
Combine your frozen watermelon with the tequila mixture in the pitcher of a powerful blender. Blend on highest setting, pulsing and scraping down sides if necessary, until completely smooth. Serve immediately. If desired, garnish with a small wedge of fresh watermelon.

Notes: To make simple syrup, combine equal volumes of sugar and water in a small saucepan and heat until the sugar is dissolved. Cool before combining with alcohol.
While you certainly can mix the base just before blending, your drinks will be significantly less frosty and more liquid. The base mixture can be made up to a week ahead and stored in the freezer.
In my experience, a small to medium seedless watermelon gave me enough cubes for roughly 8 pitchers of this recipe, but that will depend on the size of your watermelon.

orange carrot ice pops

Lately I’ve been trying really hard to stay away from foods with lots of refined sugar.

orange carrot ice pops | Brooklyn Homemaker

I confessed a few weeks ago that all my baking and bundt-ing had me feeling a little lethargic and down, so I’ve been trying my best to eat a little healthier and concentrate on fresh whole foods rather than baked goods and sweets.

I’ve actually been doing really well too!

orange carrot ice pops | Brooklyn Homemaker

That is, I was anyway, until Lindsay over at If the Spoon Fits had to go and post this Orange Creamsicle Ice Cream recipe. There I was, minding my own business, eating fruit instead of cake, and walking home after work every day, when boom!
Ice Cream!
Irresistible orange creamsicle ice cream! During last week’s damned heat wave mind you, when I couldn’t have been craving something icy and sweet any more than I was in that exact moment.

orange carrot ice pops | Brooklyn Homemaker

Not wanting to completely undo all the good choices I’ve been making lately, I started thinking about what I might be able to make to satisfy my intense craving without actually busting out the ice cream maker.

I recently saw these juice ice pops at the grocery store that had me really curious. They were made with flavor combinations you’d expect to find at a fancy juice bar- apple, celery, & ginger; or blueberry & beet. You know, that kind of thing.
I figured that trying something kind of like that could be healthy-ish and tasty-ish. I’m sure there’s plenty of sugar in them but it’s like, natural and stuff. Right?

I didn’t want to copy the fancy juice bar flavors exactly though, so I started trying to come up with a flavor that would A) taste great and satisfy my sweet tooth, and B) not taste like a health-food alternative to something I’d rather be eating.

orange carrot ice pops | Brooklyn Homemaker

Suddenly I thought of something called “Orange Carrot Elixir” that I used to drink when I was a teenager. I can’t even remember who made it, and I’m not sure the company is even around anymore, but I used to drink the stuff by the gallon.

Growing up in a small town in Upstate New York, my exposure to new and interesting flavors and foods left a lot to be desired. Fortunately, one of my first high school friends with a car shared my desire to branch out and try something new, and rather than doing drugs or causing mischief, we and our friends used to drive around checking out grocery stores and searching for their “International Foods” sections.
We’d drink Mexican Goya sodas (I especially loved tamarind flavor), eat carob “chocolates” by the fist-full, wolf down whole baguettes, and munch on marinated canned octopus. We’d drive almost an hour to Ithaca, NY to go swimming, visit Indian or vegetarian restaurants, and browse the prepared foods section at Wegmans where I’d stare at trays of sushi that I was too chicken to try.
In the grand scheme of things the Orange Carrot Elixir wasn’t nearly as exotic as some of the other things I was eating and drinking, but I seriously couldn’t get enough of the stuff.

Carrots, in sweet beverage form! Mind blown.

I decided it was worth a shot to try to capture that sweet orange-carrot combination but in frozen ice pop form instead.

orange carrot ice pops | Brooklyn Homemaker

It actually took me a few tries to get these right. First I just tried pureeing whole carrots with orange juice, but the end result was bitter and pulpy. Then I tried peeling the carrots to remove the bitterness and juicing them rather than pureeing to remove the pulpiness. This was a start but the pops still weren’t sweet enough and the flavor was kind of flat and boring. Next I added a bit of fresh ginger for kick and apple juice for sweetness. Muuuch better but the pops still weren’t quite sweet enough, and were icy hard rather than bite-able and tender like store bought ice pops.

I did some reading online and found out that since ice pop manufacturers are able to freeze their pops much faster at lower temperatures that home freezers, some type of thickener like cornstarch or gelatin is needed to help give homemade ice pops a better texture. This also keeps the juices from separating before they freeze, and helps prevent the pops from dripping while you eat them. Since ice pops (and ice cream) are frozen, they also need a little bit of extra sugar because freezing-cold foods slightly dull your sense of taste. I went ahead and added juuuust a little extra sugar, and a little bit of cornstarch, and bingo! Success!

If you don’t have a vegetable juicer you can still easily make these at home using store bought juices. Most grocery stores these days (at least here in my neck of the woods) carry bottled carrot juice, so I don’t think it should be too hard to find. The only thing you’ll need to do differently is to add grated ginger in with the sugar and cornstarch, and then strain out the pulp just before pouring into  your molds. I promise I tried this during one of my experiments and it worked great.

These puppies are TASTY! They’re bright and citrusy and summery, with just a touch of fresh spicy zing from the ginger. The carrot juice and orange juice are a match made in heaven and the apple juice just helps sweeten things up. They’re just sweet enough, with a really great bite-able texture, and the absolute last words that come to mind is “health food” or “diet”.

Craving satisfied. Officially.

orange carrot ice pops | Brooklyn Homemaker

Orange Carrot Ice Pops

  • Servings: makes ten 3-ounce ice pops
  • Print
3/4 cups apple juice (I used fuji apples)
1 3/4 cups orange juice
1/4 cup sugar
1/4 cup cornstarch
pinch of salt
zest of 1 orange
1 cup carrot juice (from about 2 lbs peeled carrots)
1 to 2 inch peeled chunk of fresh ginger (juiced with carrots if possible, finely grated if not)

In a medium saucepan, combine apple juice, orange juice, sugar, cornstarch, salt, & orange zest. If you don’t have a juicer at home you’ll also need to add your grated ginger now as well.

Bring mixture to a boil over medium heat, whisking regularly to prevent lumps. Once the mixture has boiled and thickened to a citrus-curd-like consistency, remove from heat. Add carrot juice and ginger juice (if you aren’t using grated ginger) and whisk to combine. If using grated ginger, strain mixture through a fine mesh strainer to remove pulp.

Pour the mixture into ice pop molds (makes enough liquid to fill ten 3-ounce pops). If your ice pop maker comes with plastic sticks, insert now and freeze at least 4 hours or until solid. If using wooden sticks, cover the mold and freeze for 45 minutes to 1 hour before inserting sticks and freezing for at least three hours more.

To un-mold your pops, run them under warm water to 10 to 15 seconds each. Pops should slide out of molds easily and can be quickly refrozen and stored in a ziplock bag or individually wrapped in plastic wrap.

grilled chicken tacos with cilantro pesto and red cabbage slaw

Growing up in Auburn, New York, my only concept of Mexican food was the drive-thru menu at Taco Bell.

grilled chicken tacos with cilantro pesto and red cabbage slaw | Brooklyn Homemaker

All through my childhood I thought “Mexican food” meant odd smelling greasy ground beef with a choice of soft or crunchy taco. If my mom ever had a hankering for something from “south of the border”, it meant she would have to make two trips; one to Taco Bell for her, and one to the Burger King across the street for my sister and myself. The only thing Taco Bell ever had to offer that I had any interest in was their sweet and greasy Cinnamon Twists, the American bastard cousin of the Churro, that I’d happily munch on while we rode across the street to get some “real” food at the BK.

Although I pride myself in being an adventurous eater now, as a kid I was anything but, and my mom was well aware that cooking tacos at home was also a no-no. My sister and I both made it perfectly clear that “Mexican food” (ground beef with seasoning packet and crunchy shells from a box) was not welcome in our home.

grilled chicken tacos with cilantro pesto and red cabbage slaw | Brooklyn Homemaker

When I went vegetarian in high school (all the cool kids were doing it) I did end up learning to love Taco Bell, and my usual order consisted of a Chalupa Supreme with refried beans instead of meat. To this day, if I ever find myself in line at the Bell, this is still my go-to order. Even though I eat meat now, I’m not a huge fan of theirs, so I’m more than happy to stick with the beans instead.

grilled chicken tacos with cilantro pesto and red cabbage slaw | Brooklyn Homemaker

Considering that I grew up only a few hours from the bright lights of the big city, I’m really not sure why my hometown was so completely devoid of any authentic Latin food or culture (or ANY food or culture other than American or Italian). I don’t think it even really occurred to me that Taco Bell wasn’t “authentic Mexican cuisine” (Or that Hong Kong Buffet wasn’t “authentic Chinese cuisine”) until I started watching the Food Network in high school and learned there was more to the world of food than was available in my little slice of the world.

grilled chicken tacos with cilantro pesto and red cabbage slaw | Brooklyn Homemaker

Of course, taking culinary courses in college opened my eyes to a whole new world of flavors and cuisines, and there were even a few mediocre Mexican restaurants near my school. It wasn’t until moving to Brooklyn though, that I was finally able to taste actual authentic Mexican food, made by REAL Mexicans! Imagine my surprise when I learned what a real chalupa looked like!

There was a small family owned tortilla factory down the street from my first apartment here, and shortly after I moved in they opened a little lunch counter with amazing tacos on fresh tortillas that could be bought for a song. Eventually the tacos caught on with the 20 year old hipster set and their lunch business blew up and turned into a full scale restaurant business. I practically lived off of those tacos for my first few years in Brooklyn.

grilled chicken tacos with cilantro pesto and red cabbage slaw | Brooklyn Homemaker

Here’s the thing about “authentic” Mexican taco recipes though… This isn’t actually one of them.
You may have already guessed this after seeing the Pfeffernusse, apfelkuchen, & kugelhopf recipes in my repertoire, but… I’m not Mexican.
If I want the real deal I need only to walk around the corner. If I’m making my own at home though, I feel like I’m allowed to take a little poetic license, especially now that I know what a real taco actually tastes like!

I will say this though; Cilantro, though not necessarily in this form, is about as traditional an ingredient for tacos as you can find. Fresh lime juice and the pungent bite of raw onion, both of which you’ll find in the red cabbage slaw, are also integral parts of authentic Mexican tacos.

grilled chicken tacos with cilantro pesto and red cabbage slaw | Brooklyn Homemaker

Grilling is an amazing way to get tons of flavor into your food without adding a ton of fat or salt or sugar. Of course, it’s also summer so I’m always looking for an excuse to cook outside. I’m a charcoal man myself, but if you have a gas grill you can add a smoking box with your choice of wood chips to help get that wonderful smokiness into your food.

If you don’t have a grill, or you’re making this recipe six months in the future when your grill is buried under six feet of snow, you can definitely skip the skewers and roast the chicken strips under your broiler. You might even be able to sear them in a heavy skillet, but the pesto may want to stick to the pan rather than the chicken.

grilled chicken tacos with cilantro pesto and red cabbage slaw | Brooklyn Homemaker

Authentic or not, it doesn’t get much better than soft white corn tortillas filled with smoky tender grilled chicken, vibrant summery cilantro pesto, creamy ripe avocado, and crunchy cabbage with biting raw onion and bright tangy lime juice.
Not bad for a gringo eh?

For the best flavor I like to make the pesto ahead and let the chicken marinate in it for a few hours. I’d recommend that you make the slaw ahead too so all the flavors have some time to hang out together and get nice and friendly.

grilled chicken tacos with cilantro pesto and red cabbage slaw | Brooklyn Homemaker

Grilled Chicken Tacos with Cilantro Pesto and Red Cabbage Slaw

1 1/4 to 1 1/2 lbs skinless boneless chicken breast
3 cloves garlic
2 cups fresh cilantro, lightly packed
1 jalapeño, sliced and seeded (2 if you like heat)
1/4 cup olive oil
juice of 2 limes, divided
1 to 2 additional limes cut into wedges
1/2 teaspoon salt
1/2 teaspoon freshly ground black pepper
1/4 shredded red cabbage (about 1 1/2 cups)
1/2 cup finely diced red onion
1 ripe avocado, sliced
12 to 16 white corn tortillas

Slice chicken breasts into thin strips with a very sharp knife. I find that putting them into the freezer for 30 to 45 minutes beforehand firms them up and makes them easier to slice.

To make the cilantro pesto combine garlic, cilantro, olive oil, juice of 1 lime, salt, & pepper in a food processor and process until completely smooth. Transfer to a large bowl with sliced chicken and toss to combine. Cover and refrigerate for at least an hour or two, or overnight if desired.

To make the red cabbage slaw, combine the shredded cabbage, diced onion, and juice of 1 lime in a medium bowl. Toss to combine and season with salt and pepper. Cover and refrigerate for at least an hour or two, or overnight if desired.

I find that skewering the chicken makes it easier to flip and keeps it from falling through the grill grates. If using wooden skewers make sure to soak them in water for an hour before use so they don’t burn up.

Thread 4 or 5 chicken strips onto each skewer and try to leave as much of the pesto on them as possible. Grill the skewers over a medium to high flame until just cooked through, flipping once. This should only take 4 or 5 minutes per side but that will depend on the heat in your grill. Since the chicken is sliced thin it will dry out if overcooked.
Warm your tortillas over the grill too, just until soft and warm, about a minute per side.

Assemble the tacos with a few chunks of chicken, a sprinkle of red cabbage slaw, a couple slices of avocado, and a squeeze of fresh lime. Serve with additional lime wedges if desired.
I recommend about 3 tacos per serving, 4 if you’re hungry.

homemade taco seasoning

Why hello there! Longy time no seeum!

homemade taco seasoning | Brooklyn Homemaker

It’s been a minute, I know. Sorry about that.

I went upstate for a little vacation with my sister and her kids, and as much as I wanted to, I didn’t have time to get a backup post together to share while I was away. We went to a Bluegrass festival in the Catskills for 5 glorious days, and while I missed you guys, I loved every second of it.

Amazing music and friendly strangers. Boiling hot days and freezing cold nights. Spending time with family. Getting drunk on whiskey and wine and dancing barefoot until the wee hours of the night. Going to sleep on a firmly inflated mattress and waking up on a rock. Drying blankets in the sun after accidentally leaving the tent windows open during a thunderstorm. Lifting my niece up over a sea of tents to see the rainbow after the storm. Doing my duty in a porta potty or at the grocery store bathroom…

Absolute heaven.

Grey Fox bluegrass festival Grey Fox bluegrass festival Grey Fox bluegrass festival

In keeping with my last post, I had ideas for a summery healthy dinner that I planned to share with you last week, but fate had other ideas. I scheduled an extra day off after the festival so I’d have time to nurse the world’s largest hangover. My plan was to make and photograph said recipe then. Two days into my trip however, things changed.

If you recall my “yardening” post from last spring, you may remember hearing about our “sickly plum tree” and seeing the trunk of said tree in the photo below.

tree trunk

Two days into my trip I received a text from Russell with this photo:

fallen tree

That’s taken from our bedroom window, and in the foreground you can see the deck we built last summer (with stairs to the right) to make getting out into the yard easier for us and the pups. The old “sickly plum tree” had just given up. Since we moved in I’ve been trying to figure out how to nurse the poor tree back to health, but the fact of the matter is that I had little to no idea what I was doing. I tried trimming off dead branches, but more kept dying, and every spring the leaves and fruit suffered from a white mildew that would cause all the fruit and about half of the leaves to fall off early in the summer.

Late last summer I noticed that the tree had A LOT of ants on it, and most of them would travel down to the base of the tree and disappear into the ground between the roots. Well, apparently the ants had decided to take advantage of the defenseless old tree and make a nice home in it’s trunk. When I finally got back home to take a look, the trunk of the tree was completely rotted out and had been turned into a dark and crumbly swiss cheese of insect tunnels. After fighting with all the strength it had left, the tree had finally just given up.

Seeing how bad the trunk was, I’m actually surprised it hadn’t fallen earlier.

Rather than making delicious food in the comfort of my home, on my day off I got to stand outside for several hours in 95 degree heat and cut the poor tree up into manageable chunks with the world’s dullest, rustiest handsaw. After waiting for almost a month for our landlord to fix our oven when it broke, we figured it wasn’t even worth asking for his help with the tree so I just did it myself. It was quite a workout though, so at least I can say it was all in the name of fitness.

Anyway, now the yard looks more like this.

fallen tree after

I’ve still got a lot of work to do to clear all the debris and get rid of the wood somehow (we can’t have fires back there, we tried once and had the fire department at our door within 20 minutes). Although I miss the tree, and it may take some getting used to, I actually really like how open the yard feels now. I feel like I might need to rethink my (meager) landscaping there, but the quality of light in our room feels so much nicer and brighter now, so that’s good.

SOOOooooo…

Without the time to photograph a full meal after the tree massacre, I thought I might share this taco seasoning I’ve been using lately instead. Russell and I tend to eat a lot of ground turkey or grilled chicken tacos, and now that we’re trying to eat better they’re a great meal we can make after work. There are a lot of small family owned tortilla factories in my neighborhood so we can get our corn tortillas super fresh. A few torillas filled with some well seasoned lean meat, sauteed onion, and black beans is the perfect quick and easy weeknight meal. Rather than cheese or sour cream, we like ours with a few creamy slices of ripe avocado.

homemade taco seasoning | Brooklyn Homemaker

I like to make my own seasoning because we make tacos so often. The store bought stuff is crazy salty and some of it has some really questionable ingredients that I’m not super comfortable eating on a regular basis.

This seasoning is not only fresher and much less salty, but you also know exactly what you’re putting into it and can customize it to your taste. I like my tacos nice and spicy, so in addition to the chile powder I like to add ground cayenne pepper too. Cinnamon adds a warmth without adding spicy heat, and smoked paprika adds a great warm smokiness. You may think cornstarch is an odd addition to a seasoning blend, but most taco seasoning does have thickening agents in it to help make a nice thick sauce. If you don’t like using cornstarch you could substitute arrowroot powder instead or leave it out altogether. It’s your party!

homemade taco seasoning | Brooklyn Homemaker

Homemade Taco Seasoning

  • Servings: makes about 6 ounces, enough for 4 to 6 pounds of meat
  • Print
adapted from Love & Olive Oil

6 tablespoons ground chile powder
1 tablespoon garlic powder
1 tablespoon onion powder
1 tablespoon dried oregano
1 tablespoon cornstarch
2 teaspoons ground cayenne pepper, optional
2 teaspoons ground cumin
2 teaspoons smoked paprika
2 teaspoons fine sea salt
2 teaspoons ground black pepper
1 teaspoon ground cinnamon

Combine all spices in a small bowl and whisk until evenly distributed. Can be stored in an airtight jar or container for future use. Recipe doubles (or triples, or more) very easily.

If using ground meat, brown the meat first then add seasoning along with a few tablespoons of water. You’ll want about 2 tablespoons of seasoning per pound of ground meat. Stir regularly until meat is fully cooked and sauce is thickened. I like to add a diced small onion while I brown the meat, and a drained can of black beans right at the end. Serve with a squeeze of fresh lime juice.

You can also use the seasoning as a rub for chicken breast. Sear the chicken breasts until fully cooked and slice thin before adding to tacos.