carrot

orange carrot ice pops

Lately I’ve been trying really hard to stay away from foods with lots of refined sugar.

orange carrot ice pops | Brooklyn Homemaker

I confessed a few weeks ago that all my baking and bundt-ing had me feeling a little lethargic and down, so I’ve been trying my best to eat a little healthier and concentrate on fresh whole foods rather than baked goods and sweets.

I’ve actually been doing really well too!

orange carrot ice pops | Brooklyn Homemaker

That is, I was anyway, until Lindsay over at If the Spoon Fits had to go and post this Orange Creamsicle Ice Cream recipe. There I was, minding my own business, eating fruit instead of cake, and walking home after work every day, when boom!
Ice Cream!
Irresistible orange creamsicle ice cream! During last week’s damned heat wave mind you, when I couldn’t have been craving something icy and sweet any more than I was in that exact moment.

orange carrot ice pops | Brooklyn Homemaker

Not wanting to completely undo all the good choices I’ve been making lately, I started thinking about what I might be able to make to satisfy my intense craving without actually busting out the ice cream maker.

I recently saw these juice ice pops at the grocery store that had me really curious. They were made with flavor combinations you’d expect to find at a fancy juice bar- apple, celery, & ginger; or blueberry & beet. You know, that kind of thing.
I figured that trying something kind of like that could be healthy-ish and tasty-ish. I’m sure there’s plenty of sugar in them but it’s like, natural and stuff. Right?

I didn’t want to copy the fancy juice bar flavors exactly though, so I started trying to come up with a flavor that would A) taste great and satisfy my sweet tooth, and B) not taste like a health-food alternative to something I’d rather be eating.

orange carrot ice pops | Brooklyn Homemaker

Suddenly I thought of something called “Orange Carrot Elixir” that I used to drink when I was a teenager. I can’t even remember who made it, and I’m not sure the company is even around anymore, but I used to drink the stuff by the gallon.

Growing up in a small town in Upstate New York, my exposure to new and interesting flavors and foods left a lot to be desired. Fortunately, one of my first high school friends with a car shared my desire to branch out and try something new, and rather than doing drugs or causing mischief, we and our friends used to drive around checking out grocery stores and searching for their “International Foods” sections.
We’d drink Mexican Goya sodas (I especially loved tamarind flavor), eat carob “chocolates” by the fist-full, wolf down whole baguettes, and munch on marinated canned octopus. We’d drive almost an hour to Ithaca, NY to go swimming, visit Indian or vegetarian restaurants, and browse the prepared foods section at Wegmans where I’d stare at trays of sushi that I was too chicken to try.
In the grand scheme of things the Orange Carrot Elixir wasn’t nearly as exotic as some of the other things I was eating and drinking, but I seriously couldn’t get enough of the stuff.

Carrots, in sweet beverage form! Mind blown.

I decided it was worth a shot to try to capture that sweet orange-carrot combination but in frozen ice pop form instead.

orange carrot ice pops | Brooklyn Homemaker

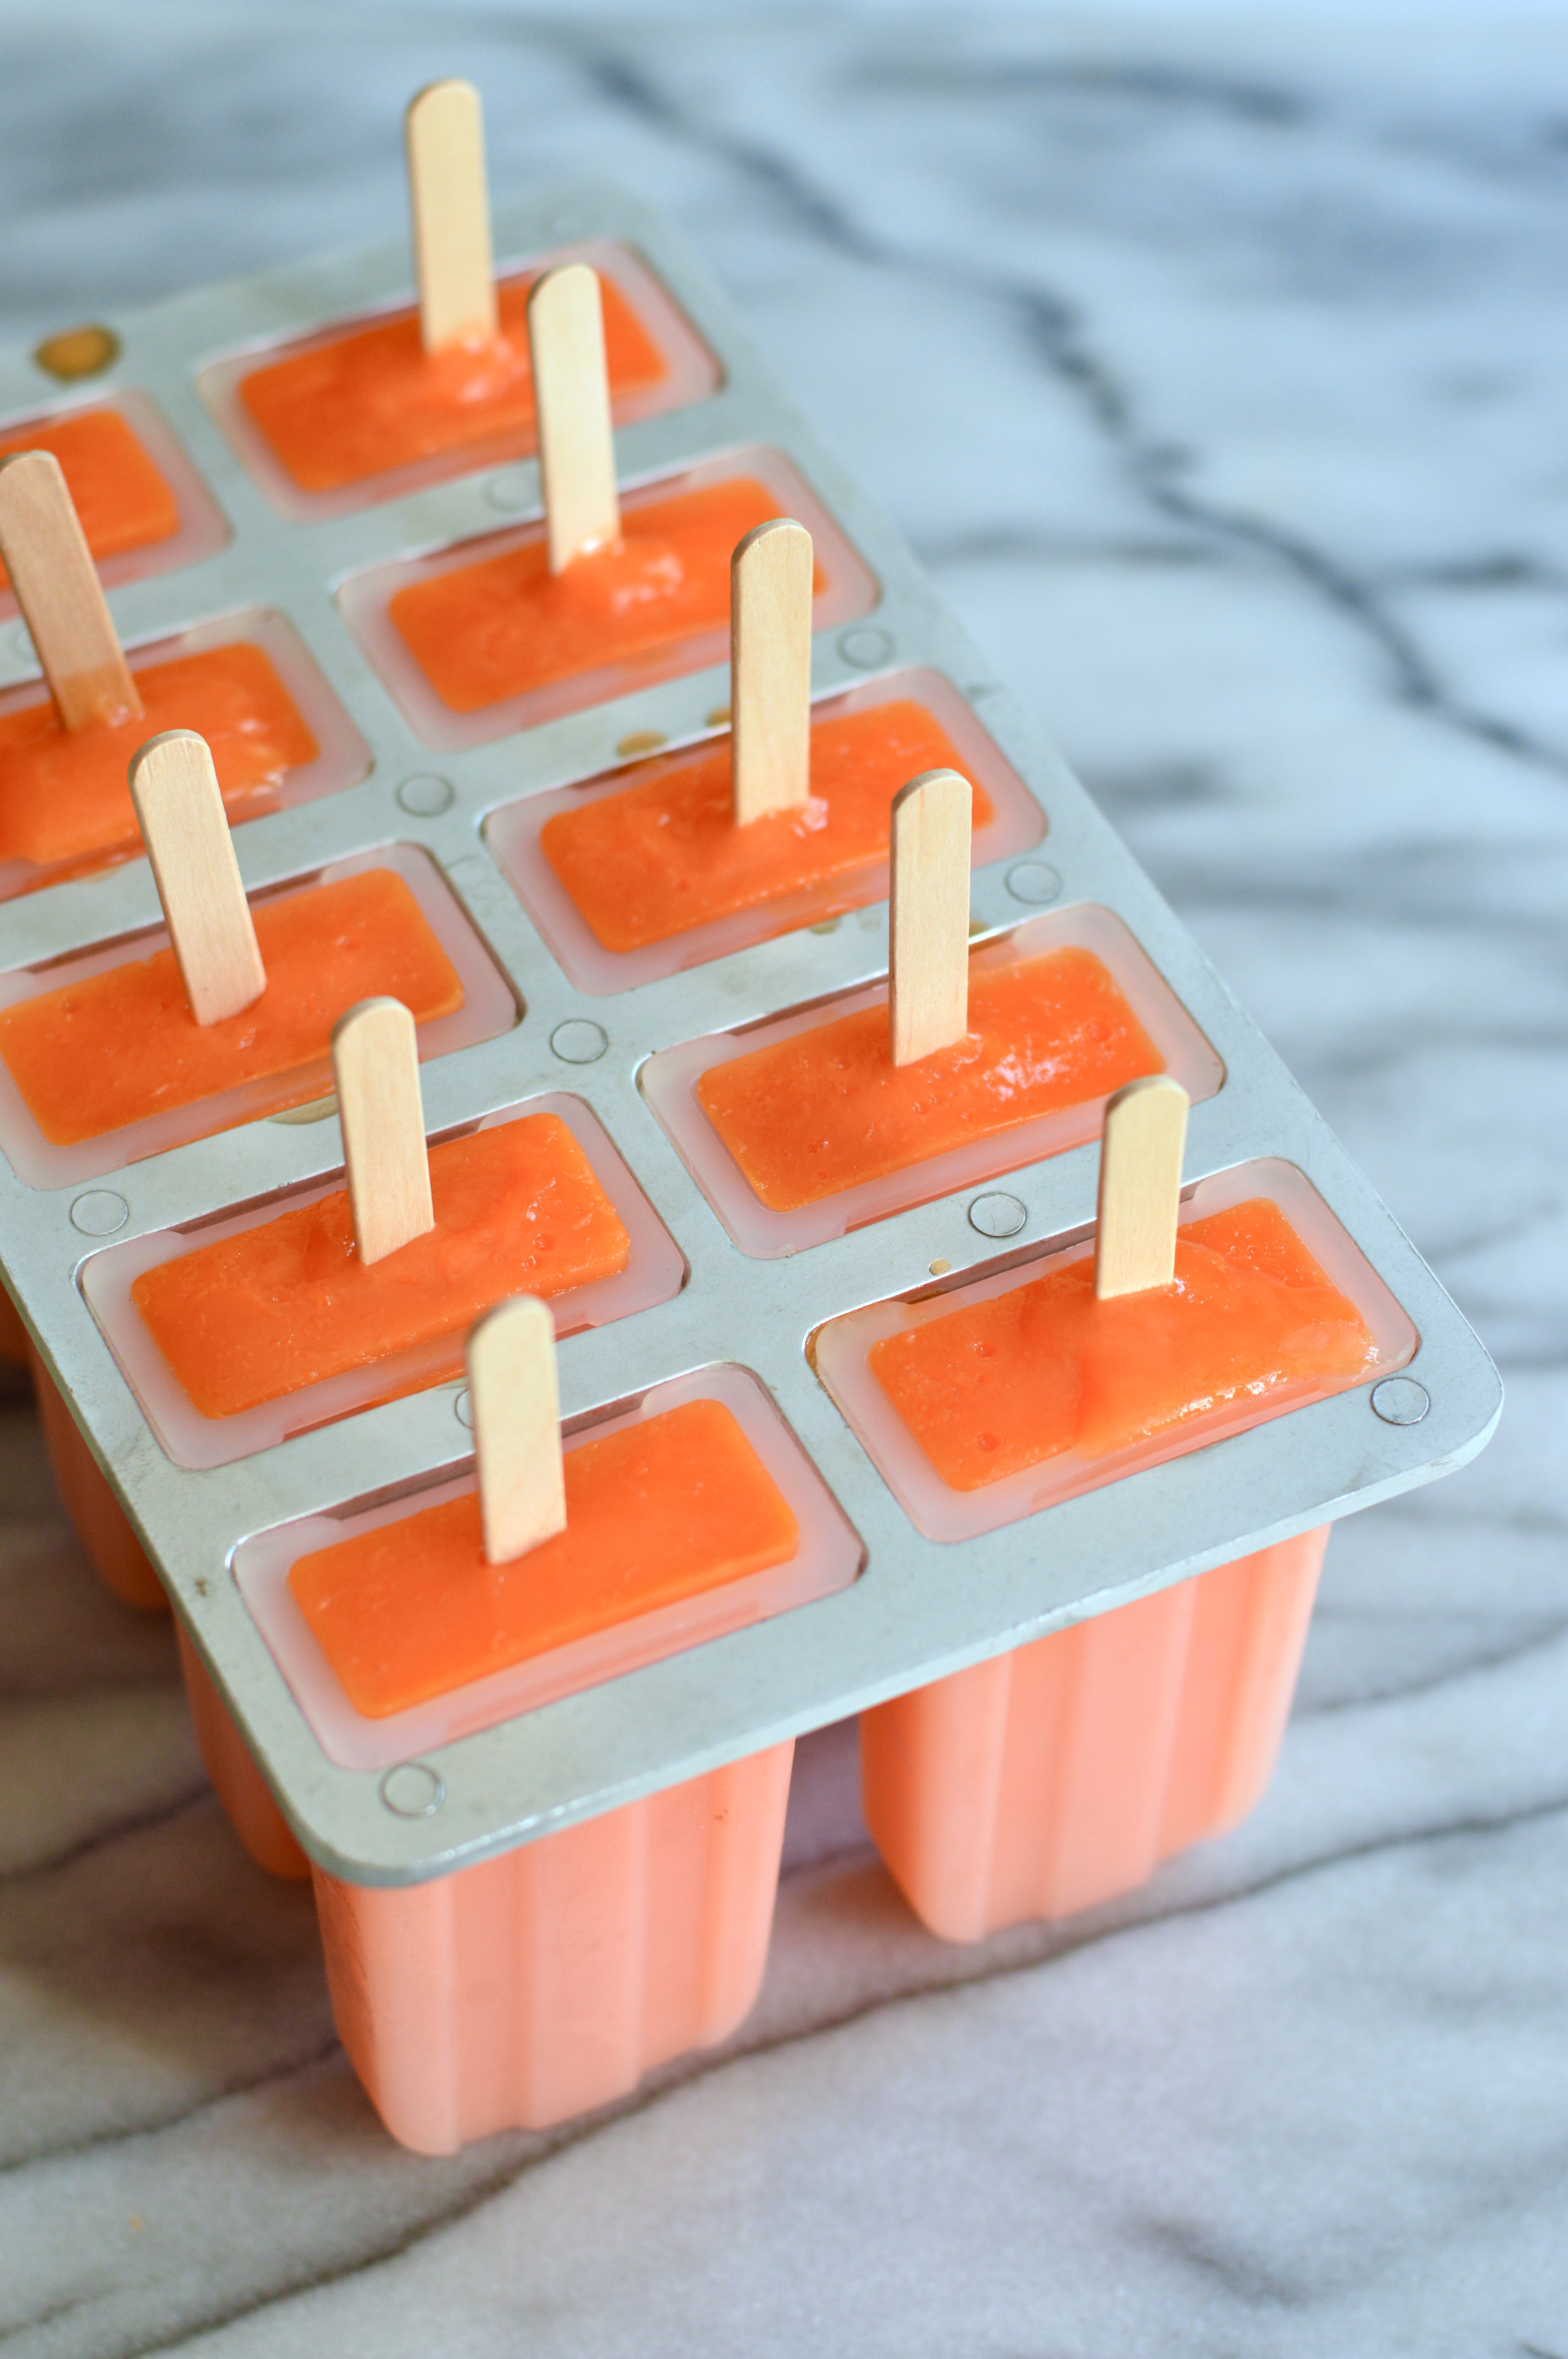
It actually took me a few tries to get these right. First I just tried pureeing whole carrots with orange juice, but the end result was bitter and pulpy. Then I tried peeling the carrots to remove the bitterness and juicing them rather than pureeing to remove the pulpiness. This was a start but the pops still weren’t sweet enough and the flavor was kind of flat and boring. Next I added a bit of fresh ginger for kick and apple juice for sweetness. Muuuch better but the pops still weren’t quite sweet enough, and were icy hard rather than bite-able and tender like store bought ice pops.

I did some reading online and found out that since ice pop manufacturers are able to freeze their pops much faster at lower temperatures that home freezers, some type of thickener like cornstarch or gelatin is needed to help give homemade ice pops a better texture. This also keeps the juices from separating before they freeze, and helps prevent the pops from dripping while you eat them. Since ice pops (and ice cream) are frozen, they also need a little bit of extra sugar because freezing-cold foods slightly dull your sense of taste. I went ahead and added juuuust a little extra sugar, and a little bit of cornstarch, and bingo! Success!

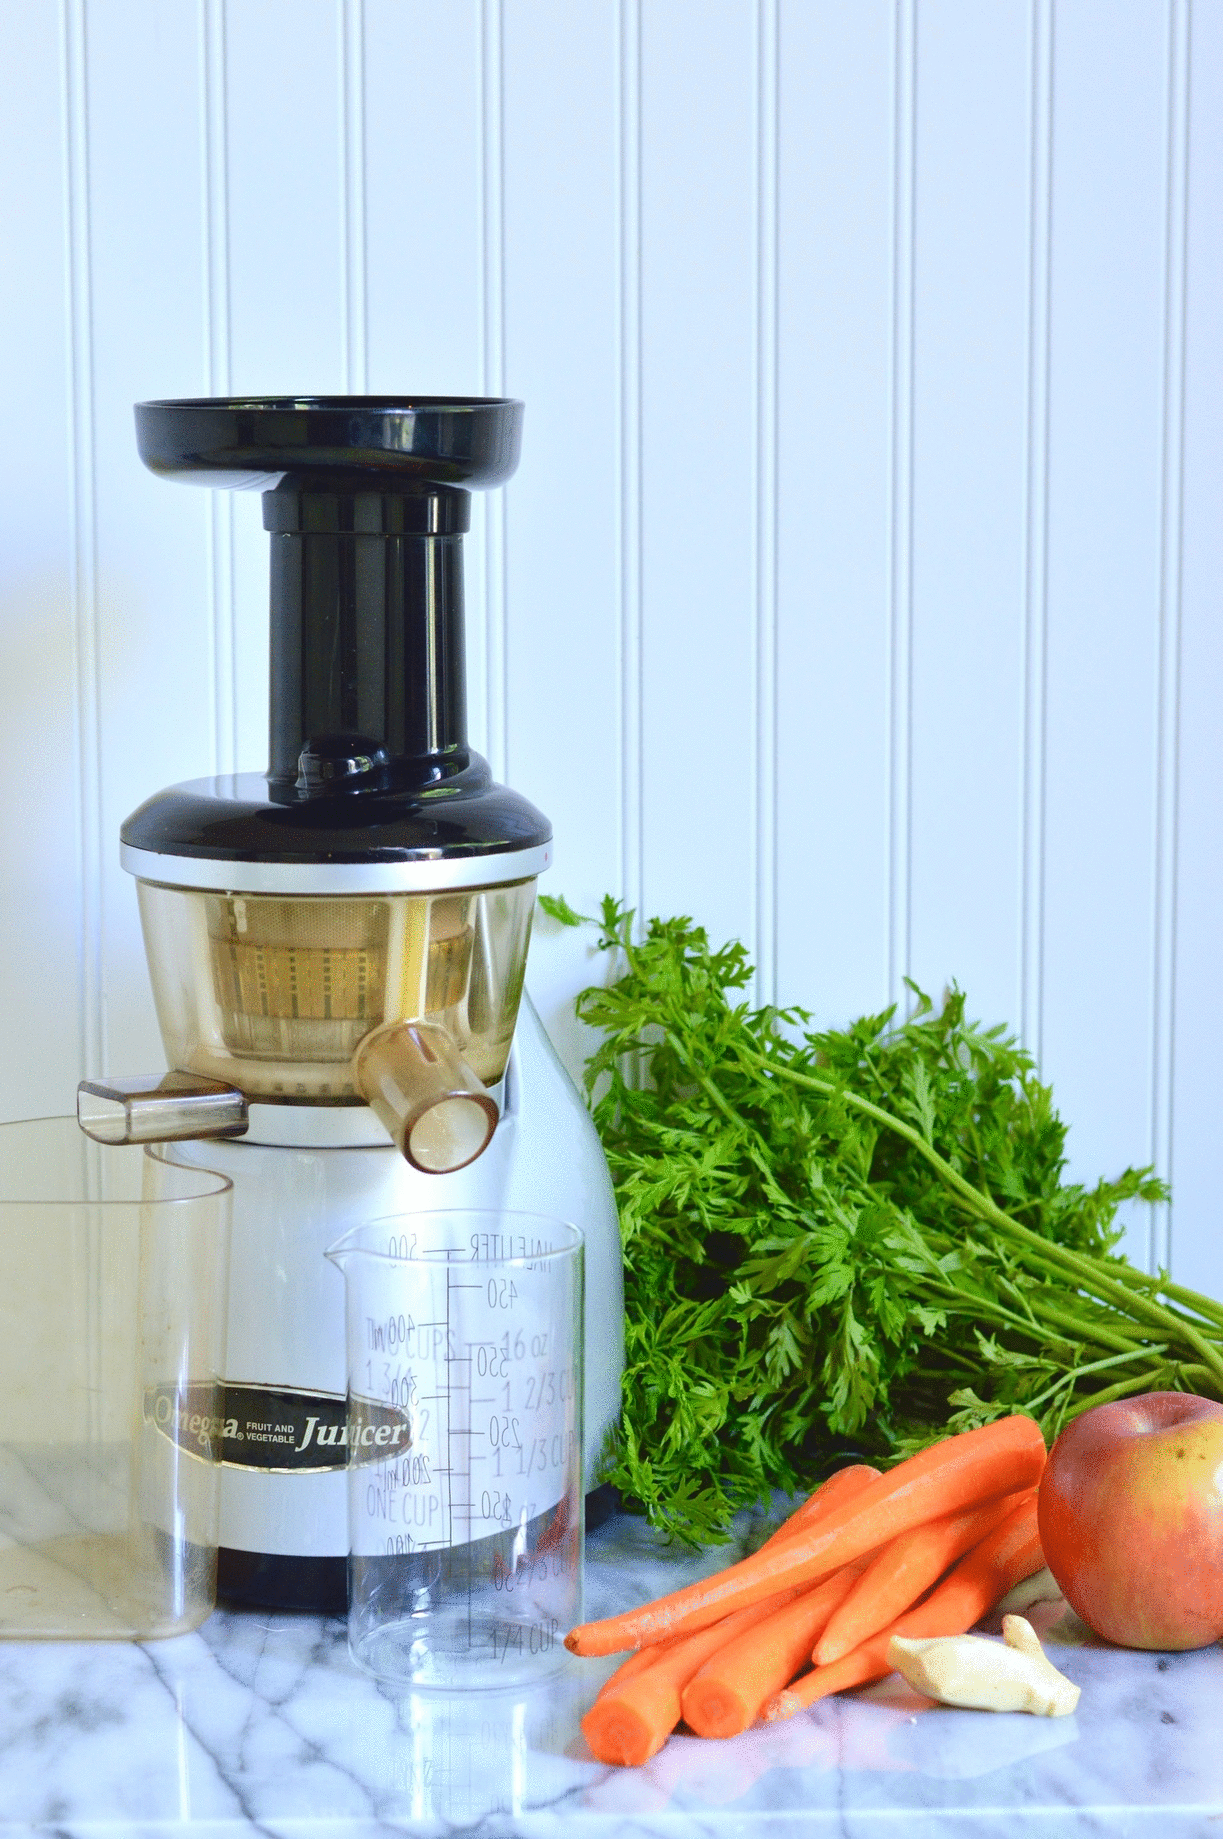
If you don’t have a vegetable juicer you can still easily make these at home using store bought juices. Most grocery stores these days (at least here in my neck of the woods) carry bottled carrot juice, so I don’t think it should be too hard to find. The only thing you’ll need to do differently is to add grated ginger in with the sugar and cornstarch, and then strain out the pulp just before pouring into  your molds. I promise I tried this during one of my experiments and it worked great.

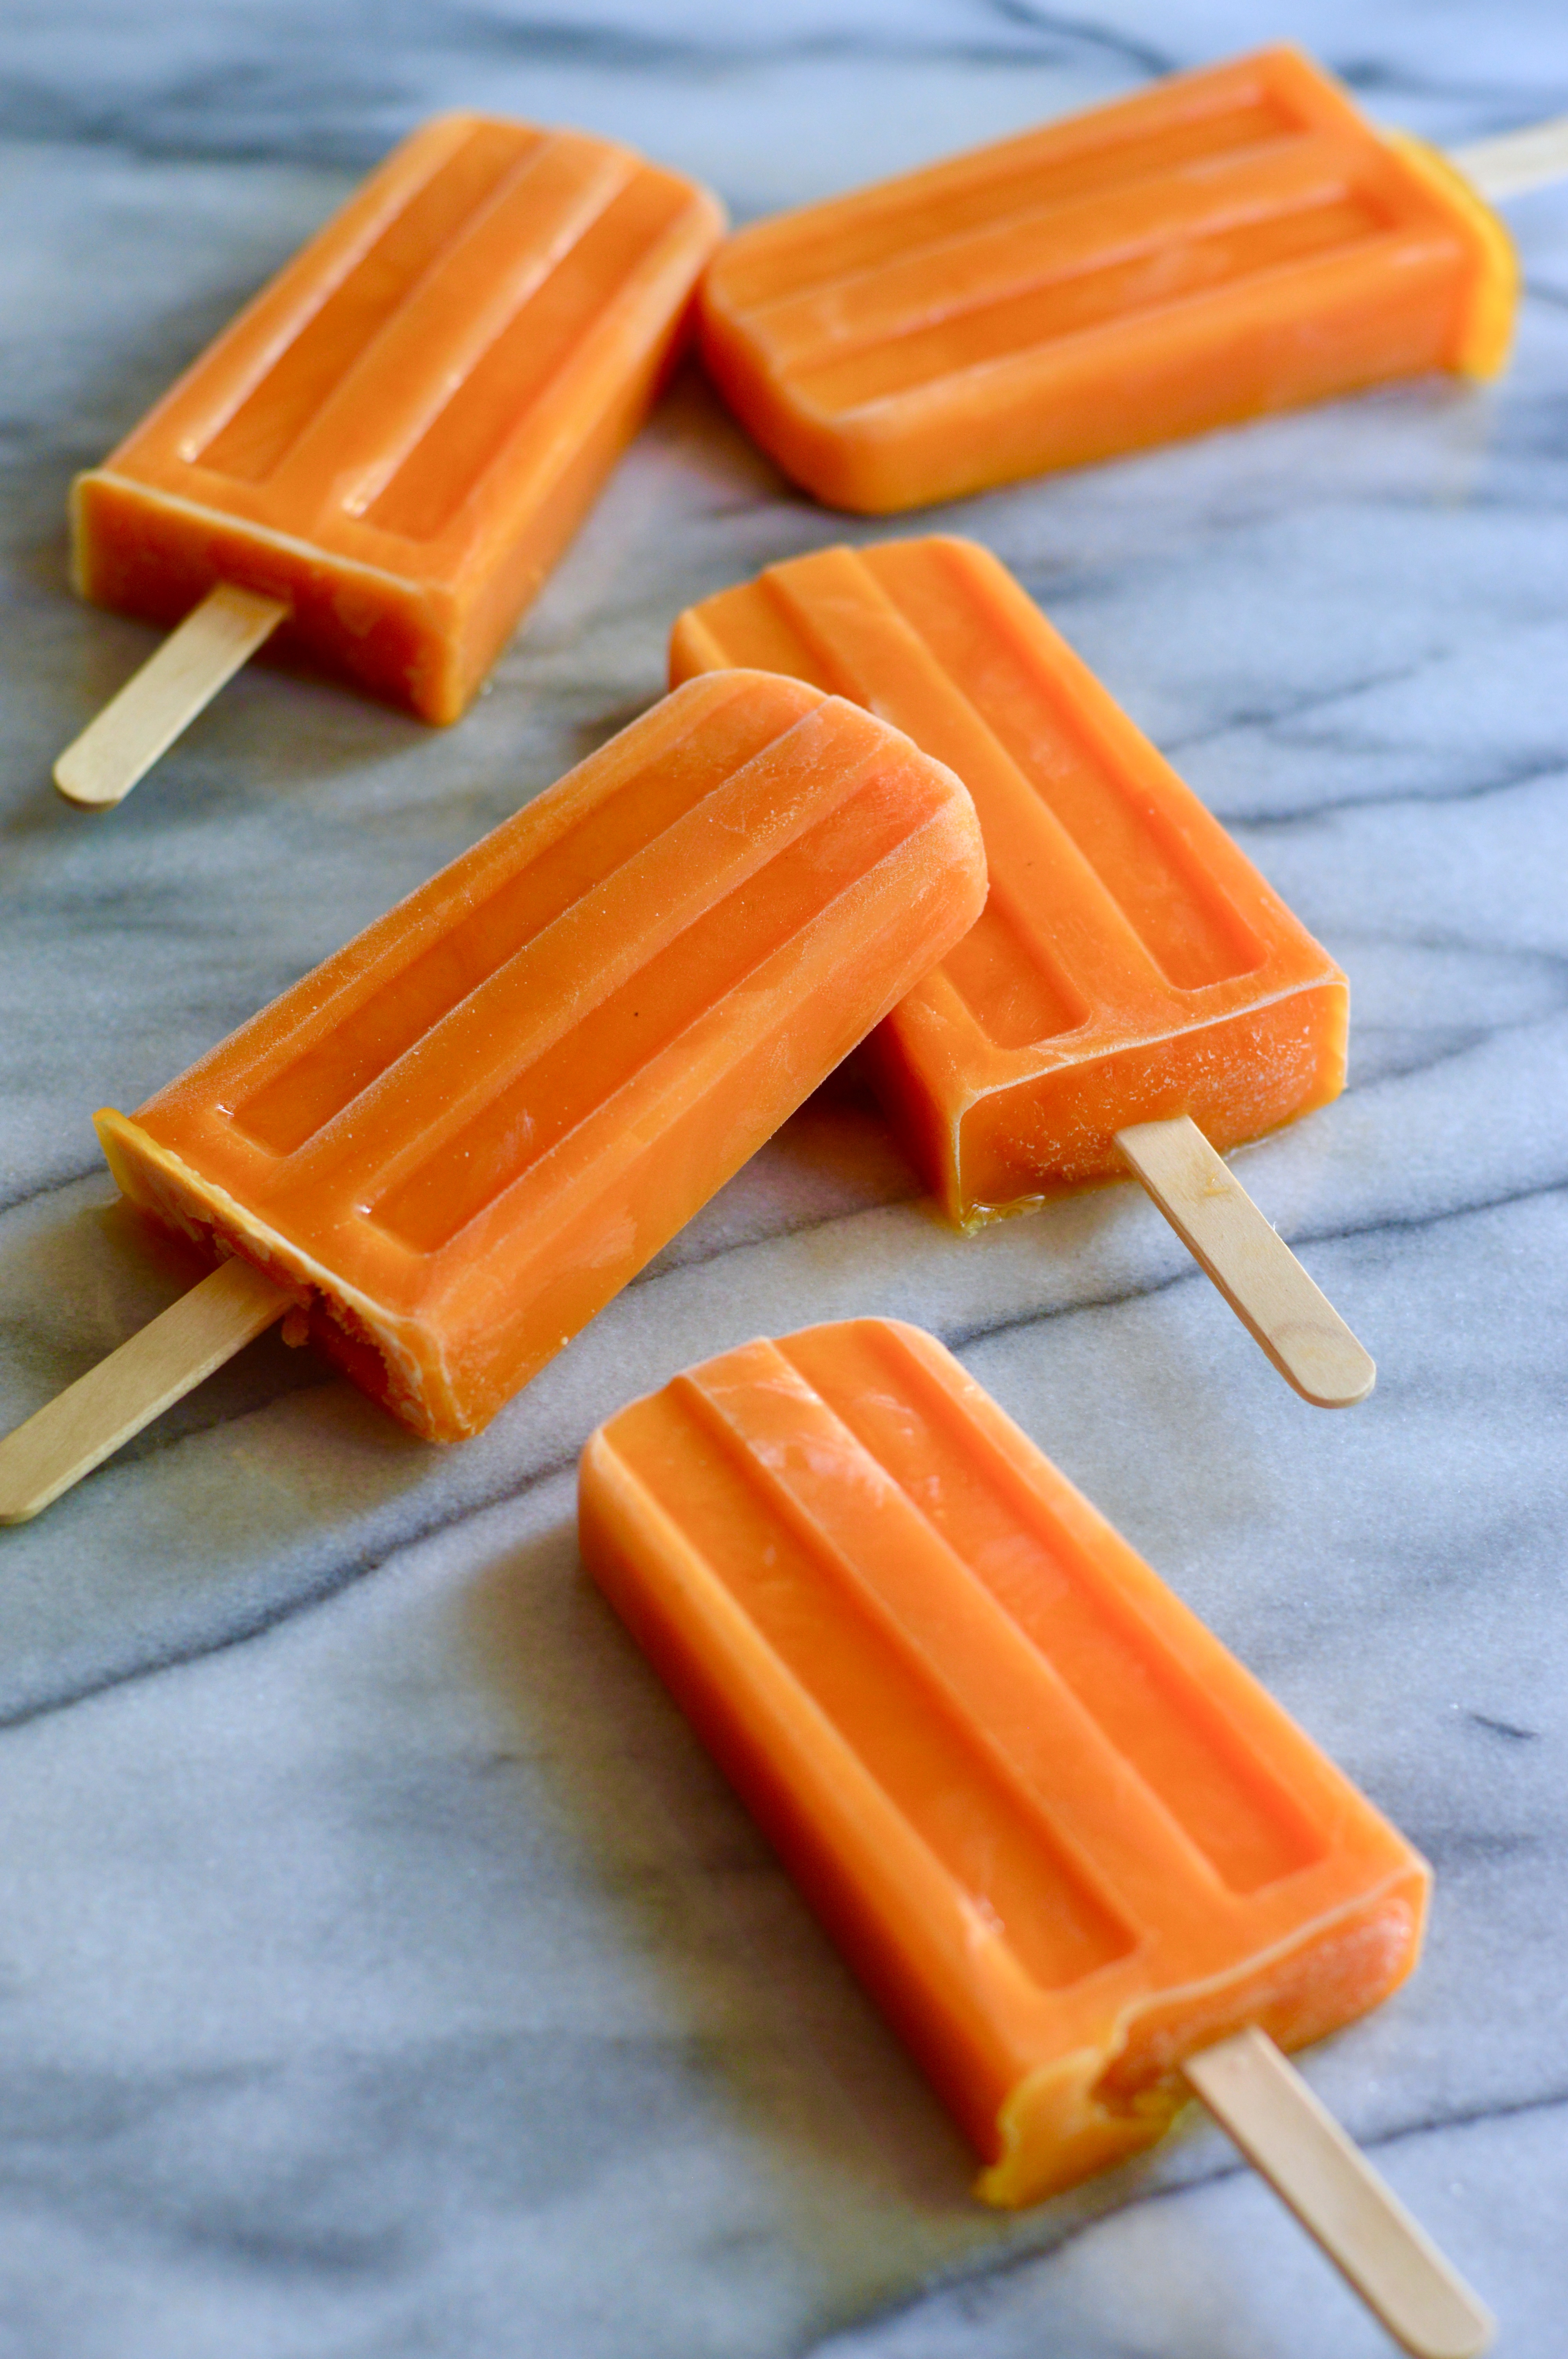
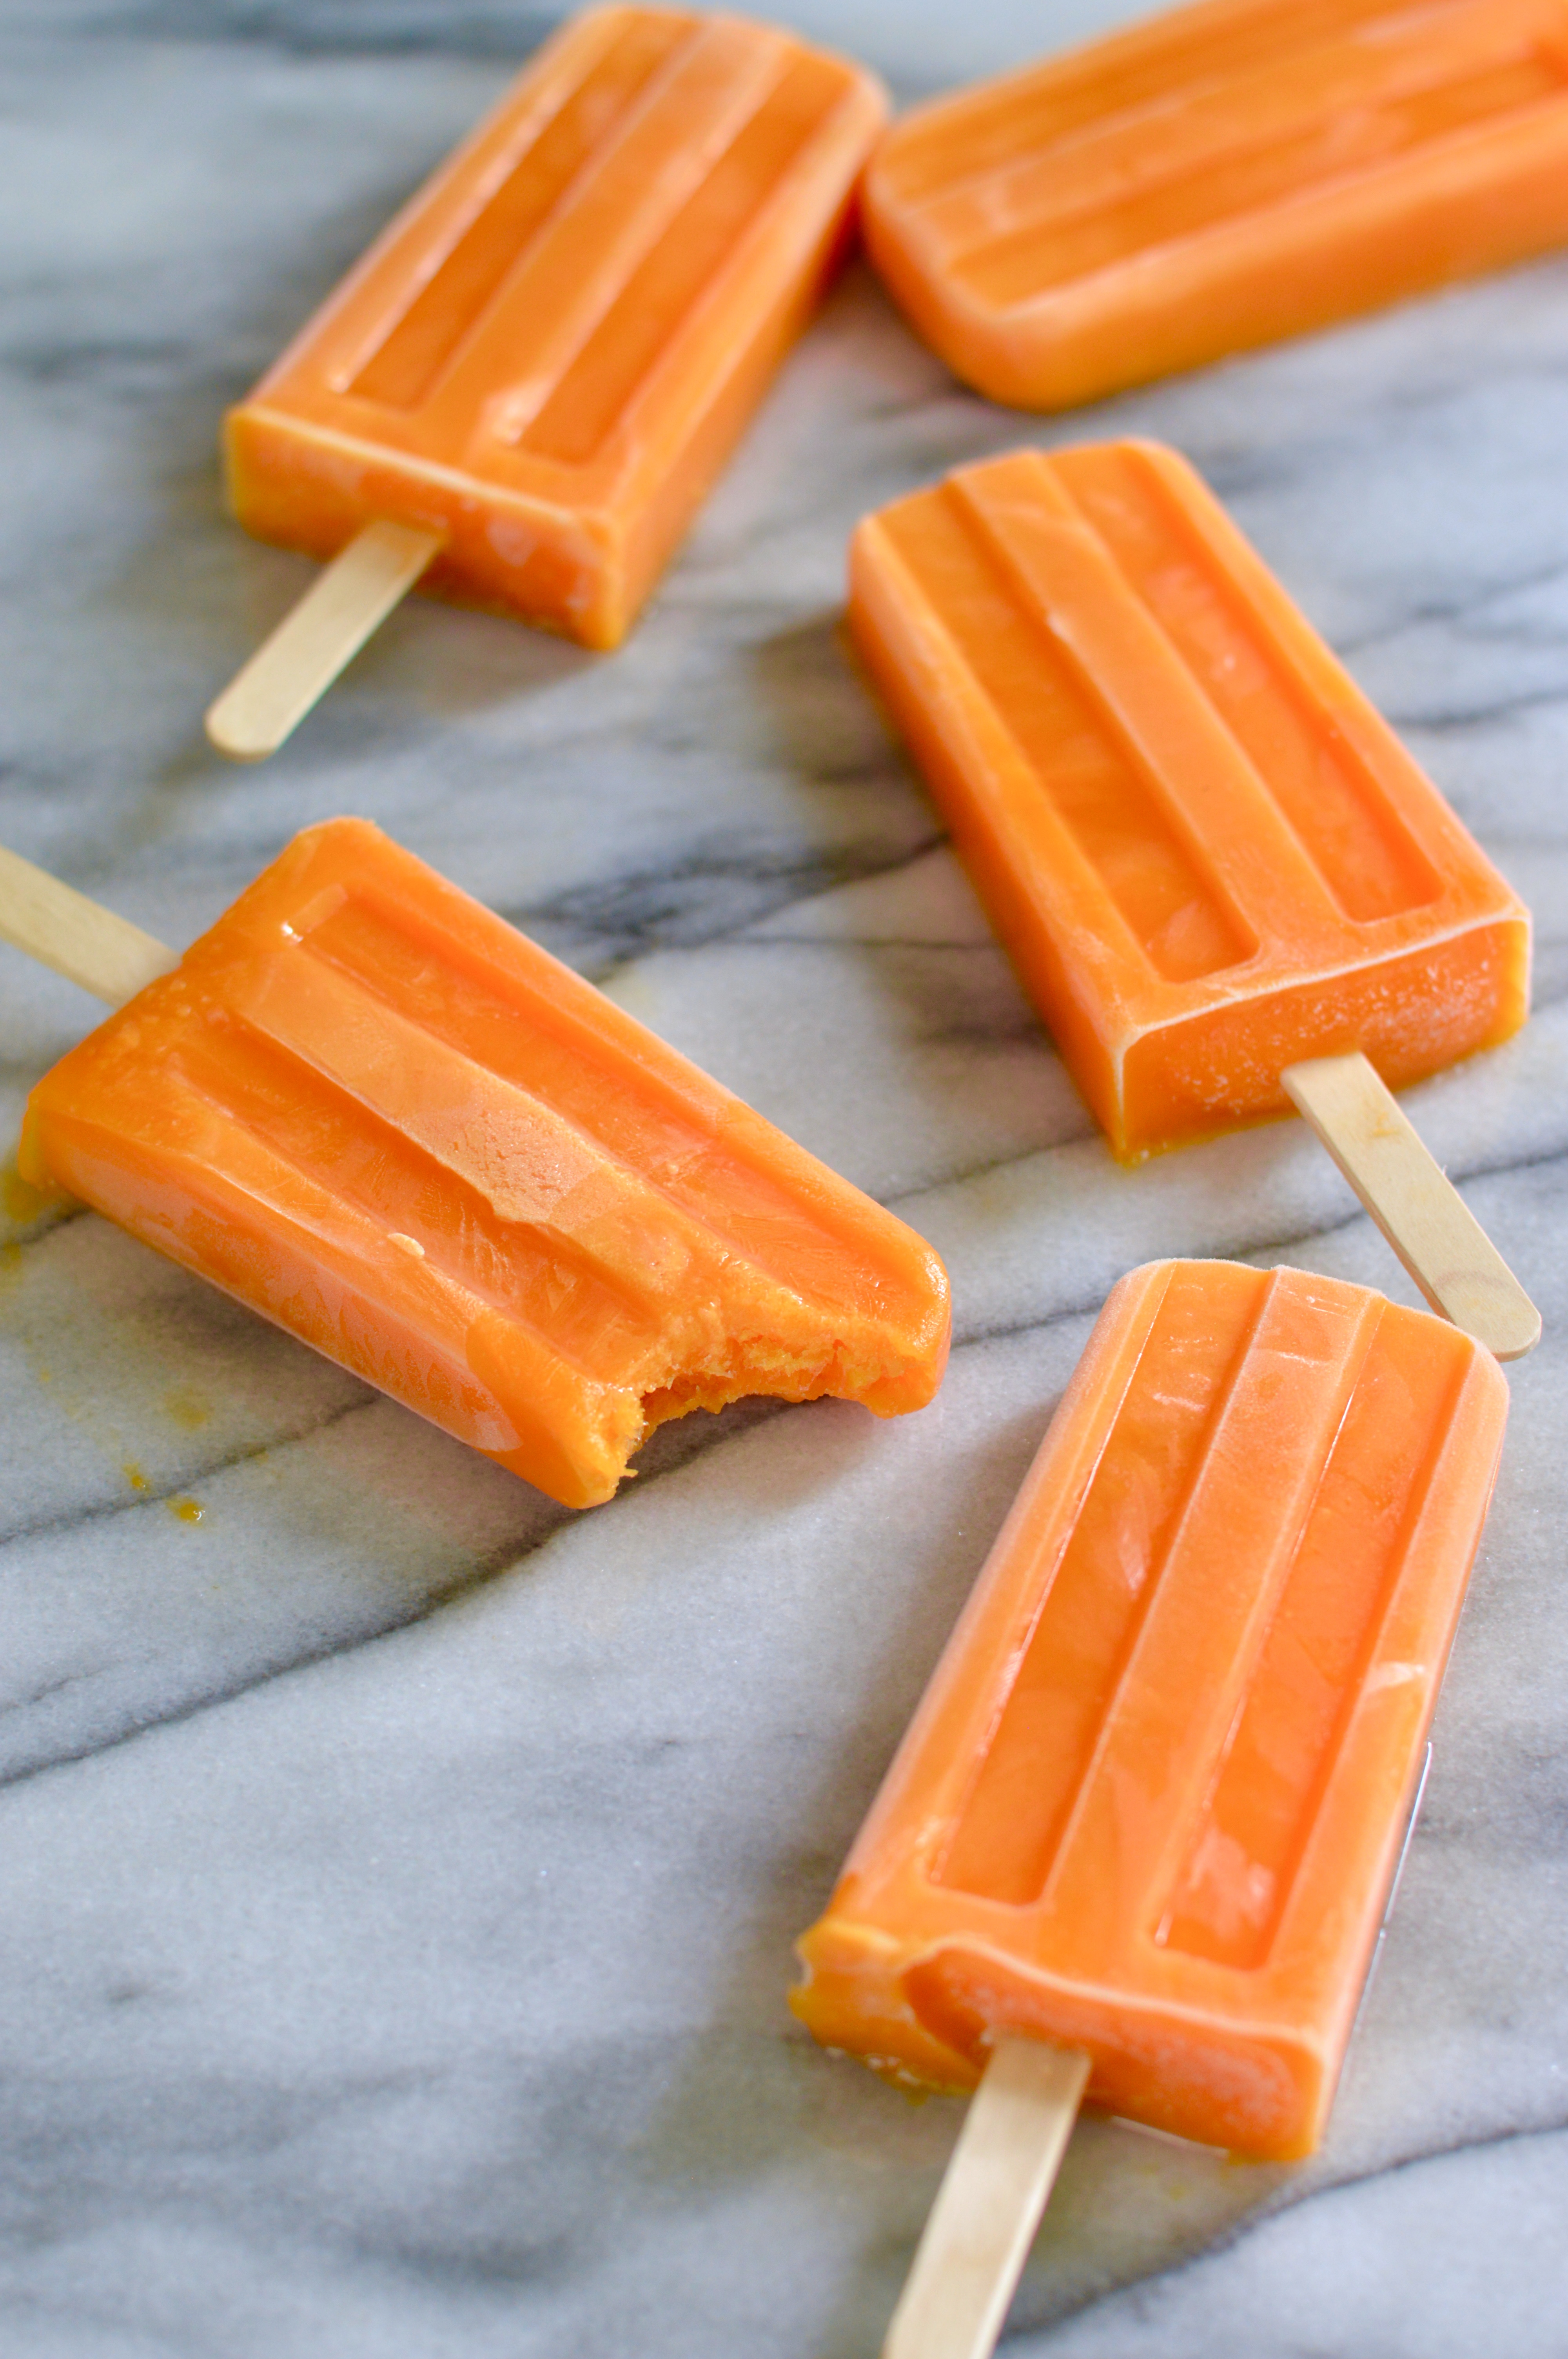
These puppies are TASTY! They’re bright and citrusy and summery, with just a touch of fresh spicy zing from the ginger. The carrot juice and orange juice are a match made in heaven and the apple juice just helps sweeten things up. They’re just sweet enough, with a really great bite-able texture, and the absolute last words that come to mind is “health food” or “diet”.

Craving satisfied. Officially.

orange carrot ice pops | Brooklyn Homemaker

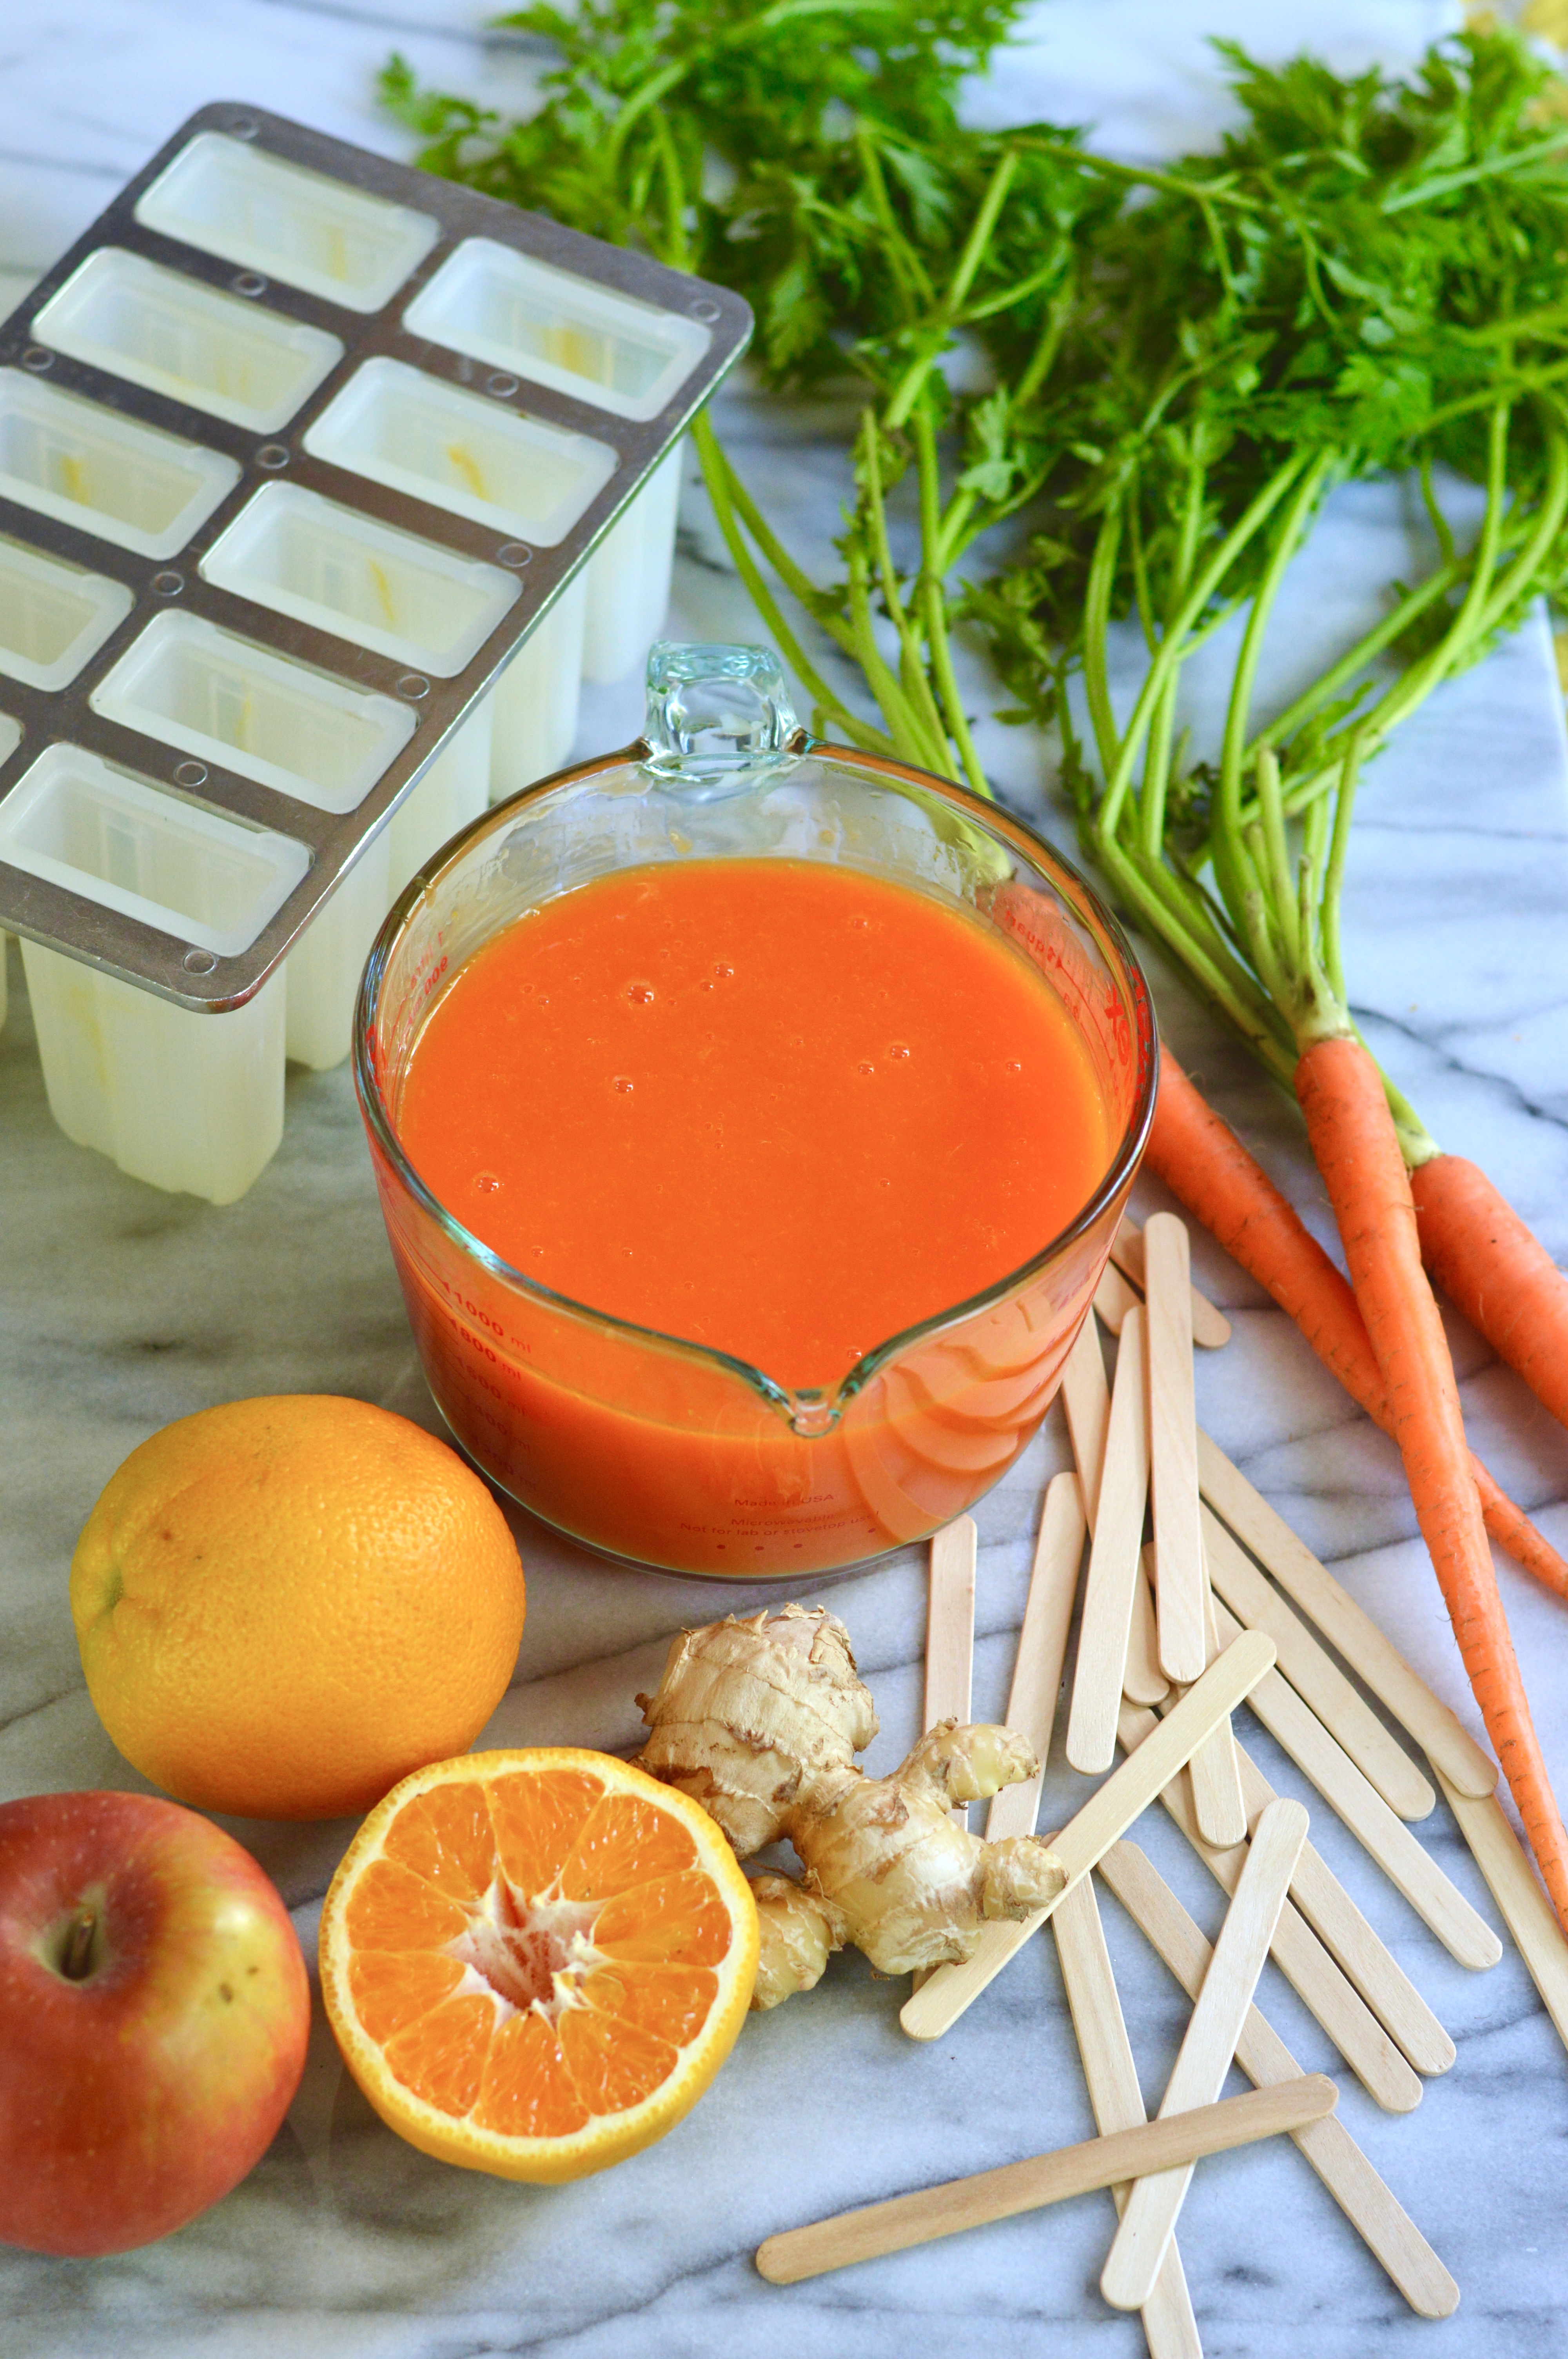
Orange Carrot Ice Pops

  • Servings: makes ten 3-ounce ice pops
  • Print
3/4 cups apple juice (I used fuji apples)
1 3/4 cups orange juice
1/4 cup sugar
1/4 cup cornstarch
pinch of salt
zest of 1 orange
1 cup carrot juice (from about 2 lbs peeled carrots)
1 to 2 inch peeled chunk of fresh ginger (juiced with carrots if possible, finely grated if not)

In a medium saucepan, combine apple juice, orange juice, sugar, cornstarch, salt, & orange zest. If you don’t have a juicer at home you’ll also need to add your grated ginger now as well.

Bring mixture to a boil over medium heat, whisking regularly to prevent lumps. Once the mixture has boiled and thickened to a citrus-curd-like consistency, remove from heat. Add carrot juice and ginger juice (if you aren’t using grated ginger) and whisk to combine. If using grated ginger, strain mixture through a fine mesh strainer to remove pulp.

Pour the mixture into ice pop molds (makes enough liquid to fill ten 3-ounce pops). If your ice pop maker comes with plastic sticks, insert now and freeze at least 4 hours or until solid. If using wooden sticks, cover the mold and freeze for 45 minutes to 1 hour before inserting sticks and freezing for at least three hours more.

To un-mold your pops, run them under warm water to 10 to 15 seconds each. Pops should slide out of molds easily and can be quickly refrozen and stored in a ziplock bag or individually wrapped in plastic wrap.

Advertisement

spicy peanut carrot and cabbage salad

I’m sure that I’ve said this before, but one of my favorite little kitchen gadgets is a simple julienne peeler.

carrot and cabbage salad with spicy peanut dressing | Brooklyn Homemaker

The one I have is a sturdy dishwasher-safe stainless model by Kuhn Rikon that I found at Whisk for about $20, but there are a lot of other options out there on the market. The basic idea is sort of similar to a regular vegetable peeler, but with teeth running along the blade so that in one motion you end up with perfectly julienned strips of whatever you’re using it on.

carrot and cabbage salad with spicy peanut dressing | Brooklyn Homemaker

I’ve also used vegetable spiralizers that produce similar results, and while spiral slicers offer more options and variation, my julienne peeler is sturdier, smaller, and cheaper than even the smallest handheld spiral slicer.

Although it has tons of uses, my favorite use for this nifty little guy is to peel strips of carrot for salads, slaws, asian dishes, and garnishes.

carrot and cabbage salad with spicy peanut dressing | Brooklyn Homemaker

Now that the weather is warming up I’ve been looking for light summery (I know we’re not quite there yet, but a man can dream) salads and cold dishes to eat on hot days. One of my favorite warm weather meals is a soba noodle salad with lots of veggies and a spicy peanut dressing.

carrot and cabbage salad with spicy peanut dressing | Brooklyn Homemaker

I was thinking about making that very dish, it’s one that I make a variation on at least once or twice every summer, but I thought it might be fun to try it without the noodles this time. Instead of the cold soba noodles I opted for long thin julienned strips of fresh carrot, and thinly shredded savoy cabbage.

carrot and cabbage salad with spicy peanut dressing | Brooklyn Homemaker

If you’re looking to add a little extra protein to this salad I think that laying some thinly sliced grilled chicken breast or lean steak over the top makes for a gorgeous presentation. To make things even simpler, you could just pull the meat off of a store bought rotisserie chicken and toss it all together with the other ingredients. My local grocery store recently started doing air-chilled organic chickens on their rotisserie too, which I think is a really nice option to have. Easy, delicious, and good quality!

If you wanted to keep the salad vegetarian, I think some roasted chickpeas would also be a really nice option!

carrot and cabbage salad with spicy peanut dressing | Brooklyn Homemaker

Added protein or not, this salad is pretty stellar.

The cabbage and carrot softens ever so slightly but still offers a pleasant crunch in every bite. The peanut dressing is thick and creamy and ever so slightly spicy and tangy from the vinegar and lime juice. The green onions and basil add even more green earthiness and flavor, and the toasted peanuts add great texture and flavor. It’s the perfect meal for the warm weather to come, and keeps well for a day in the refrigerator if you want to pack it for lunch. It would also be the perfect make-ahead meal for a picnic!
If you do decide to make it ahead, just be sure to wait to add the toasted peanuts until serving or they can absorb the oils in the dressing and lose their crunch.

carrot and cabbage salad with spicy peanut dressing | Brooklyn Homemaker

Carrot and Cabbage Salad with Spicy Peanut Dressing

Dressing:
1/4 cup smooth peanut butter (reduced sugar or sugar free is best)
3 tablespoons rice wine vinegar
1 teaspoon sesame oil
2 tablespoons olive oil
1 tablespoons low sodium soy sauce
1 teaspoon honey (optional)
2 teaspoons sriracha sauce
1 garlic clove, finely minced or crushed
2 teaspoons fresh ginger, finely grated
2 tablespoons fresh lime juice, plus wedges of an additional lime for serving

Salad:
4 cups thinly shredded savoy cabbage, loosely packed (about half a head)
3 cups julienned or shredded carrots, loosely packed (about 4-6 large carrots)
1/2 cup scallions, thinly sliced
1/4 cup fresh basil leaves, sliced or torn
1/4 cup unsalted peanuts, toasted or pre-roasted

Combine all dressing ingredients in a medium bowl and whisk until smooth and lump free. If using sweetened peanut butter, taste before adding the honey.

Combine the salad ingredients in a large bowl. If making ahead, reserve the peanuts and wait to add until just before serving. Pour the dressing over the top of the salad and toss like mad until well combined. It may seem like there isn’t enough dressing but the cabbage will begin to wilt once tossed and the dressing will stretch. Of course, if you like a heavily dressed salad you can increase the dressing recipe. Serve with lime wedges if desired

Salad will keep, refrigerated and well covered, for at least a day.

If desired, top with thinly sliced lean steak or chicken breast, or toss with pulled rotisserie chicken meat or roasted chickpeas.

steak topped carrot and mango salad with chili lime dressing

Okay so the holidays are fast approaching and we are all surrounded by sweets and cookies and cakes and rich hearty indulgences.

steak topped carrot and mango salad with chili lime dressing | Brooklyn Homemaker

With all the temptations at your fingertips this time of year, it’s easy to go overboard, and as much as I love to indulge, after a while your body just craves something fresh and bright and healthy. Of course, it’s also important to maintain a balance in your diet, to keep your ticker ticking and all. The thing about writing a food blog though, is that you tend to want to write about beautiful foods that make your mouth water just looking at them. While a lot of healthy foods certainly can taste great, “health food” ain’t sexy.

steak topped carrot and mango salad with chili lime dressing | Brooklyn Homemaker

We tend to eat a lot of salads at home, though from what I post here you might not know it. Most of our dinner salads are a kitchen sink of whatever produce we can find in the fridge, and while they’re usually delicious, they’re not all that photogenic or imaginative. For that reason, they don’t often make it to the pages of Brooklyn Homemaker.

steak topped carrot and mango salad with chili lime dressing | Brooklyn Homemaker

This salad though, is different. This salad isn’t just sexy, it’s seductive.

steak topped carrot and mango salad with chili lime dressing | Brooklyn Homemaker

To get those super long, super thin, super sexy julienned strips of carrot and mango, I used a julienne peeler. In a pinch you could also use a standard box grater, but the results won’t be nearly as long or thin, and if your mango isn’t super firm I fear that it might just turn to mush. I think that getting those perfect thin strands of vegetables makes salads look so much more delicious and interesting and makes you want to just dive right in. These peelers are also really really easy to use, so if you’re looking for a fun and affordable new tool for your kitchen, or a great stocking stuffer for the cook in your life, I’d highly recommend picking one up!

steak topped carrot and mango salad with chili lime dressing | Brooklyn Homemaker

To finish the salad and make it feel even more substantial and filling, I added some seared London broil, sliced ultra thin. If you’re not a steak fan though you can use whatever protein you like. I think the steak works really well with the dressing, but sliced chicken breast would be great here too. You could even go for some fresh juicy shrimp, seared salmon fillets, or even some decadent confit duck leg. Or, for that matter, skip the protein altogether. There is such a wide variety of flavors and textures going on that this salad is pretty amazing all on it’s own.

steak topped carrot and mango salad with chili lime dressing | Brooklyn Homemaker

While it certainly is good for you, the last word that comes to mind when you eat this salad is healthy. It’s bursting with so much flavor and offers such a variety of textures that you won’t be thinking about anything else. The carrots and mango are crunchy and fresh, and every bite is permeated with the sweet, bright, and spicy dressing. The crunchy cashews taste almost buttery against the sweet acidity of the rest of the salad, the cilantro is fresh and green and summery, and the sliced steak stands in soft and tender contrast to all that crispness and crunch.

steak topped carrot and mango salad with chili lime dressing | Brooklyn Homemaker

Steak Topped Carrot and Mango Salad with Chili Lime Dressing

Dressing:
zest and juice of 2 limes
3 tablespoons olive oil
1 tablespoon honey
1/2 teaspoon coarse Kosher salt
1/4 teaspoon ground black pepper
1/4 teaspoon chili powder
1/8 teaspoon ground cayenne pepper

Combine all ingredients in a dressing bottle or measuring cup and whisk or shake vigorously.

Salad:
6 medium carrots, julienned or grated (about 4 cups)
1 firm (or slightly under-ripe) mango, peeled and julienned or grated (about 2 1/2 to 3 cups)
1 small shallot, thinly sliced
1/2 cup torn cilantro leaves
1 cup unsalted roasted cashews
12 to 16 oz London Broil (or other lean boneless steak), optional
salt and pepper
1 tablespoon olive oil or butter

Julienne carrots using a julienne peeler (I LOVE this one), or grate them with a box grater. Peel the mango and julienne it, stopping where you feel the pit beneath the flesh. You can also slice the mango off the pit and grate it with a box grater. Combine the carrots, mango, sliced shallot, and chili lime dressing in a large bowl and toss well to combine.

At this point you could finish the salad and eat it as is, but I think it really benefits from at least an hour’s rest covered in the refrigerator.
So, if you have time, cover and refrigerate from 1 to 24 hours to let the flavors mingle. Just before serving, add the cashews and cilantro and toss until well combined.

Generously season the steak on both sides with salt and pepper. Preheat a large heavy bottom skillet (not non-stick) over high heat. Once the pan is good and super hot, add butter or oil, and sear the steak for 3-6 minutes on either side, flipping only once. This will depend on the thickness of the steak, but 3 minutes per side should get you to about medium rare, and 6 should get you closer to medium well. Remove steak to a cutting board and let it rest for at least 5 minutes before slicing against the grain of the meat, into super thin slices with a very sharp knife.

While steak is resting, toss the salad again to redistribute the dressing. Plate the salad and top with slices of steak.

Harvest Cake with Cream Cheese Icing

This year, instead of starting a diet on New Year’s Day, we had friends over for brunch. The only thing I resolved to do in the new year is the learn to be a better photographer, and to continue cooking and baking tasty and interesting things to share with you.

harvest cake with cream cheese icing | Brooklyn Homemaker

When it comes to New Year’s Day menu planning, Southern food is king. Most people know that collard greens and black eyed peas are a traditional staple for getting your year started out on the right foot. When it comes to planning a brunch for New Year’s day, most people might stop with the collards and peas, but not me. If I’m going to the trouble of hosting a brunch for 15 or 20 people, you better believe I’m going to make a big fancy dessert to go along with the meal. I’m a sucker for a show stopper, and love the ooohs and aaahs when a multi-layer cake comes out after a big meal.


harvest cake with cream cheese icing | Brooklyn Homemaker

When I was trying to think of a cake to fit with my southern themed menu, carrot cake immediately came to mind. I’ve always thought of carrot cake as one of those desserts that Southern homemakers would make to bring to a ladies garden party, church picnic, or social club. What better way to round out a big Southern brunch at the beginning of a brand new year? As it turns out though, carrot cake, or at least carrot based desserts, have been around much longer than the American south. People have been using carrots in desserts to help sweeten them since medieval times, and carrot cake as we know it today was likely adapted from earlier recipes brought by immigrants from Eastern Europe. Whatever the real origins, the wide popularity and availability of carrot cake in the American South still makes it feel “Southern” to me.

harvest cake with cream cheese icing | Brooklyn Homemaker

The thing is, when it came time to start baking, I decided not to do a standard carrot cake.  I wanted to make a carrot cake with a little something extra. Something that still kept that traditional and comfortable feel, but with a new and modern twist. I once saw a recipe on Pinterest for a cake with grated zucchini & apples along with the carrots. I thought the concept for this cake was amazing, and could be really delicious, but that particular recipe didn’t really appeal to me. I think they were trying to make something super healthy, subbing dates for sugar, ground nuts for flour, and goat cheese for cream cheese. I suppose it could be tasty, but I worried that it could come out gummy and bland. I love the idea of adding fresh, good-for-you elements into a dessert, but I would be really upset if “healthy” was the first word that came to mind while eating a cake I’d made.

harvest cake with cream cheese icing | Brooklyn Homemaker

To make this cake I took a standard carrot cake recipe and tweaked it a bit. I added more spice, and subbed in fresh grated granny smith apples and zucchini in for some the carrots. I ended up with a ratio of about 1 part zucchini and 1 part apple to 2 parts carrots. I didn’t want to mess with perfection though, so I stuck with the traditional cream cheese icing. Since I wanted this cake to be as picture perfect as possible, I decided to make it with 3 layers, with the cream cheese icing as the filling and the icing.

When you’re making a multi-layered cake I think it’s important that all three layers are the same size. Not only will this make for a more professional presentation, but it will also help make sure your layers all bake at the same time instead of one drying out while the other is still underdone. To ensure even layers, I like to use a kitchen scale to make sure the batter is evenly distributed between the pans.

When I first announced my plans for this cake, Russell was skeptical, thinking that carrot cake was just something that shouldn’t be messed with, but I’ve converted him. In the end, this cake was divine and everyone loved it. Although it has a few different fruits and vegetables in it, healthy is the last word that comes to mind when you take a bite. The cream cheese icing is wonderfully creamy, and perfectly sweet & tangy. The cake itself is super moist and delicious, with a hearty hint of spice and a traditional carrot cake flavor. There’s just a hint of tanginess from the tart apples and a nice summery freshness from the green zucchini and fresh carrot. If you love carrot cake, you will surely love this cake too. Go preheat the oven. It’s cold outside, it’ll help you warm up.

harvest cake with cream cheese icing | Brooklyn Homemaker


Harvest Cake with Cream Cheese Icing

makes one 8 inch 3 layer cake

Cake:
2 1/4 cups all purpose flour
1 3/4 cups granulated sugar
2 teaspoons baking soda
1 teaspoon salt
2 teaspoons ground cinnamon
1 teaspoon ground nutmeg
1 teaspoon ground ginger
1 1/4 cups peanut oil (or any neutral vegetable oil)
4 large eggs
2 cups grated carrots (approximately 3-4 carrots)
1 cup grated zucchini (approximately 1 small zucchini)
1 cup peeled, cored & grated granny smith apple (approximately 1 large apple)
4 ounces finely chopped walnuts (optional)

Icing:
1 1/2 pounds powdered sugar
16 ounces room temperature cream cheese
1 tablespoon vanilla extract
1 stick (8 tablespoons) room temperature unsalted butter

Preheat oven to 350 degrees F. With cheesecloth or paper towels, squeeze excess moisture out of grated zucchini and set aside. Butter 3 (8-inch) round pans and line bottoms with parchment. Butter and lightly coat with flour.

In a large bowl, sift together flour, sugar, baking soda, spices, and salt and make a well in the center.  In a small bowl beat together eggs and vegetable oil until combined, and pour into flour mixture. Using a mixer or wooden spoon, blend until combined. Stir in grated carrots, zucchini & apple.

Divide batter evenly between pans. Bake for 35 to 40 minutes, or until a cake tester inserted in the center of the cake comes out clean. Remove from oven and cool for 15 minutes. Remove from pans, turn over onto parchment paper and allow to cool completely before assembling.

In the bowl of an electric mixer, beat cream cheese and butter until completely smooth, about 5 minutes. Add sugar and vanilla and stir in very slowly until incorporated. Once the sugar is mixed in, turn mixer up to high and beat until smooth, about 5 minutes more.

To assemble your cake, level your layers with a sharp serrated knife or cake leveler. Spread about 3/4 cup of icing between each layer of cake, and cover the top and sides of the cake with a thin layer of icing to seal in the crumbs. Refrigerate the cake for about 30 minutes before finishing with another layer of icing. Decorate with swirls, piped details, chopped pecans, or however desired.