food history

tomato soup bundt cake #bundtbakers

When I first started Brooklyn Homemaker, I hoped it would be an outlet for not only my love of food, but also for my love of food history and my off-the-charts food nerdiness.

tomato soup bundt cake | Brooklyn Homemaker

I used to post lots of recipes (especially cake recipes) with fun details and anecdotes about their histories, how they came to be, and why we were still making and eating them today. As much as I still love writing these kinds of posts, life gets in the way and the fact of the matter is that researching the history of a recipe is a lot more involved and a lot more time consuming than just whipping something up on a whim. I also thought that I’d sort of exhausted my supply of cool, iconic desserts with histories that I’d find interesting enough to write about. That is, I thought I had until this month’s bundt bakers.

tomato soup bundt cake | Brooklyn Homemaker

Felice of All That’s Left are the Crumbs chose Retro Desserts as our theme this month, and I was all over it! You know how much I love an old cookbook, and I kind of feel like this theme was hand selected to appeal to me! Thanks Felice!

To me the word “retro” always inspires images of the 50’s and 60’s, the atomic era, the age of ambrosia salads and jell-o molds. The days of gas guzzling pastel land yachts, wall to wall pink tile bathrooms, and single story cookie cutter ranch homes. I prefer my “old fashioned” dessert recipes from the 30’s and 40’s though, so I decided to go back a little further. People were doing all sorts of inventive things with food back then, either just to stretch their scarce resources, or maybe even to make their lives a little lighter and brighter.

tomato soup bundt cake | Brooklyn Homemaker

My favorite (and most popular) dessert history post that I’ve written so far is Red Velvet Cake, which didn’t actually originate in the 30s, but did reach it’s wild popularity in that era. Long story short; a big food coloring and extract company started giving away a red velvet cake recipe, complete with color photos, to try to boost their struggling sales during the Depression. It worked like a charm and soon red velvet cake was on American tables, and in American hearts, where it’s managed to stay for almost a century.

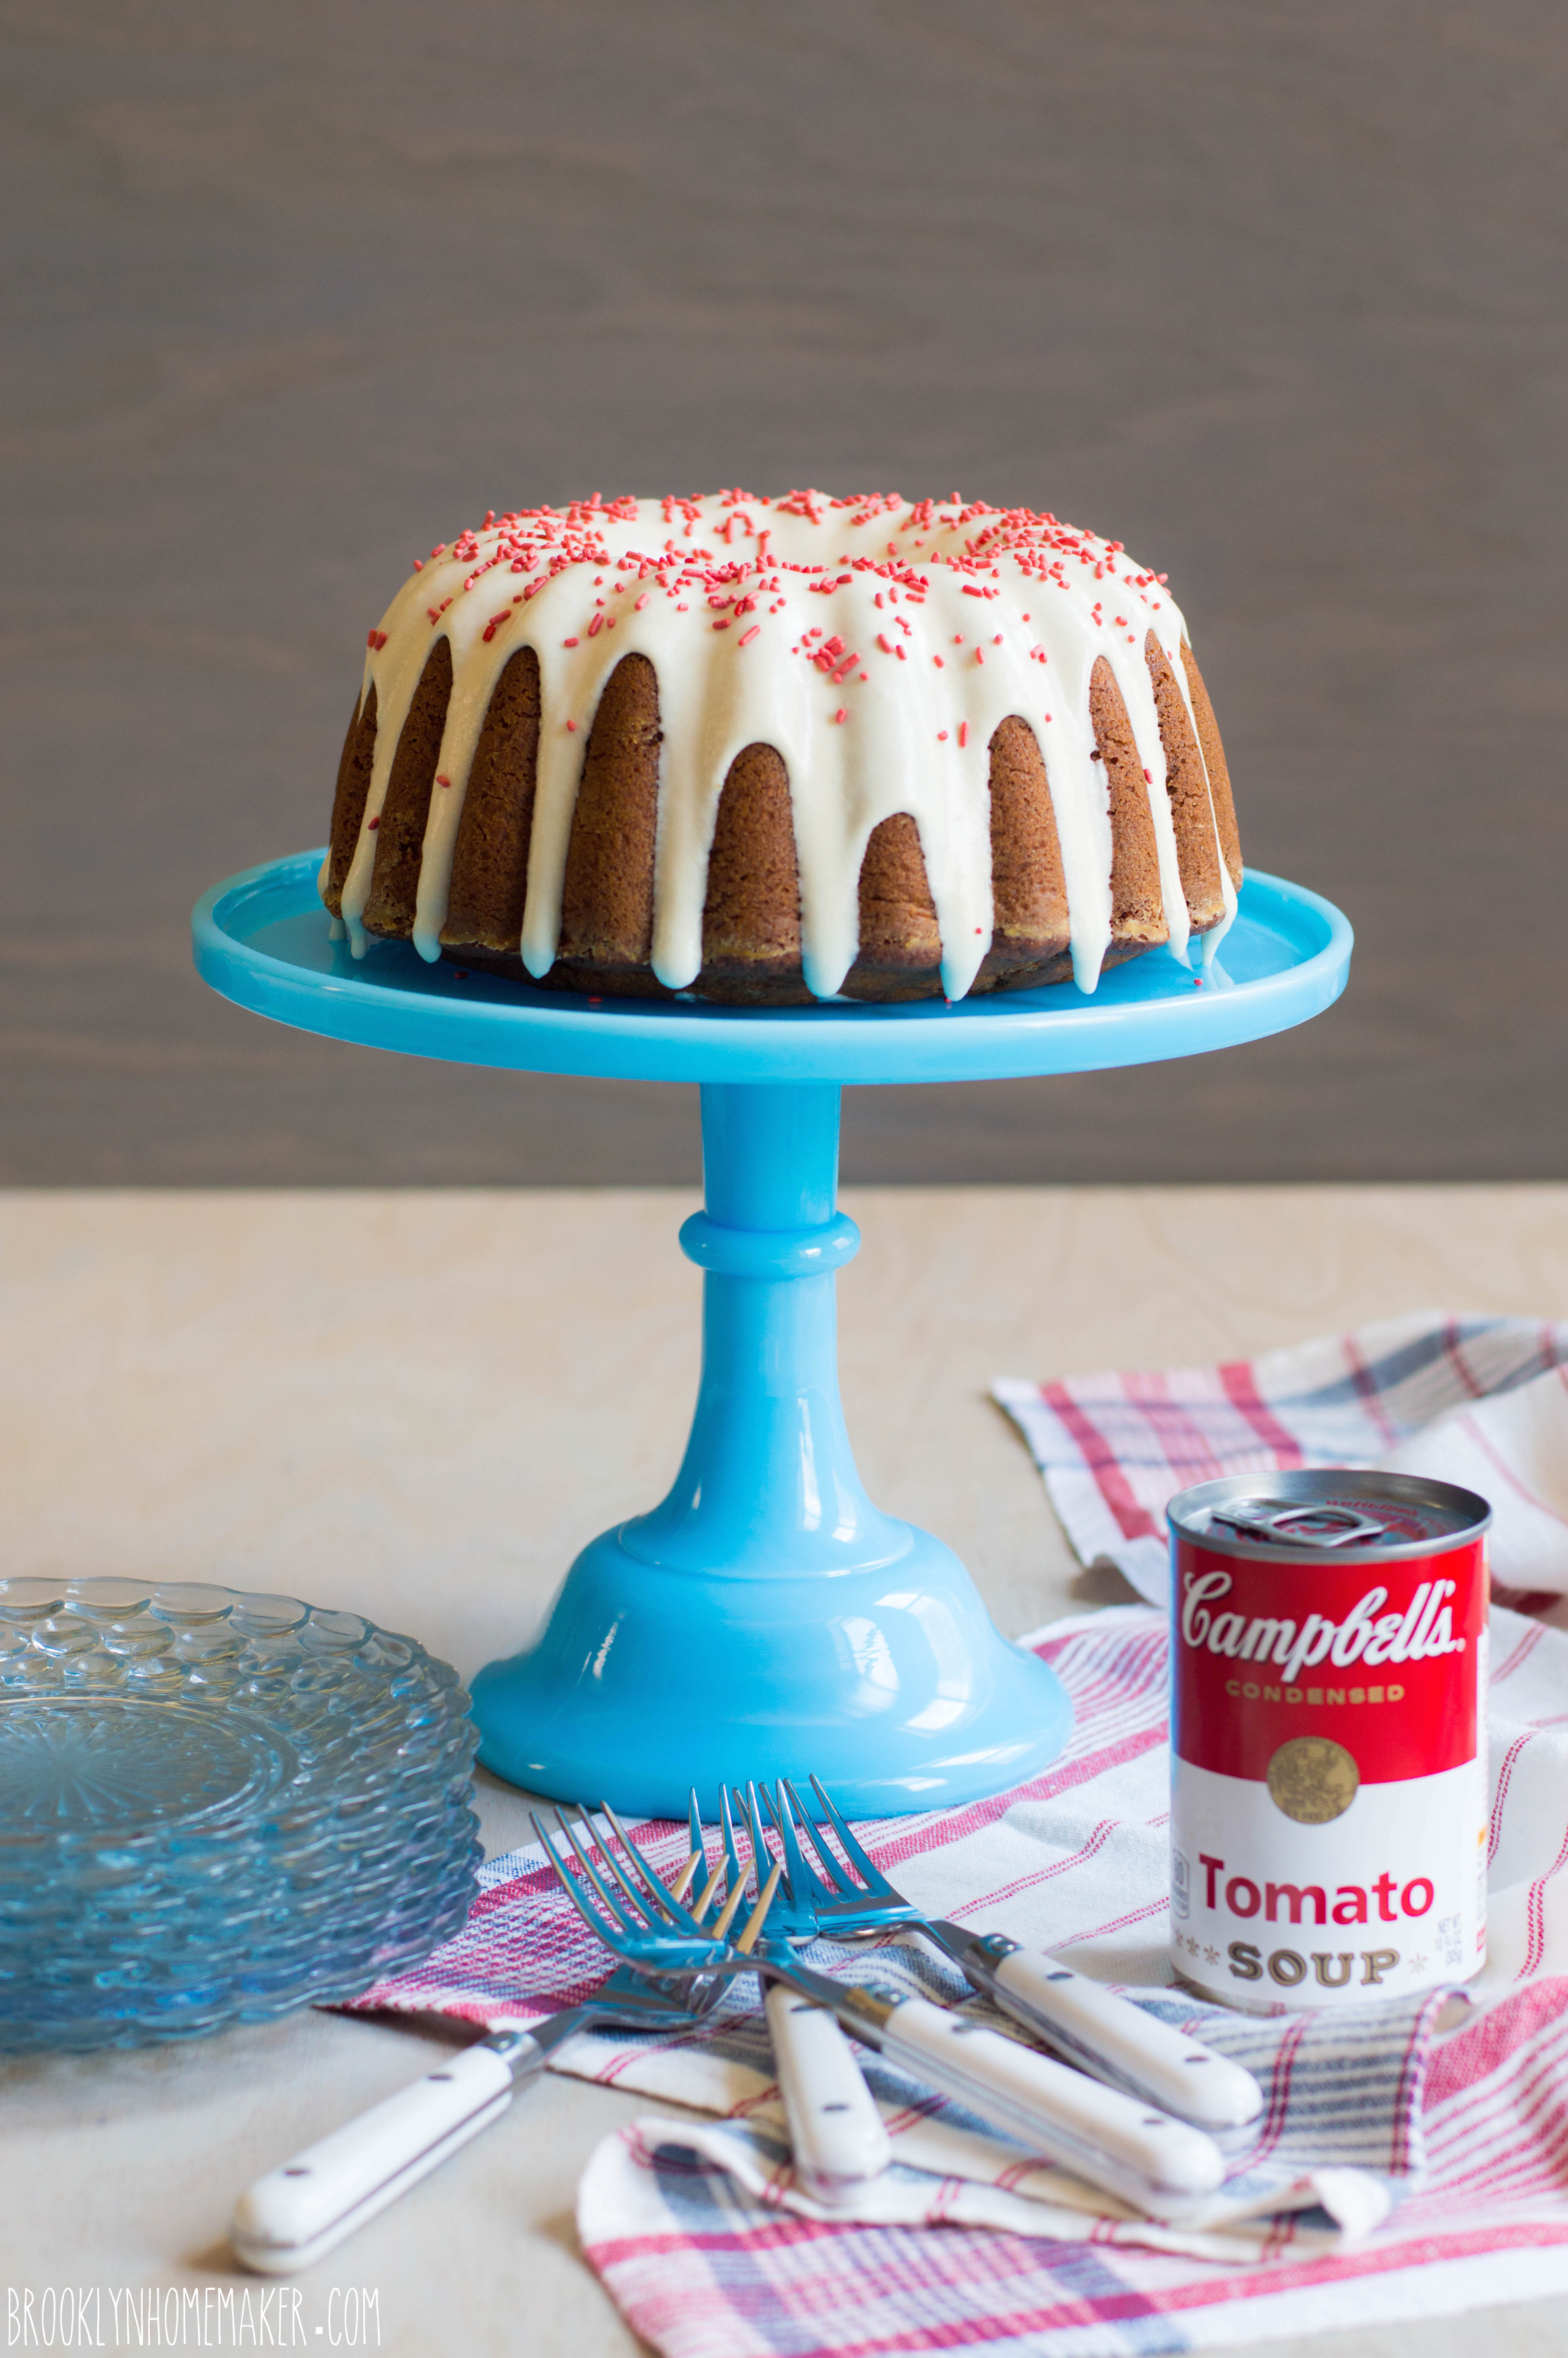
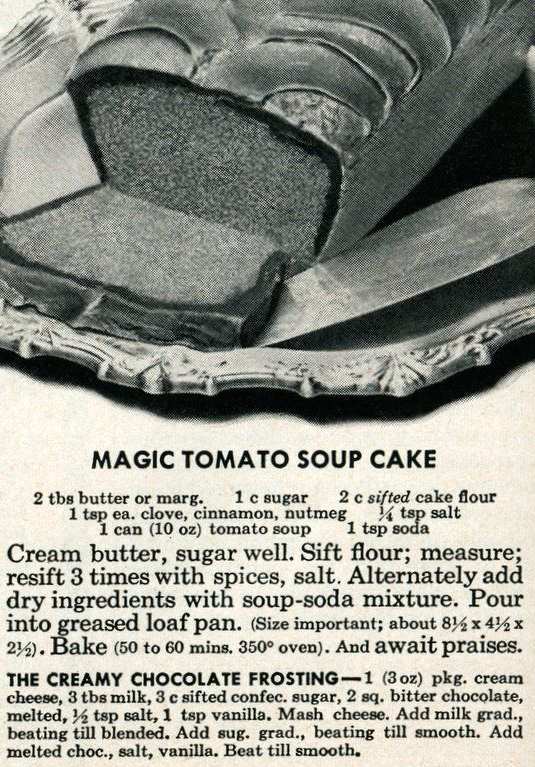
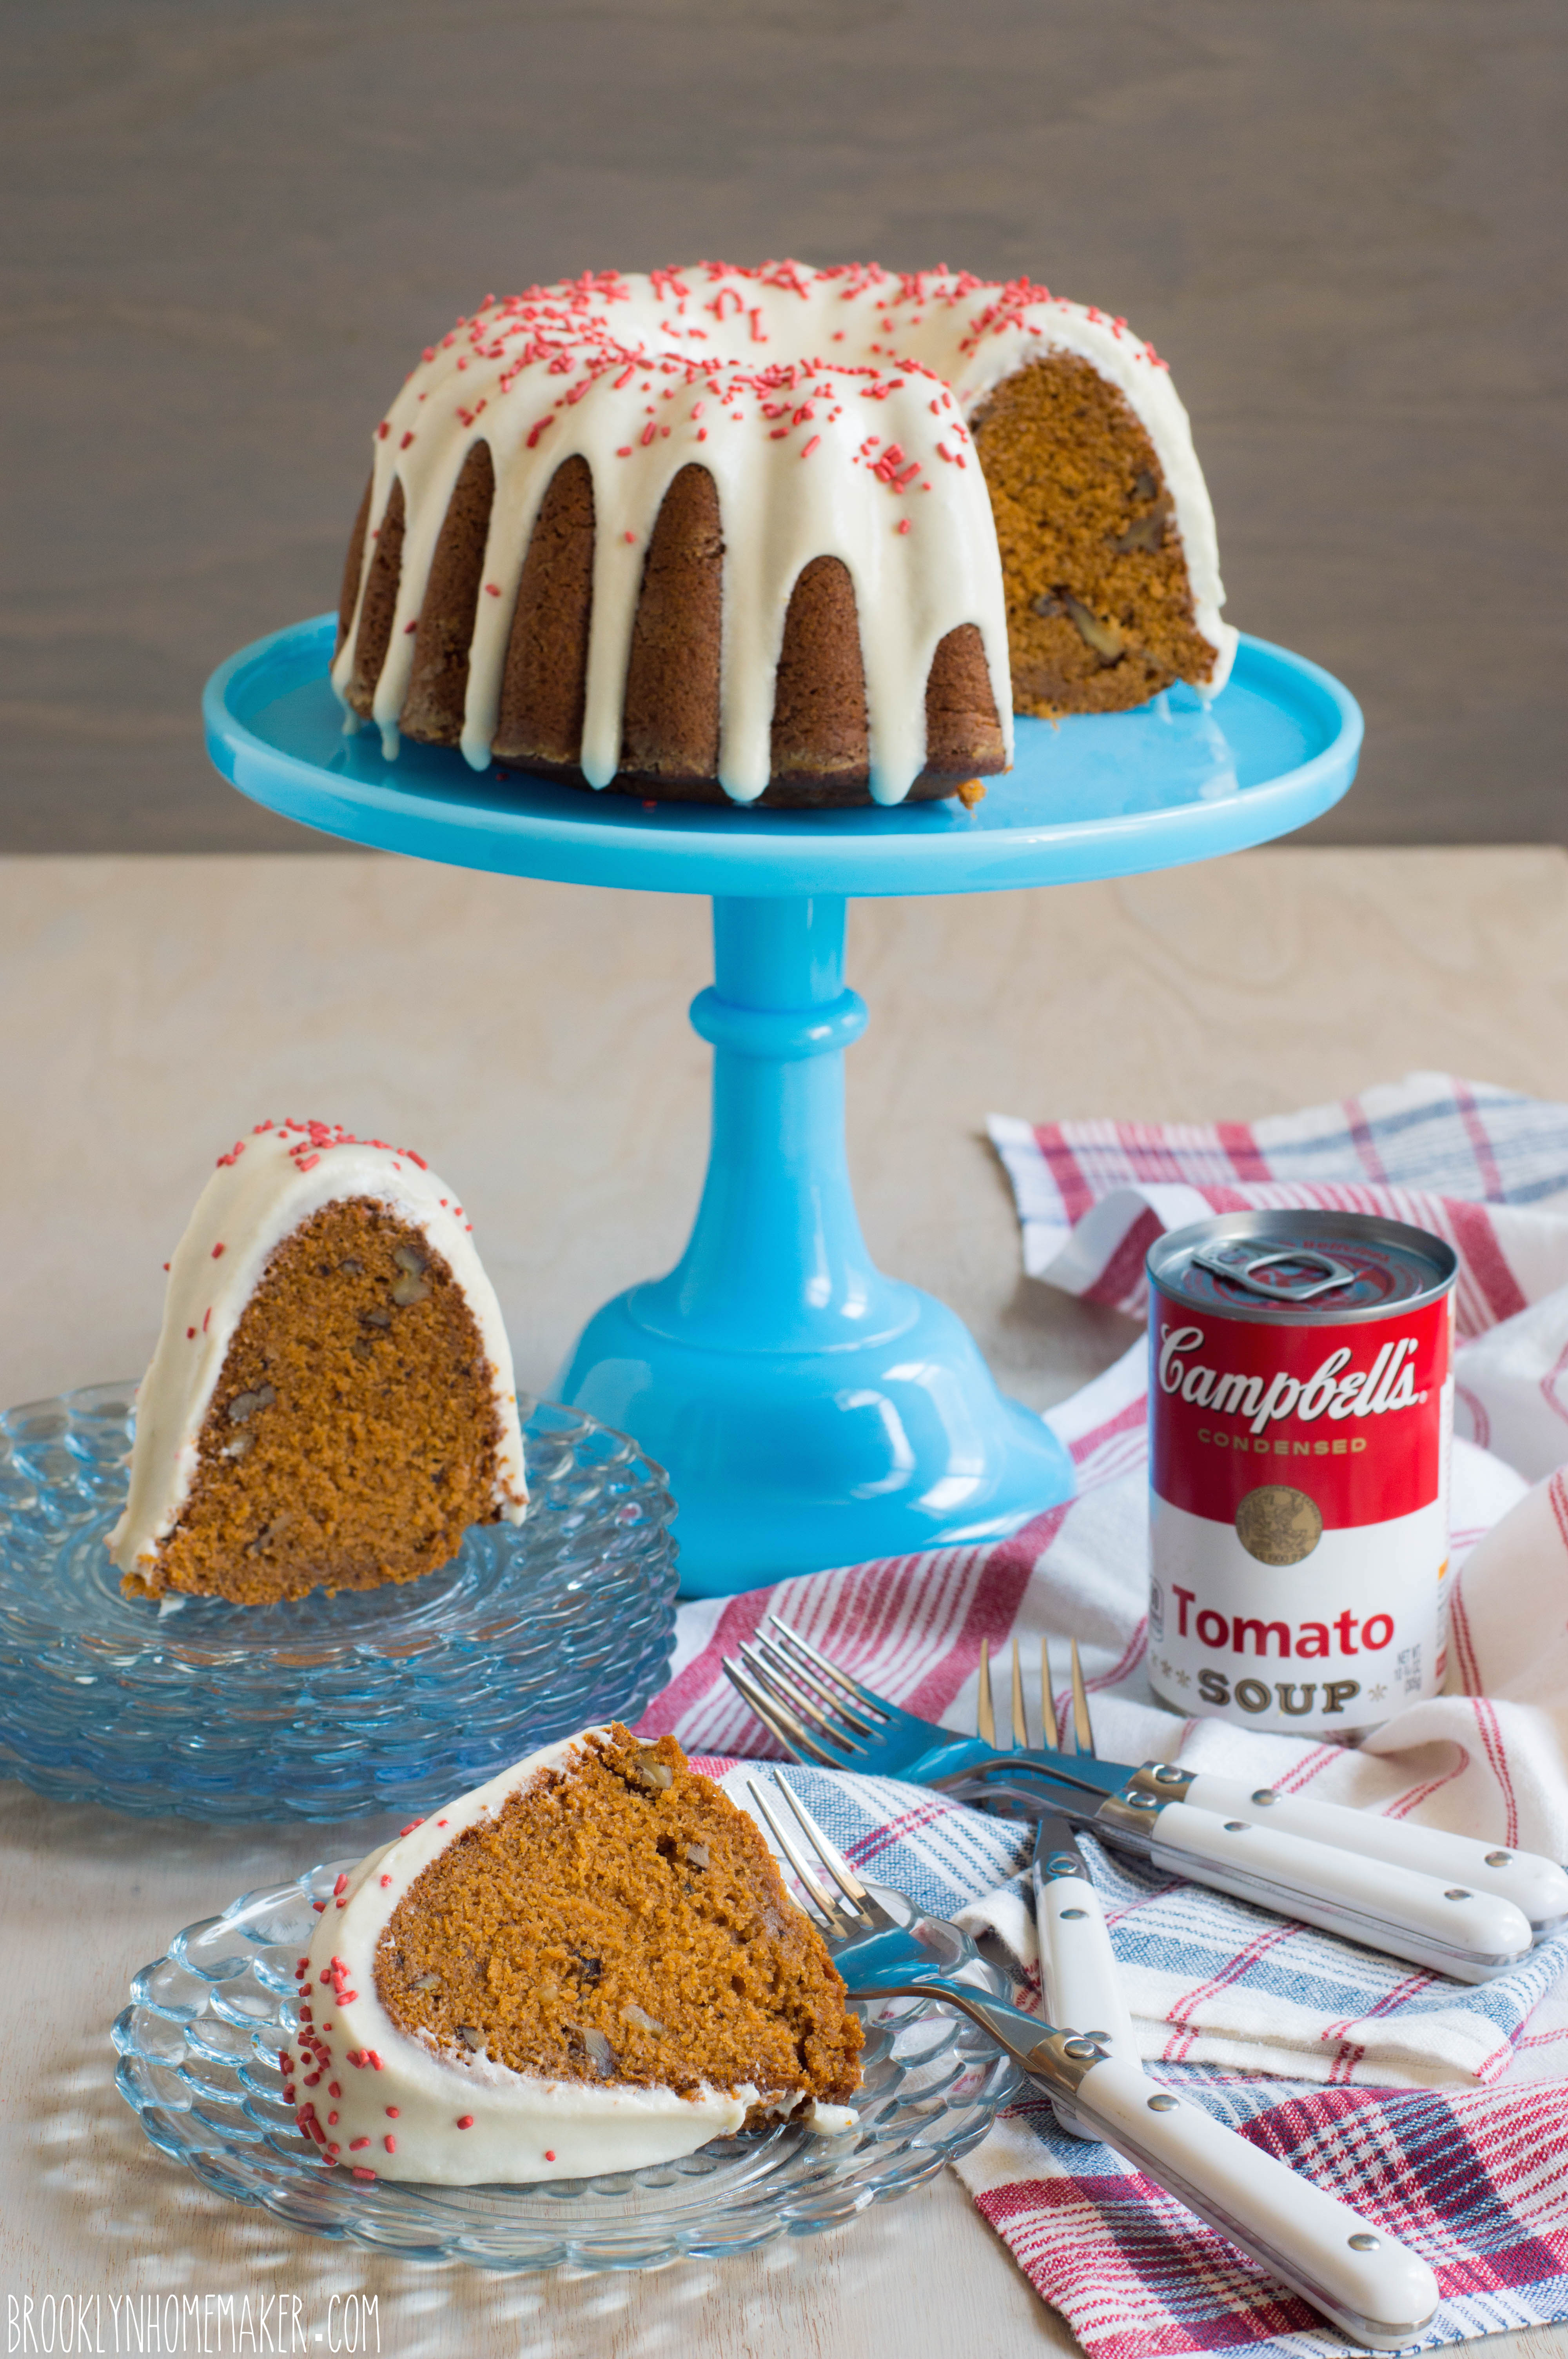
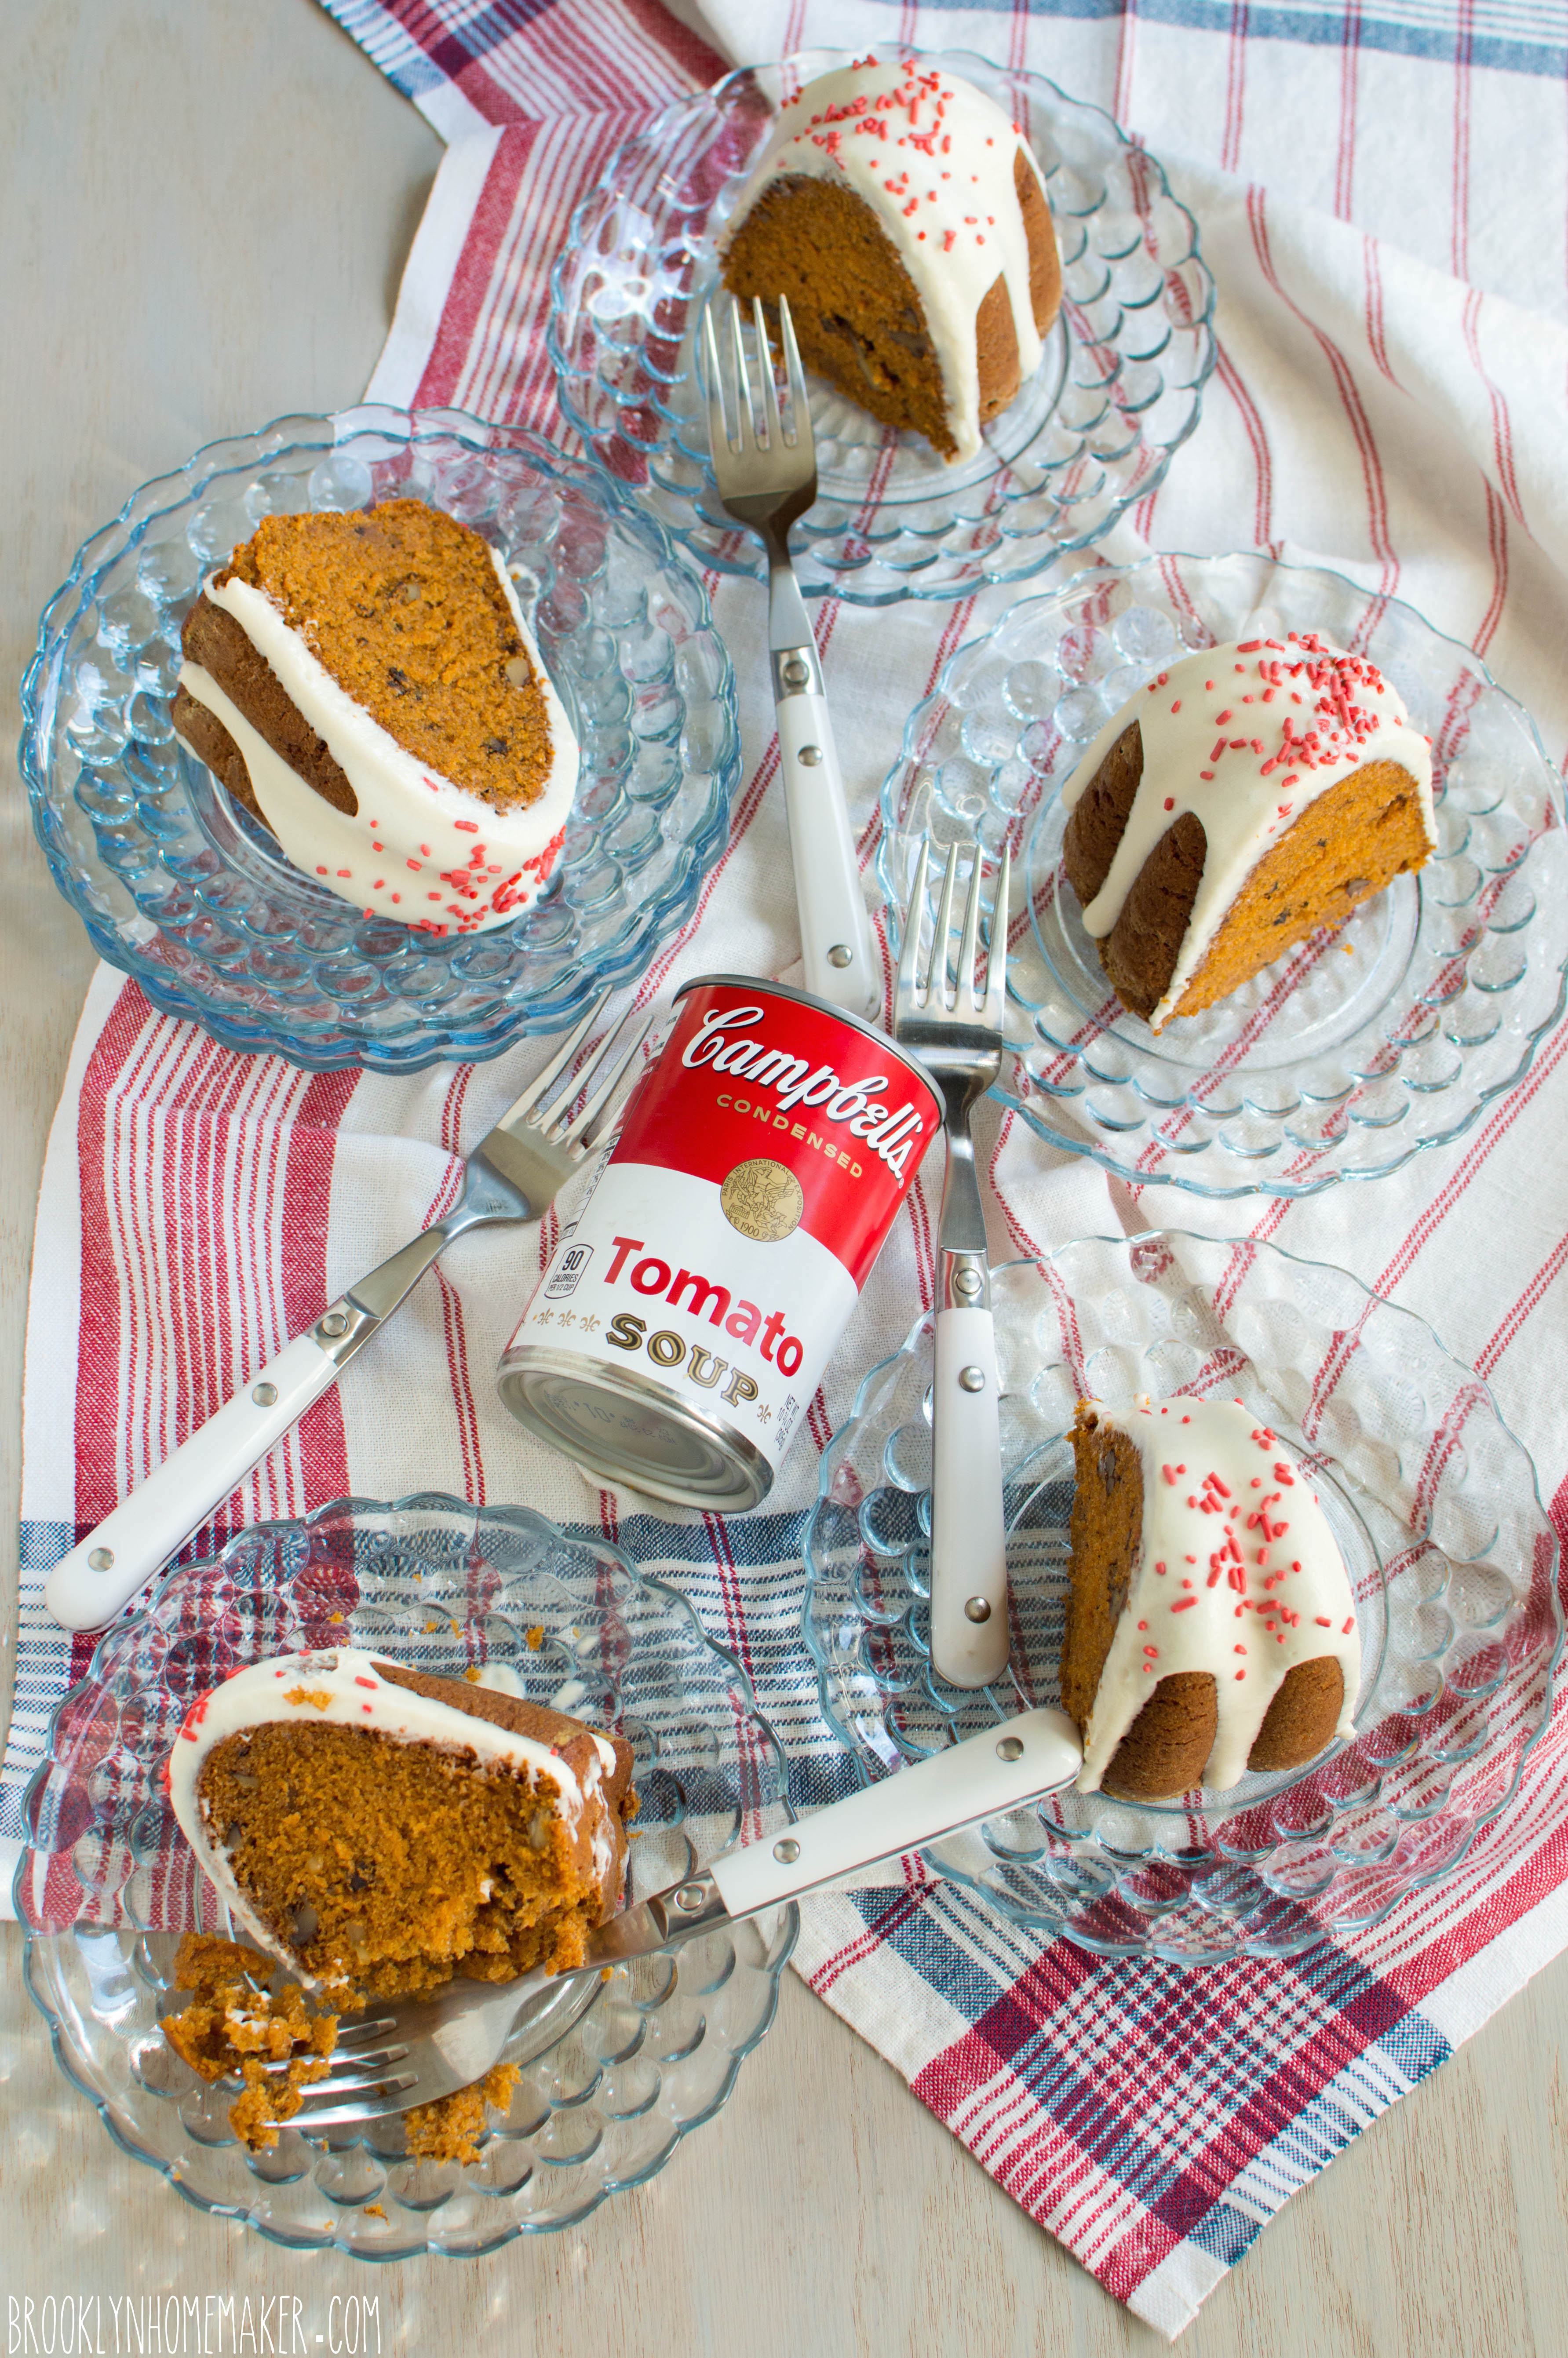
Not surprisingly, the cake I’m posting today is another Depression era recipe, though not currently as well known and loved as Red Velvet. Originally called “Mystery Cake”, this spice cake contains a full can of condensed tomato soup. The “mystery” was that you’d never guess the “secret ingredient” if you didn’t already know.

tomato soup bundt cake | Brooklyn Homemaker

This recipe most likely originated in the 20’s, as the first printed reference to it comes from a September 1928 notice about cooking classes in the Los Angeles Times. “The opening of the fall season is observed on the menu arranged by Mrs. Mabelle (Chef) Wyman for her demonstrating this afternoon… Under the dessert classification are velvet cake and mystery cake, a culinary idea of Mrs. Wyman’s skill.”

Mystery cake didn’t really become well known though until the Great Depression. The use of egg, dairy, and butter substitutes was very popular during this time because these grocery items were expensive and scarce. Grated or pureed vegetables like zucchini or carrots were popular substitutions for eggs and butter, as was applesauce, which remains a popular substitution for health conscious bakers to this day. Along with it’s moisture content, condensed tomato soup had the added benefit of an acidity that works as a flour conditioner. This meant that it could not only be used in place of butter, but could also replace the buttermilk usually used in baking to ensure a moist, tender, and delicate crumb.

tomato soup bundt cake | Brooklyn Homemaker

Mystery Cake really took off in the early 1940’s when Campbell’s started promoting their own recipe during World War II. The same ingredients that were too expensive for home bakers in the 30’s were suddenly being rationed for the war effort in the 40’s and were even harder to come by. Canned food companies all over the country were using wartime rationing as a way to boost sales, and Campbell’s didn’t miss the opportunity. They quickly developed a recipe for Tomato Soup Cake that included only two tablespoons of butter and no eggs to appeal to homemakers with limited resources.

tomato soup bundt cake | Brooklyn Homemaker

The American food writer and cookbook author M.F.K. Fisher even included a recipe for Tomato Soup Cake in her 1942 book on wartime rationing and shortages, How to Cook a Wolf. Her recipe varied just slightly from Campbell’s but the idea was the same. “This is a pleasant cake, which keeps well and puzzles people while you are cooking other things, which is always sensible and makes you feel rather noble, in itself a small but valuable pleasure.”

tomato soup bundt cake | Brooklyn Homemaker

Tomato Soup Cake remained popular even after the war, and another version of the recipe was included in the Joy of Cooking in 1964. Modern homemakers in the 1960’s and 70’s, fascinated with convenience foods and time saving tricks, loved to make their Tomato Soup Cake with boxed cake mixes.

Eventually the cake did wane in popularity though, and today many people have never even heard of it. I myself only discovered it a few years ago, and had a really difficult time wrapping my head around the idea when I first saw it. Eventually I warmed up to trying it, and by the time this month’s theme was chosen I was full well ready to give it a shot!

tomato soup bundt cake | Brooklyn Homemaker

Since the Great Depression and wartime rationing are now just distant memories, the butter and eggs have found their way back into most of the recipes you’ll find out there, including Campbell’s updated version. Of course, the tomato soup still remains as a way to add moisture, acidity, and interest to this simple spice cake.

Nuts and raisins have always been common additions to Tomato Soup Cake, and for my recipe I kept the nuts but skipped the raisins. Sorry raisin lovers. You can add them back in if you want.

tomato soup bundt cake | Brooklyn Homemaker

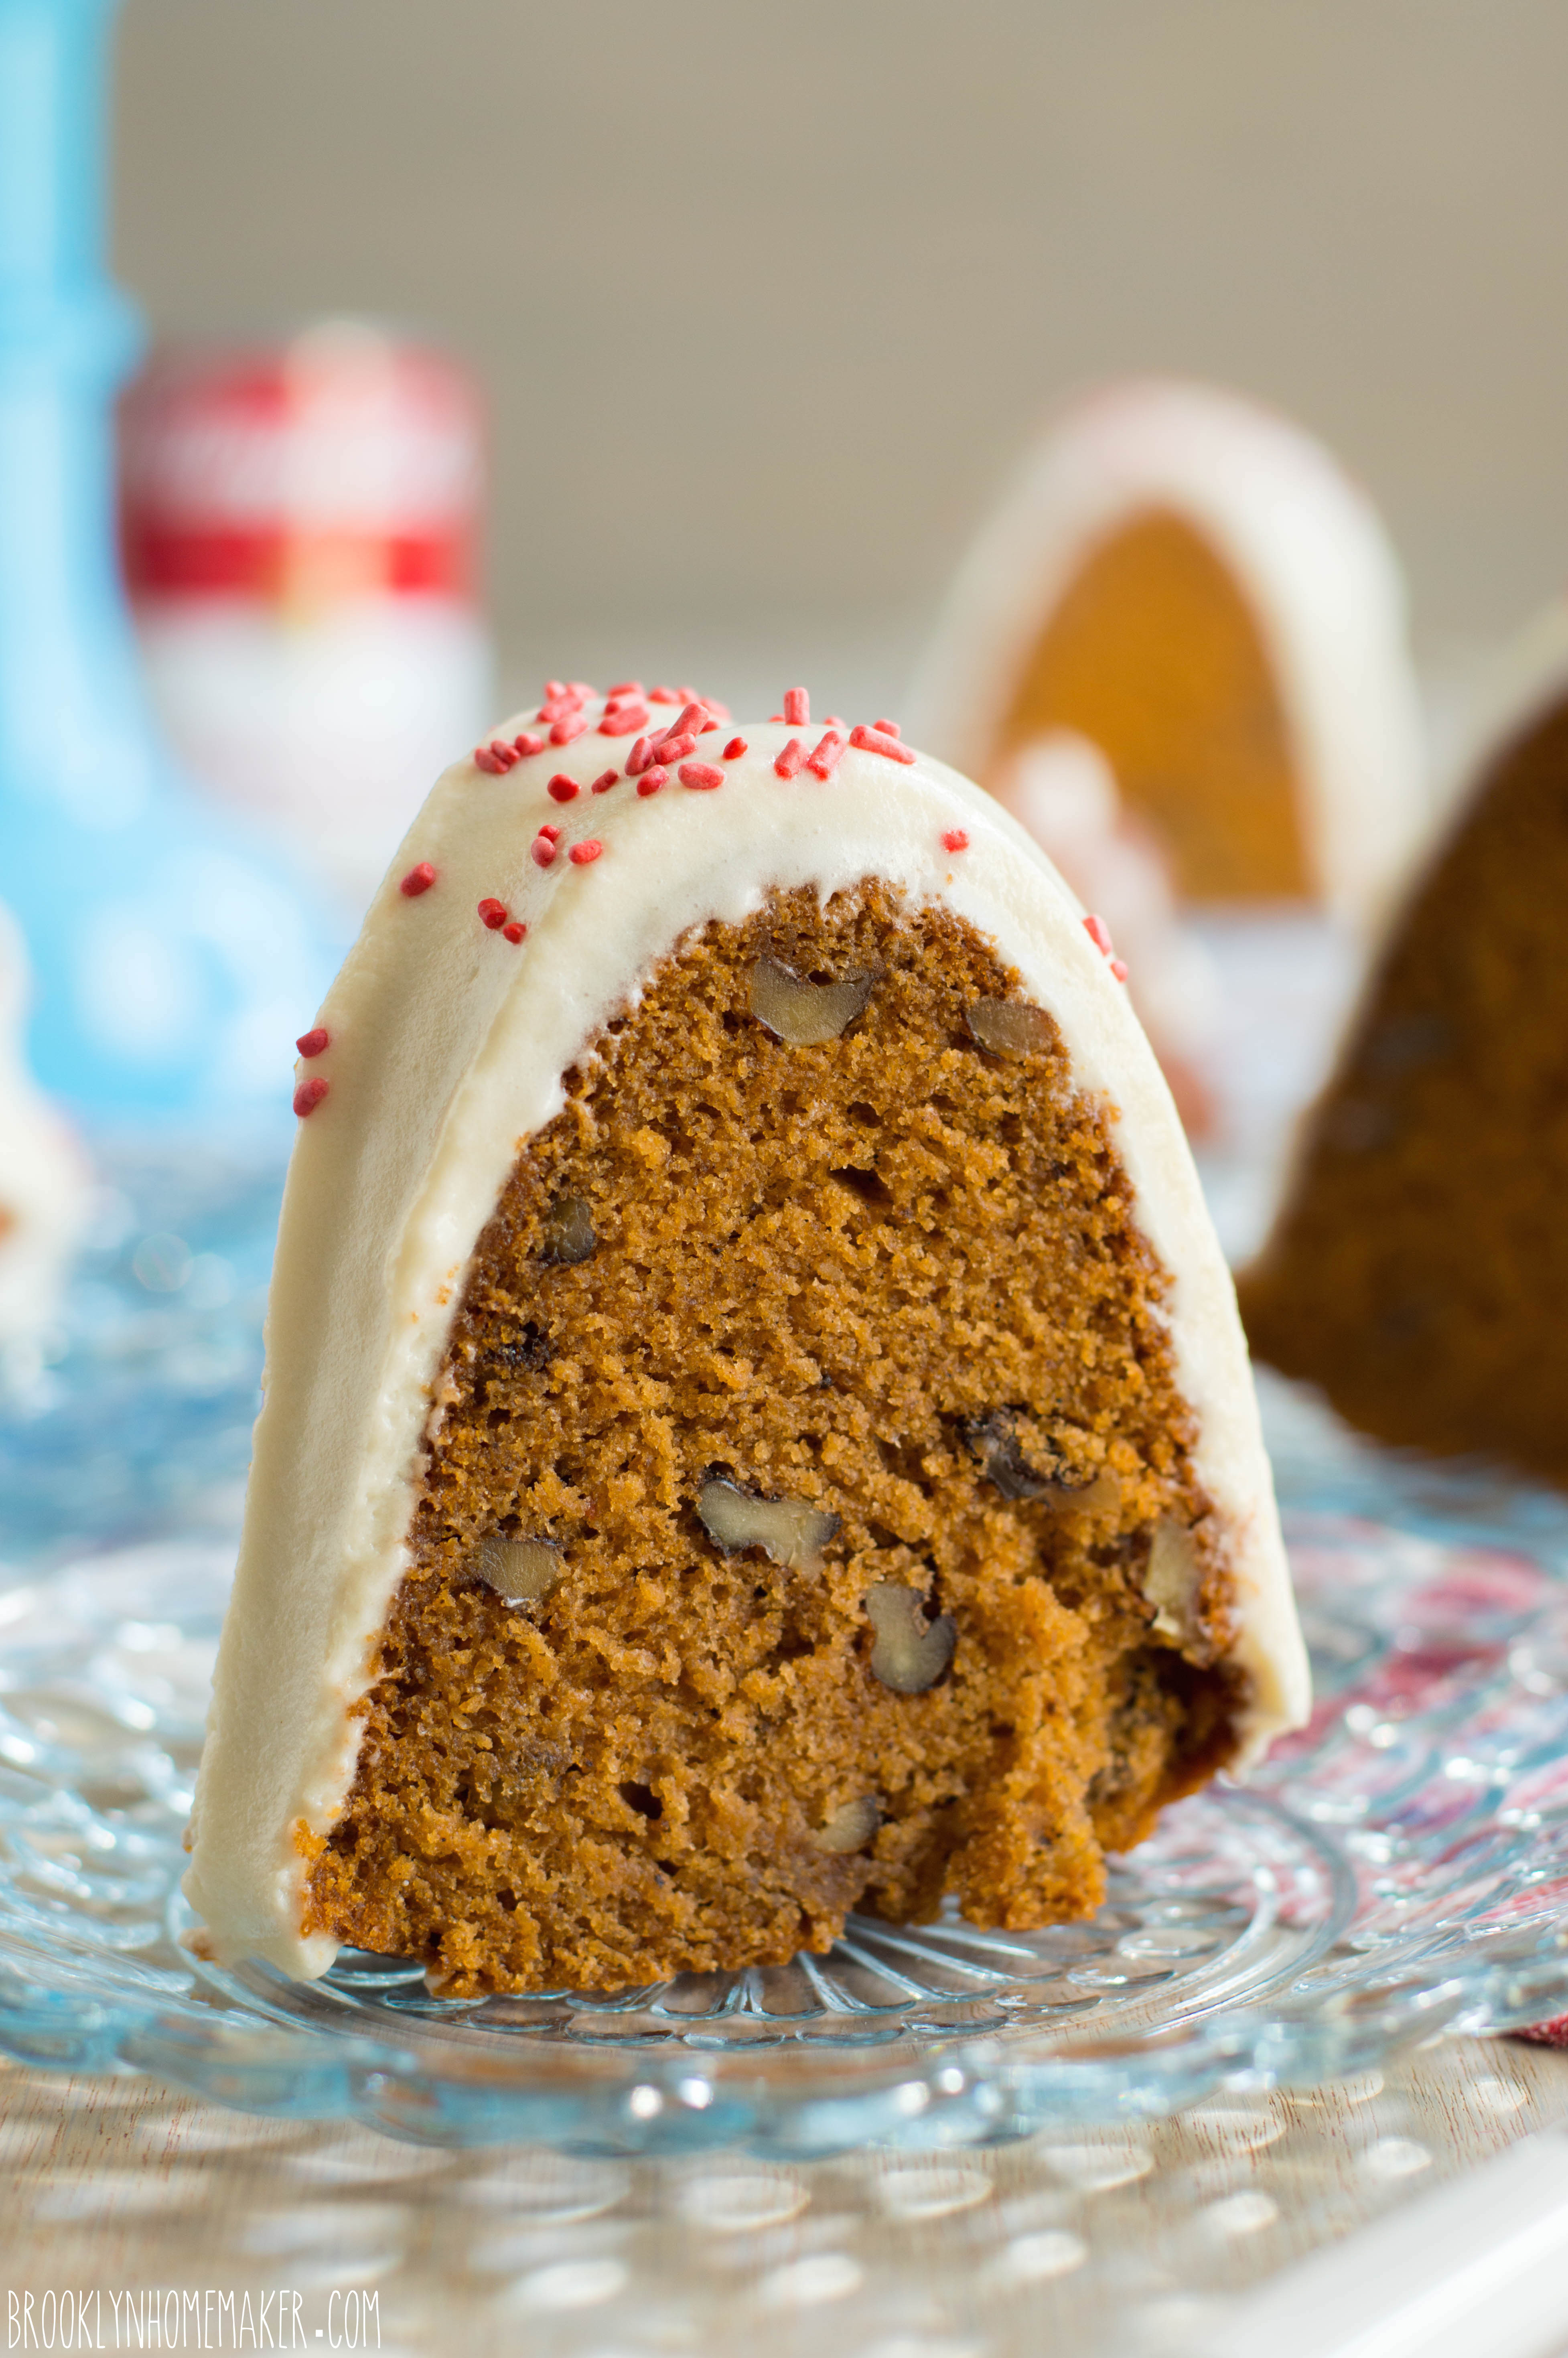
Mystery Cake was definitely an appropriate name for this recipe. I was worried that the tomato soup would add a weird tinny chemical taste, but I really don’t think I could have figured out what was in it if I hadn’t baked it myself. The tomato soup concentrate adds a subtle sweetness and tang, and ensures that the cake is moist and keeps well for days. It has a perfect just-enough sweetness and a lovely touch of spice that doesn’t overpower the cake. The walnuts add a nice contrast in texture and a welcome touch of earthy bitterness.

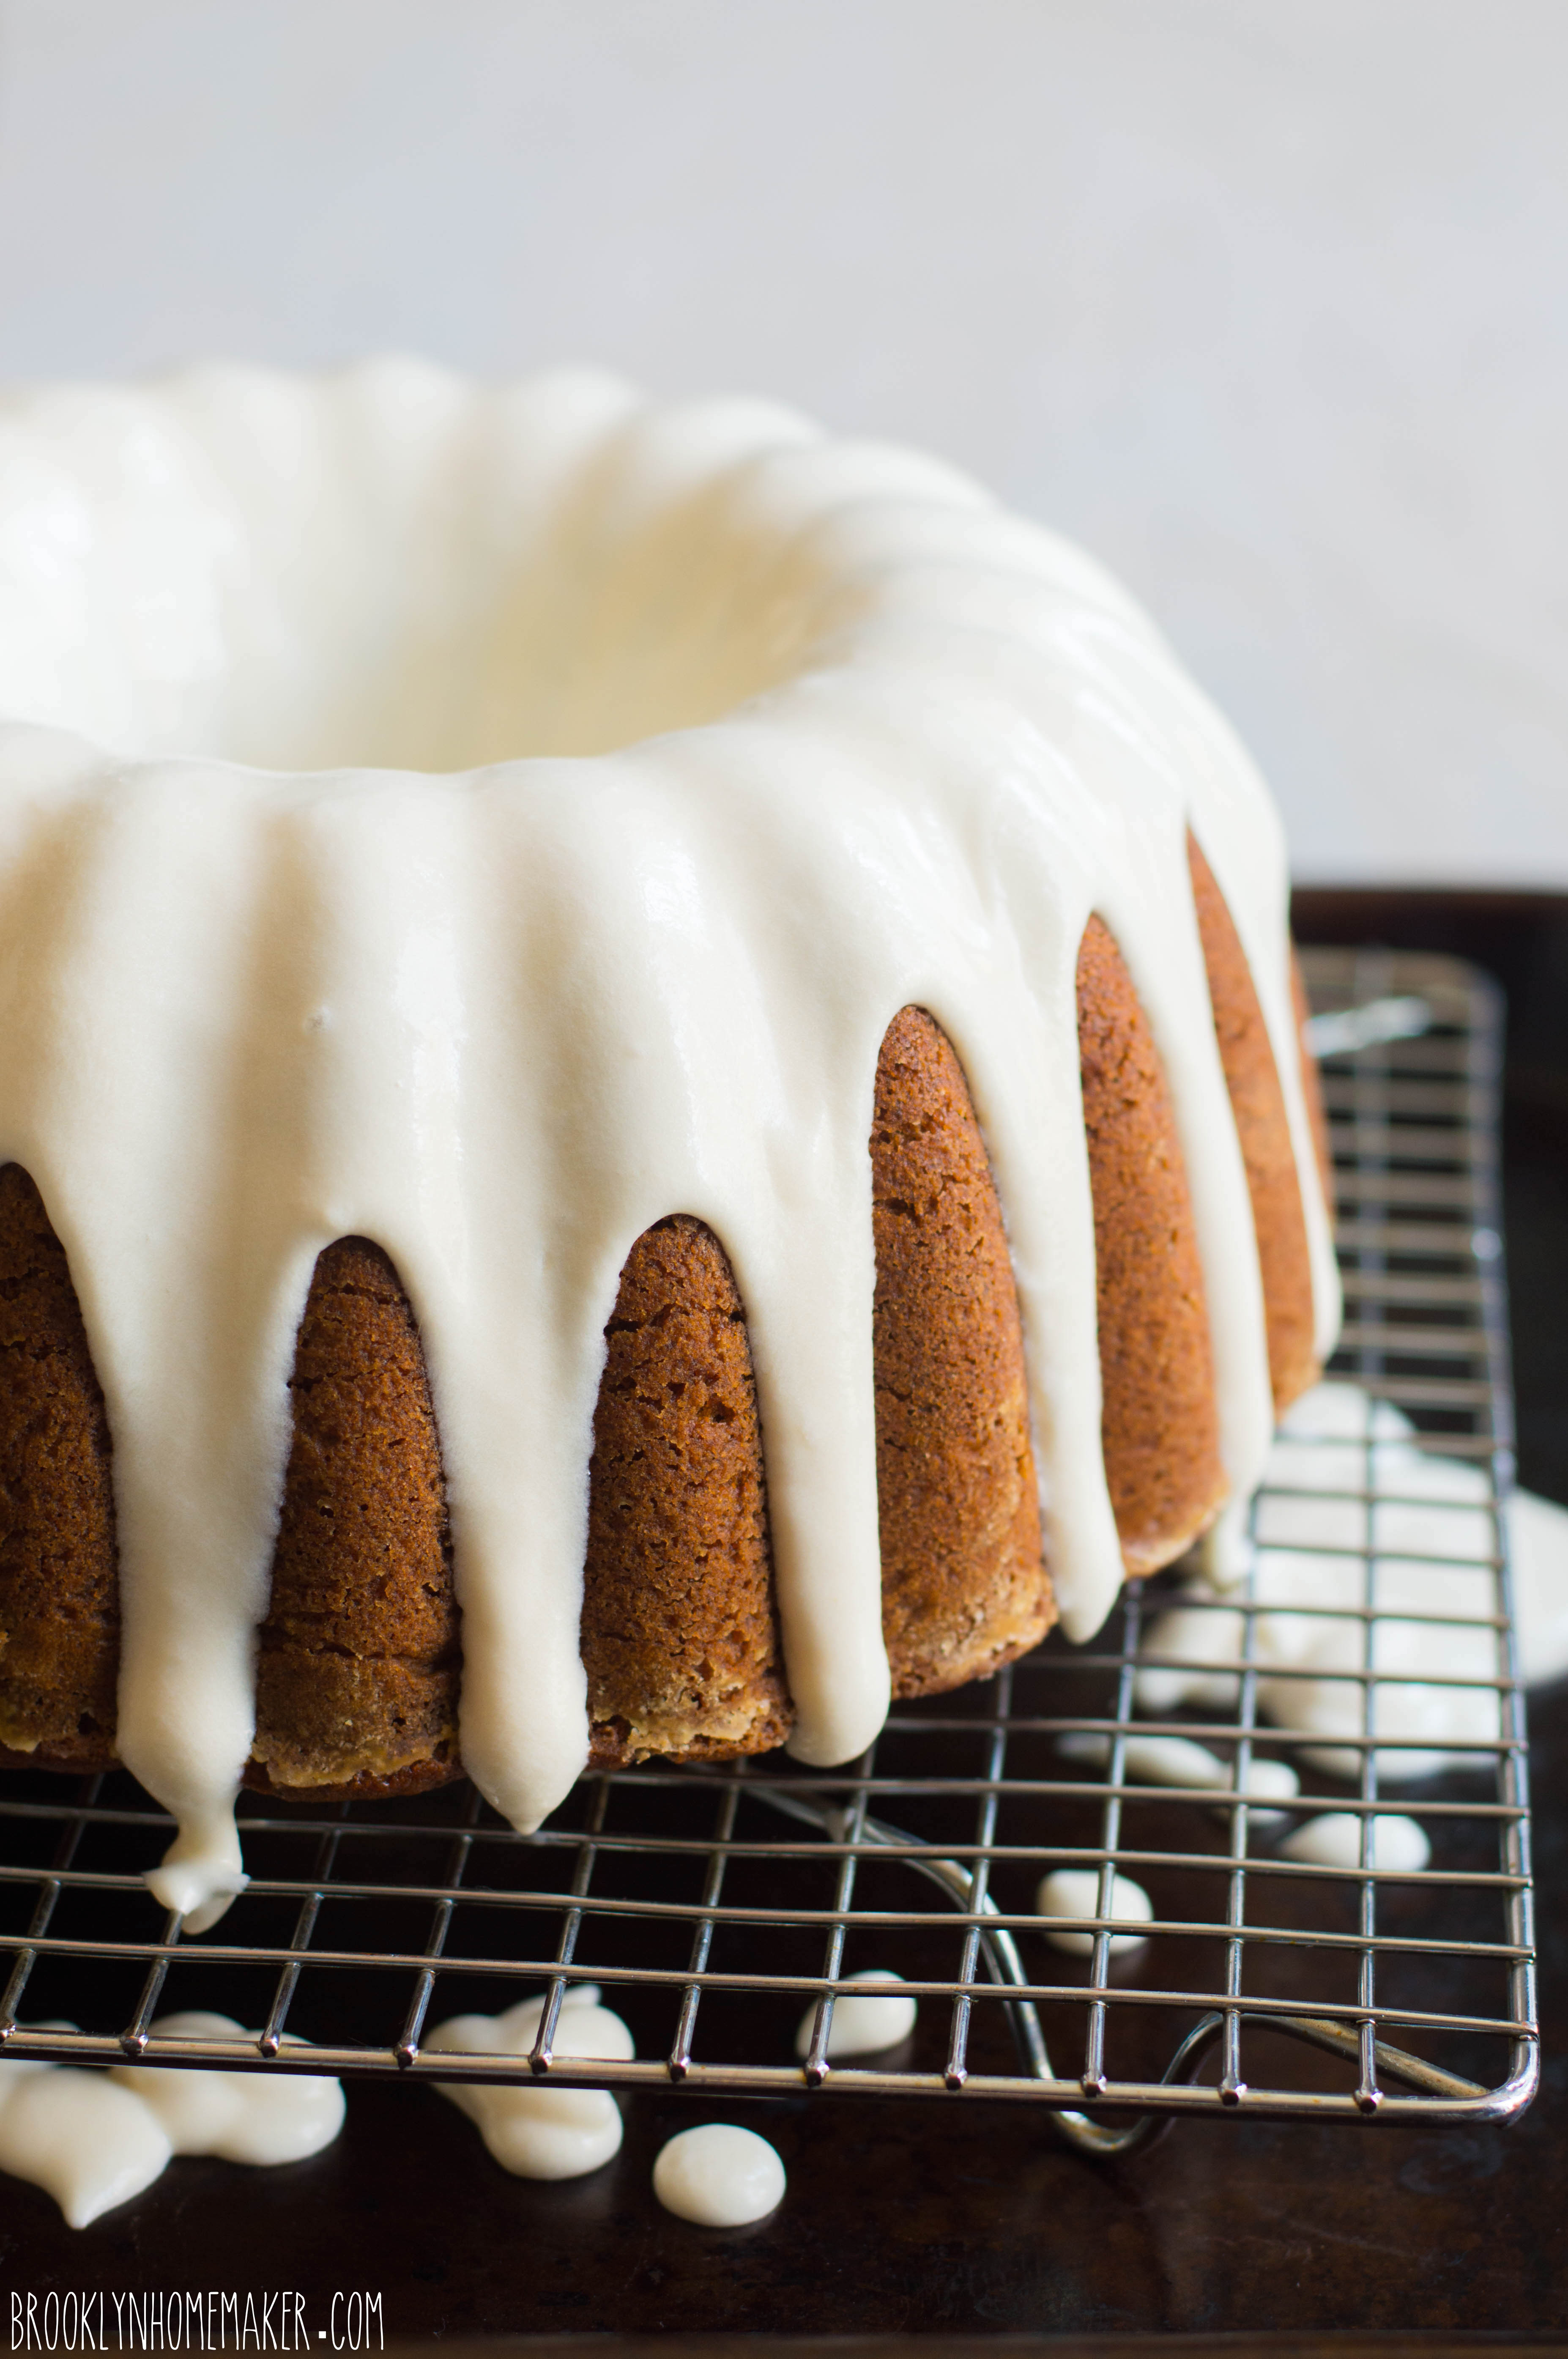
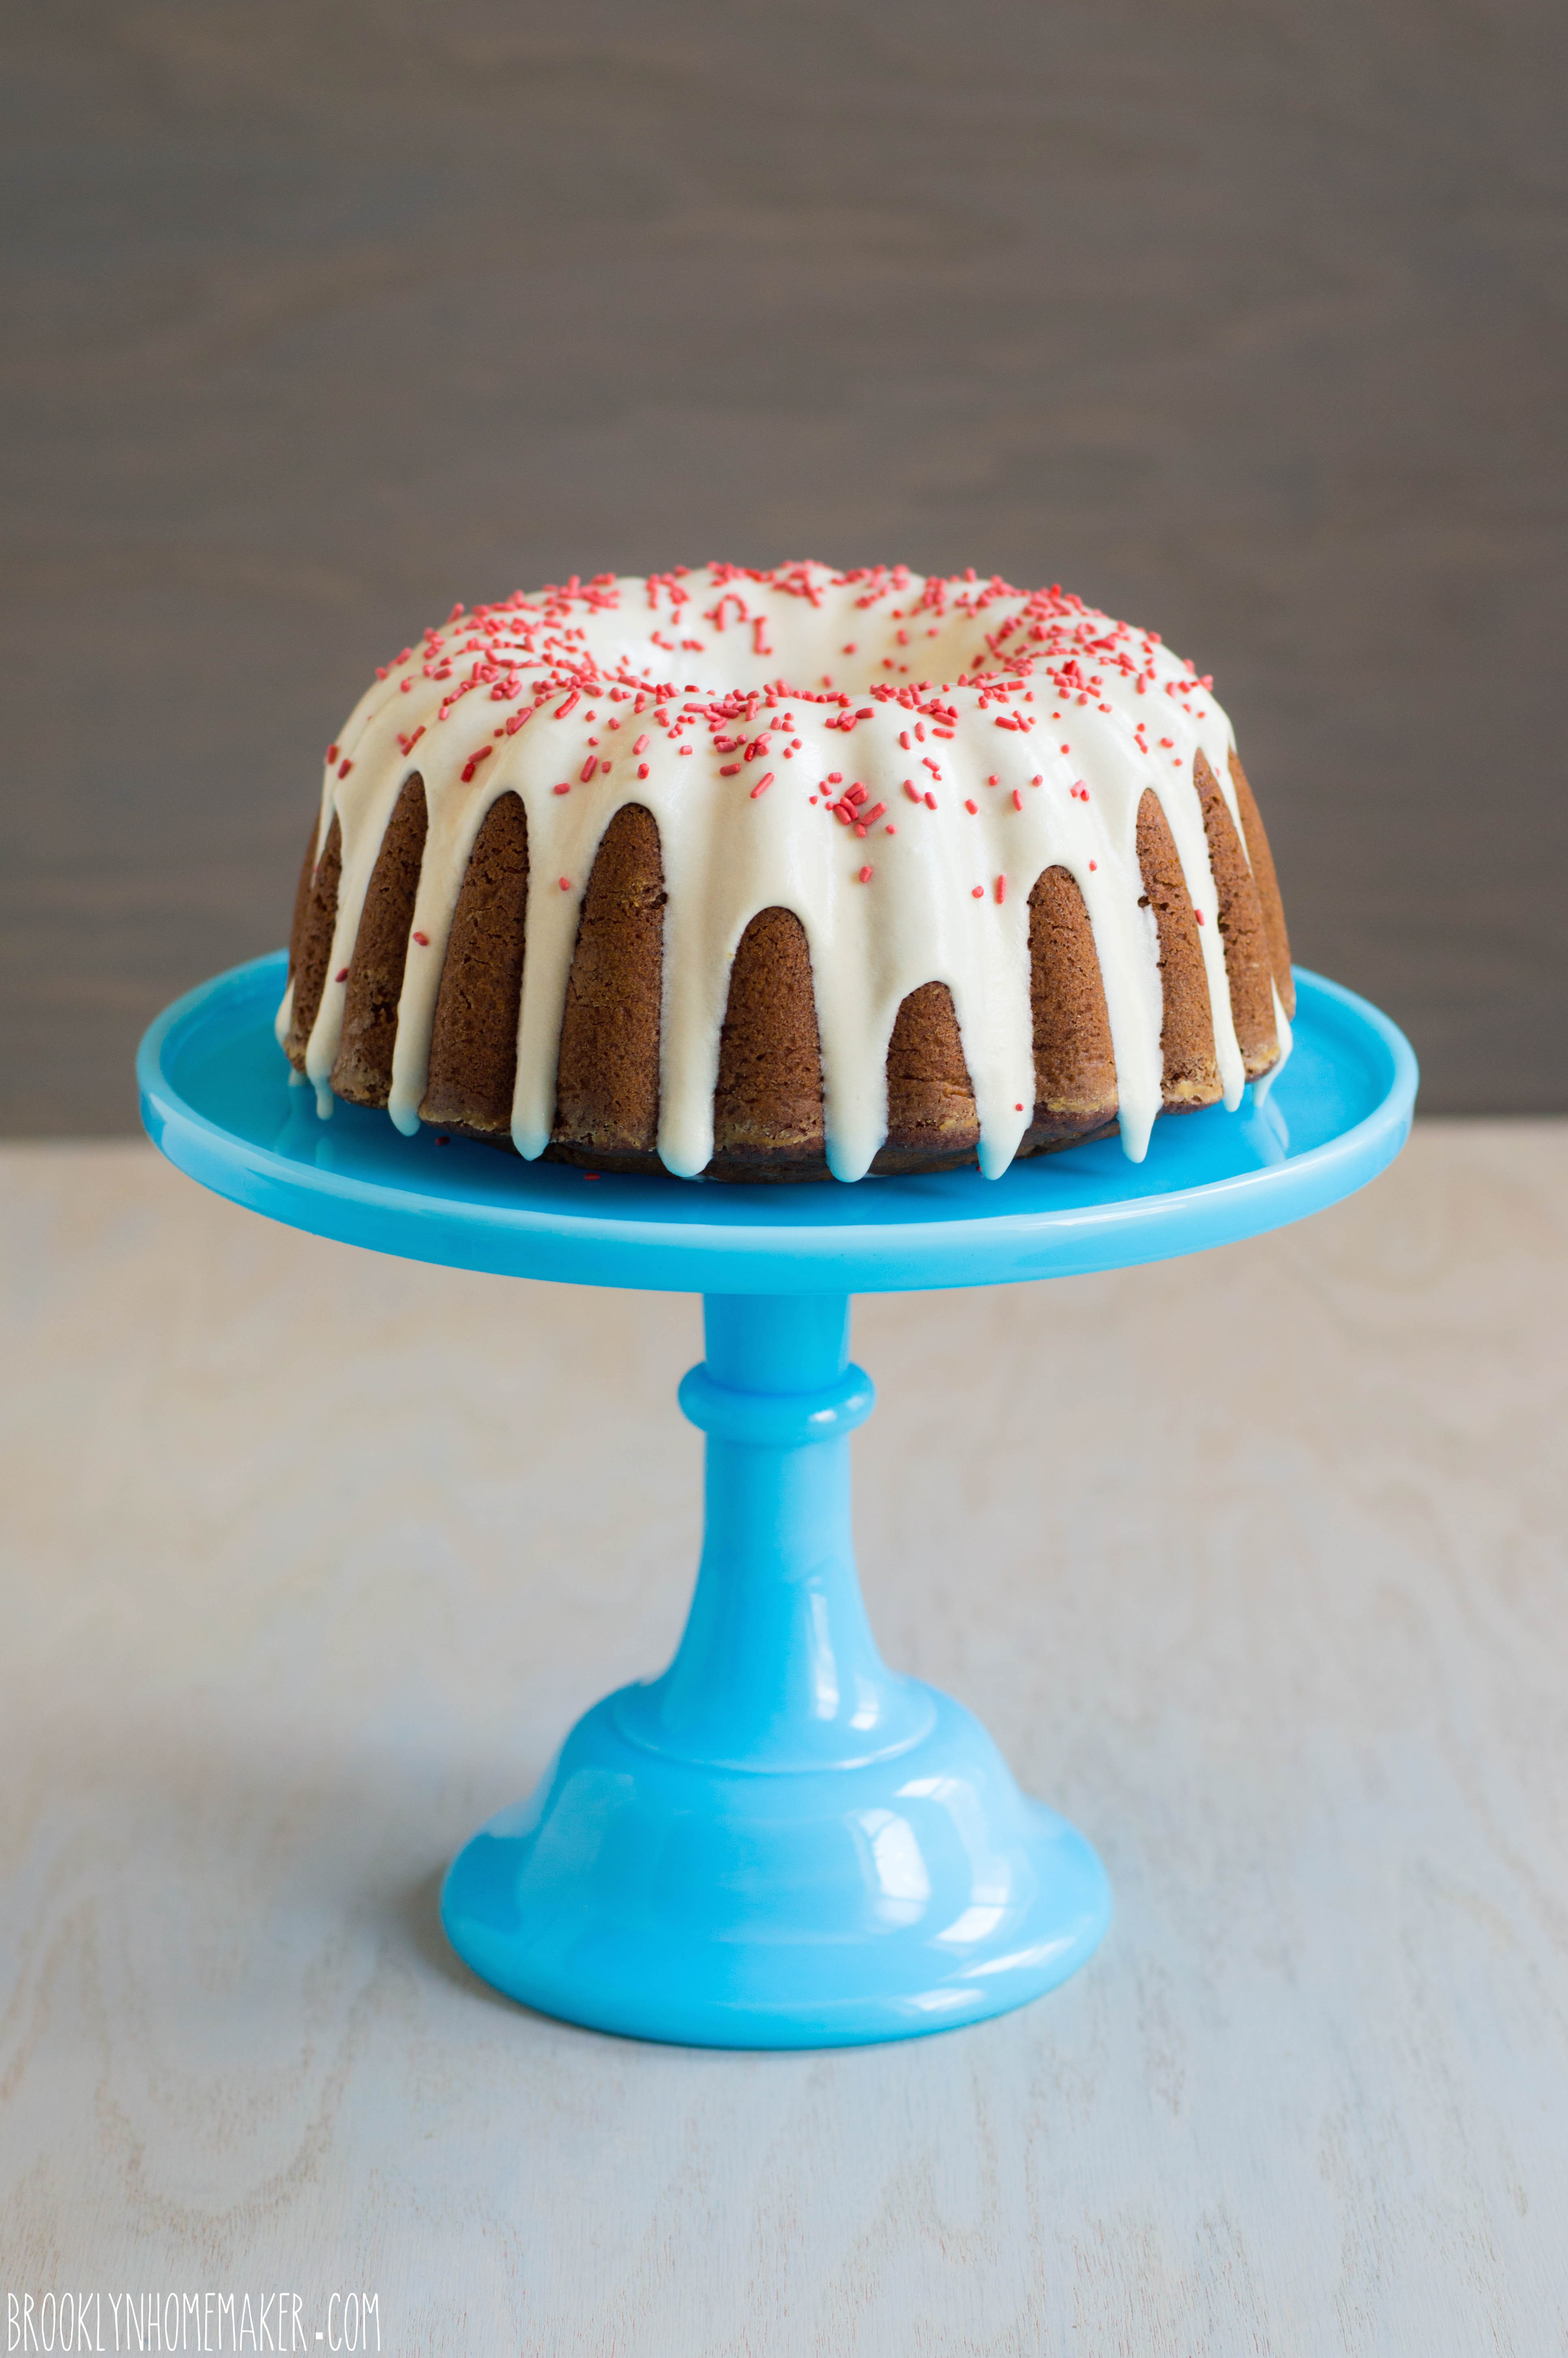
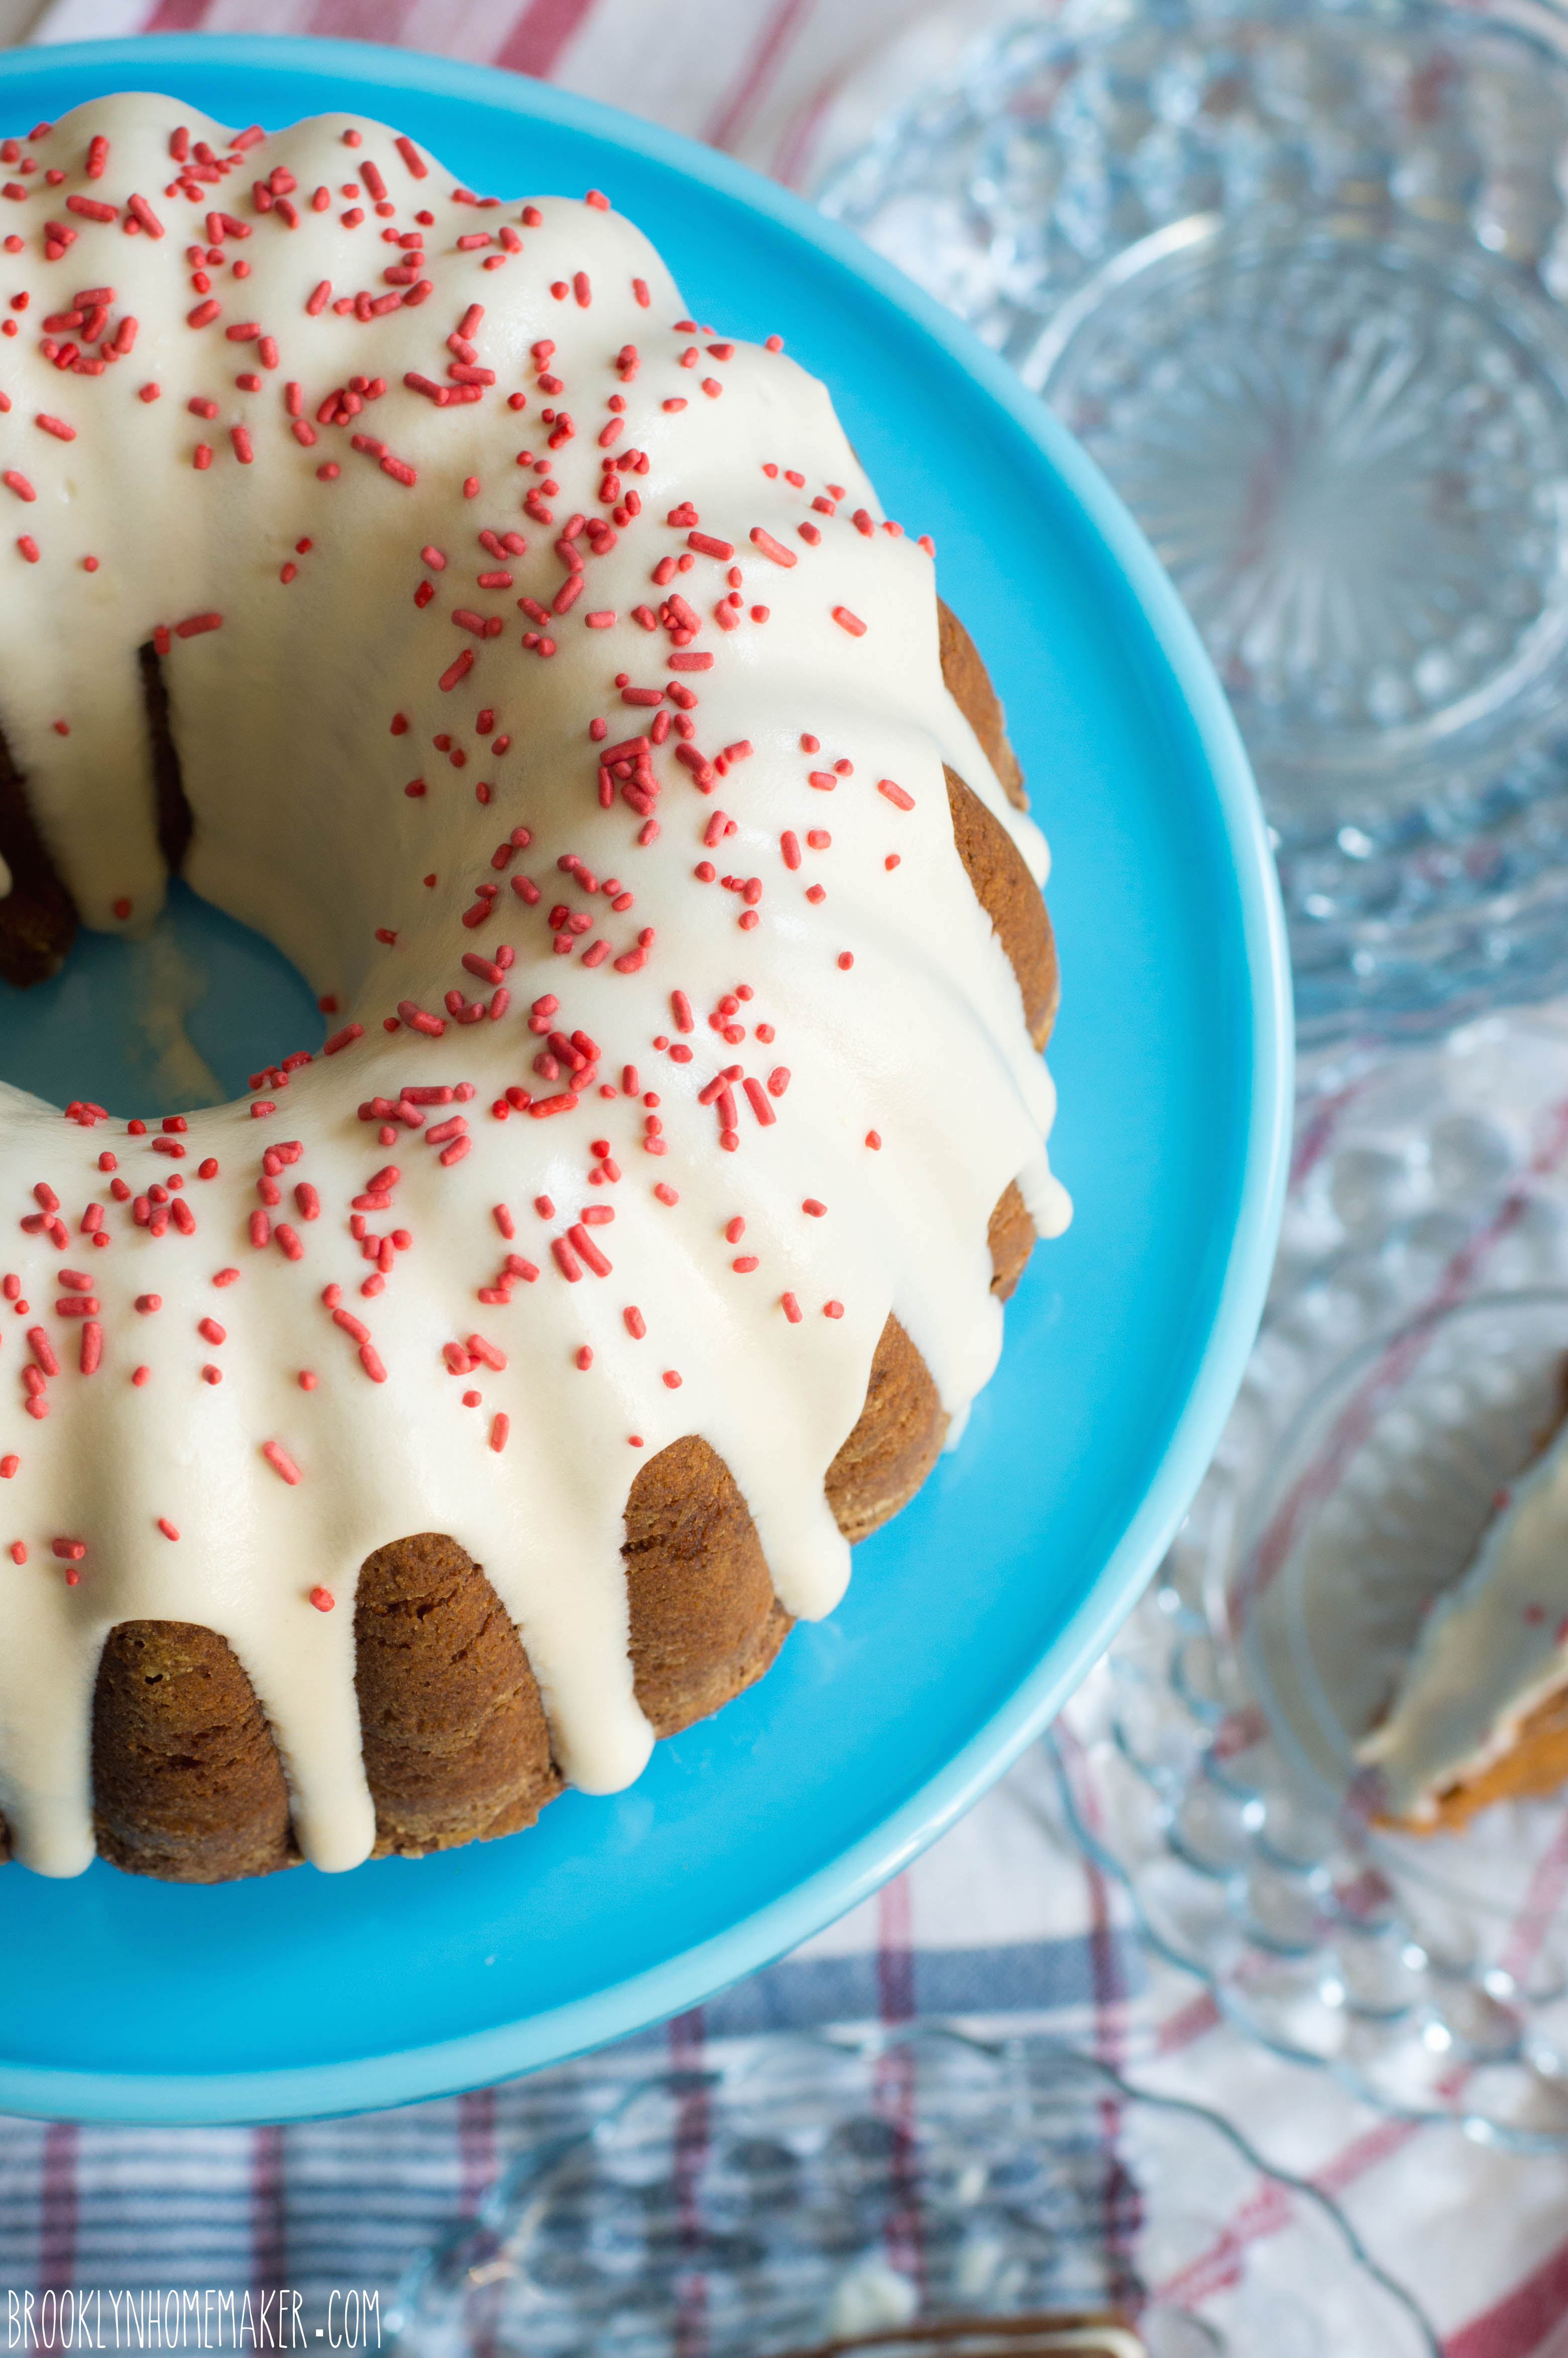
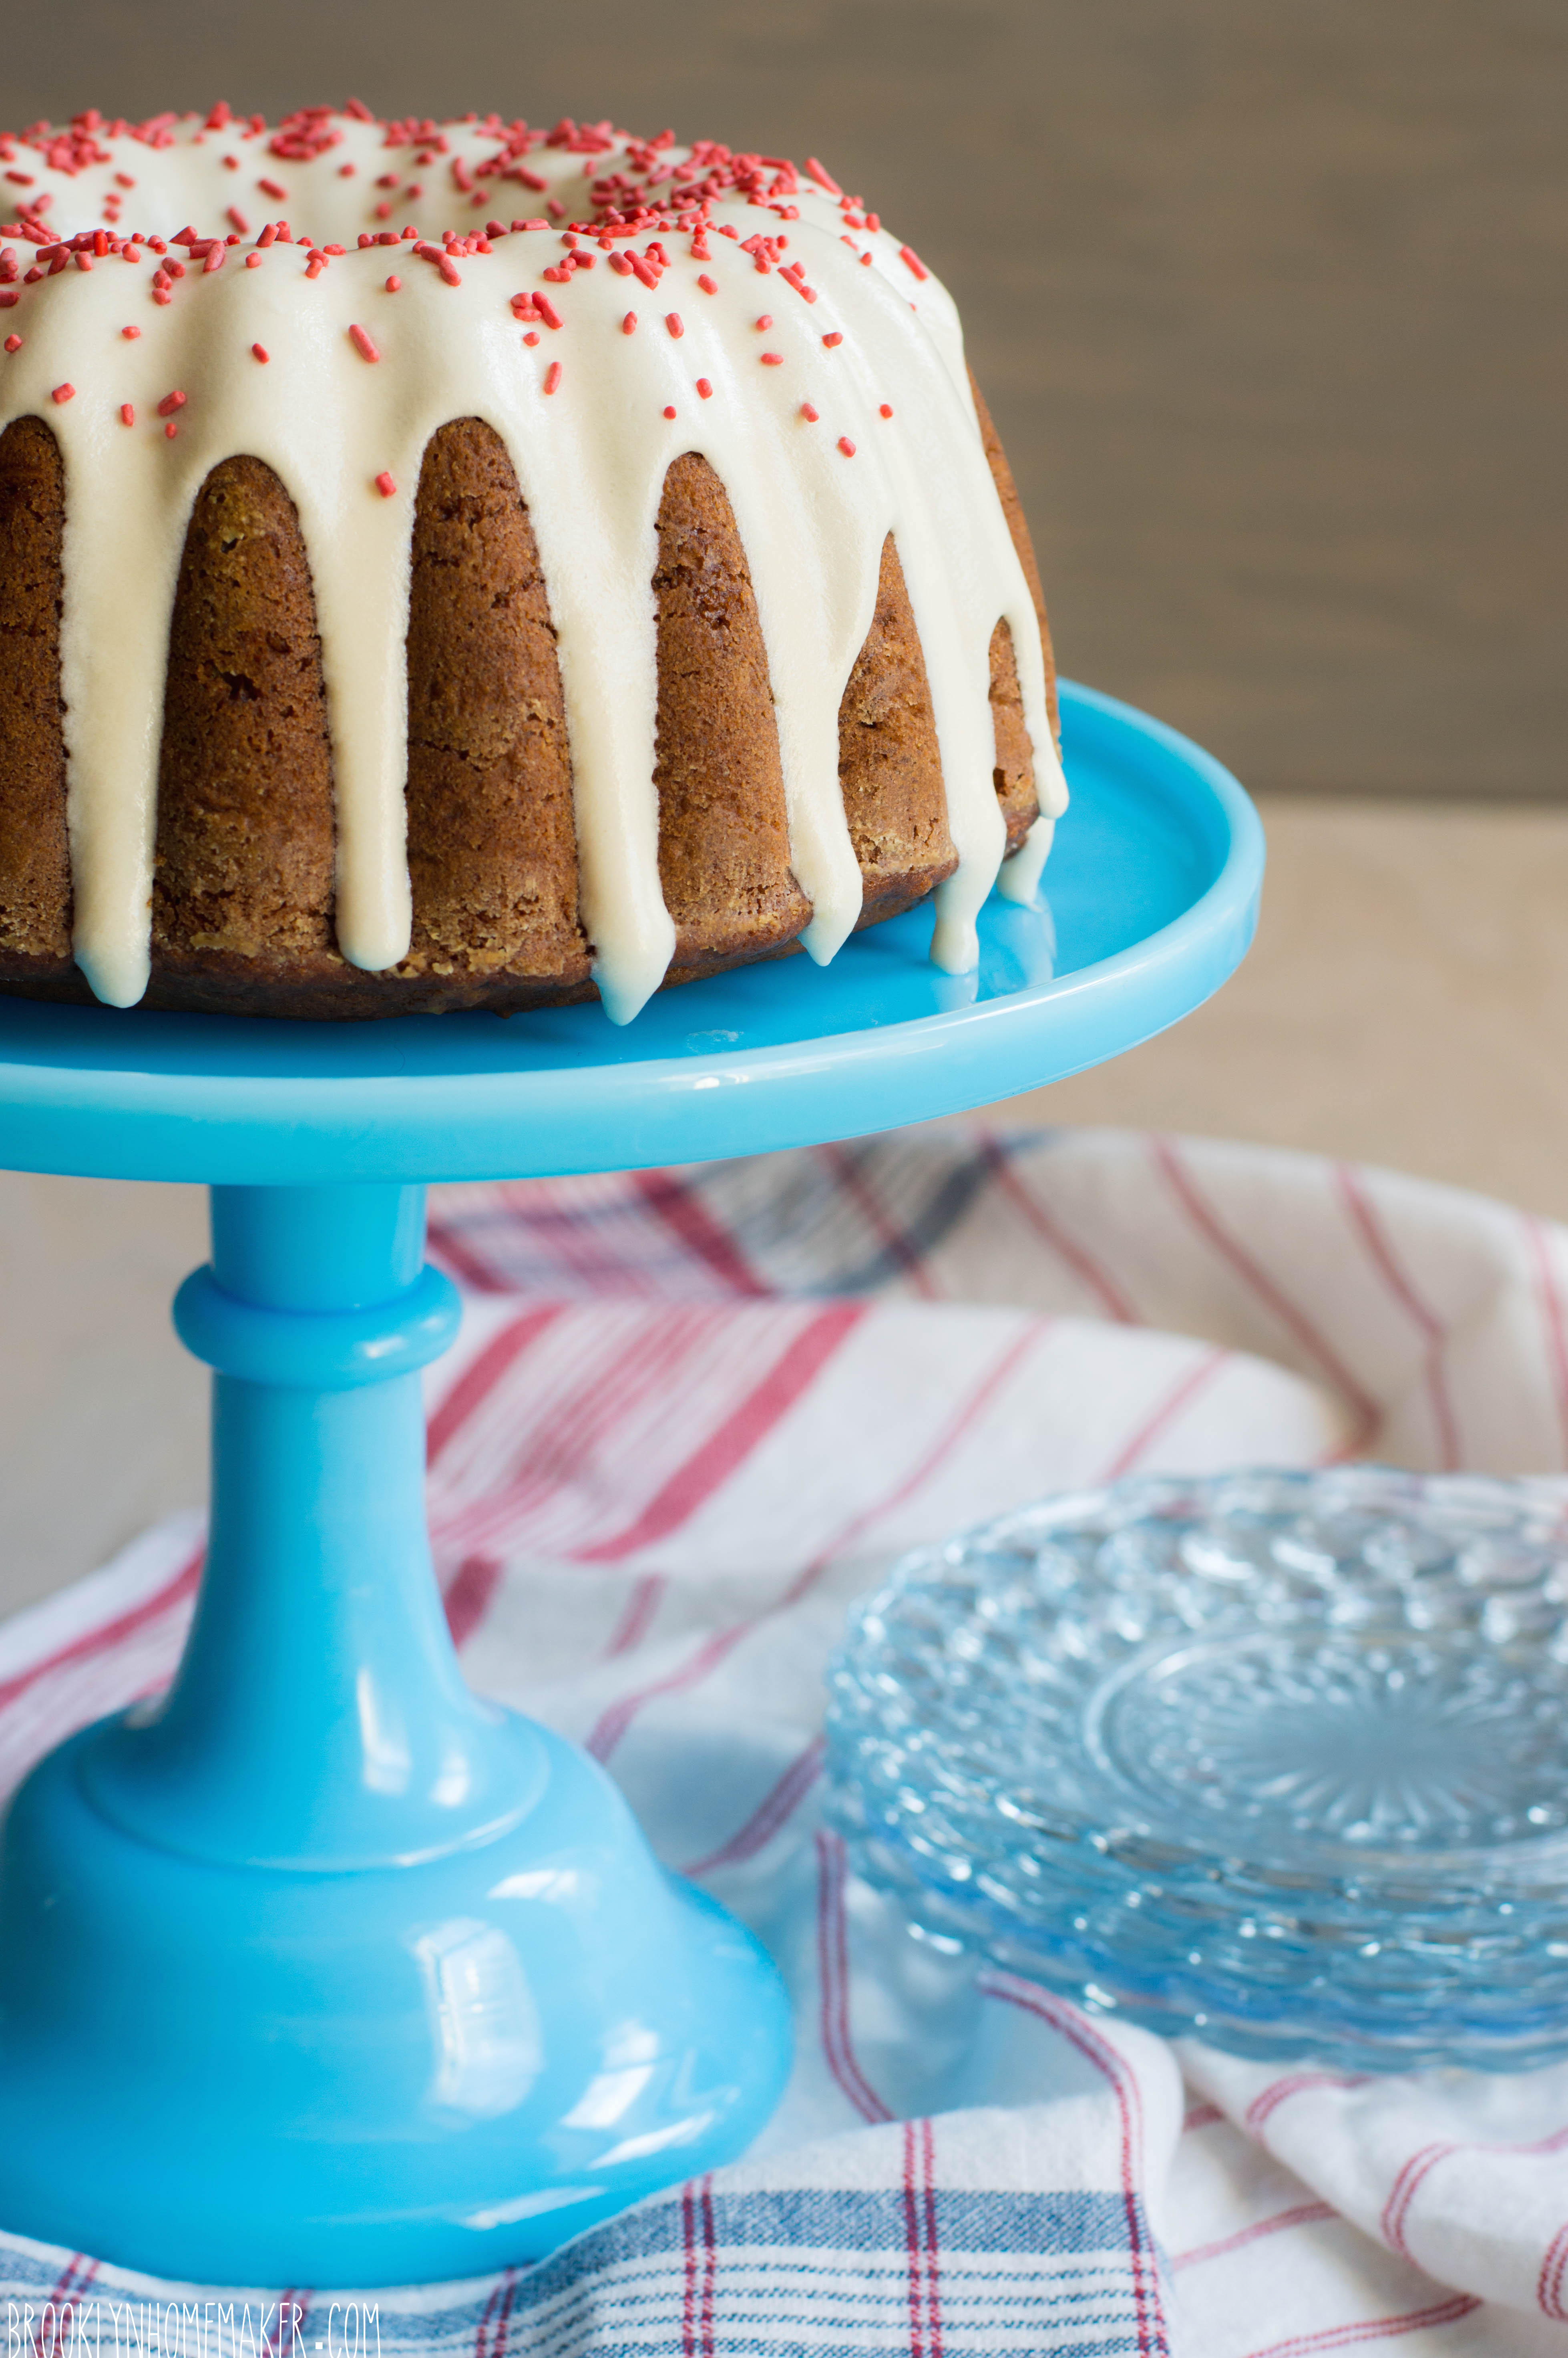
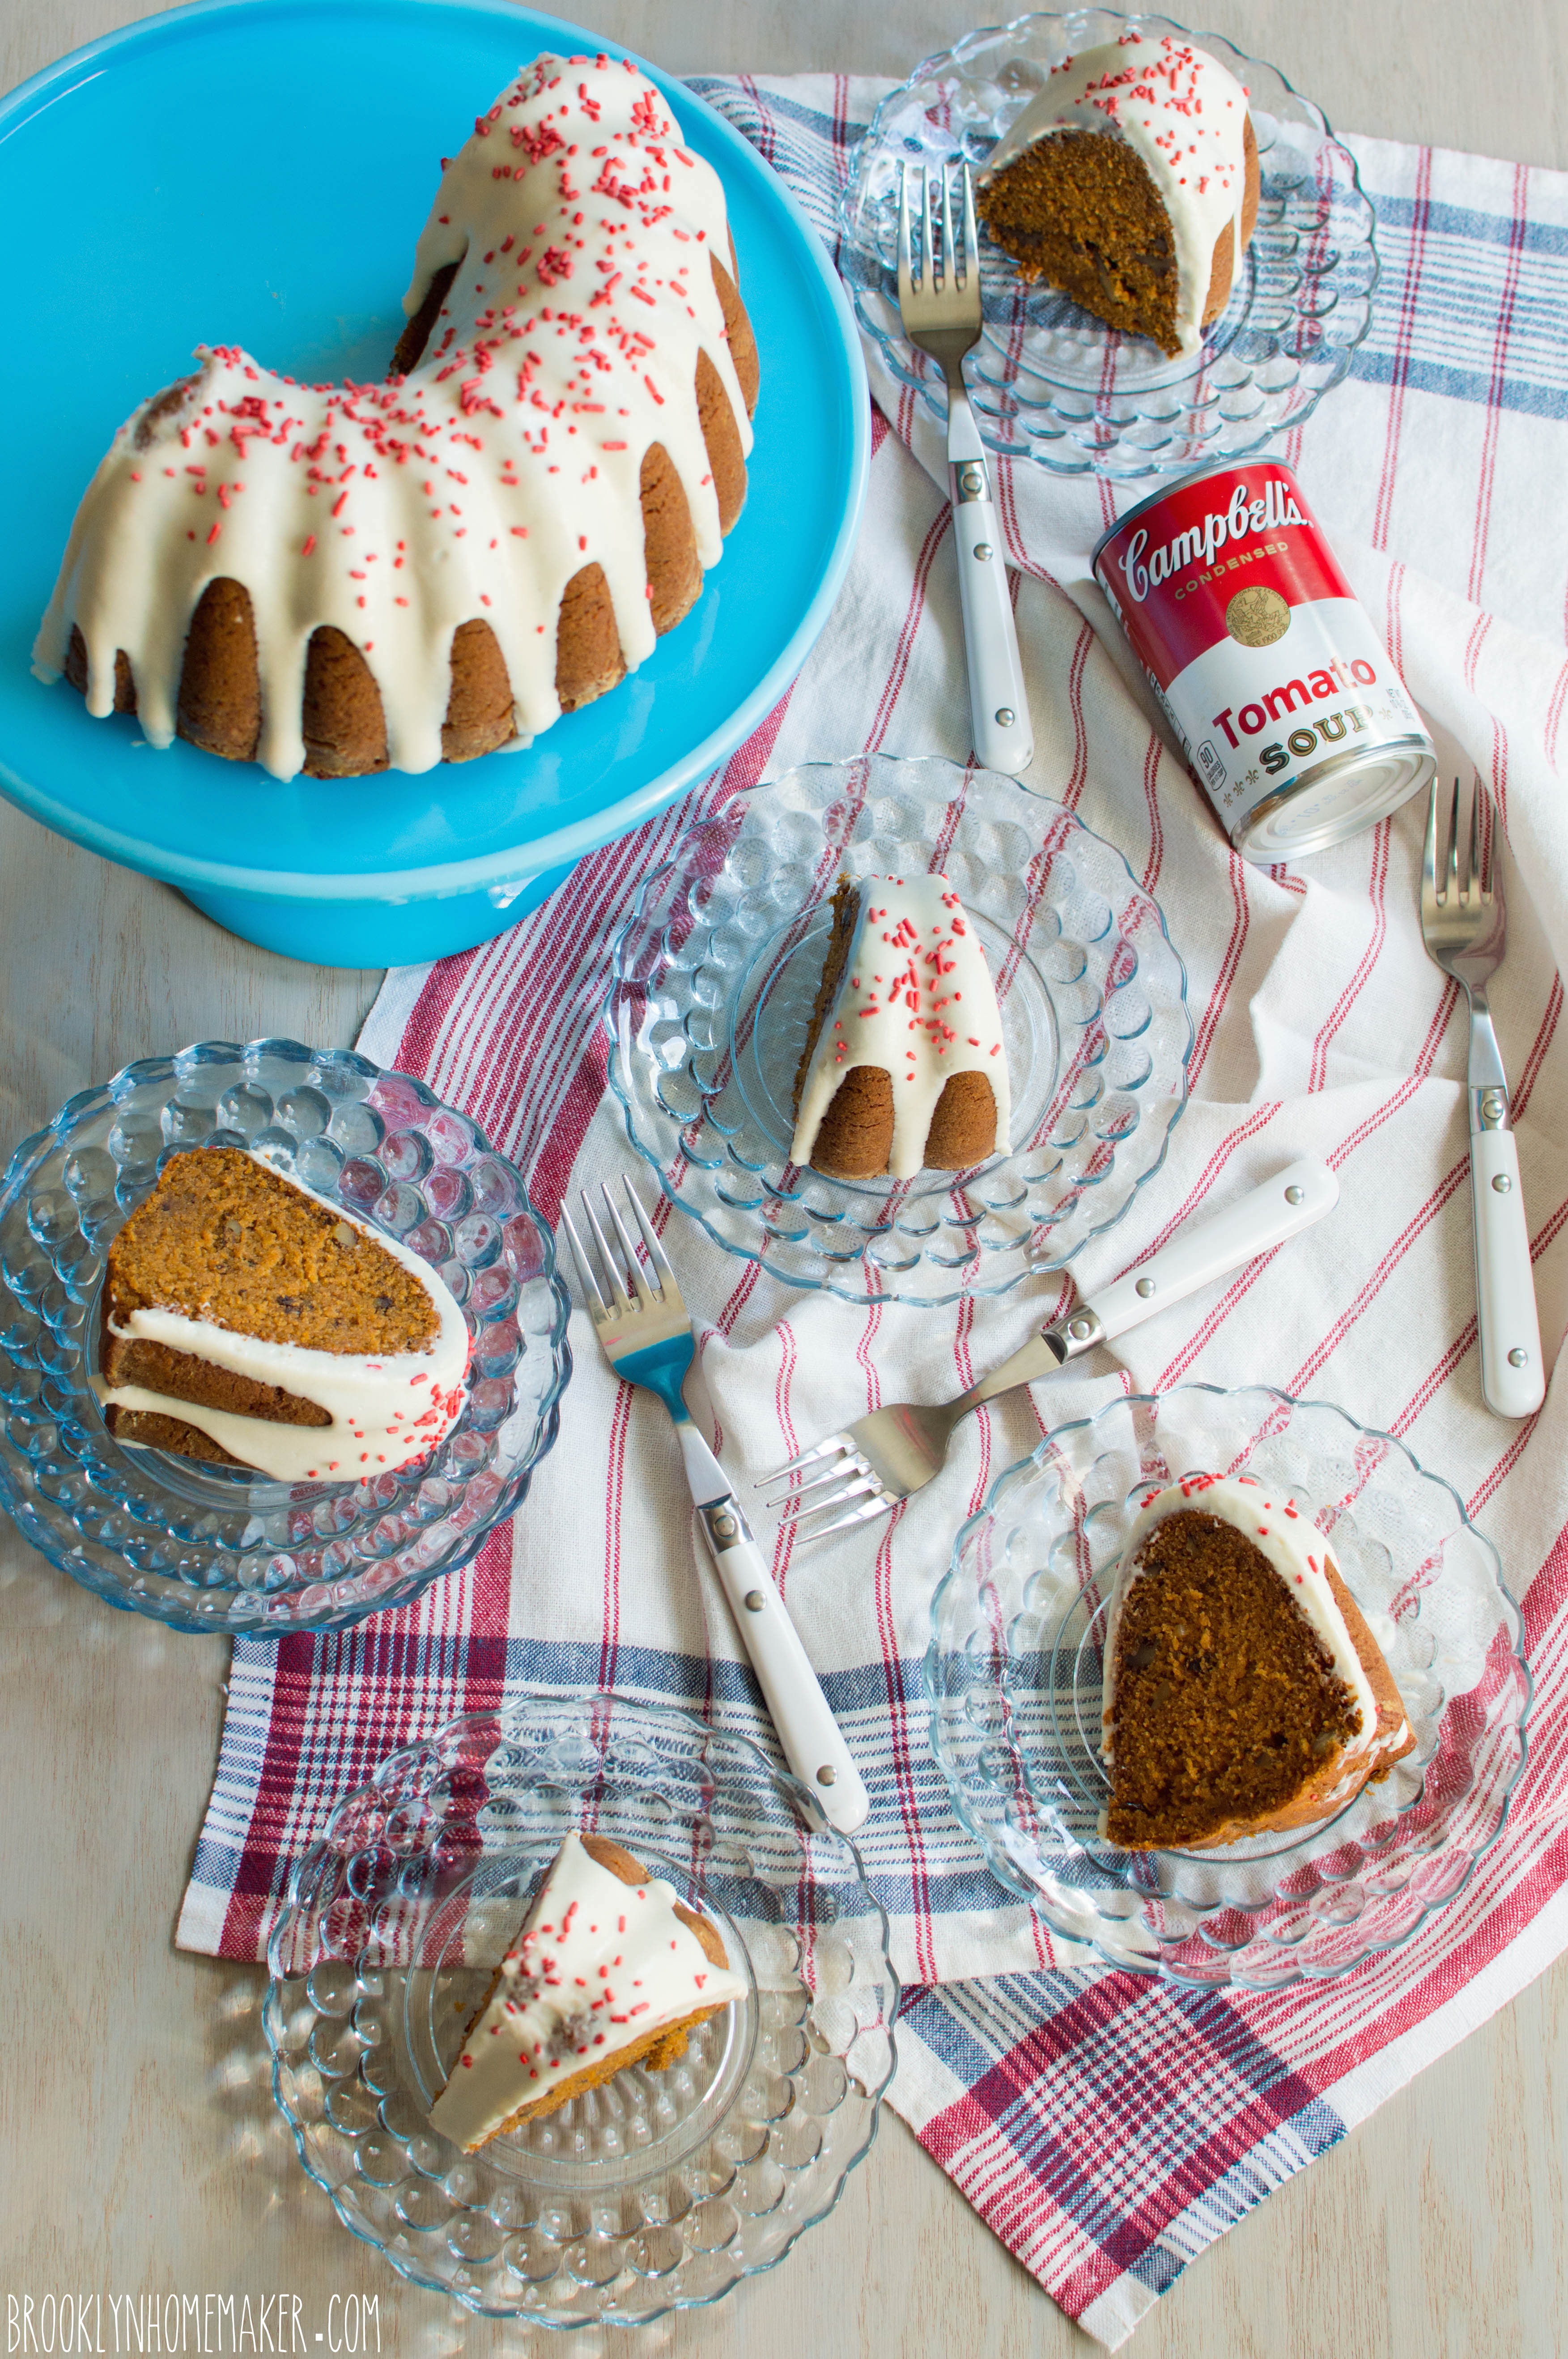
Many older recipes for Mystery Cake were topped with chocolate icing, but cream cheese icing has always been popular too. I decided to go for a drizzlable cream cheese glaze that adds sweetness and tang, and helps keep the cake from drying on the outer edges. I don’t usually go for sprinkles, but this fun retro theme got the best of me and I couldn’t help but add a handful of bright red jimmies as a play on the iconic tomato soup can!

Although this recipe has been around for almost a century, it definitely still feels relevant and delicious in these modern times. Why not step back in time and see what other retro bundts the talented team of bundt bakers came up with this month? Please scroll down past the recipe to find the links.

tomato soup bundt cake | Brooklyn Homemaker

Tomato Soup Bundt Cake
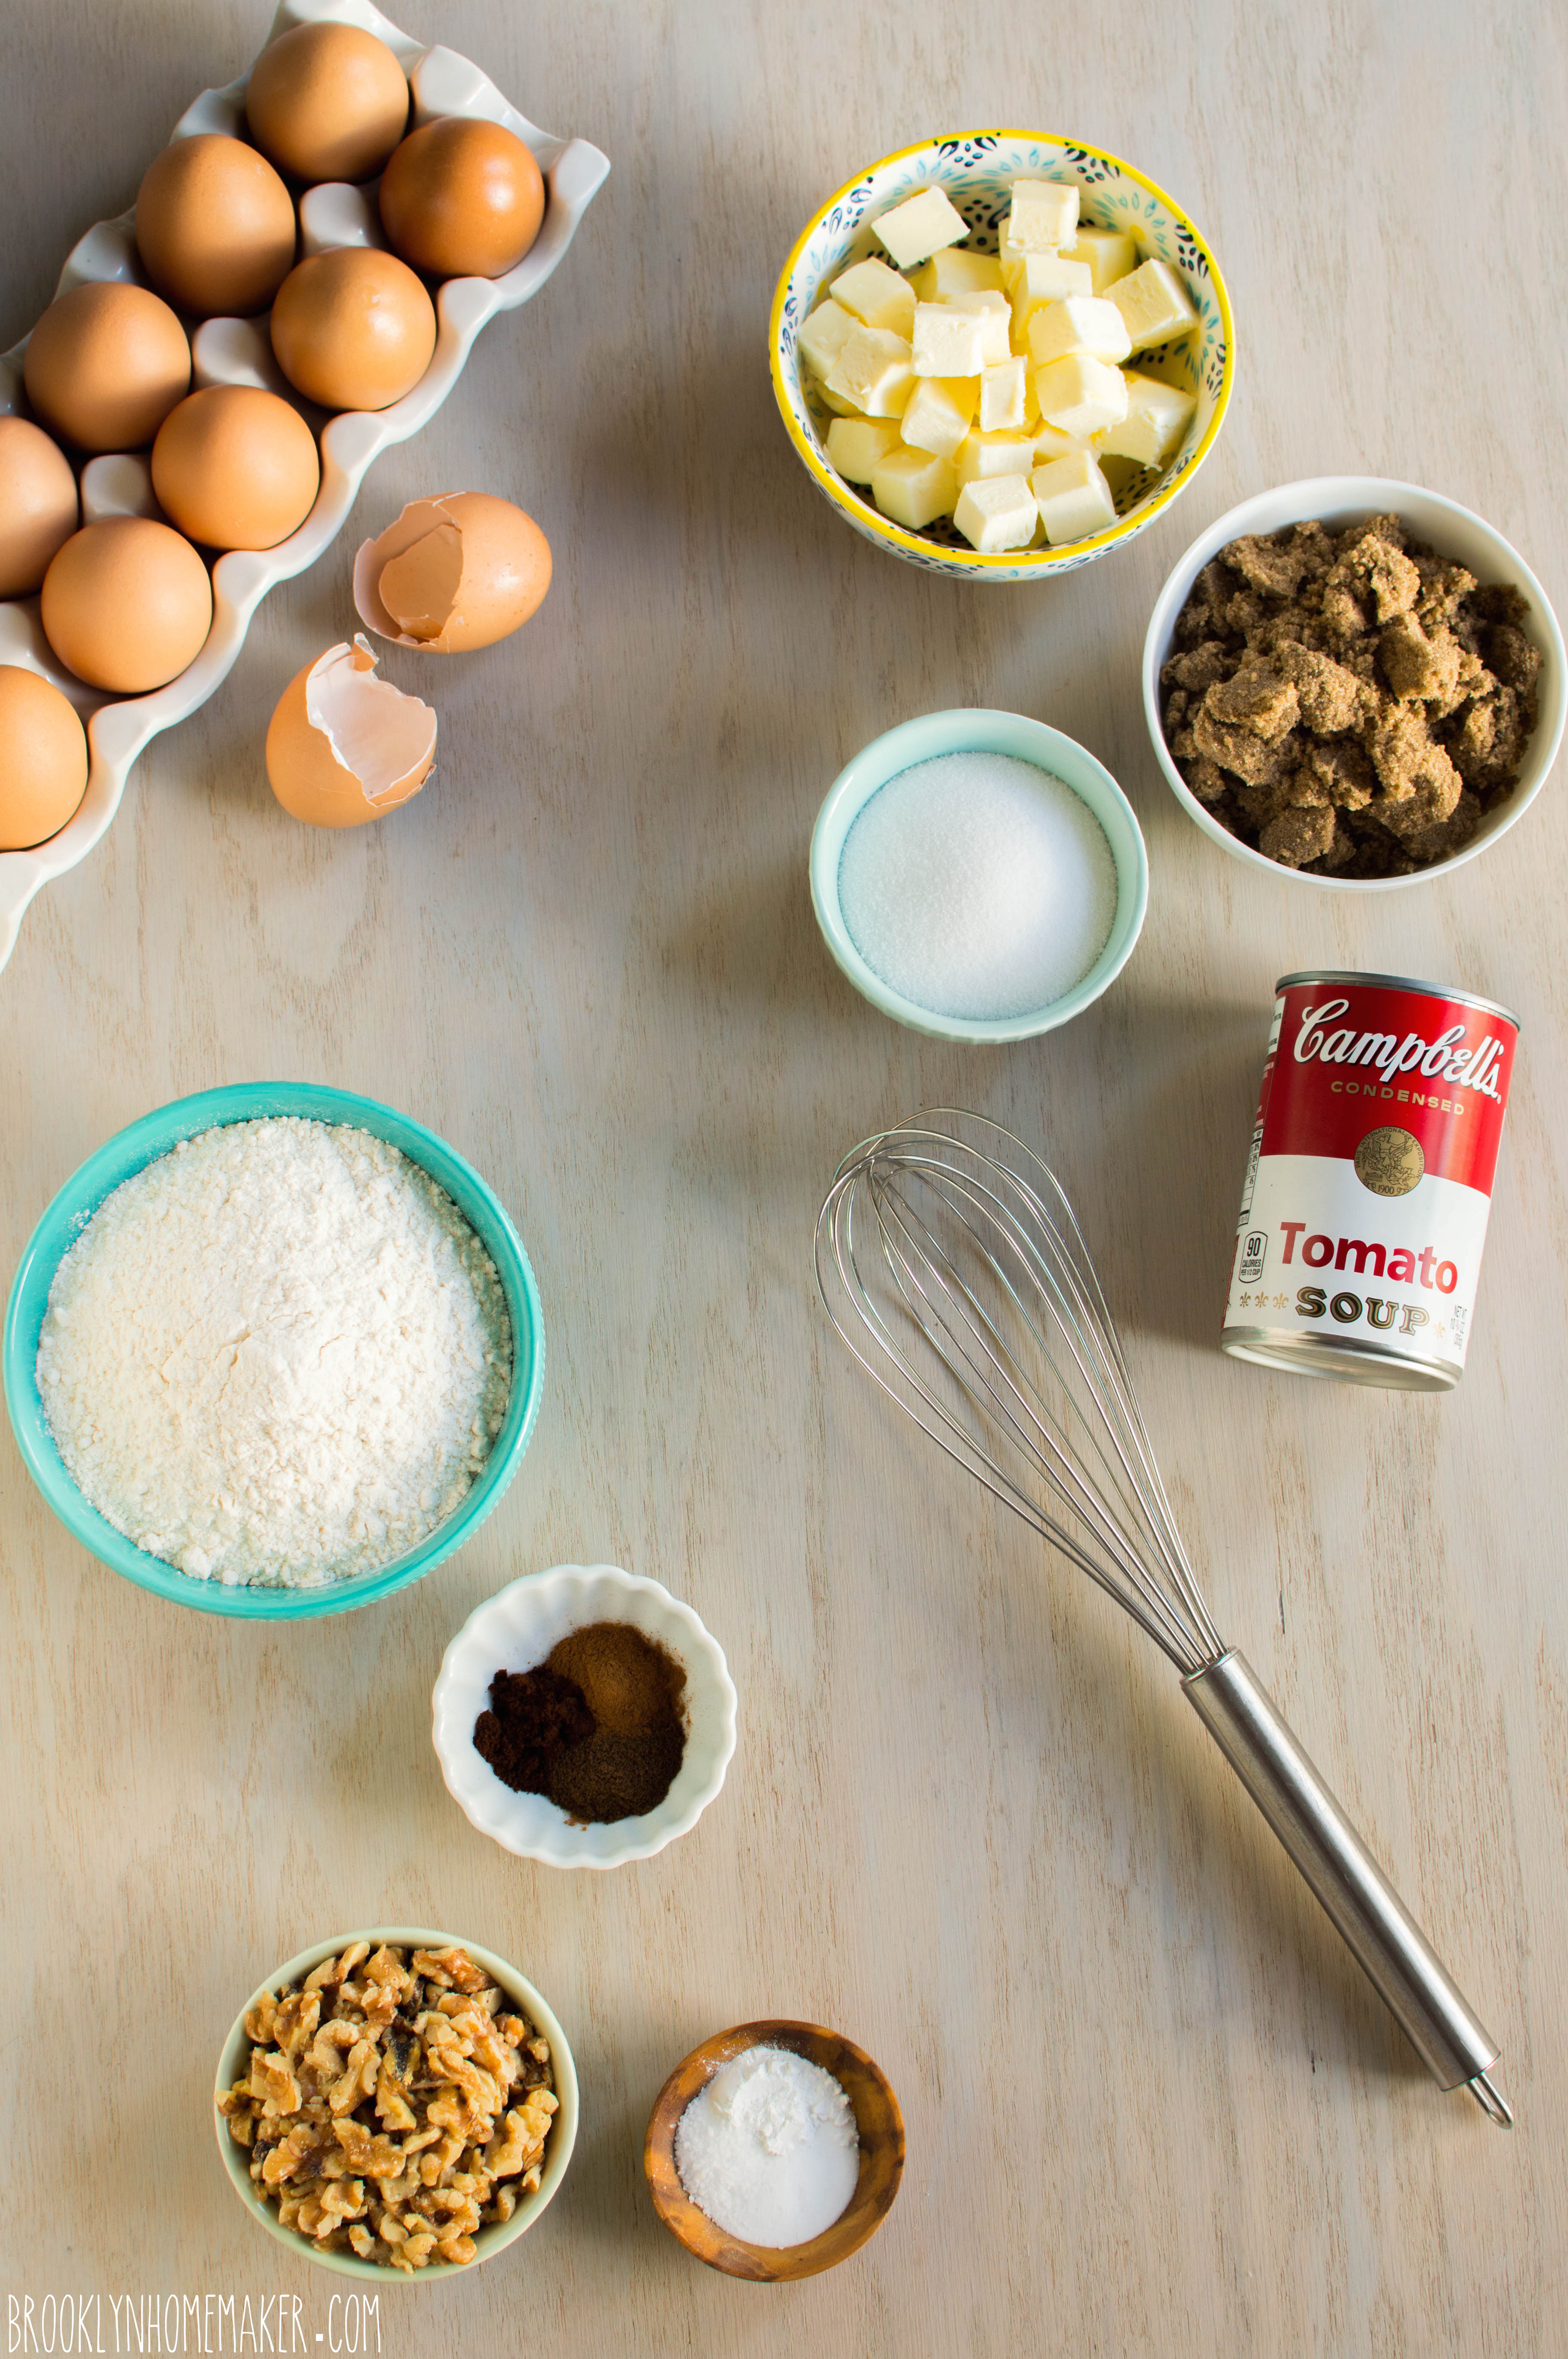
Adapted from several sources, mostly from Campbell’s

Cake:
2 1/2 cups all-purpose flour
1 1/2 teaspoons baking powder
1 teaspoon baking soda
1/4 teaspoon salt
1 1/2 teaspoon ground cinnamon
1 teaspoons ground allspice
1/2 teaspoon ground cloves
1 can (10 3/4 ounces) Condensed Tomato Soup
1/3 cup water
3/4 cup (1 1/2 sticks) unsalted butter, softened
3/4 cup granulated sugar
3/4 cup packed brown sugar
3 large eggs
1 cup chopped walnuts (or pecans)

Cream Cheese Glaze:
4 ounces (1/2 package) cream cheese, softened
1 cup powdered sugar
1 teaspoon vanilla extract
4 to 8 tablespoons milk

Preheat oven to 350.
Butter and flour pan. Refrigerate.

Whisk flour, baking powder, baking soda, salt, cinnamon, allspice, & cloves together in a medium bowl. Set aside.
In a separate small bowl, whisk together condensed tomato soup and water until smooth.
Cream butter and sugars on high speed with an electric mixer until light and fluffy. Mix in eggs, one at a time, and scrape down the sides of the bowl. Alternate additions of the flour mixture and the tomato soup mixture, beginning and ending with flour. Mix each addition just to combine. Do not over-mix.
Stir in walnuts just until evenly distributed.

Pour into prepared bundt pan and bake for 45 to 55 minutes. Cool on a wire rack for 15 to 20 minutes. Invert the pan and turn the cake out onto the rack to cool completely before glazing.

While the cake cools, make the glaze.
In the bowl of a stand mixer, beat the cream cheese until it’s soft and smooth and light. Add the powdered sugar, vanilla, and 4 tablespoons of milk and blend until there are no lumps. If necessary, add more milk, a tablespoon at a time, beating after each addition until the glaze reaches the desired drizzle-able consistency. It should be about the consistency of melted ice cream to drizzle correctly.

Place a tray under cake and cooling rack to catch any drips. Pour glaze over cake and let the glaze work its way down the side, tapping the tray on the counter if necessary. Top with red jimmies if desired.

Well covered in an airtight container, this cake should keep at room temperature about 3 or 4 days.

tomato soup bundt cake | Brooklyn Homemaker

Don’t forget to travel back in time with all the other retro cakes the bundt bakers came up with this month.

BundtBakers
 .
You can see all our of lovely Bundts by following our Pinterest board. Updated links for all of our past events and more information about #BundtBakers, can be found on our home page.
Advertisement

creole red jambalaya with chicken, shrimp, & andouille

Last Saturday when I got home from work I started making dinner.

creole red jambalaya with chicken, shrimp, & andouille | Brooklyn Homemaker

I cut up some broccoli, crisped up some bacon, made a béchamel, boiled some noodles, and grated a heaping pile of aged Irish cheddar. After mixing all the ingredients for my homemade macaroni & cheese together I turned the oven on to preheat while I melted a little butter for my bread crumb topping.

With the weighty casserole ready to go into the oven to bubble and crisp, I reached down to open the oven door. That’s when I noticed it wasn’t hot.
Panic.

creole red jambalaya with chicken, shrimp, & andouille | Brooklyn Homemaker

Though you wouldn’t know if from the number of baked goods I turn out of my kitchen, I have been having trouble with my oven for over a year. I won’t get into all the specifics, but it basically starts to preheat but will turn off before coming to temperature. After months of dealing with it I finally figured out that if I switched on the range it would trick the oven to turning back on and I’d be in business.
That is, until the night that I had a big dish of macaroni and cheese waiting to bake. No amount of trickery or tinkering could induce my ancient apartment oven to turn on.

A broken oven. My worst nightmare.
I wanted to cry.

creole red jambalaya with chicken, shrimp, & andouille | Brooklyn Homemaker

I wrapped the macaroni and cheese up and put it into the refrigerator, crossing my fingers that it would miraculously work again the next day. Nope.

Of course my landlord is dragging feet his feet about getting it fixed too. Doesn’t he know who I am?

creole red jambalaya with chicken, shrimp, & andouille | Brooklyn Homemaker

A few days later we finally got a repair man in to take a look. After less than five minutes of tinkering he blithely says, “Oh it’s just a blown fuse.”
I had just enough time to breath a sigh of relief before he continued, “Of course I don’t have one with me, and it’s out of stock. We’ll have to order it. We’ll call you in a few days.”
Way to toy with my fragile emotions Mr. Evil Repair Man. After he left I microwaved a bowl of never-baked macaroni and cheese and cried into it.

Another day passed before I heard back from them, and just my luck, this tiny stupid fuse is backordered from the manufacturer and they don’t know when it’ll be back in stock. What are the chances?
When it’s my oven we’re talking about? 100%.

creole red jambalaya with chicken, shrimp, & andouille | Brooklyn Homemaker

I could use this as an opportunity to make no-bake recipes and experiment with any number of savory stove top recipes. But, of course in the absence of my oven, all I want to do is bake. I even want to bake things I would normally do on the stove top! I’m suddenly overwhelmed by cravings for baked eggs, roasted chicken, twice baked potatoes, roasted cauliflower. My urge to bake cookies, usually strong enough already, is suddenly all consuming. I’m overcome with worry that I won’t be able to participate in this month’s #bundtbakers, which is fast approaching.

Wallowing rather than overcoming, I can’t think of a single thing that I could share here that wouldn’t require a functional oven. Forget the fact that at least half or more of the recipes I’ve posted up until now haven’t.

creole red jambalaya with chicken, shrimp, & andouille | Brooklyn Homemaker

Then, one morning I wake up and suddenly I NEED to make jambalaya. I consult my favorite recipe to make a few tweaks. I consult other recipes to see what else could be improved on. Oddly enough, I discover a few recipes that call for the jambalaya to be assembled on the stovetop and finished in the oven! WHAT?!?! WHY!?!!?! Okay, forget that. Back to the original stovetop recipe I was looking at.

creole red jambalaya with chicken, shrimp, & andouille | Brooklyn Homemaker

My recipe hunt turned up so many different variations on jambalaya that I decided to turn to Wikipedia for some clarification. As it turns out, there are actually three distinct varieties of jambalaya, depending on the regions they come from and the ingredients used.

The style I made is called a red Creole jambalaya, or a city Creole jambalaya. This is the most common style, and the main difference between this and other varieties is the use of tomatoes. The less common rural Creole jambalaya is almost identical but uses no tomatoes in the recipe. The third, and even less common variety is the Cajun or “white” jambalaya, in which the rice is cooked in broth separately from the meat and vegetables and combined just before serving.

Most people believe Creole red jambalaya was created as a way to make Spanish Paella without using saffron which was very hard to come by at the time. Tomatoes were added in place of the saffron for flavor, but eventually the other two styles came about without the tomatoes.

creole red jambalaya with chicken, shrimp, & andouille | Brooklyn Homemaker

The house smells completely heavenly while this bubbles away on the stovetop (and not in the oven), and the flavor could not be more amazing. Tender rice, perfectly cooked shrimp, soft cooked vegetables, and andouille with a nice bit of bite. The fresh herbs, crushed tomatoes, and spices combine to make one of the most flavorful dishes I’ve had in a good long time. Using smoked paprika really makes a difference to impart a nice smoky depth to the dish and the cayenne adds a welcome bit of heat.

Depending on how spicy you like things, the heat level can definitely be adjusted to your taste. I like mine quite spicy so I used the full teaspoon of cayenne. One teaspoon might not sound like much, but a little goes a long way and gave this big pot of jambalaya some serious heat. Feel free to scale it back to 1/2 or even 1/4 teaspoon if you can’t take the heat, but I beg you not to skip it altogether or you’re not doing it right!

creole red jambalaya with chicken, shrimp, & andouille | Brooklyn Homemaker

Creole Red Jambalaya with Chicken, Shrimp, & Andouille

  • Servings: about 8 to 10
  • Print
adapted from Spoon Fork Bacon for the Fix

1 tablespoon olive oil (or bacon grease, if you have it, will add a bit of welcome smokiness)
12 to 16 oz. Andouille sausage, thinly sliced
1 lb boneless skinless chicken thighs, cut into small bite sized cubes
1 medium yellow onion, diced
1 red bell pepper, seeded and diced
1 green bell pepper, seeded and diced
2 to 3 ribs of celery, diced (about 1/2 cup)
4 garlic cloves, minced
1 1/2 cups of corn kernels (fresh is best but frozen is fine)
2 cups long grain rice
2 tablespoons parsley, finely chopped
1 tablespoon thyme, minced
2 1/2 teaspoons smoked paprika
1/4 to 1 teaspoon ground cayenne pepper (to your taste)
2 teaspoons cumin
1 (15 oz) can, crushed tomatoes
3 cups chicken stock
1 lb. shrimp, cleaned peeled and deveined

garnish:
fresh thyme, parsley, or green onion

Preheat 1 tablespoon of oil or grease in a heavy stockpot or dutch oven over medium-high heat. Brown andouille for about 5 minutes, remove from oven, leaving grease, and set aside.
Add chicken thighs, season with salt and pepper, and cook about 5 minutes. They don’t need to be cooked through, just have a bit of color on them. Remove and set aside with sausage
Add onions, bell peppers, and celery and sauté for 4 to 5 minutes or until onions barely begin to look translucent.  Season with salt and pepper. Stir in garlic and corn and continue to sauté for 2 minutes more.
Add rice, herbs and spices and sauté for 4 to 5 minutes. Season well with salt and pepper.
Stir in crushed tomatoes, stock, chicken thighs, and sausage. Bring mixture to a boil, then reduce the heat to simmer and cover. Cook for about 15 to 20 minutes or until cooked about 2/3 of the way, then add shrimp by gently pressing shrimp slightly into the mixture. DO NOT STIR while rice is cooking.
Cover again and continue to simmer for 7 to 10 minutes or until rice is cooked through and the liquid has evaporated.
Gently toss jambalaya together to incorporate shrimp and fluff the rice. Top with chopped parsley or sliced green onion, and serve.

seared pork chops with apples, onions, & mustard

I love pork. Just so we’re all on the same page.

seared pork chops with apples, onions, & mustard | Brooklyn Homemaker

I’ve really always been a big fan of pork. Give me a big thick juicy pork chop over a steak any day of the week. In the words of Homer Simpson, “Porkchops and bacon, my two favorite animals.”

When I was growing up my grandmother used to make us porkchops a lot. Shake n bake, of course, and of course I helped. Grandma’s pork chops were usually cut thin and baked until well done. The common conventional wisdom in my grandmother’s day was that if you saw even a tiny twinkle of pink in your pork you’d probably keel over dead on the spot. You were supposed to cook ’em through and then keep on going, just for good measure. The only problem with that wisdom is that todays pork is bred to be so lean that cooking to well done produces a bone-dry chop that is, sorry grandma, pretty terrible. I know it’s not your fault grandma! Damned conventional wisdom! Maybe this is why a lot of people think they don’t like pork?

Well, I’m here to challenge that wisdom. It’s totally okay if you cook your pork to medium-well or even medium. You’re not going to die. You’re not even going to get sick. Unless you caught your pig in the wild, the only thing you’re at risk of is eating a seriously tasty pork chop. Thanks to modern farming, Trichinosis (the food borne illness commonly associated with pork), hasn’t been a concern for American eaters since the 1970s. In fact, the USDA even recently lowered their recommended internal cooking temperature for pork from 160 degrees to 145. Yay! We can finally eat tasty pork again!

seared pork chops with apples, onions, & mustard | Brooklyn Homemaker

While we’re on the topic of tasty pork, lets talk about how I like to eat a pork chop. Call me uninspired, but my favorite flavor to pair with pork is apple. I know it’s super traditional and I’m not showing you anything you haven’t seen before, but hey, it’s friggin good! If it ain’t broke, I ain’t trying to fix it.

I’ve been eating apples with pork for as long as I can remember, which probably stemmed from grandma’s well done chops. I used to slather those suckers with mountains of applesauce, for the moisture as much as the flavor.

seared pork chops with apples, onions, & mustard | Brooklyn Homemaker

People have actually been pairing pork with apples for centuries. Before sugar was readily available to most people, fruit sweetened foods were usually served alongside or in combination with savory, and apples were a common way to add a touch of sweetness to pork dishes. This may have started because some farmers would feed old or rotten apples to their pigs, and some people say that a diet high in apples can actually flavor the meat.

On a side note, I might just need to plant some apple trees and buy a few pigs…

seared pork chops with apples, onions, & mustard | Brooklyn Homemaker

I think pork chops on the bone tend to have the best flavor, and the thicker they’re cut the juicier they’re going to be when they’re finished cooking. If you get your pan nice and screaming hot you only need to sear the chops for a few minutes on either side to get them perfectly cooked to medium well. If you’re still scared and want to cook them to well done, remove them from the pan the second the meat reaches an internal temperature of 145 degrees. Even thick cut chops will get dry and tough if overcooked.

To add a little depth to the pork and apple combination, I deglazed the pan with white wine after searing the pork, sautéed the apples with some onions and mustard, and finished the the whole thing with some cream and fresh sage from our back yarden. The onion helps keep things from going too sweet and fruity, and the mustard adds some interesting texture and a nice earthy vinegary bite. The sage reinforces that earthiness, and the cream gives the topping a really nice velvety finish. Despite feeling kind of “grown-up” and “fancy”, this meal is actually pretty simple to make and comes together in less than 30 minutes!

Since things are getting all nice and autumnal outside, I decided to pair my pork chop with some mashed sweet potatoes and roasted brussels sprouts. And, of course, there was also some white wine.

seared pork chops with apples, onions, & mustard | Brooklyn Homemaker

Seared Pork Chops with Apples, Onions, & Mustard

  • Servings: 2 generous portions
  • Print
2 center cut pork chops, bone in, at least 1 inch thick
salt and pepper to taste
2 tablespoons butter
1/4 cup white wine
1 firm sweet apple, such as pink lady
1 small onion
2 tablespoons whole grain mustard
2 tablespoons finely sliced fresh sage
1/4 cup cream

Generously season pork chops on both sides with salt and pepper. Preheat a heavy skillet over high heat until your butter sizzles and immediately browns when added. Add 1 tablespoon butter, swirl in pan, and immediately add pork chops. Reduce heat just slightly to medium high, and cook for about 3 to 4 minutes per side. You want them cooked to about medium-well. A little pink won’t hurt you but you want the meat to be mostly white. If you’re scared, use a meat thermometer to be sure the meat reaches an internal temperature of 145 degrees. Do not overcook or the chops will be tough and dry. Meanwhile; peel, core, and finely dice the apple, and finely dice the onion.

Remove pork chops to a plate and tent with foil (remember they’ll keep cooking a little while they rest). Deglaze pan with white wine, add remaining butter, apples, and onions and season with salt and pepper. Cook until onions are translucent, apples are tender, and everything is starting to get a healthy caramel brown, about 10 minutes. Add mustard, sage, and cream; and cook about 3 minutes more.

toasted coconut cream pie

Suddenly, one morning last week, I woke up with a hankering for coconut cream pie.

toasted coconut cream pie | Brooklyn Homemaker

Don’t ask me why. Just don’t, okay. I honestly couldn’t tell you.

I mean, I’ve always considered pie one of my favorite food groups, but double-crusted fruit pies have always been much more my style than cream pies.

toasted coconut cream pie | Brooklyn Homemaker

Perhaps one reason I prefer fruit pies is that the crust and the filling cook all at once, rather than baking the crust separately from what’s going into it. I’ve never been a fan of blind baking pie shells, and have had more than my fair share of sadness and anger and tantrums over blind baking disasters. You name it, it’s happened to me. I’ve had aluminum foil stick to the crust and tear it in half when removed, I’ve had crusts bake with a giant humped bubble in the center because there weren’t enough weights to keep it flat, and I’ve even had the crust shrink and slip down the edges of the pan leaving me little more than a half inch mound to contain my filling.

My love for sweet potato and pumpkin pies at Thanksgiving was my incentive to try try again, and I’ve finally gotten the technique down. Sort of. If you’re new to blind baking, check out this great tutorial from thekitchn for more detail. In my experience, the key points to keep in mind are as follows:
A) Use parchment paper, not foil, and you won’t have to worry about it sticking to the crust.
2) Chill (or better yet, freeze) your crust for a bit before baking and it won’t shrink as much.
3) Fill the parchment-lined pie crust with plenty of weights or beans, you don’t want to skimp.

toasted coconut cream pie | Brooklyn Homemaker

When I woke up with my coconut cream craving I knew I could handle the blind baking. What I wasn’t expecting was how much more time goes in to a cream pie than a fruit pie. I mean, the recipe is not at all difficult, but I won’t lie to you; This pie is kind of involved. You’re making a crust, and a filling, and a topping; all of which need to be prepared separately, combined, and chilled before eating.

But then there’s the eating. The sweet, creamy, coconutty wonderful eating.

toasted coconut cream pie | Brooklyn Homemaker

All this pie making, and pie eating, got me thinking about where the idea of coconut cream pie came from. Who on earth got the idea of putting coconut into a pudding, then putting that pudding into a pie shell, then topping that pudding filled pie shell with whipped cream?

toasted coconut cream pie | Brooklyn Homemaker

As it turns out, the coconut cream pie has been around for over a century.

Back in the late 1800s Europeans and Americans were really in to their imported tropical fruit like pineapples and bananas, but the coconut hadn’t yet taken off. This was mostly because they were hard to transport without spoiling, and because people didn’t really know what to do with them once they had them in their kitchens. Everyting started to change when a French company based in Ceylon (now Sri Lanka) started shredding coconut meat and drying it for easier shipping, thereby making coconut accessible to European chefs and home cooks.

toasted coconut cream pie | Brooklyn Homemaker

Shortly after gaining popularity in Europe, coconut took the United States by storm when a Philadelphia flour miller received a shipment of coconuts as payment of a debt from a Cuban businessman. In 1895 he set up a factory for shredding and drying his coconut meat and singlehandedly put coconut into the hands of American homemakers and commercial bakers and candy makers.

Recipes for coconut cream pie start showing up in cookbooks almost immediately, and by the early 1900’s coconut custard and coconut cream pie was everywhere.

toasted coconut cream pie | Brooklyn Homemaker

And it’s no wonder. This pie is really something. As much as I still think baked fruit pies are more my thing, this pie is worth all the time and separate steps. The crust is flaky and tender and crisp, and since it’s made with butter instead of shortening, it’s got a great flavor as well as texture. The coconut pudding filling is rich and custardy and creamy and thick, studded with plenty of super flavorful toasted coconut. The whipped cream is just barely sweetened, and laced with just a hint of rum to take that tropical coconut to another place. The whipped cream is also stabilized with a tiny bit of gelatin, just to make sure it doesn’t turn into a runny puddle if you don’t serve every last slice right away.

If you’re a fan of cream pies, or a fan of coconut, this recipe is one to dog-ear.

toasted coconut cream pie | Brooklyn Homemaker

Toasted Coconut Cream Pie

adapted from Brown Eyed Baker

Pie crust:
1 1/2 cups flour
1/2 teaspoon salt
2 teaspoons sugar
1 stick (8 tablespoons) unsalted butter
1/2 cup ice cold water

Coconut Cream Filling:
1 ½ cup unsweetened shredded coconut
1 (14-ounce) can coconut milk, well stirred (not cream of coconut)
1 cup whole milk
2/3 cup granulated sugar
¼ teaspoon salt
5 egg yolks
¼ cup cornstarch
1½ teaspoons vanilla extract
2 tablespoons unsalted butter, cut into pieces

Stabilized Whipped Cream:
1 1/2 teaspoons unflavored gelatin
6 tablespoons ice cold water
1½ cups heavy cream, chilled
1/3 cup confectioners (powdered) sugar
1 tablespoon dark rum (optional)
1 teaspoon vanilla extract (if not using rum, add another teaspoon)

Make the pie crust:
Stir or whisk together flour, sugar, & salt in a medium bowl. If you have time, toss the bowl in the freezer for a 15 or 20 minutes. Cube the butter, add it to the chilled flour, and cut it in with a pastry blender, until it looks like coarse pea sized chunks. You can also do this by pulsing in a food processor. If you took very long to cut the butter in, you can toss the bowl back in the freezer for another 15 minutes, but if the butter is still firm and cold, don’t bother.

Start mixing in the water and stirring and tossing with a fork to distribute and combine. Try starting with about 1/4 cup, mix together, and add about a tablespoon or two at a time, until it starts to come together. The less water you use the better and flakier the crust will be, but you don’t want to use so little that it won’t hold together. If you can press it together with your hands and it mostly stays in a ball, with a few little bits crumbling out, you’re good to go.

Form the dough into to a ball and wrap it tightly in plastic wrap. Try to handle it as little as possible so as not to warm or melt the butter. Press or pat the covered ball of dough into a thick disk and refrigerate for at least two hours (or up to a few days)

Preheat oven to 425 degrees.

On a well floured surface with a floured rolling pie, roll the dough out in a disk that’s about 2 inches wider than your pie plate. Transfer to the plate, center the crust (do not stretch it out or it’ll shrink when baked) and trim the edge so there’s about half an inch to an inch of overhang. Fold the overhang under itself right at the edge of the pie plate, and crimp the crust with a decorative edge.

To blind bake the pie crust, cut a large square of parchment paper and line the crust with it. Fill the paper with pie weights, dried beans, or pennies to weight down the crust or it’ll bubble up when baked. Bake for about 15 minutes, or until the edges of the crust are beginning to turn golden brown. Remove the pie plate from the oven, and lift the weight filled parchment out of the pie crust. Return it to the oven for another 5 minutes or so, or until the center of the crust looks dry and cooked through. Set the crust aside to cool.
For more information on blind baking a pie crust, check out this detailed tutorial from TheKitchn.

Make the filling:
Turn the oven down to 325. Spread the coconut in an even layer on a parchment lined baking sheet, and toast until golden brown, about 9 minutes, stirring every couple of minutes. When cool enough to handle, reserve 1/2 cup for garnishing the finished pie.

Bring the coconut milk, whole milk, 1 cup loosely packed toasted coconut, 1/3 cup of the sugar, and the salt to a simmer in a medium saucepan over medium-high heat, stirring occasionally with a wooden spoon to dissolve the sugar. When the mixture reaches a simmer, whisk the egg yolks in a medium bowl to break them up, then whisk in the remaining 1/3 cup sugar and cornstarch until well combined and no lumps remain. Gradually whisk the simmering liquid into the yolk mixture to temper it, then return the mixture to the saucepan, scraping the bowl with a rubber spatula. Bring the mixture to a simmer over medium heat, whisking constantly, and let thicken at a low simmer for about 3 to 5 minutes.

Off the heat, whisk in the vanilla and butter. Pour the filling into the cooled crust, press a sheet of plastic wrap directly on the surface of the filling and refrigerate until the filling is cold and firm, at least 2 to 3 hours.

Make the stabilized whipped cream:
In a small pan, combine gelatin and cold water and let stand until thick.
Place over low heat, stirring constantly, just until the gelatin dissolves. Remove from heat and let cool for just a few minutes. (do not allow it to set).
Whip the cream with the confectioner’s sugar, until slightly thick. While slowly beating, add the gelatin to whipping cream.
Whip at high speed until stiff. Add the rum and vanilla, and whip for 1 minute more.

Spread or pipe the whipped cream over the chilled filling. Sprinkle the reserved 1/2 cup toasted coconut over the whipped cream and return the pie to the refrigerator for at least 1 hour more for the whipped cream to set. Cover with plastic wrap after the first hour, if not serving at that moment. Leftovers should be wrapped in plastic too, and stored in the refrigerator.