pies

bourbon ginger pumpkin pie

There’s just something about pumpkin pie.

bourbon ginger pumpkin pie | Brooklyn Homemaker

When I was a kid I was completely obsessed with pumpkin pie and had a really hard time understanding why we only ate it at Thanksgiving and not, say, every single day of the year.

My grandmother would always make her pies a day ahead and stash them in her sewing room, usually one of the coolest rooms in the house, to rest until after dinner on turkey day. She always covered them with an oversized square of waxed paper, and when no one was looking I’d sneak into the sewing room, close the door behind me, and lift the paper up and just stare at those pies.

bourbon ginger pumpkin pie | Brooklyn Homemaker

I knew I couldn’t eat them until after dinner, but that didn’t stop me from just standing there taking in their earthy, homey aroma. I was tempted but I never touched them. I just wanted to look.

Of course, once dinner was over wild horses couldn’t have kept me from tearing into those rich, earthy, custardy pies.
bourbon ginger pumpkin pie | Brooklyn Homemaker

When I was trying to decide what to serve for my fakesgiving dinner, the pumpkin pie was the menu item I had the most trouble with.

I think that my love for pumpkin pie was clouding my judgement. I wanted to do something sort of elevated and innovative, but I just couldn’t make up my mind. I took to pinterest to soak up some inspiration, and quickly realized that anyone who has ever posted a recipe on the internet has their own way of making pumpkin pie, and that any and every type of dessert ever invented and has had pumpkin and spice added to it at some point.

Just try typing the words “pumpkin dessert” into the search bar on pinterest. I dare you. Pumpkin bread, pumpkin bars, pumpkin tarts, pumpkin cheesecake, pumpkin custards, pumpkin flans, pumpkin trifles, pumpkin mousse, pumpkin cookies, pumpkin ice cream served inside a hollowed out pumpkin…

bourbon ginger pumpkin pie | Brooklyn Homemaker

My head spinning, I moved on from pinterest and decided to check some of my favorite food blogs and websites for ideas. Eventually I stumbled across an entire opinion thread on serving these fancy pants pumpkin desserts for Thanksgiving.

Someone had written to say that he was invited by some foodie friends to a Thanksgiving potluck and he was in charge of the pumpkin pie. He wanted to impress his friends and take pumpkin pie to the next level, and was asking for some help with ideas and inspiration.  (sound familiar?)
The answers he got back were a total surprise to me, but the more I think about it, the more sense it makes.

Everyone was basically saying either:
A) just make a damn pumpkin pie because that’s all people really want to eat anyway.
or
B) go ahead and make your fancy pants “elevated” pumpkin dessert, but you should make a damn pumpkin pie too and bring both, because that’s all people really want to eat anyway.
bourbon ginger pumpkin pie | Brooklyn Homemaker

So, I tossed all the recipes for pumpkin tarts and custards and trifles out the window, and started thinking about why I was so enamored with Grandma’s pumpkin pie in the first place. It was all about the buttery crust, the earthy sweet pumpkin, the warm spices, and the rich creamy custard. Why complicate things?

Of course I did want to do something just a little special with my pie this year, but was looking for a subtle twist on the classics rather than trying to reinvent the wheel. Just a touch of (totally optional) bourbon and some grated fresh ginger was all I needed to take things to the next level.

bourbon ginger pumpkin pie | Brooklyn Homemaker

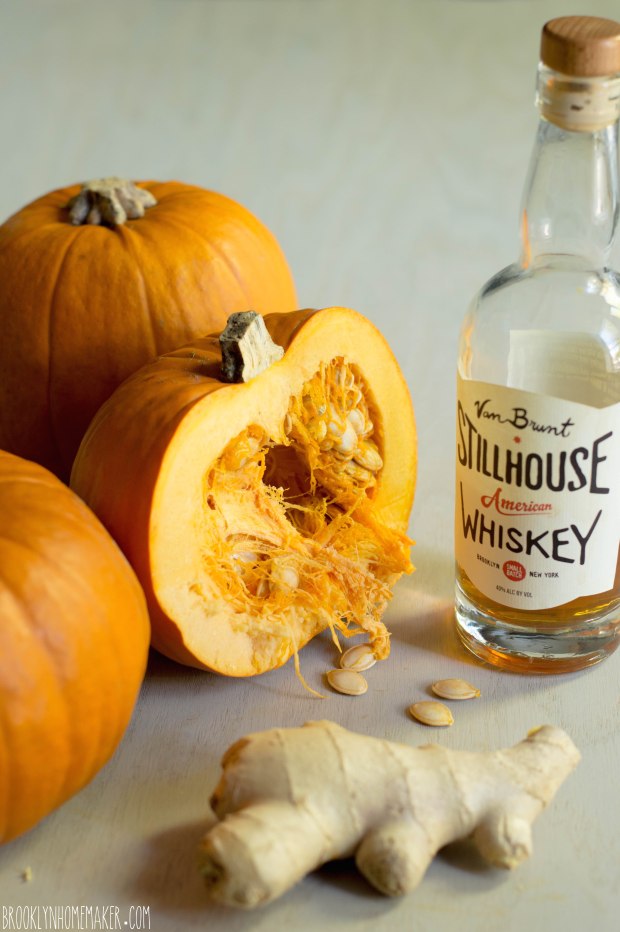
I also thought it would be fun to make some more work for myself by roasting my own sugar pumpkins instead of using canned. To save some time and a few dishes I tried mashing the pumpkin flesh rather than completely pureeing it in the food processor. You guys. Don’t do this. Just puree your pumpkin. (Or use canned)

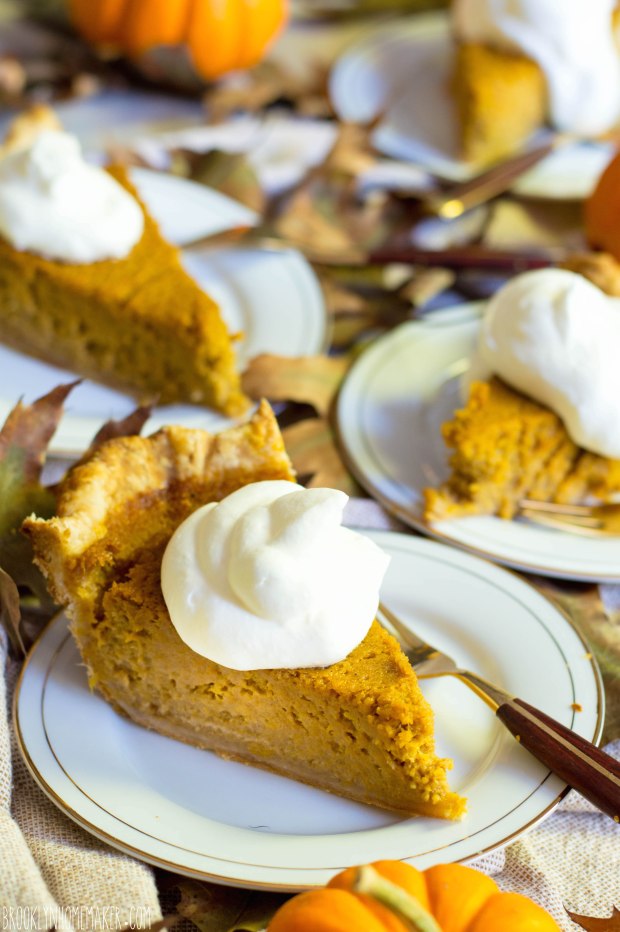
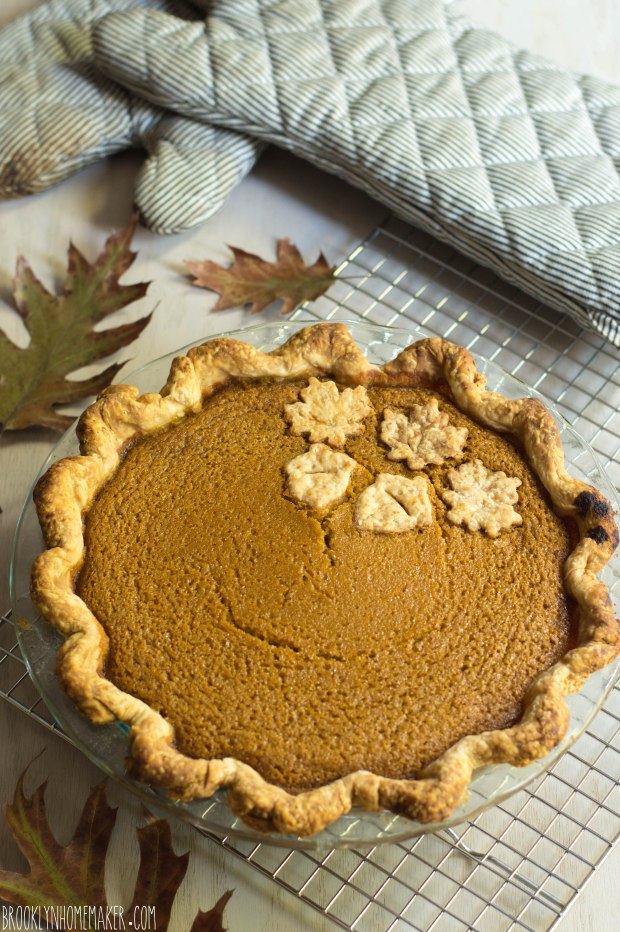
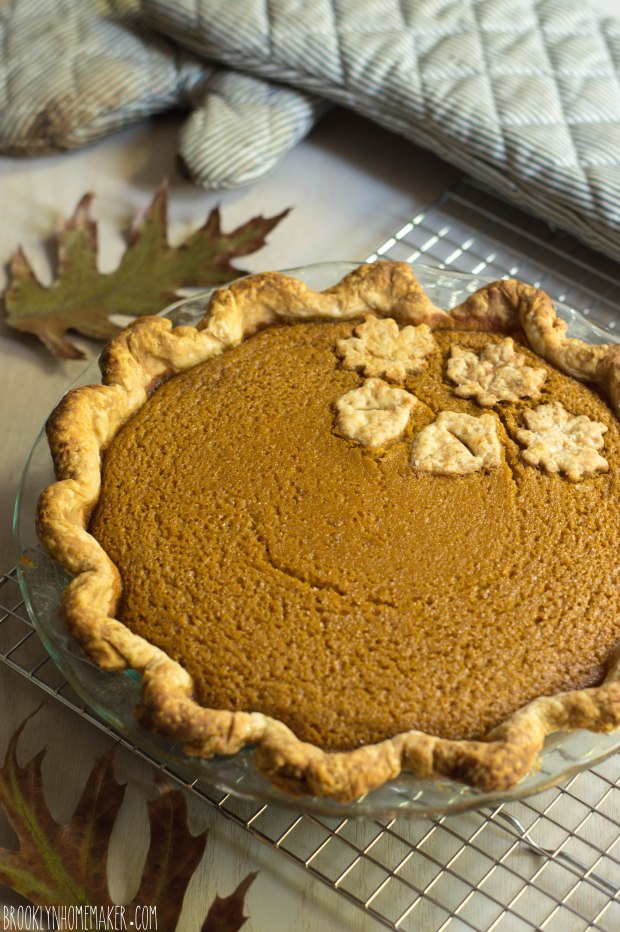
When I started mixing in the rest of the ingredients, I realized that my pumpkin was kind of lumpy and had some strands of fiber in it.  Not wanting to end up with a funky lumpy pie filling, I decided to toss the entire bowl into the food processor to smooth it out. What I didn’t realize was that doing this would also whip the cream in my filling and make it sort of frothy. While the texture of the filling wasn’t changed, it did make the top of the pie look sort of funky and pitted. Not a big deal really, just a little funny looking.

A few days later I read online that in a blind taste test, most people preferred the taste and texture of pies made with canned pumpkin puree over homemade. Ugh. Whatever.

bourbon ginger pumpkin pie | Brooklyn Homemaker

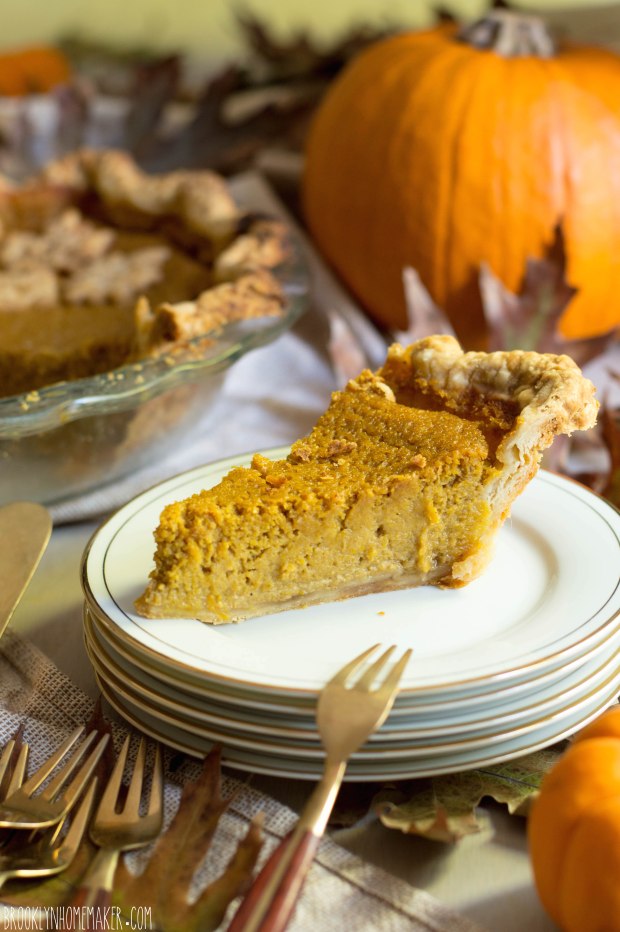
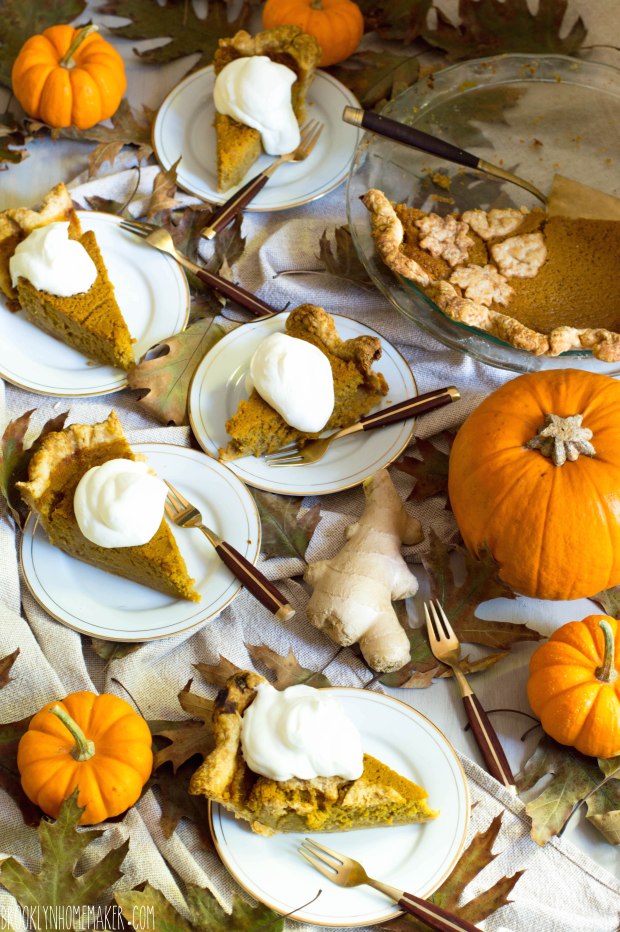
Whether you decide to roast your own pumpkins or reach for the can, this pumpkin pie is everything you could ever want in a Thanksgiving pie. Rich, thick, creamy, custardy, earthy, & warmly spiced. A little slice of heaven with a buttery flaky crust.

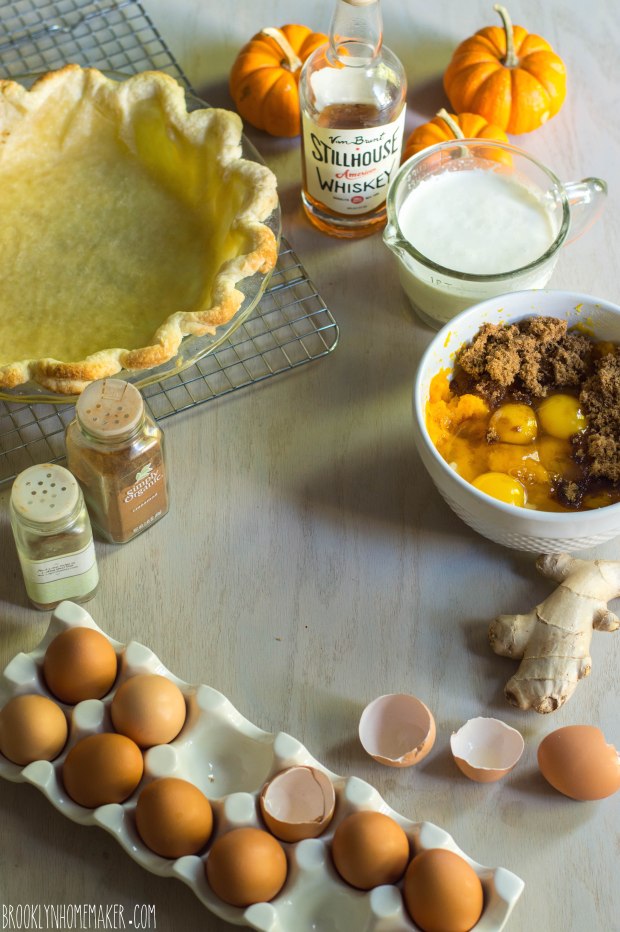
Because I don’t usually keep evaporated milk in the house, the filling is made completely from scratch, using only eggs and cream and milk instead of evaporated or condensed milk for the base of the custard. A splash of  bourbon adds a touch of warmth and depth without necessarily making it taste “boozey”, and using grated fresh ginger adds an edge of zingy heat that you wouldn’t otherwise get. When sliced and served a few of our friends noticed the hint of bourbon, others the touch of ginger, and others still didn’t notice anything until I told them. Neither of these flavors is overpowering, nor do they really change or alter the flavor profile of the classic pie everyone is craving on Thanksgiving day. If you’re looking for a classic pumpkin pie with a subtle something extra, this is the recipe for you.

bourbon ginger pumpkin pie | Brooklyn Homemaker

Bourbon Ginger Pumpkin Pie

Adapted from Sally’s Baking Addiction

1 single pie crust * see note
2 cups (or 15oz can) pumpkin puree
3 large eggs
1 and 1/4 cups packed dark brown sugar
1 tablespoon cornstarch
1/2 teaspoon salt
1 1/2 teaspoons ground cinnamon
2 teaspoons finely grated fresh ginger
1/4 teaspoon ground or freshly grated nutmeg
1 cup heavy cream
1/4 cup milk
3 tablespoons bourbon whiskey (or rum would work too)
1 tablespoon vanilla extract

Preheat oven to 425F.
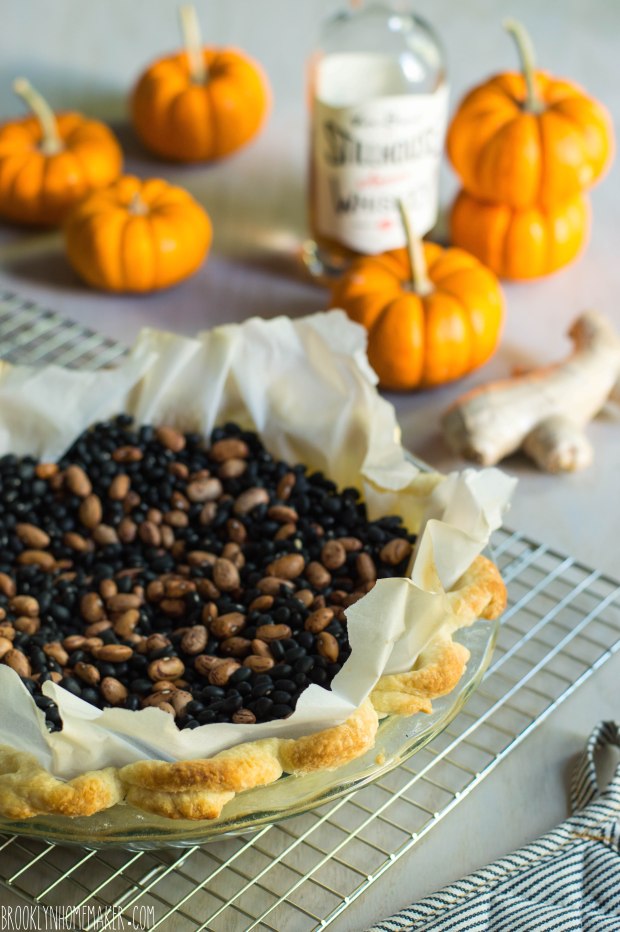
Roll out pie crust and gently transfer to a 9.5″ or deep dish pie dish (** see note). Trim and crimp the edges and freeze the crust for at least 15 or 20 minutes. Fit the crust with a large square of parchment paper and fill the dish with pie weights, dried beans, or even pennies. Bake the crust at 425 for about 15 minutes or until the crust is set and the edges are beginning to brown. This is called blind baking the pie shell. For more info, the Kitchn has a great tutorial.

If you have any leftover dough from trimming and want to get fancy, you can use a cookie cutter or pastry stamp to create fall leaves for decoration. This is totally unnecessary but kind of fancy and fun. Cut the leaves out and bake on a parchment lined sheet pan in the same oven as the pie crust for about 10 minutes. You want them cooked through and nicely browned, but not burned. They won’t really brown any further once you add them to the pie filling.

Let the leaves and the pie shell cool and turn the oven down to 375F.

For the filling:
Whisk or stir the pumpkin, eggs, and brown sugar together until combined. Add all remaining ingredients and whisk vigorously until everything is well combined.

Pour filling into the pre-baked shell. Bake until the center is almost set, about 55-60 minutes or so. It’s okay if a small part of the very center is still wobbly, it’ll continue to cook and set as it cools. After about 25 or 30 minutes of baking, Add the pre-baked fall leaves if desired.

Cool completely before serving. Cover leftovers tightly and store in the refrigerator for up to 3 days.

Notes:
*You can use any recipe you like, or even a store bought crust, but I think all butter crusts have the best flavor. I used my favorite crust recipe, but it makes two single crusts so you can freeze one, make another pie, or use the other for your maple walnut pie.

**If you don’t have a 9.5″ or deep dish pan, you’ll likely have a bit too much filling. Do not overfill or it may run and drip. Any extra can be baked separately in ramekins if necessary.
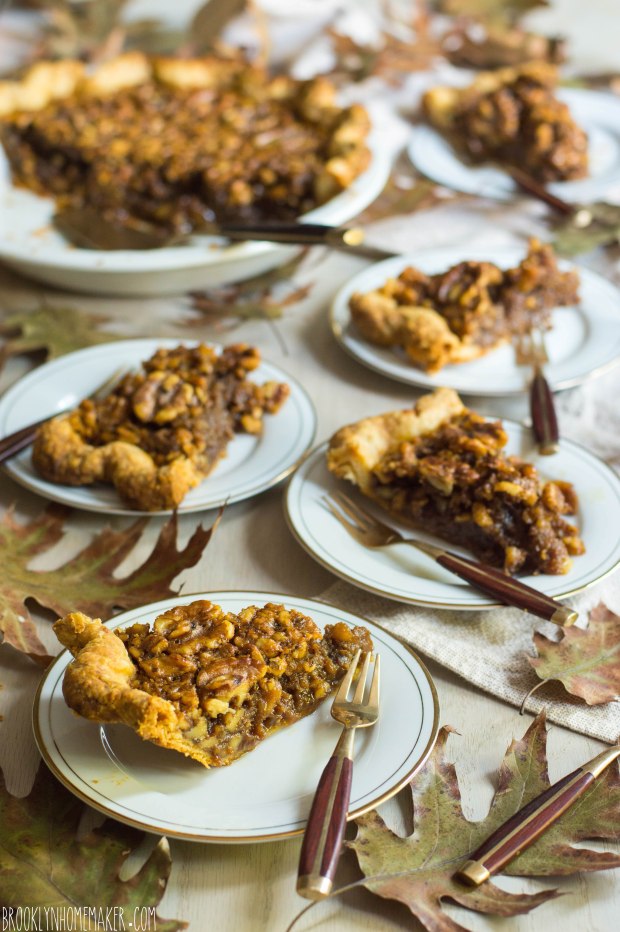
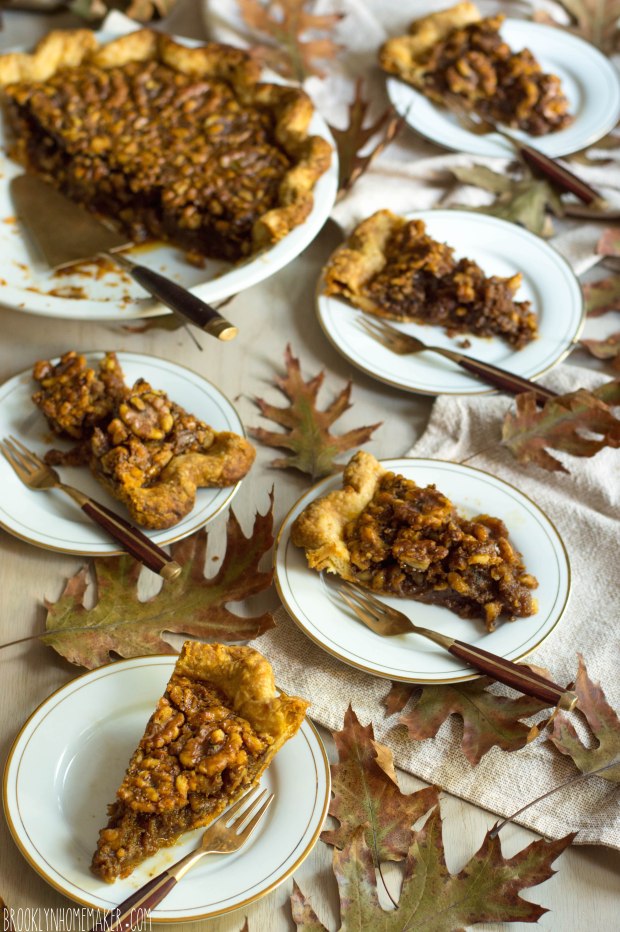
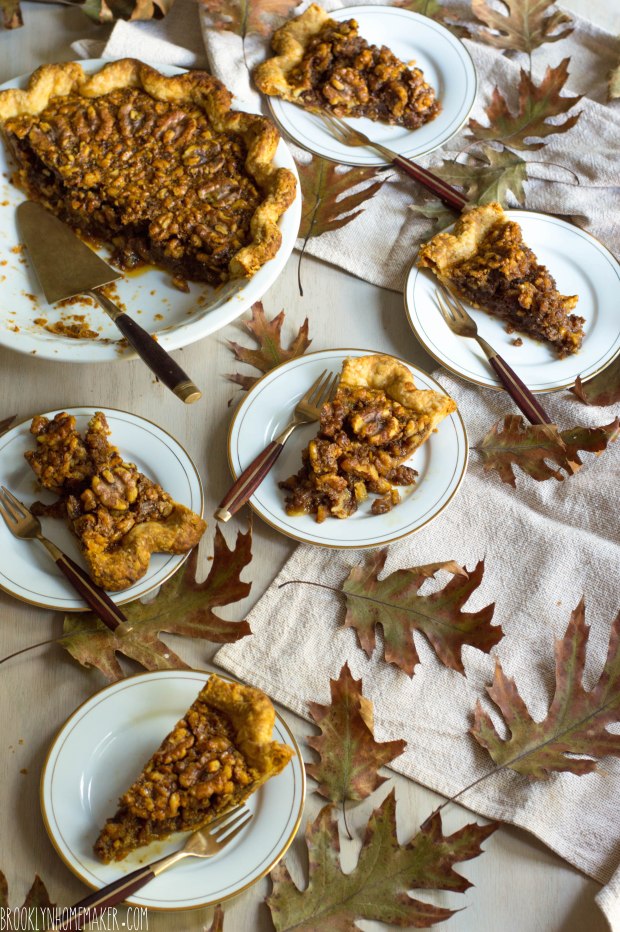
maple walnut pie

Growing his own food has always been very important to my grandfather and it shows.

maple walnut pie | Brooklyn Homemaker

His entire house in surrounded by food. Edible things are everywhere, and as a child, I took it completely for granted.

Now that I’m an adult I realize the value of having access to home grown produce, and pay a hefty premium at New York’s green markets to buy food that someone else grew for me. As a kid though, the stuff was literally growing up out of the ground and falling from the trees. Even today grandpa has more than he and my grandmother could even imagine eating, and give it away for free to anyone who stops by for a visit.

maple walnut pie | Brooklyn Homemaker

When I was young though, I didn’t even like most of what Grandpa grew. Other than strawberries and grapes, much of what came out of his garden was completely wasted on me. I wasn’t very fond of apples, I thought pears were grainy and disgusting, and I wouldn’t even eat tomato sauce on pasta, let alone eat a fresh tomato from the garden. I hated squash, asparagus, peppers, you name it. As fondly as I remember my childhood, I can’t help but look back on those days with a bit of remorse for the things I could have eaten but didn’t.

Now that I do like most of these foods, I live too far away to take much advantage of the bounty of Grandpa’s garden. I don’t get to take home any of the bags of asparagus and bright juicy berries in the spring, peaches and zucchini and summer squash in the summer, tidy rows of tomatoes ripening on the window sills later in the year, or mountains of butternut squash and branches weighed down by apples and pears in the fall.

maple walnut pie | Brooklyn Homemaker

The whole coulda, shoulda, woulda, but didn’t thing doesn’t end with the fruits and veggies either. Grandpa also has plenty of nut trees growing on his land too. Big spiky chestnuts litter the yard behind his garage, and he’s locked in a constant battle with squirrels over the English walnuts towering over the gravel driveway across from the house.


maple walnut pie | Brooklyn Homemaker

Walnuts though, took me even longer to learn to appreciate. I didn’t like nuts as a kid (suprised?) but even after I started eating tomatoes and squash and asparagus, I still hated walnuts. In most baking recipes that called for them, I usually left them out entirely or occasionally might substitute pecans in their place.

maple walnut pie | Brooklyn Homemaker

While pecans are sweet and subtle, walnuts are bitter and bold in a way that I only learned to love a year or two ago. I think it was my love of dark chocolate that finally taught my palate to appreciate the earthy bitterness of walnuts in baking.

maple walnut pie | Brooklyn Homemaker

Look at me now, only a few short years later, substituting walnuts for pecans instead of the other way around. I absolutely love pecan pie, especially at Thanksgiving, but I thought adding walnuts might be a fun twist. Pecan pie is sweet and crunchy and buttery and wonderful in every possible way, but I sometimes find it can be a little one note with all that corn syrup and sweet nuts.

maple walnut pie | Brooklyn Homemaker

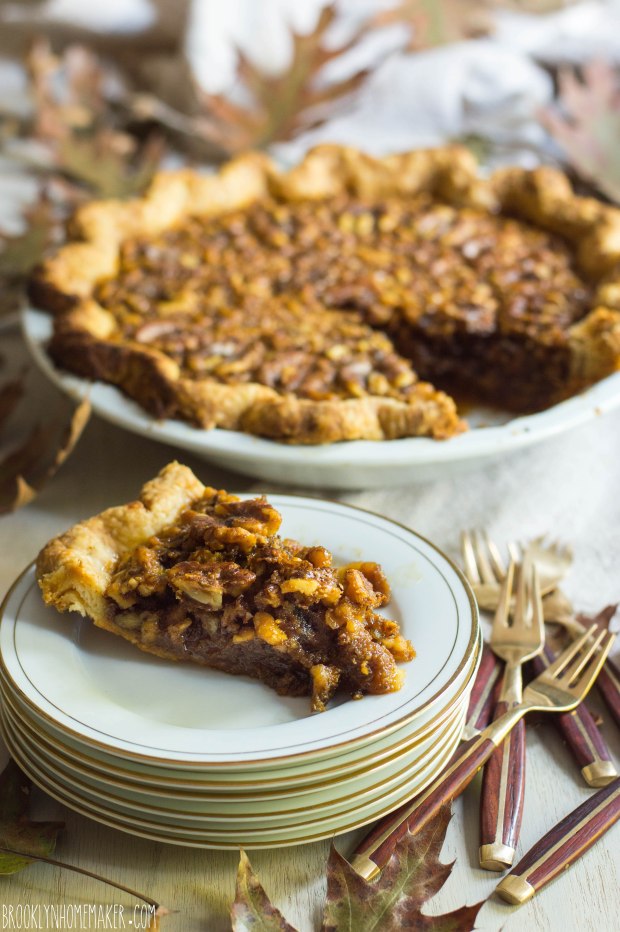
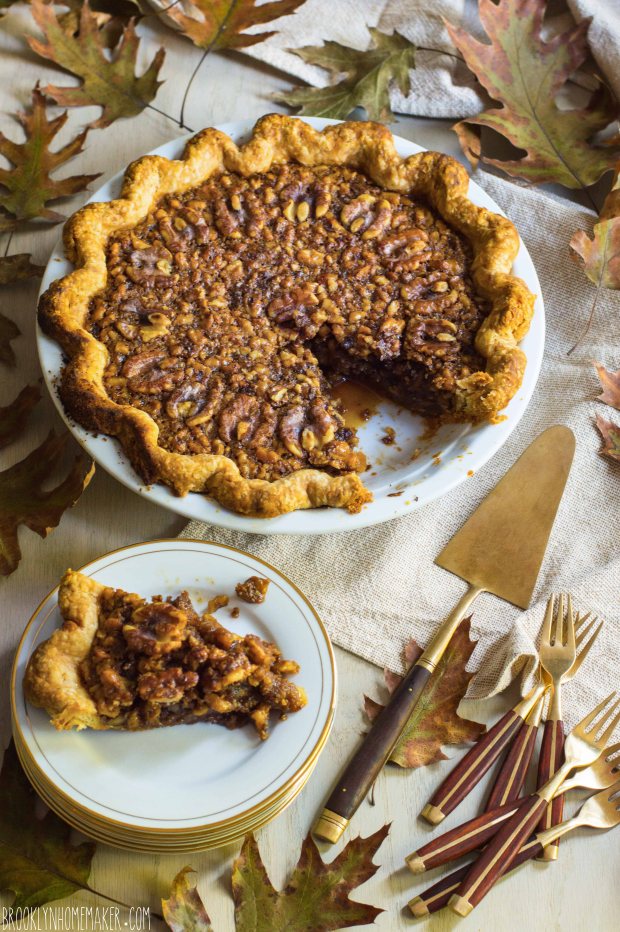
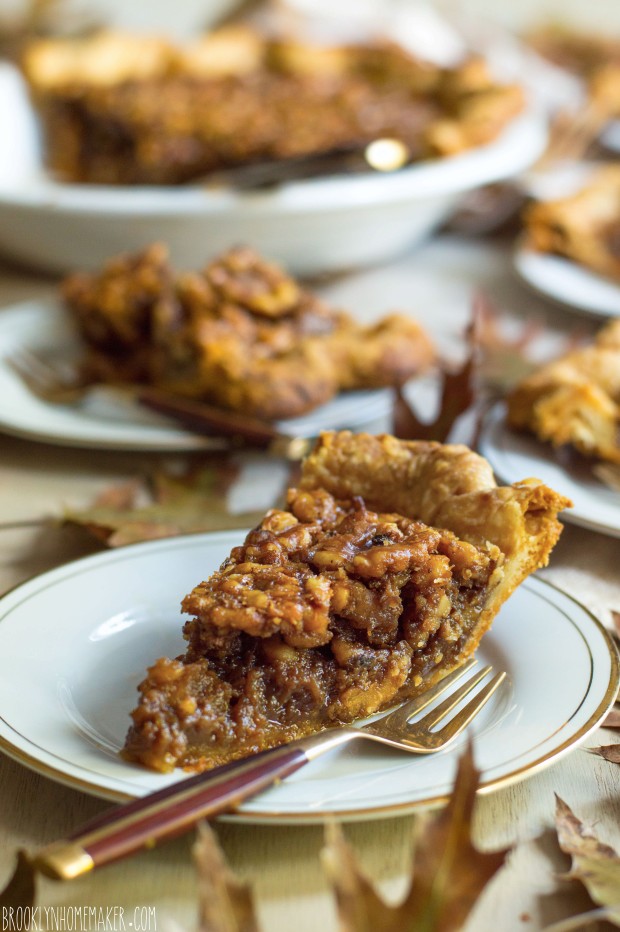
This maple walnut pie is basically a Yankee version of the traditional Thanksgiving pecan pie. Rather than just subbing walnuts for pecans, I also swapped the corn syrup for maple syrup and brown sugar. The pie retains every bit of it’s sweet buttery goodness, with crunchy nuts and a crispy flaky crust, but instead of one-note sweetness it has incredible depth. The earthy bitter walnuts are perfectly balanced by the rich sweetness of the caramel-y maple syrup and deep molasses-y brown sugar. Even people who might not love the bitter crunch of walnuts will likely love this pie. I’m reluctant to say that I’ve improved upon the pecan pie that many hold so dear, but this year when I had my fakesgiving dinner this was definitely the fastest pie to disappear.

Just sayin’.

maple walnut pie | Brooklyn Homemaker.

Maple Walnut Pie

1 single pie crust * see note
2 1/2 cups shelled walnuts
6 tablespoons unsalted butter
3/4 cup dark brown sugar (light will work fine too)
1 cup REAL maple syrup
1/2 teaspoon salt
3 large eggs
1 tablespoon vanilla extract
2 tablespoons bourbon
1/4 teaspoon grated nutmeg

Preheat oven to 425.
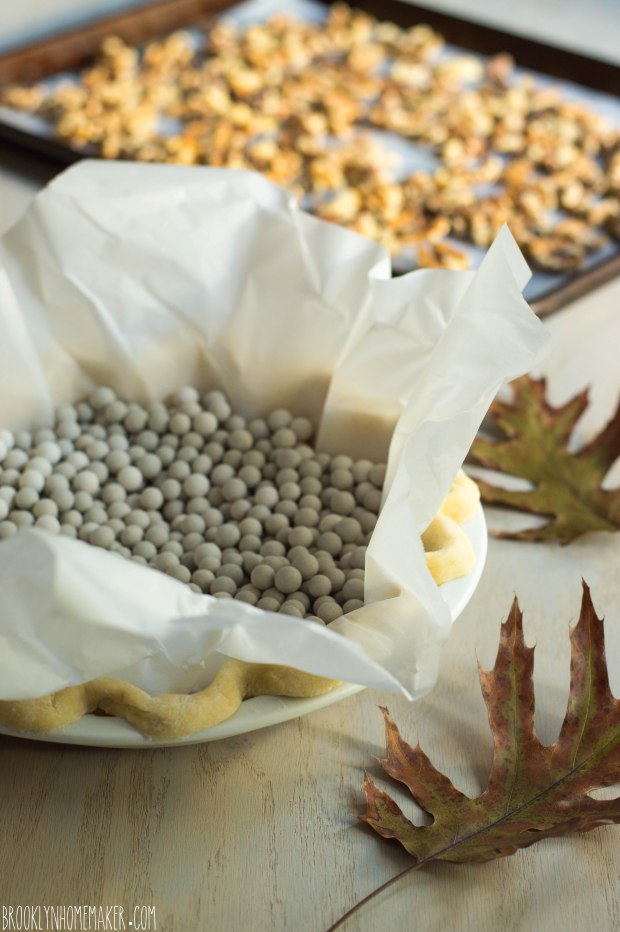
Roll out pie crust and gently transfer to a 9 to 9.5″ pie dish. Trim and crimp the edges and freeze the crust for at least 15 or 20 minutes. Fit the crust with a large square of parchment paper and fill the dish with pie weights, dried beans, or even pennies. Bake the crust at 425 for about 15 minutes or until the crust is set and the edges are beginning to brown. This is called blind baking the pie shell. For more info, the Kitchn has a great tutorial. Let cool.

Turn the oven down to 350.
Arrange walnuts in a single layer on an ungreased baking sheet. Toast the nuts until fragrant and oily looking, about 8 to 10 minutes. Be careful they don’t burn or they can become very bitter. Let cool and crush 2 cups of the nuts, keeping 1/2 cup whole if desired.

Turn the oven back up to 375.
Melt butter in a small saucepan over medium heat. Add brown sugar and stir until completely dissolved. Add maple syrup and salt, stir, and let cool for at least 10 minutes.
In a medium bowl lightly beat eggs and add vanilla, bourbon, and nutmeg. Mix in butter mixture and the 2 cups of crushed walnuts. Stir until well combined, and pour into baked pie shell. If desired, top with reserved whole walnuts in a circular pattern.
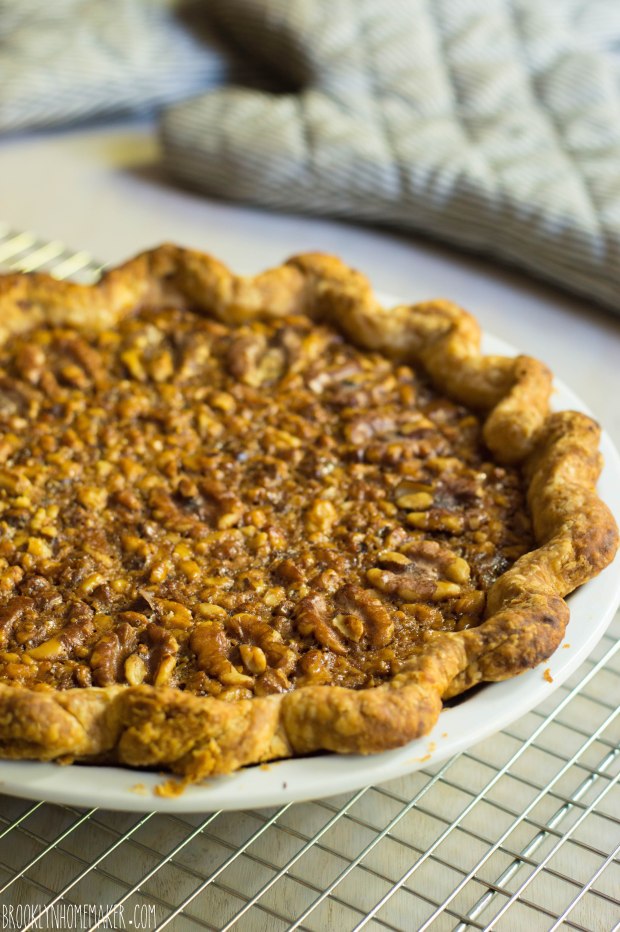
Bake for 45 minutes or until well set and puffed in the center. Cool on a wire rack. Cool completely before serving.

*note:
You can use any recipe you like, or even a store bought crust, but I think all butter crusts have the best flavor. I used my favorite crust recipe, but it makes two single crusts so you can freeze one, make another pie, or use the other for your pumpkin pie.

classic apple pie

A few times now, I’ve mentioned my good friends who have been planning their wedding.

classic apple pie & a rustic fall wedding | Brooklyn Homemaker

Well folks, they finally went and done got hitched.

Mazel Tovs all around!

classic apple pie | Brooklyn Homemaker

Back when Russell and I were married in June of 2013, our caterer’s mother baked us some pies for the dessert table at our wedding. Not only did having a variety of pies and treats alongside our cake look really festive and beautiful, but it felt like a really personal way to offer something extra for the sweets lovers at our reception.
I’ve also heard that there are some people in the world who don’t like cake, and as hard as I find that fact to believe, we thought this might be a nice way to make sure those people felt included. I mean, I don’t know why anyone who doesn’t like cake would have been at our wedding, but just in case we had pies and cookies for them to choose from too.

classic apple pie | Brooklyn Homemaker

That aspect of our wedding ended up being something that our friends really really enjoyed, so when it came to planning their own wedding, they were inspired to do the same and enlisted me to help them with it. In last month’s #bundtbakers post I mentioned that I’d be baking a few things for their big day, and that my apple-pear-carrot-parsnip-packed spiced harvest bundt cake won out in little a pre-wedding cake tasting. I also said that in addition to the bundts, I’d be baking a couple pies too.

classic apple pie | Brooklyn Homemaker

As you’ve probably guessed by now (the title of this post may have been a clue), the bride and groom-to-be decided on classic apple pies.  Their wedding was in the Catskill mountains on October 12th, so apple pies really could not have been more appropriate for the occasion. The fall has always been my favorite time of year, as much for the weather and scenery as for the food and sweets so, truth be told, I was thrilled to have an excuse to bake so many fall desserts in one fell swoop!

classic apple pie | Brooklyn Homemaker

I’d be lying if I said I didn’t know my way around an apple pie. Growing up, my grandfather had a dozen or so apple trees on his property and this time of year there were always plenty of fresh apple pies coming from grandma’s oven. As soon as I learned to make pie crust from scratch I set to mastering apple pie for myself.

classic apple pie | Brooklyn Homemaker

Over the years, I’ve baked approximately 42.6 million apples pies, so at this point I think I have my technique pretty well figured out.

I mean, I actually think that apple pie is kind of a personal thing, and different people like theirs made different ways. Myself, I tend to like a pie with a healthy amount of spice and a nice lemony boost. A lot of recipes recommend a bit of lemon juice, but I usually use a bit more and add the zest too because I think it adds a really interesting floral quality that I love. I also tend to use sweet soft apples that benefit from the extra bit of acidity.

classic apple pie | Brooklyn Homemaker

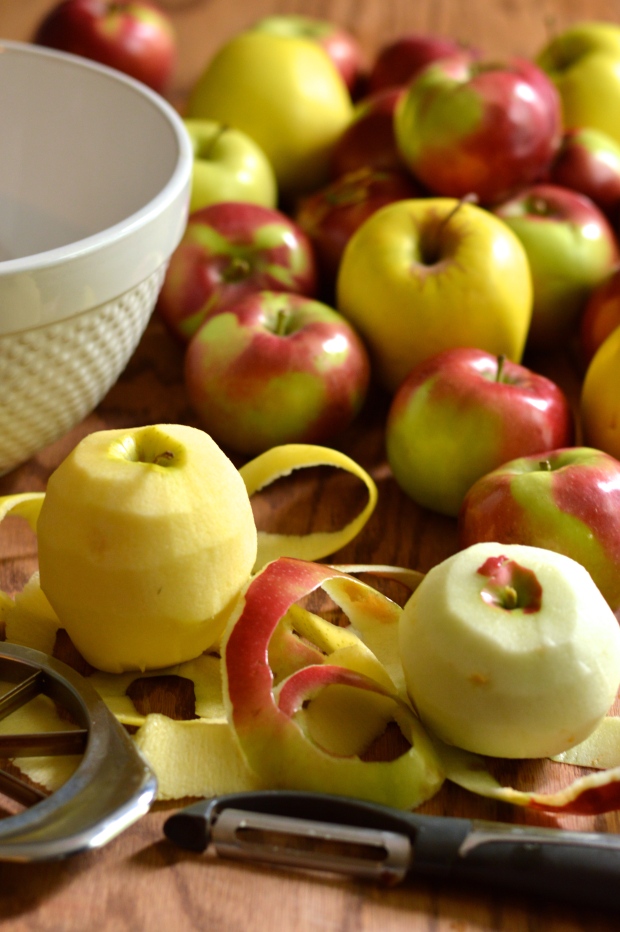
When it comes to the apples, there are a lot of options out there. A lot of people like to use Granny Smiths because of their balanced acidity and subtle sweetness, but personally I think their flavor is a bit flat, and their flesh a bit too firm for my liking. When I first started experimenting with different types of apples for pie, a few varieties quickly moved to the top of my list. If you like a firmer apple, Braeburns have a great flavor for pie. If you want an apple that softens a bit but still retains a good bite when baked, I think Golden Delicious are ideal. If you like something a bit softer when baked, McIntosh and Cortlands are some of my favorites, but they produce a bit more water so a bit more flour may be needed to keep the pie from getting soggy.

If you want to get really next level and pack your pie with as much complex apple-y flavor as possible, I recommend that you mix a few varieties together. For these pies I used a half and half mix of McIntosh and Golden Delicious, but you can play around and decide what you like best yourself.

classic apple pie & a rustic fall wedding | Brooklyn Homemaker

With the pies and bundts baked and ready to go, Russell and I piled into a car and made the short trip up to the Catskills for the wedding. The scenery was almost as stunning as the wedding itself. Our friends though, would not be outshone.

It was such an absolutely beautiful day. Every aspect of their wedding was perfect. Their vows were some of the most meaningful beautiful words I’ve ever heard, and there were gorgeous personal touches at every turn. I only wish I could have gotten more photos. Alas, I was too busy enjoying myself. Sorry guys!

I was able to sneak a few shots in though, and I’ve shared a few of my favorites below.

classic apple pie & a rustic fall wedding | Brooklyn Homemaker classic apple pie & a rustic fall wedding | Brooklyn Homemaker

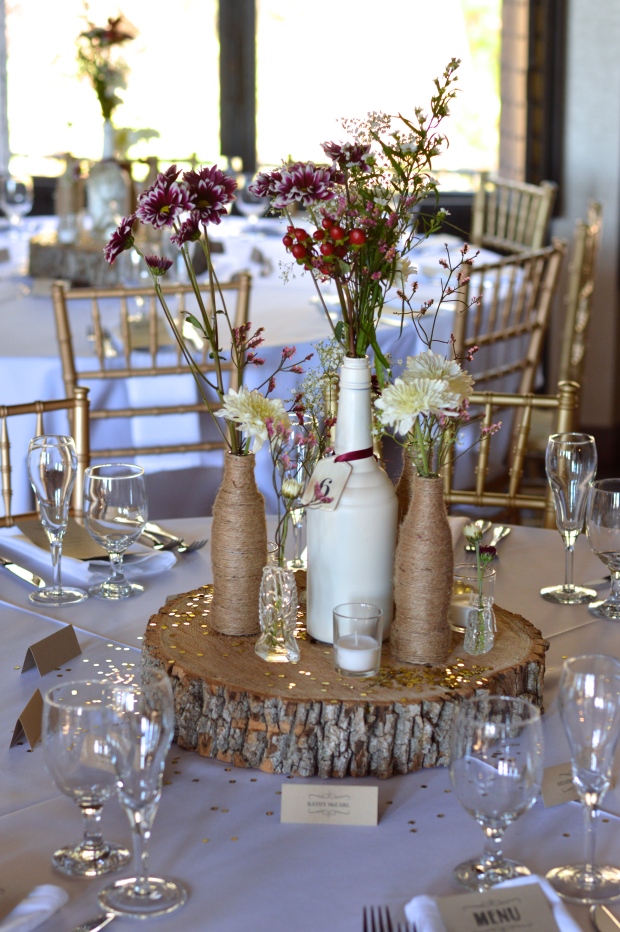
Check out the insanely beautiful centerpieces at the reception. I can’t even.

classic apple pie & a rustic fall wedding | Brooklyn Homemaker

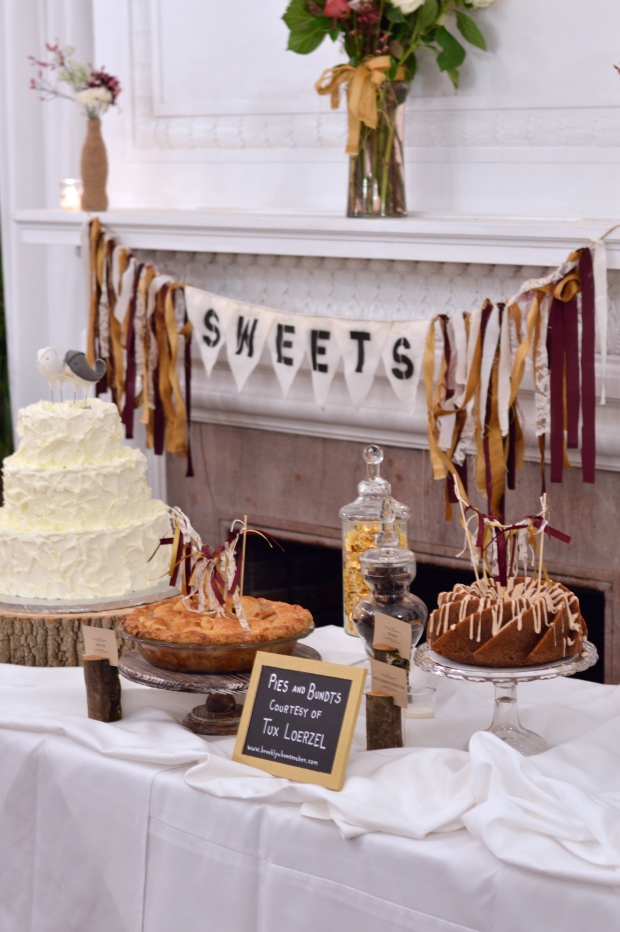
In the name of blogging, I made damn certain to get in a few shots of their dessert table so you could see it in all it’s glory. Just like the rest of their wedding, every detail was too adorable and perfect for words.

classic apple pie & a rustic fall wedding | Brooklyn Homemakerclassic apple pie & a rustic fall wedding | Brooklyn Homemaker

The bundts and pies were a huge hit. Having these homemade treats alongside their wedding cake was such an inspired way to make their dessert table feel more personal and thoughtful. Being surrounded by the stunning fall foliage of the Catskills, these desserts also brought that fall feeling into their reception in a really special way.

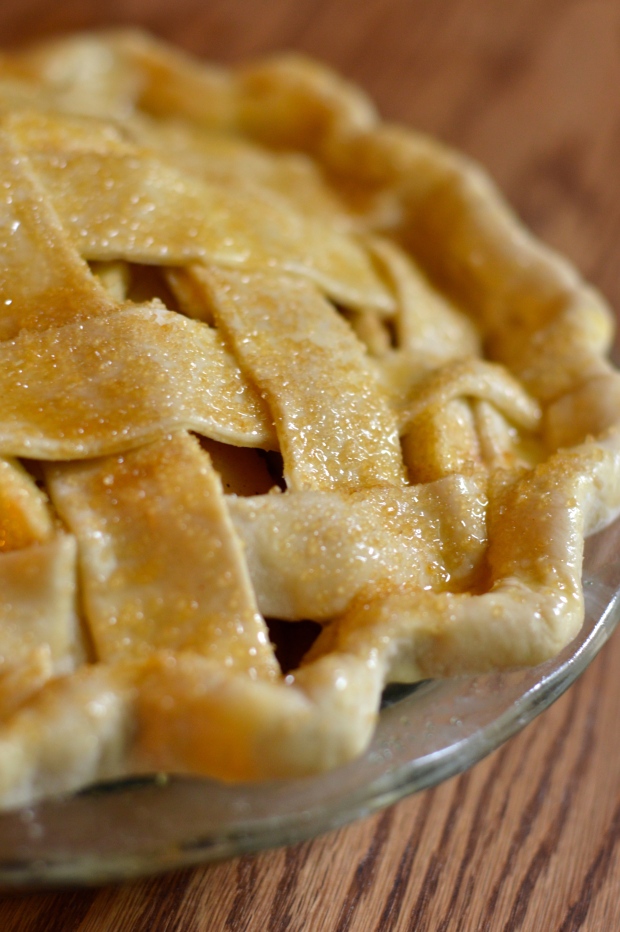
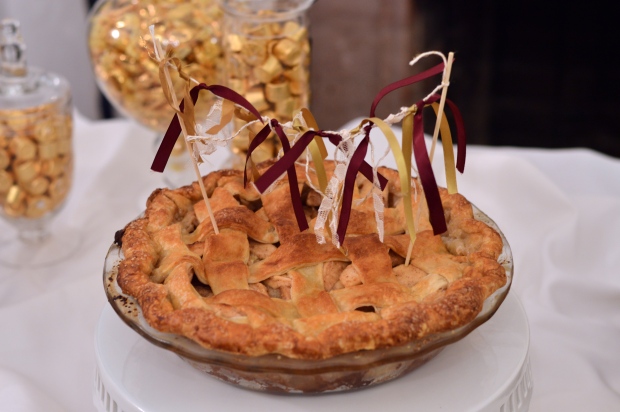
This apple pie is packed with sweet soft tender apples, a really healthy amount of spice, and a great citrusy floral twist from the lemon zest and juice. The all butter crust is the perfect compliment to the flavor of the baked apples; tender, crisp, flaky, and oh-so-buttery. To give the pie a bit of shine, an egg wash is brushed on before baking, and some coarse sugar sprinkled over the top adds a beautiful sparkle.

I’m going to go ahead and say that this is the perfect fall dessert. As well as being an incredible compliment to a wedding dessert table, this recipe would be an ideal addition your Thanksgiving spread. Just sayin’.

classic apple pie & a rustic fall wedding | Brooklyn Homemaker

Classic Apple Pie

All-butter pie crust

makes enough for 1 double-crust or 2 single-crust pies

3 cups all purpose flour
2 tablespoons sugar
1 teaspoon coarse kosher salt
1 cup (2 sticks) unsalted butter, cold
(up to) 1 cup ice cold water

Stir or whisk together flour, sugar, & salt in a medium bowl. If you have time, toss the bowl in the freezer for a 15 or 20 minutes. Cube the butter, add it to the chilled flour, and cut it in with a pastry blender, until it looks like coarse pea sized chunks. You can also do this by pulsing in a food processor. If you took very long to cut the butter in, you can toss the bowl back in the freezer for another 15 minutes, but if the butter is still firm and cold, don’t bother.

Start mixing in the water and stirring and tossing with a fork to distribute and combine. Try starting with about 1/2 cup, mix together, and add about a tablespoon or two at a time, until it starts to come together. The less water you use the better and flakier the crust will be, but you don’t want to use so little that it won’t hold together. If you can press it together with your hands and it mostly stays in a ball, with a few little bits crumbling out, you’re good to go.

Divide the dough into to balls, and wrap each tightly in plastic wrap. Try to handle it as little as possible so as not to warm or melt the butter. Press or pat the covered balls of dough into thick disks and refrigerate for at least an hour or two (or up to a few days)

Classic apple pie

3 1/2 to 4 lbs apples (I used about 1/2 golden delicious and 1/2 macintosh, but cortlands & braeburns are great too)
zest and juice of half a lemon
1 cup of sugar
3 to 4 tablespoons flour (4 for juicy soft apples like mcintosh or cortland, 3 for other varieties)
3/4 teaspoon ground cinnamon
1/4 teaspoon ground nutmeg
1/4 teaspoon ground cloves (optional)
1/4 teaspoon ground cardamom (optional)
2 tablespoons butter, cut into several pieces
1 egg, beaten
2 to 3 tablespoons coarse sugar

Preheat your oven to 375.

On a well floured surface, roll out the first disk crust and line a 9.5 or 10 inch pie dish. Place the dish in the refrigerator while you prepare your apples.

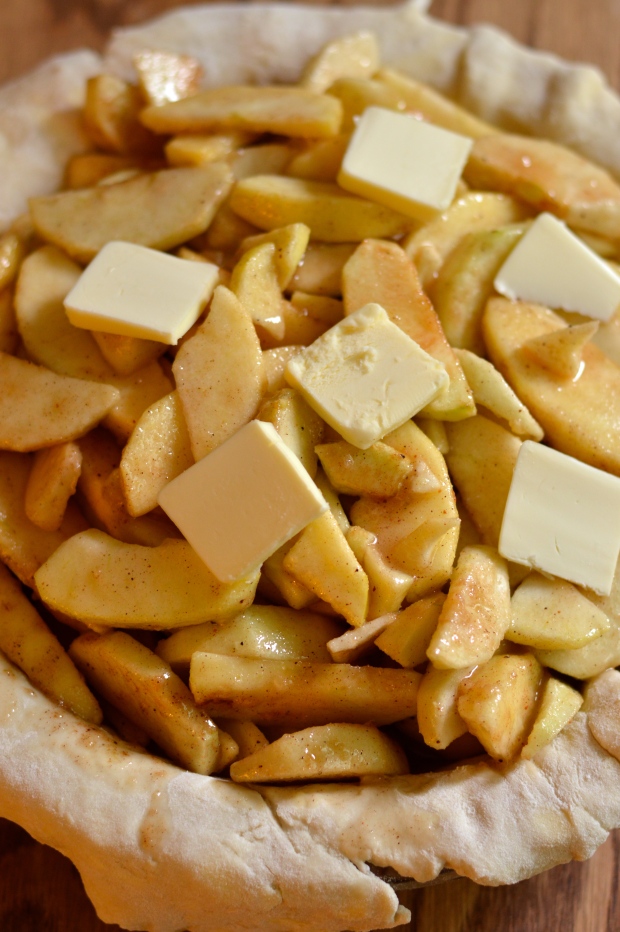
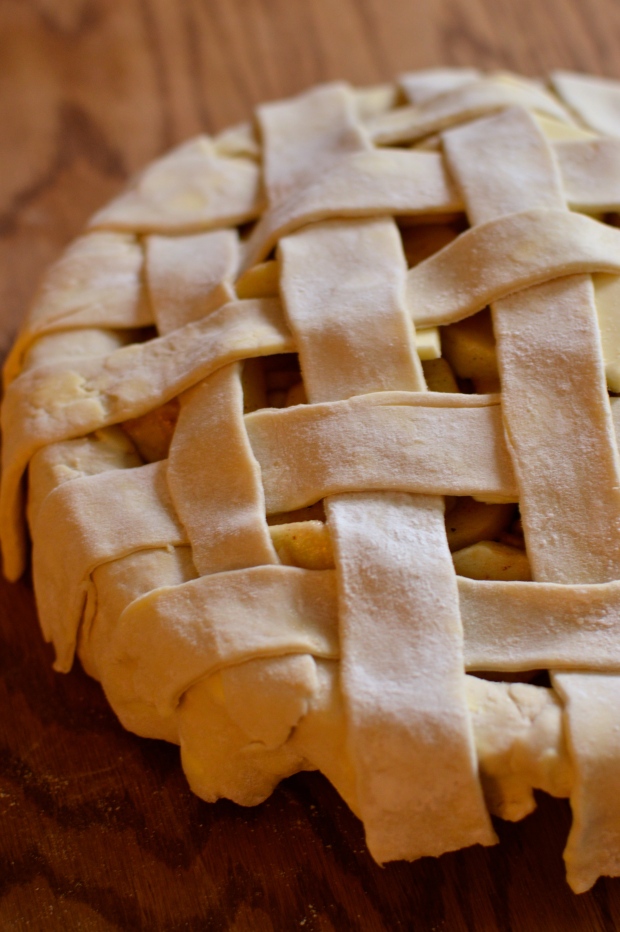
Peel, core, and thinly slice your apples and place in a large bowl with lemon juice and zest, sugar, flour, and spices. Gently toss to combine. Transfer the apples into the pastry lined pie dish, and dot the apples with the butter. Roll out the other disk of crust and either top the filled pie with it and cut slits to vent the pie, or cut the crust into strips to make a lattice crust. If you’re interested, follow this link for a lattice crust tutorial. Either way, once the pie is topped, trim the edges to about 1/2 inch overhang, roll it under itself, and crimp the edges to seal the top and bottom crusts together.

Brush the top crust with the beaten egg, and sprinkle with the coarse sugar. You’ll want to arrange the oven racks so one is in the middle, and one is just beneath it. Put a foil lined tray on the lower rack to catch any potential drips and spills. It will likely boil over a little. Place the pie on the middle rack and bake for 60 to 65 minutes, or until well browned and nice and bubbly and smelling like heaven.

I’d recommend, especially with McIntosh or Cortland apples, that you let the pie rest for at least a few hours before slicing or it may be watery. I usually make mine a day ahead and reheat them just slightly in the oven if I want to serve them warm.

toasted coconut cream pie

Suddenly, one morning last week, I woke up with a hankering for coconut cream pie.

toasted coconut cream pie | Brooklyn Homemaker

Don’t ask me why. Just don’t, okay. I honestly couldn’t tell you.

I mean, I’ve always considered pie one of my favorite food groups, but double-crusted fruit pies have always been much more my style than cream pies.

toasted coconut cream pie | Brooklyn Homemaker

Perhaps one reason I prefer fruit pies is that the crust and the filling cook all at once, rather than baking the crust separately from what’s going into it. I’ve never been a fan of blind baking pie shells, and have had more than my fair share of sadness and anger and tantrums over blind baking disasters. You name it, it’s happened to me. I’ve had aluminum foil stick to the crust and tear it in half when removed, I’ve had crusts bake with a giant humped bubble in the center because there weren’t enough weights to keep it flat, and I’ve even had the crust shrink and slip down the edges of the pan leaving me little more than a half inch mound to contain my filling.

My love for sweet potato and pumpkin pies at Thanksgiving was my incentive to try try again, and I’ve finally gotten the technique down. Sort of. If you’re new to blind baking, check out this great tutorial from thekitchn for more detail. In my experience, the key points to keep in mind are as follows:
A) Use parchment paper, not foil, and you won’t have to worry about it sticking to the crust.
2) Chill (or better yet, freeze) your crust for a bit before baking and it won’t shrink as much.
3) Fill the parchment-lined pie crust with plenty of weights or beans, you don’t want to skimp.

toasted coconut cream pie | Brooklyn Homemaker

When I woke up with my coconut cream craving I knew I could handle the blind baking. What I wasn’t expecting was how much more time goes in to a cream pie than a fruit pie. I mean, the recipe is not at all difficult, but I won’t lie to you; This pie is kind of involved. You’re making a crust, and a filling, and a topping; all of which need to be prepared separately, combined, and chilled before eating.

But then there’s the eating. The sweet, creamy, coconutty wonderful eating.

toasted coconut cream pie | Brooklyn Homemaker

All this pie making, and pie eating, got me thinking about where the idea of coconut cream pie came from. Who on earth got the idea of putting coconut into a pudding, then putting that pudding into a pie shell, then topping that pudding filled pie shell with whipped cream?

toasted coconut cream pie | Brooklyn Homemaker

As it turns out, the coconut cream pie has been around for over a century.

Back in the late 1800s Europeans and Americans were really in to their imported tropical fruit like pineapples and bananas, but the coconut hadn’t yet taken off. This was mostly because they were hard to transport without spoiling, and because people didn’t really know what to do with them once they had them in their kitchens. Everyting started to change when a French company based in Ceylon (now Sri Lanka) started shredding coconut meat and drying it for easier shipping, thereby making coconut accessible to European chefs and home cooks.

toasted coconut cream pie | Brooklyn Homemaker

Shortly after gaining popularity in Europe, coconut took the United States by storm when a Philadelphia flour miller received a shipment of coconuts as payment of a debt from a Cuban businessman. In 1895 he set up a factory for shredding and drying his coconut meat and singlehandedly put coconut into the hands of American homemakers and commercial bakers and candy makers.

Recipes for coconut cream pie start showing up in cookbooks almost immediately, and by the early 1900’s coconut custard and coconut cream pie was everywhere.

toasted coconut cream pie | Brooklyn Homemaker

And it’s no wonder. This pie is really something. As much as I still think baked fruit pies are more my thing, this pie is worth all the time and separate steps. The crust is flaky and tender and crisp, and since it’s made with butter instead of shortening, it’s got a great flavor as well as texture. The coconut pudding filling is rich and custardy and creamy and thick, studded with plenty of super flavorful toasted coconut. The whipped cream is just barely sweetened, and laced with just a hint of rum to take that tropical coconut to another place. The whipped cream is also stabilized with a tiny bit of gelatin, just to make sure it doesn’t turn into a runny puddle if you don’t serve every last slice right away.

If you’re a fan of cream pies, or a fan of coconut, this recipe is one to dog-ear.

toasted coconut cream pie | Brooklyn Homemaker

Toasted Coconut Cream Pie

adapted from Brown Eyed Baker

Pie crust:
1 1/2 cups flour
1/2 teaspoon salt
2 teaspoons sugar
1 stick (8 tablespoons) unsalted butter
1/2 cup ice cold water

Coconut Cream Filling:
1 ½ cup unsweetened shredded coconut
1 (14-ounce) can coconut milk, well stirred (not cream of coconut)
1 cup whole milk
2/3 cup granulated sugar
¼ teaspoon salt
5 egg yolks
¼ cup cornstarch
1½ teaspoons vanilla extract
2 tablespoons unsalted butter, cut into pieces

Stabilized Whipped Cream:
1 1/2 teaspoons unflavored gelatin
6 tablespoons ice cold water
1½ cups heavy cream, chilled
1/3 cup confectioners (powdered) sugar
1 tablespoon dark rum (optional)
1 teaspoon vanilla extract (if not using rum, add another teaspoon)

Make the pie crust:
Stir or whisk together flour, sugar, & salt in a medium bowl. If you have time, toss the bowl in the freezer for a 15 or 20 minutes. Cube the butter, add it to the chilled flour, and cut it in with a pastry blender, until it looks like coarse pea sized chunks. You can also do this by pulsing in a food processor. If you took very long to cut the butter in, you can toss the bowl back in the freezer for another 15 minutes, but if the butter is still firm and cold, don’t bother.

Start mixing in the water and stirring and tossing with a fork to distribute and combine. Try starting with about 1/4 cup, mix together, and add about a tablespoon or two at a time, until it starts to come together. The less water you use the better and flakier the crust will be, but you don’t want to use so little that it won’t hold together. If you can press it together with your hands and it mostly stays in a ball, with a few little bits crumbling out, you’re good to go.

Form the dough into to a ball and wrap it tightly in plastic wrap. Try to handle it as little as possible so as not to warm or melt the butter. Press or pat the covered ball of dough into a thick disk and refrigerate for at least two hours (or up to a few days)

Preheat oven to 425 degrees.

On a well floured surface with a floured rolling pie, roll the dough out in a disk that’s about 2 inches wider than your pie plate. Transfer to the plate, center the crust (do not stretch it out or it’ll shrink when baked) and trim the edge so there’s about half an inch to an inch of overhang. Fold the overhang under itself right at the edge of the pie plate, and crimp the crust with a decorative edge.

To blind bake the pie crust, cut a large square of parchment paper and line the crust with it. Fill the paper with pie weights, dried beans, or pennies to weight down the crust or it’ll bubble up when baked. Bake for about 15 minutes, or until the edges of the crust are beginning to turn golden brown. Remove the pie plate from the oven, and lift the weight filled parchment out of the pie crust. Return it to the oven for another 5 minutes or so, or until the center of the crust looks dry and cooked through. Set the crust aside to cool.
For more information on blind baking a pie crust, check out this detailed tutorial from TheKitchn.

Make the filling:
Turn the oven down to 325. Spread the coconut in an even layer on a parchment lined baking sheet, and toast until golden brown, about 9 minutes, stirring every couple of minutes. When cool enough to handle, reserve 1/2 cup for garnishing the finished pie.

Bring the coconut milk, whole milk, 1 cup loosely packed toasted coconut, 1/3 cup of the sugar, and the salt to a simmer in a medium saucepan over medium-high heat, stirring occasionally with a wooden spoon to dissolve the sugar. When the mixture reaches a simmer, whisk the egg yolks in a medium bowl to break them up, then whisk in the remaining 1/3 cup sugar and cornstarch until well combined and no lumps remain. Gradually whisk the simmering liquid into the yolk mixture to temper it, then return the mixture to the saucepan, scraping the bowl with a rubber spatula. Bring the mixture to a simmer over medium heat, whisking constantly, and let thicken at a low simmer for about 3 to 5 minutes.

Off the heat, whisk in the vanilla and butter. Pour the filling into the cooled crust, press a sheet of plastic wrap directly on the surface of the filling and refrigerate until the filling is cold and firm, at least 2 to 3 hours.

Make the stabilized whipped cream:
In a small pan, combine gelatin and cold water and let stand until thick.
Place over low heat, stirring constantly, just until the gelatin dissolves. Remove from heat and let cool for just a few minutes. (do not allow it to set).
Whip the cream with the confectioner’s sugar, until slightly thick. While slowly beating, add the gelatin to whipping cream.
Whip at high speed until stiff. Add the rum and vanilla, and whip for 1 minute more.

Spread or pipe the whipped cream over the chilled filling. Sprinkle the reserved 1/2 cup toasted coconut over the whipped cream and return the pie to the refrigerator for at least 1 hour more for the whipped cream to set. Cover with plastic wrap after the first hour, if not serving at that moment. Leftovers should be wrapped in plastic too, and stored in the refrigerator.