Main Dishes

creole red jambalaya with chicken, shrimp, & andouille

Last Saturday when I got home from work I started making dinner.

creole red jambalaya with chicken, shrimp, & andouille | Brooklyn Homemaker

I cut up some broccoli, crisped up some bacon, made a béchamel, boiled some noodles, and grated a heaping pile of aged Irish cheddar. After mixing all the ingredients for my homemade macaroni & cheese together I turned the oven on to preheat while I melted a little butter for my bread crumb topping.

With the weighty casserole ready to go into the oven to bubble and crisp, I reached down to open the oven door. That’s when I noticed it wasn’t hot.
Panic.

creole red jambalaya with chicken, shrimp, & andouille | Brooklyn Homemaker

Though you wouldn’t know if from the number of baked goods I turn out of my kitchen, I have been having trouble with my oven for over a year. I won’t get into all the specifics, but it basically starts to preheat but will turn off before coming to temperature. After months of dealing with it I finally figured out that if I switched on the range it would trick the oven to turning back on and I’d be in business.
That is, until the night that I had a big dish of macaroni and cheese waiting to bake. No amount of trickery or tinkering could induce my ancient apartment oven to turn on.

A broken oven. My worst nightmare.
I wanted to cry.

creole red jambalaya with chicken, shrimp, & andouille | Brooklyn Homemaker

I wrapped the macaroni and cheese up and put it into the refrigerator, crossing my fingers that it would miraculously work again the next day. Nope.

Of course my landlord is dragging feet his feet about getting it fixed too. Doesn’t he know who I am?

creole red jambalaya with chicken, shrimp, & andouille | Brooklyn Homemaker

A few days later we finally got a repair man in to take a look. After less than five minutes of tinkering he blithely says, “Oh it’s just a blown fuse.”
I had just enough time to breath a sigh of relief before he continued, “Of course I don’t have one with me, and it’s out of stock. We’ll have to order it. We’ll call you in a few days.”
Way to toy with my fragile emotions Mr. Evil Repair Man. After he left I microwaved a bowl of never-baked macaroni and cheese and cried into it.

Another day passed before I heard back from them, and just my luck, this tiny stupid fuse is backordered from the manufacturer and they don’t know when it’ll be back in stock. What are the chances?
When it’s my oven we’re talking about? 100%.

creole red jambalaya with chicken, shrimp, & andouille | Brooklyn Homemaker

I could use this as an opportunity to make no-bake recipes and experiment with any number of savory stove top recipes. But, of course in the absence of my oven, all I want to do is bake. I even want to bake things I would normally do on the stove top! I’m suddenly overwhelmed by cravings for baked eggs, roasted chicken, twice baked potatoes, roasted cauliflower. My urge to bake cookies, usually strong enough already, is suddenly all consuming. I’m overcome with worry that I won’t be able to participate in this month’s #bundtbakers, which is fast approaching.

Wallowing rather than overcoming, I can’t think of a single thing that I could share here that wouldn’t require a functional oven. Forget the fact that at least half or more of the recipes I’ve posted up until now haven’t.

creole red jambalaya with chicken, shrimp, & andouille | Brooklyn Homemaker

Then, one morning I wake up and suddenly I NEED to make jambalaya. I consult my favorite recipe to make a few tweaks. I consult other recipes to see what else could be improved on. Oddly enough, I discover a few recipes that call for the jambalaya to be assembled on the stovetop and finished in the oven! WHAT?!?! WHY!?!!?! Okay, forget that. Back to the original stovetop recipe I was looking at.

creole red jambalaya with chicken, shrimp, & andouille | Brooklyn Homemaker

My recipe hunt turned up so many different variations on jambalaya that I decided to turn to Wikipedia for some clarification. As it turns out, there are actually three distinct varieties of jambalaya, depending on the regions they come from and the ingredients used.

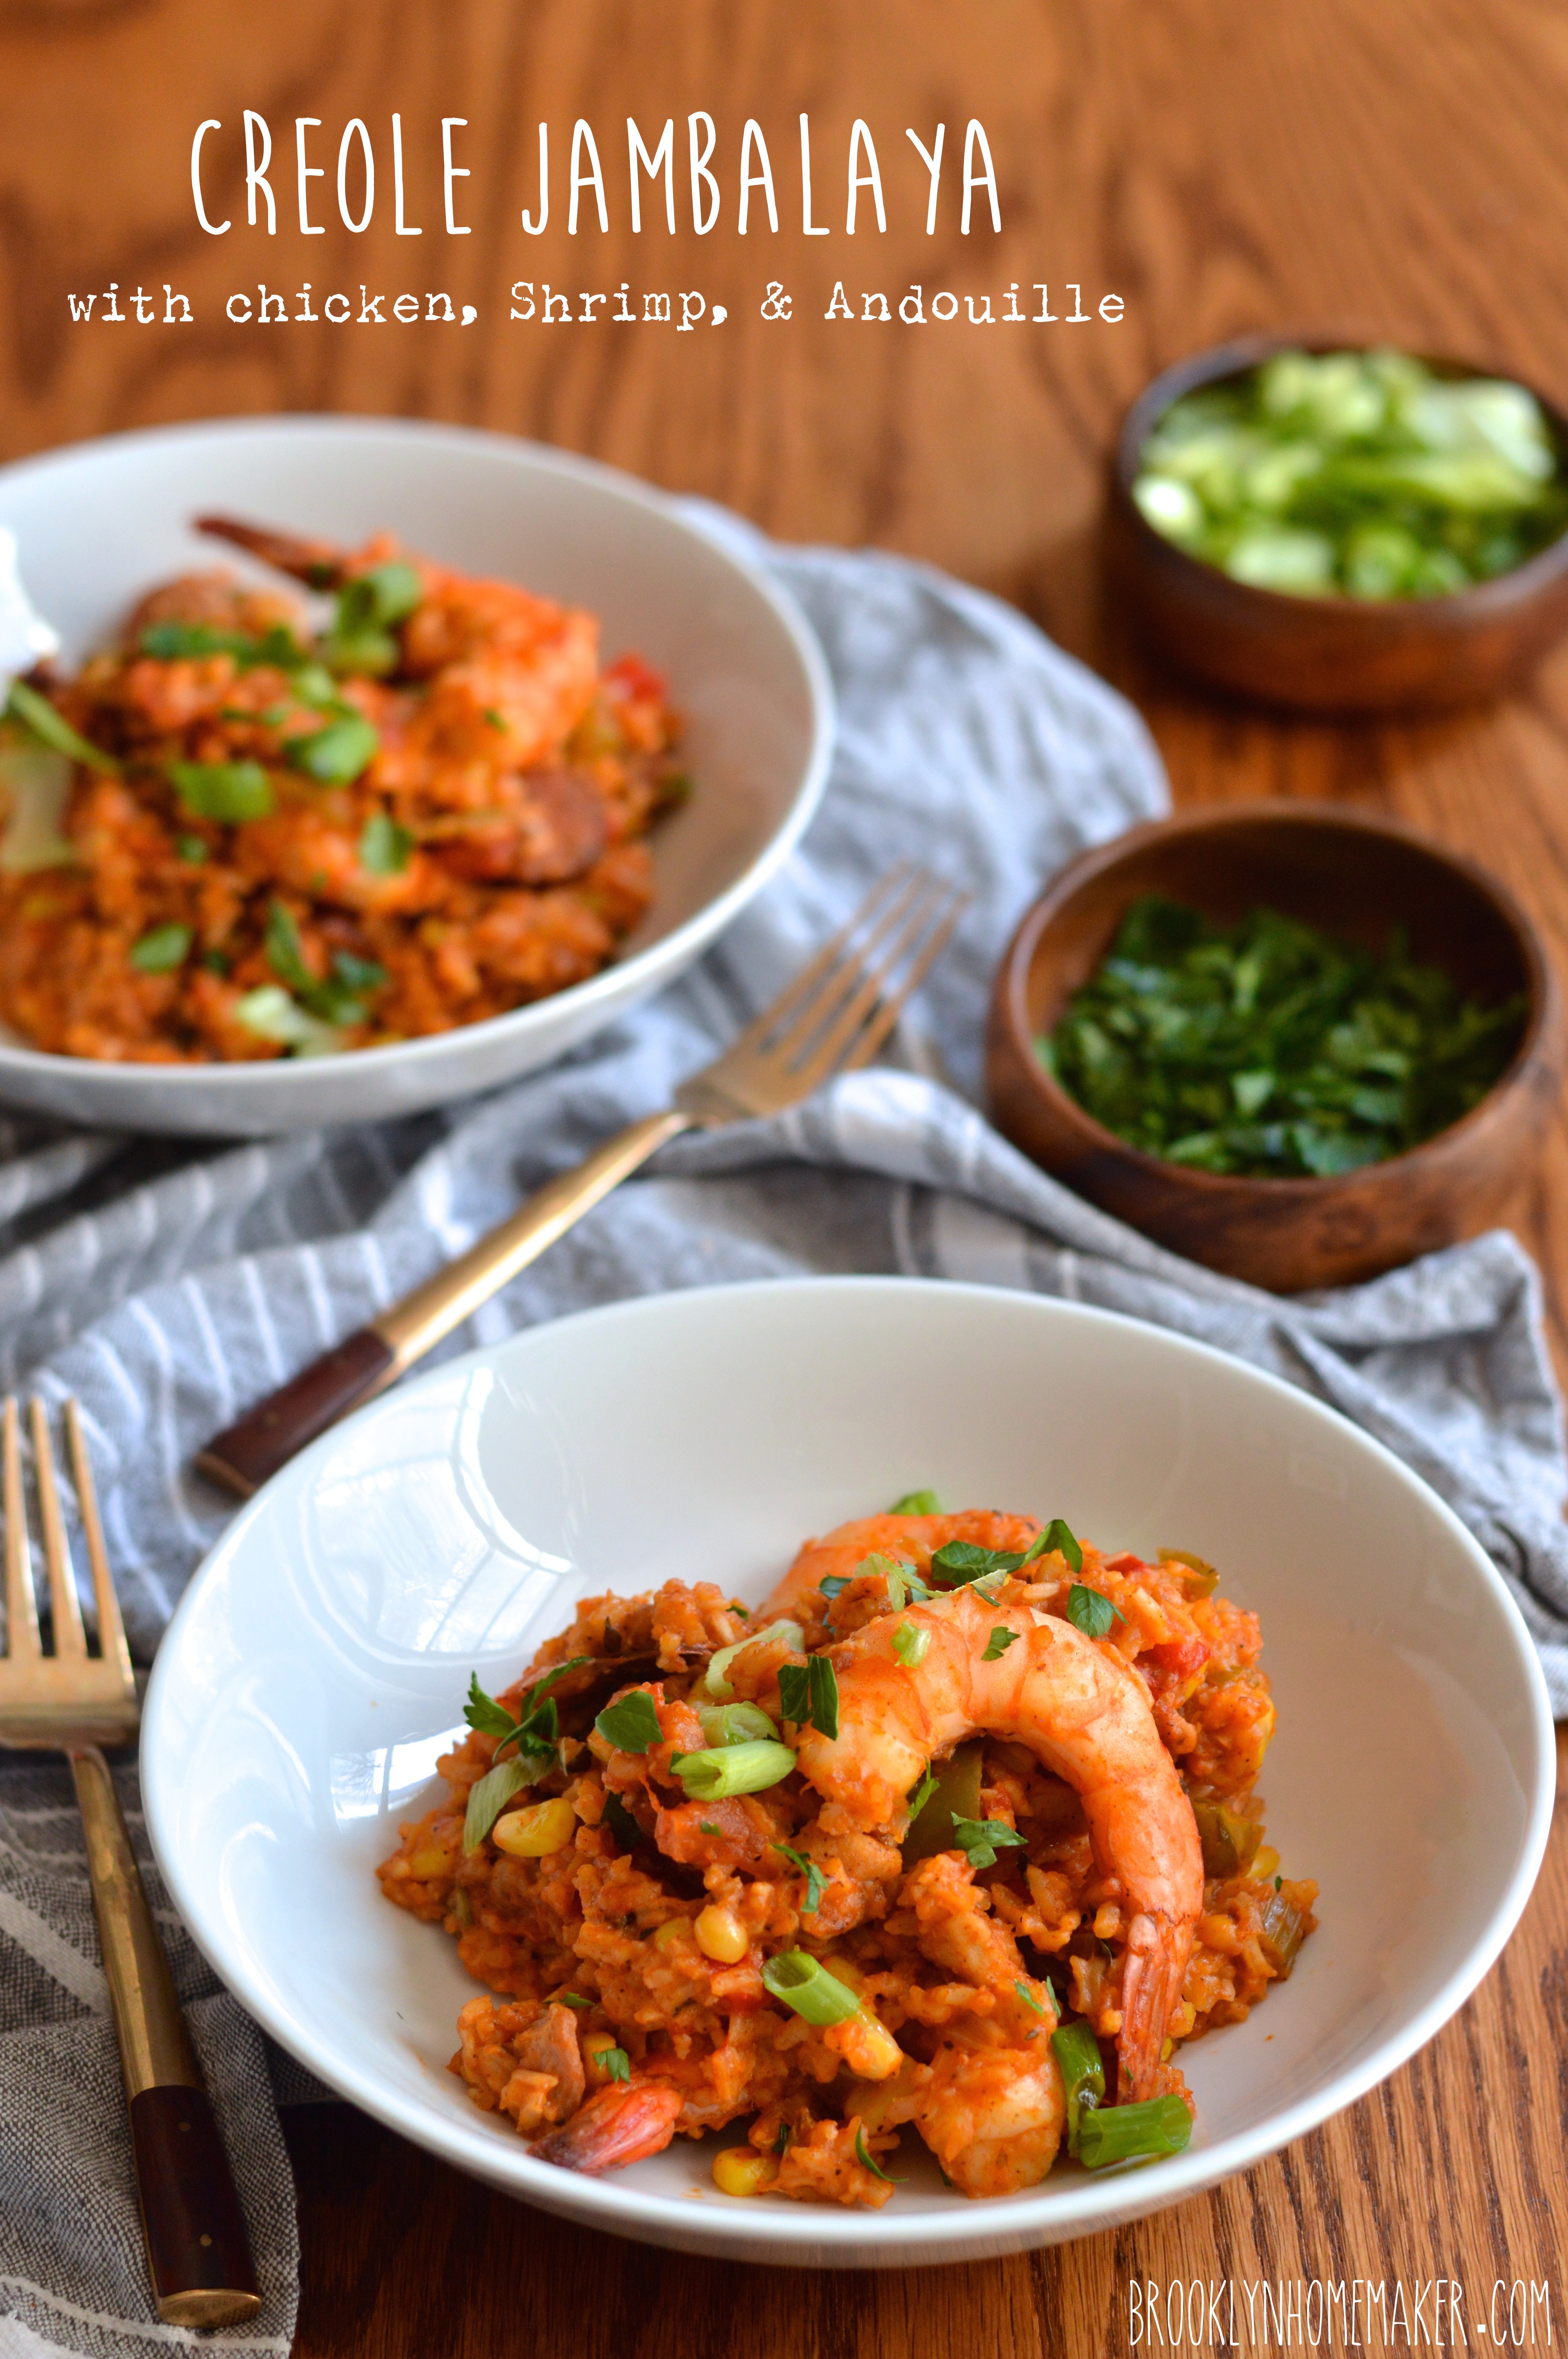
The style I made is called a red Creole jambalaya, or a city Creole jambalaya. This is the most common style, and the main difference between this and other varieties is the use of tomatoes. The less common rural Creole jambalaya is almost identical but uses no tomatoes in the recipe. The third, and even less common variety is the Cajun or “white” jambalaya, in which the rice is cooked in broth separately from the meat and vegetables and combined just before serving.

Most people believe Creole red jambalaya was created as a way to make Spanish Paella without using saffron which was very hard to come by at the time. Tomatoes were added in place of the saffron for flavor, but eventually the other two styles came about without the tomatoes.

creole red jambalaya with chicken, shrimp, & andouille | Brooklyn Homemaker

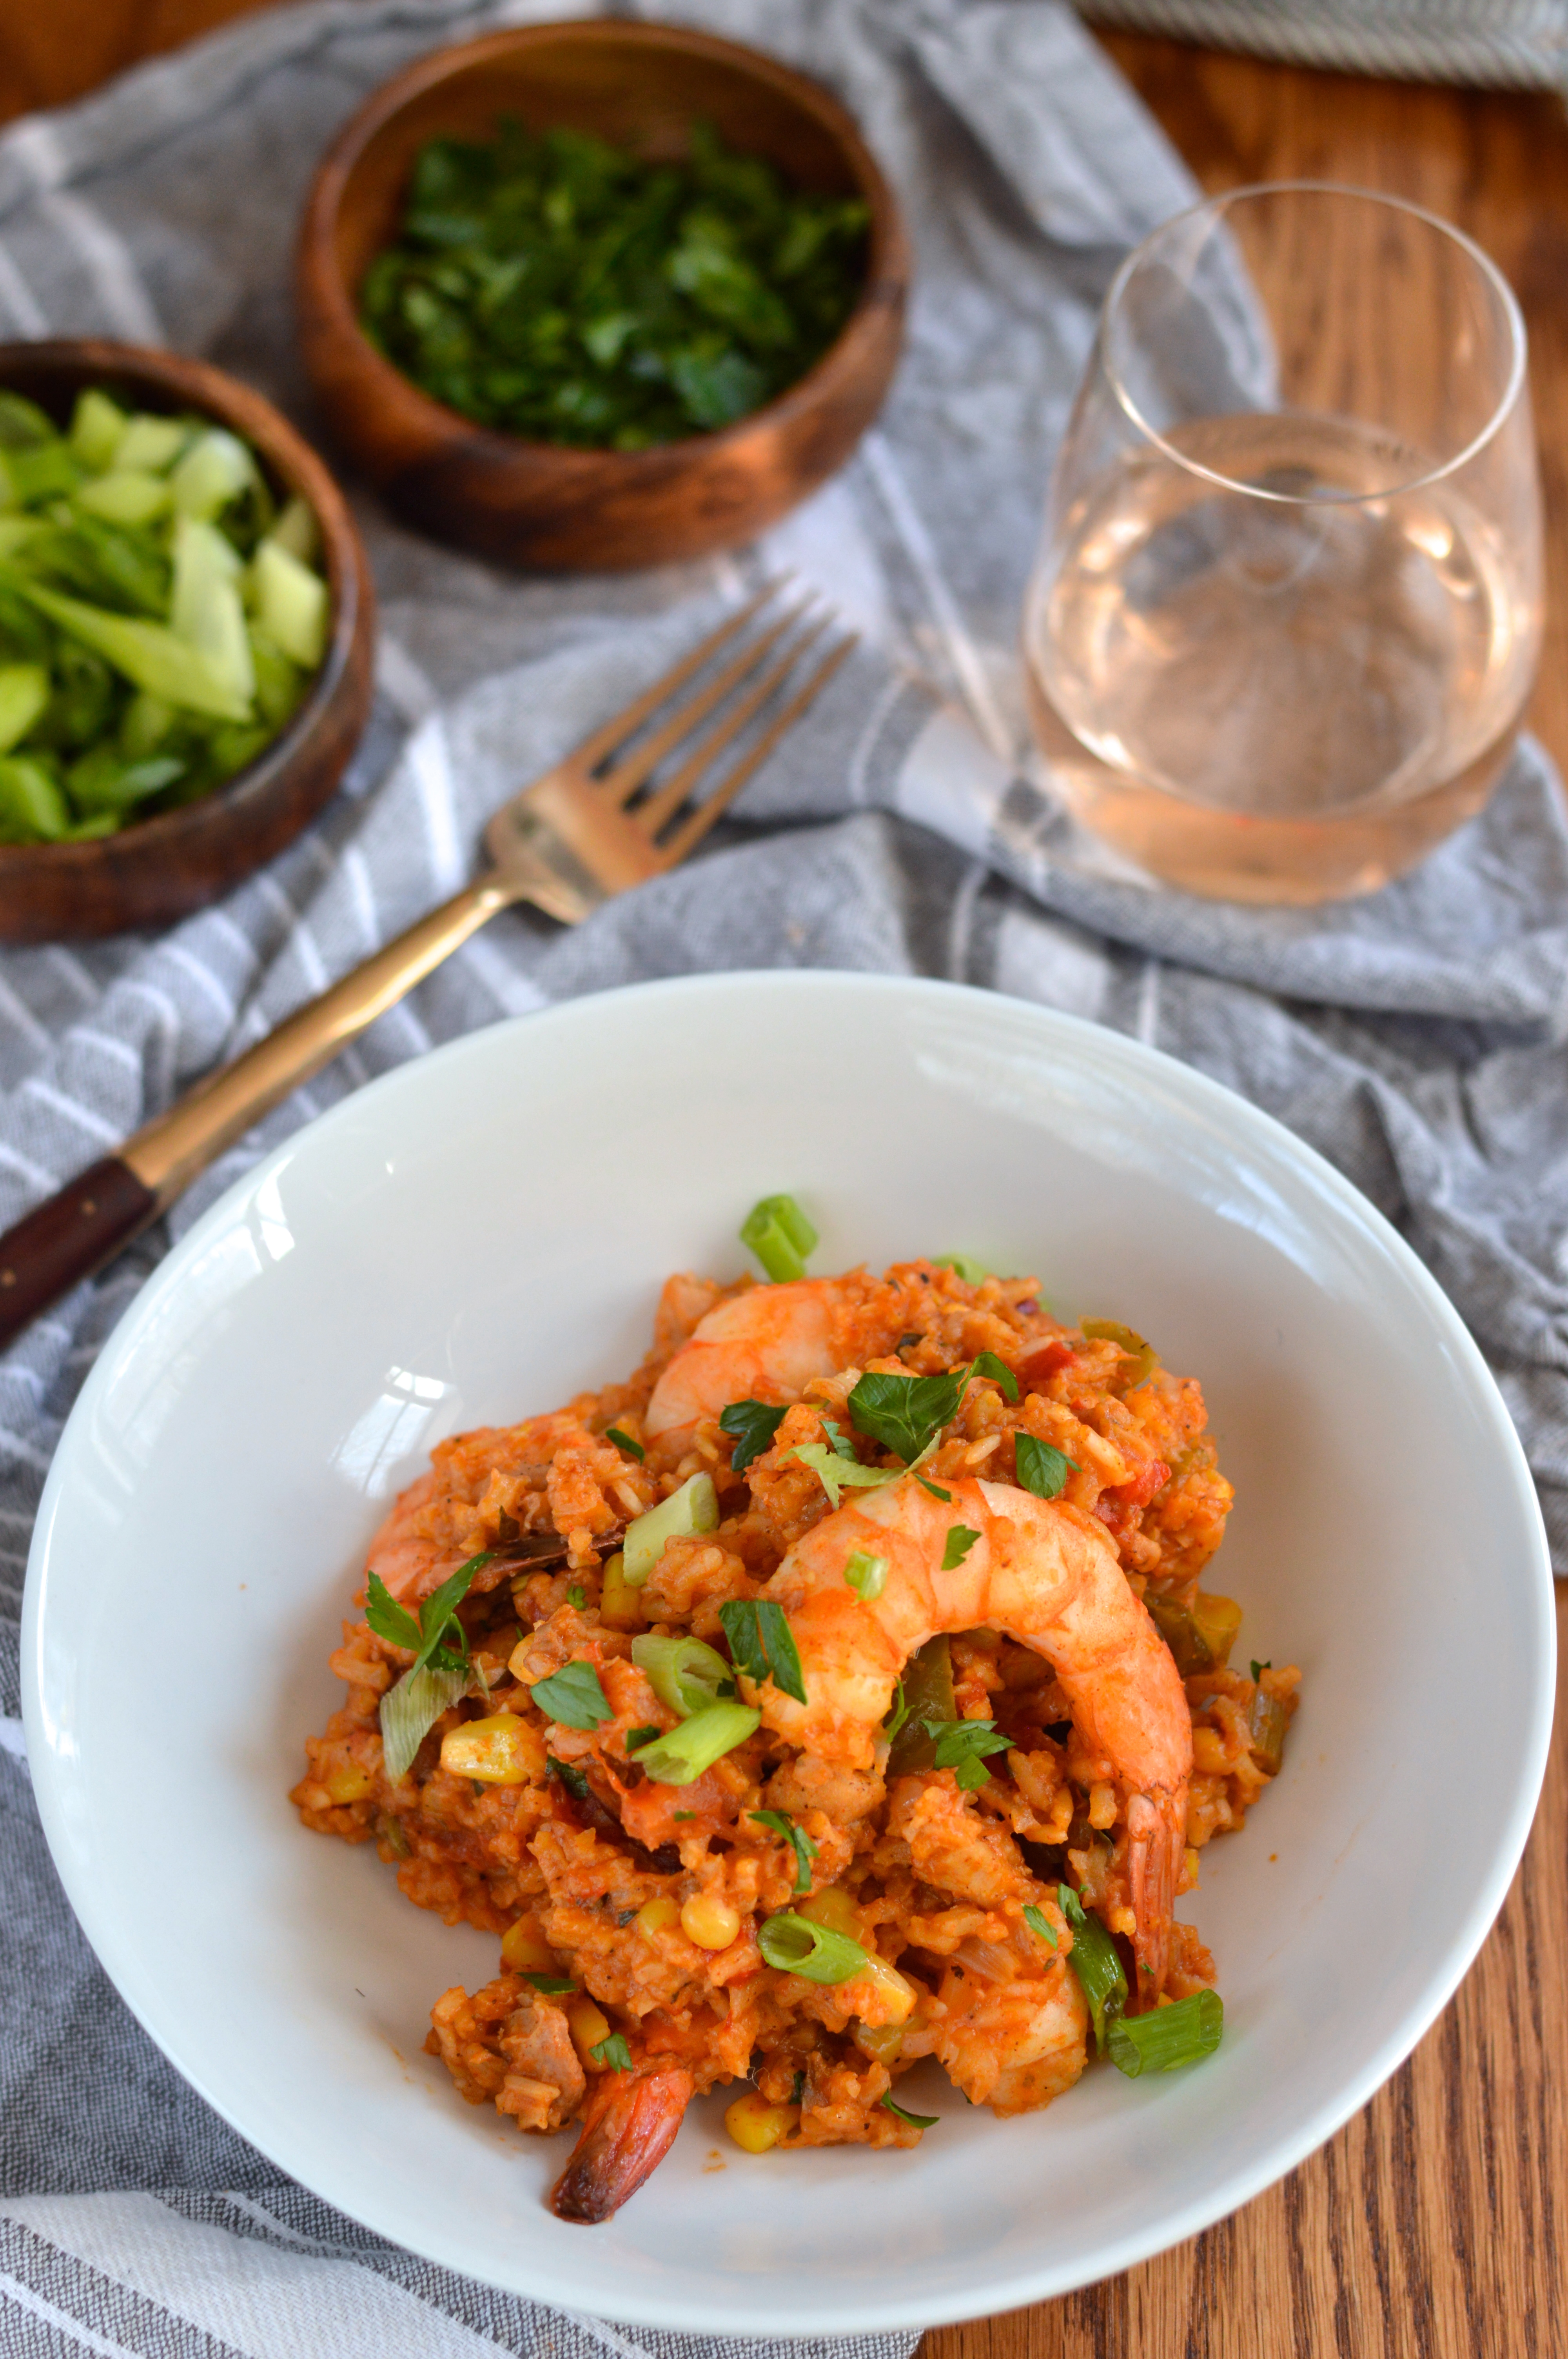
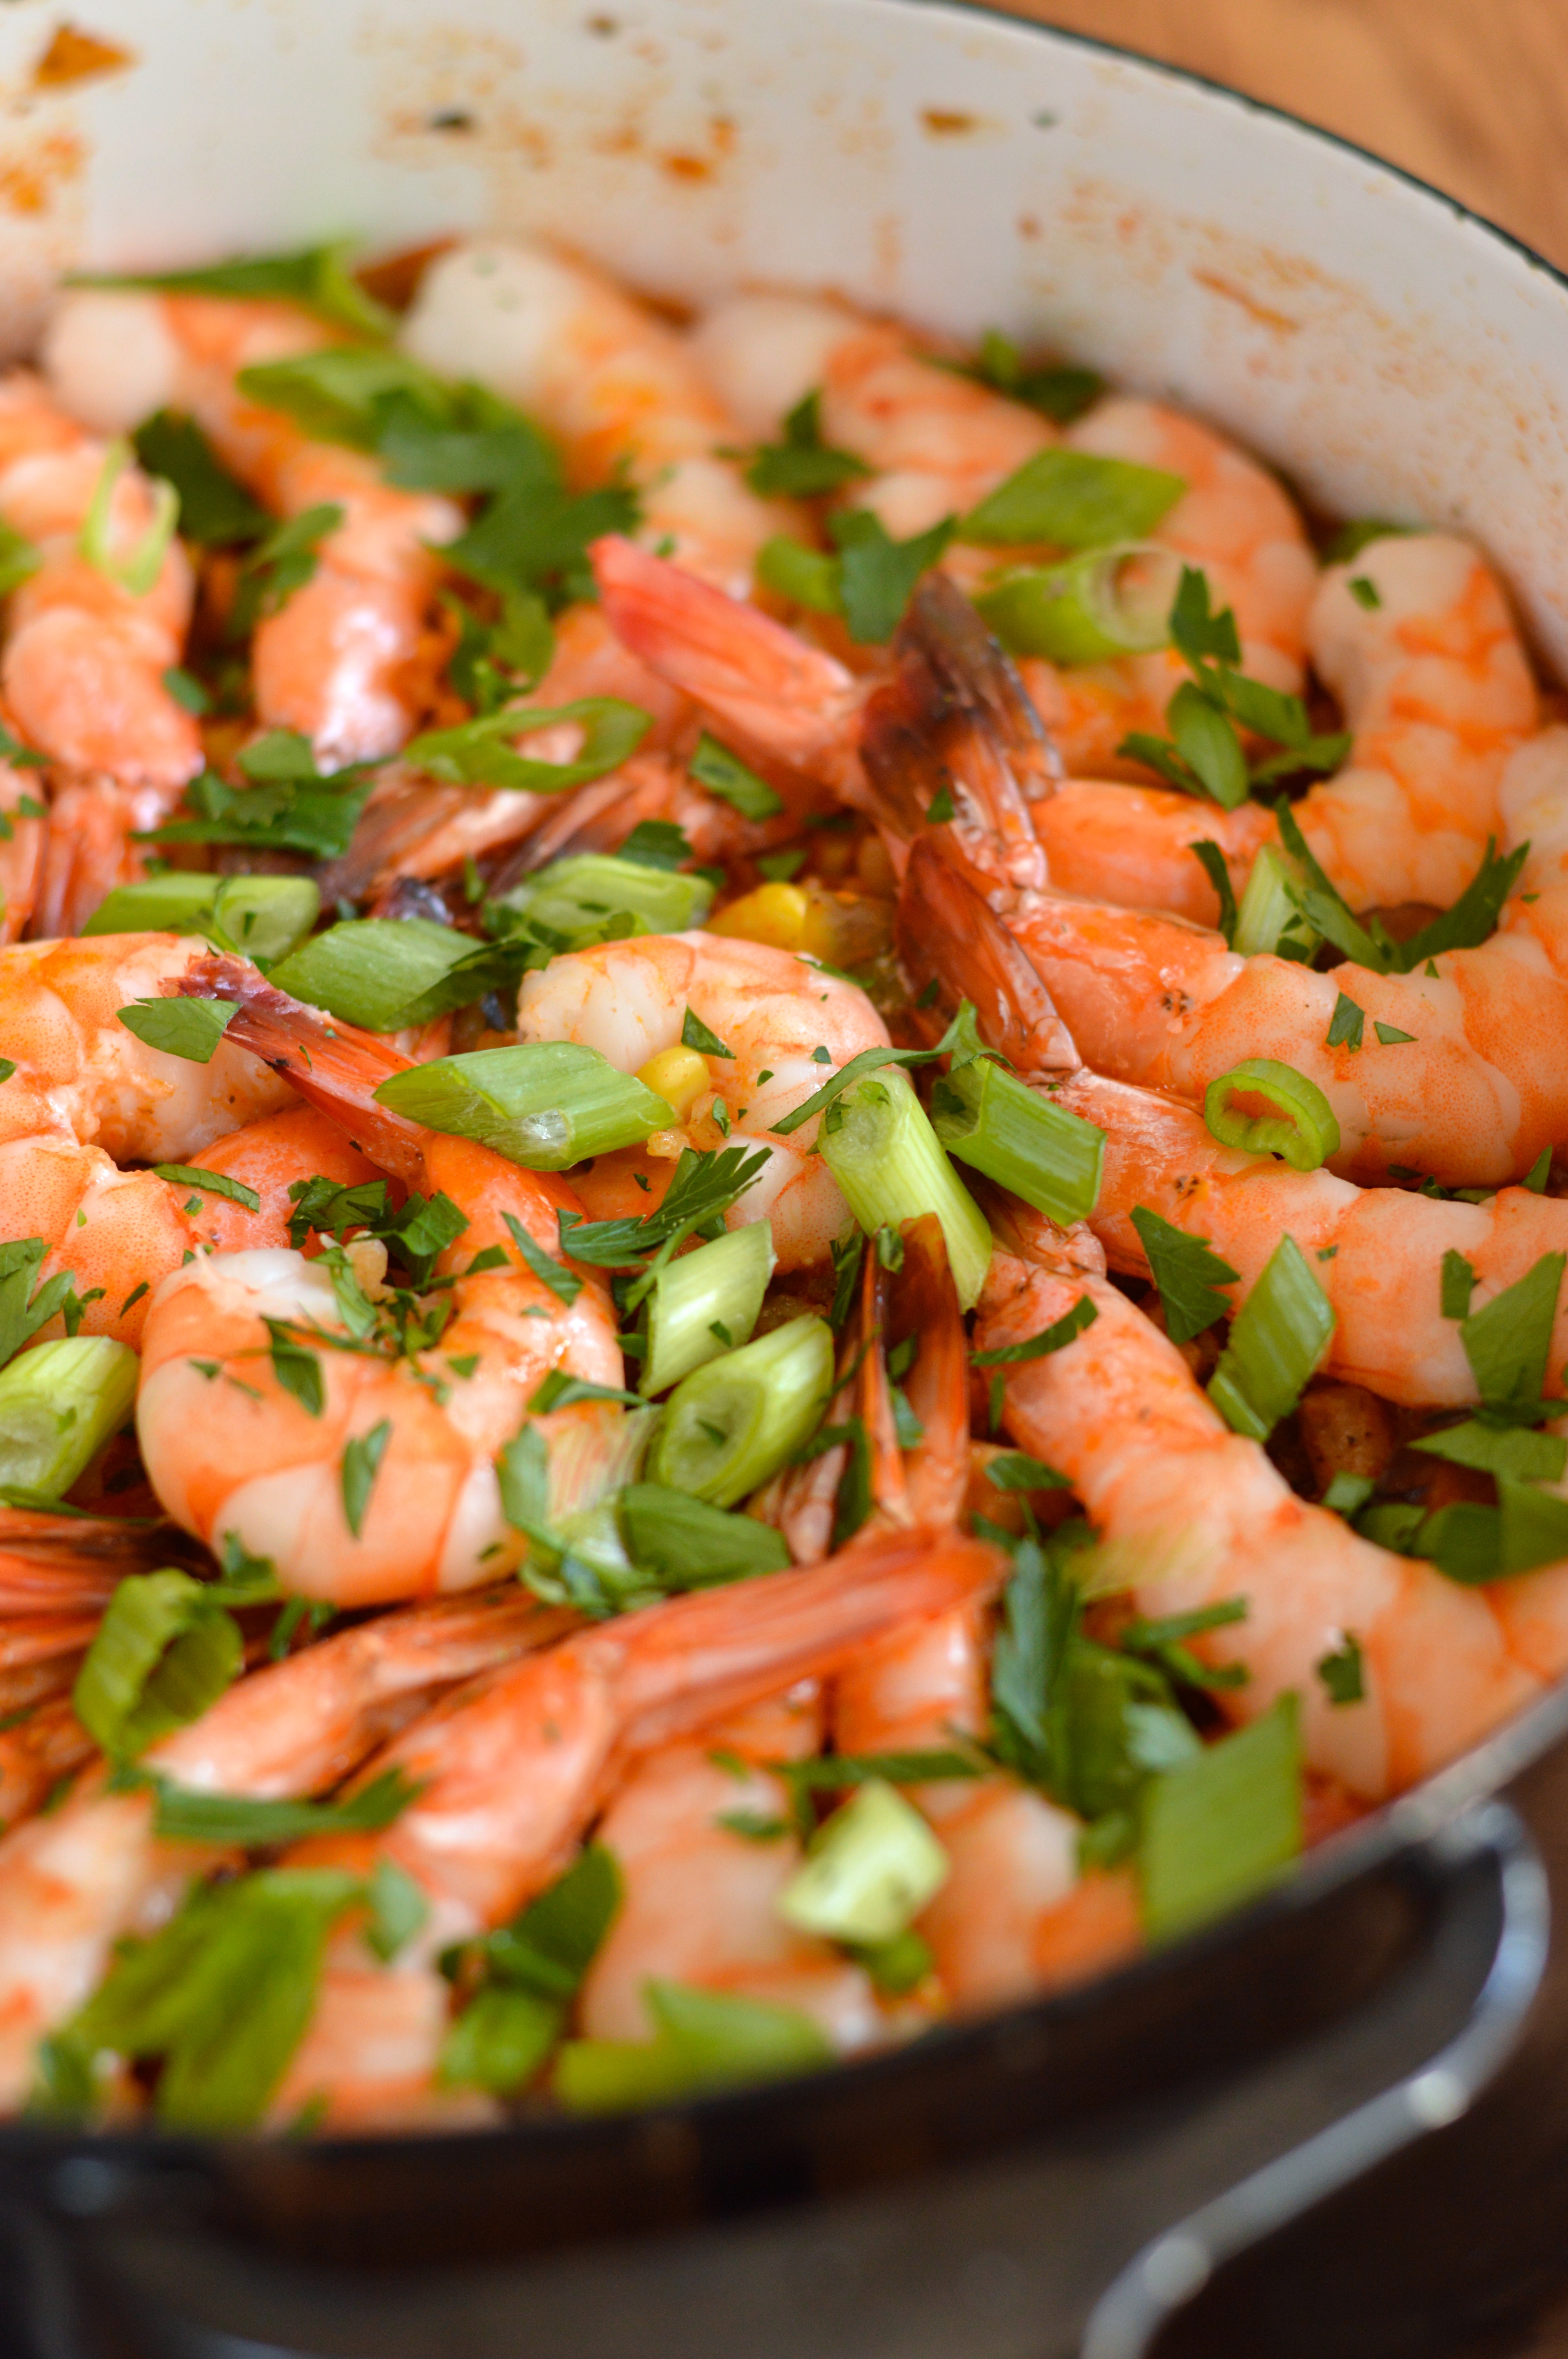
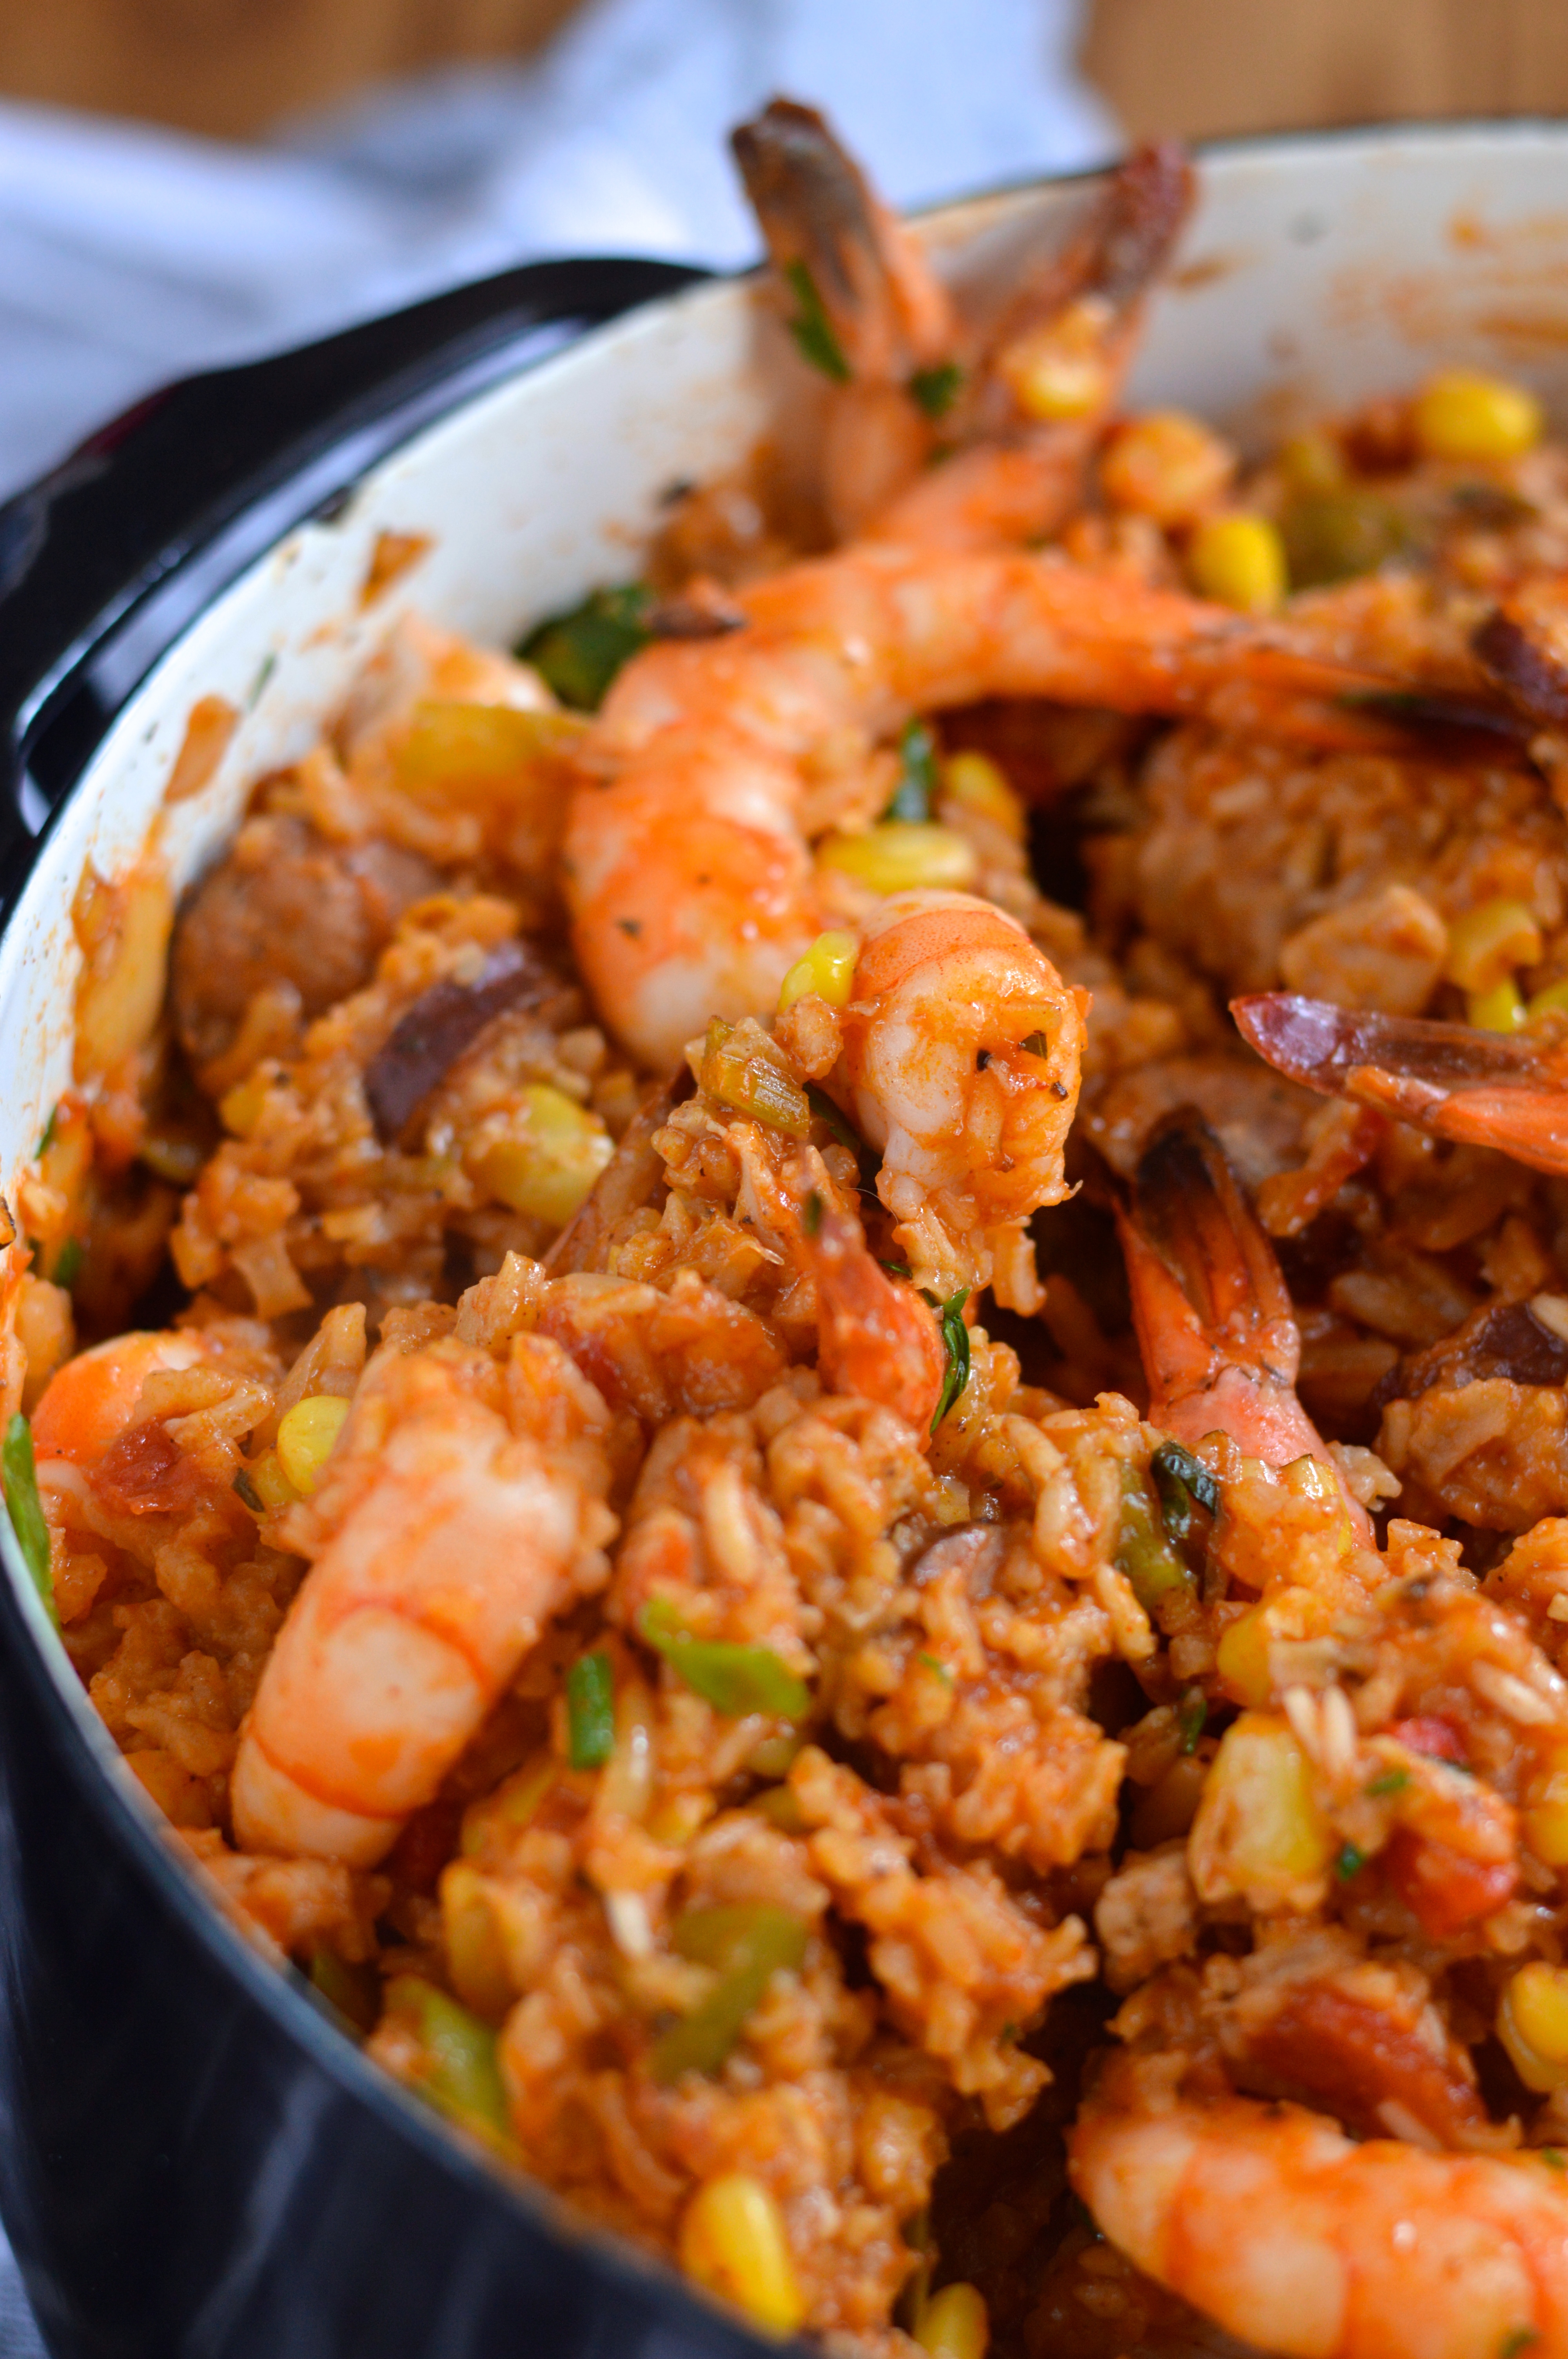
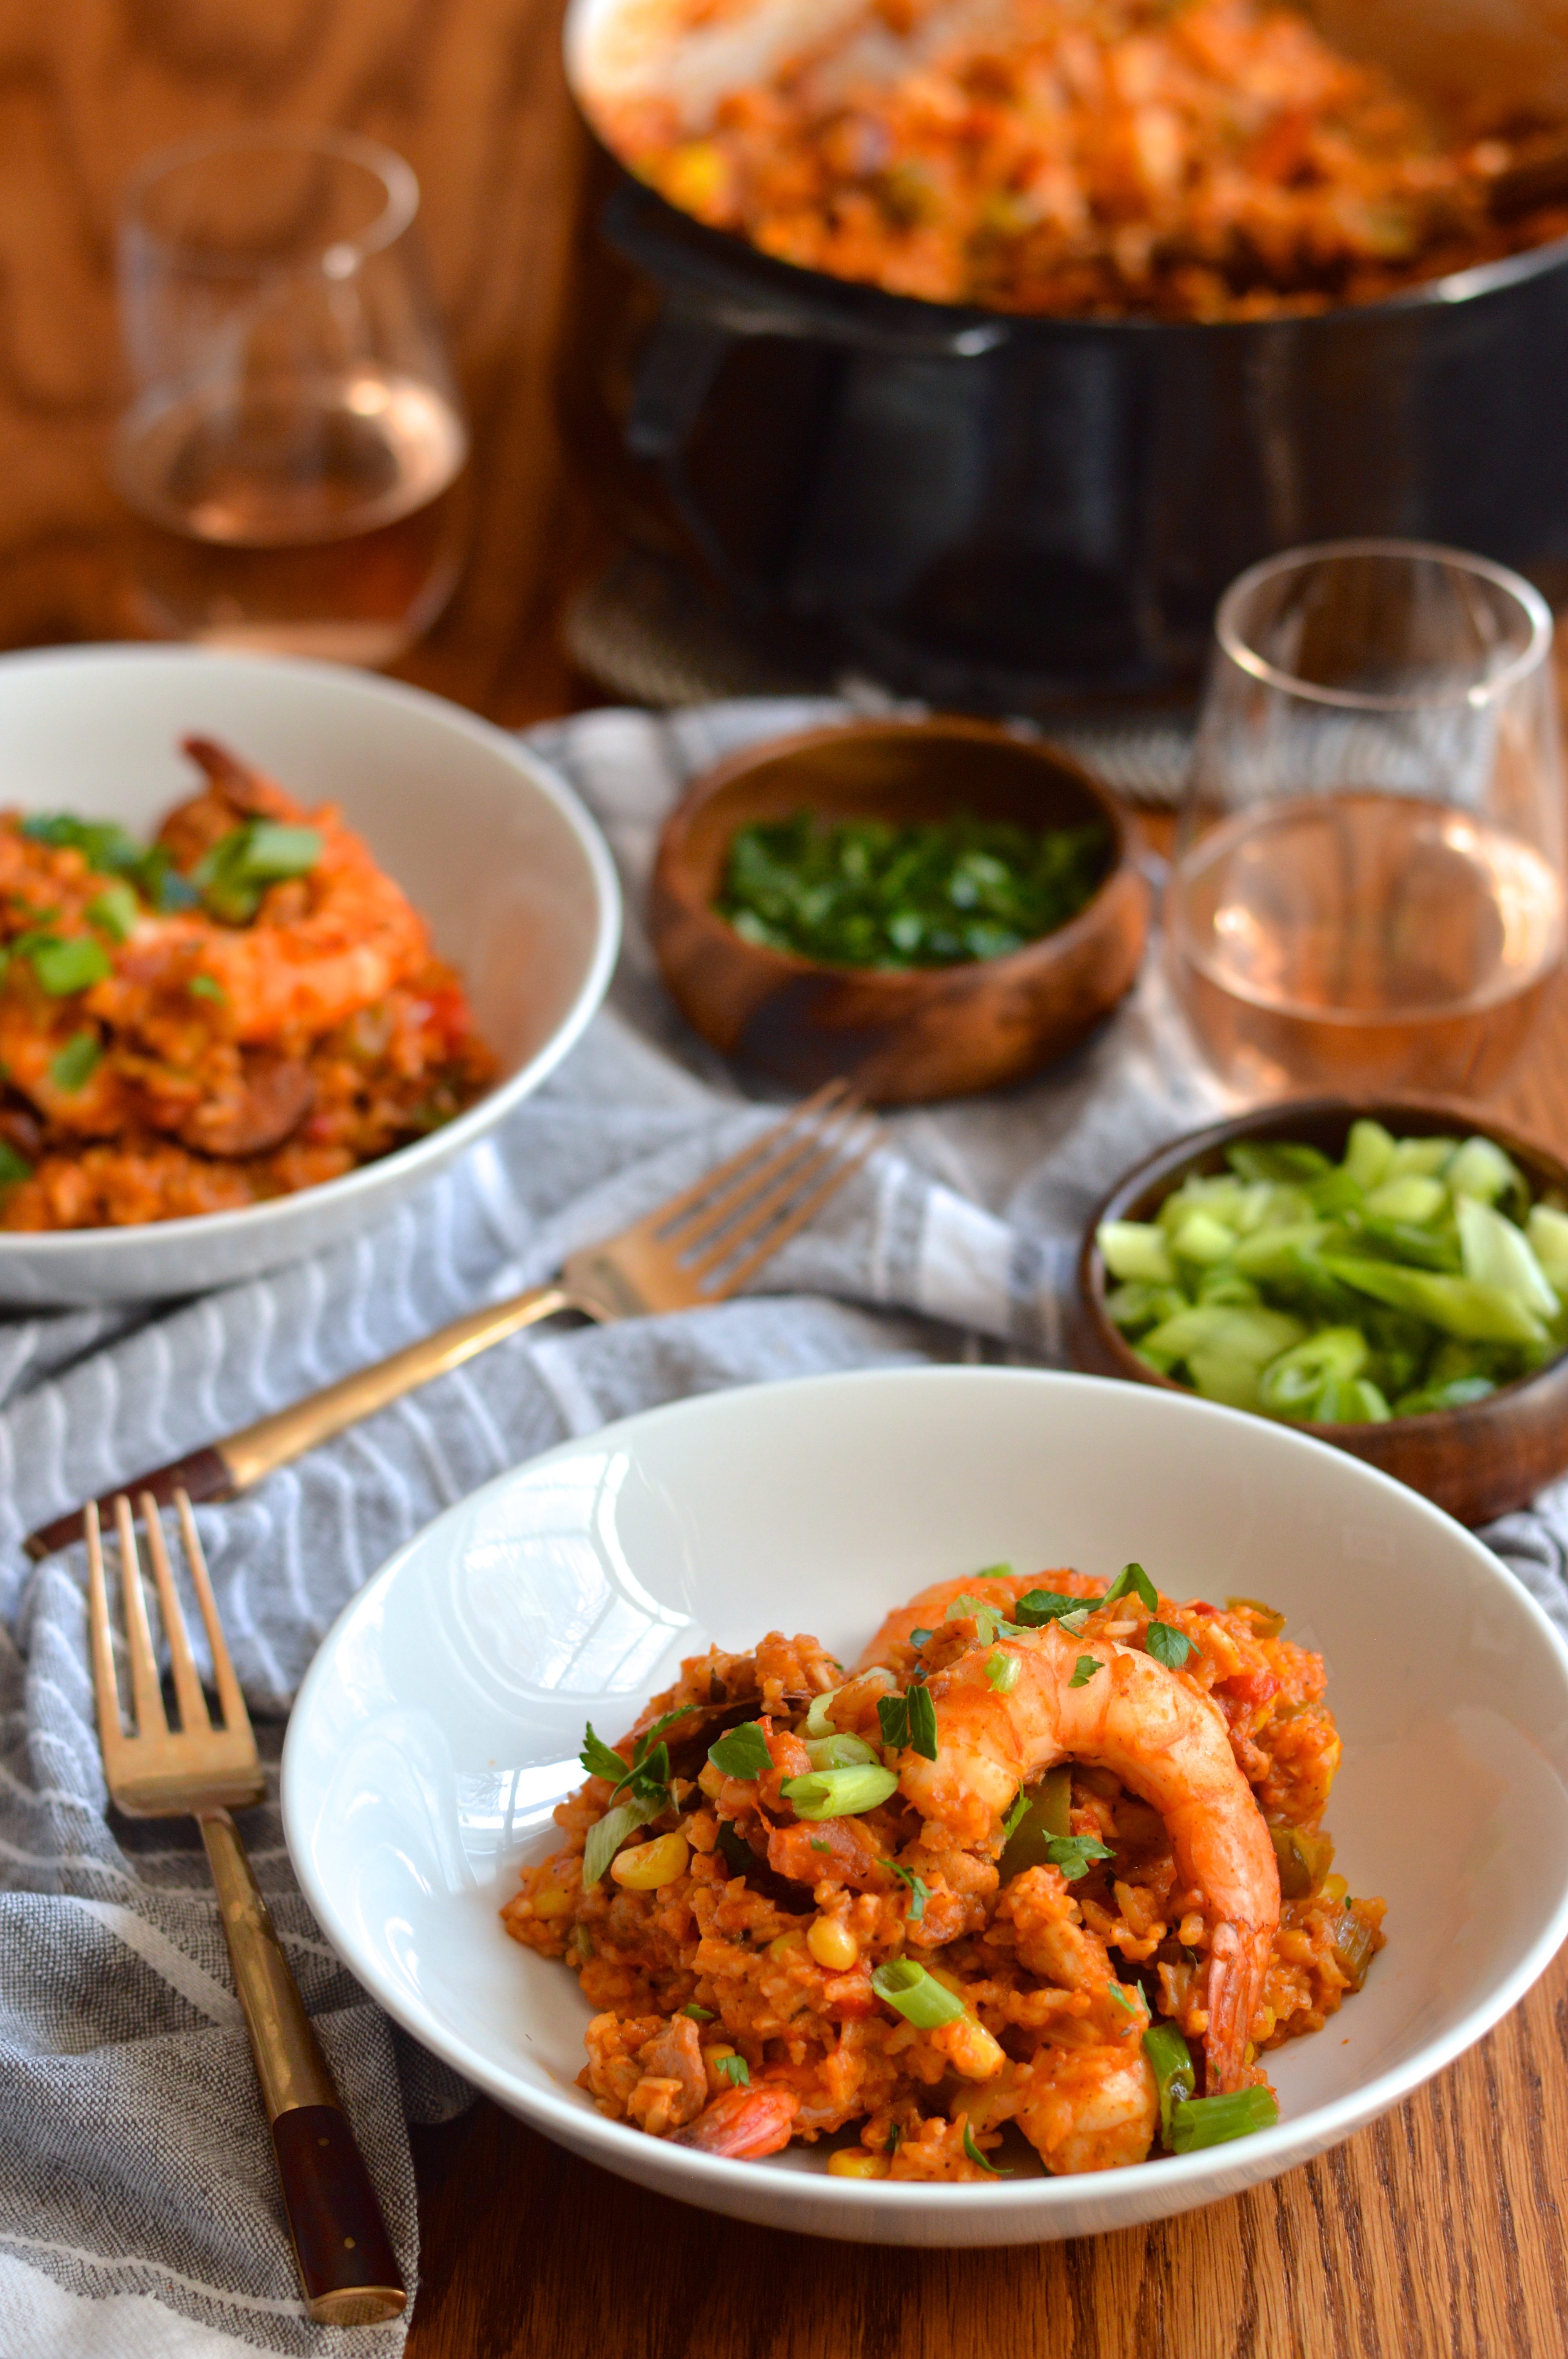
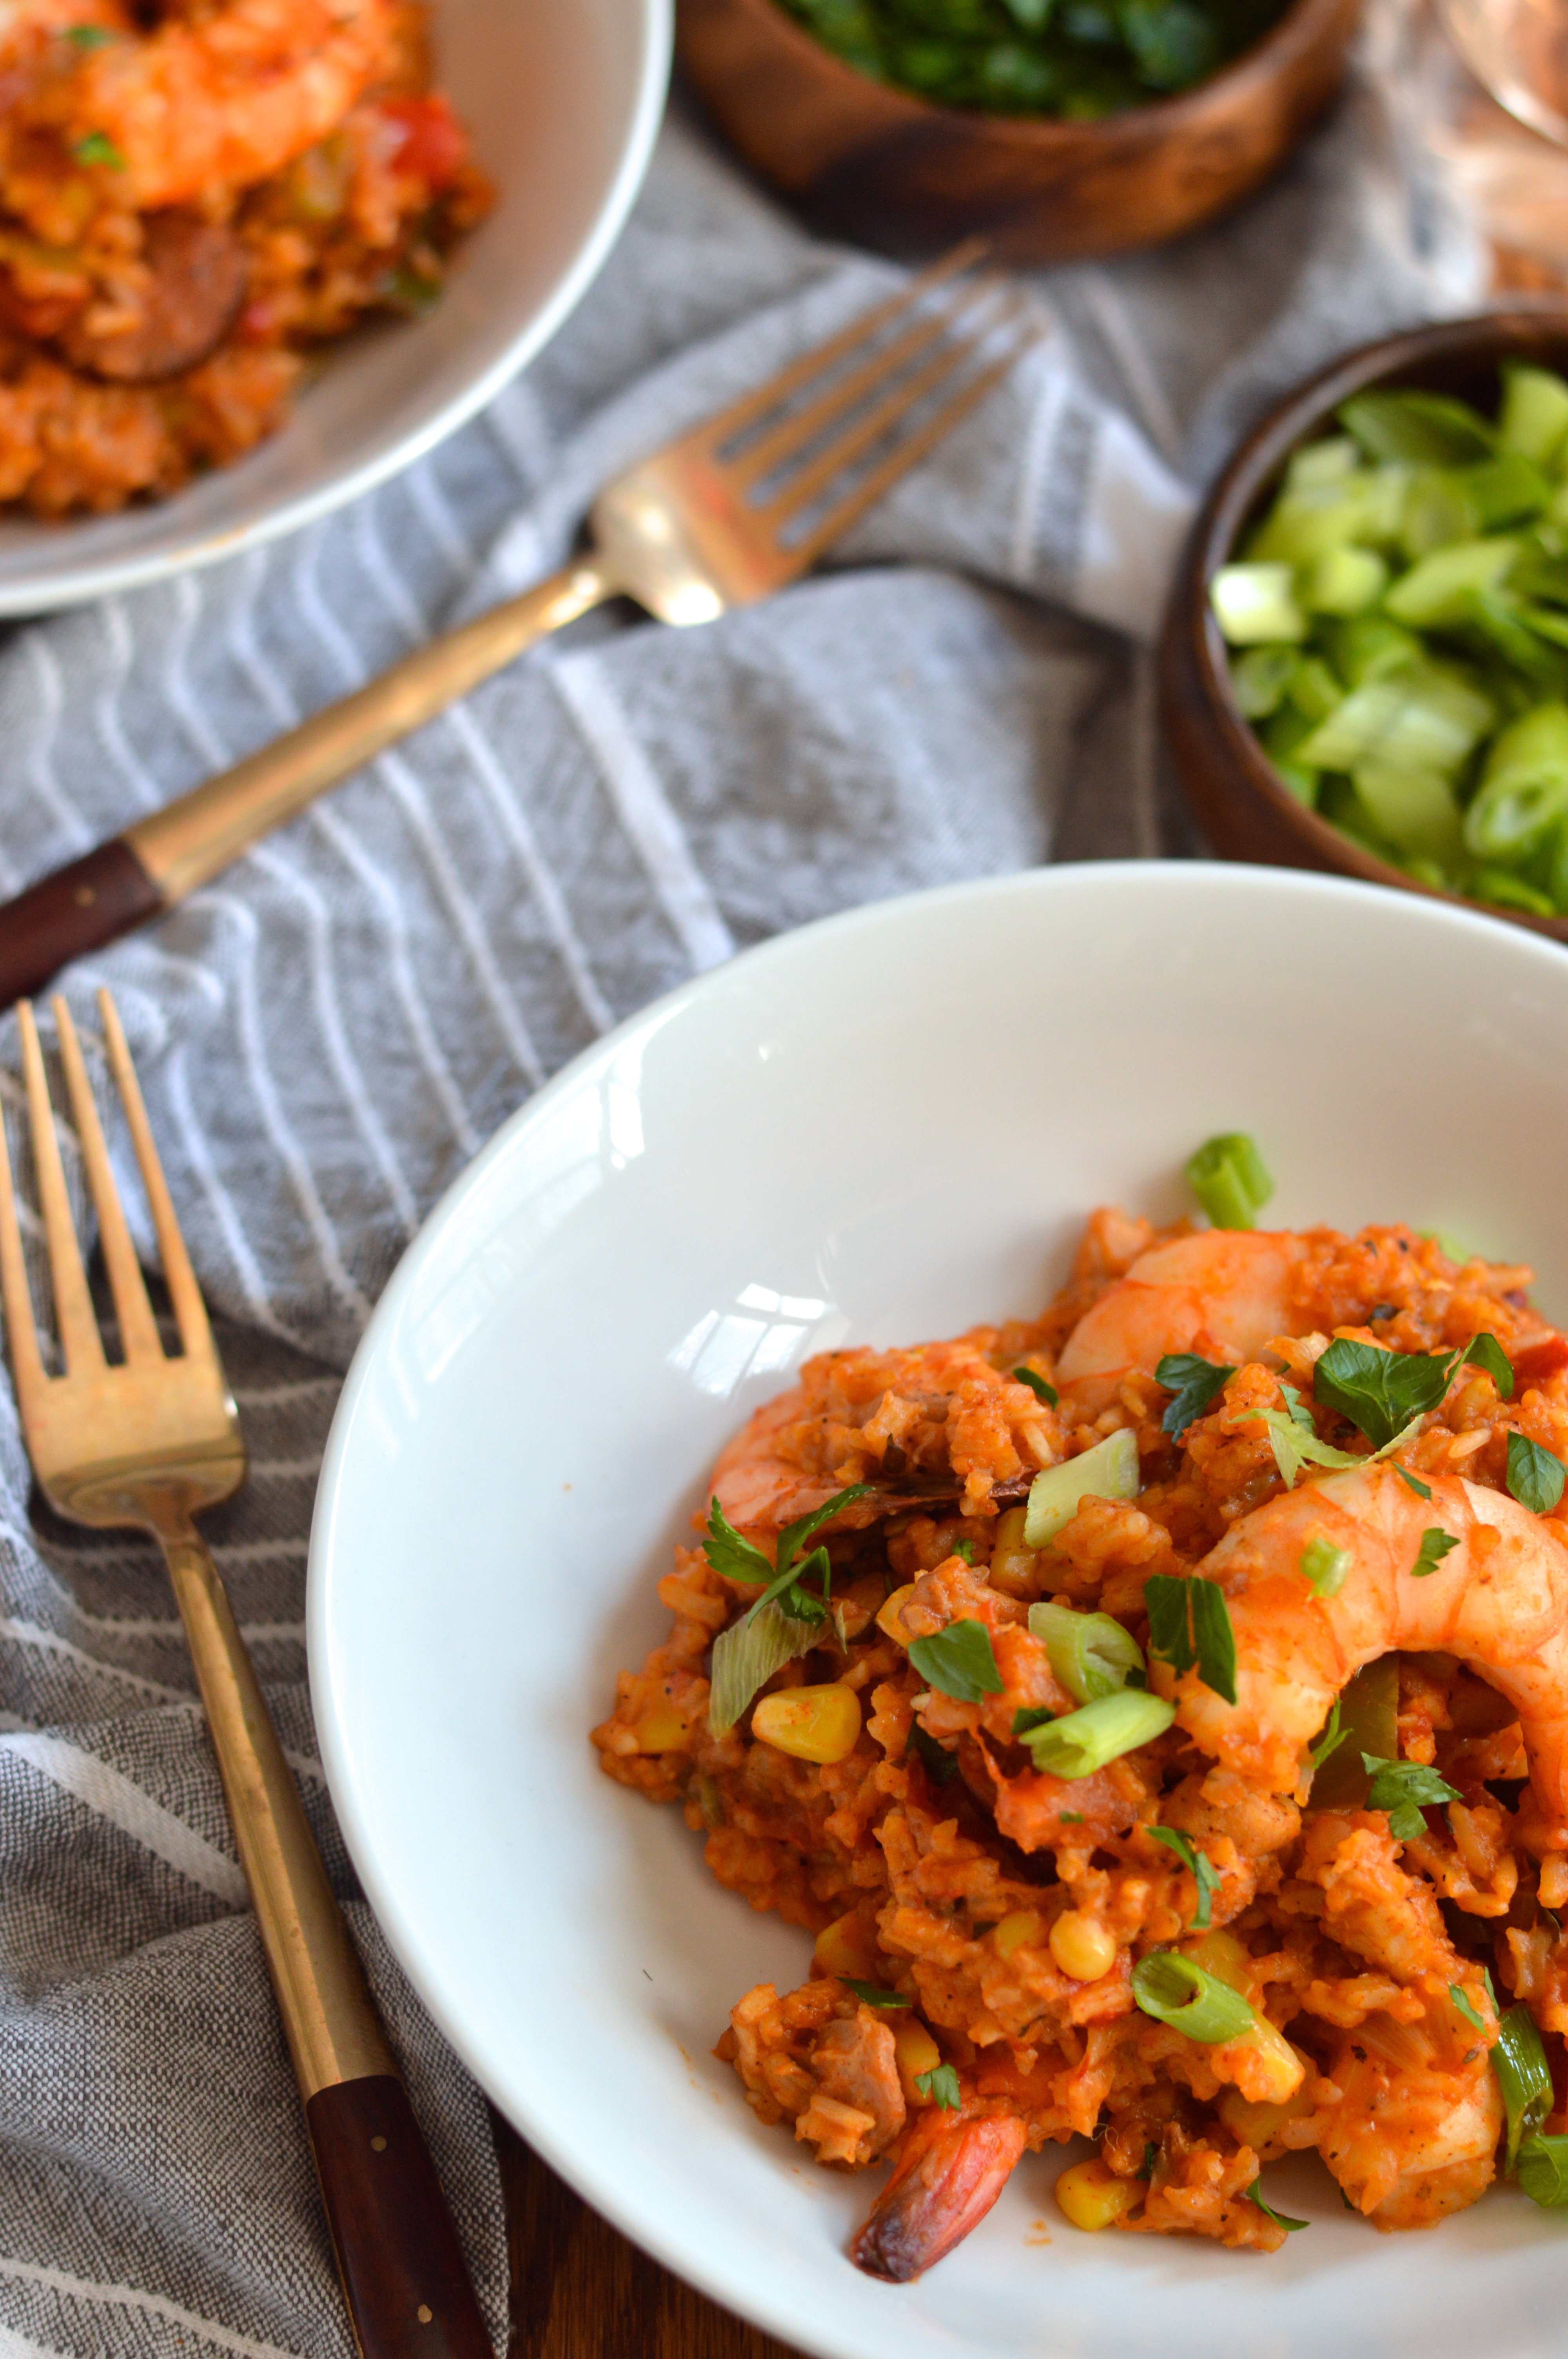
The house smells completely heavenly while this bubbles away on the stovetop (and not in the oven), and the flavor could not be more amazing. Tender rice, perfectly cooked shrimp, soft cooked vegetables, and andouille with a nice bit of bite. The fresh herbs, crushed tomatoes, and spices combine to make one of the most flavorful dishes I’ve had in a good long time. Using smoked paprika really makes a difference to impart a nice smoky depth to the dish and the cayenne adds a welcome bit of heat.

Depending on how spicy you like things, the heat level can definitely be adjusted to your taste. I like mine quite spicy so I used the full teaspoon of cayenne. One teaspoon might not sound like much, but a little goes a long way and gave this big pot of jambalaya some serious heat. Feel free to scale it back to 1/2 or even 1/4 teaspoon if you can’t take the heat, but I beg you not to skip it altogether or you’re not doing it right!

creole red jambalaya with chicken, shrimp, & andouille | Brooklyn Homemaker

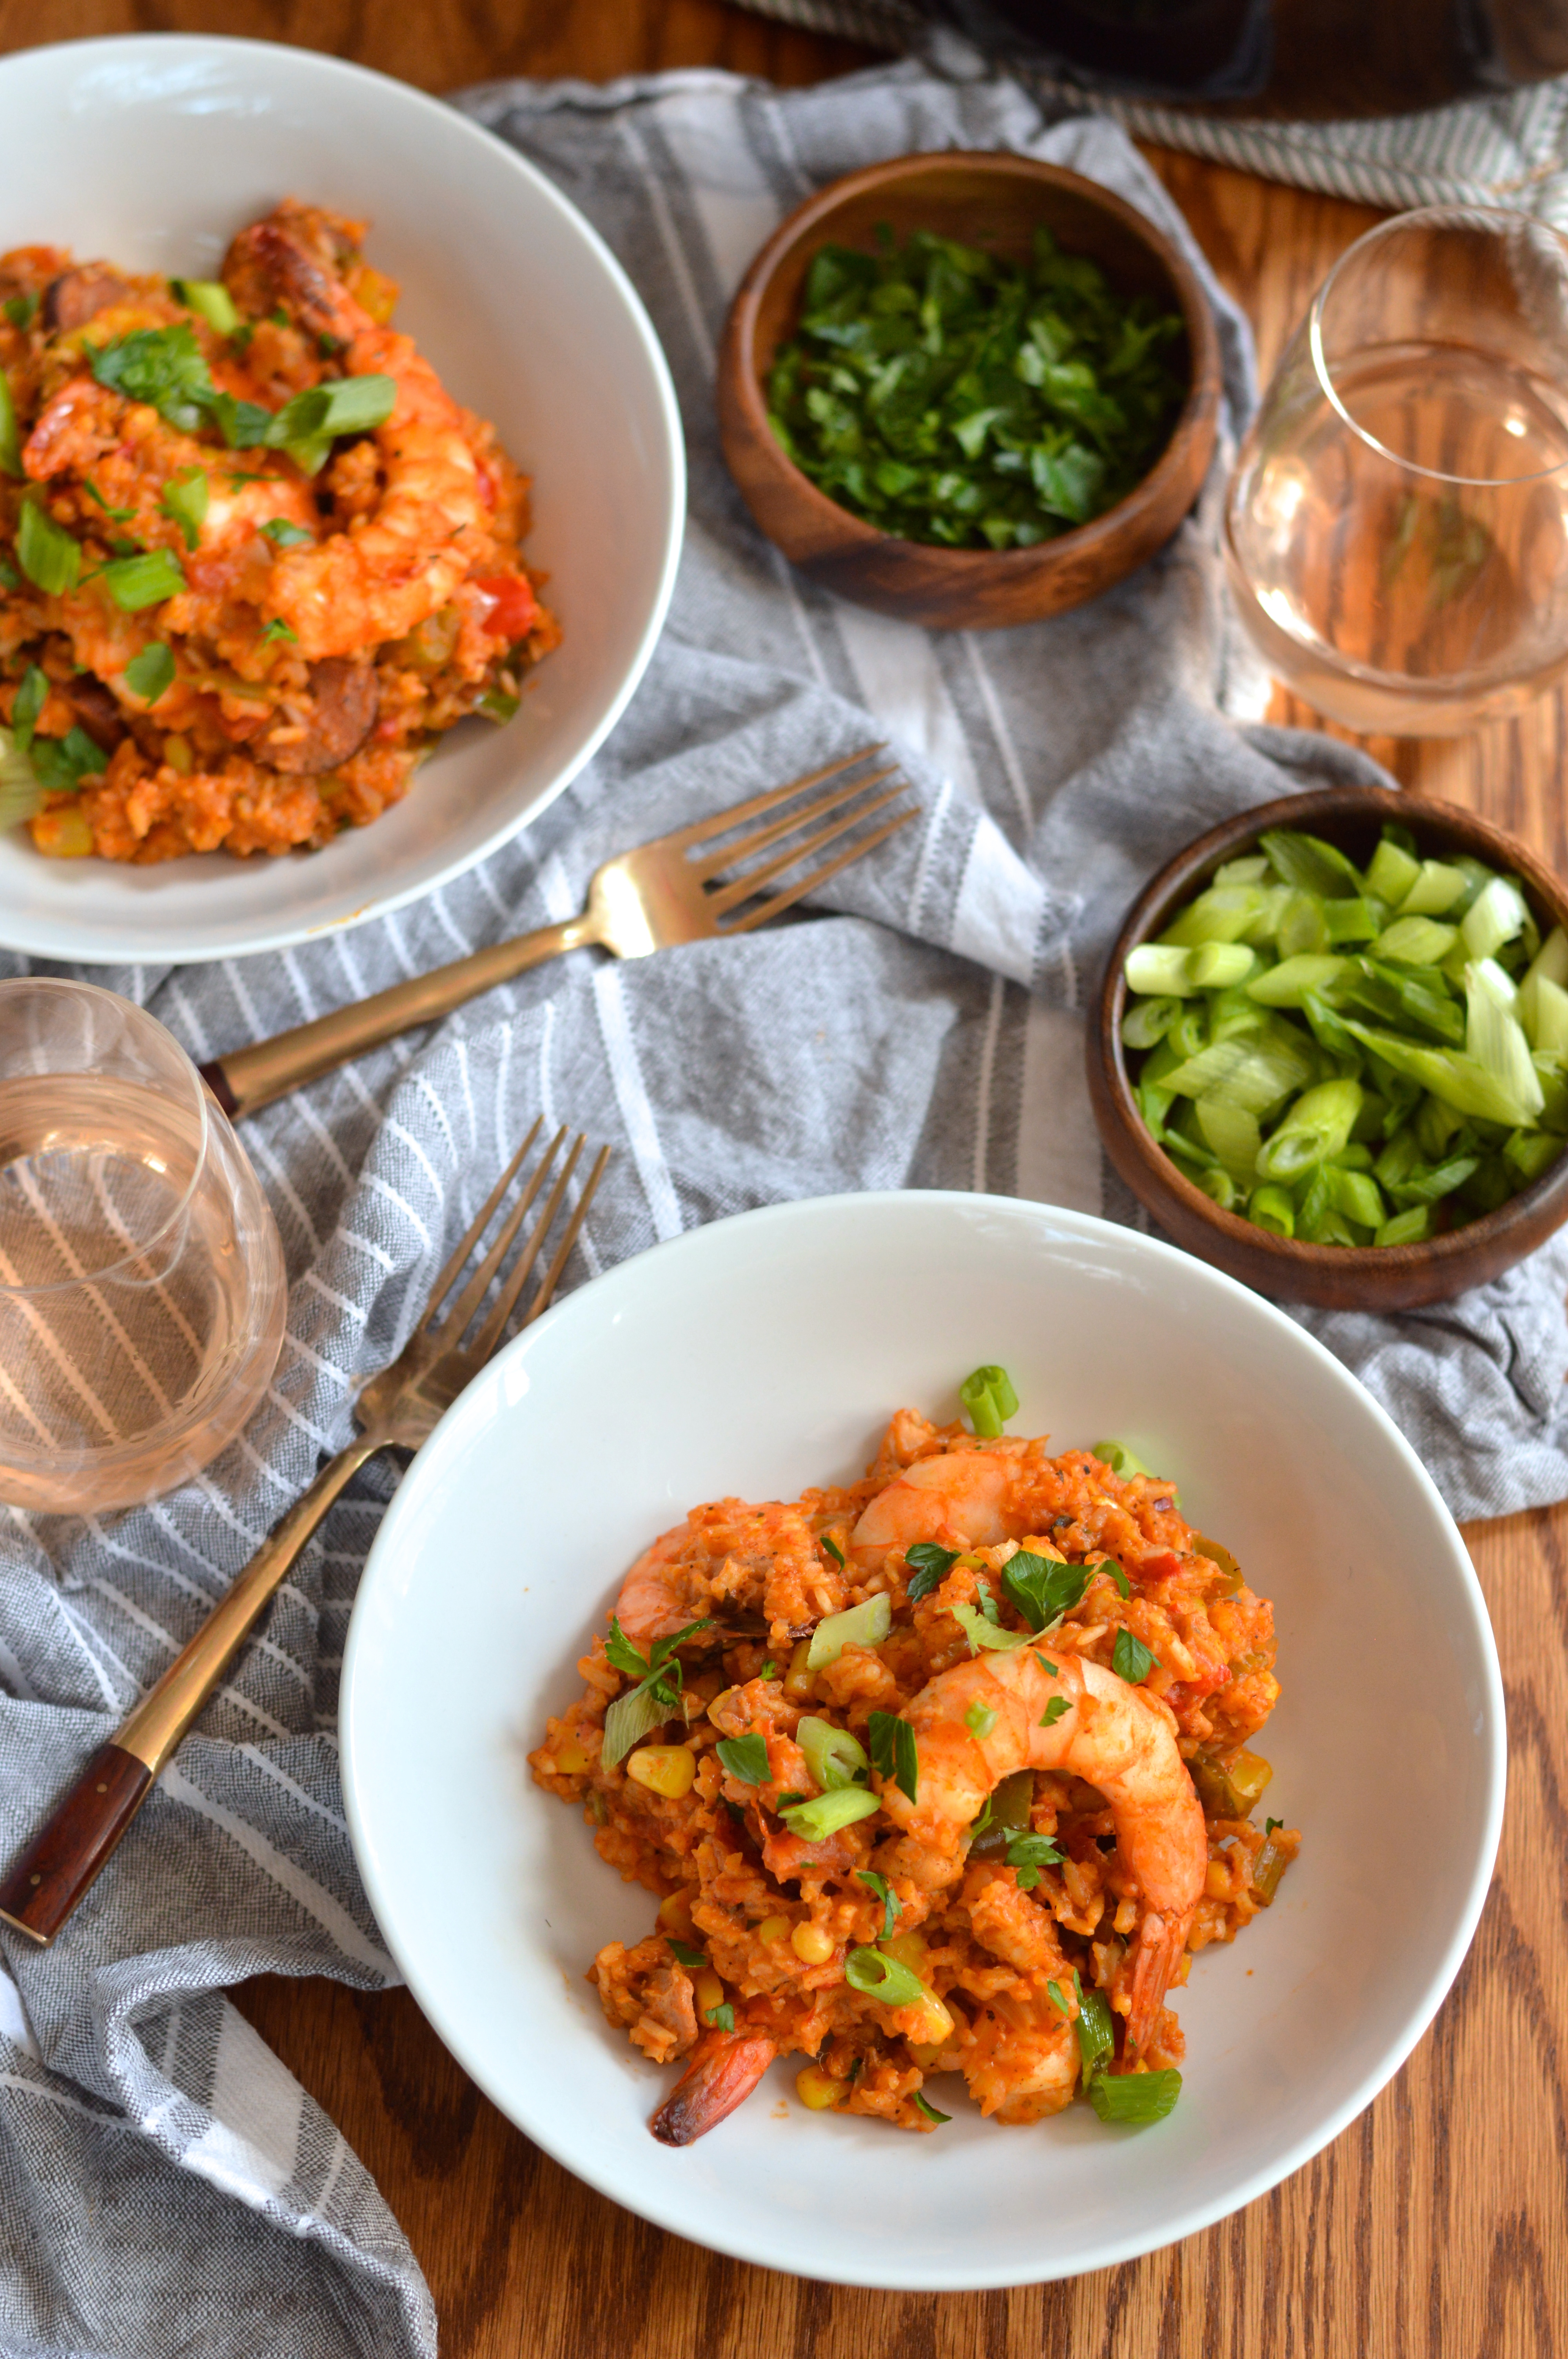
Creole Red Jambalaya with Chicken, Shrimp, & Andouille

  • Servings: about 8 to 10
  • Print
adapted from Spoon Fork Bacon for the Fix

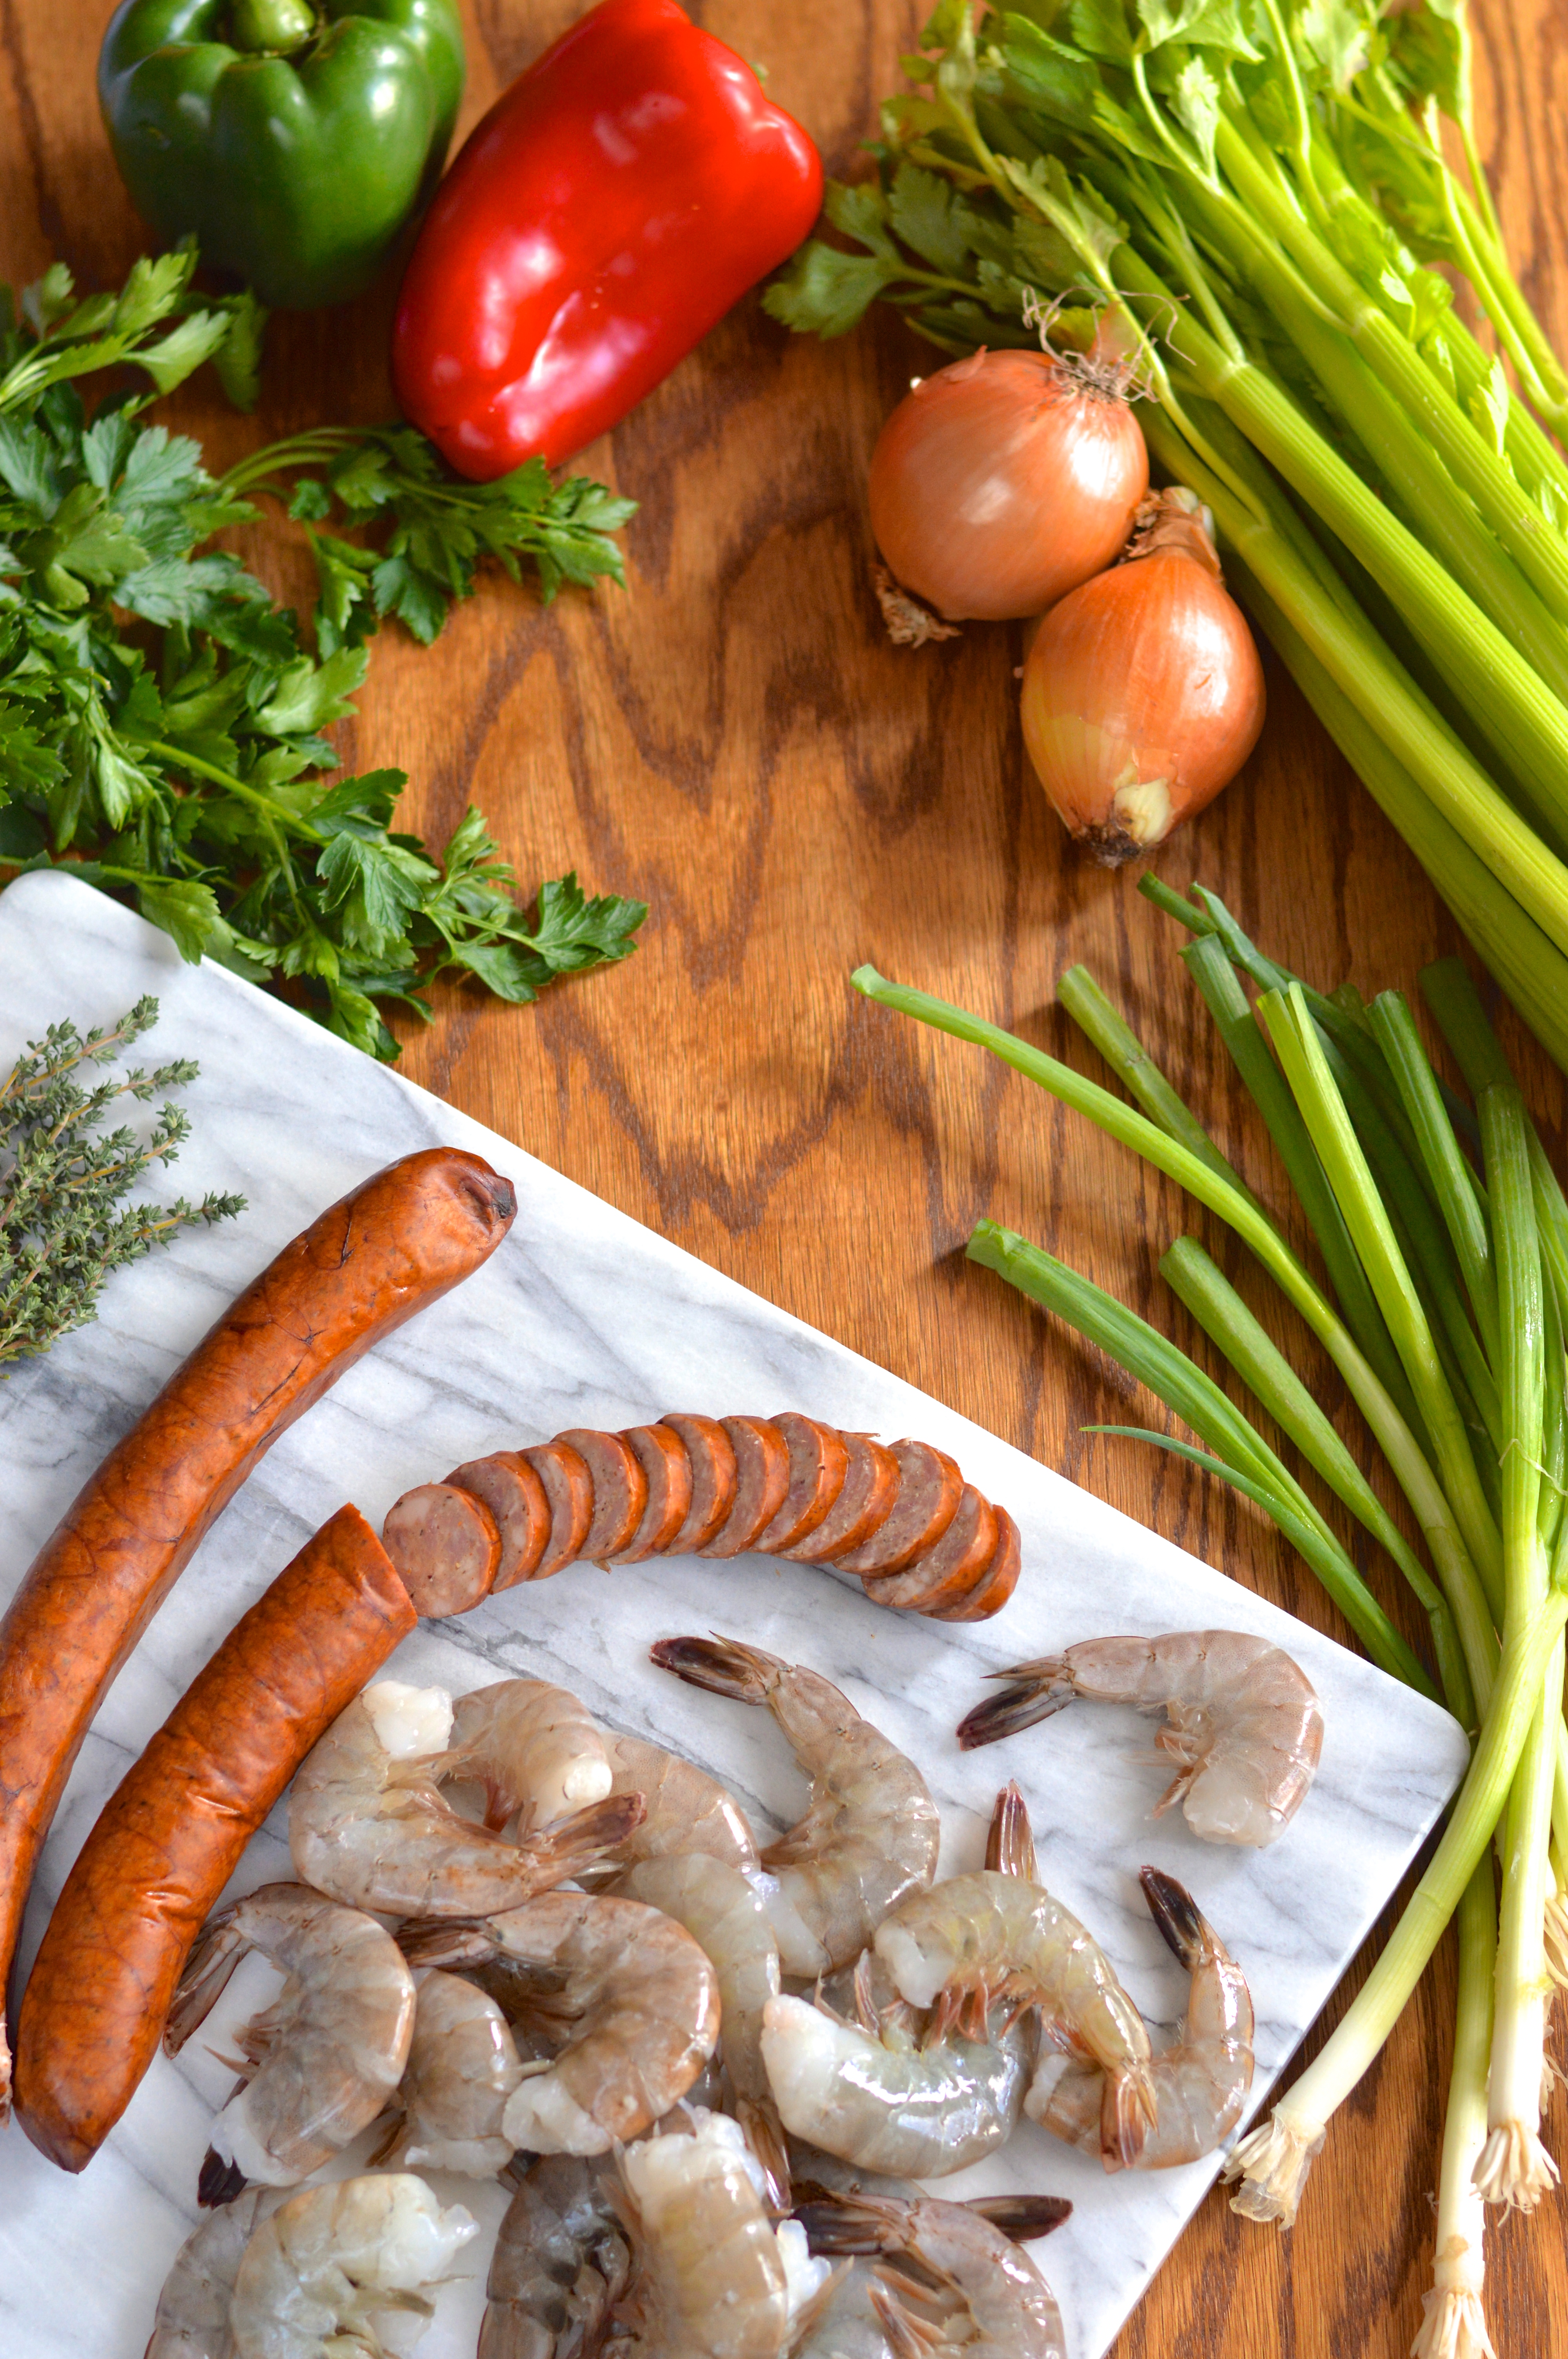
1 tablespoon olive oil (or bacon grease, if you have it, will add a bit of welcome smokiness)
12 to 16 oz. Andouille sausage, thinly sliced
1 lb boneless skinless chicken thighs, cut into small bite sized cubes
1 medium yellow onion, diced
1 red bell pepper, seeded and diced
1 green bell pepper, seeded and diced
2 to 3 ribs of celery, diced (about 1/2 cup)
4 garlic cloves, minced
1 1/2 cups of corn kernels (fresh is best but frozen is fine)
2 cups long grain rice
2 tablespoons parsley, finely chopped
1 tablespoon thyme, minced
2 1/2 teaspoons smoked paprika
1/4 to 1 teaspoon ground cayenne pepper (to your taste)
2 teaspoons cumin
1 (15 oz) can, crushed tomatoes
3 cups chicken stock
1 lb. shrimp, cleaned peeled and deveined

garnish:
fresh thyme, parsley, or green onion

Preheat 1 tablespoon of oil or grease in a heavy stockpot or dutch oven over medium-high heat. Brown andouille for about 5 minutes, remove from oven, leaving grease, and set aside.
Add chicken thighs, season with salt and pepper, and cook about 5 minutes. They don’t need to be cooked through, just have a bit of color on them. Remove and set aside with sausage
Add onions, bell peppers, and celery and sauté for 4 to 5 minutes or until onions barely begin to look translucent.  Season with salt and pepper. Stir in garlic and corn and continue to sauté for 2 minutes more.
Add rice, herbs and spices and sauté for 4 to 5 minutes. Season well with salt and pepper.
Stir in crushed tomatoes, stock, chicken thighs, and sausage. Bring mixture to a boil, then reduce the heat to simmer and cover. Cook for about 15 to 20 minutes or until cooked about 2/3 of the way, then add shrimp by gently pressing shrimp slightly into the mixture. DO NOT STIR while rice is cooking.
Cover again and continue to simmer for 7 to 10 minutes or until rice is cooked through and the liquid has evaporated.
Gently toss jambalaya together to incorporate shrimp and fluff the rice. Top with chopped parsley or sliced green onion, and serve.

orecchiette with sausage and broccoli rabe

So according to the name up at the top of the page, I do most of my cooking, baking, home improvement projects, and general homemaking in a little known town called Brooklyn.

You’ve heard of it maybe?

orecchiette with sausage and broccoli rabe | Brooklyn Homemaker

I’m not sure how familiar most of you are with the different neighborhoods in Brooklyn, but the area where I live is called Bushwick. Bushwick is pretty much as far north as you can get before accidentally crossing over into Queens, and by subway it’s only a few stops away from it’s bigger, wealthier, more popular sister neighborhood Williamsburg.

orecchiette with sausage and broccoli rabe | Brooklyn Homemaker

When I first moved to Brooklyn in 2007, Williamsburg was still a growing artist community and Bushwick was an industrial no mans land that hadn’t yet been invaded by more than a handful of hipsters. In those days Williamsburg was still (almost) affordable, and was still home to art galleries, dive bars and record stores, but a good friend of mine had a place in Bushwick and let me crash until I got on my feet, so I landed in Bushwick and never left.

orecchiette with sausage and broccoli rabe | Brooklyn Homemaker

In the years since, Williamsburg has become a playland for the rich and famous and one of New York’s biggest tourist destinations. Thanks to rising rents forcing young people further out, Bushwick was recently named one of the hippest neighborhoods in the world by Vogue Magazine. In 2007 Bushwick was a very different place. It was one of the most affordable neighborhoods in Brooklyn, which I why I stuck around, but it was also dirty and dangerous and filled with just as many junkies as it was rats.
We’ve gone from dead rats and pepper spray to baby strollers and art galleries. Abandoned buildings and needle exchanges to luxury condos and organic food co-ops.

If I hadn’t found a rent stabilized apartment a few years back I probably couldn’t even afford to live here anymore.

orecchiette with sausage and broccoli rabe | Brooklyn Homemaker

Bushwick has always been a neighborhood in transition, since the very beginning. Originally a farming community, in the 1800s Bushwick grew into a beer brewing hub filled with German immigrants, their breweries, and their huge mansions lining Bushwick Avenue. Prohibition eventually shuddered most of the breweries though, and by the 1950s Bushwick had become one of New York’s largest Italian neighborhoods.
Big changes came again as post war white families flocked to the suburbs and were replaced largely by Puerto Ricans immigrants and African Americans. According to US Census records, in just one decade Bushwick’s caucasian population dropped from over 90% in 1960 to less than 40% in 1970.

Thanks to the energy crisis of the 1970s and the closures of most of Bushwick’s industry, the neighborhood was quickly overrun with crime, drugs, abandoned buildings, and urban decay. Bushwick was one of the neighborhoods hardest hit by riots and looting during the New York blackout of 1977, forcing even more businesses out of the area. Things didn’t improve any during the 1980s and 90s, but by the late 2000s things finally started to turn around as Williamsburg artists flocked in to take advantage of the neighborhood’s low rents and large loft spaces. I’ve been here for about 8 years and I’ve seen things change so quickly and completely it makes my head spin. I can’t even begin to imagine what this neighborhood will look like in another 10 years.

orecchiette with sausage and broccoli rabe | Brooklyn Homemaker

One of the easiest places to visualize all this transition first hand is Graham Avenue. Cultures literally clash as streets signs on Graham Ave declare “Avenue of Puerto Rico” south of Metropolitan Ave, but suddenly change to “Via Vespucci” north on up to the BQE. Avenue of Puerto Rico is populated with cheap clothing stores, Iglesias, and Puerto Rican beauty supply shops; but cross Metropolitan Ave and it feels like a whole different neighborhood dotted with Italian restaurants, pizzerias, and wine shops.

orecchiette with sausage and broccoli rabe | Brooklyn Homemaker

Russell recently heard about an old Italian butcher shop on the Via Vespucci side of Graham Ave called, appropriately enough, The Pork Store. He paid them a visit on his day off and brought home some of the best Italian sausage I’ve ever tasted, along with a gorgeous bag of imported Orecchiette. I knew I wanted to make something amazing to put his Bushwick bounty to good use, but knew I had to keep it simple enough to let these superior ingredients shine.

orecchiette with sausage and broccoli rabe | Brooklyn Homemaker

All I needed was a big bunch of broccoli rabe, sometimes called rapini, and a bit of nice dry white wine. Broccoli rabe has a grassy bitterness that stands up really well to the unctuous richness of sausage and cream. White wine adds just a touch of sweetness to counteract the bitterness of the rapini, and al dente Orecchiette is nice and thick and adds great texture and happens to be the perfect bite size. A bit of cream gives the reduced white wine a bit of saucy body, and a handful of salty grated parmesan cheese brings everything together.

If you don’t have access to a local Italian butcher shop, just get the freshest and best Italian sausage you can find. If you can’t find orecchiette, any bite sized thick cut pasta, something like penne or bow ties, will do just fine.

This dish is simple, delicious, and perfectly satisfying. The best part though, is how quickly and easily it comes together if you start cooking at the same time you bring the pasta water to a boil. Everything else should be done just in time to drain the pasta and all you have to do is toss it all together and dig in!

orecchiette with sausage and broccoli rabe | Brooklyn Homemaker

Orecchiette with Sausage and Broccoli Rabe

1 medium onion, diced
1 tablespoon olive oil
1 lb mild italian sausage, casings removed
1 lb broccoli rabe
1 lb orecchiette pasta
1 cup white wine
1 /2 cup heavy cream
1/2 cup finely grated parmesan cheese
salt and pepper to taste, if needed

Bring a large pot of salted water to a boil on one burner while you prepare the rest of the meal on another.

Heat olive oil in a large skillet. Sauté onion until soft and translucent, about 5 minutes. Add sausage and break up with a spatula or spoon as it cooks. Once the sausage is fully cooked, add half of the white wine and reduce until almost completely dry. Once reduced add the remaining wine and reduce until almost dry again.

Remove thick woody stems from broccoli rabe and discard. Roughly chop or tear the leaves and heads into large bite sized pieces.

Cook pasta to al dente according to package directions. Meanwhile, add heavy cream and broccoli rabe to the sausage and onion mixture and cook until dark green and wilted through, about 3 or 4 minutes. Add about a half cup ladle of pasta water and reduce for about 5 minutes more. Taste and see if seasoning needs to be adjusted. (I didn’t need to add any salt because my sausage was salty enough for the whole dish.) Drain cooked orecchiette and combine with sausage and broccoli rabe mixture. Add grated parmesan and toss toss toss until well combined.

Serve with an additional shaving of parmesan if desired.

garlicy lemony creamy classic hummus

When I was a teenager hummus was a unknown and totally exotic foreign food.

garlicy lemony creamy classic hummus | Brooklyn Homemaker

Those years were recent enough that I probably should have know what hummus was, but I grew up far enough upstate as to be rather isolated from the food trends and cultural open-mindedness of the big city.

garlicy lemony creamy classic hummus | Brooklyn Homemaker

In the 90s in Auburn, NY, the closest most people ever got to experiencing foods from other cultures was Chinese take out or one of the many MANY old school Italian restaurants.

Or maybe Taco Bell.

garlicy lemony creamy classic hummus | Brooklyn Homemaker

When I entered high school I met a whole new group of friends; among them were the punks, hippies, goths, skate boarders, hacky sackers, vegetarians, and vegans of the alterna-teen umbrella. Falling in with a different crowd meant hearing new music, having new adventures, and experiencing new foods.

Sushi! Indian! Falafel! So new! So Exciting!

garlicy lemony creamy classic hummus | Brooklyn Homemaker

One of my favorite discoveries was hummus.

Growing up with staunchly American cuisine and lots of convenience foods, Hummus was completely foreign and exotic to me. It was simply bursting with unfamiliar spices and bold flavors that I’d never encountered before my teen years. Even the texture was new to me, and I couldn’t get enough of the stuff.

I still remember the first time I tried to get my mom to buy some for me in the grocery store and she had no idea what the heck it was or why in the world I’d want to eat it.

garlicy lemony creamy classic hummus | Brooklyn Homemaker

One of my favorite things about hummus even today is how versatile it can be. It makes a great dip at parties, a delicious spread on a sandwich, and even works as a side dish or major part of a meal. One of our favorite things to do when we make our own hummus is to thinly slice, marinate, and broil some chicken breast and serve it alongside some sliced cucumbers, grilled pita wedges, and giant bowl of hummus for dipping.

garlicy lemony creamy classic hummus | Brooklyn Homemaker

There are many different ways to make hummus and just as many flavors you can blend into it. Personally, I prefer a classic approach with lemon, garlic, and cumin. I also like to take the extra step of soaking and boiling dried chickpeas rather than using canned. I think dried chickpeas have a slightly cleaner flavor and make it much easier to control the amount salt you add.

This recipe can be made thick and chunky, or creamy and smooth, depending on how long you process everything. I myself like to let the food processor whir and whir until the hummus is unbelievably smooth and silky. While it’s really traditional to serve hummus with a drizzle of olive oil, I like to add some extra in while it’s pureed for even more velvety creaminess.

While the flavors in this recipe are very traditional, I like to turn up the volume and add a little bit extra lemon and garlic to make sure they really shine through. If you’re not as big a fan of raw garlic, feel free to skip one or two of the cloves.

garlicy lemony creamy classic hummus | Brooklyn Homemaker

Classic Creamy Hummus

  • Servings: makes about 3 or 4 cups
  • Print
1 cup dried chickpeas
1 tablespoon plus 1/4 teaspoon baking soda
1/2 cup tahini
juice of 2 to 3 lemons
3 to 4 cloves of garlic (less if preferred)
1 teaspoon cumin
1 teaspoon salt
1 tablespoon olive oil, plus more for serving

Wash the chickpeas three or four times, or until they don’t cloud the water when submerged. Check for stones and other non-chickpea debris.

Soak the chickpeas in clean water with 1 tablespoon of baking soda for at least 8 hours or overnight. Wash and drain them, and soak again in new clean water for a two or three more hours. The grains should be almost double their original size.

Wash and drain the chickpeas once more and put them in a large pot. Cover with water and add remaining baking soda and NO salt. Bring to a boil, reduce heat to a gentle simmer, and cook until the grains are tender enough to be easily smooshed between two fingers. It should take about an hour to an hour and a half. As they cook some foam may form on the water and skins may rise to the top. Try your best to skim off as much of the foam and as many of the skins as possible. The fewer skins you have the creamier and smoother your hummus will be. Once finished, drain them and reserve some of the cooking liquid.

Let the chickpeas cool for a bit before adding to a food processor. Pulse them a few times before adding the remaining ingredients and processing until you get the desired texture. I like mine super smooth and creamy so I just let it go for a bit, but if you like yours chunkier just pulse it until it comes together in a thick chunky paste. If the Humus is too thick, add some of the cooking water or some more lemon juice or olive oil. Try to get it a bit thinner than the consistency you desire, as it will thicken a bit once it’s refrigerated. Check for seasoning, and if you’re happy with the levels of salt, cumin, garlic, and lemon, you’re done!

Serve with a drizzle of good olive oil and some chopped parsley if desired.

This recipe recipe doubles very easily, but you do not need to double the amount of baking soda used for either soaking or cooking.

thai style chicken noodle soup

March is here, which means that winter is finally on it’s way out!

thai style chicken noodle soup | Brooklyn Homemaker

The other day I got off the train after work and looked up to notice the last warm fingers of daylight still touching the tops of the buildings in my neighborhood. I can’t tell you how warm and fuzzy that made me feel after walking home in the dark all winter long.

The days are getting longer, the air is getting (ever so slightly) warmer, and while the snow still seems to keep falling, spring will be here in just a few short weeks.

thai style chicken noodle soup | Brooklyn Homemaker

For now though, it’s still winter. If I ever had any doubt, all I’d have to do is look out my bedroom window to see the blanket of white snow perforated in tight tracks by the paws of little pups.

thai style chicken noodle soup | Brooklyn Homemaker

I’m no stranger to long winters. I lived in the Adirondacks for my college years, and grew up in Central New York, the land of lake effect snow and highway clogging blizzards.

Winters in the city have always paled in comparison, being more about rain and slush than actual snow accumulation. When I first moved to Brooklyn I would laugh when people complained about winter weather, but after living through more than a few New York City winters, I realize that freezing rain and grey haze are just as depressing and awful as snow that won’t quit piling up.

thai style chicken noodle soup | Brooklyn Homemaker

This winter has been one of the coldest on record here in Brooklyn, and has felt like one of the longest.

I have to admit, I’m over it.
Officially.

thai style chicken noodle soup | Brooklyn Homemaker

The idea for this recipe came from my desire for something warm and homey and satisfying, like old fashioned chicken noodle soup, mixed with my yearning for bright summery flavors that might draw me out of my cold weather funk.

I thought it was worth a shot to try marrying the idea of chicken noodle soup with the flavors of a Thai Tom Kha Gai coconut soup.

thai style chicken noodle soup | Brooklyn Homemaker

Let me tell you, this soup is amazing. It’s rich and satisfying while somehow also feeling light and healthy.

It’s got a mildly sweet tanginess from the acidic lime juice, a nice bright tropical creaminess from the coconut milk, and just a hint of spice from the fresh ginger and sriracha. The chicken thighs and stock add a nice richness and the carrots give it that traditional chicken soup feeling. The torn cilantro and green onion round out the flavor with green summery freshness, and the al dente rice noodles add a nice bit of texture and substance.

All together every bite is a bright vibrant burst of the tropics in the midst of a dreary grey winter.

thai style chicken noodle soup | Brooklyn Homemaker

2 tablespoons coconut oil (or olive oil)
4 cloves garlic, minced
2 tablespoons finely grated ginger
4 carrots, thinly sliced into disks
1 1/2 lbs skinless boneless chicken thighs
sea salt to taste
4 cups chicken stock
1 14 oz can coconut milk
juice of 1 to 4 limes *see note
1 1/2 tablespoons fish sauce
1 1/2 tablespoons sriracha
1/2 cup sliced scallions
1/2 cup torn cilantro leaves
6 oz package of rice noodles, softened or cooked according to package

Preheat oil over high heat in a large heavy bottom stockpot. Add garlic & ginger and cook, stirring often, for 1 minute. Add carrots and cook for 1 minute more. Add chicken thighs and cook for about 3 or 4 minutes. Add chicken stock & salt bring to simmer. Cover and simmer for 15 minutes. Remove chicken thighs with a slotted spoon and set aside to cool for 5 minutes or until cool enough to handle. Skim any foam off of the stock. Slice or shred chicken into bite sized pieces. Add the chicken pieces back to the stock along with coconut milk, lime juice, fish sauce, & sriracha. Taste and adjust seasoning if necessary. Bring just back to a simmer, remove from heat, add scallions and cilantro. Ladle into bowls, serve with a generous handful of rice noodles.

*cooks note: I am crazy for citrus so when I developed this recipe I used the juice of 4 limes. I was thrilled with the flavor and posted the recipe the way I liked it.
Over time, a few readers expressed that it was too much for them and they’d prefer it with less lime if they made it again. I’d suggest you that start with the juice of one lime and give it a taste before deciding if you’d enjoy more.