veg

favorite creamy coleslaw

I have the best job in the world, y’all.

favorite creamy coleslaw | Brooklyn Homemaker

Not only do I get to sell kitchenware and talk about food all day, but I work with a group of people who love food just as much as I do. A few times a year my boss organizes work events and parties, and they usually revolve around food (and drinking), and everyone in the store gets involved.

Most recently, to celebrate the warm weather and sunshine, she invited us to her home for a seafood boil.

favorite creamy coleslaw | Brooklyn Homemaker

I wish you could see the email chain with never-ending menu planning notes, logistics and to-do lists. I seriously LOVE my job.

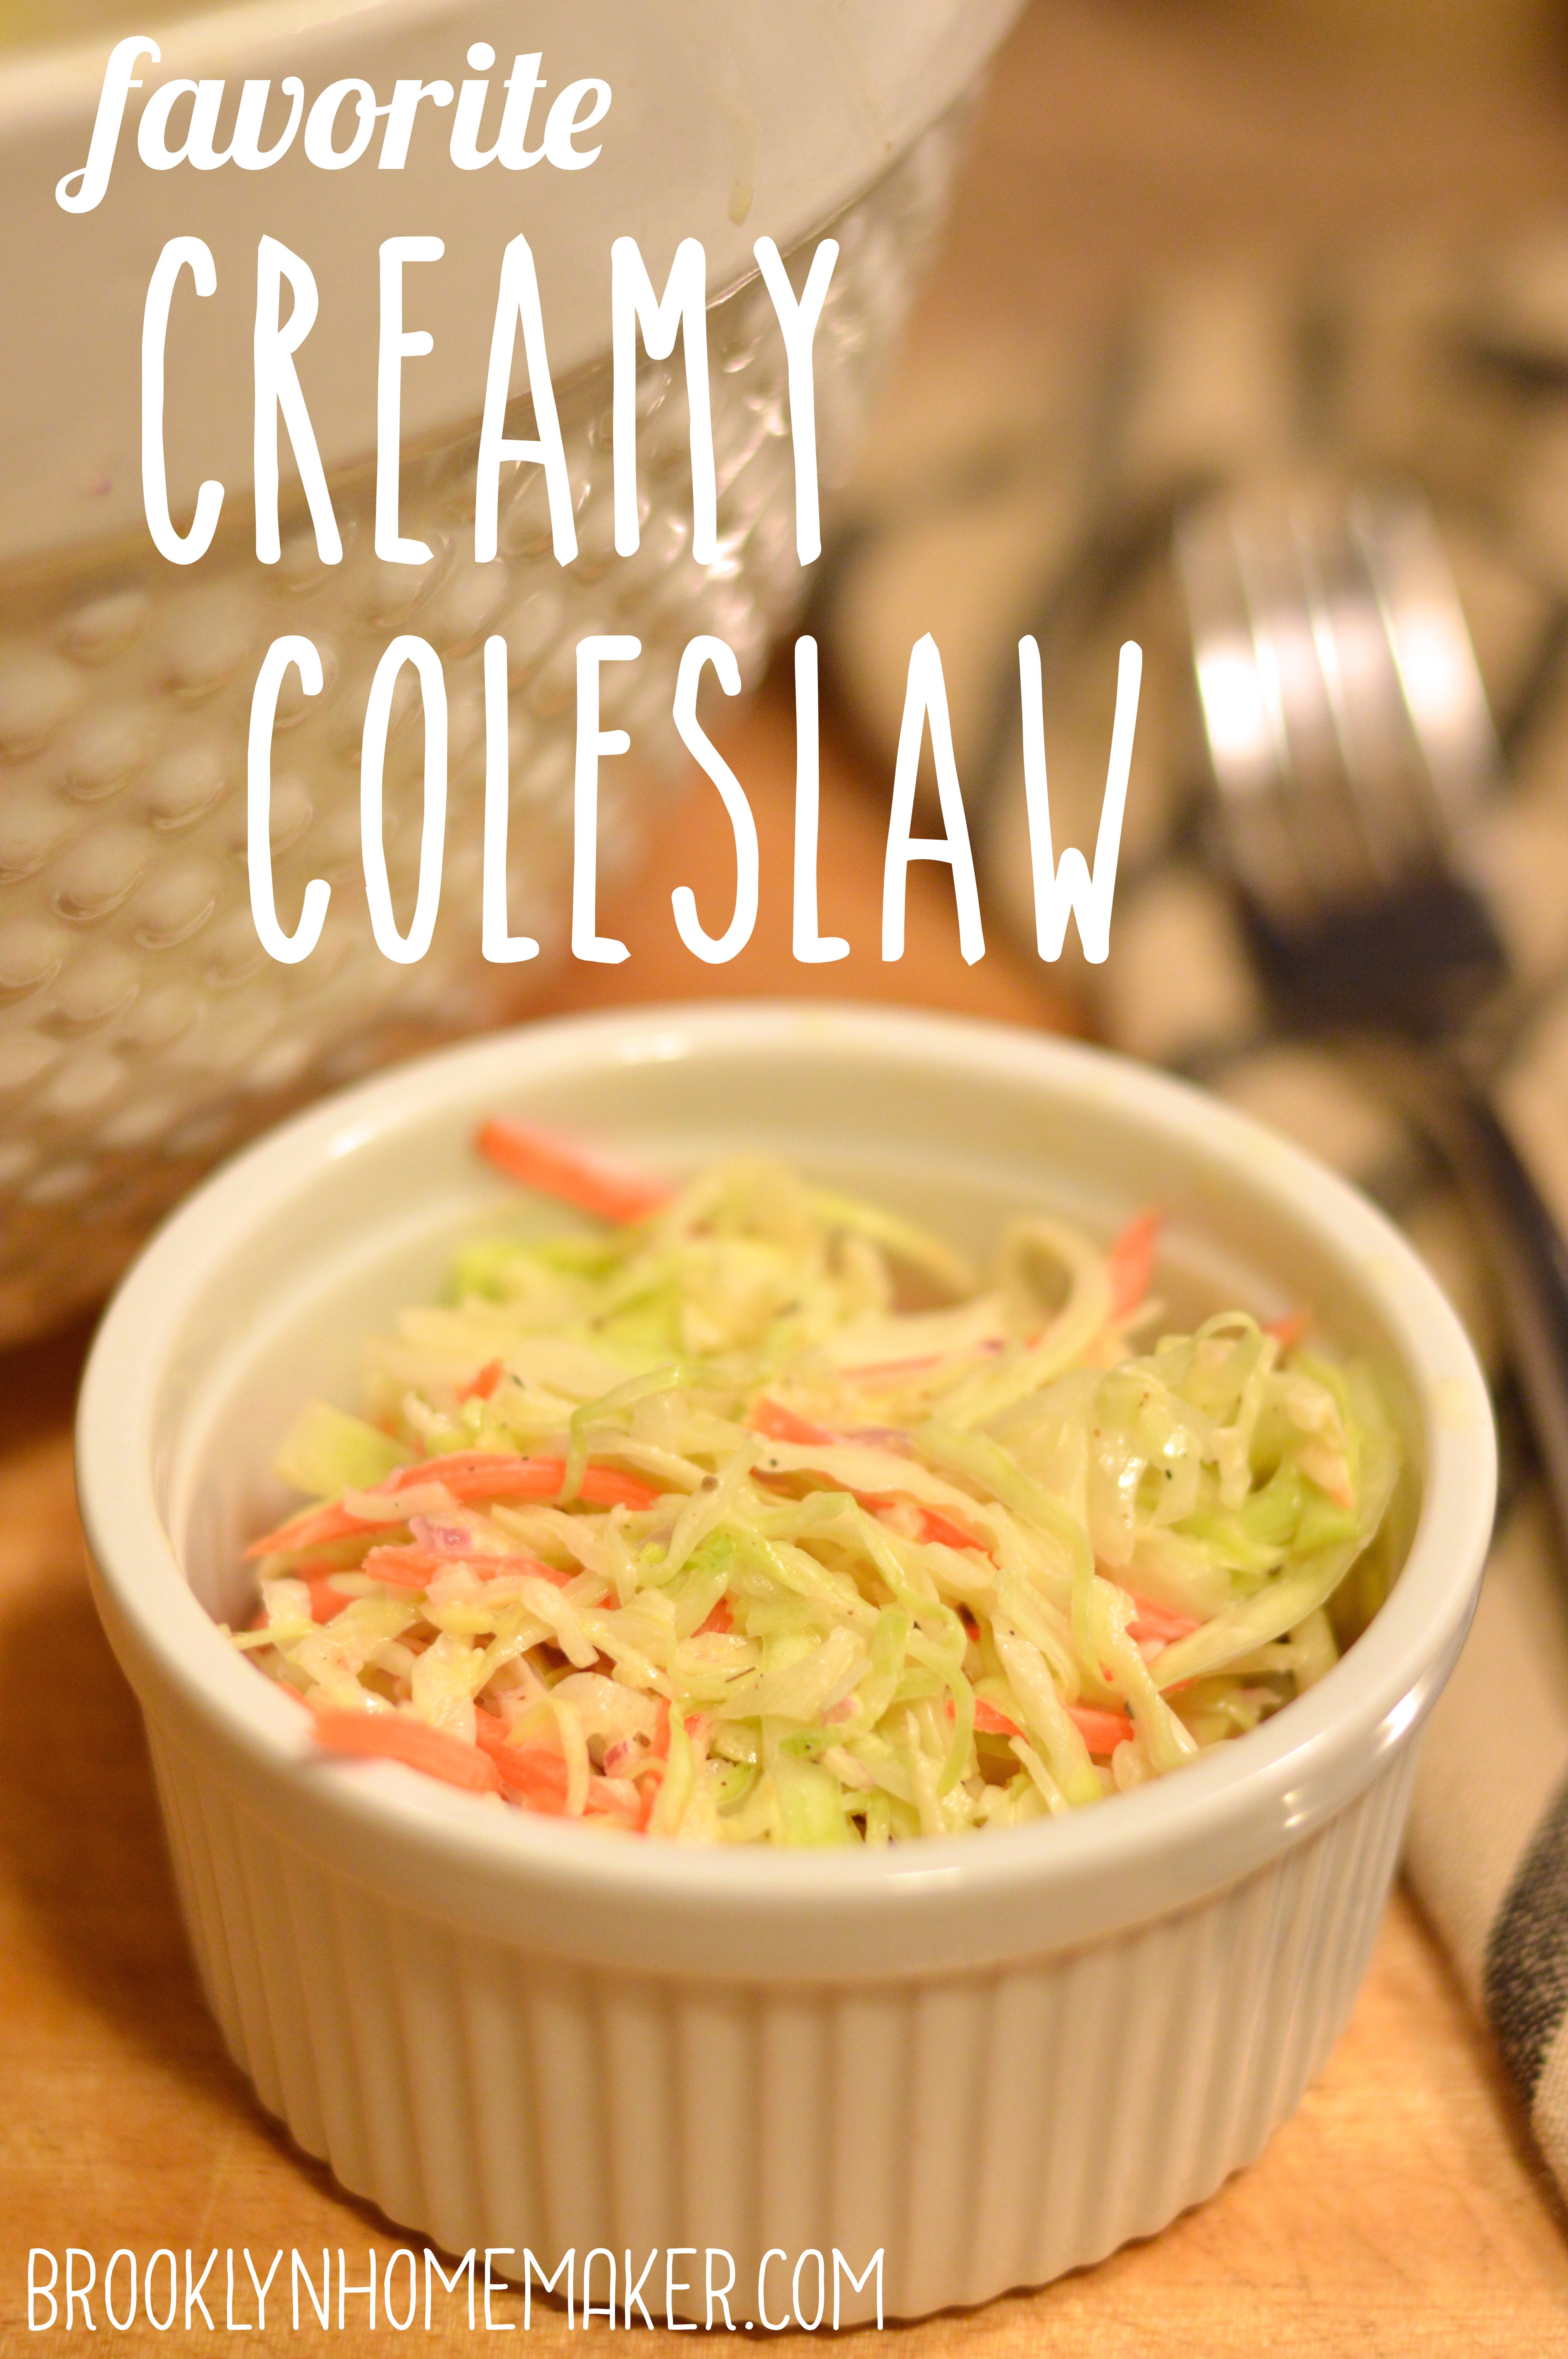
The spread included a huge cooler full of crawfish flown in from Louisiana and a giant bag of 300 littleneck clams, along with seafood stew, boiled corn, potato salad, vegetarian paella, homemade caesar salad, lemon bars, key lime pie, beer, wine, & vodka spiked lavender lemonade. My contribution was a giant skillet of cornbread, a blueberry cornmeal cobbler, and coleslaw. Amazing coleslaw. This coleslaw.

favorite creamy coleslaw | Brooklyn Homemaker

I know coleslaw is an afterthought for most people, but I really love it. Like, a lot. Especially when it’s done right. I’m the kind of guy that eats, or at least tastes, the coleslaw every time it comes on my plate. For years I’ve struggled to find a classic homemade coleslaw recipe that I really loved. This time I finally got it right. I swear this might be the only coleslaw I ever make for the rest of my days. Probably not though. I can’t leave well enough alone.

Anyway, I’ve tried a ton of different recipes and none of them ever seemed to live up to my hopes and expectations. I’ve adjusted the levels of mayonnaise, vinegar, sugar, & seasoning. I’ve experimented with different types of cabbage, and different shred sizes. I tried using celery salt, onion salt, mustard powder, flavored vinegars, you name it, but nothing I tried ever tasted quite right.

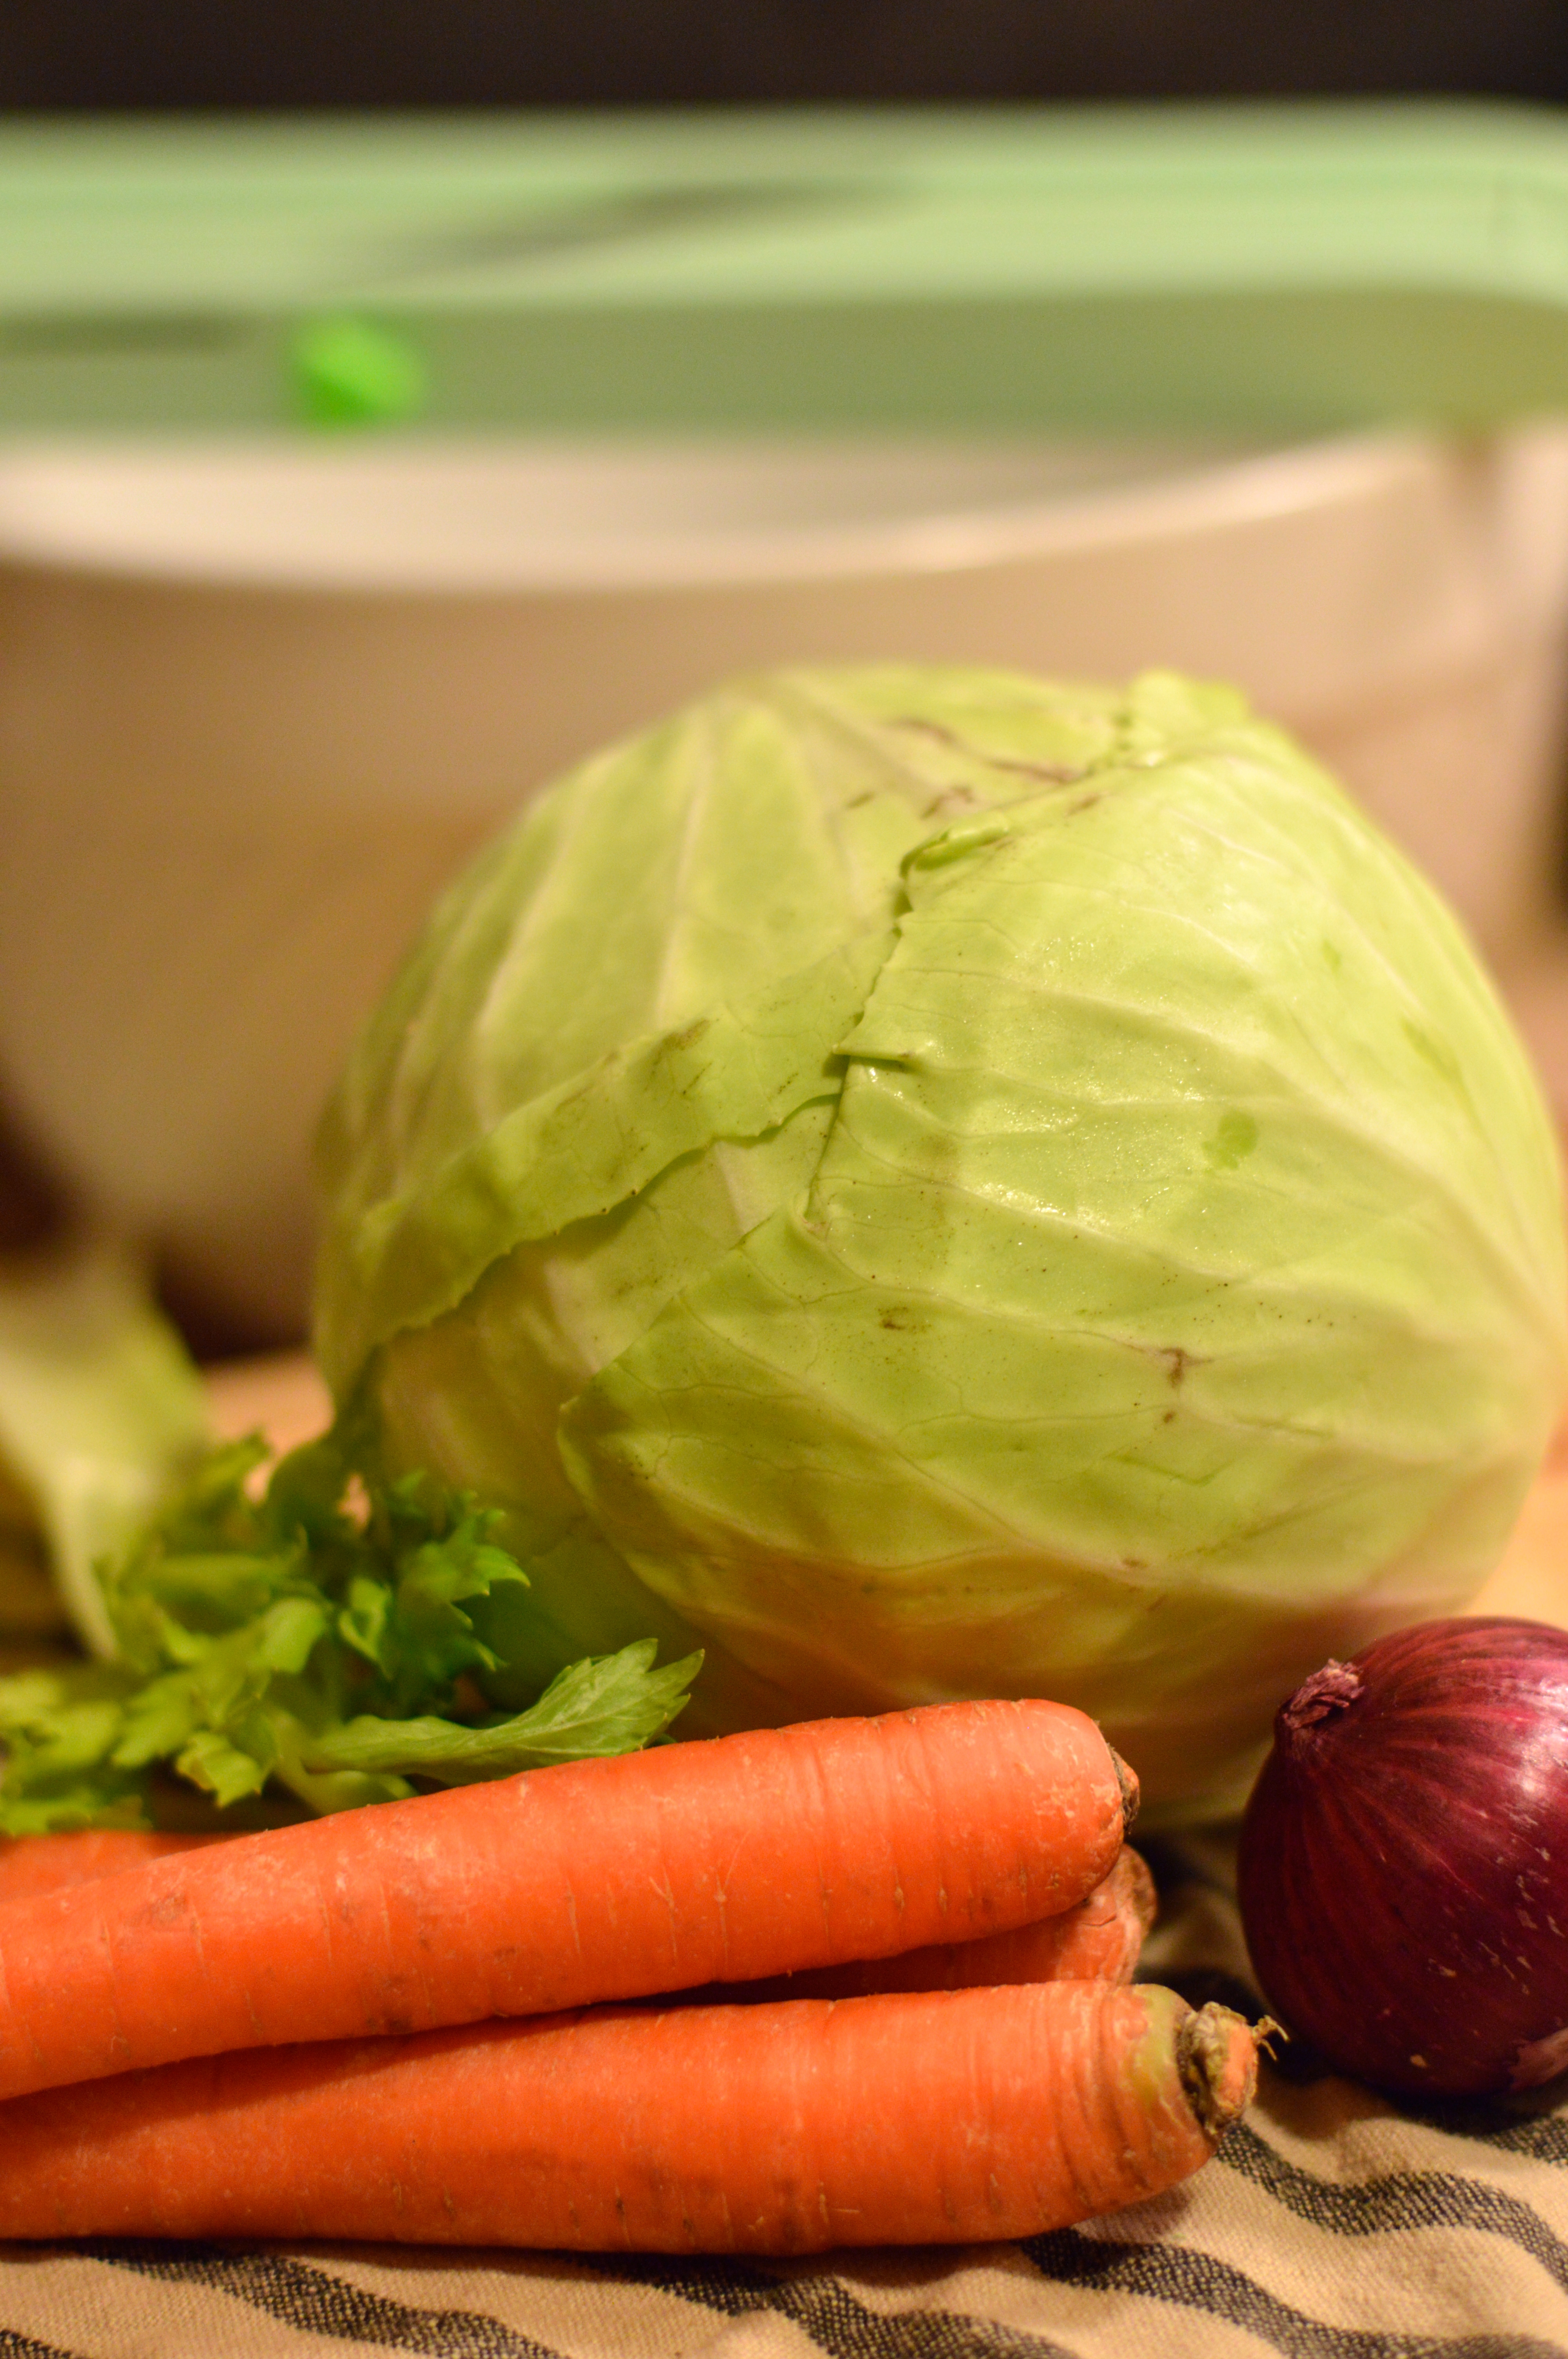
This time I went back to the basics and started with a simple classic recipe. Plain old white cabbage and carrots with mayonnaise and vinegar, but with just a few little twists.  I used apple cider vinegar rather than white vinegar because it has a bit more flavor and a nice subtle sweetness. I substituted celery seed and finely diced fresh celery instead of celery salt, and it made huge a difference, bringing an unexpected brightness and fresh summery flavor. I used some finely diced red onion for a subtle bite, and added a bit of dijon mustard for some depth and a tiny hint of spice. The sugar and salt are just enough to bring out all the bright fresh flavors and make everything pop without being overpowering.

favorite creamy coleslaw | Brooklyn Homemaker

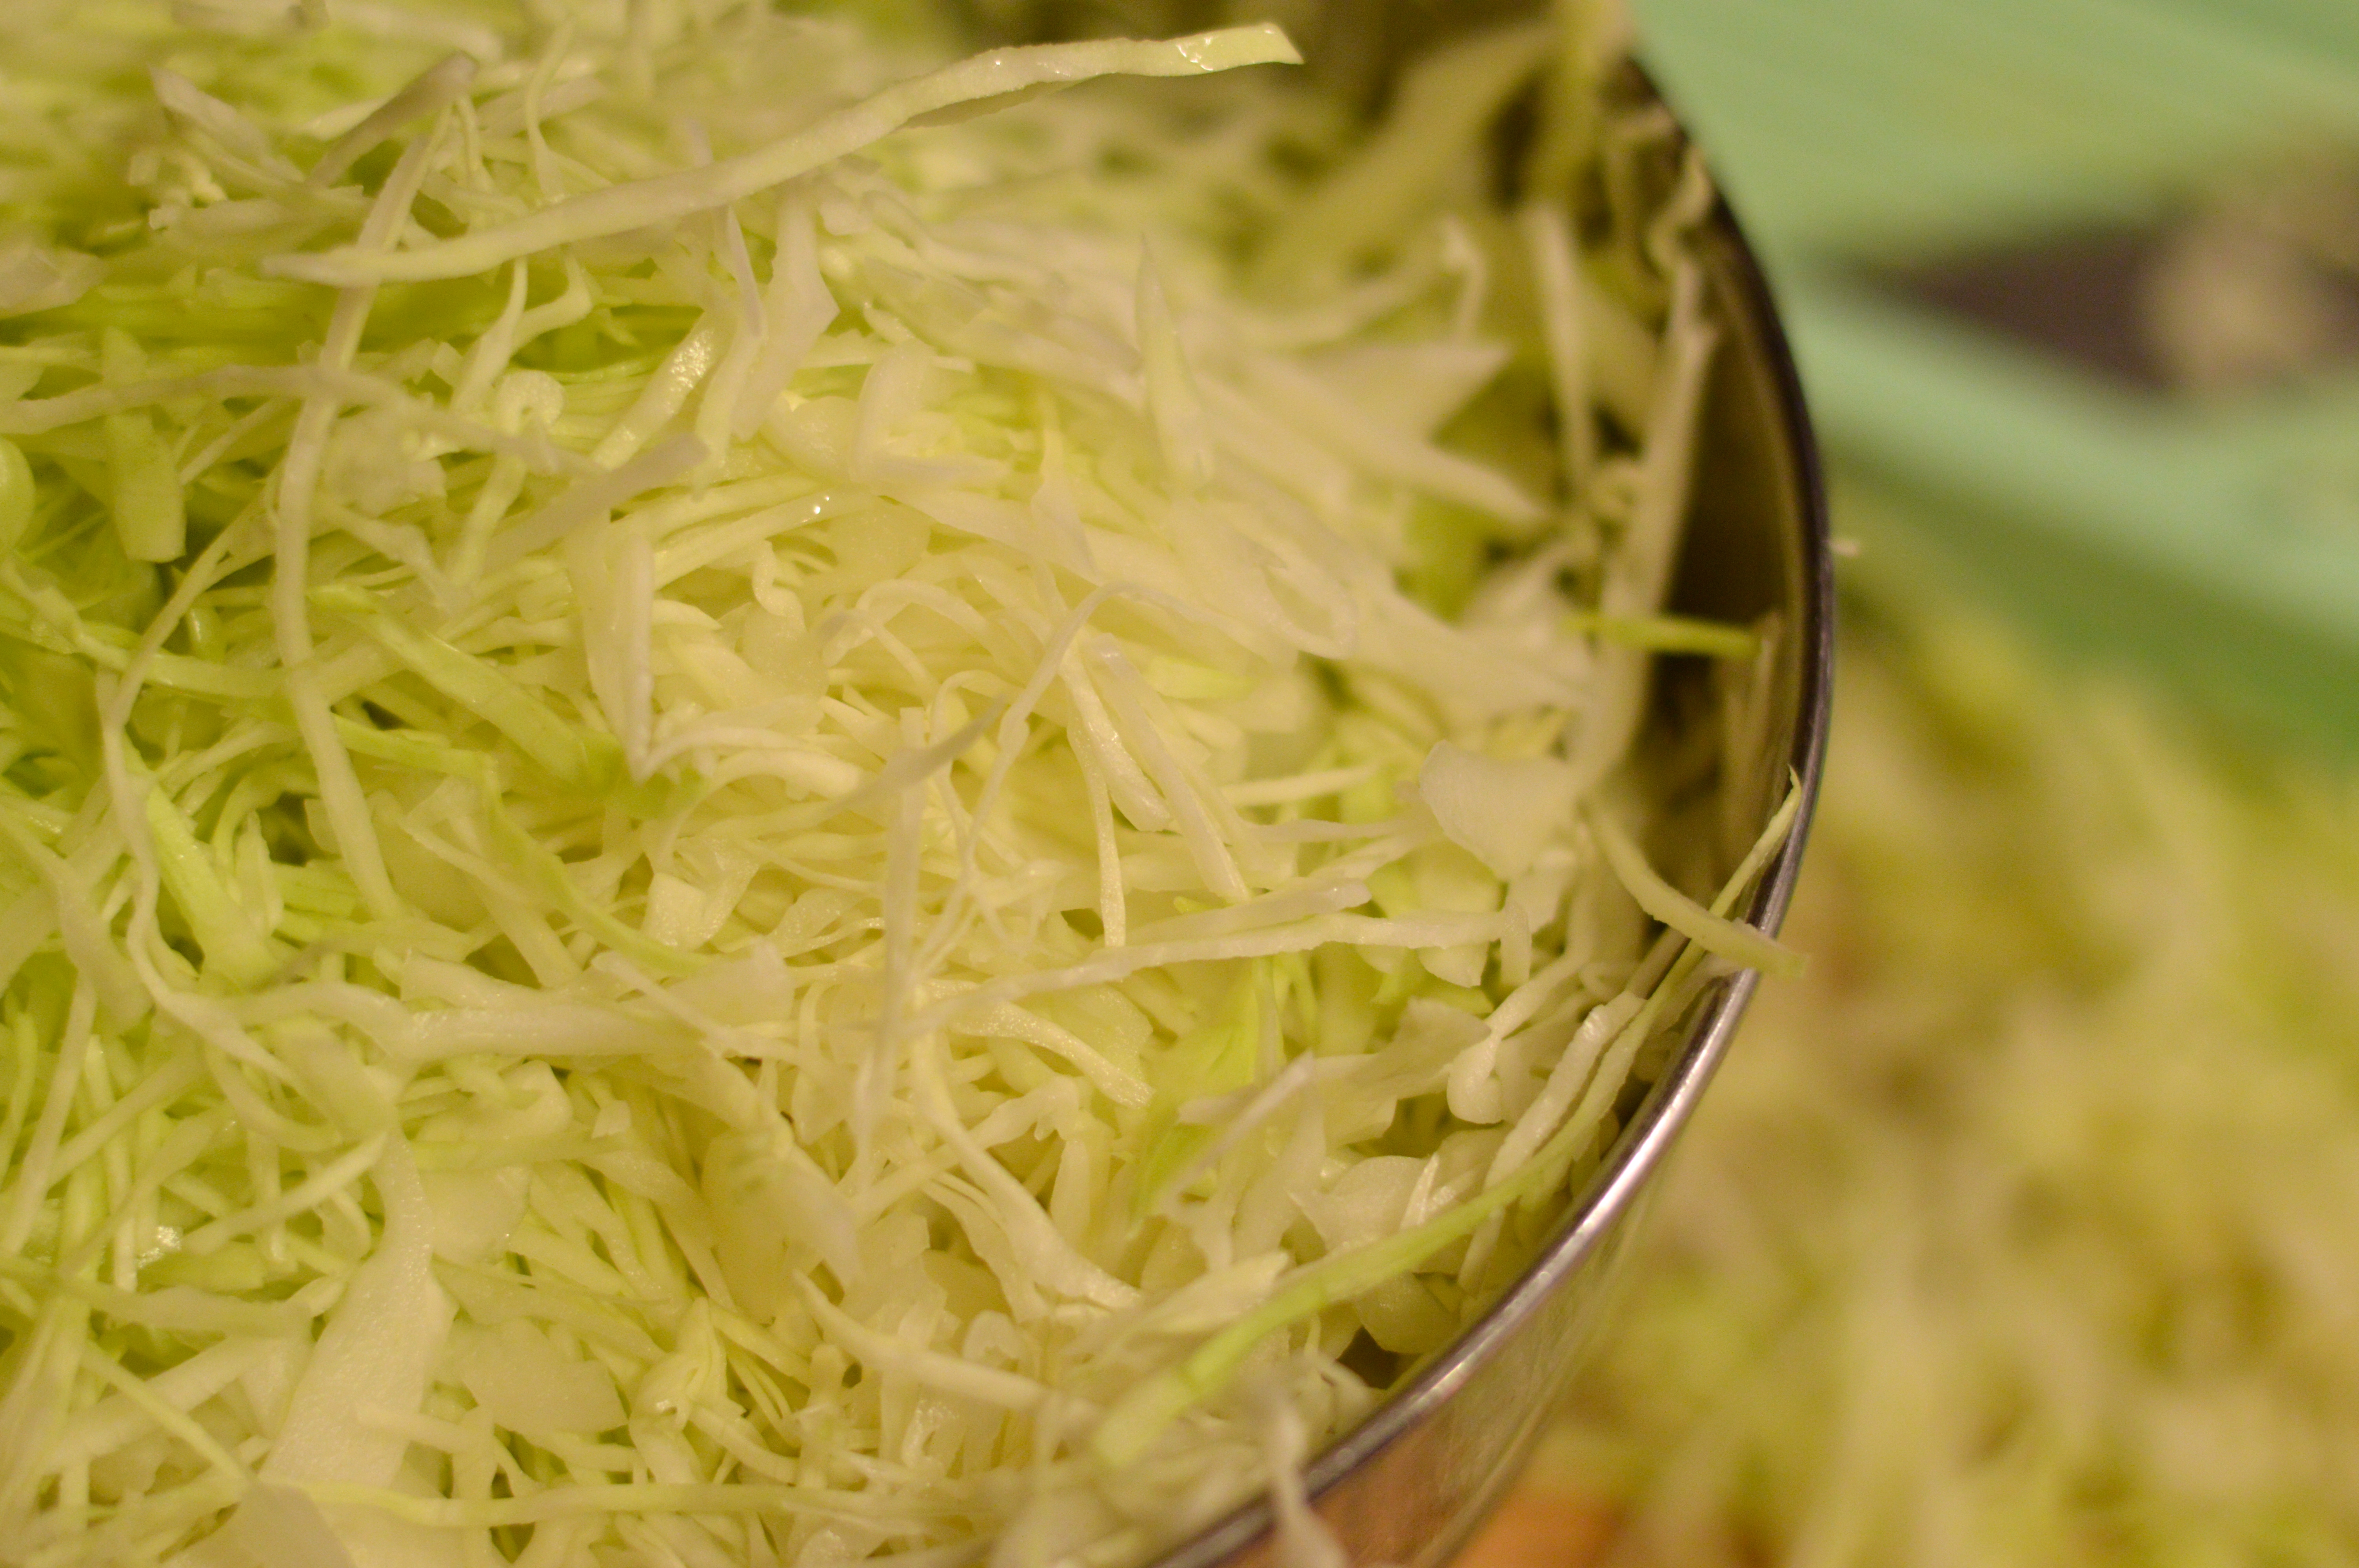
This is actually a really simple recipe to put together, especially if you have a mandoline slicer. I shredded the cabbage as finely as I could and, using the medium-tooth blade attachment, diced the celery and red onion just as fine. When you first shred it, the cabbage seems like SO MUCH, but once you toss it in the dressing it loosens up and compresses down. I think it’s important to let the cabbage soak in the dressing for at least an hour or two before serving, and it manages to stay crunchy and fresh even made a day or two ahead.

Just a quick side note, it turns out that our dogs LOVE raw shredded cabbage. They’re so funny sometimes.

favorite creamy coleslaw | Brooklyn Homemaker

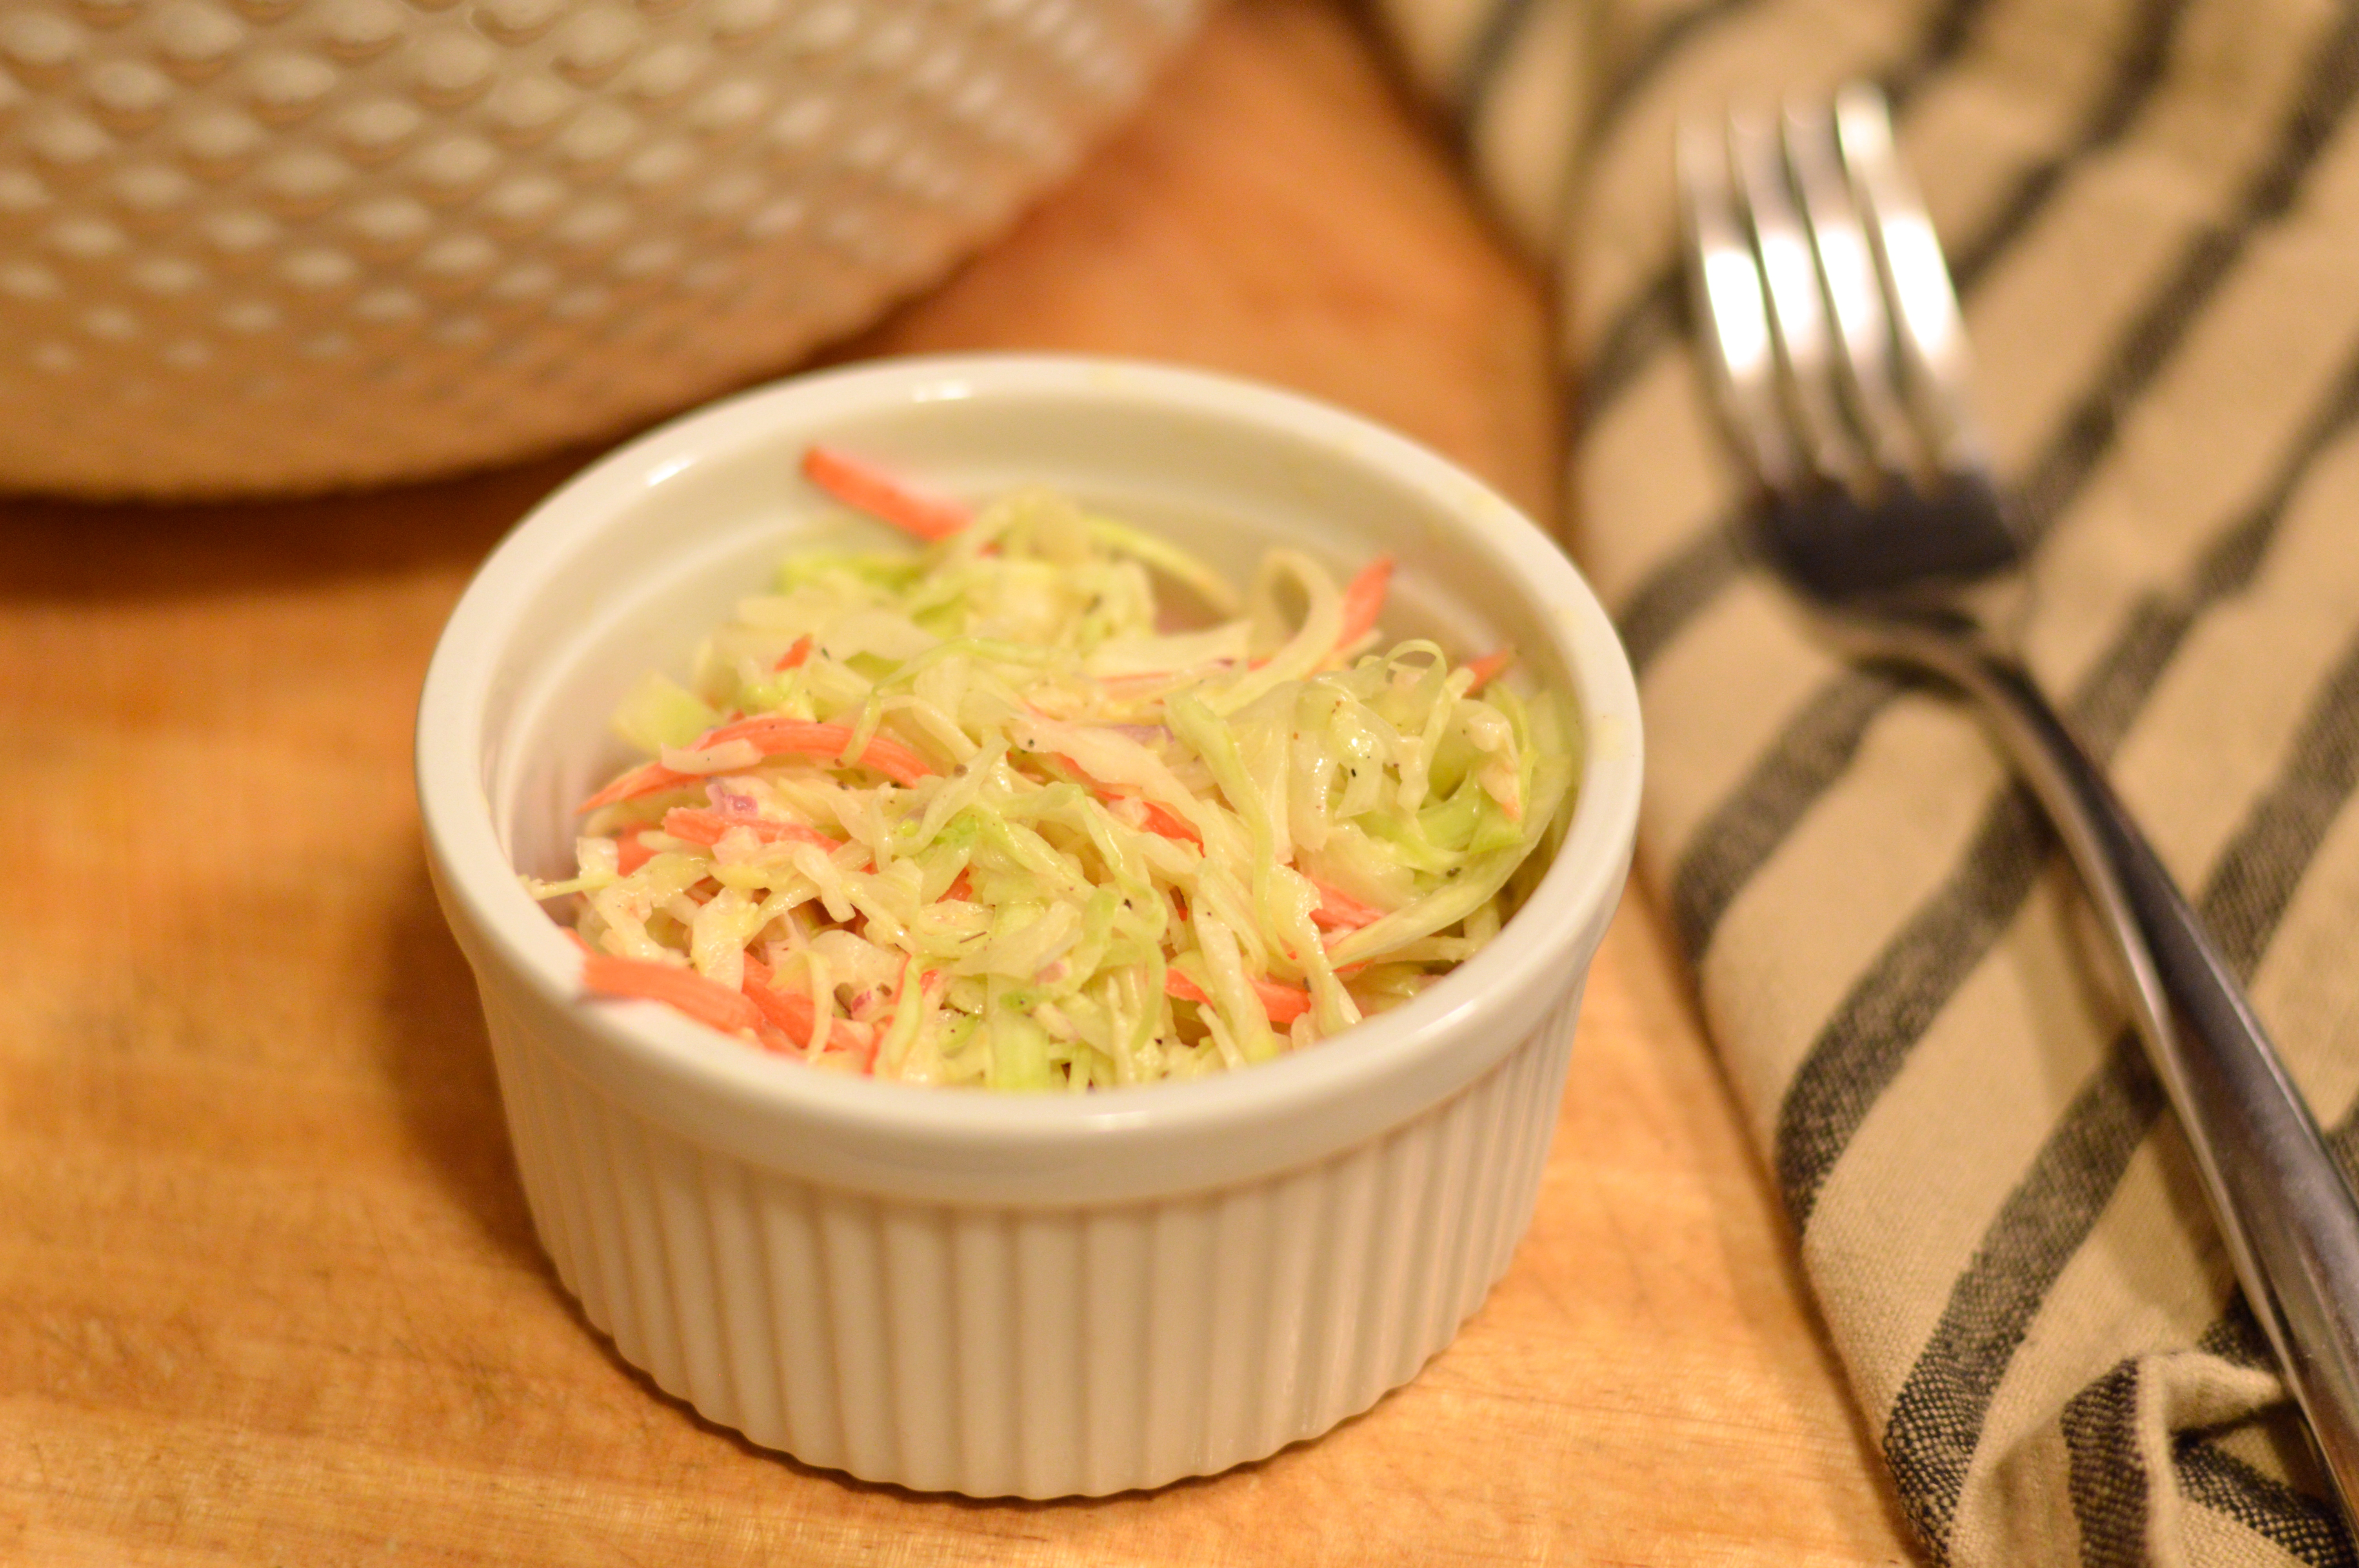
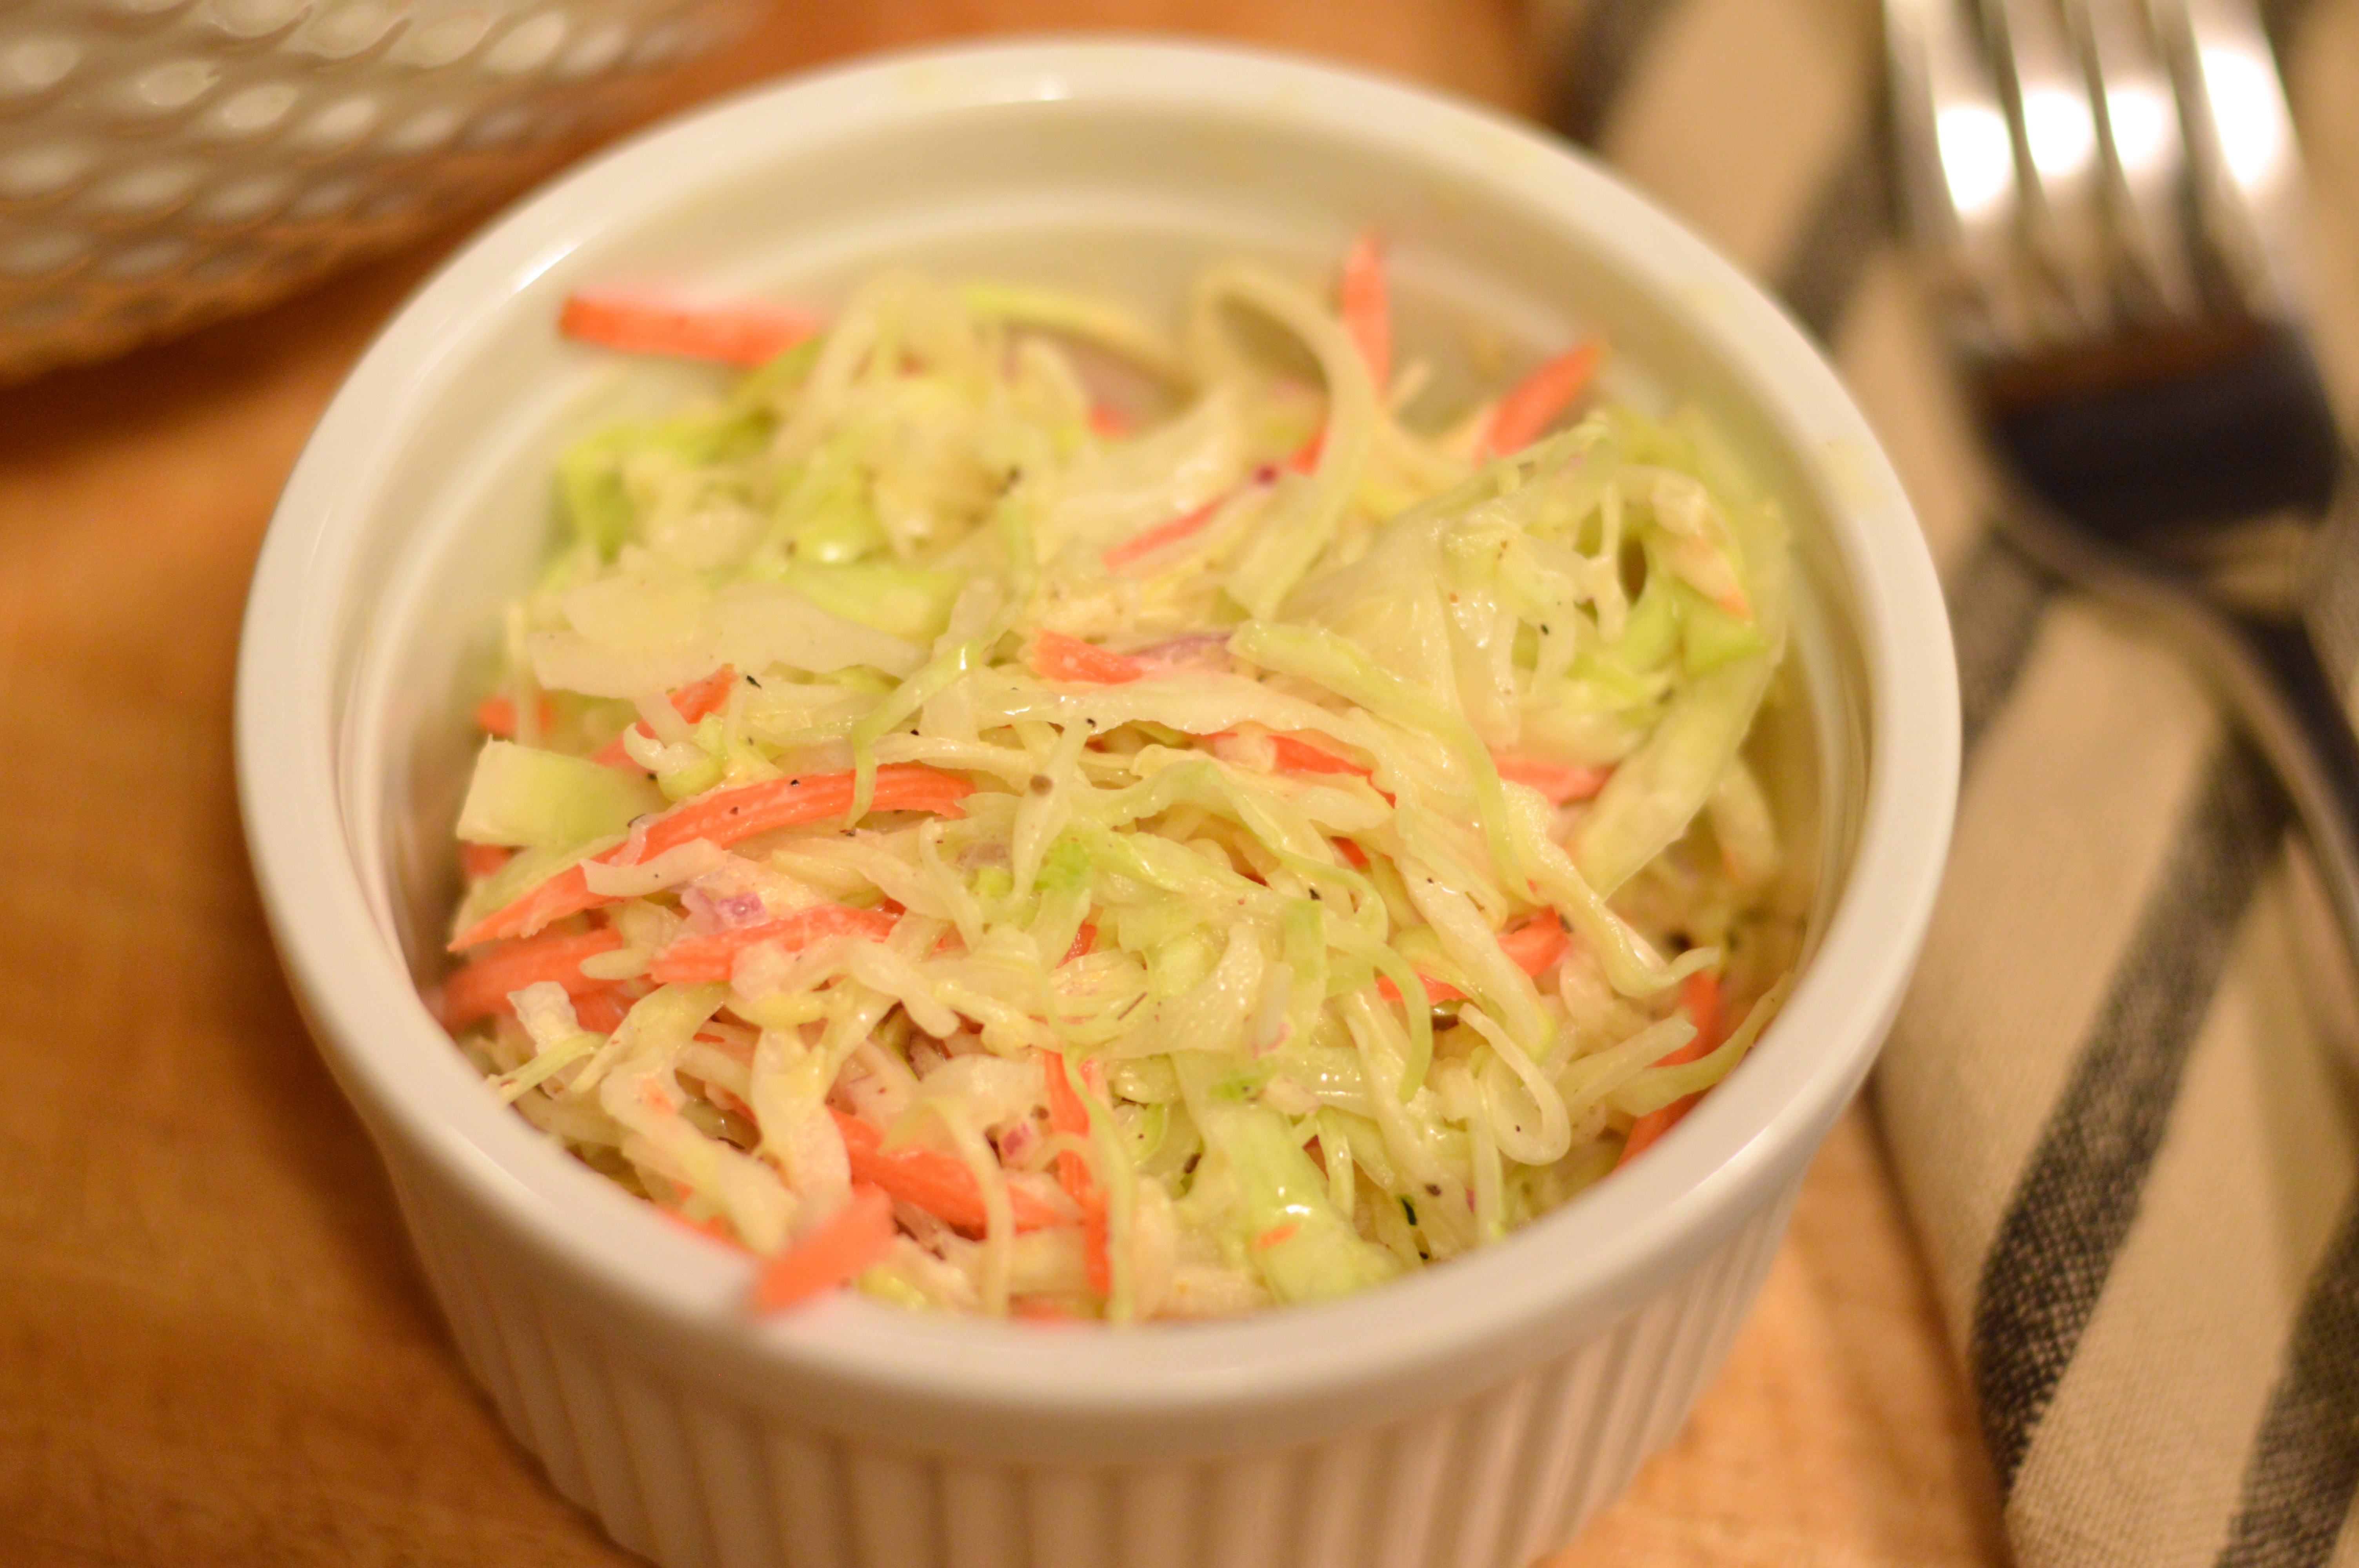
I know it’s just coleslaw, but I’m really proud of myself. The dressing is totally perfect too. Creamy, without being gloppy or overly mayonnaise-y. Tangy, not biting or vinegar-y. Subtly sweet, but not at all cloying. Juuuust right.

Look out summer. Here I come.

favorite creamy coleslaw | Brooklyn Homemaker

Favorite Creamy Coleslaw

1 medium head of green cabbage, finely shredded
1 small to medium red onion, finely diced
2 stalks celery, finely diced
3 carrots, julienned or grated

Dressing:
3/4 cup good quality mayonnaise
1/4 cup apple cider vinegar
1 tablespoons dijon mustard
1/4 teaspoon celery seed
1 teaspoon salt
1 tablespoon freshly ground black pepper
3 tablespoons sugar

Prepare all vegetables and toss together in a large bowl. This can be done with a sharp knife and/or a box grater; but I used a mandoline cutter with the cabbage, onion, & celery to get perfect thin shreds, and a julienne peeler to get long thin strips of carrot.
Whisk all dressing ingredients together in a medium bowl until well combined. Pour dressing over cabbage mix and toss toss toss. Cover and refrigerate for at least an hour. Before serving toss again to incorporate any dressing at the bottom of the bowl.
If served right away the cabbage will be wonderfully crisp, but this can be made up to two days in advance without getting too soft or soggy.

summery steak salad with chili lime dressing

OMG it’s actually summer now!

summery steak salad with chili lime dressing | Brooklyn Homemaker

It’s already felt like summer for weeks, but according to the dates on the calendar, it’s official now. Summer, with it’s long days and sunshine, picnics and parties, and farm stands and markets filled with fresh produce. Bright, vibrant, sweet, crunchy, juicy, wonderful, delicious produce.

summery steak salad with chili lime dressing | Brooklyn Homemaker

I know it’s not really corn season just yet here in New York, but real fresh sweet corn is starting to show up in the grocery store and that’s good enough for me. I seriously LOVE the first sweet corn of the season. It’s just so much sweeter and crunchier than the frozen bagged corn I’ve been eating all winter. I know the local stuff will be even fresher, sweeter, and more delicious, but it’s not time yet and I need my fix.

I’m not ashamed to admit that after slicing off the kernels, I was standing alone in the kitchen nibbling away at the ears to get at those last juicy little golden bits.

summery steak salad with chili lime dressing | Brooklyn Homemaker

When corn is fresh and ripe, it’s sweet and crunchy enough to go straight into the salad raw, right off the ear. For an extra layer of flavor though, I tossed the corn into a screaming hot cast iron pan for a couple minutes to roast the kernels just a bit.

summery steak salad with chili lime dressing | Brooklyn Homemaker

Along with the corn, I added crisp sweet slices of red bell pepper, romaine lettuce for body and crunch, red onion for bite, and big chunks of ripe avocados for their soft creamy texture. Then the cherry on top of it all was thinly sliced tender juicy steak.

summery steak salad with chili lime dressing | Brooklyn Homemaker

I think London Broil is perfect for this salad. It’s not too fatty, with nice even marbling, and free of any gristle or nastiness. Flank steak would work really well too. Either way, it’s best if you slice it super thin with a very sharp knife. Russell likes his more cooked than I do, so I sliced the steak in half and put his on a few minutes before mine. If everyone likes it the same way though, there’s no need. Generously season your steak, get your pan screaming hot, and let it go for a few minutes on either side. It really just takes a few minutes. You can cook it as much as you like, but it’ll be more tender, and better for a salad, at about medium rare or medium.

Quick side note, don’t attempt searing your steak on a non-stick pan. The high heat will ruin the surface. It’s best to use a cast iron or stainless steel skillet, but if you don’t have one you can put your steak under the broiler or on the grill instead.

summery steak salad with chili lime dressing | Brooklyn Homemaker

To pair with the sweet crisp veggies in the salad, I wanted a bright acidic dressing with a bit of spice. I chose to go for little more than a couple freshly squeezed limes with their zest, some good extra virgin olive oil, a touch of honey, and a bit of cayenne pepper and chili powder for spice. The dressing is really quick to throw together, and it really is the perfect compliment to all the other elements of this salad. Tangy, crisp, sweet, and acidic, with just a hint of heat.

summery steak salad with chili lime dressing | Brooklyn Homemaker

Summery Steak Salad with Chili Lime Dressing

Dressing:
zest and juice of 2 limes
3 tablespoons olive oil
2 teaspoons honey
1/2 teaspoon coarse Kosher salt
1/4 teaspoon ground black pepper
1/4 teaspoon chili powder
1/8 teaspoon ground cayenne pepper (if desired)

Combine all ingredients in a dressing bottle or measuring cup and whisk or shake vigorously.

Salad:
1 lb london broil
1 teaspoon coarse Kosher salt
1/2 teaspoon ground black pepper
1/2 teaspoon chili powder
1/4 teaspoon cayenne pepper (if desired)
1 large head romaine lettuce
1 tablespoon olive oil, divided
2 ears sweet corn
1/2 medium red onion, sliced into thin strips
1 red bell pepper, sliced into thin strips
1 avocado, cut into large bite-sized chunks

Season steak on both sides with salt, pepper, chili powder, and cayenne, and set aside to rest. Shuck the corn and slice the kernels off the ear using a sharp knife. I hold the ear straight up and down with the butt end on a board, and shave down with my knife. Add 1/2 the tablespoon of olive oil to a preheated skillet and roast kernels over high heat for about 4 or 5 minutes, stirring infrequently, until they just begin to brown. Set aside, wipe out the skillet, and add remaining olive oil. Sear your steak for 3-6 minutes on either side, flipping only once. Depending on the thickness of the steak, 3 minutes per side should get you to about medium rare, and 6 should get you closer to medium well. Remove steak to a cutting board and let it rest for at least 5 minutes while you prepare the rest of the salad. Chop, wash, and dry romaine and add to a large bowl with roasted corn, red onion, bell pepper, and avocado. Top with dressing and toss until well combined. Plate your tossed salad and top with steak sliced into super thin strips.

zucchini “pasta” with chicken, white wine, & tomatoes

You probably haven’t noticed this yet, but I’m not super big on “health food”.

zucchini "pasta" with chicken, white wine, & tomatoes | Brooklyn Homemaker

I mean, don’t get me wrong. I actually do try to eat healthy. In fact, when you bake as many treats as I do, you don’t really have a choice. You definitely need to balance the (delicious) unhealthy stuff with something light and green every once in a while. We try to make a green juice every morning before work, we (almost) never eat fast food, very rarely eat junk food (unless we’ve made it ourselves), and try to eat only whole foods (rather than heavily processed prepared ones). That doesn’t necessarily mean we’re in great shape or anything because, again, we also eat lots of sweets and homemade treats. It also doesn’t mean that we would ever consider ourselves “health nuts” or ever say we prescribe to any fad diets or trends in nutrition.
And then this weird thing happened.

zucchini "pasta" with chicken, white wine, & tomatoes | Brooklyn Homemaker

At work we started getting all of these requests for a hand-held spiral slicer, and everyone asking for it said they wanted to make “noodles” out of zucchini. We had two options for spiral slicers at the time, but both of them are a significant investment, and neither of them are even close to being hand-held. Some people would go with those options, others would choose something else we’d recommend, but most would sullenly walk out empty-handed, after begging that we bring in their requested item. I always assumed these poor souls were on some annoying fad diet that forced them to eat soggy squash “noodles” when they’d rather be eating pasta, but the number of requests we were getting in such a short period made us take notice. After a long search, we finally found one we liked and a few weeks ago we started carrying it. The one we have now is called the “Spirelli” by Gefu, and can it be found here.

zucchini "pasta" with chicken, white wine, & tomatoes | Brooklyn Homemaker

Even after we brought it in, and it started selling really well, I was still a total skeptic. Then one of my co-workers bought one and started raving about it. So, I decided I should probably give it a shot.

zucchini "pasta" with chicken, white wine, & tomatoes | Brooklyn Homemaker

The other night I tried it out for the first time and was shocked at how easy (and kind of fun) it was, and Russell actually requested I make zucchini “pasta” again the next night. I honestly can’t believe I’m saying this, but it’s pretty great.  The texture of the “noodles” is way better than I expected, not soggy at all, a bit like an al dente pasta. Since zucchini has such a neutral flavor, it absorbs the flavor of whatever else you’re cooking, and doesn’t end up tasting at all “health-food-y”.

zucchini "pasta" with chicken, white wine, & tomatoes | Brooklyn Homemaker

The one problem I had the first night was that when cooked, the zucchini gave off a ton of liquid and made the sauce really runny. I had to take the “noodles” out to reduce the sauce and then add them back in at the end. The next night I decided to try salting the “noodles” beforehand to get them to give off their liquid before cooking. Worked like a charm!
Some recipes I found recommend that you peel the zucchini for a more “noodle-y” appearance, but I don’t think the skins do anything negative to the texture, and the dark green skins have a lot of nutrients that you’d lose if you peeled them. I say leave ’em!

zucchini "pasta" with chicken, white wine, & tomatoes | Brooklyn Homemaker

This method is actually super quick and easy too! You just cut the end off the zucchini and push and twist it through the slicer like a giant pencil sharpener. If you don’t have this tool you could also use a mandoline slicer or another spiral slicer, or even a julienne peeler, to make zucchini “noodles”. The only time consuming step is letting the zucchini absorb the salt and release its moisture, which takes about 30 minutes, but that can be done while you prepare the rest of the dish. If you time it right and work efficiently, the whole meal including prep time can be on your plate and in your belly in well under an hour. Even with frequent pauses to photograph the whole process, it only took me about an hour.

zucchini "pasta" with chicken, white wine, & tomatoes | Brooklyn Homemaker

For this dish I paired the “noodles” with seared chicken and a white wine and blistered tomato sauce. Obviously this recipe could be adapted to be as healthy, or as rich, as you like. As is, it has little more than protein, vegetables, and a little seasoning and olive oil. I can’t believe I’m pushing zucchini noodles on my blog. I never thought this day would come. But they’re so GOOD!!!

zucchini "pasta" with chicken, white wine, & tomatoes | Brooklyn Homemaker

Tender “al dente” noodles, sweet blistered tomatoes, tender perfectly browned chicken, sweet garlicy wine sauce, bright fresh basil… It doesn’t get any better than that!

zucchini "pasta" with chicken, white wine, & tomatoes | Brooklyn Homemaker

Zucchini 'Pasta' with Chicken, Tomatoes, & White Wine

4 medium zucchini
3 Tablespoons good olive oil, divided
2 skinless, boneless chicken breasts
salt and pepper to taste
1 pint ripe grape tomatoes
3 large cloves garlic, crushed or finely minced
1/2 cup white wine
handful fresh basil leaves

Wash zucchini and use a spiral slicer (like this one), julienne slicer, or mandolin to create spaghetti style “noodles”. Place “pasta” in a mesh strainer and sprinkle with about 2 teaspoons salt. Toss well and allow to sit for at least 30 minutes. Gently squeeze out any remaining liquid and discard.
Meanwhile, heat large cast iron or stainless steel skillet over high heat. Season your chicken breasts on both sides with salt and pepper. Add 1 tablespoon olive oil to pan and sear chicken for 5-7 minutes on either side, or until nicely browned and cooked through. Set aside to rest.

Wash tomatoes and slice each in half, lengthwise. Add remaining olive oil to pan, add tomatoes, and season with salt and pepper. Cook tomatoes, stirring occasionally for 7 to 10 minutes until they are browning and starting to fall apart. Add garlic and wine, stir well, and cook down until wine is reduced by at least half, about 5 minutes.
Slice your chicken up into bite sized pieces. Arrange basil leaves in a flat pile, roll up into a “cigar” and slice into very thin strips. (this is called a chiffonade)
Add chicken and basil to pan with sauce. Add zucchini and toss to combine. I find this works best with long silicone tipped tongs. Cook until noodles are heated through, about 5 minutes.
Adjust seasoning if necessary, and top with a little fresh basil.

favorite roasted broccoli

So, when it comes to meal planning, I’m kind of old fashioned.

favorite roasted broccoli | Brooklyn Homemaker

I’m not quite sure why, but I often feel like a balanced meal should have three components. You gotta have your protein, your starch, and your veg. I don’t know exactly when or where I picked up this way of thinking about my dinner plate, but it’s deeply ingrained.  Maybe it was from my mother, or maybe my grandmother. When I was studying abroad in France, a chef once told me that plates should always feature odd numbers because odd numbers are more “beautiful” than even ones. Maybe that’s why I’m partial to having three different things on my plate.

favorite roasted broccoli | Brooklyn Homemaker

I really like to experiment with new recipes, but when it comes to filling those three little voids I keep an arsenal of quick and easy go-to recipes for when I’m feeling uninspired or in a rush. One of my favorite vegetable preparations is oven-roasted broccoli. It’s super simple, super healthy, and super delicious!

favorite roasted broccoli | Brooklyn Homemaker

I’m sorry that I waited this long to share this recipe with you, but for a long time I actually thought it was too simple to necessitate a full post of it’s own. It’s not really very original or innovative, and it requires so little work or thought that I assumed it wasn’t worth writing about. A few weeks ago I made this for my mother and she mentioned that she’d never thought to make broccoli this way, and I realized that some of you might enjoy trying a new technique too!

favorite roasted broccoli | Brooklyn Homemaker

I know a lot of people like to steam or boil their broccoli, so I thought it’d be nice to share another idea that’s just as easy and happens to be (in my opinion) more flavorful. Cooking broccoli with water can make it taste, well, watery. Rather than losing any flavor, roasting your broccoli concentrates and intensifies it. It requires little more work than chopping fresh broccoli into large bite-sized florets, tossing with some olive oil and salt & pepper, and sliding into the oven just long enough to give it a bit of color.

favorite roasted broccoli | Brooklyn Homemaker

This preparation pairs really well with any number of meals. I’ve even used this method to pre-cook broccoli for pasta dishes or salads. It can also easily be tweaked or gussied up to fit the flavors of whatever you’ll be serving it with. If you wanted to add a little extra flavor before roasting, you could toss the broccoli in a little soy sauce, balsamic vinegar, or hot sauce along with the olive oil. My favorite way to prepare it though is to roast it first and then squeeze a little fresh lemon juice over the top to bring out the fresh bright green flavor without overpowering or covering it up.

 favorite roasted broccoli | Brooklyn Homemaker

This will work with other vegetables too, but cooking time may need to be adjusted. I just made some fresh local asparagus (Yay!! Asparagus season!!), roasted it for a few minutes less, and boy was it wonderful! I don’t think this would work very well with frozen vegetables though, because they’d likely end up mushy and overcooked. Part of the appeal of this technique is that vegetables maintain a little bit of their crisp texture and bite, which frozen vegetables have already lost.

favorite roasted broccoli | Brooklyn Homemaker

Cutting up your own head of fresh broccoli is super easy and worth the little (tiny) bit of effort. I usually turn the head over stem-side-up (or on it’s side) and work around the head with a sharp knife cutting the florets off where they branch out naturally, rotating the head as I work my way in. If some of the florets are especially large you can cut them in half or in quarters, from top to bottom. Simple. Easy. Healthy. Delicious.

favorite roasted broccoli | Brooklyn Homemaker

roasted broccoli

1 large head broccoli

1/4-1/2 tsp coarse kosher salt (to taste)
1/4 tsp freshly ground pepper
1 tbsp olive oil
1 lemon, cut into wedges (optional)

Preheat oven to 425. Cut broccoli into large bite sized florets and place in a large bowl. Add salt, pepper, & olive oil and toss toss toss until well coated. Spread evenly over a parchment lined baking sheet and roast for 20 minutes or until just starting to brown. Serve with a squeeze of fresh lemon juice if desired.