fall

sweet potato gratin

Sweet potatoes are seriously the best.

sweet potato gratin with caramelized onions & Jarlsberg | Brooklyn Homemaker

Though they’re not technically in the same family, a sweet potato can do almost anything a regular potato can, and can probably do it better. They can be french fried, mashed, baked, roasted, you name it. You can even turn these puppies into dessert! Take that, potatoes!

Sweet potatoes have more flavor and are (obviously) sweeter, but what you might not consider is that they’re also packed with beta-carotene and calcium, and have almost 300% of the vitamin A you need in a day. Now that’s what I call a superfood.

sweet potato gratin with caramelized onions & Jarlsberg | Brooklyn Homemaker

One thing I’m not crazy about when it comes to sweet potatoes though, is the tendency to make them even sweeter while serving them with dinner. I mean, if you want to make a dessert, go ahead and make a dessert. There’s nothing better than a good sweet potato pie. But if you’re serving sweet potatoes as a side dish I really don’t get the desire to cover them in marshmallows. I guess its just not for me. You wouldn’t cover a radish or a green bean in brown sugar and marshmallows would you? Well, I don’t know, maybe you would. I wouldn’t though!

I know some people really dig candied sweet potatoes at Thanksgiving, but it’s just not for me. Sorry.

sweet potato gratin with caramelized onions & Jarlsberg | Brooklyn Homemaker

Anyway, because I’m a lunatic forward-thinker, I’m already planning my Thanksgiving menu. You already know this, but I take this holiday pretty seriously. I really want to highlight sweet potatoes on my table this year, but I’ll be damned if a marshmallow comes anywhere near my little orange beauties. I love mashing them just like potatoes, with lots of butter, but this year I want to do something special.

sweet potato gratin with caramelized onions & Jarlsberg | Brooklyn Homemaker

It didn’t take me long to decide on some type of layered casserole. A gratin is the perfect solution. Rich and satisfying, with a touch of cream and cheese to gussy things up.

sweet potato gratin with caramelized onions & Jarlsberg | Brooklyn Homemaker

Most gratin recipes call for a salty hard cheese like parmesan, but I thought the sweet potatoes called for something a bit creamier and nuttier, so I opted for Jarlsberg. If you’re not familiar, Jarlsberg is a mild cow’s milk cheese from Norway. It has large holes like swiss, but it’s more buttery and nutty. If you can’t find it I think Gruyere would work really well too.

sweet potato gratin with caramelized onions & Jarlsberg | Brooklyn Homemaker

I wanted to pack as much savory flavor into this gratin as possible, so I poked around the internet until I found a recipe that sandwiched a layer of caramelized onions between the sliced sweet potatoes. Yes please. To take the flavor even further I went and added a few thing; some thyme and parsley along with the sage in the original recipe, as well as a bit of dijon mustard, some ground cayenne pepper for kick, and some smoked paprika for a nice hint of smoky depth.

This is not only the perfect side dish for Thanksgiving, but really any large gathering or dinner party. On top of being crazy delicious, I think it’ll travel really well too, and could easily be prepared ahead and reheated.

sweet potato gratin with caramelized onions & Jarlsberg | Brooklyn Homemaker

As soon as I took my first bite, I knew I’d reached sweet potato perfection.

If you want to know how good it tastes, let me just say this. Russell is spoiled by my cooking. While he absolutely loves and appreciates everything I make, most of my cooking gets little more than a “thank you” or “yummy”. This though, he couldn’t shut up about. He went on and on about how delicious and perfect it was. He ran out of words. And frankly, I don’t think there are enough words in the English language to properly describe this gratin. A few that come to mind though are creamy, savory, spicy, smoky, cheesy, buttery, tender, rich, delicious, satisfying, hearty, flavorful, heavenly and amazing… Oh yeah, and Bow-chicka-wow-wow.

sweet potato gratin with caramelized onions & Jarlsberg | Brooklyn Homemaker

Sweet Potato Gratin

  • Servings: 8 to 12-ish (depending on serving size)
  • Print
adapted from the kitchn

2 tablespoons unsalted butter (plus more for pan)
2 medium onions, sliced into thin half circles
3 pounds sweet potatoes or yams (3 to 4 large)
Kosher salt and fresh ground pepper
2 tablespoons fresh sage leaves, finely chopped
1 tablespoon fresh parsley, finely chopped
1 teaspoon fresh thyme leaves
1 teaspoon dijon mustard
1/2 teaspoon smoked paprika
1/4 teaspoon cayenne pepper powder (optional)
1 1/4 cups heavy cream

Topping:
2 tablespoons unsalted butter
3/4 cup panko breadcrumbs (or plain, unseasoned bread crumbs)
3/4 cup grated Jarlsberg cheese (or Gruyere)
3 tablespoons fresh parsley, finesly chopped

Heat the oven to 350°F and butter a 9×13 casserole or gratin dish. In a heavy skillet heat 2 tablespoons of butter to a foam and add the sliced onions. Season them with a bit of salt and slowly caramelize them over medium-low heat, stirring frequently. To get them nice and brown (but not burned) should take about 20 or 30 minutes.

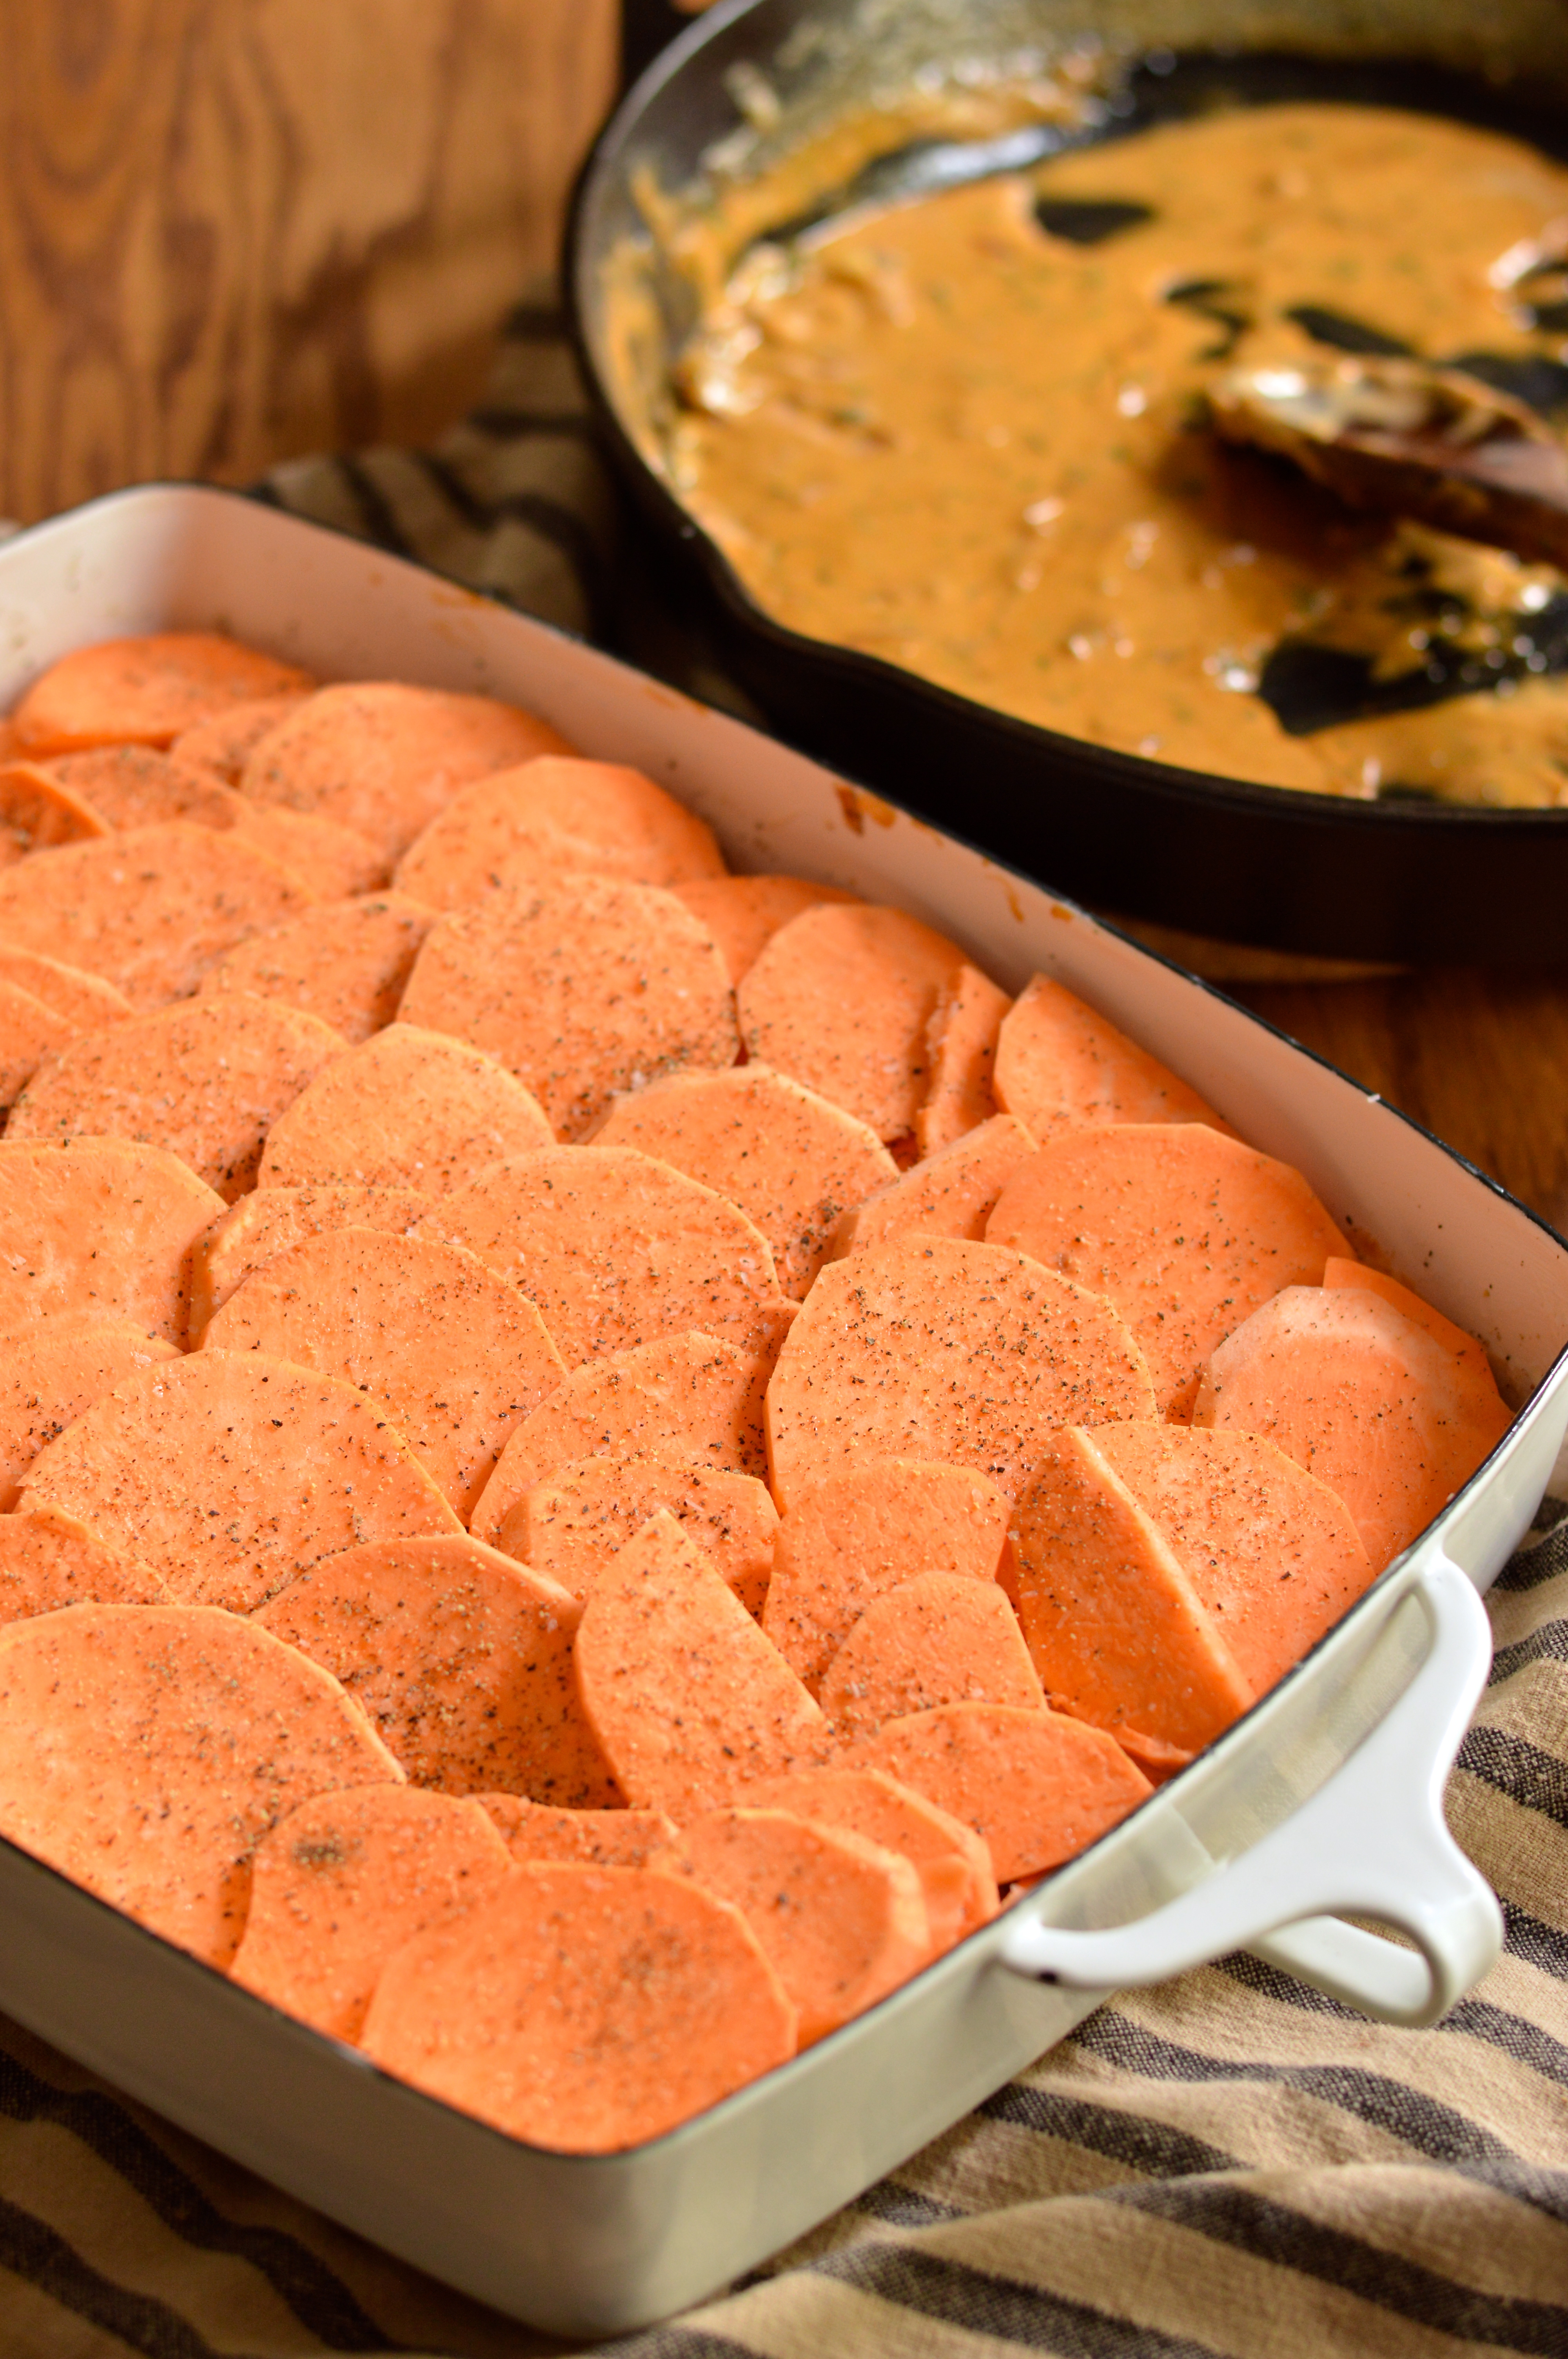
While the onions sizzle away, peel your sweet potatoes and slice them into 1/4-inch thick disks. Getting thin and even slices will be easiest with a mandolin, but is totally possible with a sharp knife and a steady hand. Layer half of the slices in the buttered dish, overlapping them in tight rows or spirals. Season the layer with salt and pepper.

Once the onions are soft and caramelized to your liking, add the sage, parsley, thyme, dijon mustard, paprika, cayenne pepper, and cream. Bring to a simmer, stir well, and cook until the cream is thick and bubbly, about 2 minutes. Remove from the heat.

Do your best to remove the onions from the cream with a slotted spoon. Spread the onions evenly over the first layer of sweet potatoes. Layer the remaining sweet potatoes on top, in the same rows or spirals as before. Season with kosher salt and black pepper, and evenly pour or spread the cream over the top. The cream will not cover the potatoes completely or fill the dish and you will think there’s isn’t enough. Don’t add more! Too much will make the sweet potatoes mushy.

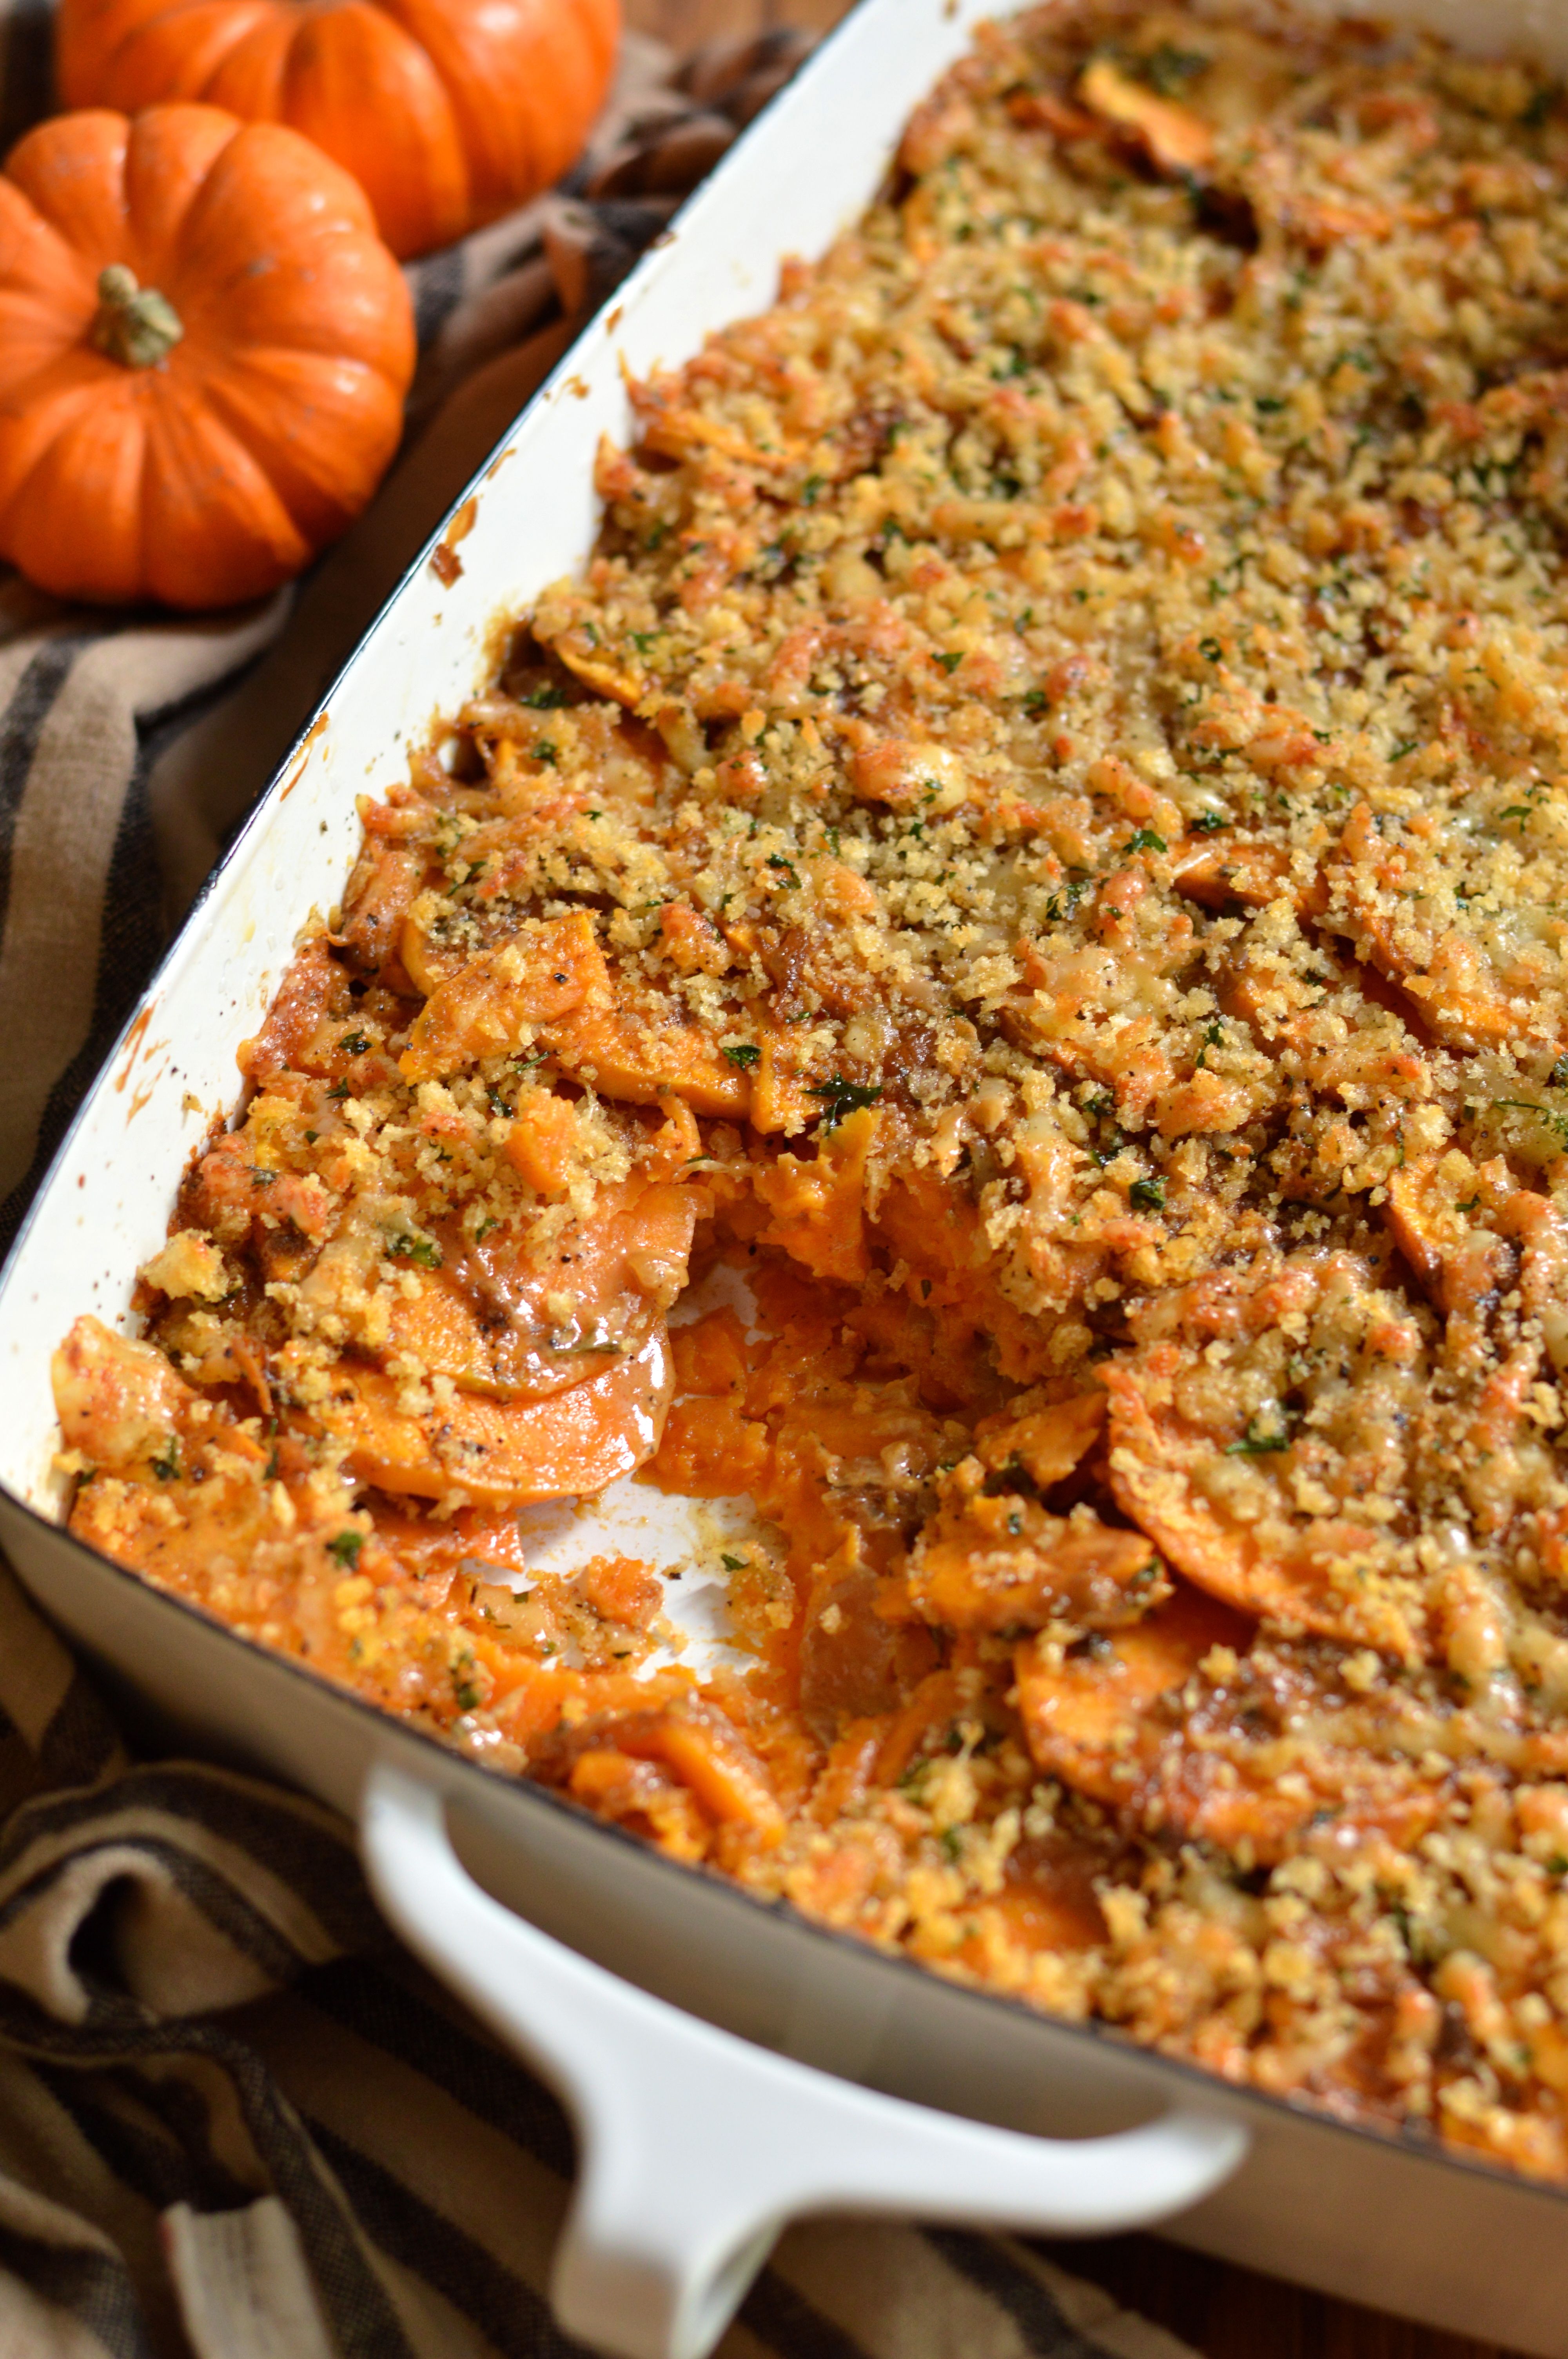
Cover the dish with foil and bake for 15 minutes. Remove the foil and bake for 10 or 15 minutes more, or until the potatoes are just tender. (Note: If your sweet potato slices are thicker than 1/4 inch- baking time is likely going to take longer.)

While the sweet potatoes are in the oven, melt 2 tablespoons of butter and let cool a bit. In a small bowl, pour the butter over the bread crumbs, grated Jarlsberg and chopped parsley, and toss well to combine. Sprinkle evenly over the top of the gratin and return to the oven (uncovered) for about 15 minutes or until brown and crispy. Let cool for at least 15 minutes before serving.

Grandma Rindfleisch’s Apfelkuchen (sort of)

Apfelkuchen (or apple kuchen) is a german apple cake.

grandma Rindfleisch's apfelkuchen  | german apple cake | Brooklyn Homemaker

Apfelkuchen translates simply to apple cake, but this is not just any old apple cake. This quintessentially German recipe consists of a single layer of buttery cake topped with neat and orderly rows of sliced baking apples. Most recipes today are made in a square or rectangular shaped pan and cut into bars, but I have seen some older European recipes that produce a thicker round cake. Most recipes are finished with a crumble or streusel topping, but some are simply sprinkled with confectioners sugar.

Fruit kuchens have been around for centuries, and many traditional recipes used to be leavened with yeast. Many cooks swapped the yeast for chemical leaveners like baking powder and soda as their popularity grew decades ago.  However they’re made, most recipes today resemble a dense fruity coffee cake.

DSC_0153

Growing up, my great grandmother was famous for her apple kuchen, and it came along with her to every family gathering and church function as far back as I can remember. She made it almost by instinct, measuring out all her ingredients in her hands, and since she didn’t use exact measurements she never put the recipe down on paper.  It was definitely her signature and no get-together was complete without it.

When she passed in 2003, it dawned on everyone in the family that no one had ever asked her to teach them how to make it. Suddenly she was gone, and so was her apple kuchen.

grandma Rindfleisch's apfelkuchen  | german apple cake | Brooklyn Homemaker

She’ll always be Grandma Rindfleisch to me, but she was born Anna Hollatz in Germany in 1909. She emigrated in 1928 when she was engaged to be married to my great grandfather who lived here in the U.S. Before their marriage they sent love letters back and forth to each other from across the world, and my grandfather says she still had all those letters when he was growing up.

grandma Rindfleisch's apfelkuchen  | german apple cake | Brooklyn Homemaker

Get a look at that dress! Va-Va-Voom! If you ever wondered how wedding dress fashions may have looked in the late 1920’s, now you have an idea.

Writing about her apple kuchen got me really curious about my great grandmother’s history, and because I’m a total nerd, I researched her Ellis Island records. She sailed on the White Star line’s S.S. Arabic, and the ships manifest was full of information I never expected to find there, including handwritten changes to the name of the person who met her when she arrived. I was even able to find a few photos of the actual ship on which she made her journey, and I’m thinking of trying to get one printed and framed.

grandma Rindfleisch's apfelkuchen | german apple cake | Brooklyn Homemaker

After they were married, she and my great grandfather moved from Connecticut to the Fingerlakes region of upstate New York, where they owned and operated a dairy farm on the shores of Cayuga Lake. My mom has tons of stories of what life was like on the farm when she was growing up, and even keeps some of the dairy’s original glass milk bottles on a shelf in her kitchen. One of her fondest memories is of watching Grandma Rindfleisch churn her own butter in the well worn wooden churn she kept on her countertop. I best remember her thick German accent and the way she used to tightly wrap her white braids on the sides of her head like Princess Leia.

grandma Rindfleisch's apfelkuchen | german apple cake | Brooklyn Homemaker

When I started asking around about trying to recreate her recipe, my mom and all her cousins had loads of ideas and advice. “The cousins” (as mom calls them) had some ideas on what recipes would come closest, what ingredients should go in, and in what order. My uncle has a recipe that was supposed to come close, but a few of the cousins said it wasn’t right for a few reasons. First, and most importantly, the almond flavor should be present only in the crunchy streusel topping on the cake, but in his recipe the almond extract is added to the cake instead. There was also quite an uproar over the fact that his recipe called for (gasp) cooking oil spray!

grandma Rindfleisch's apfelkuchen  | german apple cake | Brooklyn Homemaker

The one thing everyone could agree on was that nothing would ever come close to the flavor of her home-churned butter, and therefore no one will ever be able to make her kuchen exactly the way she did.

My advice is to use the best quality unsalted butter you can find. If you have the means to churn your own, knock yourself out. If not, don’t sweat it. I was lucky enough to find some imported German cultured butter made with cream from grass fed cattle when I was butter hunting. The flavor was amazing and I think it really did make such a difference in my kuchen.

grandma Rindfleisch's apfelkuchen  | german apple cake | Brooklyn Homemaker

The recipe I ended up settling on, given to me by one of the cousins, comes really damned close to the real thing. It’s been over a decade since I tasted grandma’s kuchen, but if memory serves I think this is almost perfect. The only significant difference is that she would bake hers on a sheet pan or jelly roll, producing a thinner cake with a much higher apple to cake ratio. I didn’t go that route because it would make way more cake than I could handle, but if you’re looking to feed a crowd that’s the way to do it.

Either way, this cake is phenomenal. It’s simple, homey and unfussy but totally satisfying. It also happens to be really easy to make. The cake itself has an incredible rich buttery flavor that’s perfectly complimented by the sweet and tender apples. The topping combines even more butter with almond extract and cinnamon to finish the cake with just enough sweet crunch to tie everything together.

grandma Rindfleisch's apfelkuchen  | german apple cake | Brooklyn Homemaker

Grandma Rindfleisch's Apfelkuchen

Cake:
1/2 cup (1 stick) highest quality unsalted butter, softened
3/4 cup sugar
1 egg
2 cups flour
2 1/2 teaspoons baking powder
1/4 teaspoon salt
1/2 cup milk
3 or 4 firm baking apples (I used braeburns)

Topping:
1/2 cup sugar
1/2 cup flour
1 teaspoon ground cinnamon
1/4 cup (1/2 stick) highest quality unsalted butter
1 teaspoon almond extract

Preheat your oven to 350. Butter and flour a 9×13 baking dish (or an 18×13 jelly roll pan or half sheet pan). Cream butter and 3/4 cup sugar together until light and fluffy. Add the egg & beat until well incorporated. Whisk together the 2 cups of flour, baking powder, and salt. Add flour to butter mixture in three additions, alternating with milk. Beat just until incorporated, scraping the sides of the bowl after each addition.

Spread the batter in the bottom of the buttered pan. Peel, core, & slice the apples. Arrange the slices in three four or neat rows lengthwise, depending on the size of the apples. Whisk together the remaining sugar, flour, and cinnamon. Mash the butter into the topping with a fork, or with your fingers. Mix in almond extract, break the topping up so it’s nice and crumbly, and sprinkle it evenly over the apples. Bake for 40 to 45 minutes, or until a toothpick inserted in the center of the cake (avoid apple slices) comes out clean. If you’re baking on a jelly roll the cake may cook faster, start checking after 30 minutes.

Cool for at least 30 minutes before dividing into three rows of slices.

classic apple pie

A few times now, I’ve mentioned my good friends who have been planning their wedding.

classic apple pie & a rustic fall wedding | Brooklyn Homemaker

Well folks, they finally went and done got hitched.

Mazel Tovs all around!

classic apple pie | Brooklyn Homemaker

Back when Russell and I were married in June of 2013, our caterer’s mother baked us some pies for the dessert table at our wedding. Not only did having a variety of pies and treats alongside our cake look really festive and beautiful, but it felt like a really personal way to offer something extra for the sweets lovers at our reception.
I’ve also heard that there are some people in the world who don’t like cake, and as hard as I find that fact to believe, we thought this might be a nice way to make sure those people felt included. I mean, I don’t know why anyone who doesn’t like cake would have been at our wedding, but just in case we had pies and cookies for them to choose from too.

classic apple pie | Brooklyn Homemaker

That aspect of our wedding ended up being something that our friends really really enjoyed, so when it came to planning their own wedding, they were inspired to do the same and enlisted me to help them with it. In last month’s #bundtbakers post I mentioned that I’d be baking a few things for their big day, and that my apple-pear-carrot-parsnip-packed spiced harvest bundt cake won out in little a pre-wedding cake tasting. I also said that in addition to the bundts, I’d be baking a couple pies too.

classic apple pie | Brooklyn Homemaker

As you’ve probably guessed by now (the title of this post may have been a clue), the bride and groom-to-be decided on classic apple pies.  Their wedding was in the Catskill mountains on October 12th, so apple pies really could not have been more appropriate for the occasion. The fall has always been my favorite time of year, as much for the weather and scenery as for the food and sweets so, truth be told, I was thrilled to have an excuse to bake so many fall desserts in one fell swoop!

classic apple pie | Brooklyn Homemaker

I’d be lying if I said I didn’t know my way around an apple pie. Growing up, my grandfather had a dozen or so apple trees on his property and this time of year there were always plenty of fresh apple pies coming from grandma’s oven. As soon as I learned to make pie crust from scratch I set to mastering apple pie for myself.

classic apple pie | Brooklyn Homemaker

Over the years, I’ve baked approximately 42.6 million apples pies, so at this point I think I have my technique pretty well figured out.

I mean, I actually think that apple pie is kind of a personal thing, and different people like theirs made different ways. Myself, I tend to like a pie with a healthy amount of spice and a nice lemony boost. A lot of recipes recommend a bit of lemon juice, but I usually use a bit more and add the zest too because I think it adds a really interesting floral quality that I love. I also tend to use sweet soft apples that benefit from the extra bit of acidity.

classic apple pie | Brooklyn Homemaker

When it comes to the apples, there are a lot of options out there. A lot of people like to use Granny Smiths because of their balanced acidity and subtle sweetness, but personally I think their flavor is a bit flat, and their flesh a bit too firm for my liking. When I first started experimenting with different types of apples for pie, a few varieties quickly moved to the top of my list. If you like a firmer apple, Braeburns have a great flavor for pie. If you want an apple that softens a bit but still retains a good bite when baked, I think Golden Delicious are ideal. If you like something a bit softer when baked, McIntosh and Cortlands are some of my favorites, but they produce a bit more water so a bit more flour may be needed to keep the pie from getting soggy.

If you want to get really next level and pack your pie with as much complex apple-y flavor as possible, I recommend that you mix a few varieties together. For these pies I used a half and half mix of McIntosh and Golden Delicious, but you can play around and decide what you like best yourself.

classic apple pie & a rustic fall wedding | Brooklyn Homemaker

With the pies and bundts baked and ready to go, Russell and I piled into a car and made the short trip up to the Catskills for the wedding. The scenery was almost as stunning as the wedding itself. Our friends though, would not be outshone.

It was such an absolutely beautiful day. Every aspect of their wedding was perfect. Their vows were some of the most meaningful beautiful words I’ve ever heard, and there were gorgeous personal touches at every turn. I only wish I could have gotten more photos. Alas, I was too busy enjoying myself. Sorry guys!

I was able to sneak a few shots in though, and I’ve shared a few of my favorites below.

classic apple pie & a rustic fall wedding | Brooklyn Homemaker classic apple pie & a rustic fall wedding | Brooklyn Homemaker

Check out the insanely beautiful centerpieces at the reception. I can’t even.

classic apple pie & a rustic fall wedding | Brooklyn Homemaker

In the name of blogging, I made damn certain to get in a few shots of their dessert table so you could see it in all it’s glory. Just like the rest of their wedding, every detail was too adorable and perfect for words.

classic apple pie & a rustic fall wedding | Brooklyn Homemakerclassic apple pie & a rustic fall wedding | Brooklyn Homemaker

The bundts and pies were a huge hit. Having these homemade treats alongside their wedding cake was such an inspired way to make their dessert table feel more personal and thoughtful. Being surrounded by the stunning fall foliage of the Catskills, these desserts also brought that fall feeling into their reception in a really special way.

This apple pie is packed with sweet soft tender apples, a really healthy amount of spice, and a great citrusy floral twist from the lemon zest and juice. The all butter crust is the perfect compliment to the flavor of the baked apples; tender, crisp, flaky, and oh-so-buttery. To give the pie a bit of shine, an egg wash is brushed on before baking, and some coarse sugar sprinkled over the top adds a beautiful sparkle.

I’m going to go ahead and say that this is the perfect fall dessert. As well as being an incredible compliment to a wedding dessert table, this recipe would be an ideal addition your Thanksgiving spread. Just sayin’.

classic apple pie & a rustic fall wedding | Brooklyn Homemaker

Classic Apple Pie

All-butter pie crust

makes enough for 1 double-crust or 2 single-crust pies

3 cups all purpose flour
2 tablespoons sugar
1 teaspoon coarse kosher salt
1 cup (2 sticks) unsalted butter, cold
(up to) 1 cup ice cold water

Stir or whisk together flour, sugar, & salt in a medium bowl. If you have time, toss the bowl in the freezer for a 15 or 20 minutes. Cube the butter, add it to the chilled flour, and cut it in with a pastry blender, until it looks like coarse pea sized chunks. You can also do this by pulsing in a food processor. If you took very long to cut the butter in, you can toss the bowl back in the freezer for another 15 minutes, but if the butter is still firm and cold, don’t bother.

Start mixing in the water and stirring and tossing with a fork to distribute and combine. Try starting with about 1/2 cup, mix together, and add about a tablespoon or two at a time, until it starts to come together. The less water you use the better and flakier the crust will be, but you don’t want to use so little that it won’t hold together. If you can press it together with your hands and it mostly stays in a ball, with a few little bits crumbling out, you’re good to go.

Divide the dough into to balls, and wrap each tightly in plastic wrap. Try to handle it as little as possible so as not to warm or melt the butter. Press or pat the covered balls of dough into thick disks and refrigerate for at least an hour or two (or up to a few days)

Classic apple pie

3 1/2 to 4 lbs apples (I used about 1/2 golden delicious and 1/2 macintosh, but cortlands & braeburns are great too)
zest and juice of half a lemon
1 cup of sugar
3 to 4 tablespoons flour (4 for juicy soft apples like mcintosh or cortland, 3 for other varieties)
3/4 teaspoon ground cinnamon
1/4 teaspoon ground nutmeg
1/4 teaspoon ground cloves (optional)
1/4 teaspoon ground cardamom (optional)
2 tablespoons butter, cut into several pieces
1 egg, beaten
2 to 3 tablespoons coarse sugar

Preheat your oven to 375.

On a well floured surface, roll out the first disk crust and line a 9.5 or 10 inch pie dish. Place the dish in the refrigerator while you prepare your apples.

Peel, core, and thinly slice your apples and place in a large bowl with lemon juice and zest, sugar, flour, and spices. Gently toss to combine. Transfer the apples into the pastry lined pie dish, and dot the apples with the butter. Roll out the other disk of crust and either top the filled pie with it and cut slits to vent the pie, or cut the crust into strips to make a lattice crust. If you’re interested, follow this link for a lattice crust tutorial. Either way, once the pie is topped, trim the edges to about 1/2 inch overhang, roll it under itself, and crimp the edges to seal the top and bottom crusts together.

Brush the top crust with the beaten egg, and sprinkle with the coarse sugar. You’ll want to arrange the oven racks so one is in the middle, and one is just beneath it. Put a foil lined tray on the lower rack to catch any potential drips and spills. It will likely boil over a little. Place the pie on the middle rack and bake for 60 to 65 minutes, or until well browned and nice and bubbly and smelling like heaven.

I’d recommend, especially with McIntosh or Cortland apples, that you let the pie rest for at least a few hours before slicing or it may be watery. I usually make mine a day ahead and reheat them just slightly in the oven if I want to serve them warm.

sweet potato & pecan cinnamon rolls

I’ve always been a little bit intimidated by yeast doughs.

sweet potato & pecan cinnamon rolls | Brooklyn Homemaker

When I was a teenager I was a very adventurous cook and baker (especially for a teenager) and loved to experiment with new recipes. Most of the time things worked out in my favor, but every once in a while, they didn’t. Once my cousin came over to stay the night and we decided it might be fun to try to make some white sandwich bread. The resulting loaf though, was a total mess. It was dense, heavy, tough, and dry, and while it had definitely risen to an extent, a tap of the loaf was met with a dull thud rather than that nice hollow sound you expect from quality bread.

sweet potato & pecan cinnamon rolls | Brooklyn Homemaker

Everyone in my family thought of me as an excellent cook for my age, and my cousin was obsessed with my omelettes, begging me to make them for her whenever she stayed over. When we baked this loaf together I think she assumed my touch would turn our dough to gold, so when the bread didn’t live up to her expectations the disappointment was palpable.

One bite, and I could see it in her eyes.

sweet potato & pecan cinnamon rolls | Brooklyn Homemaker

It was at least another decade before I tried to bake a loaf of bread again.

In my mid twenties, a year or so after I moved to Brooklyn, I decided I was going to start making my own sourdough. It’d had been ten + years since the last time I’d tried to make bread, and instead of trying to perfect a traditional white loaf raised with active dry yeast, I thought, “Oh! The last time I baked bread it was a minor disaster, so I should definitely try to make a bread so hard to master that there are entire online forums on the subject.” Sometimes I can’t even handle what a genius I am.

sweet potato & pecan cinnamon rolls | Brooklyn Homemaker

I mixed up my little cup of flour and water, set it near my kitchen window, and waited for a little community of wild yeast to set up camp and start birfin’ some babies. To my surprise and elation, on the first try, my starter took and was bubbling away after a few feedings.

And then I made my loaf.

sweet potato & pecan cinnamon rolls | Brooklyn Homemaker

It barely rose at all. Dense. Heavy. Tough. Dry. Dull Thud.
History repeating itself.

I tried a few more times, thinking my starter just wasn’t strong or mature enough, but never had any results that were worth eating and I decided my attempts were little more than a waste of time and wheat.

sweet potato & pecan cinnamon rolls | Brooklyn Homemaker

Still, not all yeast doughs intimidate me. I make a pretty decent pizza dough, and a few years ago I made some really great English muffins that I’ve been thinking about trying again soon. When it comes to actual loaves of bread though, I’ve accepted that they just might not be my thing. I might eventually go back to the basics and try some white bread again sometime, but for now I’m not all that worried about trying to perfect my bread game.

sweet potato & pecan cinnamon rolls | Brooklyn Homemaker

I decided recently that it might be fun to try to branch out and try some other types of yeasted doughs. A few months ago I made a roasted cherry kugelhopf with great results, and the other day I was in the mood for some cinnamon rolls with an autumnal twist. Sweet sticky yeasted doughs like cinnamon rolls are actually crazy easy to get right, to the point of being nearly fool proof. As long as you don’t overheat the milk and kill your yeast, the amount of sugar in this dough will ensure that it will rise like it’s getting paid.
The only thing I had a little trouble with was rolling the dough tightly around the filling, but once it rose again you couldn’t tell the difference.

sweet potato & pecan cinnamon rolls | Brooklyn Homemaker

These cinnamon rolls are seriously unbelievable. Like… Whoa.

They’re sweet, tender, light as air, and richly autumnal; with plenty of spice and a nice depth and hint of earthiness from the roasted sweet potato. Wrapped up inside is a sticky sweet filling that’s dripping in cinnamon and bursting with toasted pecans. Then a sweet and tangy cream cheese icing goes on top and takes things to a place I almost can’t even handle. Almost.

While I usually prefer desserts with a subtle, reserved sweetness; these cinnamon rolls are anything but subtle and I LOVE it. Warm from the oven they beg to be pulled apart into tender strips of gooey cinnamon heaven dripping with cream cheese icing. I honestly don’t know who I thought I was fooling with that fork in the first photo. My fingers were covered in sticky nutty spicy sugary goodness mere minutes after these came out of the oven, and that fork went back in the drawer clean as a whistle. I promise that if you make these the last thing anyone will be looking for is a fork, but you should probably make sure you’ve got plenty of napkins on hand.

sweet potato & pecan cinnamon rolls | Brooklyn Homemaker

Sweet Potato & Pecan Cinnamon Rolls

adapted from Smitten Kitchen

Roasted sweet potato puree:
2 medium sweet potatoes
1 tablespoon vegetable or olive oil

Dough
6 tablespoons unsalted butter, to be divided
1/2 cup whole milk
2 1/4 teaspoons active dry yeast (from a 1 .25-ounce envelope)
3 1/2 cups all-purpose flour, plus extra for rolling out
1/4 cup firmly packed brown sugar (dark if you have it, but light is fine)
1/4 cup granulated sugar
1 teaspoon coarse kosher salt
1/2 teaspoon ground cinnamon
1/4 teaspoon freshly grated nutmeg
1/8 teaspoon ground cardamom (optional)
1/4 teaspoon ground ginger
2/3 cups sweet potato puree
1 large egg
Oil for coating rising bowl

Filling
3/4 cup firmly packed brown sugar (dark if you have it, but light is fine)
1/4 cup granulated sugar
1/8 teaspoon table salt
2 teaspoons  ground cinnamon
1 cup finely chopped pecans

Glaze
4 ounces cream cheese, softened
2 tablespoons milk or buttermilk
2 cups confectioner’s (powdered) sugar, sifted
Few drops vanilla extract (optional)

Make the sweet potato puree:
Preheat your oven to 375 degrees. Wash your sweet potatoes and prick them all over with a fork. Rub them with oil and wrap in aluminum foil. Place on a baking sheet and bake for 30 to 60 minutes, depending on size. Check with a fork after 30 minutes, and if the fork slides through the flesh easily, they’re done. If not, continue to check them every 10 to 15 minutes until they are done.
Let cool for at least 30 minutes, or until you can handle them comfortably.
Peel the skins off the potatoes, they should probably peel off pretty easily. Place flesh in a bowl and mash with a fork or potato masher. Measure out 2/3 of a cup, and eat the rest or save it for another use.

Make the dough:
Brown the butter in a medium saucepan for about 10 minutes or until nutty and golden. Once it starts to brown watch it carefully so it doesn’t burn. Remove from heat and set aside to cool slightly.

Heat your milk in a saucepan or in the microwave, until warm but not hot. Too hot (over 116) and you’ll kill the yeast. Combine the warmed milk and yeast in a small bowl and set aside to get slightly foamy, which should take about five to seven minutes.

In the bowl of an electric mixer combine flour, sugars, salt and spices. Add just 1/4 cup (not all) of your browned butter and stir to combine. Add yeast-milk mixture, 2/3 cup sweet potato puree and egg, and mix until combined. Switch mixer to a dough hook and run it for 5 minutes on low speed.

Scrape mixture into a large lightly oiled bowl, flip it so the top of the dough is oiled too, and cover with plastic wrap or a damp kitchen towel. Set aside until doubled in size, about 1 hour, in a draft-free place.

Meanwhile, line the bottom of two 9-inch round cake pans (or 8-inch round if that’s all you got) with parchment paper, and butter the paper and the sides of the pan.

Assemble buns:
Scoop dough onto a very well floured work surface and flour the top of it. Roll the dough out to an approximately 16×11-inch rectangle and brush with reserved browned butter. Stir together the filling ingredients and sprinkle mixture evenly over dough. Starting on the longer side, roll the dough into as tight a spiral as you can. It’s will make a mess and filling will spill from the ends, no big deal. Just sprinkle the stuff that falls out over the pan after you put the rolls in.

With a sharp serrated knife, using as little pressure as possible, gently saw the log with a back-forth motion, trying not to squish it too much. The dough will be really soft so this will be tough, but you can reshape the rolls as you add them to the pan if need be. I cut the log in half, and then cut the halves in half, and again, and again, until I had 16 even(ish) rolls.

Divide the 16 rolls between two prepared pans, and sprinkle any fallen filling over them. Arrange the two end pieces cut side up. Cover each pan with plastic wrap and let rise for another 45 minutes.

If you want to do these ahead of time, at this point you can put the pans in the refrigerator overnight. In the morning, leave them out for an hour to warm up and finish rising.

15 minutes before you’re ready to bake them, heat the oven to 350°F. Once they’re finished rising, remove the plastic and bake the buns for 25 minutes, until puffed and golden and smelling like spiced autumn heaven. Meanwhile, make the glaze. Beat the cream cheese until it is smooth, light and fluffy. Add the powdered sugar and vanilla and beat until combined. Drizzle in the milk, a little at a time, until you get the consistency you’re looking for, either thick enough to ice or thin enough to drizzle. Transfer the pans of finished rolls to wire cooling racks and drizzle or ice them with glaze. Eat them while they’re still warm and steamy if you can.