bars

Grandma Rindfleisch’s Apfelkuchen (sort of)

Apfelkuchen (or apple kuchen) is a german apple cake.

grandma Rindfleisch's apfelkuchen  | german apple cake | Brooklyn Homemaker

Apfelkuchen translates simply to apple cake, but this is not just any old apple cake. This quintessentially German recipe consists of a single layer of buttery cake topped with neat and orderly rows of sliced baking apples. Most recipes today are made in a square or rectangular shaped pan and cut into bars, but I have seen some older European recipes that produce a thicker round cake. Most recipes are finished with a crumble or streusel topping, but some are simply sprinkled with confectioners sugar.

Fruit kuchens have been around for centuries, and many traditional recipes used to be leavened with yeast. Many cooks swapped the yeast for chemical leaveners like baking powder and soda as their popularity grew decades ago.  However they’re made, most recipes today resemble a dense fruity coffee cake.

DSC_0153

Growing up, my great grandmother was famous for her apple kuchen, and it came along with her to every family gathering and church function as far back as I can remember. She made it almost by instinct, measuring out all her ingredients in her hands, and since she didn’t use exact measurements she never put the recipe down on paper.  It was definitely her signature and no get-together was complete without it.

When she passed in 2003, it dawned on everyone in the family that no one had ever asked her to teach them how to make it. Suddenly she was gone, and so was her apple kuchen.

grandma Rindfleisch's apfelkuchen  | german apple cake | Brooklyn Homemaker

She’ll always be Grandma Rindfleisch to me, but she was born Anna Hollatz in Germany in 1909. She emigrated in 1928 when she was engaged to be married to my great grandfather who lived here in the U.S. Before their marriage they sent love letters back and forth to each other from across the world, and my grandfather says she still had all those letters when he was growing up.

grandma Rindfleisch's apfelkuchen  | german apple cake | Brooklyn Homemaker

Get a look at that dress! Va-Va-Voom! If you ever wondered how wedding dress fashions may have looked in the late 1920’s, now you have an idea.

Writing about her apple kuchen got me really curious about my great grandmother’s history, and because I’m a total nerd, I researched her Ellis Island records. She sailed on the White Star line’s S.S. Arabic, and the ships manifest was full of information I never expected to find there, including handwritten changes to the name of the person who met her when she arrived. I was even able to find a few photos of the actual ship on which she made her journey, and I’m thinking of trying to get one printed and framed.

grandma Rindfleisch's apfelkuchen | german apple cake | Brooklyn Homemaker

After they were married, she and my great grandfather moved from Connecticut to the Fingerlakes region of upstate New York, where they owned and operated a dairy farm on the shores of Cayuga Lake. My mom has tons of stories of what life was like on the farm when she was growing up, and even keeps some of the dairy’s original glass milk bottles on a shelf in her kitchen. One of her fondest memories is of watching Grandma Rindfleisch churn her own butter in the well worn wooden churn she kept on her countertop. I best remember her thick German accent and the way she used to tightly wrap her white braids on the sides of her head like Princess Leia.

grandma Rindfleisch's apfelkuchen | german apple cake | Brooklyn Homemaker

When I started asking around about trying to recreate her recipe, my mom and all her cousins had loads of ideas and advice. “The cousins” (as mom calls them) had some ideas on what recipes would come closest, what ingredients should go in, and in what order. My uncle has a recipe that was supposed to come close, but a few of the cousins said it wasn’t right for a few reasons. First, and most importantly, the almond flavor should be present only in the crunchy streusel topping on the cake, but in his recipe the almond extract is added to the cake instead. There was also quite an uproar over the fact that his recipe called for (gasp) cooking oil spray!

grandma Rindfleisch's apfelkuchen  | german apple cake | Brooklyn Homemaker

The one thing everyone could agree on was that nothing would ever come close to the flavor of her home-churned butter, and therefore no one will ever be able to make her kuchen exactly the way she did.

My advice is to use the best quality unsalted butter you can find. If you have the means to churn your own, knock yourself out. If not, don’t sweat it. I was lucky enough to find some imported German cultured butter made with cream from grass fed cattle when I was butter hunting. The flavor was amazing and I think it really did make such a difference in my kuchen.

grandma Rindfleisch's apfelkuchen  | german apple cake | Brooklyn Homemaker

The recipe I ended up settling on, given to me by one of the cousins, comes really damned close to the real thing. It’s been over a decade since I tasted grandma’s kuchen, but if memory serves I think this is almost perfect. The only significant difference is that she would bake hers on a sheet pan or jelly roll, producing a thinner cake with a much higher apple to cake ratio. I didn’t go that route because it would make way more cake than I could handle, but if you’re looking to feed a crowd that’s the way to do it.

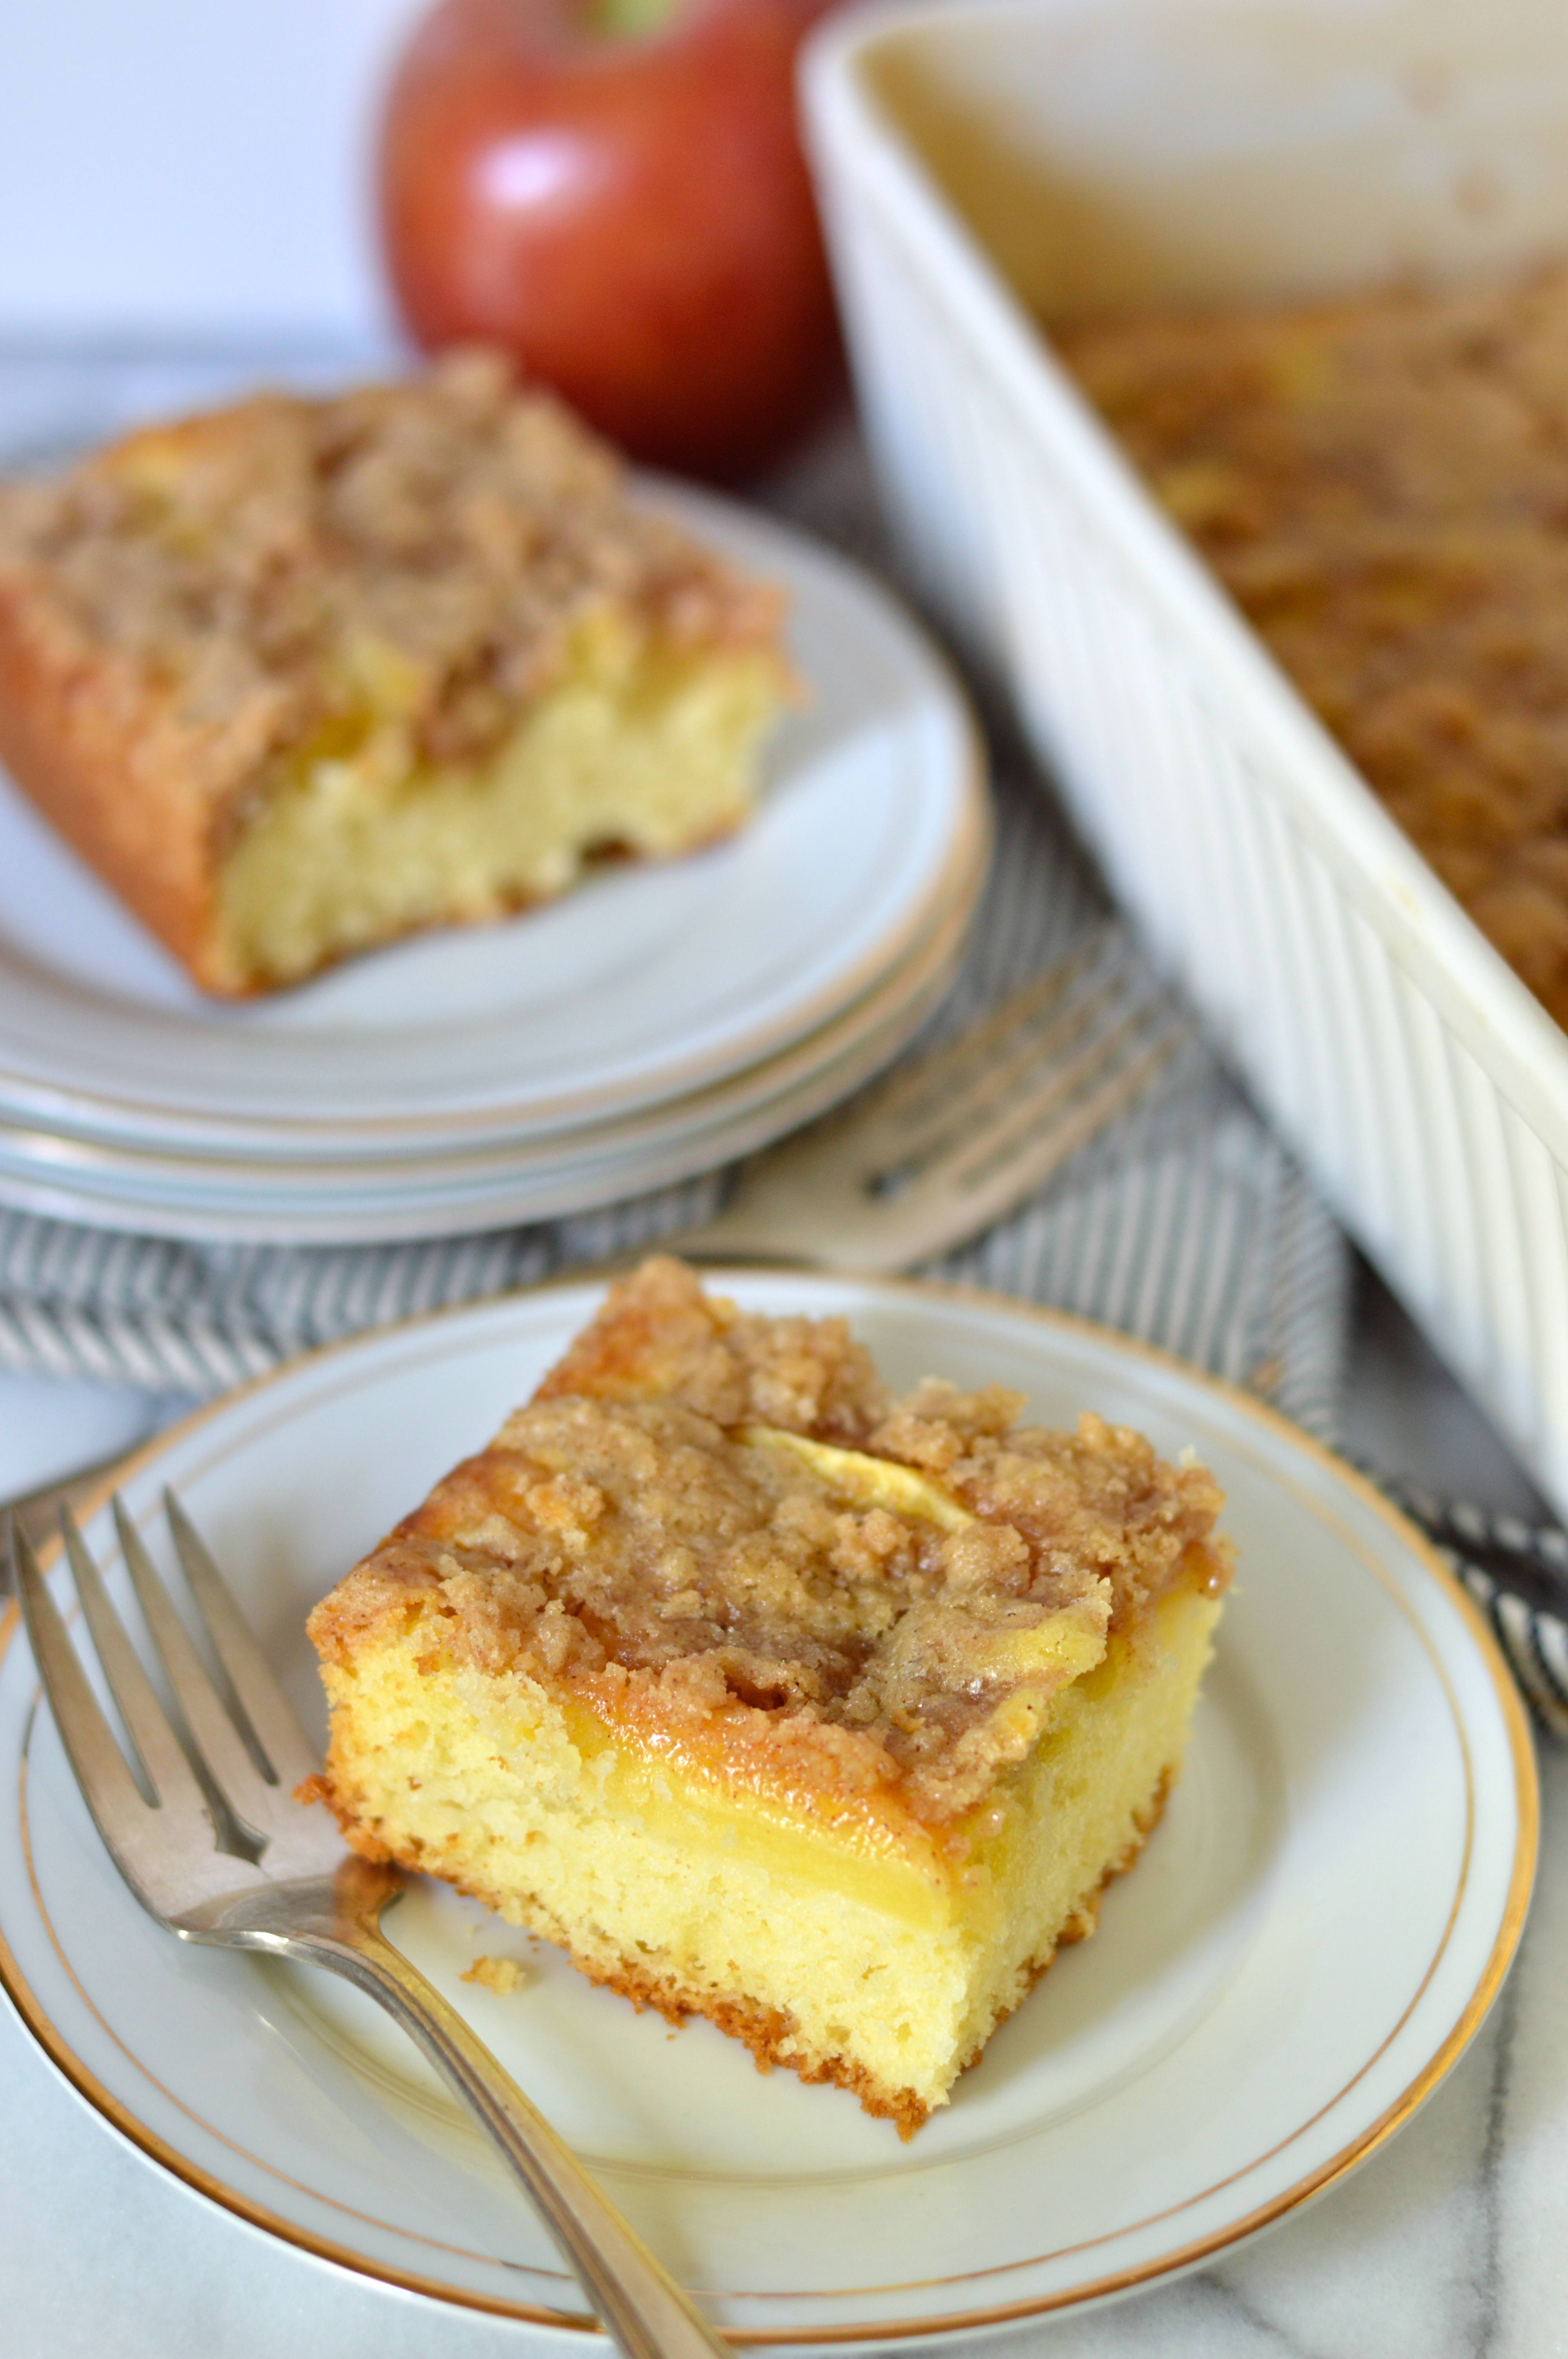
Either way, this cake is phenomenal. It’s simple, homey and unfussy but totally satisfying. It also happens to be really easy to make. The cake itself has an incredible rich buttery flavor that’s perfectly complimented by the sweet and tender apples. The topping combines even more butter with almond extract and cinnamon to finish the cake with just enough sweet crunch to tie everything together.

grandma Rindfleisch's apfelkuchen  | german apple cake | Brooklyn Homemaker

Grandma Rindfleisch's Apfelkuchen

Cake:
1/2 cup (1 stick) highest quality unsalted butter, softened
3/4 cup sugar
1 egg
2 cups flour
2 1/2 teaspoons baking powder
1/4 teaspoon salt
1/2 cup milk
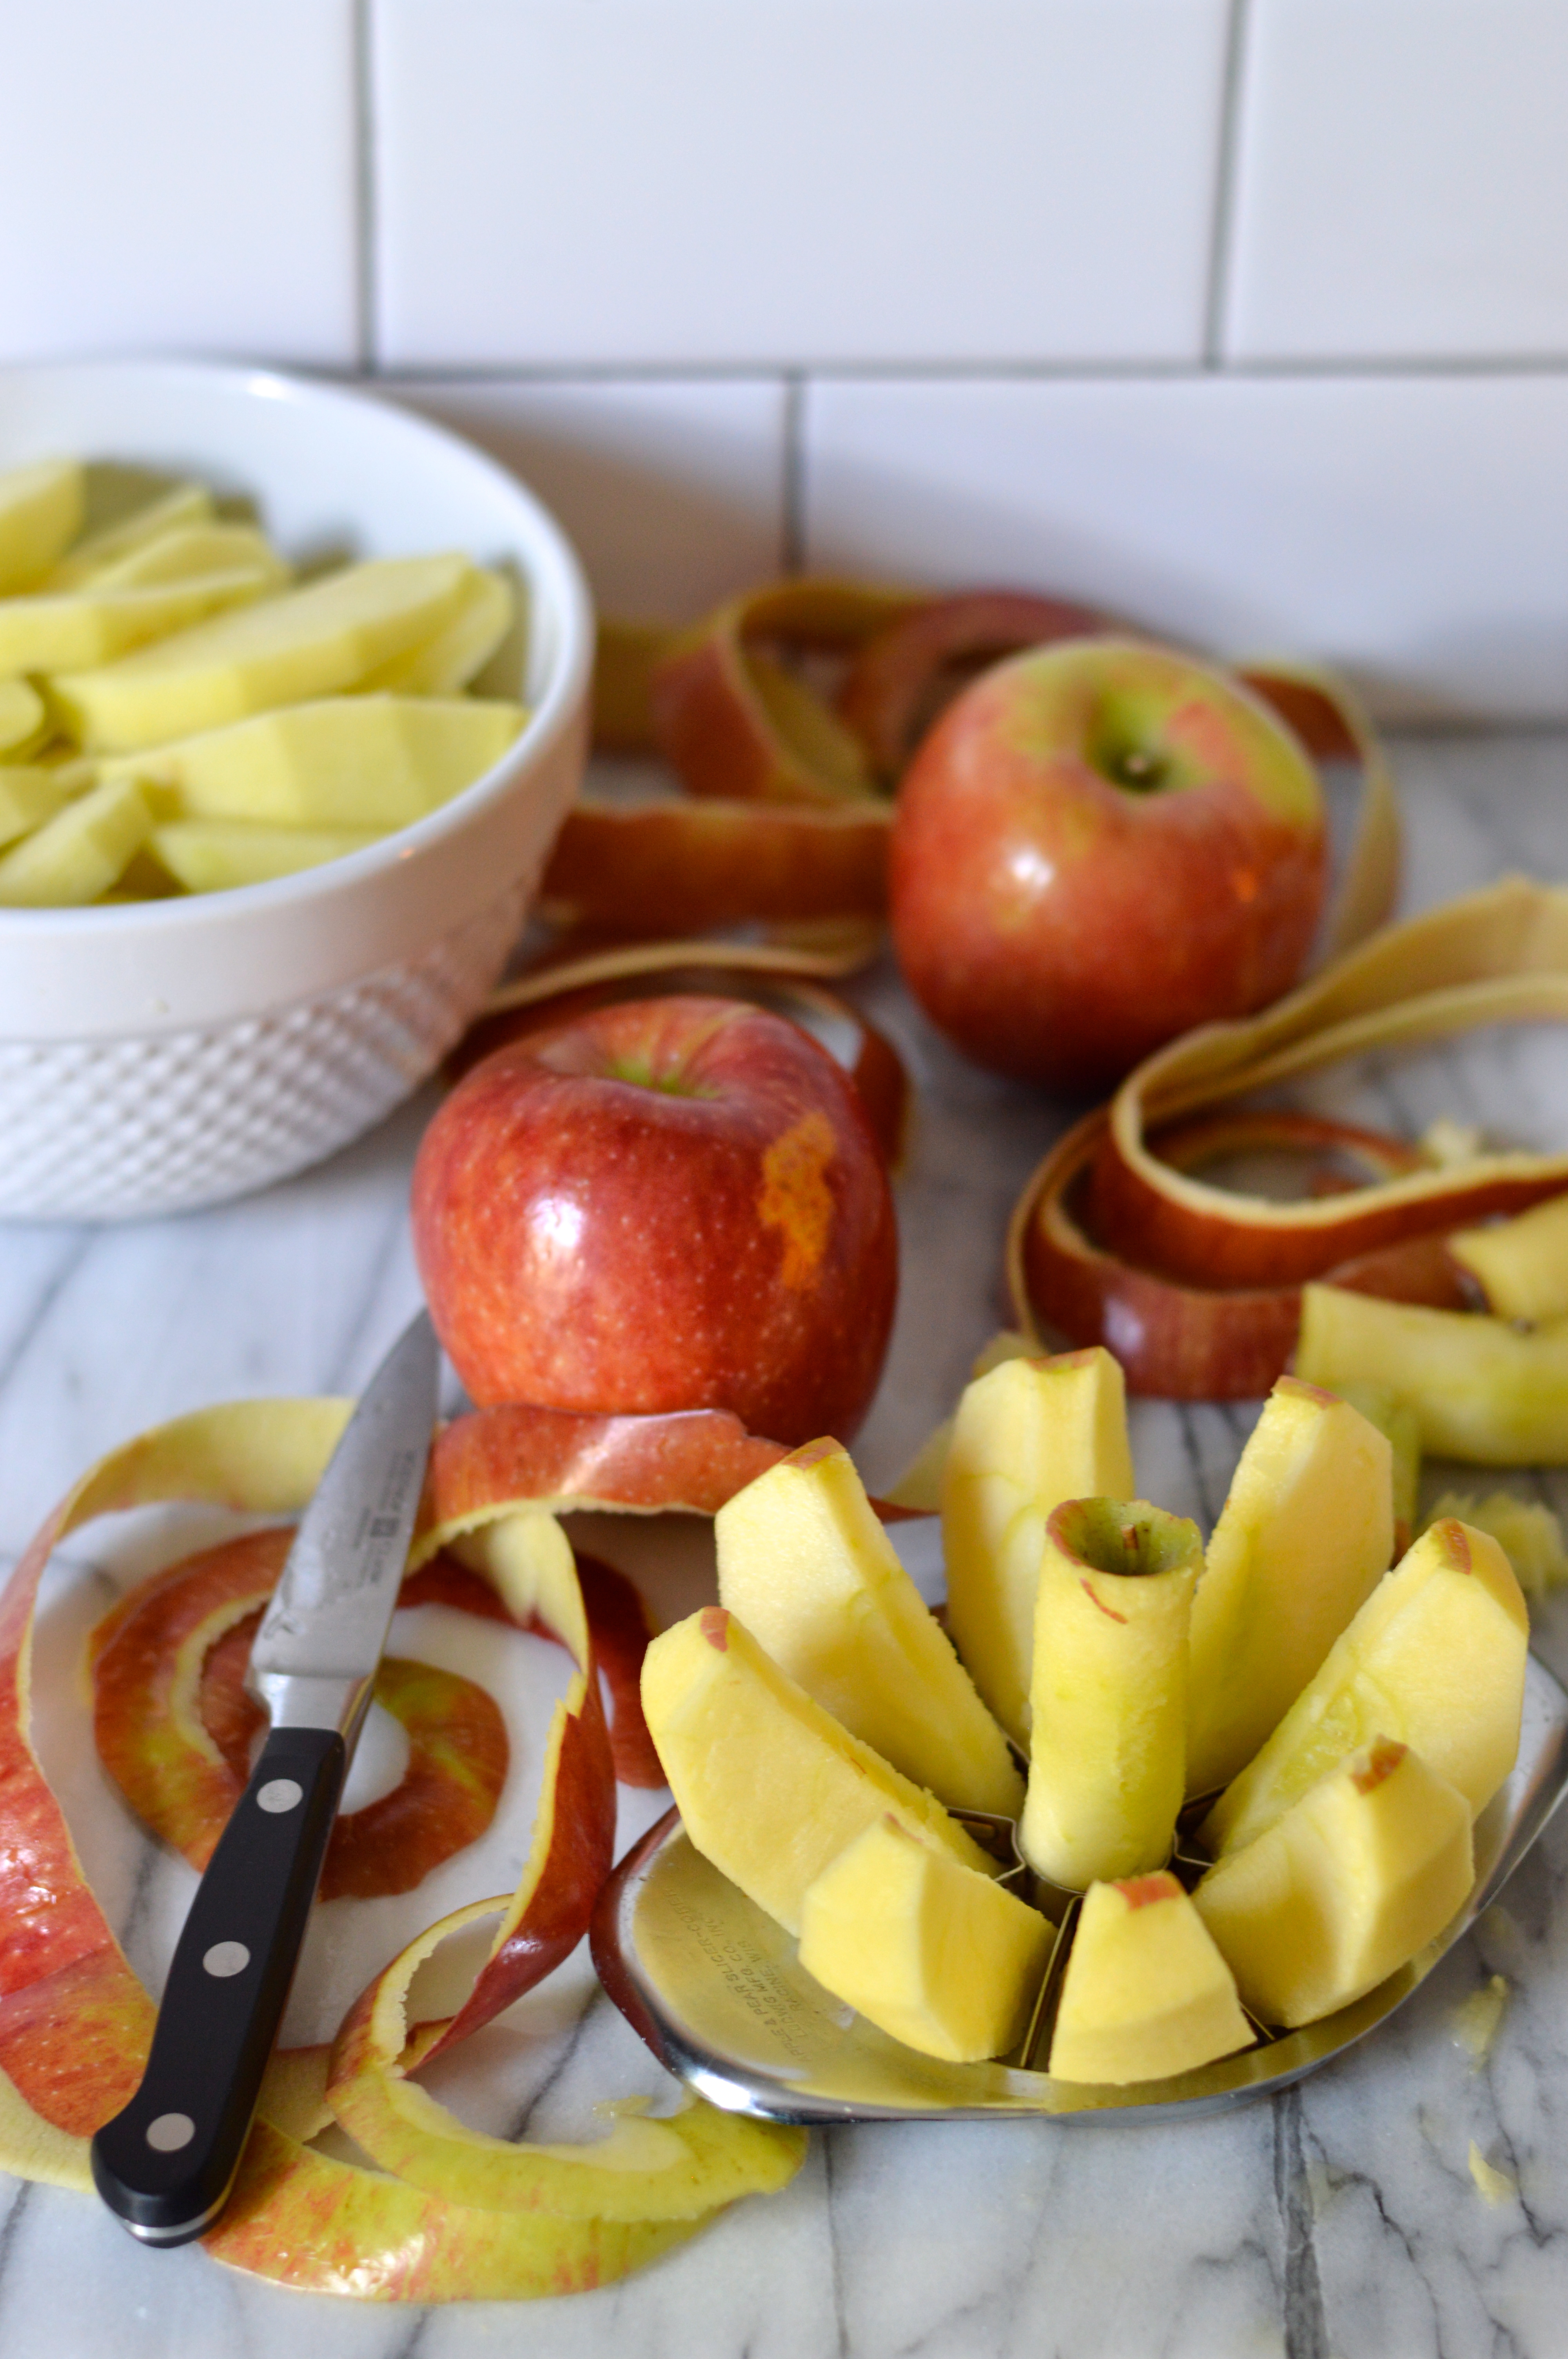
3 or 4 firm baking apples (I used braeburns)

Topping:
1/2 cup sugar
1/2 cup flour
1 teaspoon ground cinnamon
1/4 cup (1/2 stick) highest quality unsalted butter
1 teaspoon almond extract

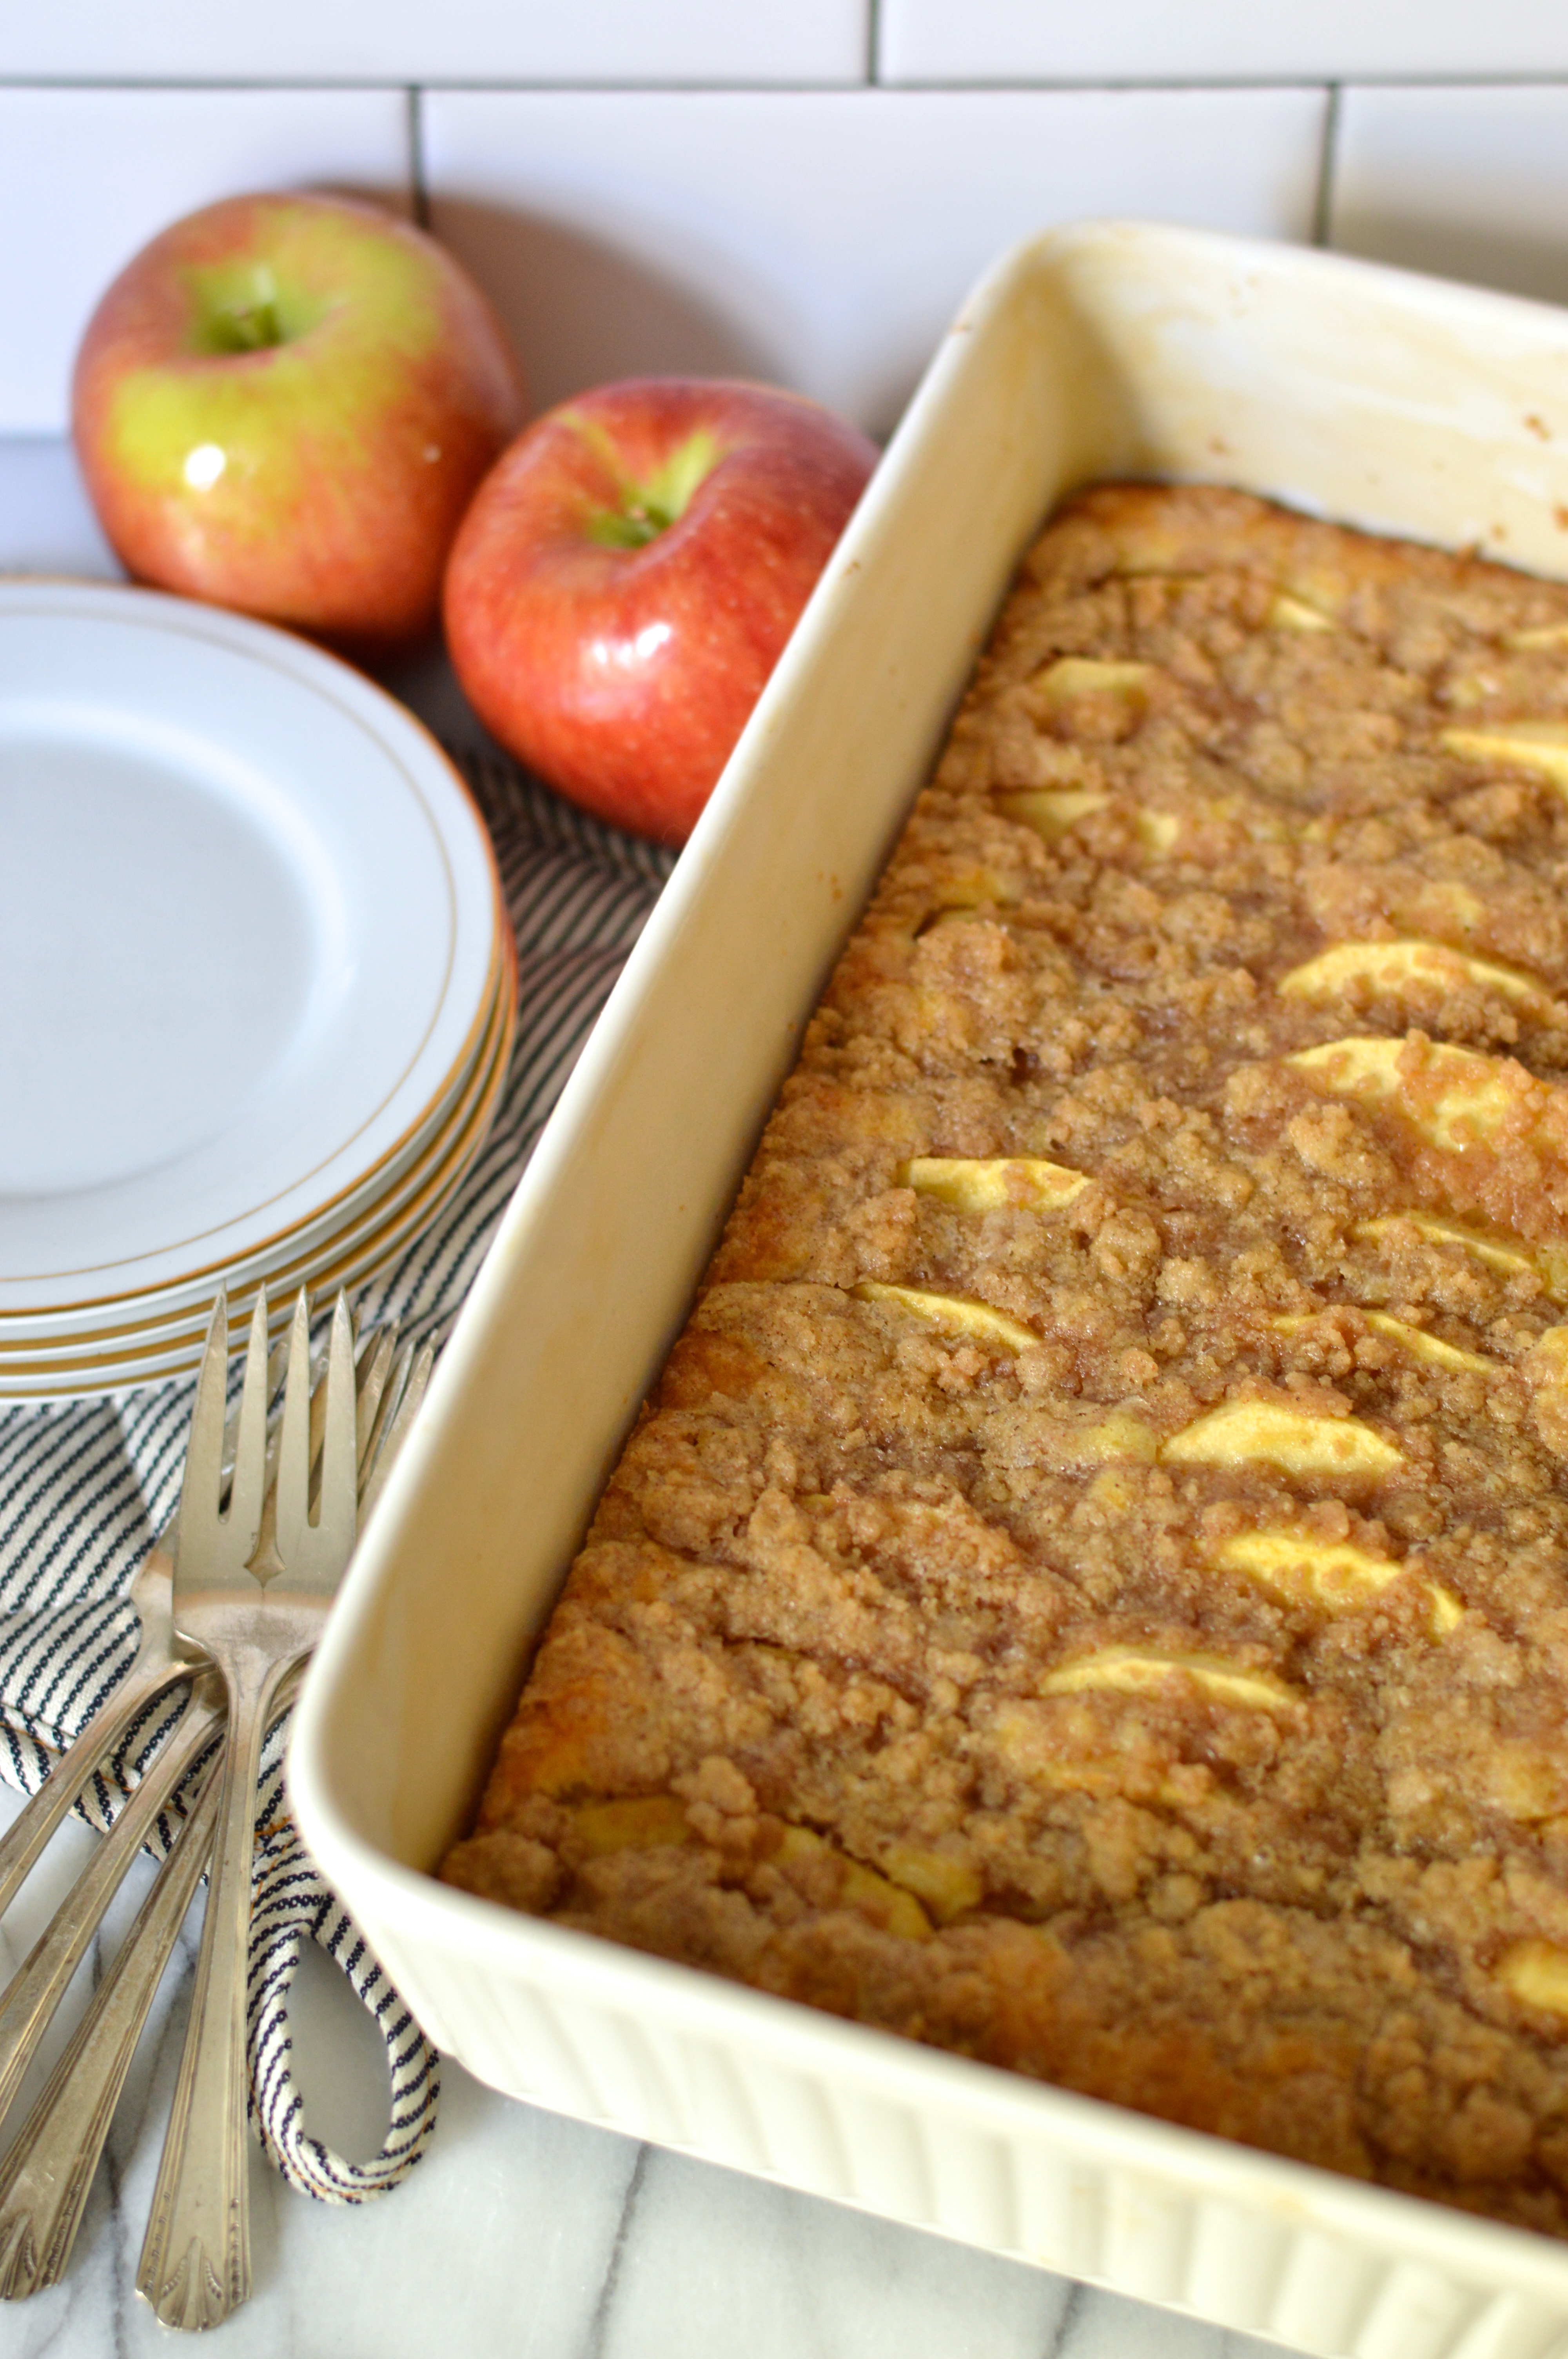
Preheat your oven to 350. Butter and flour a 9×13 baking dish (or an 18×13 jelly roll pan or half sheet pan). Cream butter and 3/4 cup sugar together until light and fluffy. Add the egg & beat until well incorporated. Whisk together the 2 cups of flour, baking powder, and salt. Add flour to butter mixture in three additions, alternating with milk. Beat just until incorporated, scraping the sides of the bowl after each addition.

Spread the batter in the bottom of the buttered pan. Peel, core, & slice the apples. Arrange the slices in three four or neat rows lengthwise, depending on the size of the apples. Whisk together the remaining sugar, flour, and cinnamon. Mash the butter into the topping with a fork, or with your fingers. Mix in almond extract, break the topping up so it’s nice and crumbly, and sprinkle it evenly over the apples. Bake for 40 to 45 minutes, or until a toothpick inserted in the center of the cake (avoid apple slices) comes out clean. If you’re baking on a jelly roll the cake may cook faster, start checking after 30 minutes.

Cool for at least 30 minutes before dividing into three rows of slices.

Advertisement

easy fudgy cocoa skillet brownies

I’ve made, and eaten, a lot of brownies in my day.

easy fudgy cocoa skillet brownies | Brooklyn Homemaker

I’ve tried countless recipes, and most of them were pretty good, but none have really made enough of an impression to make it into my recipe collection. I mean, they were brownies, sure, so naturally they were delicious and chocolatey and decadent, but none of them have felt special enough for me to make them a second time. Every time I’ve gotten the itch to make a pan of brownies I’ve searched my cookbooks (or google) and found a new recipe to try.

easy fudgy cocoa skillet brownies | Brooklyn Homemaker

Some have been cake-y, some have been fudgy, some have been light and milky, some deep and dark. Some have been thick and dry, others thin and gooey, some have had nuts, some have had icing, some have had crackled sugary tops.

easy fudgy cocoa skillet brownies | Brooklyn Homemaker

To be perfectly honest, I’m not a much of a fan of cakey brownies, and I definitely don’t like brownies with icing. (If I wanted chocolate cake, that’s what I’d be making.) Nuts I can take or leave, but the one thing I always look for in a brownie is the fudgy factor.

When you search recipes for “fudgy brownies”, most of the recipes you’ll find call for melted unsweetened baking chocolate. I’ve always thought that melted chocolate was essential to make a really rich fudgy brownie, but I don’t usually keep it in the house. If I do have it, it’s probably left over from the last time I made brownies, but the leftovers never seems to be in the right amount to make them again.

easy fudgy cocoa skillet brownies | Brooklyn Homemaker

I’ve also seen quite a few recipes out there that go out of their way to try to recreate the look, texture, and flavor of boxed brownies. Deeply chocolatey with a fudgy (but not-too-gooey) texture and a craggy crackly sugary top. I’ve seen recipes with combinations of oil and butter, brown sugar and white, cocoa and melted chocolate, all in the name of recreating that nostalgic iconic boxed brownie flavor.

The one thing I’ve always found odd though, is that there’s no melted chocolate in boxed brownies. There’s no boxed mix that calls for a combination of butter and oil either. So why must it be so difficult and complicated to recreate something so easy and simple? Why?

easy fudgy cocoa skillet brownies | Brooklyn Homemaker

Last week I came down with the flu and was out of work for a few days. I’m really bad at being sick, and find it nearly impossible to just sleep and nap and lay around all day even though I know full well that I should be resting and recovering. I ended up spending most of my time laying on the couch watching old movies and eating chicken soup, but one day I got a powerful craving for brownies, so I started looking for a recipe that wouldn’t require too much effort and could be made with ingredients I already had in the house. While I was fidgety enough to want to get up and make brownies, I was decidedly not well enough for a trip to the grocery store just for a bar of unsweetened chocolate.

easy fudgy cocoa skillet brownies | Brooklyn Homemaker

I typed “easy cocoa brownies” into the googler, and when a recipe from Bon Appetit came up I figured it was worth a shot. The only real changes I made were to use dutch process cocoa (I didn’t have any natural cocoa), and to bake the brownies in the same skillet used to melt the butter (because I was feeling too lazy to wash a skillet and a baking pan).

Well, guess what. This recipe has definitely made it into my recipe collection. If I must be honest, I’ve already made it again too. Maybe twice more…

Maybe.

easy fudgy cocoa skillet brownies | Brooklyn Homemaker

These brownies are deeply, darkly & decadently chocolatey thanks to the dutch process cocoa, and every bit as fudgy as I hoped they’d be. They’re crazy delicious, super buttery, and have a perfect hint of pleasant saltiness. They’re a little dense and gooey, but I’m totally into that! They even have that iconic crackled crusty sugar top, as well as a really wonderful chewy edge thanks to the heavy cast iron they’re baked in.  Since they’re baked in a round skillet you can cut them into wedges, and that way every slice has a little bit of gooey center and chewy edge.

My favorite part of this recipe though, might have to be how crazy easy they are to make!

easy fudgy cocoa skillet brownies | Brooklyn Homemaker

easy fudgy cocoa skillet brownies

  • Servings: 8 - 16 depending on size
  • Print
adapted from Bon Appetit

1/2 cup (1 stick) unsalted butter
1 1/4 cups sugar
3/4 cup unsweetened dutch-process cocoa powder
1/2 teaspoon coarse kosher salt
1 teaspoon vanilla extract
2 large eggs
1/3 cup all-purpose flour
2 tablespoons confectioners (powdered) sugar, optional

Preheat oven to 325°F.

Over medium heat, melt butter in an 8 or 9 inch cast iron skillet. Let cool slightly.

Whisk sugar, cocoa, and salt in a medium bowl to combine. Pour butter in a steady stream into dry ingredients, leaving a light coating of butter in the skillet. Whisk to combine, then whisk in vanilla and eggs, one at a time. With a wooden spoon or rubber spatula, add flour and stir until just combined (do not over-mix). Scrape batter into buttered skillet and smooth the top. (If you don’t have a skillet, you can substitute a parchment lined and buttered 8×8 square baking dish)

Bake until edges look craggy, center rises but doesn’t wobble much, and a toothpick inserted into the center comes out with just a few moist crumbs attached, 30-35 minutes.

Transfer skillet to a wire rack to cool completely. If desired, dust lightly with confectioners sugar. Cut into 8 to 16 wedges depending on how much you want. They’re so rich you probably should cut them into 16 wedges, but they’re so good you’ll want to cut them into 8.

dark chocolate dipped hazelnut & olive oil shortbread cookies

Back in my 20s, when I was single, I tended to hang out almost exclusively with other single people.

dark chocolate dipped hazelnut and olive oil shortbread cookies | Brooklyn Homemaker

If one of my friends would start dating someone seriously we would try to maintain our friendship, but we’d usually start to drift apart as they hung out with their partner, or with other couples, more often than their single friends. I always quietly resented those friends, and their partners, for falling out of touch and drifting from me and my desire to blow three days worth of tips in one night of debauchery. Why would anyone chose to stay in with popcorn and netflix when they could hang out with me, bar hopping and getting embarrassingly sloppy until the bars closed, when we could try to find some cheap mexican food to gorge on before falling asleep with our clothes on? What could be more fun?

dark chocolate dipped hazelnut and olive oil shortbread cookies | Brooklyn Homemaker

Now that I’m on the other side of that situation, married and in a relationship for several years, I’m starting to understand. It might have something to do with being a few years older, or the fact that I work mornings now, or that I have two dogs to get home to, but the very idea of staying out past midnight and paying for drinks at a bar rather than drinking at home has me yawning wide and worrying about my bank balance.

dark chocolate dipped hazelnut and olive oil shortbread cookies | Brooklyn Homemaker

I mean, it’s not as if I don’t have any unattached friends, it’s just that more and more couples have made their way into my social circle. Call it maturity, or call it geriatric old age, but I’ve reached the phase of my life where nights out on the town are fewer and farther between, while socializing and entertaining at home happens more and more often. Part of the appeal of hanging out with other couples is that they tend to be just as willing (and eager) to have drinks, dinner, and visits in each others homes.

dark chocolate dipped hazelnut and olive oil shortbread cookies | Brooklyn Homemaker

One of our closest friend-couples are in the process of organizing a DIY wedding. Last year when they were early in the planning stages, we had them over for brunch to discuss their ideas and pass down some of the supplies we had leftover from our own wedding. It was actually during that brunch that I served the Aunt Sassy Cake that was the inception of Brooklyn Homemaker, largely thanks to their insistence and enthusiasm.  Little by little, we’ve been helping them with certain aspects of their wedding along the way, and I might even be planning to bake a few little things for their big day.

dark chocolate dipped hazelnut and olive oil shortbread cookies | Brooklyn Homemaker

When they asked if I’d be interested in coming over to help out with some DIY craft projects for the wedding, I was all over it. I love doing that sort of stuff anyway, but I was especially into the idea of hanging out for the day. There would also be wine.

While the setting may have changed as I’ve gotten older, my inability to practice self control has not. I may, just may, have consumed a few too many glasses of wine and done a lot more drunken gum flapping than actual crafting.

dark chocolate dipped hazelnut and olive oil shortbread cookies | Brooklyn Homemaker

There’s something in my DNA that dictates I must always arrive to a party, no matter how big or small, with something homemade and delicious. So, I asked if I could bring some cookies along, as if the answer might actually be anything other than yes.

My original thought was something like a simple chocolate chip cookie, but when I learned that one of their crafting friends is vegan, I started brainstorming. It’s no secret that I love a challenge.

dark chocolate dipped hazelnut and olive oil shortbread cookies | Brooklyn Homemaker

As much as I adore butter and bacon, I really love to make the occasional vegan recipe. The one thing I don’t like though, is using vegan substitutes for things that are innately un-vegan. Egg substitutes and margarine are not things that you’re likely to ever find in my refrigerator. The way I see it, if you want eggs and butter, eat eggs and butter; and if you want to avoid them, avoid them without substituting impostors that look, taste, and smell vaguely similar.

So when I started thinking of a vegan cookie recipe, I immediately thought I wanted to try using olive oil in place of butter. I knew a simple shortbread would be perfect to highlight the choice of olive oil, and from there my mind went straight to sea salt, crunchy nuts, and dark chocolate.

dark chocolate dipped hazelnut and olive oil shortbread cookies | Brooklyn Homemaker

My instincts paid off, and these purdy little cookies were a hit. There’s something so wonderful about a shortbread cookie made with olive oil. While the amount of sugar in these cookies is restrained and subtle, it’s presence completely transforms the olive oil to give the cookie a bright, light, and fruity quality.  The shortbread has a perfectly crisp texture, with a nice hint of crunch from the toasted hazelnuts. The cherry on the sundae is the coating of bitter dark chocolate and tiny sprinkling of fleur de sel. You gotta love a sweet treat with a healthy hint of salt.

Even though there were only a few of us crafting, and this recipe makes 3 dozen little cookies, there was little more than a few crumbs left at the end of the night.

dark chocolate dipped hazelnut and olive oil shortbread cookies | Brooklyn Homemaker

Dark Chocolate Dipped Hazelnut & Olive Oil Shortbread Cookies

  • Servings: 36 cookies
  • Print
3 cups all purpose flour
1 cup confectioners (powdered) sugar (for a sweeter cookie use 1 1/4 cups)
1 teaspoon coarse kosher salt
1 cup hazelnuts, roughly chopped
1 cup + 1 tbsp good quality extra virgin olive oil, divided
8-10 oz good quality dark chocolate, roughly chopped
1/2 teaspoon fleur de sel (or coarse kosher salt)

Preheat the oven to 350 degrees Fahrenheit.
Toast chopped hazelnuts on a parchment lined baking sheet for about 5 minutes, or until they smell nice and nutty and look slightly oily. Turn oven down to 325 degrees.

In a medium-sized mixing bowl, whisk together the flour, sugar, salt, and hazelnuts. Pour in 1 cup olive oil and stir until all of the dry mixture is incorporated. Brush a 9×13 baking pan with remaining olive oil, and use your fingers to press the dough down in an even layer. Prick the surface of the dough all over with a fork (try to create an even pattern). Bake until it is just beginning to turn slightly golden around the edges (keep a close eye on it), about 40 to 50 minutes.
Remove from oven and let the pan cool for 20 minutes. Do not let them cool completely before slicing! Using a very sharp knife, slice the shortbread into 6 rows of 6 rectangles. Then let the cookies cool completely before using a small spatula to remove them from the pan. Resist the urge to remove them before they’re totally cooled, or they’ll crumble to bits.

Transfer cookies to a parchment lined sheet pan, cooling rack, or countertop. Using a double boiler, or 15 second bursts in the microwave, melt dark chocolate until smooth and shiny. Dip cooled cookies, one at a time, in chocolate. I thought it looked nicer to just dip half the cookie, but you can do what you like best. Before chocolate sets sprinkle each cookie with a few grains of fleur de sel or coarse kosher salt. Transfer back to parchment and let chocolate set completely before removing and serving. (I used the refrigerator to speed this up.)

grapefruit bars

Well folks. Guess what…
I’m a man obsessed. I have yet another citrus recipe to share with you.

grapefruit bars | Brooklyn Homemaker

First though, I would like to mention that Brooklyn Homemaker received enough nominations in theKitchn’s The Homies to make it into the finals for “best daily read” cooking blog! Woohoo!!! I only started writing this blog about six months ago, and at that time I never imagined that I would come so far so quickly. I hate to sound like I’m bragging, but I feel like my writing style and photography skills, as well as my understanding of blogging and my idea of what I want Brooklyn Homemaker to be, have grown and improved so so much. There’s still a lot of room for improvement, but I’m at a place where I feel very pleased with the direction of this blog and excited for what it will become in the future.

If you are as big a fan of Brooklyn Homemaker as I am, and you’re as excited about the future of the blog as I am, please take a moment to vote for me in The Homies for “best daily read”. TheKitchn does make you create an account, but they make it very easy, and you can even sign in through facebook. Please choose Brooklyn Homemaker from the list of ten finalists at the top of the page HERE. Being such a young blog, I honestly cannot believe that I’m holding my own against blogs that have been around for years and have thousands of readers. It is such a huge honor to have made it into the finals and no matter what the outcome, I will be thrilled to have done so well. Being one of the ten finalists has brought in so many new readers, and I couldn’t be happier about it. If you’re new here, welcome! I’m glad you’re here, and I hope you’ll keep coming back!

grapefruit bars | Brooklyn Homemaker

Okay. Enough about me, let’s get back to the recipe.

Although we’re facing another cold front, the weather in Brooklyn actually warmed up for a brief moment over the weekend. Unsurprisingly though, my nagging citrus craving didn’t subside one bit. This time around I thought something bright and sweet and unmistakably citrus-y might do the trick to help me snap out of it. For over a week now I’ve been thinking about trying to make grapefruit curd, but I hadn’t yet because I couldn’t decide what I’d do with it. I love citrus curd but if I’m making it fresh I usually like to use it to fill a cake or serve with brunch or some such thing. Homemade curd tastes one bajillion times better than the store-bought stuff, but it isn’t nearly as shelf stable, so if I don’t have a plan to use it up pretty quickly, I generally don’t think it’s worth the trouble.

grapefruit bars | Brooklyn Homemaker

I toyed with the idea of making a grapefruit cake, but decided that if I were going to do that I’d want to make the famous Brown Derby grapefruit cake, which doesn’t actually call for grapefruit curd. Maybe some other time. After racking my brain a bit longer it finally hit me, I’d make lemon bars but with grapefruit instead. Since you don’t have to pre-cook the curd on the stove top it’s actually even simpler, but with very similar (delicious) results. I consulted with my dream woman, idol, and friend-in-my-head, Ina Garten, for the recipe, and made some tweaks and substitutions to turn her more traditional lemon bars into grapefruit bars instead.

grapefruit bars | Brooklyn Homemaker

Though her recipe is truly wonderful and worked perfectly with the grapefruit substitution, I wish I’d read some of the comments before I got started. I ended up having to make two batches to perfect this recipe, and I learned a few important things from the first, failed, attempt. The first batch wasn’t actually a true fail though. They were pretty decent, but they weren’t GREAT, and I wasn’t sure they were worth sharing here. So, rather than accepting defeat, or worse, blogging about a recipe I wasn’t that happy with, I decided to give it another shot the next day, and had MUCH better results.

grapefruit bars | Brooklyn Homemaker

In the name of learning, here’s what I did wrong the first time around. In an attempt to make for more attractive photos, I tried to make the first batch in a pretty white ceramic baking dish, but the pan was slightly smaller than the recommended 9×13 called for in the recipe. This already makes for a thick bar, and the smaller pan ended up making them even thicker. They took much longer to set than expected, baked kind of unevenly, and resulted in a slightly overcooked and muted flavor instead of the bright citrus-forward flavor I was hoping for. After reading some of the comments, I learned that a lot of people said they like a thinner bar and used a larger pan, like a 10×15 or a baker’s half sheet to spread the bars out, which apparently works really well. Making the bars even thicker than they already were though, was definitely not a wise decision on my part. Another thing I learned from reading the comments, again too late for the first batch, is that the filling shouldn’t be mixed together until the very last minute. If mixed too early, the acid in the citrus juice can affect the texture of the raw eggs, effectively cooking the eggs before they’re baked, and giving the cooked filling a rubbery “off” texture.

grapefruit bars | Brooklyn Homemaker

But here’s the good news! The second time around these bars were everything I was hoping they would be and more! The grapefruit really makes for a wonderful and interesting twist on the traditional lemon bar. I think lemon bars are delicious, but the super tart, super sweet flavor can sometimes seem a little one note and end up tasting like sour candy rather than a homemade baked treat. In addition to the tart and sweet flavors, the grapefruit juice adds some bitterness and depth that pairs really well with the buttery shortbread crust. They’re such a great little twist on the traditional lemon bars. They have all of that sweet and tart flavor you’re expecting but with just a hint of grapefruity bitterness. The curd filling is soft and sweet and ever-so-slightly gooey, and the buttery shortbread adds just enough crispness and bite to really bring another layer of texture and interest to the experience. SO. GOOD.

grapefruit bars | Brooklyn Homemaker

I hope you’ll give these bars a shot. Don’t let my initial mistakes scare you, this recipe is actually really simple and easy. If you learn from my mistakes and use the right size (or larger) pan, and be patient enough not to mix the filling too early, you’ll be thrilled with the results. Especially, obviously, if you’re a big grapefruit fan like I am. If you’re someone, also like me, who likes to try to get yourself prepared and ready ahead of time, you could always zest and juice your citrus ahead and could even mix the sugar in with the zest and juice. Just make sure you don’t mix the eggs in until you’re ready to bake. Okay? Now go preheat that oven. It’s cold outside again and you need something tropical-ish in your life.

grapefruit bars | Brooklyn Homemaker

Grapefruit Bars

  • Servings: 20-40 bars, depending on how you cut them
  • Print
adapted from The Barefoot Contessa Cookbook

crust:
1/2 pound (2 sticks) unsalted butter, at room temperature
1/2 cup granulated sugar
2 cups flour
1/4 teaspoon kosher salt

filling:
6 large eggs at room temperature
3 cups granulated sugar
2 tablespoons grated citrus zest (from 2 lemons and 1 large grapefruit)
1/4 cup freshly squeezed lemon juice (from 1-2 lemons)
3/4 cup freshly squeezed grapefruit juice (from 1 large grapefruit)
1 cup flour
Confectioners’ sugar, for dusting

Preheat the oven to 350 degrees F.
For the crust, cream the butter and sugar together in the bowl of an electric mixer with the paddle attachment until light and fluffy. Add the flour and salt and mix on low until just combined. Gather the dough together into a ball, and with floured hands, flatten the dough and press it into a 9 by 13 inch baking pan, building up a 1/2-inch edge on all sides. Chill in the refrigerator for at least 15 minutes.
Bake the crust for 15 to 20 minutes, until very lightly browned. Leave the oven on and let the crust cool slightly while you make the filling. Resist the urge to make the filling ahead, and wait until the crust comes out of the oven.
In a large bowl, whisk together the sugar, citrus zest, citrus juices, and eggs. Add flour and whisk until well combined, making sure there are no lumps. Pour the filling over the crust and bake for 30 to 35 minutes, until the filling is just set. Let cool to room temperature before cutting.
Cut into triangles and, with a sieve or dredger, dust with confectioners’ sugar.