When I first met my husband he was a really picky eater. This was very difficult for me to deal with, being a relatively adventurous eater and lover of variety, but I tried to handle it as best I could. He even used to insist that he was “allergic” to a few certain foods, but over time I began to suspect that it was all in his head. He claimed to be allergic to eggs, but had no reaction if they were mixed into a cake or custard. For some reason his “allergy” was only an issue if the eggs were on their own, and when I pressed him on his symptoms he couldn’t really come up with any. Finally I was able convince him that he just didn’t like these foods, and didn’t actually have any real food allergies. He still won’t eat eggs, but at least now he admits that he just doesn’t like them.
One of the foods I was most upset about his being “allergic” to was mushrooms. I love mushrooms so much that when I considered a long term relationship with Russell, I mourned losing them. Once I was able to convince him he wasn’t allergic to them, and I got him to try them, surprise! He loved them! We eat mushrooms all the time, and as weird as this may sound, I couldn’t be more thrilled about it.
The other night we went out with friends for dinner to celebrate Russell’s birthday. After a few minutes looking at the menu, Russell ordered a dish that wasn’t much more than sautéed mushrooms with fresh pappardelle pasta and butter. Of course, I had to try a bite, and I thought the sauce was perfectly simple and light, but was just a bit one-note to me. I decided, after my third Manhattan, that I could improve on this dish. I loved that it wasn’t overdone with cream and wine and cheese and stock, but thought it could just use a little boost. I started thinking that the best way to bring out the fresh lightness of the sauce would be just a bit of fresh herbs and maybe a hint of lemon to brighten it up.
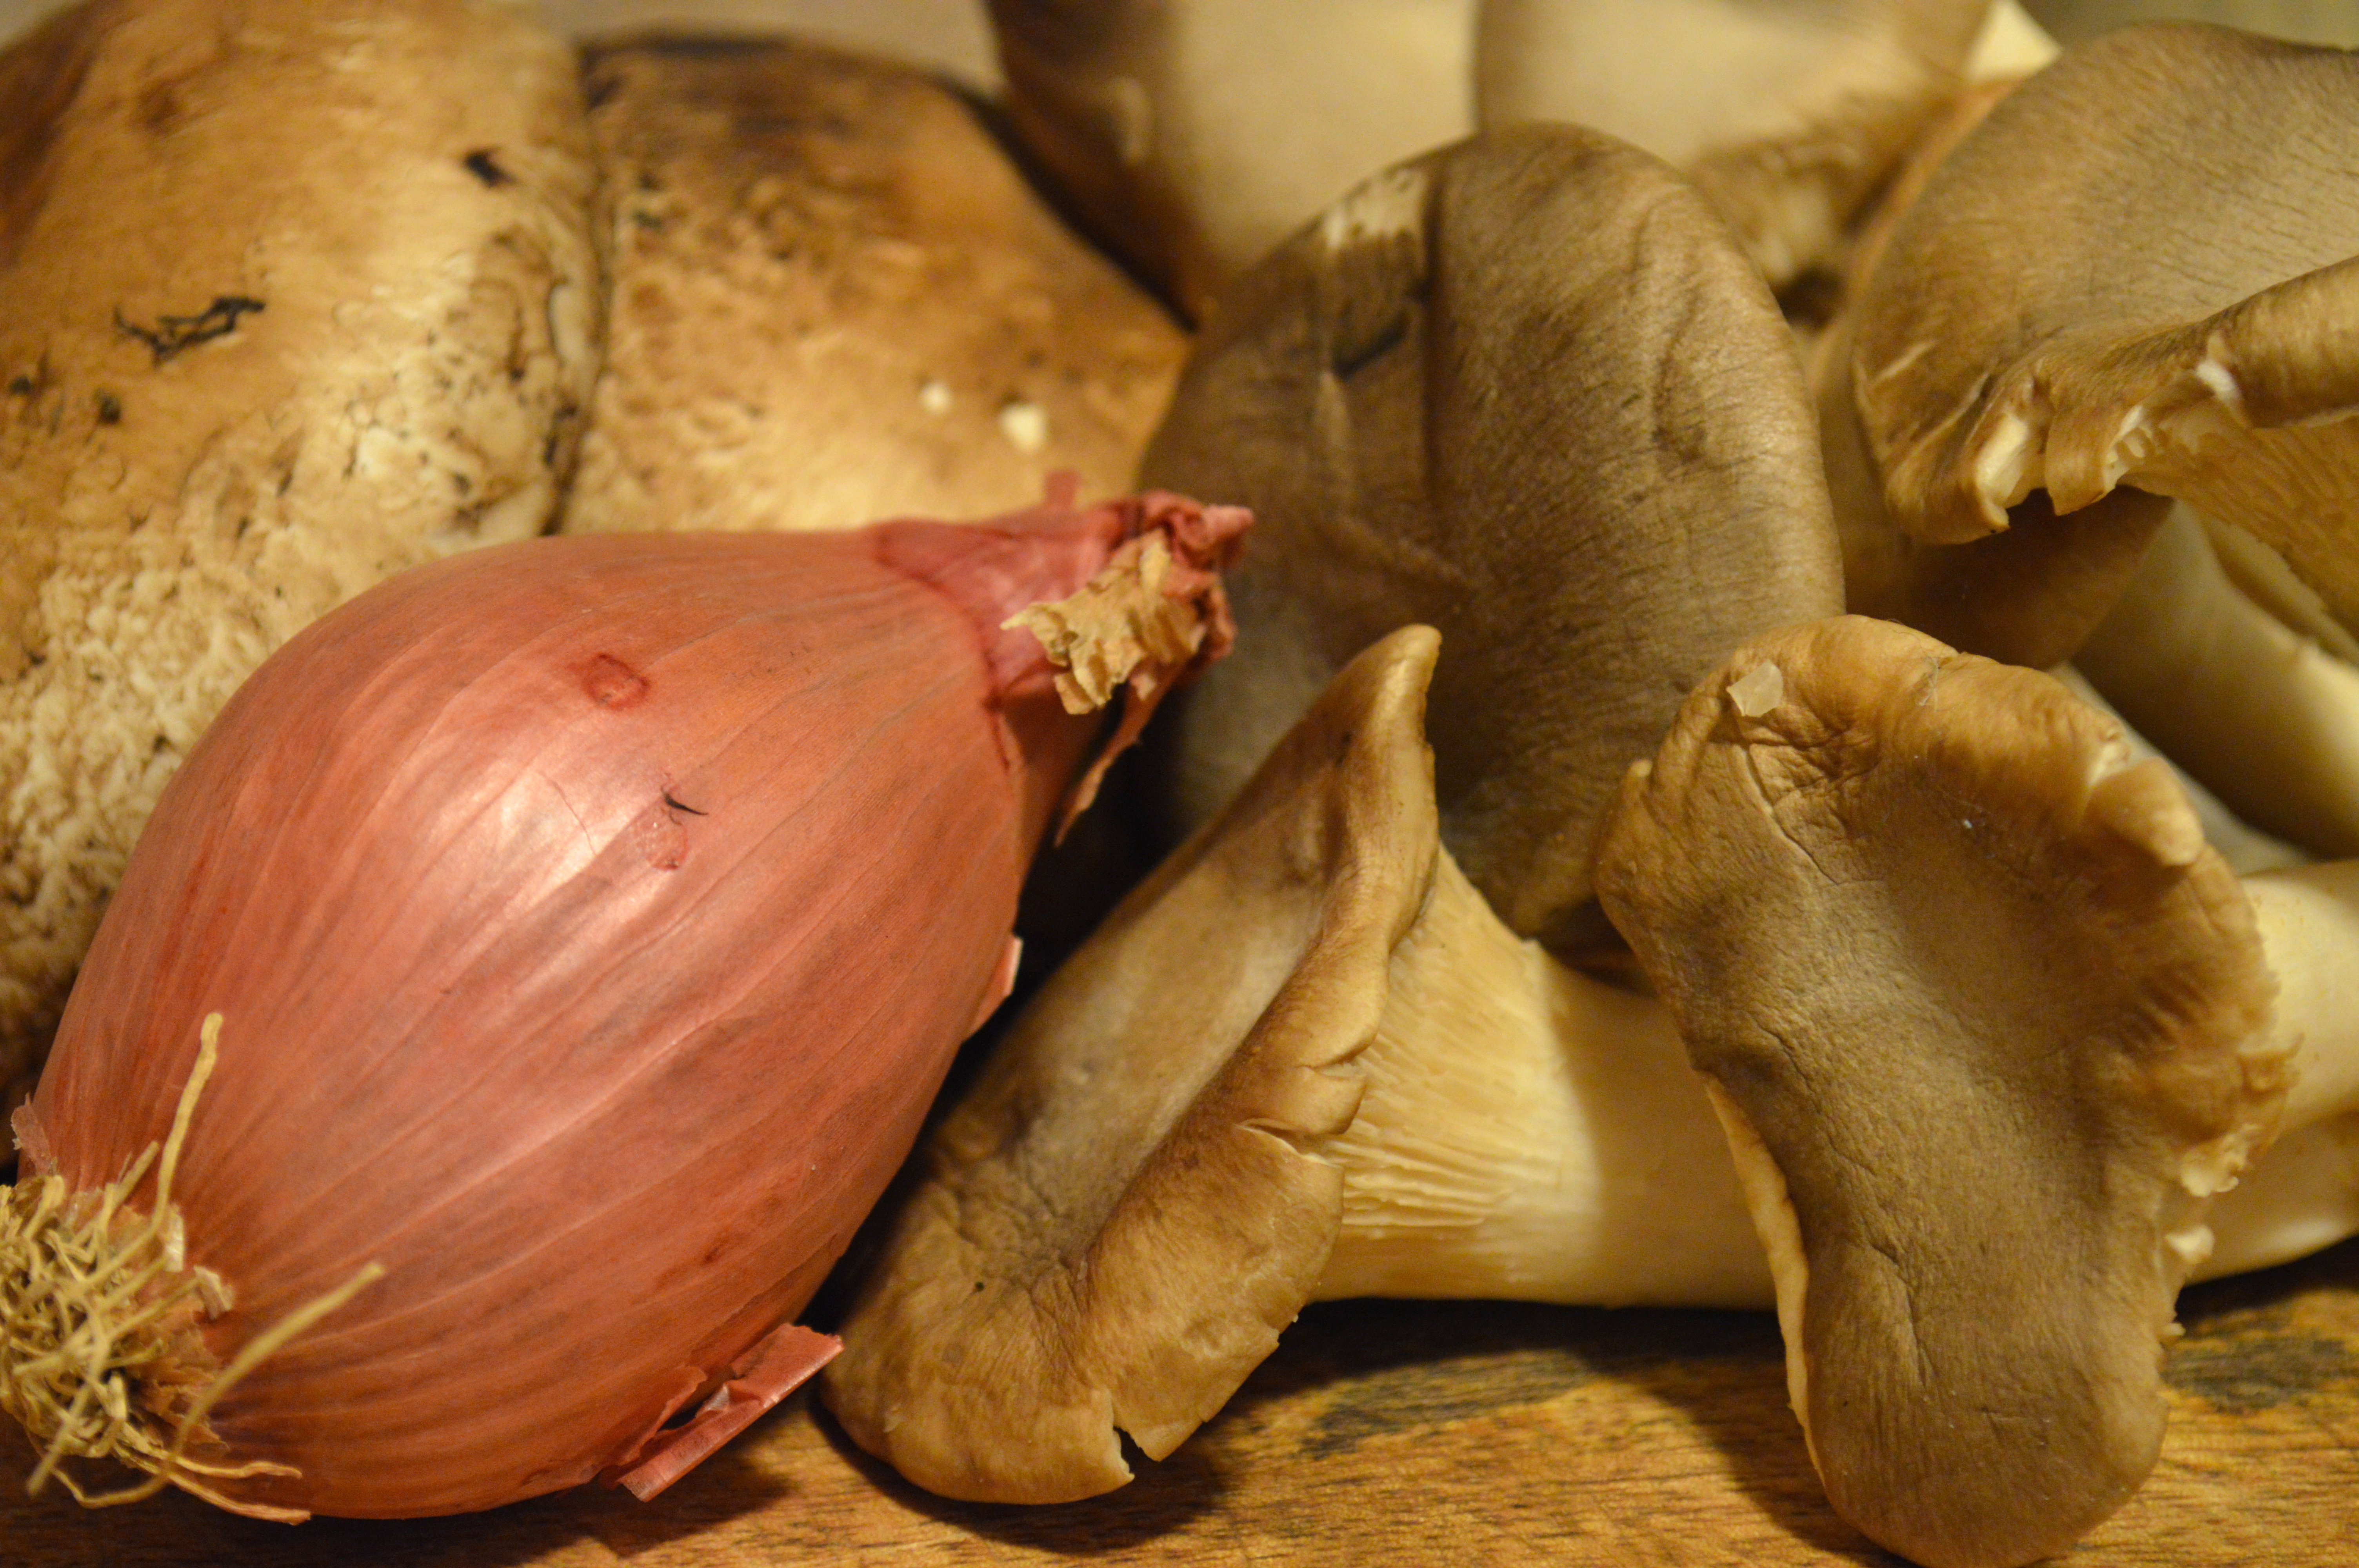
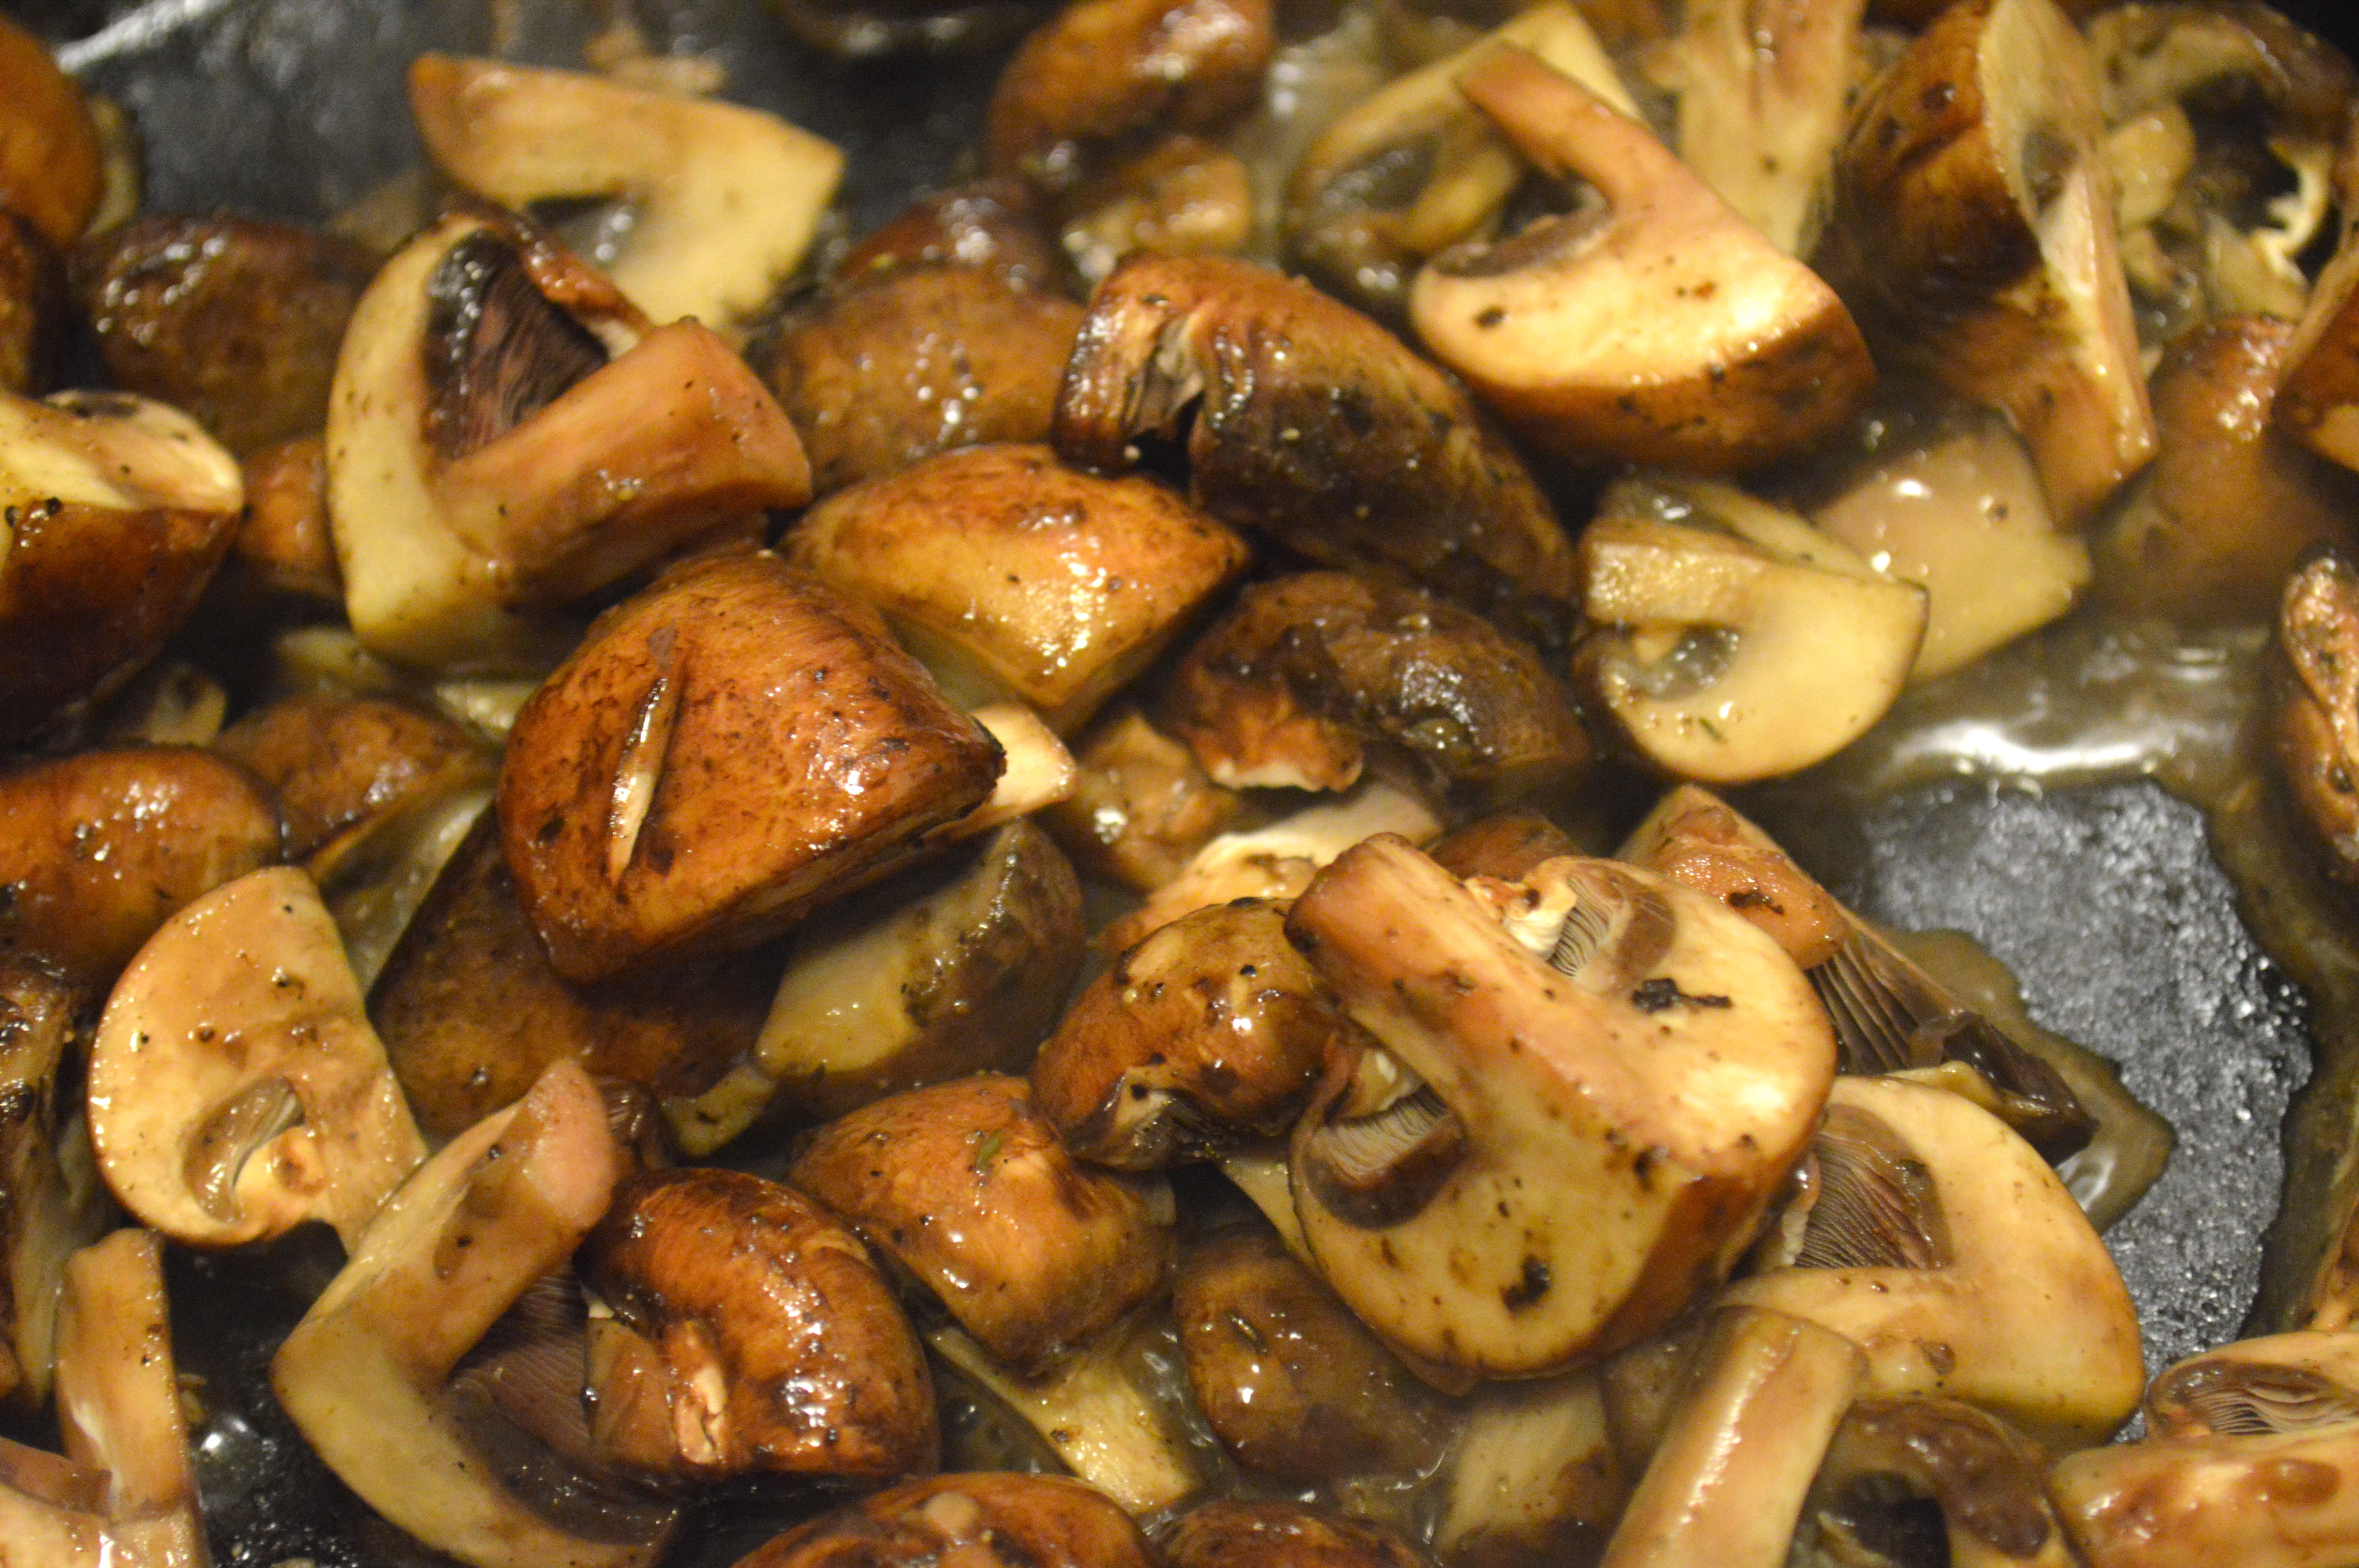
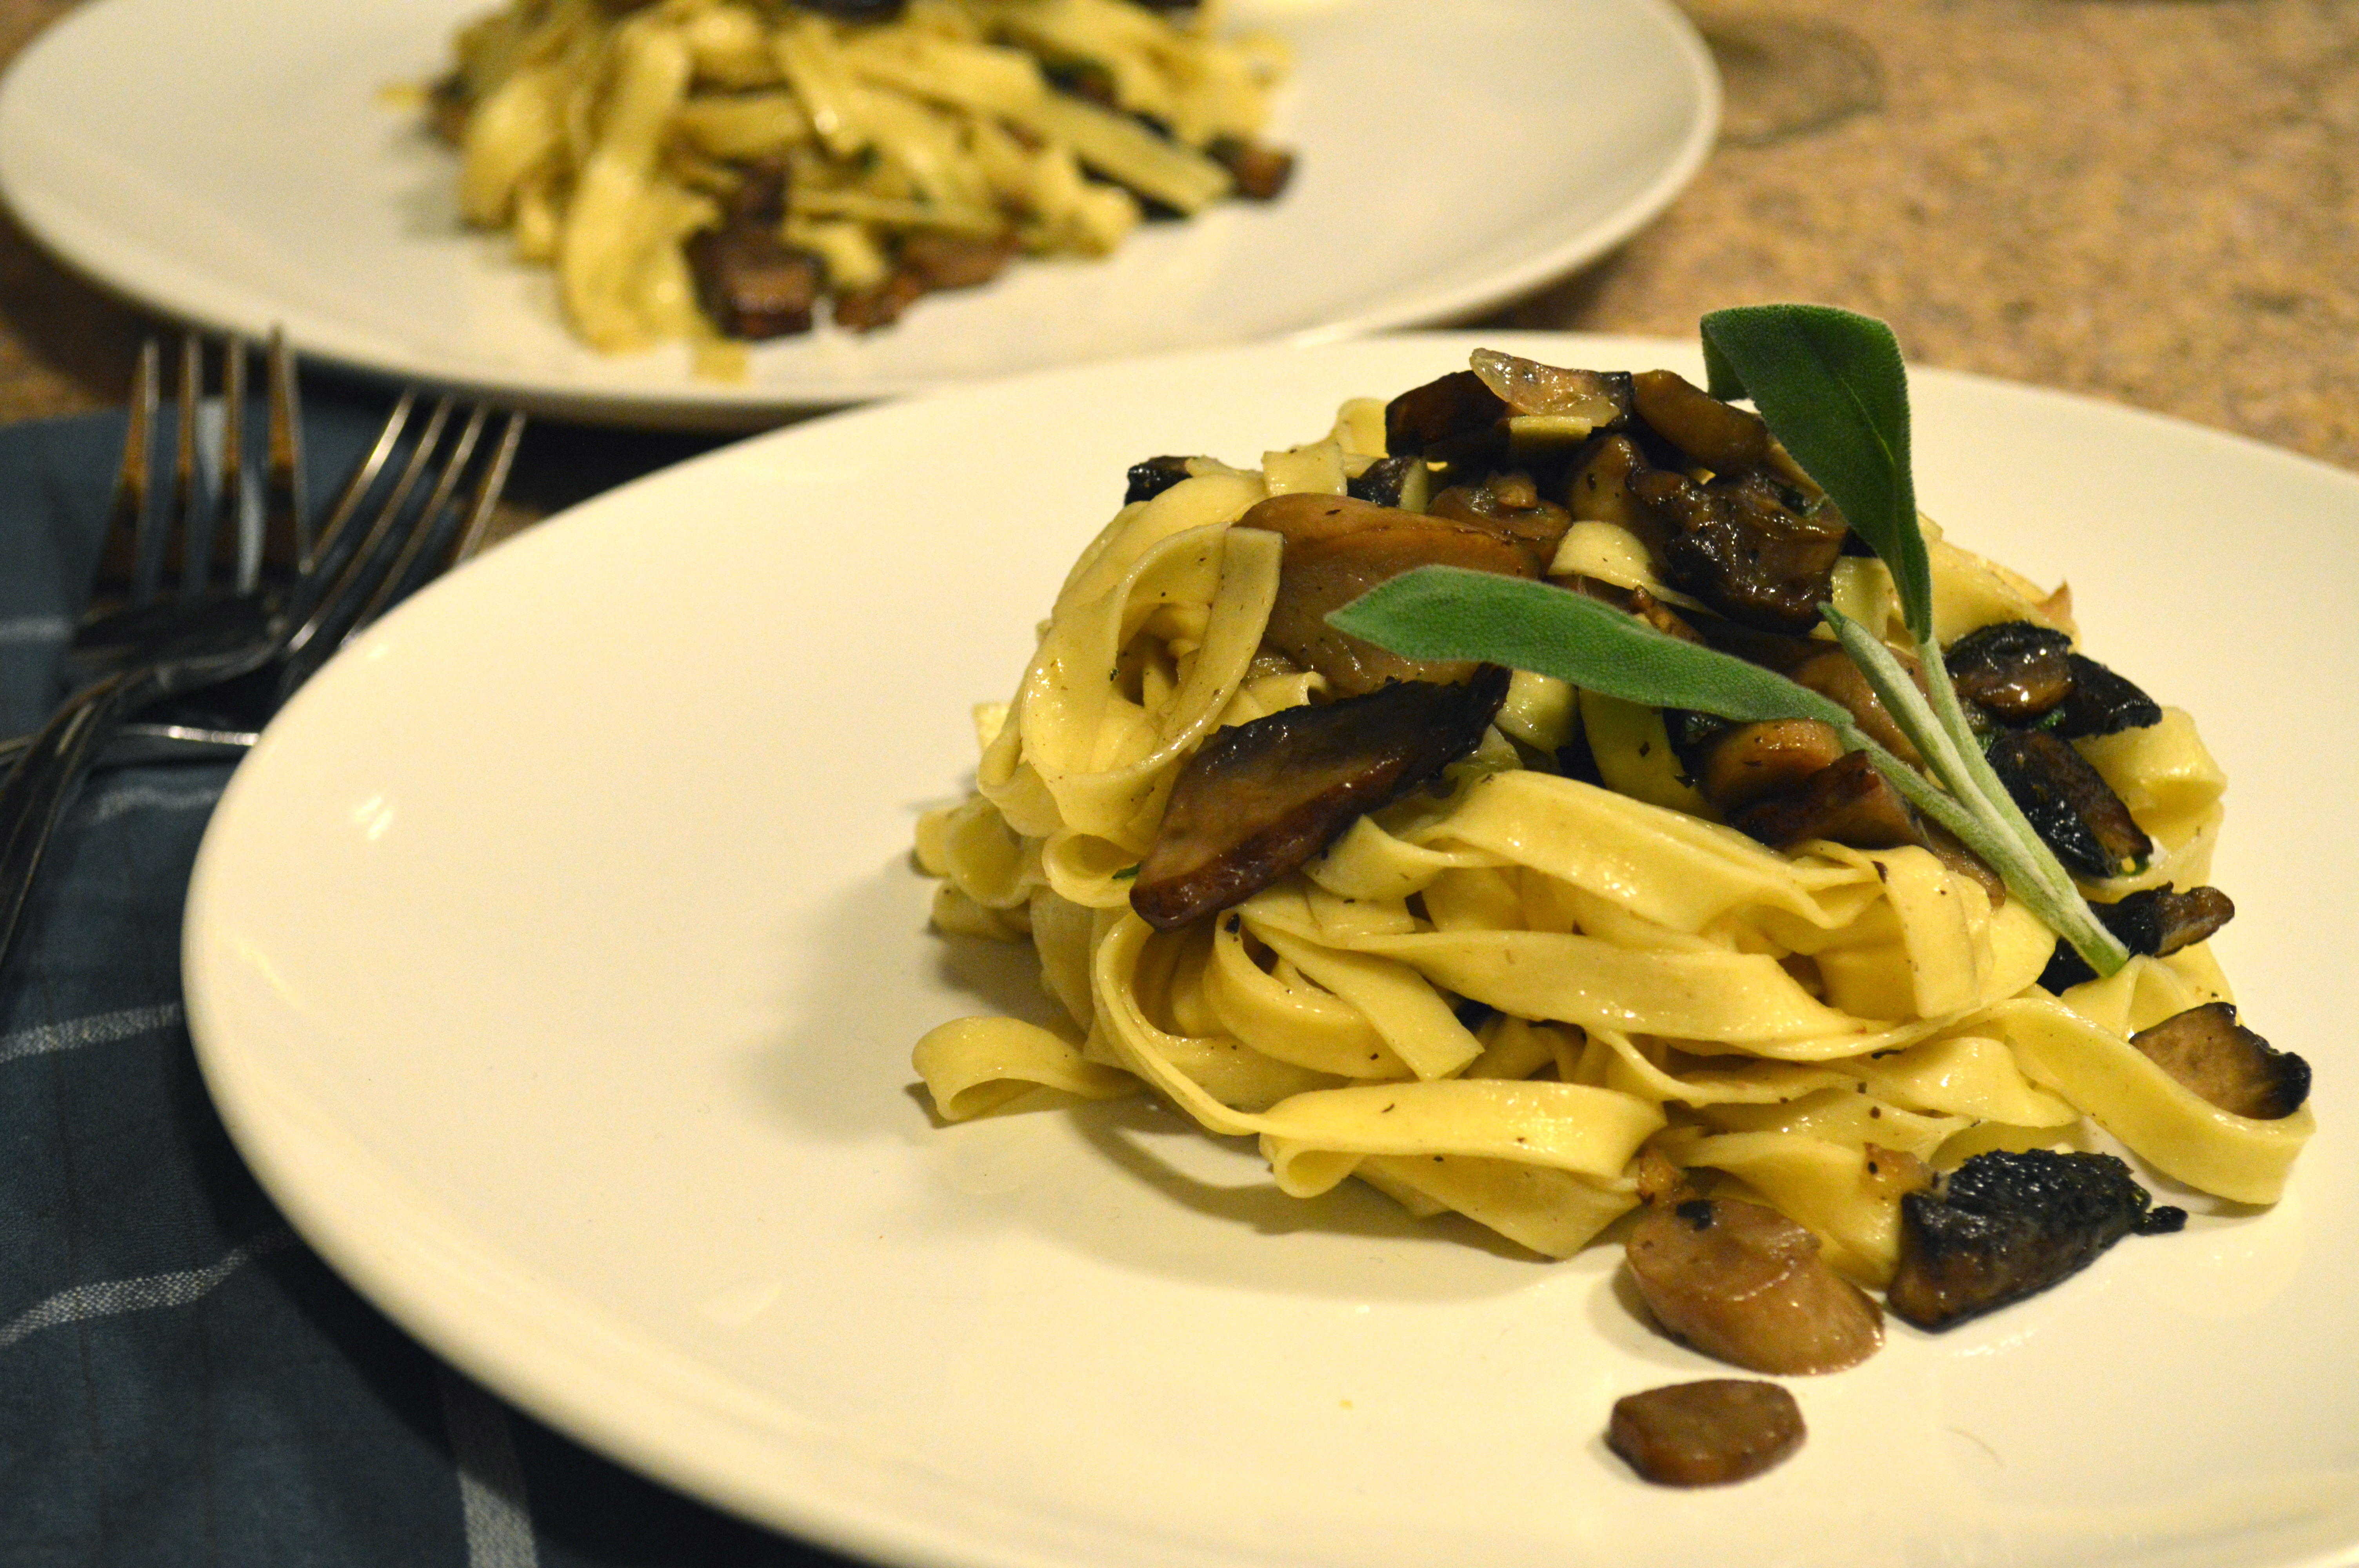
A few days later I decided to go for it and see what I could do. I started with store-bought fresh pasta, going for fettuccine instead of pappardelle. If you have a pasta maker and want to go crazy, by all means. Homemade pasta would elevate this dish even more, but part of what I like about this recipe is how quick and easy it is to prepare. I think store-bought fresh pasta is a great way to get that homemade taste without the work, but I’m sure dried pasta would be fine too. For the sauce I used about a pound of mushrooms, opting for a mix of trumpet and Portobello for a nice varied earthy flavor. If all you can find is Portobellos they’ll work great on their own, but I wouldn’t use white button mushrooms because they’d probably be a bit bland.
The restaurant used butter for the base of their sauce, and I decided a nice way to make the flavor richer would be to brown the butter. When you brown butter, you’re essentially cooking the milk solids that are present in your butter, giving it a wonderful nuttiness and complexity. Brown butter is also great for baking. Try it with cookies sometime, you’ll thank me. After the butter browned I added some finely chopped shallots and let them saute a bit to add some caramelized sweetness. Right before finishing the dish I added some fresh sage and lemon zest and tossed everything together.

I have a tendency to overdo meals a lot. I can take a meal that should take 45 minutes to prepare and spend the better part of an evening making it. This meal however, is anything but overdone. I am so proud of myself for letting this meal remain simple and easy. Hopefully this will be the beginning of a new era for me. An era where I can start dinner after work and have it on the table before bed time! If you work efficiently, from start to finish this meal can be ready to go in 30 minutes. Brown the butter while the mushrooms roast, saute the shallots while the pasta water comes to a boil, chiffonade the sage while the pasta is cooking. Use your time wisely. If you aren’t familiar with the term chiffonade, you basically take your sage leaves, roll them all up like a cigar, and slice them into super thin strips. This technique works really well for basil too.

There are not a million different things going on in this pasta dish, but every ingredient gets special treatment to make sure it imparts as much flavor as possible. Roasting the mushrooms concentrates their earthy flavor and makes them taste almost meaty. Browning the butter adds a nutty richness, and sauteing the shallots in the brown butter gives the sauce a caramelized sweetness. Fresh sage and lemon zest brighten the dish without overpowering it, adding a summery freshness that’s much-needed in this cold weather. Overall the simplicity of this dish is what makes it so tasty. So simple, so elegant, SOO delicious.
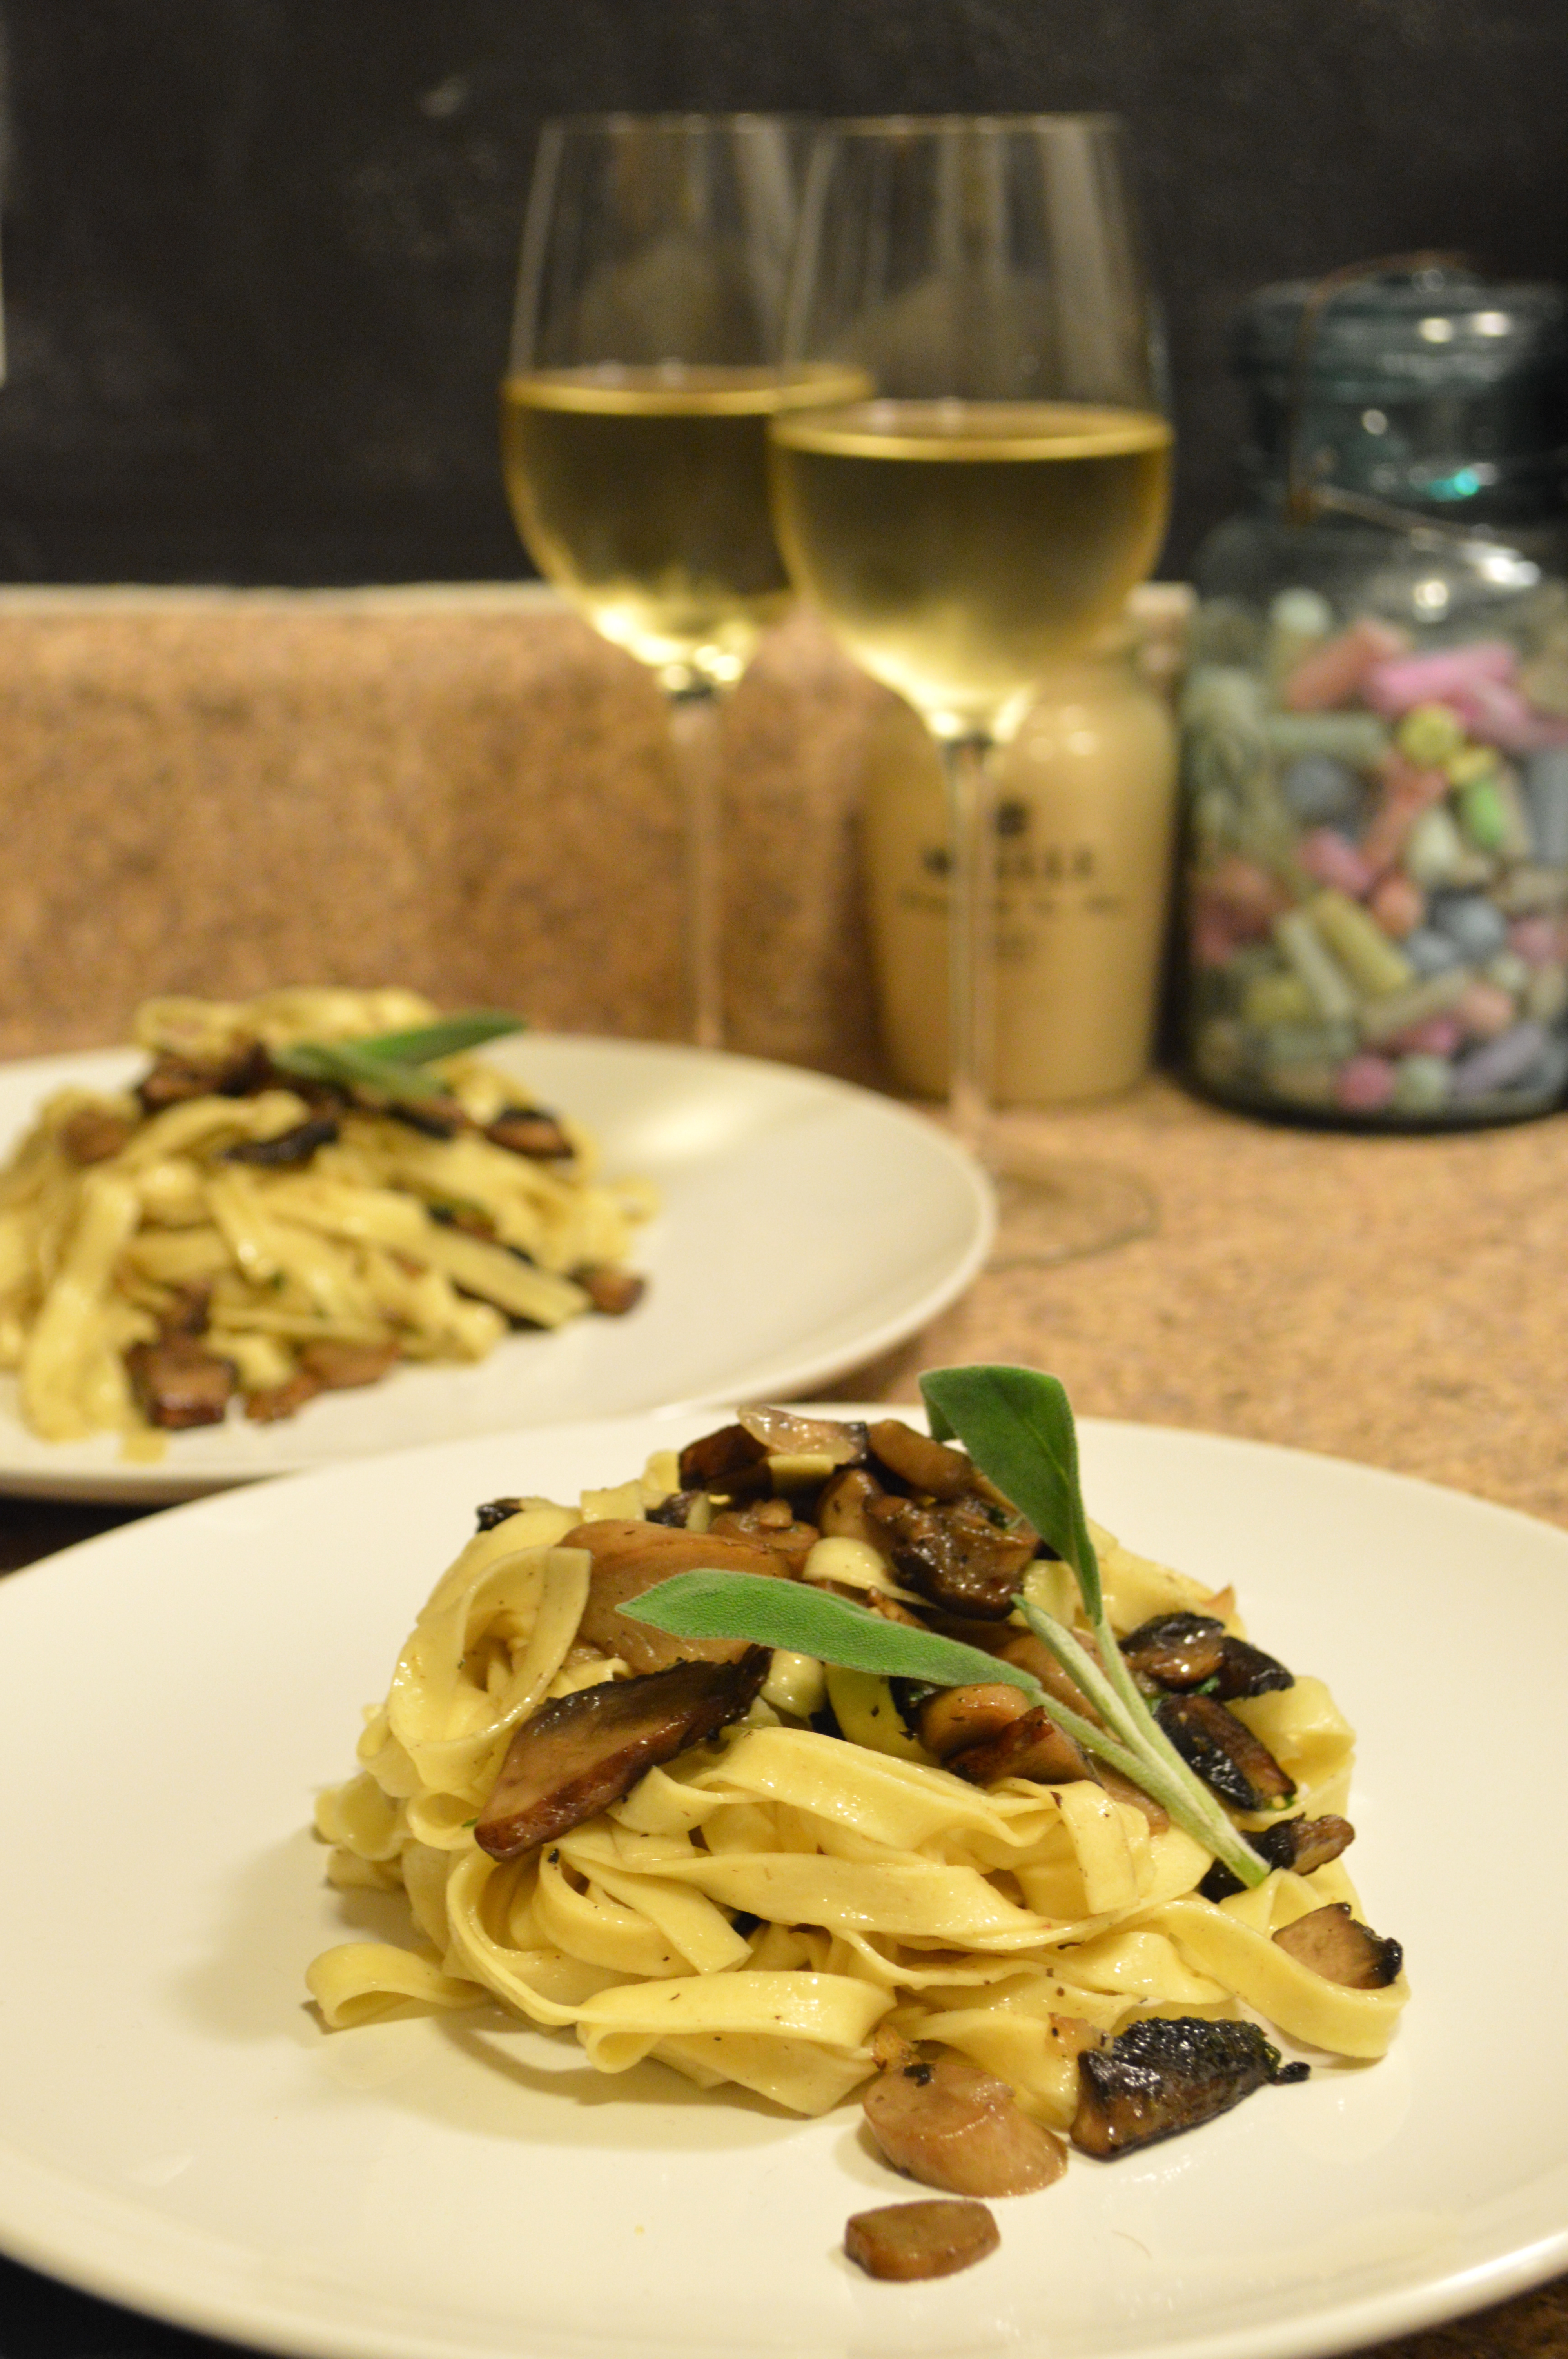
Fettuccine with Roasted Mushrooms, Brown Butter & Sage
1 lb fresh mushrooms (I used a mix of Portobello and trumpet)
salt and pepper
1 tablespoon olive oil
1 medium shallot, diced
8 tablespoons butter (1 stick)
5-6 sage leaves
zest of one lemon
16 oz fresh or 12 oz dry fettuccine
Preheat your oven to 400 degrees. Fill a large stockpot with water and a tablespoon of salt, cover and bring to a boil over high heat. While oven is preheating and water is coming to a boil, roughly chop your mushrooms. Toss in olive oil, season with salt and pepper, spread in an even layer on a parchment lined sheet pan and roast for 10-15 minutes or until most moisture has cooked off. While mushrooms are roasting, heat butter in a large skillet until it begins to brown and smell slightly nutty, this should take about 5 minutes. Add shallots, season with salt and pepper, and saute until they begin to caramelize. While pasta is cooking, add roasted mushrooms to sauce and saute for 5 minutes or until pasta is cooked. While pasta cooks, chiffonade your sage and stir it into the sauce with the lemon zest. Add cooked pasta to sauce and toss with tongs until well coated with an even distribution of mushrooms.