apple

basic bundt series: spice cake

Hey guess what!
It’s finally officially fall, y’all!

basic bundt series | spice cake | Brooklyn Homemaker

I’ve said it before and I’ll say it again (and again and again and again).

Fall is absolutely my favorite time of year. It’s clearly, obviously, indisputably the best season ever, and if you don’t agree with me, you’re wrong.
I told you it was indisputable okay?
The only negative thing I could ever say about fall, if I had to come up with something, is that it doesn’t last nearly long enough.

basic bundt series | spice cake | Brooklyn Homemaker

Cooler weather means we can finally turn off the air conditioner and open up the windows. It means layered clothing, and finally giving up on the “beach body” I’m never going to have. It means beautiful brightly colored foliage, falling leaves, crisp fresh air, and spending as much time outdoors as possible before it’s too late.

It also means all of my favorite foods are back in season. Squash and pumpkins and root veggies and soups and stews and braises and apples and pears and fresh sweet cider and sugar-coated cider doughnuts and everything infused with warm homey baking spices.

basic bundt series | spice cake | Brooklyn Homemaker

Now, I’m well aware that Martha Stewart thinks pumpkin spice is for basic bitches only, but I also happen to know that she has a thing for a well baked spice cake. And hey, this is the basic bundt series after all, so why not embrace the basic and just go for it?

Basic or not, the classic combination of cinnamon, ginger, nutmeg, & clove will never go out of style. I mean, can you think of any better flavor to usher in the best season of the year?

No.
You can’t.

basic bundt series | spice cake | Brooklyn Homemaker

Anyways, not to toot my own horn or anything (toot toot), but this is one seriously delicious freaking cake!

It’s tender and moist with a soft delicate crumb, a refined subtle sweetness, and the perfect amount of spice. I tested this recipe half a dozen times to get it juuuust right, and I seriously couldn’t be happier with the results. My coworkers, for that matter, couldn’t have been happier that I baked so many cakes to get the recipe just right either. The poor dears.

basic bundt series | spice cake | Brooklyn Homemaker

My favorite thing about this recipe though, is just how versatile it is.

The whole idea behind the basic bundt series was to come up with simple and straightforward, but completely flawless, cake recipes that can either be baked and enjoyed as is, or gussied up and personalized with a few easy additions or substitutions.

basic bundt series | spice cake | Brooklyn Homemaker

When I did my recipe testing this time around, I didn’t just play with the spice levels to perfect them, I also experimented with different “liquid” ingredients to change the flavor profile. I started with and perfected a simple buttermilk-based spice cake, but then I tried swapping the buttermilk for other ingredients like unsweetened applesauce, grated fresh apples, and canned pumpkin puree.

Without changing a single other ingredient, swapping out the buttermilk for something else produces an entirely new and distinctly different cake! I promise that I’ve tried and tested all of these substitutions and they’re all equally delicious and perfectly spiced.
The pumpkin version was definitely a favorite with my (decidedly basic) coworkers.

basic bundt series | spice cake | Brooklyn Homemaker

The endless variations you can put on this recipe don’t have to stop with swapping out the buttermilk either. This cake is just screaming for a cup of toasted walnuts or pecans, or a bit of buttery streusel. Even changing the glaze could make a difference in the flavor profile. I decided that a tangy cream cheese glaze would pair perfectly with any one of the buttermilk, apple, or pumpkin versions of the cake; but I think that a thick caramel glaze would be heavenly too. You could also do a bourbon glaze, or maybe even just sprinkle the cake with cinnamon and granulated sugar.

No matter what variation you choose to bake though, this perfectly spiced basic bundt is sure to satisfy the basic bitch in all of us this fall.

basic bundt series | spice cake | Brooklyn Homemaker

Spice Cake Bundt

3 cups flour
2 teaspoons baking powder
1 teaspoon salt
1 1/2 teaspoons ground cinnamon
1 1/2 teaspoons ground ginger
1/2 teaspoon ground cloves
1/2 teaspoon ground nutmeg
1/2 cup (1 stick) unsalted butter, at room temperature
1 cup granulated sugar
1 cup dark brown sugar, firmly packed
4 large eggs
1/2 cup peanut oil (or vegetable or canola oil)
2 teaspoons vanilla extract
1 1/4 cup buttermilk *see note below for alternatives

Preheat oven to 350F.
Butter and flour a 10 to 12 cup bundt pan (or spray with a baking spray that includes flour), and refrigerate while preparing the cake.

Whisk flour, baking powder, salt, cinnamon, ginger, cloves, & nutmeg together in a bowl and set aside. In the bowl of a stand mixer fitted with the paddle attachment, beat the butter, sugar, & brown sugar together on high speed until light and fluffy, about three minutes. Scrape down the sides of the bowl and add the eggs, one at a time, scraping between additions. In a small bowl or measuring cup, stir together oil, vanilla, & buttermilk (or substitution). In the bowl with the butter and sugars, alternate additions of the flour and buttermilk mixtures at low speed, beginning and ending with flour. Mix just until combined and do not overwork the batter. Scrape down the sides of the bowl to make sure all ingredients are well incorporated.

Pour the batter into the prepared bundt pan, smooth out the top, and firmly pound the pan against the countertop several times to tap out any air bubbles. Bake in the center of the oven for 50 to 55 minutes, or until a toothpick or cake tester comes out clean from the center of the cake.

Transfer the pan to a wire rack to cool for about 20 to 30 minutes before turning the cake out onto the rack to cool completely. Once cool, drizzle with cream cheese glaze (recipe below) if desired. Cake should keep, in an air tight container at room temperature, for about 3 or 4 days.

*baker’s note:
Changing the flavor profile of this cake couldn’t be simpler.
Just omit the buttermilk completely, and substitute with one of the following:

  • 1 1/2 cups unsweetened applesauce
  • an entire 15 oz can (1 3/4 cups) of pumpkin puree (not pumpkin pie filling)
  • 2 cups grated baking apples, well packed (peeled and cored before grating)

The applesauce cake should bake for the same time, and the pumpkin and grated apple cakes may take about 5 extra minutes or so.

Cream Cheese Bundt Glaze: 
4 ounces (1/2 package) cream cheese, at room temperature
1 cup powdered sugar
1 teaspoon vanilla extract
3 to 6 tablespoons milk

In the bowl of a stand mixer, beat the cream cheese until it’s soft and smooth and light. Add the powdered sugar, vanilla, and 3 tablespoons of milk and blend until there are no lumps. If necessary, add more milk, a tablespoon at a time, beating after each addition until the glaze reaches the desired drizzle-able consistency. It should be about the consistency of melted ice cream to drizzle correctly.

Place a tray under cake and cooling rack to catch any drips. Pour glaze over cake and let the glaze work its way down the side, gently tapping the tray on the counter to smooth it out if necessary.

classic pot roast with sweet potato parsnip mash

Being raised by a single parent meant that my sister and I shared in a lot of the household responsibilities.

classic pot roast with sweet potato parsnip mash | Brooklyn Homemaker

It was a different time, we lived in a safe neighborhood, and my grandma lived next door. When we’d get home from school mom would still be at work and we’d have the house to ourselves. Every day we’d be met at the door with a long list of chores taped to the newel post at the foot of the stairs. The list changed daily and was usually pretty substantial, at least long enough to keep us out of trouble until mom got home. Chores didn’t just include vacuuming or washing the dishes either, we were in charge of serious cleaning jobs like vacuuming out heating vents and scrubbing the bathroom tile surround.

At the time, I don’t think it would have been humanly possible (if you consider pre-teens human) for us to hate our chores any more than we did, but looking back on it I’m incredibly grateful. After living with countless roommates through college and until meeting Russell, I now realize that beyond keeping a tidy house, mom was also teaching us valuable life skills that many of my friends and neighbors weren’t learning. I know all sorts of things about not living like a slob that many of my peers don’t, like how to wash dishes and actually get them clean. I can remember the specific moment in college when I realized I no longer wanted to fight with my roommate about who’s turn it was to do the dishes, because whenever she did them I’d end up wanting to wash them again anyway.

classic pot roast with sweet potato parsnip mash | Brooklyn Homemaker

Another item that was usually on the list was making dinner. Working later in the day meant mom wouldn’t always have time to get dinner on the table after she got home, so she taught me a few simple recipes I could make on my own. Cooking dinner was one of the chores that I actually enjoyed doing and as time went on I started teaching myself new dishes all the time.

Pot roast was one of my old standbys, but back then I didn’t really know the “rules” when it came to braising and roasting, so to be honest my roasts weren’t very good. At the time I don’t think I even realized it, and mom never complained, but I hold myself to much higher standards nowadays. I was probably using the wrong cuts of meat, or cooking them at too high a temperature too quickly. I may have even been undercooking them, or at least not cooking them long enough to melt the collagen and make them tender. Either way, they were often as rubbery as shoe leather and flavored with little more than dried onion flakes, so as I got older I decided I didn’t really like pot roast.

classic pot roast with sweet potato parsnip mash | Brooklyn Homemaker

Unfortunately I was a vegetarian in college, so even though I took several culinary courses, at the time I didn’t really feel the need to pay much attention during the meat classes.

If I could turn back time…
If I could find a way…

classic pot roast with sweet potato parsnip mash | Brooklyn Homemaker

It was only a few years ago that I finally decided to give pot roast another go around, and that’s when I looked to the internet to show me the way. I tried a few recipes that came out okay; certainly better than what I made when I was 12, but not really good enough to make me want to bookmark any of them to make again.

Then, one day, I discovered the Cook’s Illustrated pot roast recipe.

Game-changing. Mind-blowing. Life-altering.
Etc.

classic pot roast with sweet potato parsnip mash | Brooklyn Homemaker

Seriously. Their method makes, hands down, the best pot roast I’ve ever tasted in my entire life.

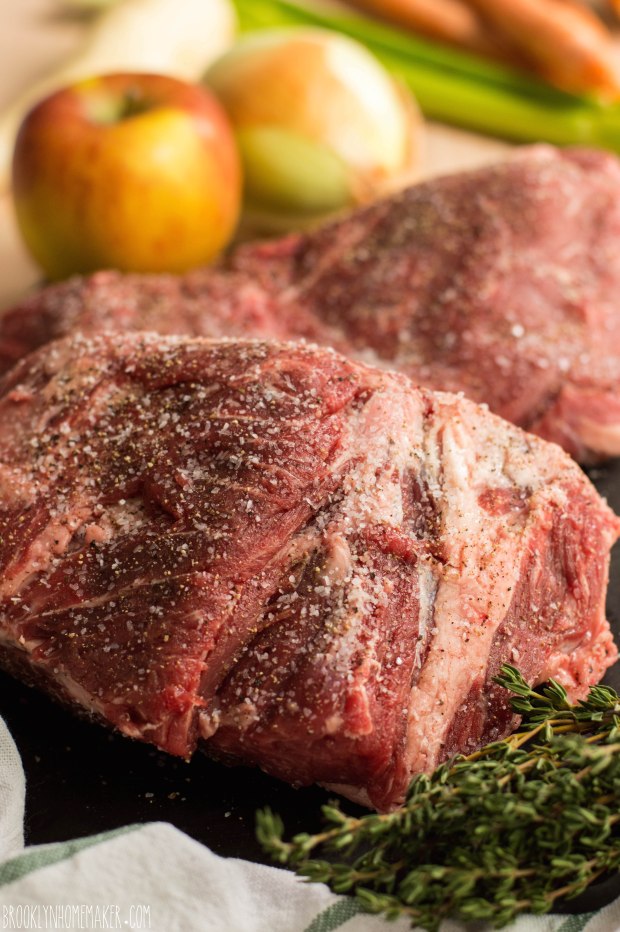
It is a little more work than some of the other recipes I’ve tried, but it is WELL worth it. It’s important to find the right cut of meat, and to speed up the collagen melting you’ll need to do some butchering of your own. You’ll also need to tie the meat up with cooking twine so it doesn’t fall apart in the pot, and to promote even cooking you have to flip it half way through cooking. Then the sauce for the meat is made by pureeing the vegetables from the roasting pan with broth and red wine for texture and flavor. This makes it a bit more involved than the set-it-and-forget-it style recipes prominent on Pinterest, but you guys, I swear. You’ll never want to make pot roast any other way.

classic pot roast with sweet potato parsnip mash | Brooklyn Homemaker

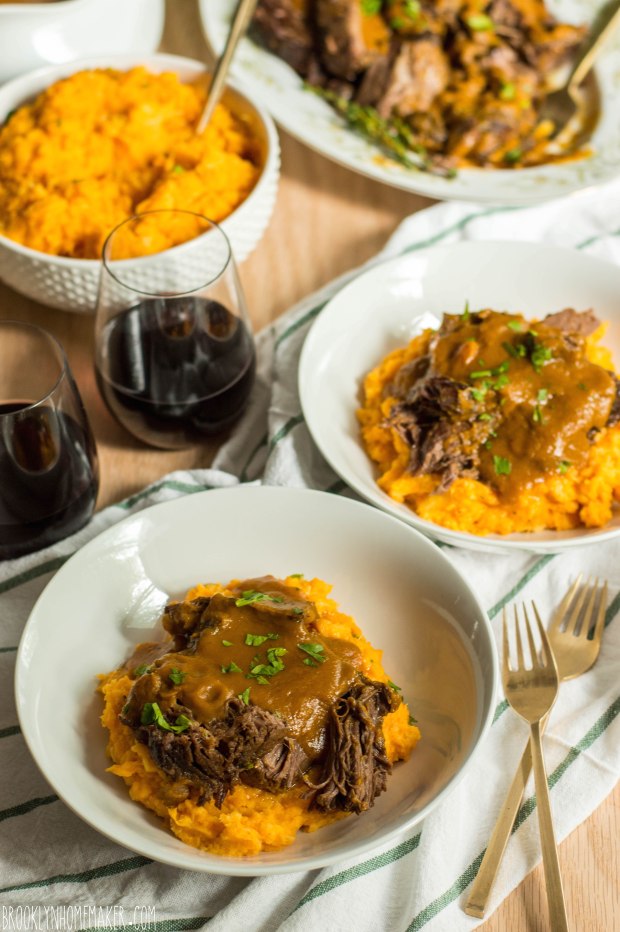
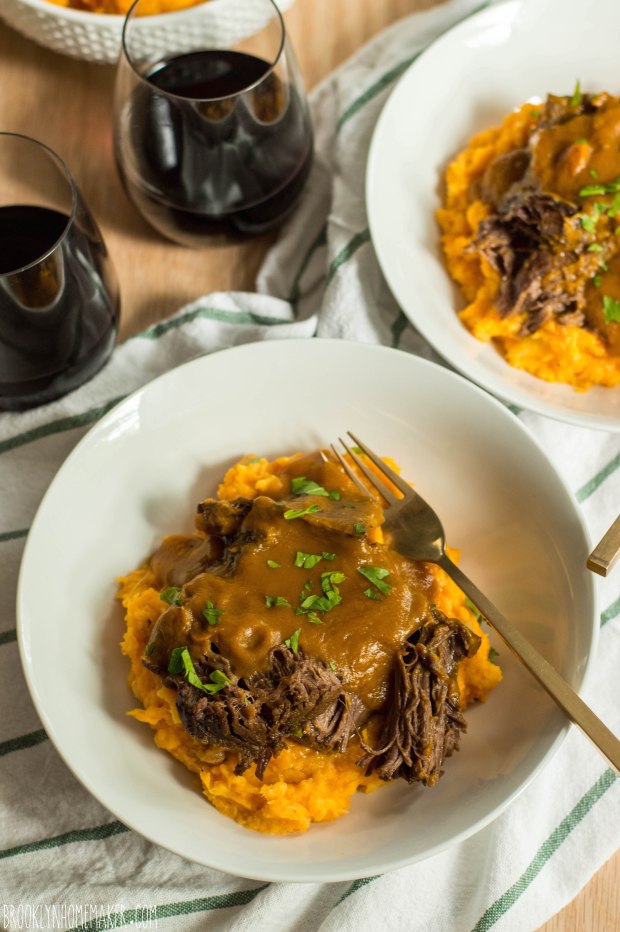
Because I don’t know how to leave well enough alone, I did go ahead and make a few changes to their recipe to make it my own. The cooking method is exactly the same though, and produces the same mouthwatering, fork tender, practically falling apart results. Beyond the traditional red wine, the sauce benefits from a bit of acid and the original recipe calls for balsamic vinegar to be added at the end. Instead, I added apple cider (and a bit of chopped apple) to the cooking liquid. I thought this could be a fun seasonal twist and would add a subtle sweetness. It really works and makes this roast the perfect dish for welcoming fall weather.

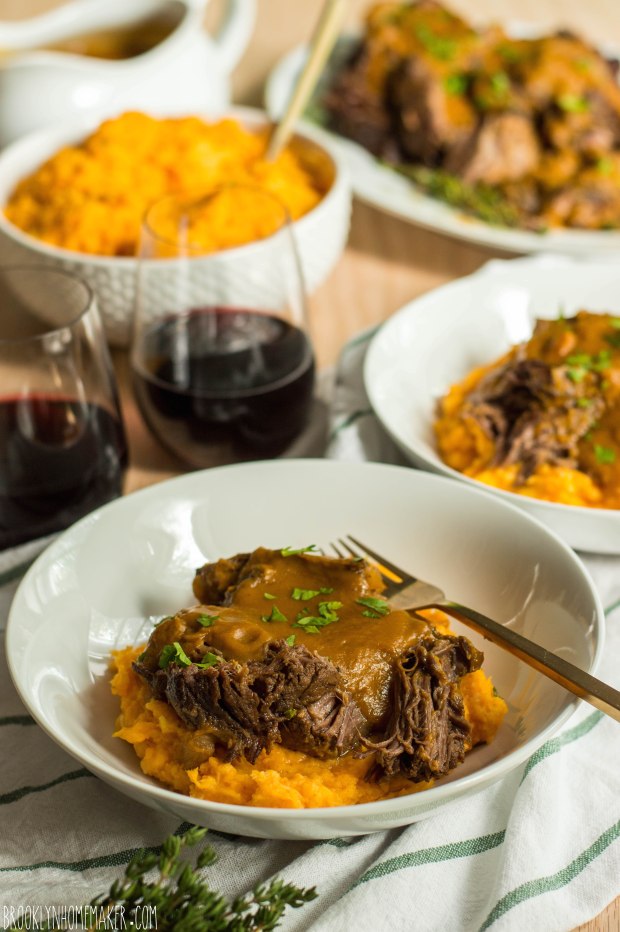
Instead of roasting large chunks of potatoes and carrots to serve with the roast, I decided that I wanted to serve it over a bed of mashed sweet potatoes and parsnips. I think the slight sweetness and bright color pairs perfectly with the subtle apple flavor in the sauce.

classic pot roast with sweet potato parsnip mash | Brooklyn Homemaker

I know I already said this, but hello fall flavors. You couldn’t ask for a more perfect dish to celebrate the change of seasons. A word of warning though, the house will smell unbelievable for up to four hours and your mouth will be watering constantly.

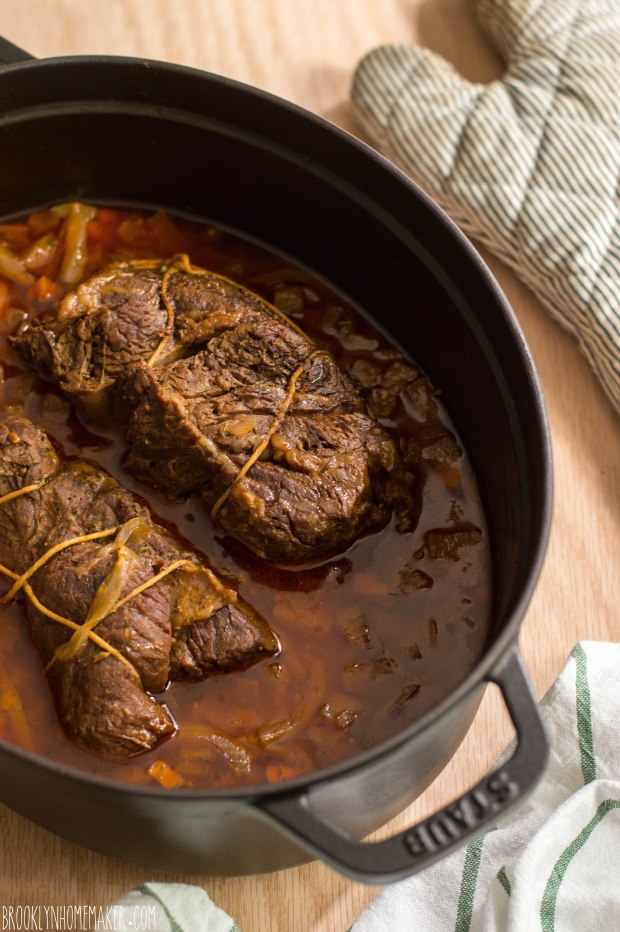
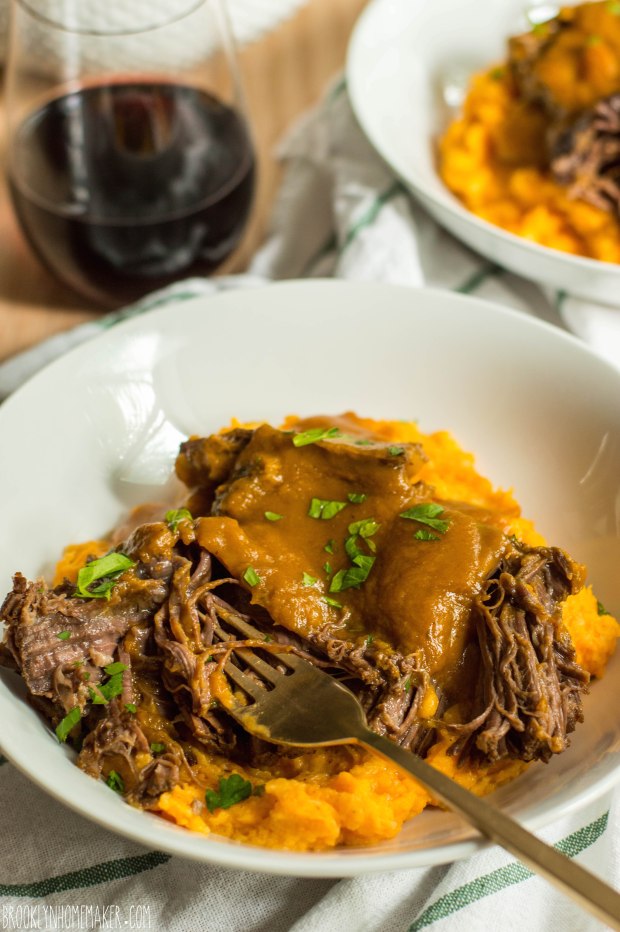
The flavor of this meat is just so…. meaty, and you won’t believe how tender it comes out. No knife required.
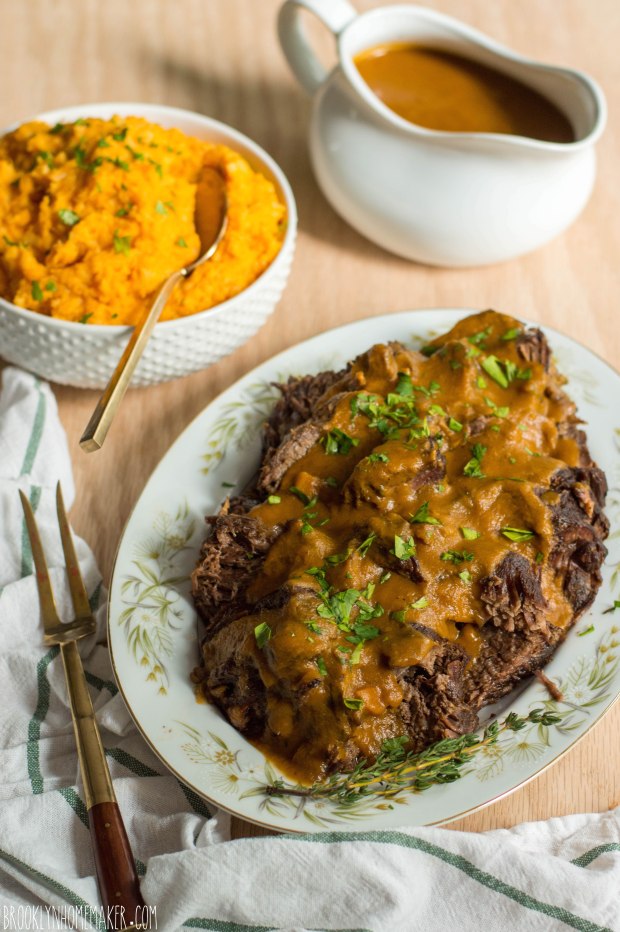
The pureed veggies in the sauce add a great rich and roasty flavor, and gives the sauce a nice thickness without having to make a roux for gravy.
Adding parsnips to the mashed sweet potatoes really helps balance their sweetness and adds a depth of flavor. Taking the time to brown the butter gives them an extra richness, and helps them feel well paired with the roasted meat.

Go make this.
Now.

classic pot roast with sweet potato parsnip mash | Brooklyn Homemaker

Classic Pot Roast with Sweet Potato Parsnip Mash

Adapted from Cook’s Illustrated

3 1/2- to 4-pound boneless beef chuck-eye roast
Kosher salt
2 tablespoons unsalted butter
2 medium (or 1 large) onions, halved and sliced thin (about 2 cups)
1 large carrot, chopped medium (about 1 cup)
1 parsnip, peeled and chopped medium (about 3/4 cup)
2 celery ribs, chopped medium (about 3/4 cup)
1/2 firm tart apple (I used Braeburn), peeled cored and chopped medium (about 1/2 cup)
2 medium garlic cloves, minced or crushed (about 2 teaspoons)
1 cup beef broth, plus more for sauce
1/2 cup dry red wine, plus another 1/4 cup for sauce
1/2 cup fresh apple cider
1 tablespoon tomato paste
1 bay leaf
1 large sprig plus 1/4 teaspoon chopped fresh thyme leaves
Ground black pepper
chopped fresh parsley for garnish, if desired

Sweet Potato Parsnip Mash:
3/4 pound parsnips, peeled and cut into 2-inch pieces
2 pounds sweet potatoes, peeled and quartered
6 tablespoons butter
1 to 1 1/2 cups milk
1/4 teaspoon grated nutmeg
salt and pepper to taste

Pull your chuck roast into two pieces at the natural seam, and trim off any large layers and knobs of fat. Sprinkle both pieces of meat with 1 tablespoon salt (1½ teaspoons if using table salt), place on wire rack set in rimmed baking sheet, and let stand at room temperature 1 hour.

Adjust your oven rack to the lower-middle position and preheat oven to 300 degrees.

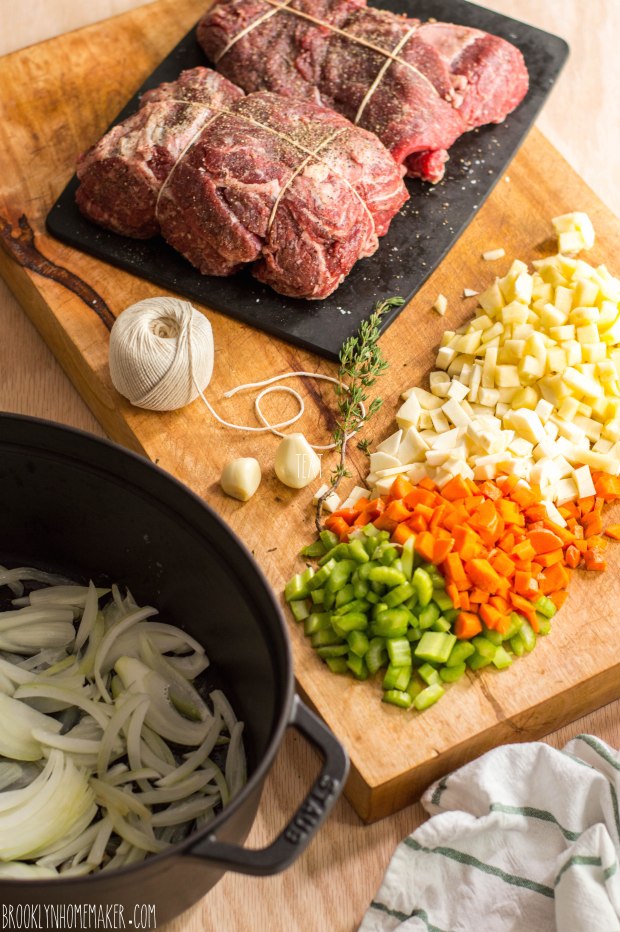
Heat butter in heavy-bottomed Dutch oven over medium heat. When foaming subsides, add onions and cook, stirring occasionally, until softened and beginning to brown, about 10 minutes. Add carrot, parsnip, celery, and apple; and continue to cook, stirring occasionally, for 5 minutes more. Add garlic and cook until fragrant, about one minute. Stir in 1 cup of broth, ½ cup wine, apple cider, tomato paste, bay leaf, and thyme sprig; and bring to simmer.

Pat the roasts dry with paper towels and generously season on all sides with pepper. Use kitchen twine to tie each piece of meat into a loaf shape for even cooking and prevent it from falling apart.

Nestle the meat on top of the vegetables. Cover pot with a tight fitting lid and transfer to the oven. Cook beef for three hours, flipping halfway through. Check and, if necessary, continue cooking until beef is completely tender and sharp knife easily slips in and out, about 30 minutes to 1 hour. This extra time is best used to start your sweet potato parsnip mash, recipe below.

Once fully cooked, transfer roasts to cutting board and loosely tent with foil. Strain liquid through mesh strainer into a large liquid measuring cup. Discard bay leaf and thyme sprig. Transfer cooked vegetables to blender jar. Allow liquid to settle 5 minutes, then skim any fat off surface. Add beef broth as necessary to bring liquid amount to 3 cups. Place liquid in blender with vegetables and blend until completely smooth, about 2 minutes. Transfer sauce to medium saucepan, add remaining wine and chopped thyme, and bring to simmer over medium heat. If sauce is too thick it can be thinned out with more beef stock. If too thin let it reduce to the desired consistency. Once reduced taste and adjust seasoning if necessary.

While sauce heats and reduces, remove twine from roast and slice against grain into ½-inch-thick slices.

Sweet Potato Parsnip Mash: 
Place sweet potatoes and parsnips in a large stockpot, cover with salted water, and bring to a boil. The parsnips can take longer to cook than the sweet potatoes, so it’s important that they’re in smaller pieces. Once the pot comes to a boil reduce the heat to medium and cook until vegetables are fork tender. This should take about 15 or 20 minutes, but can vary depending on the size of the pieces.

Once tender, transfer sweet potatoes and parsnips to a colander to drain. In the same pot heat the butter over medium heat just until it begins to brown. Stir occasionally and watch it closely or it can burn. Remove from heat. You can either push the drained sweet potatoes and parsnips through a potato ricer or food mill and add them back into the pot, or add them to the pot first and mash them with a potato masher. Stir in milk, a little at a time, until you reach your desired consistency. Add nutmeg, and salt and pepper to taste. Taste for seasoning and adjust if necessary.

Serve the meat on top of the mash and top with sauce and a sprinkle of chopped parsley.

Harvest Cake with Cream Cheese Icing

This year, instead of starting a diet on New Year’s Day, we had friends over for brunch. The only thing I resolved to do in the new year is the learn to be a better photographer, and to continue cooking and baking tasty and interesting things to share with you.

harvest cake with cream cheese icing | Brooklyn Homemaker

When it comes to New Year’s Day menu planning, Southern food is king. Most people know that collard greens and black eyed peas are a traditional staple for getting your year started out on the right foot. When it comes to planning a brunch for New Year’s day, most people might stop with the collards and peas, but not me. If I’m going to the trouble of hosting a brunch for 15 or 20 people, you better believe I’m going to make a big fancy dessert to go along with the meal. I’m a sucker for a show stopper, and love the ooohs and aaahs when a multi-layer cake comes out after a big meal.


harvest cake with cream cheese icing | Brooklyn Homemaker

When I was trying to think of a cake to fit with my southern themed menu, carrot cake immediately came to mind. I’ve always thought of carrot cake as one of those desserts that Southern homemakers would make to bring to a ladies garden party, church picnic, or social club. What better way to round out a big Southern brunch at the beginning of a brand new year? As it turns out though, carrot cake, or at least carrot based desserts, have been around much longer than the American south. People have been using carrots in desserts to help sweeten them since medieval times, and carrot cake as we know it today was likely adapted from earlier recipes brought by immigrants from Eastern Europe. Whatever the real origins, the wide popularity and availability of carrot cake in the American South still makes it feel “Southern” to me.

harvest cake with cream cheese icing | Brooklyn Homemaker

The thing is, when it came time to start baking, I decided not to do a standard carrot cake.  I wanted to make a carrot cake with a little something extra. Something that still kept that traditional and comfortable feel, but with a new and modern twist. I once saw a recipe on Pinterest for a cake with grated zucchini & apples along with the carrots. I thought the concept for this cake was amazing, and could be really delicious, but that particular recipe didn’t really appeal to me. I think they were trying to make something super healthy, subbing dates for sugar, ground nuts for flour, and goat cheese for cream cheese. I suppose it could be tasty, but I worried that it could come out gummy and bland. I love the idea of adding fresh, good-for-you elements into a dessert, but I would be really upset if “healthy” was the first word that came to mind while eating a cake I’d made.

harvest cake with cream cheese icing | Brooklyn Homemaker

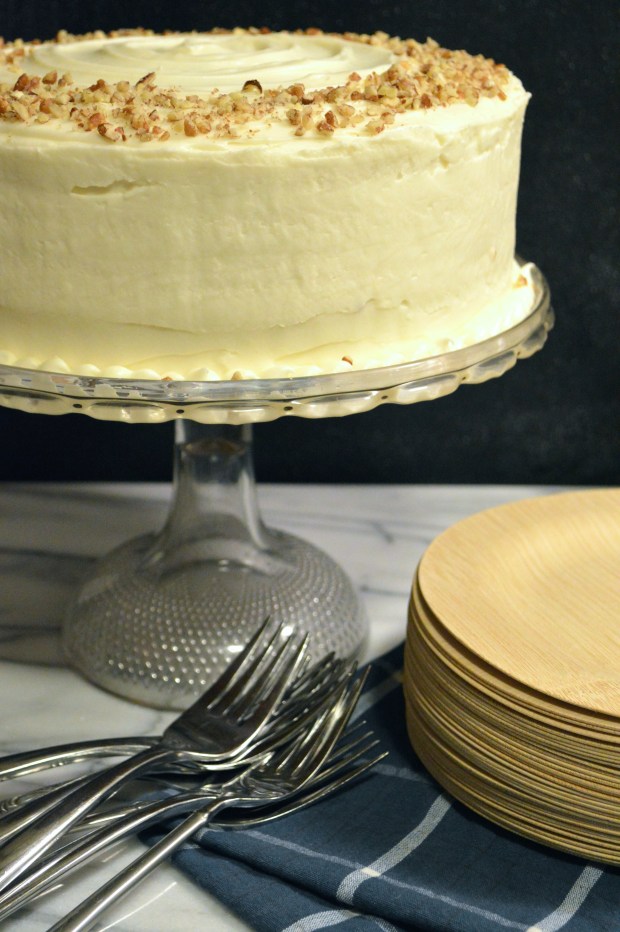
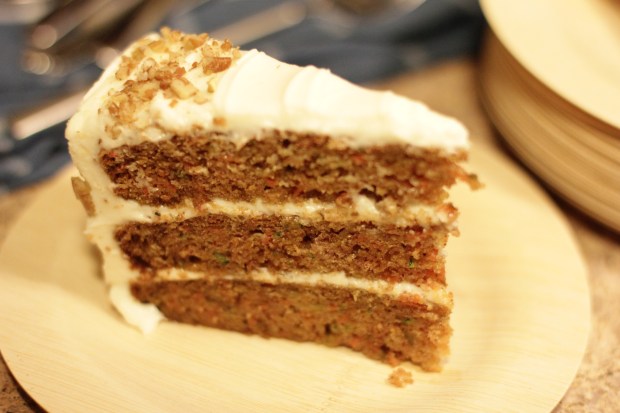
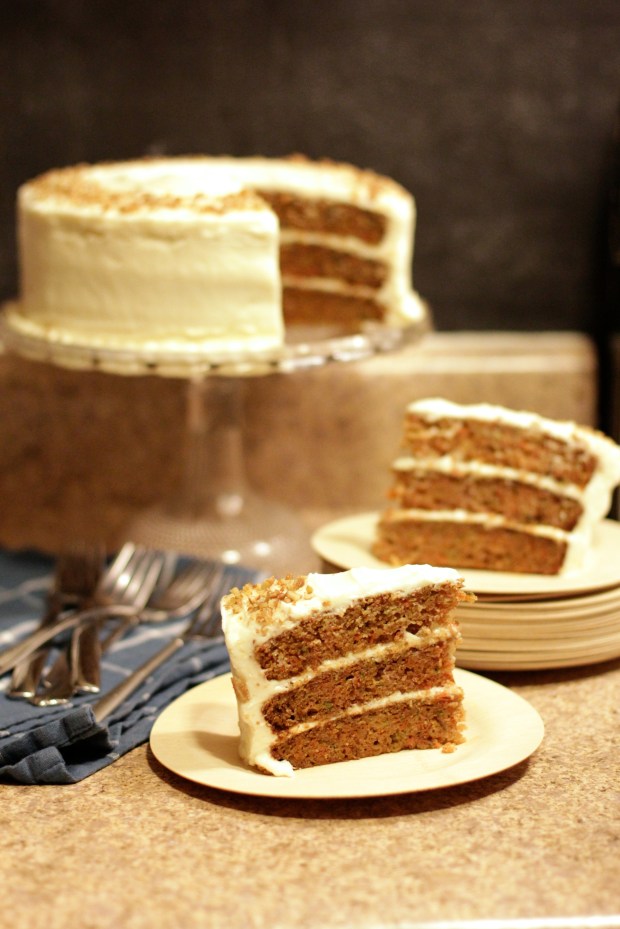
To make this cake I took a standard carrot cake recipe and tweaked it a bit. I added more spice, and subbed in fresh grated granny smith apples and zucchini in for some the carrots. I ended up with a ratio of about 1 part zucchini and 1 part apple to 2 parts carrots. I didn’t want to mess with perfection though, so I stuck with the traditional cream cheese icing. Since I wanted this cake to be as picture perfect as possible, I decided to make it with 3 layers, with the cream cheese icing as the filling and the icing.

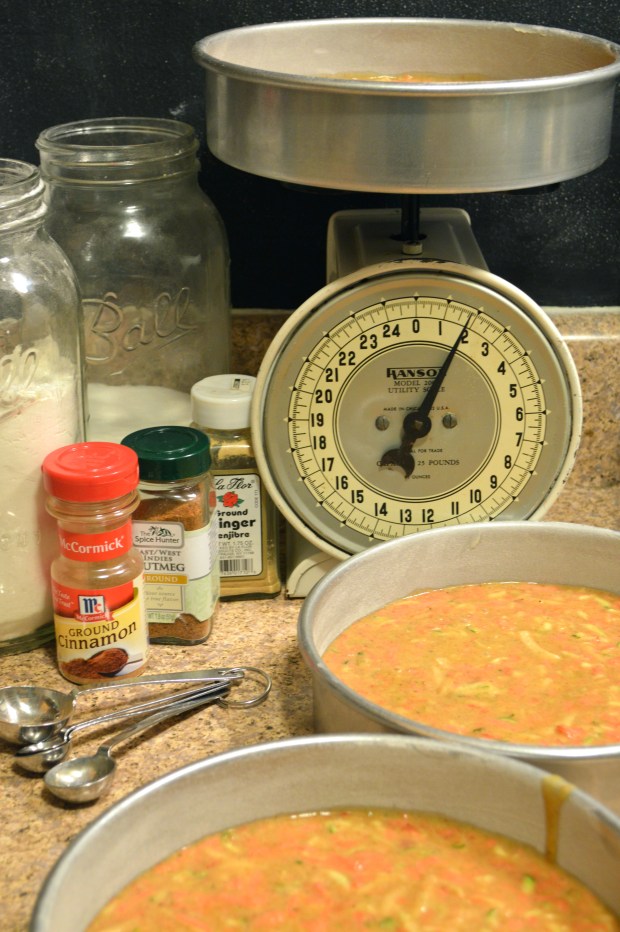
When you’re making a multi-layered cake I think it’s important that all three layers are the same size. Not only will this make for a more professional presentation, but it will also help make sure your layers all bake at the same time instead of one drying out while the other is still underdone. To ensure even layers, I like to use a kitchen scale to make sure the batter is evenly distributed between the pans.

When I first announced my plans for this cake, Russell was skeptical, thinking that carrot cake was just something that shouldn’t be messed with, but I’ve converted him. In the end, this cake was divine and everyone loved it. Although it has a few different fruits and vegetables in it, healthy is the last word that comes to mind when you take a bite. The cream cheese icing is wonderfully creamy, and perfectly sweet & tangy. The cake itself is super moist and delicious, with a hearty hint of spice and a traditional carrot cake flavor. There’s just a hint of tanginess from the tart apples and a nice summery freshness from the green zucchini and fresh carrot. If you love carrot cake, you will surely love this cake too. Go preheat the oven. It’s cold outside, it’ll help you warm up.

harvest cake with cream cheese icing | Brooklyn Homemaker


Harvest Cake with Cream Cheese Icing

makes one 8 inch 3 layer cake

Cake:
2 1/4 cups all purpose flour
1 3/4 cups granulated sugar
2 teaspoons baking soda
1 teaspoon salt
2 teaspoons ground cinnamon
1 teaspoon ground nutmeg
1 teaspoon ground ginger
1 1/4 cups peanut oil (or any neutral vegetable oil)
4 large eggs
2 cups grated carrots (approximately 3-4 carrots)
1 cup grated zucchini (approximately 1 small zucchini)
1 cup peeled, cored & grated granny smith apple (approximately 1 large apple)
4 ounces finely chopped walnuts (optional)

Icing:
1 1/2 pounds powdered sugar
16 ounces room temperature cream cheese
1 tablespoon vanilla extract
1 stick (8 tablespoons) room temperature unsalted butter

Preheat oven to 350 degrees F. With cheesecloth or paper towels, squeeze excess moisture out of grated zucchini and set aside. Butter 3 (8-inch) round pans and line bottoms with parchment. Butter and lightly coat with flour.

In a large bowl, sift together flour, sugar, baking soda, spices, and salt and make a well in the center.  In a small bowl beat together eggs and vegetable oil until combined, and pour into flour mixture. Using a mixer or wooden spoon, blend until combined. Stir in grated carrots, zucchini & apple.

Divide batter evenly between pans. Bake for 35 to 40 minutes, or until a cake tester inserted in the center of the cake comes out clean. Remove from oven and cool for 15 minutes. Remove from pans, turn over onto parchment paper and allow to cool completely before assembling.

In the bowl of an electric mixer, beat cream cheese and butter until completely smooth, about 5 minutes. Add sugar and vanilla and stir in very slowly until incorporated. Once the sugar is mixed in, turn mixer up to high and beat until smooth, about 5 minutes more.

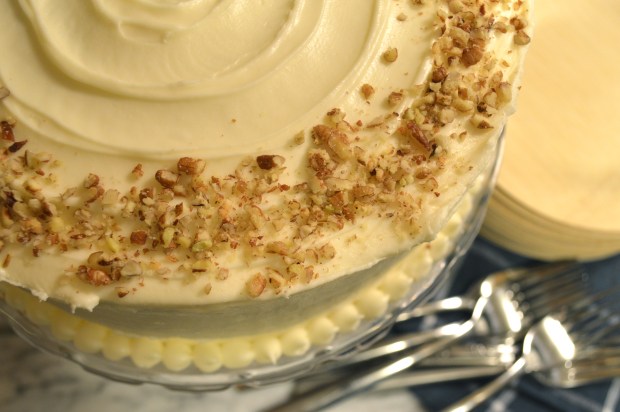
To assemble your cake, level your layers with a sharp serrated knife or cake leveler. Spread about 3/4 cup of icing between each layer of cake, and cover the top and sides of the cake with a thin layer of icing to seal in the crumbs. Refrigerate the cake for about 30 minutes before finishing with another layer of icing. Decorate with swirls, piped details, chopped pecans, or however desired.