Author: Tux | Brooklyn Homemaker

A food and lifestyle blog focused on gussied up american classics, baked goods with a history, and schnauzer babies.

the paloma cocktail

It’s finally FINALLY starting to warm up and stay warm(ish) outside.

the paloma cocktail | Brooklyn Homemaker

I know that it’s not actually WARM, yet, but it’s warmer, and I’ll take it. Today the sun was shining, the birds were chirping, and Doris and Betty were driving me crazy going outside and coming back in and running back and forth all day long. All this warm(ish) weather had me standing outside in our backyard, wandering around staring hard at the dirt to see if I could spy any little hints of green poking up from underneath the soil. It also had me yearning for backyard barbecues and fresh summery cocktails.

I guess Russell had the same idea, because when I came home from work yesterday he greeted me at the door with a sparkling, icy, fresh paloma. If you’ve never had a paloma, it’s really one of the simplest cocktails you can make, and one of the most delicious you can drink. It’s little more than a few ounces of white tequila served over ice and topped with grapefruit soda. I’ve seen it gussied up at fancy restaurants with homemade soda, fresh fruit juice, and salt or sugar rimmed glasses; but I really think that in this case you shouldn’t mess with tradition. This super simple cocktail is said to be the most popular tequila-based cocktail in Mexico, more popular than the margarita, and once you taste it you’ll understand why.

the paloma cocktail | Brooklyn Homemaker

I can actually remember the exact moment that I tasted my first paloma. It was the summer of 2008, I was waiting tables in Williamsburg Brooklyn, and the restaurant where I worked added a paloma to their seasonal cocktail menu. I was hesitant to try it at first because at that time I tended to stick with whiskey or gin, and really didn’t care for tequila. I did love grapefruit though, so I let the bartender twist my arm and I was hooked for life. It went straight to the top of my list of favorite summertime libations, and ended up being a gateway drink that taught me to love tequila.

the paloma cocktail | Brooklyn Homemaker

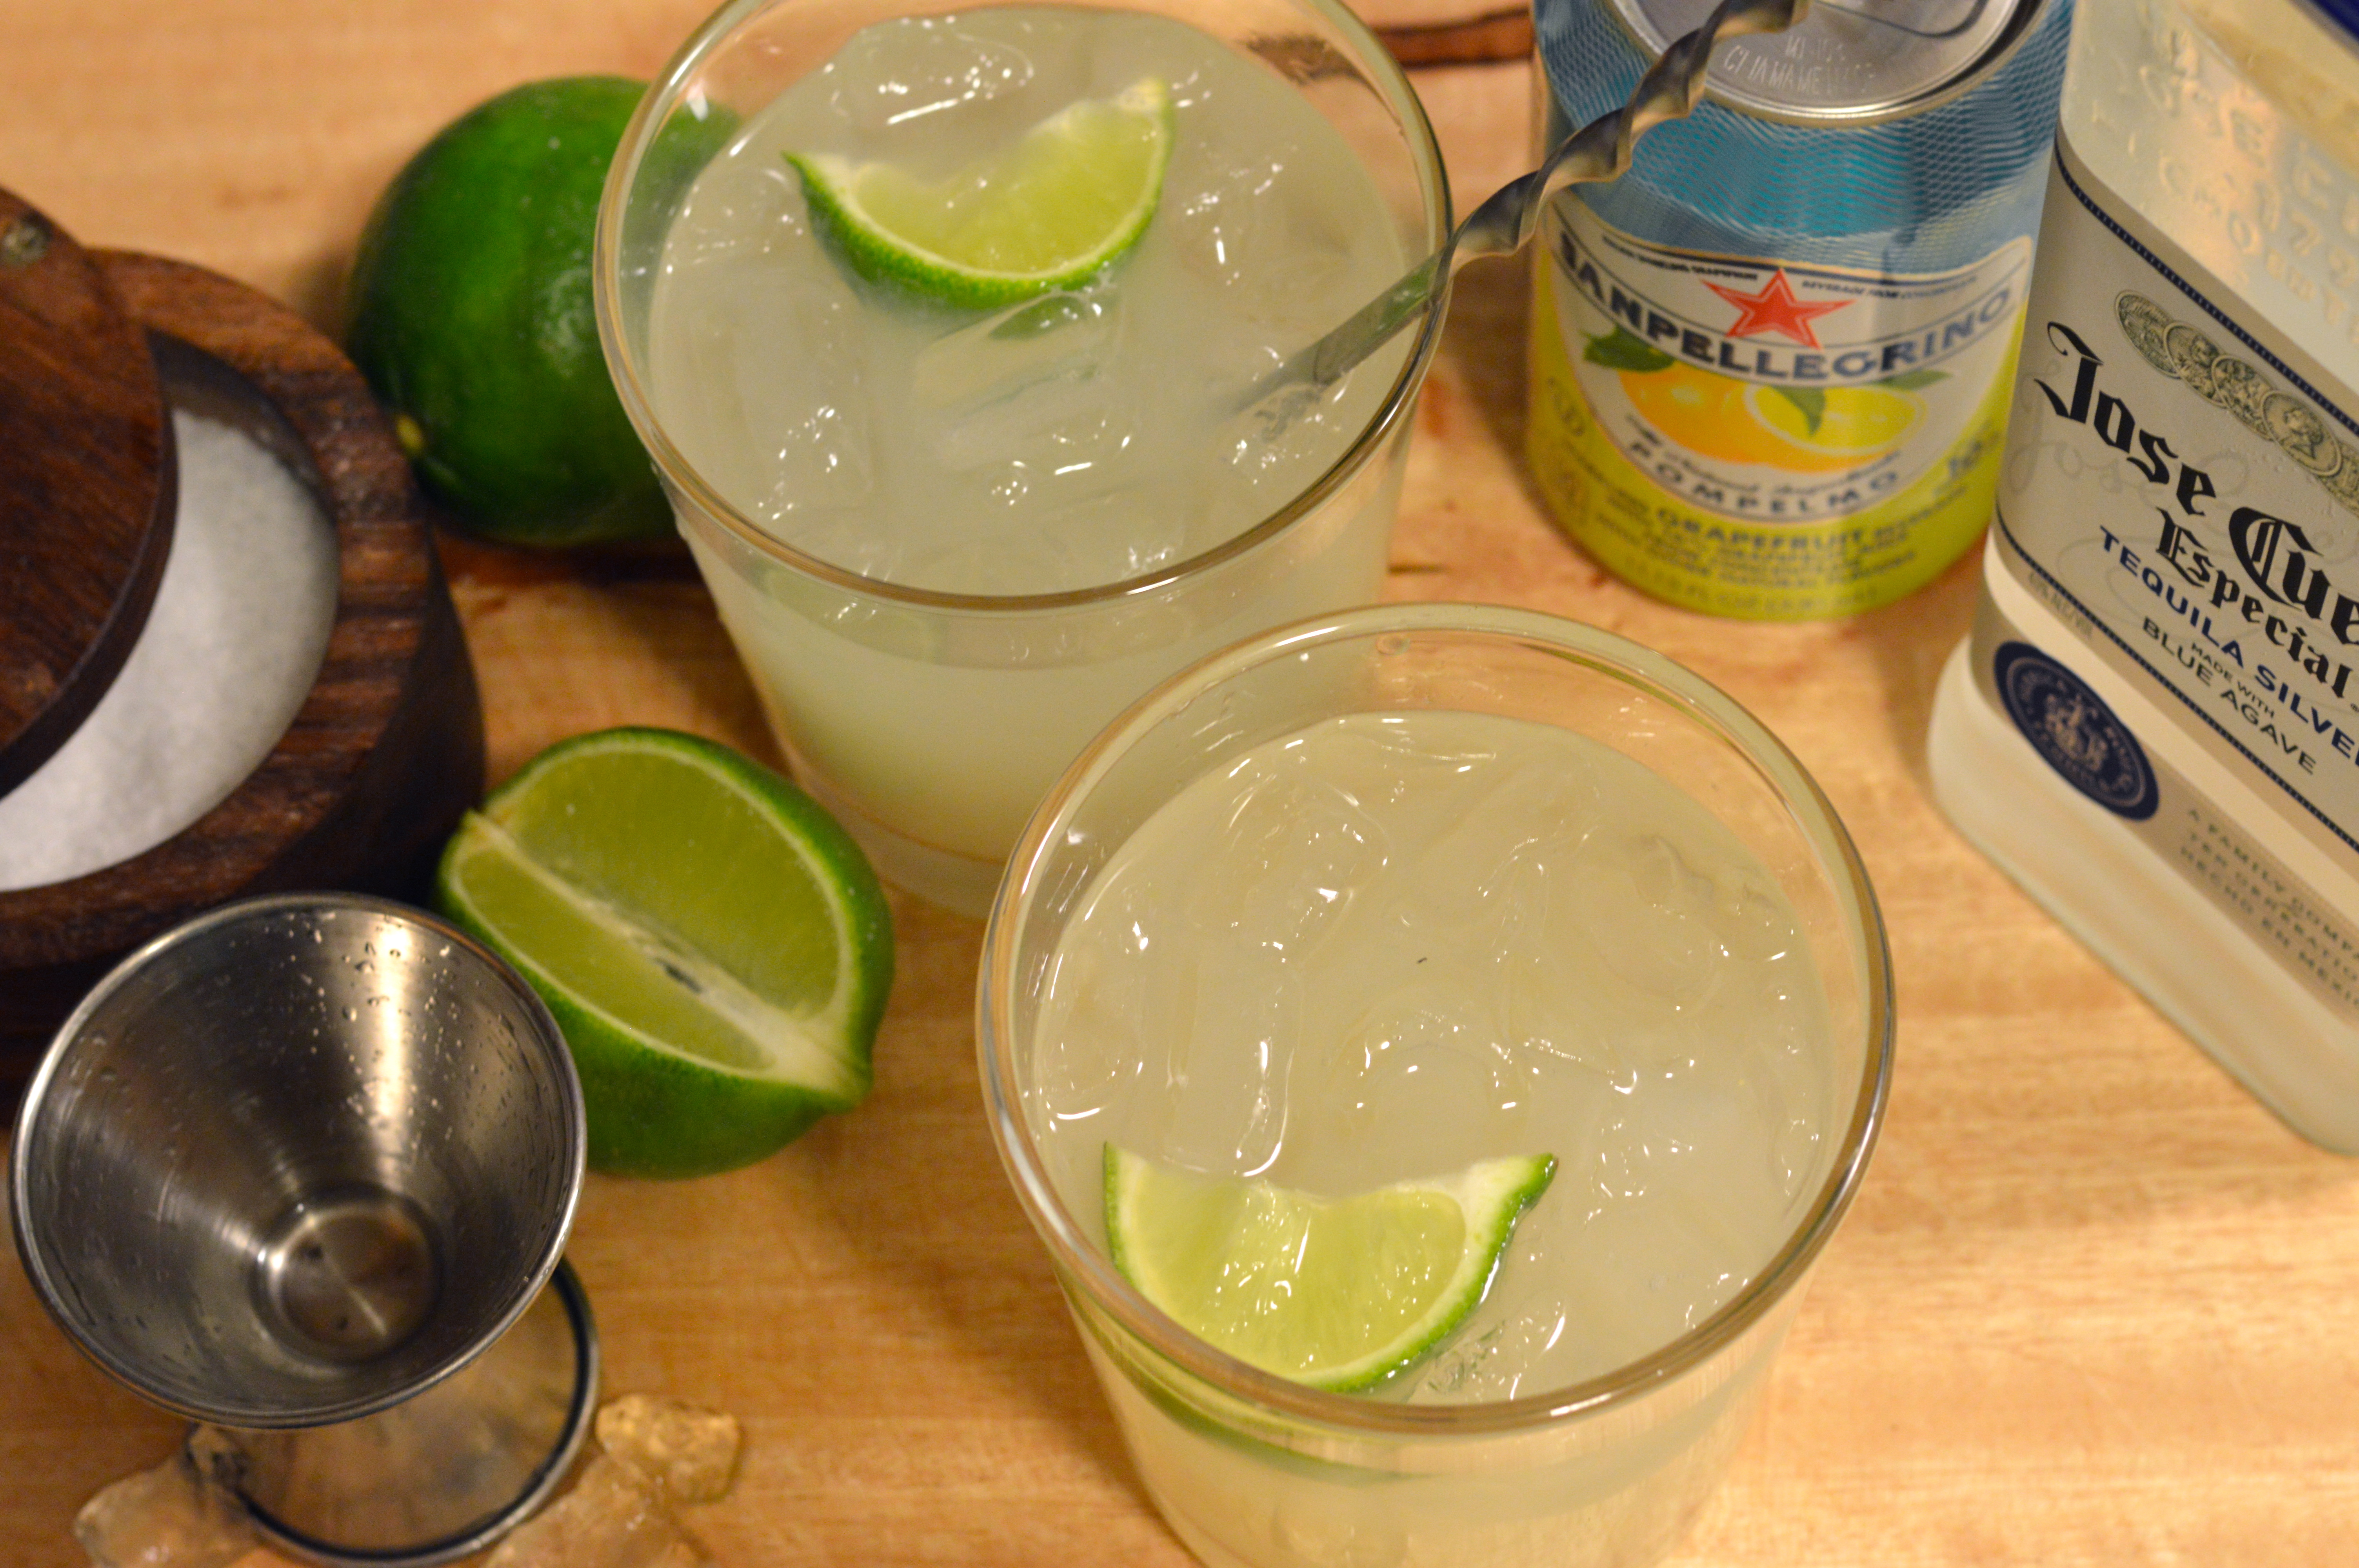
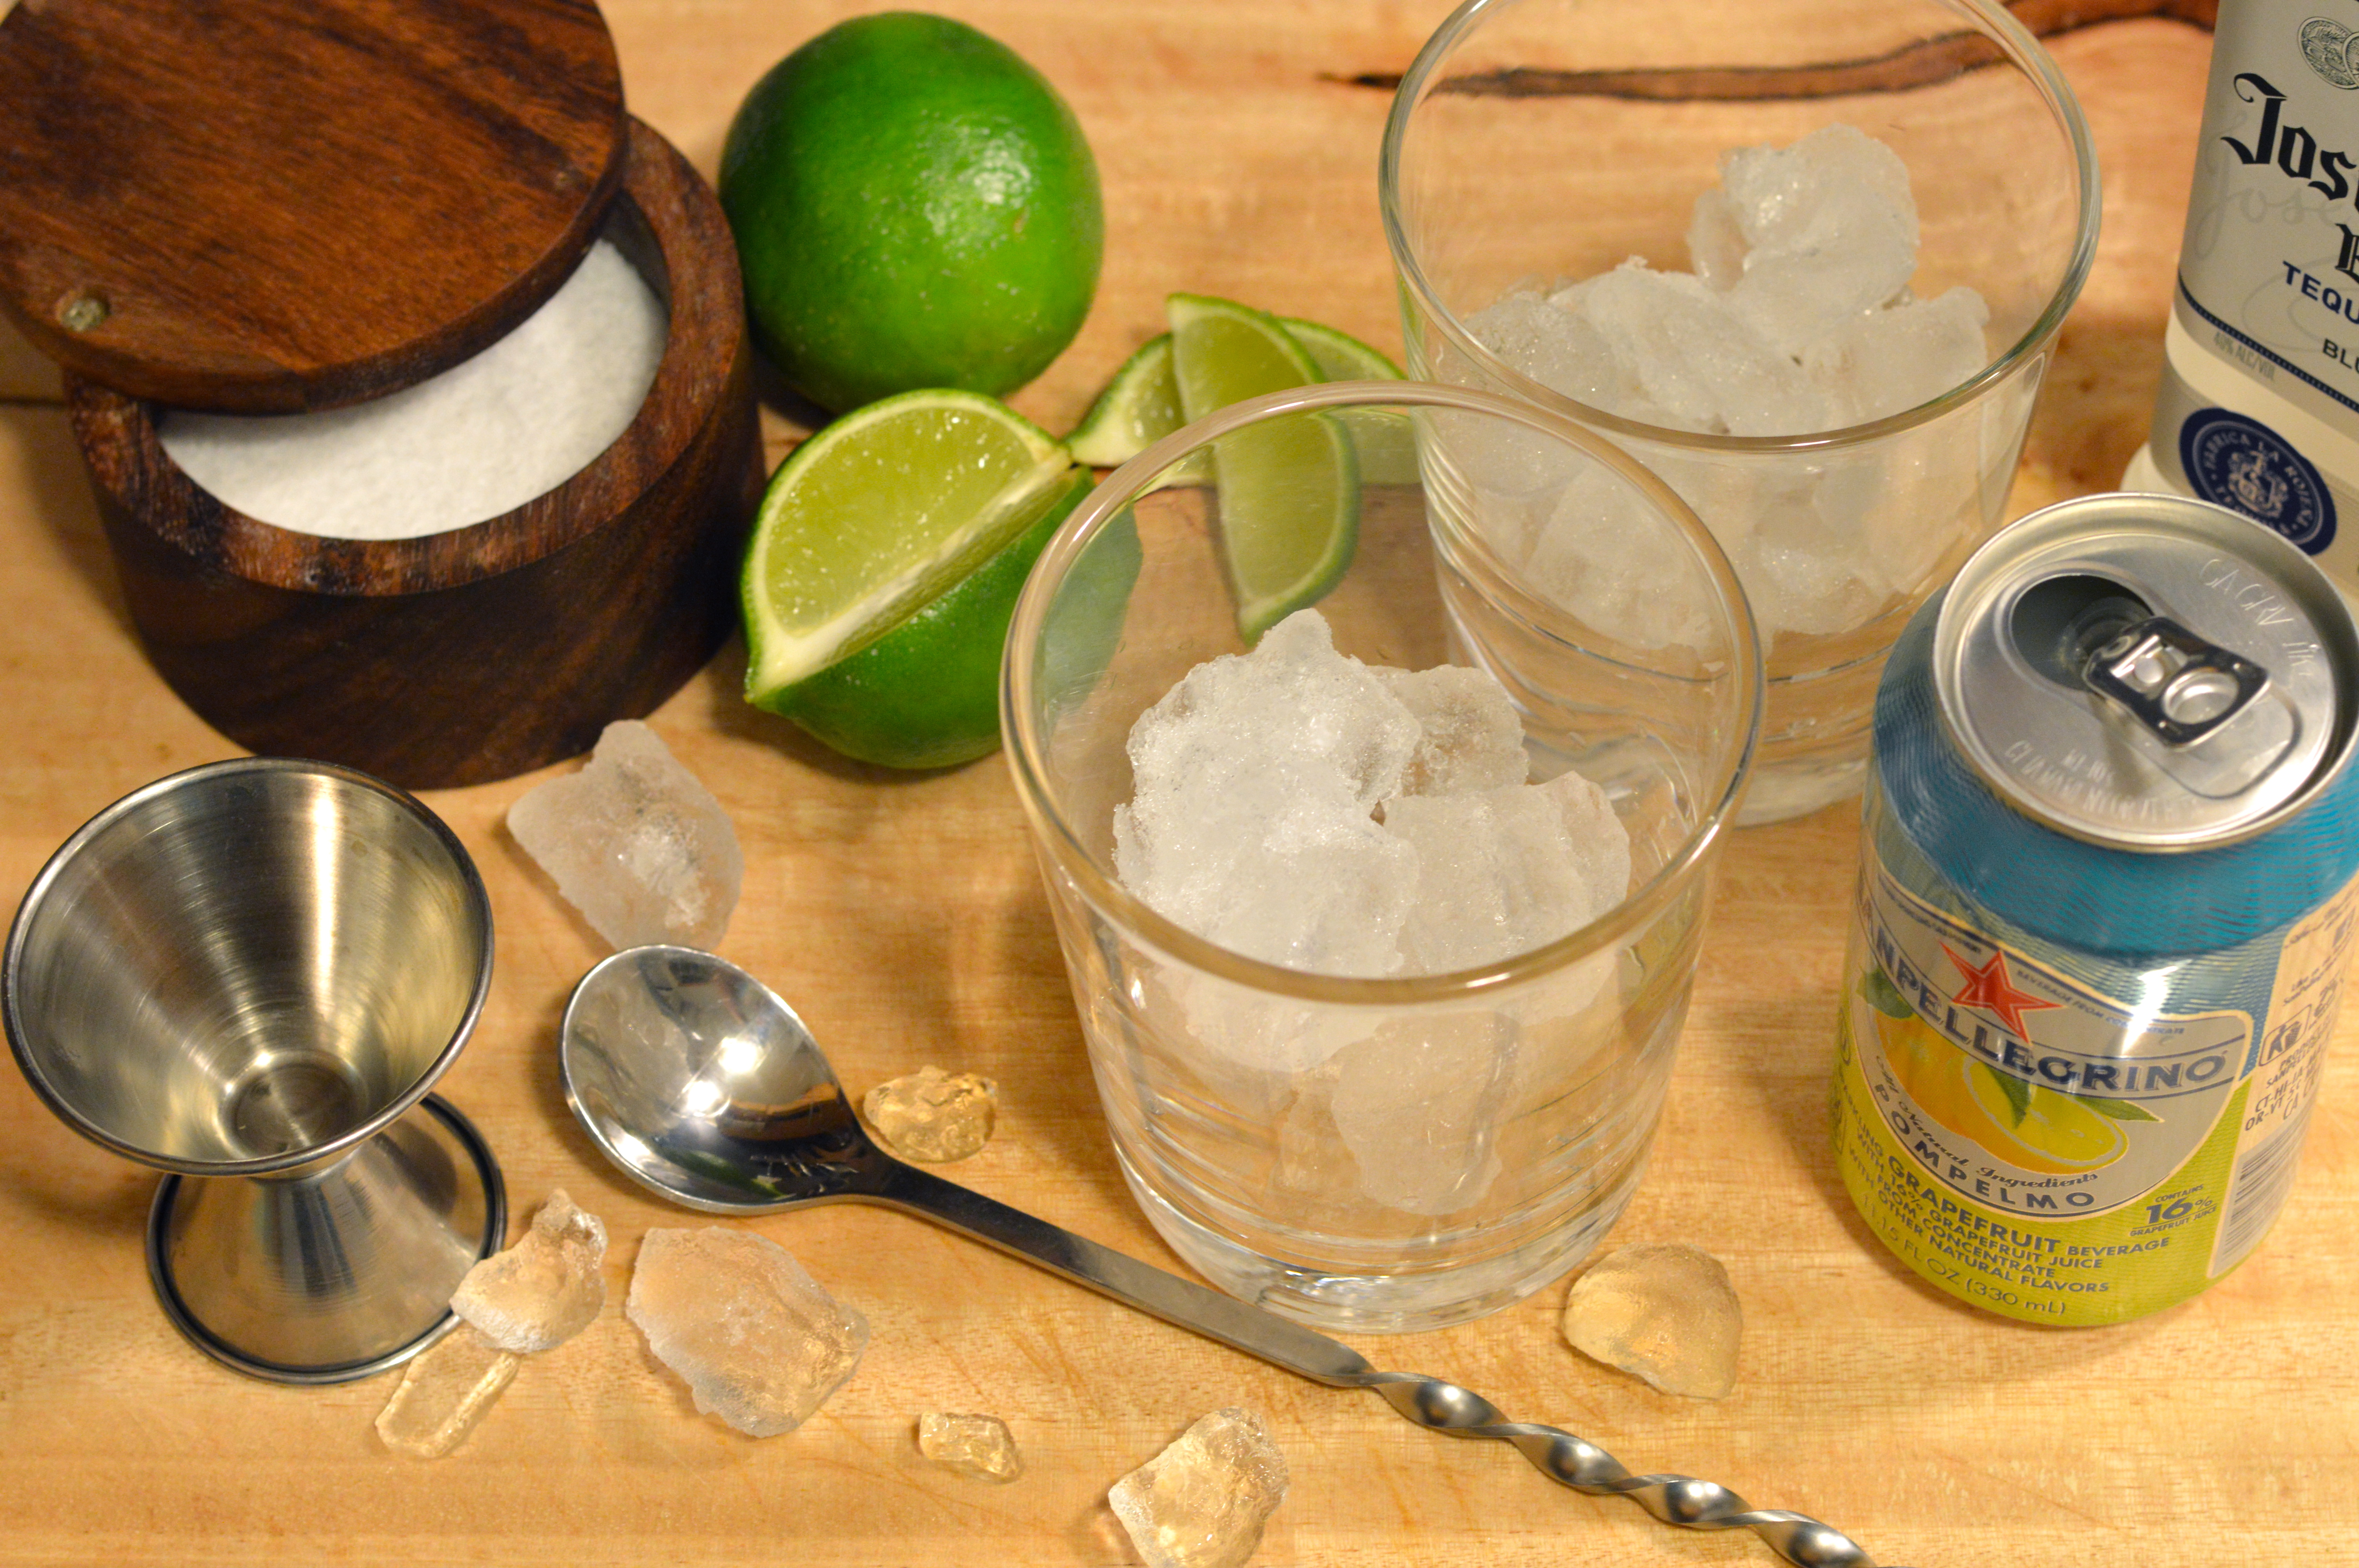
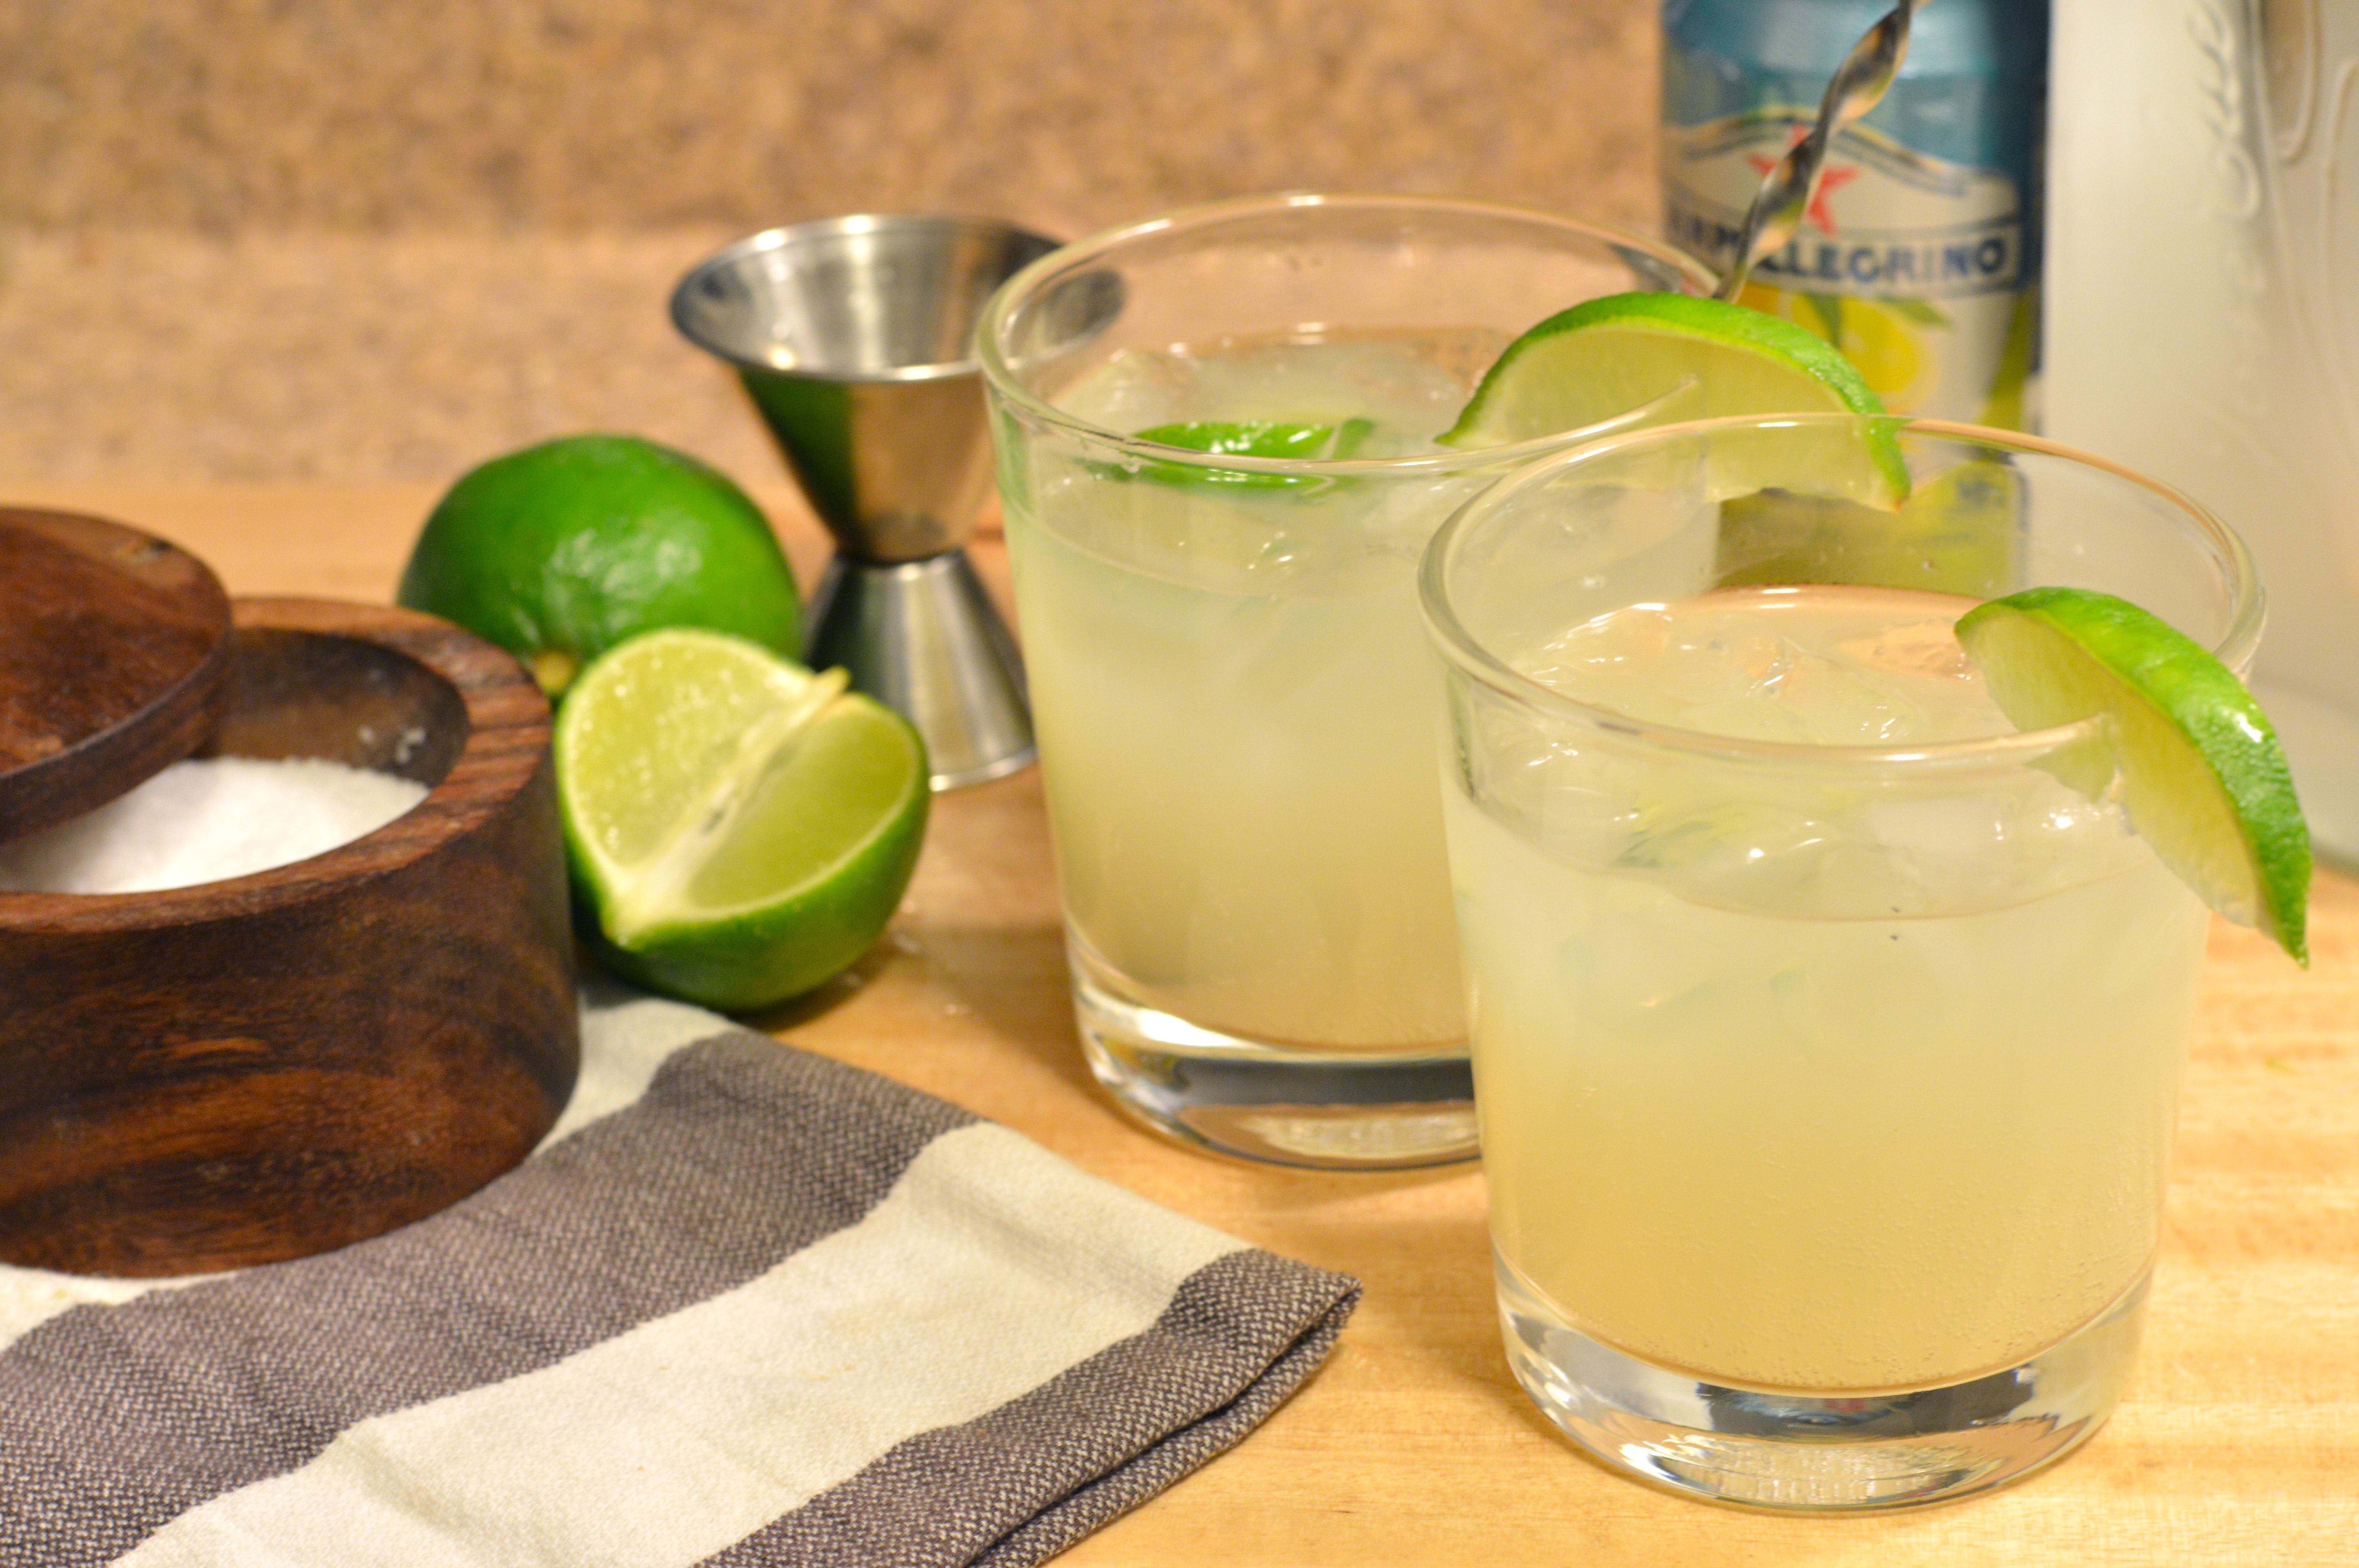
Traditionally a paloma is served in a highball with a pinch of salt and squeeze of lime. It’s decidedly unfussy, so you really don’t need to rush out and buy the fanciest tequila or make your own grapefruit soda. I recently discovered that San Pellegrino makes a grapefruit soda called “Pompelmo” that’s seriously perfect for making palomas. It’s made with real grapefruit juice so it has a fresher, more natural flavor, without all the bother of making your own soda. If you can’t find the SanPellegrino Pompelmo don’t freak, you can make a totally legit and delicious paloma using Squirt or Fresca.

the paloma cocktail | Brooklyn Homemaker

Brooklyn is in the midst of a resurgence of fancy-pants depression-era craft cocktails, but every once in a while a simple classic does the job without all the fuss. You don’t need to know how to tie a bow tie or wax a mustache to make this cocktail. Not only is the paloma super easy to make, but it tastes totally amazing! Even though it’s made from little more than soda and hooch, it tastes impossibly summery and refreshing. It literally tastes like sunshine and warm weather. Are you thirsty yet?

The recipe is so ridiculously simple that it’s almost silly to write it out, but check it out below. In the words of Russell, “It’s so easy it’s stupid.” If you want a to gussy it up a little you can salt or sugar the rim of your glass before serving, but I don’t think you need to bother.
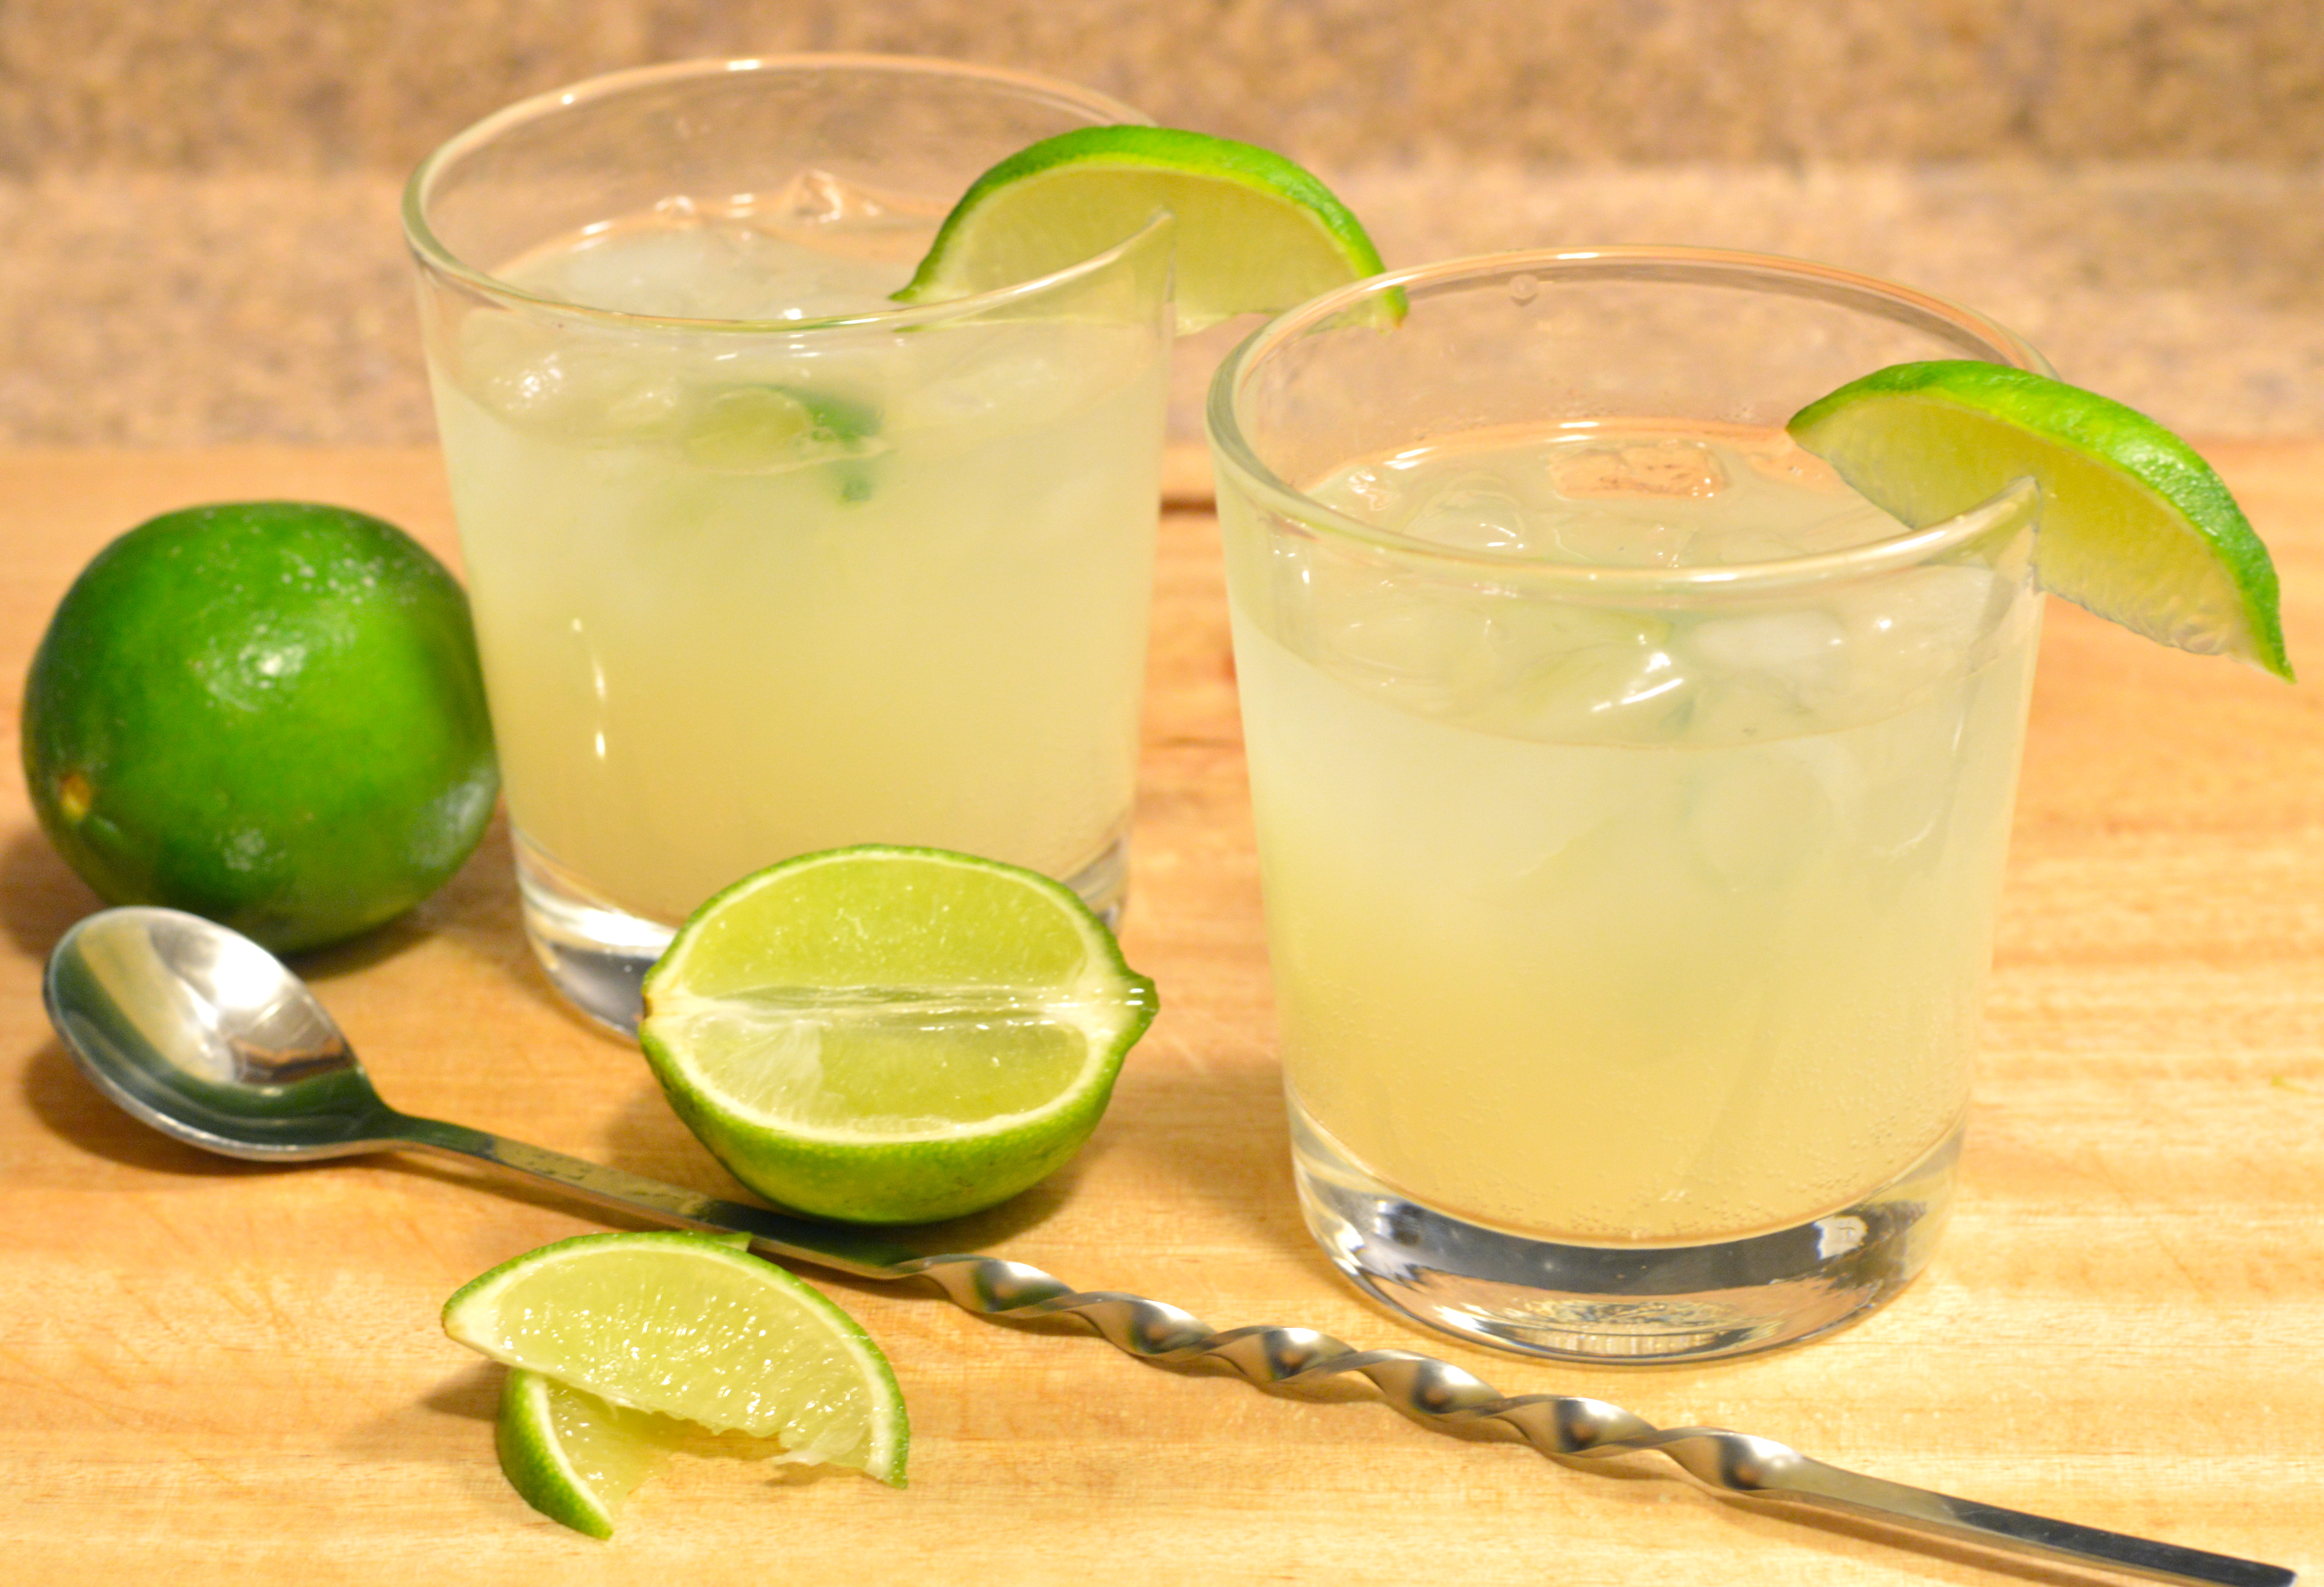
the paloma cocktail | Brooklyn Homemaker

The Paloma

  • Servings: one 7 oz cocktail
  • Print

ice
2 oz silver tequila
6 oz grapefruit soda
pinch of kosher salt
1 lime wedge

Fill a highball or rocks glass with ice. Pour tequila over ice, sprinkle with salt, and top with grapefruit soda. Squeeze some juice from the lime wedge into the drink, and add the wedge. Stir. Sip. Enjoy.

warm farro salad with roasted sweet potatoes & brussels sprouts

I know. It’s been a while since I posted last. I’m really sorry folks.
I had a pretty nasty cold last week and then I went upstate to visit family for a few days.
warm farro salad with roasted sweet potatoes & brussels sprouts | Brooklyn Homemaker

My mother is in the midst of renovating an old house, so I was pretty busy when I was home and didn’t bring my computer with me to distract me from the task at hand. The house needed to be completely gutted and redone because there were plumbing issues, a leaky roof, cracked plaster, and non-existent insulation. She opted for a beautiful metal roof, which is almost finished, but the interior of the home is still stripped down to the studs. Luckily the original moldings and hardwood floors are still in place, but there’s little else intact. I’m not entirely sure how (or if) I’ll do it, but I might end up sharing the progress with you, because I’m a crazy person and I love home renovations and big old houses. While I was home we were driving all over the world choosing flooring and finishes for the upstairs bathroom. I’m sure you’re fascinated. I hope you’re fascinated.

warm farro salad with roasted sweet potatoes & brussels sprouts | Brooklyn Homemaker

Anyways, like I said, I had a cold just before I left. I’m a total whiney little baby when I’m sick, and I also tend to get ravenously hungry. I made this salad when I was feeling well enough to spend some time in the kitchen, because I was looking for something healthy and filling, and packed with flavor since I couldn’t taste much. It really didn’t disappoint.

warm farro salad with roasted sweet potatoes & brussels sprouts | Brooklyn Homemaker

Russell has been completely obsessed with farro lately, and it’s starting to rub off on me. If you’re not familiar with farro, it’s a whole grain that’s often used in salads, soups, sides, and breakfasts dishes, or cooked like risotto. Most people think of and refer to farro as one variety of grain, but there are actually three different types composed of the grains of three ancient species of wheat. The most common found in the US, and the one you might already be familiar with, comes from Emmer wheat. It’s earthy, nutty, chewy and really satisfying. It’s also packed with fiber, vitamin B3, and zinc. Zinc is my favorite things to overload on to help cure a cold, so that was a great bonus!

If you’ve not had a chance to try farro yet, I’d really recommend it. Not only is it good for you, it’s also great tasting and versatile. It maintains its chewy texture better than rice or pasta in liquid, so it’s especially ideal for soups and dishes with a bit of moisture. I used semi-pearled farro which is probably the easiest kind to find. It has some (but not all) of its bran removed so it cooks up in about 30 minutes and doesn’t require overnight soaking like the whole-grain variety. It is not gluten-free, but it does have a significantly lower gluten content than most modern varieties of wheat.

warm farro salad with roasted sweet potatoes & brussels sprouts | Brooklyn Homemaker

This salad was just what the doctor ordered. It’s filling and savory with just a hint sweetness and tang. It also has a wonderful mix of textures and flavors. The chewy farro, crunchy cashews, creamy goat cheese, and tender brussels sprouts with a bit of bite inside made for such an interesting and satisfying combination. The sweet and tangy dressing, sweet tart cherries, nutty farro, and toasty roasted brussels sprouts and sweet potatoes all pair really well together and made every bite super flavorful and delicious.

warm farro salad with roasted sweet potatoes & brussels sprouts | Brooklyn Homemaker

I would say that this salad is best when its first tossed together and still warm, but it was pretty tasty served cold with lunch the next day too. It somehow tasted sweeter cold so if you’d prefer to serve it chilled you might want to cut back on the cherries or tone down the honey in the dressing. Also, if you plan to make this ahead, I’d suggest that you wait to add the cashews until just before serving, as they can absorb moisture and oils from the dressing and lose their crunch.
When you’re mixing in the goat cheese, be careful not to squish it. It’s so soft and creamy and so mildly flavored that it could get lost in the salad if it’s completely incorporated. I think it’s best if there are some separate gobs of it interspersed throughout the salad.

warm farro salad with roasted sweet potatoes & brussels sprouts | Brooklyn Homemaker

Warm Farro Salad with Roasted Sweet Potatoes & Brussels Sprouts

2 cups semi-pearled farro
3 cups small brussels sprouts, washed and halved
1 large or 2 small sweet potatoes, peeled and cut into 1/2″ cubes (about 3 cups of cubes)
1 red onion, cut into thin strips
2 tablespoons olive oil, divided
salt and pepper for seasoning
1 cup cashews, roughly chopped
1/3 dried cherries, roughly chopped
2-3 oz goat cheese

dressing
1/2 cup olive oil
1/3 cup lemon juice (about 2 lemons)
2 tablespoons balsamic vinegar
1 tablespoon honey
1 tablespoon dijon mustard
1/2 teaspoon salt
1/2 teaspoon cinnamon
1/4 teaspoon fresh ground pepper

Preheat oven to 400. Combine farro, 6 cups of water, and 1 tsp of salt in a medium saucepan. Cover and bring to a boil. Reduce heat and simmer for 30 minutes. Drain well and transfer to a large bowl.
Meanwhile, place sweet potato cubes into a heat proof bowl, and cover with enough boiling water to cover completely. Let soak for 10 minutes. Carefully drain and pat dry with a kitchen towel or paper towels. Toss in 1 tablespoon olive oil and season with salt and pepper. Spread evenly over a parchment lined sheet pan. Set aside.
In the same bowl, toss halved brussels sprouts and onion in 1 tablespoon of olive oil and season with salt and pepper. Spread evenly over another parchment lined sheet pan and roast for 20 minutes along with the sweet potatoes.
Add roasted sweet potatoes, brussels sprouts, & onions, as well as the chopped cherries and cashews to the bowl with the farro while everything is still warm.
In a large measuring cup combine all ingredients for the dressing and whisk until well combined. Pour over salad and mix until incorporated. Crumble goat cheese over the salad and lightly toss to combine.

braised chicken thighs with creamy greens and beans

So, as much as everyone in New York is trying to convince themselves otherwise, it’s still winter… UGH.

braised chicken thighs with creamy greens and beans | Brooklyn Homemaker

It’s a strange thing to be able to literally smell spring around the corner, but to have it still remain painfully out of reach. After this long hard winter, people want to bust out the short shorts and tank tops the minute the sun comes out and temperatures rise above freezing. Unfortunately, mother nature has other plans for us poor ol’ city folk. One day birds are chirping, the sun is shining, and temperatures are soaring (SOARING!!!) into low sixties, but it’s just lady nature messing with our heads, and the next day the wind is reaching gail force and the temperatures barely reach the high teens. One day I’m dreaming of barbecues and watermelon margaritas, and the next day the heat’s cranking and I’m back in front of the stove trying to trick myself with citrus, garlic and greens.

braised chicken thighs with creamy greens and beans | Brooklyn Homemaker

Hopefully I’ll be out in the garden planting annuals and watching the crocus’ bloom very soon, but for now I’m back in the kitchen braising chicken thighs again. This recipe is kind of similar to the last braised chicken recipe I posted, but with some pretty major changes. I guess I’m a creature of habit. What can I say? I used chicken thighs again because, like I said before, they’re a great way to make a meal taste like it cooked all day when it really took about an hour and a half. I also used thyme, lemon, and white wine again, because, well… because those flavors are killer together with braised chicken thighs. Deal with it.
After that though, things went in a very different, very delicious direction.

braised chicken thighs with creamy greens and beans | Brooklyn Homemaker  braised chicken thighs with creamy greens and beans | Brooklyn Homemaker

The sauce for this is so rich and creamy and garlicy and wonderful. After the chicken gets all cozy and relaxed in the oven, it comes out and rests a bit while the sauce reduces and some fresh greens and white beans go in to soak up all that deliciousness. I chose to make this with red chard, but if you’d prefer spinach or something similar, knock yourself out. If you’d like to try this with kale or another braising green, I’d suggest cooking the greens for an extra five or ten minutes, and waiting to add the beans until the greens are almost fully cooked. I think the chard was the perfect choice though, and it adds a bit of bitterness and bite while still being fresh and green and tender. The beans add a bit of texture and interest, along with just enough starch to make this feel like a complete meal.

braised chicken thighs with creamy greens and beans | Brooklyn Homemaker

This dish came out better than I ever imagined. Like sooooooooo good. First of all, thyme and chicken are amazing together. Definitely one of my favorite combinations. Then when you add white wine, cream, and garlic, and just let it all get happy together in the oven… Heaven. The chicken is perfectly rich and falling off the bone, and the tender wilted greens and soft starchy beans make this meal one perfect wonderful dish. After one bite Russell was planning dinner parties and deciding which of our friends should have the privilege of tasting this. If it wasn’t amazing enough already, on top of everything this meal is also really simple to make and is all made in the same pot! I mean. Can it get any better? Actually, yes it can. With a glass of white wine and a big thick slice of nice crusty bread to sop up the sauce. You’re welcome.

braised chicken thighs with creamy greens and beans | Brooklyn Homemaker

Braised Chicken Thighs with Creamy Greens and Beans

  • Servings: 4-8 (depending on the size of your chicken thighs)
  • Print

8 chicken thighs (skin-on & bone-in)
salt and pepper for seasoning
3 tablespoons flour
2 tablespoons olive oil
2 shallots, chopped
7 or 8 garlic cloves, peeled
1 cup dry white wine
2 cups chicken stock
1 cup heavy cream
zest of 1 lemon (peeled in strips with a vegetable peeler, avoiding the white pith)
6 or 7 fresh thyme sprigs
1 (28 oz) can cannellini beans
1 or 2 bunches of swiss chard, washed and torn into bite sized shreds *see note

Preheat your oven to 375.
Season your chicken thighs with salt and pepper and dust with flour, on both sides. Heat olive oil in a dutch oven or braising pan (not raw cast iron) and add chicken skin side down. Brown for 5 to 8 minutes on each side. Remove the chicken to a plate, leaving the remaining oil. Saute the shallots and garlic for 5 minutes until the shallots are tender and translucent. Add the wine and thyme, turn the heat up to high, and boil until reduced by half, about 5 minutes. Stir frequently with a wooden spoon or silicone spatula, scraping the bottom of the pan to loosen up any browned bits. Add the lemon, stock, and cream to the pan, bring back to a boil, and add the chicken skin side up.  Transfer the pan, uncovered, to the oven to braise for 45 minutes or until meat is fork tender.

Remove the pan from the oven, transfer the chicken to a plate, and tent with foil. Move the pan back to the stovetop and boil over high heat until the sauce is slightly reduced, for about 10 minutes. Remove and discard the thyme and lemon zest. Add the chard and beans, and cook on high for 5 minutes more, or until the greens are completely wilted. Adjust seasoning with salt and pepper if necessary, and serve the chicken over a bed of the beans and greens.

*cook’s note- if you have large chicken thighs or want to serve a lot of greens use 2 bunches, otherwise one is fine. It cooks down A LOT, so 2 bunches will be perfect if you’re serving more than 4 people, or if you really like chard!

garlic press giveaway

UPDATE: CONTEST CLOSED!

Today I have something big for everyone! I’m announcing the first ever Brooklyn Homemaker giveaway!

garlic press giveaway | Brooklyn Homemaker

In my last post, I reviewed several garlic presses, detailed some of the different features available on some of them, and discussed which ones I liked the best. The Harold Import Company, makers of the garlic press and slicer that I reviewed, has generously agreed to donate one for a loyal reader and fan of Brooklyn Homemaker!

garlic herb compound butter | Brooklyn Homemaker

This one ended up being one of my favorites. Though unpeeled garlic requires a bit of extra force, it can handle both peeled and unpeeled cloves. It’s better at getting more garlic through the press than some of the other ones I tested, but it did still leave a small bit behind. One of the reasons I like it so much is that it also doubles as a garlic slicer, giving you nice thin evenly sliced garlic. To use the slicer function the clove needs to be peeled, but it’s very efficient and leaves no garlic behind at all.

garlic herb compound butter | Brooklyn Homemaker

Another really great feature is that this tool has a press that actually swivels out of the hopper to make it more accessible for easy cleaning. This is a common feature in many high end garlic presses, so it’s nice to see it in such an affordable tool. It also comes with a handy cleaning tool that attaches to the inside of the arm, and slides out when needed.

In case you forgot, there was even a handy video, produced by my amazing friends from Crown Street Productions! Check it out!

This tool is versatile, easy to use, and easy to clean; and at only $20, it’s a great value too!  Now, thanks to the generosity of the Harold Import Company, this tool could be yours for FREE!!! Entries will be accepted until 6pm on Tuesday March 18th. To enter, please follow the contest rules detailed at the bottom of the post.

garlic herb compound butter | Brooklyn Homemaker

After I was finished pressing all that garlic, I had to find a use for it. I thought a perfect way to let the garlic shine while putting it to practical use was to make a garlic and herb compound butter. Compound butter is basically any mix of butter with supplementary ingredients like herbs, spices, garlic, etc.; that’s then formed and refrigerated to be sliced for later use. It’s great to top a steak, mix into (or use as) a sauce, or toss into pasta. This super garlicy butter would also be perfect to make garlic bread, or as a sauce for a white pizza.

garlic herb compound butter | Brooklyn Homemaker

Quick and Easy Garlic and Herb Butter

1 stick, 8 tablespoons softened unsalted butter
1 tablespoon minced (pressed) garlic
2 teaspoons finely chopped parsley
1 teaspoon finely chopped thyme (or other herbs as desired)
1/2 teaspoon coarse kosher salt
1/2 teaspoon freshly cracked pepper

With a fork, mash all the ingredients together until very well combined. Butter will need to be at room temperature or softer, but not melted. Transfer the mixture to a piece of plastic wrap, wrap up and shape into a round tube. Twist the ends of the wrap closed and refrigerate the butter until hard. It will keep in the refrigerator for weeks and can be sliced off as needed. Yum!

garlic & herb compound butter | Brooklyn Homemaker

Contest rules:

Entries will be accepted up until Tuesday March 18th, at 6PM EST.

To enter, please follow these links and “like” both Brooklyn Homemaker and Harold Import Company on facebook. Then come back and leave the comment “Gimme Garlic!” on this post, and tell me why you’d love to have a new garlic press.

Only one comment per entrant, please.  The winning garlic press can only be shipped within the contiguous United States, so entrants must live or have a mailing address within the lower 48. Winner will be chosen from the comments by selecting a number (using a random number generator) from the total number of comments when the contest comes to a close. Winner will be contacted via email for shipping information.