cakes

roasted cherry kugelhopf with cherry bourbon glaze #bundtbakers

You guys. Can you believe it’s already time for the July edition of #bundtbakers?
Time flies when you’re baking bundts.

roasted cherry kugelhopf with cherry bourbon glaze | Brooklyn Homemaker

This month’s theme is stone fruit, and I immediately knew I wanted to do something with cherries. I also thought that it might be fun to try something a little different this time around. I was recently researching the history of the bundt cake and learned that Kugelhopf is basically the bundt cake’s great-grandpappy, so I thought it would be really interesting to play with a version this old world classic.

roasted cherry kugelhopf with cherry bourbon glaze | Brooklyn Homemaker

The birth story of the bundt pan all started with some members of a Jewish women’s group called Hadassah who were looking for an alternative to expensive imported kugelhopf molds. Nowadays it’s not hard to find inexpensive metal kugelhopf pans, but they’re traditionally made in Europe from heavy, fragile terra cotta, and in the 1950s they were extremely hard to come by here in the states. Some members of the group approached a young inventor named H. David Dalquist who had recently formed a cookware company called Nordic Ware. They commissioned him to make a lighter, cheaper version of the pans they used to use in the old country. One of the ladies had a traditional mold they lent him as a prototype and he crafted a similarly shaped pan out of lightweight aluminum. Originally he called it a “Bund” pan, based on a German word that loosely translates to, “a gathering of people”. He later added the “t”, making it “bundt”, to avoid confusion with a controversial German-American social club.

roasted cherry kugelhopf with cherry bourbon glaze | Brooklyn Homemaker

Nordic Ware and their pans were moderately popular throughout the 50s with Hadassah members, but the bundt pan didn’t really take off and become the ubiquitous phenomenon we know them to be today until the late 1960s. In 1966 a woman from Texas won the Pillsbury Bake-Off with a recipe she called the “Tunnel of Fudge” that called for Nordic Ware’s patented pan. After that every housewife in America had to have a new bundt pan in their cupboard.

roasted cherry kugelhopf with cherry bourbon glaze | Brooklyn Homemaker

Being a self-proclaimed Bundt enthusiast, I found this history to be totally fascinating. It also made me really curious. I started looking into the Kugelhopf and found that depending on where you are and who you ask, it’s also known as Gugelhupf, guguluf, or kuglóf. Depending on the region, the recipe changes too. It can range from dry and bread-like, sometimes even salty or savory in some places, to fruity, dense and just barely sweet in others. Wherever you are though, this is a yeast leavened cake or loaf that’s usually studded with raisins and nuts. Since it’s not especially sweet, it’s often eaten with breakfast or as a snack, usually spread with unsalted butter.

roasted cherry kugelhopf with cherry bourbon glaze | Brooklyn Homemaker

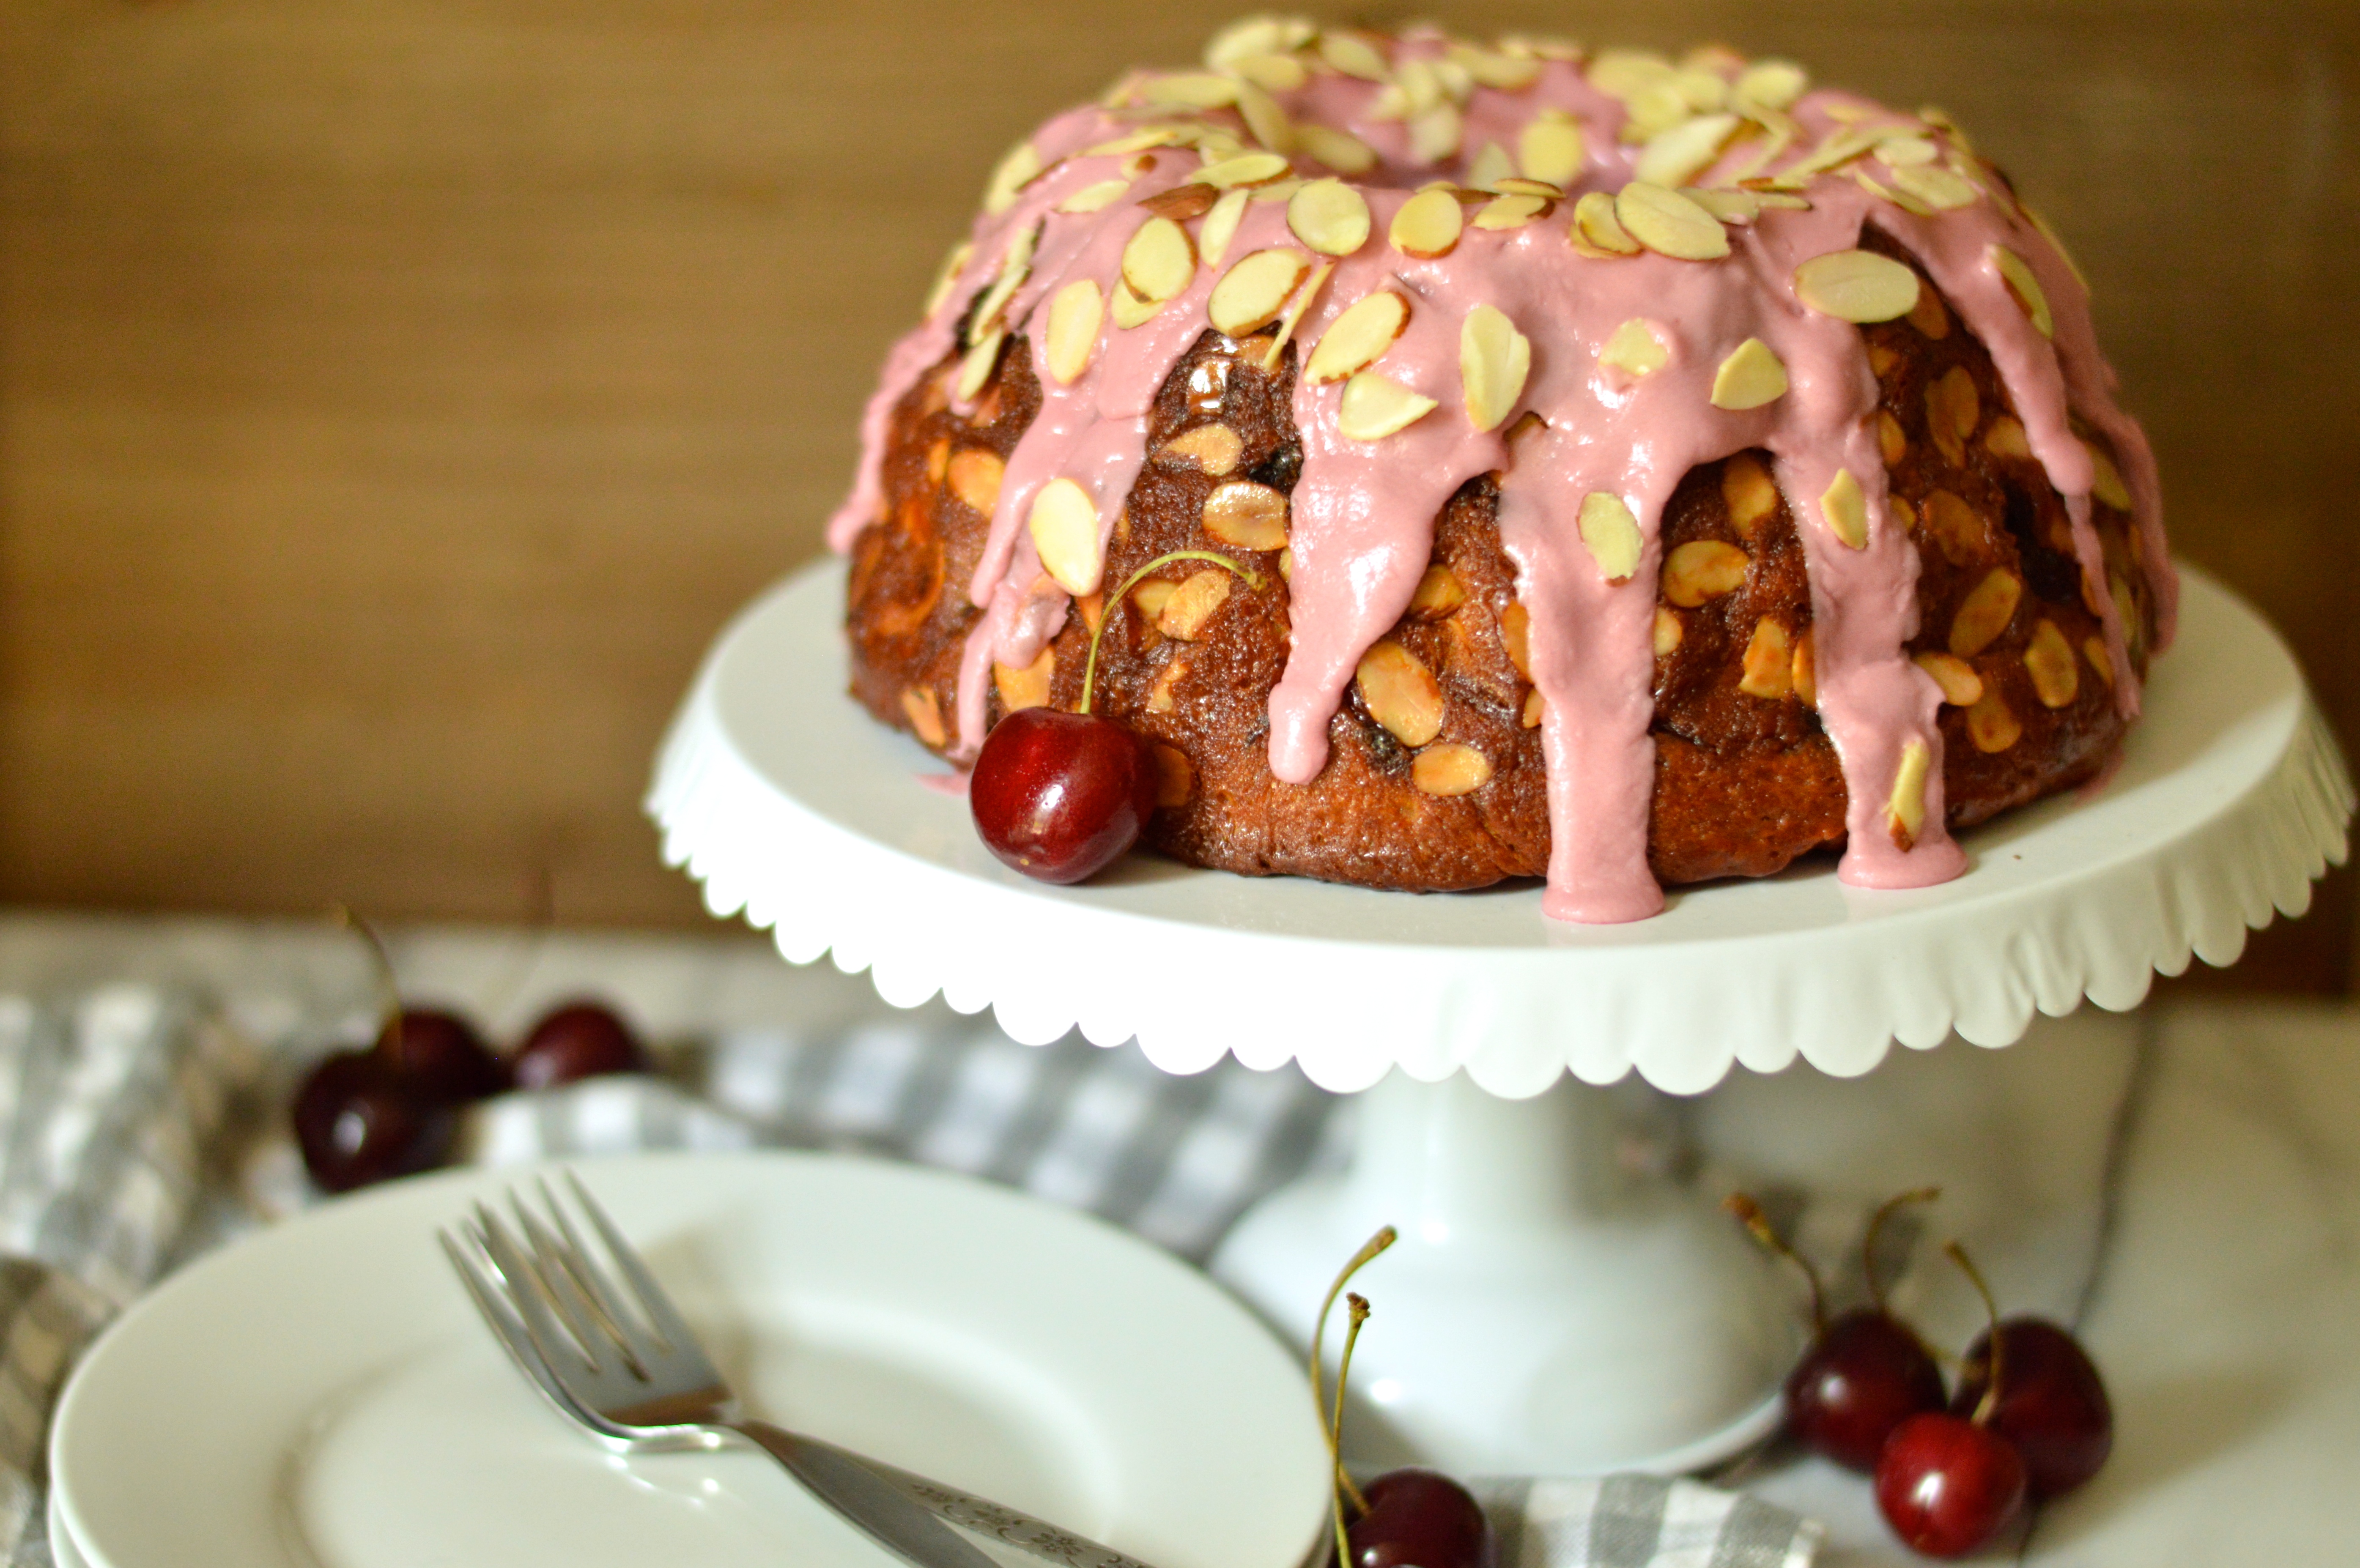
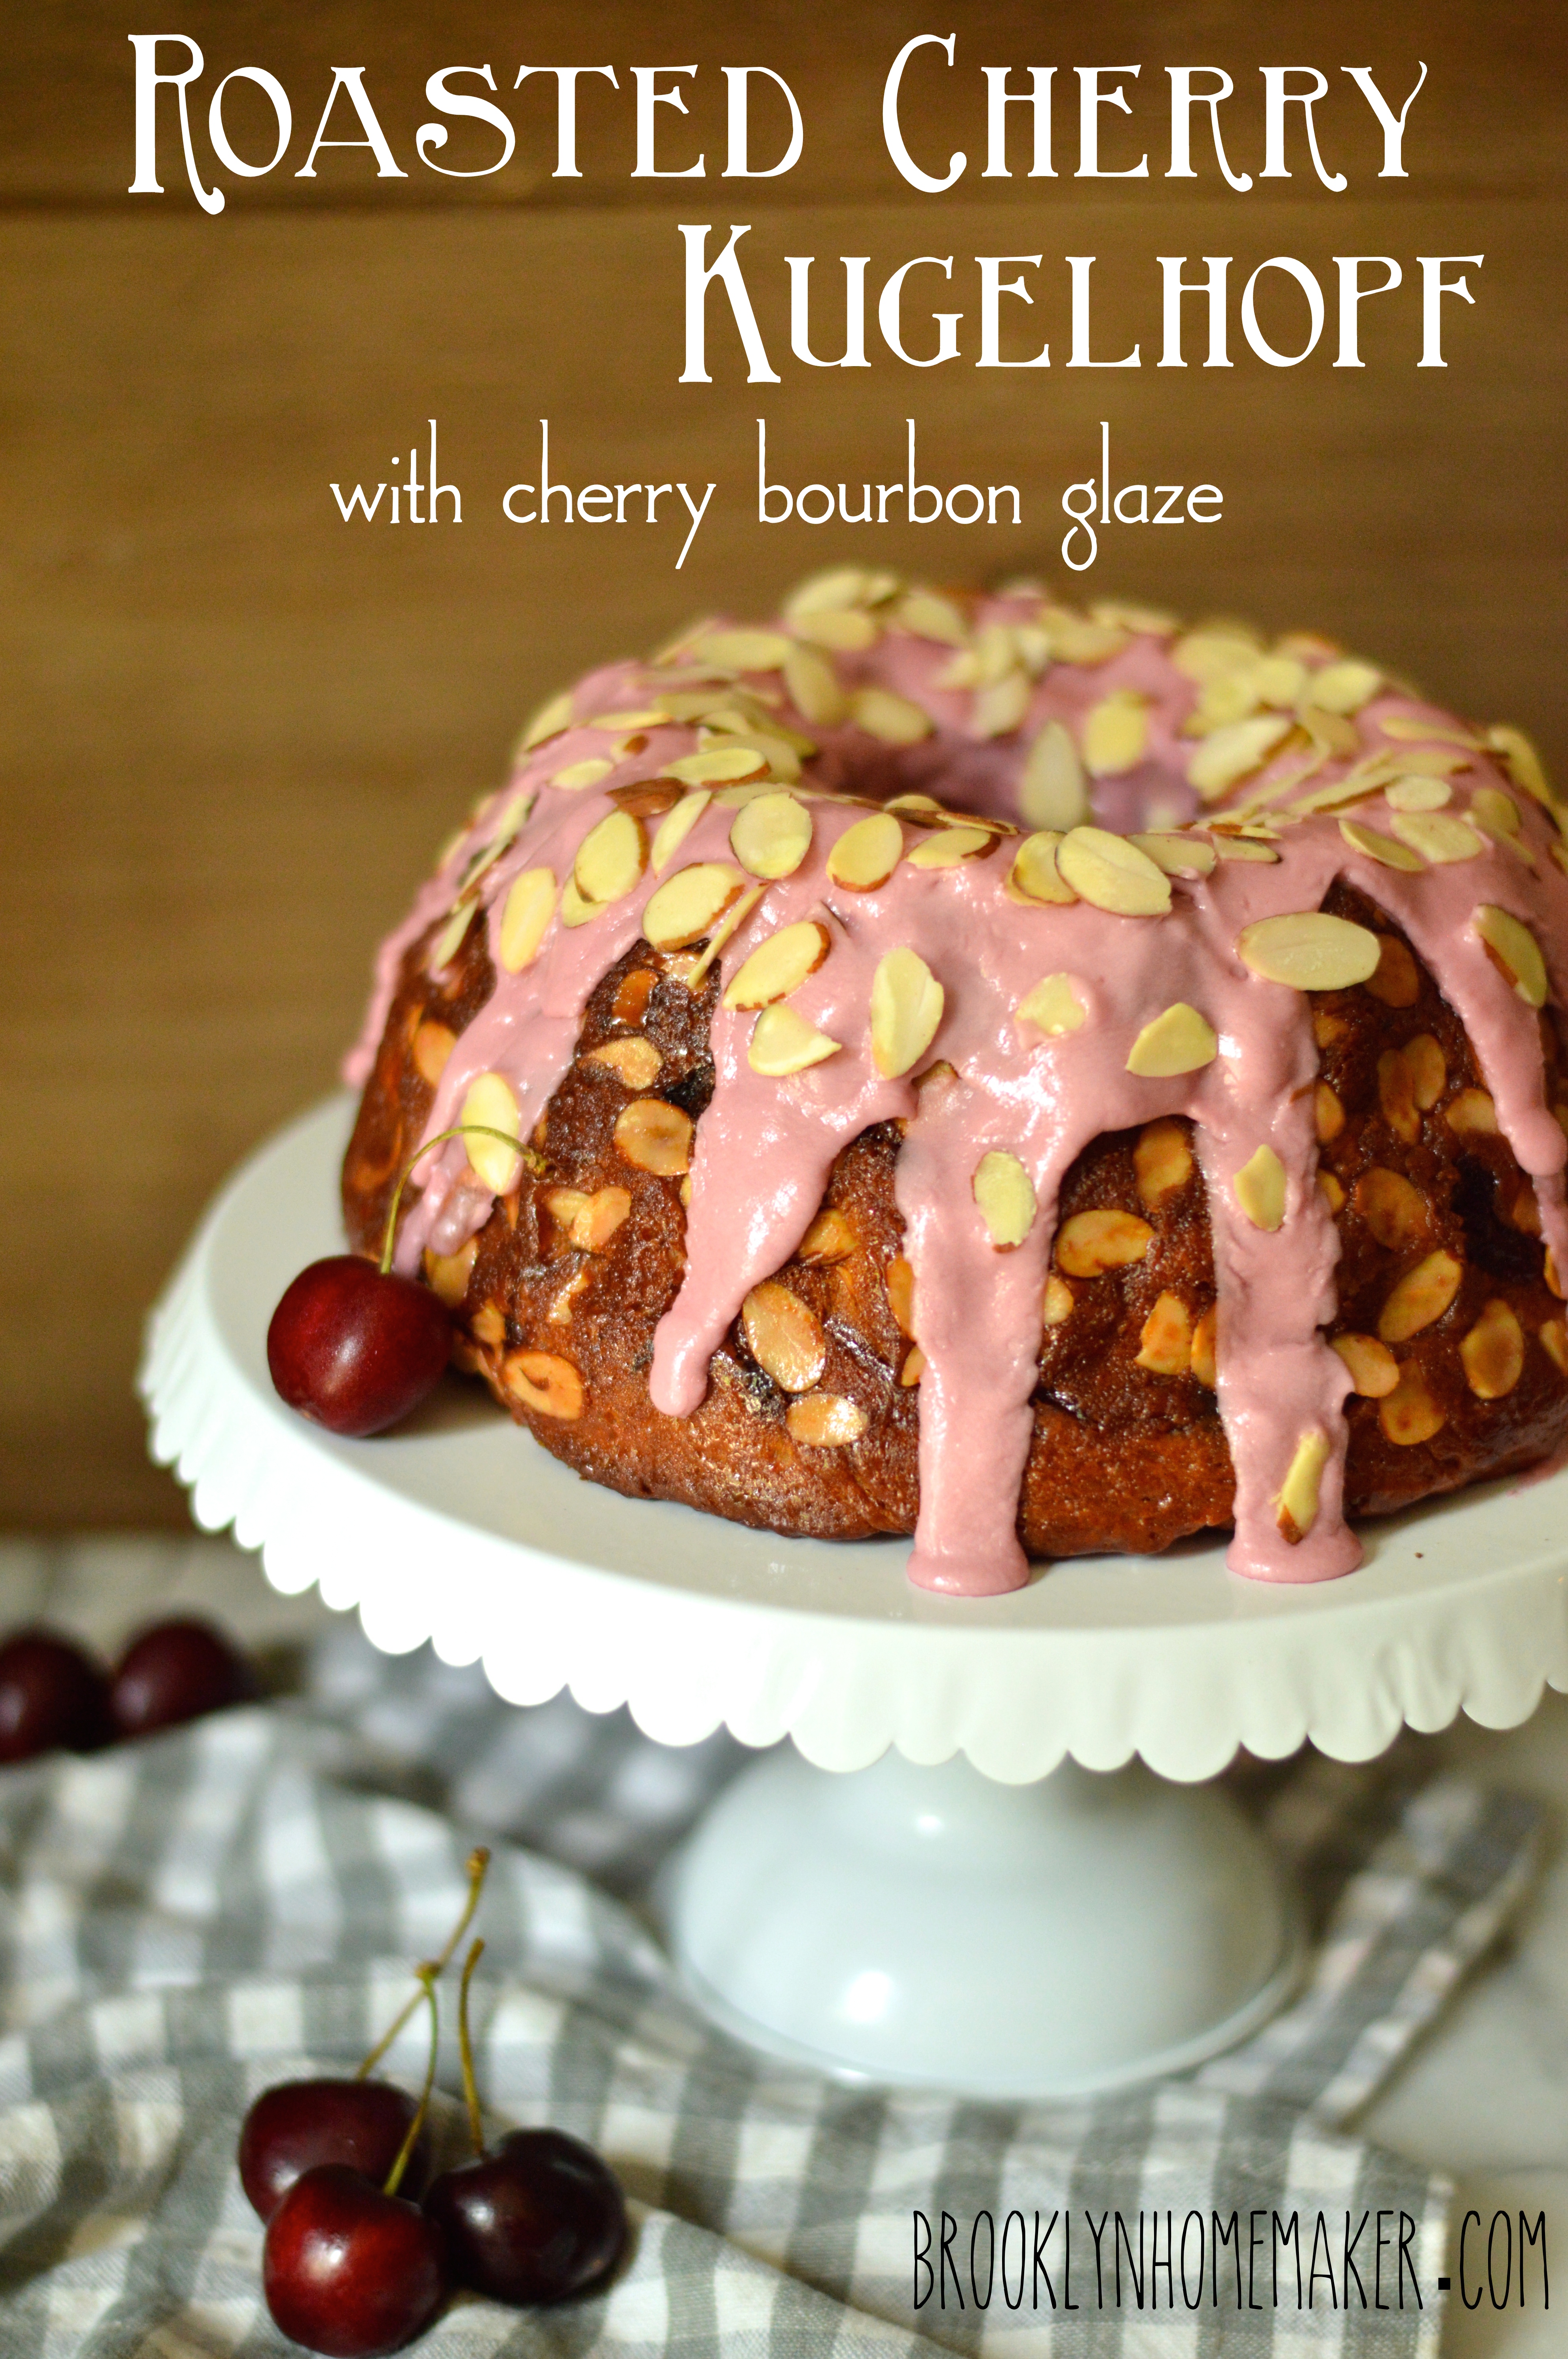
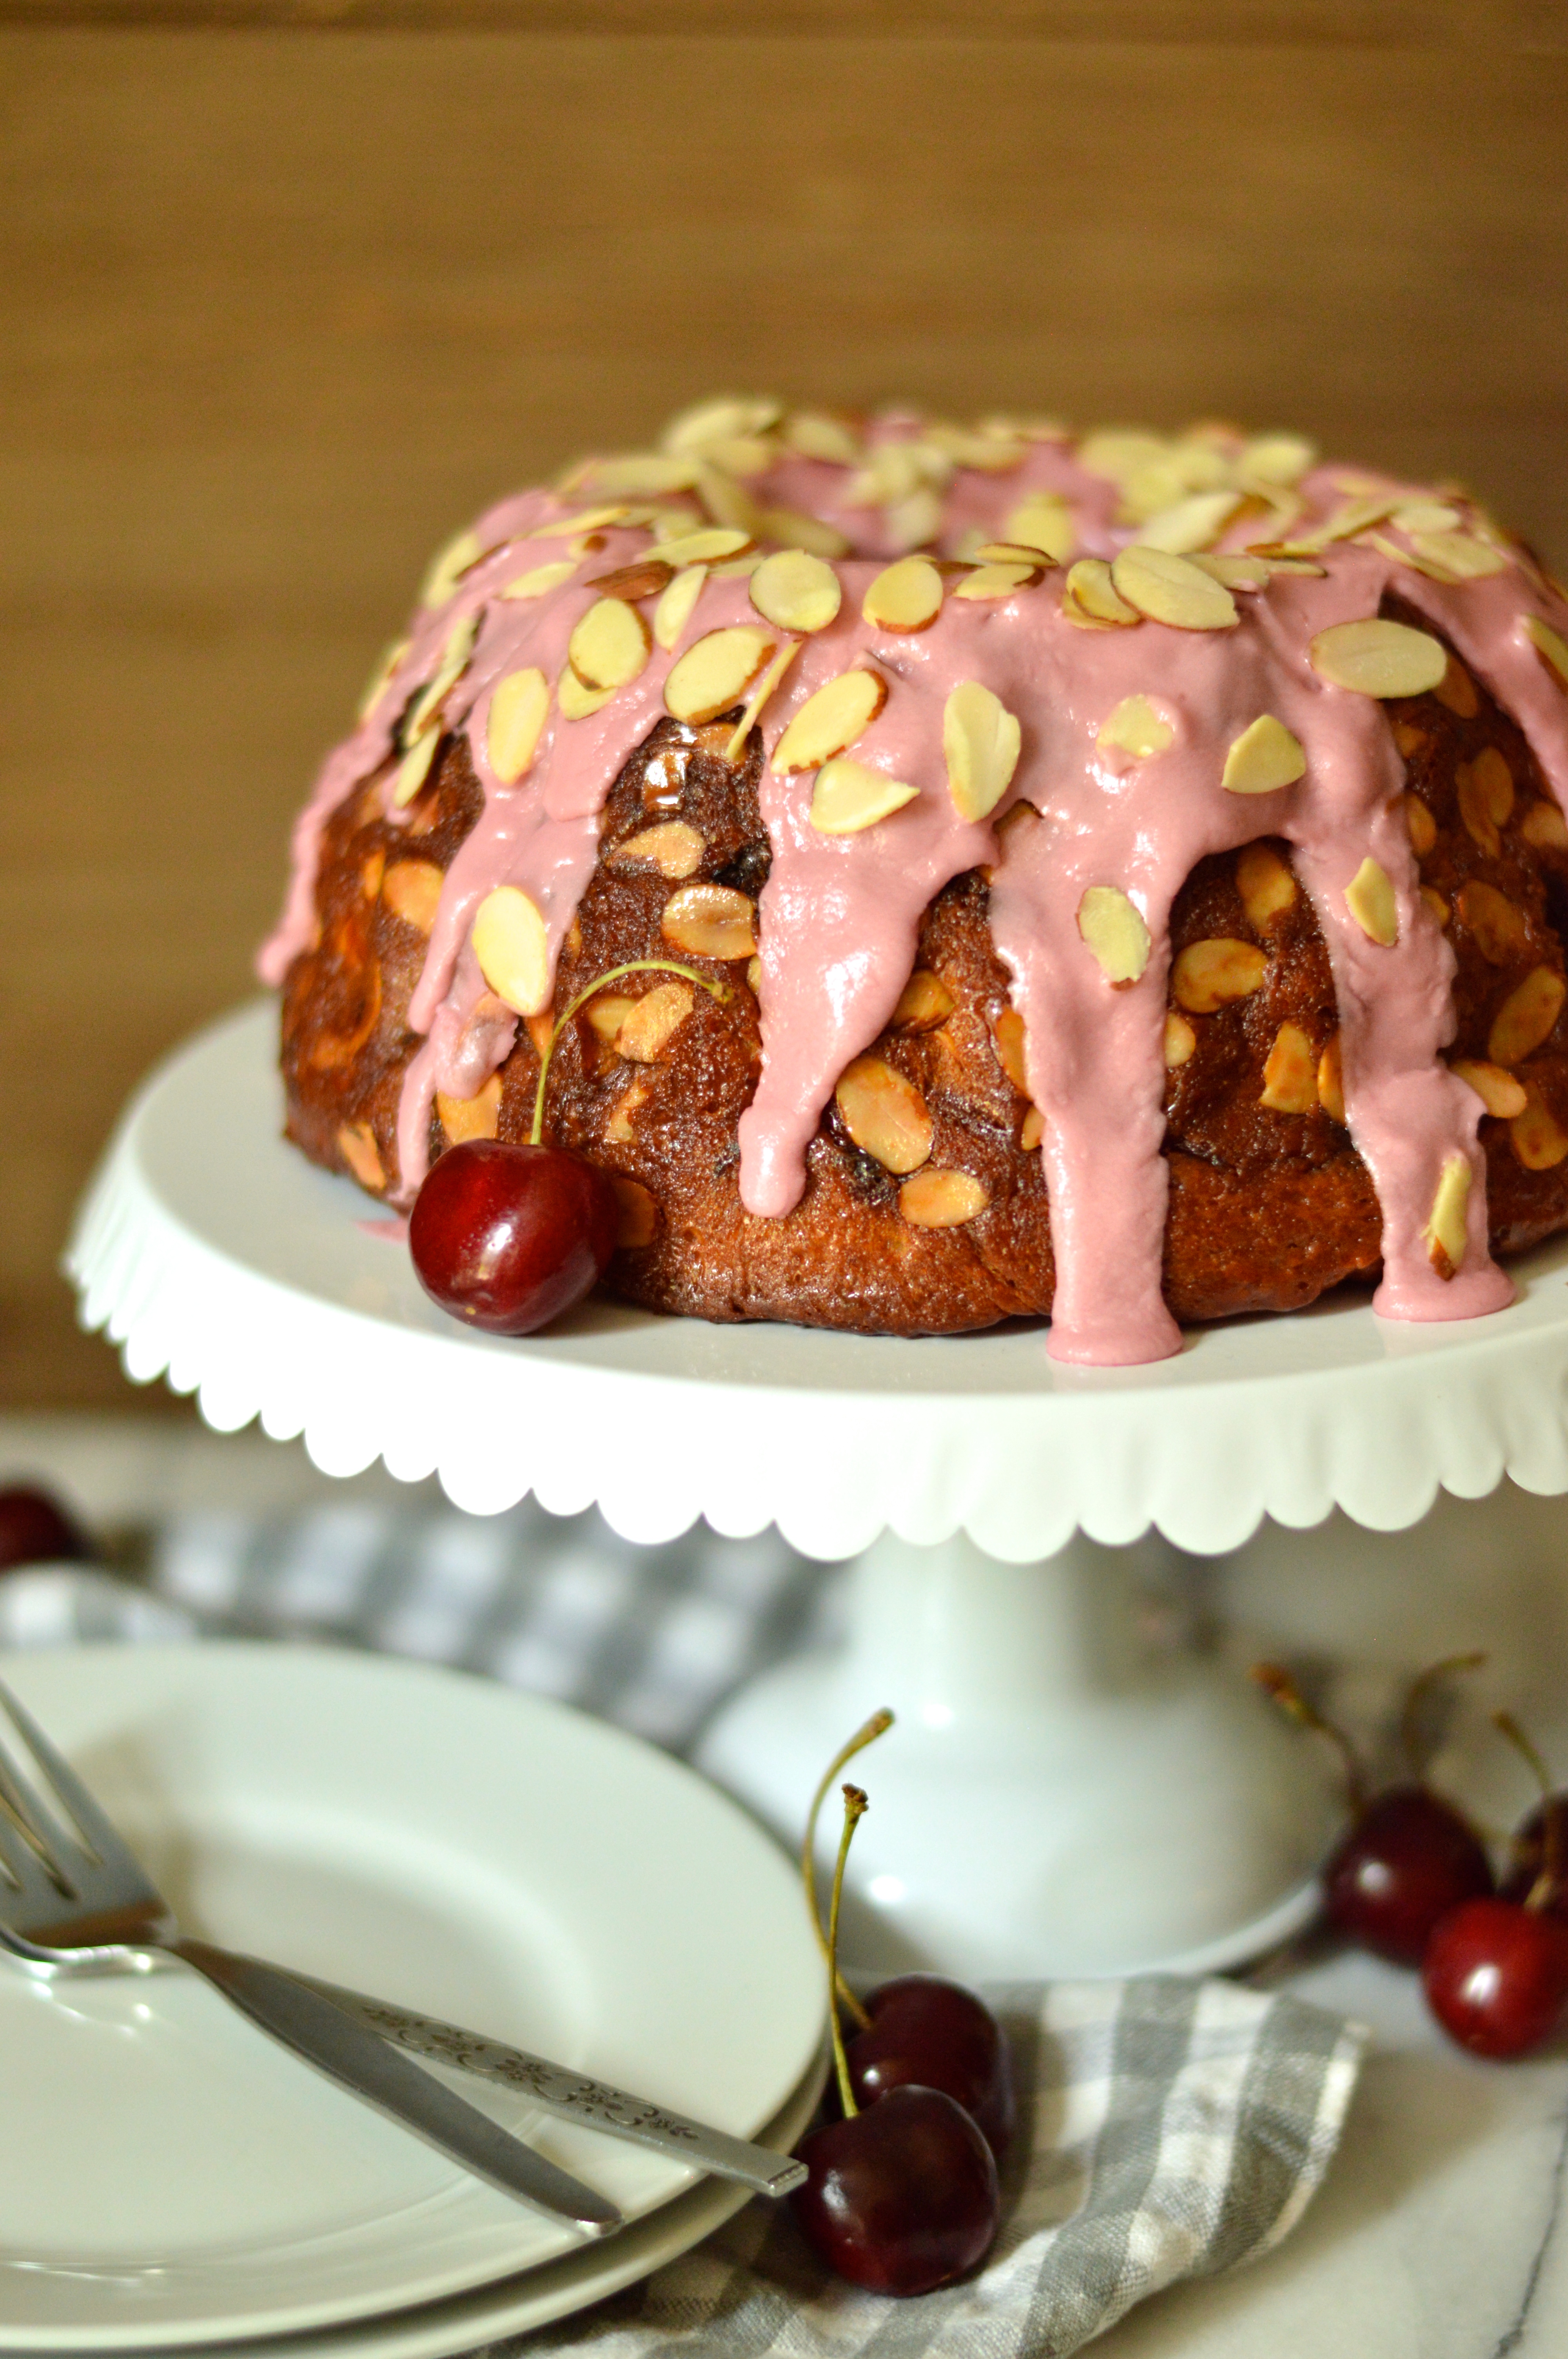
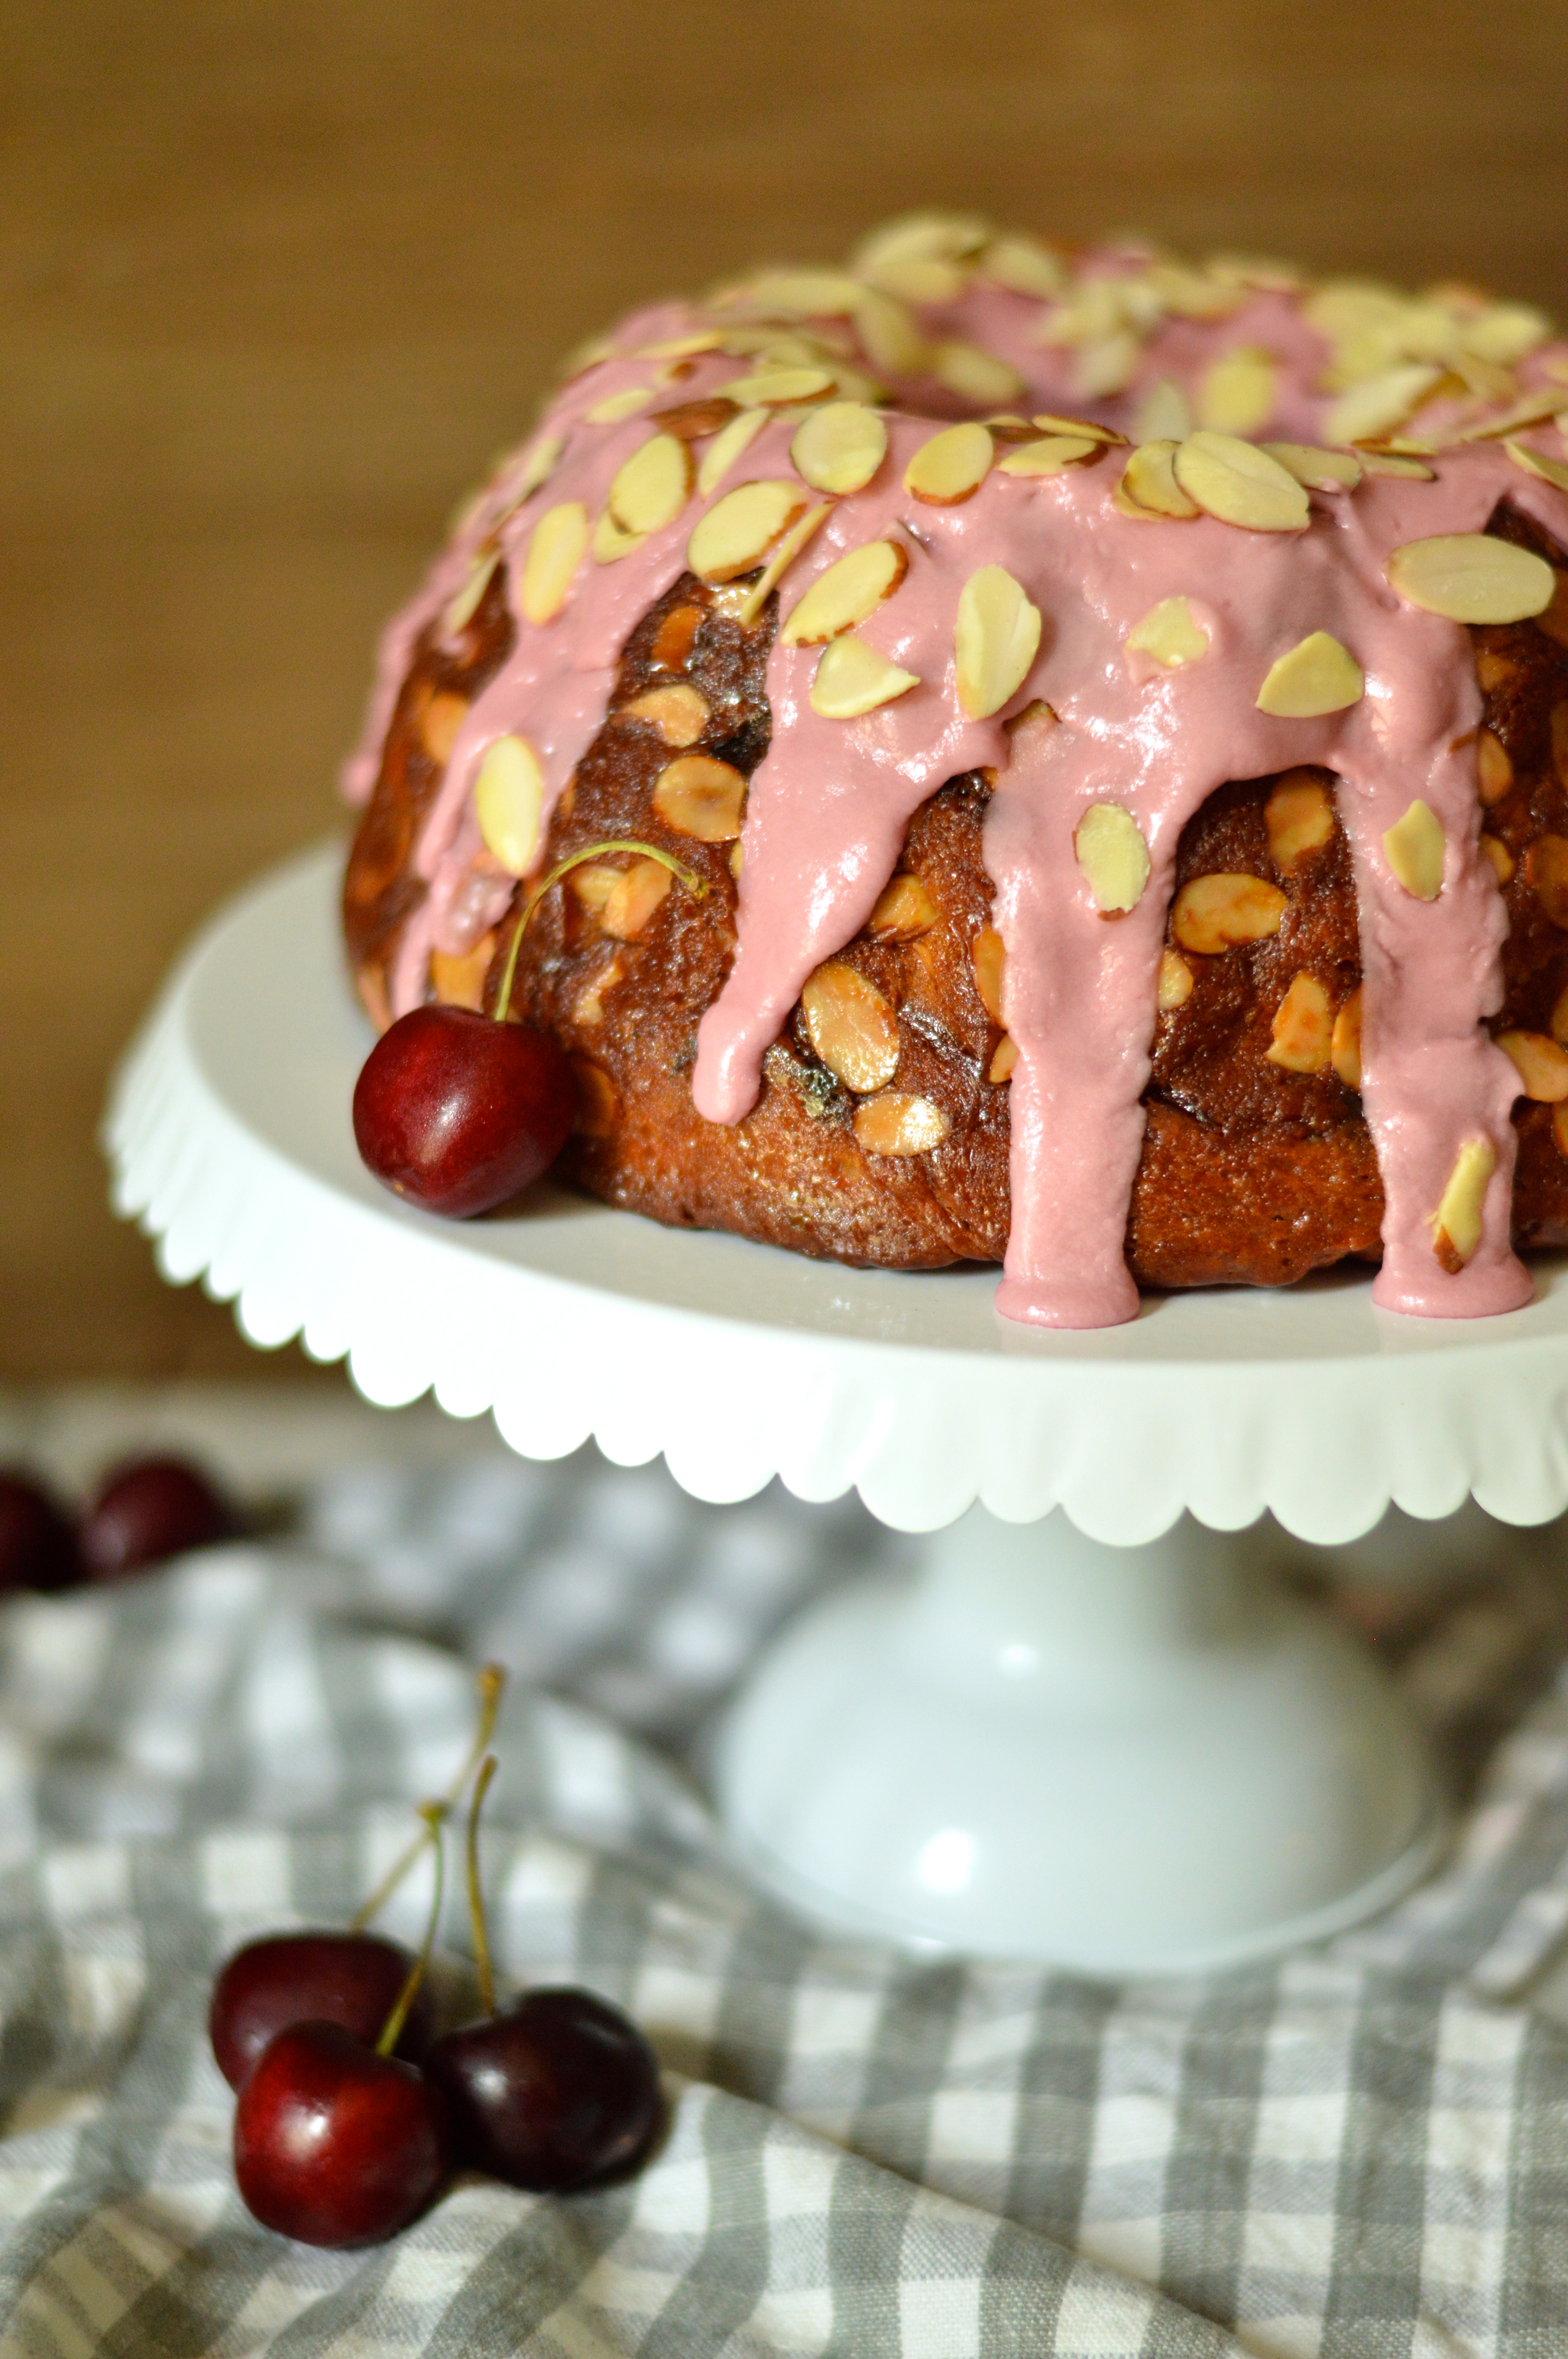
This kugelhopf though, strays pretty far from old-world heritage. I based it on a traditional Austrian/German recipe, but took a few liberties to make it fit my purpose.  I don’t really care for raisins in baking, and usually prefer to use dried cranberries or cherries in their place. In this case I decided to go for fresh cherries that I oven-roasted to concentrate their flavor. I was also hoping for something a bit more bundt-like than bread-like so I made a few changes to make the recipe just a bit sweeter and richer. I went ahead and added a splash or two of bourbon too, because, why not? Traditionally kugelhopfs are just dusted with powdered sugar, but to make sure it wouldn’t need to be spread with butter, I topped mine off with a very non-traditional cherry bourbon glaze.

roasted cherry kugelhopf with cherry bourbon glaze | Brooklyn Homemaker

To ensure the kugelhopf is nice and moist, I think it benefits from a soak. For this, you could make a plain old simple syrup, or add some sort of flavoring or extract to a syrup. After roasting the cherries I was left with some of their syrupy juices and thought I’d use that for my soak along with some butter and maybe another splash of bourbon.

I also think that this recipe improves with a day’s rest.  I mean, don’t get me wrong, this was pretty damned great on the first day, but seemed to be the teeeeeniest bit dry to me. For some reason, the second day this was no longer an issue. I’m not sure if it was the cherries, the soak, or the glaze but somehow the bread-y body of this cake was borrowing moisture for some other component. The crumb seemed more moist, the flavors better developed, and the whole concept better realized on the day after baking. So, if you have the time and the foresight to make this a day ahead, do that. Just cover it tightly and hide it away somewhere at a cool room temperature.

roasted cherry kugelhopf with cherry bourbon glaze | Brooklyn Homemaker

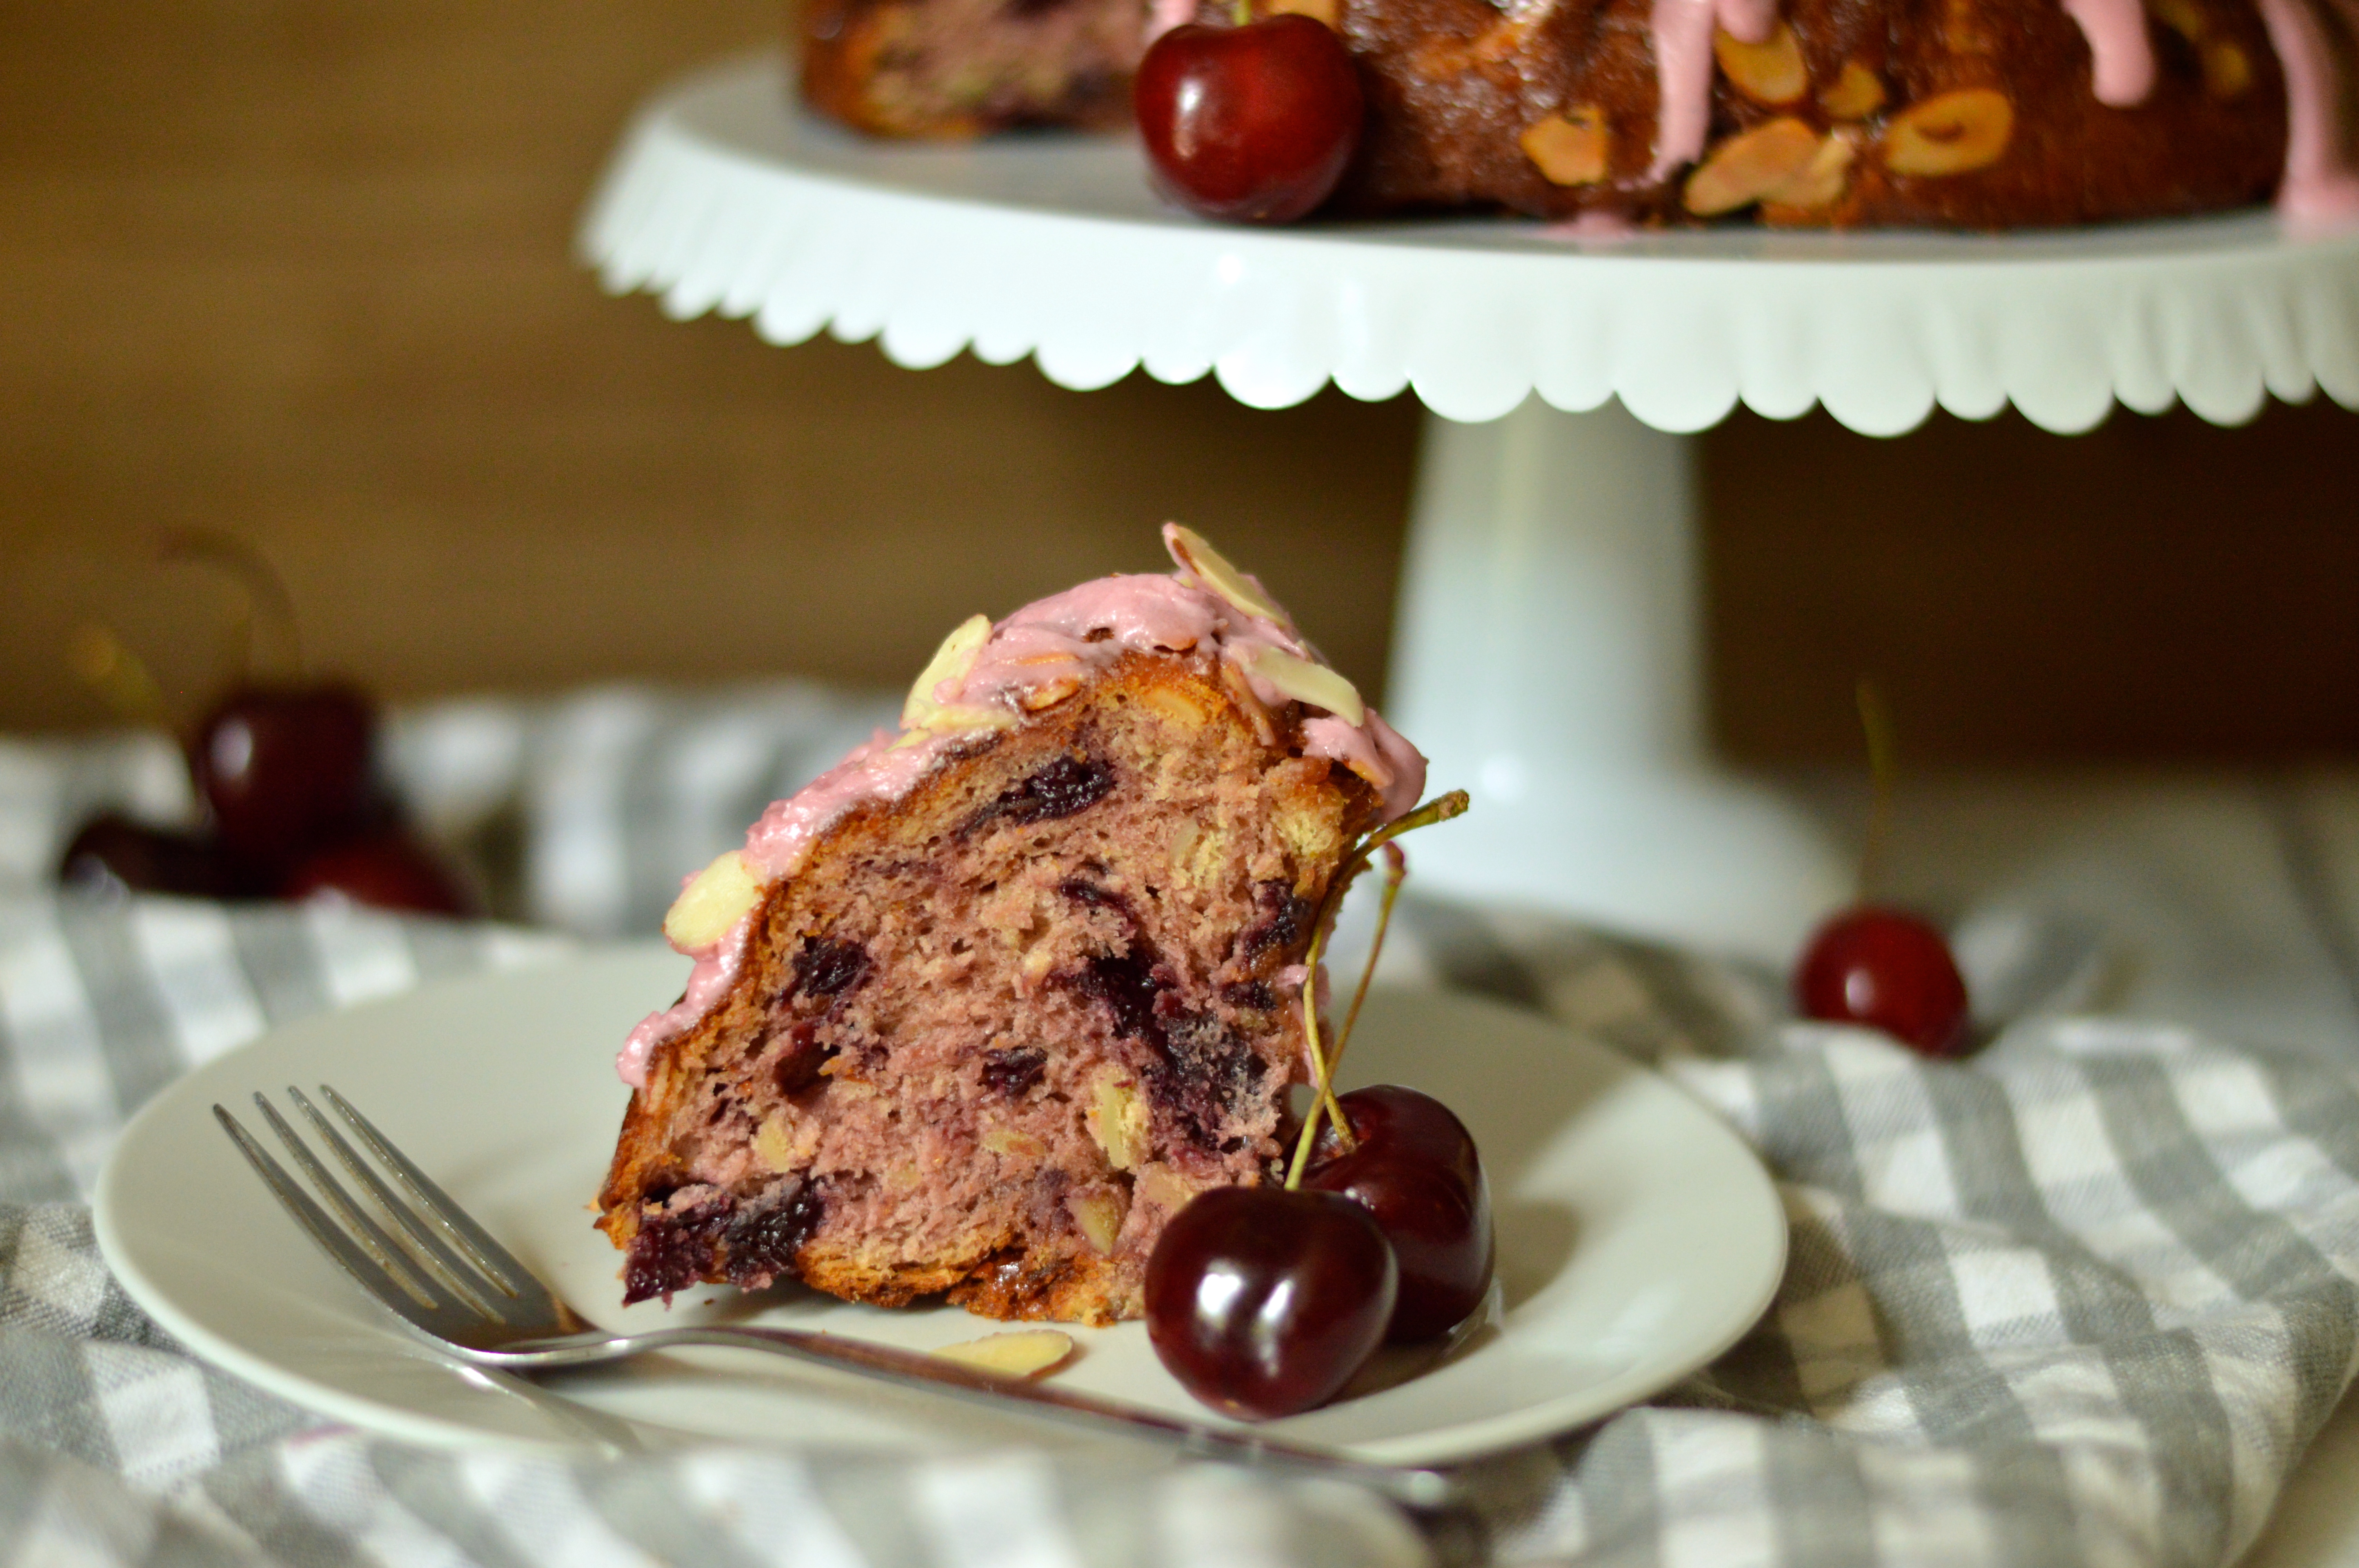
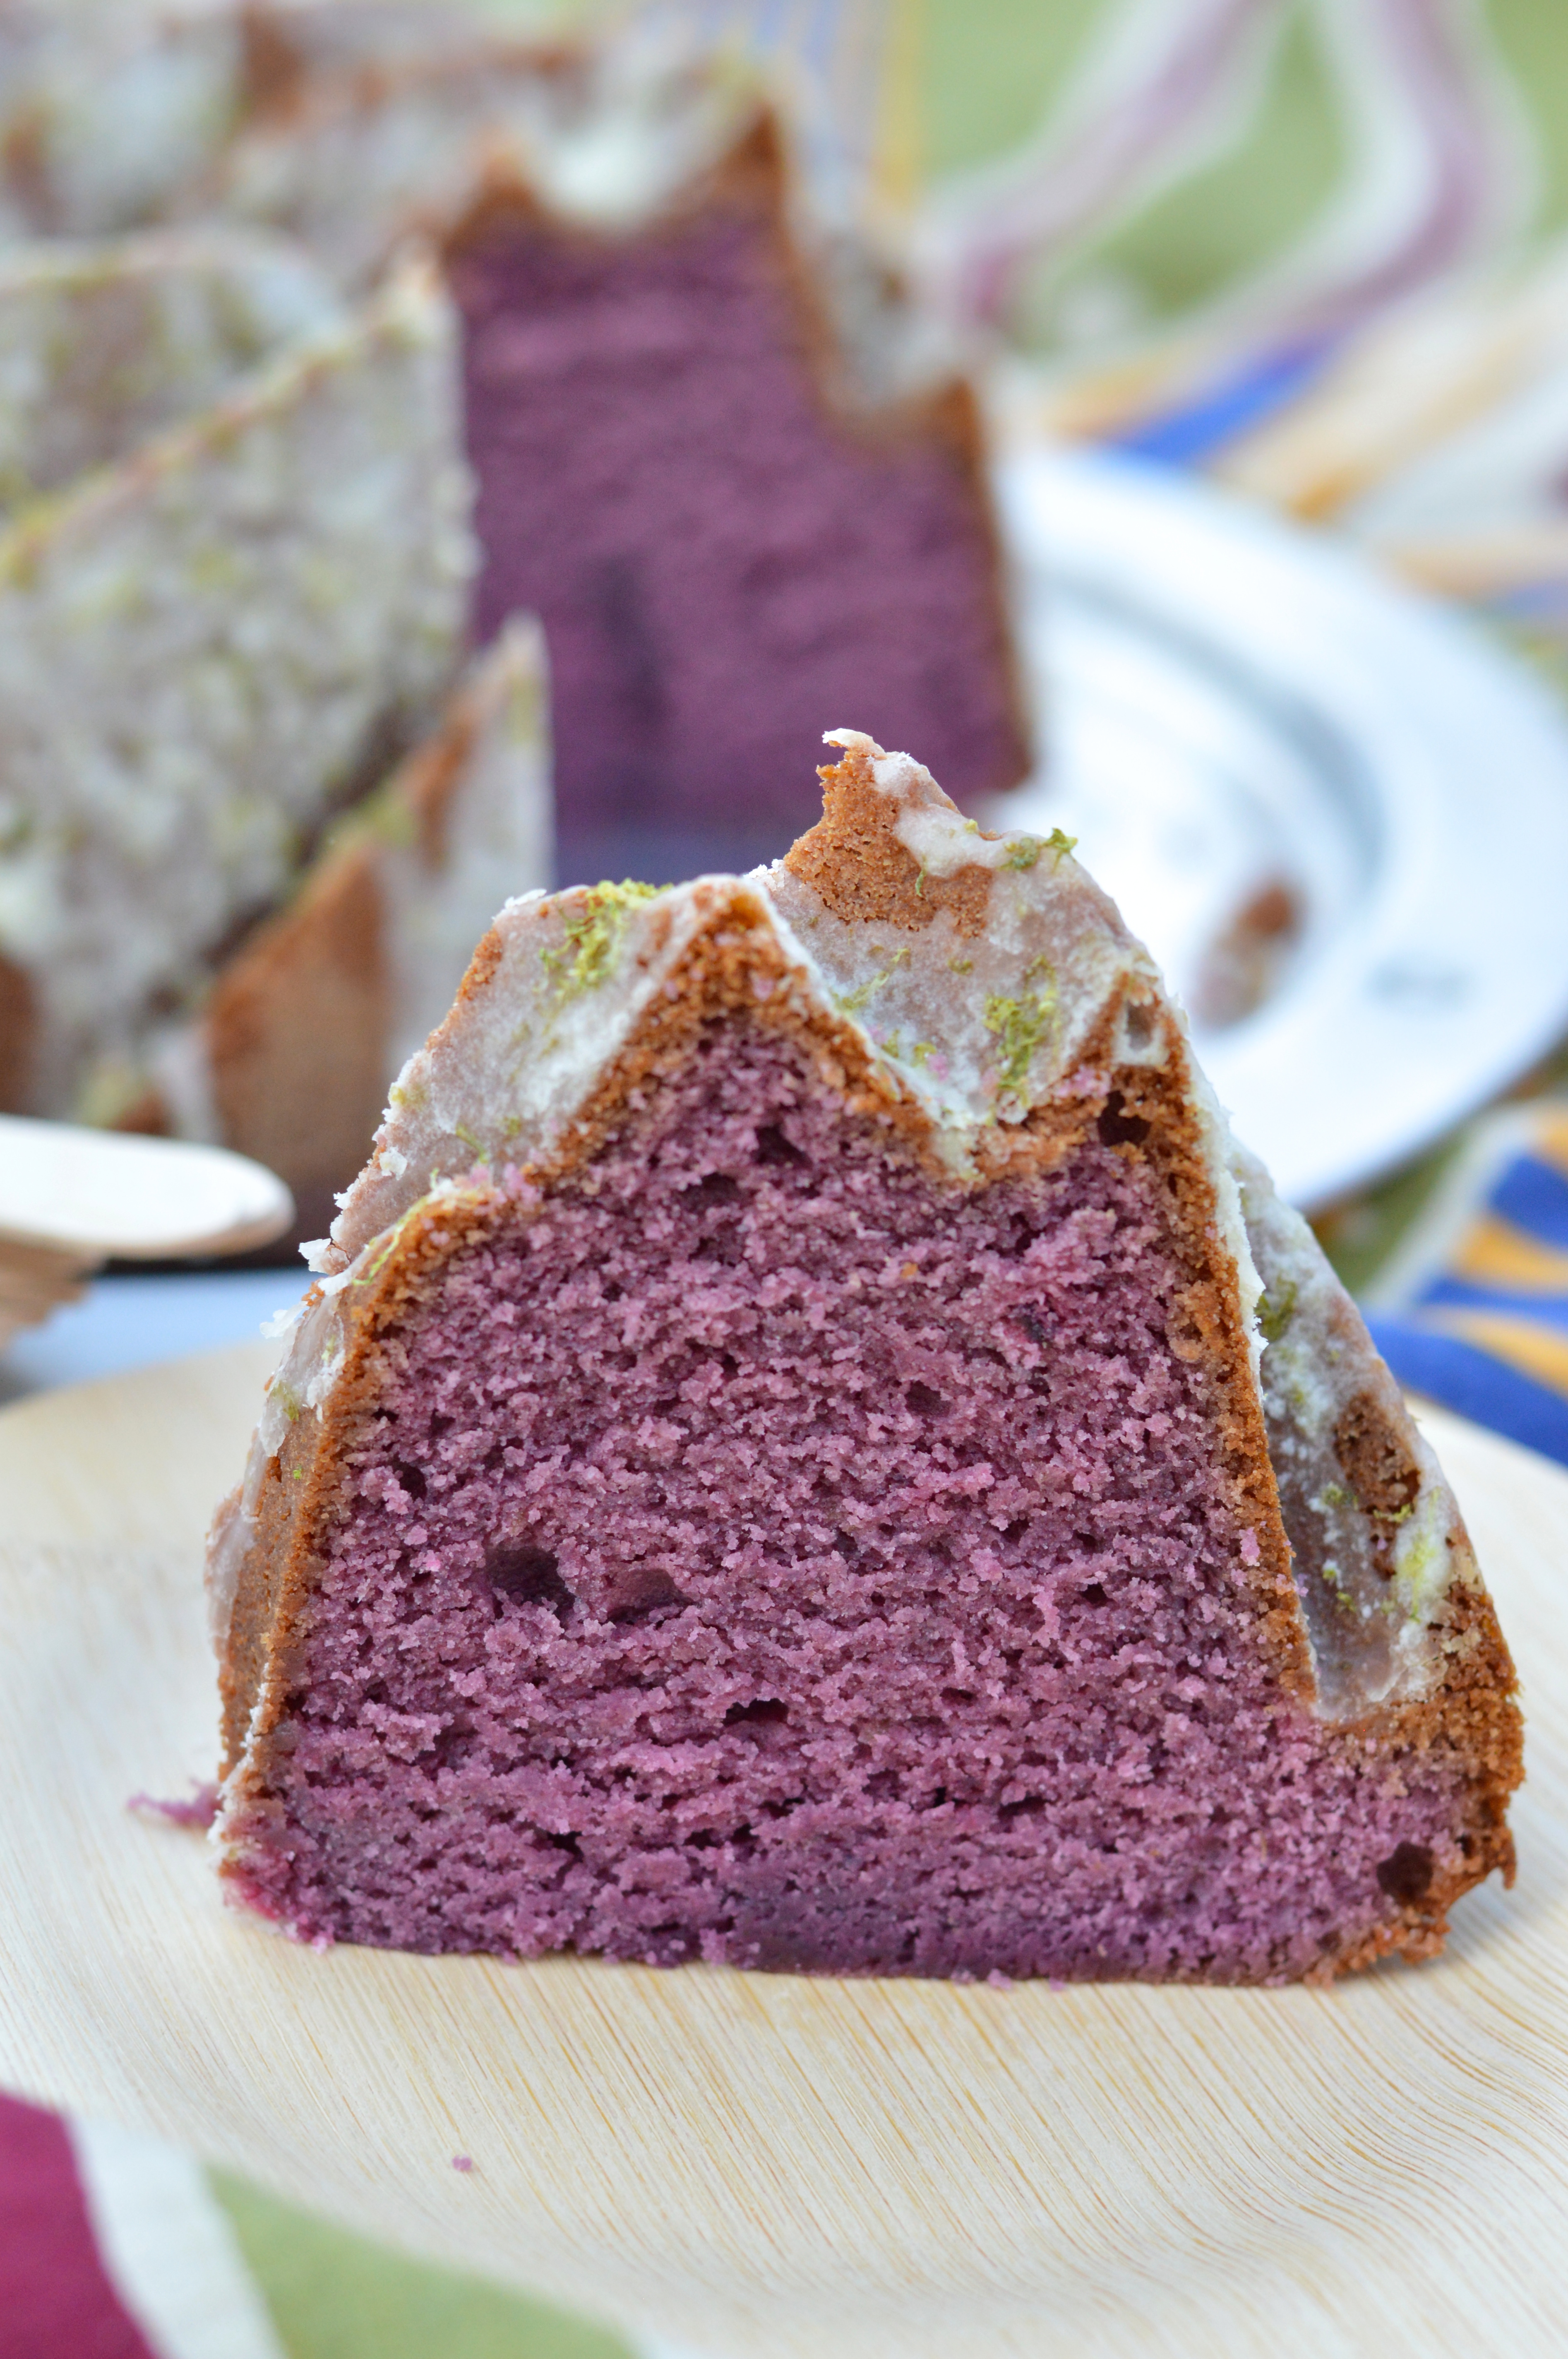
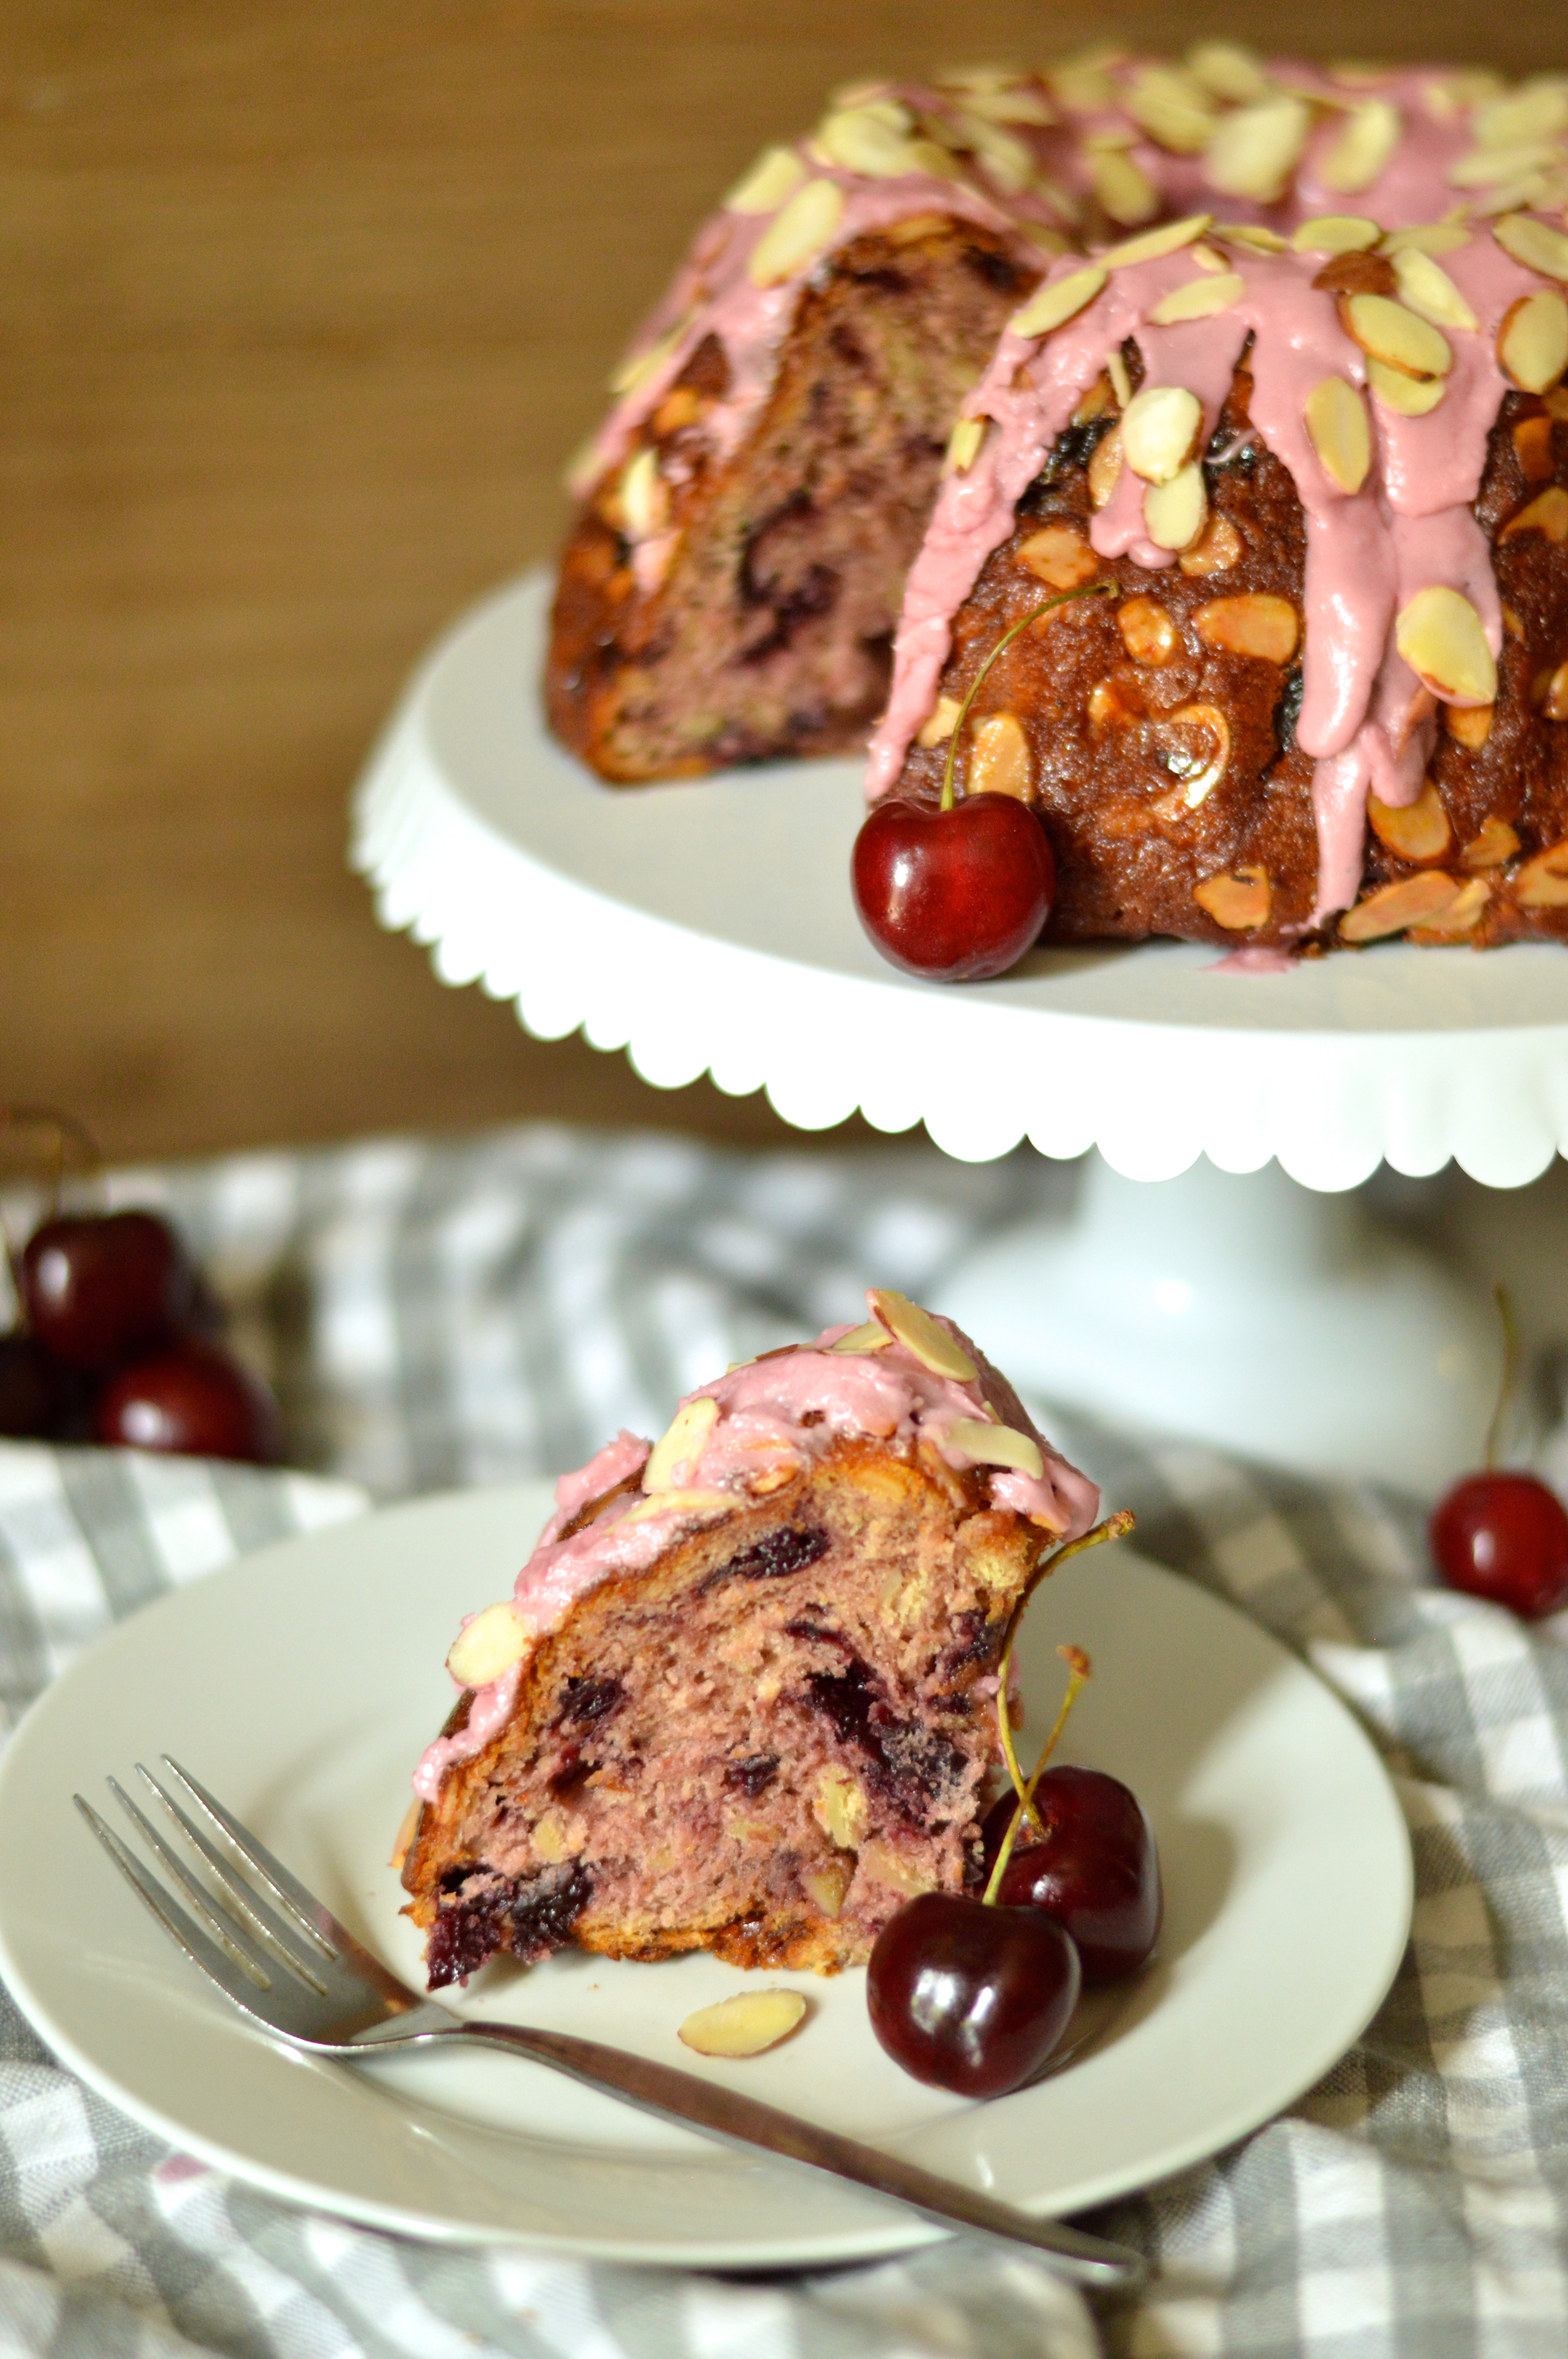
In the end all my efforts really paid off. Using oven-roasted fresh cherries in place of raisins was nothing short of genius. (That’s right, I just called myself a genius). The cherries are soft yet chewy and bursting with a bright deeply-concentrated fruity flavor, and adding bourbon while they roast adds a rich warmth and depth. Of course, if you wanted to use dried cherries instead, I think that they’d work really well too, especially if you reconstitute them in bourbon first. The roasted cherry juice and the egg yolks gives the cake a rich soft crumb, and the sliced almonds add a really nice soft bite. All these flavors in combination are so totally warm and homey with a perfect old-world feeling.

The kugelhopf itself is a bit sweeter than traditional ones, but it’s still a restrained just-barely-sweet sweetness. The texture is somehow softer than bread, but chewier and doughier than cake. It’s almost similar to the texture of a cinnamon roll, if that makes any sense.

roasted cherry kugelhopf with cherry bourbon glaze | Brooklyn Homemaker

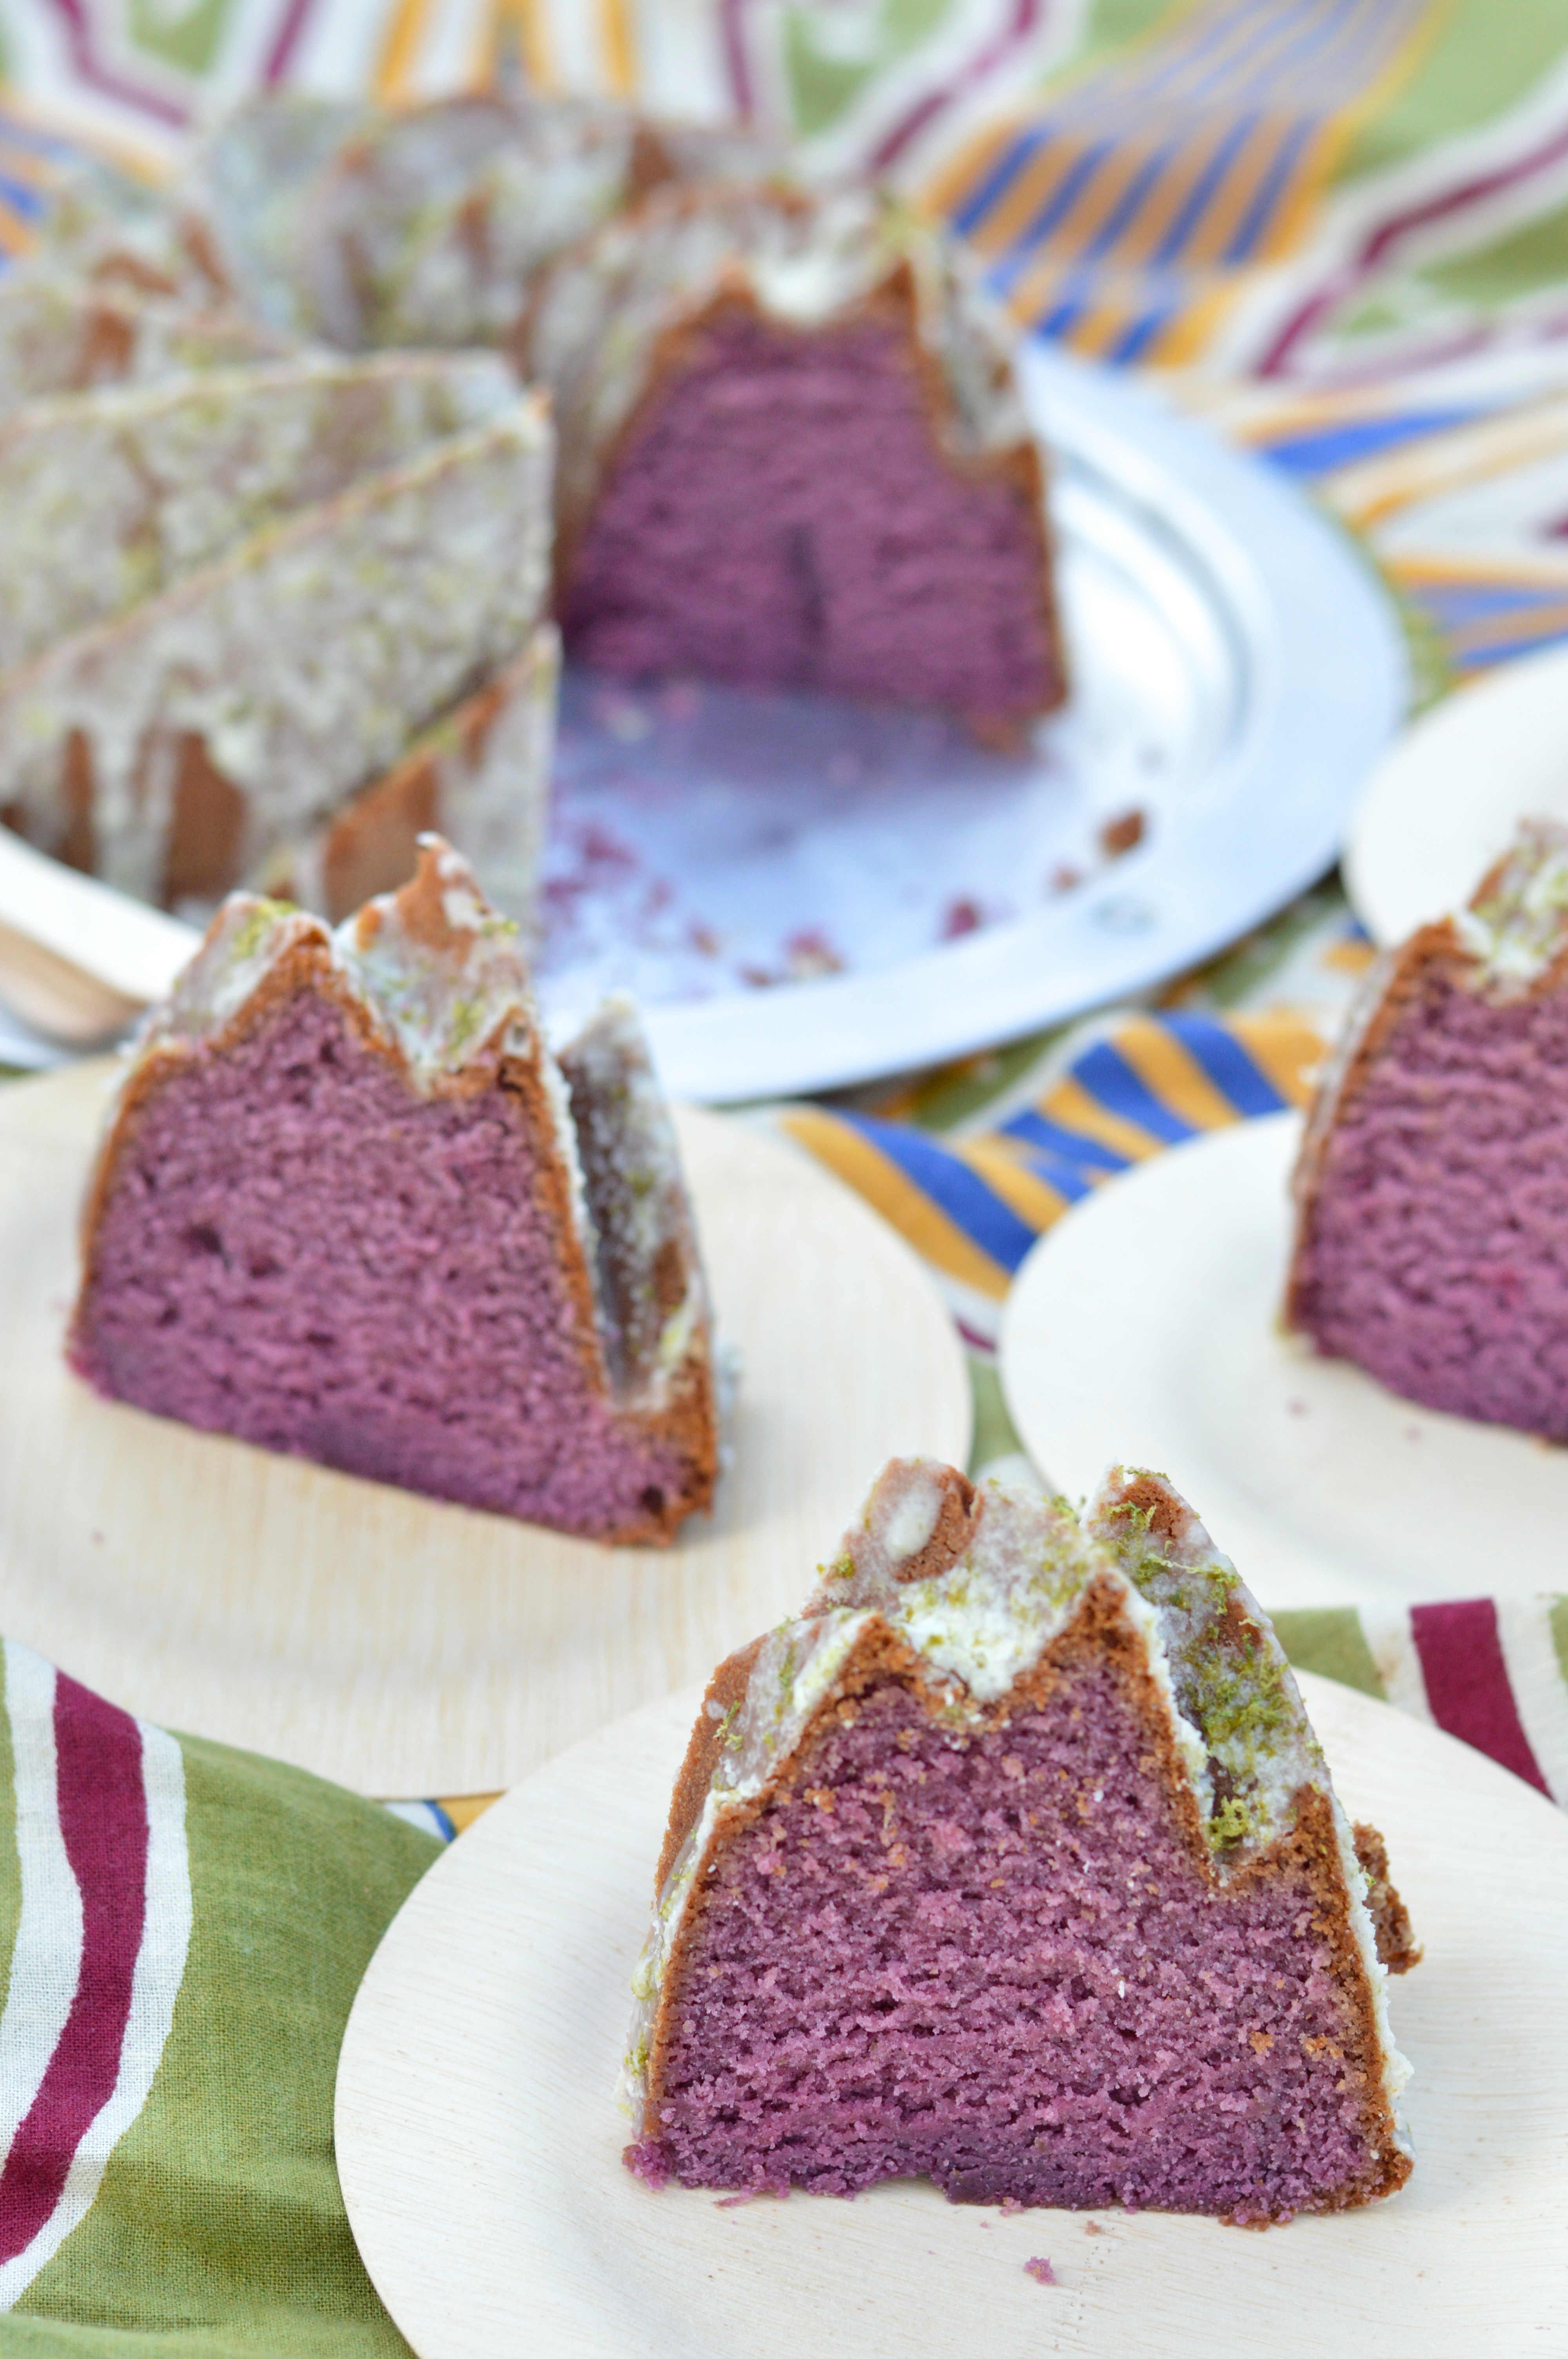
Since this still remains relatively bread-y, this kugelhopf would be perfect served at a breakfast get together or a brunch. Of course, it still feels very much like dessert, so feel free to serve it as you would any other cake. No matter how or when you eat it, you’re going to want to go back in for seconds.

If you love summer produce and cherries and all kinds of stone fruit, please be sure to scroll down past the recipe and check out all the other mouthwatering stone fruit themed bundt cakes. They all look unbelievable and I wish I could have a slice of each and every one of them. Thank you so much to our hosts, Felice of All That’s Left Are The Crumbs and Stacy of Food Lust People Love, for choosing this months theme and organizing our efforts.

roasted cherry kugelhopf with cherry bourbon glaze | Brooklyn Homemaker

Roasted Cherry Kugelhopf with Cherry Bourbon Glaze

Adapted from David Lebovitz

Roasted Cherries
1 1/2 lb sweet cherries
1/4 cup sugar
1/8 teaspoon salt
1 tablespoon bourbon

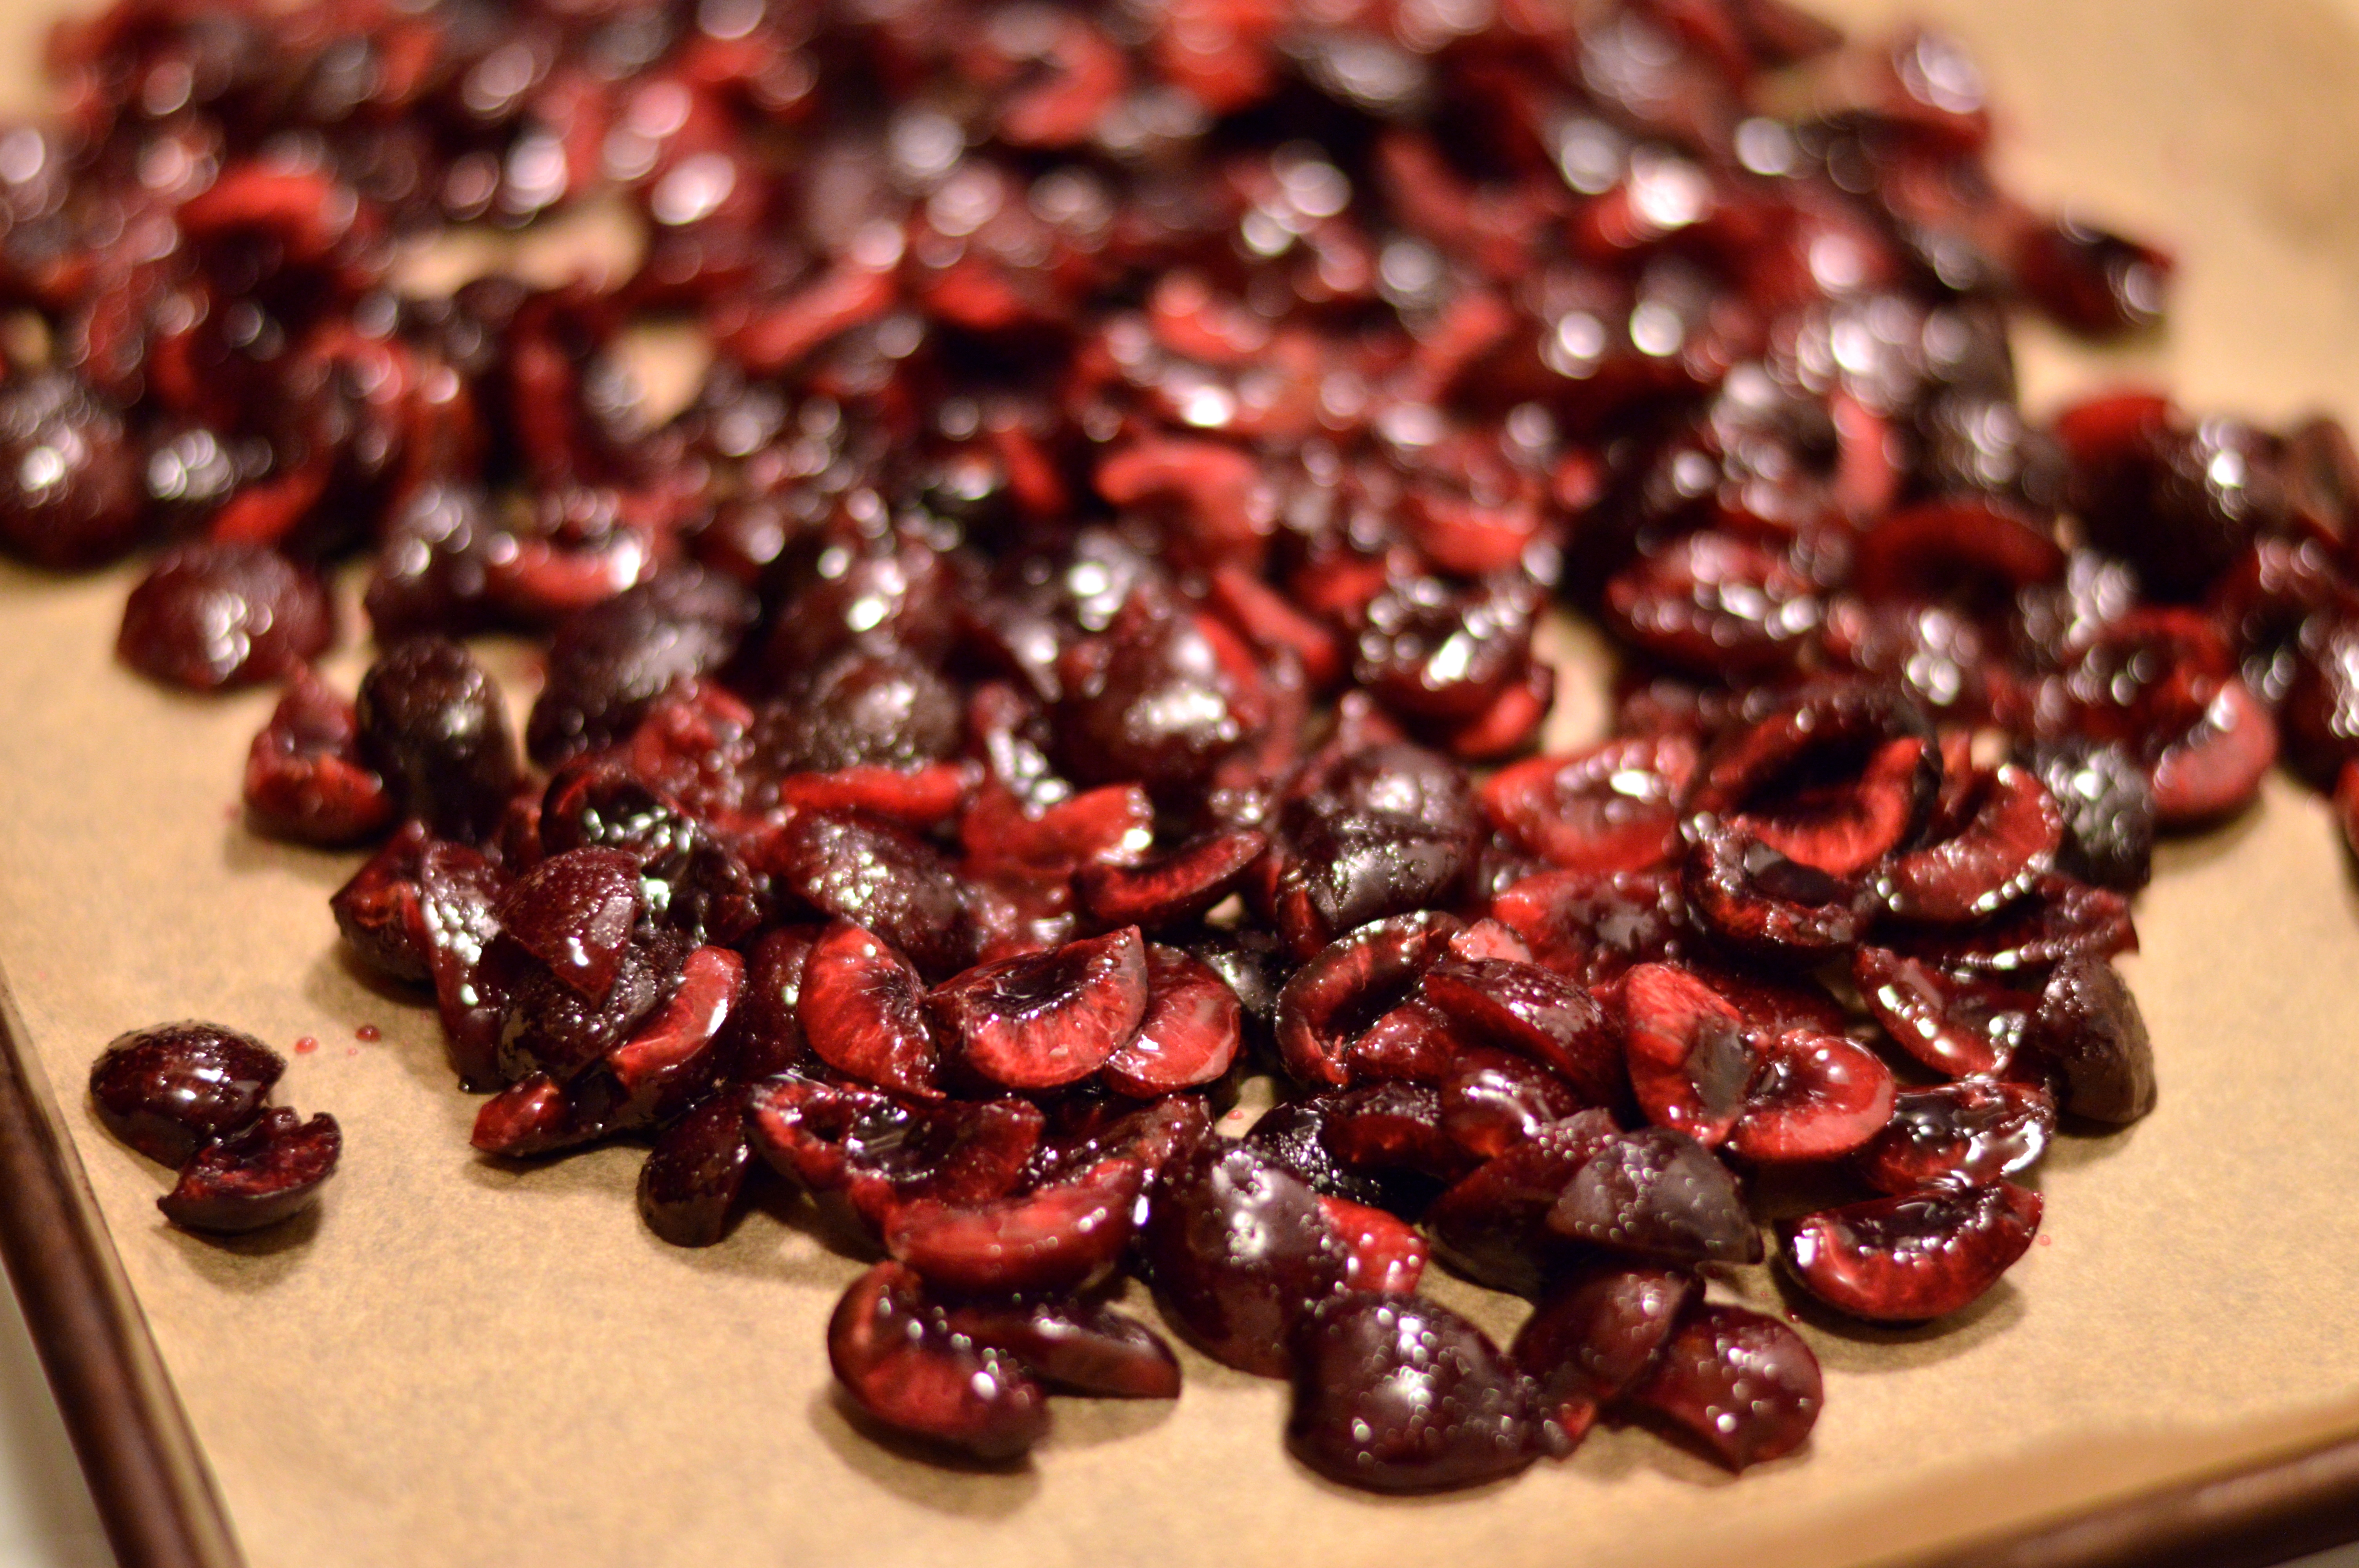
Preheat the oven to 400. Wash, pit and quarter your cherries. Toss the quartered cherries in the sugar, salt, and bourbon to coat. Spread evenly over a parchment lined baking sheet, and roast for 20 to 25 minutes. Toward the end, watch that the cherry juices don’t burn.
Fit a fine mesh strainer into a bowl, and scrape or pour the cherries into to the strainer. Leave the cherries in the strainer for a few minutes to allow the juices to drip and collect in the bowl. Reserve the juice and the drained cherries in separate bowls.

Sponge
½ cup milk
2 ½ teaspoons active dry yeast (not instant)
2/3 cup all-purpose flour

Dough
6 tablespoons unsalted butter, at room temperature
1/2 cup sugar
½ teaspoon salt
2 teaspoons orange zest
1 teaspoon vanilla extract
1 teaspoon bourbon
2 teaspoons reserved cherry juice
3 large egg yolks
1 1/2 cup all-purpose flour
1 1/4 cup sliced almonds, divided
One 6- to 9-cup kugelhof pan (or you can use a bundt pan)

Make the sponge by warming the milk over low heat in a small saucepan until it’s tepid. Pour into a bowl, and mix in the yeast then the flour. Cover with plastic wrap and let rise until bubbly, about 20 minutes.

In a standing electric mixer with a paddle attachment, beat the butter with sugar and salt until soft and light, about 3 minutes. Mix in the orange zest, vanilla, 2 teaspoons cherry juice, and 1 teaspoon of bourbon. Next, add the egg yolks and beat until smooth. Scrape down the sides of the bowl, add the sponge, then beat another minute.
Add the flour and mix on low speed for 2 minutes and let rest for 10 minutes.
Beat on medium speed until smooth and elastic, about 2 minutes.
Slowly beat in the cherries and 1/2 cup of the almonds. Scrape the dough into a buttered bowl and turn it so the top is buttered. Cover with plastic wrap and let rise for 20 to 30 minutes.

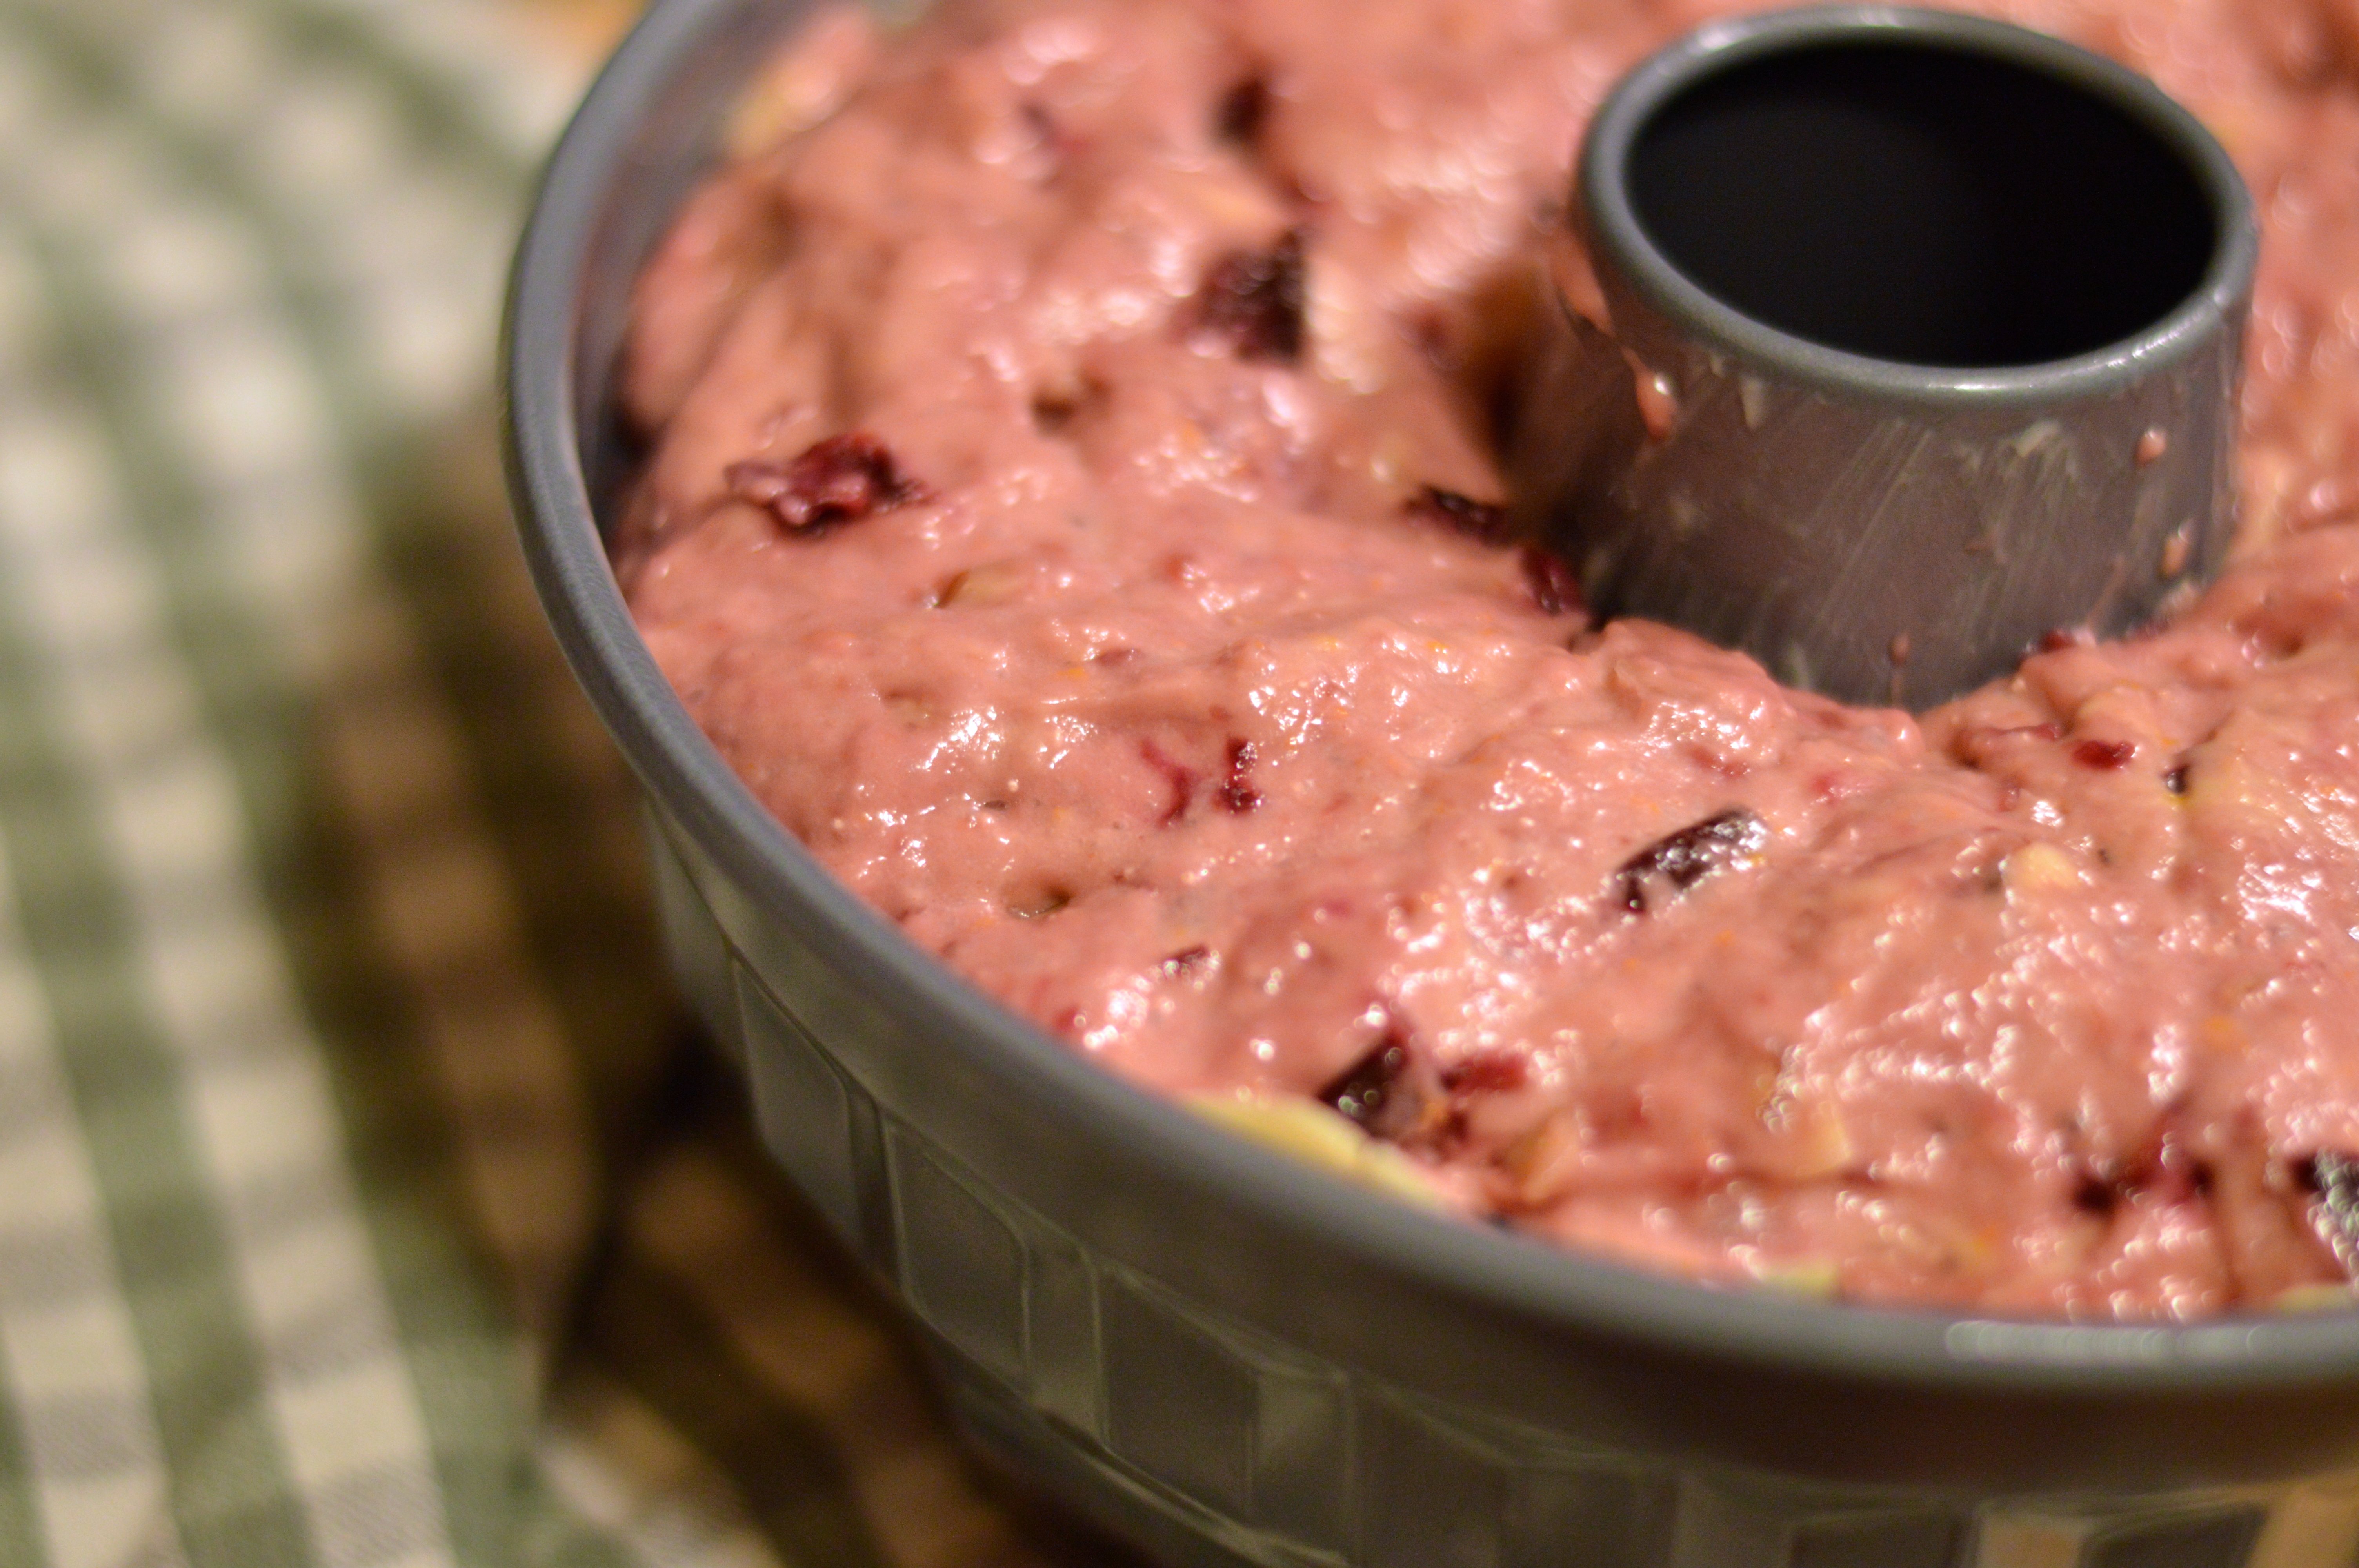
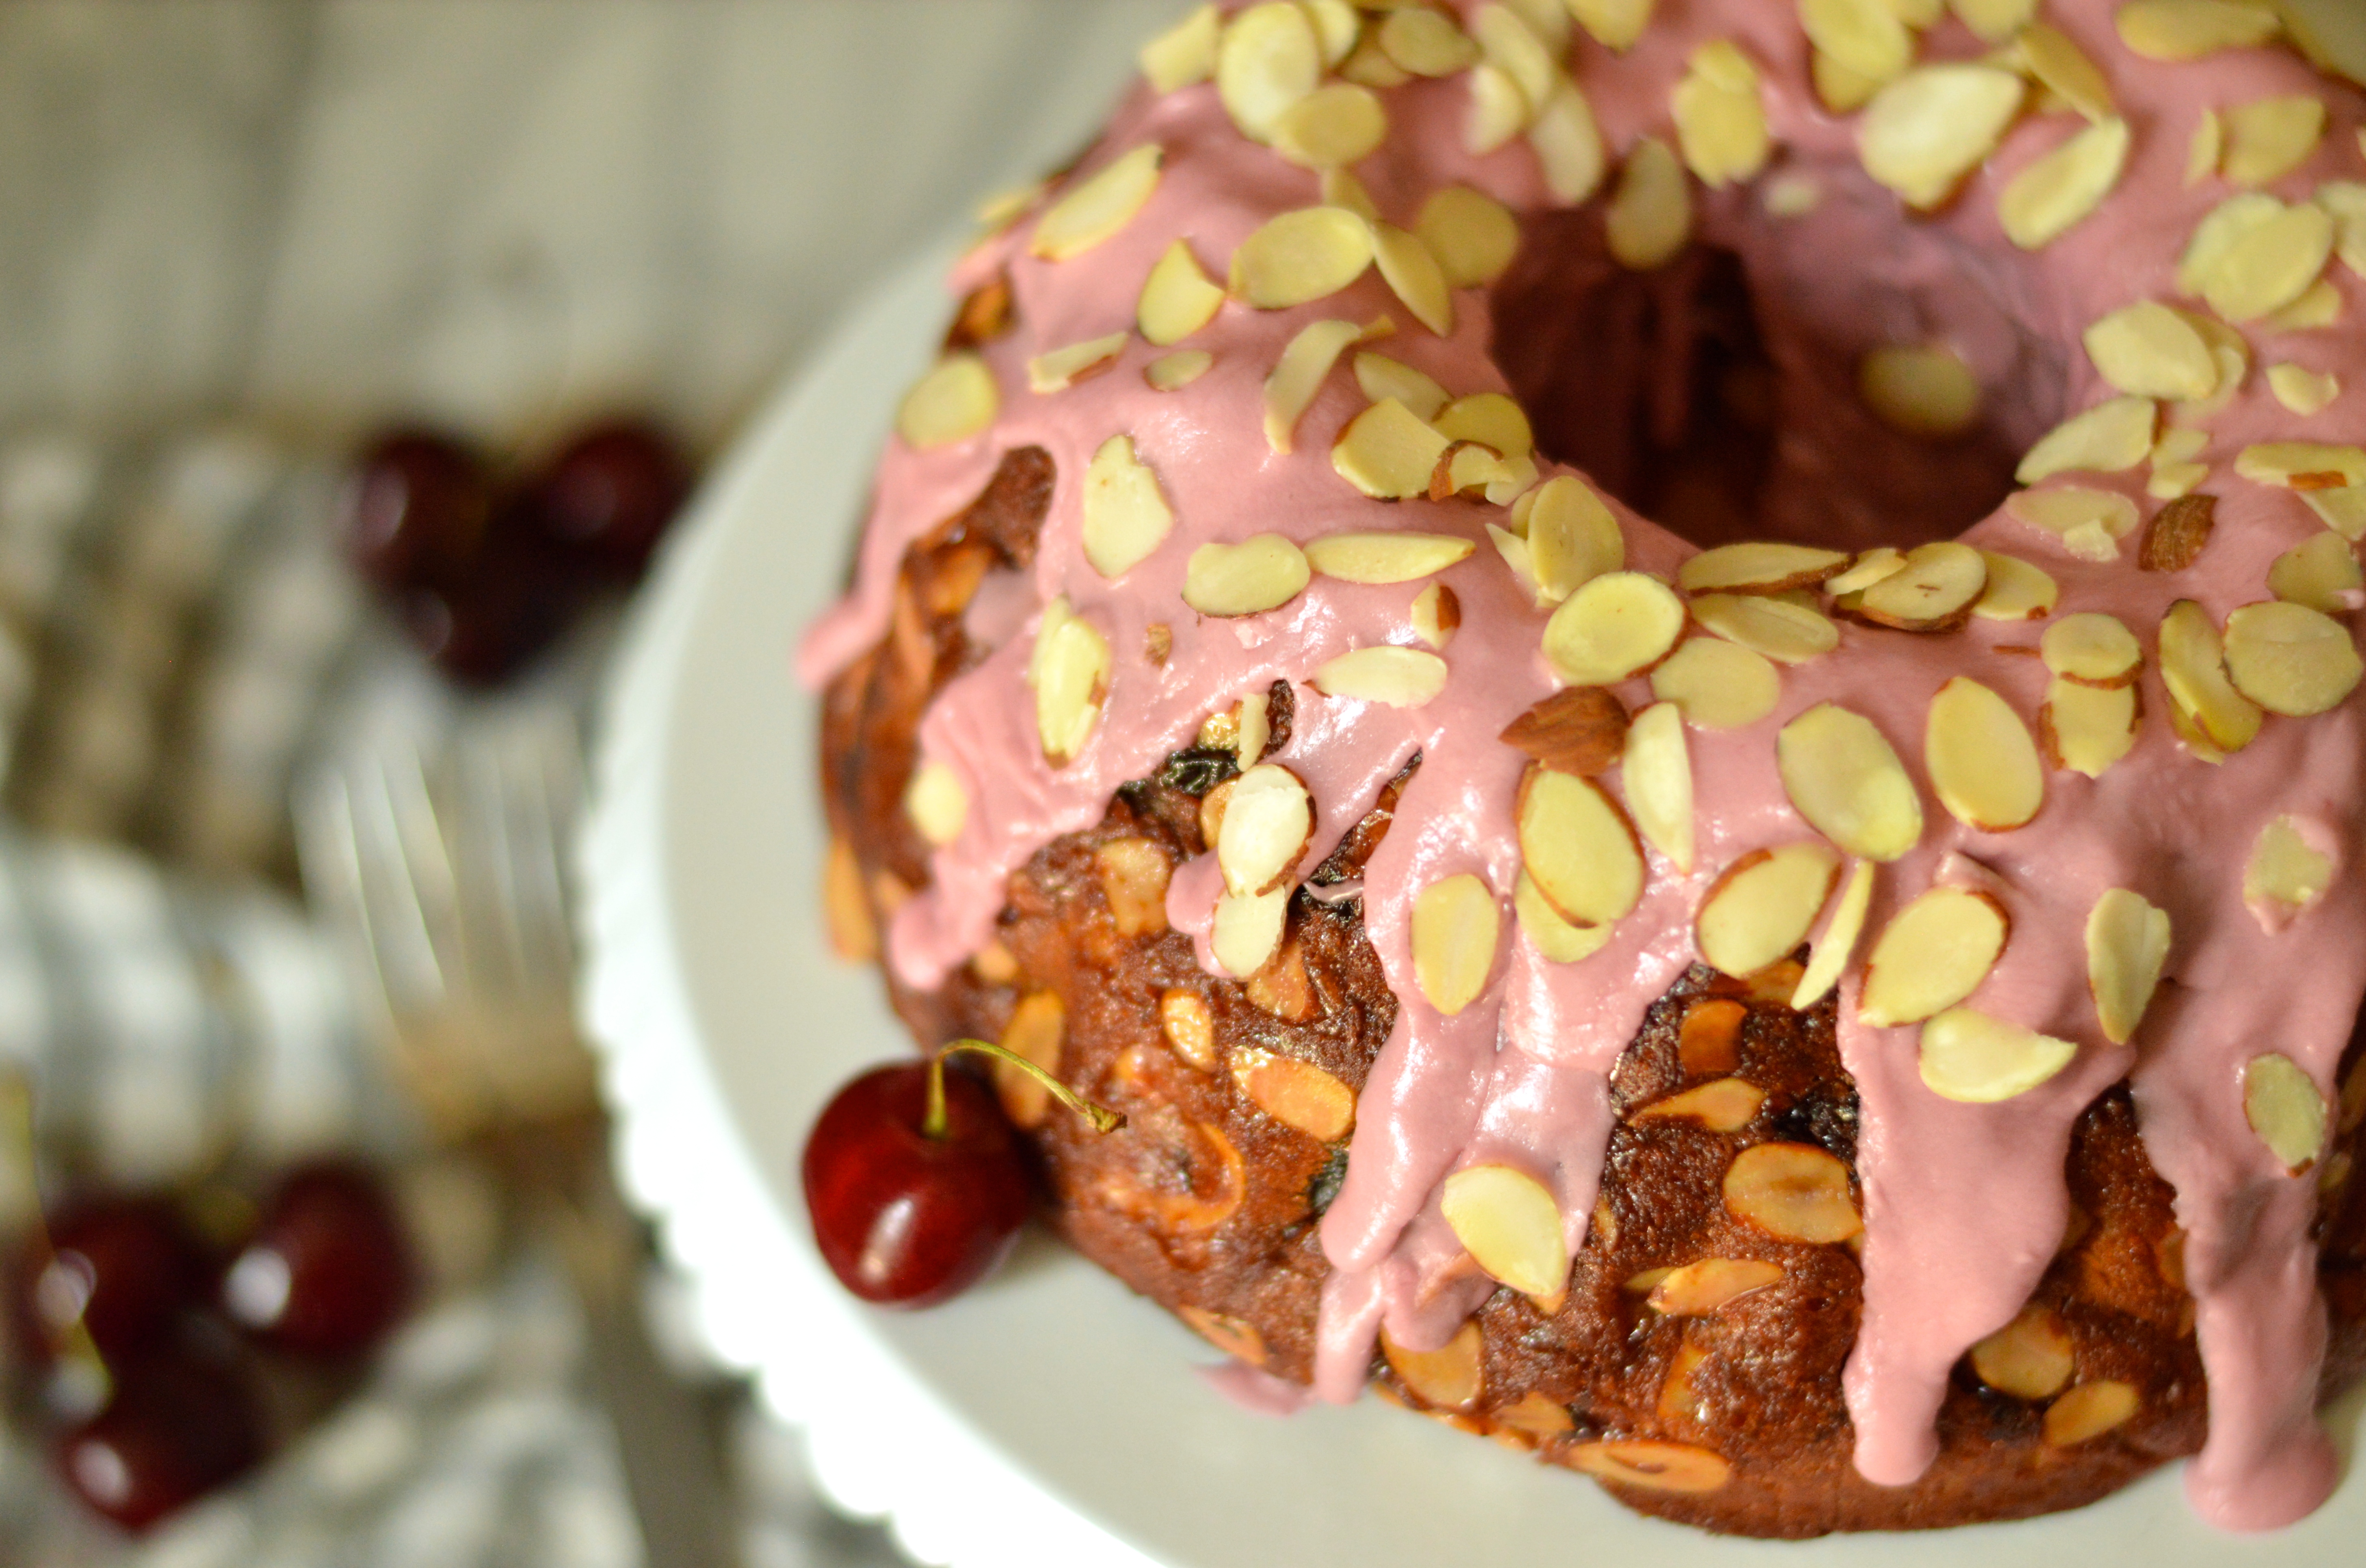
Butter the kugelhof mold well, and the scatter another 1/2 cup of sliced almonds over the inside of the mold, turning to coat it evenly. Scrape the dough into the kugelhof mold and cover with a towel or buttered plastic wrap. Let rise until doubled, about an hour or maybe a bit longer.

About 15 minutes before the dough is fully risen, preheat the oven to 375 degrees. Bake the kugelhof until it’s a deep golden brown, about 40-45 minutes. Cool for 10 minutes, then unmold onto a wire rack.

Soak and Glaze:
5 tablespoons unsalted butter, melted
5 tablespoons bourbon
remaining reserved cherry juice
2 cups powdered sugar, divided

To make the soak; combine butter, bourbon, & cherry juice in a small bowl. Add 1/2 cup of powdered sugar and whisk to combine. Measure out 1/2 cup of the mixture for the soak and set aside. Add remaining sugar to the liquid to make the glaze, and whisk to combine. Add more sugar, a few tablespoons at a time, if you want a thicker glaze. After kugelhopf is removed to a wire rack, brush the soak all over the top and sides. Let it cool at least 30 minutes before drizzling or pouring the glaze evenly over the top. While glaze is still wet, sprinkle remaining 1/4 cup of almonds over the top.

If possible, allow the kugelhopf to rest for a day, tightly covered at room temperature, before slicing and serving.

roasted cherry kugelhopf with cherry bourbon glaze | Brooklyn Homemaker

Check out all of these delicious sounding stone fruit based bundts. What a perfect theme to celebrate all the wonderful fresh fruit the summer has to offer.


BundtBakers


Interested in learning more about us??  #BundtBakers is a group of Bundt loving bakers who get together once a month to bake Bundts with a common ingredient or theme. We take turns hosting each month and choosing the theme/ingredient. You can see all our of lovely Bundts by following our Pinterest board right here. Links are also updated after each event on the BundtBaker home page here.

If you are a food blogger and would like to join us, just send an email with your blog URL to foodlustpeoplelove@gmail.com. If you are just a lover of Bundt baking, you can find all of our recipe links by clicking our badge above or on our group Pinterest board.

DSC_0171

devil’s food cupcakes with salted caramel cream cheese icing

So, I was afraid this might happen.

devil's food cupcakes with salted caramel cream cheese icing | Brooklyn Homemaker

I’m back on a cupcake kick again. Last month when I made these, I warned you about my baking in cycles. Well, this month another friend had another birthday at another bar, and another fresh batch of homemade cupcakes crashed the party.

devil's food cupcakes with salted caramel cream cheese icing | Brooklyn Homemaker

I might be getting back on the cupcake train, but as you may have heard, a lot of Americans have had enough and want to get off. In case you’ve been living under a rock, the news broke recently that Crumbs cupcakes has shuttered their doors after being kicked off of the Nasdaq stock market. I’m not going to claim that I also predicted this, but I did say that the cupcake trend was over. And I was right. The Crumbs legacy has come to an end, but that’s not to say that the cupcake’s legacy has. While the trend is over, the cupcake itself is not.

devil's food cupcakes with salted caramel cream cheese icing | Brooklyn Homemaker

So the cupcake is no longer the celebrity of the dessert world. So what? That’s okay. Actually, I’m pretty happy about it. That means that now we can get back to enjoying the cupcake for what it is instead of what it represents. We can get back to just eating cupcakes because they’re good, and fun, and portable, and perfectly portioned; and stop eating them because they’re hip, and trendy, and expensive, and pretty, and because you saw Carrie Bradshaw eating one that one time.

devil's food cupcakes with salted caramel cream cheese icing | Brooklyn Homemaker

While I’m on the subject of eating cupcakes for all the wrong reasons, let’s go back to Crumbs for just a moment. Brace yourself though. I’m about to say something scandalous and potentially polarizing.

Crumbs sucked.

They were just terrible. Like, the worst. I know some people liked them, and I know the media is mourning their loss as they would the loss of a beloved celebrity, but this was one of those tacky celebrities that were famous for being famous, not for having any real talent or substance. People ate Crumbs because they heard that they were great. They saw their friends on Facebook taking a selfie with a cupcake the size of their head. They saw that the chain was everywhere and thought they had to be doing something right, but the only thing Crumbs was doing right was marketing. The cupcakes themselves didn’t live up to the legend, and eventually, finally, that caught up to them.

Crumbs cupcakes were stale and dry and tasteless, that is, unless you consider SWEET a flavor. They were piled high with mountains of thick, pasty, tooth-rottingly sweet frosting, and they were gigantic for no good reason. Those cupcakes could have fed a family of four.

The only thing better than a bad cupcake is a HUGE bad cupcake, right? right? Ugh.

devil's food cupcakes with salted caramel cream cheese icing | Brooklyn Homemaker

If you were one of the Crumbs lovers in the world, I’m truly sorry, but this is a good thing! There are plenty of other bakeries out there making way better cupcakes than Crumbs ever did, so please don’t mourn too hard. The way I see it, the fall of the famous-for-being-famous cupcakes empire is a step forward.  Now we can start our journey away from eating cupcakes because they’re trendy, pretty sugar-bombs, and get back to loving cupcakes for being tasty little single-serving cakes. Delicious, wonderful, festive, easily transported tasty little single-serving cakes.

If you’re like me, rather than hunting for a great bakery, you’d probably prefer to make your own cupcakes. Instead of mourning, why not celebrate by firing up the oven and making something tasty at home?

devil's food cupcakes with salted caramel cream cheese icing | Brooklyn Homemaker

The birthday girl who inspired these cupcakes is crazy about salt. She’s the kind of gal who eats (salted) tortilla chips with a salt shaker in hand. So, for her birthday I thought salted caramel was the obvious way to go. What better way to make our salt-fiend friend happy on her birthday?

Boy did these cupcakes ever deliver. Not only was she was thrilled, but so was everyone else, including the bartender. They combine super chocolatey cake, creamy homemade salted caramel sauce, and a tangy velvety cream cheese icing. Then the cherry on top of it all is a chocolate covered salty pretzel!

devil's food cupcakes with salted caramel cream cheese icing | Brooklyn Homemaker

The cake itself is delightfully chocolatey and just sweet enough; with a soft, moist crumb and a tender, almost springy texture. To pack as much punch into the cake as possible, I injected them with a little bit of caramel sauce using a marinade injector. It sort of melts into and moistens the cake, rather than creating a pocket of caramel. If you don’t want to do this, or don’t have a way to make it happen, it’s totally fine. The cake is really wonderful on it’s own, I just have a tendency to take things further than necessary.

The salted caramel sauce here is super easy to make and completely delicious. It’s creamy and sweet and buttery and rich and pleasantly salty. You’ll want to make it first so it has time to cool down while the rest of the components come together.

As if there wasn’t enough flavor in these cupcakes, I decided to go with a tangy cream cheese icing with plenty of sweet and salty caramel sauce whipped in. The end result is creamy and soft and full of rich caramely punch, backed up by that distinctive cream cheese twang. The one problem with cream cheese icing is that it tends to be so soft that it’s hard to pipe because it wants to kind of sink into itself. You can add more sugar to stiffen it, but then it ends up being too sweet, at least that is, for my taste. If you want to pipe this icing though, I’d recommend refrigerating it for at least an hour beforehand. Otherwise just slather it on with an offset spatula.

Just to drive the sweet and salty point home, I topped each finished cupcake with a salty chocolate covered pretzel, drizzled even more homemade caramel sauce over the top, and finished with a tiny sprinkling of flaky crunchy fleur de sel.

devil's food cupcakes with salted caramel cream cheese icing | Brooklyn Homemaker

Devil's Food Cupcakes with Salted Caramel Cream Cheese Icing

  • Servings: 24-32 cupcakes
  • Print
Salted Caramel Sauce: 
recipe from Brown Eyed Baker2 cups granulated sugar
12 tablespoons unsalted butter, at room temperature, cut into pieces
1 cup heavy cream, at room temperature
1 tablespoon fleur de sel (or any other flaky sea salt)

Add the sugar in an even layer over the bottom of a large heavy saucepan, and heat the sugar over medium-high heat, whisking it as it begins to melt. You’ll see that the sugar will begin to form clumps, but that’s okay. Just whisk regularly-ish and as it continues to cook it will melt back down.
Stop whisking once all of the sugar has melted, and swirl the pan occasionally while the sugar cooks.
Continue cooking until the sugar has reached a deep amber color. It should look almost a reddish-brown, and have a slight toasted aroma. This is the point where caramel can go from perfect to burnt in a matter of seconds, so keep a close eye. If you are using an instant-read thermometer, cook the sugar until it reaches 350 degrees F.
Immediately add the butter all at once. Be careful, as the caramel will bubble up when the butter is added. Whisk the butter into the caramel until it is completely melted.
Remove the pan from the heat and slowly pour the cream into the caramel. Again, be careful because the mixture will once again bubble up.
Whisk until all of the cream has been incorporated and you have a smooth sauce. Add the fleur de sel and whisk to incorporate.
Set the sauce aside to cool for 10 to 15 minutes and then pour into a glass jar or heat proof container to let cool to room temperature. You can refrigerate the sauce for up to 2 weeks. You might have a little extra after making these cupcakes. You won’t mind, I promise.

Devil’s Food Cupcakes
Recipe from Ad Hoc at Home

1 2/3 cups cake flour
1/3 cup plus 1 Tbsp unsweetened dutch process cocoa powder
1 tsp baking soda
1 1/2 cups granulated sugar
1/2 tsp. kosher salt
1 cup buttermilk
1 cup sour cream
3 large eggs, lightly beaten
6 Tbsp melted unsalted butter, cooled
1/2 cup salted caramel sauce, optional

Preheat oven to 350F. Prepare your muffin pan with paper liners. Sift all dry ingredients into the bowl of a stand mixer, place on mixer fitted with paddle attachment. Mix buttermilk and sour cream. In a separate bowl, combine eggs and butter. Alternately add sour cream mixture and egg mixture to dry ingredients with the mixer running on medium low just until mixed. Fill cups 2/3 full with batter. Bake about 20 minutes, turning pan midway through cooking time. The cupcakes are done when a cake tester or toothpick inserted in the middle comes out clean.
Remove cupcakes from the tins and cool to room temperature on a cooling rack. If desired, once cooled, inject centers of cupcakes with a little salted caramel sauce. You can do this using a bismark tip (which is basically an injector tip for a piping bag), a marinade injecting syringe, or by making a small hole with an apple corer or paring knife. Top with salted caramel icing, recipe below.

Salted Caramel Cream Cheese Icing:
recipe from Brown Eyed Baker

1 cup unsalted butter, at room temperature
8 ounces cream cheese, at room temperature
½ cup salted caramel sauce
4 cups powdered sugar

Beat together the butter and cream cheese on medium-high speed for 5 minutes (I like to use the whisk attachment for my KitchenAid stand mixer, but it’s not necessary). Pour in the salted caramel and beat until combined. Reduce the speed to medium-low and slowly add the powdered sugar, a little at a time, until it has all been incorporated. Increase the speed to medium-high and beat for an additional two to three minutes, until light and fluffy.

Garnish:
Salted Caramel Sauce
Fleur de Sel (or other flaky sea salt)
2 to 3 dozen small chocolate covered pretzels

To finish, pipe frosting (I used an Ateco #846 tip) onto the top of each cupcake (or use an offset spatula to spread the frosting). Top each cupcake with a chocolate covered pretzel, drizzle with some additional salted caramel sauce, and sprinkle with a pinch of fleur de sel.

lemony strawberry cupcakes with strawberry meringue buttercream

For whatever reason, I tend to cook, and bake, in phases.

lemony strawberry cupcakes with strawberry meringue buttercream | Brooklyn Homemaker

There was a point, a few years ago, when I was making scads of cupcakes. Up until that point pies were my thing, but then one day, suddenly, I started making cupcakes and couldn’t stop. Every chance I got; birthdays, special occasions, holidays, parties, picnics, you name it; I was there with a box of cupcakes in hand.

lemony strawberry cupcakes with strawberry meringue buttercream | Brooklyn Homemaker

Then, a year or two ago, I started perfecting my layer cake technique and my cupcake phase was over as suddenly as it began. I started pumping out picture perfect layer cakes, and my overgrown stash of cupcake liners and muffin pans got pushed to the back of the cupboards and forgotten. I’m not positive, but this might mean I’m getting back on the cupcake train.

lemony strawberry cupcakes with strawberry meringue buttercream | Brooklyn Homemaker

When a good friend of ours announced the other day that she was having a birthday party at a bar in her neighborhood, I knew right away that it was time to dust off the muffin pans and bake some cupcakes.

lemony strawberry cupcakes with strawberry meringue buttercream | Brooklyn Homemaker

A lot of people have become disillusioned with cupcakes because they were so ubiquitous at their peak, especially in New York. I totally get it. I do. The cupcake trend was out of control, and there were a lot of bad cupcakes out there.

lemony strawberry cupcakes with strawberry meringue buttercream | Brooklyn Homemaker

But! The cupcake craze is over! Like totally over. We moved on. We have gourmet donuts! And Cronuts! And Cragels!
You’re officially allowed to like cupcakes again. You don’t even have to make any references to Sex and the City when you eat them or anything. I promise! Really.

lemony strawberry cupcakes with strawberry meringue buttercream | Brooklyn Homemaker

And, the thing about cupcakes is that they’re extremely portable and easy to eat without plates and forks and knives and all the other things you need to serve and eat a layer cake. Cupcakes are a whole lot easier, and a whole lot more fun. They’re the perfect single serving of cake and icing, they’re handheld, and they’re totally adorable and festive.

lemony strawberry cupcakes with strawberry meringue buttercream | Brooklyn Homemaker

Not only are these cupcakes fun and easy to eat, but they also happen to be completely and thoroughly delicious. Our friend requested something fruity and summery, so I went all out and flavored both the cake and the icing with strawberries and lemon. To really pack in the flavor I pulsed the strawberries in a blender with a little bit of sugar, and cooked the mixture on the stove to reduce and concentrate the ripe berry flavor. This extra step makes a huge difference to fill these cupcakes with bright fruit forward flavor without the use of any extracts or artificial flavorings.

lemony strawberry cupcakes with strawberry meringue buttercream | Brooklyn Homemaker

These cupcakes are incredibly moist and full of summery flavor. They’re sweet but not too sweet, and the lemon juice and zest adds a bold brightness to the strawberry flavor. Since the cakes are sweet enough on their own, I chose to go for a light and airy meringue buttercream, and it was definitely the right decision. Traditional American buttercream would probably have been too heavy and sweet here. Meringue buttercream is fluffy and light and just barely sweet, like whipped cream but much more stable. Not only is the texture and flavor perfect, but the icing is perfectly pretty in pink, with little specks of fresh strawberry showing through. Because these were for a birthday I added some festive pink sanding sugar for extra sparkle and shine, but to be honest, I probably didn’t need to.

Obviously, they were a huge hit.

lemony strawberry cupcakes with strawberry meringue buttercream | Brooklyn Homemaker

Lemony Strawberry Cupcakes with Strawberry Meringue Buttercream

  • Servings: About 32 - 34 cupcakes
  • Print
Adapted from Martha Stewart’s Cupcakes

Reduced Strawberry Puree:
2 lbs of ripe strawberries
1/4 cups sugar
pinch of salt

wash and hull strawberries and either chop very finely, or pulse in a food processor or blender. You want them finely chopped, not liquified. Mix together with sugar and salt in a large saucepan. Bring to a boil over medium high heat and reduce for about 20 or 30 minutes, until thick and jammy. Stir regularly and watch carefully, it’ll want to boil over. I had about 1 1/2 cups of puree when I was finished. If you have more, or less, divide between the cake batter and the icing at a 2:1 ratio.

For the Cupcakes:
3 1/4 cups all-purpose flour
1 tablespoon baking powder
1 teaspoon salt
1 cup unsalted butter, at room temperature
2 cups granulated sugar
1½ teaspoons vanilla extract
zest and juice of 2 lemons
3 eggs
1 egg white
1 cup buttermilk
1 cup reduced strawberry puree

Preheat oven to 350 degrees F. Line standard muffin tins with paper liners.
Whisk together flour, baking powder and salt; set aside.
With an electric mixer on medium-high speed, cream together the butter, sugar, lemon zest and vanilla until pale and fluffy, about 3 minutes. Add the eggs and egg white, one at a time, beating until each is fully incorporated & scraping down the sides of the bowl as needed. Reduce the mixer speed to low and add the flour in two batches, alternating with the buttermilk, and beating until well combined. Add lemon juice and strawberry puree, and blend until just combined.
Divide the batter evenly among the lined cups, filling each three-quarters full. Bake until golden and a cake tester inserted in centers comes out clean, 25 to 30 minutes. Transfer to pans to wire racks to cool for 15 minutes; turn out the cupcakes onto the rack and let cool completely. Cupcakes can be stored up to 1 day at room temperature in airtight containers before frosting.

Strawberry Lemonade Meringue Buttercream:
4 egg whites
1¼ cups granulated sugar
1½ cups unsalted butter, cut into tablespoons, at room temperature
1/2 cup reduced strawberry puree
zest and juice of 1 lemon

Combine the egg whites and sugar in the heatproof bowl of a stand mixer set over a pan of simmering water. Whisk constantly by hand until the mixture is warm to the touch and the sugar has dissolved (the mixture should feel completely smooth when rubbed between your fingertips).
Attach the bowl to the mixer fitted with the whisk attachment. Starting on low and gradually increasing to medium-high speed, mix until stiff (but not dry) peaks form. Continue mixing until the mixture is fluffy and glossy, and completely cool (test by touching the bottom of the bowl), about 10 minutes.
Reduce the mixer speed to medium-low and add the butter a few tablespoons at a time, mixing well after each addition. Once all the butter has been added, scrape down the sides of the bowl with a spatula and switch to the paddle attachment; continue beating on low speed until all air bubbles are eliminated, about 2 minutes. Add the strawberry puree, lemon zest and juice; and beat until combined. Stir the icing with a rubber spatula until smooth. Keep the buttercream at room temperature if using the same day, or transfer to an airtight container and refrigerate up to 3 days or freeze up to 1 month. Before using, bring to room temperature and beat with paddle attachment on low speed until smooth again, about 5 minutes.
Spread or pipe the buttercream onto each cupcake. I used an Ateco #846 tip and piped a large swirl, then sprinkled on a bit of pink “raspberry rose” colored sanding sugar. They’re best eaten the day they’re made, but can be stored in an airtight container at room temperature for up to 1 day, or refrigerated for up to 3 days.


hibiscus lime bundt cake #bundtbakers

Woohoo! Time for another installment of #BundtBakers!

hibiscus lime bundt cake | Brooklyn Homemaker

This months theme is “tropical”, which I thought would be really easy, but ended up tripping me up at first.  My maple bacon bundt cake was such a hit last month that I felt like I needed to keep up that momentum and do something totally unexpected.

hibiscus lime bundt cake | Brooklyn Homemaker

At first I thought I’d try to get away from the idea of “caribbean” tropical flavors like guava and mango, and go for a more Southeast Asian profile. I decided to keep pushing the sweet and savory thing and make a Thai coconut curry bundt cake with a spicy thai chili & lime glaze. I made the cake with coconut milk, lime and fresh ginger, and I really wanted that coconut curry spice to be present so I added a tablespoon of Thai green curry paste. The cake was baked, cooled, glazed, photographed, sliced…

And…

And…

hibiscus lime bundt cake | Brooklyn Homemaker

NOPE.
(I bet you already guessed though, since I’m sharing a different recipe.)

The thing about curry paste is that along with the chili, lime, lemongrass and galangal, there’s also a healthy dose of garlic and shallots. Not exactly what you want in a cake, even if you are trying to push the limits of sweet and savory. I didn’t hate it, but Russell said it was absolutely disgusting and spit it out in dramatic fashion into the kitchen sink. He also poo-pooed last month’s maple bacon cake though, and everyone else loved it, so I brought it in to work for a second opinion.
NOPE. Not this time.
I came home with almost as much cake as I left with. Everyone was polite about it, but didn’t go in for more than a few bites. I actually think certain elements of the cake were great, especially the chili lime glaze, but the garlic and shallots in the curry paste just tasted… wrong. I thought about trying again without the curry paste, and eventually I might, but for now my heart isn’t in it anymore.

hibiscus lime bundt cake | Brooklyn Homemaker

A few days later I came across some dried hibiscus flowers in bulk at my local grocery store and I was reminded of a hibiscus tea I used to drink as a teenager. It was naturally sweet, tart and citrusy, with a definite tropical flavor. When I opened the bin to scoop it out, the smell was overwhelming. Oddly enough, hibiscus smells much more fruity than floral. It’s sticky sweet, tangy, & pungent, reminiscent of overripe cherries and citrus fruit. I may or may not have stuck my head into the bin to take a big whiff. I also may or may not have caught the cashier taking a big sniff of the bag while I was digging for my wallet. If you can’t find hibiscus flowers (sometimes called flor de Jamaica), they can easily be found online.

hibiscus lime bundt cake | Brooklyn Homemaker

I decided to steep the flowers in buttermilk and lime juice (rather than water) to concentrate the flavors. The hibiscus tea I used to drink was a brilliant pinky-red so I hoped that the cake might come out a similar color. After steeping, I squeezed the beet red liquid out of the flowers, but when I mixed it into the batter it turned the cake a gorgeous deep dark purple. I swear that there is not a single drop of food coloring in this cake.

hibiscus lime bundt cake | Brooklyn Homemakerhibiscus lime bundt cake | Brooklyn Homemakerhibiscus lime bundt cake | Brooklyn Homemaker

When baked, the interior retained that purple color but the outside of the cake faded and browned. At first I was disappointed but then I realized it would make for an even more dramatic presentation when sliced. Just imagine bringing this unassuming, seemingly normal looking bundt cake to a party and slicing in to reveal the beautiful brilliant purple interior. Talk about wow factor!

hibiscus lime bundt cake | Brooklyn Homemaker

Even though this was another experimental recipe, I was confident from tasting the batter that no one would turn their nose up at this one.
On a beautiful sunny Sunday we took the East River Ferry to Dumbo, vintage cake carrier in hand, and met some friends for a picnic at Brooklyn Bridge Park. When we showed up with a shiny aluminum cake carrier our friends knew they were in for something good, but when I cut in and people saw the purple-y mauve interior there were a few actual gasps, “OH MY GOD”s, and “SHUT UP!”s.

hibiscus lime bundt cake | Brooklyn Homemaker

And guess what.
Everyone cleaned their plates! A few even went back in for seconds. This cake is crazy good. Perfectly moist, just sweet enough, and not too heavy. The lime flavor is a perfect compliment to the tangy tropical flavor of the hibiscus. The first bite is bright, citrusy, and tart, but with the second bite an interesting depth begins to unfold. The hibiscus gives this cake a subtle fruitiness similar to that of red berries or dark cherries. It’s almost difficult to describe such an exotic and unexpected flavor, but Russell says that the cake tastes just like it’s color; bright, fruity, & tropical.

hibiscus lime bundt cake | Brooklyn Homemaker

Hibiscus Lime Bundt Cake

3 limes
2 cups sugar
1 1/4 cups buttermilk
2 cups dried hibiscus flowers (3 oz by weight)
2 sticks unsalted butter, at room temperature
5 large eggs, at room temperature
3 cups all-purpose flour
1/2 teaspoon baking powder
1/2 teaspoon baking soda
1 teaspoon kosher salt

Glaze:
2 limes
2 tablespoons butter
2 to 2 1/2 cups confectioners’ sugar, sifted.

Heat oven to 350 degrees F. Generously grease and flour a 10+ cup pan and refrigerate.

Zest and juice limes (you want about 6 tablespoons of juice). Whisk zest and sugar together in the bowl of a stand mixer and set aside. Combine lime juice and buttermilk in a small saucepan and bring to a low simmer. Stir in hibiscus flowers, bring back to a simmer, and remove from heat. Press the hibiscus flowers down so they’re mostly covered in liquid, and steep for 15 or 20 minutes. (They’ll swell and appear to absorb the liquid) Once they’ve steeped, use a fine mesh strainer and a spoon to press the liquid out of the hibiscus flowers into a measuring cup. Measure 1 cup of liquid total. If you’re a little short you can supplement with more buttermilk.
Add butter to lime zest and sugar and cream on high with a paddle attachment for about 5 minutes, or until very light and fluffy. Mixing at medium speed, add eggs, one at a time, scraping down the sides of the bowl between additions.

Sift together flour, baking powder, baking soda and salt in a bowl. Add flour and buttermilk mixtures alternately to butter mixture, beginning and ending with flour. Pour batter into pan, smooth top, and bake for 55 minutes to 65 minutes, or until a cake tester or toothpick comes out clean. Let cool on a cooling rack for 15 or 20 minutes before turning out onto the rack to cool completely.

Make the glaze:
Zest and juice limes (you want about 4 tablespoons of juice) Combine with confectioners’ sugar and whisk until smooth. Pour over top of cooled cake, and allow glaze to drizzle down the sides.

Thank you so much to our host, Lauren of From Gate to Plate, for organizing and hosting this month’s event! Please scroll down and check out all the other amazingly delicious sounding tropical bundts! You’ll definitely be glad that you did!

hibiscus lime bundt cake | Brooklyn Homemaker

This month we have so many amazing tropical Bundts that have me anxious for summer! Be sure to check them all out.

BundtBakers


Interested in learning more about us??  #BundtBakers is a group of Bundt loving bakers who get together once a month to bake Bundts with a common ingredient or theme. We take turns hosting each month and choosing the theme/ingredient. You can see all our of lovely Bundts by following our Pinterest board right here. Links are also updated after each event on the BundtBaker home page here.

If you are a food blogger and would like to join us, just send an email with your blog URL to foodlustpeoplelove@gmail.com. If you are just a lover of Bundt baking, you can find all of our recipe links by clicking our badge above or on our group Pinterest board.