Nordic Ware

basic bundt series: chocolate bundt cake

Hey there! Remember me?

basic bundt series | chocolate bundt cake | Brooklyn Homemaker

If you follow me on instagram, you probably already know from my stories that I have been a busy busy BUSY little bee. If you don’t follow me, btw, what the hell man?

Not cool.

basic bundt series | chocolate bundt cake | Brooklyn Homemaker

In the months since the holidays, I designed and renovated another hair shop with my husband and wonderful amazing mother, and now Maxwell’s has a second location in Crown Heights, Brooklyn. It’s taken every ounce of strength in my being not to call it “Maxwell’s 2, Electric Boogaloo”. Sadly for me, but more appropriately, Russell decided to keep the same name, Maxwell’s for Hair, or Maxwell’s Crown Heights if you need to keep the two locations straight.
It’s absolutely nuts, but you guys, we’re a chain! (Oh Spud!)

I also moved into a new position at work, which is amazing and exciting and perfect for me, but getting used to the new role has taken a lot out of me, which is another reason that I’ve been MIA on this end.

Oh yeah, and I decided to paint our bedroom, which basically turned into redecorating the entire room from floor to ceiling. I’ve brought some of you along with me on this journey via instagram stories, but just to re-cap, I painted the walls, painted the ceiling, got new bedding, added a bunch of purdy new potted plants, and after an exhaustive search, decided on new curtains.
If I can get my shit together maybe I’ll post about it, because there have actually been even more changes in there since I last blogged about my apartment, but who am I kidding?
No promises.

basic bundt series | chocolate bundt cake | Brooklyn Homemaker

Thankfully, things are beginning to calm down around here and it feels like, at least temporarily, life is getting back to normal. The new shop is doing well, I’m adjusting to the new position, and the bedroom is like 93% done.

basic bundt series | chocolate bundt cake | Brooklyn Homemaker

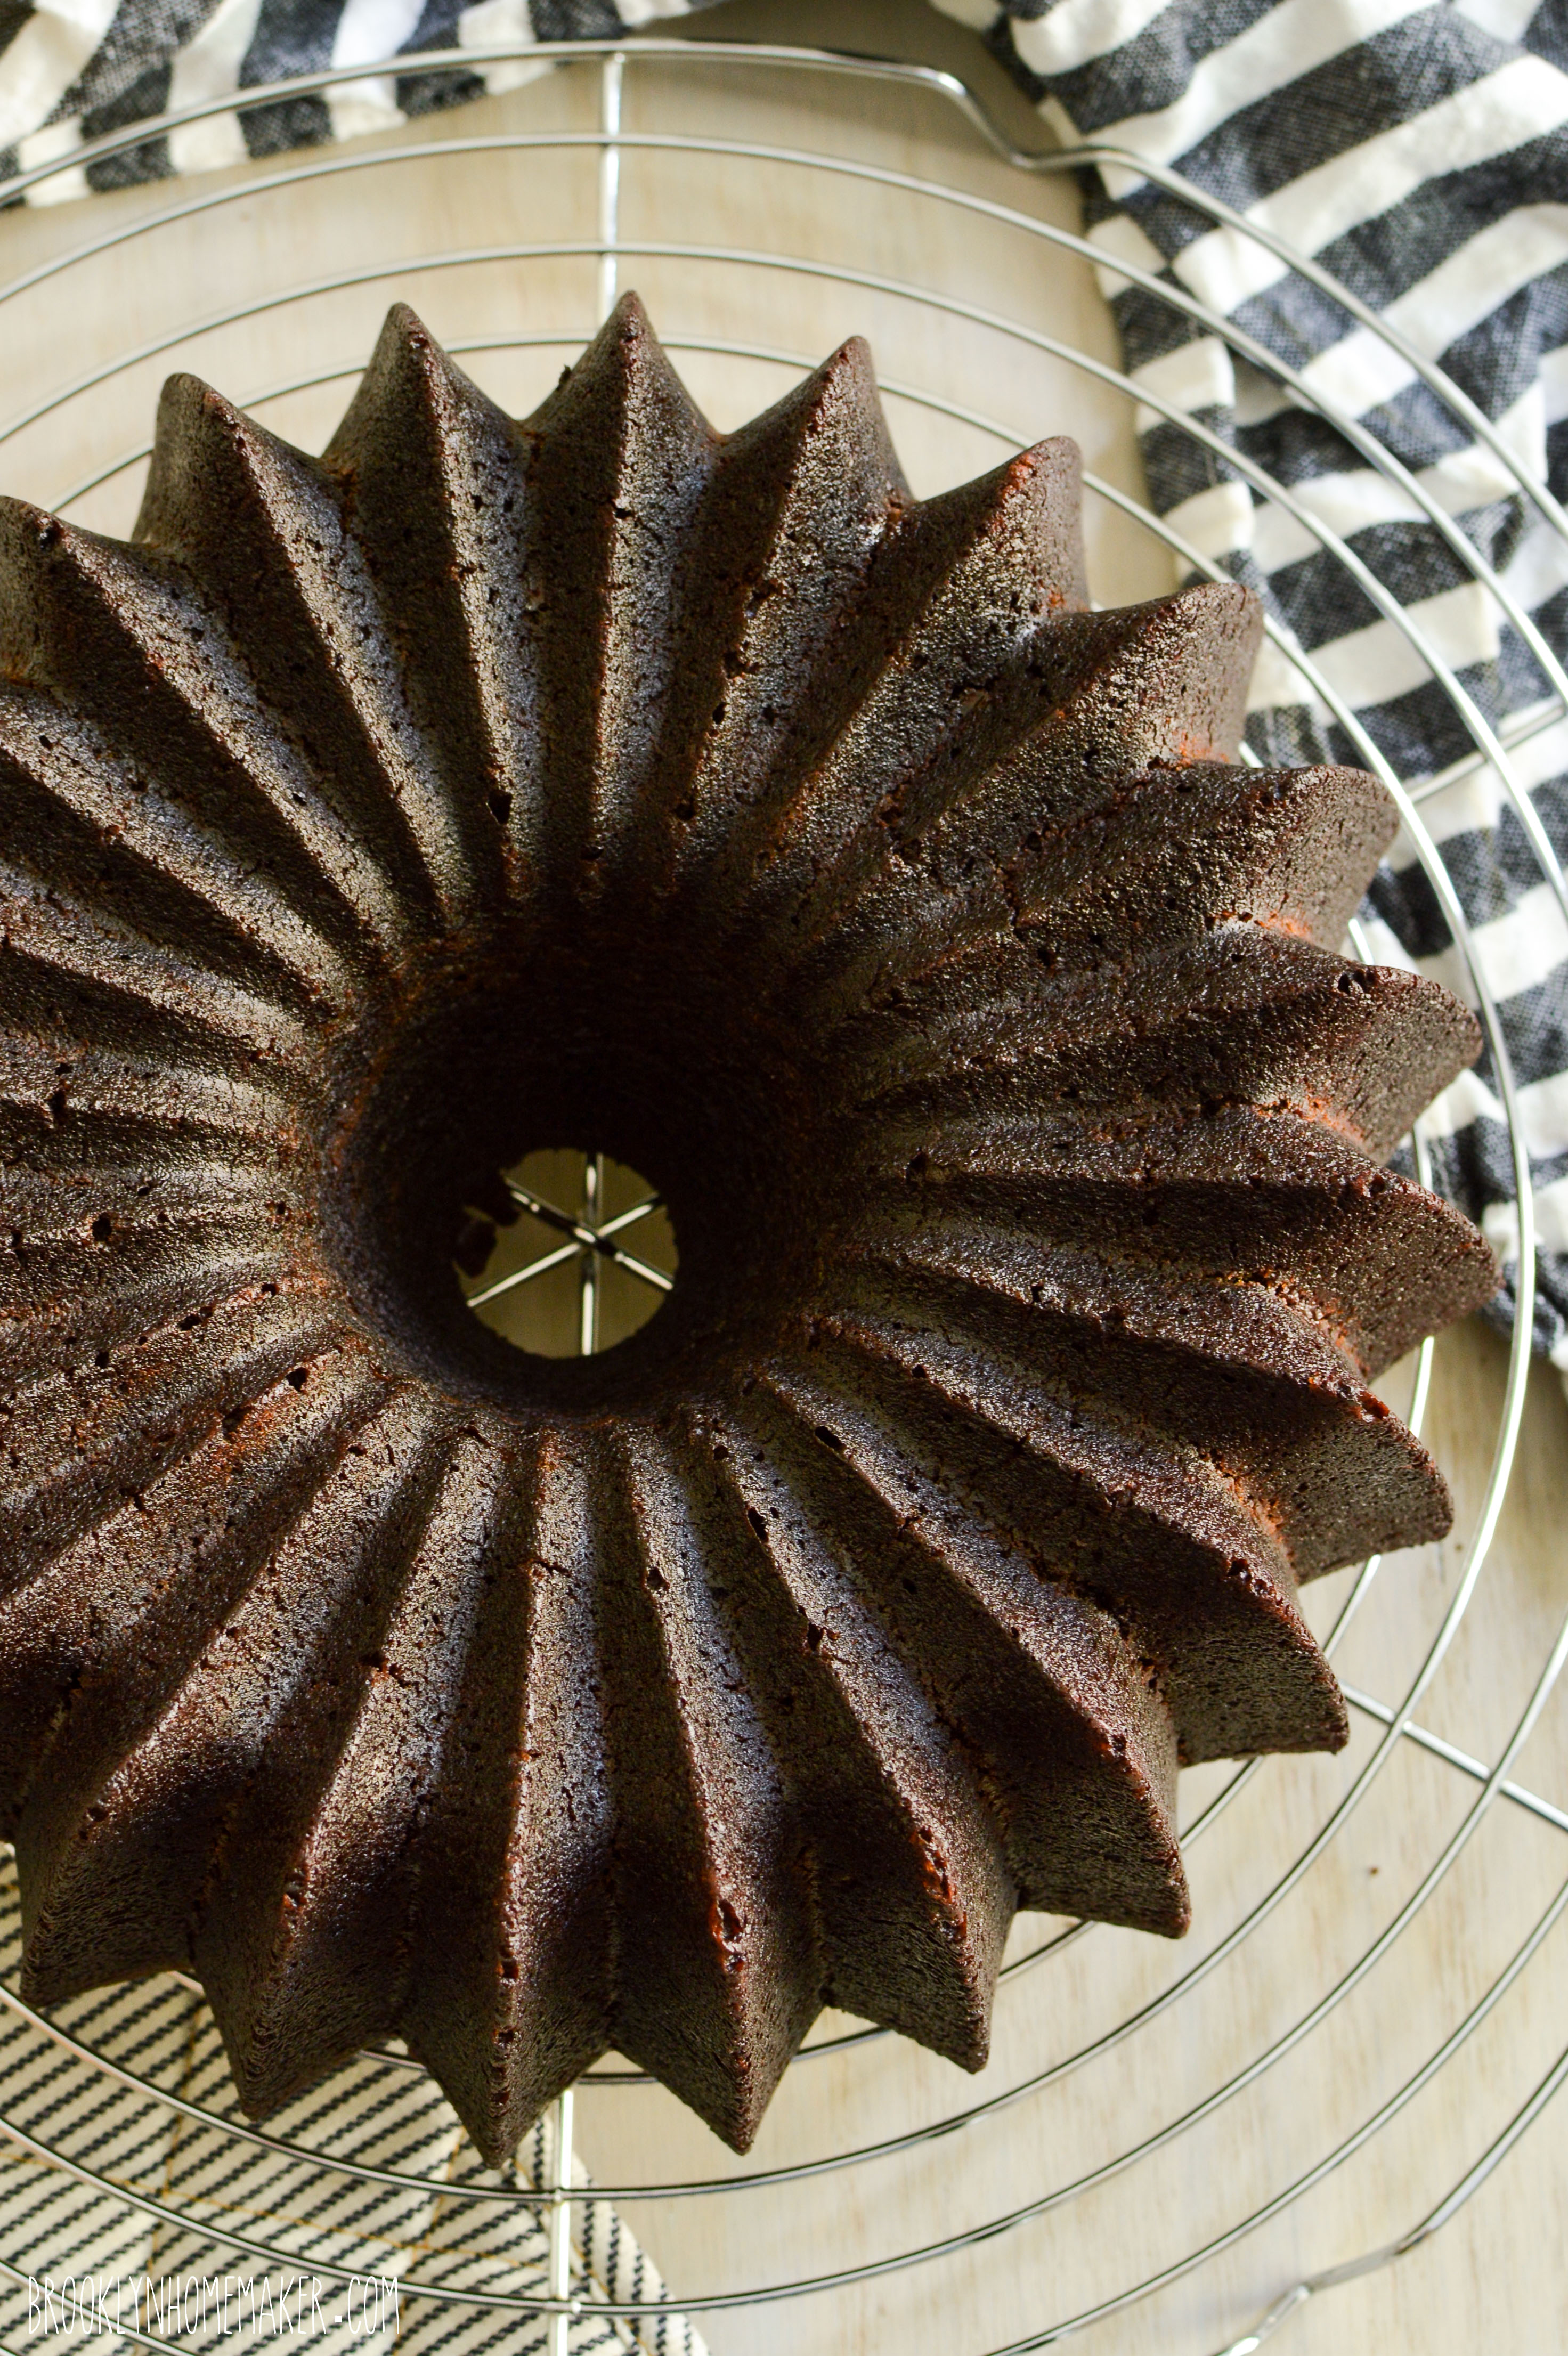
I also got a new oven for Christmas which has not seen nearly enough action, so now that things are calming down I’m hoping to get back into baking much more regularly. Just in time to get back into the kitchen, Nordic Ware released a stunning new bundt pan that you know I just HAD to have.

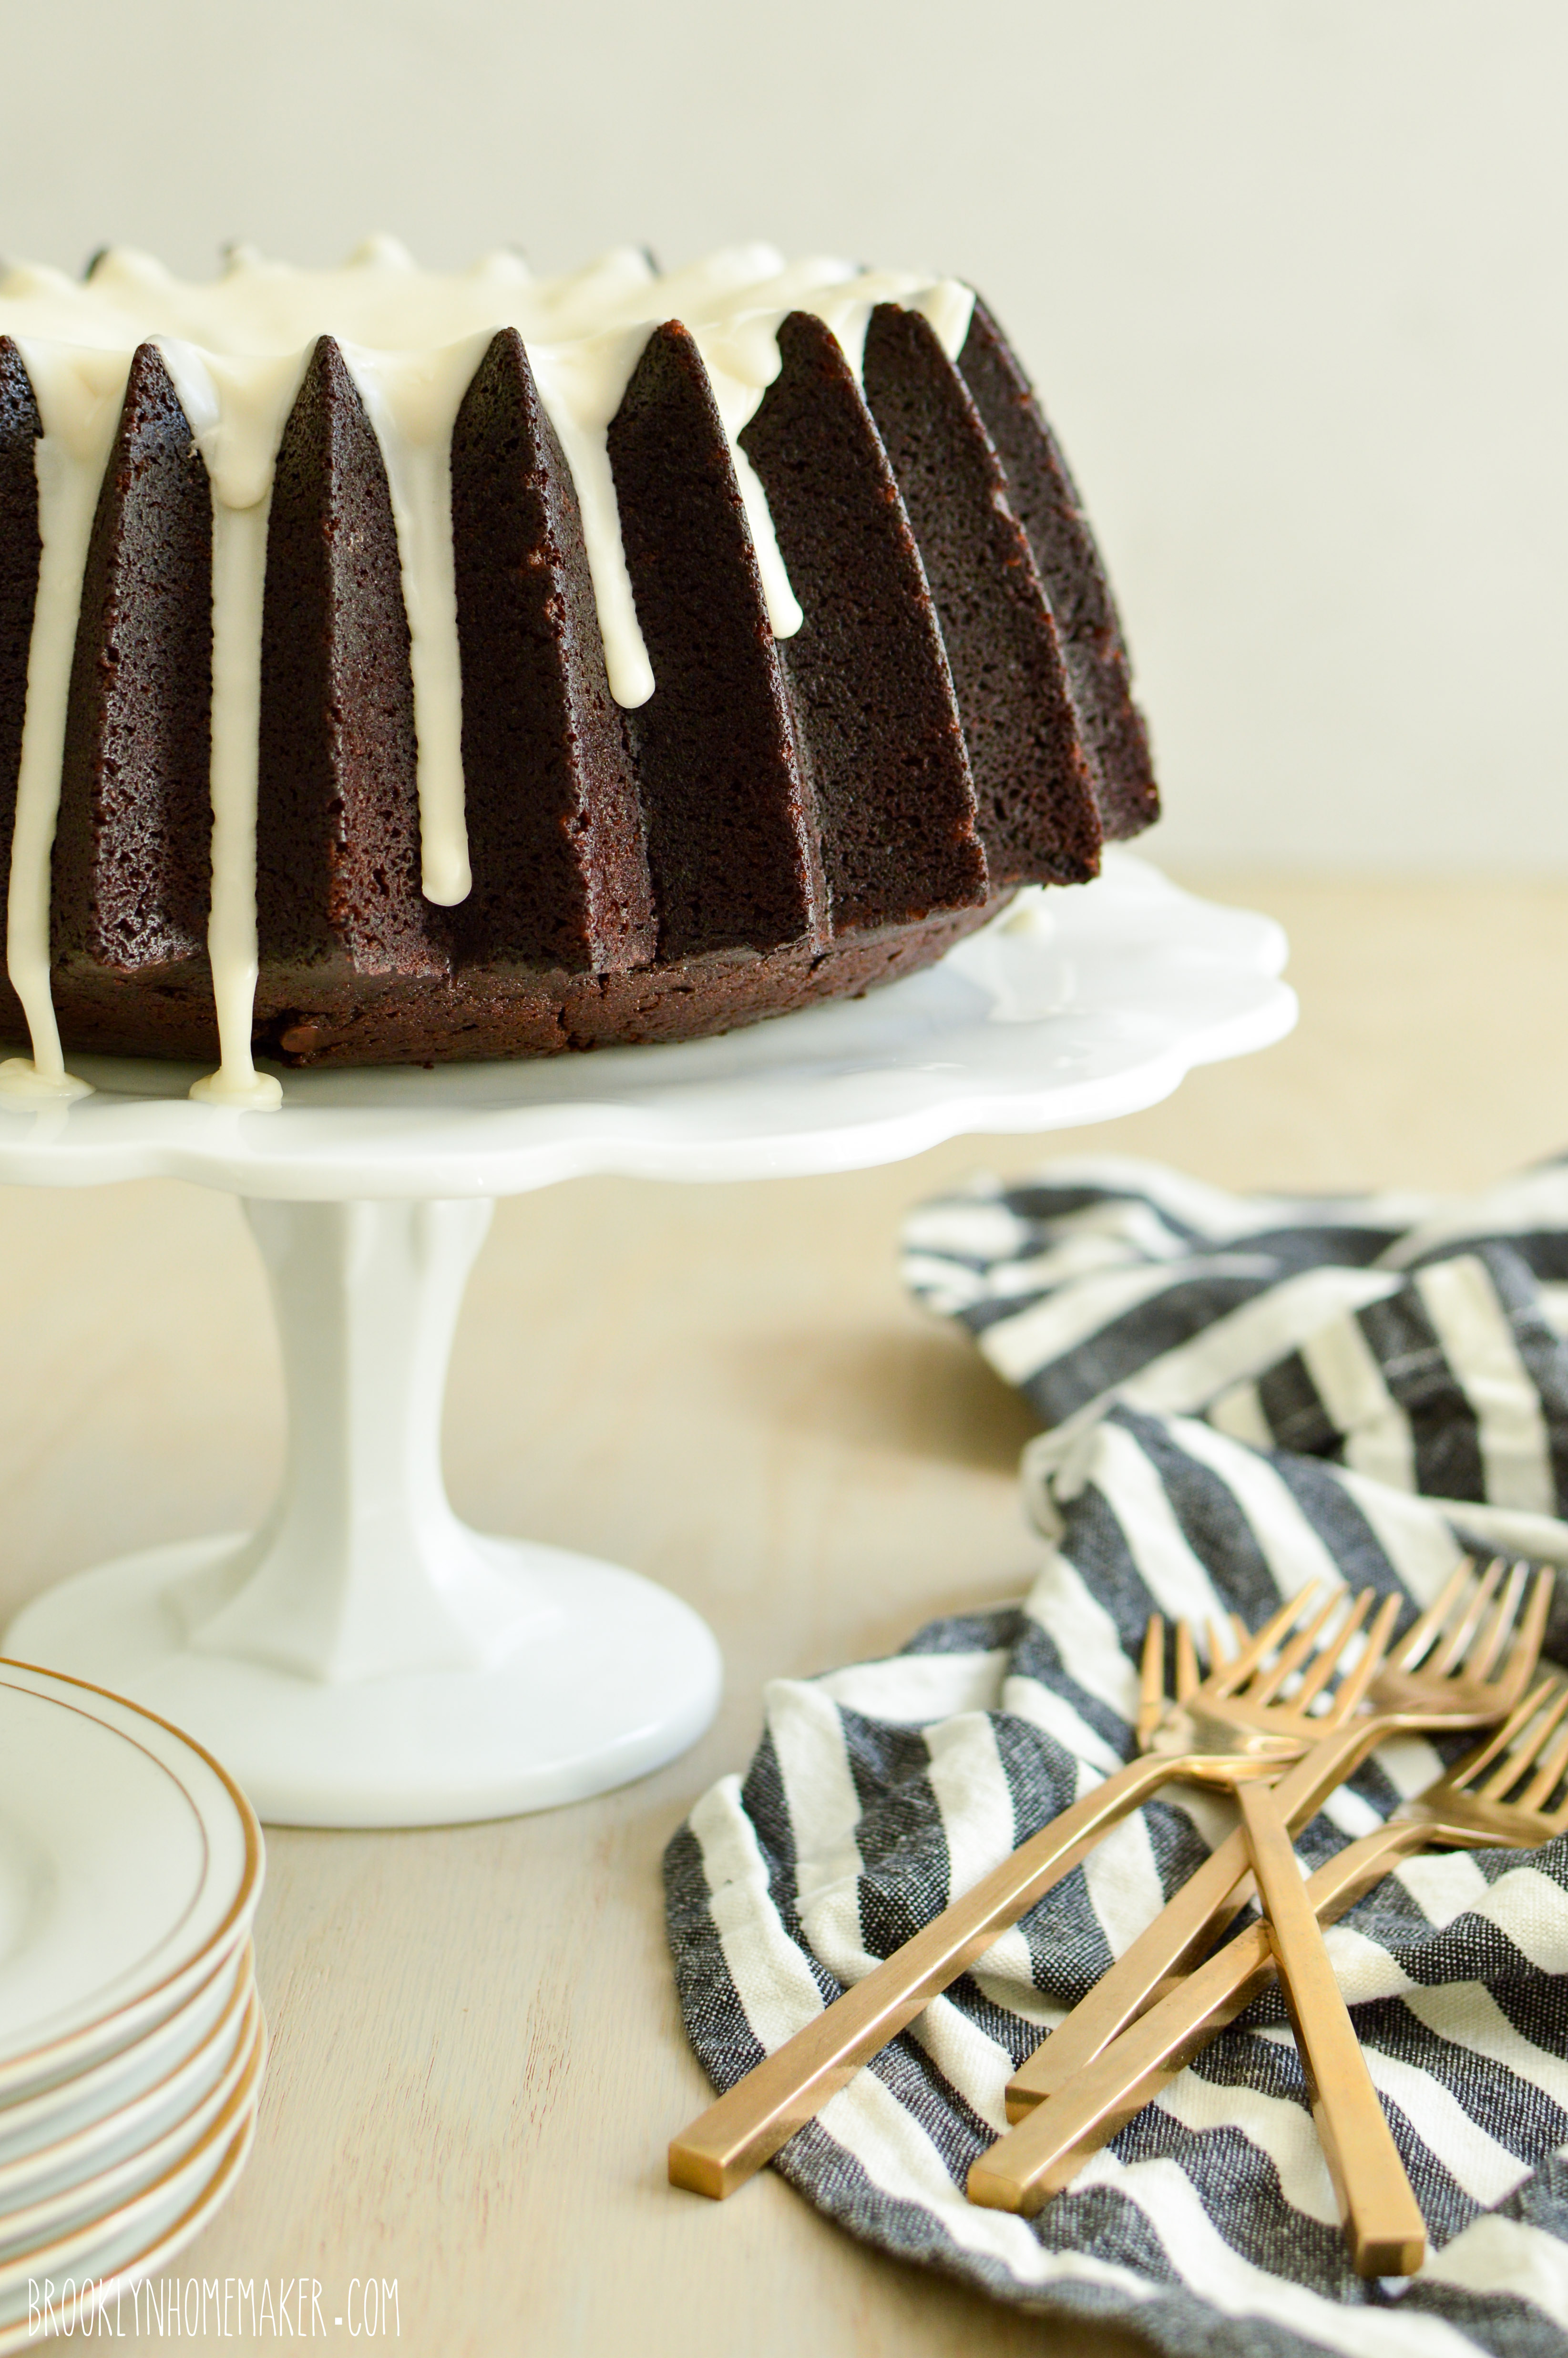
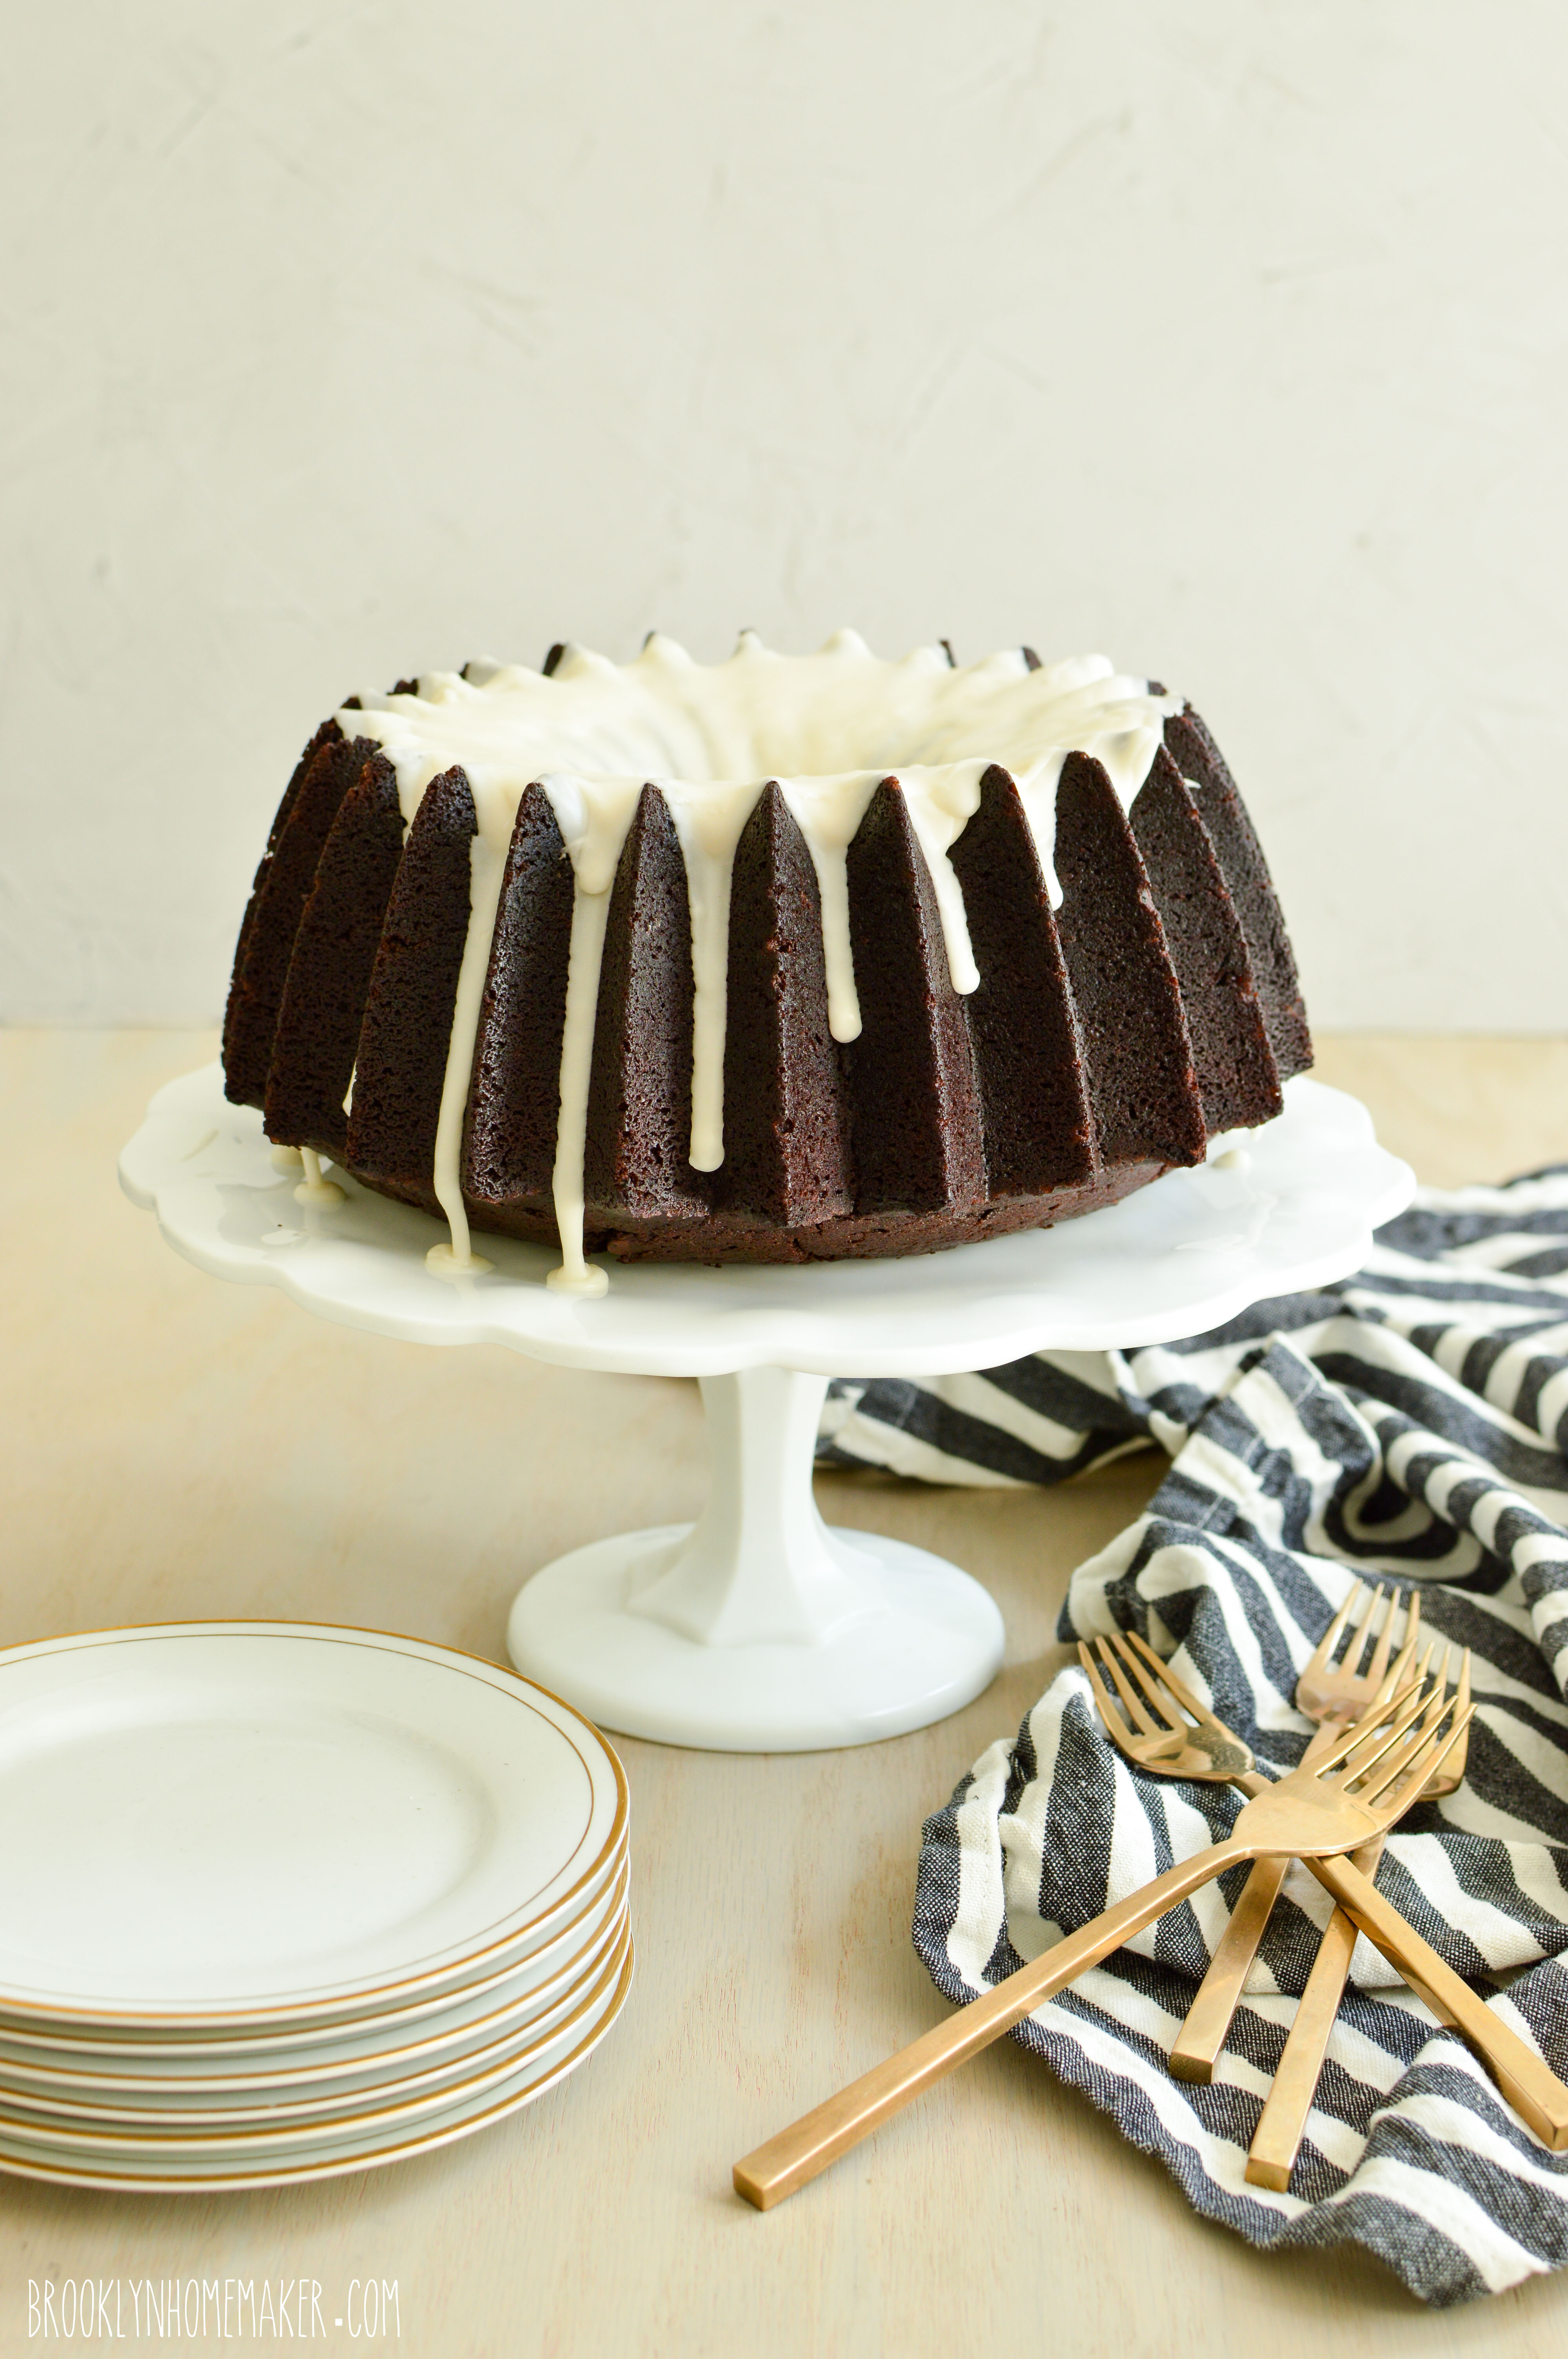
Their Brilliance pan is modern yet timeless, perfectly elegant, and absolutely gorgeous. I’ve said it time and time again, but on top of being beautiful, Nordic Ware bundt pans are sturdy, heavy-duty, ultra-non-stick, and unbelievably durable. You know I bake a butt load of bundts y’all, so trust me, these pans hold up well to a beating!

They’re also a family owned company that still makes their beautiful bundt pans right here in the good ol’ U.S. of A. The bundt pan is by far their most famous and popular product, and no one makes bundt pans as well as they do.

basic bundt series | chocolate bundt cake | Brooklyn Homemaker

I’ve been trying to perfect a chocolate bundt for a good long while now to share as part of my Basic Bundt Series. I’m always looking for bundt recipes that are classic and simple, relatively easy to prepare, impossibly delicious on their own, but also customizable with a few simple changes or substitutions.

After more recipe testing than I’d like to admit (it’s written all over my waistline), I’ve finally perfected the most amazing chocolate bundt cake the world (or at least my mouth) has ever known!

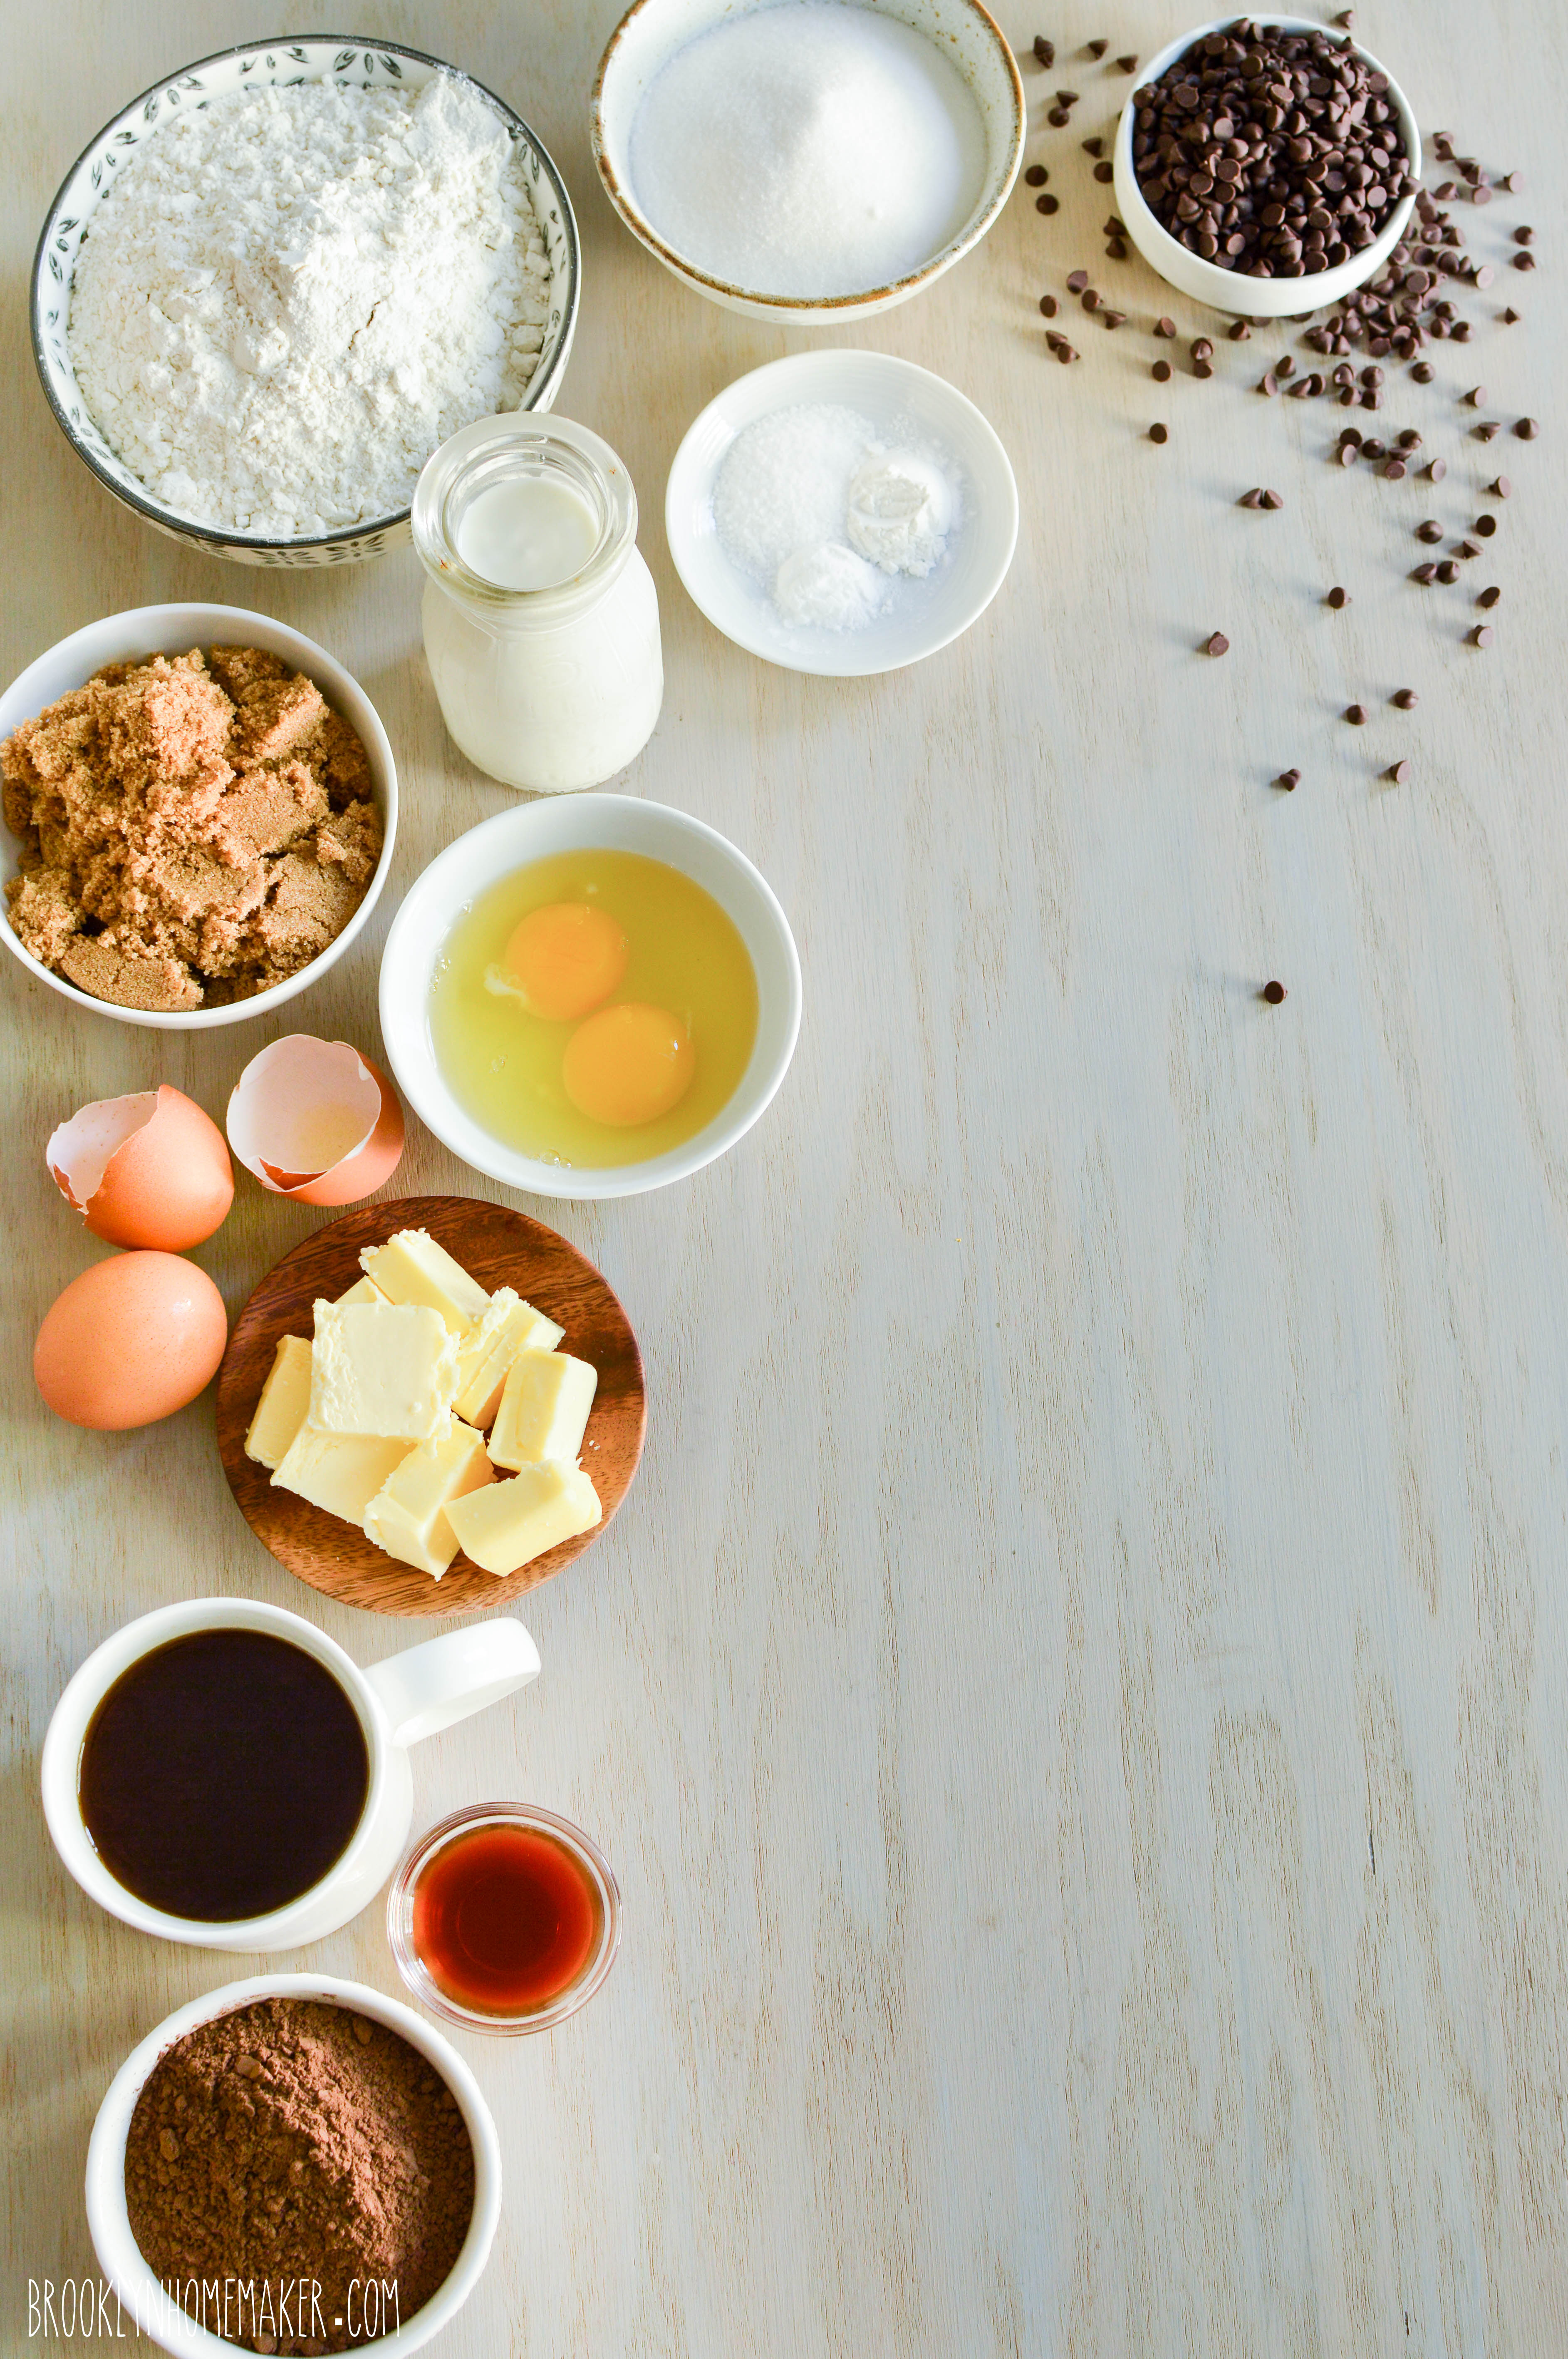
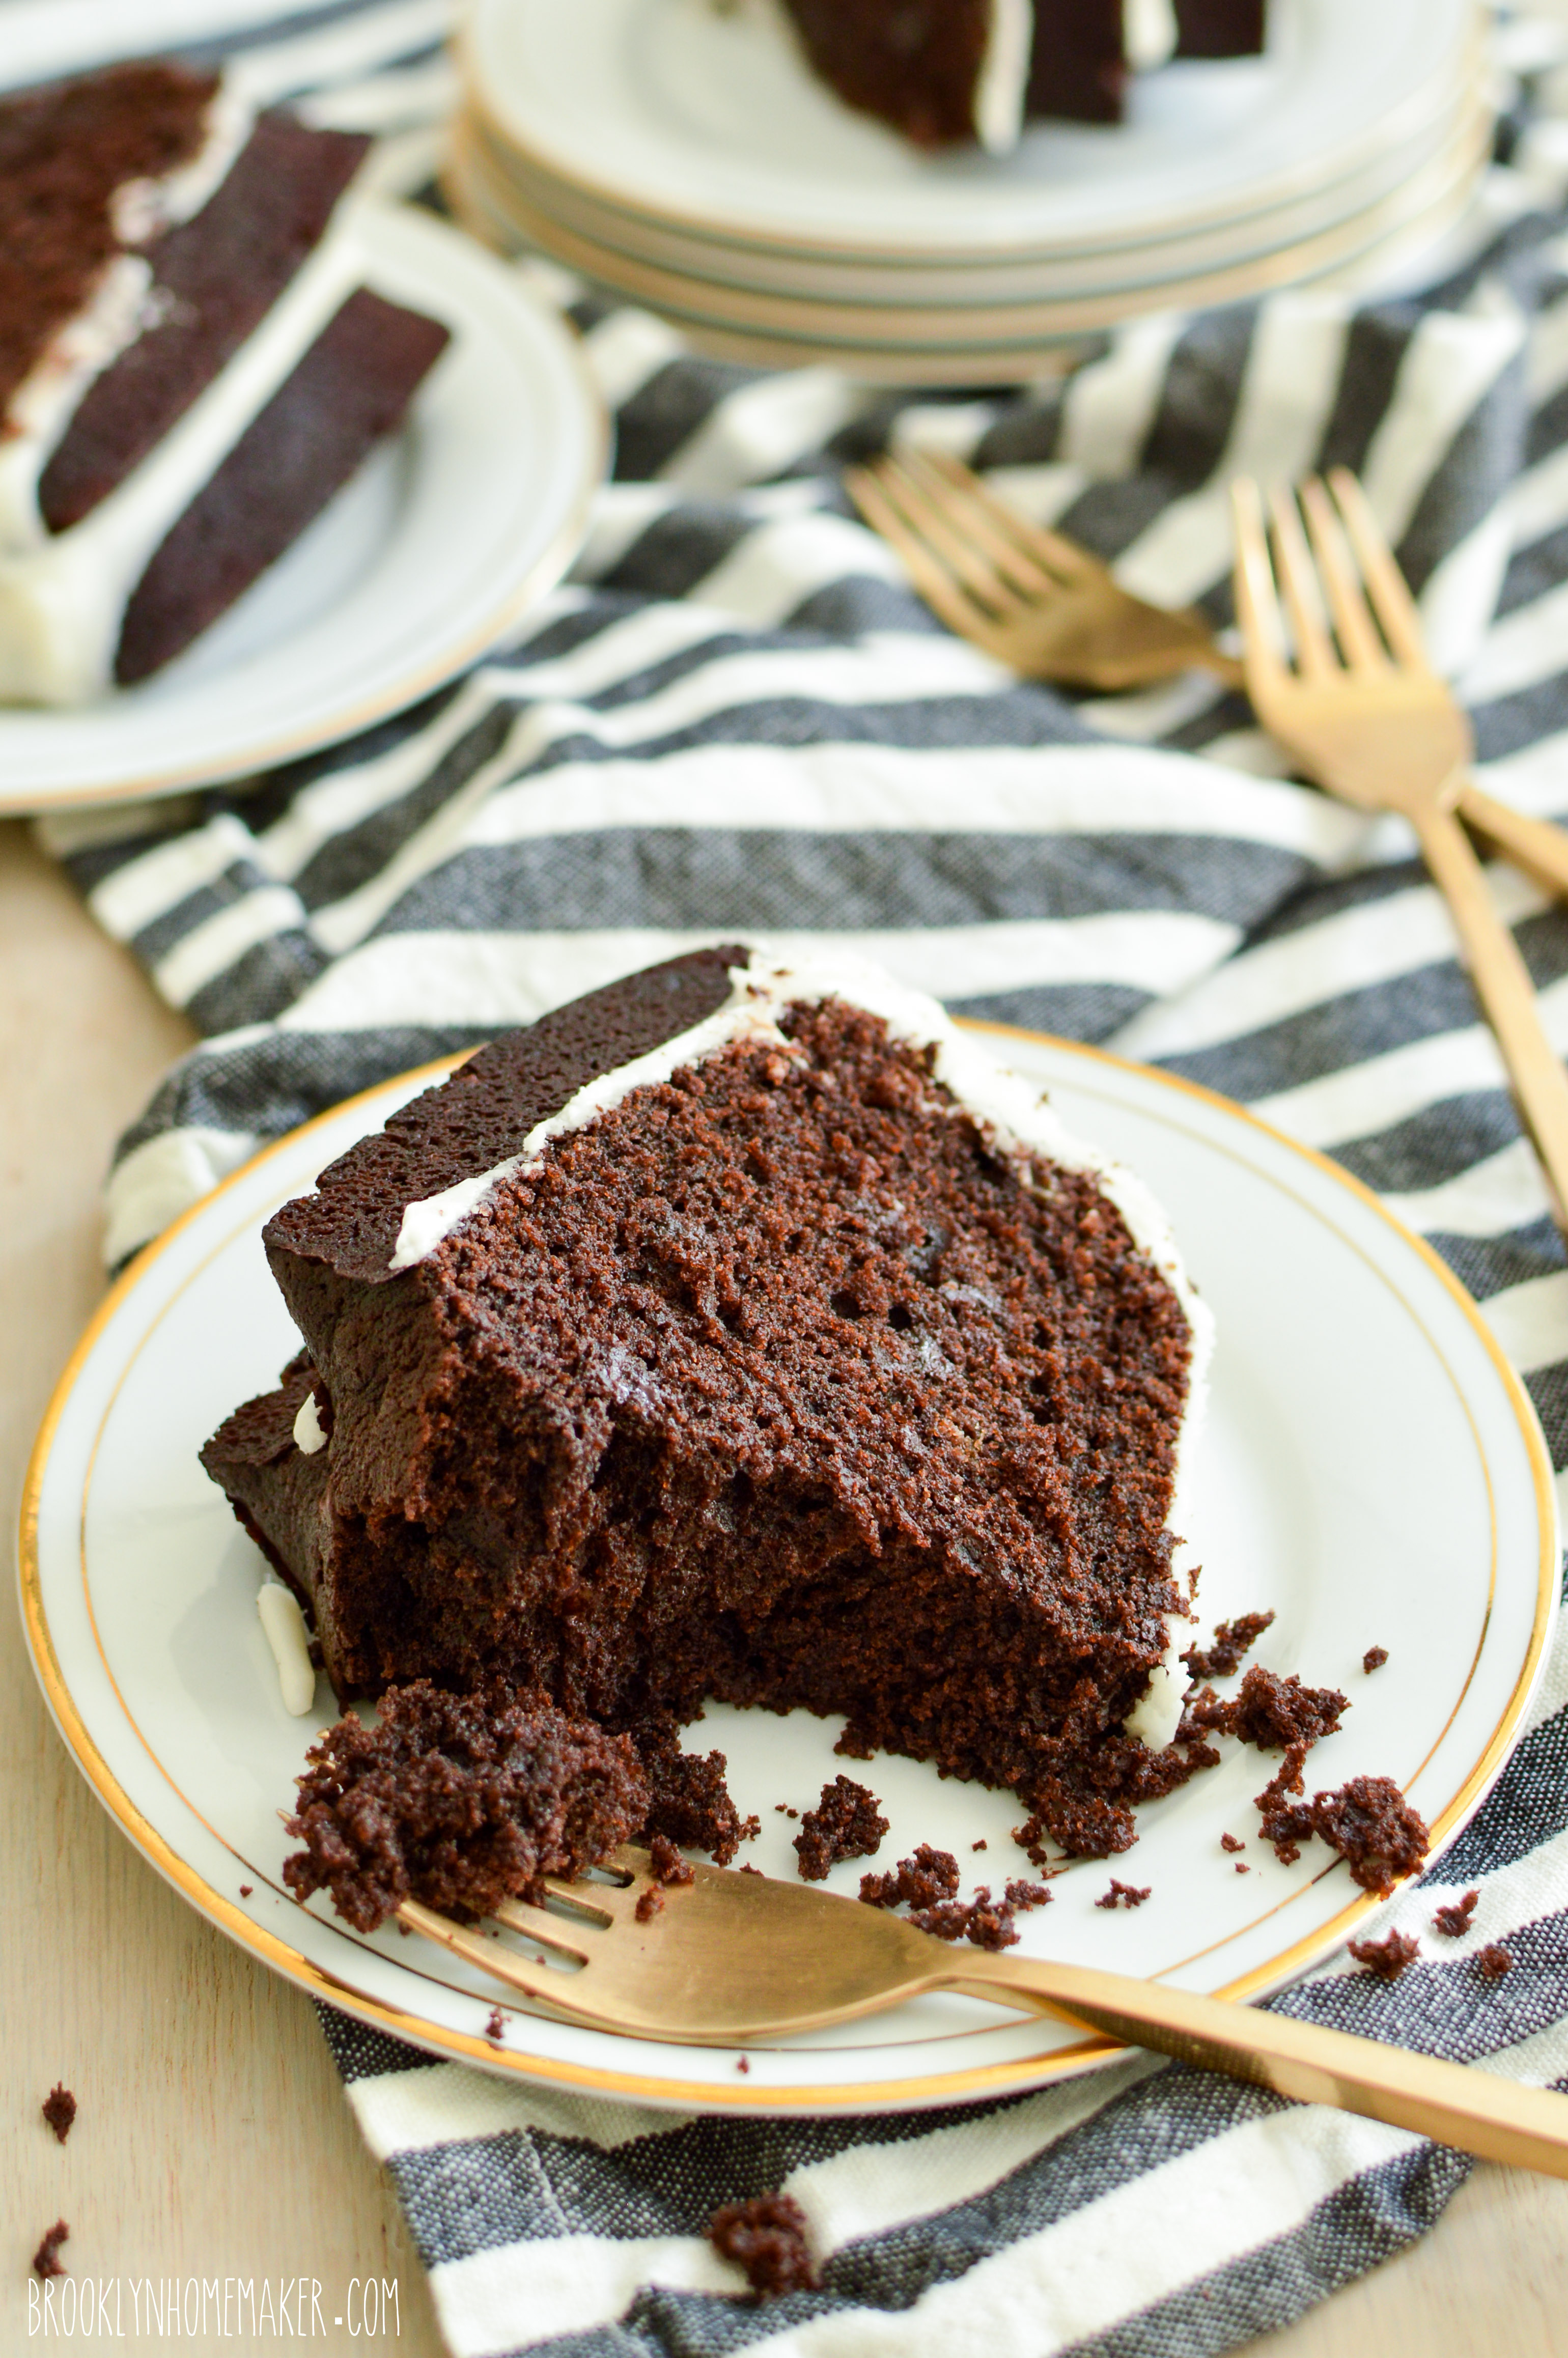
It’s perfectly moist and tender, with rich chocolate flavor thanks to the addition of both dutch process cocoa and mini chocolate chips, and has a nice depth from the addition of both coffee and brown sugar. It’s also just sweet enough without being cloying, and the best part? No stand mixer! The whole thing can be thrown together with a big bowl, a whisk, and a silicone spatula!

basic bundt series | chocolate bundt cake | Brooklyn Homemaker

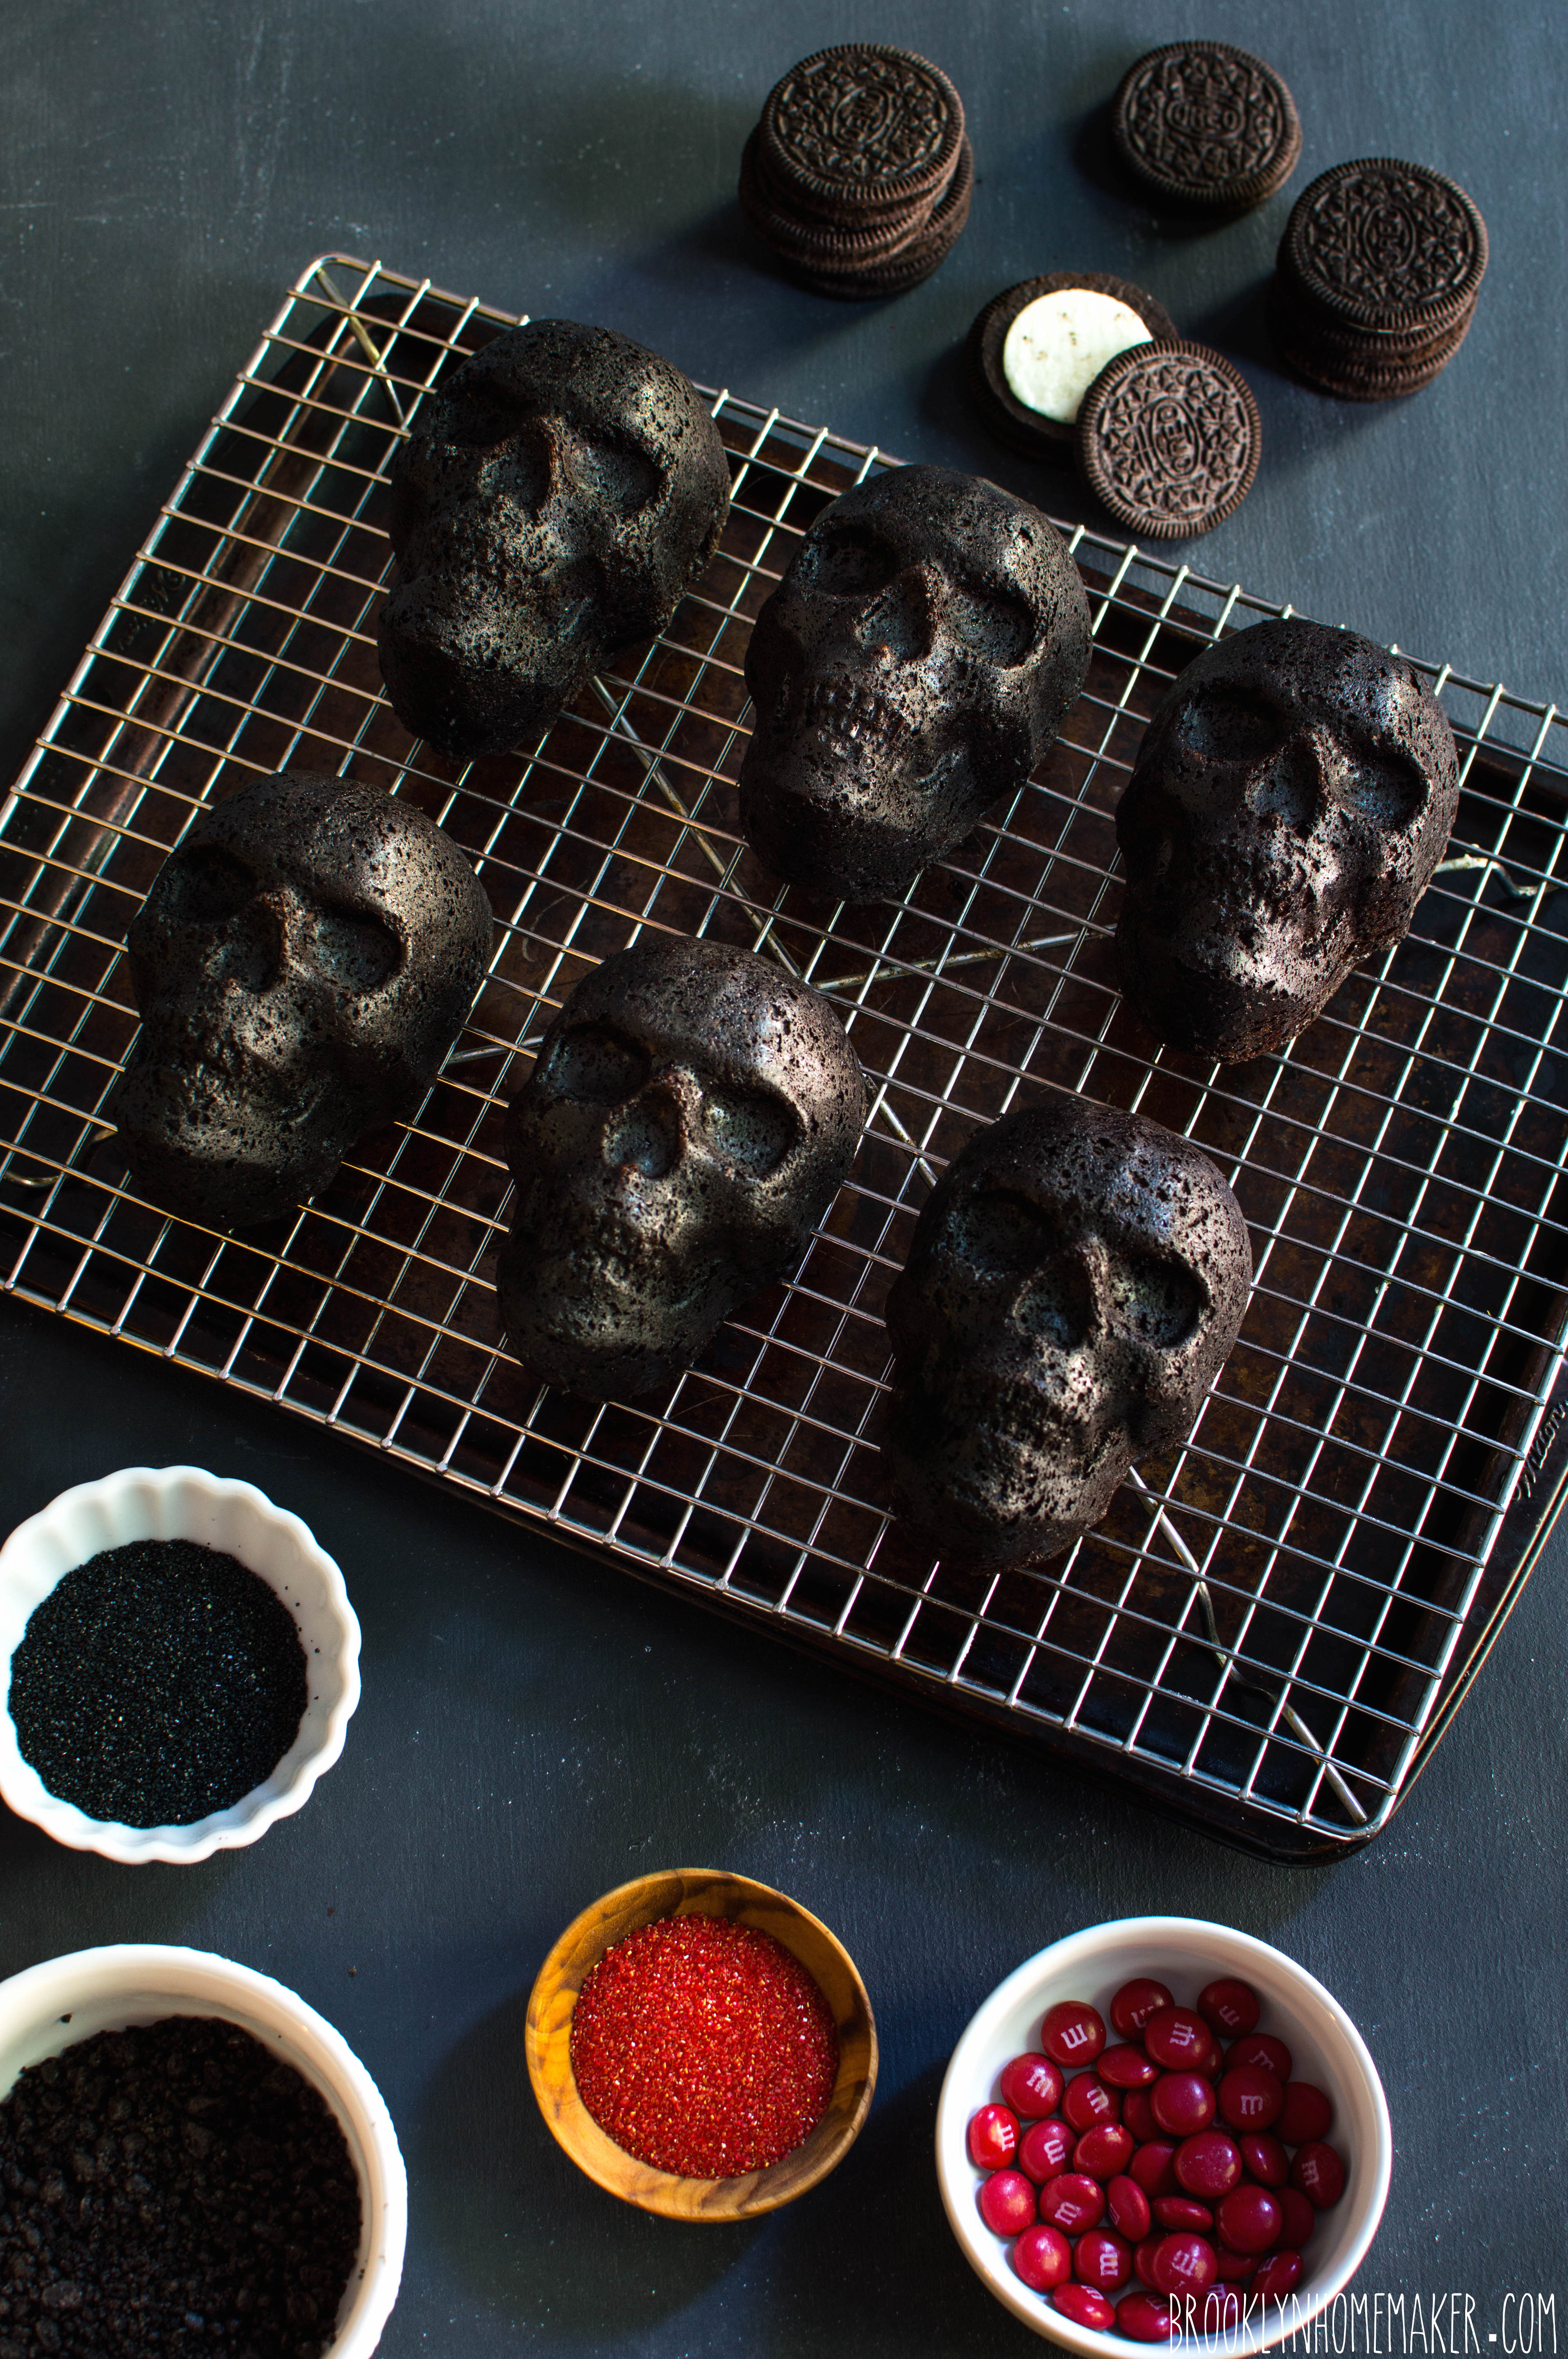
A coworker of mine described the flavor of this cake as “Oreos dipped in milk” which honestly might be the highest praise any of my cakes have ever received.

Ever.

Part of that “Oreo” flavor definitely comes from using dutch process cocoa, which is darker and richer, more chocolatey and less cocoa-y, than traditional baking cocoa. It’s definitely worth looking for, but if you can’t find it, don’t worry! This cake will still be incredibly moist and delicious and chocolatey, if just a bit lighter in color and less Oreo-like in flavor.

basic bundt series | chocolate bundt cake | Brooklyn Homemaker

I went with a basic white glaze because I thought it would contrast nicely against the deep dark brown of the cake, and I honestly didn’t think any more chocolate was necessary. If you wanted to though, you could certainly go for a ganache or cocoa glaze instead.

In terms of customization, the sky’s the limit with this basic chocolate cake. One of my favorite ways to jazz it up is to zest an orange or two into the granulated sugar before mixing it in with the dry ingredients, and then swapping out the brewed coffee for some fresh squeezed orange juice!
You could also swap out the mini chocolate chips for a cup of fresh raspberries or halved pitted cherries to add some summer brightness.
If you wanted a more powerful coffee flavor you could also mix a couple teaspoons of espresso powder in with the coffee, or make a glaze with a coffee liqueur. Speaking of adding liqueur to the glaze, why not go nuts with some Amaretto or Frangelico, or even go all out with bourbon or rum?

Gussied up and personalized, or un-fussed with and made as written, this chocolate cake is a definite crowd pleaser y’all!

basic bundt series | chocolate bundt cake | Brooklyn Homemaker

Chocolate Bundt Cake

1 cup hot brewed coffee
3/4 cup dutch process cocoa powder (plus more for pan) *see note
1 stick (8 tablespoons) unsalted butter (plus more for pan)
1/2 cup peanut (or vegetable) oil
3/4 cup buttermilk
2 teaspoons real vanilla extract
2 eggs
1 cup brown sugar
1 cup granulated sugar
2 1/2 cups all-purpose flour
1 1/4 teaspoons coarse kosher salt
1/2 teaspoon baking soda
1 teaspoon baking powder
3/4 cup mini chocolate chips (optional) **see note

Preheat the oven to 350F.
Brush (or spray) a 10 to 12 cup bundt pan with softened butter (or oil), and add a few tablespoons of cocoa powder. Shake the cocoa around the pan until evenly distributed, and tap out any excess.

In a large measuring cup or microwave safe bowl, combine the coffee and cocoa powder and whisk out any lumps. If the coffee is still very hot, add the stick of butter and stir until melted or, if necessary, microwave it just until the butter is melted. Whisk in oil, buttermilk, and vanilla to cool the mixture down a bit before adding the eggs. Then add the eggs and brown sugar and whisk until well blended and free of lumps.

In a separate bowl, whisk together granulated sugar, flour, salt, & baking soda and powder. Make a well in the center of the flour and pour in the liquid ingredients. With a silicone spatula, stir just until there are no visible streaks of dry flour left. Then stir in the mini chocolate chips if using, just until evenly distributed.

Pour batter into the prepared pan, not more than 3/4 of the way up the sides. If using a 12 cup pan, all the batter will fit. In a 10 cup pan, you may want to reserve just a tiny bit to avoid a mess in your oven. Bake in the center of the oven for 50 to 55 minutes, or until the cake no longer jiggles, and the top springs back when gently pressed with a fingertip. You could try a toothpick or cake tester but the melted chocolate chips may give you a false reading.

Cool for about 30 minutes on a wire rack before turning out of pan. Turn out onto the rack and cool completely before glazing.

Best Simple Bundt Cake Glaze:
1 1/2 cups powdered sugar
1 teaspoon vanilla extract
2 to 2 1/2 tablespoons half & half

Mix sugar, vanilla, and 2 tablespoons half & half together in a small bowl. Mix until completely smooth and free of lumps. You want the glaze to be very thick so it doesn’t slide right off the cake, but it does need to be liquid enough that it pours smoothly. If necessary, thin the glaze out with more half & half, adding only about 1/4 a teaspoon at a time to avoid thinning it too much.

Place a sheet pan under the cooling rack to catch any drips, and pour the glaze in a steady stream over the cake.. Let the glaze harden for at least 30 minutes before slicing.

Cake can be stored, tightly covered at room temperature, for about 3 days.

cooks notes:
* I use a dutch process cocoa for a deep, rich chocolate flavor, but if you can’t find it, regular cocoa powder will work.
** If you use regular size chocolate chips or chunks, they’ll likely sink to the bottom of the pan and could cause the cake to stick. The minis however, are light enough to stay evenly distributed throughout the batter as it bakes.

Advertisement

ginger pinchies

Have you guys decided which cookies you’ll be baking for the holidays yet? Have you narrowed it down to just one recipe, or are you making a few different kinds?

ginger pinchies | Brooklyn Homemaker

When I was little my grandma would always have a big tray of homemade cookies on the counter every Christmas, and it was always so much fun to choose which kind to try first. Being the chubby little dough boy that I was, by the time we were done opening presents you better believe that I’d tried each and every recipe she had on that platter, sampling a few of them more than once, you know, just to be sure.

ginger pinchies | Brooklyn Homemaker

This year I signed up for a cookie swap at work and I couldn’t be more excited about it. I’ve always wanted to host one myself but never thought enough of my friends would be interested to make it work. This year though, one of my coworkers suggested it and to my surprise, so many people signed up that I’m actually worried about how many batches I’m going to have to make. The more people who sign up though, the more varieties of cookies I’ll have for my holiday spread this year. An embarrassment of riches y’all!

Originally my plan was some kind of spicy gingerbread cutouts, but after Nordic Ware reached out to me to ask if I’d be interested in a project they’re working on with the Minnesota Historical Society, I might just have to change my plans!

ginger pinchies | Brooklyn Homemaker

To celebrate their Scandinavian American roots this holiday season, Nordic Ware joined forces with the Minnesota Historical Society and Mill City Museum to help them promote a special holiday cookbook they’ve just released.

Nordic Ware has been a major part of Minnesota’s heritage and history since 1946, and they’re still a family owned company!  The Minnesota Historical Society helps preserve Minnesota’s past, shares the state’s stories and connects people with history in meaningful ways. They play an important role in Minnesota’s historic preservation, education and tourism; and provide the public with award-winning programs, exhibitions and events. Part of the historical society, The Mill City Museum was built into the ruins of what was once the world’s largest flour mill, located in Minneapolis on the historic Mississippi Riverfront. They teach their visitors about the intertwined histories of the flour industry, the Mississippi river, and the city of Minneapolis.

ginger pinchies | Brooklyn Homemaker

Written by self proclaimed Nordic food geek and meatball historian Patrice M. Johnson, and published by Minnesota Historical Society Press; Jul: Swedish American Holiday Traditions focuses on the Christmas food traditions of Swedish Americans in the Midwest.

From smörgåsbord and St. Lucia processions, to Christmas Eve gatherings with family and friends, Swedish Americans are linked through the generations by a legacy of meatballs and lutfisk. Throughout the Midwest where Swedish immigrants settled, holiday dishes placed on the julbord (Christmas table) tell stories about who they are, where they come from, and where they are heading.

In exploring Swedish American holiday customs, Johnson begins with her own family’s Christmas Eve gathering, which involves a combination of culinary traditions: allspice-scented meatballs, Norwegian lefse served Swedish style (warm with butter), and the American interloper, macaroni and cheese. Just as she tracks down the meanings behind why her family celebrates as it does, she reaches into the lives and histories of other Swedish Americans with their own stories, their own versions of traditional recipes, their own joys of the season. The result is a fascinating exploration of the Swedish holiday calendar and its American translation.

ginger pinchies | Brooklyn Homemaker

Jul is full of recipes that are perfect for holiday celebrations, even if you don’t have Swedish or Scandinavian roots.  The are tons of mouth-watering recipes for celebratory savory dishes, drinks, and desserts, but I went straight for the cookies when I was deciding which recipe to try out and share. Coming from a German American family, I share the author’s love for heavily spiced holiday treats and it didn’t take me long to zero in on a fun and unusual recipe for spice cookies she calls “Ginger Pinchies”.

These two-tone cookies were named after Johnson’s cat Pinchy, and inspired by her daughter’s love of ginger and her aunt’s well-worn copy of a Swedish Tabernacle Church Cookbook. Although they’re rolled up differently, the recipe is similar to a traditional pinwheel cookie. Rather than chocolate though, the dark part is a ginger-heavy spiced molasses dough and the light is perfumed with fresh citrus zest and a touch of vanilla. It reminds me so much of an Old-Fashioned marble cake recipe that I found in an old cookbook from the 1940s, which I made into this stunning holiday bundt a couple years ago!

ginger pinchies | Brooklyn Homemaker

Reading that this recipe was a 2015 Minnesota State Fair Gold Medal Flour Cookie Contest Blue Ribbon Winner was all  I needed to see to know this was the one for me.

The results are in y’all, these cookies are amazing! The light part is citrusy and delicate, soft and chewy, and I absolutely love the contrast with the rich and spicy molasses dough. Taken all in one bite they balance perfectly, and because I’m a nerd I also tried eating each dough separately in small bites to see how I liked them on their own. Just perfect! Thanks to my new Nordic Ware half sheet pans, the cookies baked up perfectly tender with delicately and evenly browned bottoms. While dark non-stick pans can sometimes overheat and burn the bottoms of cookies, these professional grade pans heat evenly and consistently producing perfectly baked cookies every time!

These cookies are absolutely ideal for your holiday spread, and they’ll be great for my cookie swap. You should definitely check out this cookbook for yourself, but so you don’t have to wait to make these cookies, I’ve shared the recipe below.

ginger pinchies | Brooklyn Homemaker

Ginger Pinchies

  • Servings: makes 16 cookies
  • Print
recipe from Jul: Swedish American Holiday Traditions
1/2 cup (1 stick) butter, softened
1/2 cup sugar
1 egg yolk, beaten
3 tablespoons milk
1 1/2 cups plus 1 tablespoon all-purpose flour (divided)
1/2 teaspoon baking powder
1/2 teaspoon salt
1 teaspoon vanilla extract
zest of 1 orange (about 1/2 teaspoon)
zest of 1 lemon (about 1/2 teaspoon)
2 tablespoons molasses
1 teaspoon ground ginger (or 2 to 3 tablespoons grated fresh ginger)
3/4 teaspoon cinnamon
1/2 teaspoon cloves
1/4 teaspoon allspice
pinch nutmeg
pinch cayenne

Use a stand mixer with paddle or a hand mixer to beat butter on low speed for about 30 seconds. Gradually add sugar and bead on medium speed until fluffy, about 3 to 4 minutes. Turn mixer to low and add egg yolk and milk and mix well. In a small bowl, whisk together 1 1/2 cups flour, baking powder, and salt. Gradually add flour mixture and continue beating until dough forms.

Divide dough in half (there will be just over 2 cups total) Add half of the dough back to the mixing bowl along with vanilla, orange zest, and lemon zest. Mix until incorporated. Form dough into a ball and wrap in plastic wrap. Set aside. Place remaining dough in mixing bowl along with remaining 1 tablespoon flour, molasses, ginger, cinnamon, cloves, allspice, nutmeg, & cayenne. Mix until incorporated. Dough will be very soft. Form dough into a ball and wrap in plastic. Chill both dough balls at least 30 minutes. (I froze mine for 30 minutes)

Place parchment paper over work surface and roll each dough ball into a 1/4-inch-thick, 8×5-inch rectangle. (It’s important to try to get as close to a rectangle as possible, rather than an oval shape, so that your finished cookie log isn’t hollow at the ends.) Place one dough rectangle over the other, aligning the dough as perfectly as possible. Starting at one of the narrow ends of the dough, use the parchment to help you gently roll the dough into a spiral, stopping a little more than halfway up the rectangle. Flip the dough upside down and roll the other end into a spiral so that the dough resembles and S-shaped log. Wrap in clean plastic wrap and chill at least an hour. (Again, I froze mine)

Preheat oven to 350 degrees and line baking sheets with parchment paper. Slice chilled dough into 1/4-inch-thick slices for about 16 S-shaped cookies. (I sliced my log in half, then into quarters, then sliced each quarter into 4 slices to get 16 evenly sliced cookies) Place on prepared baking sheets about 1 to 2 inches apart. Bake for 8 to 10 minutes or until evenly browned on the bottom. Cool on rack.

roasted pear and walnut spice cake bundt #bundtbakers

Whoa. I just realized that I haven’t baked a bundt cake since April.

roasted pear and walnut spice cake bundt | Brooklyn Homemaker

This has been one hell of a year, both personally with the Maxwell’s build out and opening, and for the country as a whole. This election cycle really has consumed me, chewed me up and spit me out, and just when I thought it would all finally be over, it seems like we’re in for even more struggle and strife.

While things may feel a little disheartening right now, life must go on, and getting back into the kitchen and revving up the ol’ stand mixer certainly helps me feel centered and whole again.

roasted pear and walnut spice cake bundt | Brooklyn Homemaker

I’m so so thrilled that Lauren from Sew You Think You Can Cook chose pears as our inspiration for the #bundtbakers this month. Thank you so much Lauren! Not only do I absolutely love pears on their own, there’s also something especially cozy and satisfying about baking with fall fruit pear-ed (har har) with warm homey spices.

With Thanksgiving only a week away, a pear bundt cake is just what the doctor ordered.

roasted pear and walnut spice cake bundt | Brooklyn Homemaker

I have a confession to make though.
I haven’t always liked pears.

My grandfather has always had several fruit and nut trees on his property, and when I was little I thought pears were absolutely disgusting. I don’t know if it was the grainy texture, or the thick sandy skin, or what, but to be perfectly honest I didn’t care for a lot of the bounty of grandpa’s garden.

I was truly a child of the 80’s, and a lot of my culinary influence during my formative years came from spending time in my grandmother’s kitchen. She is a product of her generation, and Grandma’s food philosophy came from the atomic-age desire for shiny, new, packaged convenience foods rather than the back-to-earth approach many of us prefer today. As a kid in Grandma’s kitchen, packaged food was celophane-wrapped, sterilized heaven to me, and I couldn’t get enough of it. Give me a box of doughnuts, a bag of chips, a can of soup, a bottle of soda, and a grilled cheese sandwich made with plastic-wrapped processed “cheese food”, bagged sliced white bread, and margarine from a tub.
Who wants to have to pick and wash fresh fruits and vegetables from outside with all the dirt and bees and bugs, when the fridge is stocked with Cool Whip and Velveeta that’s clean and delicious and ready to eat?

roasted pear and walnut spice cake bundt | Brooklyn Homemaker

Not me.
That’s who.

I did like Grandpa’s strawberries and plums, but even the strawberries had to be scrubbed and sliced and covered in sugar before I deemed them edible.

roasted pear and walnut spice cake bundt | Brooklyn Homemaker

Obviously my tastes have changed over the years, and as an adult I’ll take a ripe juicy pear, still warm from the sun, over a tub of chemically Cool Whip any day of the week.

As a kid, trips to my grandparents house filled me with excitement because I knew the cupboards were bursting with store-bought chips and cookies and doughnuts. These days I still get excited when I get to visit my grandparents, but now it’s because I know grandpa will load me up with sagging grocery bags filled with dirty bell peppers, lopsided butternut squash, fuzzy warm peaches, or sun-ripened tomatoes when I get ready to leave.

roasted pear and walnut spice cake bundt | Brooklyn Homemaker

When I was planning my bundt for this month, I knew that I really wanted the pears to be the stars of the show. My first instinct was to chop or cube or grate them just like apples into a traditional spice cake for flavor and added moisture, but somehow that didn’t seem like it was “enough”. My pears deserved better than playing second fiddle to cinnamon.

Determined to leave the pears whole (or at least halved) inside the cake, I decided to poach them in a bourbon ginger syrup. They smelled like heaven in the poaching liquid and I couldn’t help myself from sneaking spoonfuls of batter from the pan before it went into the oven. I was congratulating myself on a job well done before the cake even started to rise, and I couldn’t wait to get it out of the oven and see the autumnal perfection I’d come up with.

Aaaaaaand…

It was an absolute disaster.

The pears soaked up too much moisture in the poaching liquid, releasing it back into the cake to create a jiggly bundt with the weirdest almost blubbery texture I’ve ever had the misfortune to put in my mouth. As the cake cooled it sagged and the cake separated from the pears and slumped into a wobbly mess on the plate.

So, back to the drawing board. I knew I’d need a thicker, denser batter, and I obviously needed to find a way to pull moisture out of the pears before baking them into the cake. With poaching out of the question, I decided to try dry roasting the pears so they’d be tender but slightly dried out before going into the batter. Thankfully, it worked out beautifully and I think the pears are almost as happy about it as I am.

roasted pear and walnut spice cake bundt | Brooklyn Homemaker

You’ll want to use the smallest pears you can find for this recipe, because if they’re too big or tall they’ll take up too much room in the pan. They might cause the batter to run over in the oven, or could stick out the top of the cake and cause it to sit unevenly when plated. I also think that Bosc pears are the only variety firm and sturdy enough to stand up to being roasted, handled, and baked in this way without turning to mush or falling apart.

The bit of extra effort in roasting the pears and toasting the walnuts really pays off when you slice down into the cake to reveal a perfect cross-section of a whole pear (depending on where you slice).
And the flavor? Fuggitaboudit. Warm spices, tender roasted pears, crunchy toasted walnuts, buttery tender brown sugar spice cake, and a thick and tangy cream cheese glaze.
I mean. Come on.

This is basically THE perfect fall cake, and it would make an excellent addition to your Thanksgiving spread to boot. If you’re looking for even more fall inspiration and pear-y wonderfulness, make sure you scroll down past the recipe to see what the other #bundtbakers came up with this month!

roasted pear and walnut spice cake bundt | Brooklyn Homemaker

Roasted Pear and Walnut Spice Cake

  • Servings: 8 to 12-ish
  • Print
4 to 5 small firm Bosc pears, depending on the size of your pan
1 1/4 cups chopped walnuts
2 1/4 cups all-purpose Flour
1 teaspoon baking powder
1/4 teaspoon baking soda
1 teaspoon salt
1 tablespoon cinnamon
2 teaspoons ginger
1 teaspoons cardamom (optional)
1/2 teaspoon nutmeg
1/2 teaspoon cloves
1 cup buttermilk
2 teaspoons vanilla extract
1 cup (16 tablespoons) unsalted butter, softened
1 1/2 cups dark brown sugar, packed
3 large eggs

Cream Cheese Glaze:
4 ounces (1/2 package) cream cheese, softened
1 cup powdered sugar
1 teaspoon vanilla extract
2 to 4 tablespoons milk

Preheat the oven to 350°F. Lightly butter and flour a 10 to 12 cup bundt pan, refrigerate.

Peel pears, slice in half, and scoop out seeds with a melon baller or spoon. Place cut side up on a parchment lined baking sheet and bake for 20 minutes. Flip and bake 15 minutes more. Remove from oven and set aside to cool.

Spread walnuts in an even layer on a small baking sheet and toast for 5 to 8 minutes, or until they smell toasty. Do not let them burn. Set aside to cool. Reserve 1/4 cup for topping the cake.

Whisk flour, baking powder, baking soda, salt, & spices together in a bowl. Set aside. Mix vanilla into buttermilk and set aside.
In a the bowl of and electric mixer, beat together the butter and brown sugar until light and fluffy, about 3 to 5 minutes. Add the eggs one at a time, beating for a minute or two and scraping the sides and bottom of the bowl between additions.
Alternate additions of flour and buttermilk, mixing on low just until combined, and scraping the bowl between each addition. Start and end with flour so there are 3 additions of flour and 2 of buttermilk. Stir in 1 cup walnuts until evenly distributed.

Pour about 3/4 of the batter into the prepared pan, and tap the pan on the counter to remove air bubbles. Push pear halves into the batter, top side facing down into the bottom of the pan, arranging them so the cut halves face each other as a whole pear. Arrange pears so they’re evenly spaced around the pan. Spread remaining batter over the top, leaving at least half an inch of room for the cake to rise so it doesn’t overflow in the oven. It’s okay if the pears stick out of the batter a bit, as the cake should rise around them. Bake for 50 to 55 minutes, until a cake tester or toothpick inserted in the center comes out clean.
Remove the cake from the oven, and cool in the pan for 30 minutes before turning it out onto a rack to cool completely.

While the cake cools, make the glaze.
In the bowl of a stand mixer, beat the cream cheese until it’s fluffy and smooth. Add the powdered sugar, vanilla, and 4 tablespoons of milk and blend until there are no lumps. If necessary, add more milk, a tablespoon at a time, beating after each addition until the glaze reaches the desired drizzle-able consistency. It should be about the consistency of thick melted ice cream to drizzle correctly.

Place a tray under cake and cooling rack to catch any drips. Pour glaze over cake and let the glaze work its way down the side, tapping the tray on the counter if necessary. Top with toasted walnuts.

Well covered in an airtight container, this cake should keep at room temperature about 2 days, or longer in the fridge. Just make sure to serve it at room temperature if you refrigerate it.

roasted pear and walnut spice cake bundt | Brooklyn Homemaker

The bundt bakers really outdid themselves this month, and all these perfect pear cakes have my mouth watering like crazy!

BundtBakers
 .
You can see all our of lovely Bundts by following our Pinterest board. Updated links for all of our past events and more information about #BundtBakers, can be found on our home page.

dark chocolate & oreo mini skull cakes

When I was a kid, Halloween was my absolute favorite holiday.

dark chocolate & oreo mini skull cakes | Brooklyn Homemaker

I mean, I’ve always loved Thanksgiving too, for the food of course, but as a young kid Halloween was the freakin’ best. Turkey and pumpkin pie are great and all but costumes and candy, and running around at night like a little lunatic with fake vampire teeth? Grandma’s cornbread dressing couldn’t hold a candle…

I’ve had countless costumes over the years, but I’ll never forget an especially uncomfortable year dressed as Frankenstein with tons of sticky green makeup and itchy stick-on eyebrows and neck bolts. After that, the simpler and more elegant Dracula was definitely my go to.
Each year I’d get a new costume complete with fangs, cape, and gold medallion, and as a young gay boy I already had all the crisp white button downs and black dress pants that were required but not included with the costume.  (No jeans and T-shirt for this little sissy boy!)
I think it really was the dressed up, fancy man aspect of Dracula that appealed to me most year after year, and it wasn’t until I found my grandma’s old wig in her bathroom closet that the appeal started to wear off…

dark chocolate & oreo mini skull cakes | Brooklyn Homemaker

These days I usually spend most of the month of October thinking up all sorts of witty, hysterical costumes that I could wear, but never do. The last time I dressed up was for work, about 4 years ago. I’d just started working at Whisk slinging fancy kitchen gear, and we all came up with this hilarious plan to come to work dressed as a Food Network star.
Group costumes are the best! What could go wrong?!?!

A few days later I show up to work in full Ina Garten regalia, and oops! Everyone either forgot or didn’t have time to get their costumes together.  One person, who usually works from home, loved the idea and actually did come in for an hour or two dressed as Alton Brown (essentially dressed as an older, nerdier version of himself) to take pictures, but everyone else either didn’t dress up or threw something else together at the last minute.
As I stood there working my full shift in an oversized navy blouse, huge clip on pearl earrings, lipstick, and an itchy bob wig; I vowed never again to be duped by allure of an amazing group costume idea.

I haven’t dressed up since.
Womp Womp.

dark chocolate & oreo mini skull cakes | Brooklyn Homemaker

Even though I’m too old for trick-or-treating and haven’t put on a costume in years, I really do still have a special place in my heart for Halloween.

I like to imagine that some day in the future I’ll be the type of adult who’s famous among his circle of friends for hosting amazing costume parties that are talked about for years to come. Basically I dream of one day throwing Halloween parties just like the ones on Roseanne, complete with decorations so elaborate and costumes so perfectly spot-on that everyone I know will try, and fail, to one-up me year after year.
By the way, am I the only one who’s ever wondered how the lower middle class Connor family, who always seemed to have trouble paying their bills on time, came up with all the money for their costumes and decorations?
I guess it doesn’t matter, but, like, that stuff ain’t cheap!

dark chocolate & oreo mini skull cakes | Brooklyn Homemaker

With all my dreams of Halloween entertaining one-upmanship, the minute I saw this adorable haunted skull cakelet pan, I knew that I HAD to have it.

You all know I love Nordic Ware. I’ve told you more than once twice three times (a lady), but after finally having a chance to use this pan you’ll have to excuse me as I wax poetic once again.

Nordic Ware has been making exceptional cookware and bakeware right here in the US for 70 years now, and even after all this time they’re still a family owned company. The bundt pan is by far their most famous and most popular product, but they also specialize in all sorts of elaborate and festively shaped baking pans. No one can compare to their quality and selection, and ALL of their pans are sturdy, heavy duty, ultra-non-stick, and unbelievably durable.
I should know! I put their pans through the ringer!

dark chocolate & oreo mini skull cakes | Brooklyn Homemaker

There is so much detail in these little skulls that I was worried it wouldn’t read once the cakes were baked, or that I’d have problems getting the cakes out cleanly from all the intricate details face and teeth. At this point I should have known that I had no need to worry. These little cakes released like a dream and all that detail came across with amazing definition in the finished cakes.

There’s actually so much detail in these little cakes, that even though I tried decorating them in several ways, I found that my favorite cakes were the simplest, with just a double coat of thin sugary glaze. Of course you can decorate them however you choose, but I really think the simpler, the better. In fact, as much as I love the creepy look of the bright red chocolate candy eyes, I worry that even they take away from the scary perfection of the little cakes as they were straight out of the pan.

dark chocolate & oreo mini skull cakes | Brooklyn Homemaker

The recipe below, simply adapted from my favorite chocolate bundt cake recipe, makes 12 mini skulls, or 2 pans worth. If you only have 1 pan, make sure you wash the pan really well between batches. I also recommend that you dry it well and throw it in the fridge or freezer for a few minutes before reapplying the butter and cocoa. Otherwise the pan will be warm from being washed and the butter will melt and make a mess when you try to dust it with cocoa.
If you don’t have this pan at all, you can get it here, or you can just make this recipe in one 10 cup bundt pan. It won’t be as scary to look at, but it’ll certainly taste just as chocolatey and delicious!

By the way, if you’ve never tried this trick before, using cocoa powder works just as well as flour to prevent the cakes from sticking to the pan, but helps the cakes look extra dark and chocolatey, rather than the dusty uneven look flour sometimes gives to the outside of chocolate cakes.

dark chocolate & oreo mini skull cakes | Brooklyn Homemaker

The flavor of these little cakes is deep dark chocolate perfect with a super tender and moist crumb. Thanks to that simple powdered sugar glaze, these little cakes almost taste like a reeeeeally good moist chocolate doughnut.

The Oreos, complete with cream (don’t use boxed crumbs!), add a really nice touch, especially if you leave some in nice big chunks so they don’t melt and disappear into the batter. Essentially you just want to put them in a plastic bag and crush ’em up with your hands or whack at them with a rolling-pin until there are no whole cookies left, but you still have lots of bigger pieces.

Now tell me, what kid (or adult) could resist a super moist chocolate cake filled with oreo cookie crumbs? Especially one in the shape of a cute-yet-terrifying little skull???

dark chocolate & oreo mini skull cakes | Brooklyn Homemaker

Dark Chocolate & Oreo Mini Skull Cakes

adapted from Joy the Baker

For the Cake:
1 1/4 cups strong hot coffee
3/4 cup Dutch process cocoa powder (I used “Double Dutch Cocoa“) plus extra for pan
2 1/2 cups sugar
1 1/4 teaspoons kosher salt
2 teaspoons baking soda
2 whole eggs
1 egg yolk
1 1/4 cups buttermilk
1 cup peanut oil or any neutral vegetable oil
2 teaspoons vanilla extract
3 cups all-purpose flour
2 cups (about 1 package) roughly crushed oreos (NOT oreo cookie crumbs, you want the cream too)

For the Glaze:
2 cups powdered sugar
1/4 cup milk
1 teaspoon vanilla extract

For decorating (all optional):
Red M&Ms
Sanding or decorating sugar (black, red, or silver)
white mini nonpareils
More crushed Oreos

Place an oven rack in the center of the oven and preheat to 350 degrees F.
Brush a skull cakelet pan (* see note) with softened butter, and dust with cocoa powder, tapping out any excess.

Whisk coffee and cocoa together in a bowl together until free of lumps and set aside.
In the bowl of a stand mixer with a whisk attachment, mix together sugar, salt, baking soda, eggs and egg yolk on low for just one minute. Add the buttermilk, oil and vanilla extract and mix on low again for another minute.
Add the flour and mix on medium speed for 2 minutes more. Add the cocoa mixture and mix on medium speed for 3 minutes. Finally, stir in the roughly crushed Oreos just until evenly distributed throughout. The batter will seem quite loose and liquid, it’s supposed to, don’t worry.
Pour half of the batter into the prepared cake pan, filling each cavity about 3/4 of the way up. This recipe makes two pans worth of batter. If you have two pans, you can bake them both at once, or once the first batch is out of the pan you can wash, dry, and cool the pan in the fridge before reapplying butter and cocoa and baking the remaining batter.
Bake for 20-30, or until a cake tester or toothpick inserted in the cake comes out clean.

Let the cake cool for at least 15 minutes before inverting onto a cooling rack.

To make the glaze:
Whisk the powdered sugar, milk, and vanilla together in a medium bowl until smooth and free of lumps.

To glaze and decorate:
After some trial and error I found that the easiest way to glaze the cakelets was to pick up them up by the base and dip them into the glaze like a doughnut. Remove from the glaze, let drip dry, and turn over to dry on a cooling rack. I actually liked the look of the glaze best when the cakes were glazed twice. If you want to double glaze, wait for the first coat to dry five minutes or so before dipping again.
If you’d like to decorate with sanding sugar, crushed Oreos, or mini nonpareils, sprinkle them over the cakes before your final coat of glaze has dried. If desired, add red chocolate candies in the eye sockets.

*Note: If you don’t have a skull cakelet pan this recipe makes 1 (less spooky but equally delicious) bundt cake in a 10 cup bundt pan. A bundt will need to bake for about 55 to 65 minutes .