cookies

basler brunsli | chocolate almond spice cookies

Hi there friends! It’s officially the holiday season.
When did that happen?

basler brunsli | chocolate almond spice cookie | Brooklyn Homemaker

I feel like it was mid-summer when I went to bed last night, and I woke up in early December.
Yeesh.

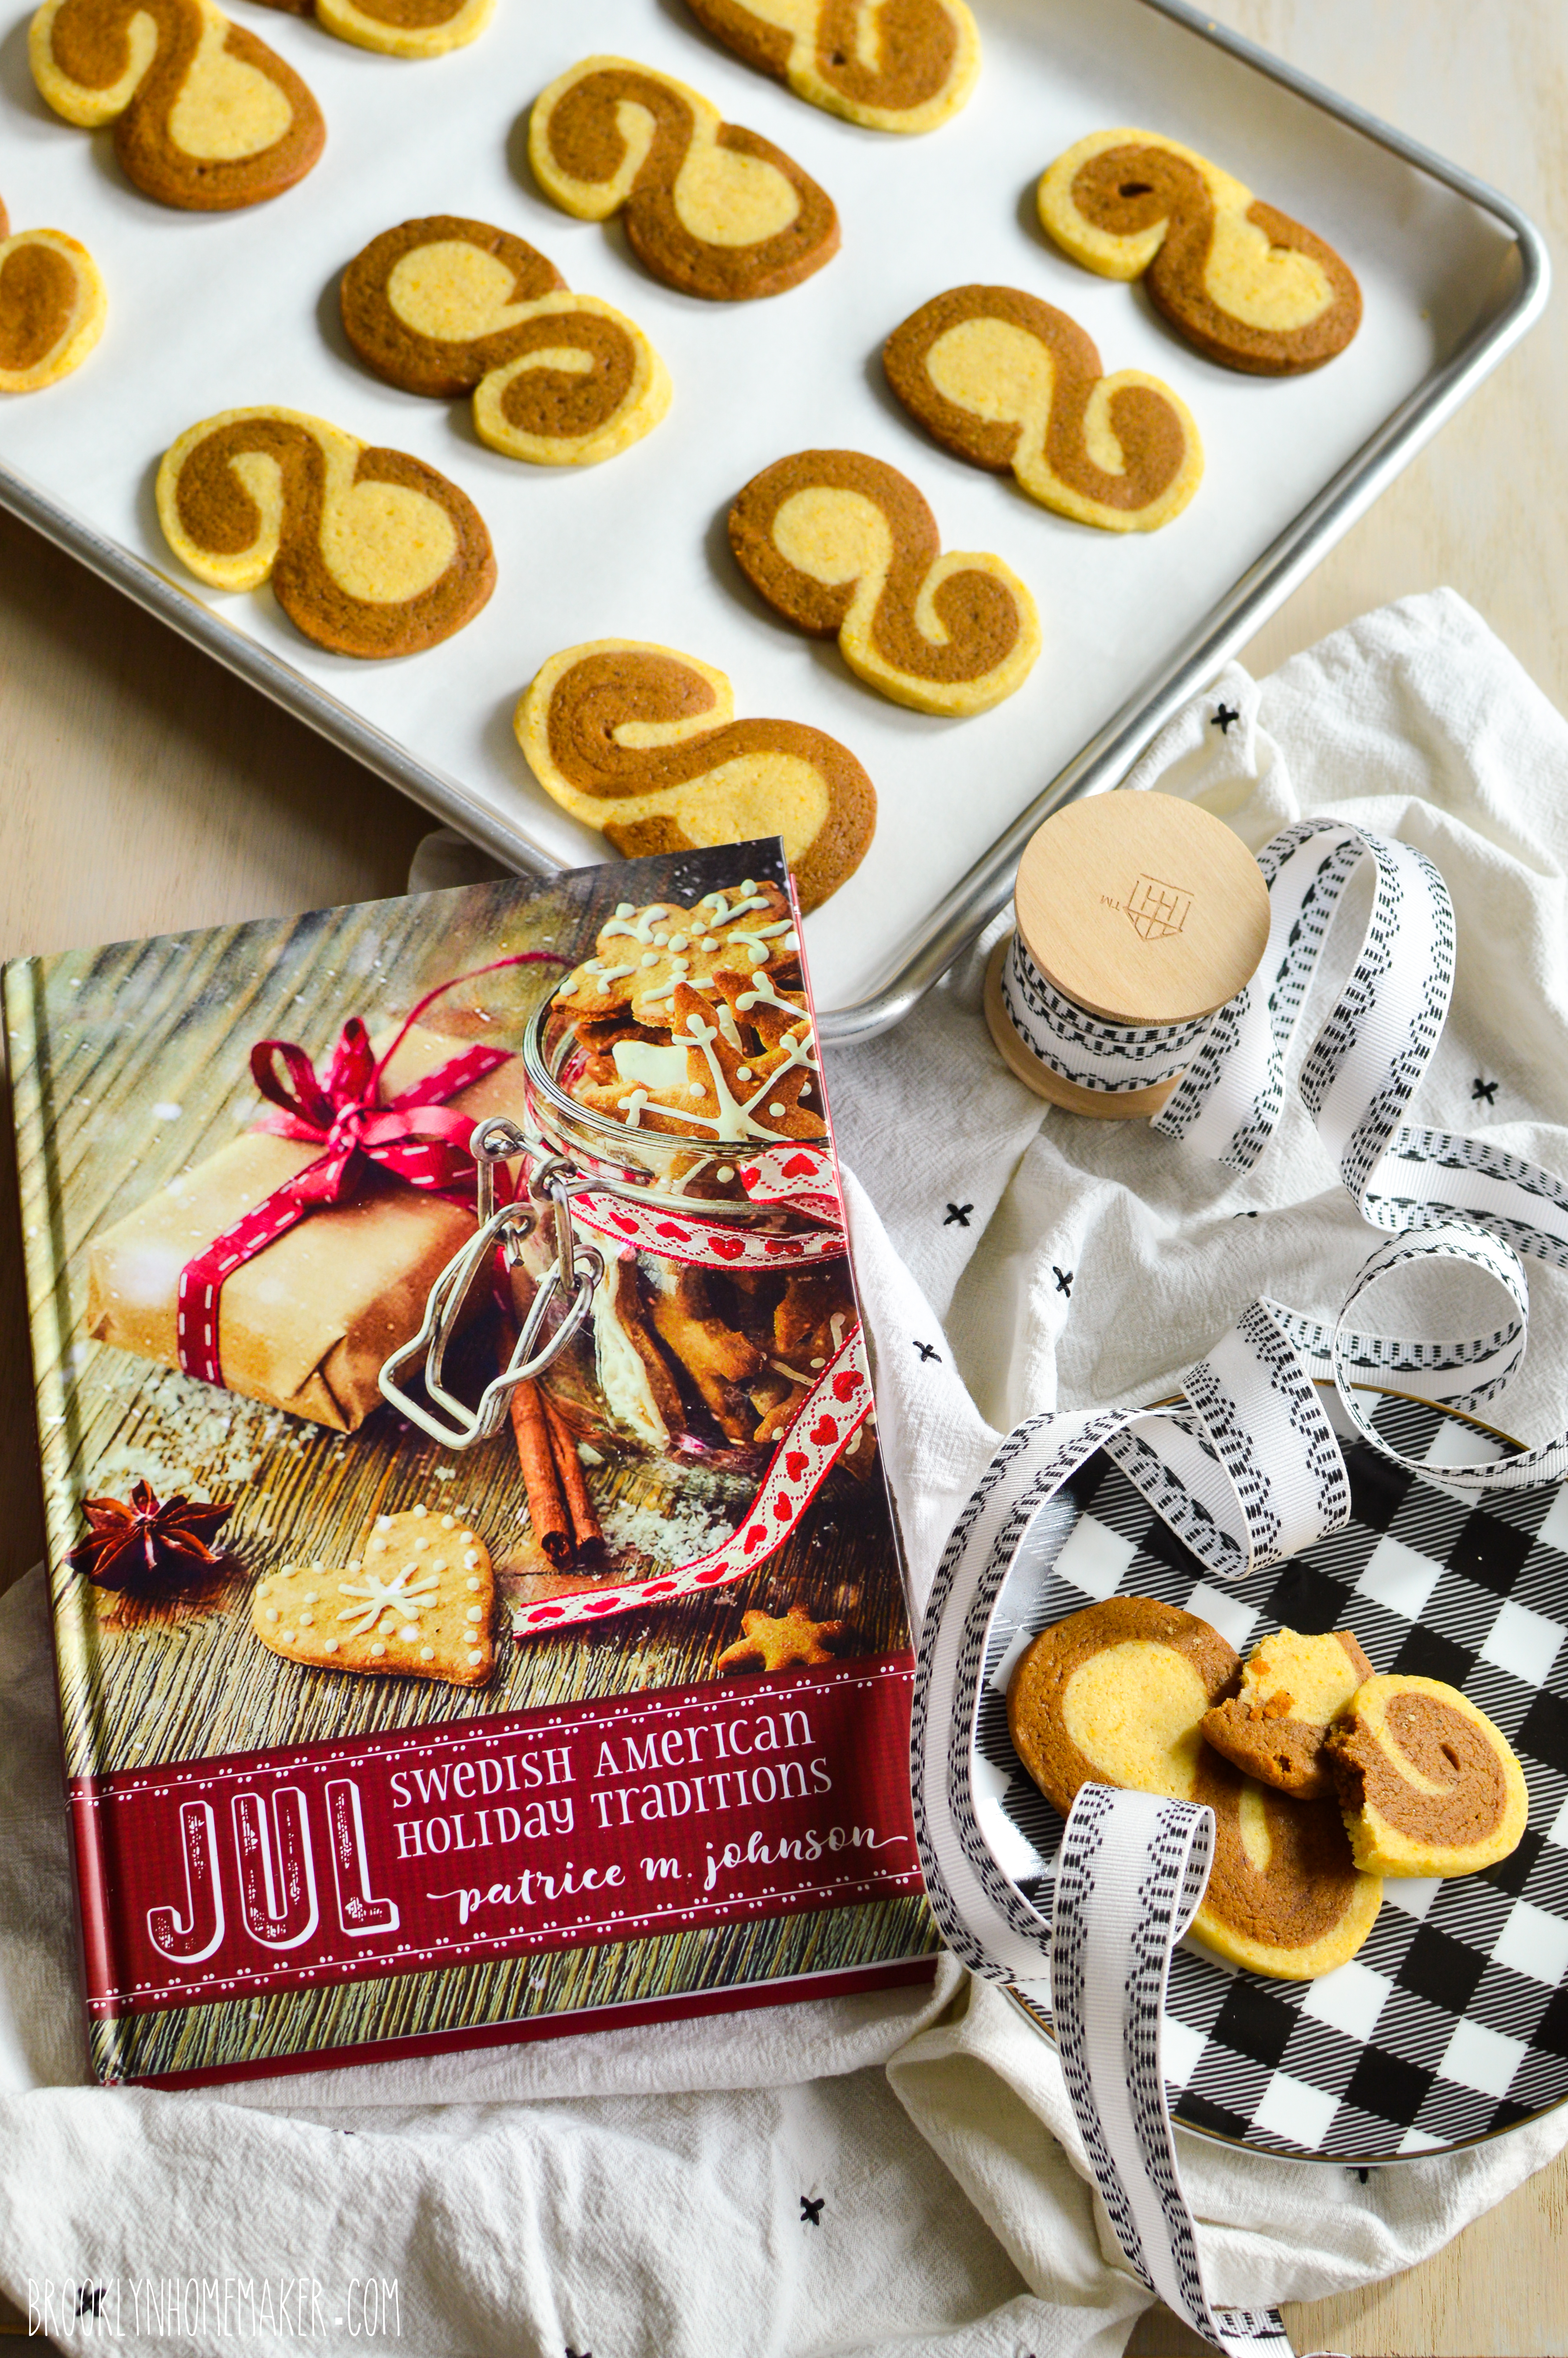
So, to try to force myself into the December/holiday spirit, I decided some holiday cookies were in order.

basler brunsli | chocolate almond spice cookie | Brooklyn Homemaker

I have a healthy cookbook collection, including some old historic cookbooks, but usually when I’m looking for recipe inspiration I tend to leave the cookbooks on the shelves to collect dust and look to the world wide web instead.

When I was trying to find a new cookie recipe for the holidays this year, I started poking around online at first, but then I remembered a book my mom gave me for Christmas a couple years ago. I’m sure that by now you know this about me already, but when it comes to holiday baked goods, I friggin love an old school German recipe, especially one with a healthy dose of spice in it. The book is titled, appropriately enough, Classic German Baking. There’s even a “Christmas Favorites” section, so this was a no brainer.

basler brunsli | chocolate almond spice cookie | Brooklyn Homemaker

I can’t tell you how much I love this book. I could just flip through the pages and drool for hours. I did, in fact, just a few days ago!

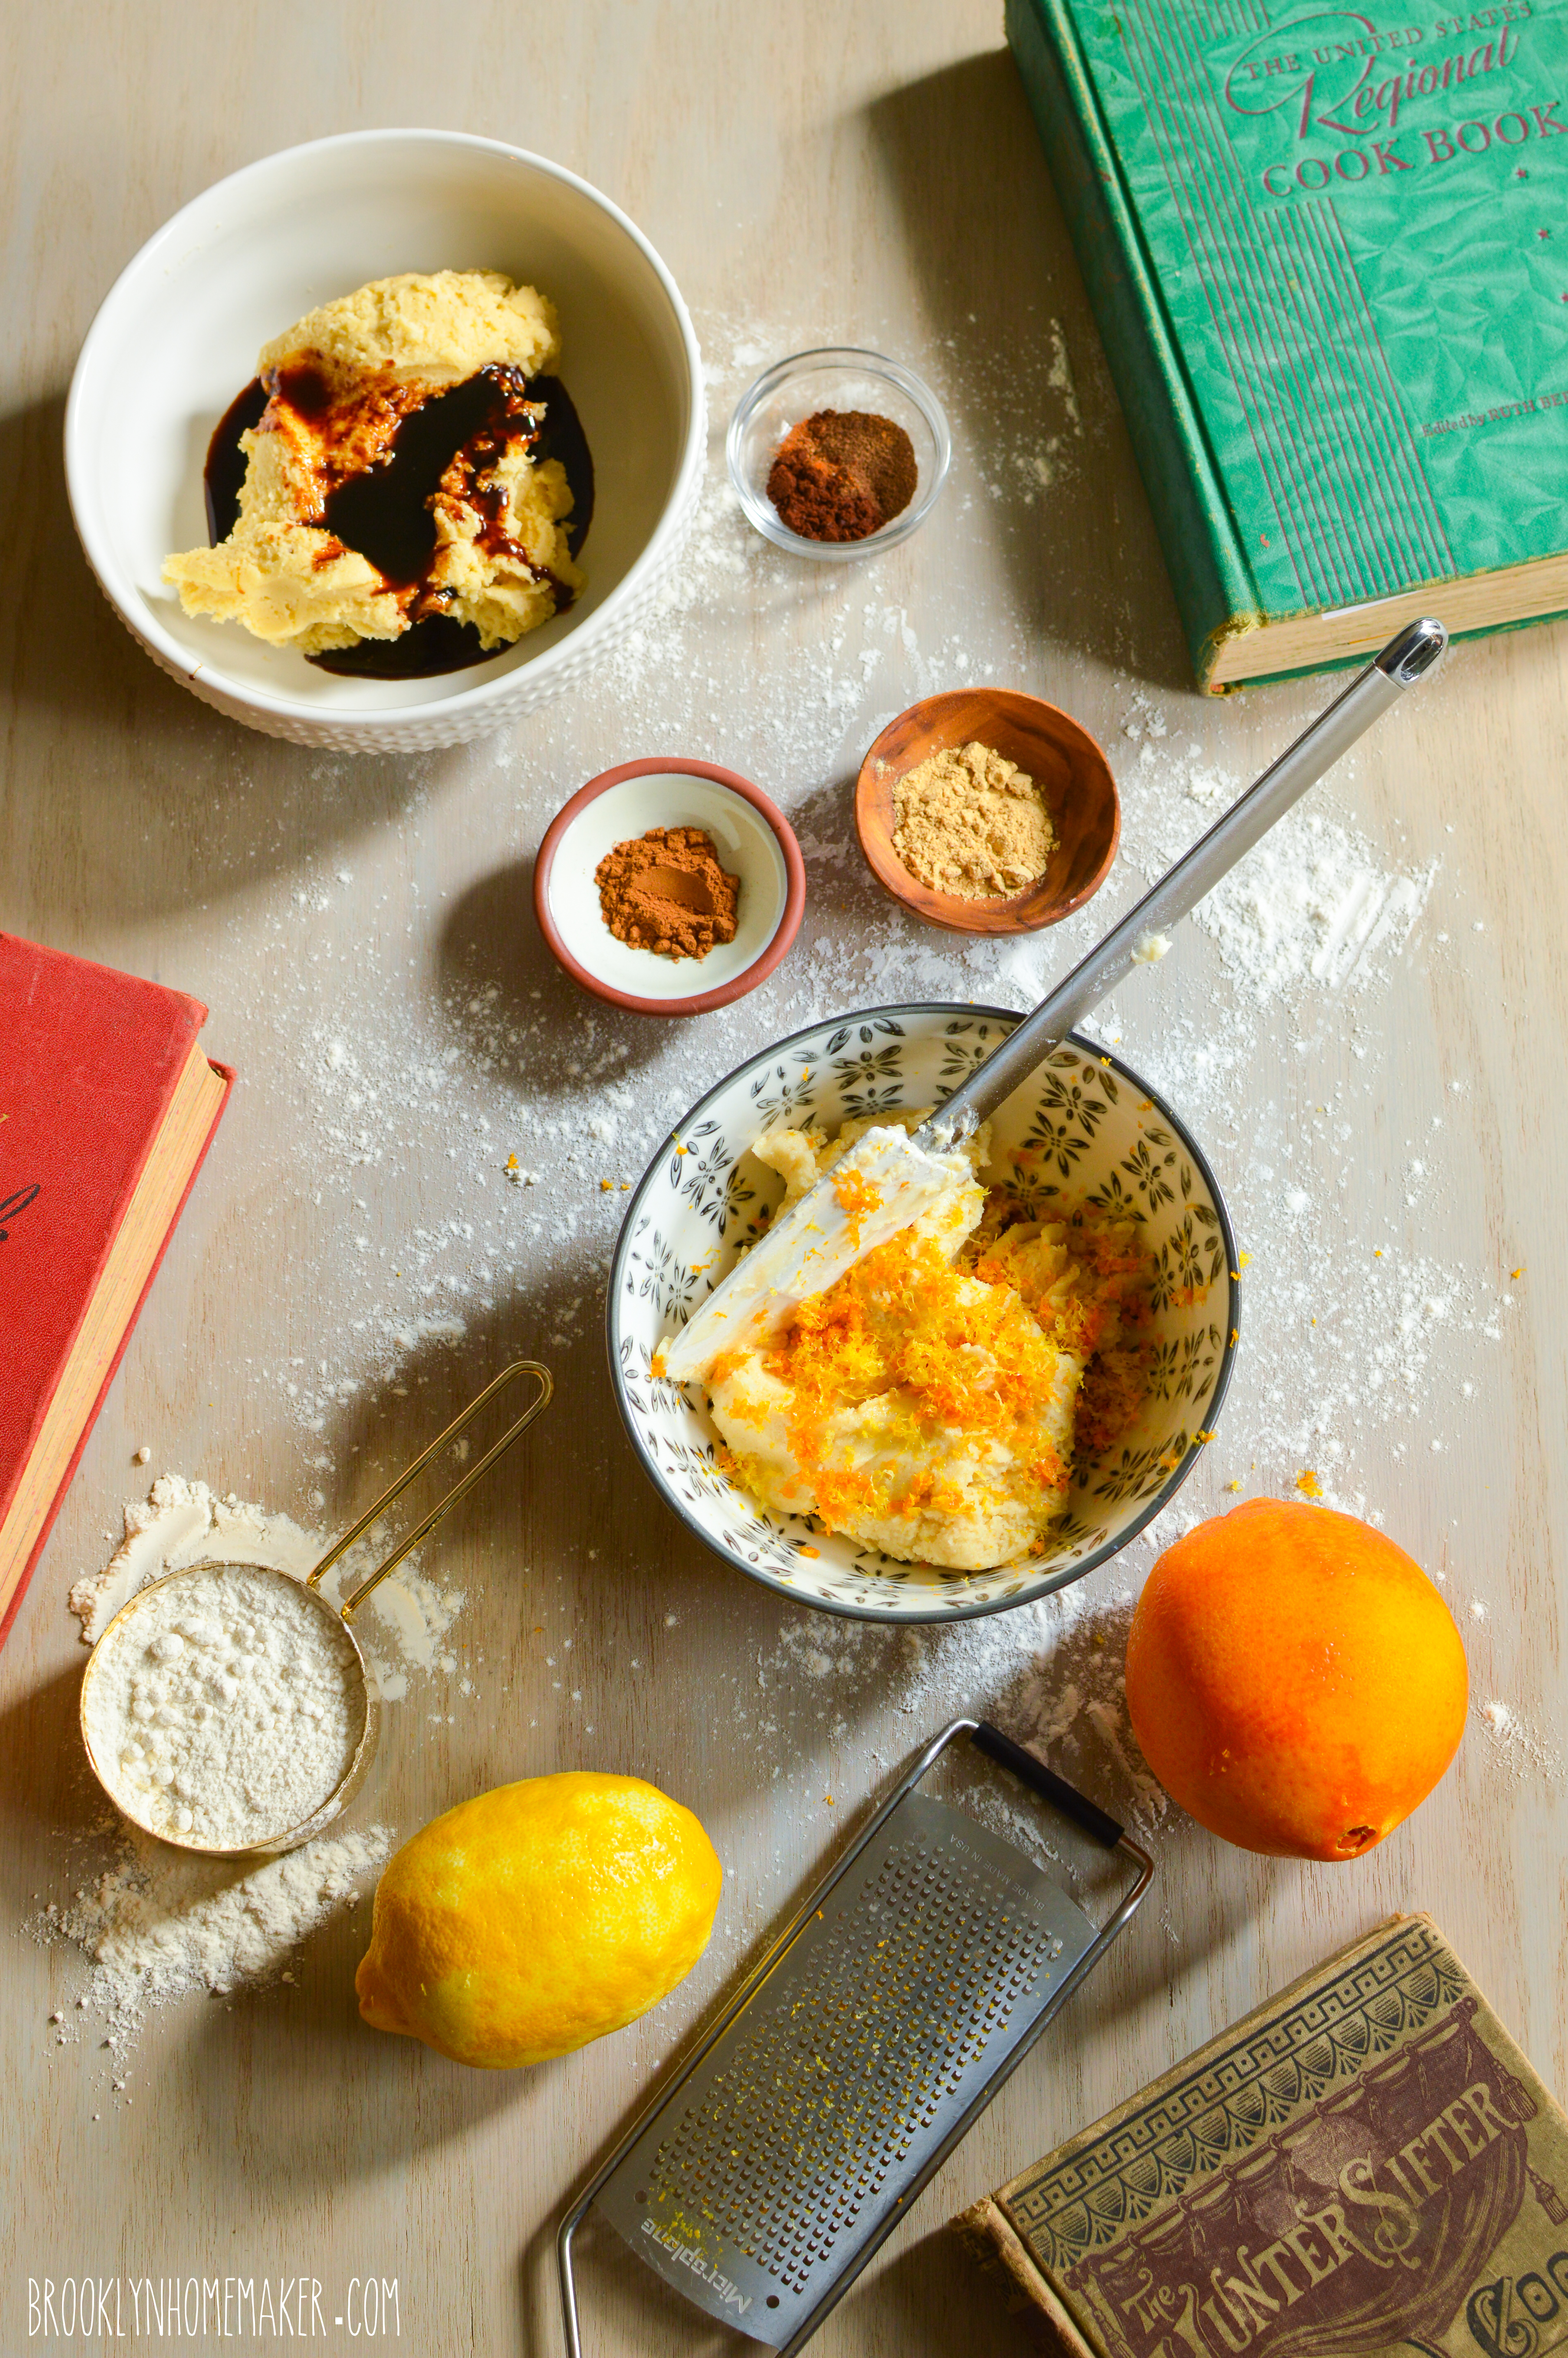
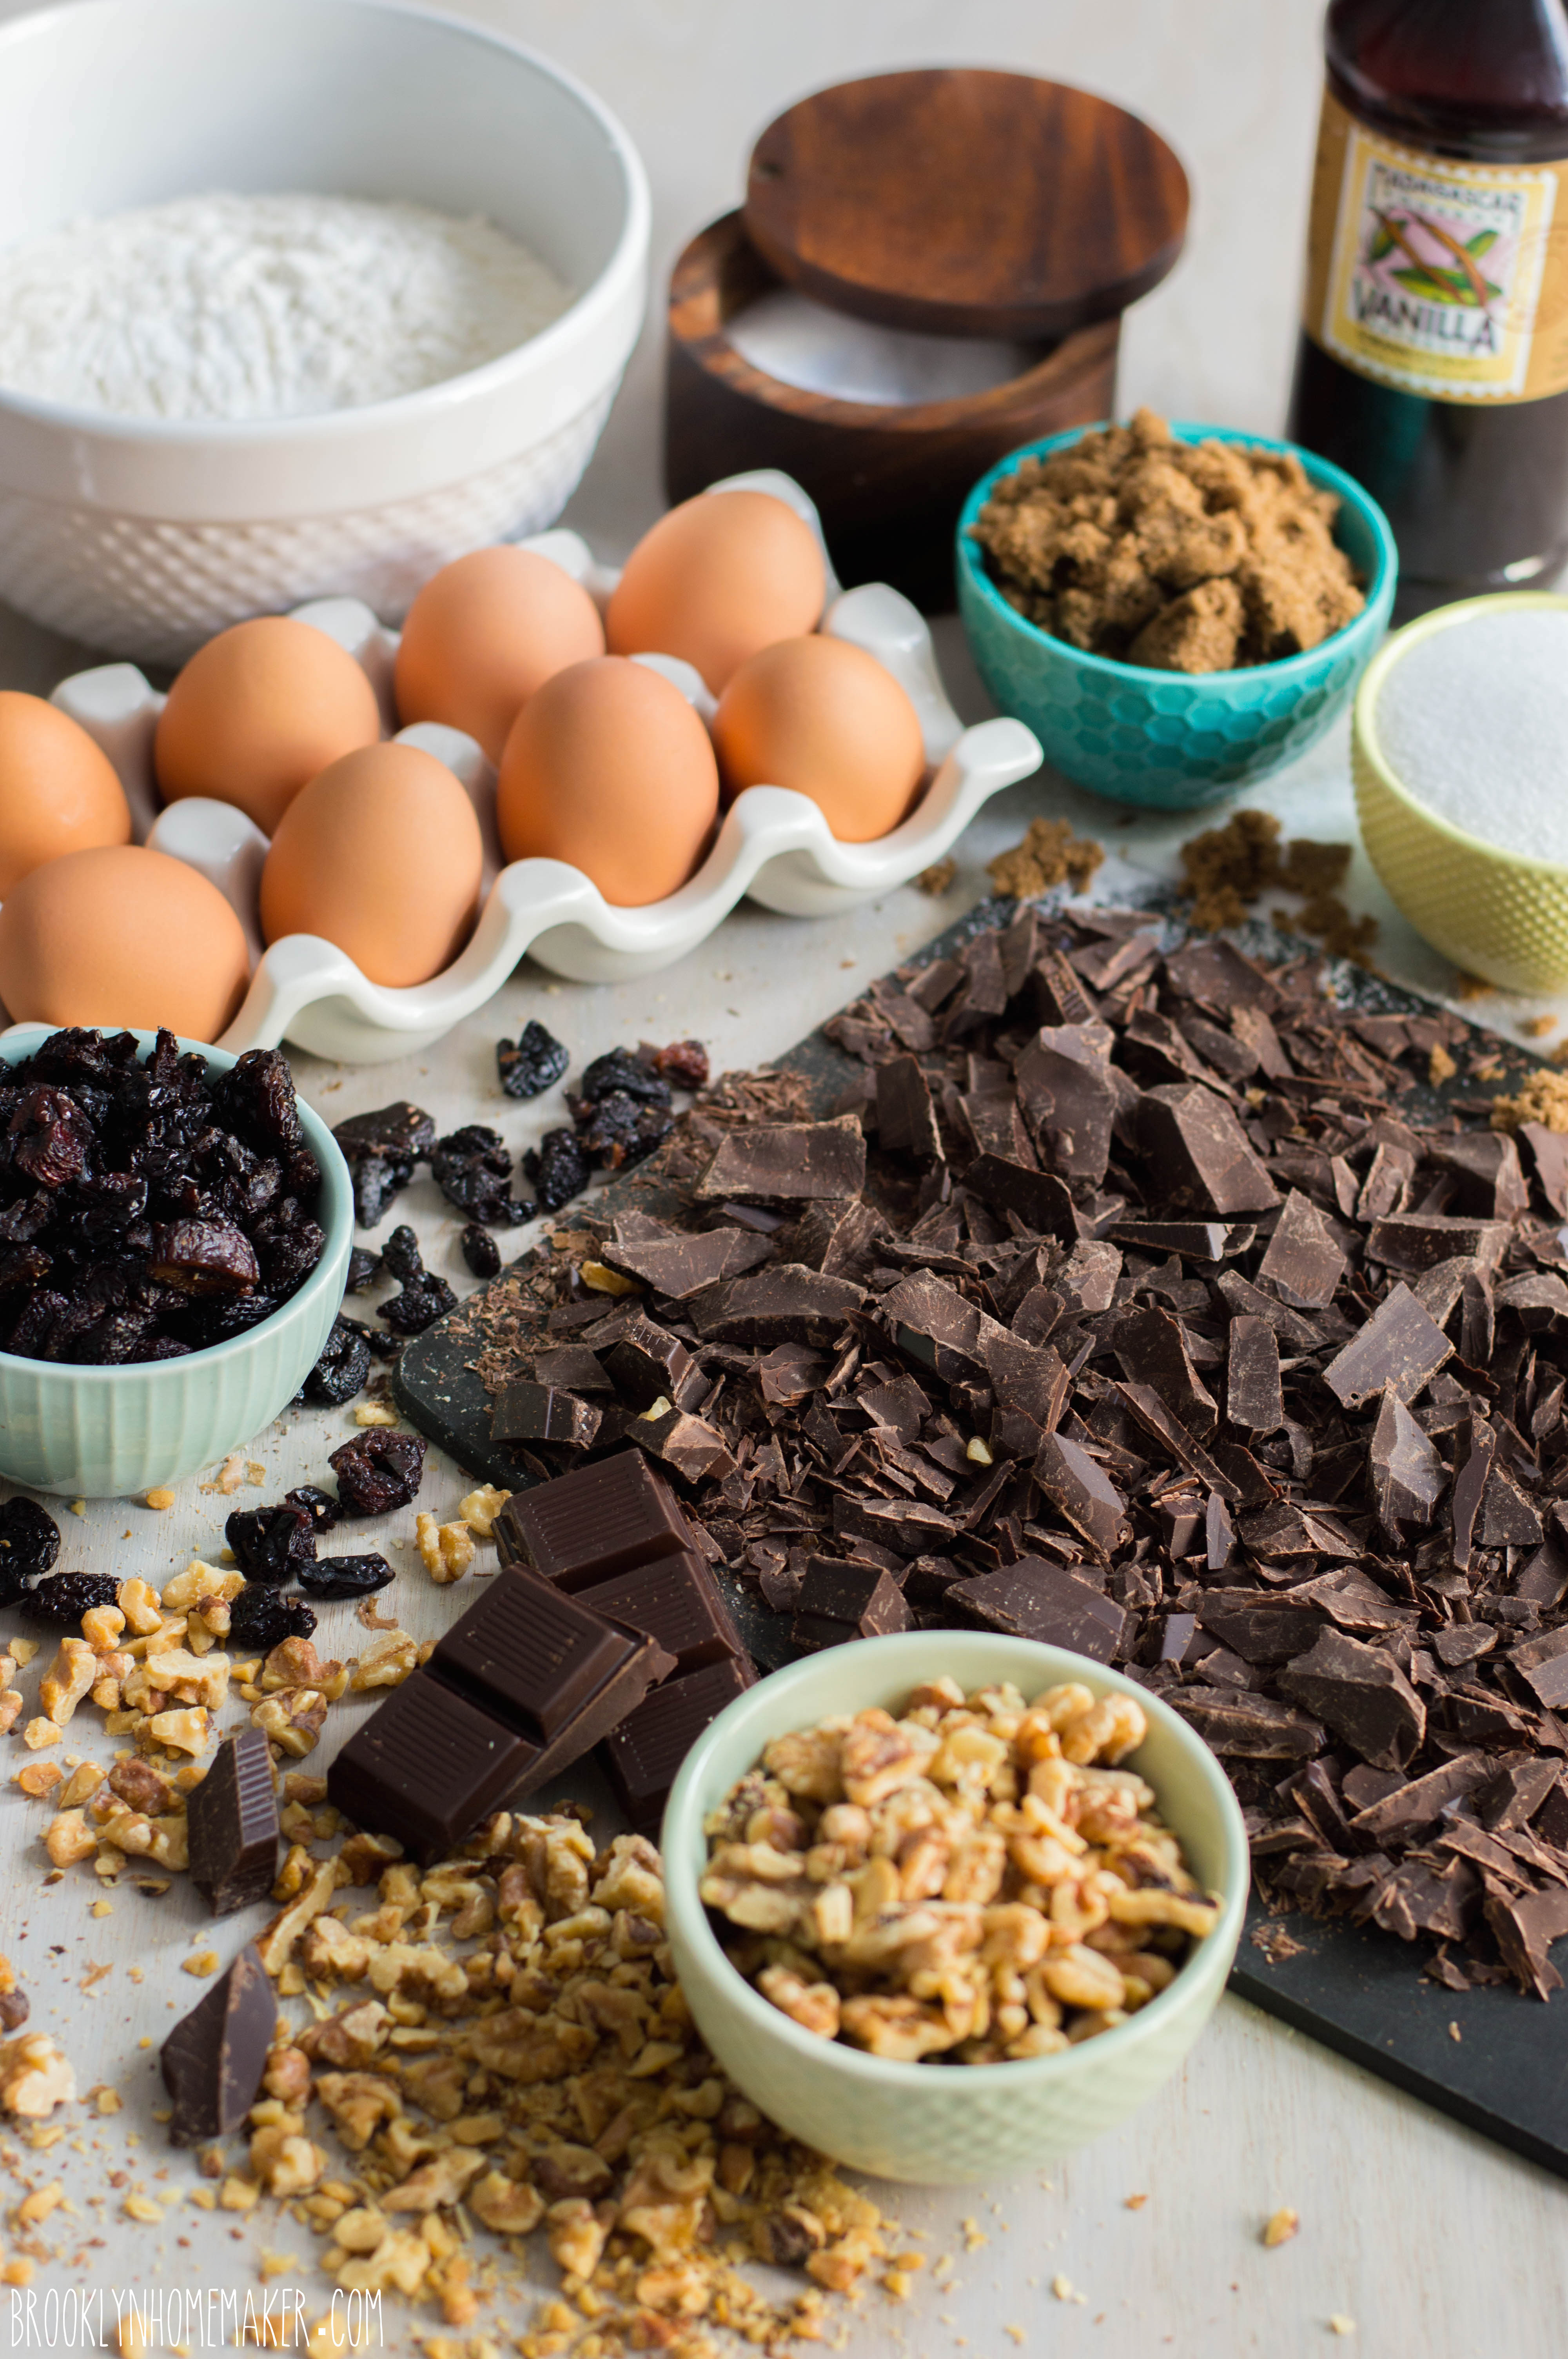
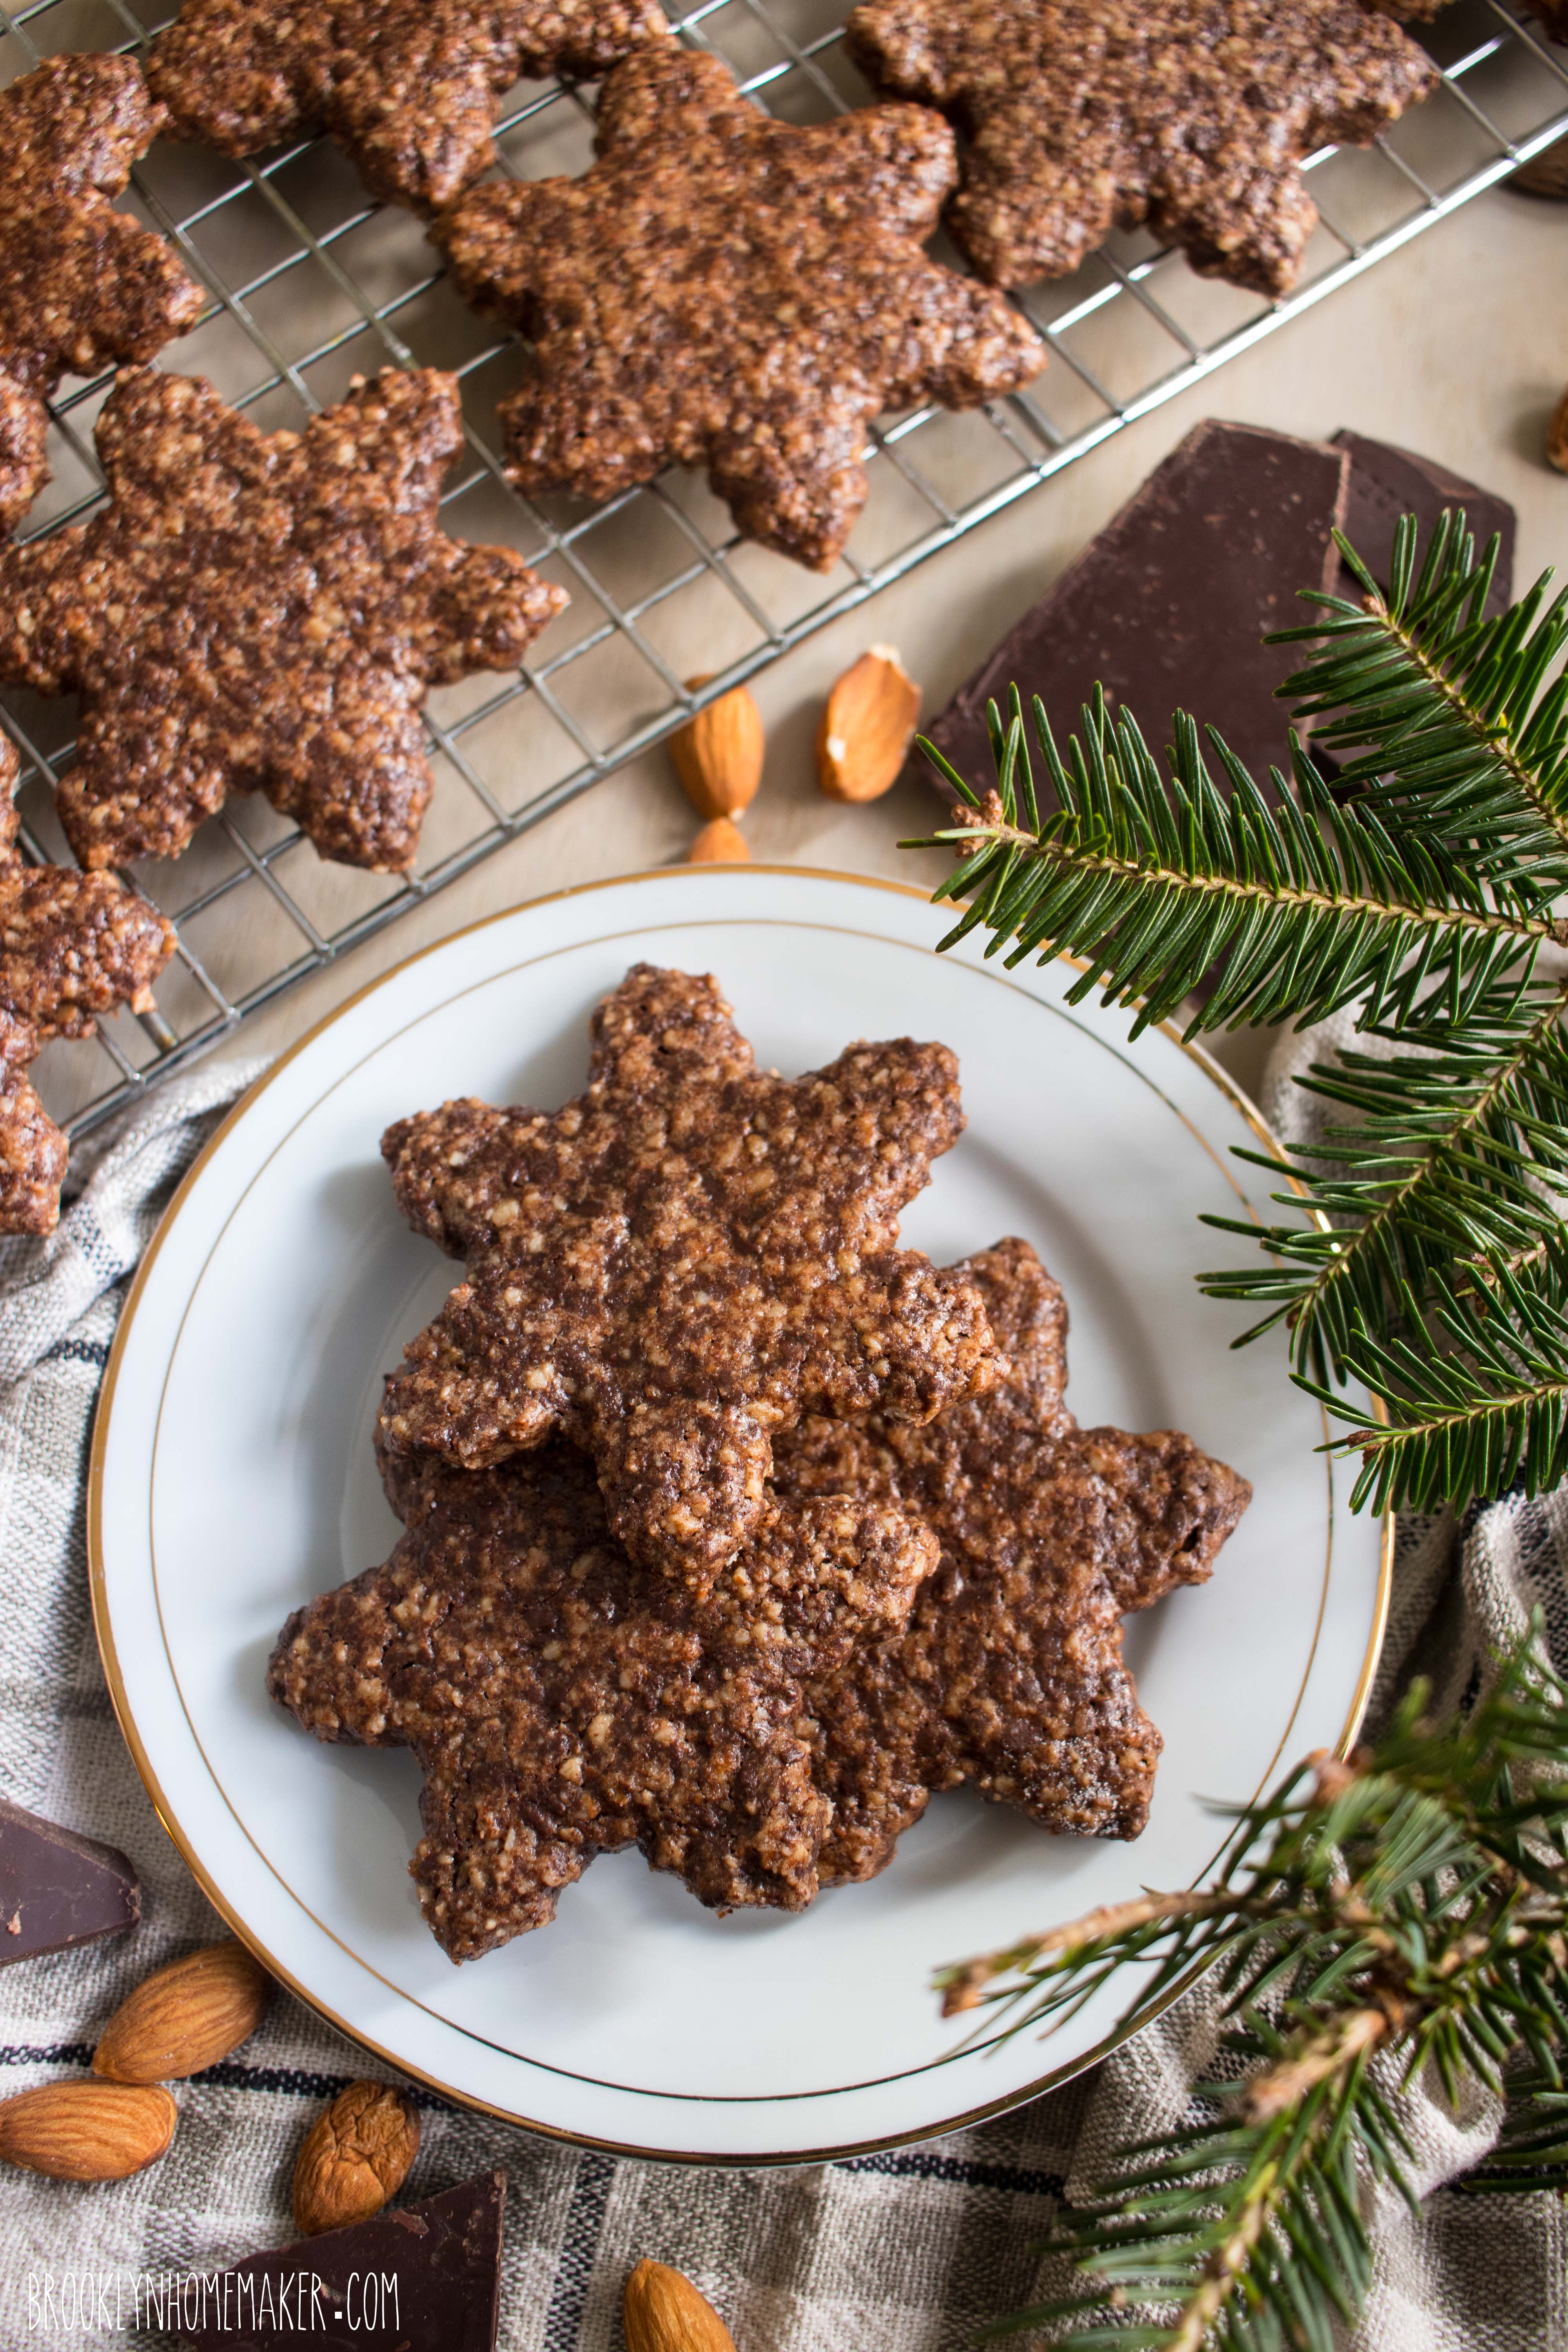
The recipe I chose actually originates from Switzerland, but is very traditional and well loved in Germany. The main ingredients in these cookies are finely ground raw almonds and dark chocolate, with a few additions to bind the dough together and add a bit of flavor. The dough is surprisingly simple to bring together if you have a food processor, but without one, I think it’d be pretty difficult to grind the almonds & chocolate finely enough.

By the way, while raw almonds and dark chocolate aren’t exactly difficult to find, they can be pretty pricey depending on where you go. I just want to mention that Trader Joes is a really great source for affordable nuts and chocolate. Three cheers for the Pound Plus bar! You’re welcome.

basler brunsli | chocolate almond spice cookie | Brooklyn Homemaker

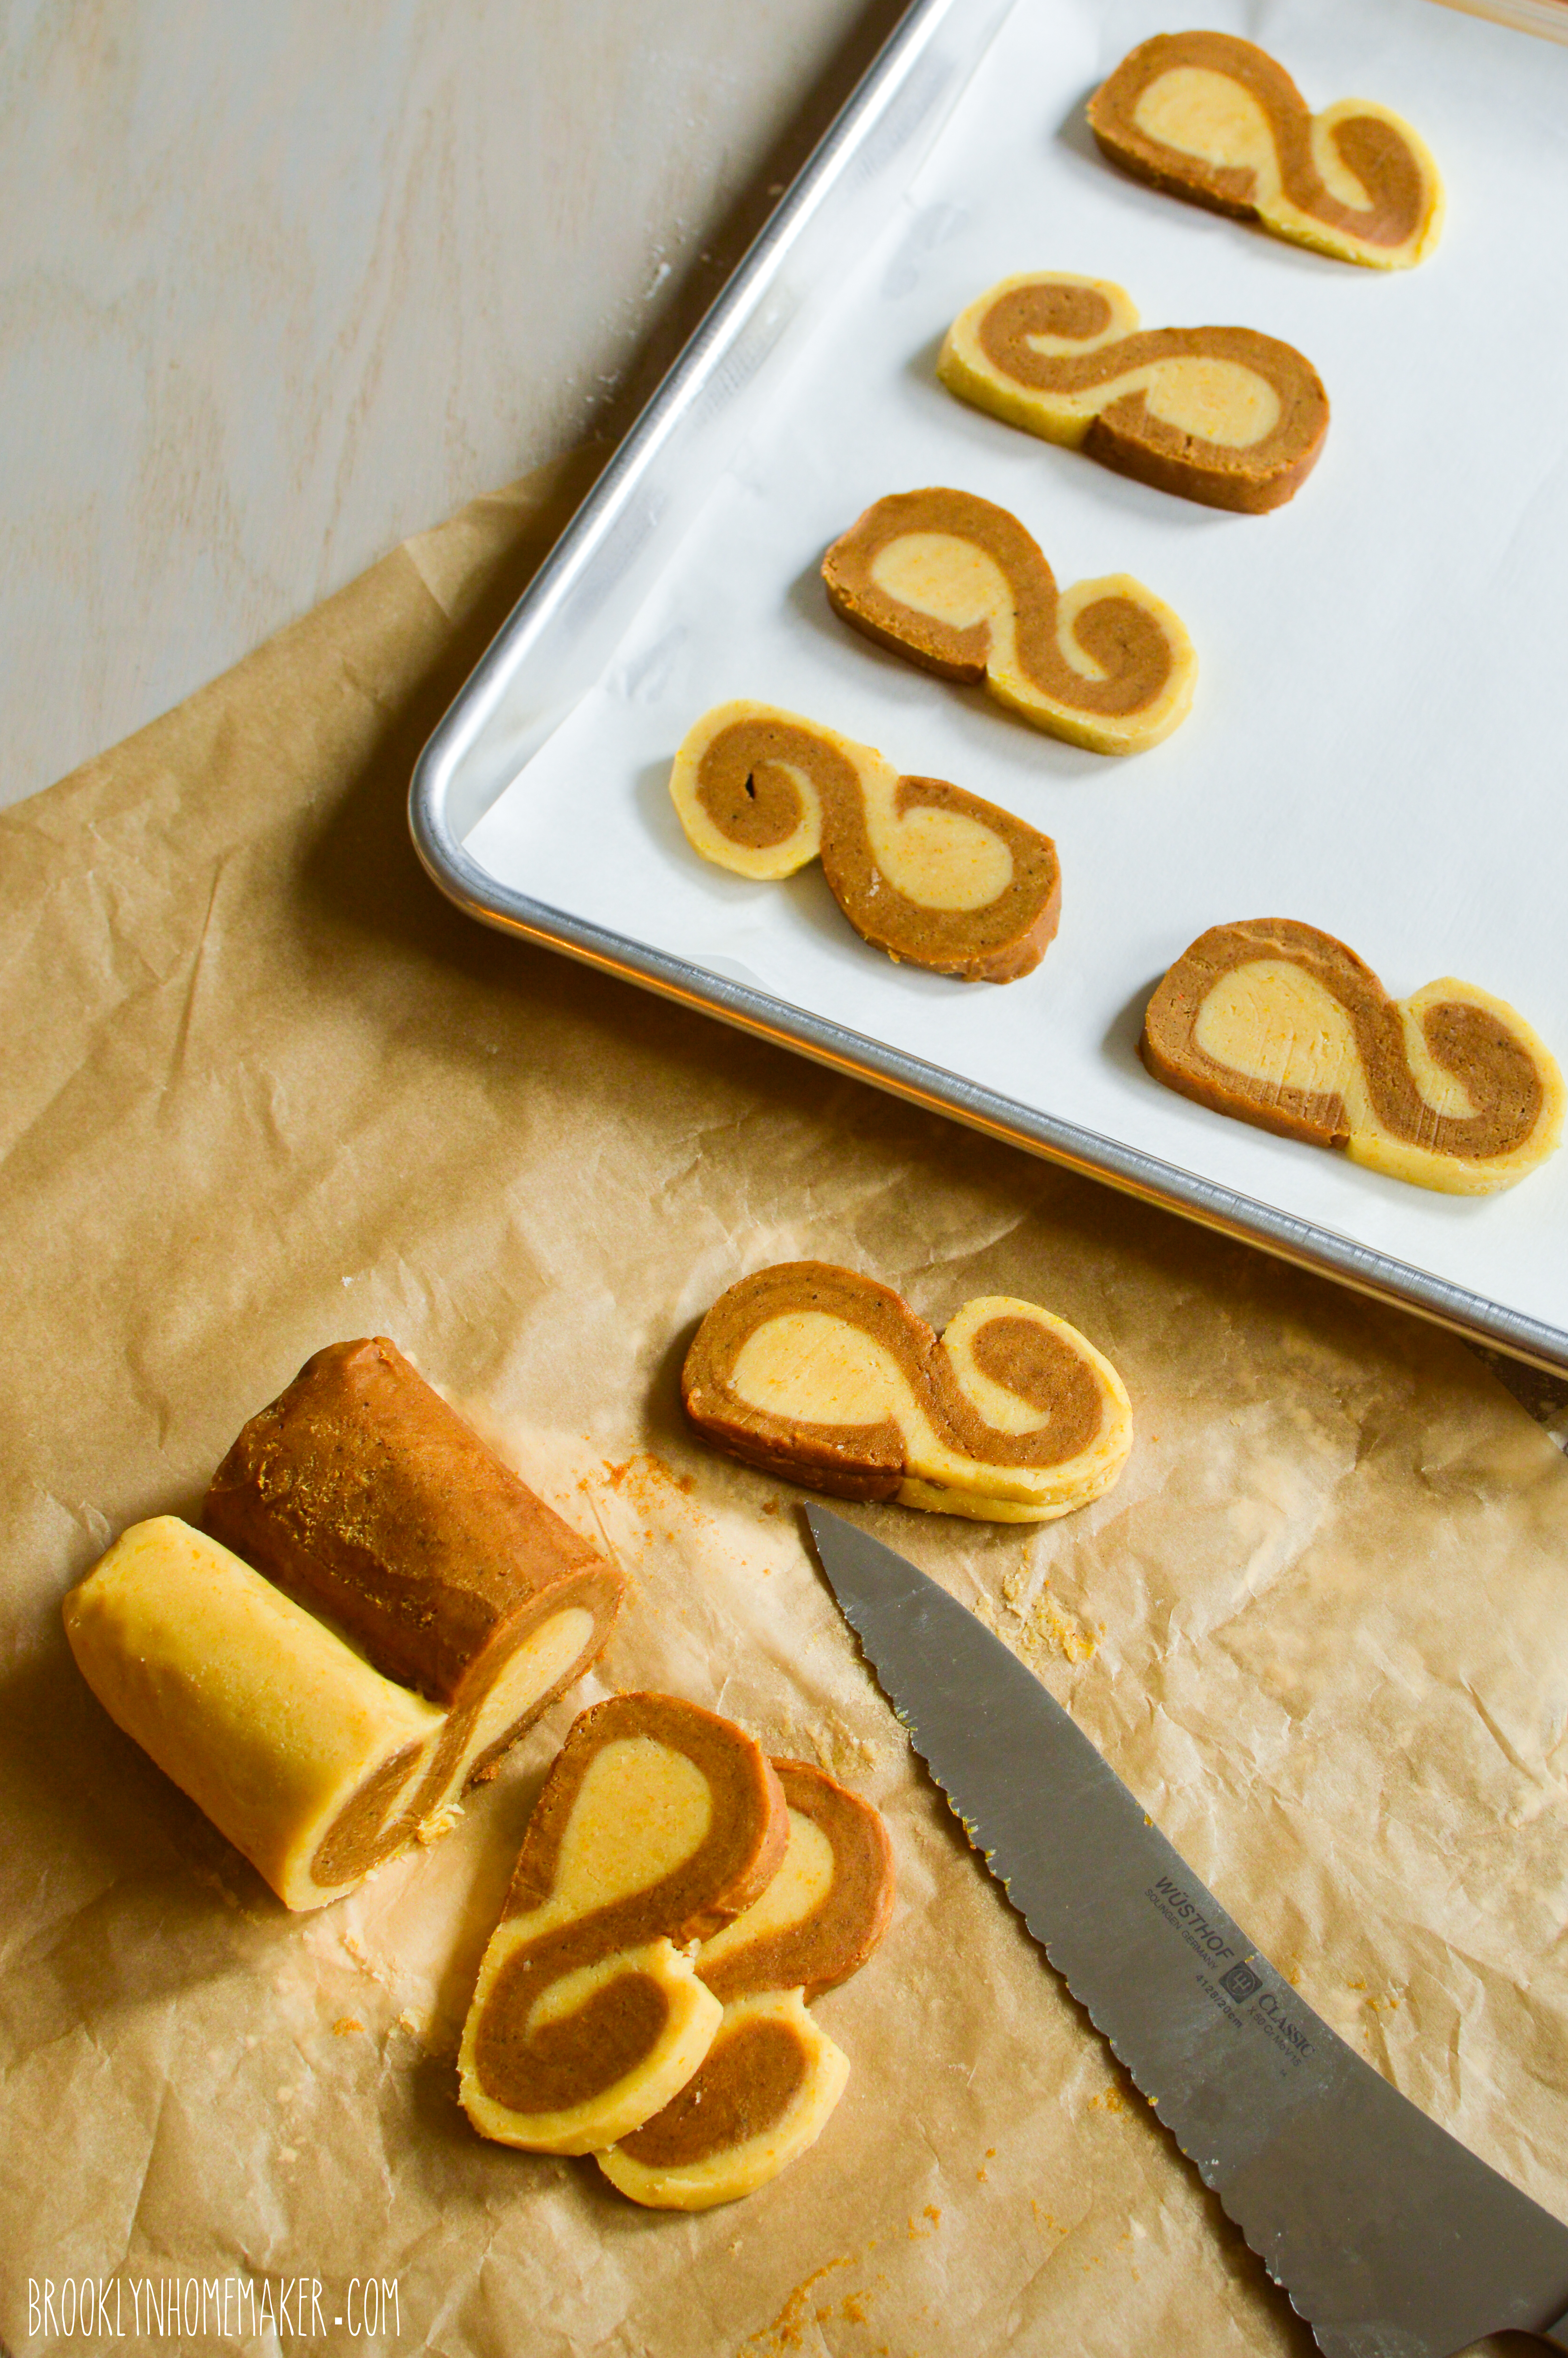
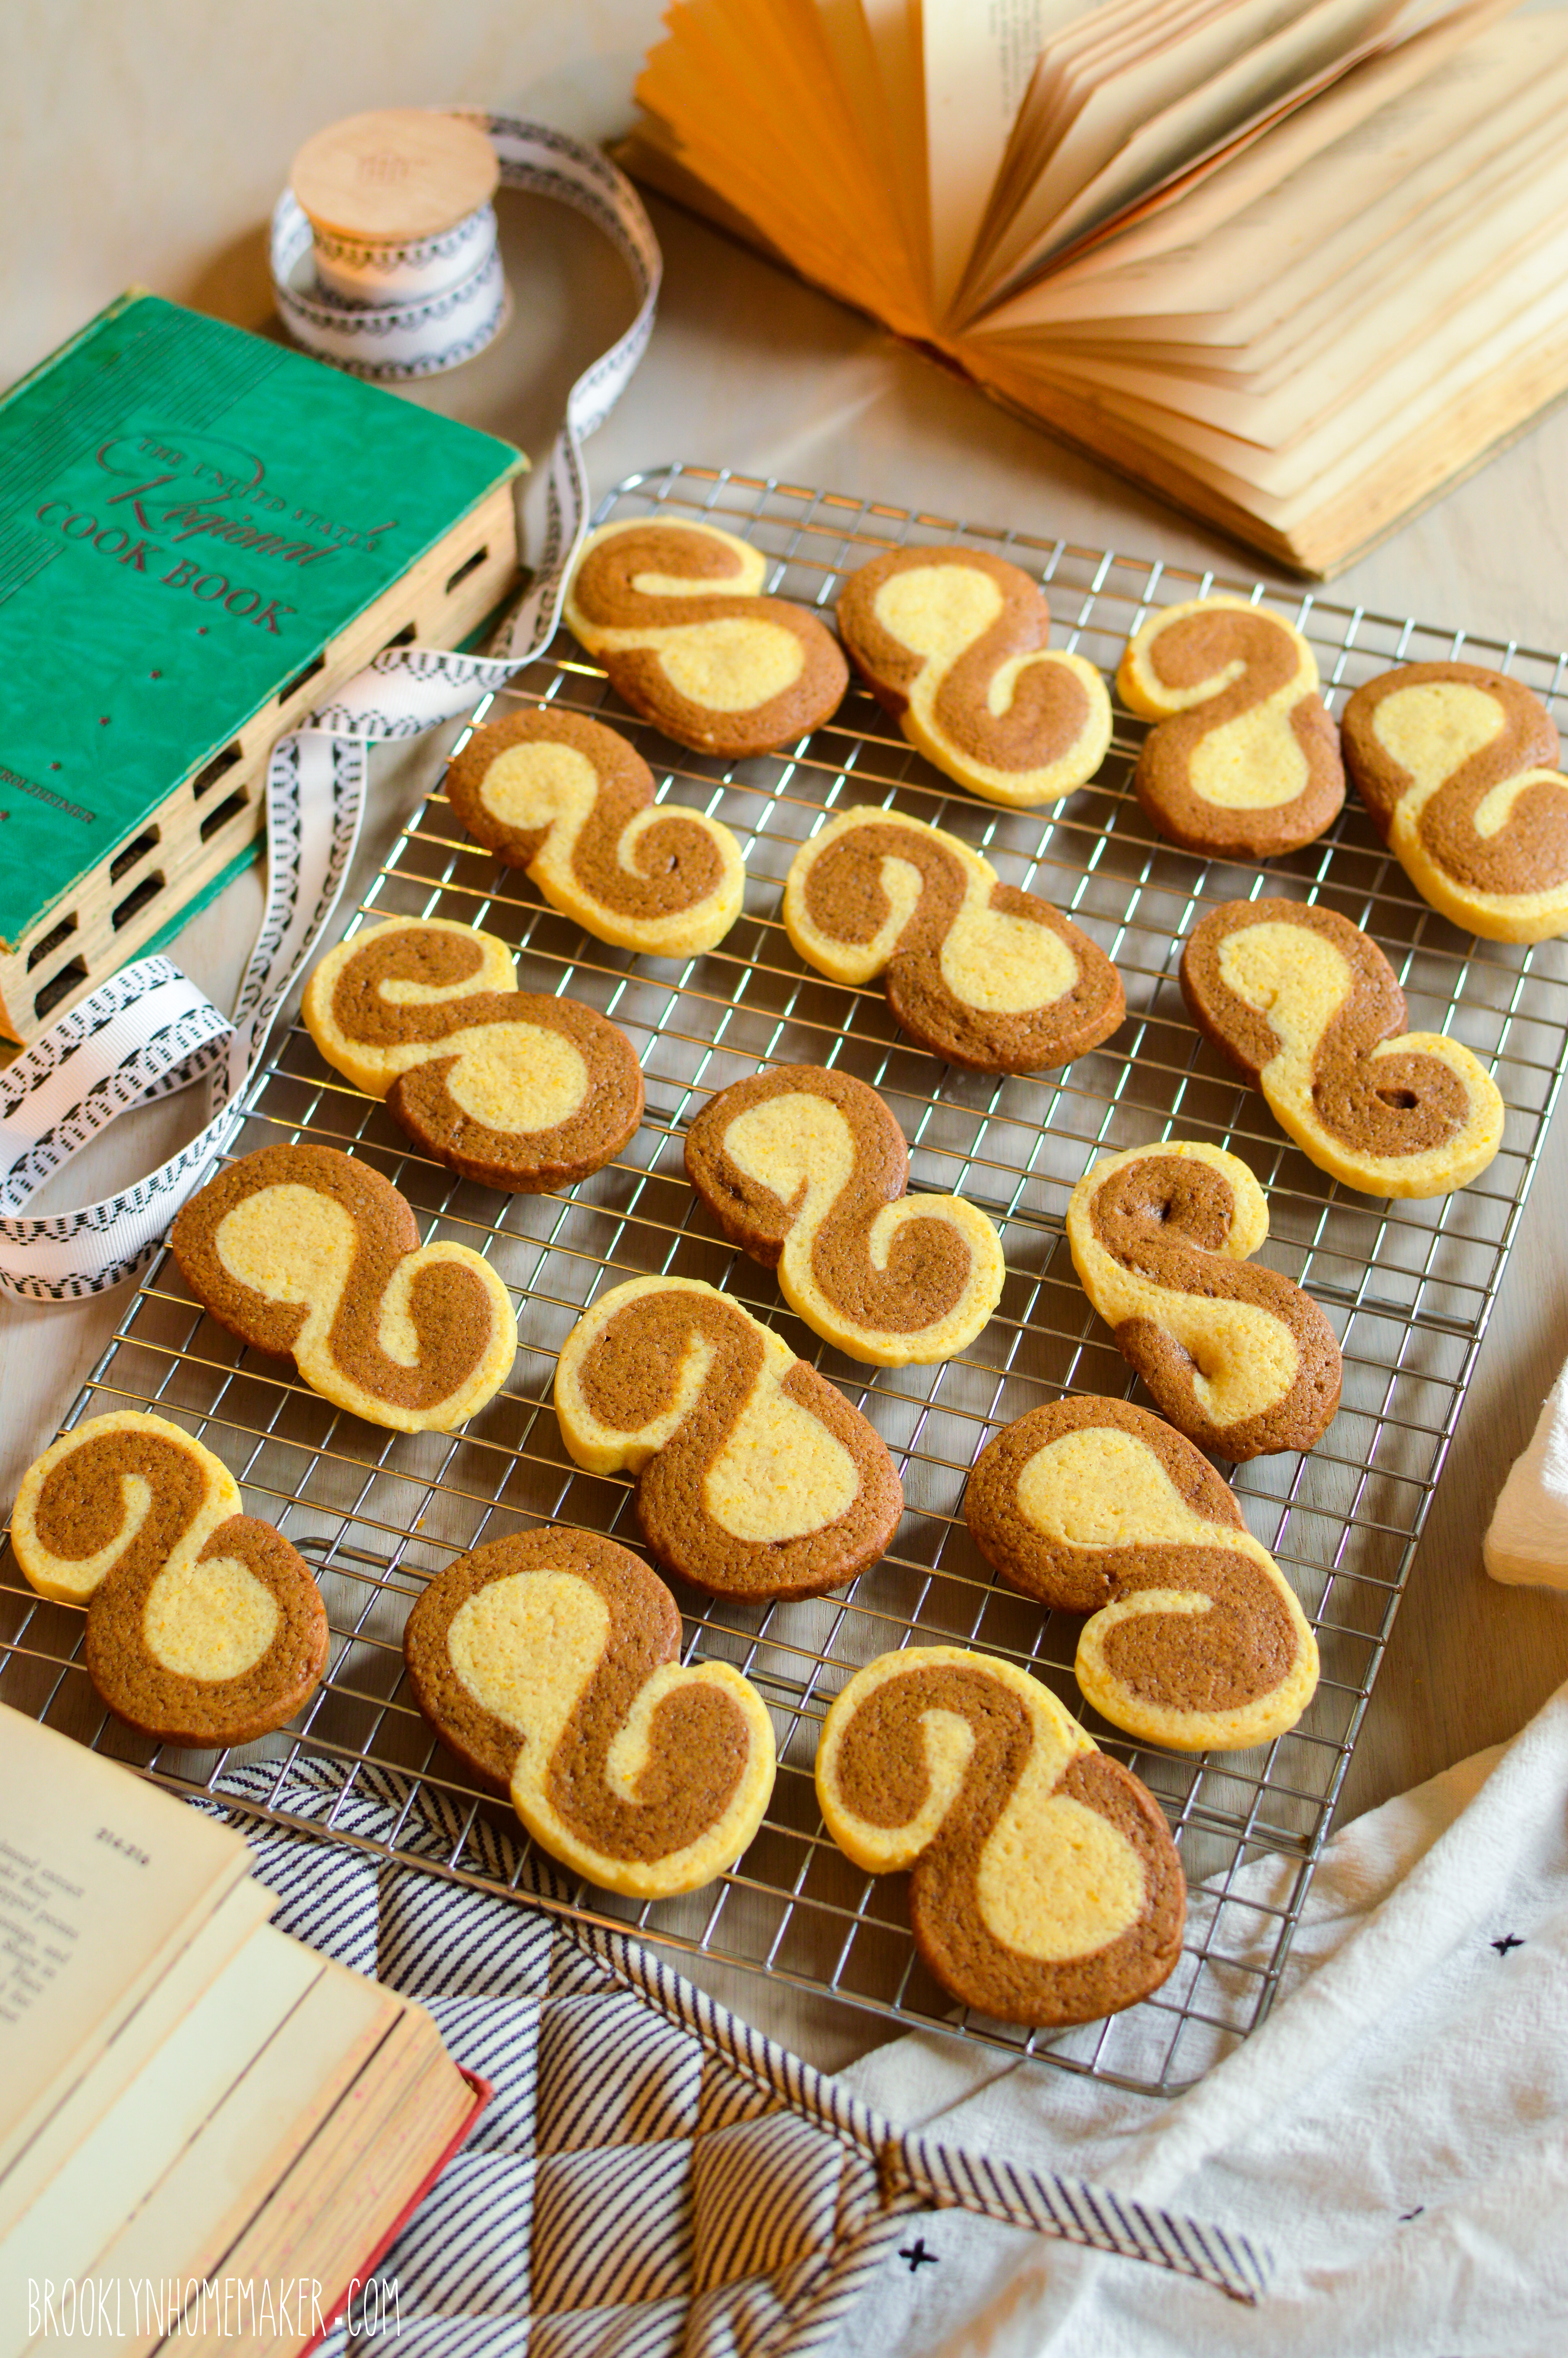
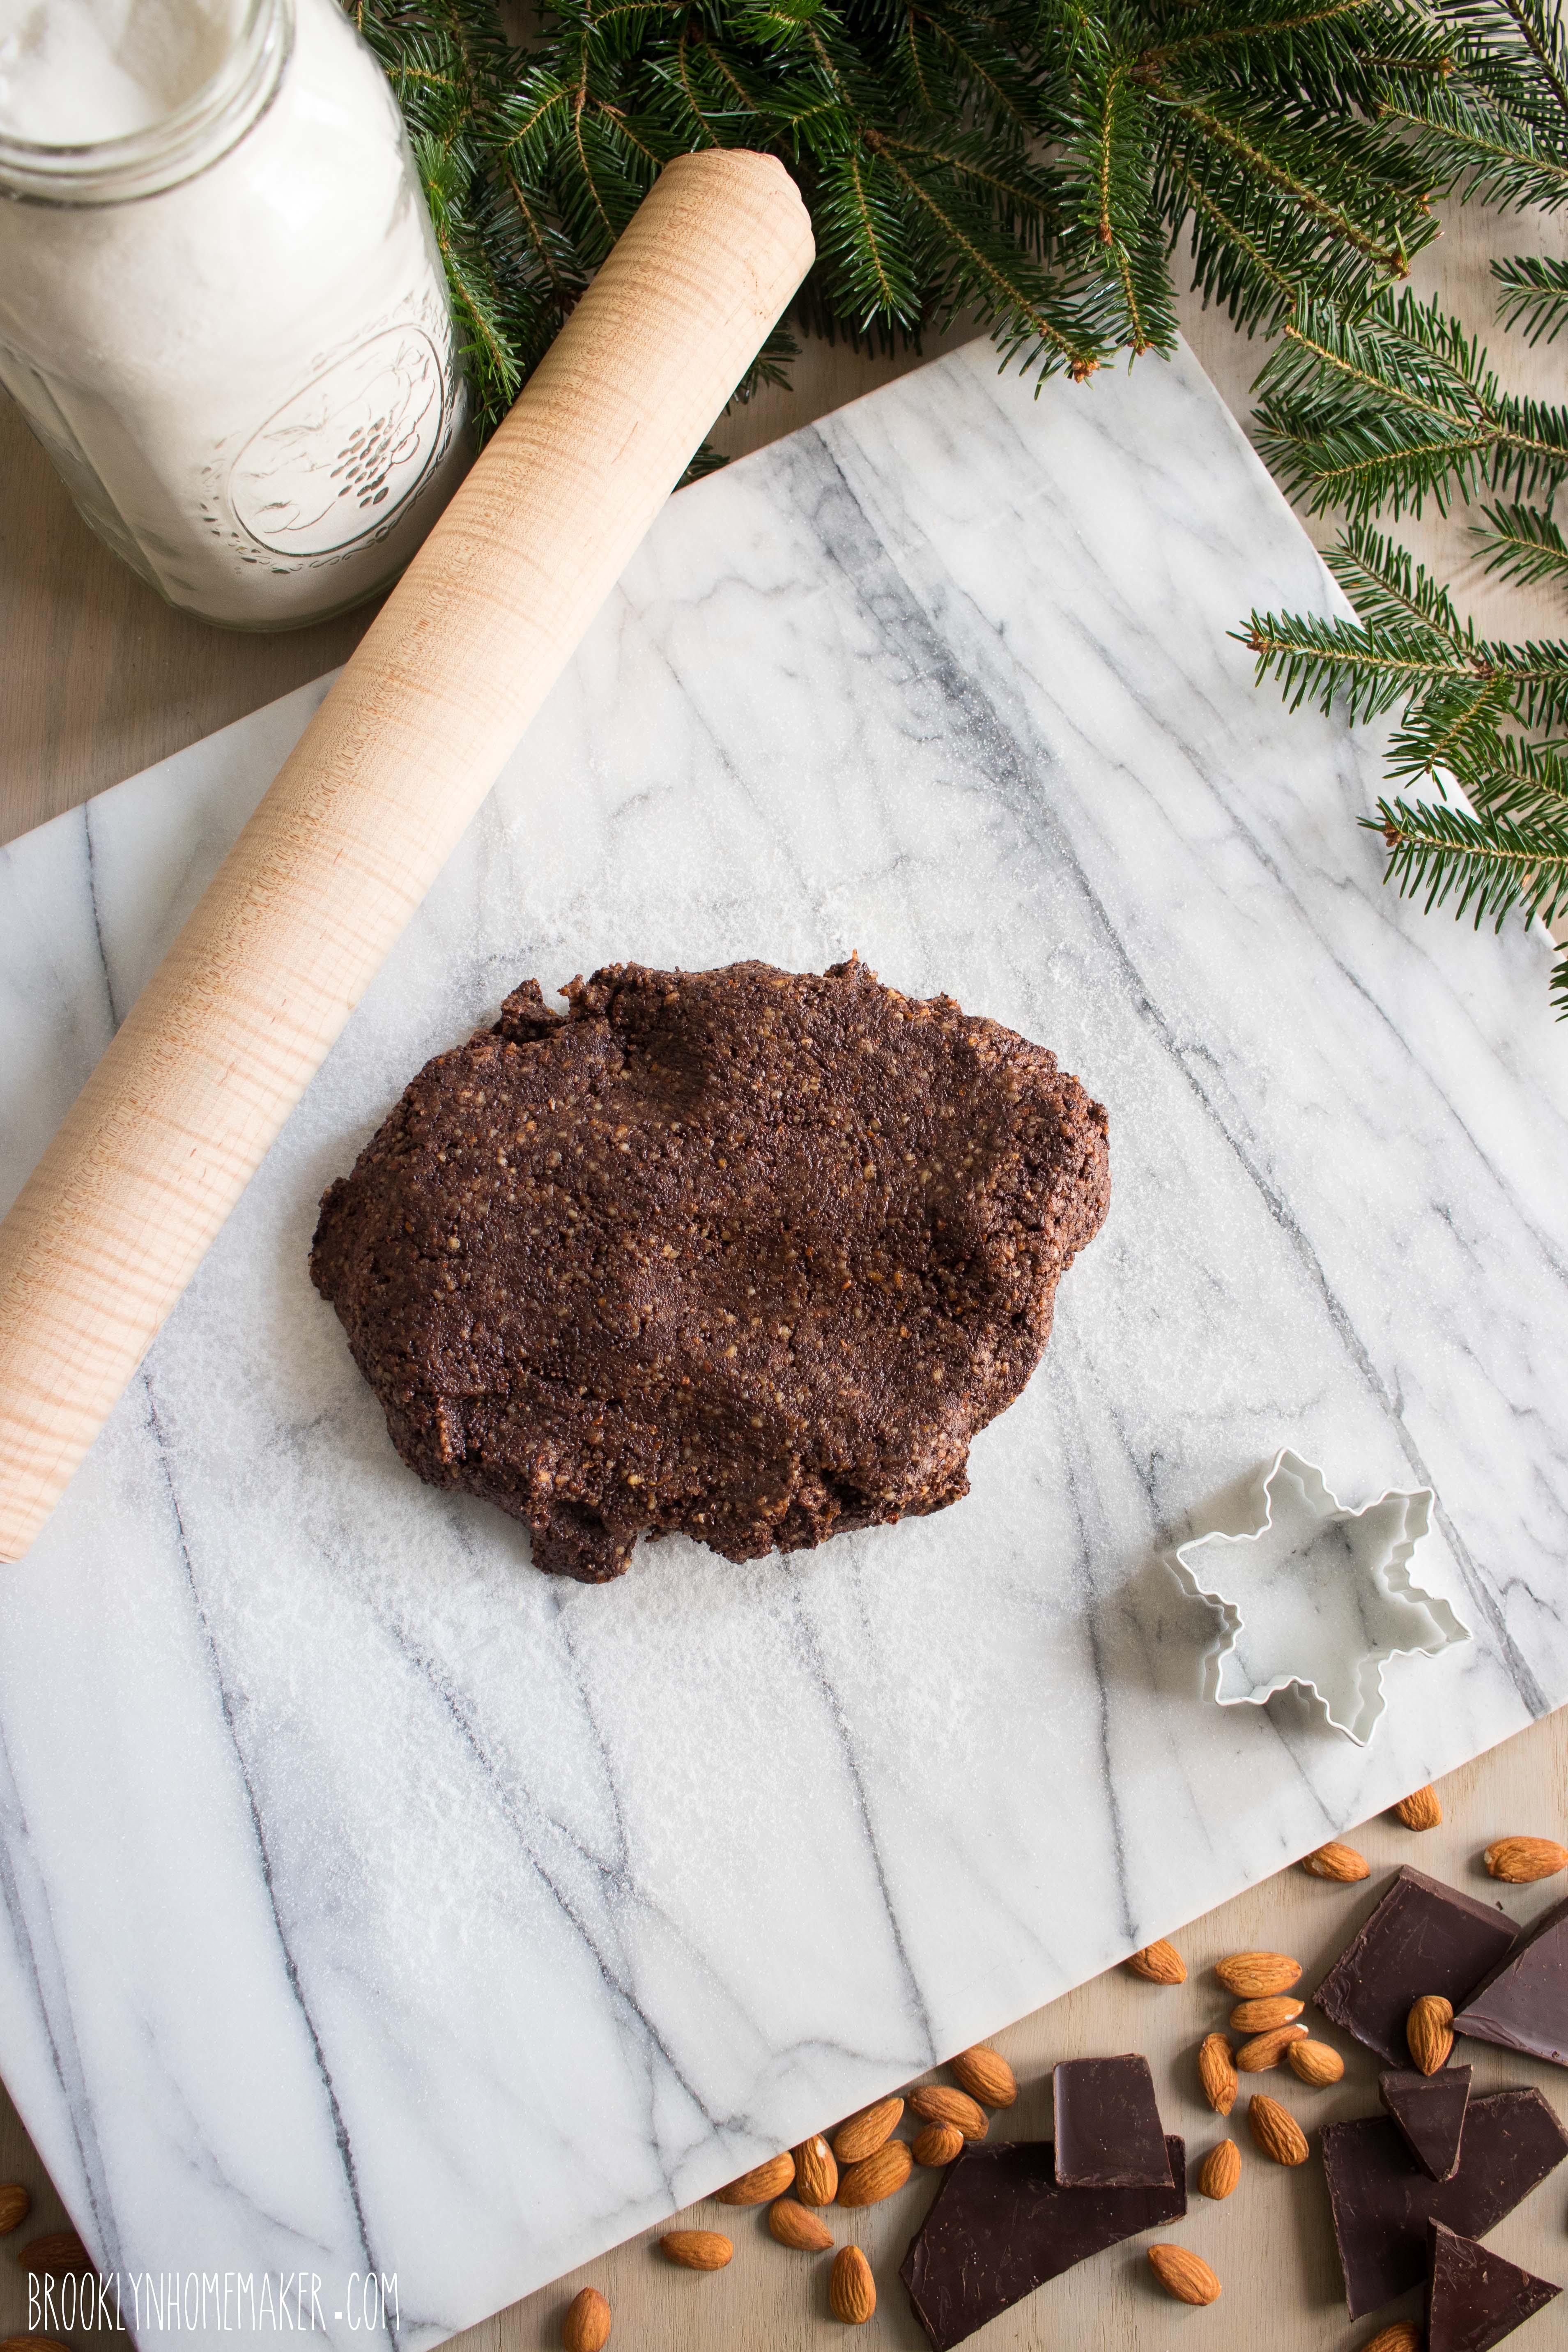
Rolling the dough out and cutting out the shapes is a little more challenging than making the dough, but no more difficult than any other rolled cutout cookies.

This is a pretty sticky dough though, so my biggest piece of advice here is to be generous with the sugar you’ll use to keep the dough from sticking to your work surface. If the dough is sticking to your counter, it’ll be almost impossible to pick up your cutouts and transfer them to your baking sheet without messing up their shape. I used plenty of sugar before rolling out the dough, and once it was rolled out to the thickness I wanted, I gently lifted the dough to make sure it wasn’t sticking anywhere before I started cutting out my shapes. If it does stick in places, try to gently release it from the counter and add more sugar before you start cutting out your shapes.

Sugar is used to prevent sticking rather than flour because, oddly enough for an old world European recipe, these cookies are actually gluten free! Woot woot.

basler brunsli | chocolate almond spice cookie | Brooklyn Homemaker

Once you’ve finished cutting out your shapes you can totally recombine the dough and re-roll it, but it will get sweeter every time since you are using sugar to keep it from sticking. I noticed that by the time I’d recombined and rerolled a third or fourth time, the cookies started to spread a little more in the oven from the extra sugar.

When it comes to the cookie cutters you’ll use, the author says that they’re traditionally cut into heart shapes, but if you want to do something else you should try to avoid any shapes with a lot of fine detail because the dough is too coarse and sticky to hold a detailed shape. The dough doesn’t really spread very much in the oven, but it’s just too hard to get this coarse sticky dough out of a cookie cutter with a lot of fine detail without messing it up. Even the snowflake cutter I used was a little fussy and I did find that some of the detail got slightly muddled.

basler brunsli | chocolate almond spice cookie | Brooklyn Homemaker

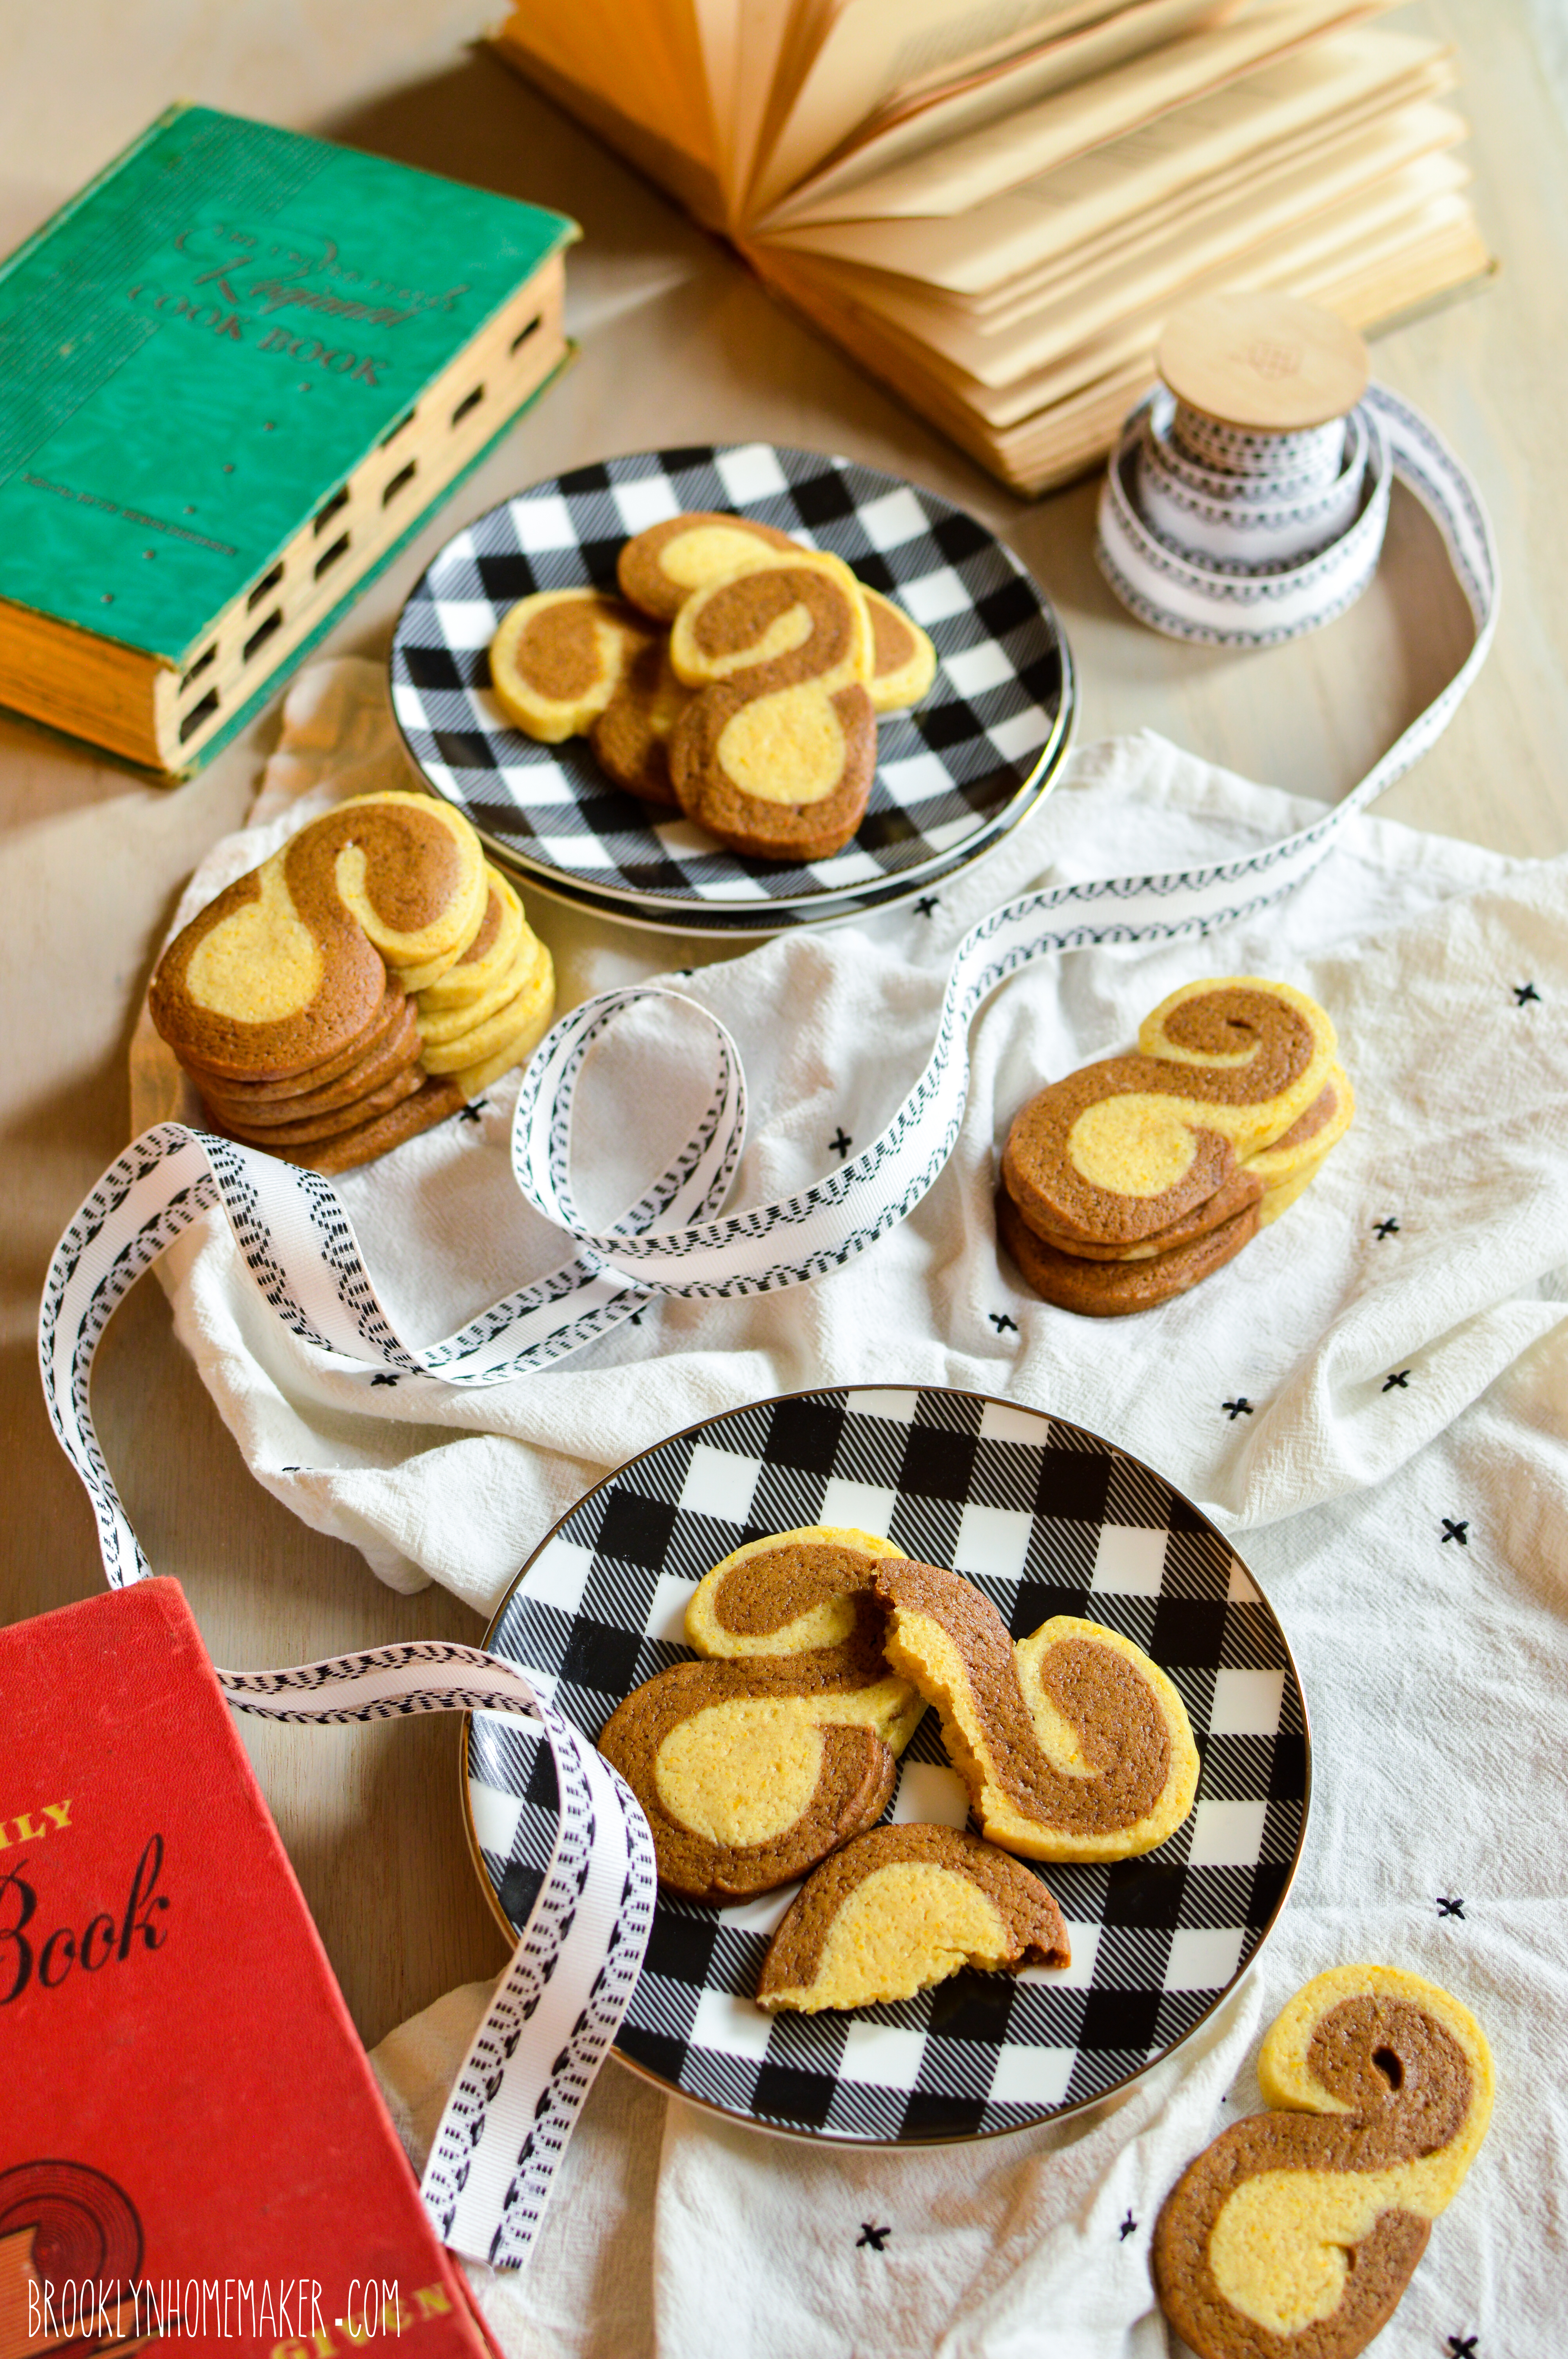
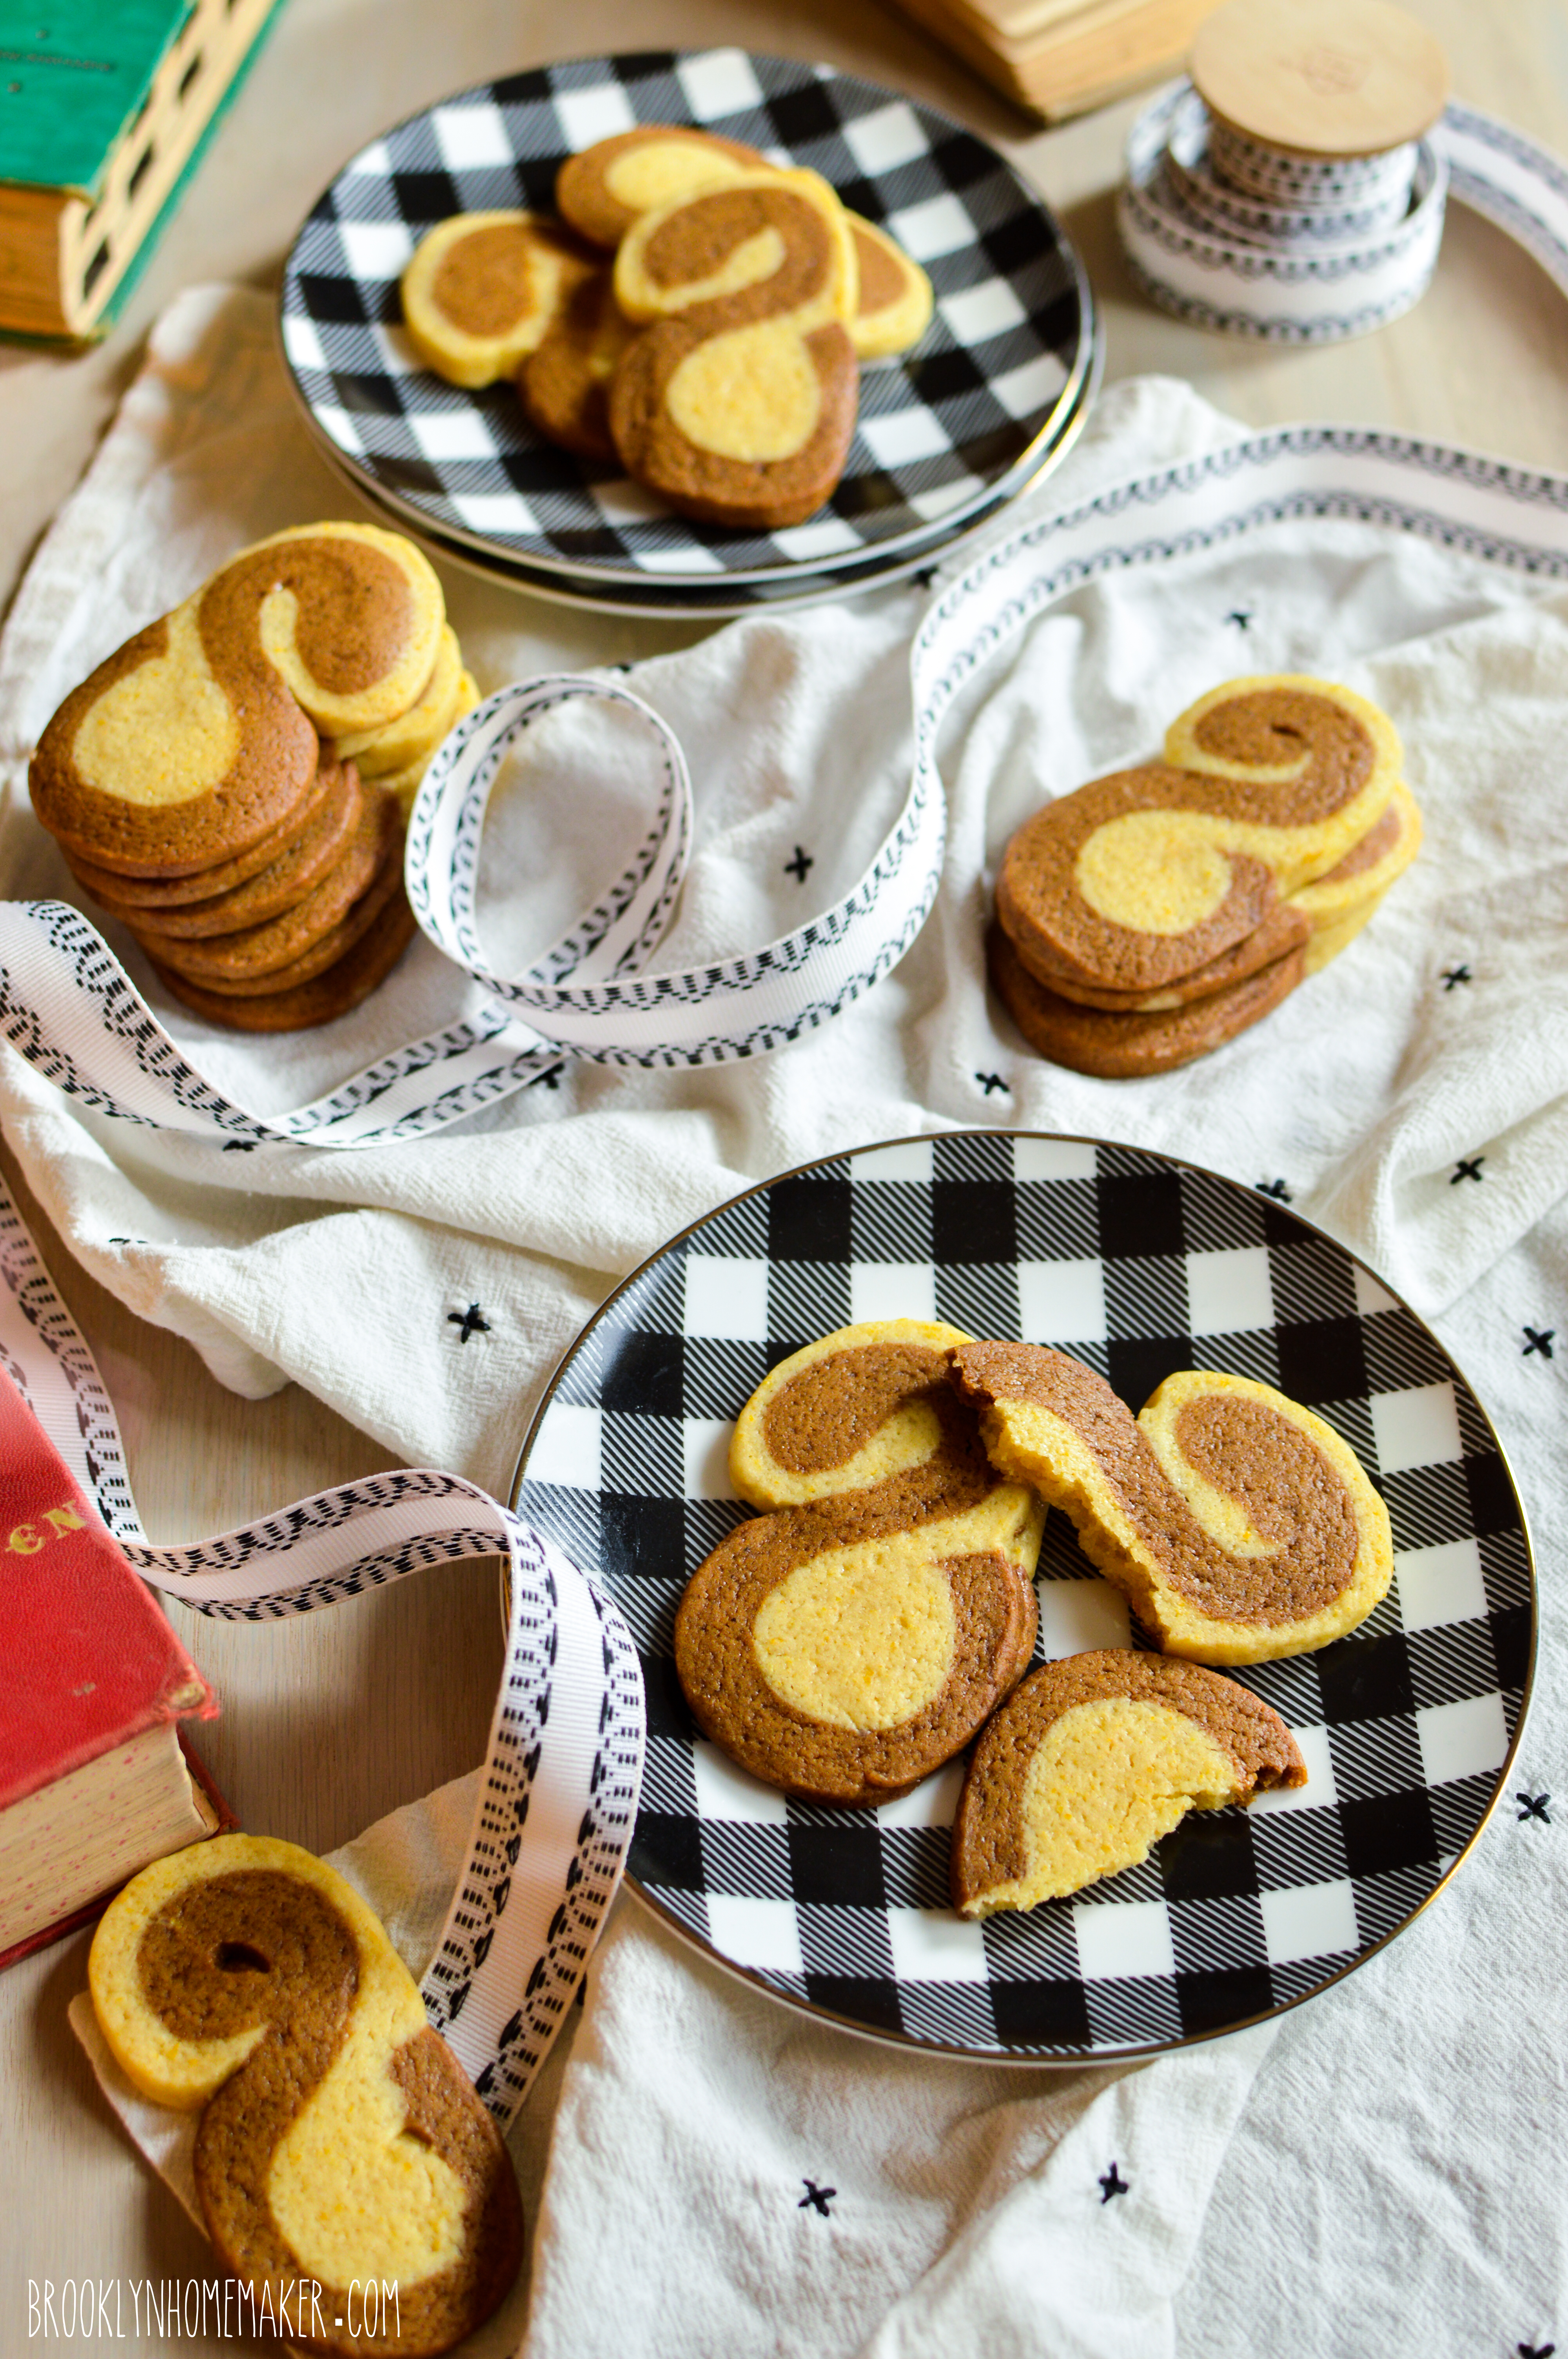
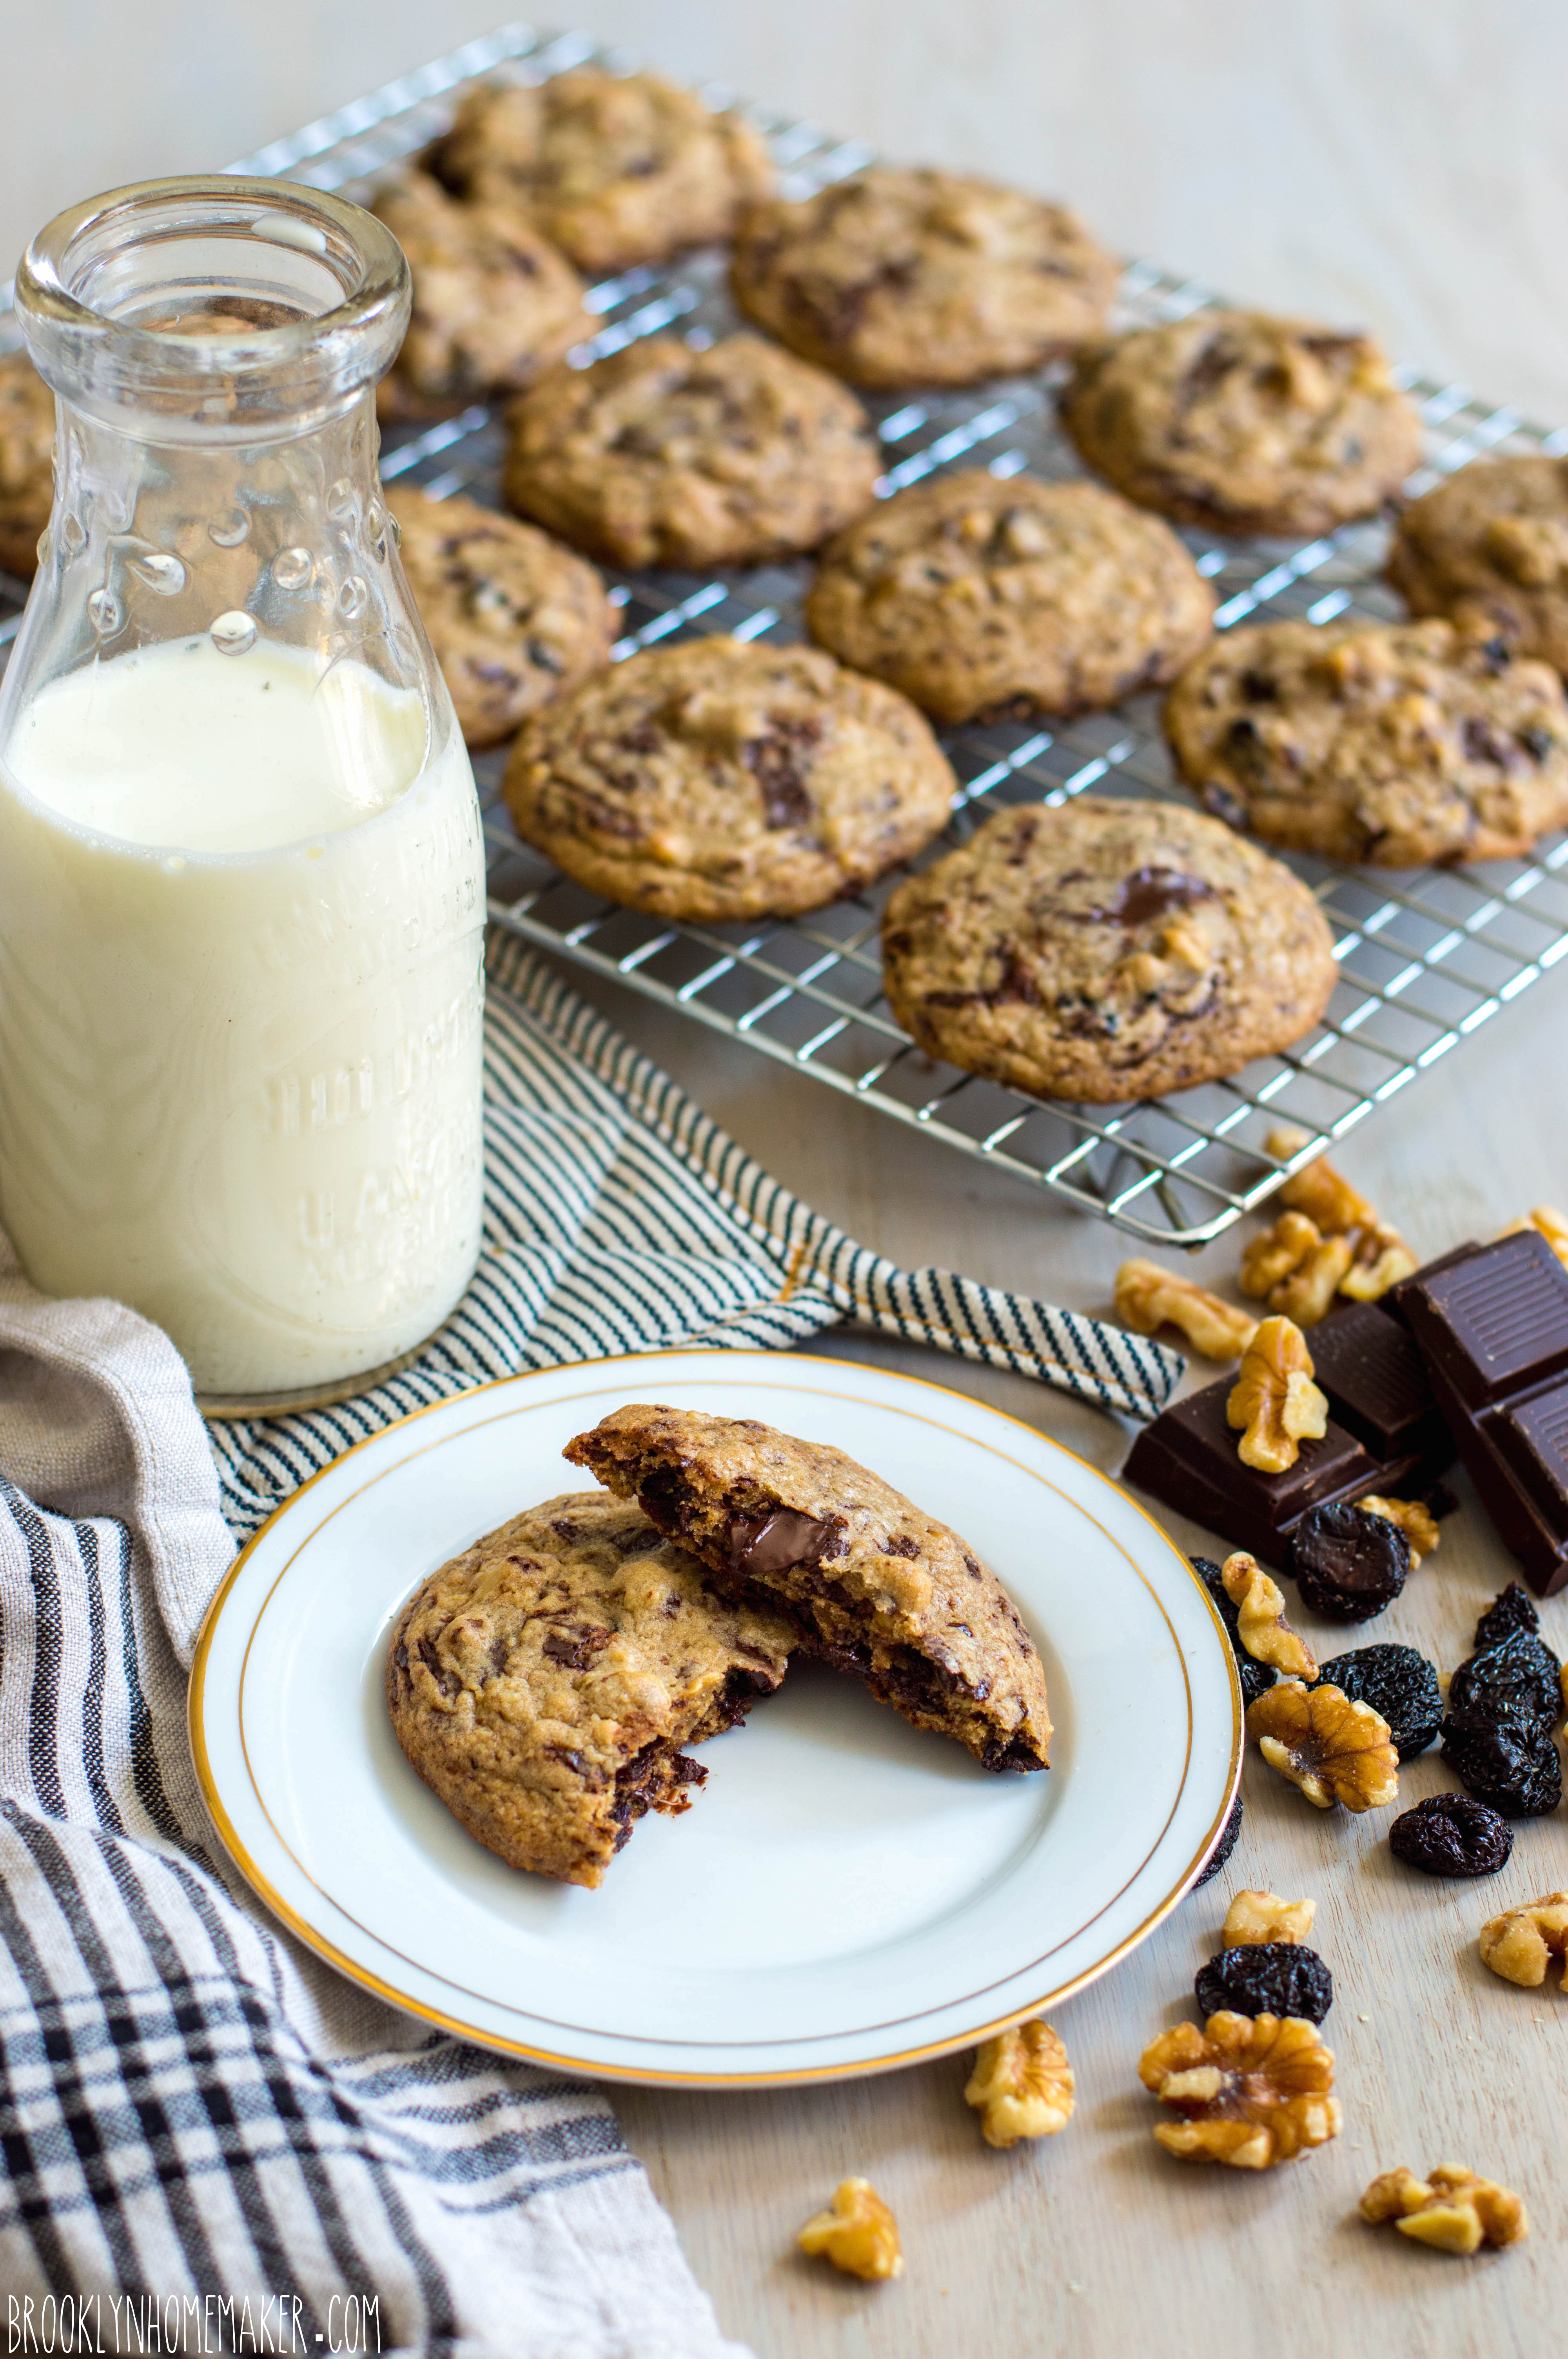
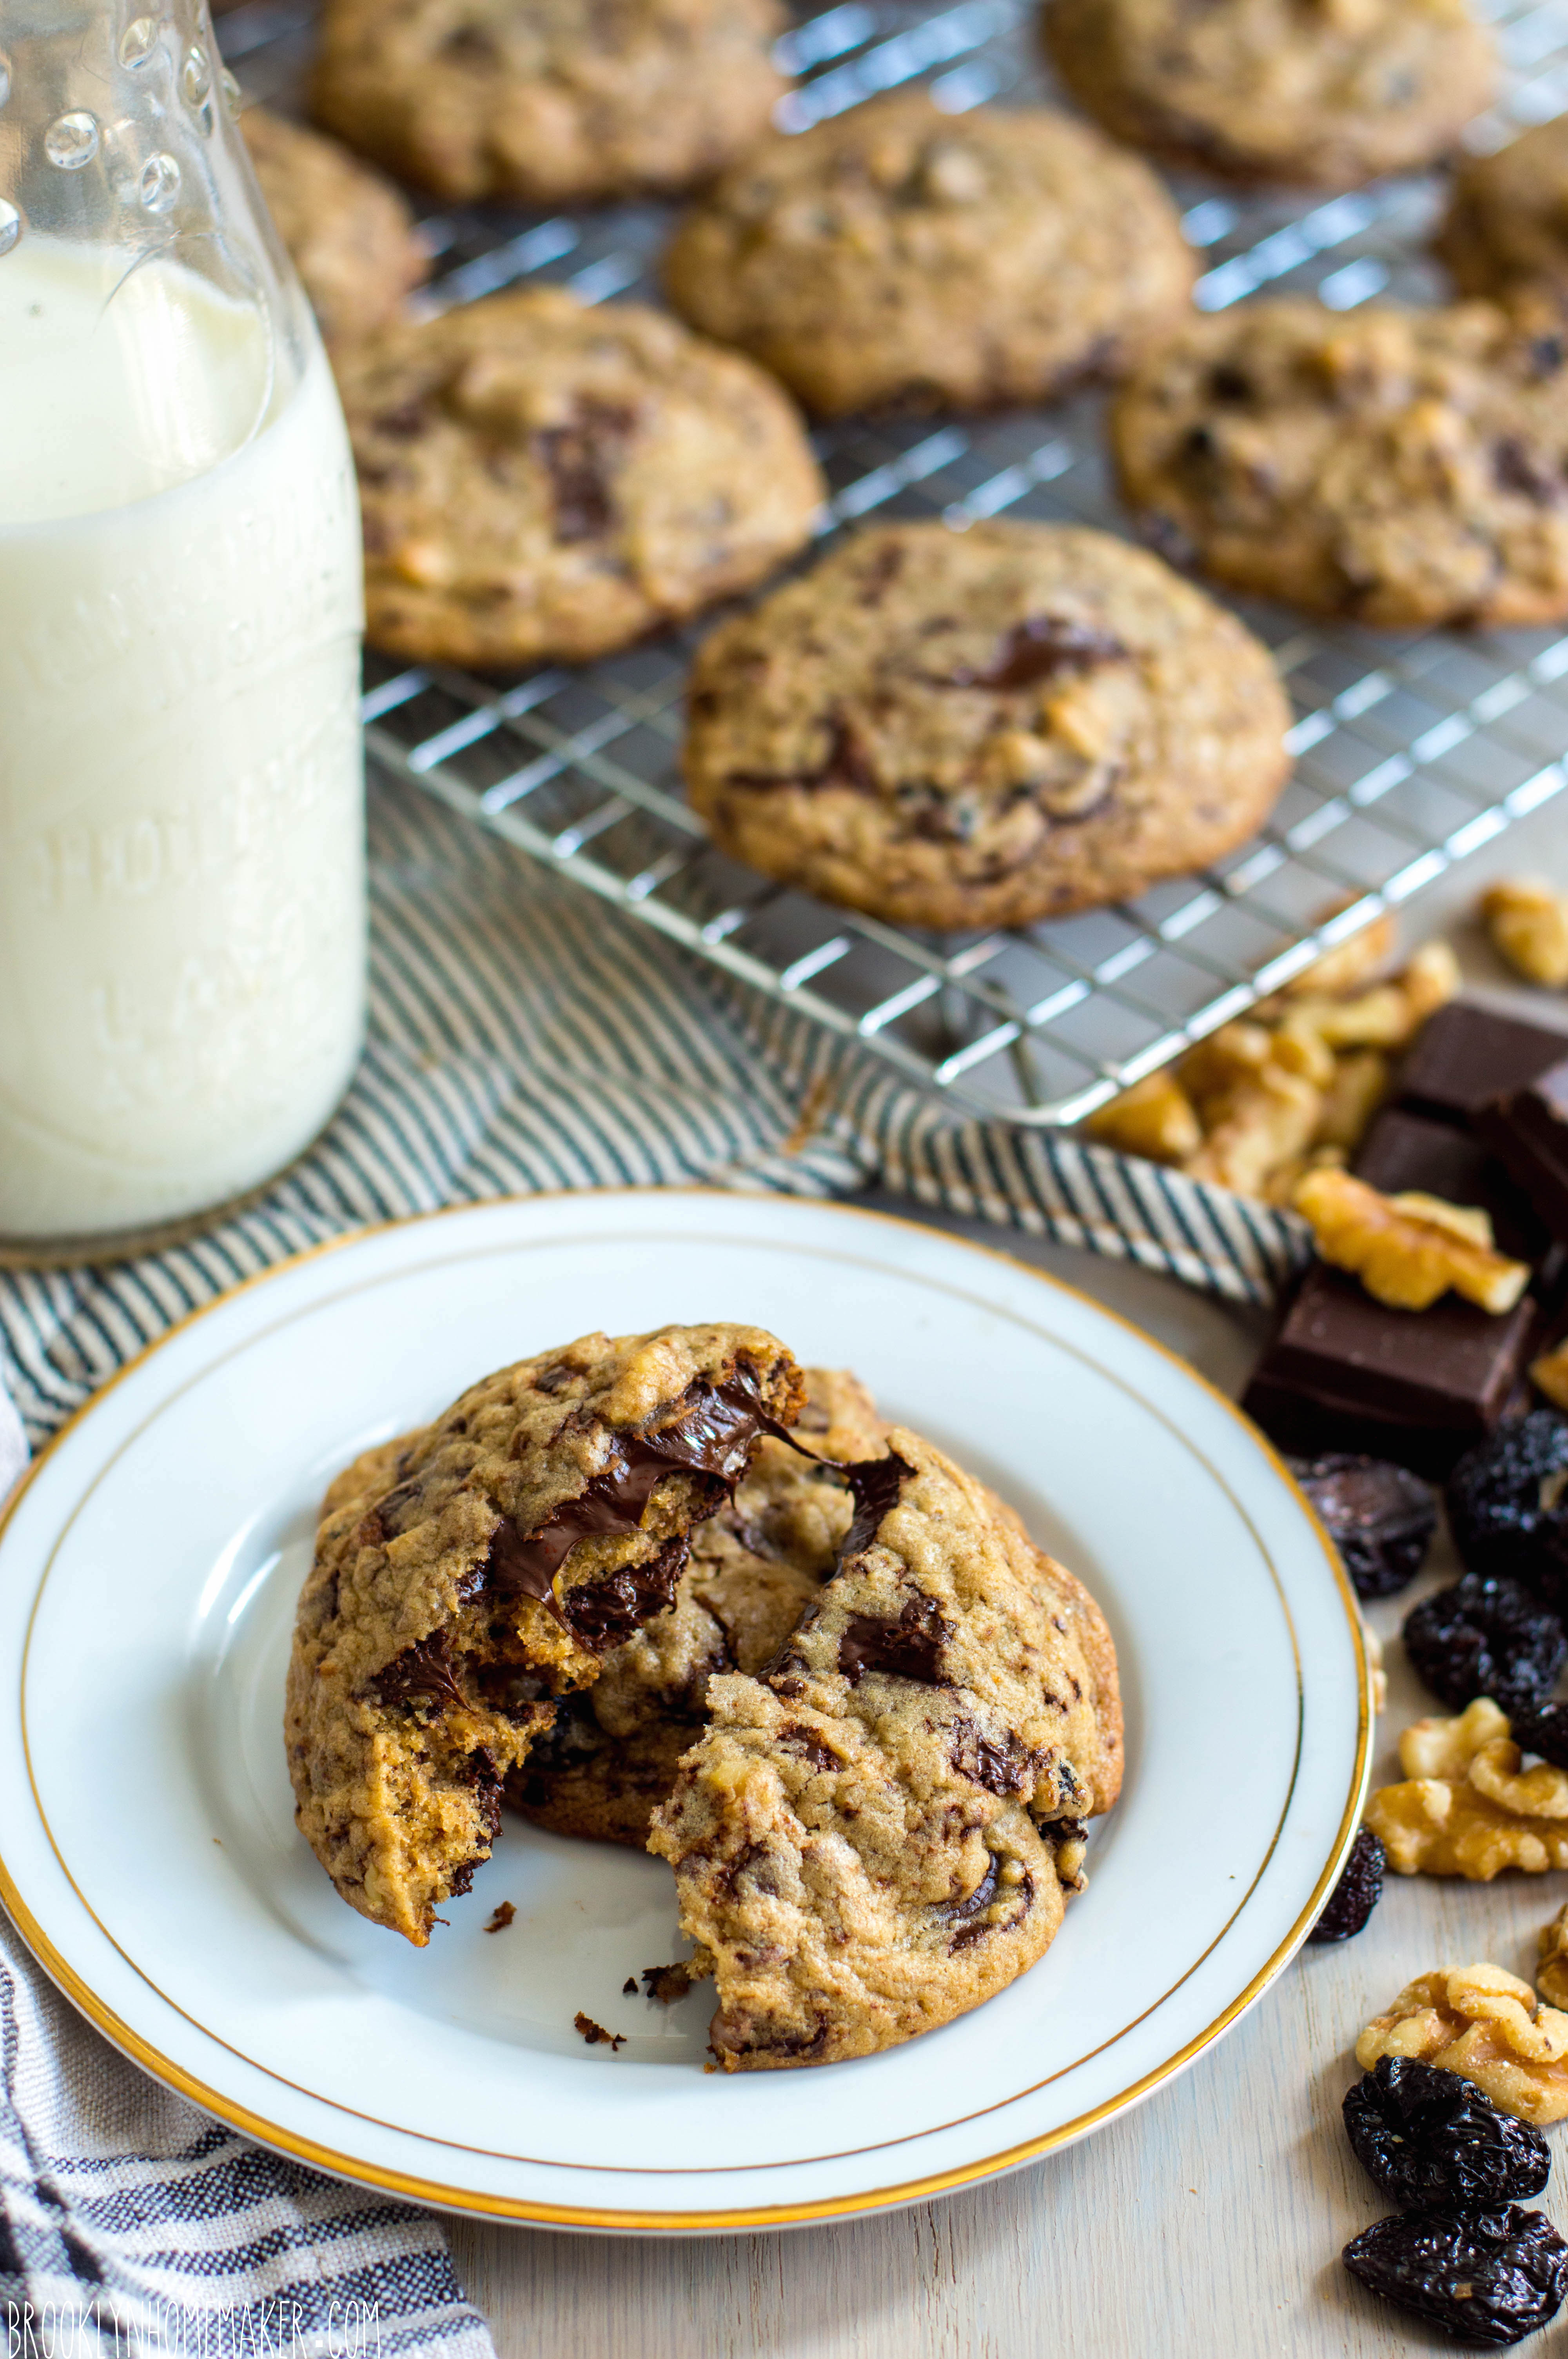
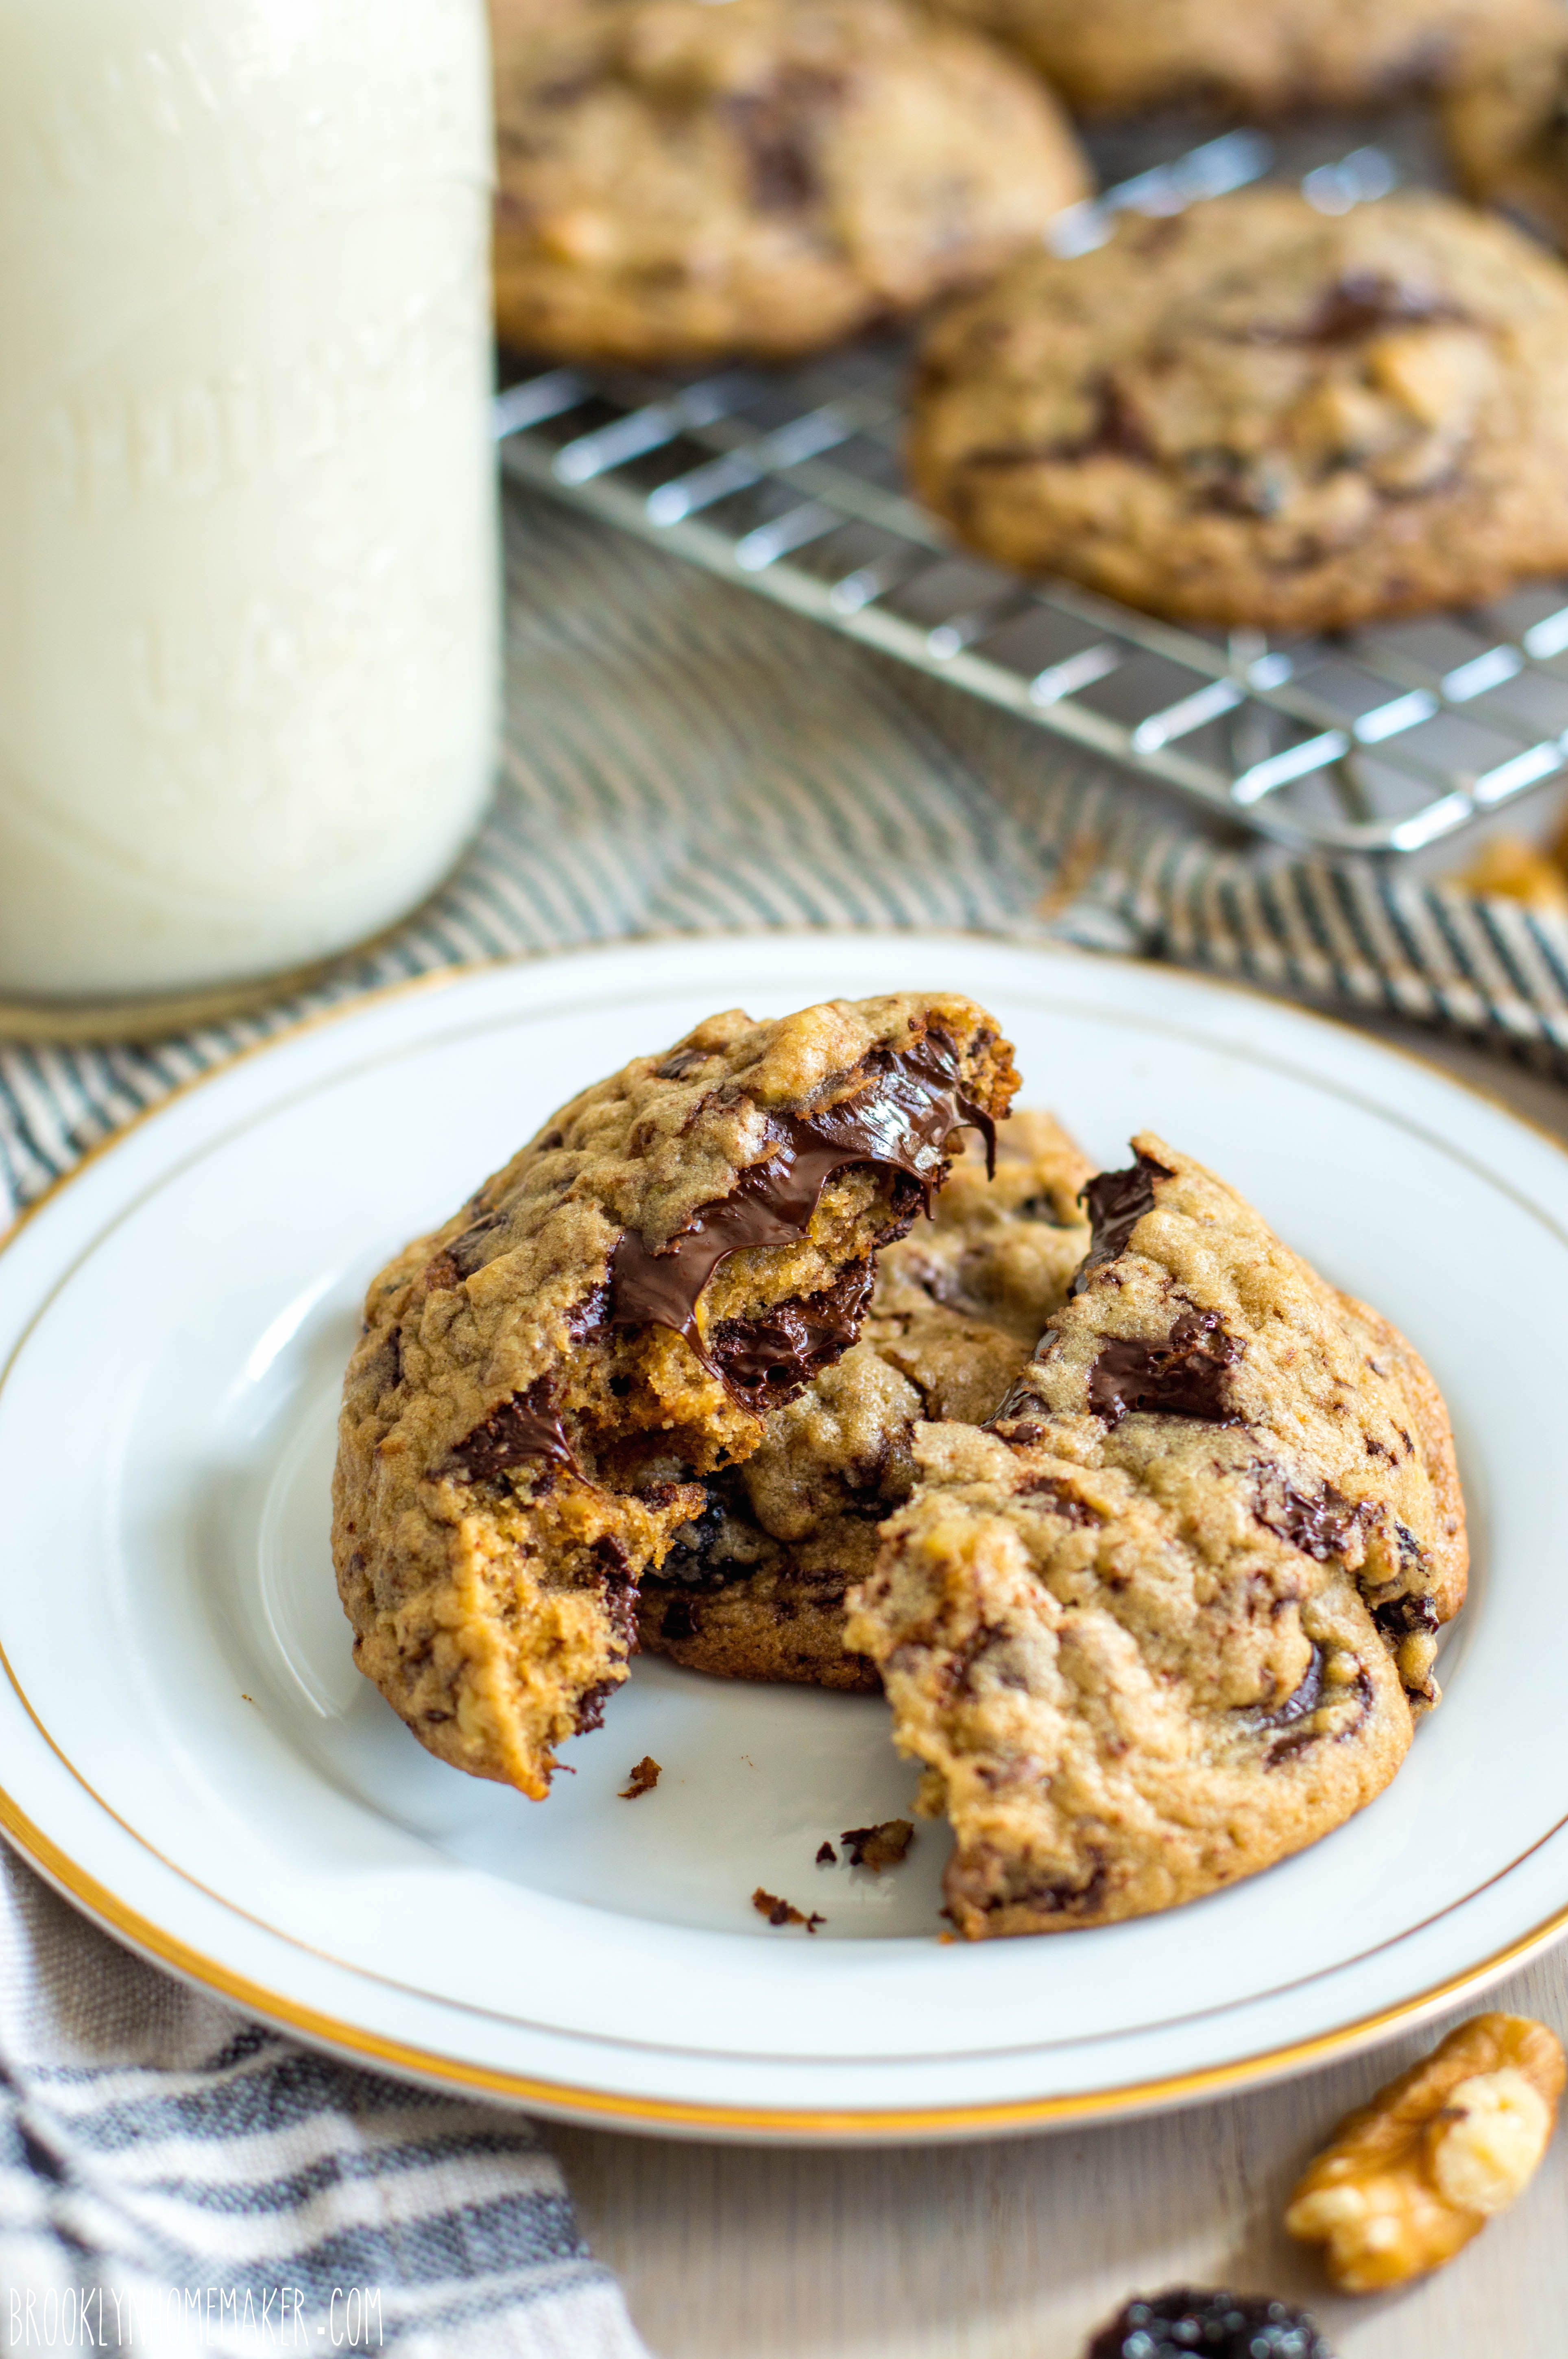
No matter what shape you decide on, these cookies are crazy delicious. They almost taste like a nutty, subtly spiced brownie. It has the perfect balance of deep chocolate, warm spice, and chewy ground almonds. Heaven.

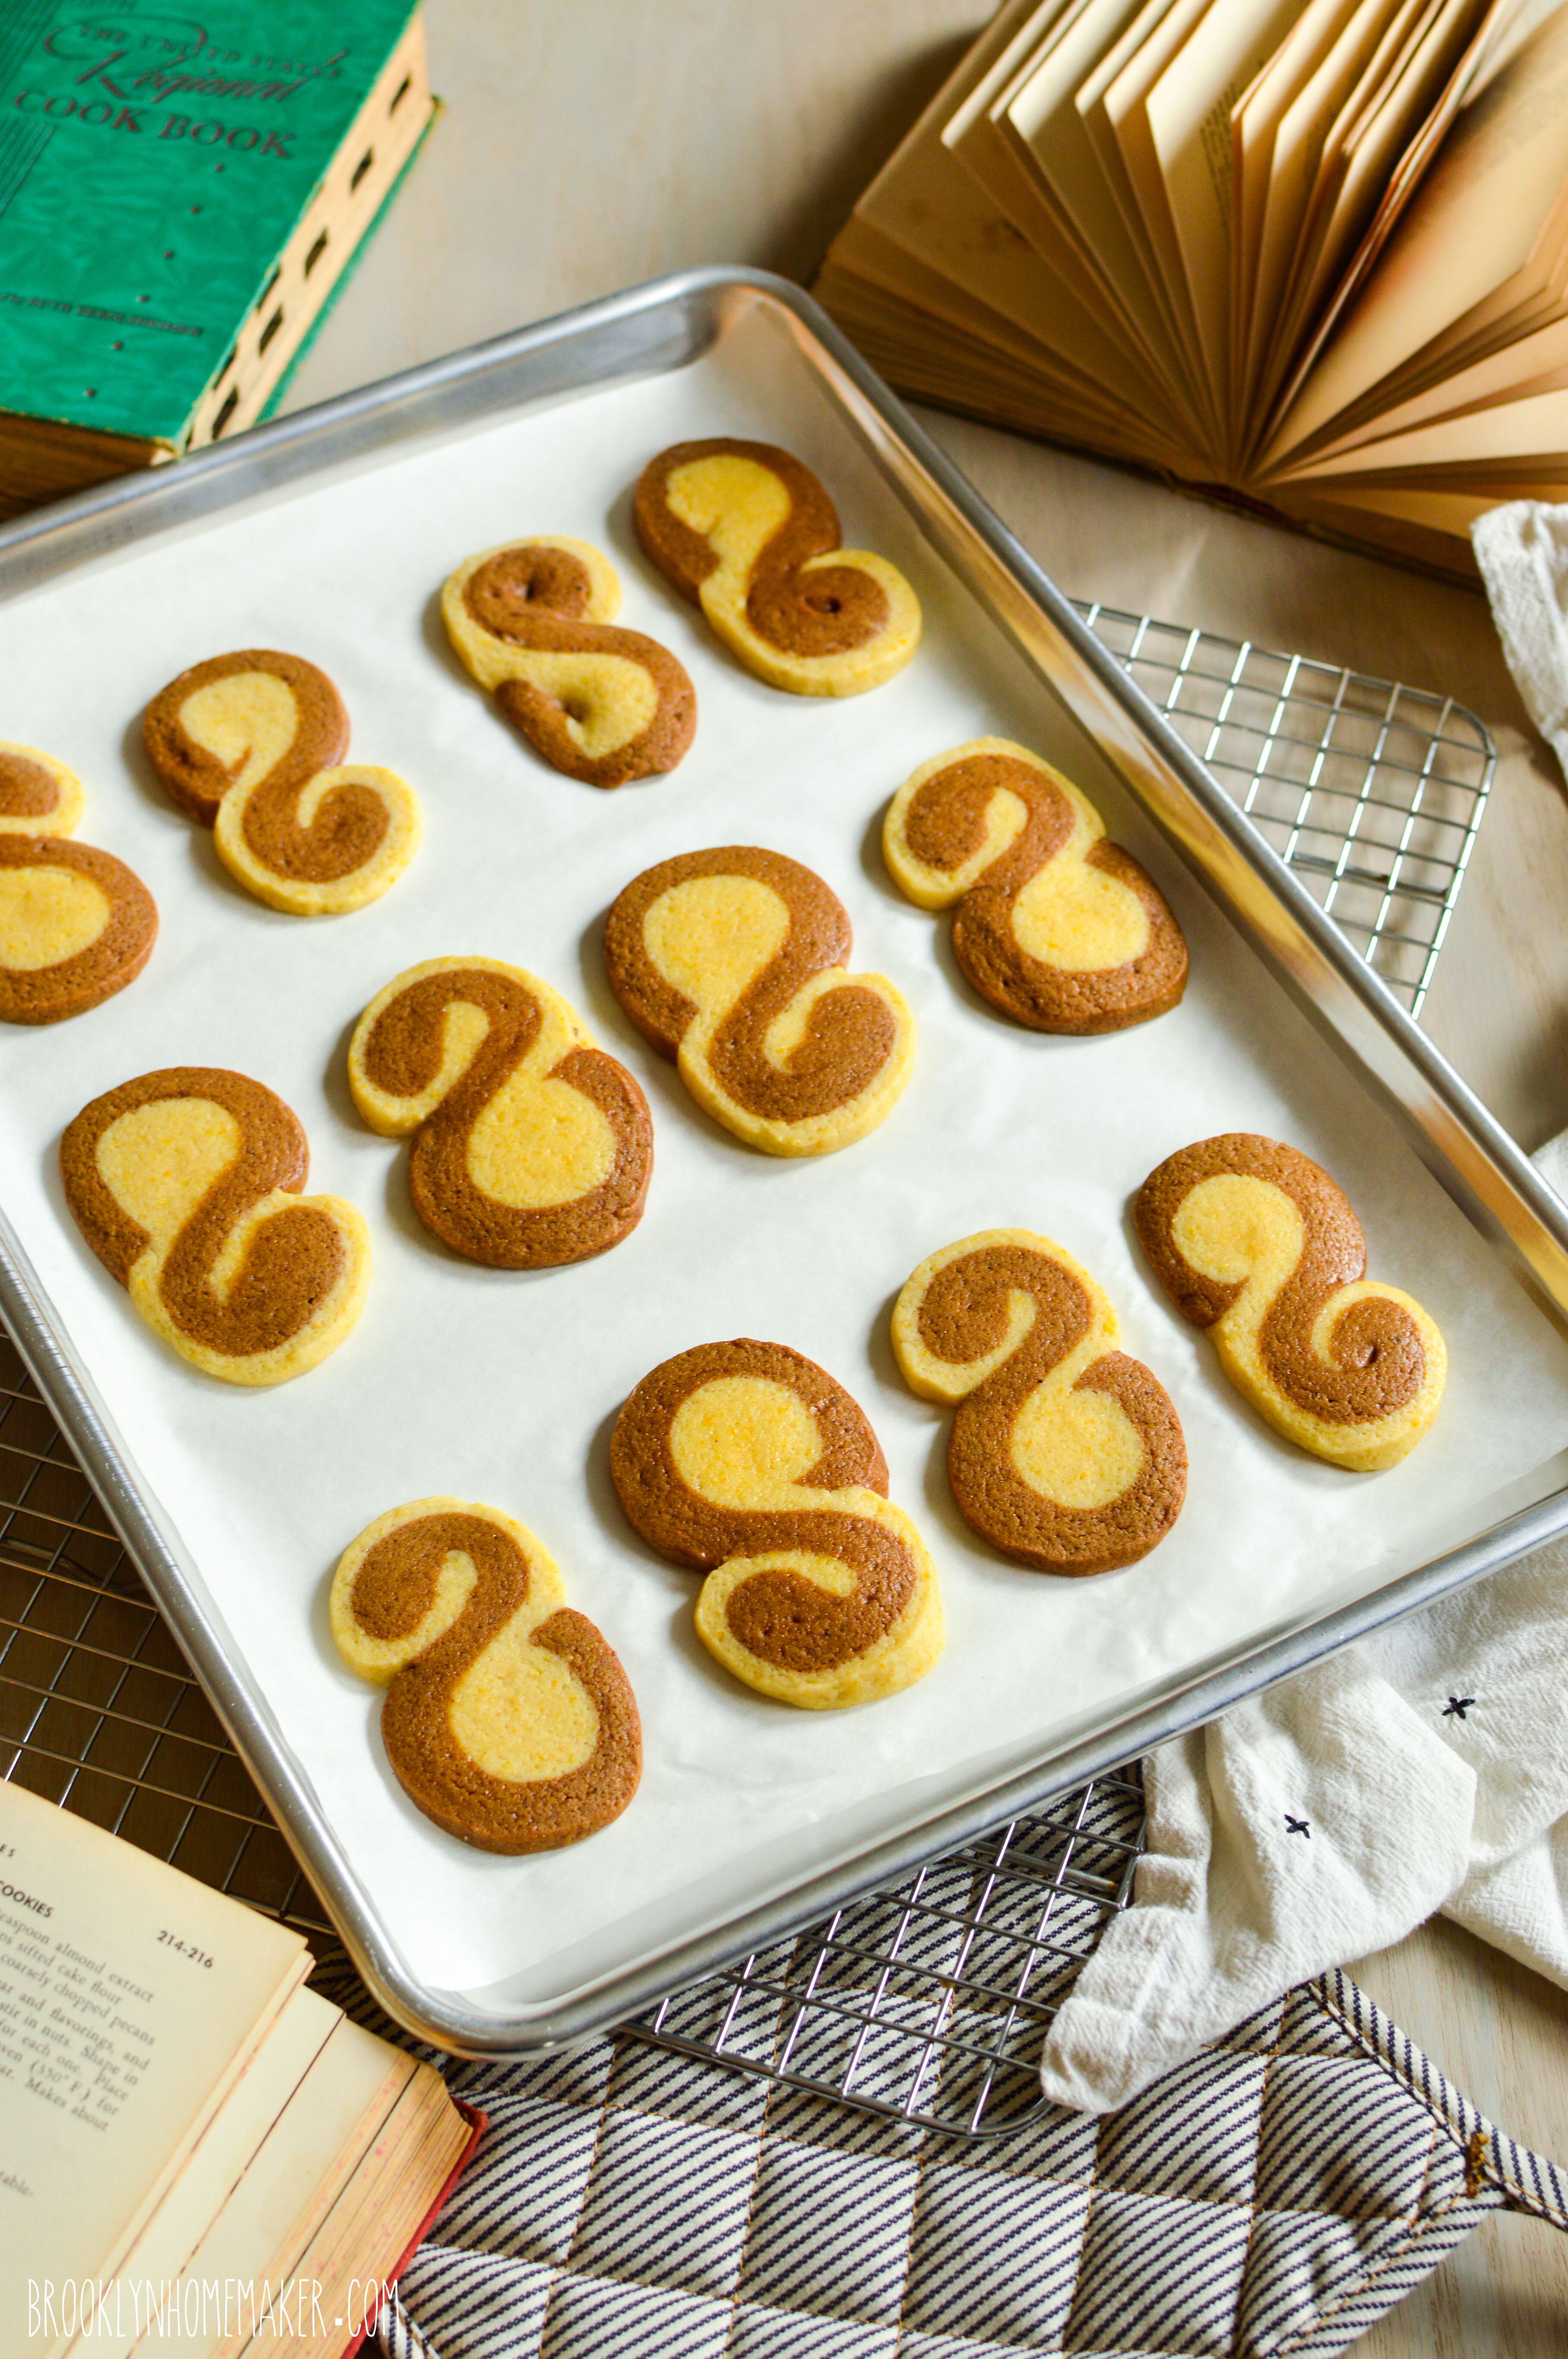
Since this recipe was so unfamiliar to me with the lack of flour and the addition of ground chocolate rather than melted chocolate or cocoa powder, I was really worried that the chocolate would just melt and turn into a mess in the oven, but my cookies kept their shape really well, so never fear y’all!

They’re soft and tender and delightfully chocolatey. Russell said they taste like a candy bar.
Better yet, they keep for up to a month, so they can be made well in advance and stored, making your holiday season a little less stressful. Just don’t store them with other, crisper cookies, or the crisp cookies will absorb their moisture and get soft.

Happy baking, and happy holidays!

basler brunsli | chocolate almond spice cookie | Brooklyn Homemaker

Basler Brunsli

  • Servings: makes about 30 cookies
  • Print
adapted, just barely, from Classic German Baking by Luisa Weiss

1 2/3 cups raw almonds
9 oz dark or bittersweet chocolate (60% to 72% cocoa)
1 1/2 cups confectioners (powdered) sugar
1/4 teaspoon salt
1/4 teaspoon cinnamon
1/8 teaspoon cloves
3 egg whites, lightly beaten
2 tablespoons dark rum (or Kirsch if you have it)
Granulated sugar, for rolling

Add the almonds to the bowl of a food processor and grind until they’re very very fine, but be sure not to go too far and let them turn into almond butter. If they start to bind together, stop!
Transfer them to a separate bowl and break the chocolate up into the food processor. Pulse until finely ground, but don’t let it melt. If it’s warm in your kitchen you may want to refrigerate your chocolate first.
Add the almonds back in with the chocolate, along with the salt, spices, egg whites, and rum or Kirsch.
Pulse until the mixture comes together in a stiff, sticky dough. Transfer the dough to a bowl, cover with plastic wrap, and refrigerate for 12 to 24 hours.

Preheat your oven to 300F (150C), and line two sheet pans with parchment paper.

Sprinkle your clean work surface with a generous layer of granulated sugar to prevent the dough from sticking. Place the dough on the sugared surface and cover with a sheet of plastic wrap or parchment paper to prevent the dough from sticking to the rolling pin. Roll the dough out 1/3″ to 1/4″ thick, and check to see if the dough is stuck to the surface (*see note). Cut out shapes with a cookie cutter (**see note) and transfer the cutouts to the prepared baking sheets leaving 1/2″ space between them. Bake, one sheet at a time, for 18 minutes. The cookies should look dry to the touch, but soft. Repeat with remaining baking sheet. Cool cookies completely before trying to remove them from the parchment, or they’ll fall apart.

Cookies can be stored in an airtight container or cookie tin, for up to a month.

Cooks notes:
*If the dough sticks to the work surface in a few spots, I found that it was easier to gently lift the dough and add more sugar underneath before cutting, rather than trying to lift stuck-on cutouts. Otherwise the cookies will lose their shape when you try to pick them up. If all of the dough is entirely stuck to your work surface, you might want to ball it back up and start over with more sugar on the surface next time.

**This dough is coarse & sticky, so avoid shapes with too much detail. Hearts are the traditional shape for these, but any simple shape will work.

Advertisement

ginger pinchies

Have you guys decided which cookies you’ll be baking for the holidays yet? Have you narrowed it down to just one recipe, or are you making a few different kinds?

ginger pinchies | Brooklyn Homemaker

When I was little my grandma would always have a big tray of homemade cookies on the counter every Christmas, and it was always so much fun to choose which kind to try first. Being the chubby little dough boy that I was, by the time we were done opening presents you better believe that I’d tried each and every recipe she had on that platter, sampling a few of them more than once, you know, just to be sure.

ginger pinchies | Brooklyn Homemaker

This year I signed up for a cookie swap at work and I couldn’t be more excited about it. I’ve always wanted to host one myself but never thought enough of my friends would be interested to make it work. This year though, one of my coworkers suggested it and to my surprise, so many people signed up that I’m actually worried about how many batches I’m going to have to make. The more people who sign up though, the more varieties of cookies I’ll have for my holiday spread this year. An embarrassment of riches y’all!

Originally my plan was some kind of spicy gingerbread cutouts, but after Nordic Ware reached out to me to ask if I’d be interested in a project they’re working on with the Minnesota Historical Society, I might just have to change my plans!

ginger pinchies | Brooklyn Homemaker

To celebrate their Scandinavian American roots this holiday season, Nordic Ware joined forces with the Minnesota Historical Society and Mill City Museum to help them promote a special holiday cookbook they’ve just released.

Nordic Ware has been a major part of Minnesota’s heritage and history since 1946, and they’re still a family owned company!  The Minnesota Historical Society helps preserve Minnesota’s past, shares the state’s stories and connects people with history in meaningful ways. They play an important role in Minnesota’s historic preservation, education and tourism; and provide the public with award-winning programs, exhibitions and events. Part of the historical society, The Mill City Museum was built into the ruins of what was once the world’s largest flour mill, located in Minneapolis on the historic Mississippi Riverfront. They teach their visitors about the intertwined histories of the flour industry, the Mississippi river, and the city of Minneapolis.

ginger pinchies | Brooklyn Homemaker

Written by self proclaimed Nordic food geek and meatball historian Patrice M. Johnson, and published by Minnesota Historical Society Press; Jul: Swedish American Holiday Traditions focuses on the Christmas food traditions of Swedish Americans in the Midwest.

From smörgåsbord and St. Lucia processions, to Christmas Eve gatherings with family and friends, Swedish Americans are linked through the generations by a legacy of meatballs and lutfisk. Throughout the Midwest where Swedish immigrants settled, holiday dishes placed on the julbord (Christmas table) tell stories about who they are, where they come from, and where they are heading.

In exploring Swedish American holiday customs, Johnson begins with her own family’s Christmas Eve gathering, which involves a combination of culinary traditions: allspice-scented meatballs, Norwegian lefse served Swedish style (warm with butter), and the American interloper, macaroni and cheese. Just as she tracks down the meanings behind why her family celebrates as it does, she reaches into the lives and histories of other Swedish Americans with their own stories, their own versions of traditional recipes, their own joys of the season. The result is a fascinating exploration of the Swedish holiday calendar and its American translation.

ginger pinchies | Brooklyn Homemaker

Jul is full of recipes that are perfect for holiday celebrations, even if you don’t have Swedish or Scandinavian roots.  The are tons of mouth-watering recipes for celebratory savory dishes, drinks, and desserts, but I went straight for the cookies when I was deciding which recipe to try out and share. Coming from a German American family, I share the author’s love for heavily spiced holiday treats and it didn’t take me long to zero in on a fun and unusual recipe for spice cookies she calls “Ginger Pinchies”.

These two-tone cookies were named after Johnson’s cat Pinchy, and inspired by her daughter’s love of ginger and her aunt’s well-worn copy of a Swedish Tabernacle Church Cookbook. Although they’re rolled up differently, the recipe is similar to a traditional pinwheel cookie. Rather than chocolate though, the dark part is a ginger-heavy spiced molasses dough and the light is perfumed with fresh citrus zest and a touch of vanilla. It reminds me so much of an Old-Fashioned marble cake recipe that I found in an old cookbook from the 1940s, which I made into this stunning holiday bundt a couple years ago!

ginger pinchies | Brooklyn Homemaker

Reading that this recipe was a 2015 Minnesota State Fair Gold Medal Flour Cookie Contest Blue Ribbon Winner was all  I needed to see to know this was the one for me.

The results are in y’all, these cookies are amazing! The light part is citrusy and delicate, soft and chewy, and I absolutely love the contrast with the rich and spicy molasses dough. Taken all in one bite they balance perfectly, and because I’m a nerd I also tried eating each dough separately in small bites to see how I liked them on their own. Just perfect! Thanks to my new Nordic Ware half sheet pans, the cookies baked up perfectly tender with delicately and evenly browned bottoms. While dark non-stick pans can sometimes overheat and burn the bottoms of cookies, these professional grade pans heat evenly and consistently producing perfectly baked cookies every time!

These cookies are absolutely ideal for your holiday spread, and they’ll be great for my cookie swap. You should definitely check out this cookbook for yourself, but so you don’t have to wait to make these cookies, I’ve shared the recipe below.

ginger pinchies | Brooklyn Homemaker

Ginger Pinchies

  • Servings: makes 16 cookies
  • Print
recipe from Jul: Swedish American Holiday Traditions
1/2 cup (1 stick) butter, softened
1/2 cup sugar
1 egg yolk, beaten
3 tablespoons milk
1 1/2 cups plus 1 tablespoon all-purpose flour (divided)
1/2 teaspoon baking powder
1/2 teaspoon salt
1 teaspoon vanilla extract
zest of 1 orange (about 1/2 teaspoon)
zest of 1 lemon (about 1/2 teaspoon)
2 tablespoons molasses
1 teaspoon ground ginger (or 2 to 3 tablespoons grated fresh ginger)
3/4 teaspoon cinnamon
1/2 teaspoon cloves
1/4 teaspoon allspice
pinch nutmeg
pinch cayenne

Use a stand mixer with paddle or a hand mixer to beat butter on low speed for about 30 seconds. Gradually add sugar and bead on medium speed until fluffy, about 3 to 4 minutes. Turn mixer to low and add egg yolk and milk and mix well. In a small bowl, whisk together 1 1/2 cups flour, baking powder, and salt. Gradually add flour mixture and continue beating until dough forms.

Divide dough in half (there will be just over 2 cups total) Add half of the dough back to the mixing bowl along with vanilla, orange zest, and lemon zest. Mix until incorporated. Form dough into a ball and wrap in plastic wrap. Set aside. Place remaining dough in mixing bowl along with remaining 1 tablespoon flour, molasses, ginger, cinnamon, cloves, allspice, nutmeg, & cayenne. Mix until incorporated. Dough will be very soft. Form dough into a ball and wrap in plastic. Chill both dough balls at least 30 minutes. (I froze mine for 30 minutes)

Place parchment paper over work surface and roll each dough ball into a 1/4-inch-thick, 8×5-inch rectangle. (It’s important to try to get as close to a rectangle as possible, rather than an oval shape, so that your finished cookie log isn’t hollow at the ends.) Place one dough rectangle over the other, aligning the dough as perfectly as possible. Starting at one of the narrow ends of the dough, use the parchment to help you gently roll the dough into a spiral, stopping a little more than halfway up the rectangle. Flip the dough upside down and roll the other end into a spiral so that the dough resembles and S-shaped log. Wrap in clean plastic wrap and chill at least an hour. (Again, I froze mine)

Preheat oven to 350 degrees and line baking sheets with parchment paper. Slice chilled dough into 1/4-inch-thick slices for about 16 S-shaped cookies. (I sliced my log in half, then into quarters, then sliced each quarter into 4 slices to get 16 evenly sliced cookies) Place on prepared baking sheets about 1 to 2 inches apart. Bake for 8 to 10 minutes or until evenly browned on the bottom. Cool on rack.

dark chocolate & oreo mini skull cakes

When I was a kid, Halloween was my absolute favorite holiday.

dark chocolate & oreo mini skull cakes | Brooklyn Homemaker

I mean, I’ve always loved Thanksgiving too, for the food of course, but as a young kid Halloween was the freakin’ best. Turkey and pumpkin pie are great and all but costumes and candy, and running around at night like a little lunatic with fake vampire teeth? Grandma’s cornbread dressing couldn’t hold a candle…

I’ve had countless costumes over the years, but I’ll never forget an especially uncomfortable year dressed as Frankenstein with tons of sticky green makeup and itchy stick-on eyebrows and neck bolts. After that, the simpler and more elegant Dracula was definitely my go to.
Each year I’d get a new costume complete with fangs, cape, and gold medallion, and as a young gay boy I already had all the crisp white button downs and black dress pants that were required but not included with the costume.  (No jeans and T-shirt for this little sissy boy!)
I think it really was the dressed up, fancy man aspect of Dracula that appealed to me most year after year, and it wasn’t until I found my grandma’s old wig in her bathroom closet that the appeal started to wear off…

dark chocolate & oreo mini skull cakes | Brooklyn Homemaker

These days I usually spend most of the month of October thinking up all sorts of witty, hysterical costumes that I could wear, but never do. The last time I dressed up was for work, about 4 years ago. I’d just started working at Whisk slinging fancy kitchen gear, and we all came up with this hilarious plan to come to work dressed as a Food Network star.
Group costumes are the best! What could go wrong?!?!

A few days later I show up to work in full Ina Garten regalia, and oops! Everyone either forgot or didn’t have time to get their costumes together.  One person, who usually works from home, loved the idea and actually did come in for an hour or two dressed as Alton Brown (essentially dressed as an older, nerdier version of himself) to take pictures, but everyone else either didn’t dress up or threw something else together at the last minute.
As I stood there working my full shift in an oversized navy blouse, huge clip on pearl earrings, lipstick, and an itchy bob wig; I vowed never again to be duped by allure of an amazing group costume idea.

I haven’t dressed up since.
Womp Womp.

dark chocolate & oreo mini skull cakes | Brooklyn Homemaker

Even though I’m too old for trick-or-treating and haven’t put on a costume in years, I really do still have a special place in my heart for Halloween.

I like to imagine that some day in the future I’ll be the type of adult who’s famous among his circle of friends for hosting amazing costume parties that are talked about for years to come. Basically I dream of one day throwing Halloween parties just like the ones on Roseanne, complete with decorations so elaborate and costumes so perfectly spot-on that everyone I know will try, and fail, to one-up me year after year.
By the way, am I the only one who’s ever wondered how the lower middle class Connor family, who always seemed to have trouble paying their bills on time, came up with all the money for their costumes and decorations?
I guess it doesn’t matter, but, like, that stuff ain’t cheap!

dark chocolate & oreo mini skull cakes | Brooklyn Homemaker

With all my dreams of Halloween entertaining one-upmanship, the minute I saw this adorable haunted skull cakelet pan, I knew that I HAD to have it.

You all know I love Nordic Ware. I’ve told you more than once twice three times (a lady), but after finally having a chance to use this pan you’ll have to excuse me as I wax poetic once again.

Nordic Ware has been making exceptional cookware and bakeware right here in the US for 70 years now, and even after all this time they’re still a family owned company. The bundt pan is by far their most famous and most popular product, but they also specialize in all sorts of elaborate and festively shaped baking pans. No one can compare to their quality and selection, and ALL of their pans are sturdy, heavy duty, ultra-non-stick, and unbelievably durable.
I should know! I put their pans through the ringer!

dark chocolate & oreo mini skull cakes | Brooklyn Homemaker

There is so much detail in these little skulls that I was worried it wouldn’t read once the cakes were baked, or that I’d have problems getting the cakes out cleanly from all the intricate details face and teeth. At this point I should have known that I had no need to worry. These little cakes released like a dream and all that detail came across with amazing definition in the finished cakes.

There’s actually so much detail in these little cakes, that even though I tried decorating them in several ways, I found that my favorite cakes were the simplest, with just a double coat of thin sugary glaze. Of course you can decorate them however you choose, but I really think the simpler, the better. In fact, as much as I love the creepy look of the bright red chocolate candy eyes, I worry that even they take away from the scary perfection of the little cakes as they were straight out of the pan.

dark chocolate & oreo mini skull cakes | Brooklyn Homemaker

The recipe below, simply adapted from my favorite chocolate bundt cake recipe, makes 12 mini skulls, or 2 pans worth. If you only have 1 pan, make sure you wash the pan really well between batches. I also recommend that you dry it well and throw it in the fridge or freezer for a few minutes before reapplying the butter and cocoa. Otherwise the pan will be warm from being washed and the butter will melt and make a mess when you try to dust it with cocoa.
If you don’t have this pan at all, you can get it here, or you can just make this recipe in one 10 cup bundt pan. It won’t be as scary to look at, but it’ll certainly taste just as chocolatey and delicious!

By the way, if you’ve never tried this trick before, using cocoa powder works just as well as flour to prevent the cakes from sticking to the pan, but helps the cakes look extra dark and chocolatey, rather than the dusty uneven look flour sometimes gives to the outside of chocolate cakes.

dark chocolate & oreo mini skull cakes | Brooklyn Homemaker

The flavor of these little cakes is deep dark chocolate perfect with a super tender and moist crumb. Thanks to that simple powdered sugar glaze, these little cakes almost taste like a reeeeeally good moist chocolate doughnut.

The Oreos, complete with cream (don’t use boxed crumbs!), add a really nice touch, especially if you leave some in nice big chunks so they don’t melt and disappear into the batter. Essentially you just want to put them in a plastic bag and crush ’em up with your hands or whack at them with a rolling-pin until there are no whole cookies left, but you still have lots of bigger pieces.

Now tell me, what kid (or adult) could resist a super moist chocolate cake filled with oreo cookie crumbs? Especially one in the shape of a cute-yet-terrifying little skull???

dark chocolate & oreo mini skull cakes | Brooklyn Homemaker

Dark Chocolate & Oreo Mini Skull Cakes

adapted from Joy the Baker

For the Cake:
1 1/4 cups strong hot coffee
3/4 cup Dutch process cocoa powder (I used “Double Dutch Cocoa“) plus extra for pan
2 1/2 cups sugar
1 1/4 teaspoons kosher salt
2 teaspoons baking soda
2 whole eggs
1 egg yolk
1 1/4 cups buttermilk
1 cup peanut oil or any neutral vegetable oil
2 teaspoons vanilla extract
3 cups all-purpose flour
2 cups (about 1 package) roughly crushed oreos (NOT oreo cookie crumbs, you want the cream too)

For the Glaze:
2 cups powdered sugar
1/4 cup milk
1 teaspoon vanilla extract

For decorating (all optional):
Red M&Ms
Sanding or decorating sugar (black, red, or silver)
white mini nonpareils
More crushed Oreos

Place an oven rack in the center of the oven and preheat to 350 degrees F.
Brush a skull cakelet pan (* see note) with softened butter, and dust with cocoa powder, tapping out any excess.

Whisk coffee and cocoa together in a bowl together until free of lumps and set aside.
In the bowl of a stand mixer with a whisk attachment, mix together sugar, salt, baking soda, eggs and egg yolk on low for just one minute. Add the buttermilk, oil and vanilla extract and mix on low again for another minute.
Add the flour and mix on medium speed for 2 minutes more. Add the cocoa mixture and mix on medium speed for 3 minutes. Finally, stir in the roughly crushed Oreos just until evenly distributed throughout. The batter will seem quite loose and liquid, it’s supposed to, don’t worry.
Pour half of the batter into the prepared cake pan, filling each cavity about 3/4 of the way up. This recipe makes two pans worth of batter. If you have two pans, you can bake them both at once, or once the first batch is out of the pan you can wash, dry, and cool the pan in the fridge before reapplying butter and cocoa and baking the remaining batter.
Bake for 20-30, or until a cake tester or toothpick inserted in the cake comes out clean.

Let the cake cool for at least 15 minutes before inverting onto a cooling rack.

To make the glaze:
Whisk the powdered sugar, milk, and vanilla together in a medium bowl until smooth and free of lumps.

To glaze and decorate:
After some trial and error I found that the easiest way to glaze the cakelets was to pick up them up by the base and dip them into the glaze like a doughnut. Remove from the glaze, let drip dry, and turn over to dry on a cooling rack. I actually liked the look of the glaze best when the cakes were glazed twice. If you want to double glaze, wait for the first coat to dry five minutes or so before dipping again.
If you’d like to decorate with sanding sugar, crushed Oreos, or mini nonpareils, sprinkle them over the cakes before your final coat of glaze has dried. If desired, add red chocolate candies in the eye sockets.

*Note: If you don’t have a skull cakelet pan this recipe makes 1 (less spooky but equally delicious) bundt cake in a 10 cup bundt pan. A bundt will need to bake for about 55 to 65 minutes .

dark chocolate chunk cookies with dried cherries and walnuts

I’m not sure if this is true where you live, but here in Brooklyn this has been the weirdest, craziest winter I’ve ever seen.

dark chocolate chip cookies with dried cherries and walnuts

To start with, up until very recently we’ve barely had anything even remotely close to an actual “winter”. I’m sure I’ve mentioned this before, but on Christmas eve it was almost 70 degrees outside. On Christmas day we had to open all the windows in the house while I made dinner, but with the oven on all day we were still all overheated and sweaty by dinner time, even with the open windows.

dark chocolate chip cookies with dried cherries and walnuts | Brooklyn Homemaker

After Christmas it was more of the same. Temperatures didn’t dip below freezing until well after the new year, but even then snow flakes were nowhere in sight. Having grown up and lived in New York State for my entire life, this is the latest and longest I’ve ever waited to see flakes of frozen water fall from the sky.

dark chocolate chip cookies with dried cherries and walnuts

Then, practically out of nowhere, we got dumped on.

A few days before it happened they mentioned the possibility of a blizzard on the news. As the day of the blizzard grew nearer, the predictions grew bleaker and more serious. They even named the storm the same way they name hurricanes. Winter storm Jonas. Since when do we name winter storms?
By the morning before Jonas came to town, they were practically predicting the end of the world, by snow and freezing and ice.

I’ve been around this block before though, this unpredictable New York State weather block, so I took the impending “snowpocalypse” with a grain of salt.

dark chocolate chip cookies with dried cherries and walnuts

Then it hit us. I checked the window just before bed last Friday night, and saw that a few flakes were just beginning to stick. I honestly expected that I’d wake the next morning to find an inch or so of accumulation, and turn on the news to hear apologies and oopsies from our local meteorologists. It’s happened before.

My alarm woke me early Saturday morning, and before I started to get ready for work I checked the window. I suppose I shouldn’t have been, but I was shocked to see that we already had about six inches on the ground, with plenty more on the way. Part of me thought it wouldn’t keep up though, and I had to go in to work anyway, so I went about my day. It wasn’t until I got to work, my beard covered in snow, that I started to realize it wasn’t letting up. It was getting worse. Some of my coworkers couldn’t even get in for the day because the trains couldn’t get through.

By noon the governor had issued a state of emergency and they were announcing bus closures and travel bans. Not long after that the police commissioner sent out a tweet saying that anyone found driving on the roads in NYC would be arrested. Staff at work, myself included, started to panic and since there weren’t many customers to speak of, we closed early and trudged our way home while we still could. Luckily the train line I live off of runs underground. There were delays, but it was still running. I walked home from the train down the middle of the street, since most sidewalks in my neighborhood hadn’t yet been shoveled.

dark chocolate chip cookies with dried cherries and walnuts

The next morning the clouds parted and the sun came out, but the sidewalks still weren’t shoveled, the intersections not clear to pedestrians, and the streets were barely plowed. I was practically snowed in, and with nothing to do and nowhere to go, I figured I may as well bake some cookies.

dark chocolate chip cookies with dried cherries and walnuts

I didn’t want to brave the streets so I dug through the cupboards and took inventory of what we had in the house. My mom gave me a big bag of shelled walnuts the last time I went to visit, and I had an extra bag of dried cherries leftover from my Christmas pork roast.  I didn’t have any chocolate chips in the house, but I did have a big ass bar of 72% dark chocolate from Trader Joe’s. (incidentally, I’m not sure if you have a TJ’s near you, but I seriously can’t sing enough praises for the price and quality of their chocolate. I generally try to avoid specific product endorsements, but their “Pound Plus” bars are a dream come true to someone who loves chocolate almost as much as he loves to bake.)

dark chocolate chip cookies with dried cherries and walnuts

In keeping with the extremely unusual and unpredictable nature of this winter, it’s less than a week since our “snowmageddon” and it’s melting away as quickly as it came. There will be nothing left but memories and instagram photos in a few days more.

dark chocolate chip cookies with dried cherries and walnuts

Whether you’re snowed in or just want a sweet treat, these cookies are THE BOMB!

The cookie itself is buttery, soft, chewy, delicately salty, and perfect in every way (Thanks Martha). Twice as much brown sugar as white ensures a tender chewy cookie that stays soft for days. Rather than the traditional chocolate chips though, this cookie is loaded with pockets of rich and melty bittersweet dark chocolate; studded with bits of chewy, sweet, tart, and jammy dried cherries; and peppered with just enough crunchy, toasty, nutty, earthy, ever-so-slightly-bitter walnuts to tie it all together. These three ingredients were seriously made for each other.

What are you still doing here? Go preheat that oven and take that butter out to soften!

dark chocolate chip cookies with dried cherries and walnuts

Dark Chocolate Chunk Cookies with Dried Cherries and Walnuts

  • Servings: makes approximately 32 cookies, depending on scoop size
  • Print
Adapted from Martha Stewart

1 cup chopped walnuts
2 1/4 cups all-purpose flour
1/2 teaspoon baking soda
1 cup (2 sticks) unsalted butter, room temperature
1/2 cup granulated sugar
1 cup packed dark-brown sugar (light would work fine too)
1 1/2 teaspoons coarse kosher salt
1 tablespoon pure vanilla extract
2 large eggs
2 cups dark chocolate chunks or chips
1 cup chopped dried cherries

Preheat oven to 350 degrees.

Arrange walnuts on a baking sheet in a single layer, and toast for about 6 to 8 minutes, or until they smell toasty and nutty. Cool and roughly chop.

In a small bowl, whisk together the flour and baking soda and set aside. In the bowl of an electric mixer fitted with the paddle attachment, combine the butter with both sugars and beat on medium-high speed until very light and fluffy, for about 2 to 3 minutes. Reduce speed to low and add the salt, vanilla, and eggs. Beat until well combined, for about 1 minute. Add flour, mix until just combined, then stir in the chocolate, cherries, and walnuts just until evenly distributed.

Scoop dough out using a portion scoop and place cookies about 2 inches apart on baking sheets lined with parchment paper. I like big cookies so I used a #24 scoop, which works out to about 3 tablespoons of dough per cookie. You can make smaller cookies, and you’ll end up with more individual cookies, but you’ll need to reduce the baking time by a few minutes. Alternatively you can make larger cookies with a smaller yield, but you may need to extend the baking time by 2 or 3 minutes.

Bake until cookies are golden around the edges, but still soft in the center, around 11 to 13 minutes for 3 tablespoon sized scoops. Remove from oven, and let cool on baking sheet 1 to 2 minutes before transferring to a wire rack to cool completely.

Cookies can be stored in an airtight container at room temperature up to 1 week.