shaved brussels sprout salad

Earlier this week I shared my first official Thanksgiving recipe for the year. Now that I think about it though, I guess I started sharing things a little out of order.

shaved brussels sprouts salad | Brooklyn Homemaker

Sometime next week I’ll let you guys in on my secret for perfectly cooked, perfectly moist turkey, and I might even give you a sneak peek into the rest of the meal. Today, though, I’m sharing my first course.

shaved brussels sprouts salad | Brooklyn Homemaker

Have you ever noticed how certain vegetables get a bad rap?

Brussels sprouts have a reputation for making children stick their tongues out and gag, but I know more people who love them than don’t. I never ate brussels sprouts growing up, I don’t even think I’d tasted one until college. A few years ago I was gabbing with my mom on the phone when I casually mentioned that i was roasting brussels sprouts for dinner. She was like, “Really? Brussels sprouts? You like Brussels sprouts?”

This got me thinking. Maybe it was the parents that didn’t like brussels sprouts? Maybe I grew up thinking they were gross even though I’d never had them, because my parents thought they were gross? If that was the case, I would guess that that generation didn’t like them because of the way they were prepared by the previous generation, our grandparents.
Growing up I also thought I hated asparagus. My grandfather has a gorgeous vegetable garden with a huge asparagus patch, and every spring he’d get really excited when the pale little stalks started coming in. He’d be out in the garden bent over staring at the ground with a little paring knife just waiting for the moment they were ready for harvest.
But then my grandmother would wash the stalks, plunk them into a pot of boiling water, and boil the ever loving crap out of them until they were reduced to limp, flabby, grey-green strands having little in common with what went into the pot initially. Then they’d be served, covered in butter and smelling like farts, where I’d politely decline or push them around my plate until I was excused. If I was forced to guess why my parents might not have liked brussels sprouts, it probably was because they’d only ever had them prepared the same way my grandmother prepared asparagus. Boiled until mushy and farty and entirely unappetizing.

shaved brussels sprouts salad | Brooklyn Homemaker

Oddly enough, I was gabbing with mom again sometime last week and she mentioned that my 16 year old sister had ordered brussels sprouts out at a restaurant. My how the tables had turned! It was my turn to ask, “Really? Brussels sprouts? She likes brussels sprouts?”
This time around though, mom’s response was a little different. “Yeah, She does! We both do. We love them!”

My my how times have changed. In world where Kale is king, Brussels sprouts might be queen. Or at least, maybe the little prince?

I think that the trend of properly cooking vegetables, leaving them bright and crisp and flavorful (and more nutritious), has finally reached the restaurants in my little slice of Upstate New York and taught my mom to finally see brussels sprouts in a different light.

shaved brussels sprouts salad | Brooklyn Homemaker

For this recipe I wanted to get as far away from mushy, farty, overcooked sprouts as possible, so I shaved them super thin with a mandolin and tossed them completely raw with a few simple ingredients.

The first time I tested this salad out on Russell, the sprouts I used were sort of sad and wilty and well past their prime, and the resulting salad was really unpleasant. No matter how thinly I shaved them, they were rubbery and flabby and no fun at all to eat raw. Russell said the salad was awful and that I should do something else, something with wilted brussels sprouts or maybe arugula or something.
I almost took his advice and ditched the recipe altogether, but I knew I really had something with this idea, and that better fresher sprouts would result in a far superior salad. So, I decided to ignore Russell’s advice and try the recipe again with fresher, crisper produce. Even Russell had to admit it was a huge success, entirely different from the first attempt.

So, take it from me, when eating them raw you really need to make sure your brussels sprouts are as fresh as can be.

shaved brussels sprouts salad | Brooklyn Homemaker

This salad is bright, light, delicate, and wonderfully refreshing. While it would make a great side salad for any meal, it’s the perfect thing to serve along with a rich, hearty, heavy meal like Thanksgiving dinner. It’s exactly what you want along with all that decadent food. The crisp bitter walnuts, crunchy sweet bursting pomegranate seeds, freshly shaved raw brussels sprouts, and simple bright lemony dressing are a welcome contrast against all the rich roasty indulgences that make up the rest of the meal. A lot of similar salads call for goat cheese or parmesan to compliment the acidic and bitter flavors, but I intentionally kept this salad as light and simple as possible, and it couldn’t be more perfect.

shaved brussels sprouts salad | Brooklyn Homemaker

Shaved Brussels Sprout Salad

Dressing: 
6 tablespoons olive oil
3 tablespoons lemon juice
2 tablespoons honey
generous salt and pepper to taste

Salad:
1 1/2 lbs brussels sprouts
1 1/2 cups walnuts
1 1/2 to 2 cups pomegranate seeds

To make the dressing combine olive oil, lemon juice, honey, salt and pepper in a bowl or lidded jar and whisk or shake until well combined. Can be made a day ahead an stored in an airtight jar.

Slice off the tough bottoms of the brussels sprouts and discard. Using a mandolin slicer (use a guard and watch those fingers) or the slicing blade of a food processor (or with a sharp knife and some patience) slice the brussels sprouts as thinly as possible. Soak in very cold water for 5 to 10 minutes before drying with a salad spinner or some kitchen towels. If necessary, this can be done a day ahead and covered with a damp paper towel and plastic wrap or an air tight lid.

Preheat the oven to 350 degrees. Arrange the walnuts in a single layer on a baking sheet and toast them for about 8 minutes or until they smell like toasty nutty heaven. Be careful they don’t burn. Cool.

Combine brussels sprouts, walnuts, pomegranate seeds, and dressing and toss to combine. Taste for seasoning and adjust if necessary. Serve immediately.

Note: Brussels sprouts should be as fresh as you can find them or they can be rubbery and a bit unpleasant to eat raw. The thinner you can shave them, the easier they’ll be to eat.

herb and cheddar corn pudding

OMG you guys. It’s November! Do you know what that means?

herb and cheddar corn pudding | Brooklyn Homemaker

Thanksgiving is almost here!!!!

Well, less than a month anyway. I guess you could say that’s “almost” right?
I’m gonna go with yes, and I’m gonna get excited about it.

herb and cheddar corn pudding | Brooklyn Homemaker

If you’ve been following me for a while you probably know that I take Thanksgiving very seriously. I have big recipe plans this year, and I’m so excited to get to share them with you. I’ve been thinking and planning and prepping and testing since early this summer, and for the next few weeks I’ll be sharing all the fruits of my labor. So much labor.

This will be my third Thanksgiving with Brooklyn Homemaker, and this time around I finally realized that I needed to get the ball rolling early if I was going to be able to share my whole meal plan with you guys. So, you’re welcome.

herb and cheddar corn pudding | Brooklyn Homemaker

Now, when I was testing out (and photographing) this particular recipe, it was basically the height of corn season here in New York so the corn I used was bright and crisp and fresh from the green market.

In many parts of the country fresh sweet corn is still available at Thanksgiving, so if you can find it, great, use that. I realize however, that it may be difficult for many of you to find it this time of year. Fear not my friends, frozen corn will work totally fine.

My only advice is that you should skip the cheap-o bag of grocery store brand corn, and go for the good stuff. The sweet crunchy kernels are the stars of the show here, so you want to try to get the freshest, crunchiest frozen corn you can find. I love frozen corn and always have a bag (or two) of it in the freezer, but not all frozen corn is created equal. The cheap stuff can sometimes have a bland boring flavor and is often mealy and mushy, so using crumby corn in this recipe will most likely result in a crumby corn pudding.

herb and cheddar corn pudding | Brooklyn Homemaker

Corn pudding isn’t super traditional in every region of the U.S., and I’d actually never even tasted it until making it myself this year. In the South however, it’s totally synonomous with Thanksgiving, and from what I’ve heard it’s served at most large family gatherings and celebrations. In the North, and on the West coast, many people haven’t even heard of it and have no clue what it is. When I told Russell I was thinking of giving it a try this Thanksgiving he had no clue what I was talking about and wasn’t really sold on the idea when I tried to explain it.

herb and cheddar corn pudding | Brooklyn Homemaker

While I may not have grown up eating corn pudding, but I did grow up eating lots of corn. Sweet corn is a kind of a big deal in New York State, and I was raised with a deep love and respect for fresh corn.

When I was young we used to spend a lot of time at my grandparent’s house. Grandma always served corn (although she was fond of canned corn over fresh) and mashed potatoes with almost every meal. My sister and I used to make the craziest concoction with our corn and potatoes. We were kids, and had wild imaginations and strange pallets, and we would take a big scoop of potatoes, make a little well in the center that we’d fill with corn, and then we’d top the whole thing with applesauce. We called it a volcano. I don’t know where we got the initial idea to do this, but it was a nightly ritual at grandma’s dinner table. These days it sounds pretty gross to me, but when I was young it was a delicacy. As weird as it sounds now, I guess it’s pretty cool that my family let me do weird things with food so I would grow up with an adventurous culinary spirit.

herb and cheddar corn pudding | Brooklyn Homemaker

Given my deep seated love of sweet corn, I’ve been lusting after this recipe for years. I can’t remember where I first saw it, maybe Pinterest, or maybe Food Network; but either way I’ve wanted to try it ever since. For the past two or three years I’ve wanted to make it for my Thanksgiving buffet but just never got around to it. Until now.

I don’t know how traditional this recipe is. I adapted it from Ina Garten, a woman who’s decidedly un-Southern but entirely capable in the kitchen. She may not be an authority on Southern home cooking, but she’s one of my greatest culinary idols so I figured her recipe had to be worth a shot.

herb and cheddar corn pudding | Brooklyn Homemaker

This corn pudding has a soft, tender, fluffy, almost soufflé like texture, studded with crunchy bursting little golden kernels of sweet corn. Beyond being slightly sweet from the corn and rich with cream, butter, and eggs; it’s also packed with flavor from the fresh green herbs and sharp nutty cheddar cheese. The flavor and texture is sort of similar to spoon bread (another Southern classic) or maybe something like a cross between cornbread and a soufflé. It’s super rich and decadent, so you probably won’t really want huge servings, especially when served along with an already heavy and bountiful meal like Thanksgiving dinner. Because the serving size is small, this recipe makes enough to feed a crowd.

My one word of warning is be careful not to overcook it. It should be tender and light and delicate and it can lose those qualities and become hard and rubbery if it’s overcooked. So, resist the urge to try to get a brown golden crust on the top. A little browning is fine, but you don’t want it crispy looking.

herb and cheddar corn pudding | Brooklyn Homemaker

Herb and Cheddar Corn Pudding

Adapted from Ina Garten for Food Network

6 tablespoons unsalted butter
1 cup chopped yellow onion (1 medium onion)
5 cups fresh or frozen sweet corn kernels (about 6 or 7 ears of fresh corn)
3 tablespoons chopped fresh parsley
2 teaspoons finely chopped fresh sage
2 teaspoons finely chopped fresh thyme leaves
5 large eggs
1 1/2 cups milk
1/2 cup heavy cream
1 cup yellow cornmeal
1 cup ricotta cheese
1 tablespoon sugar
1 tablespoon kosher salt
1 teaspoon freshly ground black pepper
1 1/2 cups grated sharp aged cheddar, divided

Preheat the oven to 375 degrees F. Grease the inside of a 8×12 or 9×13 baking dish. Try to find a dish that will easily fit inside another, larger, pan. (a high sided sheet pan works well)

Melt the butter in a very large saute pan and saute the onion over medium-high heat for 2 to 3e minutes. Add corn and saute for 4 minutes more. Add parsley, sage, and thyme and toss to coat. If using fresh corn use the butt end of your knife to scrape the “milk” from the corn cobs and add to pan. Remove from heat and cool slightly.

Whisk the eggs, milk, and cream together in a large bowl. Slowly whisk in the cornmeal and ricotta, then the sugar, salt, and pepper. Add the cooked corn mixture and 1 cup of the grated cheddar, and then pour into the baking dish. Sprinkle the top with the remaining 1/2 cup of grated cheddar.

Place your baking dish in a larger pan and transfer to the center shelf of the oven. Use a measuring cup with a spout to fill the pan 1/2 way up the sides of the dish with hot tap water. Bake the pudding for 40 to 45 minutes until the top begins to brown and a knife inserted in the center comes out clean. Serve warm.

apple cider doughnut cake

You guys. Break out the streamers and balloons.

Brooklyn Homemaker turns two today!

apple cider doughnut cake with mascarpone icing & cider caramel sauce | Brooklyn Homemaker

It has been exactly two years since I started this whole adventure, and I gotta say that I’m really proud of myself and my humble little blog. I think a celebration is in order.

When Brooklyn Homemaker was born I had no idea how far I would come, or could come, or how much I’d learn, or grow, or how many friends I’d make, how many people’s lives I’d touch, or how many people’s lives would touch my own. Day by day, post by post, little by little; I’ve forged new relationships, met new people, tried new things, experimented with new recipes and ingredients, grown as a photographer and recipe developer, and slowly developed a dessert plate hoarding problem that’s beginning to concern my husband. I’ve also learned that while the blogging world is competitive place, it’s also a warm and welcoming place with a strong sense of community. It’s filled with genuinely lovely, charitable, supportive individuals who love to help each other out whenever and however they can.

Over the past two years I’ve also learned a lot about myself and what I want for and from Brooklyn Homemaker. I’ve learned to accept that what I like and what I don’t like is more important to me than what the blogging powers-that-be tell me is important. Lately I’m trying to take a quality over quantity approach when it comes to my posting schedule, and focus on what makes me happy rather than what I’m told will get me more re-pins and likes. I gotta be me. What else can I be?

apple cider doughnut cake with mascarpone icing and cider caramel sauce | Brooklyn Homemaker

When my first anniversary rolled around last year I decided to recreate the cake that started it all, the cake that launched 1,000 posts (well, 142 and counting), the incomparable Aunt Sassy cake. While this pistachio dream cake is seriously amazing, I couldn’t do it again because, well you know, been there done that. Twice.

This year I was looking for the perfect way to represent myself and my blog, in big fancy cake form. I wanted something both festive and elegant at the same time. Something refined and adult, but with a bit of fun and nostalgia thrown in for good measure. Being that it’s Fall and all, and being that Fall is the best season ever invented, I also wanted to do something seasonally appropriate. Something with apples…

apple cider doughnut cake with mascarpone icing & cider caramel sauce | Brooklyn Homemaker

Is there any better way to add fun and nostalgia to a dessert than to base it on something we ate as kids? I don’t think so. Luckily when I was growing up there were plenty of harvest festivals and county fairs for me to get nostalgic about. Upstate New York is just lousy with them this time of year! There’s the Lafayette Apple Festival, Tomatofest (hosted in my own hometown), the Jordan Fall Festival, countless county fairs, and the great New York State Fair (dat butter sculpture doe), just to name a few several…

Of course the best part of these fairs and festivals is always the food! There’s the staples like fried dough, funnel cakes, and corn dogs; but upstate we have our own regional specialties like salt potatoes, chicken spiedies, and steaming cups of fresh pressed warm apple cider. When it comes to fall festival foods though, my all time favorite is and always will be sweet little apple cider doughnuts fresh and warm from the fryer, sparkling with sugar and cinnamon.

As soon as those chubby little doughnuts crossed my mind I KNEW I had my idea.

apple cider doughnut cake with mascarpone icing & cider caramel sauce | Brooklyn Homemaker

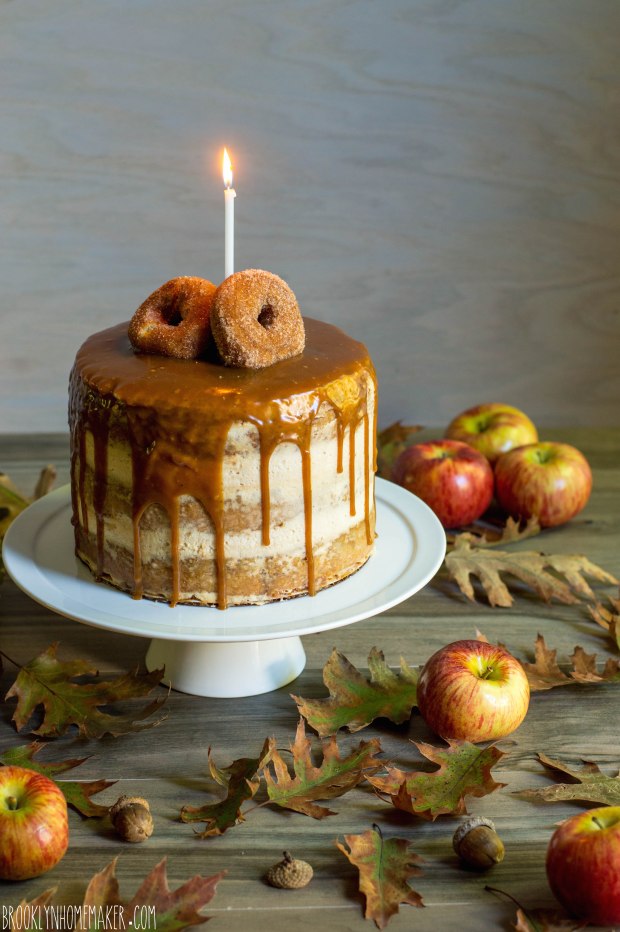
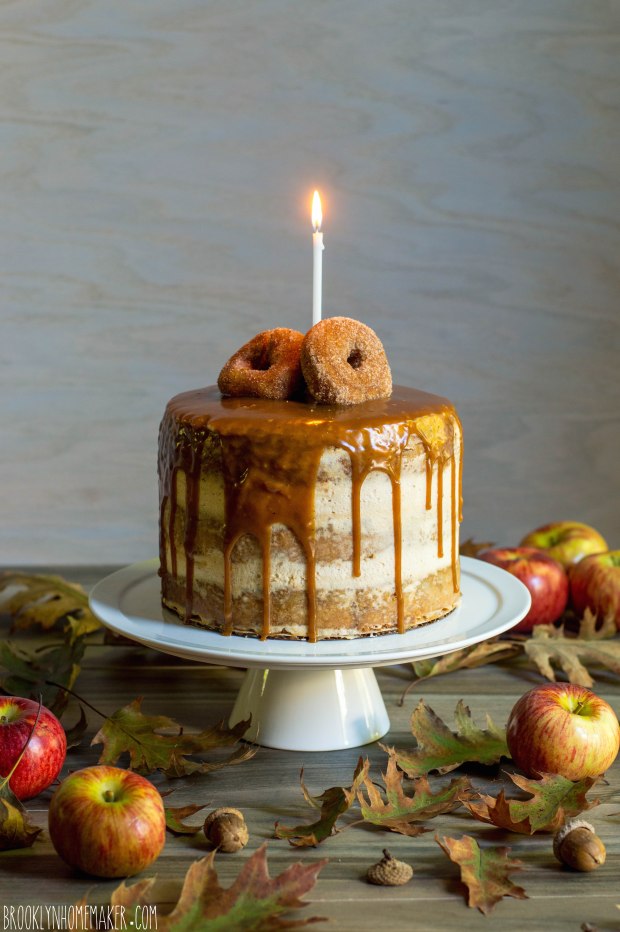
Now, you may think that to really translate the essence of a doughnut into cake form it should be round, like a bundt cake. While I’d normally agree with you, I do plenty of bundt cakes around here. This occasion called for a true celebration cake. Something with layers. Something tall.

apple cider doughnut cake with mascarpone icing & cider caramel sauce | Brooklyn Homemaker

I’m not usually a huge fan of naked cakes. They can feel a little too hip and trendy for me, but I guess I live in Brooklyn so I should probably just get over that. I also feel like the whole point of icing a cake is to seal it under a thick delicious layer of sugar and fat to keep it from drying out or going stale. This time around though, I had this whole big bright idea to coat the cake layers in cinnamon and sugar rather than icing to really drive home the cider doughnut point.

We all make mistakes.

Even me. Even after two years of blogging.

apple cider doughnut cake with mascarpone icing & cider caramel sauce | Brooklyn Homemaker

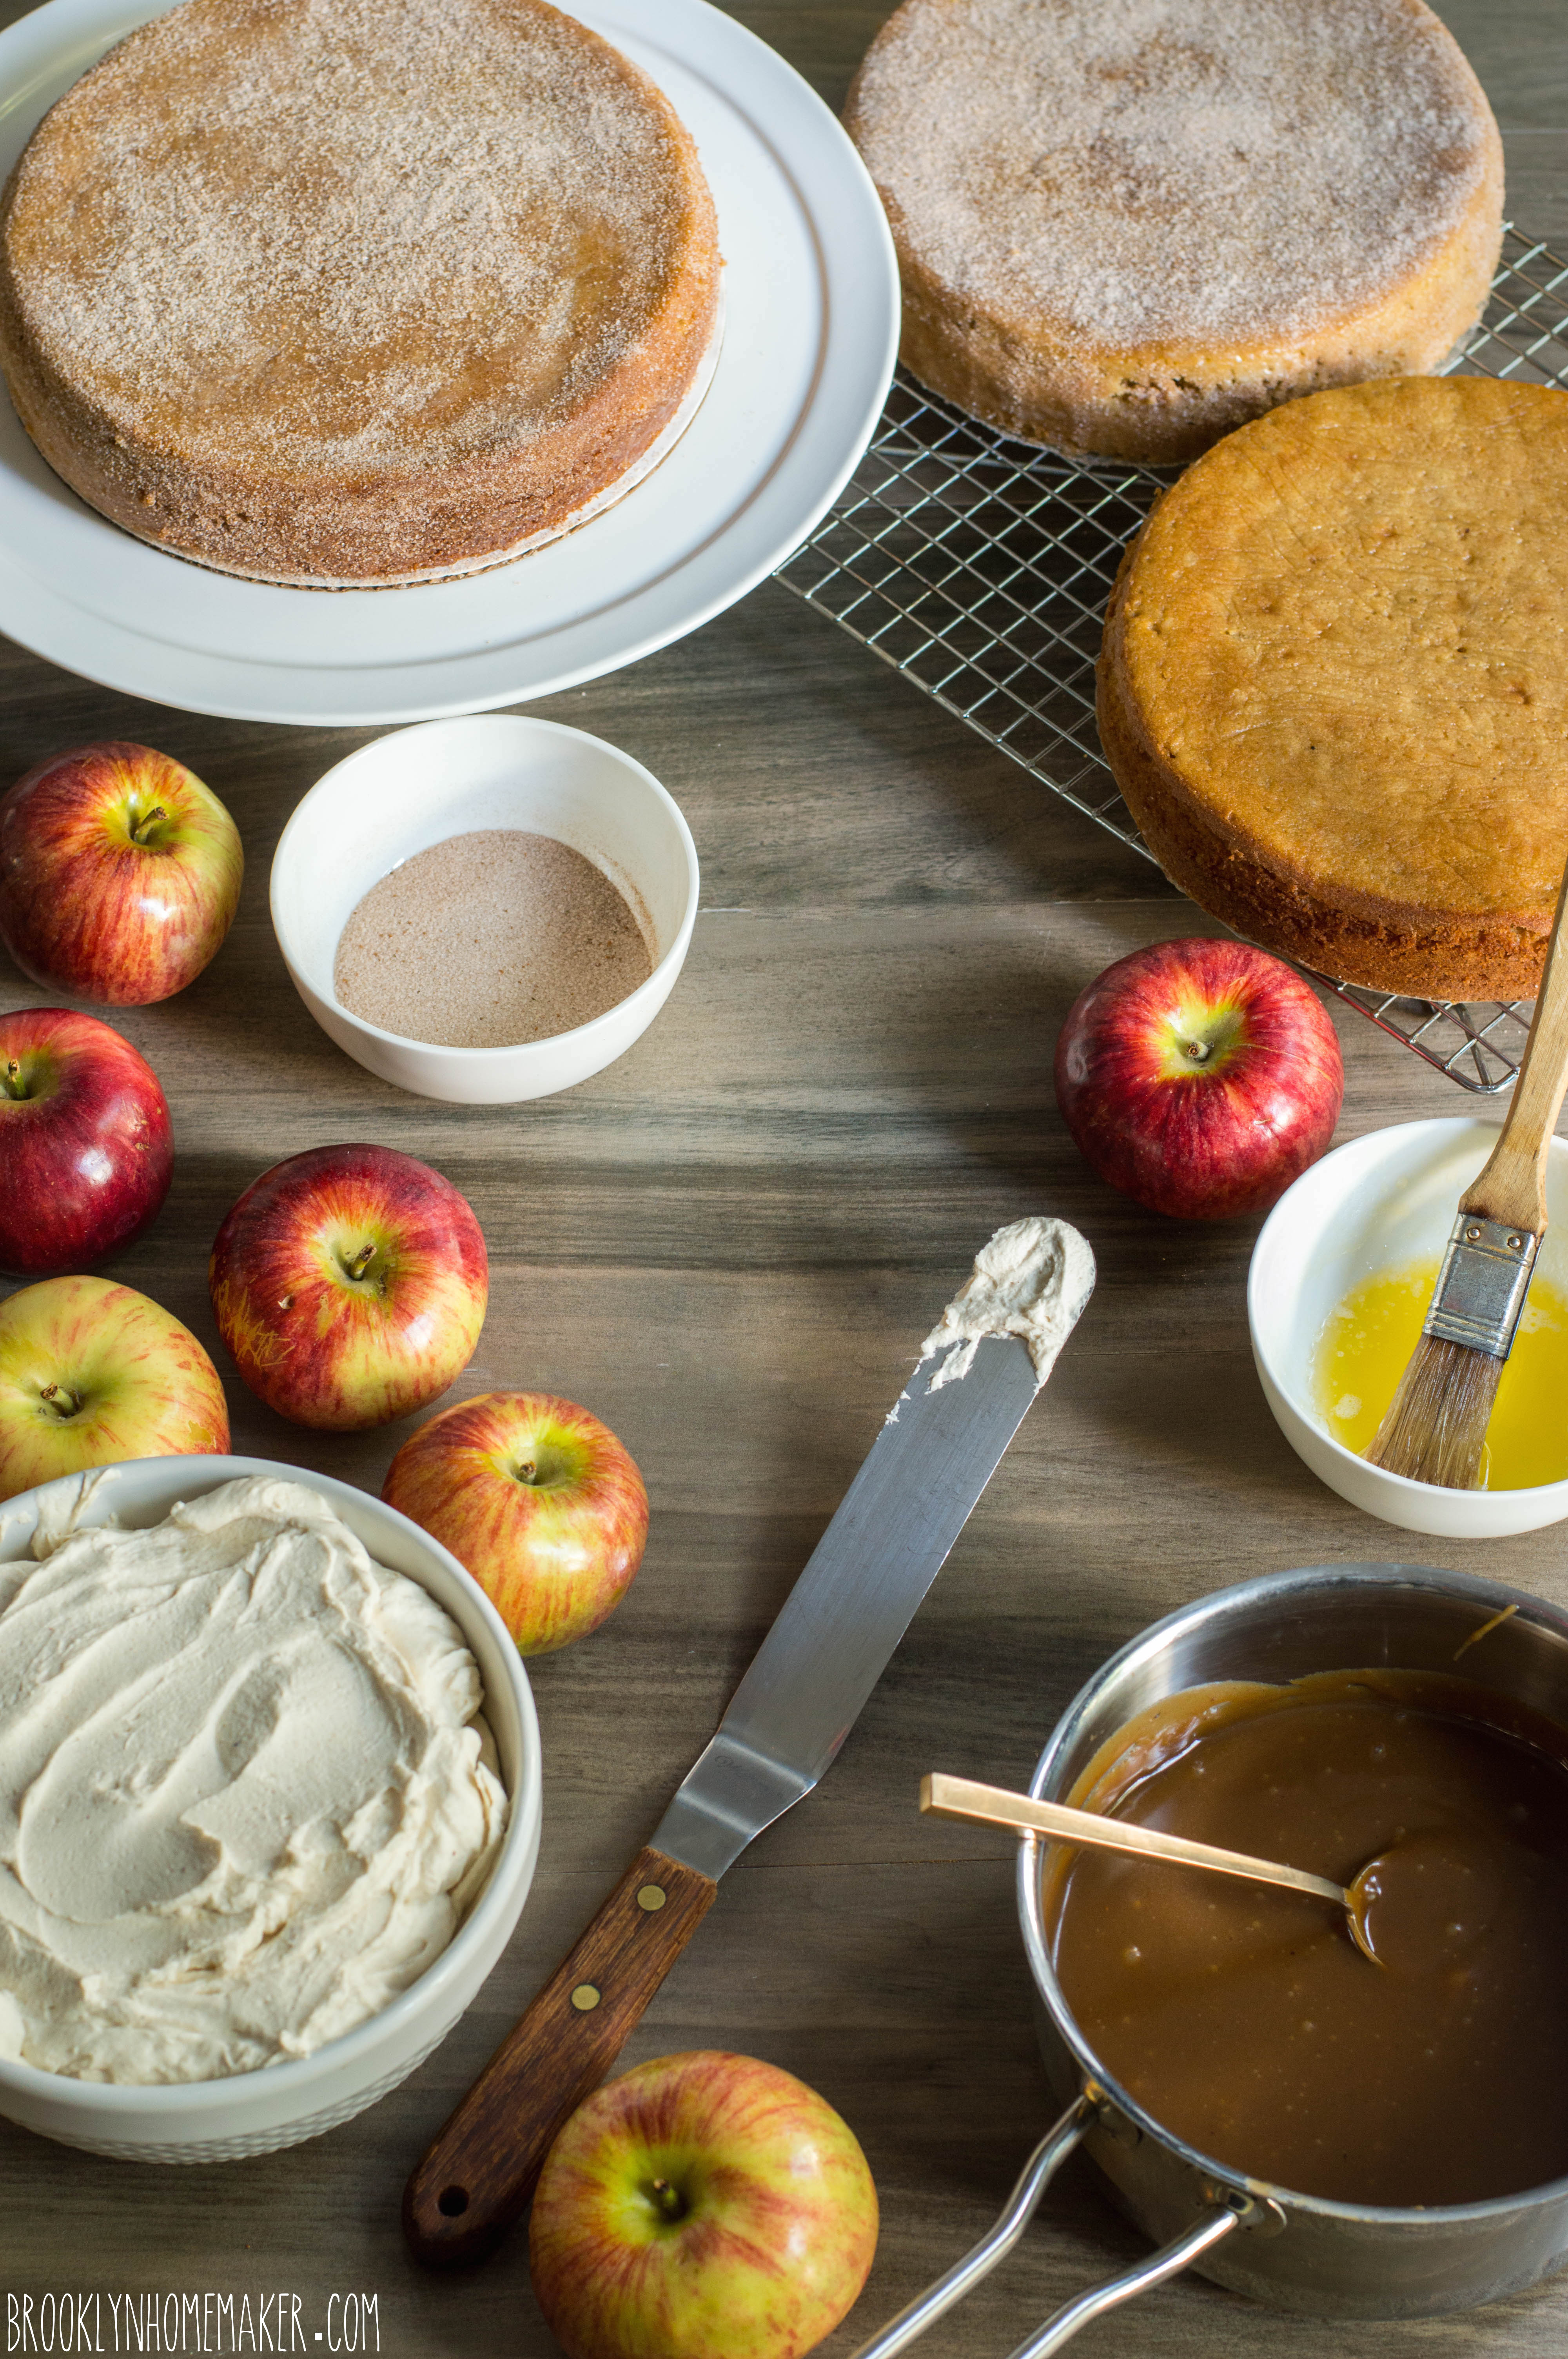
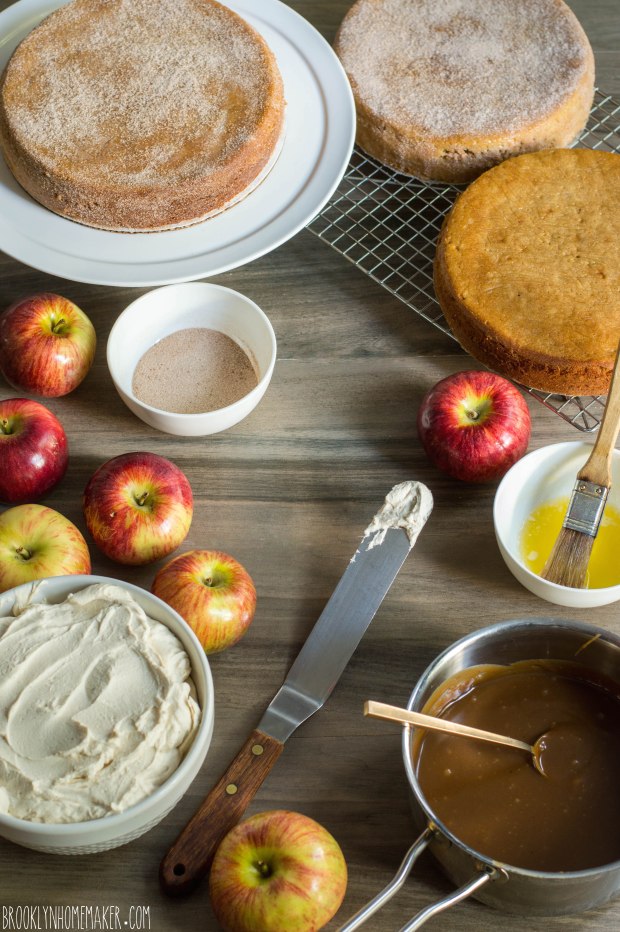
I was really stuck on this idea of coating the cake layers in sparkly cinnamon sugar, so I brushed each one with some melted butter and pressed the sugar into it. Then I stacked away and sandwiched a thick blanket of icing between each layer. The icing squeezed out the sides a little as I stacked, and at first looked imperfect and rustic in a charming sort of way. Once I went ahead with the caramel drizzle though, I had a disaster on my hands.

Rather than drizzling evenly and elegantly down the sides of the cake, as soon as the caramel reached the icing it pooled and dripped and ran all over the place. I did my best to control the way I drizzled and poured to get the look I wanted, but to no avail. You’ll just have to trust me when I say that it looked really terrible. Even Russell, who generally knows to bite his tongue when I’m in the kitchen, had to admit that it wasn’t my best work. I mean, it’d still taste great but it certainly wasn’t going to photograph well, and this is a special occasion!

As fate would have it, Russell had friends visiting from LA and of course they rang the buzzer almost at the exact moment that I realized things weren’t going my way. I was already getting frustrated, and with guests coming through the kitchen with suitcases I started to get really embarrassed too. I try to project an image of domestic perfection through my blog, so when things don’t turn out perfectly I feel like it reflects poorly on me and my abilities as a baker and blogger. I was so upset and embarrassed by my cake that I actually just stood in front of it as our guests were coming in, trying to block it from view as they were getting settled. I knew I was being ridiculous, but that just made me feel even worse and I could feel my temper getting away from me. Rather than risk a blowout in front of people I barely knew, I put the cake in the fridge for a few minutes and went to sit and chat with our guests. Once I’d calmed down a little I felt brave enough to take the cake back out of the fridge and see what I could do with it. Luckily I had a bit of icing and caramel left over, so I scraped the mess off the sides and set to work with an icing spatula. Once the sides were nice and smooth, the caramel poured down the cake like a dream!
Phew! Crisis (and tantrum) averted.

apple cider doughnut cake with mascarpone icing & cider caramel sauce | Brooklyn Homemaker

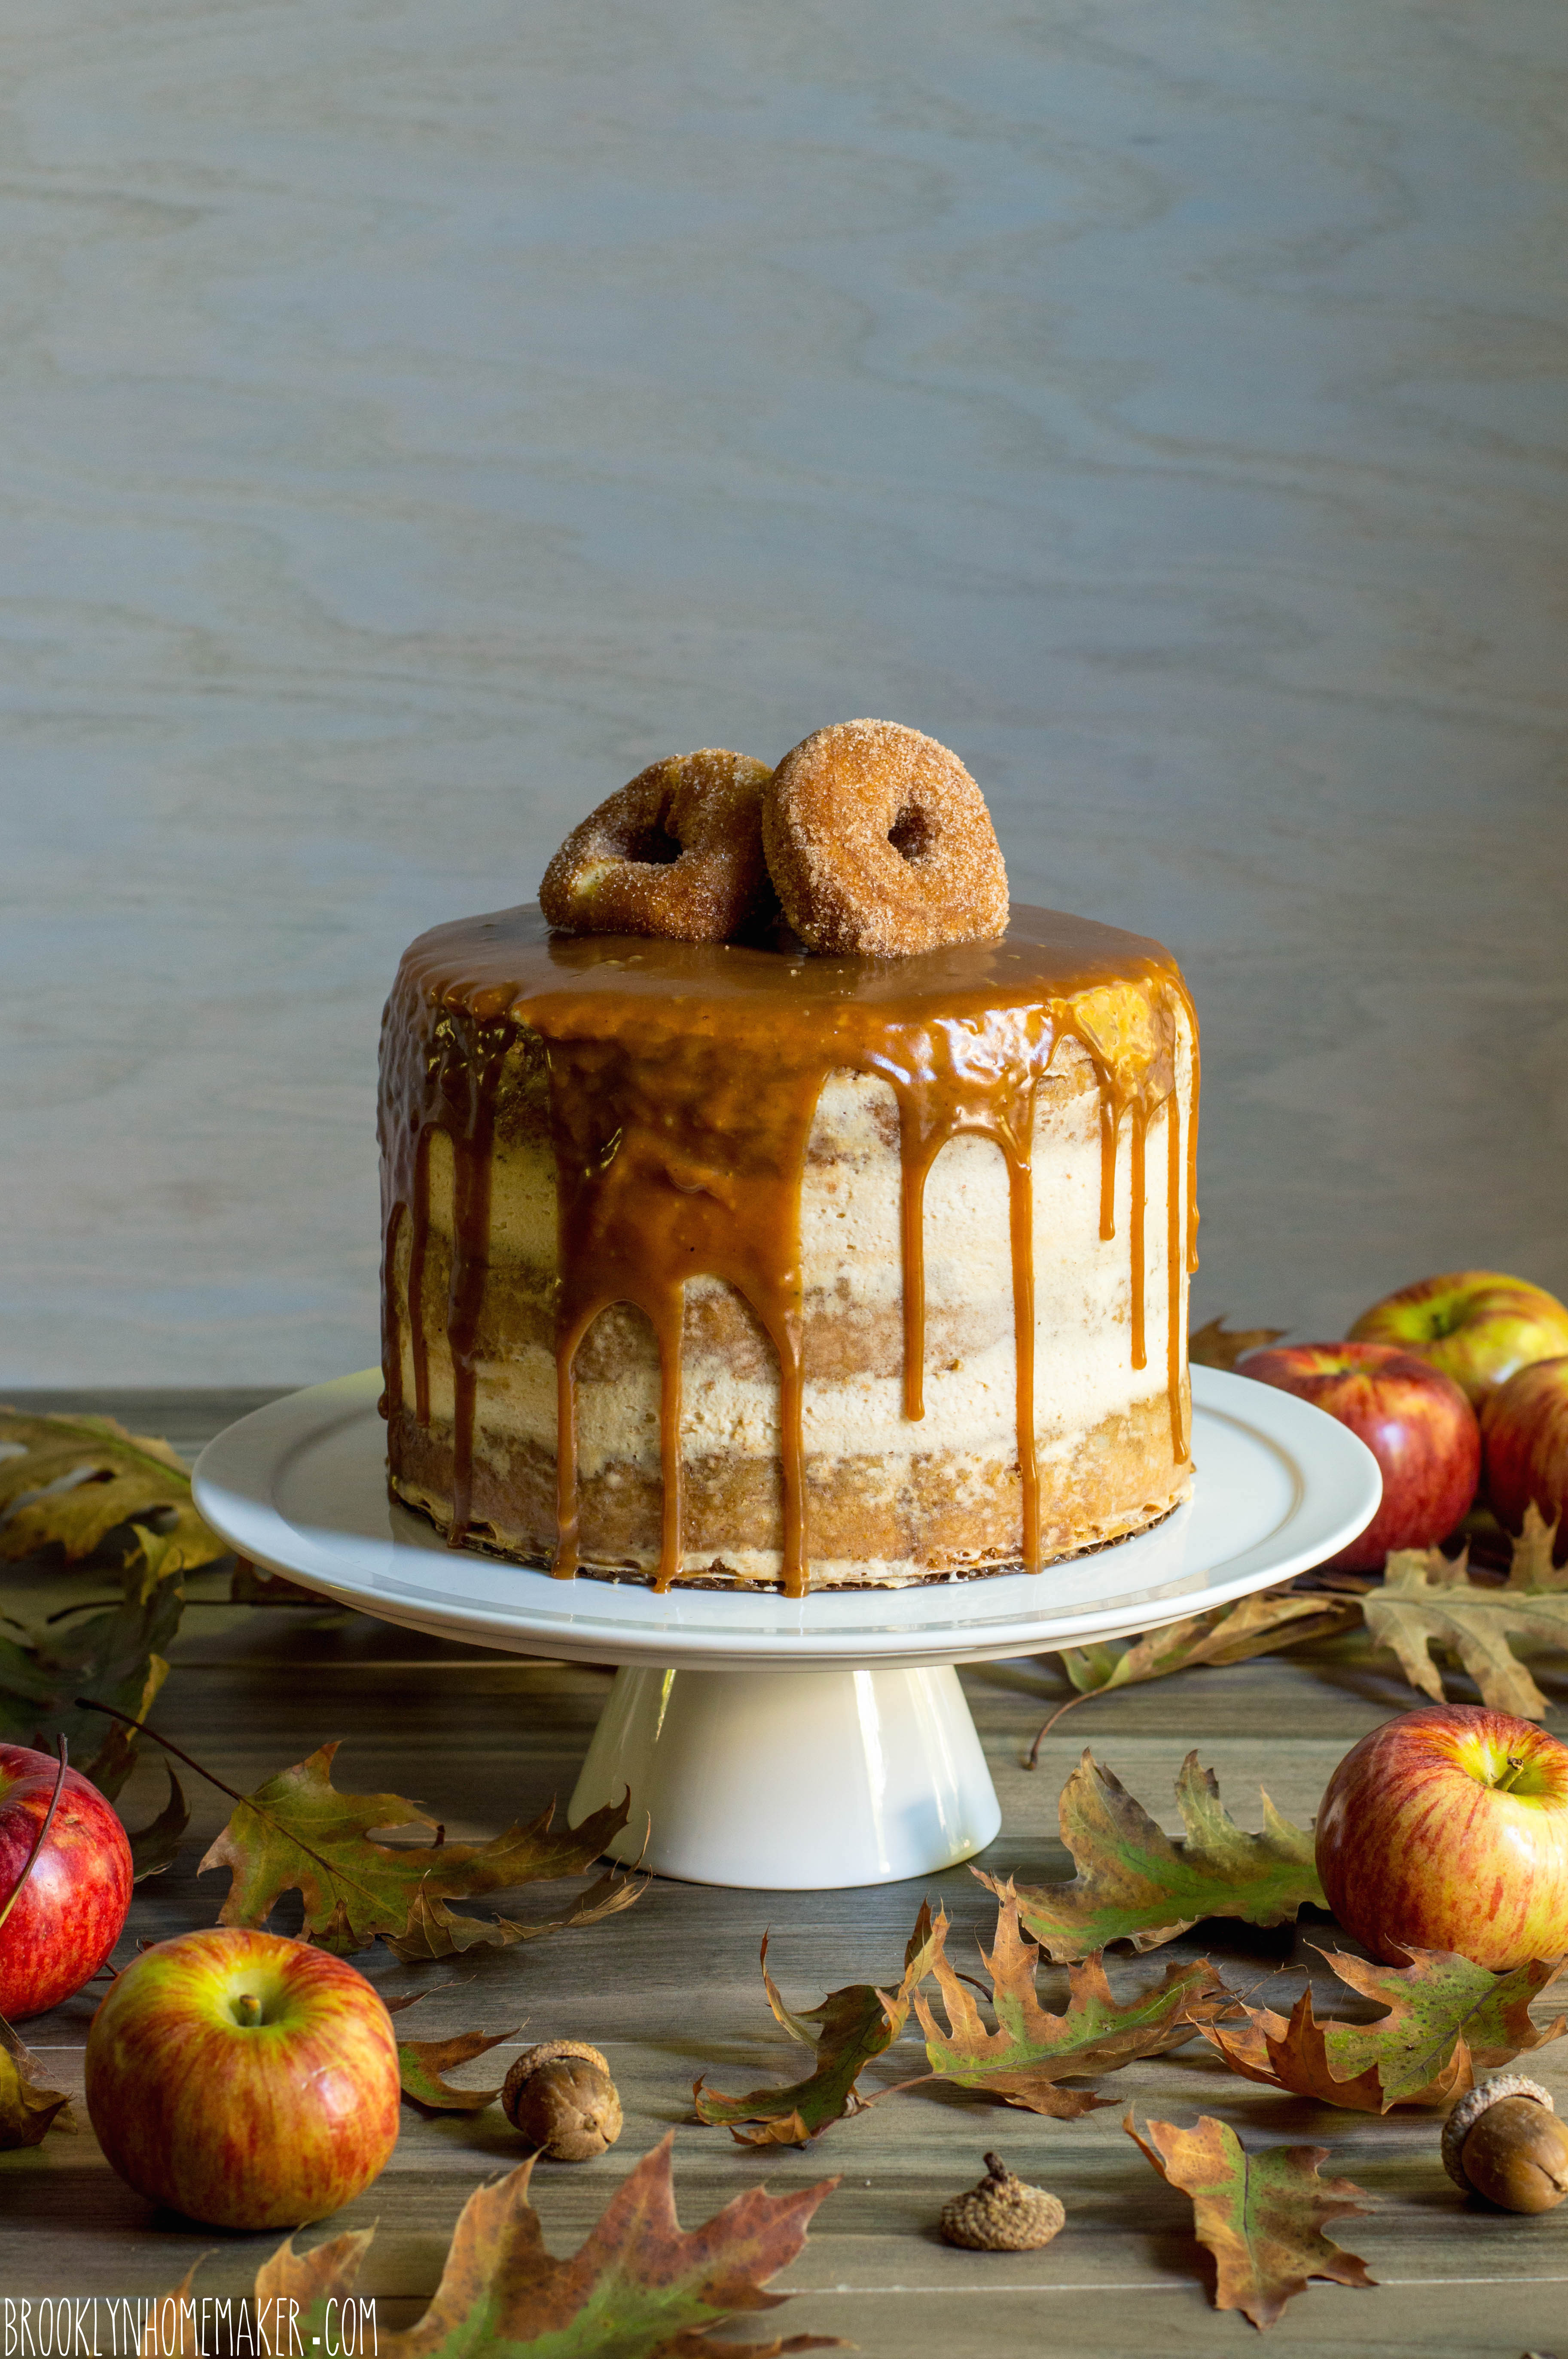
This cake. Oh boy. This cake.
What can I say?

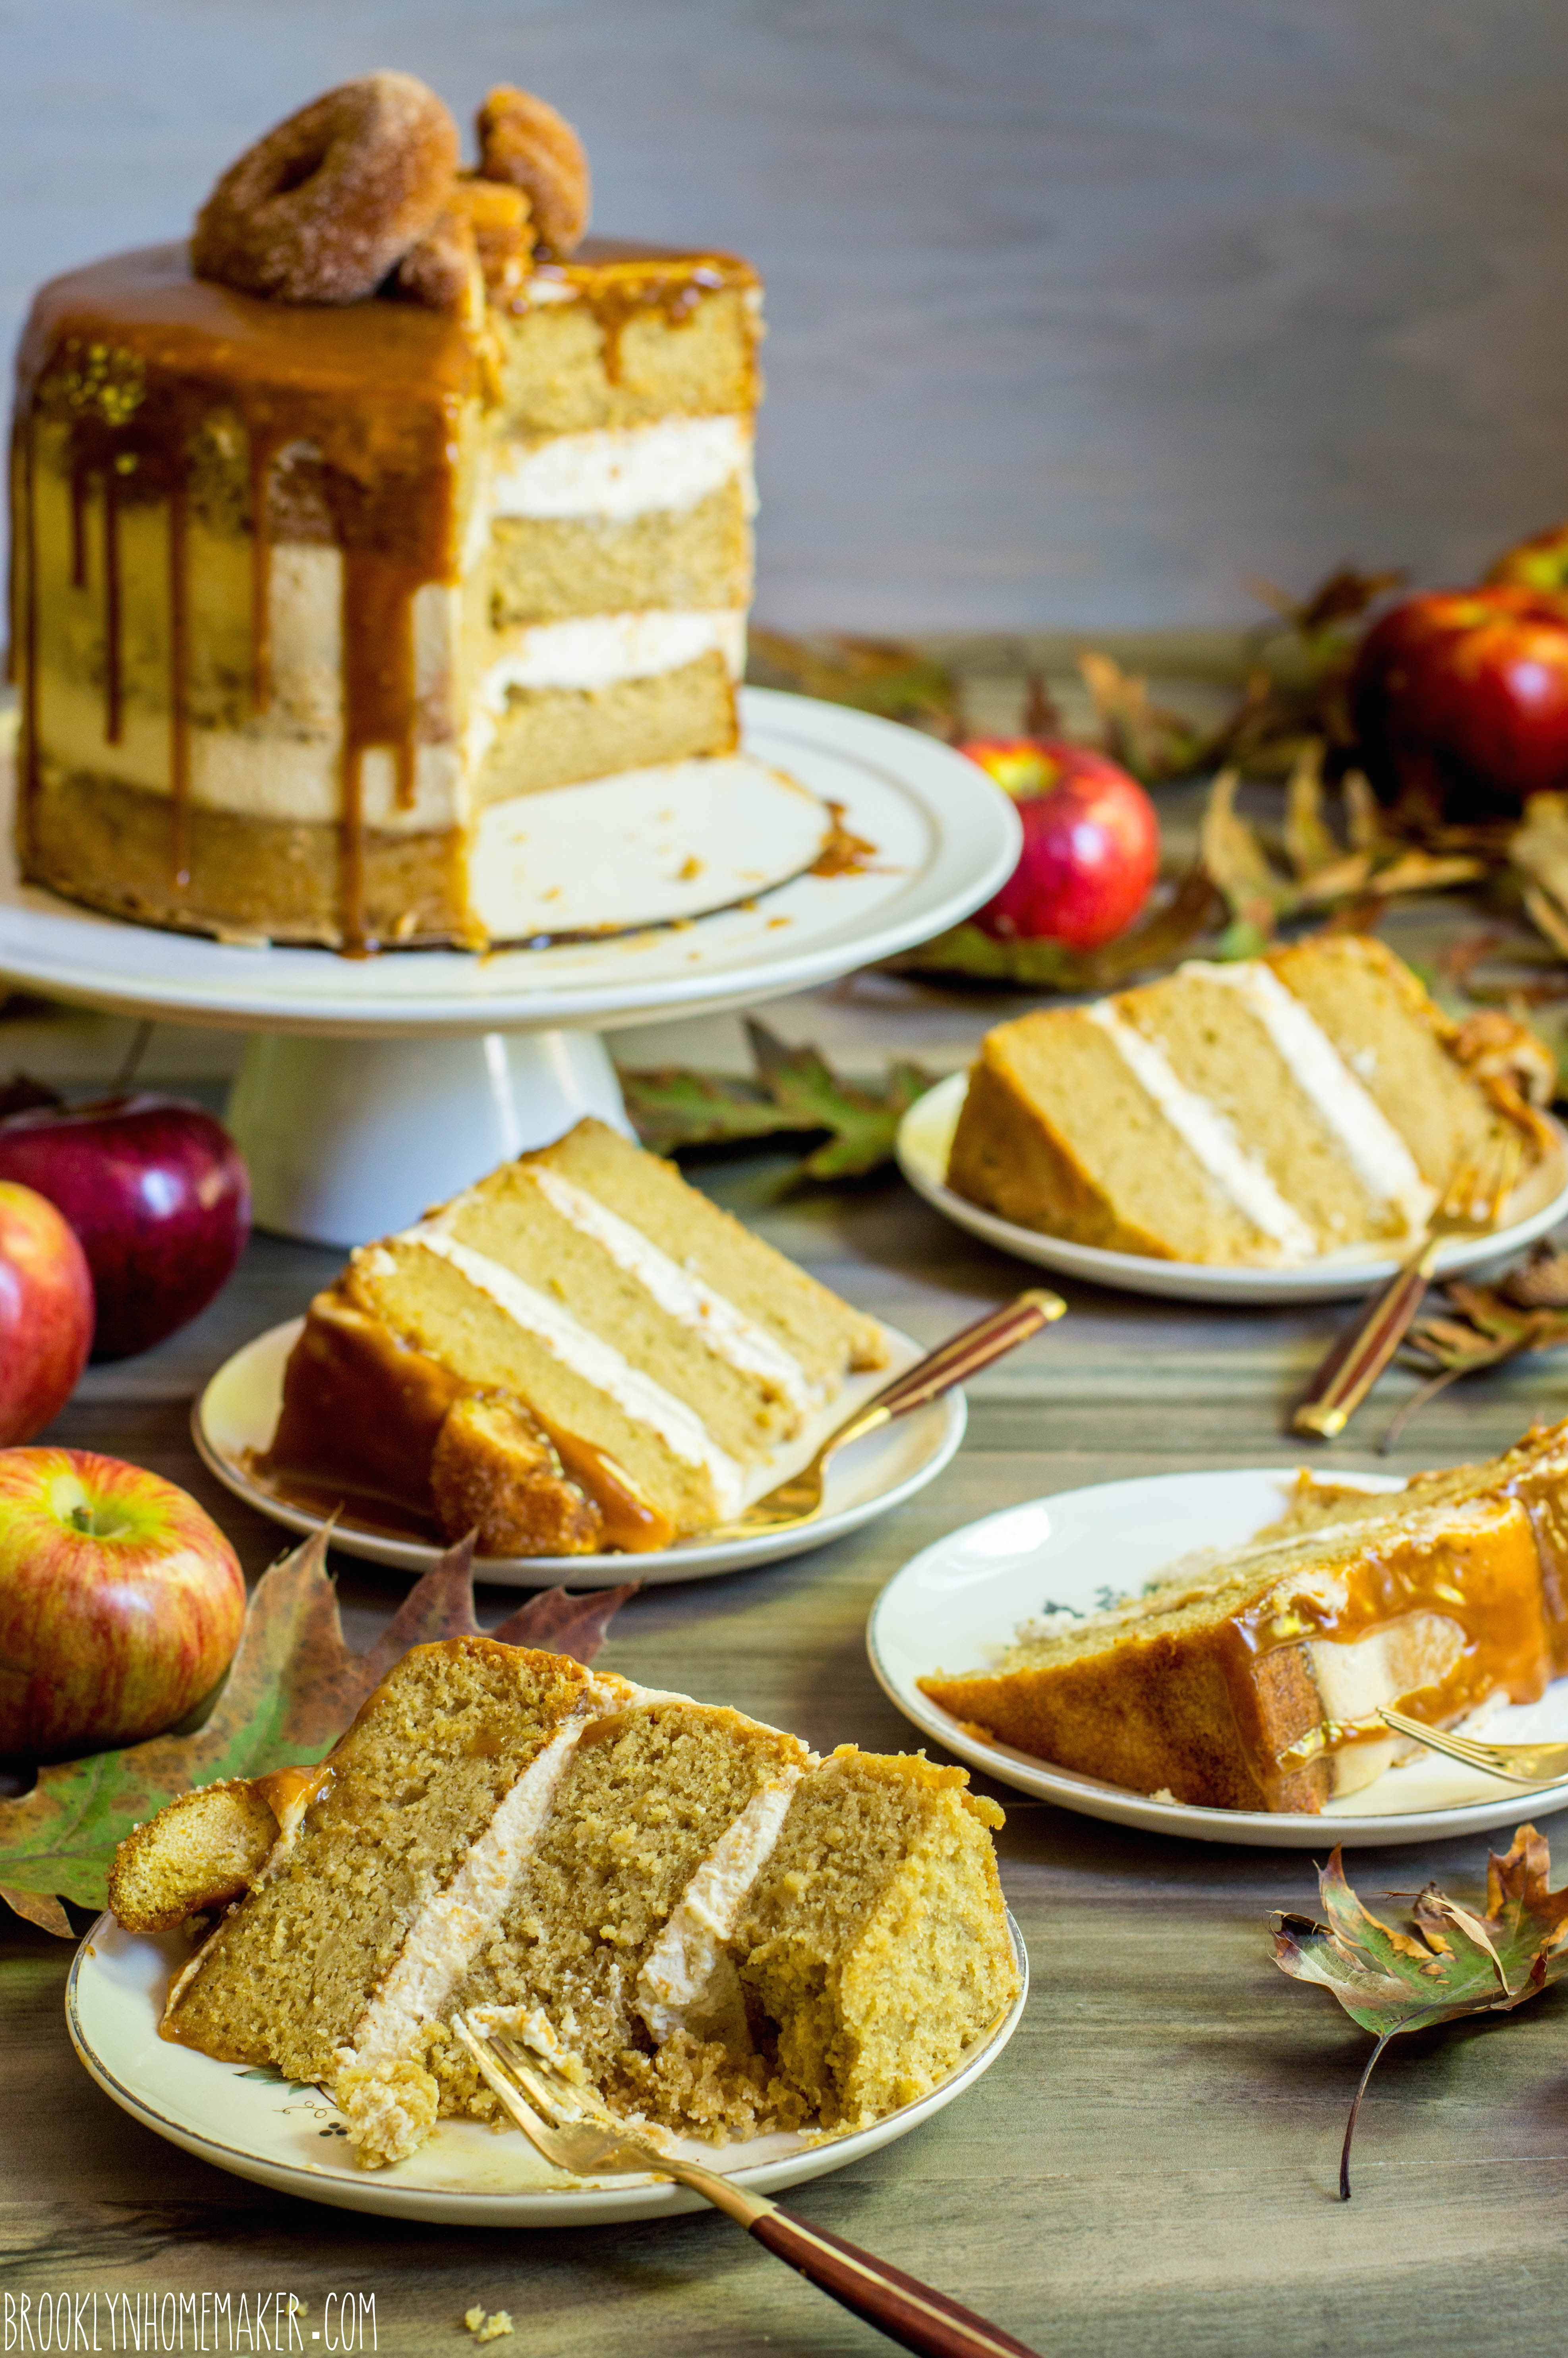
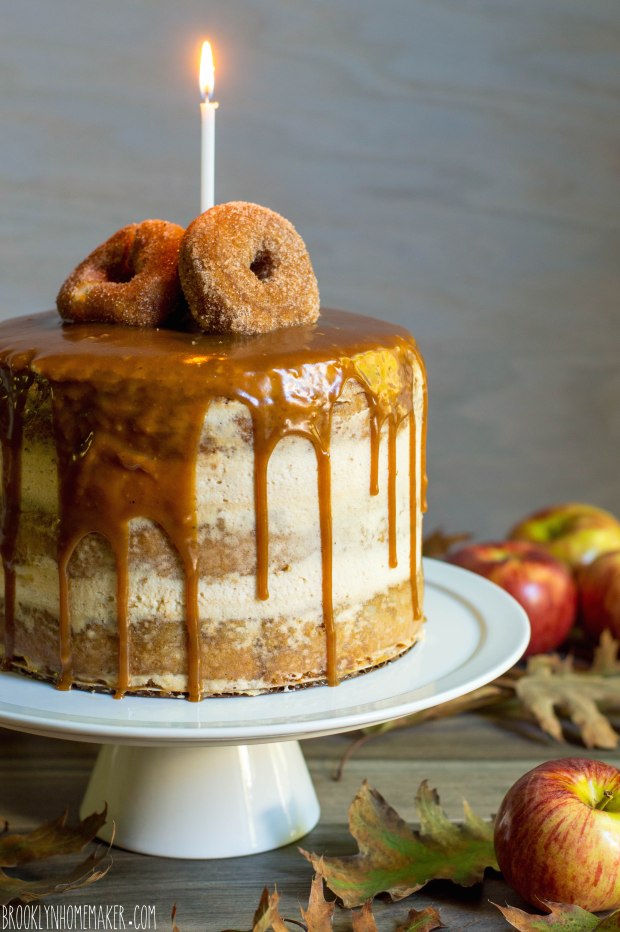
This cake is out of control. It’s a true celebration cake in every sense.
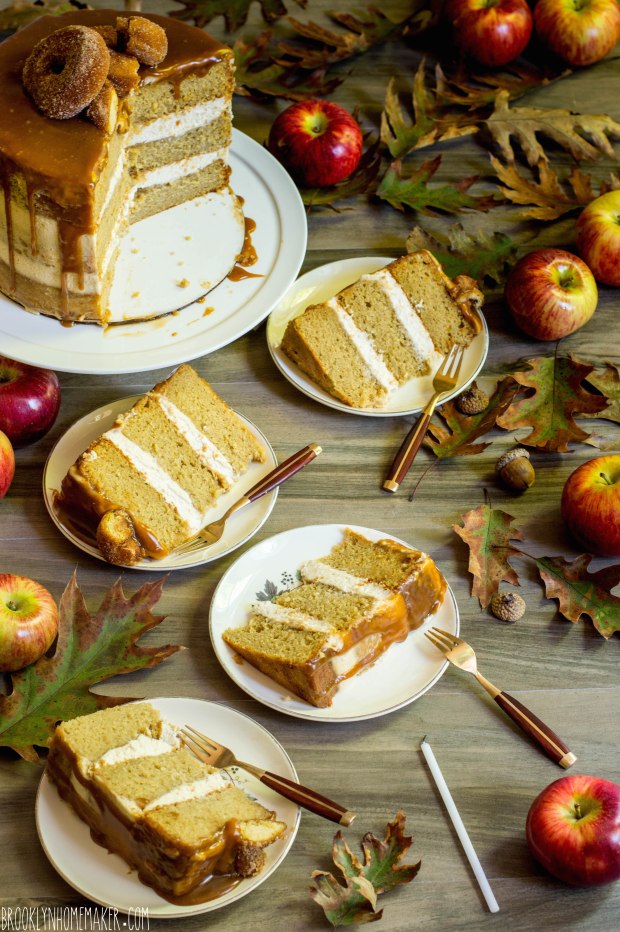
The cake itself is unbelievably moist and tender and springy, just like a fresh apple cider doughnut. It’s rich, subtly spiced, and just sweet enough; and just like an apple cider doughnut it has a delicate yet distinct apple-y flavor.
To add an adult, elegant touch I opted for a mascarpone cream icing rather than whipped cream or cream cheese. This was a new recipe to me, which can sometimes be risky, but in this case the risk really paid off. I think this might seriously be my new favorite icing, and it’s the absolute perfect compliment to this cake. Thick, creamy, rich, and just sweet enough. It has a texture almost like whipped cream, but somehow richer and thicker and more decadent (and certainly more stable at room temperature)
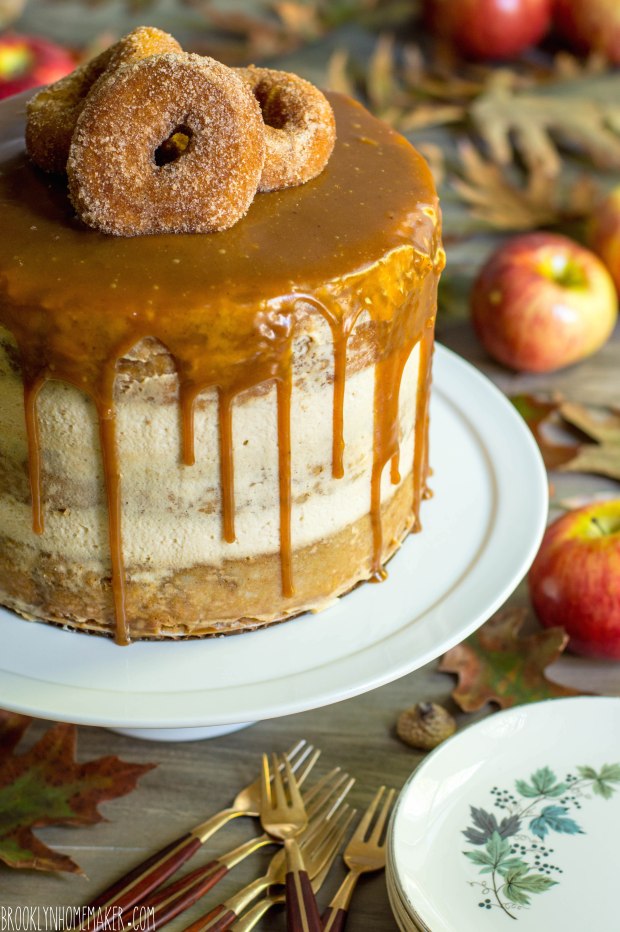
Then of course, there’s the caramel sauce. I don’t have words for just how good this stuff is. It’s insane, like eating a caramel apple, in sweet buttery sauce form. It’s made by reducing and reducing and reducing apple cider until thick and syrupy; then adding butter, cream, brown sugar, a bit of spice, and a touch of salt. I should have guessed this, but with this sauce the lost cinnamon sugar coating wasn’t even missed.
The sugary chubby little doughnuts on top aren’t absolutely necessary, but they sure are cute, and I really think they make this cake sing.

I couldn’t have asked for a better cake to celebrate my second anniversary. Here’s to many more to come, and here’s to you guys! Thanks for reading, and commenting, and thanks for coming along for the ride!

apple cider doughnut cake with mascarpone icing & cider caramel sauce | Brooklyn Homemaker

Apple Cider Doughnut Layer Cake with Spiced Mascarpone Icing and Apple Cider Caramel Drizzle

Apple Cider Doughnut Cake:
(adapted from Serious Eats)
12 tablespoons unsalted butter (1 1/2 sticks), at room temperature (plus more for pans)
2 medium cooking apples like Cortland or MacIntosh, peeled, cored, and roughly chopped
2 cups apple cider
3/4 cup buttermilk, at room temperature
2 teaspoons pure vanilla extract
3 3/4 cups all-purpose flour (plus more for pans)
2 teaspoons baking powder
1 teaspoon baking soda
1 teaspoon salt
1/4 teaspoon ground nutmeg
1/2 teaspoon ground cinnamon
1 1/4 cup sugar
3/4 cup packed light brown sugar
5 large eggs, at room temperature
1/3 cup vegetable oil

Additional for assembly:
3 fresh apple cider doughnuts (optional)

For the Cake:
Adjust oven rack to middle position and preheat oven to 350°F. Brush the bottoms of 3 eight inch cake pans with butter. Place 8″ circles of parchment in the pans, and generously brush pans all over with butter and coat with flour, tapping out any excess.

In medium saucepan, bring chopped apple and cider to boil over medium-high heat. As apple begins to fall apart, stir and whisk with a fork to try to mash and break it up as much as possible. Reduce heat slightly and simmer and reduce, stirring frequently, until mixture measures exactly 1 1/2 cups, about 20 minutes or so. Cool at least 5 minutes in a large measuring cup before mixing in buttermilk and vanilla. Set aside.

In medium bowl, whisk together flour, baking powder, baking soda, salt, nutmeg, and cinnamon; set aside.

In the bowl of an electric mixer, beat the butter, sugar, and brown sugar on medium speed until light and fluffy, about 3 minutes. Add eggs, one at a time, beating well after each addition. Add oil and beat until incorporated, about 1 minute.

Decrease mixer speed to low and add flour mixture in three batches, alternating with apple mixture, scraping down sides and bottom of bowl with rubber spatula as needed. Increase speed to medium and beat mixture just until combined, about 30 seconds.

Evenly divide batter between prepared pans. Bake until cake tester inserted in cake comes out clean, rotating cakes halfway through baking, about 30 to 40 minutes. Transfer cakes to cooling rack for about 20 or 30 minutes, before carefully removing the cakes from the pans to cool the rest of the way.

Cool completely, about 1 hour, before assembly. Just before assembly, remove parchment if still stuck to the cakes.

Apple Cider Caramel Sauce: 
(adapted from Café Sucre Farine)
2 cups apple cider
½ cup butter (1 stick)
1 cup dark brown sugar, packed
¾ cup heavy cream
¼ teaspoon nutmeg
½ teaspoon cinnamon
½ teaspoon sea salt
2 teaspoons vanilla extract

Place apple cider in a medium heavy-bottomed pot. Bring to a boil, reduce to a high simmer, and cook until cider is reduced to ¼ cup. It should get a bit thick and syrupy. The thicker it gets the closer you need to watch it to be sure it doesn’t dry out or burn.
Add butter to the pan and heat until melted. Add the sugar, cream, salt and spices and whisk to combine. Bring to a gentle boil and cook for 7 minutes, stirring frequently.
Remove from heat and add vanilla extract, stirring to combine.

Mixture will thicken as it cools.

You’ll likely have more sauce than you need for this cake. Any extra should be kept in the refrigerator to be eaten with a spoon at midnight.

Spiced Mascarpone Cream Icing:
(adapted from Fine Cooking)
1 1/2 cups cold heavy cream
1 lb. (16 oz) mascarpone cheese, at room temperature
2/3 cup granulated sugar
2 teaspoons pure vanilla extract
1/2 teaspoon cinnamon
1/8 teaspoon nutmeg
1/8 teaspoon salt

In the bowl of an electric mixer fitted with the whisk attachment, whip the heavy cream until it begins to thicken and form soft peaks. In a separate bowl, stir together the mascarpone, sugar, vanilla, spices, and salt until smooth and well combined. Transfer mascarpone mixture to bowl with thickened cream and beat on low speed until almost smooth, 30 to 60 seconds. Scrape down the sides and fold to incorporate. Increase the speed to medium high and beat until the mixture is thick and holds firm peaks, another 30 to 60 seconds. Do NOT overbeat or the frosting will become grainy.

Assemble Cake:
Place the first cake layer on an 8″ cardboard cake round, serving plate, or cake stand. If necessary, trim the top with a cake leveler or sharp serrated knife to create a flat surface. Top with about 1/3 of the mascarpone cream icing and evenly smooth out with an icing spatula. Add the next layer, trim and ice with the same amount of icing, then add the third layer and trim flat as necessary. Top the third layer with about half of the remaining icing, and smooth it out as flat as possible. Spread the remaining icing in a very thin smooth layer over the sides of the cake, and put it in the refrigerator to firm up for about 30 minutes.

Top the cake with about 3/4 to 1 cup of the cooled caramel sauce, carefully and evenly drizzling some down the sides.

If desired, top the finished cake with 3 small fresh apple cider doughnuts.

This cake will keep well in a cake saver at room temperature for up to 3 days, if the weather is not too hot or humid. Otherwise, wrap tightly and store in the refrigerator for up to 3 days. Bring to room temperature for at least an hour before serving.

earl grey bundt cake with milk and honey glaze #bundtbakers

The first time I ever tried Earl Grey tea I was pretty sure it was one of the most disgusting things I’d ever tasted.

earl grey bundt cake with milk and honey glaze | Brooklyn Homemaker

I was waiting tables at a high end restaurant in Ithaca, NY, and the owners took coffee and tea very seriously. They also owned a coffee shop in College Town, so their passion for quality teas translated into their restaurants. We had some fancy imported loose leaf teas that we would bag up and steep to order, and one day I decided to forego my usual latte to see what all the fuss was about.

Earl Grey is very floral, almost perfume-y, and my unrefined pallet didn’t quite know what to make of it. To me, that first sip tasted a bit like soap, or like drinking perfume straight from the bottle. I may have even done a cartoon style spit-take right there in the kitchen, next to the espresso machine. In my defense, at the time I wasn’t really a tea drinker, and besides the occasional glass of iced tea I was strictly a coffee man. I went right back to my latte and didn’t try Earl Grey again for a good long while.

A few years later I started opening up to hot tea, and eventually, I gave the Earl another shot. These days I totally love it and always keep a big jar of loose leaf Earl Grey on the shelf (although I still take it with honey and lots of milk, never black).

earl grey bundt cake with milk and honey glaze | Brooklyn Homemaker

Given my newfound love for it, I’ve been wanting to bake with Earl Grey for a long while but the inspiration just hasn’t come to me. I’ve been playing with the idea of making some cute little financiers or tea cakes (get it? Tea flavored tea cakes?) but I just never got around to it. The idea would come back to me every once in a while, but I’d just keep putting it off and waiting for the right moment.

earl grey bundt cake with milk and honey glaze | Brooklyn Homemaker

Enter the #bundtbakers.

You may have noticed that I haven’t posted a bundt recipe in a couple months, basically since confessing that I wanted to take some time to focus on my health. I’ve actually been doing really well and finally feel like I deserve to let myself eat the occasional slice of cake again. Even if I weren’t feeling better I don’t think I could have stayed away from my bundt baking buddies much longer anyway!

When I saw that Laura from Baking in Pyjamas had chosen “Beverages” as the bundt theme for October, I knew it was the perfect opportunity to get back to my bundt baking roots. I’m so so happy to be back, and all these beautiful beverage-y bundts are making me thirsty hungry!

earl grey bundt cake with milk and honey glaze | Brooklyn Homemaker

Another reason I wanted to get back into bundt baking is this new pan I just got!

I know I’ve gushed about Nordic Ware bundt pans before, but get ready, here I go again. Their line of cast aluminum pans are sturdy enough that they don’t bend or warp, and just thick enough that they bake super evenly with no irregular browning. They’re super non-stick too, and even though I do always butter and flour my pans before baking anyway, I can honestly say that I’ve never once had a cake stick, even when using super sticky ingredients like marshmallows or caramel. The one time I tried using a different pan though, this happened… They’re also built to last, and even with all the bundt baking I do, all of my pans are just as wonderful and just as non-stick as they were the day I bought them. If all that isn’t enough, their pans are also made right here in the good ol’ US of A.

Nordic Ware bundt pans are also available in a huge selection of beautiful designs and styles, a few of which you’ve already seen here. Their latest pan, the bundt squared, is really fun and I’m so excited to have one of my own! The square shape puts a sort of modern twist on an elegant classic design, and I just love it. I have to admit though, that one of my coworker’s mind was completely blown by the square shape. I posted a preview of this cake on instagram a few weeks ago and she texted me the minute she saw it. “A SQUARE BUNDT????! Is nothing sacred?” Even after getting to taste test the cake, she kept bringing it up. “This cake is really good, but a square bundt pan?”

So, I guess this square shape might not be for the traditionalists among you… Hahaha!
But guess what? Nordic Ware invented the bundt pan, so as far as I’m concerned they can do no wrong.

earl grey bundt cake with milk and honey glaze | Brooklyn Homemaker

With the theme and the shape decided on, my next step was to figure out how to get that distinctive Earl Grey tea flavor into my cake. I wasn’t crazy about the idea of just grinding the tea leaves up and putting them directly into the batter, because I wasn’t confident that the flavor would really come through that way. I was also worried that the ground tea leaves wouldn’t soften up enough in baking, and feared that people would be eating a cake with a sandy texture and a bland flavor.

My first thought was to infuse the tea leaves in buttermilk like I did for last year’s hibiscus lime bundt cake, but while wasting too much time on pinterest one day I came across another idea. To my surprise (and relief) there was an entire blog post about baking with tea! I gotta tell you, their solution is absolutely genius, and I never would have thought of it myself.

earl grey bundt cake with milk and honey glaze | Brooklyn Homemaker

To extract as much bold tea flavor as possible, they recommend infusing your tea leaves in butter! I cannot sing enough praises for this method. This cake tastes EXACTLY like a warm cup of Earl Grey tea.

This method uses up a lot of tea leaves though, and you want to try to use the freshest, highest quality loose tea that you can find to get the best possible flavor. You’ll also need to use more butter than you think you will, as the leaves will absorb some and you won’t be able to squeeze it all back out. To get 1 cup of butter for my cake I ended up using two and a half sticks of butter and a whole cup of tea leaves.

I was expecting the butter to take on a dark brown tea color, but to my surprise after infusing it the butter took on an olive green tint. In fact, the melted liquid butter really just looked like a dark unfiltered olive oil. You may have noticed the green butter in the photo at the top of the post.

earl grey bundt cake with milk and honey glaze | Brooklyn Homemaker

For a little extra Earl Grey oomph, I also added just a touch of bergamot oil. If you’re not familiar, the bergamot orange is the citrus fruit that gives Earl Grey tea it’s distinctive floral scent and flavor. Fresh Bergamot oranges, and even bergamot oil for that matter, can be a little difficult to find, so feel free to leave it out if need be. The infused butter definitely imparts loads of fresh tea flavor, I promise.

earl grey bundt cake with milk and honey glaze | Brooklyn Homemaker

I knew before this cake even went into the oven that it was a winner. A stray smudge of batter licked off my finger tasted exactly like a milky, honey sweetened cup of tea. While it was baking away in the oven, my entire apartment smelled like a warm Earl Grey hug. Don’t tell anyone but I may have even put my nose right down into the center of the cake after I turned it out onto the cooling rack.

Not only does this cake have amazing flavor, but thanks to a bit of oil, it’s also super moist with an incredibly tender crumb. To top it all off and drive home the cup of tea theme, I made a simple milk and honey glaze. I happened to only have buckwheat honey on hand, which is why the glaze came out the color of milky tea. It was not intentional I swear!

earl grey bundt cake with milk and honey glaze | Brooklyn Homemaker

Earl Grey Bundt Cake with Milk and Honey Glaze

2 1/2 sticks (20 tablespoons) unsalted butter
1.5 oz (about 1 cup) loose leaf Earl Grey tea (best quality possible)
1 2/3 cups granulated sugar
1/3 cup peanut oil or vegetable oil
1/3 cup honey
1/4 teaspoon bergamot oil (optional) *see note
4 large eggs, at room temperature
3 cups all-purpose flour
1/2 teaspoon baking powder
1/2 teaspoon baking soda
1 teaspoon kosher salt
1 1/4 cup buttermilk, at room
2 teaspoons pure vanilla extract

Milk and honey glaze:
2 tablespoons honey (buckwheat honey adds flavor and color, but any honey will work)
1 to 2 tablespoons milk
1 teaspoon pure vanilla extract
1 1/2 cups confectioners’ sugar, sifted

Make tea infused butter:
Melt the butter in a small saucepan over low to medium heat. Once fully melted turn the heat down to low and add the tea leaves. Stir and heat over low for 5 minutes. Remove from heat and let steep for 5 to 10 minutes more.

Place a small fine mesh strainer over a measuring cup and strain the butter. Press the tea leaves with a spatula or spoon to squeeze as much butter out as possible. You want to measure out exactly one cup of butter. If necessary add enough additional butter to make 1 cup. Discard tea leaves and refrigerate butter until completely firm.

Once firm let butter soften at room temperature for at least an hour before baking. Cold butter can be made several days ahead if kept refrigerated in a well sealed air tight container.

Make the cake: 
Preheat the oven to 350 degrees. Generously butter and flour a 10-12 cup bundt pan.

With the paddle attachment in an electric mixer, cream 1 cup of softened tea infused butter with sugar for about 5 minutes, or until very light and fluffy. Add oil, honey, and bergamot oil and mix until well combined. On low speed, add the eggs, one at a time, until just combined.

In a large bowl, sift together the flour, baking powder, baking soda, and salt. In another bowl (or measuring cup), combine the buttermilk and vanilla. Add the flour and buttermilk mixtures alternately to the batter, beginning and ending with the flour. Pour batter into prepared pan and tap on the counter to even the batter and remove air bubbles. Bake for 50 minutes to an hour, until a cake tester comes out clean.

Allow cake to cool for an hour or more before turning out onto a cooling rack.

Make the milk and honey glaze: 
To make the glaze combine honey, 1 tablespoon milk, and vanilla in a small bowl. Whisk in confectioner’s sugar and continue to whisk until combined and free of lumps. If too thick, you can add a few more drops (up to an additional tablespoon) of milk to thin it for easy pouring. Pour over the top of the completely cooled cake and serve.

Cake should keep, well sealed in an air tight container, for 3 to 4 days at a cool room temperature.

*note:
Different brands of bergamot oil can have different potencies, so start with no more than 1/4 teaspoon, and taste the batter before baking and see if you might enjoy a few drops more. If you can find it, the zest of fresh bergamot orange would be even better. Start with about a teaspoon of zest and taste to see if you’d like more.

earl grey bundt cake with milk and honey glaze | Brooklyn Homemaker

There are so many absolutely delicious bundts this month! Please take a moment to check them out!

.

BundtBakers

.
#BundtBakers is a group of Bundt loving Bakers who get together once a month to bake Bundts with a common ingredient or theme. You can see all of our lovely Bundtsby following our Pinterest Board.

We take turns hosting each month and choosing the theme or ingredient.

Updated links for all of our past events and more information about BundtBakers can be found on our homepage.