It’s official. I’ve made it through my first year of blogging and lived to tell the tale.

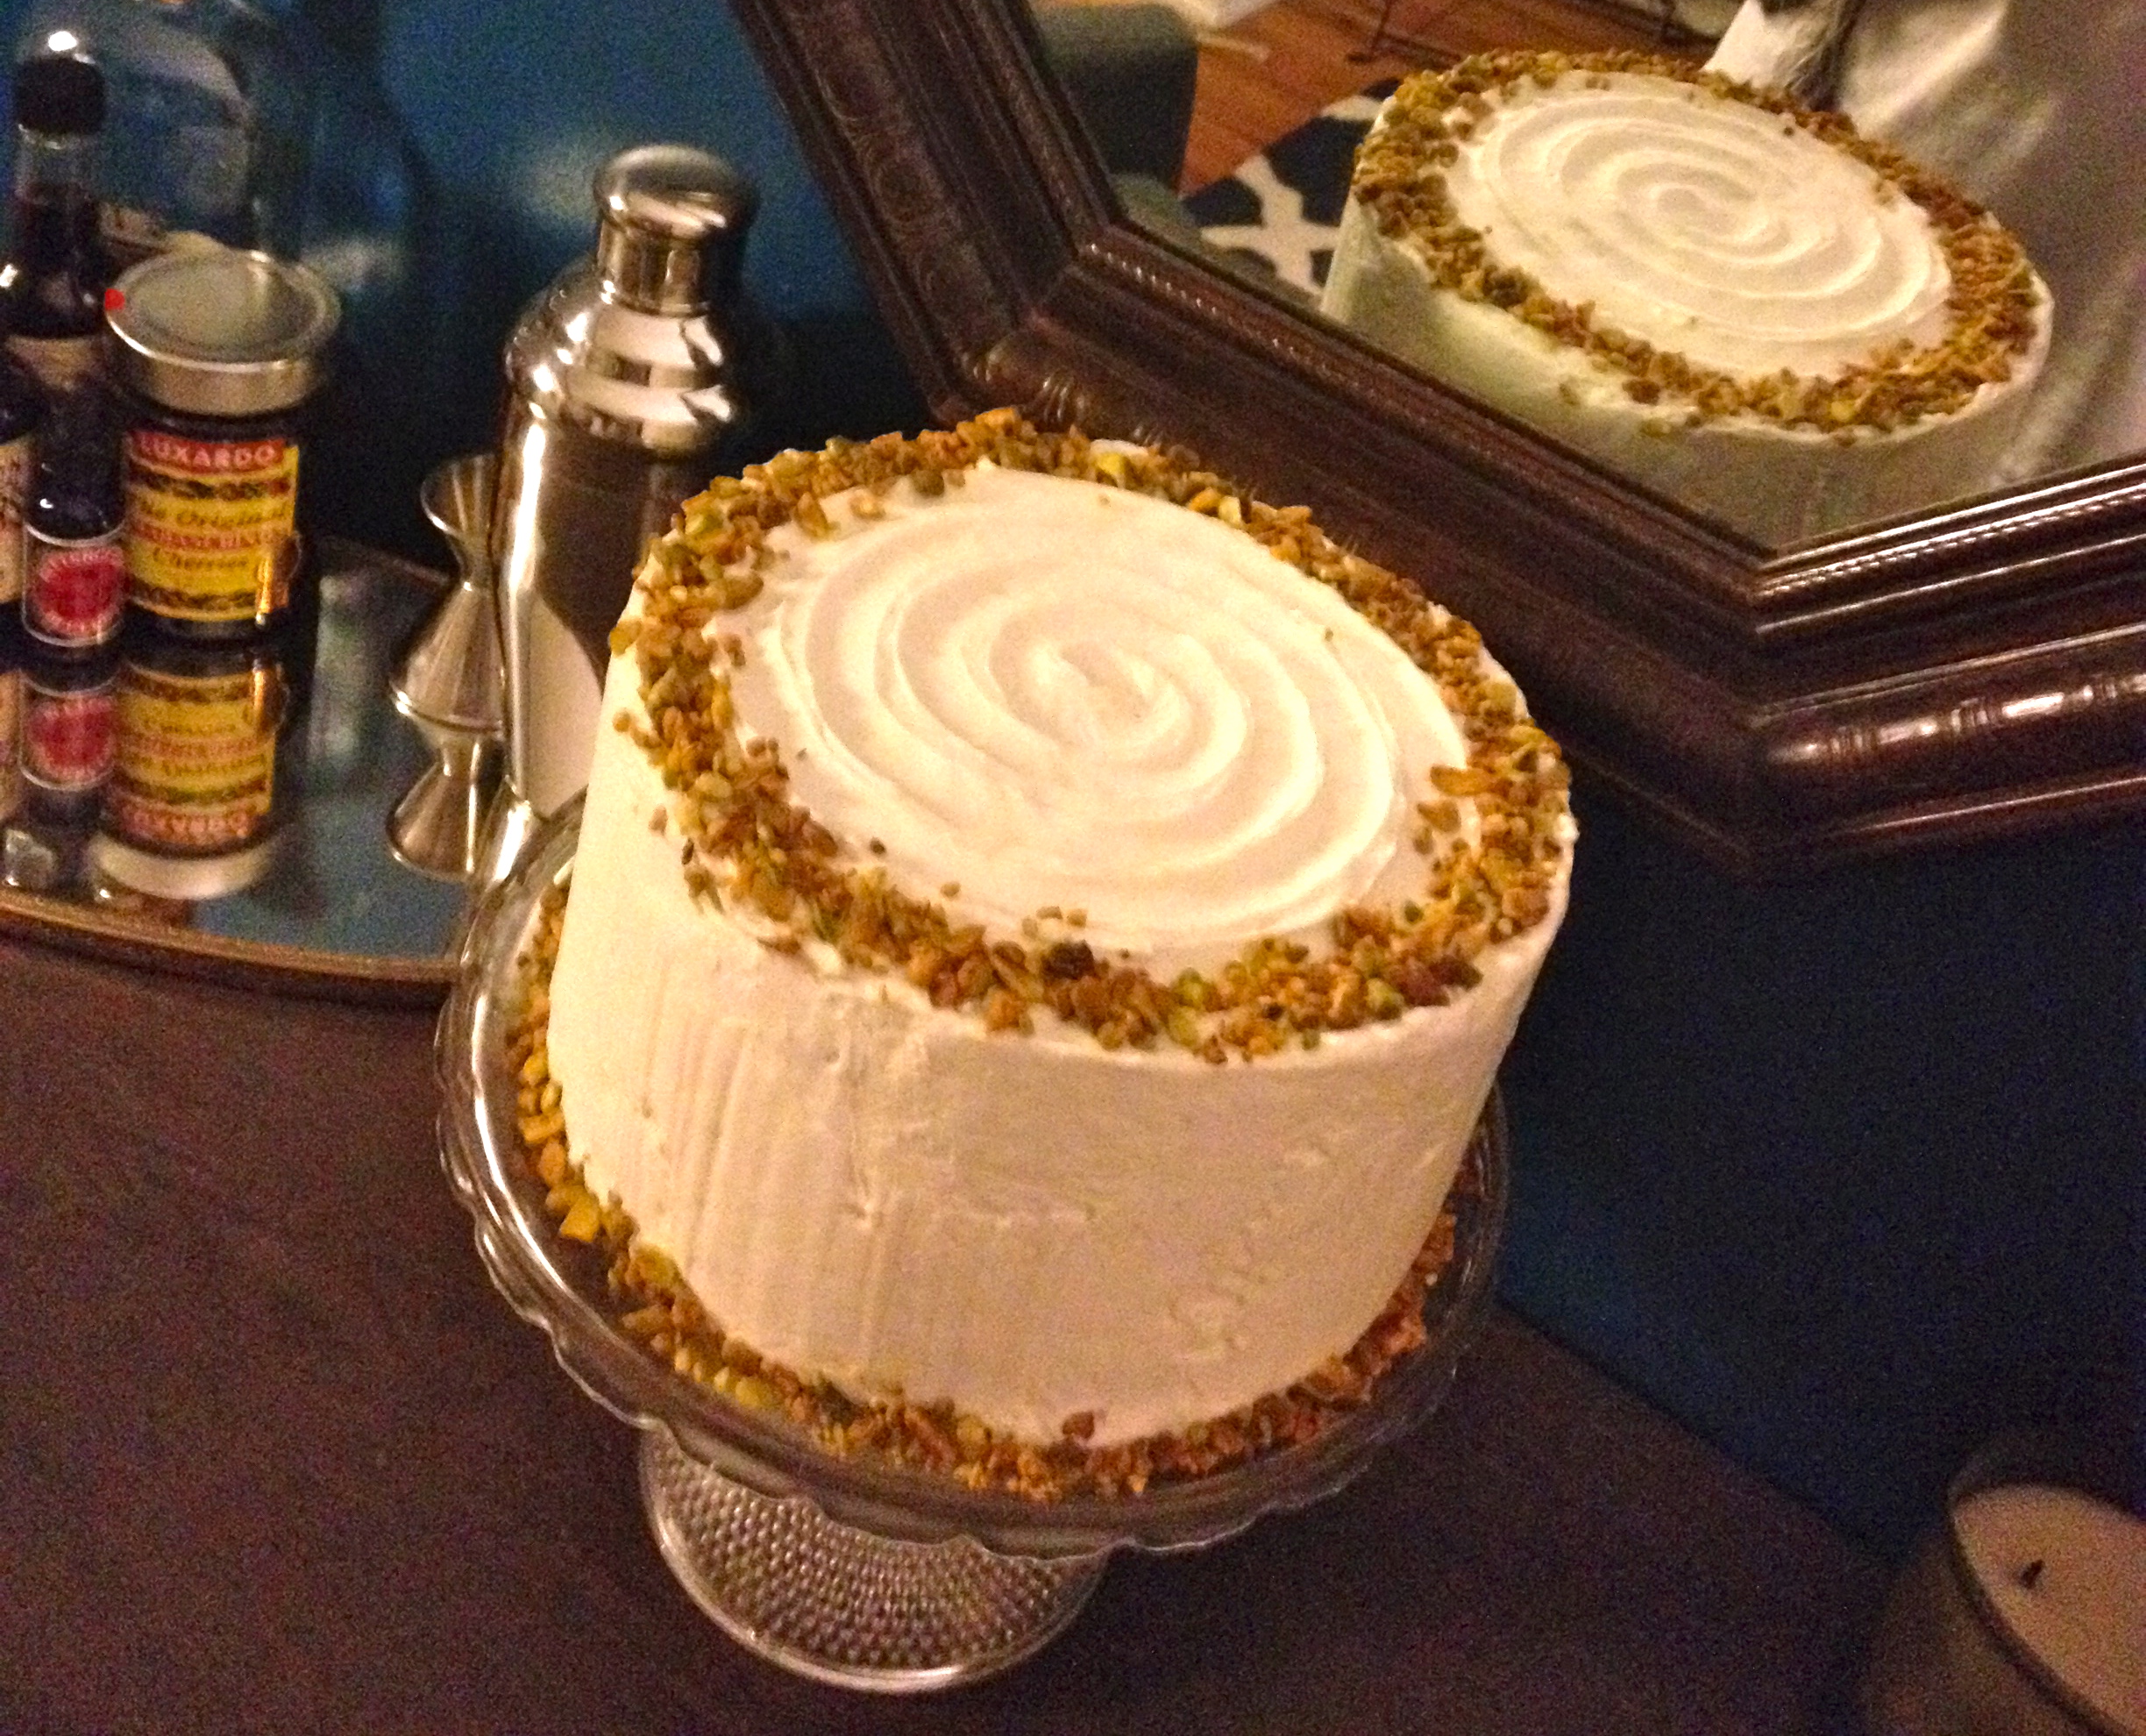
Today is the one year anniversary of Brooklyn Homemaker and I can barely contain myself. I can’t tell you what it means to me to see how far this humble little blog has come in these past twelve months. To celebrate, I baked a cake. The same cake that started this whole crazy adventure.

Just in case you haven’t already heard the short story of how I got into blogging, it basically goes something like this:
One day some newly engaged friends (now newly-weds) came over to discuss wedding planning and take some supplies off our hands from our recently nuptials. Brunch was served, several glasses of wine consumed, and a three layer pistachio cake devoured. The cake was such a huge hit that our friends insisted I start a blog. I said no, I had no business writing a blog. I didn’t have a camera, I hadn’t written anything in years, I didn’t have the time, I have shaky hands and no natural light in my kitchen. I presented every excuse I could come up with. A few more glasses of wine were guzzled and I started to warm up to the idea. The next morning Brooklyn Homemaker was born.
There’s a little more to the story than that though. Russell and I were married just over four months before we hosted that brunch, and leading up to our wedding I’d spent 17 months planning and dreaming and saving and organizing and crafting and buying and hoarding; all to make sure everything was perfect for our big day. I got really good at making spreadsheets, using them for everything from budget tracking to organizing vendor contacts. Our venue basically provided a lawn, a view, and a power source; but everything else was up to us, from the tent all the way down to the cocktail napkins. An unbelievable amount of time and energy and thought went into planning our day down to the tiniest detail. When we returned from our honeymoon, at first I felt relieved, but it wasn’t long before I realized I missed all that wedding planning. I actually felt a little lost without a clear outlet for all that creative energy. Brooklyn Homemaker really could not have come at a better time for me.

These days it’s almost hard for me to remember what life was like before I started blogging. I spend so much of my free time trying to make this blog everything I think it should be, and can be, that I sometimes feel like this all just sort of happened to me. It just sprung up, naturally, out of nowhere, and I happened to be the one who was there to keep it moving forward.

Moving this blog forward has forced me to embrace all sorts of new and unfamiliar things and teach myself skills that I couldn’t even fathom a year ago. When I first got going I’d hardly ever even touched a professional camera, and was taking all of my photos with my iPhone. It didn’t take me long to realize I needed a real DSLR if my photos were ever going to look the way I wanted them to, so I researched and asked around and decided on the Nikon D3200, which I love, btw.
Having never used a real professional camera, it took me forever to get the hang of the damned thing. I’m actually still learning new things about it every day, but I finally feel like I understand most of the knobs and nozzles and twisties and doo-hickies now. I know I still have a lot to learn about the ins and outs of photography, but I’m not afraid to admit that I’m really happy with how far I’ve come so far.

One of the biggest things I never expected when I started this adventure is the warm sense of community from other bloggers. One way or another; through back and forth comments on each other’s posts, participating in groups like #bundtbakers, or interacting through social media; I suddenly feel like I have this great big brand new group of friends that I just happen to have never met in person. Considering the fact that we live all over the world, and will likely never actually meet, I’m overwhelmed by how close I feel with certain bloggers and how caring and welcoming this community is with each other. Thank you all so much for making me feel so welcome! It really warms my cockles.

I’m also in complete awe of all of you out there who follow along with me week after week. The idea that you’re somewhere out there reading this, and sometimes even sharing your opinions and stories with me, is truly exhilarating. The first few times I saw a comment from someone other than my mother I had to wonder if she hadn’t opened a new email address just to make me feel warm and fuzzy! I never dreamed that I would see so many heart-warming words of encouragement when I started doing this, but each new comment means more to me than you’ll ever know. Whenever I’m feeling down, or second guessing myself, a new comment pops up and everything is suddenly all better. Whether you’re a regular commenter, someone who’s chimed in once or twice, or a comment-shy regular reader, I want you to know that I couldn’t do this without you. Thank you so so much. Your words and your love really keep me going.

So, as much as I’m enjoying talking about myself, I guess I should probably talk about this cake…
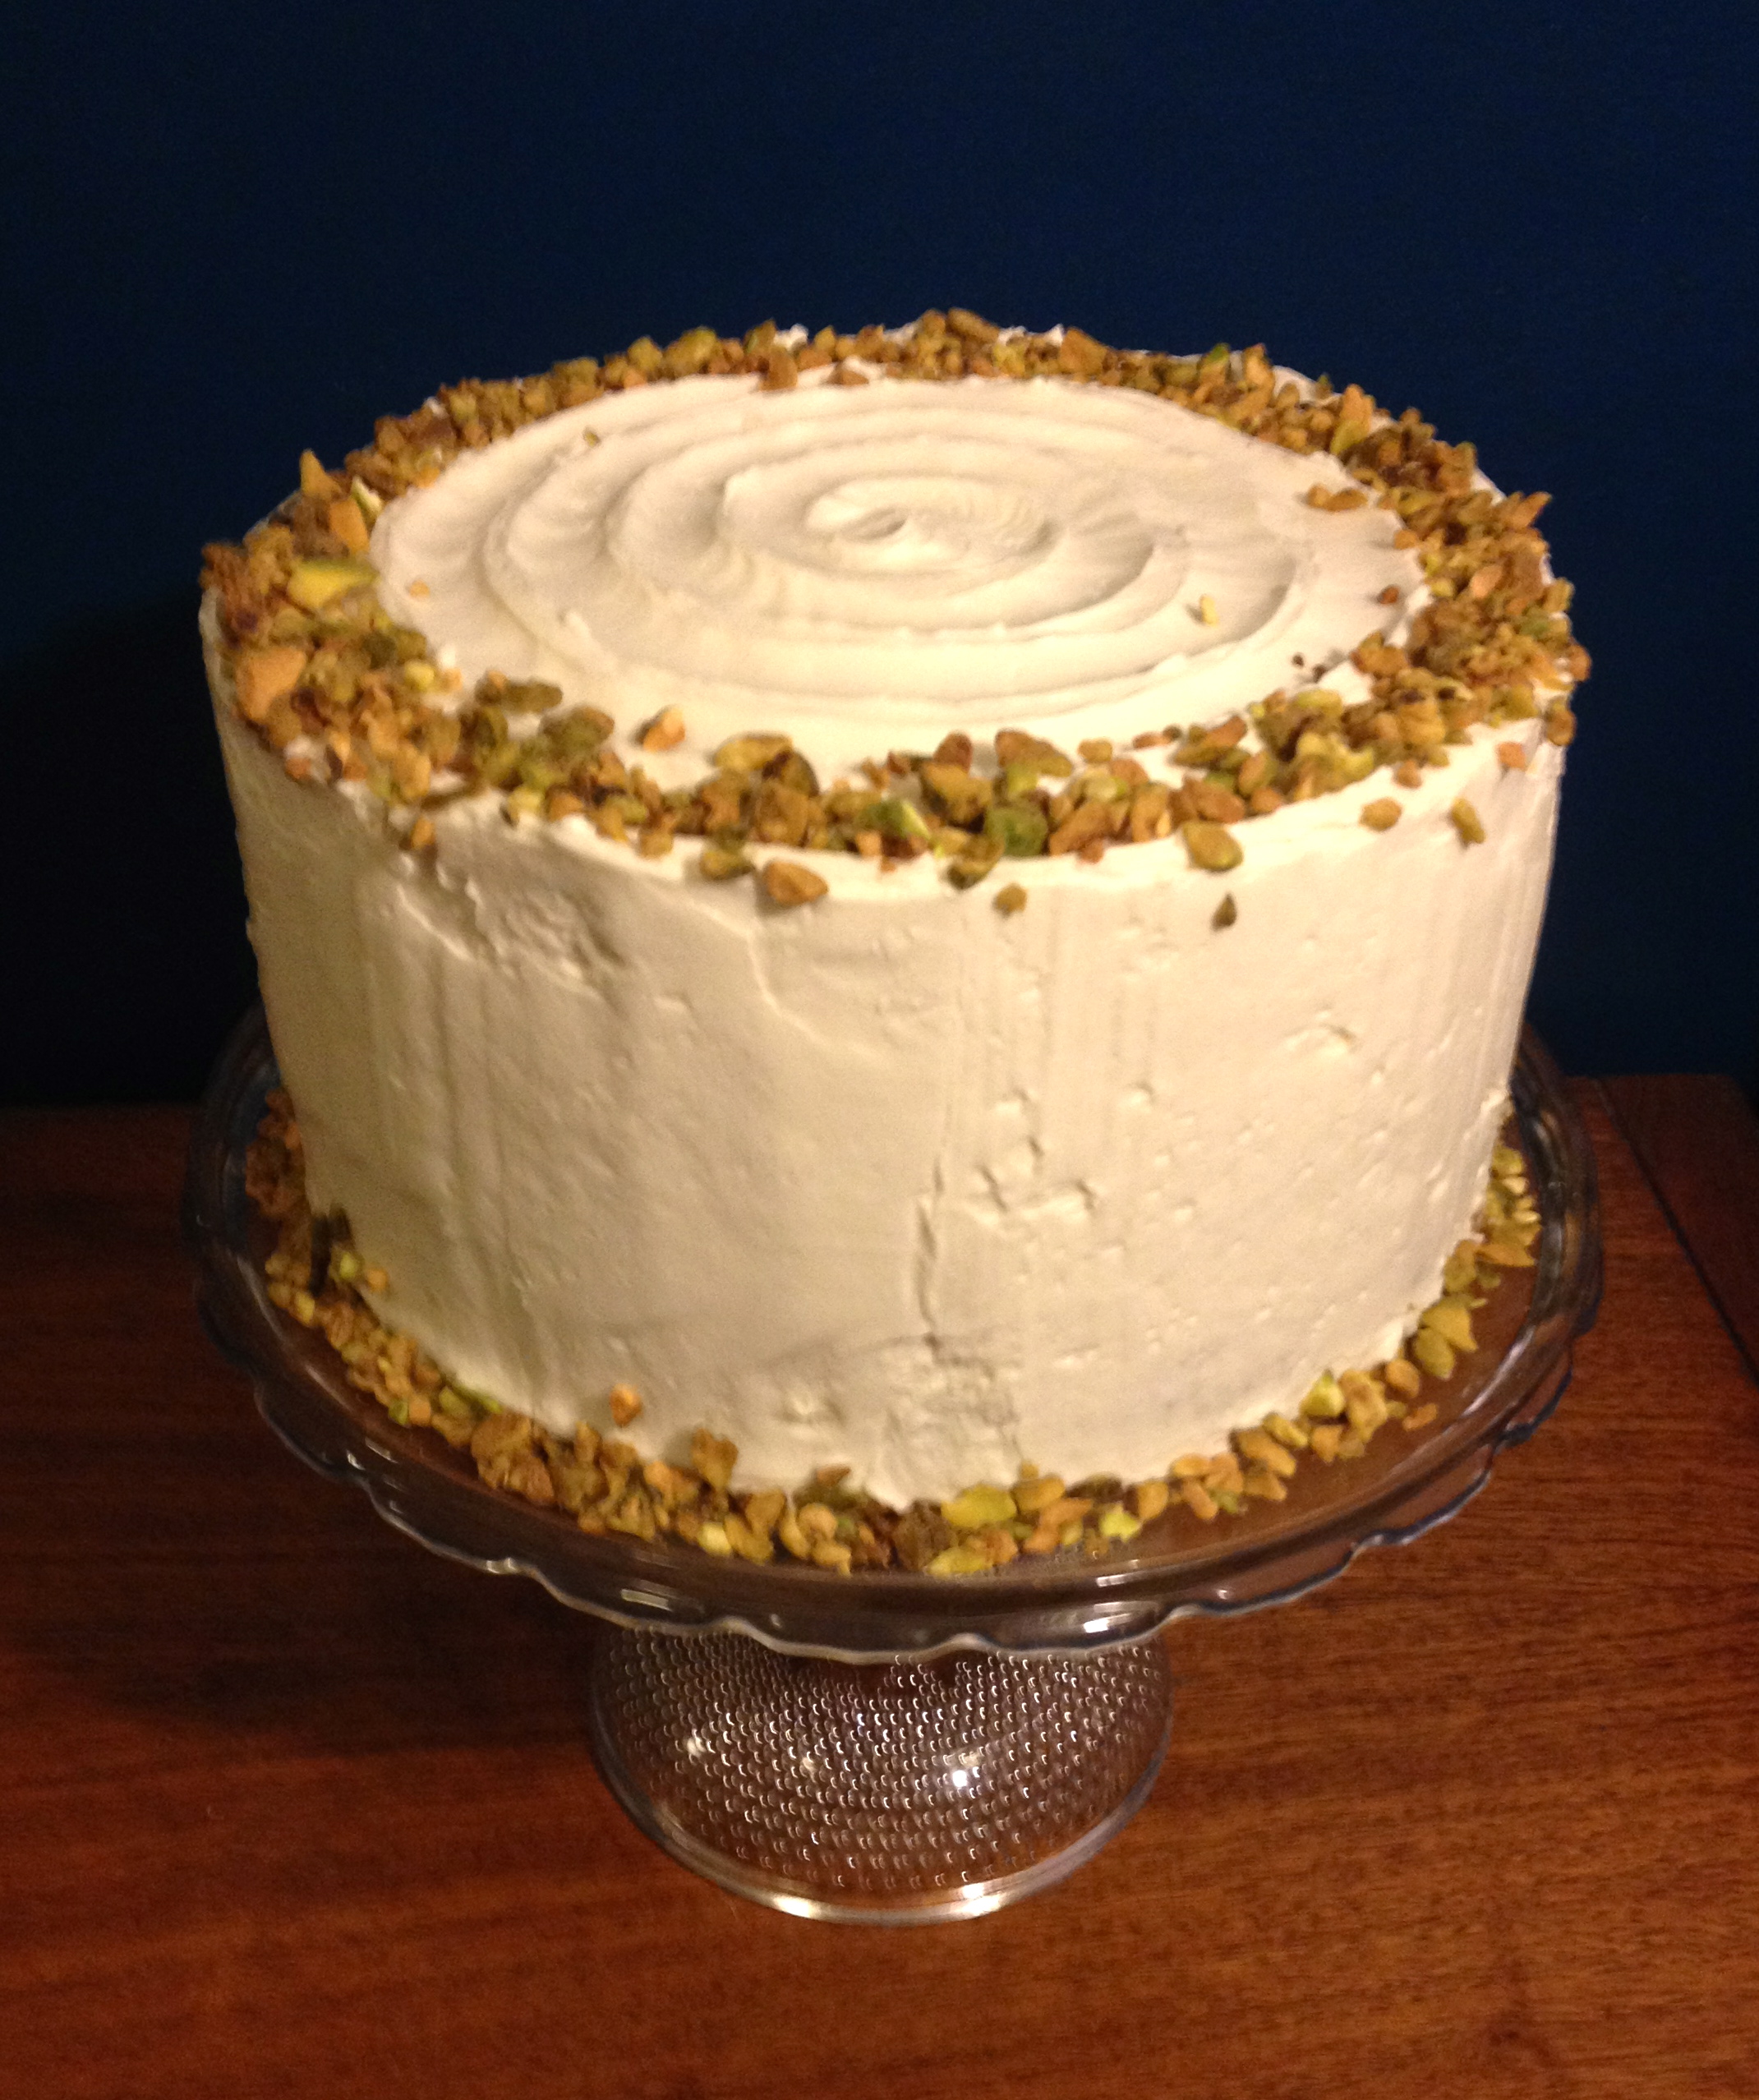
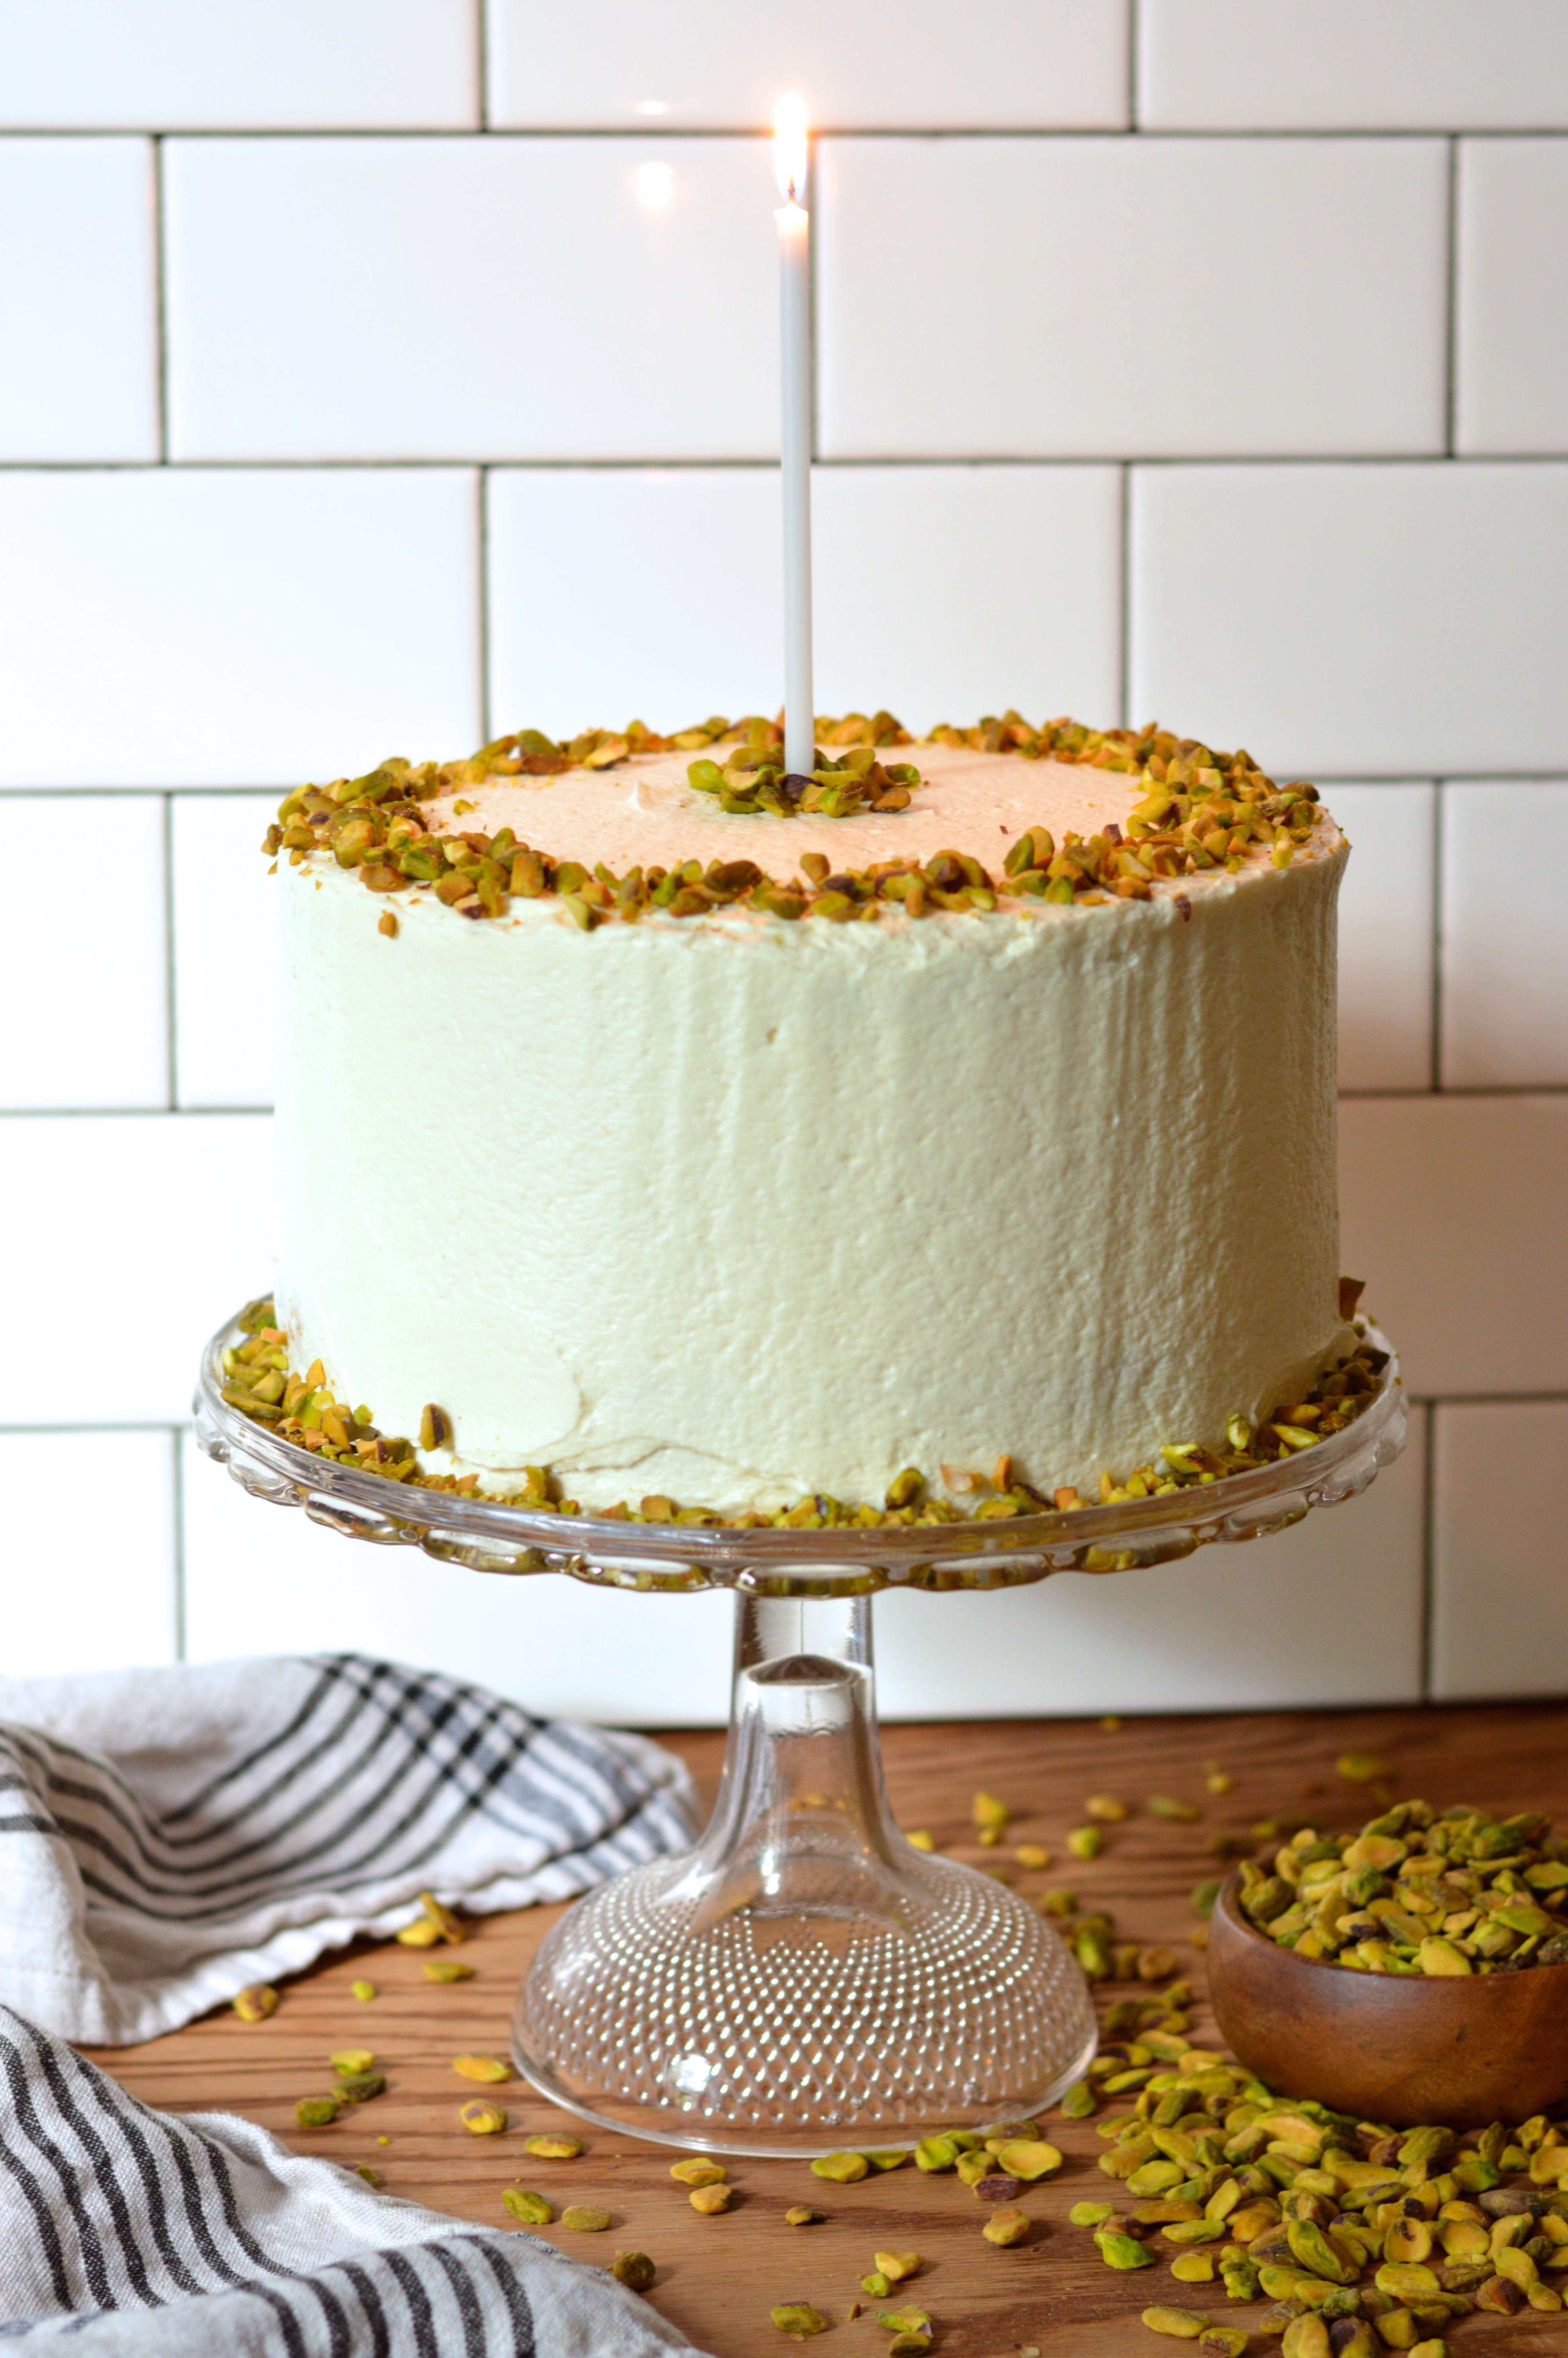
My opinion of this phenomenal recipe and the cookbook it came from hasn’t changed one iota in the last year. Everything about this cake is heaven, and there was no question in my mind that it would be the perfect way to celebrate my blogging anniversary.
While the layers of this cake are filled with ground pistachios, the addition of whipped egg whites keeps everything impossibly light and fluffy. Rich pistachio flavor is front and center, but a nice buttery backbone adds even more decadent richness. The icing on the cake (literally) is the addition of sweet floral honey to the cooked buttercream. Even with the honey though, this icing isn’t at all too sweet, but I think the best part is it’s silky texture. It’s rich and creamy and luxurious, almost like a thick whipped cream or a velvety meringue buttercream. I will admit that this cake is a bit challenging to make, but once you taste it, you’ll know it’s worth the effort.
This is a celebration cake at it’s finest. A true slice of heaven.

So, here’s to blogging, my new creative outlet and unhealthy obsession.
Here’s to having juuust one more glass of wine. If it weren’t for that fifth? sixth? (I can’t remember) glass, this might have never happened.
Here’s to trying new things. To personal growth, and to never being satisfied with “good enough”.
Here’s to many more years of blogging, and to the unknown things to come.
Here’s to you, my readers. Thank you for the comments, and the love, and the words of encouragement. You will never know how much it means to me.
And here’s to Brooklyn Homemaker! Happy birthday!
Aunt Sassy Cake
Cake:
1 cup shelled pistachios (plus 1/3 cup for decorating)
2 1/2 cups cake flour
3/4 cup all-purpose flour
1 tablespoon baking powder
1 teaspoon baking soda
3/4 teaspoon salt
1 cup (2 sticks) unsalted butter, softened
1 3/4 cups sugar
1 tablespoon pure vanilla extract
1 large egg
3 large egg whites, at room temperature
1 1/2 cups ice-cold water
1/4 tsp cream of tartar
Honey Vanilla Buttercream:
1 1/2 cups sugar
1/3 cup all-purpose flour
1 1/2 cups whole milk
1/3 cup heavy cream
1 1/2 cups (3 sticks) unsalted butter, soft but cool, cut into small pieces
1 teaspoon pure vanilla extract
3 tablespoon honey
Make the cake:
Preheat the oven to 325° F. Butter three 8-inch round cake pans, line the bottoms with parchment rounds, butter the parchment, and lightly dust with flour. Knock out any excess flour.
Pulse the pistachios in a food processor until they are coarsely chopped. Reserve about 2 tablespoons of coarsely chopped pistachios in a large bowl. Process the rest of the pistachios until they are almost powdery. Stir the pistachio powder in with the reserved coarse pistachios; add the flours, baking powder, baking soda and salt; and whisk well to combine.
In the bowl of a stand mixer fitted with the paddle attachment, beat the butter on medium speed until light and creamy, about 3 or 4 minutes. Add the sugar and vanilla and beat until fluffy, about 3 minutes. Scrape down the sides of the bowl, add the whole egg, and beat until just combined. Turn the mixture to low.
In a measuring cup, measure out 1 1/2 cups ice water. Add the flour mixture to the mixer in three parts, alternating with the ice water, beginning and ending with the flour mixture. For each addition, turn the mixer to low to add ingredients, then up to medium speed for a few seconds until incorporated. Scrape down the bowl, then mix on low-speed for a few more seconds.
In a medium bowl, whisk the egg whites and cream of tartar until soft peaks form (I promise you can handle doing this by hand. Don’t be intimidated, it should only take 5 minutes max, probably less). Do not over beat. Gently fold the egg whites into the batter.
Divide the batter among the prepared pans and smooth the tops. Bake for 40-45 minutes, rotating the pans halfway through the baking time, until a toothpick or cake tester inserted into the center of the cakes comes out clean. Transfer cakes to a wire rack and let cool for at 20 to 30 minutes. Line your cooling rack with parchment and turn the cakes out onto the rack. Let cool completely. Remove the parchment rounds.
Make the honey vanilla buttercream:
In a medium sized heavy-bottomed saucepan, whisk the sugar and flour together. Add milk and cream and cook over medium heat whisking regularly, until the mixture comes to a boil and thickens, about 10 to 15 minutes.
Transfer the mixture to the bowl of a standing mixer with paddle attachment. Beat on high until cool (this should take about 10 or 15 minutes of mixing). You may want to cover the mixer with a towel to keep the mixture from splashing your kitchen. Add the softened butter and mix until thoroughly incorporated. Increase the speed to medium-high and beat until frosting is light and fluffy, 1 to 2 minutes.
Add the vanilla and honey and mix until combined. If the icing is too soft, you can put the bowl in the refrigerator to chill slightly, then beat again until it is proper consistency. If the icing is too firm, you can set the bowl over a pot of very gently simmering water and beat with a wooden spoon until it is the proper consistency.
Assemble the cake:
Place one cake layer on a serving platter. If necessary, trim the top with a cake leveler or sharp serrated knife to create a flat surface. Evenly spread just over a cup of icing on top. Add the next layer, trim and frost it with the same amount of icing, then add the third layer. Spread a very thin layer of frosting over the sides and top of the cake and put it in the refrigerator for about 30 minutes to firm up. (This is known as the crumb coating and will help keep loose cake crumbs from showing in the final layer of icing.) Spread the sides and top of the cake with the remaining icing. Garnish the cake with crushed pistachios and refrigerate it for 15 minutes to it firm up before serving. If you want to refrigerate it longer before serving, take it out to come up to room temperature at least an hour or two before serving.
This cake will keep well in a cake saver at room temperature for up to 3 days, if the weather is not too hot or humid. Otherwise, put the cake saver in the refrigerator for up to 3 days.