pistachio

winter citrus salad with spiced pork chops

Why hello there friends! I’ve missed you!

winter citrus salad with seared pork chops | Brooklyn Homemaker

I know it’s been a long while since I shared anything with you here, and for that I’m sorry. This post has been a long time coming.

I have a little story for you.
I bought a journal the other day.
I had a journal when I was a teenager, but that was kept for reasons of pure juvenile vanity. This new journal is to be kept for a different purpose altogether.

Words like “overwhelmed”, “frightened”, and “anxious” can’t even begin to describe how I’ve been feeling for the past few months, so I’ve decided to keep a record of the things that are happening as they happen. I don’t want to forget how everything really came to pass if and when the “alternative facts” outweigh the real ones. It may be important some day.

Hold on to your butts folks, I’m about to do the thing that a food blogger is never ever supposed to do under any circumstances. I’m going to talk about politics.

GASP!

winter citrus salad with seared pork chops | Brooklyn Homemaker

Food bloggers are supposed to make light and bubbly conversation with their readers, detailing nostalgic stories from their childhoods, or relating amusing little anecdotes from daily life. We’re supposed to share our lives, but in a way that’s innocuous and easy to digest. The goal of a food blogger is to write mouth-watering recipes, amuse our readers, and hopefully grow our readership. Therefore, any subject that could be construed as polarizing is at odds with our aim to gain followers, and is usually off-limits. Under normal circumstances, we spend our days baking cakes and turning zucchini into spaghetti; we’re not “journalists”, nor are we policy experts or political science majors. That doesn’t mean however, that we don’t have opinions or principles, nor does it mean that our votes or our stakes in the management of our country count any less than anyone else’s.

I’ve been chewing away at all this in my head for the past few weeks and months, and in the end I’ve decided that some things are just too important to keep quiet about. If you find my views and convictions to be “offensive” and you decide not to keep reading my blog or cooking my recipes, I’ll just have to accept that. After all, we’re talking about pork chops and cupcakes here, while people’s lives, livelihoods, and lifestyles are on the line. If you’re a regular reader, you should at least know by now that I’m a man and I’m married to another man, so it should really be no surprise to you that I’m nervous about how our lives may be affected under a president who’s pandering to the most narrow-minded, prejudiced, and hateful among us.

winter citrus salad with seared pork chops | Brooklyn Homemaker

I realize that there are many people in the world who are thrilled with the outcome of the recent election, and are pleased as punch that campaign promises are being kept. If you’re one of those people, please understand that I’m speaking my mind today for a reason. I’m not just a “sore loser” or a “snowflake” as I’ve been called recently on social media. I’m speaking out because there’s so much at stake, and I fear the consequences of intolerant, inexperienced, irresponsible leadership.

Like it or not, we now have a man in power who cares more about money and his own ego than he cares about the country he’s pledged to lead. Say what you will about our last president, I know he wasn’t perfect, but he was a thoughtful man with integrity and grace, and a man who cared deeply about our country. Our current president is immature, irrational, erratic, and is easily influenced by those willing to stoke his ego or line his pockets. He’s proven that any billionaire willing to vocally praise him will be rewarded with a cabinet appointment, no matter how inexperienced and ill-suited they are to the job.

His closest adviser and Chief Strategist is an unapologetic racist and spokesperson for the alt-right (neo-nazi) movement, who once said in an interview, “I’m a Leninist. Lenin wanted to destroy the state, and that’s my goal too. I want to bring everything crashing down, and destroy all of today’s establishment.”
I mean, how terrifying is that? The president’s (alt-)right hand man, who knows more about politics and policy than he does himself, has proudly declared that he wants to destroy our country as we know it. With his mentorship, our president is actively working to divide our country against itself. Rich against poor, old against young, straight against gay, native-born citizen against immigrant, man against feminist, and white Christian against any and all other creeds and colors. He’s essentially waging a war against anyone in this country who isn’t a rich, straight, white, conservative, Christian, and it scares the crap out of the rest of us.

Since we’re on the subject of war by the way, his foreign policy decisions are irresponsible and ill-informed at best, and the disrespectful way he speaks with world leaders and long-time allies is downright dangerous. I don’t want to sound over-dramatic, but this man could be putting our lives and safety at serious risk.

winter citrus salad with seared pork chops | Brooklyn Homemaker

For me, the first days after the election were a mix of horror, depression, and cautious hope that maybe this man might not be as bad as he made himself out to be. Maybe he really was just trying to appeal to the worst in us because he knew it could work, but when it came to leadership, maybe he’d be… okay-ish? Of course, a lot has happened in a short time, and my worst fears have been recognized. He’s made it abundantly clear that things are going to be very, very scary for the next few years.

I have so many unanswered questions right now, and I lay awake at night thinking about how my life is in the hands of someone who doesn’t give a damn about anyone but himself and his rich white friends.
Will our marriage be deemed invalid or the federal marriage protections we enjoy reversed? Is it safe for us to ever consider having children? Will the quality of our (hypothetical) children’s education eventually be dependent on our income? Will I lose my healthcare? Will my family lose their (government) jobs? Will my neighbors be removed from their homes and deported? Will my friends become victims of harassment and violence? Will my taxes increase to pay for unnecessary and ineffective border security? Will the EPA be dissolved, climate change officially denied, and our environment and national parks destroyed for profit? Will we lose our freedom of the press under a man who can’t handle criticism or opposition? How far backward will be forced before we can move forward again, and how long will it take to repair the damage this man and his appointees can do over the next four years?

winter citrus salad with seared pork chops | Brooklyn Homemaker

Reading the news every day has become an exercise in masochism, but the one ray of hope is the knowledge that things don’t have to be like this, and this can’t last forever. To make sure these dark times end as quickly as possible, we must stand together, look past (or hopefully even celebrate) our differences, and be steadfast in our opposition to his attempts to divide and destroy us.

The people united will never be defeated.

In the months since the election, his popularity has plummeted and he’s become the least popular incoming president in the history of the gallup poll. His every move has been met with vocal criticism, nation-wide protests, and countless lawsuits; and frankly I couldn’t be more proud of the everyday citizens who’ve taken a stand. I’ve heard my whole life about how lazy and complacent my generation is, but when the shit hit the fan, we took to the streets with clever signs and knit hats, flooded our representatives in Washington with phone calls and postcards, organized resistance networks on social media, donated our hard-earned money to Black Lives Matter and the ACLU, and hosted fundraisers to benefit Planned ParenthoodCAIR, and the Water Protectors.

Ultimately, I know I’m not saying anything new here, and if you’ve been paying attention, I’m not telling you anything that you don’t already know. I guess the real point I’m trying to make here is that we all have a voice, and in these unsettling times we can’t be afraid to use them, even if doing so might have some negative consequences.
We need to do everything in our power to show people with other points of view that policies designed to “protect traditional values” can have terrible negative consequences, and don’t just affect unknown hypothetical immigrants, feminists, people of color, or homosexuals. These policies directly affect the lives of their friends and neighbors, their baristas and hair stylists, their surgeons and teachers, and even their favorite food bloggers.

winter citrus salad with seared pork chops | Brooklyn Homemaker

Whew! I didn’t realize when I started writing this that I had SO MUCH to say, but I’ve been holding back for so long that I’ve had plenty of time to gather my thoughts. I’m sorry that I’ve basically ignored the recipe altogether through this post, but I promise I have just a few quick things to say about the yummy salad in these pretty pictures.

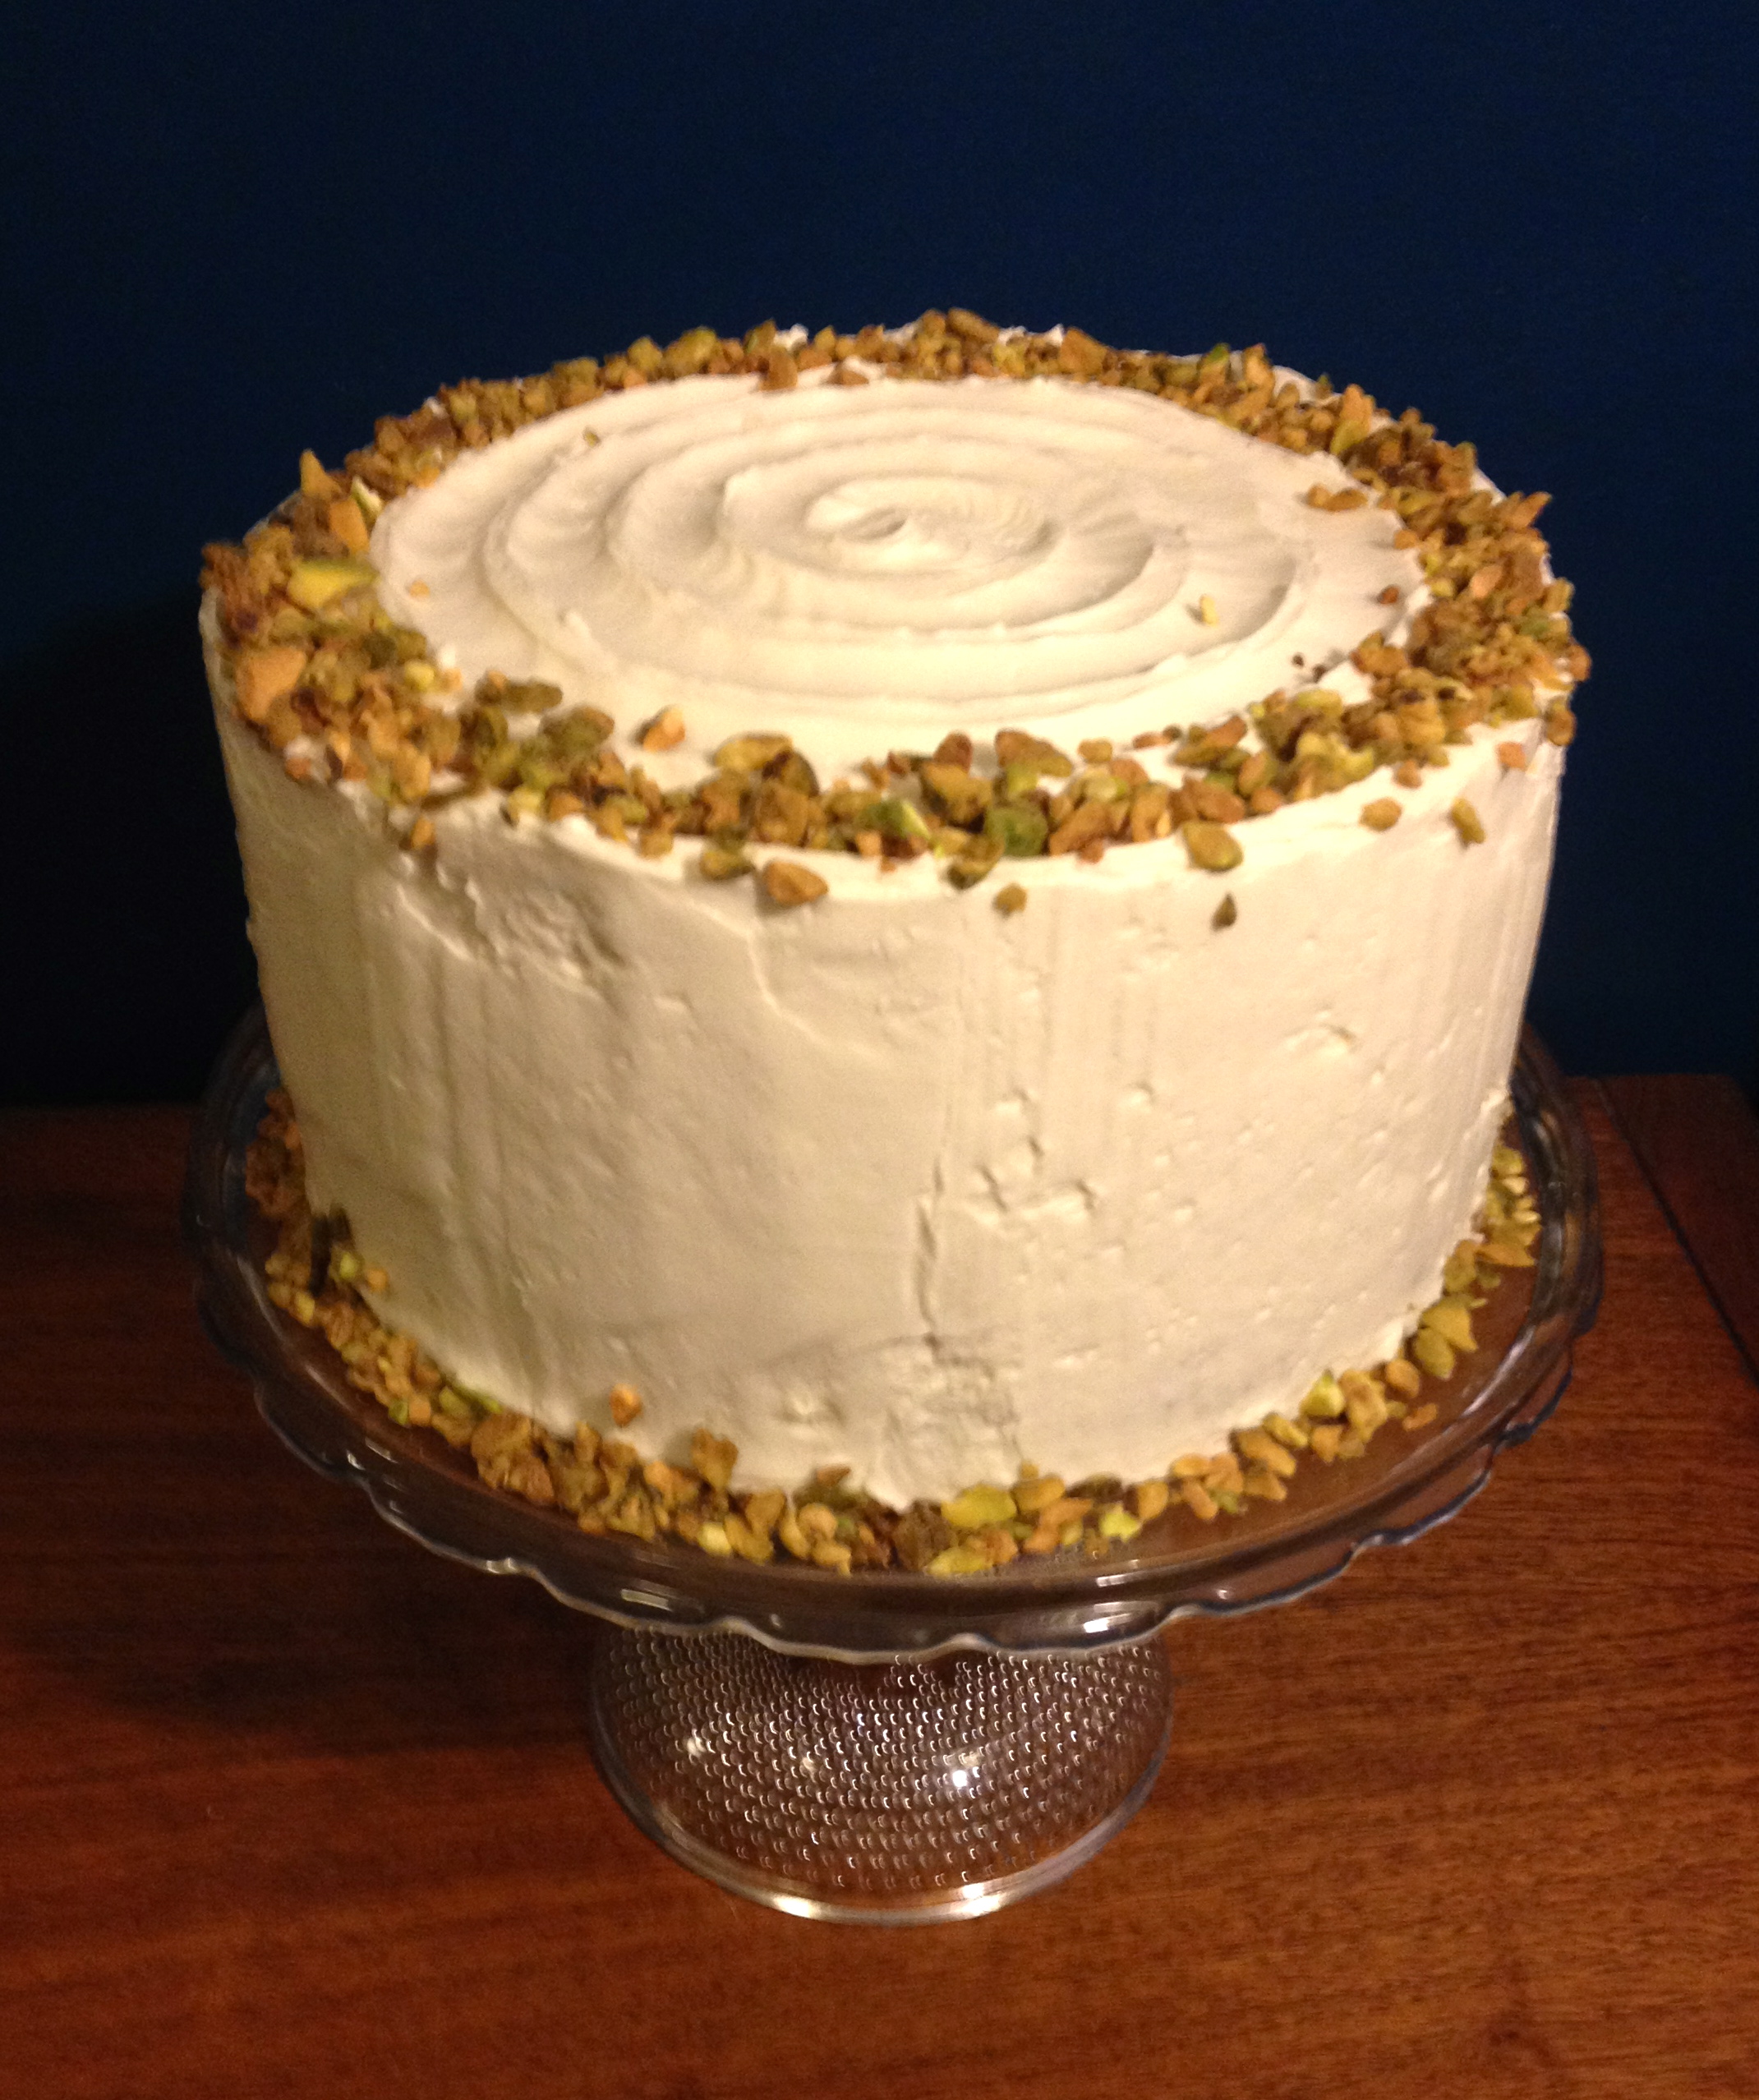
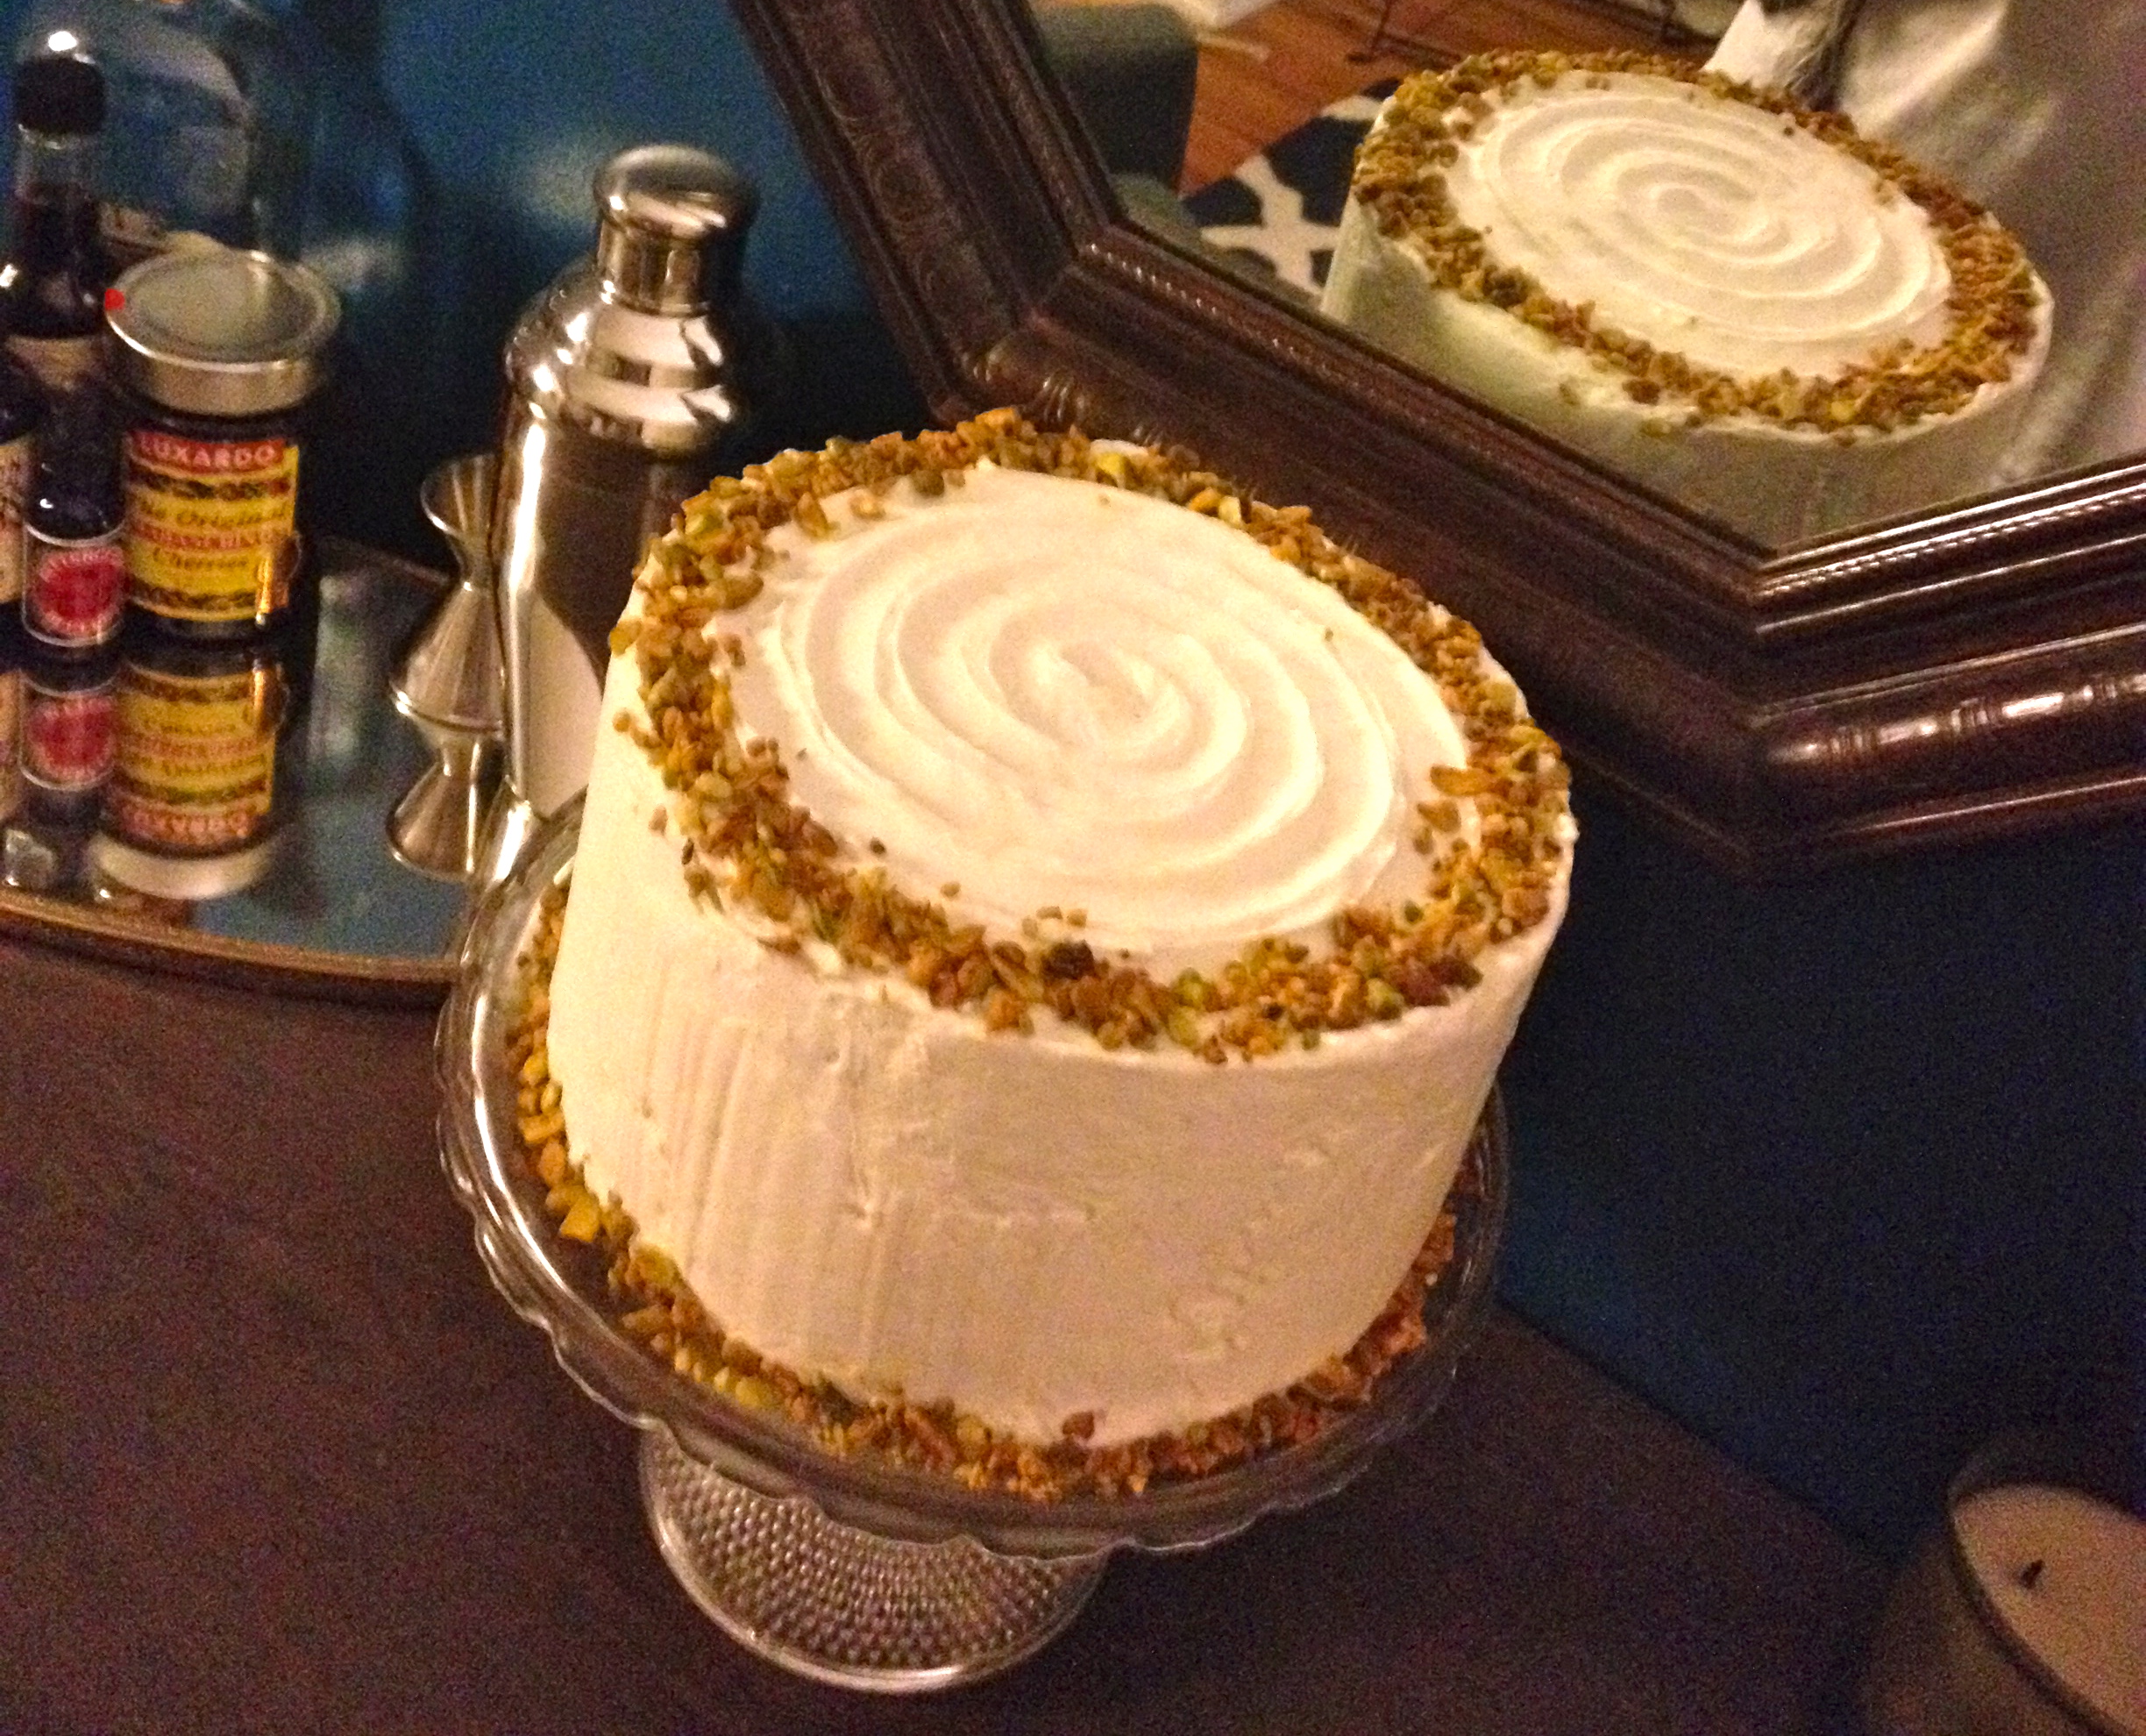
A few weeks ago Russell talked me into doing the Whole30 diet with him. I have to admit, it’s been really difficult and I’m totally over it and can’t wait for the end. I’ve been dreaming about chocolate chip cookies and pizza for weeks, but we’re in the final stretch now and I’m happy we did it. Oddly enough, as restrictive as this diet is, it’s been a sort of fun exercise in will power and self-discipline, and in a world that feels like it’s rapidly spinning out of control, having total control over something, anything, feels really refreshing. Having this much restriction has also deemed most restaurant food off-limits, and forced us into the kitchen multiple times a day, every day. While it certainly has felt like a chore at times, spending so much time in the kitchen has been strangely therapeutic. My kitchen feels like “home” to me, and cooking so often has brought some semblance of familiarity and normalcy back to my life, even if I’d really have preferred to drown my worries and sorrows in a thick slice of chocolate cake.

winter citrus salad with seared pork chops | Brooklyn Homemaker

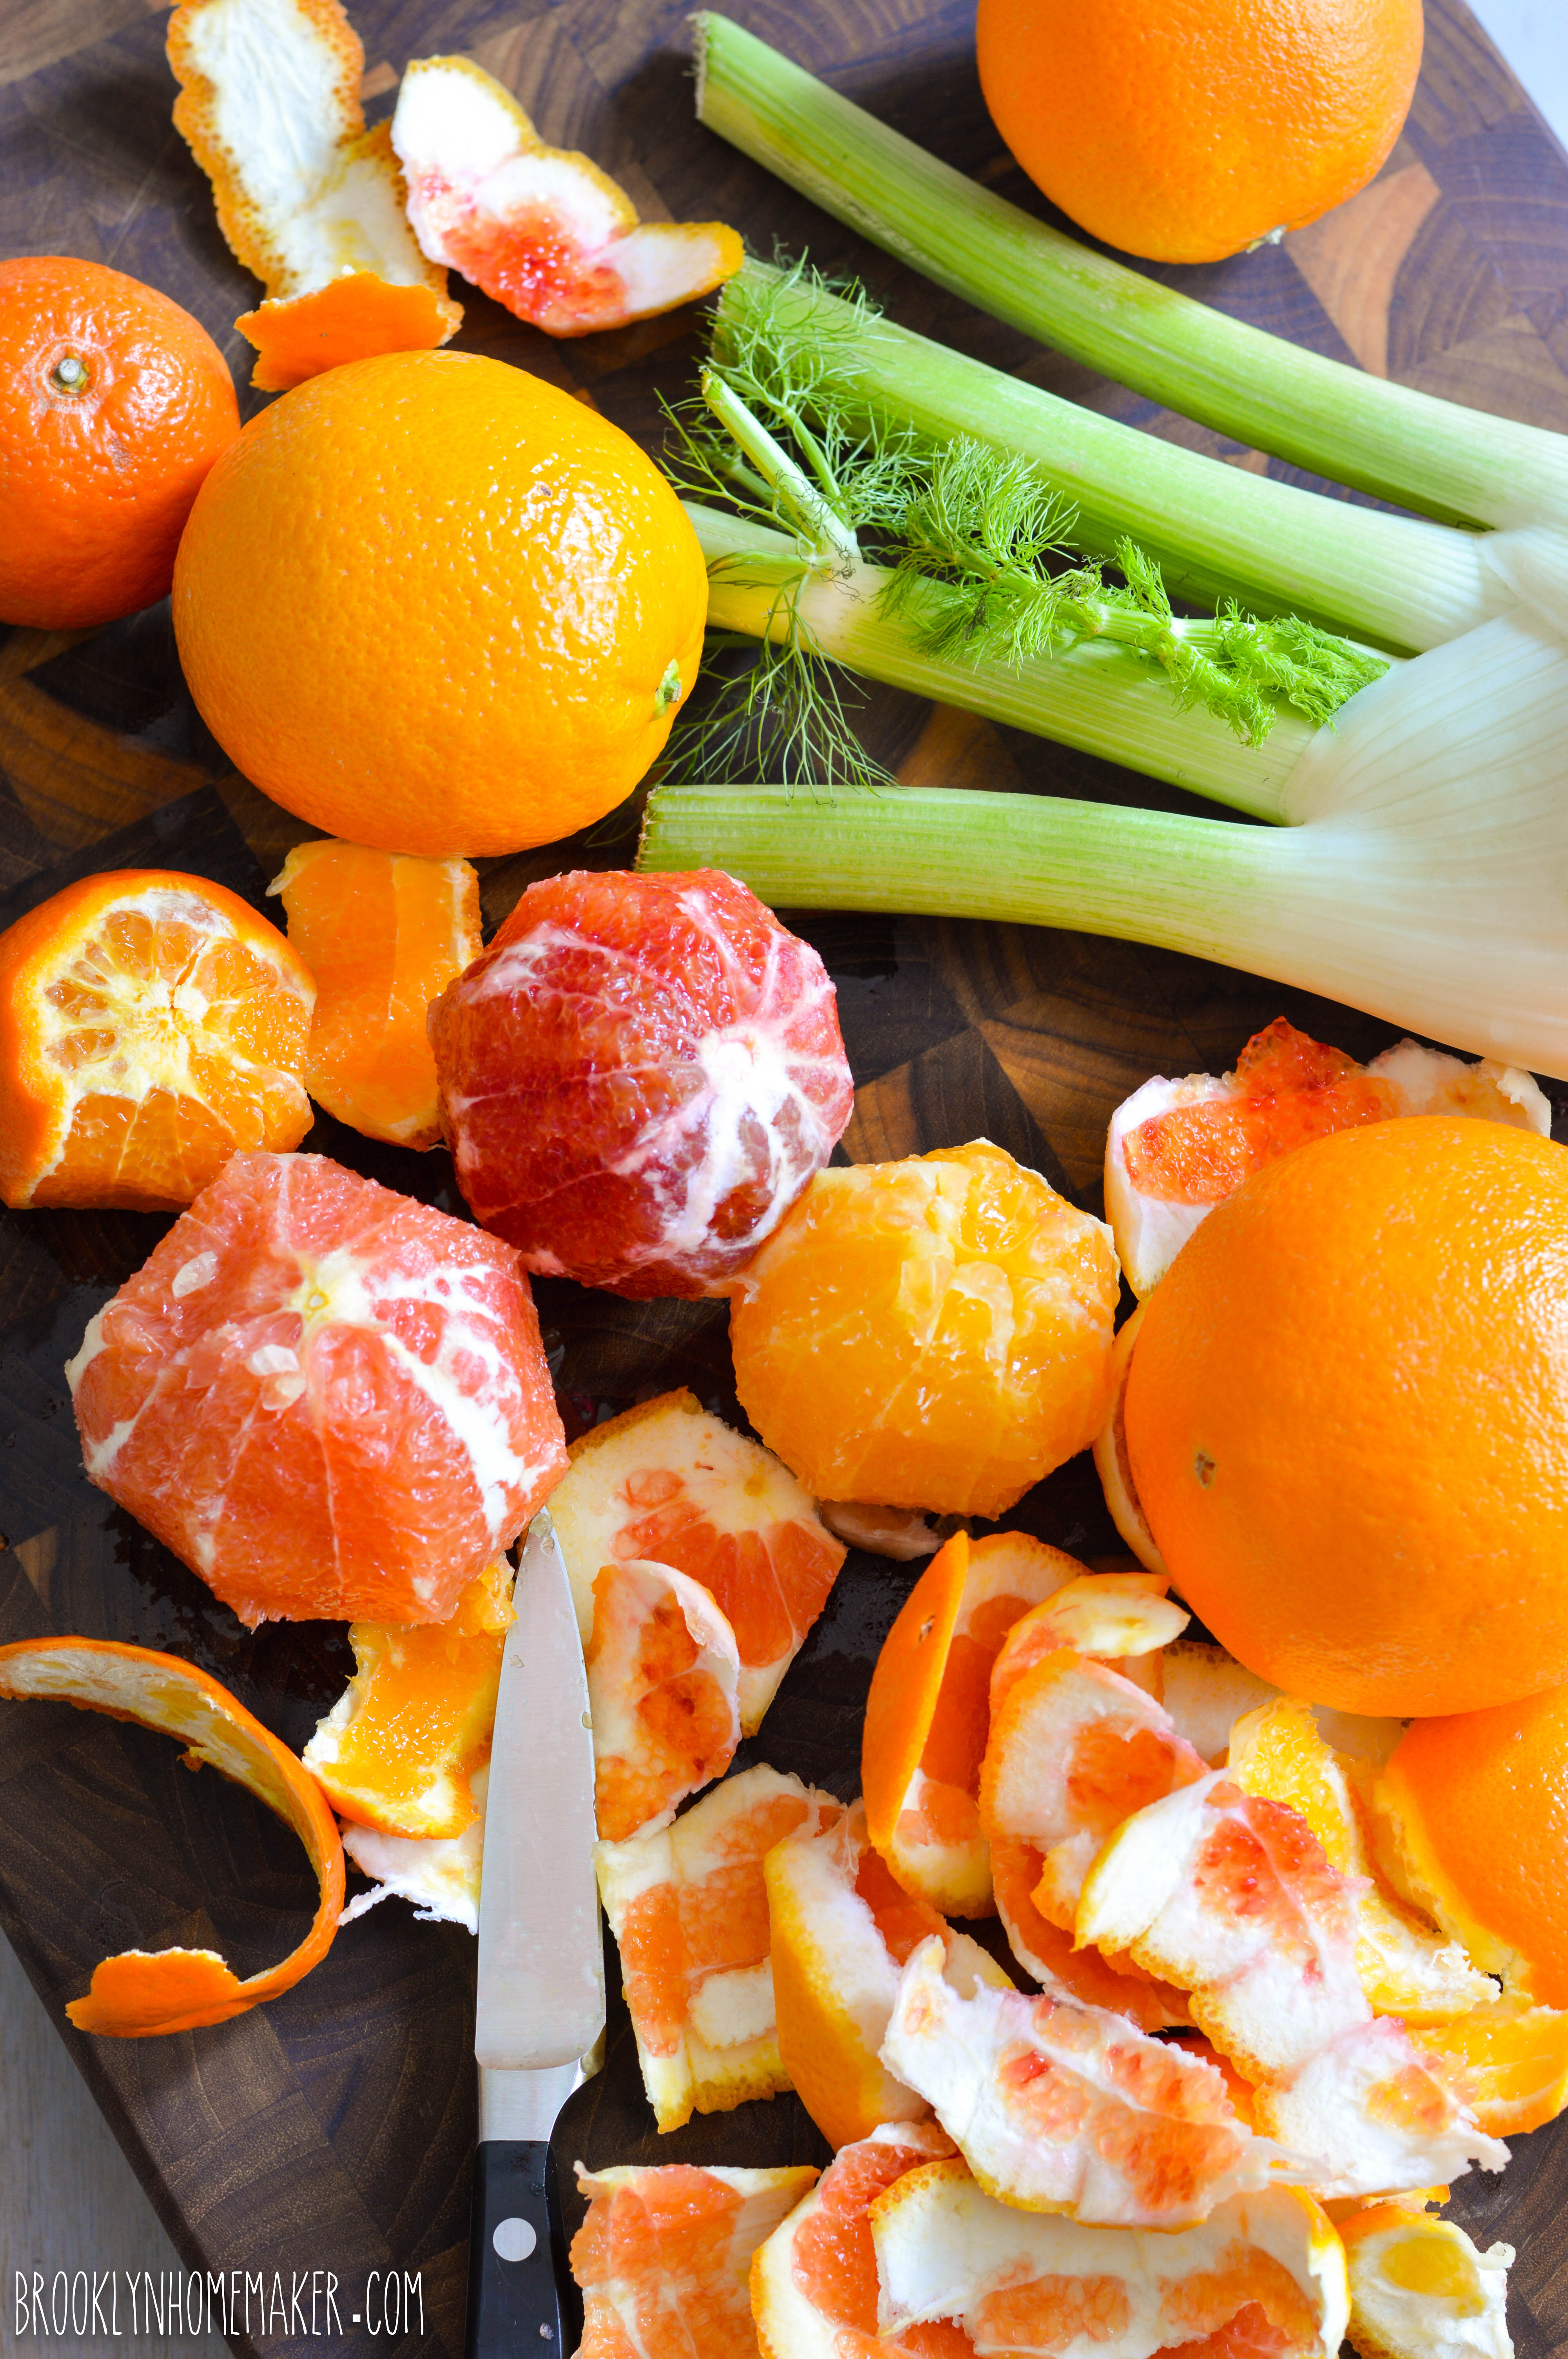
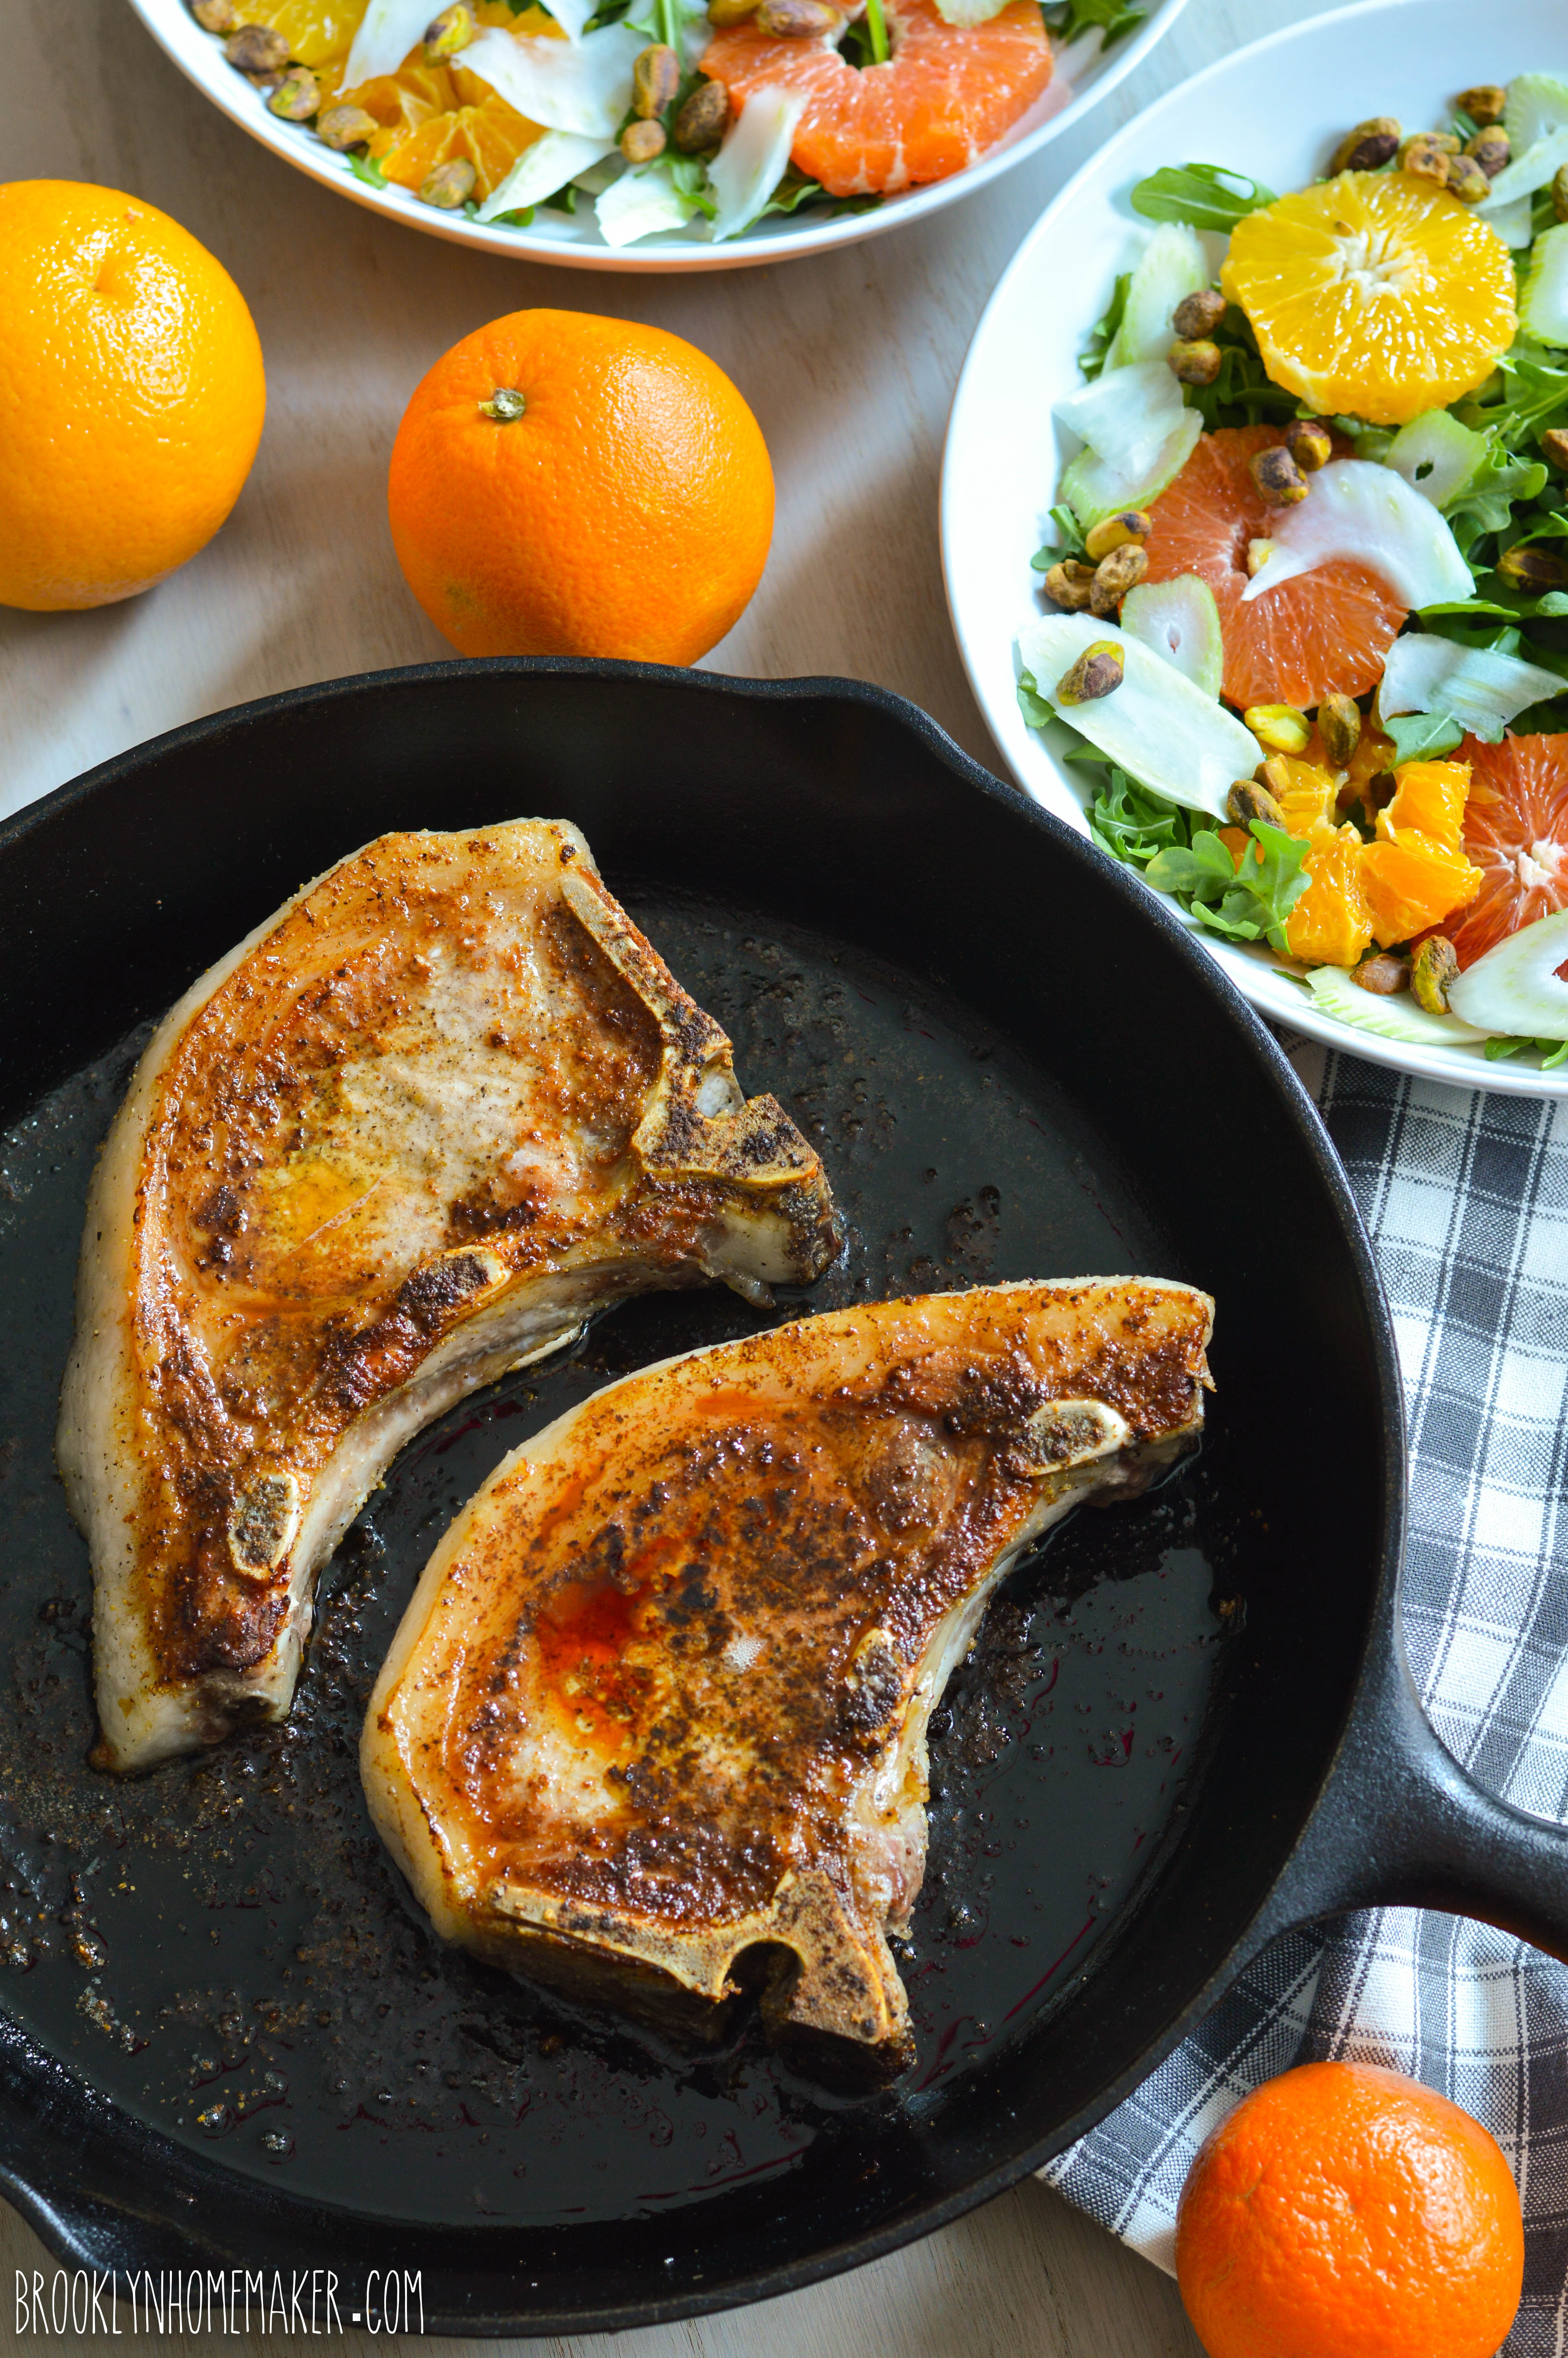
I swung by my local butcher shop one day looking for pork chops, and when I spotted the gorgeous cara cara and blood oranges in their produce case, I instantly knew what I wanted to do. We’re friends with the butchers there, and the pork chops they gave me were very generous, huge even, but I actually think a smaller chop would have been better suited to this recipe. Mine were about a pound each, but I think 1/2 lb chops would be the way to go. If you’re not a huge pork fan, or can’t find good thick pork chops, you could also do the same spice rub on some boneless, skinless chicken breasts and they’d be amazing too.

Because Whole30 is so protein heavy, it’s important to make sure you eat LOTS of veggies with every meal, and to go for BIG, BOLD flavors as often as possible to avoid gustatory boredom.

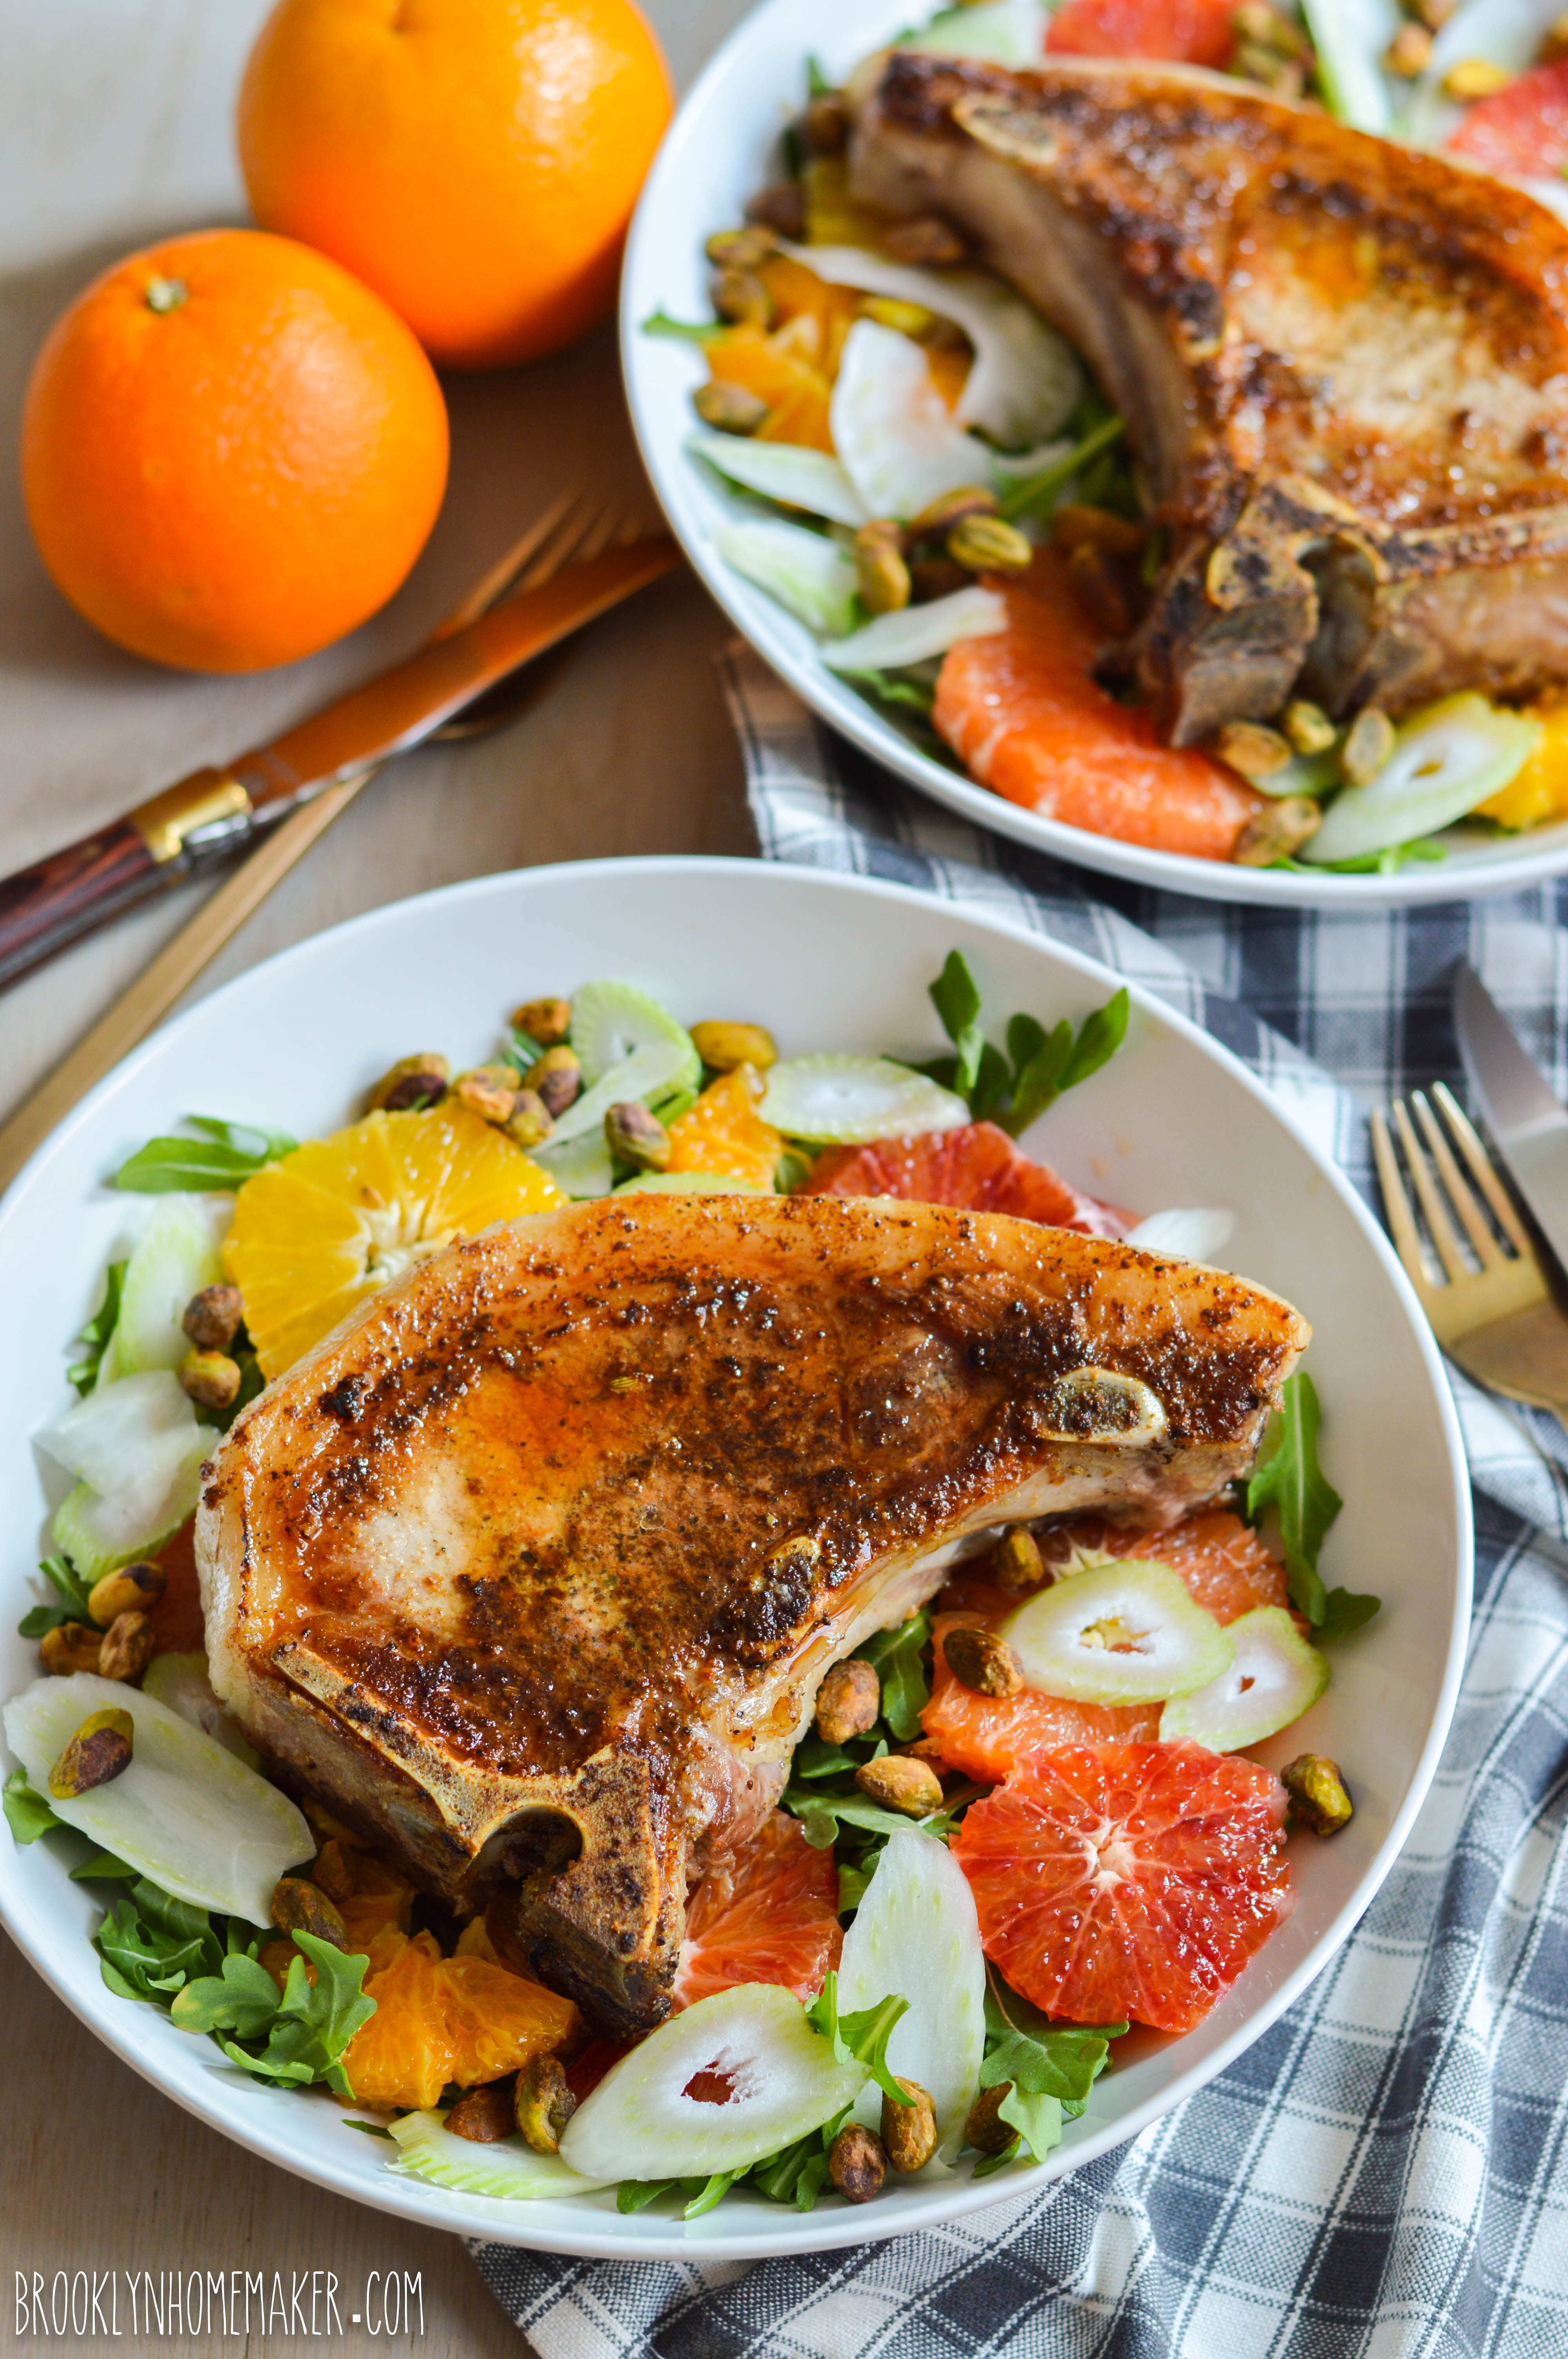
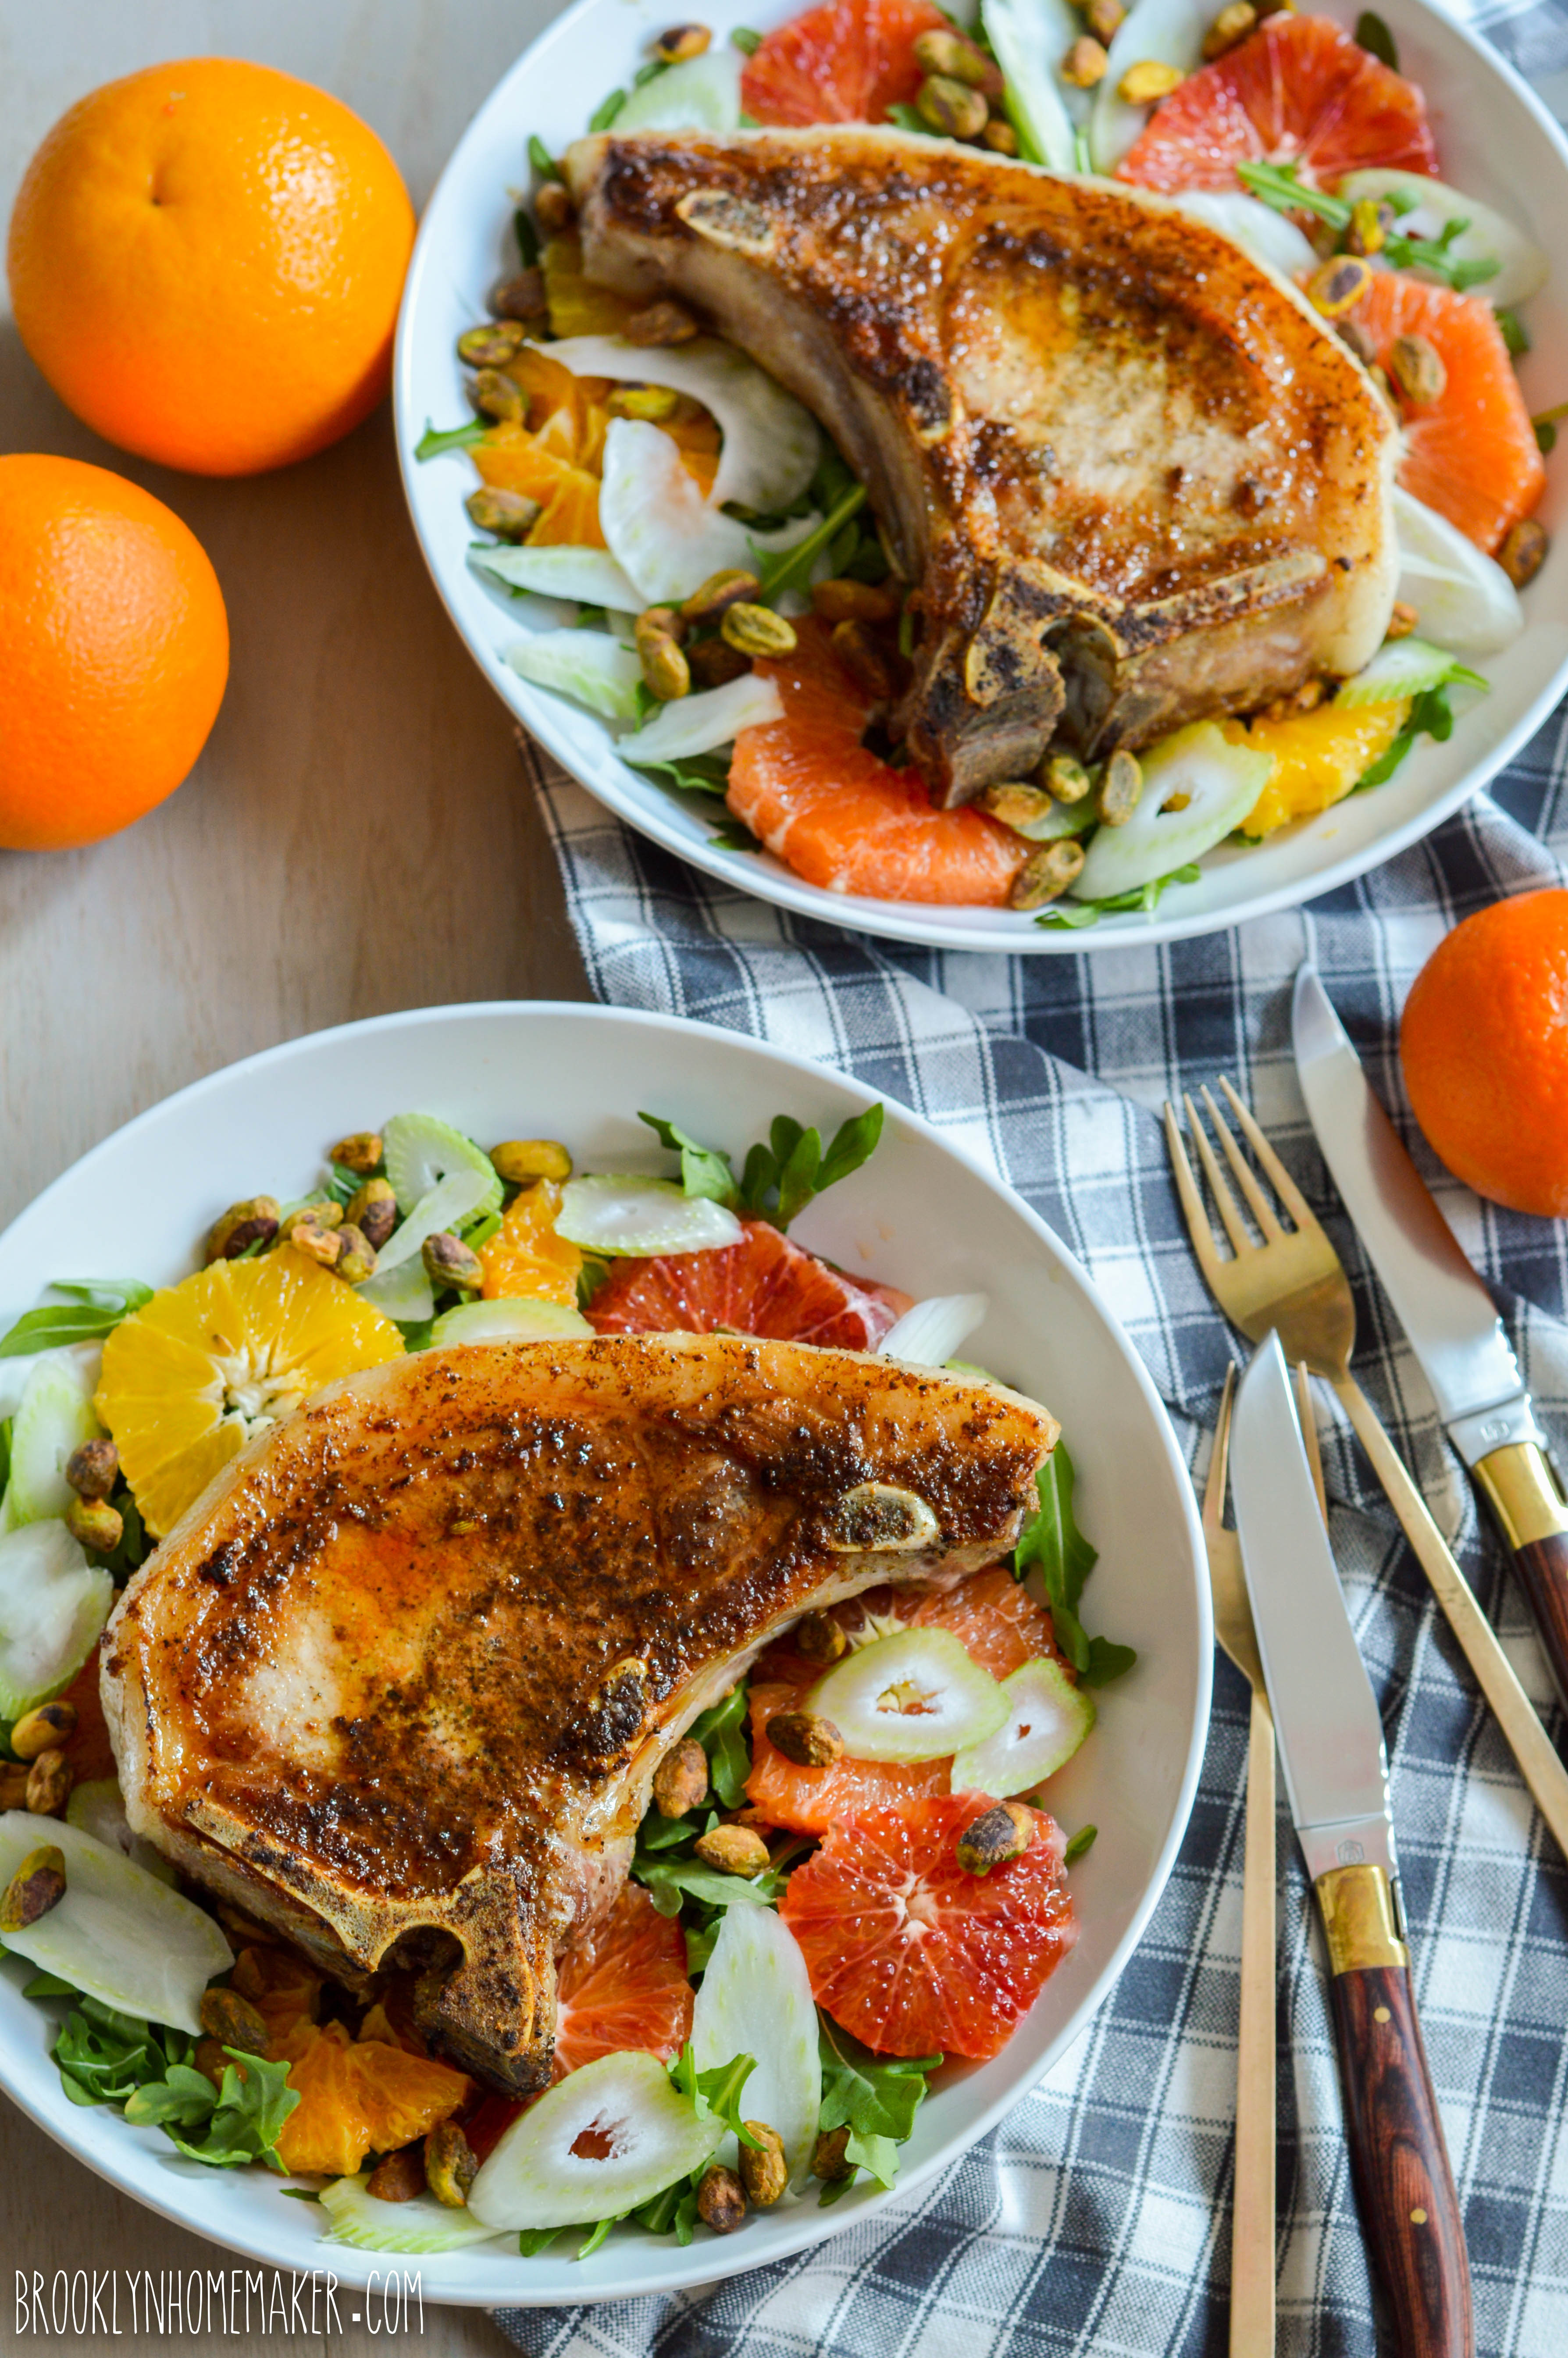
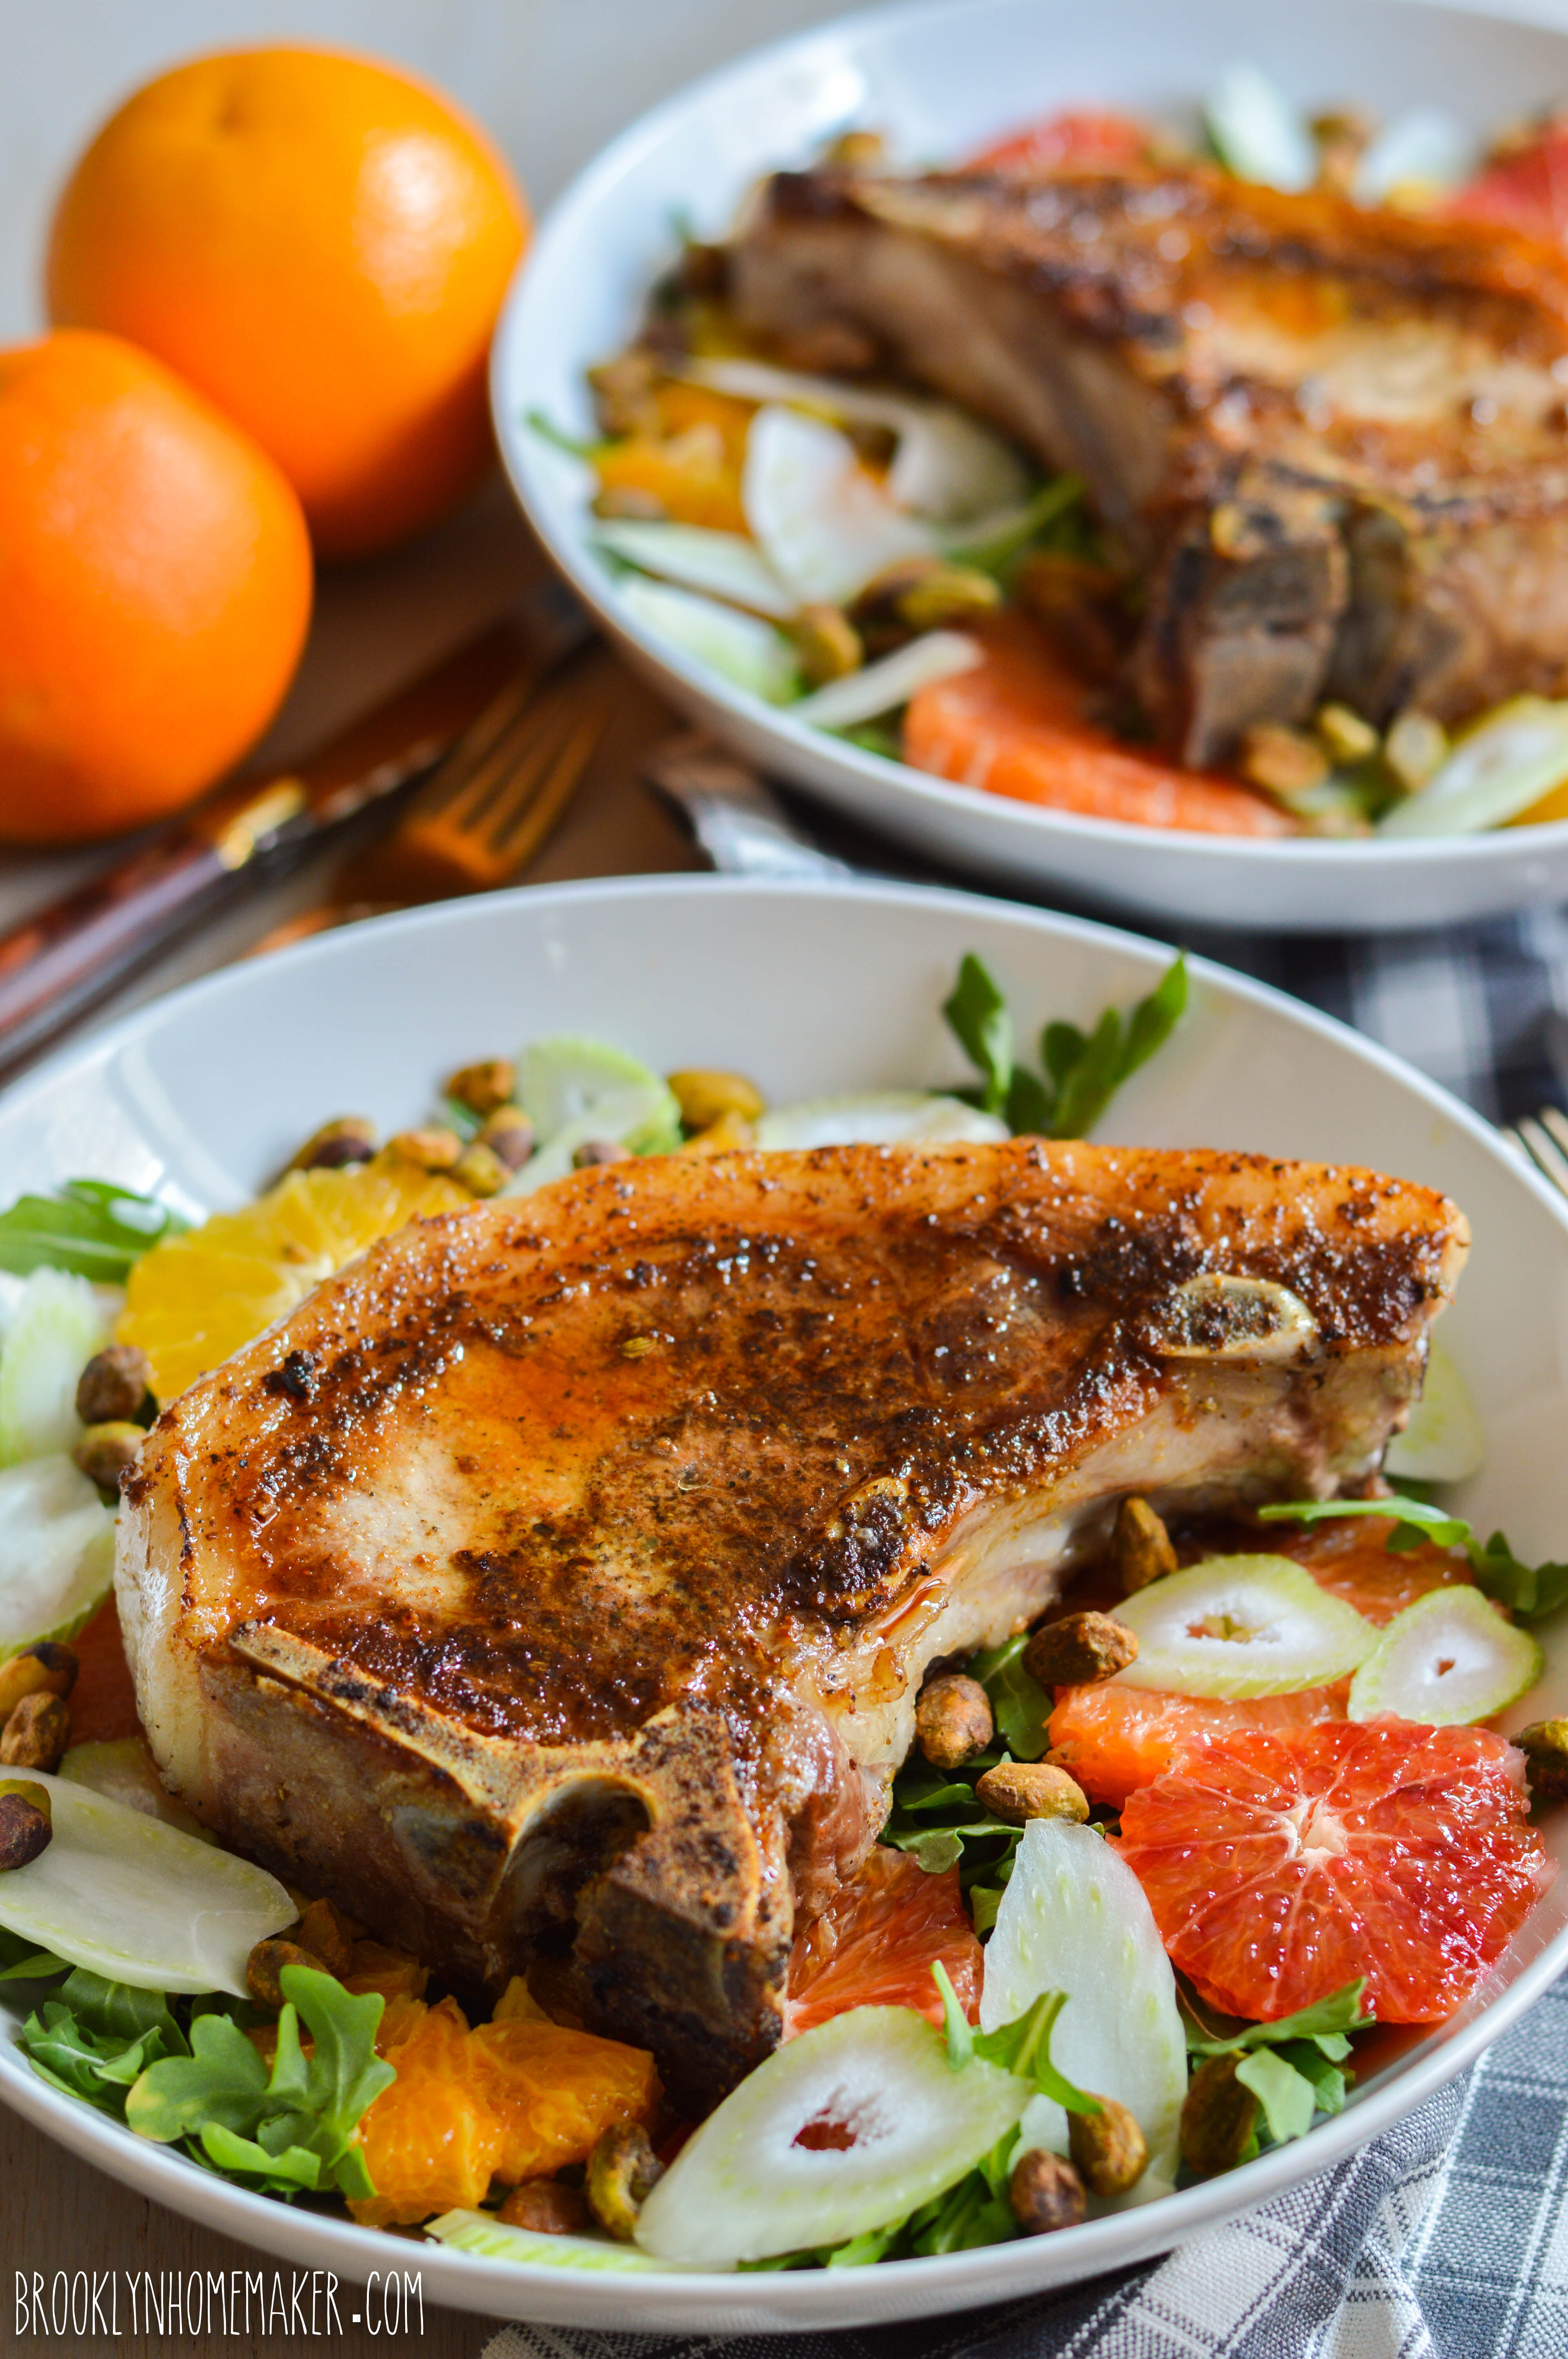
This salad is definitely not lacking in big, bold flavors. The mix of citrus fruits add fresh biting acidity and bright sweetness; the pistachios are rich and buttery; the fennel fresh, sweet, earthy, and slightly anise-y; the arugula is peppery with a hint of bitterness; the pork perfectly spiced, wonderfully browned on the outside, and tender and juicy inside; and the dressing, with red wine vinegar and a hint of Dijon mustard, ties it all together perfectly.

winter citrus salad with seared pork chops | Brooklyn Homemaker

Winter Citrus Salad with Spiced Pork Chops

1/2 teaspoon cumin seeds
1/2 teaspoon mustard seeds
1/2 teaspoon fennel seeds
Generous salt and pepper to taste
2 thick-cut, bone-in pork chops (about a half pound each)
2 teaspoons olive oil or butter
Arugula
mix of citrus fruit (I used 1 each of tangerine, blood, naval, and cara cara oranges)
a handful of thinly shaved slices of fennel bulb or stalks
1/4 cup roasted pistachios

Red Wine Vinaigrette:
4 tablespoons extra virgin olive oil
1 tablespoon dijon mustard
1 1/2 tablespoons red wine vinegar
Salt and pepper to taste

Lightly toast spices in a dry skillet until they smell fragrant. This should only take a few minutes. Transfer to a spice grinder (or coffee grinder *see note) along with salt and pepper. Grind into a fine powder. Sprinkle or rub all over both sides of your pork chops and let them rest at room temperature for about an hour. If you like, you can use this time to prepare the citrus or mix the dressing.

Preheat your oven to 400F and let a large cast iron skillet heat up with it.

Remove the skillet from the oven and add olive oil or butter. Place the skillet over a medium-high flame and sear the pork chops for about 3 minutes on one side. They’ll probably smoke a bit, so use your vent fan. Flip the chops and immediately transfer to the oven. Roast until the chops reach 135 to 140F at the thickest part of the chop. This should take between 5 and 10 minutes.

Remove from the skillet, tent with foil, and let rest for 5 to 10 minutes while you assemble the rest of the salad.

Place enough arugula for 2 individual servings (how much you like is totally up to you) into salad bowls. Use a very sharp knife to cut the peel off of your citrus and slice them into thin discs. Top the arugula with the citrus discs, shaved fennel, and pistachios.

To make the dressing, combine all ingredients in a mason jar with a lid and shake shake shake to combine. Pour over the salads and toss to combine if desired.

Top with rested pork chops and enjoy!


*Cooks note: Only use a coffee grinder if you have a spare. Don’t use a grinder you use for coffee or your coffee will taste like ground cumin, fennel, & mustard. Alternatively you could use a mortar and pestle.

Advertisement

pistachio and dark chocolate chunk cookies with brown butter and fleur de sel

I realize that a lot of you are probably all cookie’d out right about now, but I just had to squeeze one more cookie recipe in before the end of the year.

I’d say that I’m sorry, but no one should every apologize for making cookies.

pistachio and dark chocolate chunk cookies with brown butter and fleur de sel | Brooklyn Homemaker

I gathered the makings of this recipe with the intention of making them on Christmas day, but it didn’t really work out that way.

pistachio and dark chocolate chunk cookies with brown butter and fleur de sel | Brooklyn Homemaker

The days leading up to Christmas tend to be pretty stressful in my world, so when it comes to the actual holiday itself I try to take it pretty easy. Russell and I spent the day at home with the dogs, opening presents, calling friends and family, watching Murder, She Wrote, and eating everything in sight. Since it’s just the two of us, I thought that making some cookies would be a fun activity we could do together during the day. I didn’t want to do anything too fussy or involved like cutouts, but thought a fancied up chocolate chip cookie could be the perfect holiday treat.

pistachio and dark chocolate chunk cookies with brown butter and fleur de sel | Brooklyn Homemaker

The ham I was making for dinner, along with some roasted broccoli and sweet potato gratin, had other plans though. I was not thinking ahead at all and didn’t take the fact that the ham would be cooking at a low temperature for several hours into consideration.

We weren’t yet ready for cookie time when the ham went into the oven, and when it came out we feasted and immediately fell deep into a food coma, so our cookie plans were (temporarily) abandoned.

pistachio and dark chocolate chunk cookies with brown butter and fleur de sel | Brooklyn Homemaker

Later that evening we aaaaaalmost rallied and went for it, but opted instead for another glass of wine and mouthful of chocolate from our stockings.

pistachio and dark chocolate chunk cookies with brown butter and fleur de sel | Brooklyn Homemaker

In the end it may have been a good thing that we didn’t make these on Christmas day. For one thing, we had plenty of chocolate in our stockings. For another, making them a few days later also meant that I was able to photograph the process and share them with you. These babies are so delicious and perfect that I’m actually pretty thrilled to get to share them.

This post was brought to you by a salty little Christmas ham and a holiday food coma.

pistachio and dark chocolate chunk cookies with brown butter and fleur de sel | Brooklyn Homemaker

Browning the butter for this recipe requires some extra time since it needs to firm back up after it’s melted and browned, but I promise you it’s worth it. Browning butter deepens and intensifies everything that’s already great about butter, and then adds a toasty nuttiness. Taking the time to toast the pistachios before adding them to the cookies also helps to intensify the nutty goodness. It’s all about building layers of flavor here.

pistachio and dark chocolate chunk cookies with brown butter and fleur de sel | Brooklyn Homemaker

When it comes to chocolate chip cookies, I’m definitely of the “go big or go home” school of thought. I usually like to use a #24 portion scoop, which works out to 1.5 oz (or 3 tablespoons) of dough. I love portion scoops for drop cookies because it makes it really quick and easy to get all of your cookies the same size and shape. If you don’t have a portion scoop, you can certainly measure out 3 tablespoons of dough to see how it should look and then try to make the rest of your cookies match that size.

You can easily use a smaller portion scoop, or make smaller cookies if you want, you’ll just need to adjust your baking time accordingly to avoid over-baking.

pistachio and dark chocolate chunk cookies with brown butter and fleur de sel | Brooklyn Homemaker

I know there are a jillion chocolate chip cookies out there on the internets, but I beg you to give these a try. You can thank me later.

I brought some to work with me and two of my coworkers separately came to tell me that these cookies have the perfect texture for chocolate chip cookies. They’re soft and chewy in the center, with perfect crispy crusty golden edges.
The brown butter and toasted pistachios are the perfect rich nutty compliment to the sweet and bitter dark chocolate, and the briny minerally crunchy fleur de sel is the perfect finish to every bite. They’re buttery, chocolatey, sweet, salty, and completely wonderful. I could go on, but you’re just going to have to make them and see for yourself.

pistachio and dark chocolate chunk cookies with brown butter and fleur de sel | Brooklyn Homemaker

Pistachio and Dark Chocolate Chunk Cookies with Brown Butter and Fleur de Sel

  • Servings: about 2 1/2 dozen cookies, depending on size
  • Print
adapted from Martha Stewart

18 tablespoons unsalted butter (2 sticks + 2 tablespoons)
1 cup unsalted shelled pistachios
2 1/4 cups all-purpose flour
1/2 teaspoon baking soda
1/2 cup granulated sugar
1 cup packed dark brown sugar
1 teaspoon salt
2 teaspoons pure vanilla extract
2 large eggs
2 cups (about 10 to 12 ounces) roughly chopped good dark chocolate, or good quality dark chocolate chips or chunks
1 tablespoon (ish) fleur de sel or other crunchy finishing salt

In a small heavy-bottom saucepan, brown the butter over medium high heat until golden to deep brown, should take about 10 or 15 minutes. Watch carefully once it starts to brown to avoid burning. Pour out into a heat-proof dish, trying to leave the burnt solids behind, and refrigerate until soft but beginning to firm. If it solidifies, you can remove and leave out until soft.
If you want to skip this step, you can simply use 2 sticks of softened unsalted butter.

Preheat oven to 350 degrees. Arrange pistachios on a baking sheet in a single layer, and toast for about 5 or 6 minutes, or until they smell toasty and nutty. Cool and roughly chop.

Whisk together the flour and baking soda in a small bowl and set aside. Combine the cooled brown butter with both sugars in the bowl of an electric mixer fitted with the paddle attachment. Beat on medium speed until light and fluffy, about 3 to 5 minutes. Reduce the speed to low and add the salt, vanilla, and eggs. Beat until well mixed, about 1 minute. Add flour and mix until just combined. Stir in the chocolate and toasted pistachio.

Scoop dough out using a portion scoop and place about 2 inches apart on baking sheets lined with parchment paper. I used a #24 scoop, which works out to about 3 tablespoons of dough per cookie. If you make smaller cookies you’ll need to reduce the baking time by a few minutes, but you’ll have more cookies in the end. Sprinkle each cookie with a small pinch of fleur de sel.

Bake until cookies are golden around the edges, but still soft in the center, around 11 to 13 minutes. Remove from oven, and let cool on baking sheet 1 to 2 minutes. Transfer to a wire rack, and let cool completely. Store cookies in an airtight container at room temperature up to 1 week.

the aunt sassy cake: an anniversary post

It’s official. I’ve made it through my first year of blogging and lived to tell the tale.

aunt sassy cake | pistachio layer cake with honey buttercream | Brooklyn Homemaker

Today is the one year anniversary of Brooklyn Homemaker and I can barely contain myself. I can’t tell you what it means to me to see how far this humble little blog has come in these past twelve months. To celebrate, I baked a cake. The same cake that started this whole crazy adventure.

aunt sassy cake | pistachio layer cake with honey buttercream | Brooklyn Homemaker

Just in case you haven’t already heard the short story of how I got into blogging, it basically goes something like this:

One day some newly engaged friends (now newly-weds) came over to discuss wedding planning and take some supplies off our hands from our recently nuptials. Brunch was served, several glasses of wine consumed, and a three layer pistachio cake devoured. The cake was such a huge hit that our friends insisted I start a blog. I said no, I had no business writing a blog. I didn’t have a camera, I hadn’t written anything in years, I didn’t have the time, I have shaky hands and no natural light in my kitchen. I presented every excuse I could come up with. A few more glasses of wine were guzzled and I started to warm up to the idea. The next morning Brooklyn Homemaker was born.

There’s a little more to the story than that though. Russell and I were married just over four months before we hosted that brunch, and leading up to our wedding I’d spent 17 months planning and dreaming and saving and organizing and crafting and buying and hoarding; all to make sure everything was perfect for our big day. I got really good at making spreadsheets, using them for everything from budget tracking to organizing vendor contacts. Our venue basically provided a lawn, a view, and a power source; but everything else was up to us, from the tent all the way down to the cocktail napkins. An unbelievable amount of time and energy and thought went into planning our day down to the tiniest detail. When we returned from our honeymoon, at first I felt relieved, but it wasn’t long before I realized I missed all that wedding planning. I actually felt a little lost without a clear outlet for all that creative energy. Brooklyn Homemaker really could not have come at a better time for me.

aunt sassy cake | pistachio layer cake with honey buttercream | Brooklyn Homemaker

These days it’s almost hard for me to remember what life was like before I started blogging. I spend so much of my free time trying to make this blog everything I think it should be, and can be, that I sometimes feel like this all just sort of happened to me. It just sprung up, naturally, out of nowhere, and I happened to be the one who was there to keep it moving forward.

aunt sassy cake | pistachio layer cake with honey buttercream | Brooklyn Homemaker

Moving this blog forward has forced me to embrace all sorts of new and unfamiliar things and teach myself skills that I couldn’t even fathom a year ago. When I first got going I’d hardly ever even touched a professional camera, and was taking all of my photos with my iPhone. It didn’t take me long to realize I needed a real DSLR if my photos were ever going to look the way I wanted them to, so I researched and asked around and decided on the Nikon D3200, which I love, btw.

Having never used a real professional camera, it took me forever to get the hang of the damned thing. I’m actually still learning new things about it every day, but I finally feel like I understand most of the knobs and nozzles and twisties and doo-hickies now. I know I still have a lot to learn about the ins and outs of photography, but I’m not afraid to admit that I’m really happy with how far I’ve come so far.

aunt sassy cake | pistachio layer cake with honey buttercream | Brooklyn Homemaker

One of the biggest things I never expected when I started this adventure is the warm sense of community from other bloggers. One way or another; through back and forth comments on each other’s posts, participating in groups like #bundtbakers, or interacting through social media; I suddenly feel like I have this great big brand new group of friends that I just happen to have never met in person. Considering the fact that we live all over the world, and will likely never actually meet, I’m overwhelmed by how close I feel with certain bloggers and how caring and welcoming this community is with each other. Thank you all so much for making me feel so welcome! It really warms my cockles.

aunt sassy cake | pistachio layer cake with honey buttercream | Brooklyn Homemaker

I’m also in complete awe of all of you out there who follow along with me week after week. The idea that you’re somewhere out there reading this, and sometimes even sharing your opinions and stories with me, is truly exhilarating. The first few times I saw a comment from someone other than my mother I had to wonder if she hadn’t opened a new email address just to make me feel warm and fuzzy! I never dreamed that I would see so many heart-warming words of encouragement when I started doing this, but each new comment means more to me than you’ll ever know. Whenever I’m feeling down, or second guessing myself, a new comment pops up and everything is suddenly all better. Whether you’re a regular commenter, someone who’s chimed in once or twice, or a comment-shy regular reader, I want you to know that I couldn’t do this without you. Thank you so so much. Your words and your love really keep me going.

aunt sassy cake | pistachio layer cake with honey buttercream | Brooklyn Homemaker

So, as much as I’m enjoying talking about myself, I guess I should probably talk about this cake…

My opinion of this phenomenal recipe and the cookbook it came from hasn’t changed one iota in the last year. Everything about this cake is heaven, and there was no question in my mind that it would be the perfect way to celebrate my blogging anniversary.

While the layers of this cake are filled with ground pistachios, the addition of whipped egg whites keeps everything impossibly light and fluffy. Rich pistachio flavor is front and center, but a nice buttery backbone adds even more decadent richness. The icing on the cake (literally) is the addition of sweet floral honey to the cooked buttercream. Even with the honey though, this icing isn’t at all too sweet, but I think the best part is it’s silky texture. It’s rich and creamy and luxurious, almost like a thick whipped cream or a velvety meringue buttercream. I will admit that this cake is a bit challenging to make, but once you taste it, you’ll know it’s worth the effort.

This is a celebration cake at it’s finest. A true slice of heaven.

aunt sassy cake | pistachio layer cake with honey buttercream | Brooklyn Homemaker

So, here’s to blogging, my new creative outlet and unhealthy obsession.
Here’s to having juuust one more glass of wine. If it weren’t for that fifth? sixth? (I can’t remember) glass, this might have never happened.
Here’s to trying new things. To personal growth, and to never being satisfied with “good enough”.
Here’s to many more years of blogging, and to the unknown things to come.

Here’s to you, my readers. Thank you for the comments, and the love, and the words of encouragement. You will never know how much it means to me.

And here’s to Brooklyn Homemaker! Happy birthday!

aunt sassy cake | pistachio layer cake with honey buttercream | Brooklyn Homemaker

Aunt Sassy Cake

  • Servings: makes one 8 inch 3 layer cake, serves 12-16ish
  • Print
Adapted, just barely, from Baked Explorations, page 165

Cake:
1 cup shelled pistachios (plus 1/3 cup for decorating)
2 1/2 cups cake flour
3/4 cup all-purpose flour
1 tablespoon baking powder
1 teaspoon baking soda
3/4 teaspoon salt
1 cup (2 sticks) unsalted butter, softened
1 3/4 cups sugar
1 tablespoon pure vanilla extract
1 large egg
3 large egg whites, at room temperature
1 1/2 cups ice-cold water
1/4 tsp cream of tartar

Honey Vanilla Buttercream:
1 1/2 cups sugar
1/3 cup all-purpose flour
1 1/2 cups whole milk
1/3 cup heavy cream
1 1/2 cups (3 sticks) unsalted butter, soft but cool, cut into small pieces
1 teaspoon pure vanilla extract
3 tablespoon honey

Make the cake:
Preheat the oven to 325° F. Butter three 8-inch round cake pans, line the bottoms with parchment rounds, butter the parchment, and lightly dust with flour. Knock out any excess flour.

Pulse the pistachios in a food processor until they are coarsely chopped. Reserve about 2 tablespoons of coarsely chopped pistachios in a large bowl. Process the rest of the pistachios until they are almost powdery. Stir the pistachio powder in with the reserved coarse pistachios; add the flours, baking powder, baking soda and salt; and whisk well to combine.

In the bowl of a stand mixer fitted with the paddle attachment, beat the butter on medium speed until light and creamy, about 3 or 4 minutes. Add the sugar and vanilla and beat until fluffy, about 3 minutes. Scrape down the sides of the bowl, add the whole egg, and beat until just combined. Turn the mixture to low.

In a measuring cup, measure out 1 1/2 cups ice water. Add the flour mixture to the mixer in three parts, alternating with the ice water, beginning and ending with the flour mixture. For each addition, turn the mixer to low to add ingredients, then up to medium speed for a few seconds until incorporated. Scrape down the bowl, then mix on low-speed for a few more seconds.

In a medium bowl, whisk the egg whites and cream of tartar until soft peaks form (I promise you can handle doing this by hand. Don’t be intimidated, it should only take 5 minutes max, probably less). Do not over beat. Gently fold the egg whites into the batter.

Divide the batter among the prepared pans and smooth the tops. Bake for 40-45 minutes, rotating the pans halfway through the baking time, until a toothpick or cake tester inserted into the center of the cakes comes out clean. Transfer cakes to a wire rack and let cool for at 20 to 30 minutes. Line your cooling rack with parchment and turn the cakes out onto the rack. Let cool completely. Remove the parchment rounds.

Make the honey vanilla buttercream:
In a medium sized heavy-bottomed saucepan, whisk the sugar and flour together. Add milk and cream and cook over medium heat whisking regularly, until the mixture comes to a boil and thickens, about 10 to 15 minutes.

Transfer the mixture to the bowl of a standing mixer with paddle attachment. Beat on high until cool (this should take about 10 or 15 minutes of mixing). You may want to cover the mixer with a towel to keep the mixture from splashing your kitchen. Add the softened butter and mix until thoroughly incorporated. Increase the speed to medium-high and beat until frosting is light and fluffy, 1 to 2 minutes.

Add the vanilla and honey and mix until combined. If the icing is too soft, you can put the bowl in the refrigerator to chill slightly, then beat again until it is proper consistency. If the icing is too firm, you can set the bowl over a pot of very gently simmering water and beat with a wooden spoon until it is the proper consistency.

Assemble the cake:
Place one cake layer on a serving platter. If necessary, trim the top with a cake leveler or sharp serrated knife to create a flat surface. Evenly spread just over a cup of icing on top. Add the next layer, trim and frost it with the same amount of icing, then add the third layer. Spread a very thin layer of frosting over the sides and top of the cake and put it in the refrigerator for about 30 minutes to firm up. (This is known as the crumb coating and will help keep loose cake crumbs from showing in the final layer of icing.) Spread the sides and top of the cake with the remaining icing. Garnish the cake with crushed pistachios and refrigerate it for 15 minutes to it firm up before serving. If you want to refrigerate it longer before serving, take it out to come up to room temperature at least an hour or two before serving.

This cake will keep well in a cake saver at room temperature for up to 3 days, if the weather is not too hot or humid. Otherwise, put the cake saver in the refrigerator for up to 3 days.

Aunt Sassy Cake

Well hello there! Welcome to Brooklyn Homemaker!
I’m Tux. I live in Bushwick, Brooklyn with my husband Russell and our two miniature schnauzers, Doris and Betty. Nothing makes me happier than cooking, baking, and making our home a beautiful comfortable place.

Over the weekend we hosted a brunch for our friends who were recently engaged to discuss wedding planning, and see if they wanted to take any of our wedding supplies off our hands and free ups some space in our guest room. After brunch and a few cocktails I sliced into a cake I’d baked and our friends DEMANDED that I start blogging. They would not take no for an answer and all my excuses and what if’s were ignored and met with more insistence. This is not the first time I’ve been told I should blog, and It’s not the first time I’ve considered it. I’m really good at talking myself out of things in the name of being “realistic”, but my friends helped me break through that this weekend. I don’t know if it was their enthusiasm, the unearthly delicious cake, or the multiple cocktails consumed over the course of a few hours, but here I am.
As much as I love cooking, especially baking, turning a bag of groceries into a meal is not my only interest. Since blogging tends to be an exercise in self-indulgence, I’ve decided that I’m not going to limit the subject of Brooklyn Homemaker to any one subject. Along with cooking, I also love interior design, gardening, furniture restoration, event planning and party hosting, and a number of other things that manifest themselves in my life and home on a daily basis. I’d love nothing more than to share all of those interests with you here, so please, keep coming back and seeing what I’m up to!

So here I am, writing my first official post on Brooklyn Homemaker.
After months of drooling over photos of Baked’s Aunt Sassy Cake, I decided to go for it. It was clear from the recipe that this cake was to be saved for a special occasion, and from the day this cookbook came into my home I would look a this recipe and think, one day. This past weekend, one day finally came and I have to say that this 3 layer pistachio cake with honey buttercream was worth the wait.

Aunt Sassy Cake | Pistachio cake with honey buttercream | Brooklyn Homemaker

This cake is filled with ground pistachios but somehow manages to be heavenly light and fluffy thanks to the addition of whipped egg whites that are folded in at the end. Be careful not to over mix the batter after they’re combined or you can squeeze out some of that airy lightness. The fluffiness of this cake really takes it to an almost ethereal place, so you want to make sure keep it as light as possible.

Aunt Sassy Cake | Pistachio cake with honey buttercream | Brooklyn Homemaker

Full disclosure: I had a little bit of trouble getting my cakes out of the pans. I have pre-cut parchment rounds that fit 9 inch pans, but had to cut my own for the 8 inchers and they came out a little too small and they didn’t reach the edges of the pans. Since this cake is so fluffy and moist it wants to stick to the pans, so I’d suggest taking the extra time to make sure your parchment fits properly so you can get it out. They came out mostly fine but one of the layers got a little bit stuck and I had to do some quick cake surgery to get it back together. Once the crumb coat went on the cake everything was hidden.  I firmly believe that beyond keeping a cake from drying out, icing helps hide a multitude of sins. That was certainly true with this cake, and when the cake was sliced there was no telling that anything had happened.
I brought my icing opinions up during brunch and may have inadvertently made the bride-to-be think twice about her dream for a naked wedding cake. I think naked cakes can be gorgeous, but if the cake layers are not completely perfect the cake will look messy, and if the cake isn’t super moist it can dry out since it’s not encased in layers of fat and sugar.

Aunt Sassy Cake | Pistachio cake with honey buttercream | Brooklyn Homemaker

Speaking of layers of fat and sugar, the honey buttercream icing on this cake is unbelievable. This is not like any icing I’ve ever made before, but I will definitely be making it again. This is a cooked icing with an end result similar to a meringue buttercream, stable and thick, but at the same time creamy and smooth. Instead of cooked egg whites though, this frosting uses flour for thickening. It’s a similar concept to the old school Ermine icing traditional for red velvet cake, but instead of just boiling the flour and milk, the sugar also gets boiled in this recipe. This means that the sugar completely dissolves and begins to cook so that gluten isn’t the only thing thickening this icing. Once the boiled milk mixture is whipped cool, unsalted butter is whipped in until silky smooth. Last, a bit of honey goes in with vanilla to add some depth and an almost floral quality.

Aunt Sassy Cake | Pistachio cake with honey buttercream | Brooklyn Homemaker

Obviously I took these pictures with my iPhone. I know they’re not great, but they’re the only evidence I have of the amazing Aunt Sassy Cake. Now that I’m going to start blogging I’m looking into buying a real camera, but I need to weigh my options and see what I can afford and what would work best for my needs. I live in a railroad apartment with no window and no natural light in my kitchen, so that can be tough. I also have a benign tremor in my hands that means I have a very slight but rapid shake that makes getting a camera to focus challenging. Does anyone out there have any suggestions?

Aunt Sassy Cake

  • Servings: makes one 8 inch 3 layer cake, serves 12-16ish
  • Print
Adapted, just barely, from Baked Explorations, page 165

Cake:
1 cup shelled pistachios (plus 1/3 cup for decorating)
2 1/2 cups cake flour
3/4 cup all-purpose flour
1 tablespoon baking powder
1 teaspoon baking soda
3/4 teaspoon salt
1 cup (2 sticks) unsalted butter, softened
1 3/4 cups sugar
1 tablespoon pure vanilla extract
1 large egg
3 large egg whites, at room temperature
1 1/2 cups ice-cold water
1/4 tsp cream of tartar

Honey Vanilla Buttercream:
1 1/2 cups sugar
1/3 cup all-purpose flour
1 1/2 cups whole milk
1/3 cup heavy cream
1 1/2 cups (3 sticks) unsalted butter, soft but cool, cut into small pieces
1 teaspoon pure vanilla extract
3 tablespoon honey

Make the cake:
Preheat the oven to 325° F. Butter three 8-inch round cake pans, line the bottoms with parchment rounds, butter the parchment, and lightly dust with flour. Knock out any excess flour.

Pulse the pistachios in a food processor until they are coarsely chopped. Reserve about 2 tablespoons of coarsely chopped pistachios in a large bowl. Process the rest of the pistachios until they are almost powdery. Stir the pistachio powder in with the reserved coarse pistachios; add the flours, baking powder, baking soda and salt; and whisk well to combine.

In the bowl of a stand mixer fitted with the paddle attachment, beat the butter on medium speed until light and creamy, about 3 or 4 minutes. Add the sugar and vanilla and beat until fluffy, about 3 minutes. Scrape down the sides of the bowl, add the whole egg, and beat until just combined. Turn the mixture to low.

In a measuring cup, measure out 1 1/2 cups ice water. Add the flour mixture to the mixer in three parts, alternating with the ice water, beginning and ending with the flour mixture. For each addition, turn the mixer to low to add ingredients, then up to medium speed for a few seconds until incorporated. Scrape down the bowl, then mix on low-speed for a few more seconds.

In a medium bowl, whisk the egg whites and cream of tartar until soft peaks form (I promise you can handle doing this by hand. Don’t be intimidated, it should only take 5 minutes max, probably less). Do not over beat. Gently fold the egg whites into the batter.

Divide the batter among the prepared pans and smooth the tops. Bake for 40-45 minutes, rotating the pans halfway through the baking time, until a toothpick or cake tester inserted into the center of the cakes comes out clean. Transfer cakes to a wire rack and let cool for at 20 to 30 minutes. Line your cooling rack with parchment and turn the cakes out onto the rack. Let cool completely. Remove the parchment rounds.

Make the honey vanilla buttercream:
In a medium sized heavy-bottomed saucepan, whisk the sugar and flour together. Add milk and cream and cook over medium heat whisking regularly, until the mixture comes to a boil and thickens, about 10 to 15 minutes.

Transfer the mixture to the bowl of a standing mixer with paddle attachment. Beat on high until cool (this should take about 10 or 15 minutes of mixing). You may want to cover the mixer with a towel to keep the mixture from splashing your kitchen. Add the softened butter and mix until thoroughly incorporated. Increase the speed to medium-high and beat until frosting is light and fluffy, 1 to 2 minutes.

Add the vanilla and honey and mix until combined. If the icing is too soft, you can put the bowl in the refrigerator to chill slightly, then beat again until it is proper consistency. If the icing is too firm, you can set the bowl over a pot of very gently simmering water and beat with a wooden spoon until it is the proper consistency.

Assemble the cake:
Place one cake layer on a serving platter. If necessary, trim the top with a cake leveler or sharp serrated knife to create a flat surface. Evenly spread just over a cup of icing on top. Add the next layer, trim and frost it with the same amount of icing, then add the third layer. Spread a very thin layer of frosting over the sides and top of the cake and put it in the refrigerator for about 30 minutes to firm up. (This is known as the crumb coating and will help keep loose cake crumbs from showing in the final layer of icing.) Spread the sides and top of the cake with the remaining icing. Garnish the cake with crushed pistachios and refrigerate it for 15 minutes to it firm up before serving. If you want to refrigerate it longer before serving, take it out to come up to room temperature at least an hour or two before serving.

This cake will keep well in a cake saver at room temperature for up to 3 days, if the weather is not too hot or humid. Otherwise, put the cake saver in the refrigerator for up to 3 days.