fall

shaved brussels sprout salad

Earlier this week I shared my first official Thanksgiving recipe for the year. Now that I think about it though, I guess I started sharing things a little out of order.

shaved brussels sprouts salad | Brooklyn Homemaker

Sometime next week I’ll let you guys in on my secret for perfectly cooked, perfectly moist turkey, and I might even give you a sneak peek into the rest of the meal. Today, though, I’m sharing my first course.

shaved brussels sprouts salad | Brooklyn Homemaker

Have you ever noticed how certain vegetables get a bad rap?

Brussels sprouts have a reputation for making children stick their tongues out and gag, but I know more people who love them than don’t. I never ate brussels sprouts growing up, I don’t even think I’d tasted one until college. A few years ago I was gabbing with my mom on the phone when I casually mentioned that i was roasting brussels sprouts for dinner. She was like, “Really? Brussels sprouts? You like Brussels sprouts?”

This got me thinking. Maybe it was the parents that didn’t like brussels sprouts? Maybe I grew up thinking they were gross even though I’d never had them, because my parents thought they were gross? If that was the case, I would guess that that generation didn’t like them because of the way they were prepared by the previous generation, our grandparents.
Growing up I also thought I hated asparagus. My grandfather has a gorgeous vegetable garden with a huge asparagus patch, and every spring he’d get really excited when the pale little stalks started coming in. He’d be out in the garden bent over staring at the ground with a little paring knife just waiting for the moment they were ready for harvest.
But then my grandmother would wash the stalks, plunk them into a pot of boiling water, and boil the ever loving crap out of them until they were reduced to limp, flabby, grey-green strands having little in common with what went into the pot initially. Then they’d be served, covered in butter and smelling like farts, where I’d politely decline or push them around my plate until I was excused. If I was forced to guess why my parents might not have liked brussels sprouts, it probably was because they’d only ever had them prepared the same way my grandmother prepared asparagus. Boiled until mushy and farty and entirely unappetizing.

shaved brussels sprouts salad | Brooklyn Homemaker

Oddly enough, I was gabbing with mom again sometime last week and she mentioned that my 16 year old sister had ordered brussels sprouts out at a restaurant. My how the tables had turned! It was my turn to ask, “Really? Brussels sprouts? She likes brussels sprouts?”
This time around though, mom’s response was a little different. “Yeah, She does! We both do. We love them!”

My my how times have changed. In world where Kale is king, Brussels sprouts might be queen. Or at least, maybe the little prince?

I think that the trend of properly cooking vegetables, leaving them bright and crisp and flavorful (and more nutritious), has finally reached the restaurants in my little slice of Upstate New York and taught my mom to finally see brussels sprouts in a different light.

shaved brussels sprouts salad | Brooklyn Homemaker

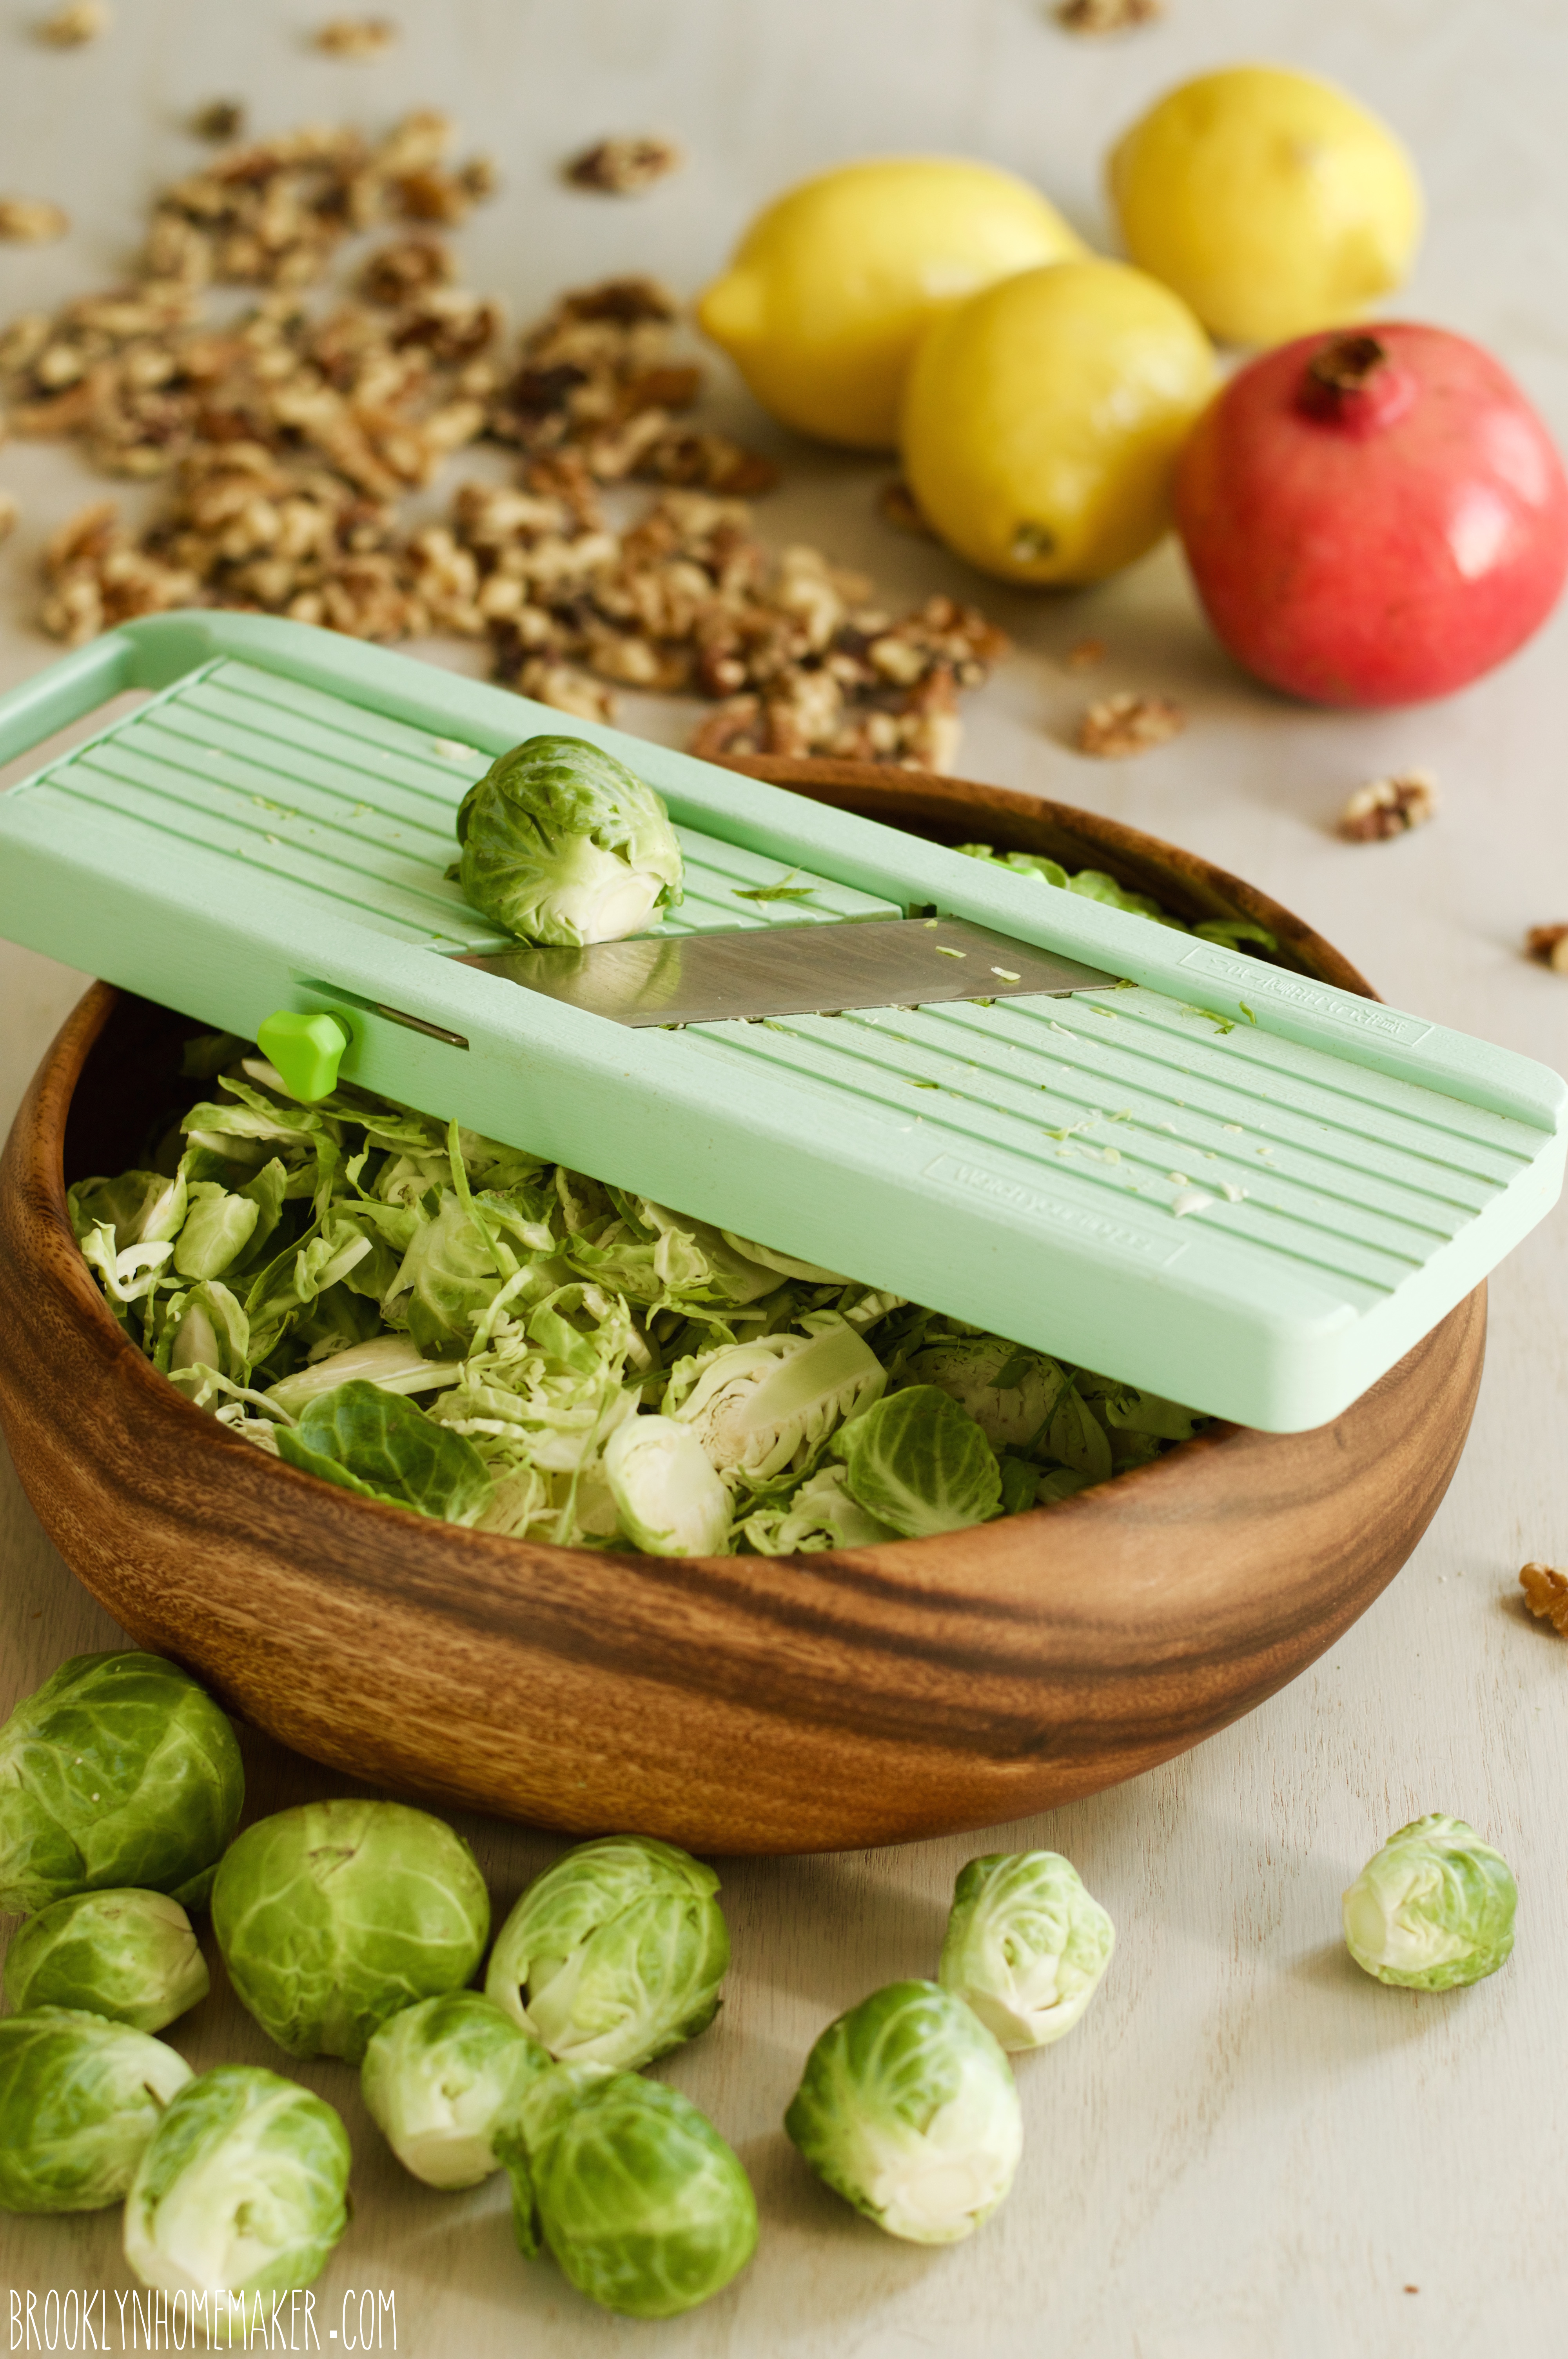
For this recipe I wanted to get as far away from mushy, farty, overcooked sprouts as possible, so I shaved them super thin with a mandolin and tossed them completely raw with a few simple ingredients.

The first time I tested this salad out on Russell, the sprouts I used were sort of sad and wilty and well past their prime, and the resulting salad was really unpleasant. No matter how thinly I shaved them, they were rubbery and flabby and no fun at all to eat raw. Russell said the salad was awful and that I should do something else, something with wilted brussels sprouts or maybe arugula or something.
I almost took his advice and ditched the recipe altogether, but I knew I really had something with this idea, and that better fresher sprouts would result in a far superior salad. So, I decided to ignore Russell’s advice and try the recipe again with fresher, crisper produce. Even Russell had to admit it was a huge success, entirely different from the first attempt.

So, take it from me, when eating them raw you really need to make sure your brussels sprouts are as fresh as can be.

shaved brussels sprouts salad | Brooklyn Homemaker

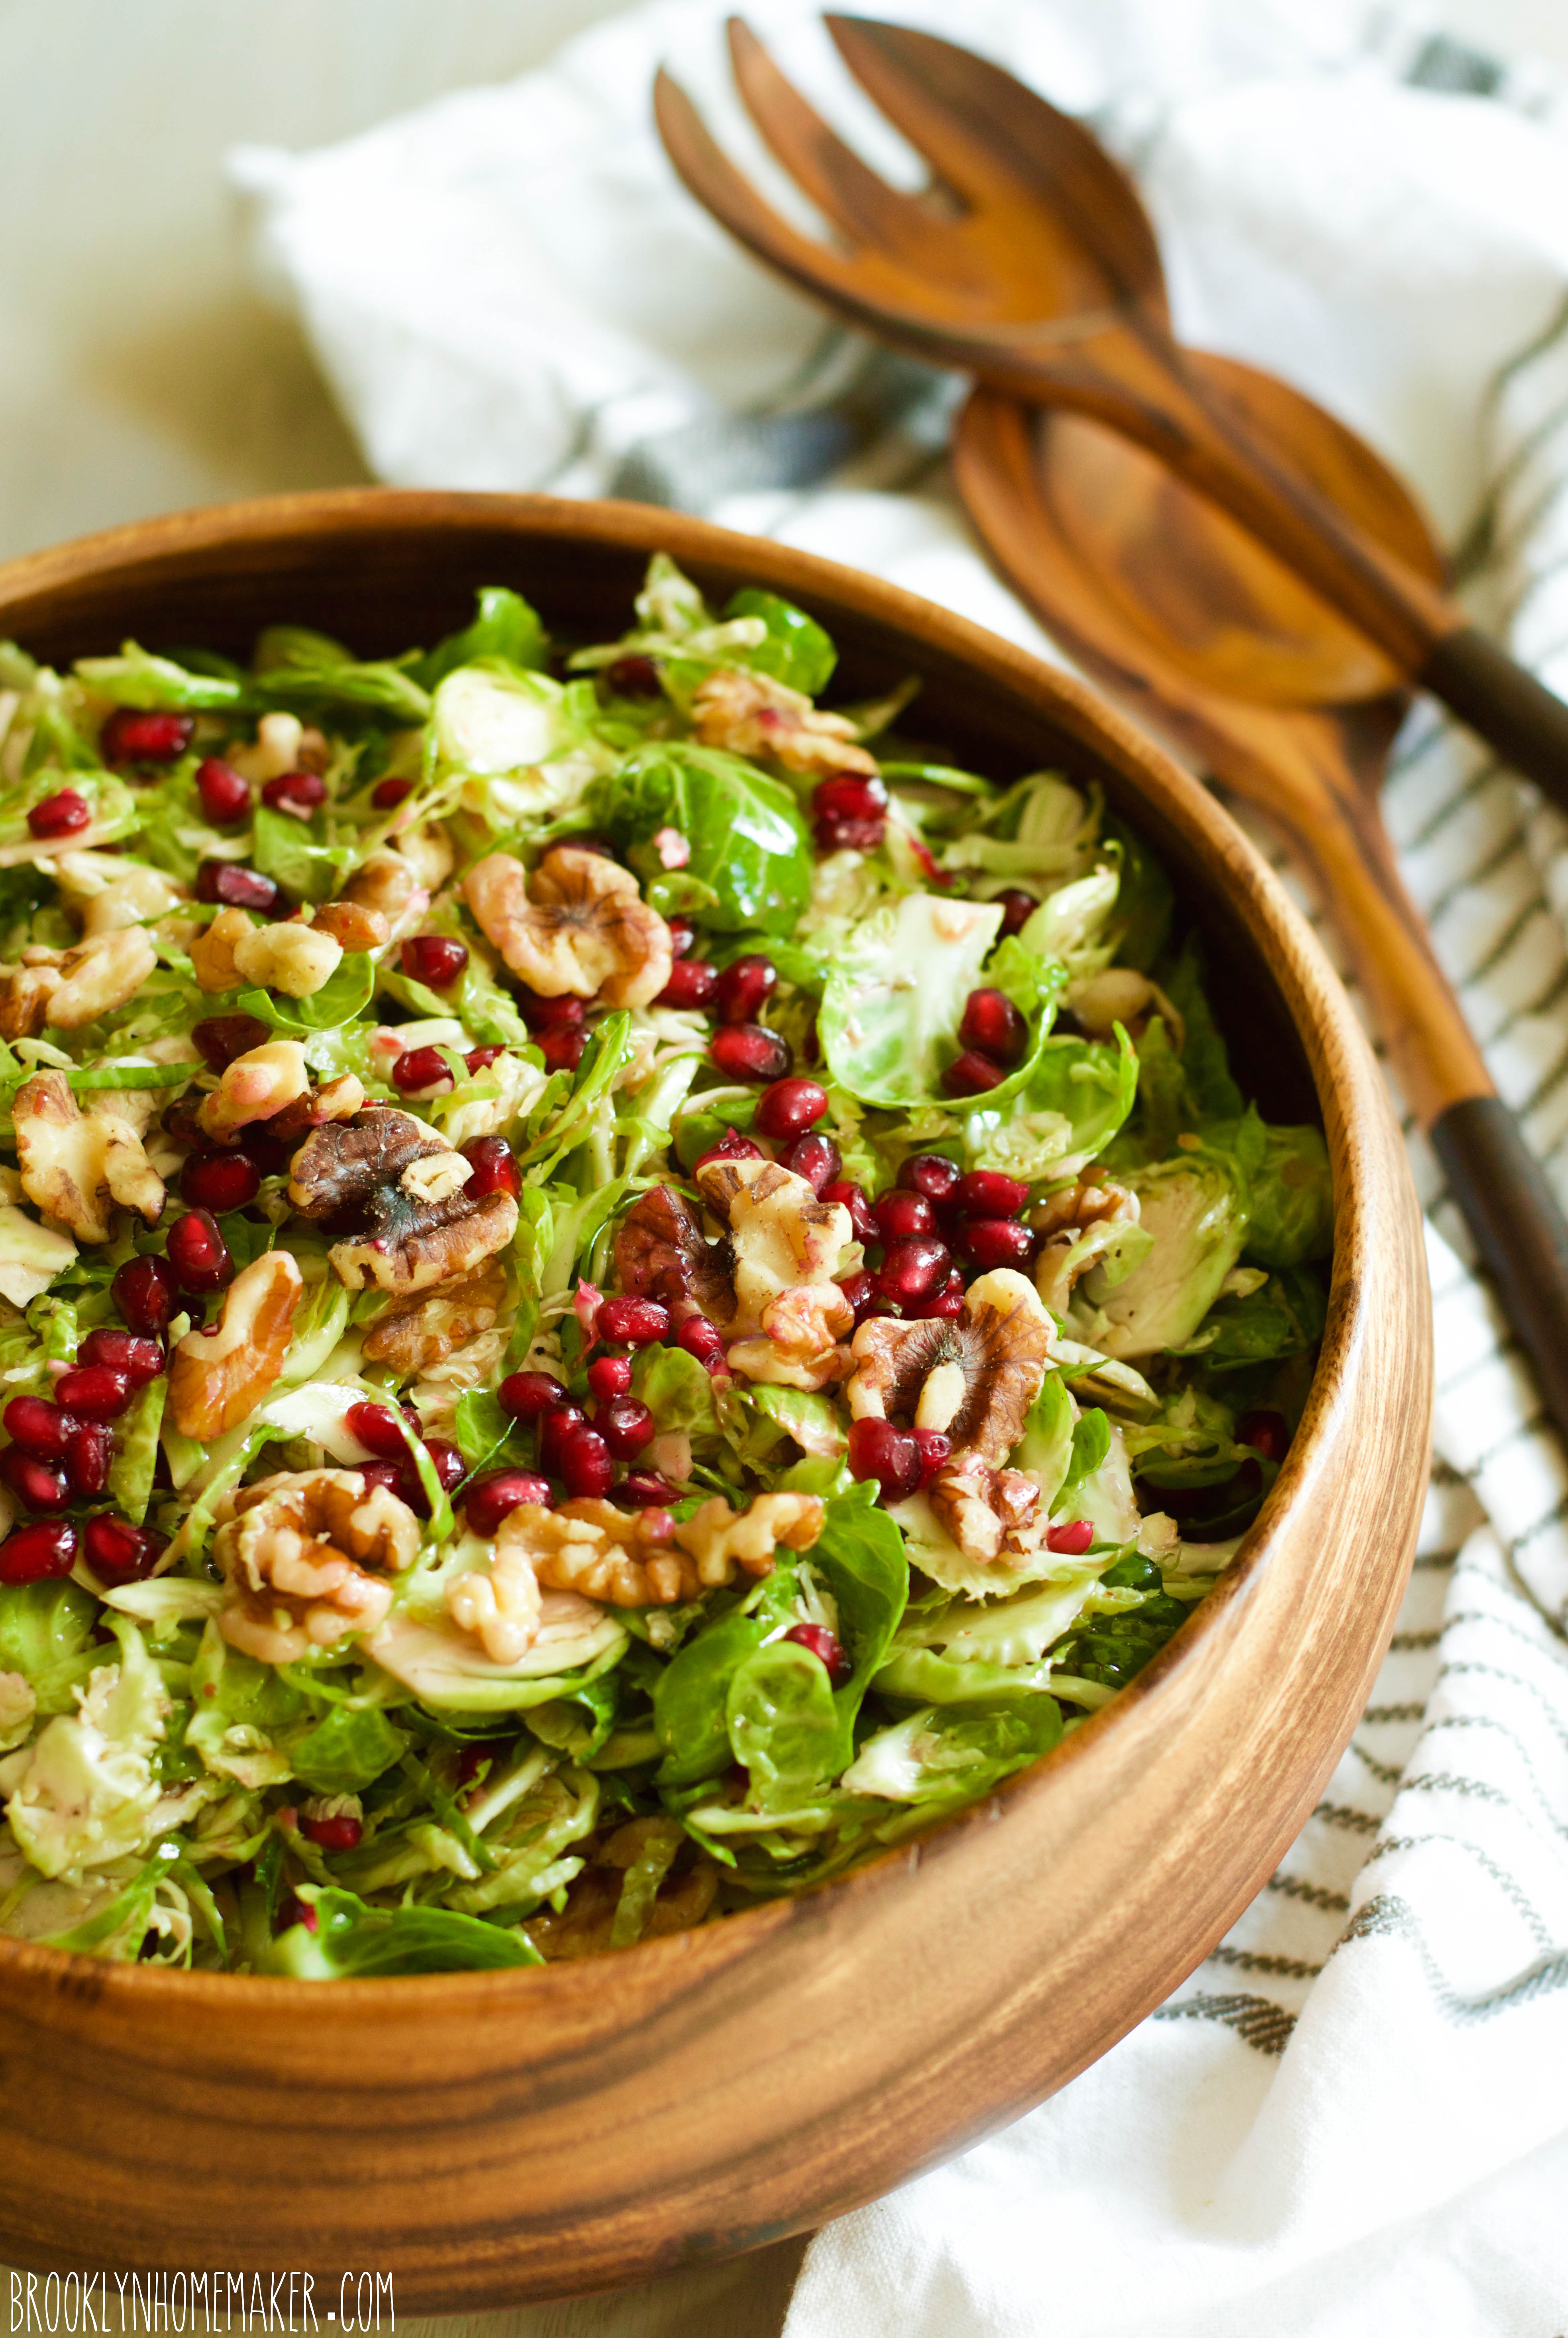
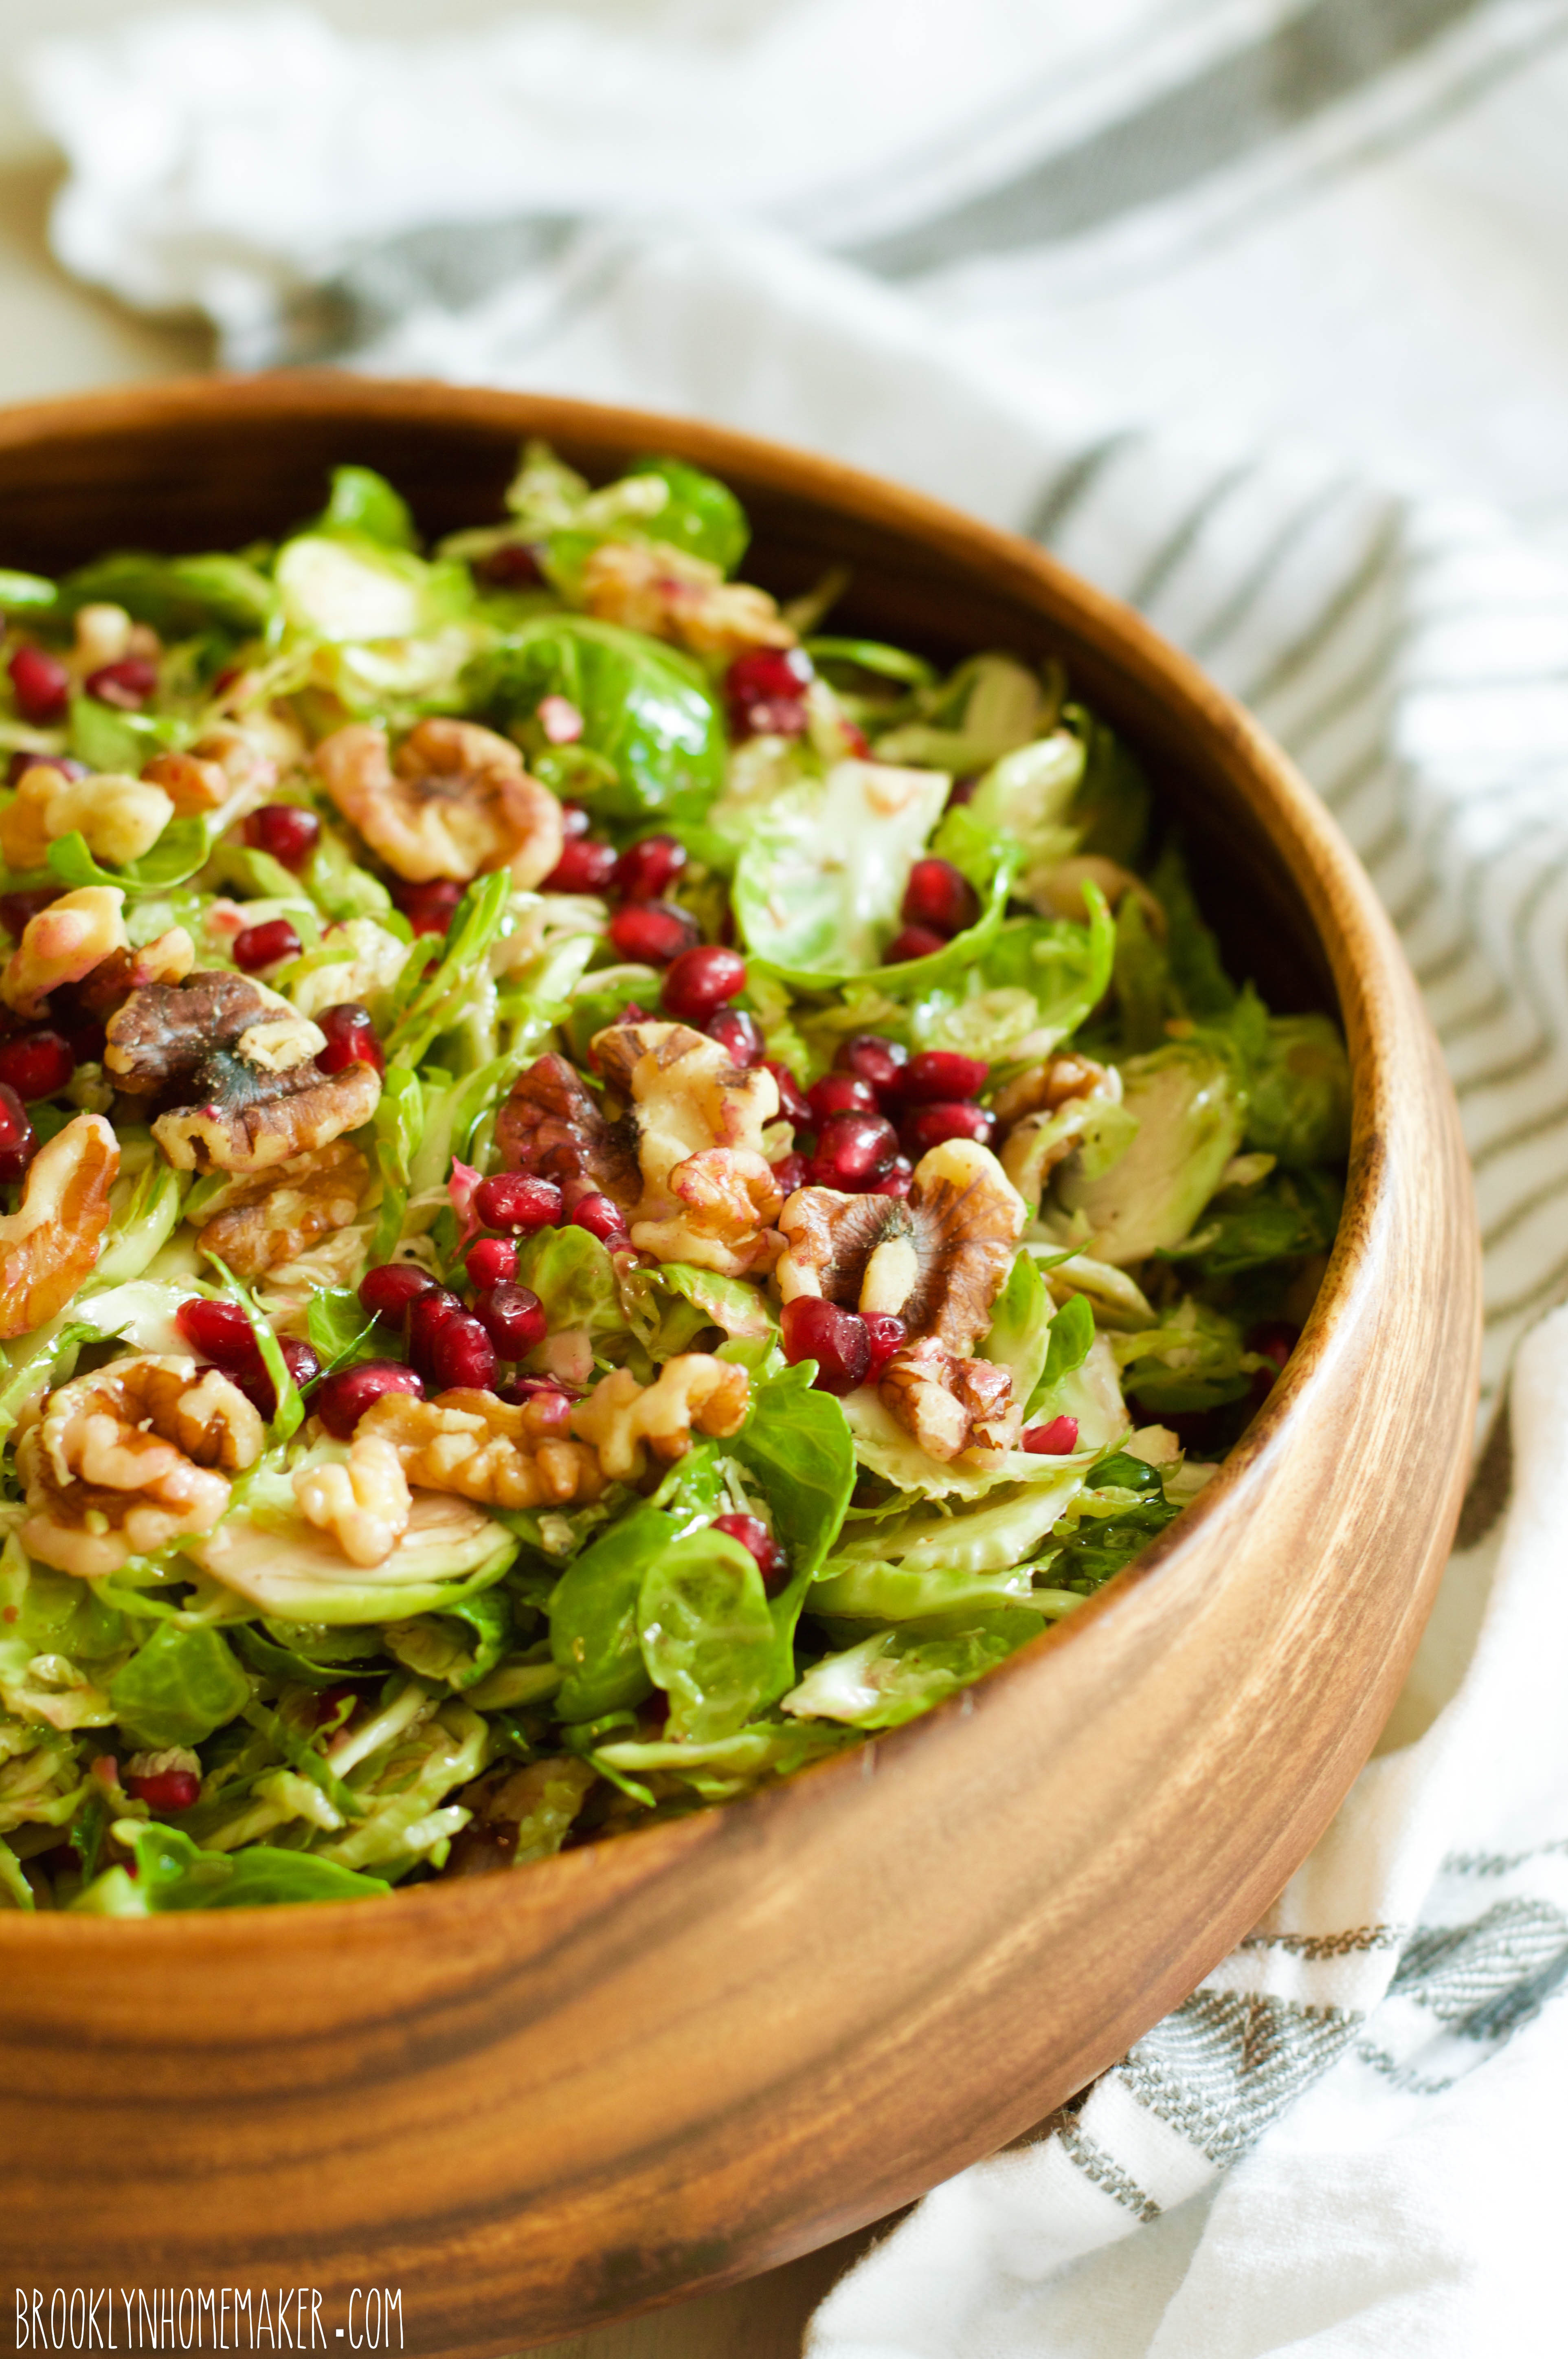
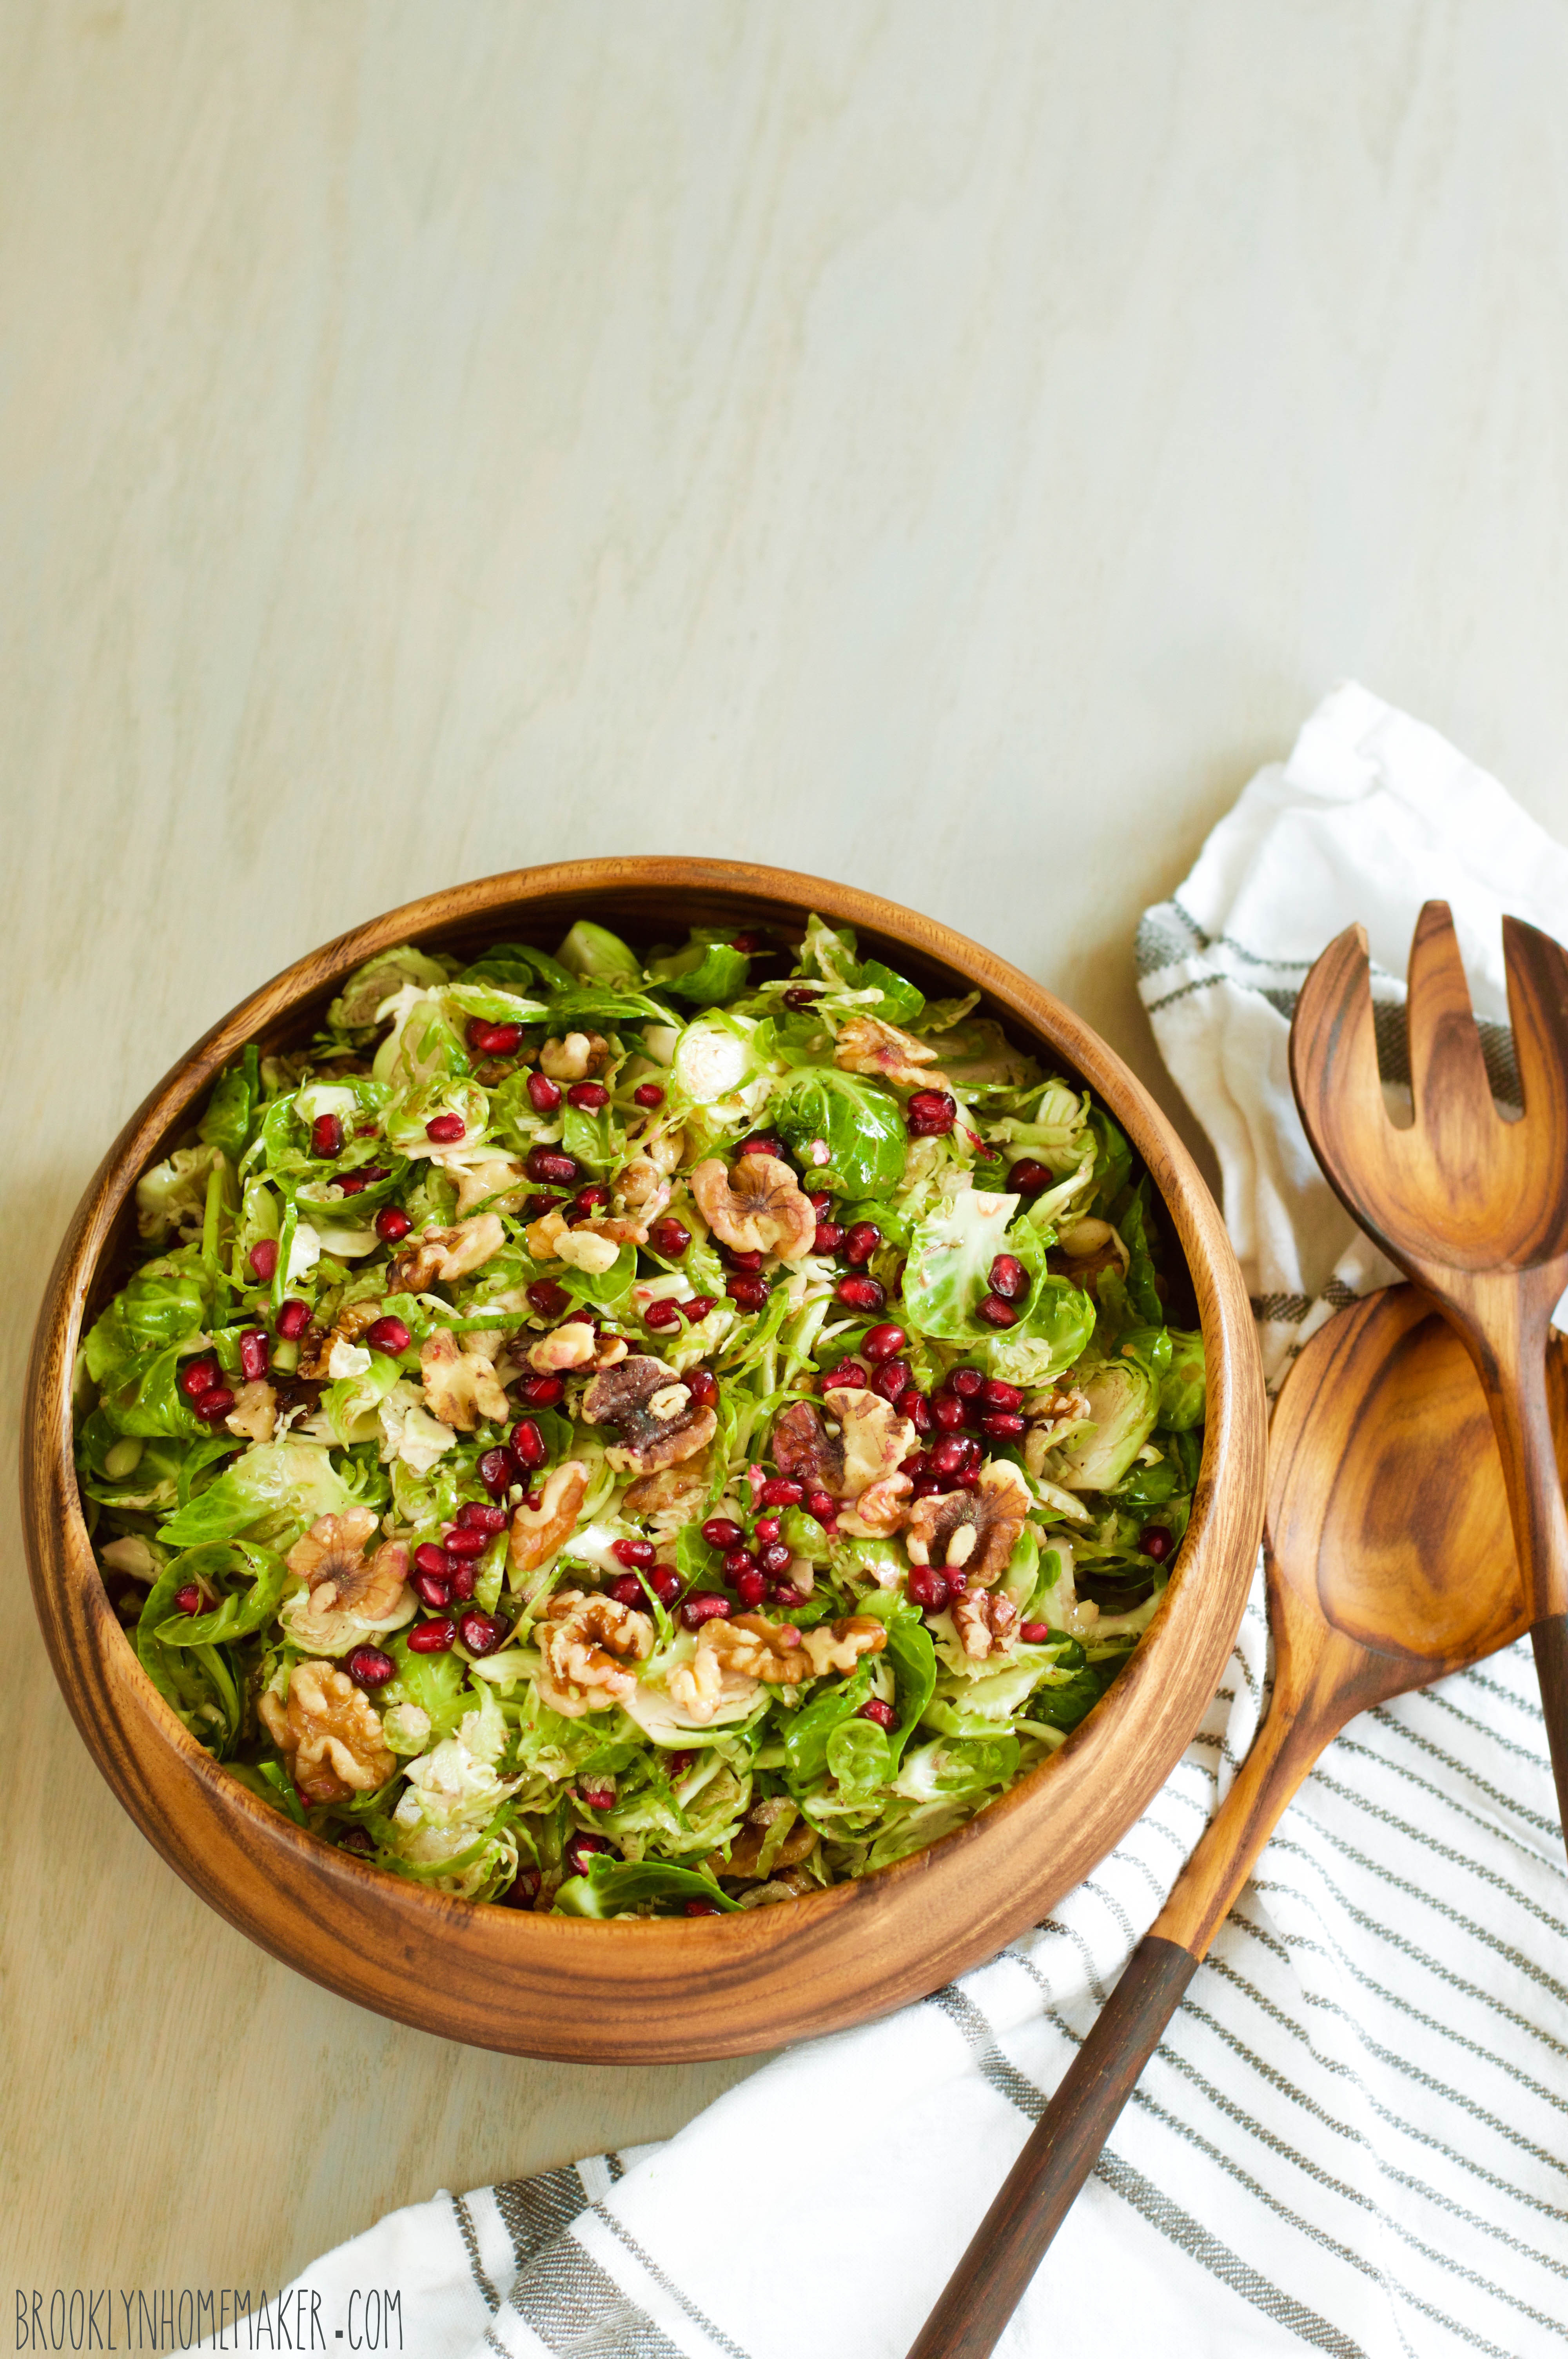
This salad is bright, light, delicate, and wonderfully refreshing. While it would make a great side salad for any meal, it’s the perfect thing to serve along with a rich, hearty, heavy meal like Thanksgiving dinner. It’s exactly what you want along with all that decadent food. The crisp bitter walnuts, crunchy sweet bursting pomegranate seeds, freshly shaved raw brussels sprouts, and simple bright lemony dressing are a welcome contrast against all the rich roasty indulgences that make up the rest of the meal. A lot of similar salads call for goat cheese or parmesan to compliment the acidic and bitter flavors, but I intentionally kept this salad as light and simple as possible, and it couldn’t be more perfect.

shaved brussels sprouts salad | Brooklyn Homemaker

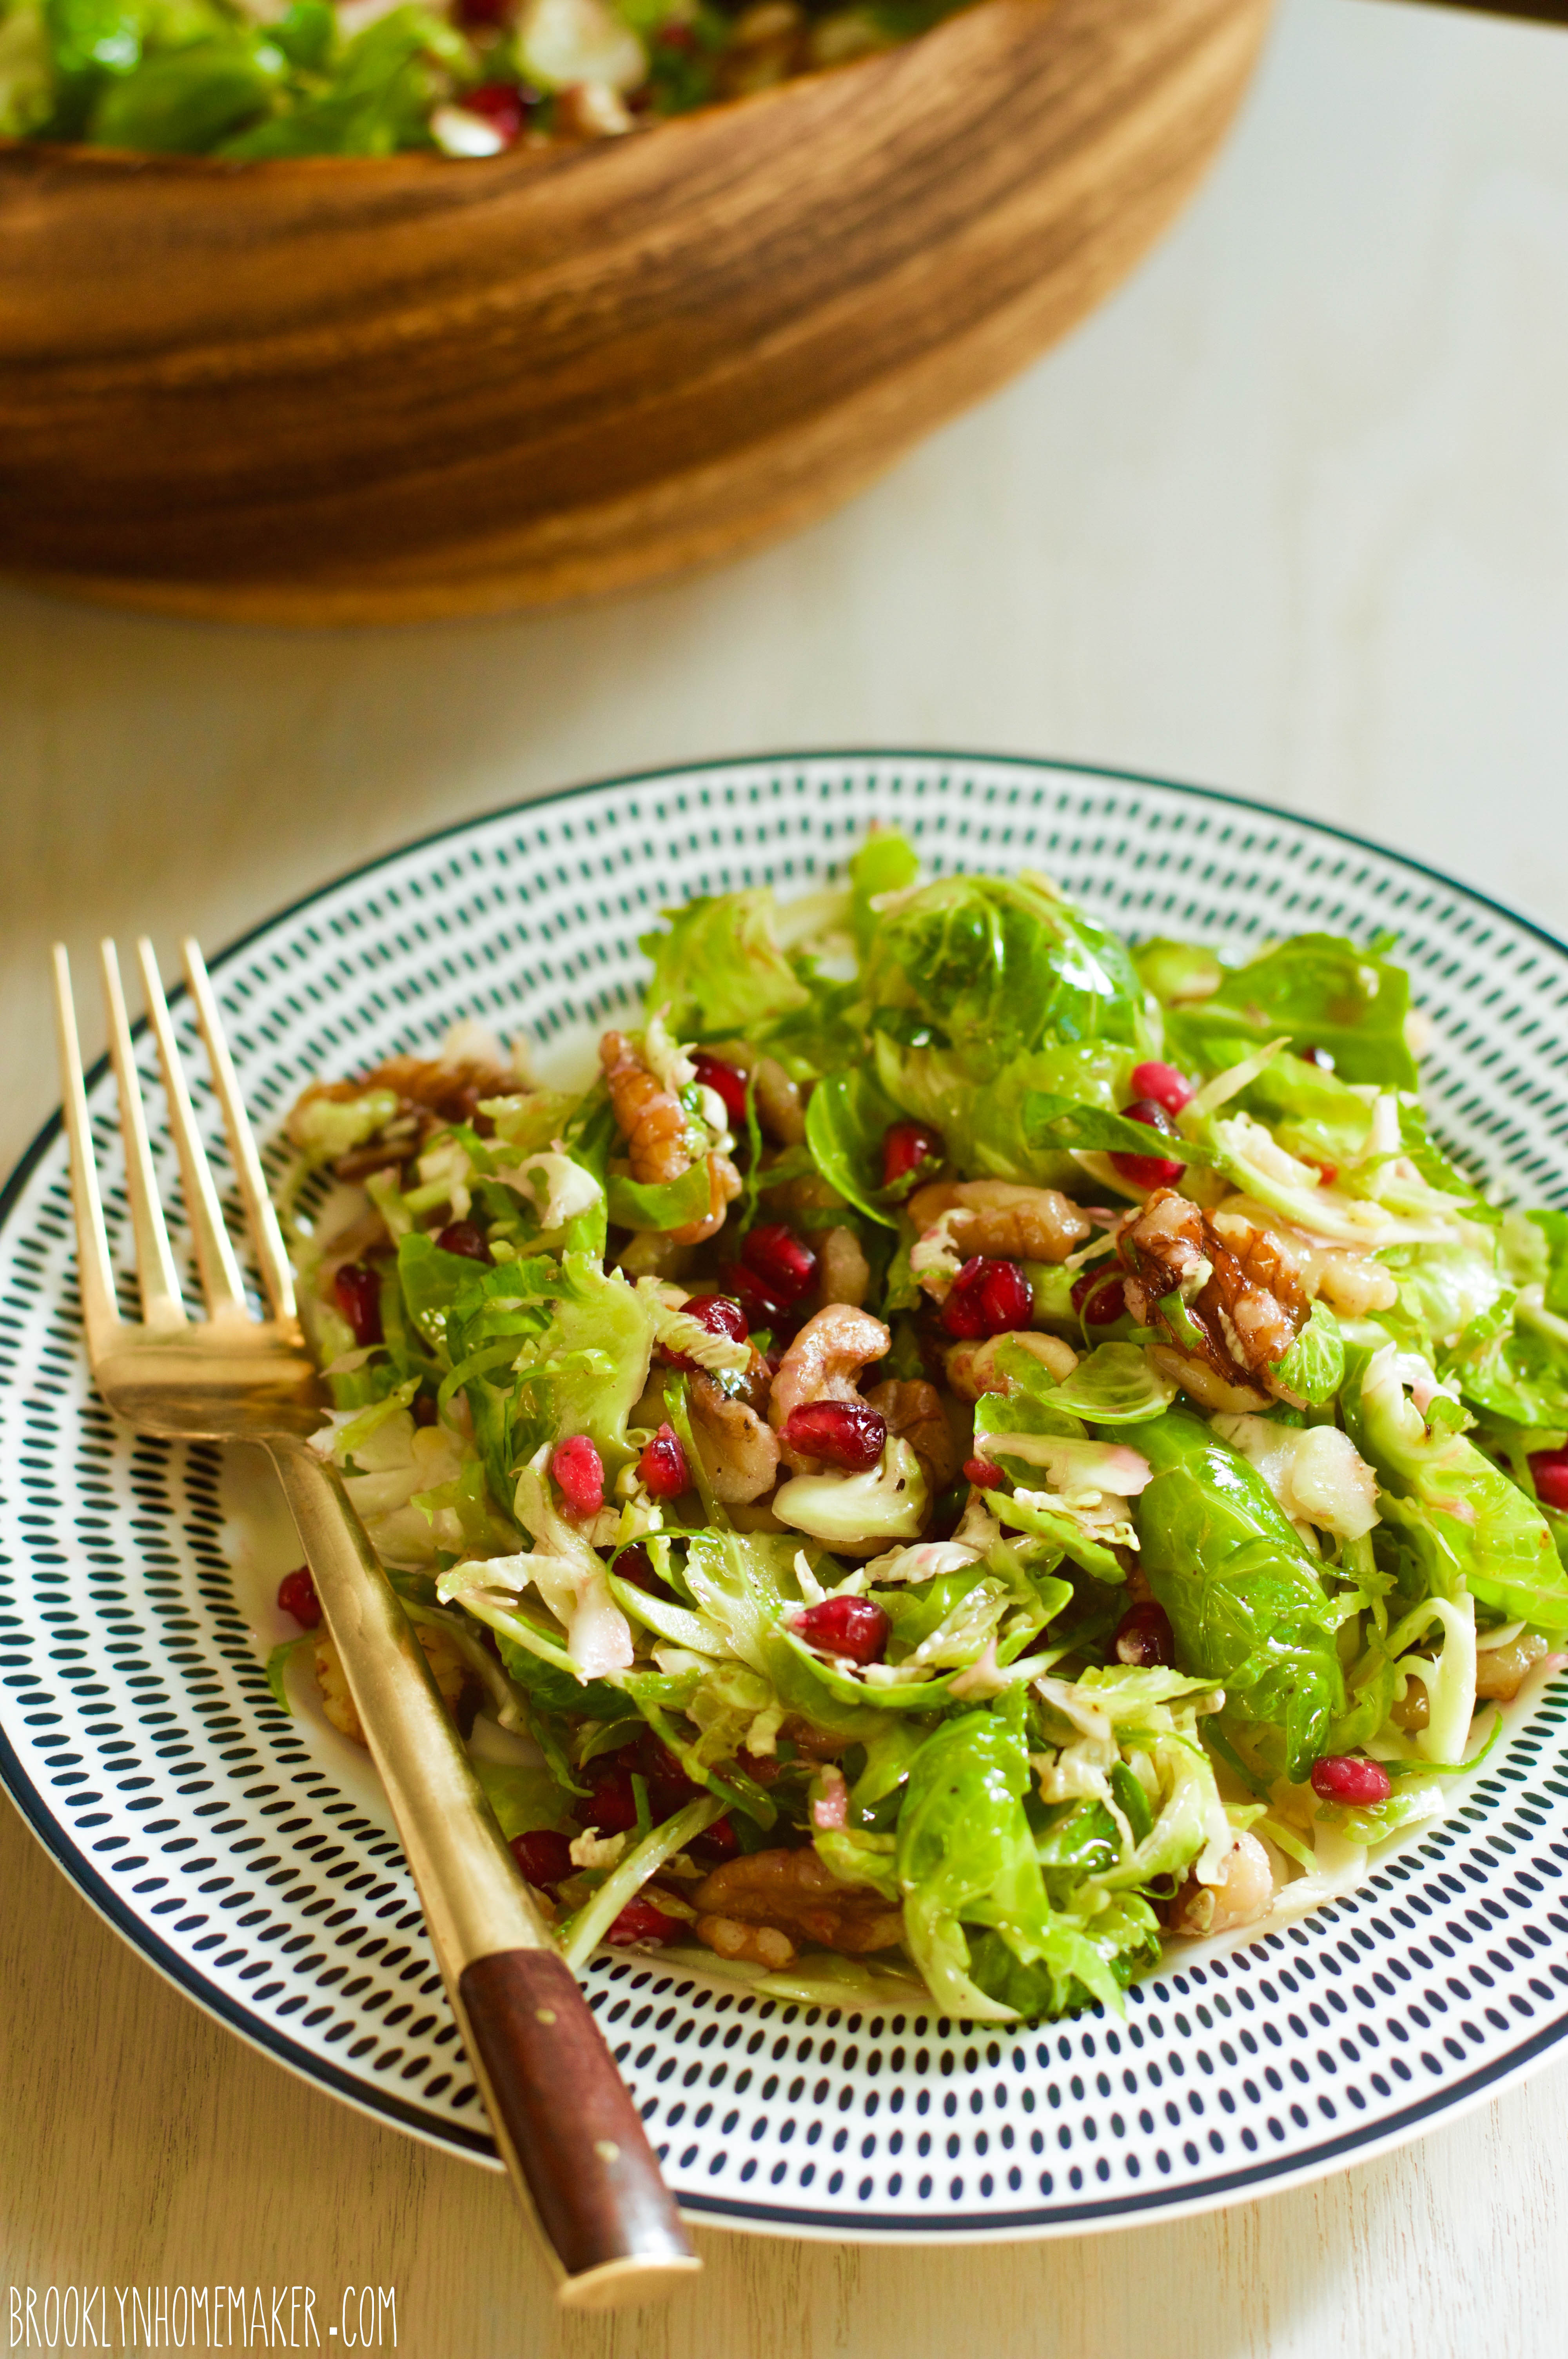
Shaved Brussels Sprout Salad

Dressing: 
6 tablespoons olive oil
3 tablespoons lemon juice
2 tablespoons honey
generous salt and pepper to taste

Salad:
1 1/2 lbs brussels sprouts
1 1/2 cups walnuts
1 1/2 to 2 cups pomegranate seeds

To make the dressing combine olive oil, lemon juice, honey, salt and pepper in a bowl or lidded jar and whisk or shake until well combined. Can be made a day ahead an stored in an airtight jar.

Slice off the tough bottoms of the brussels sprouts and discard. Using a mandolin slicer (use a guard and watch those fingers) or the slicing blade of a food processor (or with a sharp knife and some patience) slice the brussels sprouts as thinly as possible. Soak in very cold water for 5 to 10 minutes before drying with a salad spinner or some kitchen towels. If necessary, this can be done a day ahead and covered with a damp paper towel and plastic wrap or an air tight lid.

Preheat the oven to 350 degrees. Arrange the walnuts in a single layer on a baking sheet and toast them for about 8 minutes or until they smell like toasty nutty heaven. Be careful they don’t burn. Cool.

Combine brussels sprouts, walnuts, pomegranate seeds, and dressing and toss to combine. Taste for seasoning and adjust if necessary. Serve immediately.

Note: Brussels sprouts should be as fresh as you can find them or they can be rubbery and a bit unpleasant to eat raw. The thinner you can shave them, the easier they’ll be to eat.

braised chicken with kale and white beans

It’s the most wonderful time…. of the year!

braised chicken with kale and white beans | Brooklyn Homemaker

No not Christmas time silly! I work in retail.

It’s Fall!

Less than a week ago I was wearing shorts to work, and then overnight temperatures dipped and suddenly Autumn weather was upon us. This is and always has been my favorite season, and while a lot of people are lamenting the end of summer, I’m over the moon that Fall is finally here.

Maybe it’s because I grew up upstate in a region dripping in corn fields, pumpkin patches, and apple orchards. Maybe it’s the mild temperatures and the fact that I can finally turn off the damned air conditioner and open the windows. Maybe it’s the warm colors and fall foliage, or maybe it’s the smell of the air. Maybe it’s the outdoor activities like hay rides, apple picking, and last chance hiking. Maybe it’s those quintessential Fall foods like apple cider doughnuts, pumpkin pie, and roasted turkey. Maybe it’s the fact that I can finally put something other than shorts on without breaking into a sweat. Or maybe it’s the fact that I can turn the oven back on and start making rich, hearty, slow cooked meals…

Even one of my coworkers, who’s admittedly more of a Summer person, just confessed that she’s really enjoying spending time in the kitchen without the boob sweat.

braised chicken with kale and white beans | Brooklyn Homemaker

The minute the weather dips below 73 degrees I’m ready for soups and stews and braises. Over the weekend it was cold and rainy here in Brooklyn and I was craving soup something fierce. On my lunch break I sat pondering the possibilities and planning my grocery list. My first thought was a white bean and kale soup with sausage and tomatoes, but the colder and rainier it got, the more my cravings started to lean toward some type of braised chicken. Rather than choosing one over the other, I decided to combine the two in to one perfect Fall meal.

braised chicken with kale and white beans | Brooklyn Homemaker

I bought a whole air-chilled chicken and cut it into pieces myself. I think for this recipe it works best to cut your chicken into 10 pieces, including wings, drumsticks, thighs, and quartered breasts.

You can definitely substitute all breasts or all thighs, or a mix of both, but I enjoy the mix of textures and flavors you get from using a whole chicken. I also like the fact that it’s generally cheaper to buy a whole chicken and butcher it yourself than it is to buy an equal amount of pre-butchered pieces and parts. You’ll need to cut store-bought breasts pieces in half anyway, so why not just go for the whole shebang?

I promise that it’s not as scary as you think. You just need a sharp knife, some self-confidence, and a little bit of patience with yourself. If you have no idea what you’re doing and want a reference, just ask Martha.
The best part is that the more you do it the better, and faster, you’ll get at it. The first time I ever tried was the night I proposed to Russell. I wanted to make fried chicken from scratch, and while the chicken turned out kind of greasy, the night turned out wonderful!
That first try taught me that it didn’t need to feel so intimidating, and since then I’ve learned to really enjoy the process. I think it can be just a little too easy to forget where your dinner comes from when you buy it wrapped in cellophane and styrofoam, and getting your hands dirty and doing some of the work yourself gives you a greater respect and understanding for exactly what it is that you’re eating.

braised chicken with kale and white beans | Brooklyn Homemaker

When I was in high school we actually raised chickens in our garage, so maybe that experience also gave me a greater appreciation for knowing where my food comes from. We’d moved from the center of town to a larger house on some land out in the country, and sort of out of nowhere I decided I wanted some chickens. My grandfather had a handful of older laying hens and a couple roosters on his farm that he was getting a little sick of caring for, and I really just wanted them for the experience so their advanced age didn’t bother me. They didn’t produce a ton of eggs, but it was usually enough that we didn’t have to buy them and never really had a surplus either.

There was a large storage room in the garage so we sectioned off part of that with chicken wire, laid down some straw, took some of Grandpa’s equipment off his hands, and we were in business. The one thing I wasn’t really expecting is how mean and sort of territorial chickens can be, especially when there are roosters involved. I also learned never to go into their cage in sandals. It turns out that exposed toes are fare game in the eyes of a chicken…
I understand that the situation probably would have been a bit different without the roosters, but to this day I’m a little bit uncomfortable around birds.

Despite all that I still fantasize about having chickens again some day. Especially with all the baking I do I’d love to have a good source for delicious fresh eggs! Russell and I constantly dream about the day we can buy a cute old farmhouse in the Hudson Valley and build a chicken coop and maybe a pen for some pygmy goats. We even have names in mind already! The plan is to name them after the female characters from Dallas starting with Pam, Sue Ellen, Lucy, & Miss Ellie, and depending on how many we get, maybe branching out into the satellite characters like Donna, Valene, or Kristen. We probably won’t get any roosters, but it might be fun to have a cranky old J.R. chasing the poor hens around. I’d just be afraid somebody might shoot him!

braised chicken with kale and white beans | Brooklyn Homemaker

We never ate any of our old hens back then, and if Russell and I do end up getting any in the future they’d probably just be for egg laying too. When it comes to buying chicken to eat though, I’m actually pretty picky.

I know it’s not my job as a food photographer or recipe developer to tell you to eat organic, or local, or free-range, or hormone free, or whatever the buzz word du jour is. If you’re reading this you’re (probably) an adult and (probably) can make those decisions without my help. I will however remind you that spending a few extra dollars on your food doesn’t just mean you’re voting with your wallet for a healthier environment, better local economy, and more sustainable food system; it also means your food will probably taste better and be more nutritious! In my experience the biggest indicator for higher quality, better tasting chicken is the label “air chilled”. I won’t get into the gory details of how chickens are processed, but I will say that since air chilled chickens aren’t processed in water baths they usually have a meatier, chicken-ier flavor and crispier, less flabby skin. They also have a higher meat to weight ratio and better texture since they’re not absorbing any water during processing.

Since it is a slower, more labor intensive process, air chilled chicken does cost more at the grocery store. Based on flavor and texture alone though, I really do believe it’s worth the extra couple bucks.

braised chicken with kale and white beans | Brooklyn Homemaker

Knowing what I now know, it’d be pretty hard for me to go back to conventionally processed chicken. I know I promised not to get into the details, but the conventional way is pretty gross, and the air chilled method is much less so. If you’re interested in learning more, there’s a ton of information out there on the world wide web, but I learned from reading Johnathan Safran Foer’s Eating Animals. If you care about food politics and the sustainability and environmental impact of our food system I think it’s a really interesting and informative read.

braised chicken with kale and white beans | Brooklyn Homemaker

Whatever type of chicken you find in your basket while you wander the grocery aisles, this recipe is sure to please.

Browning the meat on the stovetop and then braising it in the oven gives it a rich and roasty flavor and a mouthwateringly tender texture. The touch of acidity and subtle sweetness from the white wine and tomatoes balances perfectly with the richness of the chicken and sausage and slight bitterness of the kale. The fresh pungent garlic and woodsy thyme add layers of earthy flavor, and the beans add a nice tender texture and just enough starch to make this a hearty filling meal all on it’s own.

Is your mouth watering yet?

braised chicken with kale and white beans | Brooklyn Homemaker

Braised Chicken with Kale and White Beans

one 4 to 5 lb chicken, cut into 10 pieces (you can substitute an equal amount of skin-on, bone-in breasts and/or thighs)
Coarse Kosher salt and ground pepper to taste
1 tablespoon olive oil
1/2 lb sweet Italian sausage (about 3 sausages)
1 medium to large onion, chopped
6 cloves garlic, peeled and thinly sliced
6 to 7 sprigs of fresh thyme
1 cup dry white wine
2 cups low sodium chicken stock
one 15 oz can diced tomatoes (drained)
two 15 oz cans white beans (I used Cannellini)
1 lb Lacinato kale (about 2 bunches) *see note

Preheat oven to 375.

Generously season your chicken pieces with salt and pepper. If using store-bought breasts you’ll want to cut them each in half with a very sharp knife.

Heat olive oil in a large dutch oven or braising pan over high heat. Working in batches, brown chicken pieces on all sides (about 4 to 5 minutes per side), and transfer to a plate to rest. Drain off all but about 1 tablespoon of any grease from the chicken, and brown the sausage and onions over medium high heat. Try to break up and crumble the sausage as it browns. Cook about 5 minutes, or until sausage is mostly cooked through and onions are starting to soften and get some color. Toss in garlic and cook one minute more. Add thyme and white wine, and simmer until wine has reduced by about half, about 5 or 10 minutes. Add chicken stock and drained tomatoes and bring just back to a simmer. Arrange chicken, skin side up, in a single layer and transfer to the oven to braise, uncovered, for 35-40 minutes.

While chicken is in the oven; remove the ribs, roughly chop, and thoroughly wash the kale. Dry well with a kitchen towel or salad spinner.

Once cooked through and tender, transfer chicken pieces to a plate and tent with foil. Turn the oven off and transfer the chicken back to the oven with the door slightly open to keep warm. Move the pan back to the stove and reduce the braising liquid over high heat for about 10 minutes. Add kale and beans, toss, and cook until all the kale is completely wilted, about 5 minutes more. Taste the sauce and adjust seasoning with salt and pepper if necessary. Add the chicken back to the pan and serve.

Serve the chicken in shallow bowl over a bed of beans and kale. Spoon some of the liquid over the top just before serving.

*note:
You can use other types of kale if you can’t find Lacinato, but I think it has the best flavor and texture for this dish, and holds up to best to braising and reheating.

classic pot roast with sweet potato parsnip mash

Being raised by a single parent meant that my sister and I shared in a lot of the household responsibilities.

classic pot roast with sweet potato parsnip mash | Brooklyn Homemaker

It was a different time, we lived in a safe neighborhood, and my grandma lived next door. When we’d get home from school mom would still be at work and we’d have the house to ourselves. Every day we’d be met at the door with a long list of chores taped to the newel post at the foot of the stairs. The list changed daily and was usually pretty substantial, at least long enough to keep us out of trouble until mom got home. Chores didn’t just include vacuuming or washing the dishes either, we were in charge of serious cleaning jobs like vacuuming out heating vents and scrubbing the bathroom tile surround.

At the time, I don’t think it would have been humanly possible (if you consider pre-teens human) for us to hate our chores any more than we did, but looking back on it I’m incredibly grateful. After living with countless roommates through college and until meeting Russell, I now realize that beyond keeping a tidy house, mom was also teaching us valuable life skills that many of my friends and neighbors weren’t learning. I know all sorts of things about not living like a slob that many of my peers don’t, like how to wash dishes and actually get them clean. I can remember the specific moment in college when I realized I no longer wanted to fight with my roommate about who’s turn it was to do the dishes, because whenever she did them I’d end up wanting to wash them again anyway.

classic pot roast with sweet potato parsnip mash | Brooklyn Homemaker

Another item that was usually on the list was making dinner. Working later in the day meant mom wouldn’t always have time to get dinner on the table after she got home, so she taught me a few simple recipes I could make on my own. Cooking dinner was one of the chores that I actually enjoyed doing and as time went on I started teaching myself new dishes all the time.

Pot roast was one of my old standbys, but back then I didn’t really know the “rules” when it came to braising and roasting, so to be honest my roasts weren’t very good. At the time I don’t think I even realized it, and mom never complained, but I hold myself to much higher standards nowadays. I was probably using the wrong cuts of meat, or cooking them at too high a temperature too quickly. I may have even been undercooking them, or at least not cooking them long enough to melt the collagen and make them tender. Either way, they were often as rubbery as shoe leather and flavored with little more than dried onion flakes, so as I got older I decided I didn’t really like pot roast.

classic pot roast with sweet potato parsnip mash | Brooklyn Homemaker

Unfortunately I was a vegetarian in college, so even though I took several culinary courses, at the time I didn’t really feel the need to pay much attention during the meat classes.

If I could turn back time…
If I could find a way…

classic pot roast with sweet potato parsnip mash | Brooklyn Homemaker

It was only a few years ago that I finally decided to give pot roast another go around, and that’s when I looked to the internet to show me the way. I tried a few recipes that came out okay; certainly better than what I made when I was 12, but not really good enough to make me want to bookmark any of them to make again.

Then, one day, I discovered the Cook’s Illustrated pot roast recipe.

Game-changing. Mind-blowing. Life-altering.
Etc.

classic pot roast with sweet potato parsnip mash | Brooklyn Homemaker

Seriously. Their method makes, hands down, the best pot roast I’ve ever tasted in my entire life.

It is a little more work than some of the other recipes I’ve tried, but it is WELL worth it. It’s important to find the right cut of meat, and to speed up the collagen melting you’ll need to do some butchering of your own. You’ll also need to tie the meat up with cooking twine so it doesn’t fall apart in the pot, and to promote even cooking you have to flip it half way through cooking. Then the sauce for the meat is made by pureeing the vegetables from the roasting pan with broth and red wine for texture and flavor. This makes it a bit more involved than the set-it-and-forget-it style recipes prominent on Pinterest, but you guys, I swear. You’ll never want to make pot roast any other way.

classic pot roast with sweet potato parsnip mash | Brooklyn Homemaker

Because I don’t know how to leave well enough alone, I did go ahead and make a few changes to their recipe to make it my own. The cooking method is exactly the same though, and produces the same mouthwatering, fork tender, practically falling apart results. Beyond the traditional red wine, the sauce benefits from a bit of acid and the original recipe calls for balsamic vinegar to be added at the end. Instead, I added apple cider (and a bit of chopped apple) to the cooking liquid. I thought this could be a fun seasonal twist and would add a subtle sweetness. It really works and makes this roast the perfect dish for welcoming fall weather.

Instead of roasting large chunks of potatoes and carrots to serve with the roast, I decided that I wanted to serve it over a bed of mashed sweet potatoes and parsnips. I think the slight sweetness and bright color pairs perfectly with the subtle apple flavor in the sauce.

classic pot roast with sweet potato parsnip mash | Brooklyn Homemaker

I know I already said this, but hello fall flavors. You couldn’t ask for a more perfect dish to celebrate the change of seasons. A word of warning though, the house will smell unbelievable for up to four hours and your mouth will be watering constantly.

The flavor of this meat is just so…. meaty, and you won’t believe how tender it comes out. No knife required.
The pureed veggies in the sauce add a great rich and roasty flavor, and gives the sauce a nice thickness without having to make a roux for gravy.
Adding parsnips to the mashed sweet potatoes really helps balance their sweetness and adds a depth of flavor. Taking the time to brown the butter gives them an extra richness, and helps them feel well paired with the roasted meat.

Go make this.
Now.

classic pot roast with sweet potato parsnip mash | Brooklyn Homemaker

Classic Pot Roast with Sweet Potato Parsnip Mash

Adapted from Cook’s Illustrated

3 1/2- to 4-pound boneless beef chuck-eye roast
Kosher salt
2 tablespoons unsalted butter
2 medium (or 1 large) onions, halved and sliced thin (about 2 cups)
1 large carrot, chopped medium (about 1 cup)
1 parsnip, peeled and chopped medium (about 3/4 cup)
2 celery ribs, chopped medium (about 3/4 cup)
1/2 firm tart apple (I used Braeburn), peeled cored and chopped medium (about 1/2 cup)
2 medium garlic cloves, minced or crushed (about 2 teaspoons)
1 cup beef broth, plus more for sauce
1/2 cup dry red wine, plus another 1/4 cup for sauce
1/2 cup fresh apple cider
1 tablespoon tomato paste
1 bay leaf
1 large sprig plus 1/4 teaspoon chopped fresh thyme leaves
Ground black pepper
chopped fresh parsley for garnish, if desired

Sweet Potato Parsnip Mash:
3/4 pound parsnips, peeled and cut into 2-inch pieces
2 pounds sweet potatoes, peeled and quartered
6 tablespoons butter
1 to 1 1/2 cups milk
1/4 teaspoon grated nutmeg
salt and pepper to taste

Pull your chuck roast into two pieces at the natural seam, and trim off any large layers and knobs of fat. Sprinkle both pieces of meat with 1 tablespoon salt (1½ teaspoons if using table salt), place on wire rack set in rimmed baking sheet, and let stand at room temperature 1 hour.

Adjust your oven rack to the lower-middle position and preheat oven to 300 degrees.

Heat butter in heavy-bottomed Dutch oven over medium heat. When foaming subsides, add onions and cook, stirring occasionally, until softened and beginning to brown, about 10 minutes. Add carrot, parsnip, celery, and apple; and continue to cook, stirring occasionally, for 5 minutes more. Add garlic and cook until fragrant, about one minute. Stir in 1 cup of broth, ½ cup wine, apple cider, tomato paste, bay leaf, and thyme sprig; and bring to simmer.

Pat the roasts dry with paper towels and generously season on all sides with pepper. Use kitchen twine to tie each piece of meat into a loaf shape for even cooking and prevent it from falling apart.

Nestle the meat on top of the vegetables. Cover pot with a tight fitting lid and transfer to the oven. Cook beef for three hours, flipping halfway through. Check and, if necessary, continue cooking until beef is completely tender and sharp knife easily slips in and out, about 30 minutes to 1 hour. This extra time is best used to start your sweet potato parsnip mash, recipe below.

Once fully cooked, transfer roasts to cutting board and loosely tent with foil. Strain liquid through mesh strainer into a large liquid measuring cup. Discard bay leaf and thyme sprig. Transfer cooked vegetables to blender jar. Allow liquid to settle 5 minutes, then skim any fat off surface. Add beef broth as necessary to bring liquid amount to 3 cups. Place liquid in blender with vegetables and blend until completely smooth, about 2 minutes. Transfer sauce to medium saucepan, add remaining wine and chopped thyme, and bring to simmer over medium heat. If sauce is too thick it can be thinned out with more beef stock. If too thin let it reduce to the desired consistency. Once reduced taste and adjust seasoning if necessary.

While sauce heats and reduces, remove twine from roast and slice against grain into ½-inch-thick slices.

Sweet Potato Parsnip Mash: 
Place sweet potatoes and parsnips in a large stockpot, cover with salted water, and bring to a boil. The parsnips can take longer to cook than the sweet potatoes, so it’s important that they’re in smaller pieces. Once the pot comes to a boil reduce the heat to medium and cook until vegetables are fork tender. This should take about 15 or 20 minutes, but can vary depending on the size of the pieces.

Once tender, transfer sweet potatoes and parsnips to a colander to drain. In the same pot heat the butter over medium heat just until it begins to brown. Stir occasionally and watch it closely or it can burn. Remove from heat. You can either push the drained sweet potatoes and parsnips through a potato ricer or food mill and add them back into the pot, or add them to the pot first and mash them with a potato masher. Stir in milk, a little at a time, until you reach your desired consistency. Add nutmeg, and salt and pepper to taste. Taste for seasoning and adjust if necessary.

Serve the meat on top of the mash and top with sauce and a sprinkle of chopped parsley.

zucchini peach bread

It’s officially September you guys. I know.

zucchini peach bread | Brooklyn Homemaker

Back to school season. Pumpkin spice everything. Sweaters in store windows…

While some people lament the end of summer and others celebrate the onset of fall, for all intents and purposes, it’s actually still summer. Like SUMMER. Dog days style.

zucchini peach bread | Brooklyn Homemaker

Here in Brooklyn we’re in the midst of yet another record-breaking heat wave. My backyard looks incredibly parched, sad, and droopy; and the heat over the past few days has felt downright oppressive and just generally awful. In fact, the other day many schools in the area announced they’d be letting out early because of a heat advisory, in their first week back!

zucchini peach bread | Brooklyn Homemaker

Trying to take full advantage of the extended summery weather, Russell and I took a trip to the farmer’s market over the weekend. I’ve been really stumped about what to do and make for the ol’ blog lately, because I’m having such a hard time deciding what would be considered seasonally appropriate right now. Last week I posted a recipe for some hot and steamy soup, and then the weather decided to follow my lead and went all hot and soupy too.

zucchini peach bread | Brooklyn Homemaker

I figured I should just go and see what spoke to me, and hoped I’d be able to make a plan from there.

Wandering the stalls of the market I was met with piles of gorgeous heirloom tomatoes and bushels of ripe sweet corn, but for some reason stacks of bright green zucchini were what called out to me, along with some seriously beautiful local peaches. But, what the heck could I do with peaches and zucchini in the same dish? I thought about just making a peach crumble or something, and then using the zucchini for dinner later on. I paid up and was on my way, and by the time I got home I knew what I had to do.

zucchini peach bread | Brooklyn Homemaker

When I was little I was a big fan of banana bread, especially my grandma’s banana bread. As I got older I started to develop a “distaste” for bananas that eventually blossomed into an intense hatred for bananas and anything banana related.

I usually pride myself in my openness to any food available to me, and my willingness to try anything someone might dare me to eat, but bananas are just an absolute no-no. I don’t know why, but I really can’t stand them. The tiniest piece of banana snuck into a smoothie deems it unfit for anything but the trash bin. Even the smell of them makes me retch, and my co-workers are well aware that eating a banana anywhere near me is absolutely forbidden.

zucchini peach bread | Brooklyn Homemaker

For the past few years there has been a banana bread shaped hole in my heart, but thankfully zucchini bread has stepped in to fill that giant void in my life.

So those bright green beauties fresh from some local farm had a clear and bright future, grated and baked inside a loaf of warm nutty quick bread, along with the tastiest peaches summer had to offer. (Thankfully we recently got a new AC unit so turning on the oven didn’t turn our tiny apartment into a sweltering inferno)

zucchini peach bread | Brooklyn Homemaker

These loaves are every bit as tender and moist and delicious as you could want, with a wonderful crunchy top thanks to the addition of some demerara sugar sprinkled on just before baking. They’re really the perfect transitional food between summer and fall. The zucchini and peaches are bright and fresh and summery, but they’re paired with warm autumnal spices and crunchy bitter walnuts. I never liked walnuts in my breads when I was younger, but I’ve learned to absolutely love the contrasting texture and flavor. I think the bright sweetness from the peaches really calls for the slight bitterness of the walnuts for balance, so I really recommend you don’t skip them.

The peaches aren’t really the stars of the show here, but take a backseat to the zucchini. The flavor is very similar to a normal (albeit really delicious) zucchini bread, with an added touch of sweet peachiness. I personally love the subtle addition of summer fruitiness, but if you’re looking for something with bright peach-forward flavor, I’m not sure this is the recipe for you. I added a little bit of wheat flour to soak up some of the extra moisture, but I fear that adding too many more peaches to the recipe could render your loaves dense and soggy.

zucchini peach bread | Brooklyn Homemaker

Zucchini Peach Bread

  • Servings: 2 loaves or approximately 24 muffins
  • Print
Adapted from Smitten Kitchen

3 large eggs
1 cup vegetable oil
2 teaspoons vanilla extract
1 1/2 cups sugar
1 1/2 cups grated zucchini
1 cup finely diced peaches
2 cups all-purpose flour
1 cup whole wheat flour
1 tablespoon cinnamon
1/2 teaspoon ground ginger
1/8 teaspoon nutmeg
1 teaspoon baking soda
1/2 teaspoon baking powder
1 teaspoon  table salt
3/4 cup chopped toasted walnuts
1/4 cup demerara sugar (or other coarse sanding sugar)

Preheat oven to 350°F.

Liberally butter and flour two 8×4 inch loaf pans. Alternately, line 24 muffin cups with paper liners.

In a large bowl whisk together the eggs, oil, vanilla and sugar. Add zucchini and peaches and stir to combine.

Combine flours, cinnamon, ginger, nutmeg, baking soda, baking powder, salt, and walnuts. Whisk to combine. Make a well in the center of the flour and pour egg mixture in. Gently fold and stir just to combine. Do not over mix. Divide the batter into prepared pans and sprinkle each with demerara sugar.

Bake loaves for 60 minutes, plus or minus ten, or until a toothpick or cake tester inserted into the center comes out clean. If making muffins instead, they should bake for approximately 20 to 25 minutes. Cool on a wire rack for about 15 minutes before removing from pans, and cool for at least 30 minutes more before slicing.