When I was young my mom came up with an idea for my sister and I to make homemade christmas gifts without spending a lot of money. She made up a batch of dough, we rolled it out, and cut out cute Christmas shapes with cookie cutters. This wasn’t cookie dough though, it was salt dough. At the time I didn’t know the name of it, or even what was in it, but I knew we weren’t supposed to eat it. I can only imagine how hard that was for me at seven years old. Salt dough is very simple to make, basically just flour, salt and water, and when you bake it it becomes very hard and will last forever if you keep it dry and clean.

Before we baked our “cookies”, we poked holes in the tops of each shape with a straw. After they came out of the oven we painted them with brightly colored craft paint, and strung through a piece of ribbon. Mom painted our names and the dates on the backs of each of them, and we had personalized handmade Christmas ornaments that we gave away to our family as gifts. My grandmother had those ornaments hanging on her tree each and every year until she stopped putting it up when we went away to college.

It turns out that salt dough has been around for centuries and can be traced back to ancient Egypt. Flour and water is mixed with salt as a preservative and the dough can be worked with kind of like clay. Then it’s baked at a low temperature for long enough to remove all the moisture and harden the finished product. Some people use salt dough to make elaborate sculptures and creations, but most people use it for children’s crafts. The dough is easy to make, easy to work with, non-toxic, and can be made from things most people already have at home.

At work last year we were coming up with ideas for our Christmas window and I thought it might be fun to make a grown-up version of these ornaments. We sell a lot of bakeware so I thought it would be really cute to have pretty sugar cookie snowflakes hanging in the window. I wanted them to look as real as possible, so I used real royal icing and sprinkles to decorate them. They came out beautiful and I packed them up in boxes and took them to work with me.
To my dismay, much of the detailed royal icing piping started to flake off of the cookies when we tried to hang them. I’m not exactly sure what went wrong but I’m certain it had something to do with the super high salt content. We still had enough in tact that we were still able to use them in the window, and the display was absoultely beautiful. No one would have guessed that there had been any problems, but I learned a valuable lesson. Real royal icing on salt dough fake cookies is a big fat NO.

This year I decided to give salt dough another go, but knew I should look for a better “icing” solution. I wanted to recreate the look and texture of royal icing, but using a more permanent medium. My first thought was puff paint. In the 90s you couldn’t walk down the street without tripping over a tube of puff paint, but in 2013 it seems like it’s impossible to find. I’m sure that big craft stores sell it, but I don’t have a car and couldn’t get to a craft store. I tried using some white caulk that I had leftover from my kitchen backsplash project, but the consistency was too thick and it was difficult to work with. After that I decided to try calling the local art supply store and see if they had any suggestions. They pointed me toward a product called light molding paste, which has almost the same consistency as frosting. I tried using it as is, piping it from a pastry bag with small round tip (or writing tip) and it piped out really nicely. Sprinkles and glitter stuck to it really well too, and I got some really nice results using it. The only issue I had was that it’s slightly thicker than royal icing, more like frosting, and doesn’t smooth out the way royal icing does. Since molding paste is water soluble, I tried thinning it out just slightly with water to get a thinner consistency.
I’m so glad I called that art store. This stuff was perfect. It was very easy to thin out to the consistency I wanted, and piped just like the real thing. It was easy to work with, and simple soap and water cleaned it up with no trouble. It dried nice and hard too and stayed stuck to the salt dough with no problems. I’m assuming that puff paint would probably work well too- but this stuff was truly ideal. I’d definitely recommend it if you want to try this project yourself. You can find it at any art supply store and they have it at the big craft stores too. I used Golden brand, and it’s important that you get the light molding paste. Since I didn’t completely cover my ornaments I didn’t use much either. I bought the smallest container the store had, and after decorating probably about 30+ ornaments I still have half a jar left.
Since I wanted my ornaments to look like gingerbread cookies and not sugar cookies, I decided to color the dough. I could have used food color or paint, but I wanted to try to achieve a more natural molasses and spice kind of brown color. I also thought that it would be great if the finished ornaments had a nice gingerbready smell, so I decided to use spices to color my dough. In my test batch I used ginger, nutmeg, clove and cinnamon. It smelled amazing in the oven, but after a long slow bake they didn’t smell like much after they cooled. I noticed that the best gingerbread color came from the cinnamon, so when I made the next batch I skipped the other spices all together. You can use more or less depending on how dark you’d like the dough, but cinnamon is really all you need to get the color right. My advise would be to use the cheapest cinnamon money can buy. Go to the dollar store and buy the flavorless stuff you’d never actually want to bake with. Don’t waste the good stuff on these. You need a lot of it to get the color right, and you’re never going to get to eat these “cookies”.
I also noticed in my test batch that in the first half hour of baking the salt comes to the surface of the dough, bleaching out the exposed surface and fading the color I worked so hard to get right. The side that was facing down and wasn’t exposed to the air was fine though, and once most of the moisture had baked off they could be flipped and continued baking didn’t bleach the other side. So, when I made my second batch I baked them with the side I wanted to decorate facing down. Bingo!
You should totally do that too.

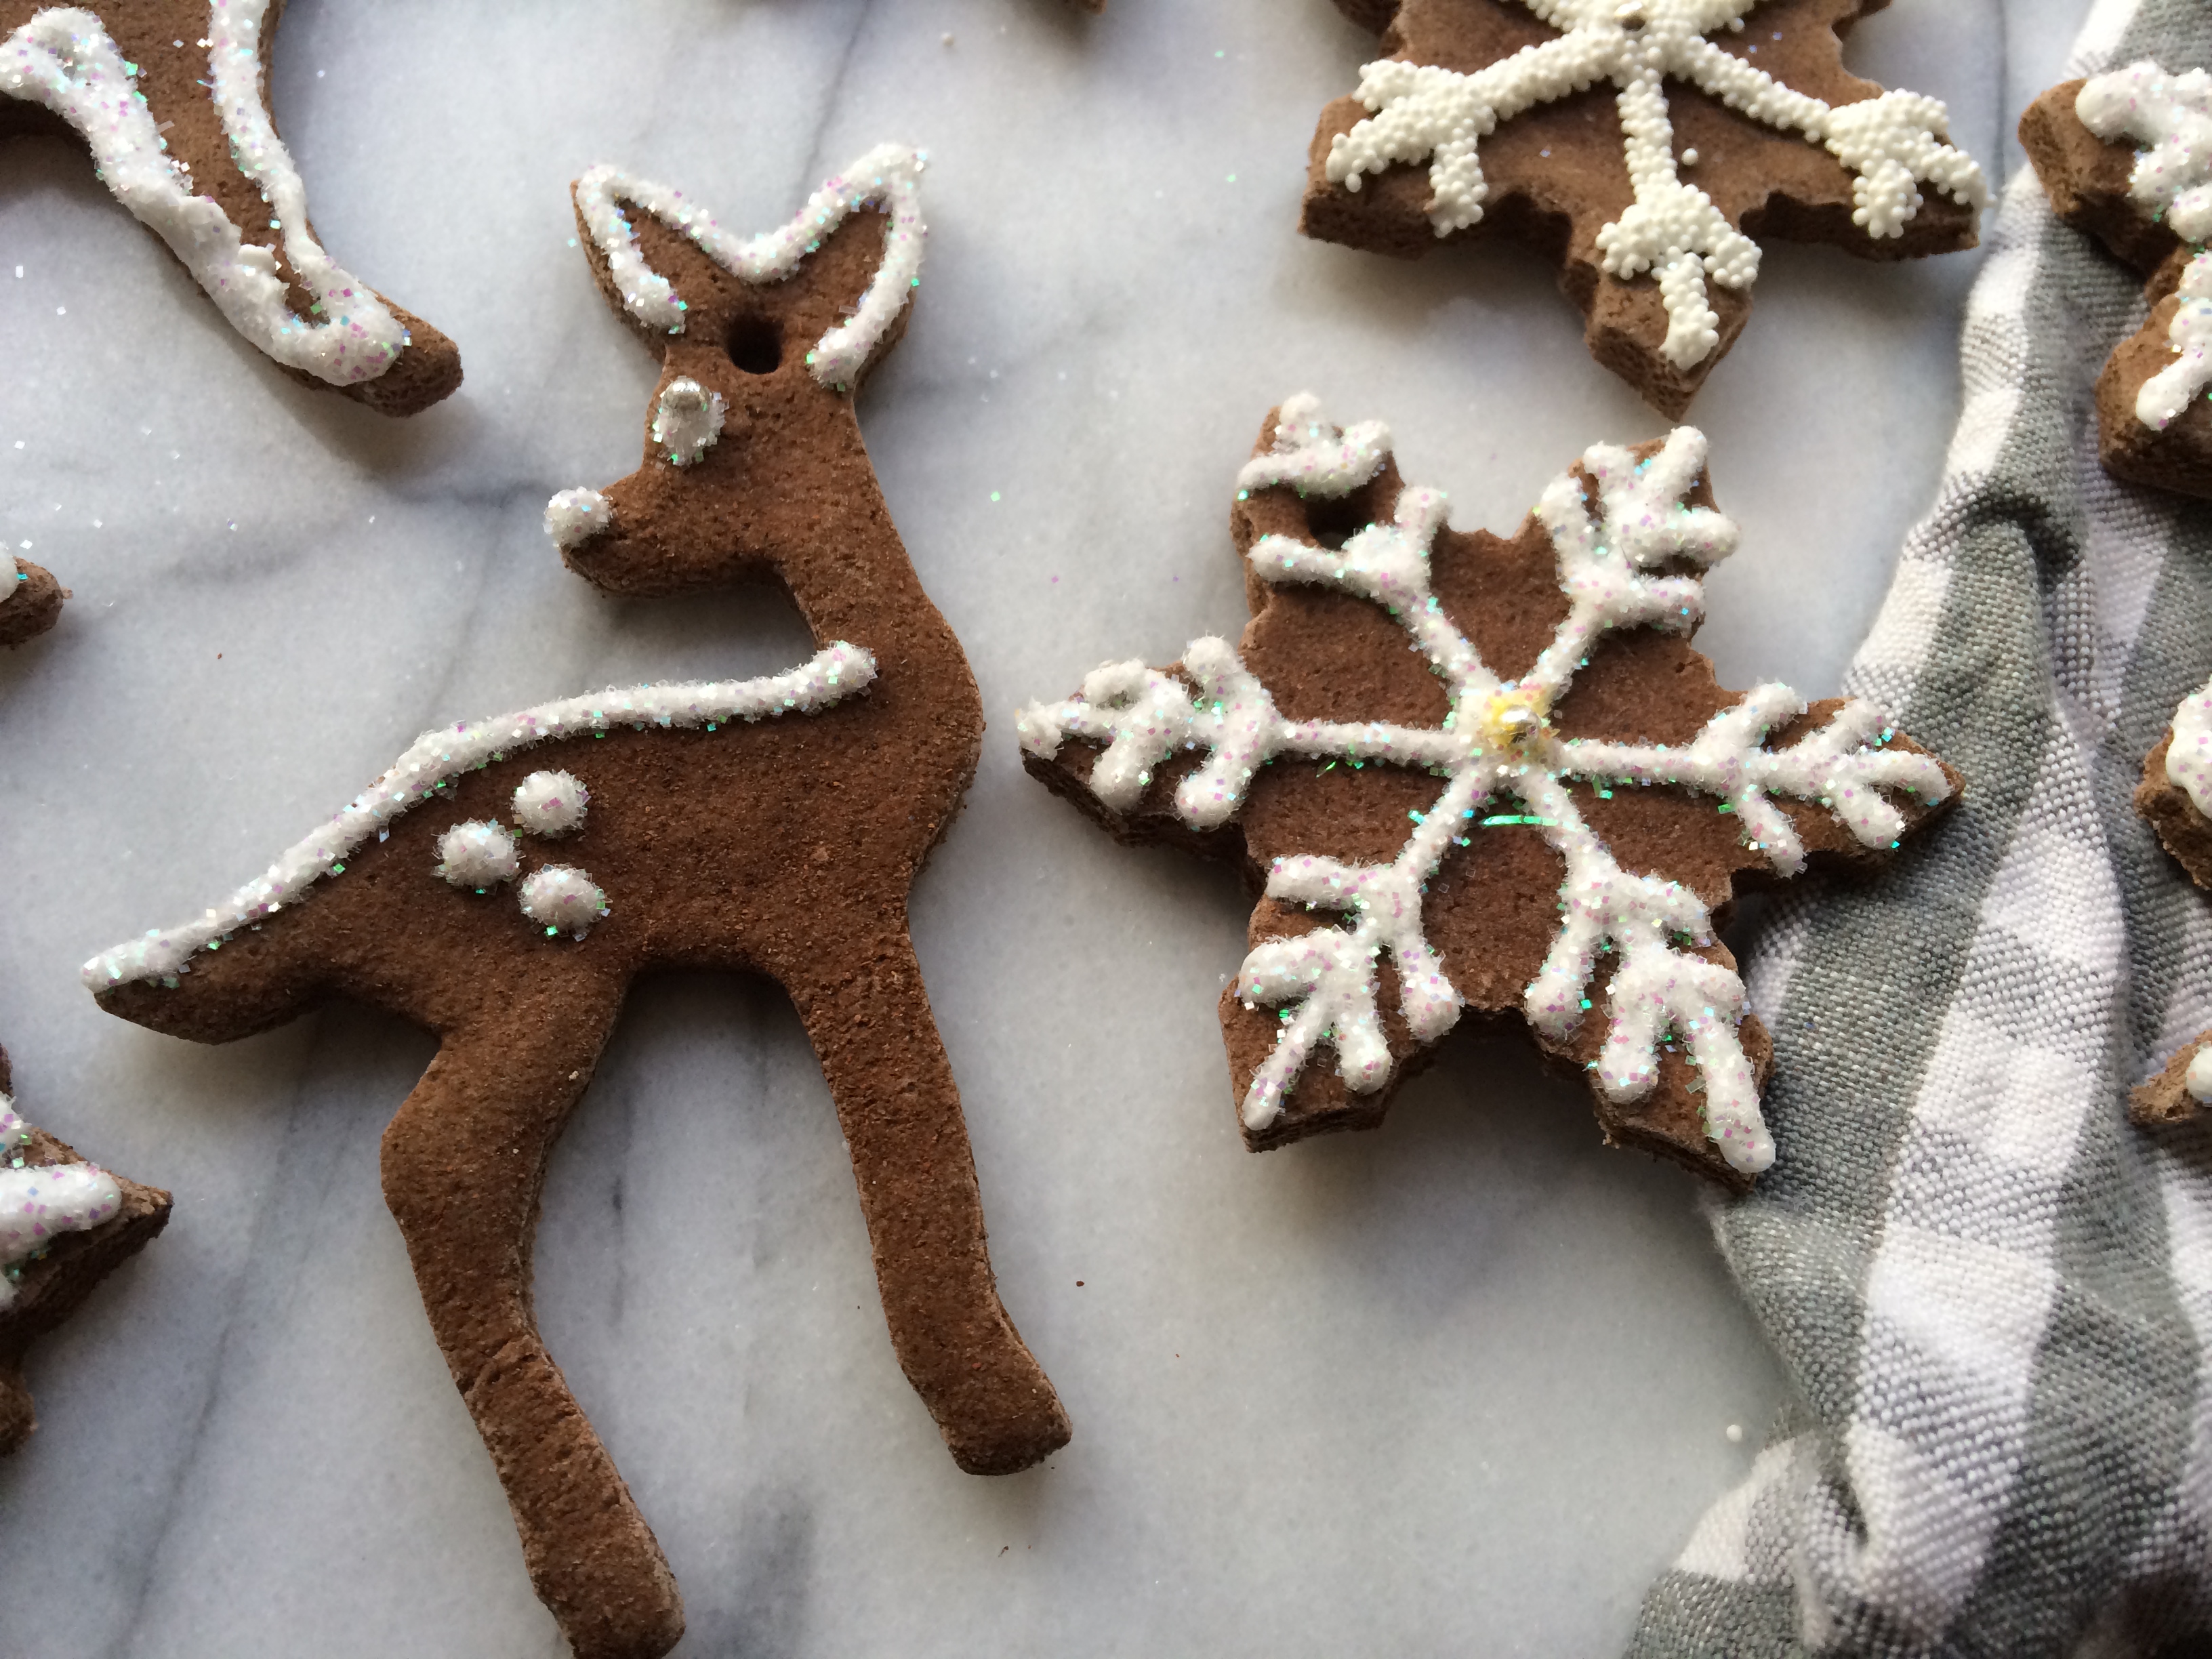
To decorate the ornaments I fitted a disposable pastry bag with a Wilton #3 tip and filled it with my thinned light molding paste. Then I piped out a thin even line and made some designs. Some ornaments were just outlined, others got lines and dots, some had intricate snowflake designs, but you can do whatever you like. If you’ve never used a piping bag and pastry tip, I’d definitely recommend some practice before you dive into this project. This is permanent so you want them to be pretty near perfect. I promise it’s not as scary as you might think. Just twist the top of the bag closed so your “icing” doesn’t squeeze out the top when you put pressure on the bag. Then hold your tip a small distance from your ornament and squeeze the bag with slight and even pressure. Patience and practice. You could also just “frost” your ornaments instead without thinning the molding paste and they would still look realistic and pretty.
Before the molding paste dried I covered the ornaments with glitter, nonpareils & dragees. I found a glitter that looked similar to a product I’ve seen in a cake decorating store- so the cookies still look very realistic. I worked with a just a few ornaments at a time to make sure the molding paste didn’t dry before I put the glitter on it. Then I just shook the glitter off and set the finished ornament on a tray to dry. I completely covered each ornament in glitter, and was able to re-use the leftover glitter for the next batch of ornaments, over and over until I was finished.
Word of warning: Glitter is pretty but it’s also the devil. There is glitter everywhere. I’ve vacuumed, mopped, rinsed, showered, and scrubbed multiple times and I still see glitter everywhere. It on my floors, in the rug, on the counters, even on me. It’s been days and I still catch customers at work looking at me funny and realize I have glitter in my beard.

I couldn’t be happier with the results.
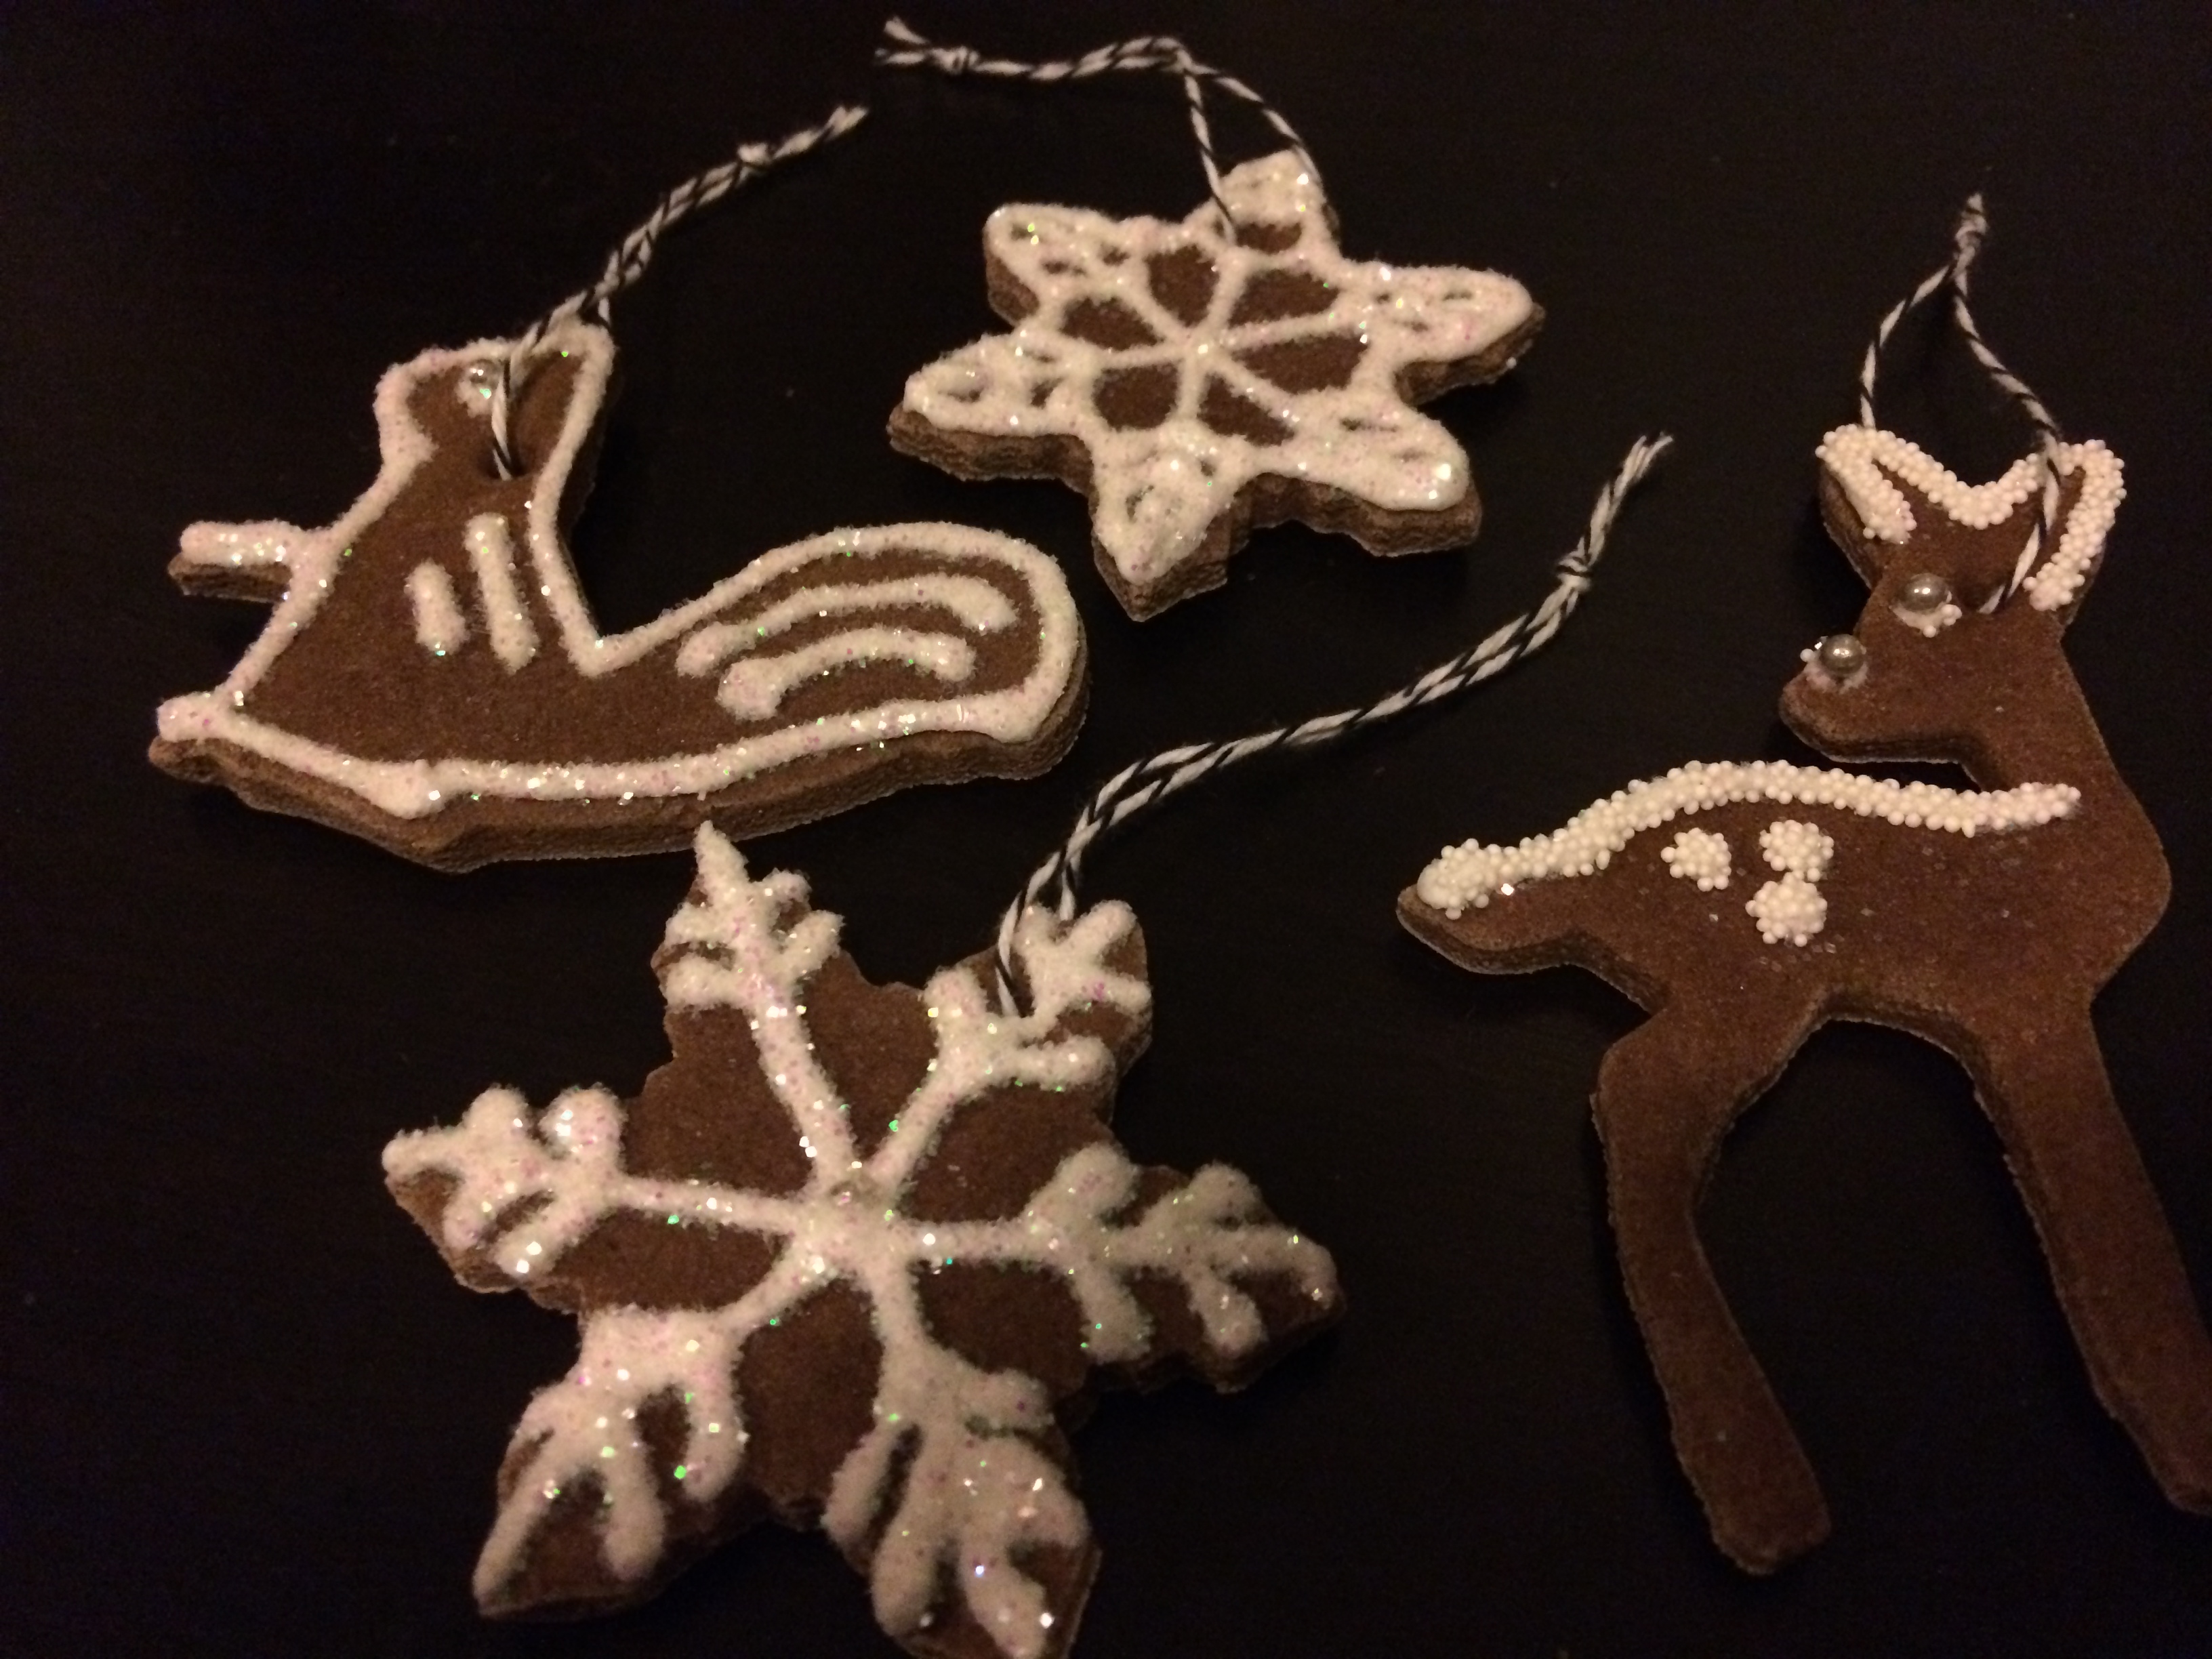
They came out beautiful. They really do look very similar to the real thing, and they look gorgeous on my tree. I’m really glad that I went with white decorations for them too. I’m sure that adding some color to the molding paste would be easy and the results would be beautiful, but these simple white ornaments go perfectly with our apartment. The white pops against the brown “cookies”, and they look chic, timeless and modern all at once. These photos don’t do them justice when the lights are on. They’re all sparkly and stuff!
You should definitely give this a try. Your Christmas tree will thank you. And then you will thank me. (You’re welcome.)

Gingerbread Salt Dough Ornaments
1/2 cup salt
1/2 cup water
4-6 tablespoons cinnamon, or more, depending on how dark you want your dough
Preheat oven to 250 degrees. Mix all ingredients together in a medium bowl. If you want plain (non-gingerbread) dough, or want to color the dough, leave out the cinnamon. Knead the dough a few times on a lightly floured surface to be sure it’s well mixed and has a smooth consistency. Knead in more cinnamon if you want a darker color or more flour if dough feels too sticky. Lightly coat with flour (or cinnamon) and roll dough out to about 1/8 to 1/4 inch thick. These “cookies” will not rise at all- so make them as thick as you’d like the finished product to be. Cut into desired shapes, and cut a small hole with a straw or piping tip. Transfer to a parchment lined baking sheet, making sure the side you want to decorate is face down. Bake for 2-3 hours or until completely dry.
Allow the ornaments to cool completely. Using a pastry bag with a small writing tip, pipe on desired design with light molding paste. Puff paint should also work well for this. Decorate with glitter, small beads, or whatever you like. If you’re only using this for one season, sprinkles and candies work too. Allow “icing” to dry completely, for at least 4 hours. If desired, spray with a matte sealer and let dry according to directions. String some ribbon or bakers twine, tie a knot or bow and you’re ready to decorate!
*Update: This didn’t happen to my ornaments, but one reader said her ornaments bubbled up in the oven. I read up on it and learned that this can happen if they dry too fast or if the oven temp is too high, so I’d suggest getting an oven thermometer to be sure your oven doesn’t go above 250. To be extra careful, you may even want to try baking them at a 225 for a longer period of time.
