gingerbread

ginger pinchies

Have you guys decided which cookies you’ll be baking for the holidays yet? Have you narrowed it down to just one recipe, or are you making a few different kinds?

ginger pinchies | Brooklyn Homemaker

When I was little my grandma would always have a big tray of homemade cookies on the counter every Christmas, and it was always so much fun to choose which kind to try first. Being the chubby little dough boy that I was, by the time we were done opening presents you better believe that I’d tried each and every recipe she had on that platter, sampling a few of them more than once, you know, just to be sure.

ginger pinchies | Brooklyn Homemaker

This year I signed up for a cookie swap at work and I couldn’t be more excited about it. I’ve always wanted to host one myself but never thought enough of my friends would be interested to make it work. This year though, one of my coworkers suggested it and to my surprise, so many people signed up that I’m actually worried about how many batches I’m going to have to make. The more people who sign up though, the more varieties of cookies I’ll have for my holiday spread this year. An embarrassment of riches y’all!

Originally my plan was some kind of spicy gingerbread cutouts, but after Nordic Ware reached out to me to ask if I’d be interested in a project they’re working on with the Minnesota Historical Society, I might just have to change my plans!

ginger pinchies | Brooklyn Homemaker

To celebrate their Scandinavian American roots this holiday season, Nordic Ware joined forces with the Minnesota Historical Society and Mill City Museum to help them promote a special holiday cookbook they’ve just released.

Nordic Ware has been a major part of Minnesota’s heritage and history since 1946, and they’re still a family owned company!  The Minnesota Historical Society helps preserve Minnesota’s past, shares the state’s stories and connects people with history in meaningful ways. They play an important role in Minnesota’s historic preservation, education and tourism; and provide the public with award-winning programs, exhibitions and events. Part of the historical society, The Mill City Museum was built into the ruins of what was once the world’s largest flour mill, located in Minneapolis on the historic Mississippi Riverfront. They teach their visitors about the intertwined histories of the flour industry, the Mississippi river, and the city of Minneapolis.

ginger pinchies | Brooklyn Homemaker

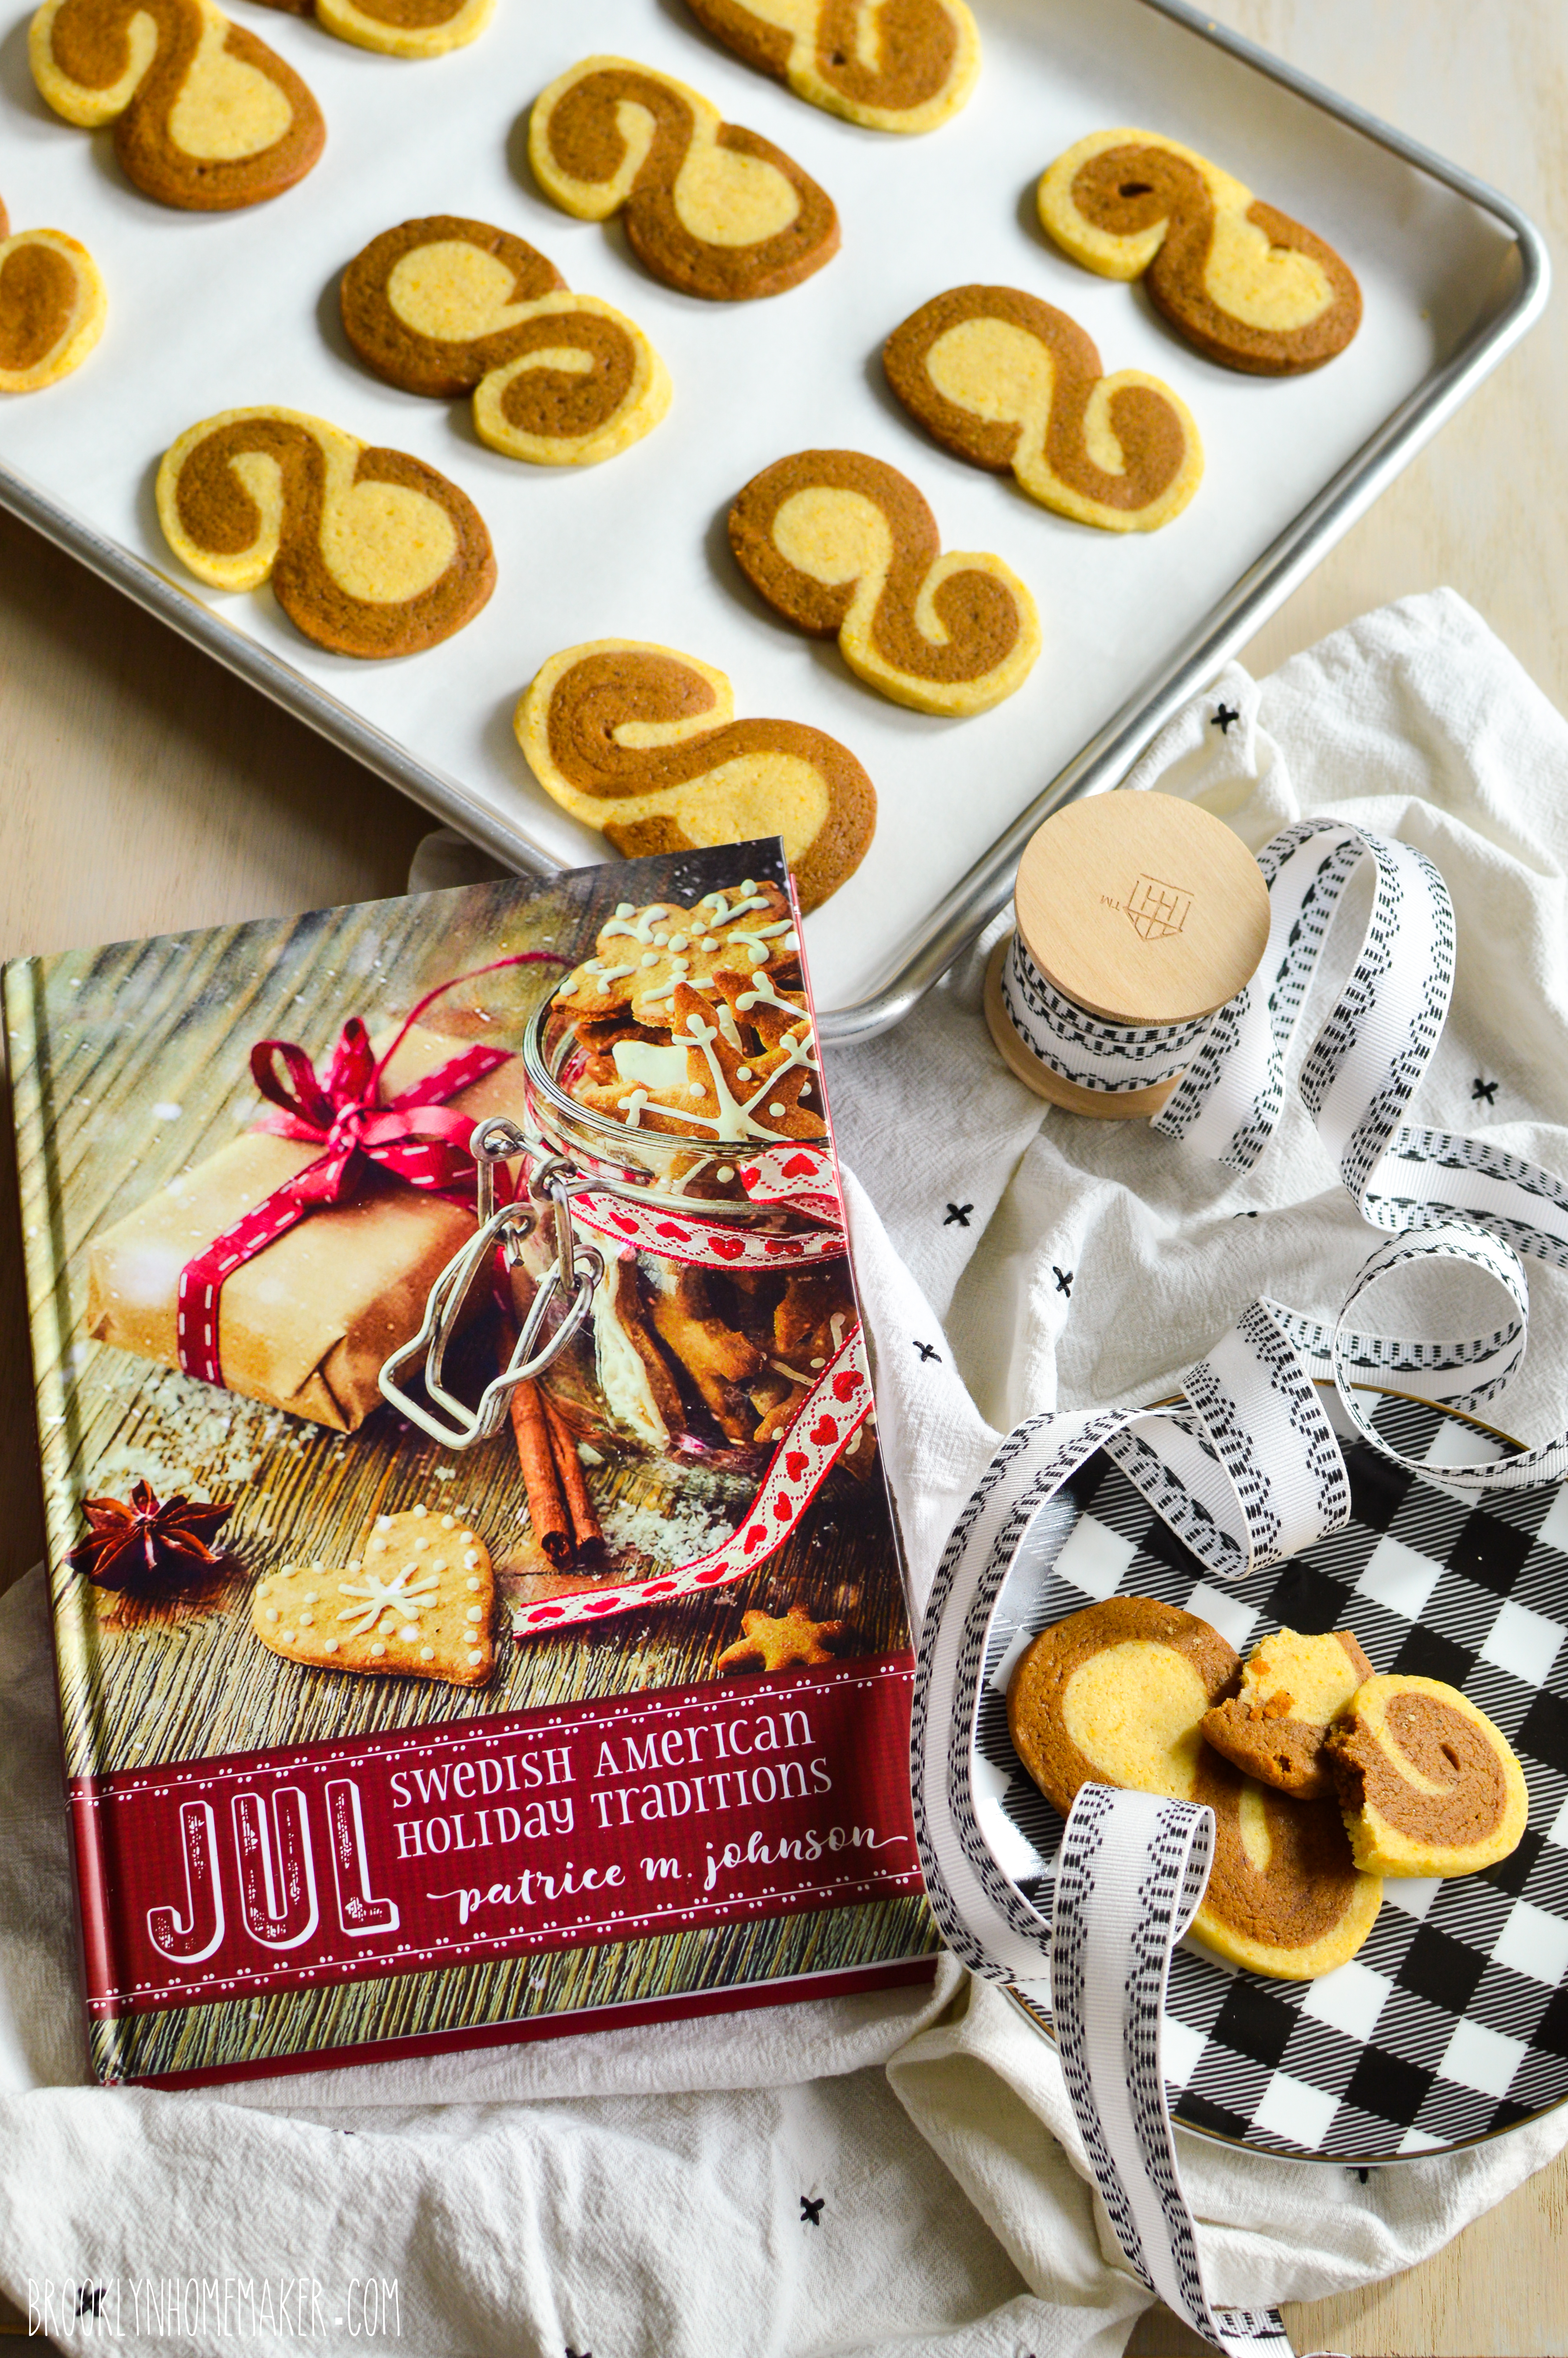
Written by self proclaimed Nordic food geek and meatball historian Patrice M. Johnson, and published by Minnesota Historical Society Press; Jul: Swedish American Holiday Traditions focuses on the Christmas food traditions of Swedish Americans in the Midwest.

From smörgåsbord and St. Lucia processions, to Christmas Eve gatherings with family and friends, Swedish Americans are linked through the generations by a legacy of meatballs and lutfisk. Throughout the Midwest where Swedish immigrants settled, holiday dishes placed on the julbord (Christmas table) tell stories about who they are, where they come from, and where they are heading.

In exploring Swedish American holiday customs, Johnson begins with her own family’s Christmas Eve gathering, which involves a combination of culinary traditions: allspice-scented meatballs, Norwegian lefse served Swedish style (warm with butter), and the American interloper, macaroni and cheese. Just as she tracks down the meanings behind why her family celebrates as it does, she reaches into the lives and histories of other Swedish Americans with their own stories, their own versions of traditional recipes, their own joys of the season. The result is a fascinating exploration of the Swedish holiday calendar and its American translation.

ginger pinchies | Brooklyn Homemaker

Jul is full of recipes that are perfect for holiday celebrations, even if you don’t have Swedish or Scandinavian roots.  The are tons of mouth-watering recipes for celebratory savory dishes, drinks, and desserts, but I went straight for the cookies when I was deciding which recipe to try out and share. Coming from a German American family, I share the author’s love for heavily spiced holiday treats and it didn’t take me long to zero in on a fun and unusual recipe for spice cookies she calls “Ginger Pinchies”.

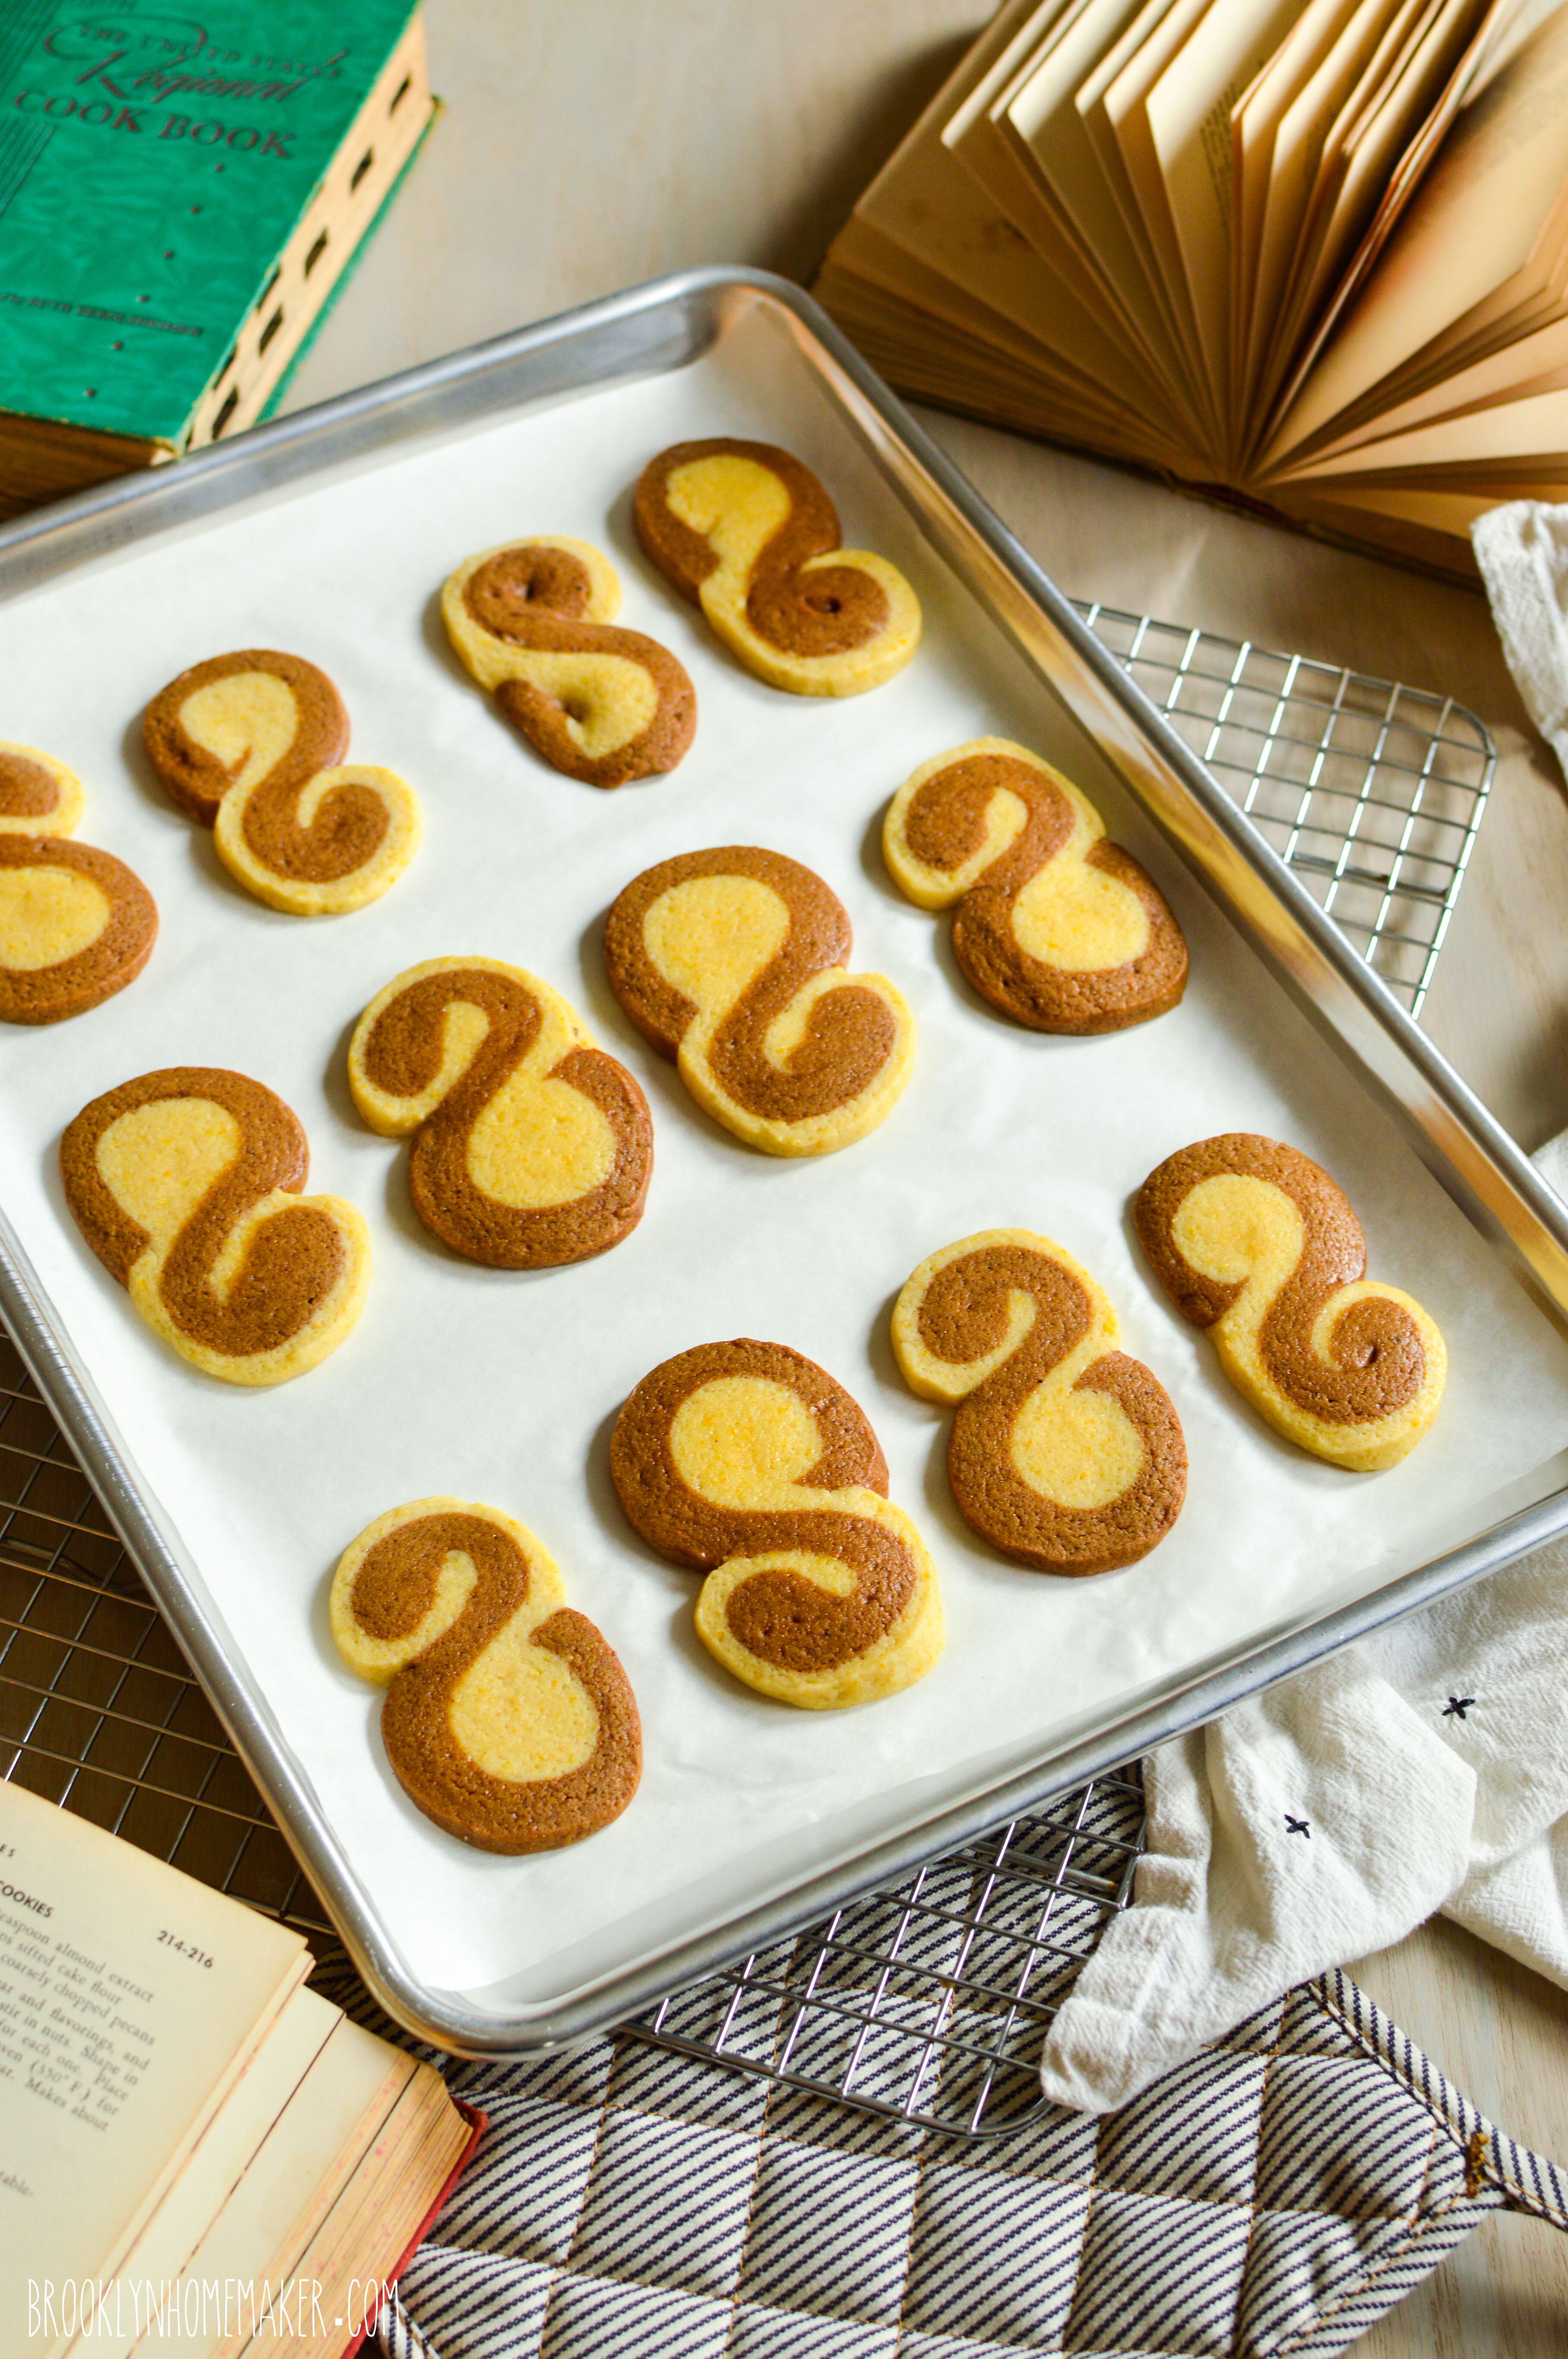
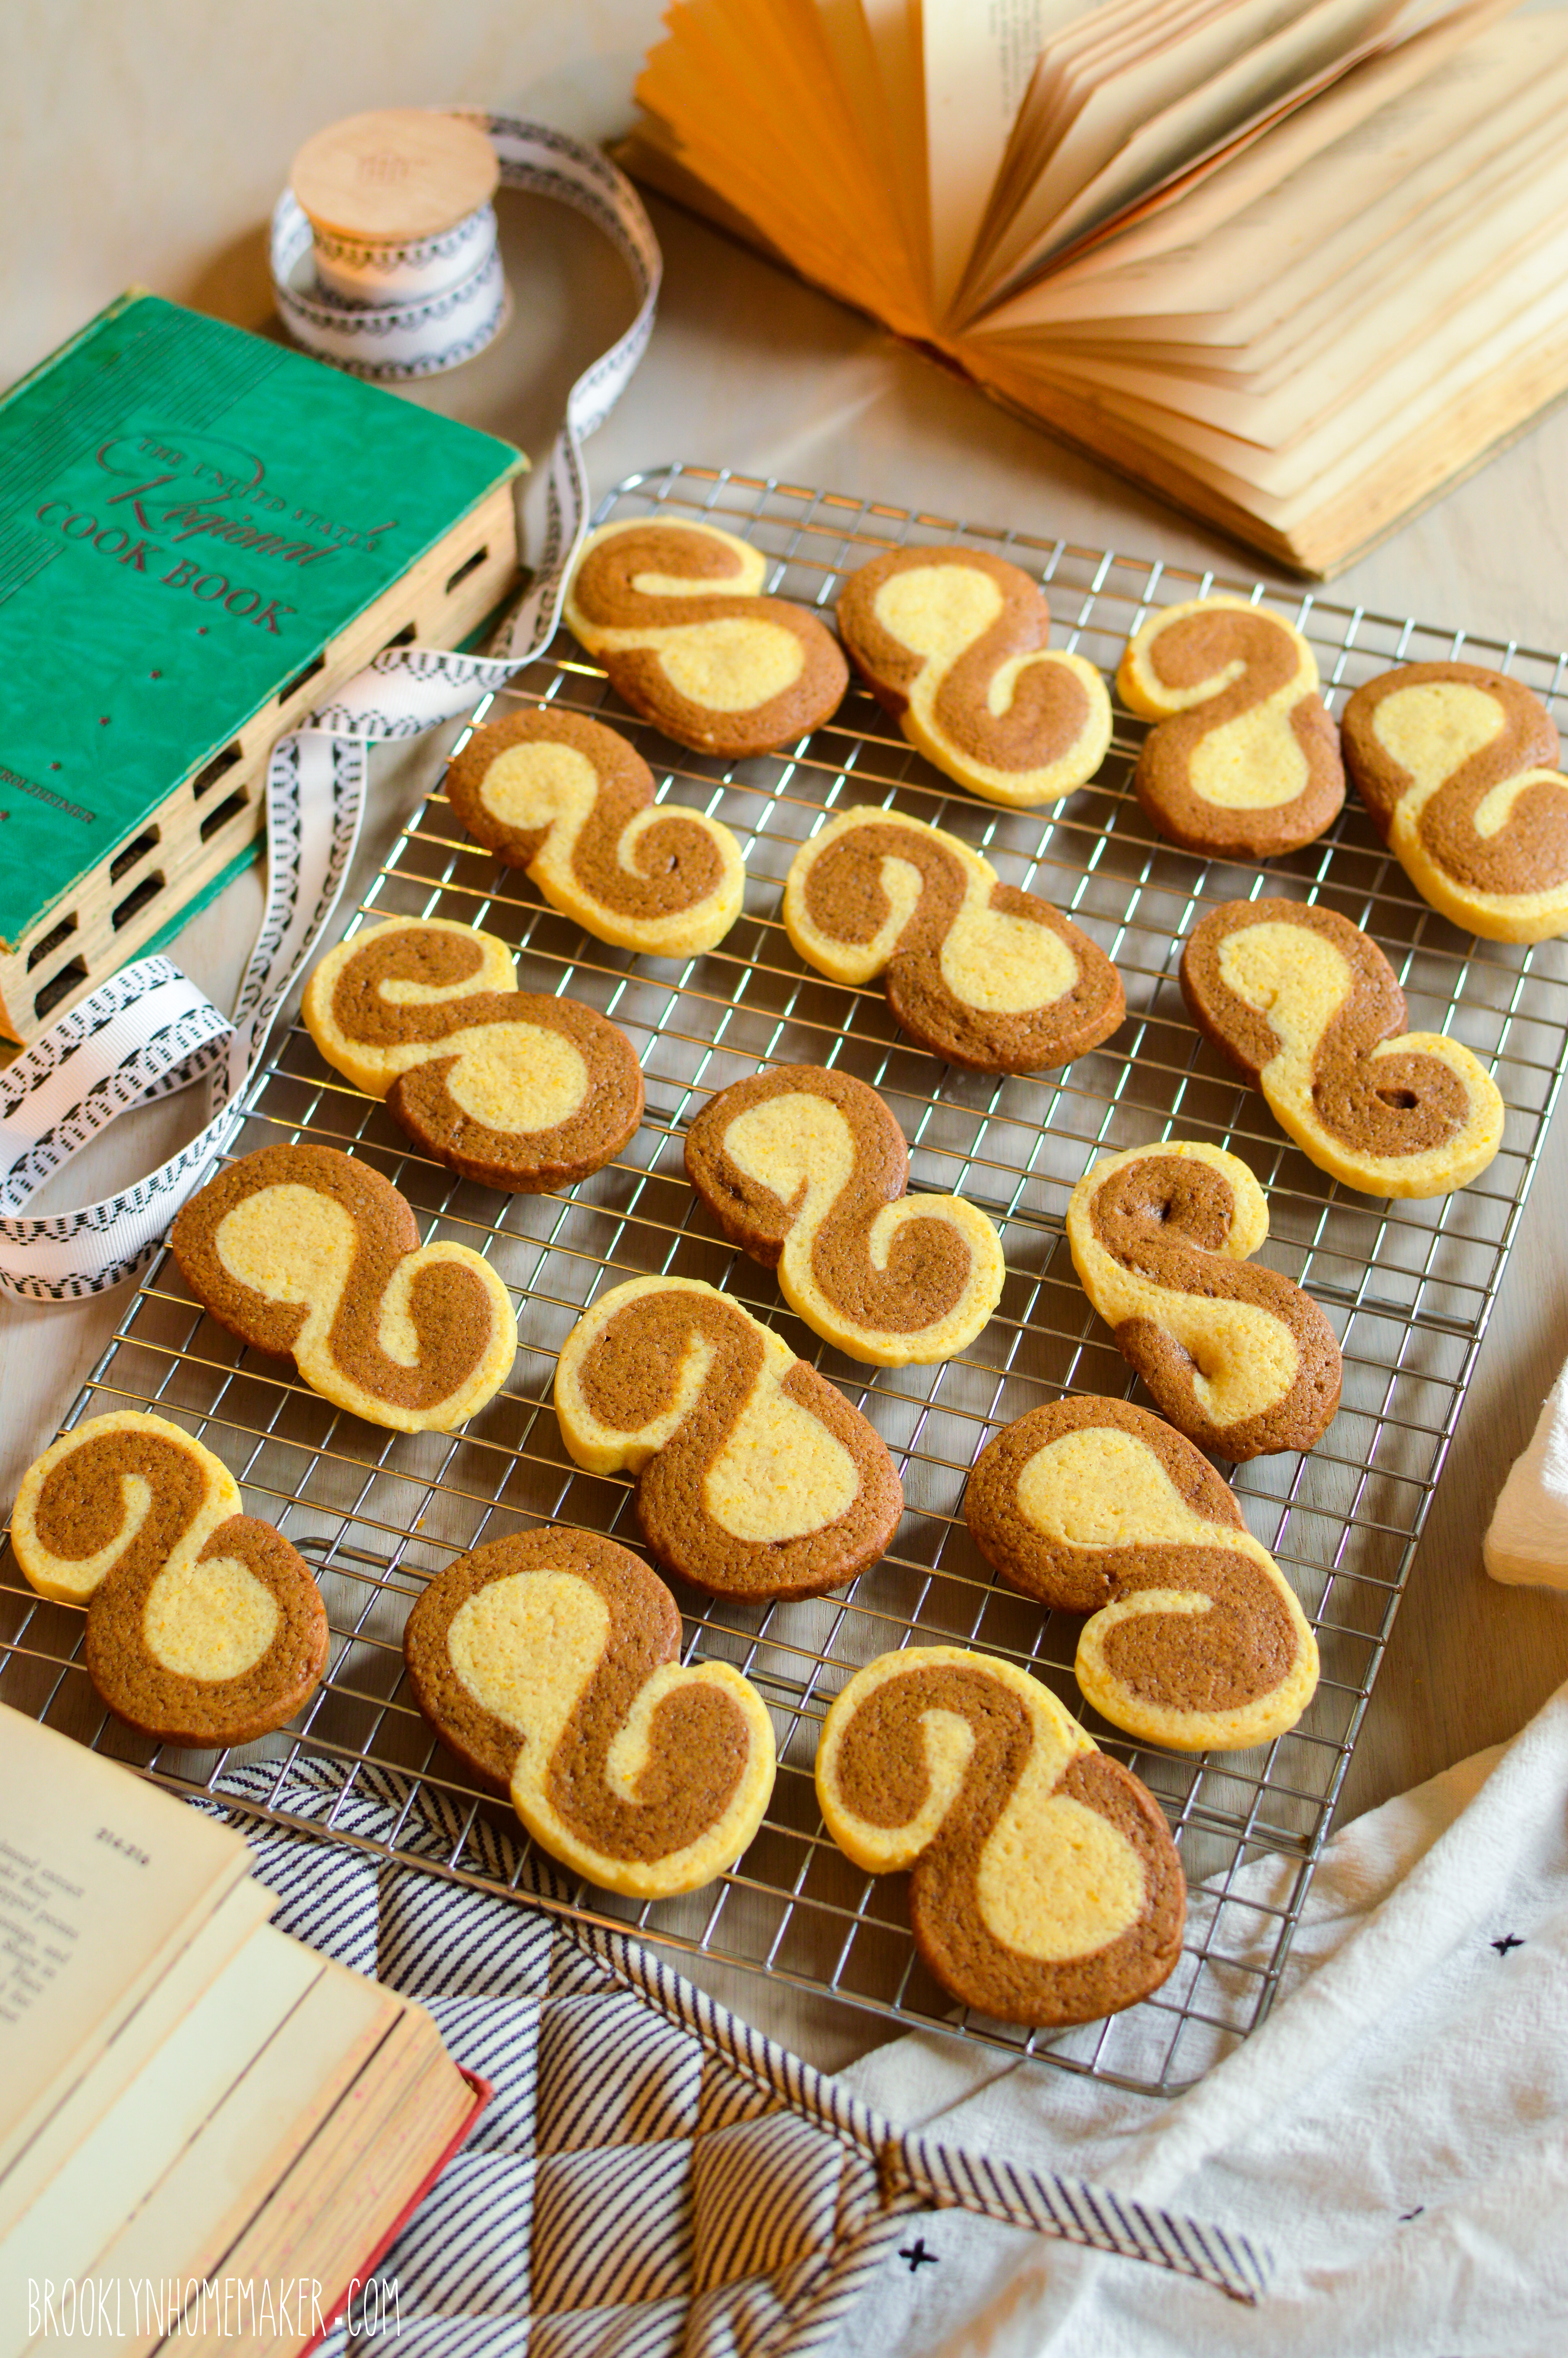
These two-tone cookies were named after Johnson’s cat Pinchy, and inspired by her daughter’s love of ginger and her aunt’s well-worn copy of a Swedish Tabernacle Church Cookbook. Although they’re rolled up differently, the recipe is similar to a traditional pinwheel cookie. Rather than chocolate though, the dark part is a ginger-heavy spiced molasses dough and the light is perfumed with fresh citrus zest and a touch of vanilla. It reminds me so much of an Old-Fashioned marble cake recipe that I found in an old cookbook from the 1940s, which I made into this stunning holiday bundt a couple years ago!

ginger pinchies | Brooklyn Homemaker

Reading that this recipe was a 2015 Minnesota State Fair Gold Medal Flour Cookie Contest Blue Ribbon Winner was all  I needed to see to know this was the one for me.

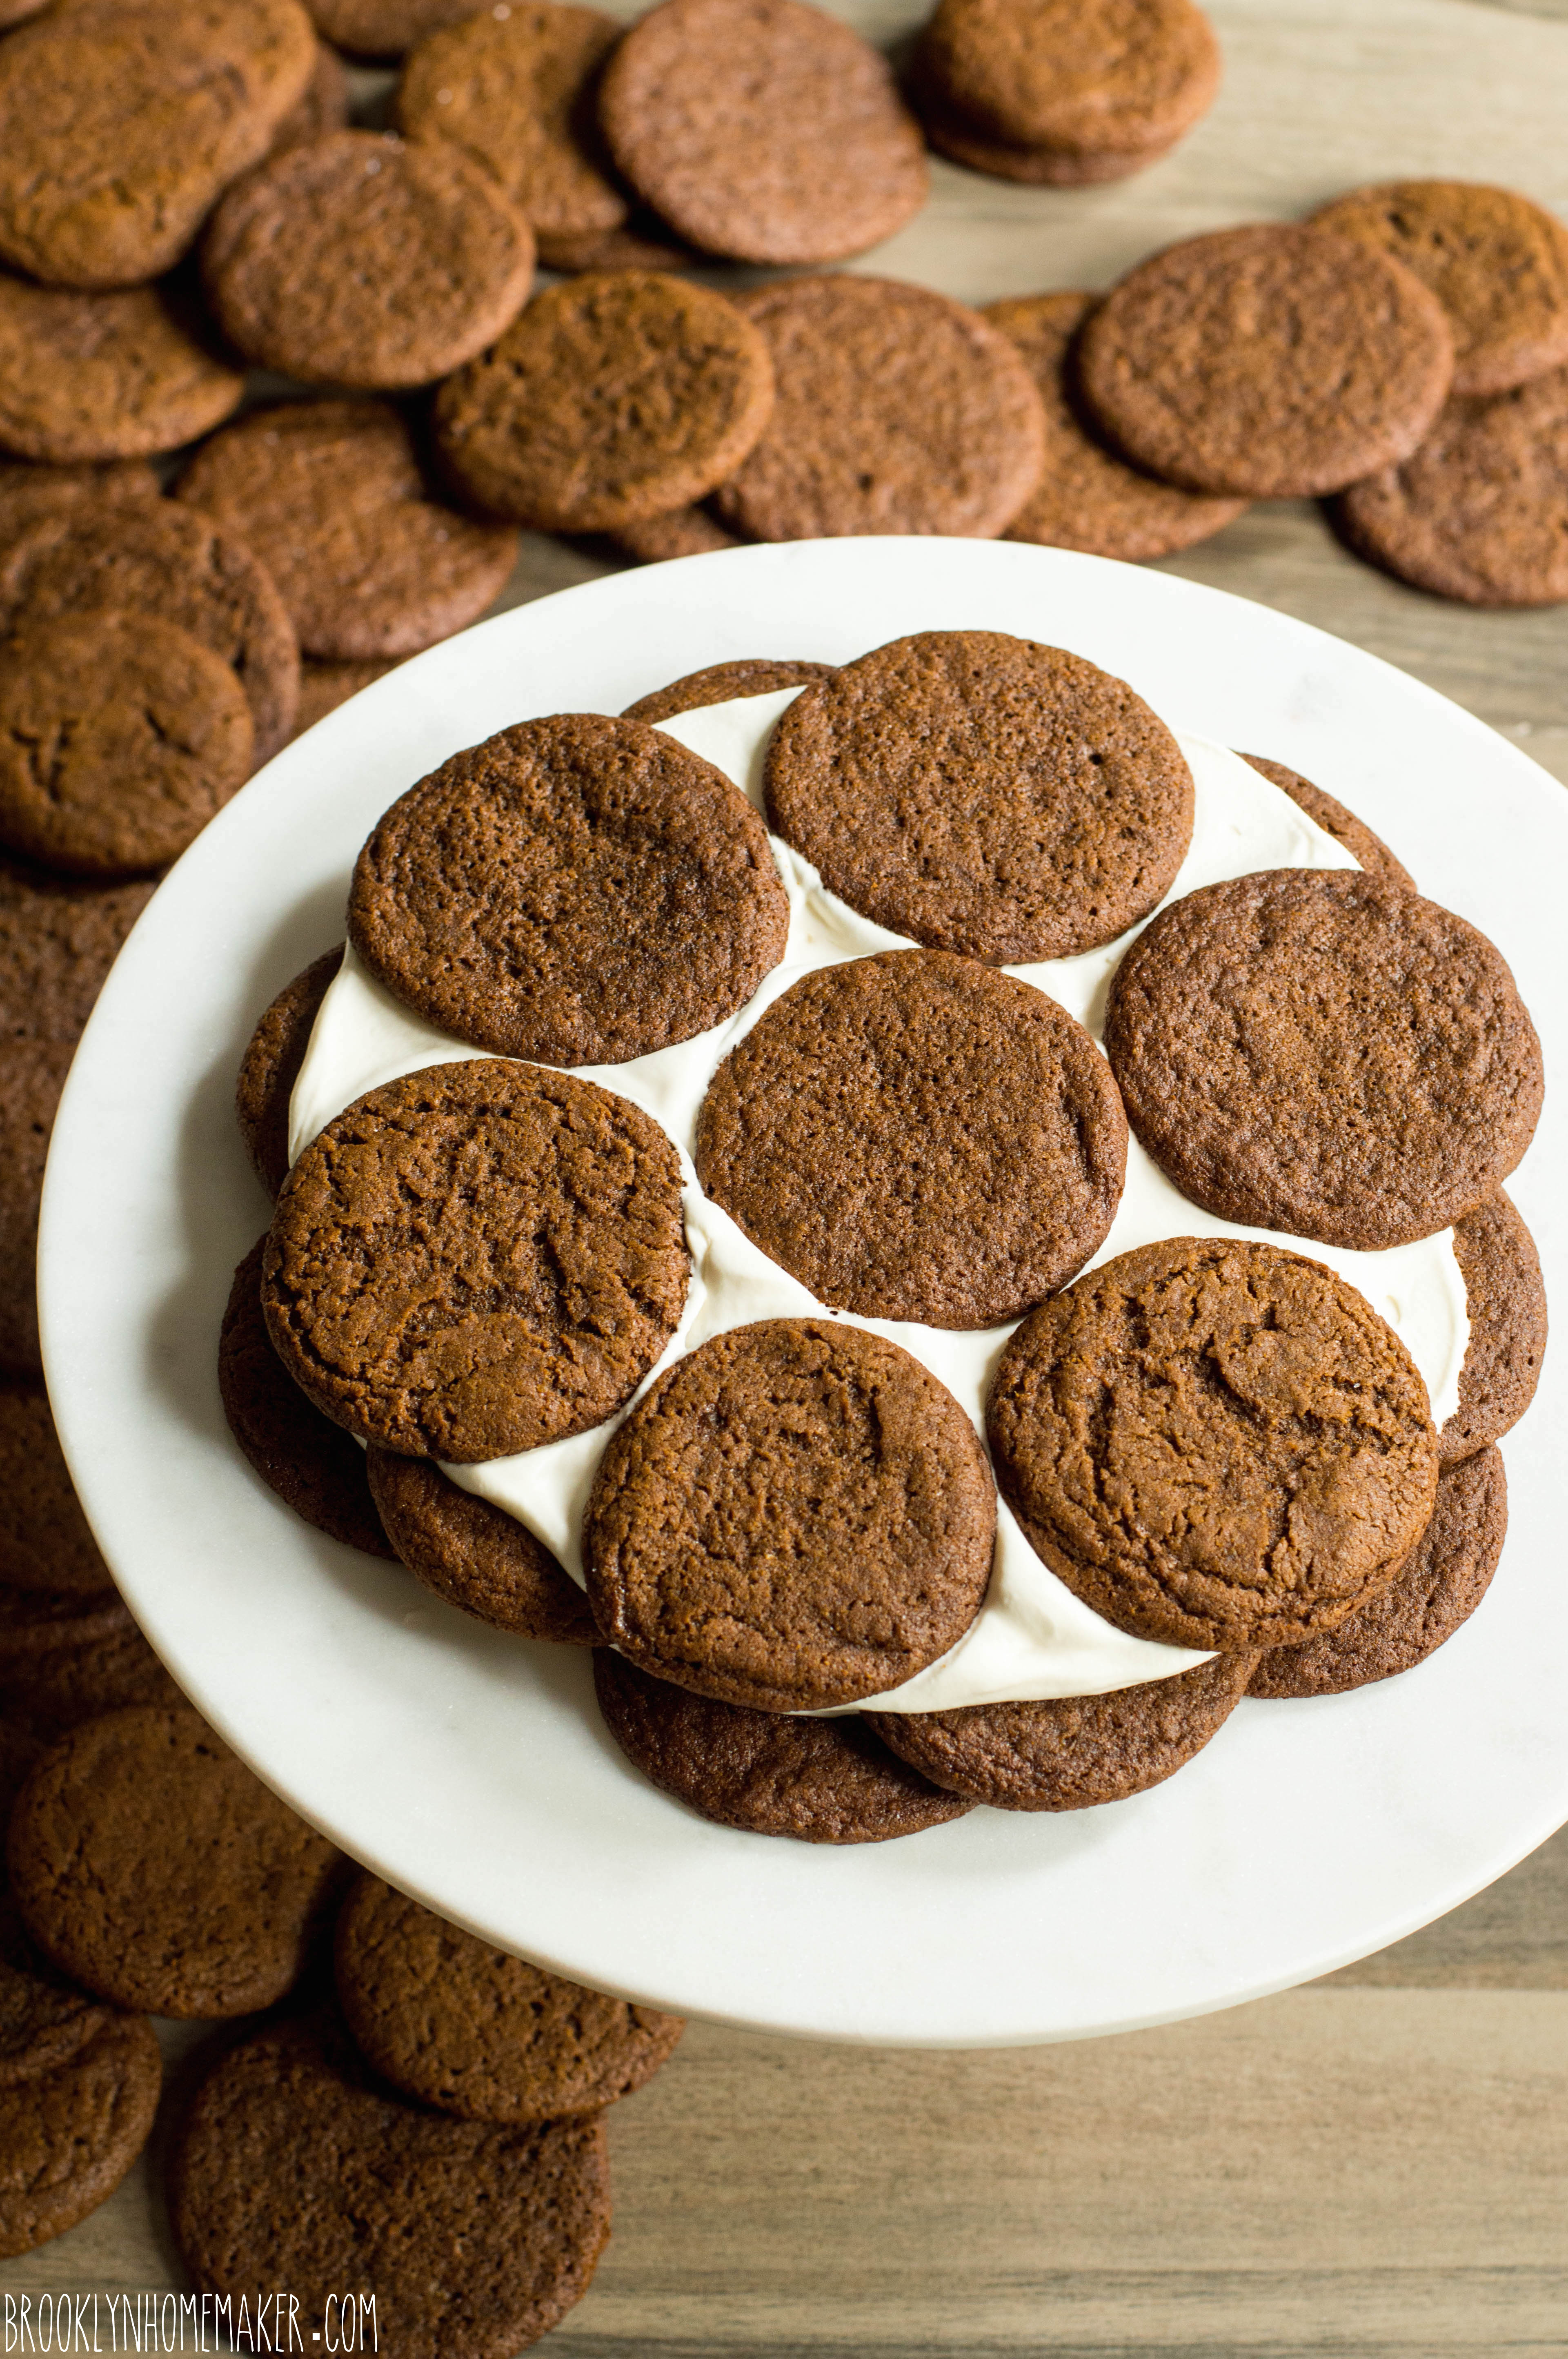
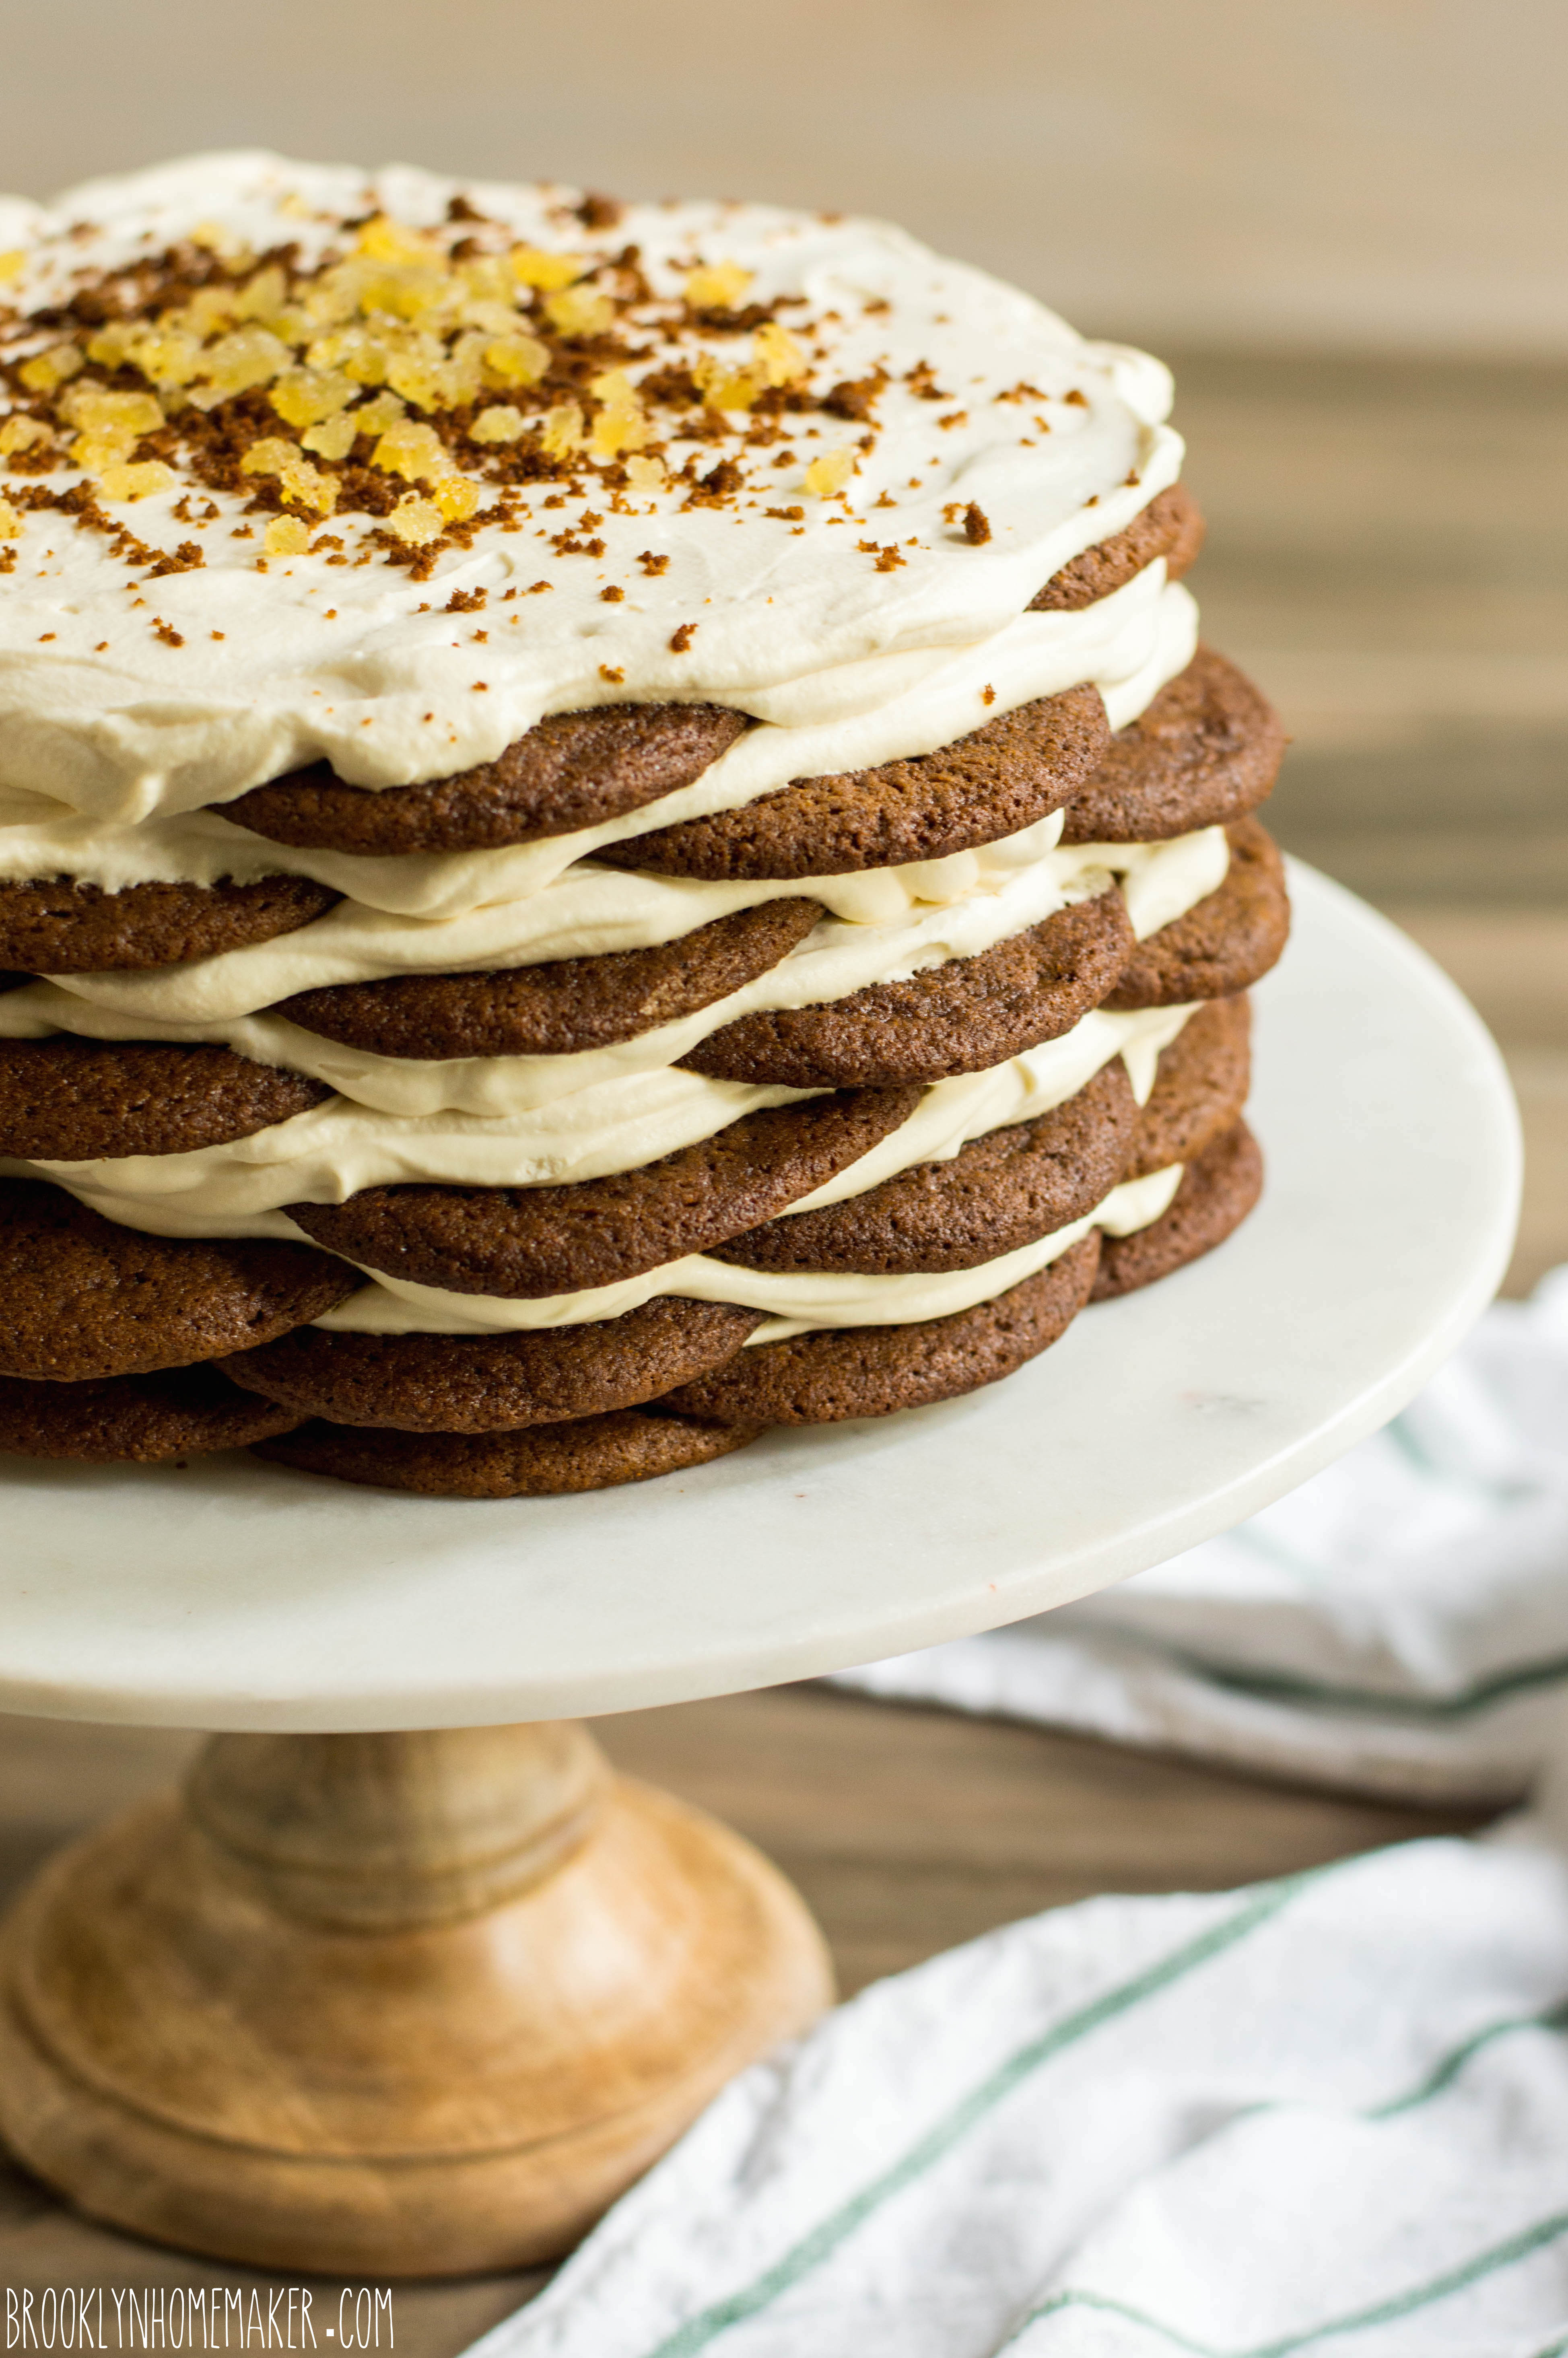
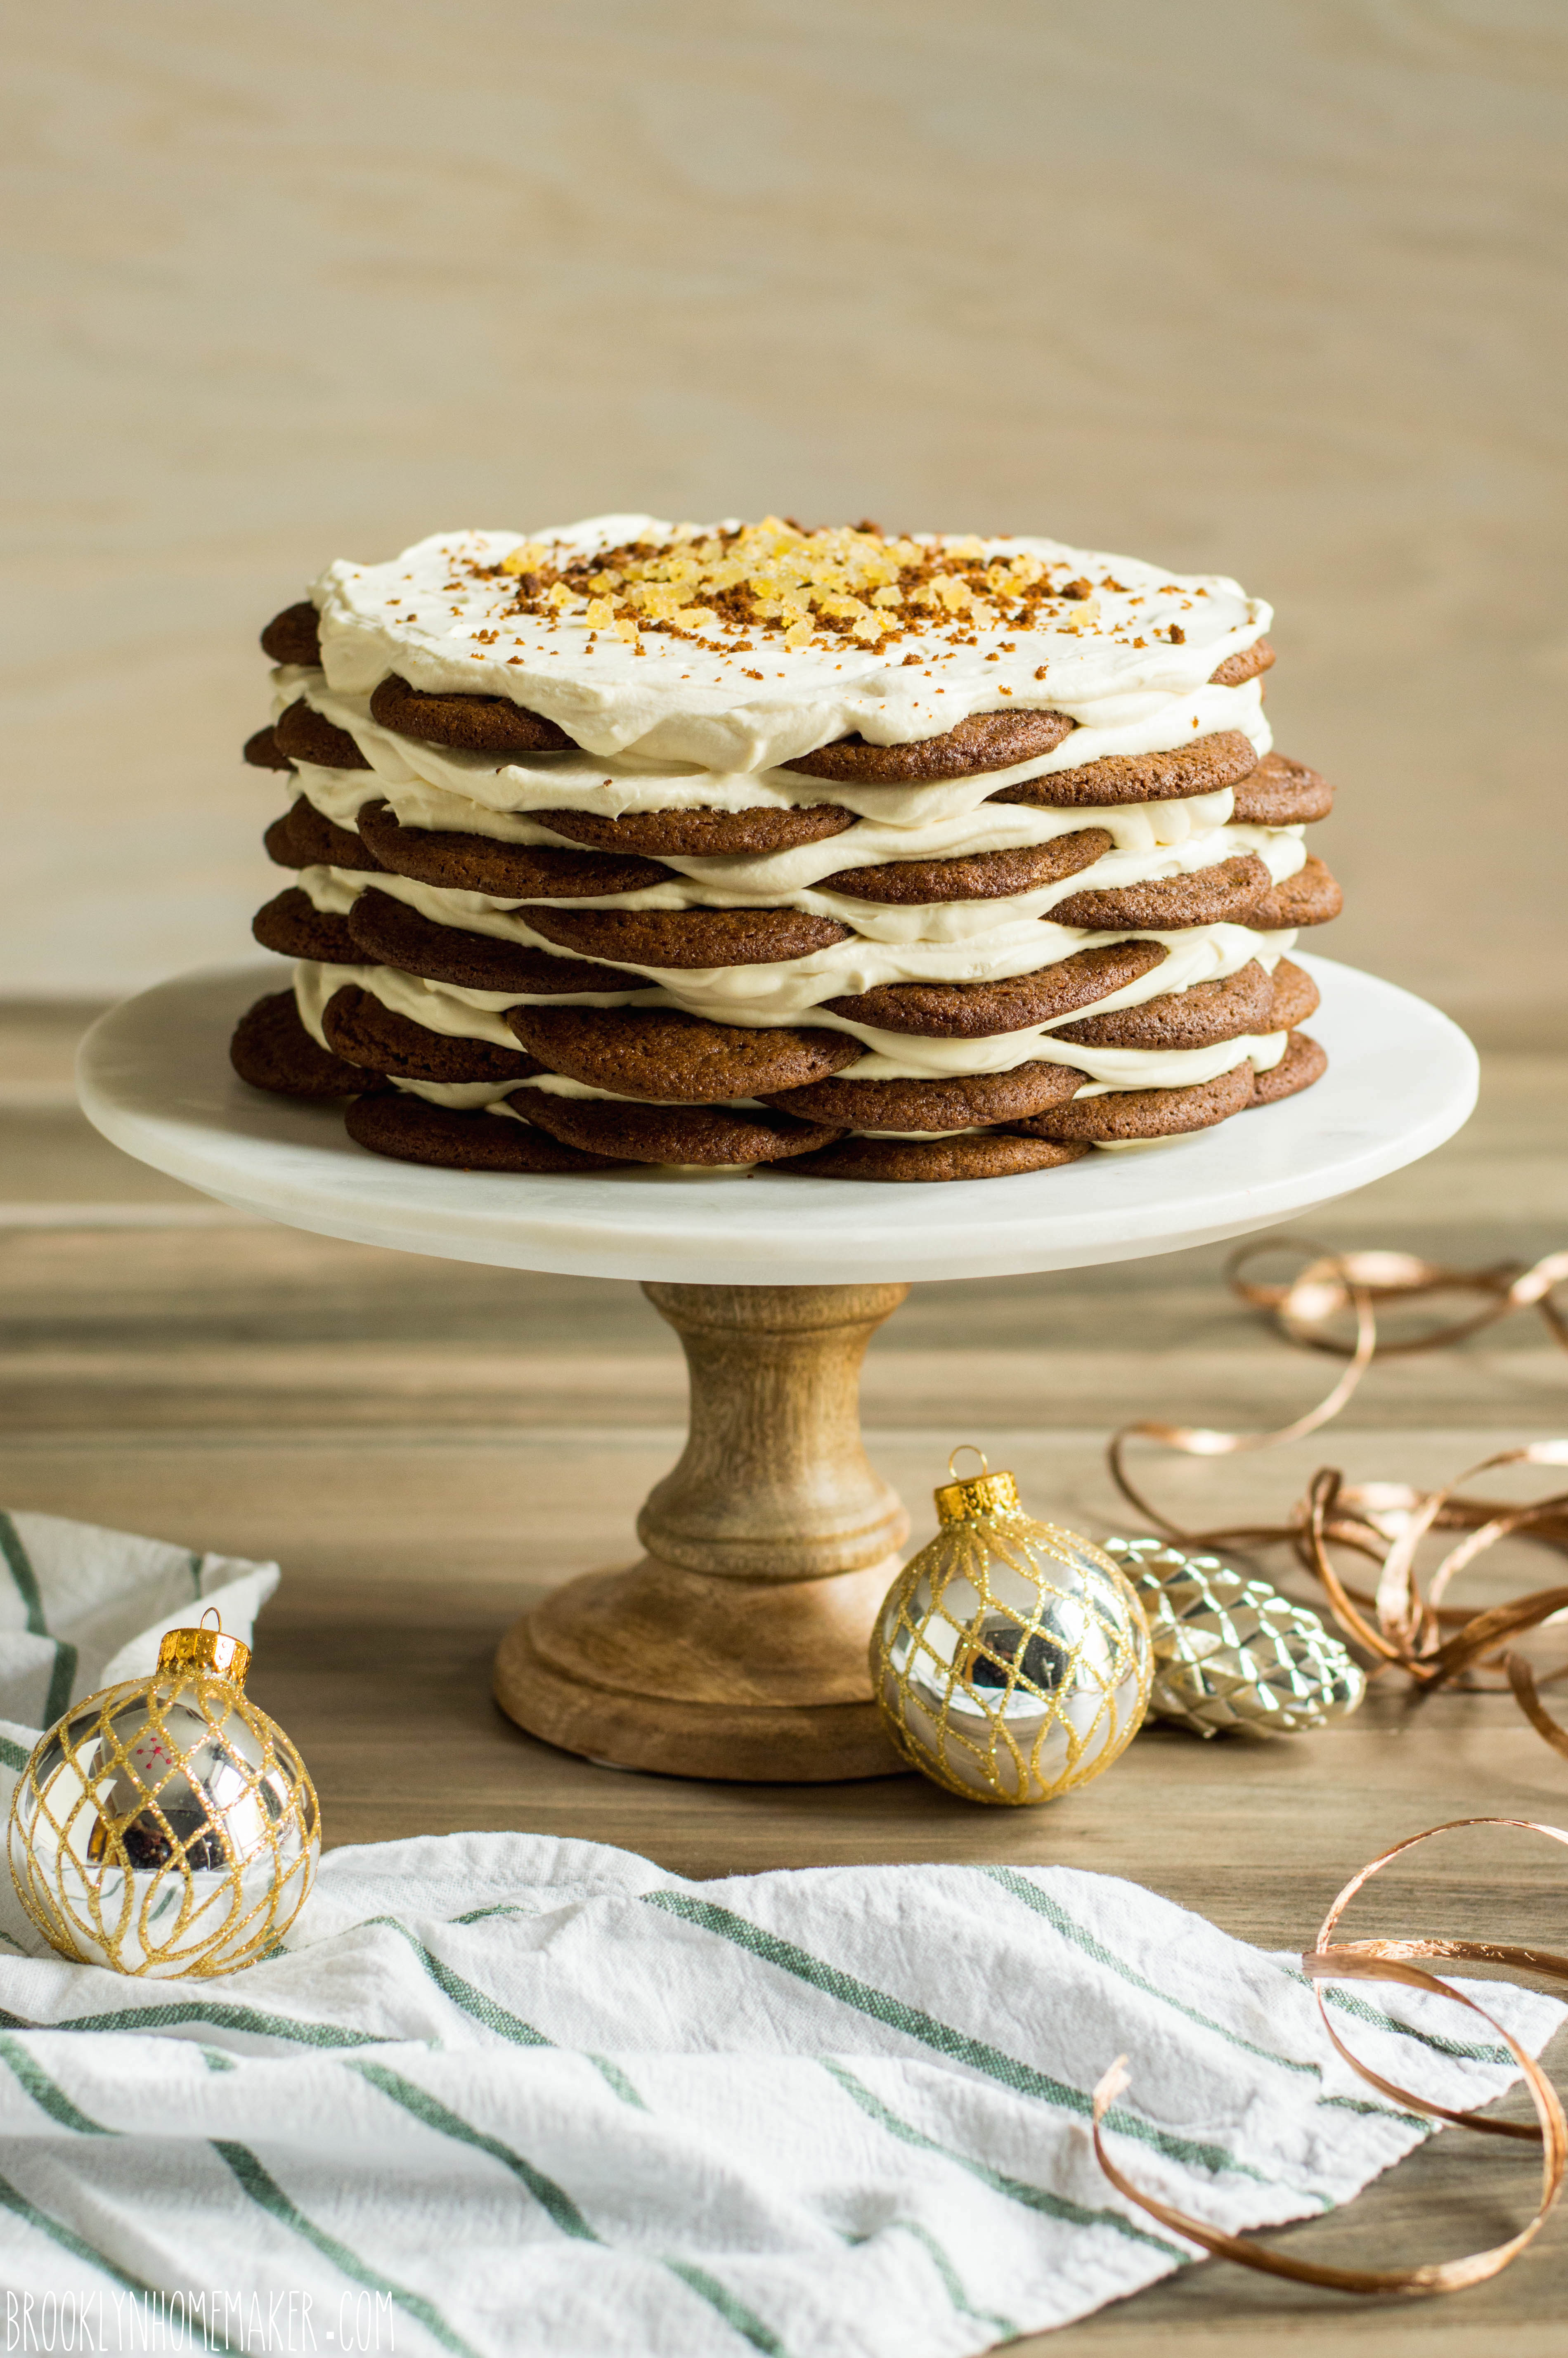
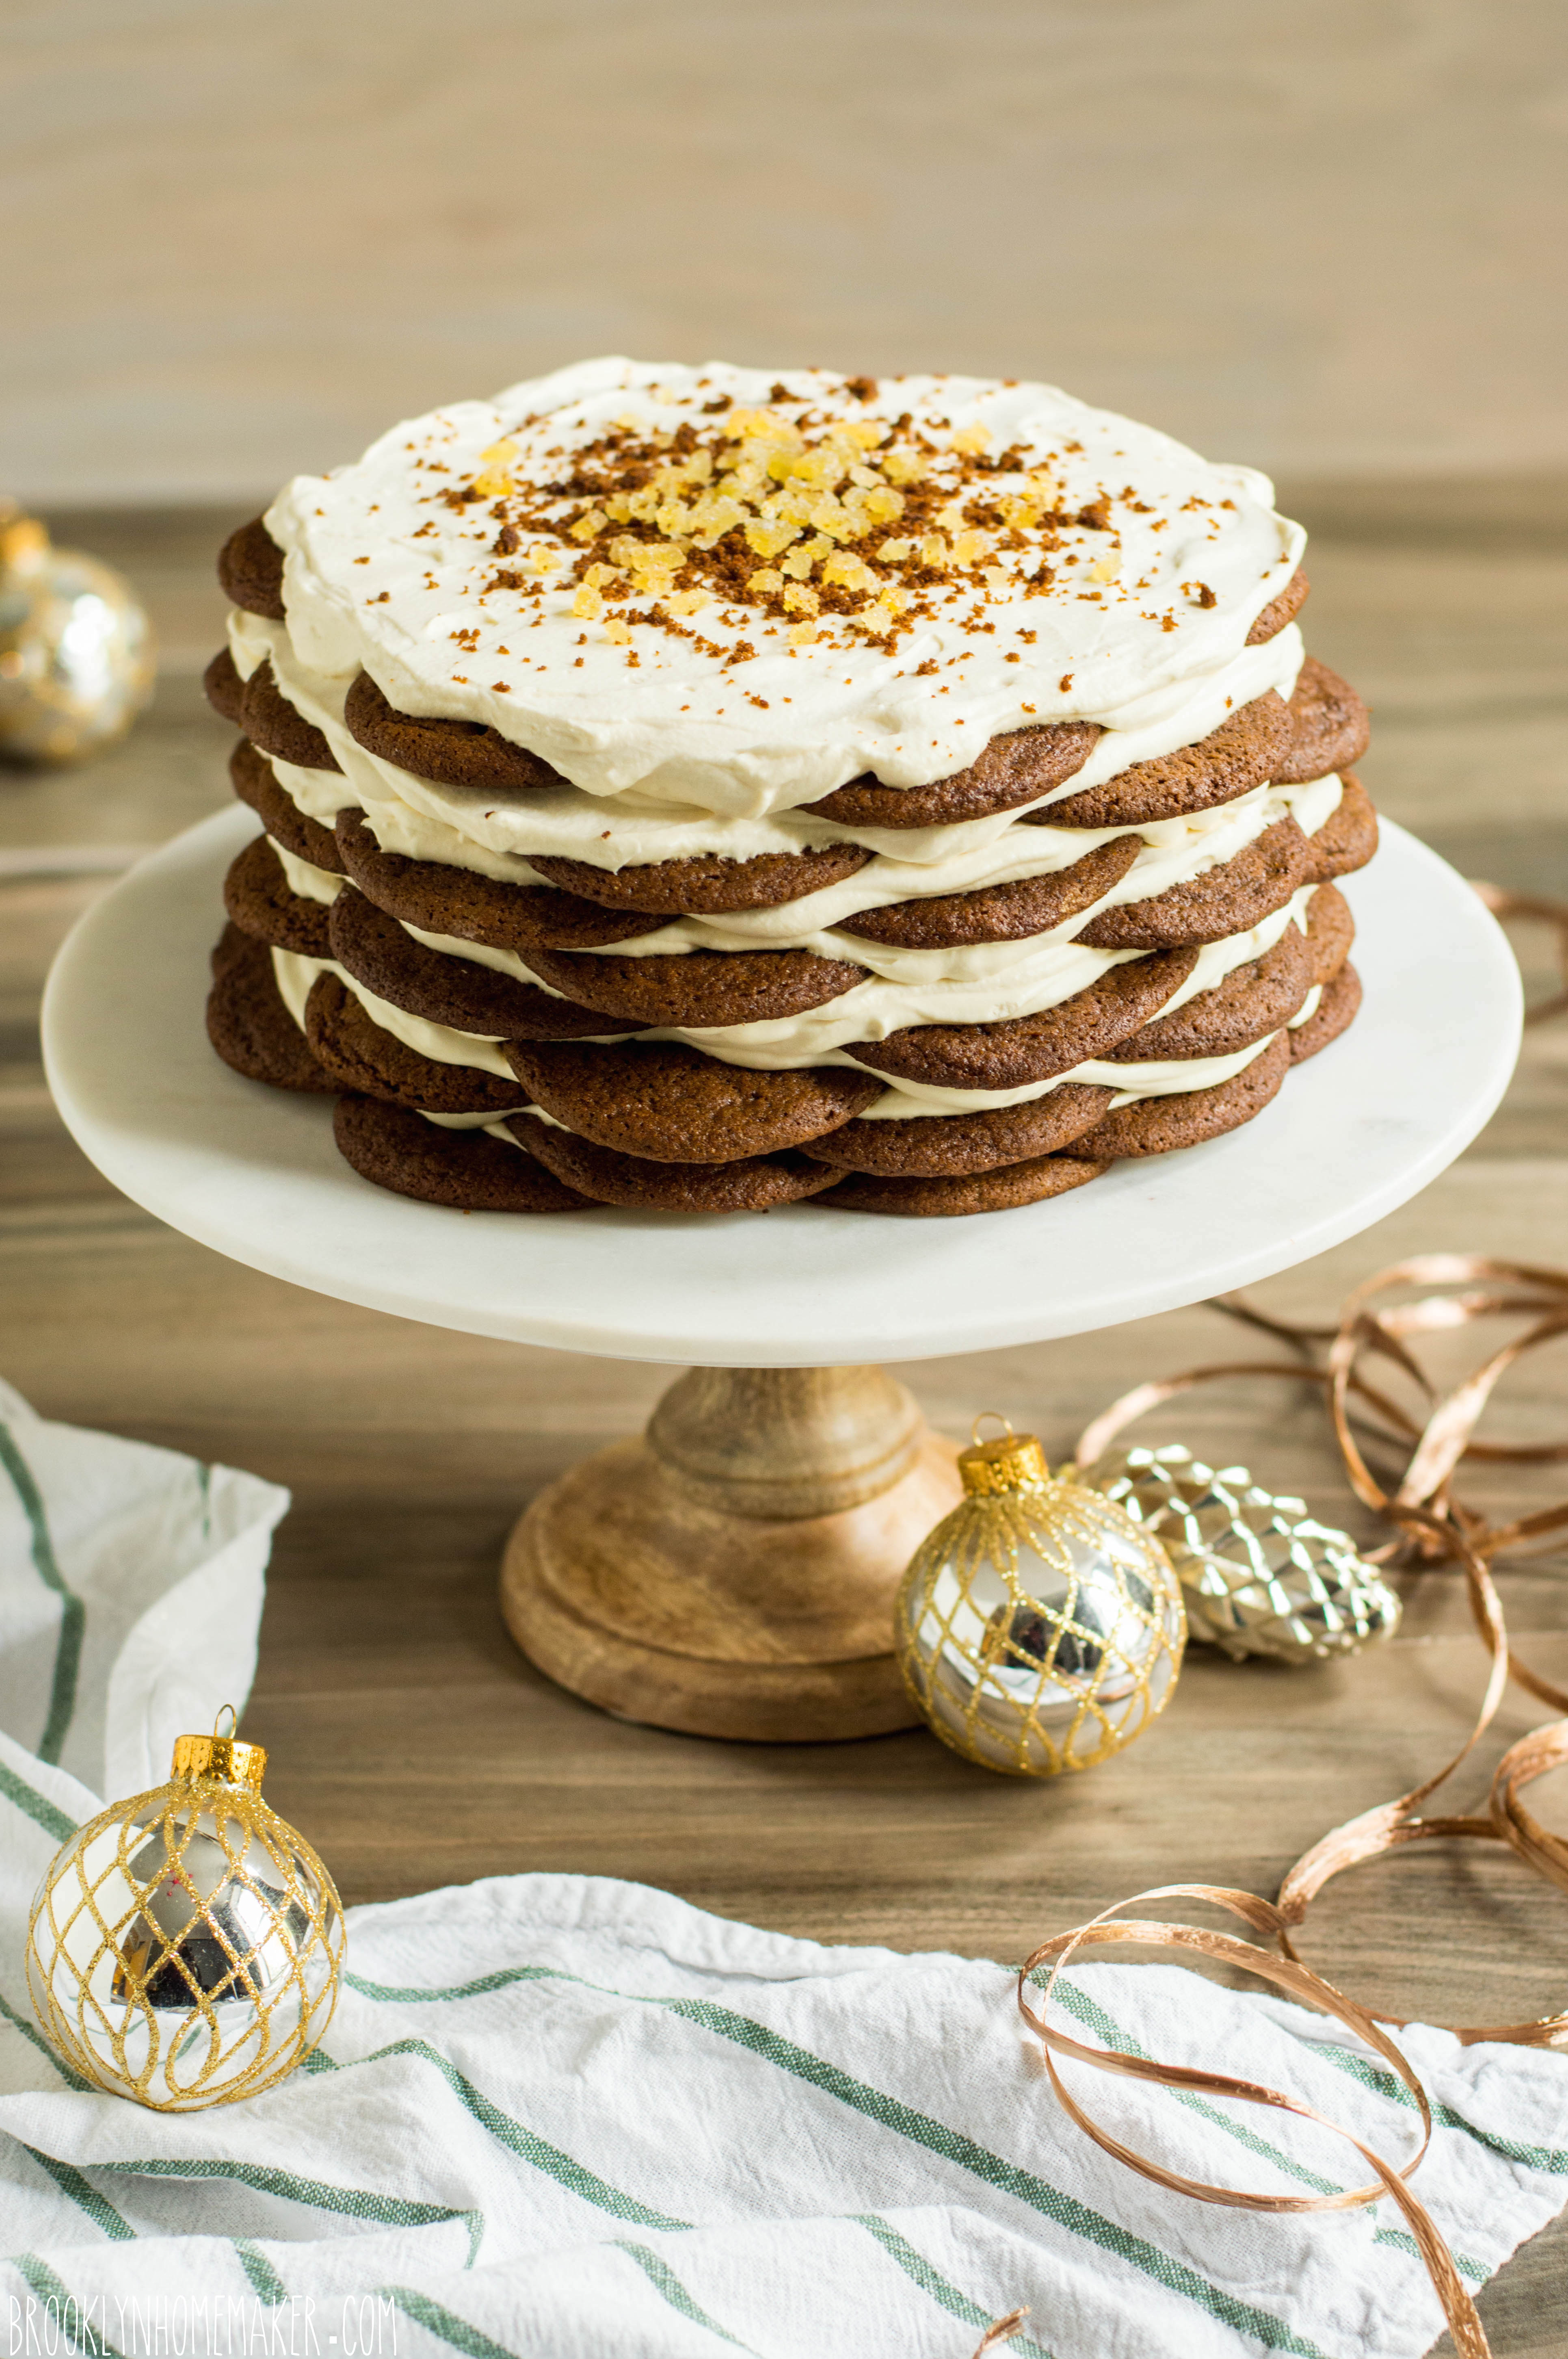
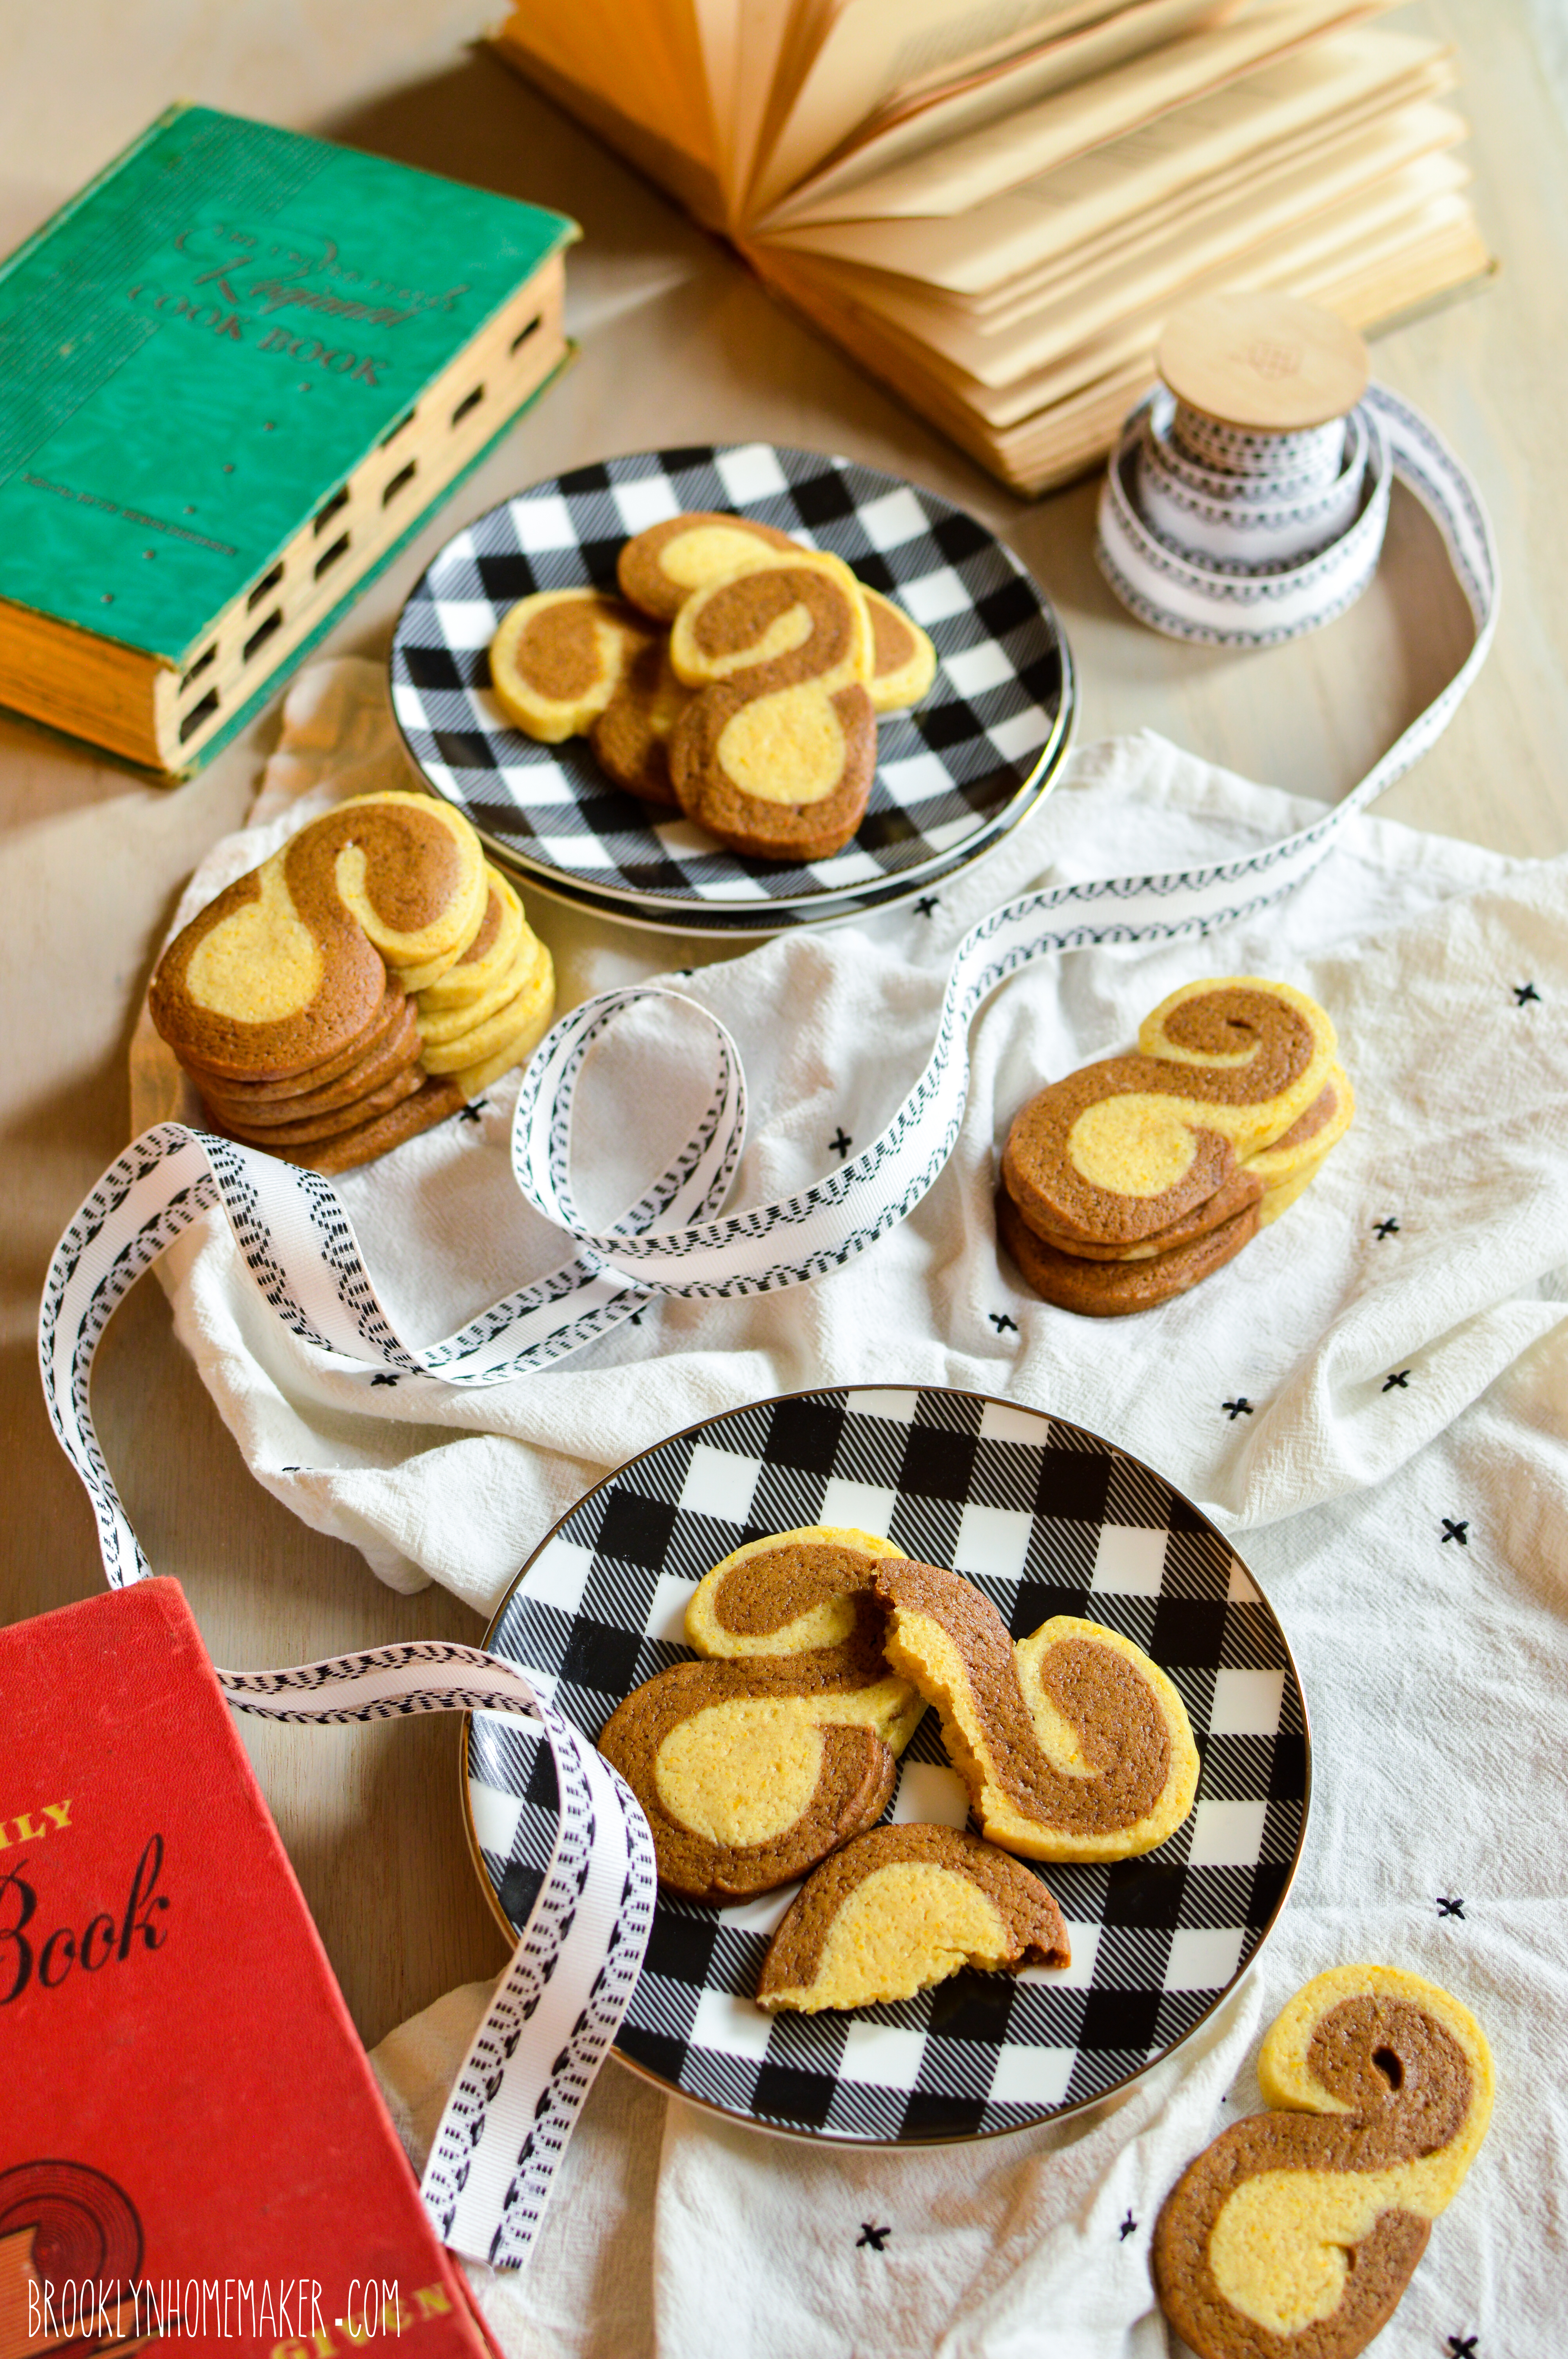
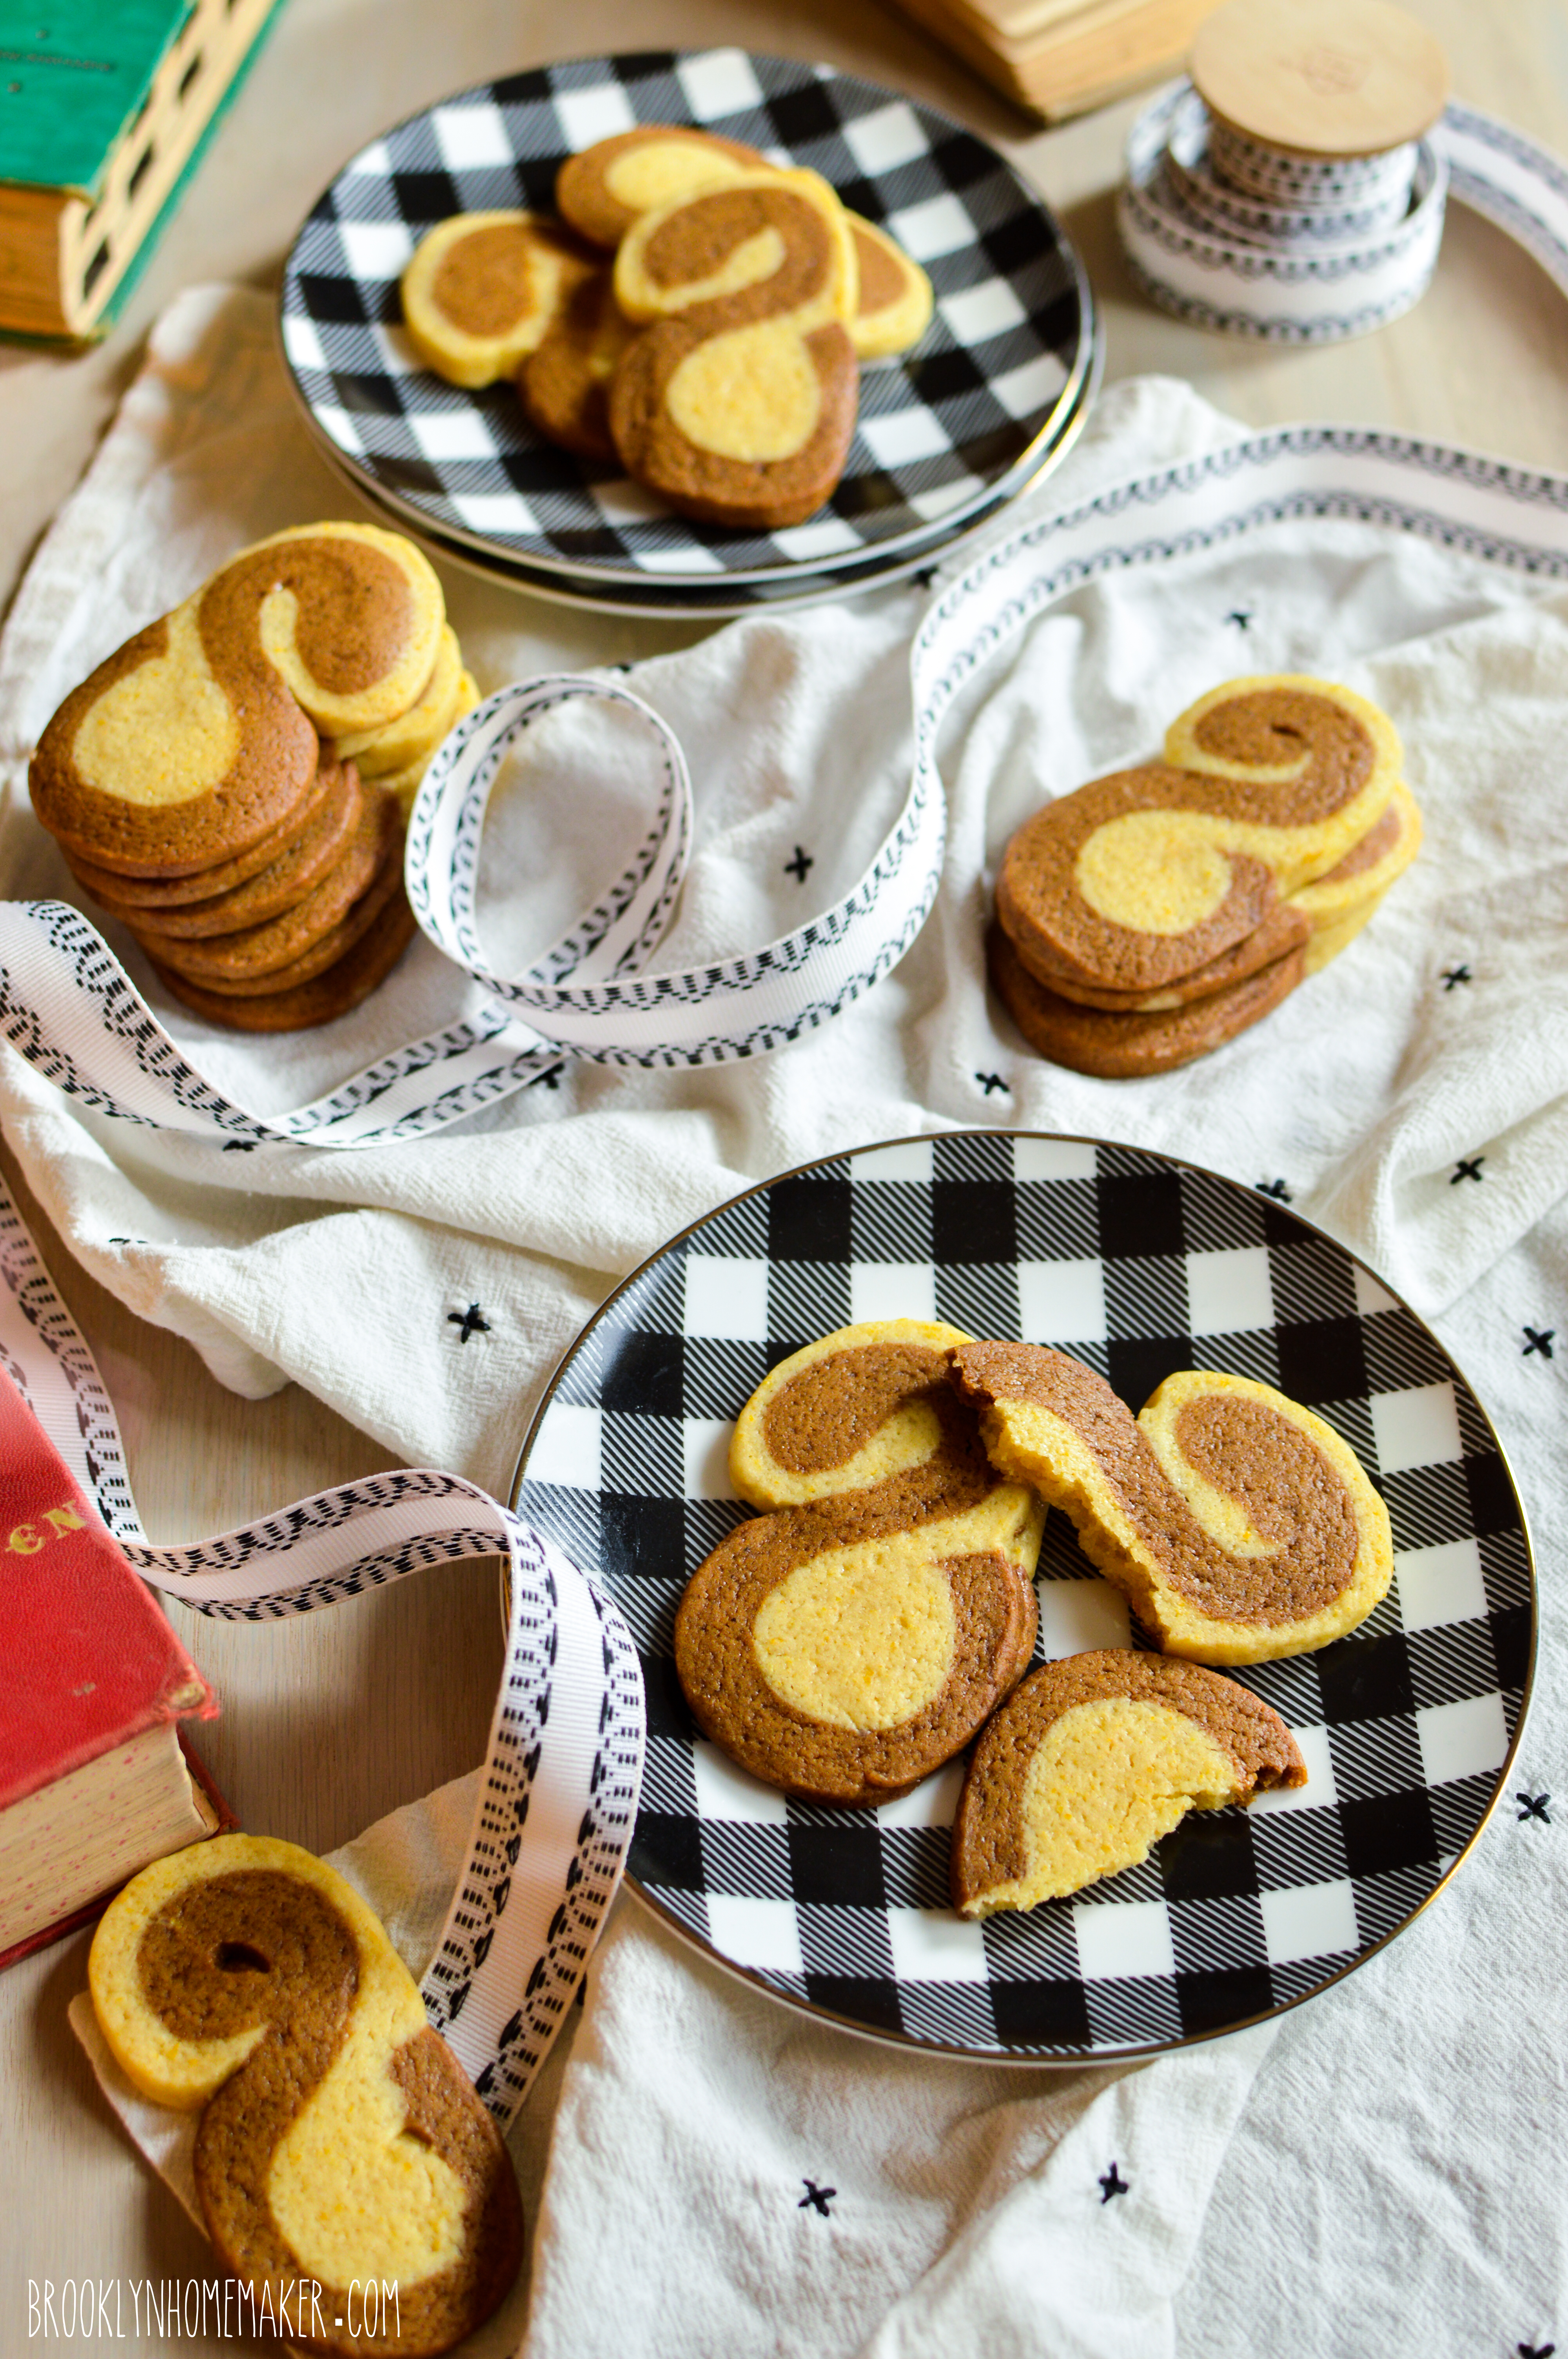
The results are in y’all, these cookies are amazing! The light part is citrusy and delicate, soft and chewy, and I absolutely love the contrast with the rich and spicy molasses dough. Taken all in one bite they balance perfectly, and because I’m a nerd I also tried eating each dough separately in small bites to see how I liked them on their own. Just perfect! Thanks to my new Nordic Ware half sheet pans, the cookies baked up perfectly tender with delicately and evenly browned bottoms. While dark non-stick pans can sometimes overheat and burn the bottoms of cookies, these professional grade pans heat evenly and consistently producing perfectly baked cookies every time!

These cookies are absolutely ideal for your holiday spread, and they’ll be great for my cookie swap. You should definitely check out this cookbook for yourself, but so you don’t have to wait to make these cookies, I’ve shared the recipe below.

ginger pinchies | Brooklyn Homemaker

Ginger Pinchies

  • Servings: makes 16 cookies
  • Print
recipe from Jul: Swedish American Holiday Traditions
1/2 cup (1 stick) butter, softened
1/2 cup sugar
1 egg yolk, beaten
3 tablespoons milk
1 1/2 cups plus 1 tablespoon all-purpose flour (divided)
1/2 teaspoon baking powder
1/2 teaspoon salt
1 teaspoon vanilla extract
zest of 1 orange (about 1/2 teaspoon)
zest of 1 lemon (about 1/2 teaspoon)
2 tablespoons molasses
1 teaspoon ground ginger (or 2 to 3 tablespoons grated fresh ginger)
3/4 teaspoon cinnamon
1/2 teaspoon cloves
1/4 teaspoon allspice
pinch nutmeg
pinch cayenne

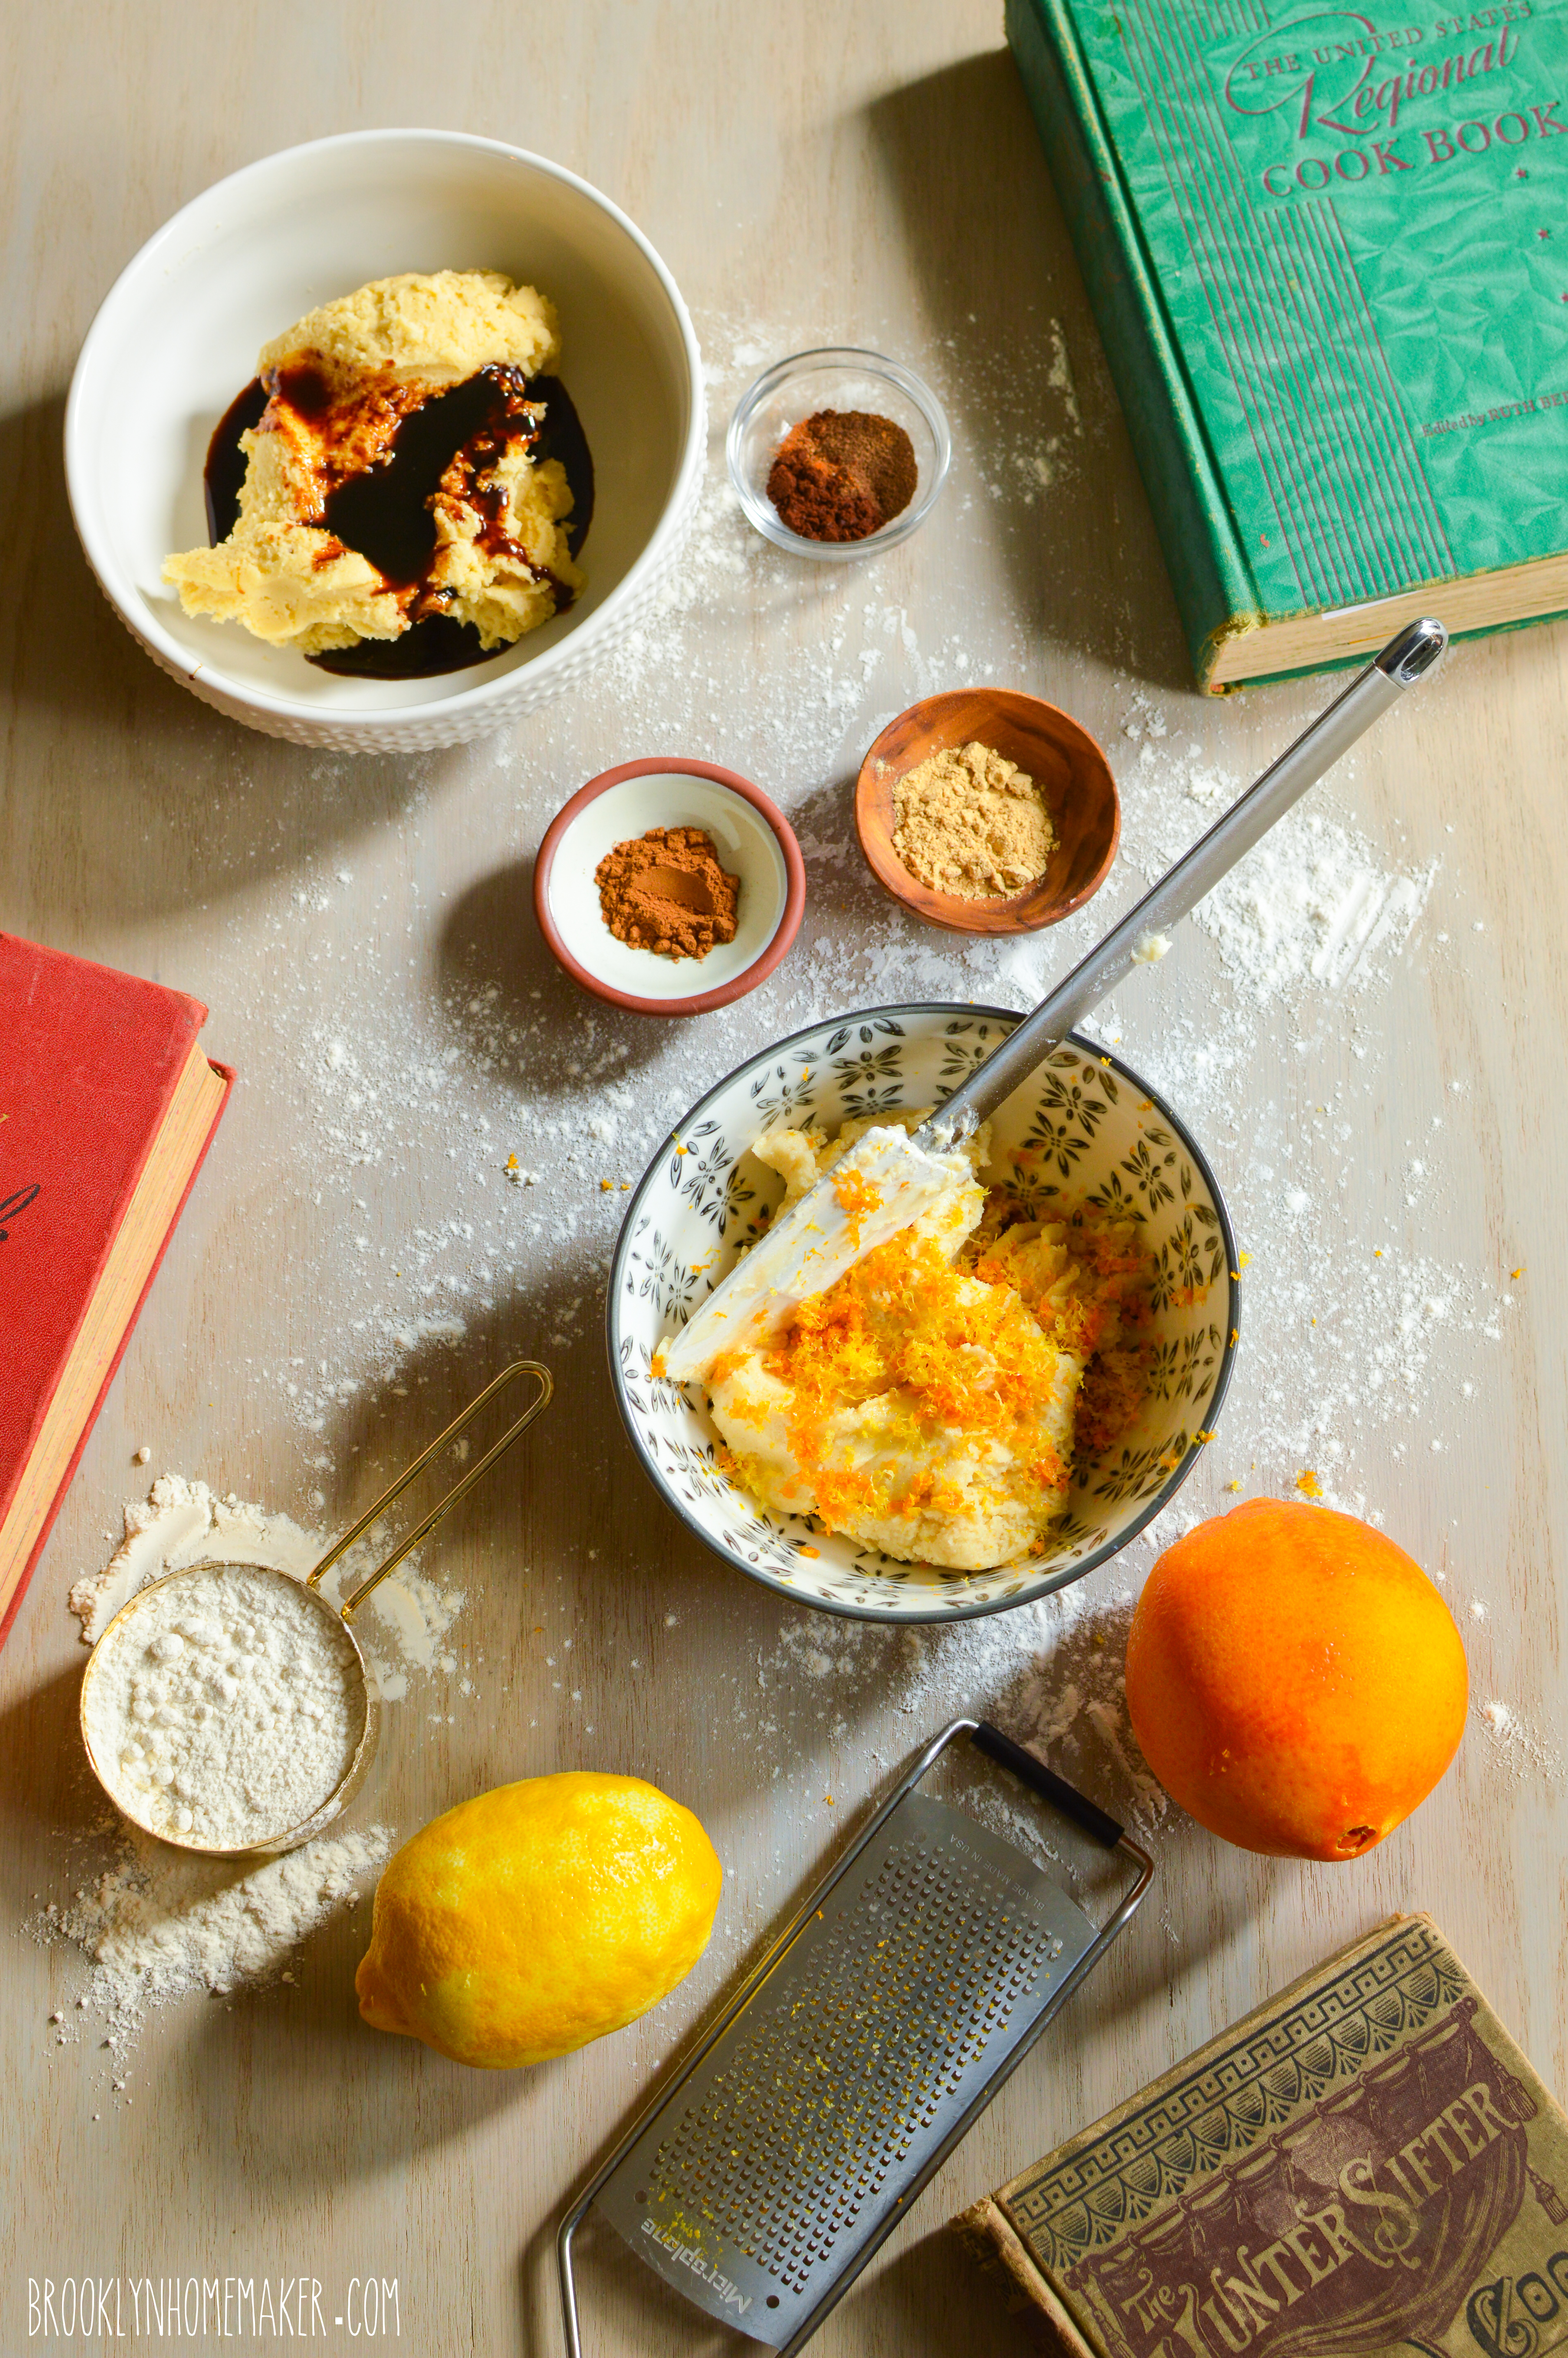
Use a stand mixer with paddle or a hand mixer to beat butter on low speed for about 30 seconds. Gradually add sugar and bead on medium speed until fluffy, about 3 to 4 minutes. Turn mixer to low and add egg yolk and milk and mix well. In a small bowl, whisk together 1 1/2 cups flour, baking powder, and salt. Gradually add flour mixture and continue beating until dough forms.

Divide dough in half (there will be just over 2 cups total) Add half of the dough back to the mixing bowl along with vanilla, orange zest, and lemon zest. Mix until incorporated. Form dough into a ball and wrap in plastic wrap. Set aside. Place remaining dough in mixing bowl along with remaining 1 tablespoon flour, molasses, ginger, cinnamon, cloves, allspice, nutmeg, & cayenne. Mix until incorporated. Dough will be very soft. Form dough into a ball and wrap in plastic. Chill both dough balls at least 30 minutes. (I froze mine for 30 minutes)

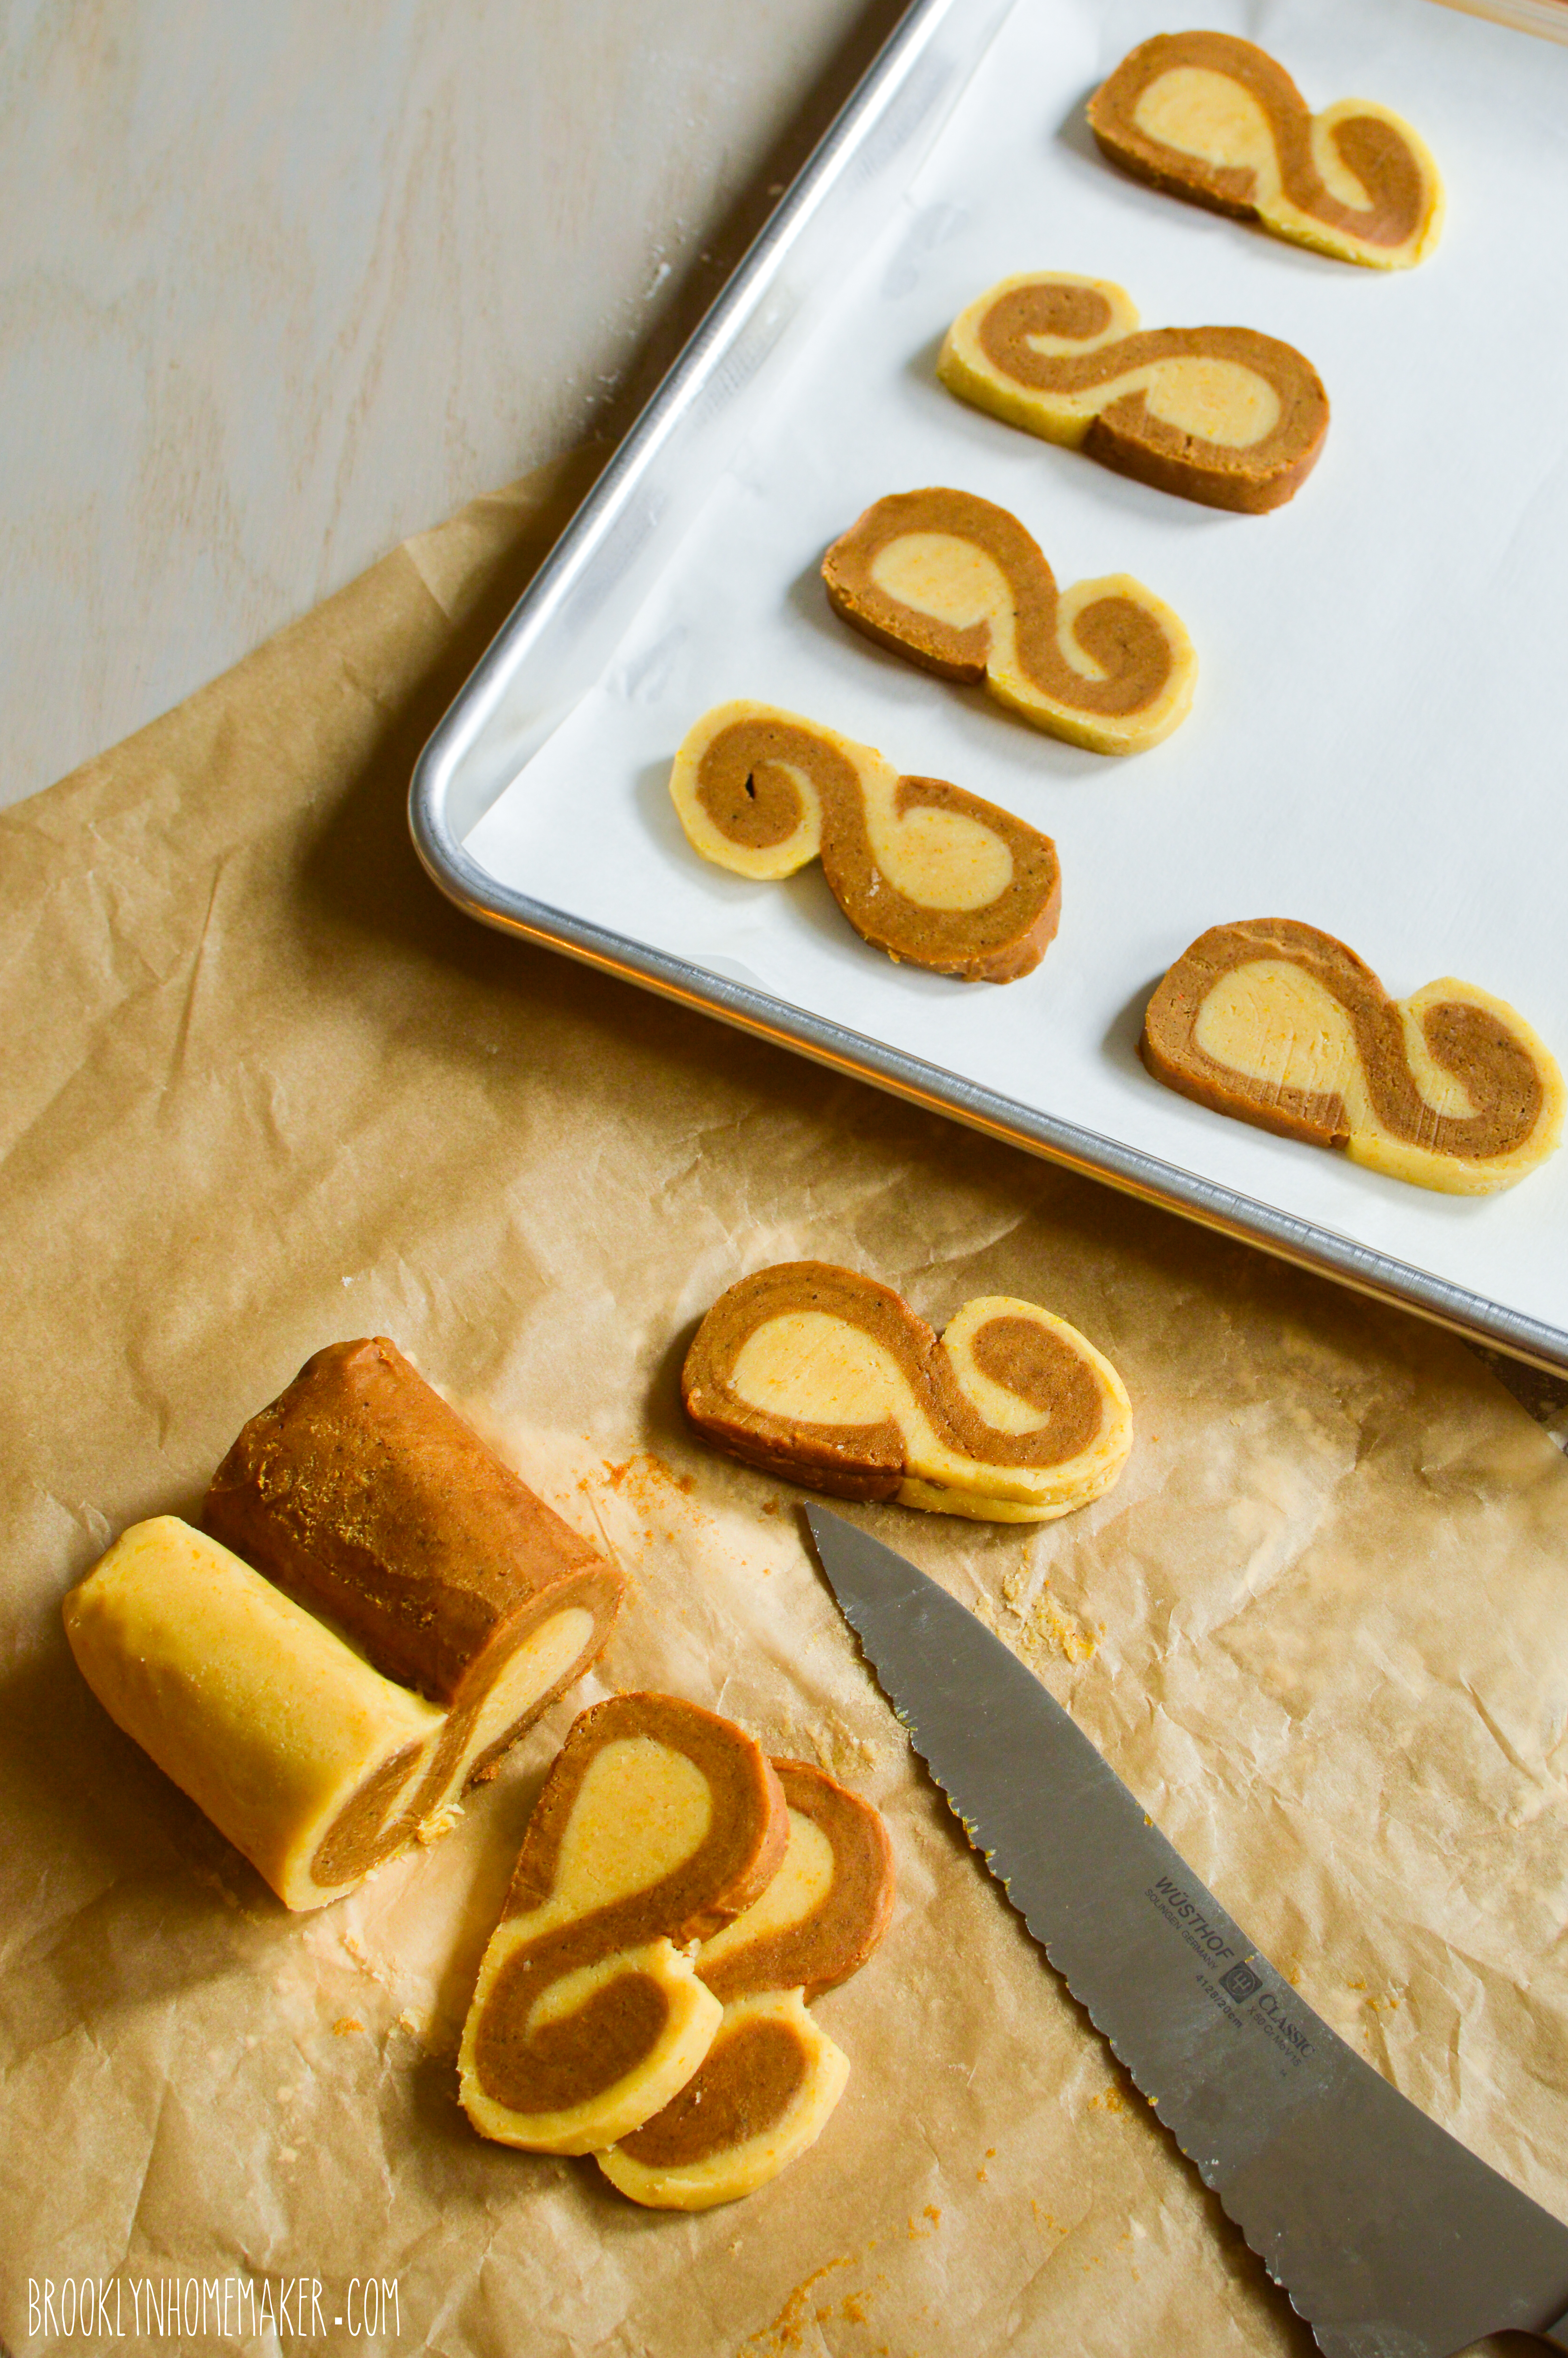
Place parchment paper over work surface and roll each dough ball into a 1/4-inch-thick, 8×5-inch rectangle. (It’s important to try to get as close to a rectangle as possible, rather than an oval shape, so that your finished cookie log isn’t hollow at the ends.) Place one dough rectangle over the other, aligning the dough as perfectly as possible. Starting at one of the narrow ends of the dough, use the parchment to help you gently roll the dough into a spiral, stopping a little more than halfway up the rectangle. Flip the dough upside down and roll the other end into a spiral so that the dough resembles and S-shaped log. Wrap in clean plastic wrap and chill at least an hour. (Again, I froze mine)

Preheat oven to 350 degrees and line baking sheets with parchment paper. Slice chilled dough into 1/4-inch-thick slices for about 16 S-shaped cookies. (I sliced my log in half, then into quarters, then sliced each quarter into 4 slices to get 16 evenly sliced cookies) Place on prepared baking sheets about 1 to 2 inches apart. Bake for 8 to 10 minutes or until evenly browned on the bottom. Cool on rack.

Advertisement

spicy gingerbread bundt cake with caramelized white chocolate ganache #bundtbakers

When it comes to being a food blogger, there’s a lot of pressure to come up with “original” recipes.

spicy gingerbread bundt with caramelized white chocolate ganache | Brooklyn Homemaker

Thing is, there ain’t much out there that ain’t been tried before. Odds are that any flavors you’re considering combining have probably already been combined before by someone else, somewhere else.

spicy gingerbread bundt with caramelized white chocolate ganache | Brooklyn Homemaker

When Laura from Baking in Pyjamas chose “winter wonderland” as our #bundtbakers theme this month, my very first thought was of a deep, dark, super spicy gingerbread bundt cake. There is nothing in the world that says winter holidays to me more than the combination of warm spices and molasses.

The problem? Everybody and their uncle is posting gingerbread cake recipes right now (and have been every December since the advent of the food blog). As much as I wanted to bake some dark, dense, spicy, & chewy gingerbread for myself, I decided that I should probably try to come up with something a bit more unique.

Life is hard sometimes you guys.

 spicy gingerbread bundt with caramelized white chocolate ganache | Brooklyn Homemaker

After a bit more brainstorming, I remembered the caramelized white chocolate I’d read about on my friend Lindsay’s ice cream blog, If the Spoon Fits.

Now, before you start with the whole “white chocolate is gross/too sweet/boring/stupid/not chocolate” comments, hear me out. When you take the time to slowly caramelize good white chocolate in the oven with a sprinkle of flaky sea salt, it transforms into something completely new and exciting and magical. The sugars in the chocolate caramelize and the cocoa butter gets richer and deeper and almost butterscotch-y. While it still has the texture of white chocolate, the flavor is much closer to a rich and creamy salted caramel.

When Lindsay first posted about it I was a bit skeptical that white chocolate could really be THAT GOOD, but I made a mental note and filed it away for a rainy day. A winter wonderland themed bundt cake seemed like the perfect rainy day opportunity to bust it out.

caramelized white chocolate | Brooklyn Homemaker

I had faith in Lindsay that the flavor would be great, but I felt like I’d want a bit more texture and interest so I decided to add some nuts. Almonds, walnuts, or pecans would have been ideal choices for flavor and crunch, but I decided that roasted chestnuts would be sooooo much more winter wonderland-y.

Oddly enough, even though my Grandfather has two giant old chestnut trees in his yard, as best I can remember I’ve never actually eaten a chestnut and had no clue what they tasted like. I called my Grandmother to ask her about it, and she confirmed that even though they’re in the yard, she’d never attempted to eat or cook with them. I remember their spiky green outer shells littering the yard when I was a kid, but I think the squirrels always made away with most of the nuts inside. Maybe that’s why they never really made it into the house.

spicy gingerbread bundt with caramelized white chocolate ganache | Brooklyn Homemaker

So, not knowing what to expect, I went to the store and picked up a jar of expensive fancy pants French chestnut puree, along with a pound of whole chestnuts that I wanted to try to oven roast.

Oh lord what a mess.

Did you know that roasted chestnuts can explode if you don’t score the shell in the right place?
I wish I were joking.
After oven roasting them according to Martha’s instructions, I noticed that one of my chestnuts hadn’t opened at the score line. A few minutes after it came out of the oven, I poked the unopened chestnut with a knife. I’m not really sure why I did it, but it was definitely a mistake.
There was a loud POP like the sound of a sealed soda bottle being run over by a car (Is that a sound everyone knows, or is that just because I live in Brooklyn?). Anyways, the two halves of the shell went flying across the kitchen in opposite directions, one landing on my dish rack and the other on the floor in front of the refrigerator. The chestnut meat itself practically vaporized into a fine, hot, sticky chestnut dust that sprayed all over my kitchen; sticking to the oven, the walls, the side of the fridge, the counters, cabinets, and floor. A bit later I walked past the mirror and found chestnut dust covering my beard and stuck to my cheeks and forehead. Yesterday I was in the kitchen and happened to glance up and notice there was chestnut dust all over the ceiling.

After the initial shock of the whole thing, I just stood there laughing like crazy for a good 10 minutes before I cleaned up the mess. Luckily there were a few whole chestnuts left that I could use, so I peeled one open and tasted it.

Sooooo….

Ummmm….

Can anyone tell me why people like chestnuts? I was expecting something, oh, I don’t know, nutty?
But no. This thing was bland and flavorless while also being oddly sweet, with a soft, pasty, almost bready texture rather than the satisfying nutty crunch I was anticipating.

I eventually decided that I must just be missing something because I’m not used to them, so I wanted to forge ahead. Since the roasted chestnuts wouldn’t have the crunch and texture I was hoping for, I decided to just go for flavor and mix the chestnut puree into the cake batter instead.

Ugh. You guys. There are entire songs devoted to chestnuts this time of year. I just don’t get it.

The chestnut puree made the cake rubbery, dense, slightly bitter, and strangely grey-ish.
FML.

spicy gingerbread bundt with caramelized white chocolate ganache | Brooklyn Homemaker

A few days later I considered baking a new caramelized white chocolate cake with some crunchier, nuttier nuts, but ultimately my first cake was such a traumatic experience from start to finish that I couldn’t bring myself to try again.

After some soul searching, (Is it weird that my life is filled with so much bundt-related soul searching?) I decided to scrap the whole thing and go back to the gingerbread cake I’d wanted to make in the first place. Who cares if a bajillion other people have already made similar cakes? As long as I enjoy it and stand behind the recipe, why not?

Since I’d already gotten more white chocolate, and really was impressed with the caramel-y flavor, I decided to go ahead and use it to make a ganache glaze for the cake.

spicy gingerbread bundt with caramelized white chocolate ganache | Brooklyn Homemaker

After that first cake, it felt SO DAMNED GOOD to have this one turn out so well.

Having grown up with traditional spicy German Christmas cookies like pfeffernusse and lebkucken, I like my gingerbread super dark and spicy so I use lots of molasses and plenty of spice. I even like to use a touch of ground black pepper for a bit more heat, and along with the dried ginger I like to stir some little chewy chunks of crystallized ginger into the batter right at the end.

The caramelized white chocolate ganache takes some time to make, but it adds a lovely sweet, salty, caramel-y touch that perfectly compliments the rich, deep flavors of the cake.

If you like gingerbread, especially dark, dense, spicy, chewy, old-world gingerbread; you’re going to flip for this cake. It’s unbelievable right out of the oven, but the best part is that it even improves with age so it can (and should!) be made a day or two ahead. After a few days it seems even more tender, moist, and flavorful than it did when I first sliced it for these photos.

Please be sure to scroll down past the recipe to see all the other winter wonderland themed bundts the other #bundtbakers came up with this month!

spicy gingerbread bundt with caramelized white chocolate ganache | Brooklyn Homemaker

Spicy Gingerbread Bundt Cake with Caramelized White Chocolate Ganache

  • Servings: 12 to 16-ish
  • Print
2 1/2 cups all-purpose flour
1 teaspoons baking powder
1/2 teaspoon baking soda
1/2 teaspoon salt
2 to 3 tablespoons ground ginger (depending on how spicy you like it)
1 1/2 teaspoons ground cinnamon
1/2 teaspoon ground cloves
1/2 teaspoon freshly grated nutmeg
1/2 teaspoon finely ground black pepper
1 cup molasses (not blackstrap)
3/4 cup water
1/2 cup (1 stick) unsalted butter, room temperature
1/2 cup vegetable oil
1 1/2 cups packed dark brown sugar
3 large eggs
1/3 cup finely chopped crystallized ginger

Preheat the oven to 350°F. Butter and flour a 10- to 12-cup bundt-style pan.

In a large bowl whisk together the flour, salt, baking soda, baking powder, and spices. Set aside. In a separate bowl, whisk together the molasses and water and set aside. 

In the bowl of a stand mixer, beat together the butter, oil, and sugar until light and fluffy, about 2 to 3 minutes. Add the eggs one at a time, beating well and scraping the bottom and sides of the bowl after each addition.

Add the flour mixture in three additions alternately with the molasses water, starting and ending with the flour. Add the chopped crystallized ginger with the last addition of flour, and mix just until smooth. Do not over-mix. 

Pour the batter into the prepared pan, smooth the top, and bake for 55 to 65 minutes, or until a cake tester inserted into the center comes out clean.

Cool in the pan on a wire rack for at least 20 minutes, then turn the cake out onto the rack to cool completely. If desired, make the caramelized chocolate while the cake cools. Recipe below. 

I recommend baking this cake a day or two ahead. It improves with age! Cake can be kept in an airtight container at room temperature for up to three days.

*note: It is totally normal and okay if this cake sinks a little bit in the center.

.

Caramelized White Chocolate Ganache Glaze:
Adapted from David Lebovitz

8 oz good quality white chocolate (must have real cocoa butter)
2 tablespoons vegetable oil
1/2 teaspoon coarse kosher salt
1/4 cup heavy cream

Optional decorations: white nonpareils, white dragees, white sixlets

Turn the oven down to 250F

If the white chocolate is in a block or bar, chop it into coarse pieces. Spread the white chocolate in an even layer on a rimmed baking sheet and heat for ten minutes.

Remove it from the oven, add the oil, and spread it out with a clean, dry spatula.

Continue to cook for and additional 30-60 minutes, stirring and spreading every 10 minutes. At some points it may look lumpy and chalky, but keep stirring and it will smooth out and caramelize. Once the chocolate reaches a deep golden brown, remove from the oven, scrape into a bowl or large measuring cup, and whisk in the salt and heavy cream until completely smooth and free of lumps.

Once the cake is completely cool drizzle the still slightly warm ganache over the cake and, if desired, top with optional decorations before it cools and sets.

spicy gingerbread bundt with caramelized white chocolate ganache | Brooklyn Homemaker

These wonderful wintery bundts are definitely putting me in the Holiday spirit this year! Thank you Laura for choosing such a perfect theme for the month of December!

BundtBakers
.

#BundtBakers is a group of Bundt loving bakers who get together once a month to bake Bundts with a common ingredient or theme. Follow our Pinterest board right here. Links are also updated each month on the BundtBakers home page.

gingersnap icebox cake with maple mascarpone cream

Why hello there! It’s so nice to see you again!

gingersnap icebox cake with maple mascarpone cream | Brooklyn Homemaker

First, I want to say that I hope you all had a perfectly wonderful (and delicious) Thanksgiving day. I know I did!

Second, I want to let you know that the pressure and the stress of making and testing and photographing and posting eight Thanksgiving recipes and making two actual Thanksgiving dinners (not to mention working at a kitchenware store leading up to the biggest food holiday in the US of A) was just too much for me. I promise that it was all worth it, but it actually killed me. I hate to be the bearer of bad news, but I’ve passed away.

gingersnap icebox cake with maple mascarpone cream | Brooklyn Homemaker

Despite my untimely demise, there’s no rest for the weary, and here I am again posting from the great unknown.

The holidays are fast approaching so I know that I need to get my blogging butt in gear and get baking! Being that I’m recently deceased though, I wanted to try to do something sort of easy(ish). Easy doesn’t mean that it shouldn’t also be really fun and impressive and totally delicious though!

gingersnap icebox cake with maple mascarpone cream | Brooklyn Homemaker

Thing is,
I don’t really do “easy”.

A while back I saw Martha (yes, THE Martha) on TV promoting her new entertaining cookbook and she made an icebox cake with thin, crisp homemade chocolate chip cookies. I’d never had an icebox cake, but her version sounded amazing and actually pretty simple (especially for Martha).

gingersnap icebox cake with maple mascarpone cream | Brooklyn Homemaker

A traditional icebox cake is make with thin, store bought crisp wafer cookies sandwiched and stacked together with whipped cream. You do a layer of cookies, a layer of cream, a layer of cookies, a layer of cream, and so on and so forth until you suddenly have a round, cake shaped stack.

It doesn’t seem like this should work, but it does. You’d think that the cream would separate and wilt and the cookies would turn to mush and the whole thing would just fall apart and be weird and gross. But that’s not what happens. Magic happens.

gingersnap icebox cake with maple mascarpone cream | Brooklyn Homemaker

The crisp cookies soften as they absorb some of the liquid from the cream and so, rather than separating and wilting, the whipped cream actually thickens even more as the cookies soften up. When left for several hours (or overnight) the whole thing sort of takes on one perfect smooth, sliceable texture, just like a rich silky cake.

Like I said.
Magic.

gingersnap icebox cake with maple mascarpone cream | Brooklyn Homemaker

I decided that if it was good enough for Martha, it was good enough for me.

Rather than Martha’s chocolate chips, or the traditional chocolate wafer cookies, I wanted to do something a little more “holiday-y”. To me, growing up with German grandparents, the holidays were always filled with molasses and spice. Gingerbread and gingersnaps and the like. You know.

So I thought that a gingersnap icebox cake was just the ticket to kick off the holiday baking season. Like I said before though, I don’t really do “easy”. I know I set out to do an easy dessert, but once I got inspired and excited I decided that it would be more fun to make my own gingersnaps rather than using store bought. This is totally unnecessary, but I’m a weirdo so I totally enjoyed the process. If you do want to make your own though, I’d suggest using a little extra ginger in the cookies. The spice is mellowed out a bit by the cream so a little extra will kick it back up to where you’d expect a gingersnap to be.

gingersnap icebox cake with maple mascarpone cream | Brooklyn Homemaker

To add a little extra depth and richness to the standard whipped cream I added mascarpone and a touch of maple syrup. A splash of bourbon was a nice touch too but could easily be left out if you’re serving this to the under 21 crowd.

The ginger and molasses in the gingersnaps pairs perfectly with the sweet mascarpone maple whipped cream. The combination is like a rich velvety gingerbread flavored mousse. A sprinkle of chopped crystalized ginger adds a nice touch of extra spice and lets your guests know that rather than simple chocolate, this cake is made with sugar and spice and everything nice.

This cake is seriously amazing. Like, totally unbelievable. Russell has been raving about it ever since the last bite disappeared and keeps saying how he wasn’t expecting something so simple to taste so delicious. But, again, this cake is made of magic. You might even say that it’s special powers were strong enough to bring me back to life!

gingersnap icebox cake with maple mascarpone cream | Brooklyn Homemaker

Gingersnap Icebox Cake with Maple Mascarpone Cream

Maple Mascarpone Cream Icing:
2 1/2 cups cold heavy cream
1/4 cup sugar
1/4 cup real maple syrup
2 tablespoons bourbon or rum (optional)
1 tablespoon vanilla extract
8 oz mascarpone at room temperature
pinch of salt

At least 63 gingersnaps, for nine layers of seven cookies each
(I made my own using a double batch of smitten kitchen‘s recipe)
A tablespoon or two of finely chopped crystalized ginger, optional

In the bowl of an electric mixer fitted with the whisk attachment, whip the heavy cream until it begins to thicken and form soft peaks. In a separate bowl, stir together the mascarpone, sugar, maple syrup, bourbon, vanilla, & salt until smooth and well combined. Transfer mascarpone mixture to bowl with thickened cream and beat on low speed until almost smooth, 30 to 60 seconds. Scrape down the sides and fold to incorporate. Increase the speed to medium high and beat until the mixture is thick and holds firm peaks, another 30 to 60 seconds. Do NOT overbeat or the icing will become grainy.

On an 8″ cake board, cake stand, or serving plate, arrange a layer of cookies into tight a circle. You’ll want one cookie in the center with a ring of cookies surrounding it with as little space between them as possible. With the size of the cookies I used I could fit 7 cookies per layer. Place about 3/4 to a cup of icing over the first layer of cookies and smooth it out with a small offset icing spatula. Spread the icing almost to the outer edge of the cookies, leaving just a small edge of cookies showing. Arrange another layer of cookies, alternating the layers so they appear staggered above one another. Repeat another layer of icing and then another layer of cookies, again and again until you have as many layers as you desire or until you run out of icing or cookies. Finish the top of the cake with a final layer of icing. My cake was 9 layers tall.

If you have a cookie or two left over, crumble it over the top and sprinkle with crystalized ginger if desired.

Transfer cake to refrigerator for a minimum of 6 hours (or overnight) before serving. 

“Gingerbread” Salt Dough Ornaments

When I was young my mom came up with an idea for my sister and I to make homemade christmas gifts without spending a lot of money. She made up a batch of dough, we rolled it out, and cut out cute Christmas shapes with cookie cutters. This wasn’t cookie dough though, it was salt dough. At the time I didn’t know the name of it, or even what was in it, but I knew we weren’t supposed to eat it. I can only imagine how hard that was for me at seven years old.   Salt dough is very simple to make, basically just flour, salt and water, and when you bake it it becomes very hard and will last forever if you keep it dry and clean.

"gingerbread" salt dough ornaments | Brooklyn Homemaker

Before we baked our “cookies”, we poked holes in the tops of each shape with a straw. After they came out of the oven we painted them with brightly colored craft paint, and strung through a piece of ribbon. Mom painted our names and the dates on the backs of each of them, and we had personalized handmade Christmas ornaments that we gave away to our family as gifts. My grandmother had those ornaments hanging on her tree each and every year until she stopped putting it up when we went away to college.

"gingerbread" salt dough ornaments | Brooklyn Homemaker

It turns out that salt dough has been around for centuries and can be traced back to ancient Egypt. Flour and water is mixed with salt as a preservative and the dough can be worked with kind of like clay. Then it’s baked at a low temperature for long enough to remove all the moisture and harden the finished product.  Some people use salt dough to make elaborate sculptures and creations, but most people use it for children’s crafts. The dough is easy to make, easy to work with, non-toxic, and can be made from things most people already have at home.

"gingerbread" salt dough ornaments | Brooklyn Homemaker

At work last year we were coming up with ideas for our Christmas window and I thought it might be fun to make a grown-up version of these ornaments. We sell a lot of bakeware so I thought it would be really cute to have pretty sugar cookie snowflakes hanging in the window. I wanted them to look as real as possible, so I used real royal icing and sprinkles to decorate them. They came out beautiful and I packed them up in boxes and took them to work with me.

To my dismay, much of the detailed royal icing piping started to flake off of the cookies when we tried to hang them. I’m not exactly sure what went wrong but I’m certain it had something to do with the super high salt content. We still had enough in tact that we were still able to use them in the window, and the display was absoultely beautiful. No one would have guessed that there had been any problems, but I learned a valuable lesson. Real royal icing on salt dough fake cookies is a big fat NO.

"gingerbread" salt dough ornaments | Brooklyn Homemaker

This year I decided to give salt dough another go, but knew I should look for a better “icing” solution. I wanted to recreate the look and texture of royal icing, but using a more permanent medium. My first thought was puff paint. In the 90s you couldn’t walk down the street without tripping over a tube of puff paint, but in 2013 it seems like it’s impossible to find. I’m sure that big craft stores sell it, but I don’t have a car and couldn’t get to a craft store. I tried using some white caulk that I had leftover from my kitchen backsplash project, but the consistency was too thick and it was difficult to work with. After that I decided to try calling the local art supply store and see if they had any suggestions. They pointed me toward a product called light molding paste, which has almost the same consistency as frosting. I tried using it as is, piping it from a pastry bag with small round tip (or writing tip) and it piped out really nicely. Sprinkles and glitter stuck to it really well too, and I got some really nice results using it. The only issue I had was that it’s slightly thicker than royal icing, more like frosting, and doesn’t smooth out the way royal icing does. Since molding paste is water soluble, I tried thinning it out just slightly with water to get a thinner consistency.

"gingerbread" salt dough ornaments | Brooklyn Homemaker

I’m so glad I called that art store. This stuff was perfect. It was very easy to thin out to the consistency I wanted, and piped just like the real thing. It was easy to work with, and simple soap and water cleaned it up with no trouble. It dried nice and hard too and stayed stuck to the salt dough with no problems. I’m assuming that puff paint would probably work well too- but this stuff was truly ideal. I’d definitely recommend it if you want to try this project yourself. You can find it at any art supply store and they have it at the big craft stores too. I used Golden brand, and it’s important that you get the light molding paste.  Since I didn’t completely cover my ornaments I didn’t use much either. I bought the smallest container the store had, and after decorating probably about 30+ ornaments I still have half a jar left.

"gingerbread" salt dough ornaments | Brooklyn Homemaker

Since I wanted my ornaments to look like gingerbread cookies and not sugar cookies, I decided to color the dough. I could have used food color or paint, but I wanted to try to achieve a more natural molasses and spice kind of brown color. I also thought that it would be great if the finished ornaments had a nice gingerbready smell, so I decided to use spices to color my dough. In my test batch I used ginger, nutmeg, clove and cinnamon. It smelled amazing in the oven, but after a long slow bake they didn’t smell like much after they cooled. I noticed that the best gingerbread color came from the cinnamon, so when I made the next batch I skipped the other spices all together.  You can use more or less depending on how dark you’d like the dough, but cinnamon is really all you need to get the color right. My advise would be to use the cheapest cinnamon money can buy. Go to the dollar store and buy the flavorless stuff you’d never actually want to bake with. Don’t waste the good stuff on these. You need a lot of it to get the color right, and you’re never going to get to eat these “cookies”.

I also noticed in my test batch that in the first half hour of baking the salt comes to the surface of the dough, bleaching out the exposed surface and fading the color I worked so hard to get right. The side that was facing down and wasn’t exposed to the air was fine though, and once most of the moisture had baked off they could be flipped and continued baking didn’t bleach the other side. So, when I made my second batch I baked them with the side I wanted to decorate facing down. Bingo!

You should totally do that too.

"gingerbread" salt dough ornaments | Brooklyn Homemaker

To decorate the ornaments I fitted a disposable pastry bag with a Wilton #3 tip and filled it with my thinned light molding paste. Then I piped out a thin even line and made some designs. Some ornaments were just outlined, others got lines and dots, some had intricate snowflake designs, but you can do whatever you like. If you’ve never used a piping bag and pastry tip, I’d definitely recommend some practice before you dive into this project. This is permanent so you want them to be pretty near perfect. I promise it’s not as scary as you might think. Just twist the top of the bag closed so your “icing” doesn’t squeeze out the top when you put pressure on the bag. Then hold your tip a small distance from your ornament and squeeze the bag with slight and even pressure. Patience and practice. You could also just “frost” your ornaments instead without thinning the molding paste and they would still look realistic and pretty.
Before the molding paste dried I covered the ornaments with glitter, nonpareils & dragees. I found a glitter that looked similar to a product I’ve seen in a cake decorating store- so the cookies still look very realistic.  I worked with a just a few ornaments at a time to make sure the molding paste didn’t dry before I put the glitter on it. Then I just shook the glitter off and set the finished ornament on a tray to dry. I completely covered each ornament in glitter, and was able to re-use the leftover glitter for the next batch of ornaments, over and over until I was finished.

Word of warning: Glitter is pretty but it’s also the devil. There is glitter everywhere. I’ve vacuumed, mopped, rinsed, showered, and scrubbed multiple times and I still see glitter everywhere. It on my floors, in the rug, on the counters, even on me. It’s been days and I still catch customers at work looking at me funny and realize I have glitter in my beard.

"gingerbread" salt dough ornaments | Brooklyn Homemaker

I couldn’t be happier with the results.

They came out beautiful. They really do look very similar to the real thing, and they look gorgeous on my tree. I’m really glad that I went with white decorations for them too. I’m sure that adding some color to the molding paste would be easy and the results would be beautiful, but these simple white ornaments go perfectly with our apartment. The white pops against the brown “cookies”, and they look chic, timeless and modern all at once. These photos don’t do them justice when the lights are on. They’re all sparkly and stuff!

You should definitely give this a try. Your Christmas tree will thank you. And then you will thank me. (You’re welcome.)

"gingerbread" salt dough ornaments | Brooklyn Homemaker

Gingerbread Salt Dough Ornaments

  • Servings: Makes about 15-20 (inedible) ornaments
  • Print
1 cup flour
1/2 cup salt
1/2 cup water
4-6 tablespoons cinnamon, or more, depending on how dark you want your dough

Preheat oven to 250 degrees. Mix all ingredients together in a medium bowl. If you want plain (non-gingerbread) dough, or want to color the dough, leave out the cinnamon. Knead the dough a few times on a lightly floured surface to be sure it’s well mixed and has a smooth consistency. Knead in more cinnamon if you want a darker color or more flour if dough feels too sticky. Lightly coat with flour (or cinnamon) and roll dough out to about 1/8 to 1/4 inch thick. These “cookies” will not rise at all- so make them as thick as you’d like the finished product to be. Cut into desired shapes, and cut a small hole with a straw or piping tip.  Transfer to a parchment lined baking sheet, making sure the side you want to decorate is face down. Bake for 2-3 hours or until completely dry.

Allow the ornaments to cool completely. Using a pastry bag with a small writing tip, pipe on desired design with light molding paste. Puff paint should also work well for this. Decorate with glitter, small beads, or whatever you like. If you’re only using this for one season, sprinkles and candies work too. Allow “icing” to dry completely, for at least 4 hours. If desired, spray with a matte sealer and let dry according to directions. String some ribbon or bakers twine, tie a knot or bow and you’re ready to decorate!

*Update: This didn’t happen to my ornaments, but one reader said her ornaments bubbled up in the oven. I read up on it and learned that this can happen if they dry too fast or if the oven temp is too high, so I’d suggest getting an oven thermometer to be sure your oven doesn’t go above 250. To be extra careful, you may even want to try baking them at a 225 for a longer period of time.