Month: October 2014

the aunt sassy cake: an anniversary post

It’s official. I’ve made it through my first year of blogging and lived to tell the tale.

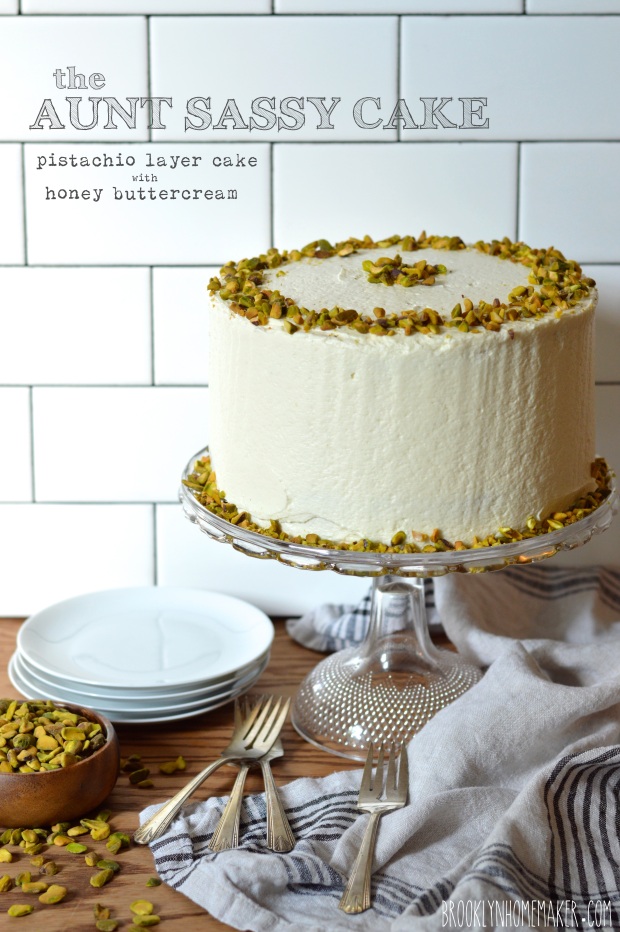
aunt sassy cake | pistachio layer cake with honey buttercream | Brooklyn Homemaker

Today is the one year anniversary of Brooklyn Homemaker and I can barely contain myself. I can’t tell you what it means to me to see how far this humble little blog has come in these past twelve months. To celebrate, I baked a cake. The same cake that started this whole crazy adventure.

aunt sassy cake | pistachio layer cake with honey buttercream | Brooklyn Homemaker

Just in case you haven’t already heard the short story of how I got into blogging, it basically goes something like this:

One day some newly engaged friends (now newly-weds) came over to discuss wedding planning and take some supplies off our hands from our recently nuptials. Brunch was served, several glasses of wine consumed, and a three layer pistachio cake devoured. The cake was such a huge hit that our friends insisted I start a blog. I said no, I had no business writing a blog. I didn’t have a camera, I hadn’t written anything in years, I didn’t have the time, I have shaky hands and no natural light in my kitchen. I presented every excuse I could come up with. A few more glasses of wine were guzzled and I started to warm up to the idea. The next morning Brooklyn Homemaker was born.

There’s a little more to the story than that though. Russell and I were married just over four months before we hosted that brunch, and leading up to our wedding I’d spent 17 months planning and dreaming and saving and organizing and crafting and buying and hoarding; all to make sure everything was perfect for our big day. I got really good at making spreadsheets, using them for everything from budget tracking to organizing vendor contacts. Our venue basically provided a lawn, a view, and a power source; but everything else was up to us, from the tent all the way down to the cocktail napkins. An unbelievable amount of time and energy and thought went into planning our day down to the tiniest detail. When we returned from our honeymoon, at first I felt relieved, but it wasn’t long before I realized I missed all that wedding planning. I actually felt a little lost without a clear outlet for all that creative energy. Brooklyn Homemaker really could not have come at a better time for me.

aunt sassy cake | pistachio layer cake with honey buttercream | Brooklyn Homemaker

These days it’s almost hard for me to remember what life was like before I started blogging. I spend so much of my free time trying to make this blog everything I think it should be, and can be, that I sometimes feel like this all just sort of happened to me. It just sprung up, naturally, out of nowhere, and I happened to be the one who was there to keep it moving forward.

aunt sassy cake | pistachio layer cake with honey buttercream | Brooklyn Homemaker

Moving this blog forward has forced me to embrace all sorts of new and unfamiliar things and teach myself skills that I couldn’t even fathom a year ago. When I first got going I’d hardly ever even touched a professional camera, and was taking all of my photos with my iPhone. It didn’t take me long to realize I needed a real DSLR if my photos were ever going to look the way I wanted them to, so I researched and asked around and decided on the Nikon D3200, which I love, btw.

Having never used a real professional camera, it took me forever to get the hang of the damned thing. I’m actually still learning new things about it every day, but I finally feel like I understand most of the knobs and nozzles and twisties and doo-hickies now. I know I still have a lot to learn about the ins and outs of photography, but I’m not afraid to admit that I’m really happy with how far I’ve come so far.

aunt sassy cake | pistachio layer cake with honey buttercream | Brooklyn Homemaker

One of the biggest things I never expected when I started this adventure is the warm sense of community from other bloggers. One way or another; through back and forth comments on each other’s posts, participating in groups like #bundtbakers, or interacting through social media; I suddenly feel like I have this great big brand new group of friends that I just happen to have never met in person. Considering the fact that we live all over the world, and will likely never actually meet, I’m overwhelmed by how close I feel with certain bloggers and how caring and welcoming this community is with each other. Thank you all so much for making me feel so welcome! It really warms my cockles.

aunt sassy cake | pistachio layer cake with honey buttercream | Brooklyn Homemaker

I’m also in complete awe of all of you out there who follow along with me week after week. The idea that you’re somewhere out there reading this, and sometimes even sharing your opinions and stories with me, is truly exhilarating. The first few times I saw a comment from someone other than my mother I had to wonder if she hadn’t opened a new email address just to make me feel warm and fuzzy! I never dreamed that I would see so many heart-warming words of encouragement when I started doing this, but each new comment means more to me than you’ll ever know. Whenever I’m feeling down, or second guessing myself, a new comment pops up and everything is suddenly all better. Whether you’re a regular commenter, someone who’s chimed in once or twice, or a comment-shy regular reader, I want you to know that I couldn’t do this without you. Thank you so so much. Your words and your love really keep me going.

aunt sassy cake | pistachio layer cake with honey buttercream | Brooklyn Homemaker

So, as much as I’m enjoying talking about myself, I guess I should probably talk about this cake…

My opinion of this phenomenal recipe and the cookbook it came from hasn’t changed one iota in the last year. Everything about this cake is heaven, and there was no question in my mind that it would be the perfect way to celebrate my blogging anniversary.

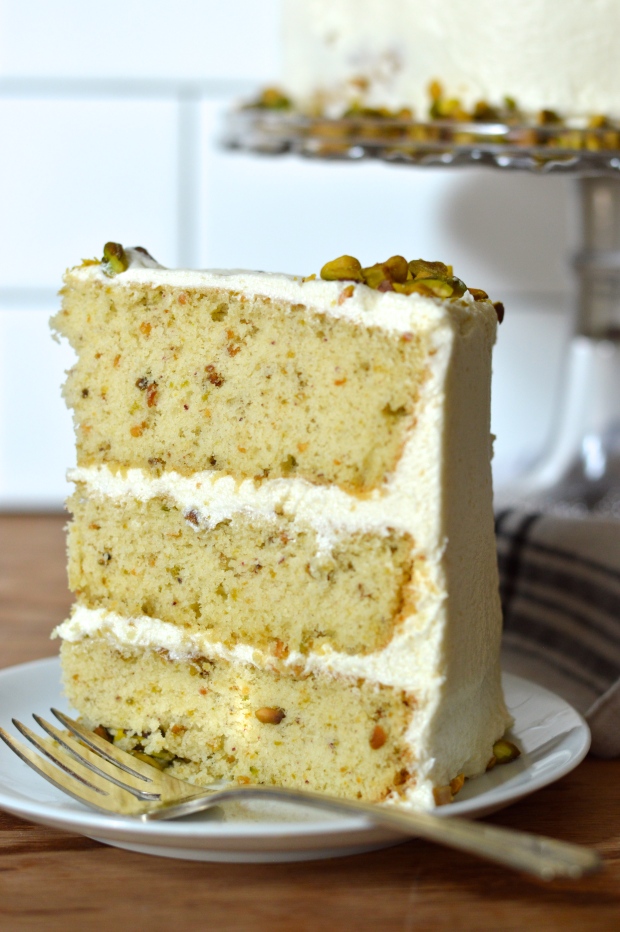
While the layers of this cake are filled with ground pistachios, the addition of whipped egg whites keeps everything impossibly light and fluffy. Rich pistachio flavor is front and center, but a nice buttery backbone adds even more decadent richness. The icing on the cake (literally) is the addition of sweet floral honey to the cooked buttercream. Even with the honey though, this icing isn’t at all too sweet, but I think the best part is it’s silky texture. It’s rich and creamy and luxurious, almost like a thick whipped cream or a velvety meringue buttercream. I will admit that this cake is a bit challenging to make, but once you taste it, you’ll know it’s worth the effort.

This is a celebration cake at it’s finest. A true slice of heaven.

aunt sassy cake | pistachio layer cake with honey buttercream | Brooklyn Homemaker

So, here’s to blogging, my new creative outlet and unhealthy obsession.
Here’s to having juuust one more glass of wine. If it weren’t for that fifth? sixth? (I can’t remember) glass, this might have never happened.
Here’s to trying new things. To personal growth, and to never being satisfied with “good enough”.
Here’s to many more years of blogging, and to the unknown things to come.

Here’s to you, my readers. Thank you for the comments, and the love, and the words of encouragement. You will never know how much it means to me.

And here’s to Brooklyn Homemaker! Happy birthday!

aunt sassy cake | pistachio layer cake with honey buttercream | Brooklyn Homemaker

Aunt Sassy Cake

  • Servings: makes one 8 inch 3 layer cake, serves 12-16ish
  • Print
Adapted, just barely, from Baked Explorations, page 165

Cake:
1 cup shelled pistachios (plus 1/3 cup for decorating)
2 1/2 cups cake flour
3/4 cup all-purpose flour
1 tablespoon baking powder
1 teaspoon baking soda
3/4 teaspoon salt
1 cup (2 sticks) unsalted butter, softened
1 3/4 cups sugar
1 tablespoon pure vanilla extract
1 large egg
3 large egg whites, at room temperature
1 1/2 cups ice-cold water
1/4 tsp cream of tartar

Honey Vanilla Buttercream:
1 1/2 cups sugar
1/3 cup all-purpose flour
1 1/2 cups whole milk
1/3 cup heavy cream
1 1/2 cups (3 sticks) unsalted butter, soft but cool, cut into small pieces
1 teaspoon pure vanilla extract
3 tablespoon honey

Make the cake:
Preheat the oven to 325° F. Butter three 8-inch round cake pans, line the bottoms with parchment rounds, butter the parchment, and lightly dust with flour. Knock out any excess flour.

Pulse the pistachios in a food processor until they are coarsely chopped. Reserve about 2 tablespoons of coarsely chopped pistachios in a large bowl. Process the rest of the pistachios until they are almost powdery. Stir the pistachio powder in with the reserved coarse pistachios; add the flours, baking powder, baking soda and salt; and whisk well to combine.

In the bowl of a stand mixer fitted with the paddle attachment, beat the butter on medium speed until light and creamy, about 3 or 4 minutes. Add the sugar and vanilla and beat until fluffy, about 3 minutes. Scrape down the sides of the bowl, add the whole egg, and beat until just combined. Turn the mixture to low.

In a measuring cup, measure out 1 1/2 cups ice water. Add the flour mixture to the mixer in three parts, alternating with the ice water, beginning and ending with the flour mixture. For each addition, turn the mixer to low to add ingredients, then up to medium speed for a few seconds until incorporated. Scrape down the bowl, then mix on low-speed for a few more seconds.

In a medium bowl, whisk the egg whites and cream of tartar until soft peaks form (I promise you can handle doing this by hand. Don’t be intimidated, it should only take 5 minutes max, probably less). Do not over beat. Gently fold the egg whites into the batter.

Divide the batter among the prepared pans and smooth the tops. Bake for 40-45 minutes, rotating the pans halfway through the baking time, until a toothpick or cake tester inserted into the center of the cakes comes out clean. Transfer cakes to a wire rack and let cool for at 20 to 30 minutes. Line your cooling rack with parchment and turn the cakes out onto the rack. Let cool completely. Remove the parchment rounds.

Make the honey vanilla buttercream:
In a medium sized heavy-bottomed saucepan, whisk the sugar and flour together. Add milk and cream and cook over medium heat whisking regularly, until the mixture comes to a boil and thickens, about 10 to 15 minutes.

Transfer the mixture to the bowl of a standing mixer with paddle attachment. Beat on high until cool (this should take about 10 or 15 minutes of mixing). You may want to cover the mixer with a towel to keep the mixture from splashing your kitchen. Add the softened butter and mix until thoroughly incorporated. Increase the speed to medium-high and beat until frosting is light and fluffy, 1 to 2 minutes.

Add the vanilla and honey and mix until combined. If the icing is too soft, you can put the bowl in the refrigerator to chill slightly, then beat again until it is proper consistency. If the icing is too firm, you can set the bowl over a pot of very gently simmering water and beat with a wooden spoon until it is the proper consistency.

Assemble the cake:
Place one cake layer on a serving platter. If necessary, trim the top with a cake leveler or sharp serrated knife to create a flat surface. Evenly spread just over a cup of icing on top. Add the next layer, trim and frost it with the same amount of icing, then add the third layer. Spread a very thin layer of frosting over the sides and top of the cake and put it in the refrigerator for about 30 minutes to firm up. (This is known as the crumb coating and will help keep loose cake crumbs from showing in the final layer of icing.) Spread the sides and top of the cake with the remaining icing. Garnish the cake with crushed pistachios and refrigerate it for 15 minutes to it firm up before serving. If you want to refrigerate it longer before serving, take it out to come up to room temperature at least an hour or two before serving.

This cake will keep well in a cake saver at room temperature for up to 3 days, if the weather is not too hot or humid. Otherwise, put the cake saver in the refrigerator for up to 3 days.
classic apple pie

A few times now, I’ve mentioned my good friends who have been planning their wedding.

classic apple pie & a rustic fall wedding | Brooklyn Homemaker

Well folks, they finally went and done got hitched.

Mazel Tovs all around!

classic apple pie | Brooklyn Homemaker

Back when Russell and I were married in June of 2013, our caterer’s mother baked us some pies for the dessert table at our wedding. Not only did having a variety of pies and treats alongside our cake look really festive and beautiful, but it felt like a really personal way to offer something extra for the sweets lovers at our reception.
I’ve also heard that there are some people in the world who don’t like cake, and as hard as I find that fact to believe, we thought this might be a nice way to make sure those people felt included. I mean, I don’t know why anyone who doesn’t like cake would have been at our wedding, but just in case we had pies and cookies for them to choose from too.

classic apple pie | Brooklyn Homemaker

That aspect of our wedding ended up being something that our friends really really enjoyed, so when it came to planning their own wedding, they were inspired to do the same and enlisted me to help them with it. In last month’s #bundtbakers post I mentioned that I’d be baking a few things for their big day, and that my apple-pear-carrot-parsnip-packed spiced harvest bundt cake won out in little a pre-wedding cake tasting. I also said that in addition to the bundts, I’d be baking a couple pies too.

classic apple pie | Brooklyn Homemaker

As you’ve probably guessed by now (the title of this post may have been a clue), the bride and groom-to-be decided on classic apple pies.  Their wedding was in the Catskill mountains on October 12th, so apple pies really could not have been more appropriate for the occasion. The fall has always been my favorite time of year, as much for the weather and scenery as for the food and sweets so, truth be told, I was thrilled to have an excuse to bake so many fall desserts in one fell swoop!

classic apple pie | Brooklyn Homemaker

I’d be lying if I said I didn’t know my way around an apple pie. Growing up, my grandfather had a dozen or so apple trees on his property and this time of year there were always plenty of fresh apple pies coming from grandma’s oven. As soon as I learned to make pie crust from scratch I set to mastering apple pie for myself.

classic apple pie | Brooklyn Homemaker

Over the years, I’ve baked approximately 42.6 million apples pies, so at this point I think I have my technique pretty well figured out.

I mean, I actually think that apple pie is kind of a personal thing, and different people like theirs made different ways. Myself, I tend to like a pie with a healthy amount of spice and a nice lemony boost. A lot of recipes recommend a bit of lemon juice, but I usually use a bit more and add the zest too because I think it adds a really interesting floral quality that I love. I also tend to use sweet soft apples that benefit from the extra bit of acidity.

classic apple pie | Brooklyn Homemaker

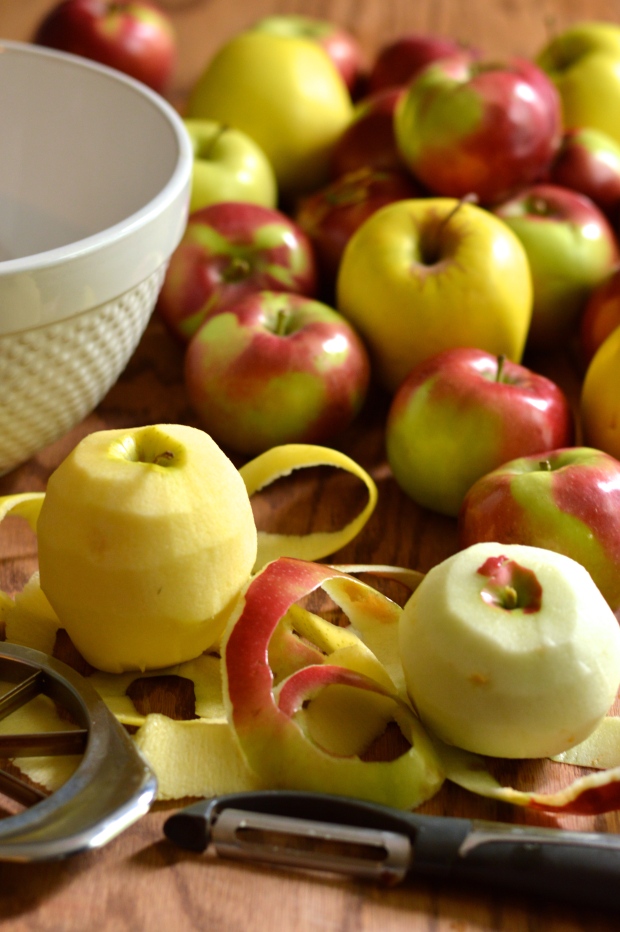
When it comes to the apples, there are a lot of options out there. A lot of people like to use Granny Smiths because of their balanced acidity and subtle sweetness, but personally I think their flavor is a bit flat, and their flesh a bit too firm for my liking. When I first started experimenting with different types of apples for pie, a few varieties quickly moved to the top of my list. If you like a firmer apple, Braeburns have a great flavor for pie. If you want an apple that softens a bit but still retains a good bite when baked, I think Golden Delicious are ideal. If you like something a bit softer when baked, McIntosh and Cortlands are some of my favorites, but they produce a bit more water so a bit more flour may be needed to keep the pie from getting soggy.

If you want to get really next level and pack your pie with as much complex apple-y flavor as possible, I recommend that you mix a few varieties together. For these pies I used a half and half mix of McIntosh and Golden Delicious, but you can play around and decide what you like best yourself.

classic apple pie & a rustic fall wedding | Brooklyn Homemaker

With the pies and bundts baked and ready to go, Russell and I piled into a car and made the short trip up to the Catskills for the wedding. The scenery was almost as stunning as the wedding itself. Our friends though, would not be outshone.

It was such an absolutely beautiful day. Every aspect of their wedding was perfect. Their vows were some of the most meaningful beautiful words I’ve ever heard, and there were gorgeous personal touches at every turn. I only wish I could have gotten more photos. Alas, I was too busy enjoying myself. Sorry guys!

I was able to sneak a few shots in though, and I’ve shared a few of my favorites below.

classic apple pie & a rustic fall wedding | Brooklyn Homemaker classic apple pie & a rustic fall wedding | Brooklyn Homemaker

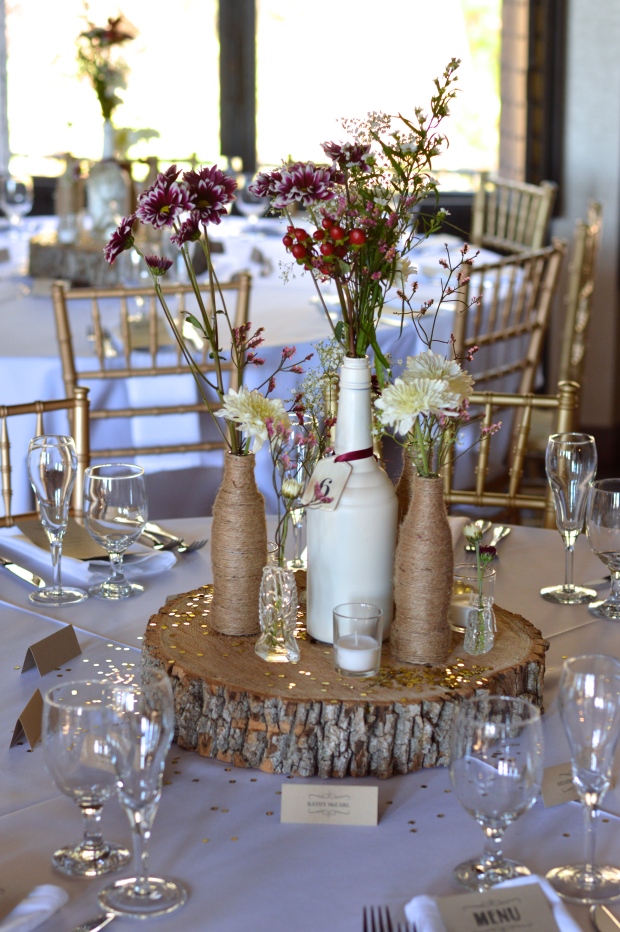
Check out the insanely beautiful centerpieces at the reception. I can’t even.

classic apple pie & a rustic fall wedding | Brooklyn Homemaker

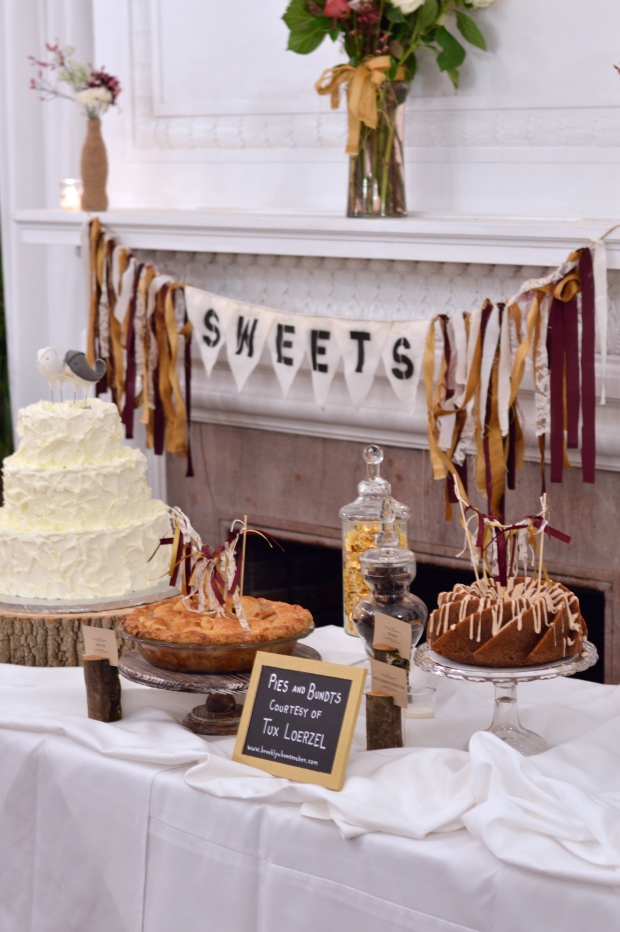
In the name of blogging, I made damn certain to get in a few shots of their dessert table so you could see it in all it’s glory. Just like the rest of their wedding, every detail was too adorable and perfect for words.

classic apple pie & a rustic fall wedding | Brooklyn Homemakerclassic apple pie & a rustic fall wedding | Brooklyn Homemaker

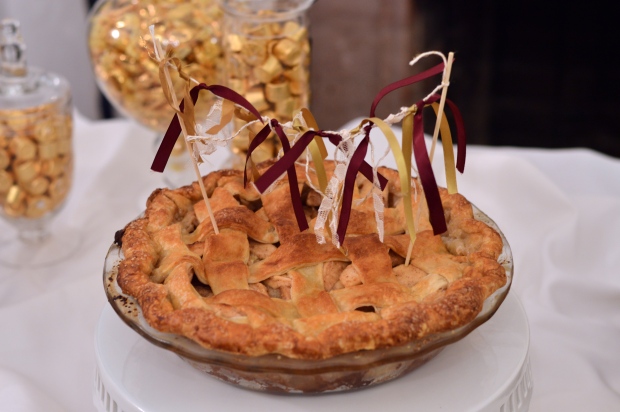
The bundts and pies were a huge hit. Having these homemade treats alongside their wedding cake was such an inspired way to make their dessert table feel more personal and thoughtful. Being surrounded by the stunning fall foliage of the Catskills, these desserts also brought that fall feeling into their reception in a really special way.

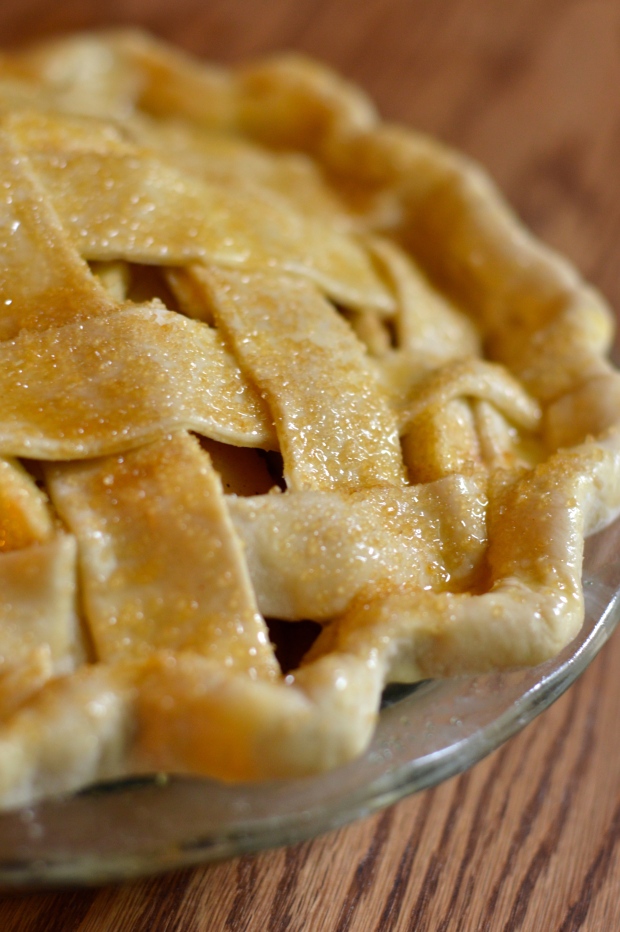
This apple pie is packed with sweet soft tender apples, a really healthy amount of spice, and a great citrusy floral twist from the lemon zest and juice. The all butter crust is the perfect compliment to the flavor of the baked apples; tender, crisp, flaky, and oh-so-buttery. To give the pie a bit of shine, an egg wash is brushed on before baking, and some coarse sugar sprinkled over the top adds a beautiful sparkle.

I’m going to go ahead and say that this is the perfect fall dessert. As well as being an incredible compliment to a wedding dessert table, this recipe would be an ideal addition your Thanksgiving spread. Just sayin’.

classic apple pie & a rustic fall wedding | Brooklyn Homemaker

Classic Apple Pie

All-butter pie crust

makes enough for 1 double-crust or 2 single-crust pies

3 cups all purpose flour
2 tablespoons sugar
1 teaspoon coarse kosher salt
1 cup (2 sticks) unsalted butter, cold
(up to) 1 cup ice cold water

Stir or whisk together flour, sugar, & salt in a medium bowl. If you have time, toss the bowl in the freezer for a 15 or 20 minutes. Cube the butter, add it to the chilled flour, and cut it in with a pastry blender, until it looks like coarse pea sized chunks. You can also do this by pulsing in a food processor. If you took very long to cut the butter in, you can toss the bowl back in the freezer for another 15 minutes, but if the butter is still firm and cold, don’t bother.

Start mixing in the water and stirring and tossing with a fork to distribute and combine. Try starting with about 1/2 cup, mix together, and add about a tablespoon or two at a time, until it starts to come together. The less water you use the better and flakier the crust will be, but you don’t want to use so little that it won’t hold together. If you can press it together with your hands and it mostly stays in a ball, with a few little bits crumbling out, you’re good to go.

Divide the dough into to balls, and wrap each tightly in plastic wrap. Try to handle it as little as possible so as not to warm or melt the butter. Press or pat the covered balls of dough into thick disks and refrigerate for at least an hour or two (or up to a few days)

Classic apple pie

3 1/2 to 4 lbs apples (I used about 1/2 golden delicious and 1/2 macintosh, but cortlands & braeburns are great too)
zest and juice of half a lemon
1 cup of sugar
3 to 4 tablespoons flour (4 for juicy soft apples like mcintosh or cortland, 3 for other varieties)
3/4 teaspoon ground cinnamon
1/4 teaspoon ground nutmeg
1/4 teaspoon ground cloves (optional)
1/4 teaspoon ground cardamom (optional)
2 tablespoons butter, cut into several pieces
1 egg, beaten
2 to 3 tablespoons coarse sugar

Preheat your oven to 375.

On a well floured surface, roll out the first disk crust and line a 9.5 or 10 inch pie dish. Place the dish in the refrigerator while you prepare your apples.

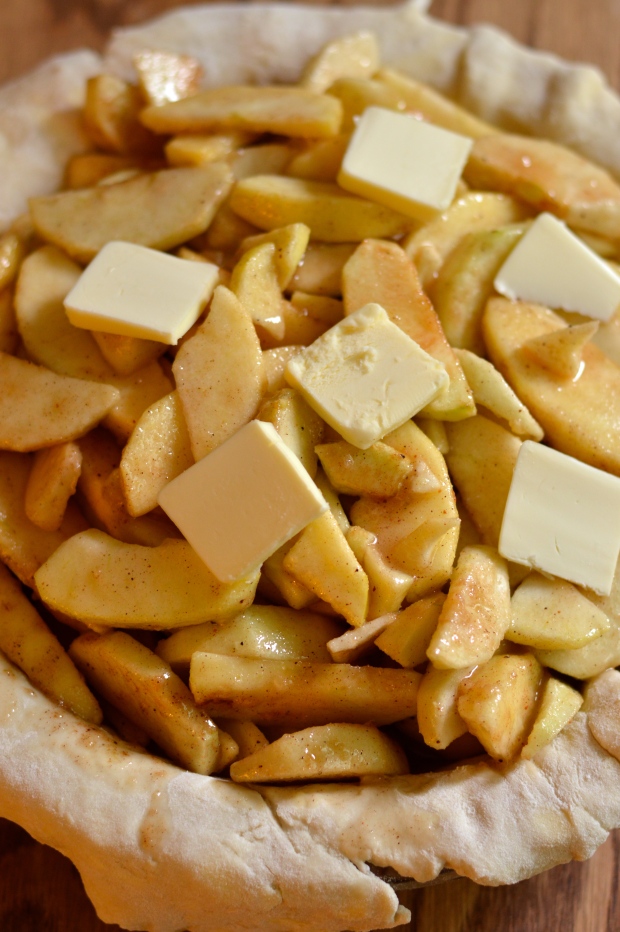
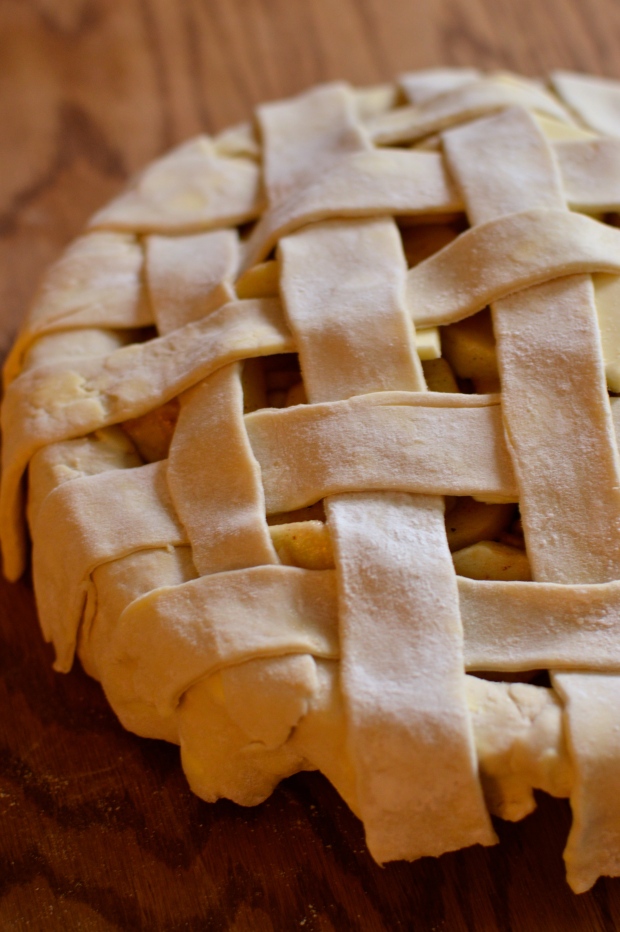
Peel, core, and thinly slice your apples and place in a large bowl with lemon juice and zest, sugar, flour, and spices. Gently toss to combine. Transfer the apples into the pastry lined pie dish, and dot the apples with the butter. Roll out the other disk of crust and either top the filled pie with it and cut slits to vent the pie, or cut the crust into strips to make a lattice crust. If you’re interested, follow this link for a lattice crust tutorial. Either way, once the pie is topped, trim the edges to about 1/2 inch overhang, roll it under itself, and crimp the edges to seal the top and bottom crusts together.

Brush the top crust with the beaten egg, and sprinkle with the coarse sugar. You’ll want to arrange the oven racks so one is in the middle, and one is just beneath it. Put a foil lined tray on the lower rack to catch any potential drips and spills. It will likely boil over a little. Place the pie on the middle rack and bake for 60 to 65 minutes, or until well browned and nice and bubbly and smelling like heaven.

I’d recommend, especially with McIntosh or Cortland apples, that you let the pie rest for at least a few hours before slicing or it may be watery. I usually make mine a day ahead and reheat them just slightly in the oven if I want to serve them warm.

sweet potato & pecan cinnamon rolls

I’ve always been a little bit intimidated by yeast doughs.

sweet potato & pecan cinnamon rolls | Brooklyn Homemaker

When I was a teenager I was a very adventurous cook and baker (especially for a teenager) and loved to experiment with new recipes. Most of the time things worked out in my favor, but every once in a while, they didn’t. Once my cousin came over to stay the night and we decided it might be fun to try to make some white sandwich bread. The resulting loaf though, was a total mess. It was dense, heavy, tough, and dry, and while it had definitely risen to an extent, a tap of the loaf was met with a dull thud rather than that nice hollow sound you expect from quality bread.

sweet potato & pecan cinnamon rolls | Brooklyn Homemaker

Everyone in my family thought of me as an excellent cook for my age, and my cousin was obsessed with my omelettes, begging me to make them for her whenever she stayed over. When we baked this loaf together I think she assumed my touch would turn our dough to gold, so when the bread didn’t live up to her expectations the disappointment was palpable.

One bite, and I could see it in her eyes.

sweet potato & pecan cinnamon rolls | Brooklyn Homemaker

It was at least another decade before I tried to bake a loaf of bread again.

In my mid twenties, a year or so after I moved to Brooklyn, I decided I was going to start making my own sourdough. It’d had been ten + years since the last time I’d tried to make bread, and instead of trying to perfect a traditional white loaf raised with active dry yeast, I thought, “Oh! The last time I baked bread it was a minor disaster, so I should definitely try to make a bread so hard to master that there are entire online forums on the subject.” Sometimes I can’t even handle what a genius I am.

sweet potato & pecan cinnamon rolls | Brooklyn Homemaker

I mixed up my little cup of flour and water, set it near my kitchen window, and waited for a little community of wild yeast to set up camp and start birfin’ some babies. To my surprise and elation, on the first try, my starter took and was bubbling away after a few feedings.

And then I made my loaf.

sweet potato & pecan cinnamon rolls | Brooklyn Homemaker

It barely rose at all. Dense. Heavy. Tough. Dry. Dull Thud.
History repeating itself.

I tried a few more times, thinking my starter just wasn’t strong or mature enough, but never had any results that were worth eating and I decided my attempts were little more than a waste of time and wheat.

sweet potato & pecan cinnamon rolls | Brooklyn Homemaker

Still, not all yeast doughs intimidate me. I make a pretty decent pizza dough, and a few years ago I made some really great English muffins that I’ve been thinking about trying again soon. When it comes to actual loaves of bread though, I’ve accepted that they just might not be my thing. I might eventually go back to the basics and try some white bread again sometime, but for now I’m not all that worried about trying to perfect my bread game.

sweet potato & pecan cinnamon rolls | Brooklyn Homemaker

I decided recently that it might be fun to try to branch out and try some other types of yeasted doughs. A few months ago I made a roasted cherry kugelhopf with great results, and the other day I was in the mood for some cinnamon rolls with an autumnal twist. Sweet sticky yeasted doughs like cinnamon rolls are actually crazy easy to get right, to the point of being nearly fool proof. As long as you don’t overheat the milk and kill your yeast, the amount of sugar in this dough will ensure that it will rise like it’s getting paid.
The only thing I had a little trouble with was rolling the dough tightly around the filling, but once it rose again you couldn’t tell the difference.

sweet potato & pecan cinnamon rolls | Brooklyn Homemaker

These cinnamon rolls are seriously unbelievable. Like… Whoa.

They’re sweet, tender, light as air, and richly autumnal; with plenty of spice and a nice depth and hint of earthiness from the roasted sweet potato. Wrapped up inside is a sticky sweet filling that’s dripping in cinnamon and bursting with toasted pecans. Then a sweet and tangy cream cheese icing goes on top and takes things to a place I almost can’t even handle. Almost.

While I usually prefer desserts with a subtle, reserved sweetness; these cinnamon rolls are anything but subtle and I LOVE it. Warm from the oven they beg to be pulled apart into tender strips of gooey cinnamon heaven dripping with cream cheese icing. I honestly don’t know who I thought I was fooling with that fork in the first photo. My fingers were covered in sticky nutty spicy sugary goodness mere minutes after these came out of the oven, and that fork went back in the drawer clean as a whistle. I promise that if you make these the last thing anyone will be looking for is a fork, but you should probably make sure you’ve got plenty of napkins on hand.

sweet potato & pecan cinnamon rolls | Brooklyn Homemaker

Sweet Potato & Pecan Cinnamon Rolls

adapted from Smitten Kitchen

Roasted sweet potato puree:
2 medium sweet potatoes
1 tablespoon vegetable or olive oil

Dough
6 tablespoons unsalted butter, to be divided
1/2 cup whole milk
2 1/4 teaspoons active dry yeast (from a 1 .25-ounce envelope)
3 1/2 cups all-purpose flour, plus extra for rolling out
1/4 cup firmly packed brown sugar (dark if you have it, but light is fine)
1/4 cup granulated sugar
1 teaspoon coarse kosher salt
1/2 teaspoon ground cinnamon
1/4 teaspoon freshly grated nutmeg
1/8 teaspoon ground cardamom (optional)
1/4 teaspoon ground ginger
2/3 cups sweet potato puree
1 large egg
Oil for coating rising bowl

Filling
3/4 cup firmly packed brown sugar (dark if you have it, but light is fine)
1/4 cup granulated sugar
1/8 teaspoon table salt
2 teaspoons  ground cinnamon
1 cup finely chopped pecans

Glaze
4 ounces cream cheese, softened
2 tablespoons milk or buttermilk
2 cups confectioner’s (powdered) sugar, sifted
Few drops vanilla extract (optional)

Make the sweet potato puree:
Preheat your oven to 375 degrees. Wash your sweet potatoes and prick them all over with a fork. Rub them with oil and wrap in aluminum foil. Place on a baking sheet and bake for 30 to 60 minutes, depending on size. Check with a fork after 30 minutes, and if the fork slides through the flesh easily, they’re done. If not, continue to check them every 10 to 15 minutes until they are done.
Let cool for at least 30 minutes, or until you can handle them comfortably.
Peel the skins off the potatoes, they should probably peel off pretty easily. Place flesh in a bowl and mash with a fork or potato masher. Measure out 2/3 of a cup, and eat the rest or save it for another use.

Make the dough:
Brown the butter in a medium saucepan for about 10 minutes or until nutty and golden. Once it starts to brown watch it carefully so it doesn’t burn. Remove from heat and set aside to cool slightly.

Heat your milk in a saucepan or in the microwave, until warm but not hot. Too hot (over 116) and you’ll kill the yeast. Combine the warmed milk and yeast in a small bowl and set aside to get slightly foamy, which should take about five to seven minutes.

In the bowl of an electric mixer combine flour, sugars, salt and spices. Add just 1/4 cup (not all) of your browned butter and stir to combine. Add yeast-milk mixture, 2/3 cup sweet potato puree and egg, and mix until combined. Switch mixer to a dough hook and run it for 5 minutes on low speed.

Scrape mixture into a large lightly oiled bowl, flip it so the top of the dough is oiled too, and cover with plastic wrap or a damp kitchen towel. Set aside until doubled in size, about 1 hour, in a draft-free place.

Meanwhile, line the bottom of two 9-inch round cake pans (or 8-inch round if that’s all you got) with parchment paper, and butter the paper and the sides of the pan.

Assemble buns:
Scoop dough onto a very well floured work surface and flour the top of it. Roll the dough out to an approximately 16×11-inch rectangle and brush with reserved browned butter. Stir together the filling ingredients and sprinkle mixture evenly over dough. Starting on the longer side, roll the dough into as tight a spiral as you can. It’s will make a mess and filling will spill from the ends, no big deal. Just sprinkle the stuff that falls out over the pan after you put the rolls in.

With a sharp serrated knife, using as little pressure as possible, gently saw the log with a back-forth motion, trying not to squish it too much. The dough will be really soft so this will be tough, but you can reshape the rolls as you add them to the pan if need be. I cut the log in half, and then cut the halves in half, and again, and again, until I had 16 even(ish) rolls.

Divide the 16 rolls between two prepared pans, and sprinkle any fallen filling over them. Arrange the two end pieces cut side up. Cover each pan with plastic wrap and let rise for another 45 minutes.

If you want to do these ahead of time, at this point you can put the pans in the refrigerator overnight. In the morning, leave them out for an hour to warm up and finish rising.

15 minutes before you’re ready to bake them, heat the oven to 350°F. Once they’re finished rising, remove the plastic and bake the buns for 25 minutes, until puffed and golden and smelling like spiced autumn heaven. Meanwhile, make the glaze. Beat the cream cheese until it is smooth, light and fluffy. Add the powdered sugar and vanilla and beat until combined. Drizzle in the milk, a little at a time, until you get the consistency you’re looking for, either thick enough to ice or thin enough to drizzle. Transfer the pans of finished rolls to wire cooling racks and drizzle or ice them with glaze. Eat them while they’re still warm and steamy if you can.

brown butter praline bundt cake with salted caramel drizzle #bundtbakers

I’m not sure if I’ve mentioned this before or not, but I love a bundt cake.

brown butter praline bundt cake with salted caramel drizzle | Brooklyn Homemaker

(I’ve definitely mentioned it before)

brown butter praline bundt cake with salted caramel drizzle | Brooklyn Homemaker

When I first started blogging I used to say that the reason I loved bundt cakes so much is that they remind me of my grandmother. While that may be true, I think there might be a little more to it than that.

To this day, every time I visit my grandmother she has some kind of homemade sweet in the house, whether she knows I’m coming or not. This has always been true, and when I was a kid I used to spend a lot of time at grandma’s house. There were always any number of store-bought cookies and donuts and candies in the pantry and some kind of homemade cake or pie was usually kicking around somewhere too.  This may or may not (definitely does) have something to do with my love of baking and sweet things, along with my perpetual and permanent state of being a bit overweight.

brown butter praline bundt cake with salted caramel drizzle | Brooklyn Homemaker

Grandma has always been known for her pies, and for her special pineapple cheesecake she makes with a vanilla cake mix crust. She used to make a lot of coffee cakes too, and every once in a while she’d make a bundt cake.
She doesn’t really make them anymore, and even when I was a kid they weren’t something she made very frequently, but they have always been something that I thought of as very very special.

Maybe it was their rarity that made them feel so impressive to me. Maybe it was the fact that Grandma was the only person (at the time) I’d ever known to make them. Or, maybe it had something to do with their unique shape. Something about their shape makes them feel really dramatic and fancy, even though most bundt cakes also manage to feel sort of rustic and unfussy at the same time.

brown butter praline bundt cake with salted caramel drizzle | Brooklyn Homemaker

Whatever the reasons, bundt cakes have always held a very special place in my heart, and I imagine they always will.
When I stumbled across a blog some six months ago that mentioned an entire group of other bloggers who loved bundt cakes as much as I did, I couldn’t wait to join in the fun.

brown butter praline bundt cake with salted caramel drizzle | Brooklyn Homemaker

I could not be more thrilled to have found these bundt loving bloggers. At first I was worried that making a bundt cake each and every month was going to be too much for me, or that I wouldn’t have the time to keep up with it, but as the months have gone on I’ve found myself more and more excited about each new theme. Ideas for some have proved to be a challenge, while others have come to me right away, but each and every cake I’ve baked has maintained that special meaning for me.

brown butter praline bundt cake with salted caramel drizzle | Brooklyn Homemaker

This months theme, chosen by the amazing Lauren of Sew You Think You Can Cook, is caramel. Lauren, you may not know this, but yours was the first blog I saw mentioning #bundtbakers, and you’re part of the reason I’m here. I can’t thank you enough.

Caramel is such a perfect choice for this time of year. It pairs so perfectly with the warm homey flavors of October, and I couldn’t have chosen a better theme if I’d tried. Make sure you scroll down past the recipe to see all the delicious caramel themed cakes that everyone came up with this month. I decided to translate the sweet buttery nutty flavors of pecan pralines into a bundt cake with toasted pecans, brown sugar, and brown butter. To reinforce that caramel candy flavor, I topped everything with a homemade salted caramel drizzle and even more toasted pecans. This cake is rich and moist and warm and golden. The brown sugar adds that rich caramel flavor, and the brown butter adds some depth and intensifies the toasty nuttiness of the pecans. If you’re a fan of caramel, and of pecans, this recipe is definitely a keeper.

brown butter praline bundt cake with salted caramel drizzle | Brooklyn Homemaker

Brown Butter Praline Bundt Cake with Salted Caramel Drizzle

  • Servings: 12 to 16-ish
  • Print

Brown Butter Praline Bundt Cake:
butter and flour for pan
1 1/4 cups unsalted butter (2 1/2 sticks)
2 cups chopped pecans
3 cups flour
2 teaspoons baking powder
1 teaspoon baking soda
1/2 teaspoon salt
3/4 cup granulated sugar
1 cup dark brown sugar
4 large eggs
2 teaspoons vanilla extract
1 cup buttermilk

Salted Caramel Sauce:
(adapted from Brown Eyed Baker)
1/2 cup granulated sugar
3 tablespoons unsalted butter, at room temperature, cut into pieces
3 tablespoons heavy cream, at room temperature
1/2 (heaping) teaspoon fleur de sel (or any flaky sea salt)

Make the cake:
Preheat oven to 350. Butter and flour a 10+ cup bundt pan and set aside. In a medium saucepan, brown butter over medium high heat until it’s golden brown and smells intensely nutty. Should take about 10 minutes or so, but watch it closely so it doesn’t burn. Set aside to cool.

On a sheet pan, arrange pecans in a single layer. Toast at 350 for about 10 minutes, or until they smell like nutty heaven.

In a medium bowl, whisk together flour, baking powder, baking soda, & salt. Set aside. In the bowl of a stand mixer, combined cool brown butter, granulated sugar, & brown sugar. Beat until well combined, about 1 minute. Add eggs, one at a time, beating well after each addition. Add vanilla and mix to combine. On low speed, beat in the flour mixture and buttermilk in 3 alternating batches, starting and ending with the dry ingredients. Mix each addition until just combined, do not over-mix, and scrape down the sides of the bowl after each addition. Finally, stir in 1 1/2 cups of toasted pecans on low speed until well distributed. Reserve remaining 1/2 cup of pecans for decorating the finished cake.

Spoon batter into prepared bundt pan and smooth the top. WARNING: At this point the batter will look and taste like butter pecan ice cream, but if you eat it all, you won’t have any left for your cake. Bake at 350 for 50 to 55 minutes, or until a toothpick or cake tester inserted into the middle of the cake comes out clean. Let cool on a wire rack for about 20 minutes before inverting the pan to release the cake onto the rack. Let cool completely before adding drizzle.

Make the caramel sauce:
Add the sugar in an even layer to the bottom of a medium-sized heavy saucepan. Heat over medium-high heat, whisking regularly as it melts. The sugar will begin to clump together, and it may stick to your whisk, but it’s okay. Once the sugar has melted completely, stop whisking and instead swirl the pan occasionally while the sugar continues to cook.

Cook to a deep amber color. It should look almost a reddish-brown, and have a slightly toasty aroma. Keep a close eye on things at this point, things can go from perfect to burnt in under a minute. If you want to use an instant-read thermometer, cook the sugar until it reaches 350 degrees F.

As soon as the caramel reaches the right color (or 350 degrees), add all the butter. The caramel will bubble up so be careful. Whisk until the butter is completely melted. Remove the pan from the heat and slowly pour the cream into the caramel. Again, be careful because the mixture will bubble a lot. Whisk until everything is well incorporated and you have a smooth sauce. Add the fleur de sel and whisk to incorporate.

Let the sauce cool in the pan for 10 to 15 minutes and then pour into a heat proof container to let cool to room temperature. If you have any left, you can refrigerate the sauce for up to 2 weeks.

Drizzle the cooled caramel sauce over the cooled cake, and top with remaining 1/2 cup of toasted pecans. Slice. Serve. Enjoy.

brown butter praline bundt cake with salted caramel drizzle | Brooklyn Homemaker

Check out all the mouthwatering cakes this talented group of bakers has come up with this month:

BundtBakers

Interested in learning more about us? #BundtBakers is a group of Bundt loving bakers who get together once a month to bake Bundts with a common ingredient or theme. We take turns hosting each month and choosing the theme/ingredient. You can see all our of lovely Bundts by following our Pinterest board right here. Links are also updated after each event on the BundtBaker home page here.

If you are a food blogger and would like to join us, just send an email with your blog URL to foodlustpeoplelove@gmail.com. If you are just a lover of Bundt baking, you can find all of our recipe links by clicking our badge above or on our group Pinterest board.