Author: Tux | Brooklyn Homemaker

A food and lifestyle blog focused on gussied up american classics, baked goods with a history, and schnauzer babies.

cherry, almond, & dark chocolate shortbread cookies

Well. It’s official. Summer is over, and with it, so is cherry season.

cherry, almond, & dark chocolate shortbread cookies | Brooklyn Homemaker

I know cherry season has actually been over for some time, but all the other fruit coming through my kitchen this summer has kept me sufficiently distracted. This week though I suddenly realized that it was fall and my beloved cherries were long gone. Apples and pears are still around, so don’t worry, I’ll survive, but it’s still a real bummer.

cherry, almond, & dark chocolate shortbread cookies | Brooklyn Homemaker

Fortunately, cooler weather brings with it the season of warm ovens, and one of the best things to do with a warm oven is bake cookies!  I swear the oven just happened to be on because of the weather, so I was forced to oblige and bake some cookies.

cherry, almond, & dark chocolate shortbread cookies | Brooklyn Homemaker

Lucky for me, the beginning of fall also means the beginning of dried fruit season. I must admit that I’m not actually a big fan of raisins, but that doesn’t stop me from adding plenty of dried fruit to my baking. I use dried cherries or dried cranberries in place of raisins in almost all baking recipes, especially cookies. What better way to mourn the end of summer and cherry season than to make cookies with some tart chewy dried cherries?

cherry, almond, & dark chocolate shortbread cookies | Brooklyn Homemaker

My boss knows my fondness for dried fruit, so when she went on a business trip to Japan recently she returned with bags full of dried figs and cherries for me. Let me tell you, those cherries were some of the best i’ve ever had. Most dried cherries you buy in the store are sweetened to taste like candy, but these cherries were just dried in their natural state and had the most amazing bright tart and just-sweet-enough flavor. I knew I would have to find a special way to put them to good use, and I couldn’t think of any better way than to chop them up with dark chocolate and almonds in a crisp buttery shortbread cookie.

cherry, almond, & dark chocolate shortbread cookies | Brooklyn Homemaker

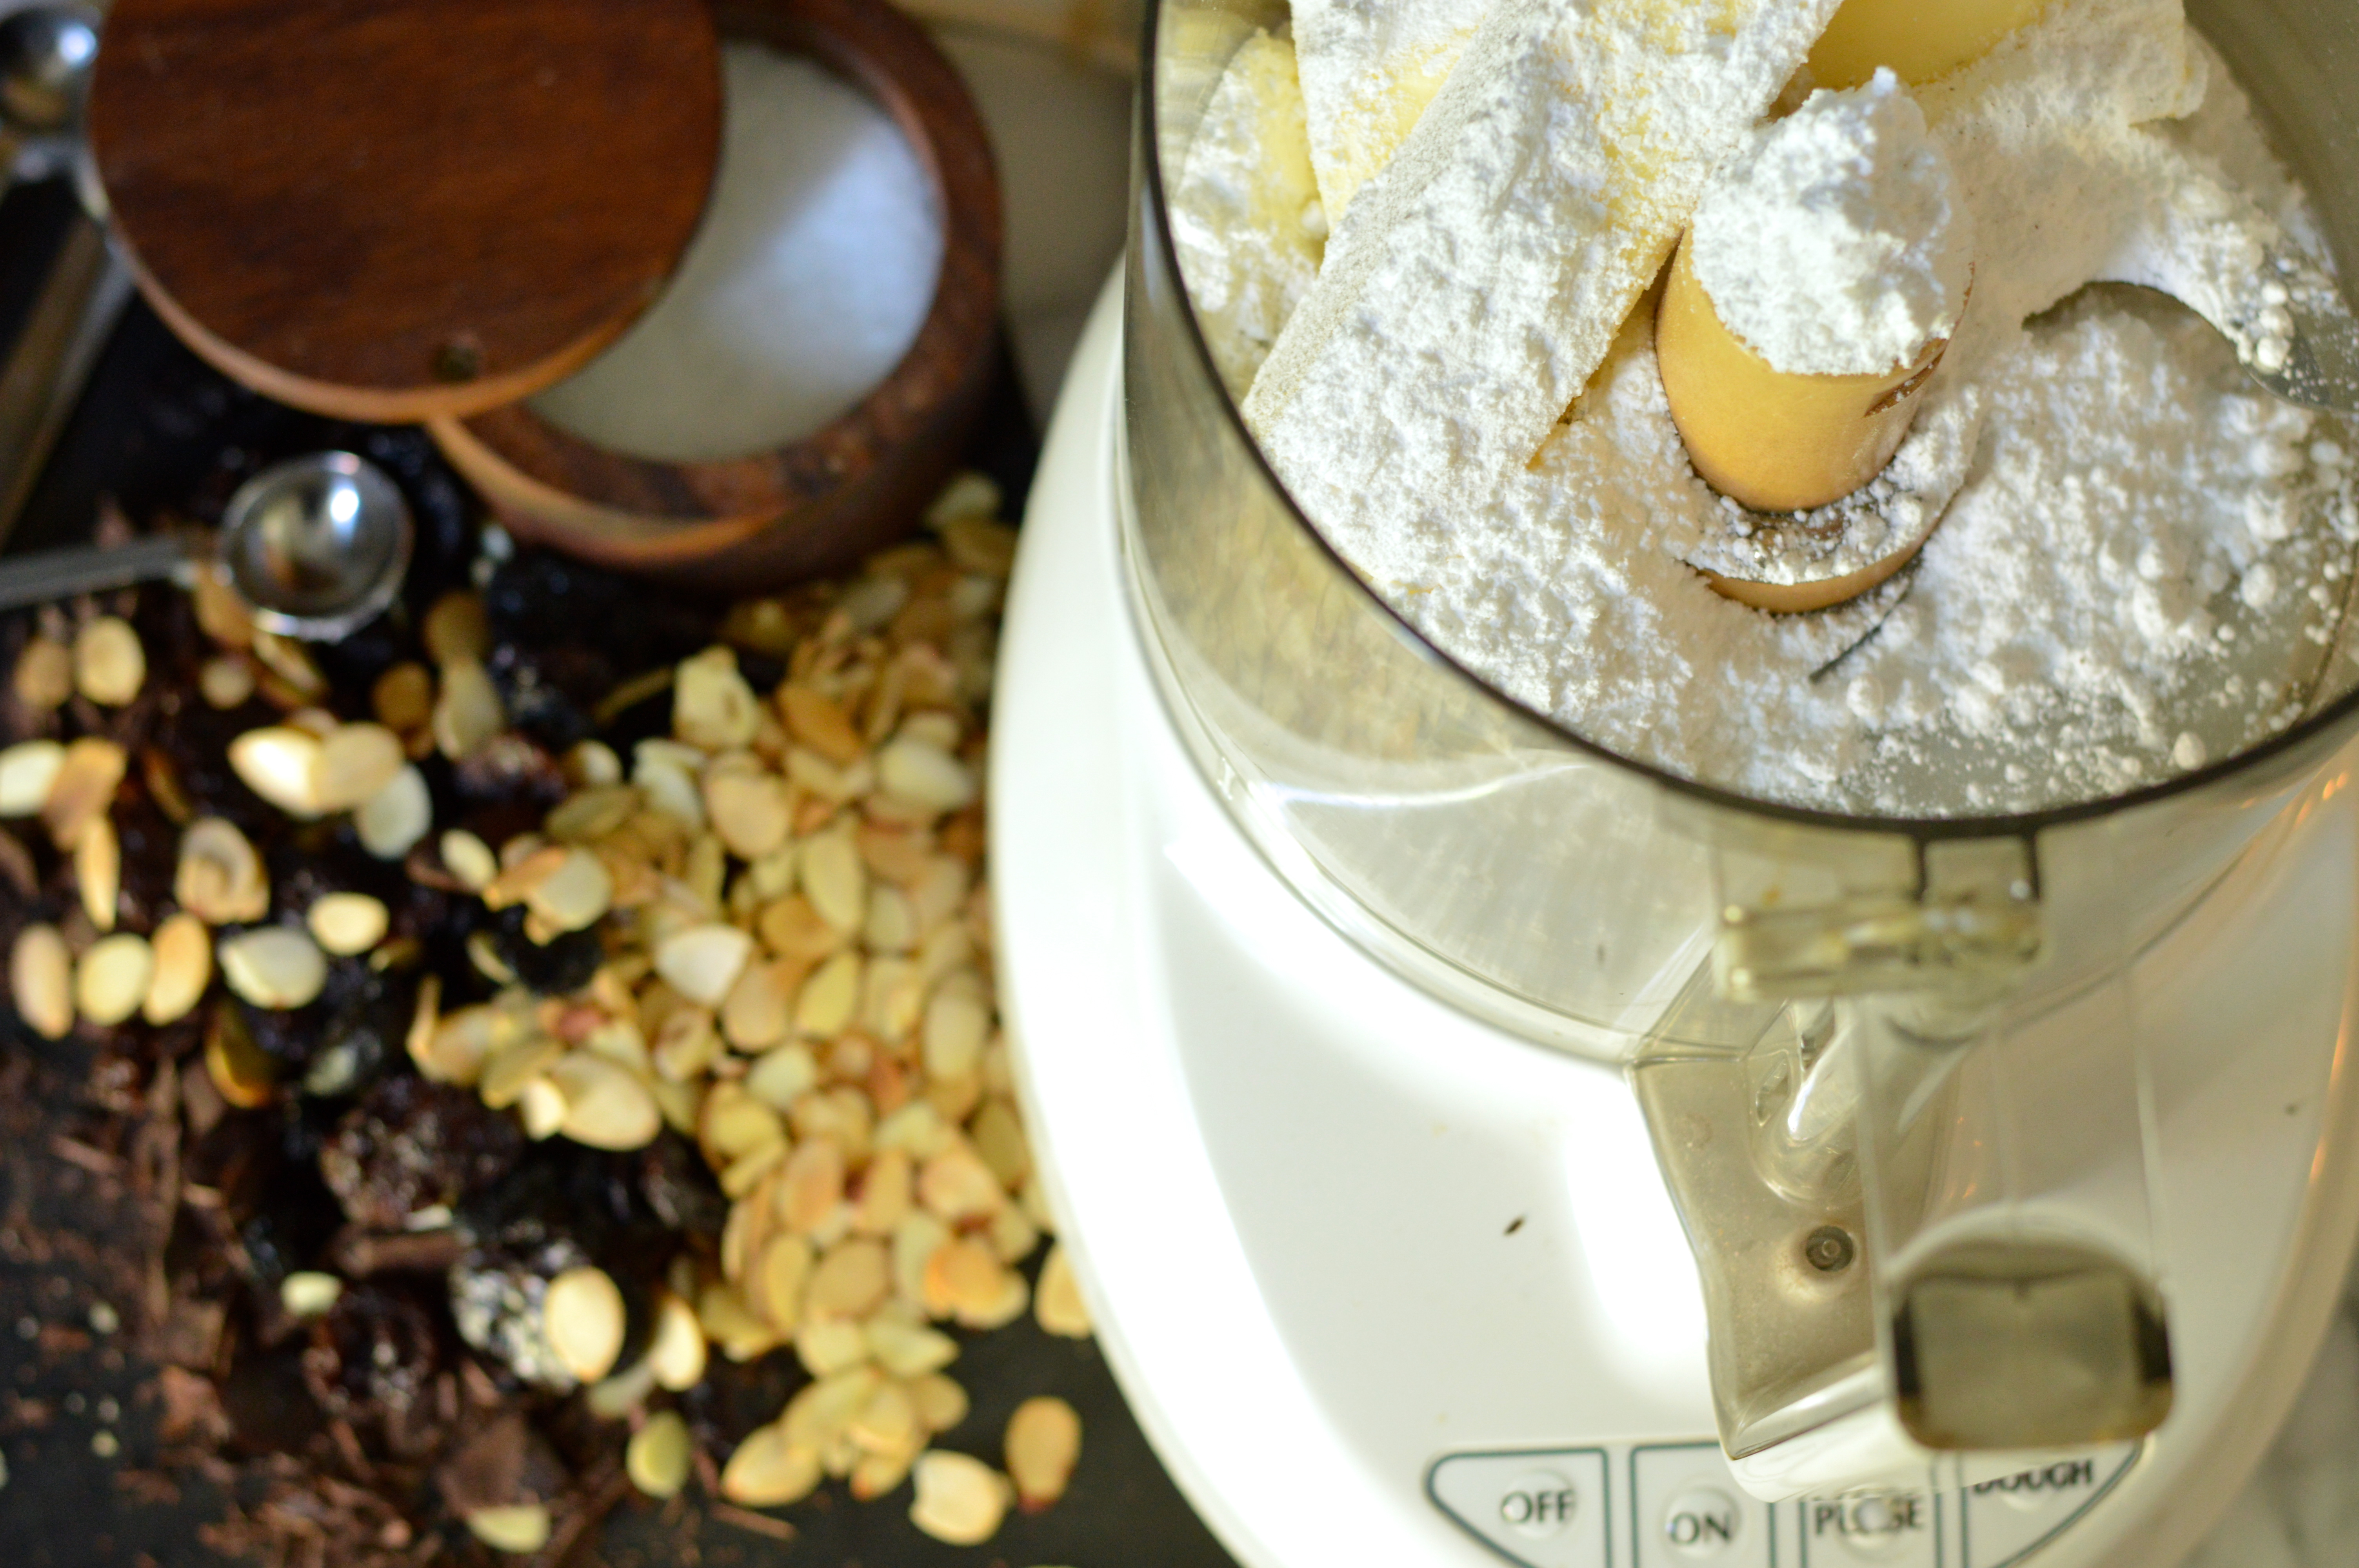
To make sure these ingredients were well distributed throughout the cookie I pulsed everything in the food processor while combining the sugar and butter. I think that it would have been better texturally if I’d waited to add theses “extras” until I added the flour. The flavor is absolutely amazing; the chocolate, cherries, and almonds marry perfectly together; but I think I would have preferred juuust slightly larger pieces of everything to be able to taste each ingredient individually as well as all together. In the recipe below I made this small change and noted that these ingredients should be pulsed with the flour, not earlier. Either way though, these cookies are crisp and buttery and ever so slightly salty, with a perfect combination of bitter dark chocolate, chewy tart cherries, and crunchy nutty almonds.

If you cant find unsweetened dried cherries, sweetened will work just as well. These cookies are perfect for fall but the flavors will translate well any time of year. I even think that these could make an excellent (and beautiful) addition to your holiday cookie tray.

cherry, almond, & dark chocolate shortbread cookies | Brooklyn Homemaker

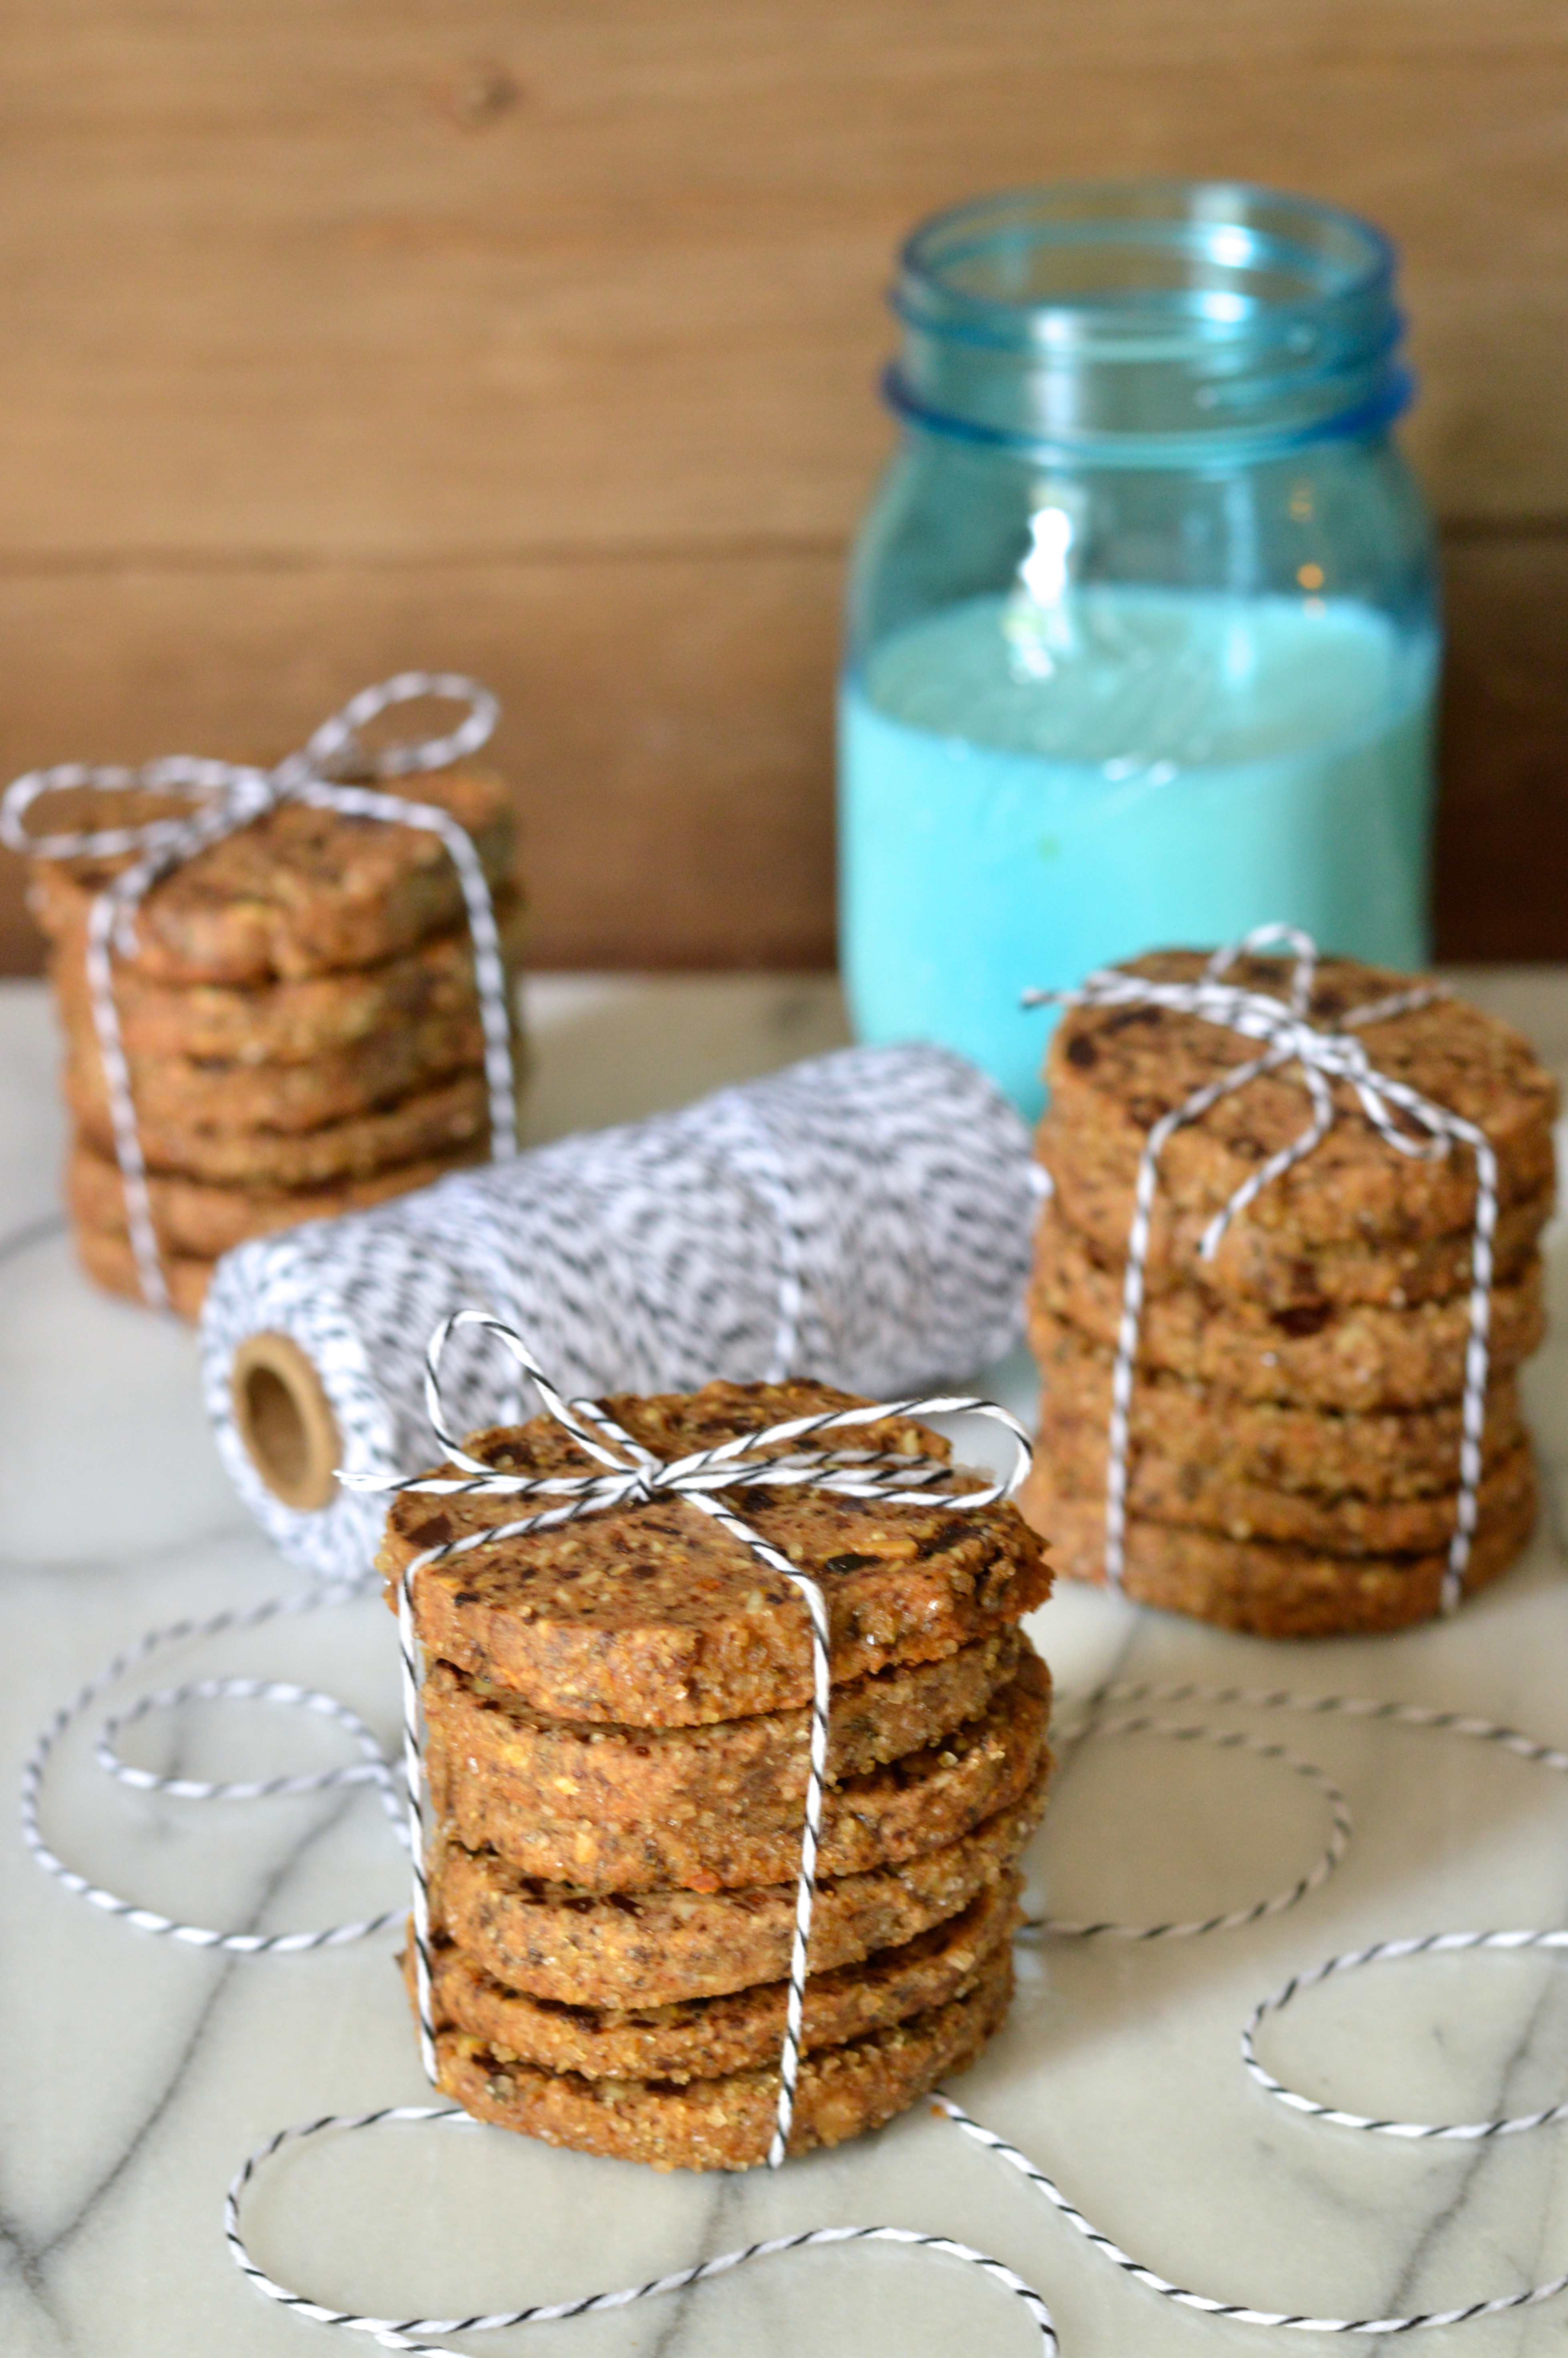
Dark Chocolate, Cherry, & Almond Shortbread Cookies

  • Servings: 24 to 36 -ish
  • Print
adapted from Martha Stewart

3/4 cups sliced almonds
1 cup (2 sticks) unsalted butter, room temperature
3/4 cup confectioners’ sugar
1 teaspoons coarse salt
3/4 cups dried cherries (unsweetened if available)
3/4 cups good dark chocolate, coarsely chopped (or dark chocolate chips)
2 cups all-purpose flour
1/4 cup coarse raw sugar (optional)

Preheat oven to 375. Spread almonds in an even layer on a baking sheet, and toast almonds for 5 to 10 minutes, checking frequently that they don’t burn. They should smell super nutty and be just barely beginning to brown. Remove from oven and cool completely.

In a food processor, combine butter, confectioners’ sugar, and salt; process until smooth and well blended. Add flour, chocolate, cherries, and almonds, and pulse until just combined and beginning to hold together. If you don’t have a food processor you could do this with a pastry blender, or even an electric mixer, but you’ll need to chop the cherry, chocolate, and almonds ahead.

Place the dough in the center of a 16 inch long sheet parchment paper. Plastic wrap would work too. Form dough into an 12-inch-long round log; and roll parchment up around it tightly to help get it smooth and perfectly round. There should be roughly 2 inches of extra parchment on either end; twist the ends up until tight and fold them over. Freeze the log until firm, at least 30 minutes (or up to 1 month).

Preheat oven to 350 degrees, with racks in upper and lower thirds. If desired, let the dough soften for about 15 minutes and roll entire log in coarse sugar to coat. Cut dough into 1/4-inch-thick slices and transfer to two parchment-lined baking sheets. Bake until cookies are golden brown around edges, 15 to 18 minutes, rotating sheets halfway through. Let cookies cool 5 minutes on sheets. Transfer to wire racks to cool completely.

seared pork chops with apples, onions, & mustard

I love pork. Just so we’re all on the same page.

seared pork chops with apples, onions, & mustard | Brooklyn Homemaker

I’ve really always been a big fan of pork. Give me a big thick juicy pork chop over a steak any day of the week. In the words of Homer Simpson, “Porkchops and bacon, my two favorite animals.”

When I was growing up my grandmother used to make us porkchops a lot. Shake n bake, of course, and of course I helped. Grandma’s pork chops were usually cut thin and baked until well done. The common conventional wisdom in my grandmother’s day was that if you saw even a tiny twinkle of pink in your pork you’d probably keel over dead on the spot. You were supposed to cook ’em through and then keep on going, just for good measure. The only problem with that wisdom is that todays pork is bred to be so lean that cooking to well done produces a bone-dry chop that is, sorry grandma, pretty terrible. I know it’s not your fault grandma! Damned conventional wisdom! Maybe this is why a lot of people think they don’t like pork?

Well, I’m here to challenge that wisdom. It’s totally okay if you cook your pork to medium-well or even medium. You’re not going to die. You’re not even going to get sick. Unless you caught your pig in the wild, the only thing you’re at risk of is eating a seriously tasty pork chop. Thanks to modern farming, Trichinosis (the food borne illness commonly associated with pork), hasn’t been a concern for American eaters since the 1970s. In fact, the USDA even recently lowered their recommended internal cooking temperature for pork from 160 degrees to 145. Yay! We can finally eat tasty pork again!

seared pork chops with apples, onions, & mustard | Brooklyn Homemaker

While we’re on the topic of tasty pork, lets talk about how I like to eat a pork chop. Call me uninspired, but my favorite flavor to pair with pork is apple. I know it’s super traditional and I’m not showing you anything you haven’t seen before, but hey, it’s friggin good! If it ain’t broke, I ain’t trying to fix it.

I’ve been eating apples with pork for as long as I can remember, which probably stemmed from grandma’s well done chops. I used to slather those suckers with mountains of applesauce, for the moisture as much as the flavor.

seared pork chops with apples, onions, & mustard | Brooklyn Homemaker

People have actually been pairing pork with apples for centuries. Before sugar was readily available to most people, fruit sweetened foods were usually served alongside or in combination with savory, and apples were a common way to add a touch of sweetness to pork dishes. This may have started because some farmers would feed old or rotten apples to their pigs, and some people say that a diet high in apples can actually flavor the meat.

On a side note, I might just need to plant some apple trees and buy a few pigs…

seared pork chops with apples, onions, & mustard | Brooklyn Homemaker

I think pork chops on the bone tend to have the best flavor, and the thicker they’re cut the juicier they’re going to be when they’re finished cooking. If you get your pan nice and screaming hot you only need to sear the chops for a few minutes on either side to get them perfectly cooked to medium well. If you’re still scared and want to cook them to well done, remove them from the pan the second the meat reaches an internal temperature of 145 degrees. Even thick cut chops will get dry and tough if overcooked.

To add a little depth to the pork and apple combination, I deglazed the pan with white wine after searing the pork, sautéed the apples with some onions and mustard, and finished the the whole thing with some cream and fresh sage from our back yarden. The onion helps keep things from going too sweet and fruity, and the mustard adds some interesting texture and a nice earthy vinegary bite. The sage reinforces that earthiness, and the cream gives the topping a really nice velvety finish. Despite feeling kind of “grown-up” and “fancy”, this meal is actually pretty simple to make and comes together in less than 30 minutes!

Since things are getting all nice and autumnal outside, I decided to pair my pork chop with some mashed sweet potatoes and roasted brussels sprouts. And, of course, there was also some white wine.

seared pork chops with apples, onions, & mustard | Brooklyn Homemaker

Seared Pork Chops with Apples, Onions, & Mustard

  • Servings: 2 generous portions
  • Print
2 center cut pork chops, bone in, at least 1 inch thick
salt and pepper to taste
2 tablespoons butter
1/4 cup white wine
1 firm sweet apple, such as pink lady
1 small onion
2 tablespoons whole grain mustard
2 tablespoons finely sliced fresh sage
1/4 cup cream

Generously season pork chops on both sides with salt and pepper. Preheat a heavy skillet over high heat until your butter sizzles and immediately browns when added. Add 1 tablespoon butter, swirl in pan, and immediately add pork chops. Reduce heat just slightly to medium high, and cook for about 3 to 4 minutes per side. You want them cooked to about medium-well. A little pink won’t hurt you but you want the meat to be mostly white. If you’re scared, use a meat thermometer to be sure the meat reaches an internal temperature of 145 degrees. Do not overcook or the chops will be tough and dry. Meanwhile; peel, core, and finely dice the apple, and finely dice the onion.

Remove pork chops to a plate and tent with foil (remember they’ll keep cooking a little while they rest). Deglaze pan with white wine, add remaining butter, apples, and onions and season with salt and pepper. Cook until onions are translucent, apples are tender, and everything is starting to get a healthy caramel brown, about 10 minutes. Add mustard, sage, and cream; and cook about 3 minutes more.

spiced harvest bundt cake with cream cheese glaze #bundtbakers

It’s that time again friends! #Bundtbakers is back, and this month is extra special to me for a couple of reasons.

spiced harvest bundt cake with cream cheese glaze | Brooklyn Homemaker

It’s my first turn to host this month, which means I’m in charge of gathering the links to everyone’s bundts and sharing the list with each participant to share on their blog. Hosting also means that I have the honor of choosing this month’s theme! September is one of my favorite months of the year because it’s still warm and sunny enough to spend time outdoors, but there’s a slight chill in the air and you can literally smell fall coming around the corner. The best part of September to me though, is the produce. This is the time of year that all those fall flavors start making their way back into our farmers markets and kitchens, and I could not be more excited about it. Pumpkins and winter squash and apples and pears and root vegetables and cranberries and figs! Be still my heart.

Given my unhealthy obsession fondness for fall produce, I decided “Autumn Harvest” would be the perfect theme for September. Make sure you check out the bounty of bundts below the recipe! They all look soooo deliciously autumnal.

spiced harvest bundt cake with cream cheese glaze | Brooklyn Homemaker

The other reason this month’s #bundtbakers is so special to me is the reason this particular cake came to be.

I’ve mentioned, a few times I believe, my good friends who are planning a wedding. Those of you who’ve been reading since the beginning may even remember that these friends inspired me to start blogging in the first place. Shortly after Russell and I were married, our friends were engaged and we had them over to our place to pass on some wedding supplies and talk through the beginning stages of their planning process. I made a big fancy brunch, and when I served a 3 layer pistachio cake for dessert they insisted that I start a blog about my cooking and baking. I habitually posted photos of my food to facebook and instagram, but I was sure that writing an actual blog was out of my league. After another glass (or two) of wine though, they had me convinced and the very next morning I started Brooklyn Homemaker.

spiced harvest bundt cake with cream cheese glaze | Brooklyn Homemaker

As their date has drawn closer and closer, Russell and I have tried to do our part to help them through the stressful and complicated business of planning a wedding. They really enjoyed several aspects of our wedding, so we’ve been giving them tips and advice on how we pulled a few of those elements together. I know that wedding planning is torture to some, but I loved every second of planning my wedding, so I’m happier than you can ever know that I have the opportunity to help someone else with their planning.

spiced harvest bundt cake with cream cheese glaze | Brooklyn Homemaker

One element of our wedding that they really enjoyed was that our caterer’s mother baked us some pies to serve along with our cake. Since my baking has played such an interesting role in our friendship, they asked if I might be able to bake them a few things for their dessert table. Of course, I was thrilled to agree. We decided on two different types of desserts; a pie, and a bundt cake; two of each so there will be enough to go around. Their wedding is less than a month away now, so I wanted the desserts to be appropriate for the fall season. The type of pie has already been decided, but I’ve had a bit of a hard time choosing what kind of bundt to make.

spiced harvest bundt cake with cream cheese glaze | Brooklyn Homemaker

So, forever indecisive, I just baked two different cakes. NBD.
I thought it could be fun to have a tasting and let the bride and groom decide.

I loved the flavors of last month’s #bundtbakers cake, my honey glazed cornmeal cake, so much that I thought I’d try to give it an Autumnal makeover. Instead of blackberries I substituted diced pear, which I thought would pair well (get it? har har) with the flavors of rustic earthy cornmeal and sweet floral honey.
Next I made a play on a carrot cake, an autumn-produce-packed “harvest cake” with grated carrots, parsnips, apples, and pears. I made sure to add plenty of fall spices, and topped the cake with a cinnamon cream cheese glaze. Then I packed both cakes up in bakery boxes and headed over to their house for a fancy cake tasting.

spiced harvest bundt cake with cream cheese glaze | Brooklyn Homemaker

While both were absolutely delicious, the clear winner was the spiced harvest cake.

This bundt has a flavor very similar to carrot cake, but with a bit more spice and a richer flavor. The addition of brown sugar helps keep the cake super moist and adds a caramel-y depth of flavor. The combination of apples and pears gives that traditional “carrot cake” flavor a slightly sweeter & fruitier edge, but the addition of parsnips with the carrots keeps everything perfectly earthy and vegetal. If you want to add walnuts or pecans I think they’d be great, but I left them out to accommodate wedding guests with nut allergies. There’s plenty of spice, with an extra boost of cinnamon in the sweet and tangy cream cheese glaze. The crumb is moist and tender and, well covered, I think this cake will travel really well upstate for their wedding.

I’m literally giddy with excitement.

spiced harvest bundt cake with cream cheese glaze | Brooklyn Homemaker

Spiced Harvest Bundt Cake with Cream Cheese Glaze

adapted from Ree Drummond for Food Network

Cake:
Butter and flour for pan
1 cup granulated sugar
1 cup dark brown sugar
1 cup vegetable oil
4 large eggs
2 1/2 cups all-purpose flour, plus more for dusting
1 1/2 teaspoon baking powder
1 teaspoon baking soda
1 teaspoon salt
1 teaspoon ground cinnamon
1/2 teaspoon nutmeg
1/2 teaspoon ginger
1/4 teaspoon ground cloves
1 cup grated carrots
1/2 cup grated parsnips
1/2 cup grated ripe bartlett pears (Bosc should work too)
1/2 cup grated granny smith apples (or any tart firm apple)

Cream Cheese Glaze:
4 ounces (1/2 package) cream cheese, softened
1 cup powdered sugar
1 teaspoon cinnamon
1 tablespoon lemon juice
2-4 tablespoons milk

Directions
Butter and flour a non-stick bundt pan. Preheat the oven to 350 degrees F.
Mix together the sugars, oil and eggs in a large bowl. In another bowl, sift together the flour, baking powder, baking soda, spices and salt. Add the flour mixture to the sugar mixture and combine. Then add the grated carrots, parsnips, apples, and pears, and mix well. Pour the batter into prepare Bundt pan and bake until a toothpick inserted in the middle comes out clean, about 55 to 65 minutes. Leave to cool completely.

Meanwhile, make the glaze: In the bowl of a stand mixer, beat the cream cheese until it’s soft and smooth and light. Add the powdered sugar, cinnamon, and lemon juice and blend until there are no lumps. Add milk, 1 tablespoon at a time, beating after each addition until the glaze reaches the desired thick yet drizzle-able consistency.

Well covered in an airtight container, this cake should keep at room temperature about 3 or 4 days.

spiced harvest bundt cake with cream cheese glaze | Brooklyn Homemaker

I’m so excited about how many bakers are participating in this months event! There are a total of 20 outstanding Autumn Harvest themed bundts to drool over, so make sure you follow the links and check them all out. Every single one sounds unbelievably delicious and I wish I could have a slice of each and every one!

BundtBakers

Interested in learning more about us? #BundtBakers is a group of Bundt loving bakers who get together once a month to bake Bundts with a common ingredient or theme. We take turns hosting each month and choosing the theme/ingredient. You can see all our of lovely Bundts by following our Pinterest board right here. Links are also updated after each event on the BundtBaker home page here.

If you are a food blogger and would like to join us, just send an email with your blog URL to foodlustpeoplelove@gmail.com. If you are just a lover of Bundt baking, you can find all of our recipe links by clicking our badge above or on our group Pinterest board.

toasted coconut cream pie

Suddenly, one morning last week, I woke up with a hankering for coconut cream pie.

toasted coconut cream pie | Brooklyn Homemaker

Don’t ask me why. Just don’t, okay. I honestly couldn’t tell you.

I mean, I’ve always considered pie one of my favorite food groups, but double-crusted fruit pies have always been much more my style than cream pies.

toasted coconut cream pie | Brooklyn Homemaker

Perhaps one reason I prefer fruit pies is that the crust and the filling cook all at once, rather than baking the crust separately from what’s going into it. I’ve never been a fan of blind baking pie shells, and have had more than my fair share of sadness and anger and tantrums over blind baking disasters. You name it, it’s happened to me. I’ve had aluminum foil stick to the crust and tear it in half when removed, I’ve had crusts bake with a giant humped bubble in the center because there weren’t enough weights to keep it flat, and I’ve even had the crust shrink and slip down the edges of the pan leaving me little more than a half inch mound to contain my filling.

My love for sweet potato and pumpkin pies at Thanksgiving was my incentive to try try again, and I’ve finally gotten the technique down. Sort of. If you’re new to blind baking, check out this great tutorial from thekitchn for more detail. In my experience, the key points to keep in mind are as follows:
A) Use parchment paper, not foil, and you won’t have to worry about it sticking to the crust.
2) Chill (or better yet, freeze) your crust for a bit before baking and it won’t shrink as much.
3) Fill the parchment-lined pie crust with plenty of weights or beans, you don’t want to skimp.

toasted coconut cream pie | Brooklyn Homemaker

When I woke up with my coconut cream craving I knew I could handle the blind baking. What I wasn’t expecting was how much more time goes in to a cream pie than a fruit pie. I mean, the recipe is not at all difficult, but I won’t lie to you; This pie is kind of involved. You’re making a crust, and a filling, and a topping; all of which need to be prepared separately, combined, and chilled before eating.

But then there’s the eating. The sweet, creamy, coconutty wonderful eating.

toasted coconut cream pie | Brooklyn Homemaker

All this pie making, and pie eating, got me thinking about where the idea of coconut cream pie came from. Who on earth got the idea of putting coconut into a pudding, then putting that pudding into a pie shell, then topping that pudding filled pie shell with whipped cream?

toasted coconut cream pie | Brooklyn Homemaker

As it turns out, the coconut cream pie has been around for over a century.

Back in the late 1800s Europeans and Americans were really in to their imported tropical fruit like pineapples and bananas, but the coconut hadn’t yet taken off. This was mostly because they were hard to transport without spoiling, and because people didn’t really know what to do with them once they had them in their kitchens. Everyting started to change when a French company based in Ceylon (now Sri Lanka) started shredding coconut meat and drying it for easier shipping, thereby making coconut accessible to European chefs and home cooks.

toasted coconut cream pie | Brooklyn Homemaker

Shortly after gaining popularity in Europe, coconut took the United States by storm when a Philadelphia flour miller received a shipment of coconuts as payment of a debt from a Cuban businessman. In 1895 he set up a factory for shredding and drying his coconut meat and singlehandedly put coconut into the hands of American homemakers and commercial bakers and candy makers.

Recipes for coconut cream pie start showing up in cookbooks almost immediately, and by the early 1900’s coconut custard and coconut cream pie was everywhere.

toasted coconut cream pie | Brooklyn Homemaker

And it’s no wonder. This pie is really something. As much as I still think baked fruit pies are more my thing, this pie is worth all the time and separate steps. The crust is flaky and tender and crisp, and since it’s made with butter instead of shortening, it’s got a great flavor as well as texture. The coconut pudding filling is rich and custardy and creamy and thick, studded with plenty of super flavorful toasted coconut. The whipped cream is just barely sweetened, and laced with just a hint of rum to take that tropical coconut to another place. The whipped cream is also stabilized with a tiny bit of gelatin, just to make sure it doesn’t turn into a runny puddle if you don’t serve every last slice right away.

If you’re a fan of cream pies, or a fan of coconut, this recipe is one to dog-ear.

toasted coconut cream pie | Brooklyn Homemaker

Toasted Coconut Cream Pie

adapted from Brown Eyed Baker

Pie crust:
1 1/2 cups flour
1/2 teaspoon salt
2 teaspoons sugar
1 stick (8 tablespoons) unsalted butter
1/2 cup ice cold water

Coconut Cream Filling:
1 ½ cup unsweetened shredded coconut
1 (14-ounce) can coconut milk, well stirred (not cream of coconut)
1 cup whole milk
2/3 cup granulated sugar
¼ teaspoon salt
5 egg yolks
¼ cup cornstarch
1½ teaspoons vanilla extract
2 tablespoons unsalted butter, cut into pieces

Stabilized Whipped Cream:
1 1/2 teaspoons unflavored gelatin
6 tablespoons ice cold water
1½ cups heavy cream, chilled
1/3 cup confectioners (powdered) sugar
1 tablespoon dark rum (optional)
1 teaspoon vanilla extract (if not using rum, add another teaspoon)

Make the pie crust:
Stir or whisk together flour, sugar, & salt in a medium bowl. If you have time, toss the bowl in the freezer for a 15 or 20 minutes. Cube the butter, add it to the chilled flour, and cut it in with a pastry blender, until it looks like coarse pea sized chunks. You can also do this by pulsing in a food processor. If you took very long to cut the butter in, you can toss the bowl back in the freezer for another 15 minutes, but if the butter is still firm and cold, don’t bother.

Start mixing in the water and stirring and tossing with a fork to distribute and combine. Try starting with about 1/4 cup, mix together, and add about a tablespoon or two at a time, until it starts to come together. The less water you use the better and flakier the crust will be, but you don’t want to use so little that it won’t hold together. If you can press it together with your hands and it mostly stays in a ball, with a few little bits crumbling out, you’re good to go.

Form the dough into to a ball and wrap it tightly in plastic wrap. Try to handle it as little as possible so as not to warm or melt the butter. Press or pat the covered ball of dough into a thick disk and refrigerate for at least two hours (or up to a few days)

Preheat oven to 425 degrees.

On a well floured surface with a floured rolling pie, roll the dough out in a disk that’s about 2 inches wider than your pie plate. Transfer to the plate, center the crust (do not stretch it out or it’ll shrink when baked) and trim the edge so there’s about half an inch to an inch of overhang. Fold the overhang under itself right at the edge of the pie plate, and crimp the crust with a decorative edge.

To blind bake the pie crust, cut a large square of parchment paper and line the crust with it. Fill the paper with pie weights, dried beans, or pennies to weight down the crust or it’ll bubble up when baked. Bake for about 15 minutes, or until the edges of the crust are beginning to turn golden brown. Remove the pie plate from the oven, and lift the weight filled parchment out of the pie crust. Return it to the oven for another 5 minutes or so, or until the center of the crust looks dry and cooked through. Set the crust aside to cool.
For more information on blind baking a pie crust, check out this detailed tutorial from TheKitchn.

Make the filling:
Turn the oven down to 325. Spread the coconut in an even layer on a parchment lined baking sheet, and toast until golden brown, about 9 minutes, stirring every couple of minutes. When cool enough to handle, reserve 1/2 cup for garnishing the finished pie.

Bring the coconut milk, whole milk, 1 cup loosely packed toasted coconut, 1/3 cup of the sugar, and the salt to a simmer in a medium saucepan over medium-high heat, stirring occasionally with a wooden spoon to dissolve the sugar. When the mixture reaches a simmer, whisk the egg yolks in a medium bowl to break them up, then whisk in the remaining 1/3 cup sugar and cornstarch until well combined and no lumps remain. Gradually whisk the simmering liquid into the yolk mixture to temper it, then return the mixture to the saucepan, scraping the bowl with a rubber spatula. Bring the mixture to a simmer over medium heat, whisking constantly, and let thicken at a low simmer for about 3 to 5 minutes.

Off the heat, whisk in the vanilla and butter. Pour the filling into the cooled crust, press a sheet of plastic wrap directly on the surface of the filling and refrigerate until the filling is cold and firm, at least 2 to 3 hours.

Make the stabilized whipped cream:
In a small pan, combine gelatin and cold water and let stand until thick.
Place over low heat, stirring constantly, just until the gelatin dissolves. Remove from heat and let cool for just a few minutes. (do not allow it to set).
Whip the cream with the confectioner’s sugar, until slightly thick. While slowly beating, add the gelatin to whipping cream.
Whip at high speed until stiff. Add the rum and vanilla, and whip for 1 minute more.

Spread or pipe the whipped cream over the chilled filling. Sprinkle the reserved 1/2 cup toasted coconut over the whipped cream and return the pie to the refrigerator for at least 1 hour more for the whipped cream to set. Cover with plastic wrap after the first hour, if not serving at that moment. Leftovers should be wrapped in plastic too, and stored in the refrigerator.