Author: Tux | Brooklyn Homemaker

A food and lifestyle blog focused on gussied up american classics, baked goods with a history, and schnauzer babies.

My Favorite Way to Roast Chicken

When I was in college I had to take a few introductory culinary classes as part of my curriculum, but at the time I was a vegetarian. I didn’t pay attention during the meat classes because I thought I’d never need to know how to cook the stuff, and I’ve always regretted that. During my veg phase I also interned abroad, working as a back waiter in Burgundy for a few months. I did eat fish while I was there because I was afraid I’d waste away to nothing in France, where bacon is considered a vegetable. In Paris I ate like a king, but 10 years ago in rural burgundy, some people had never even heard of someone not eating meat for non-religious reasons. I ate a ton of amazing food, especially river trout that were kept and caught daily from a creek behind the restaurant where I interned, but I can’t even begin to explain how much I regret politely declining the foods I turned down and missed out on. Boudin Noir sauteed in normandy butter with apples, rabbits raised in a garage by a little old lady that lived behind our dorm, fresh fois gras from a humane farm we visited one weekend. I’ll forever be kicking myself for that.  Shortly after I returned I broke and went back to eating meat. I’m a real chump.

simple roast chicken in cast iron | Brooklyn Homemaker

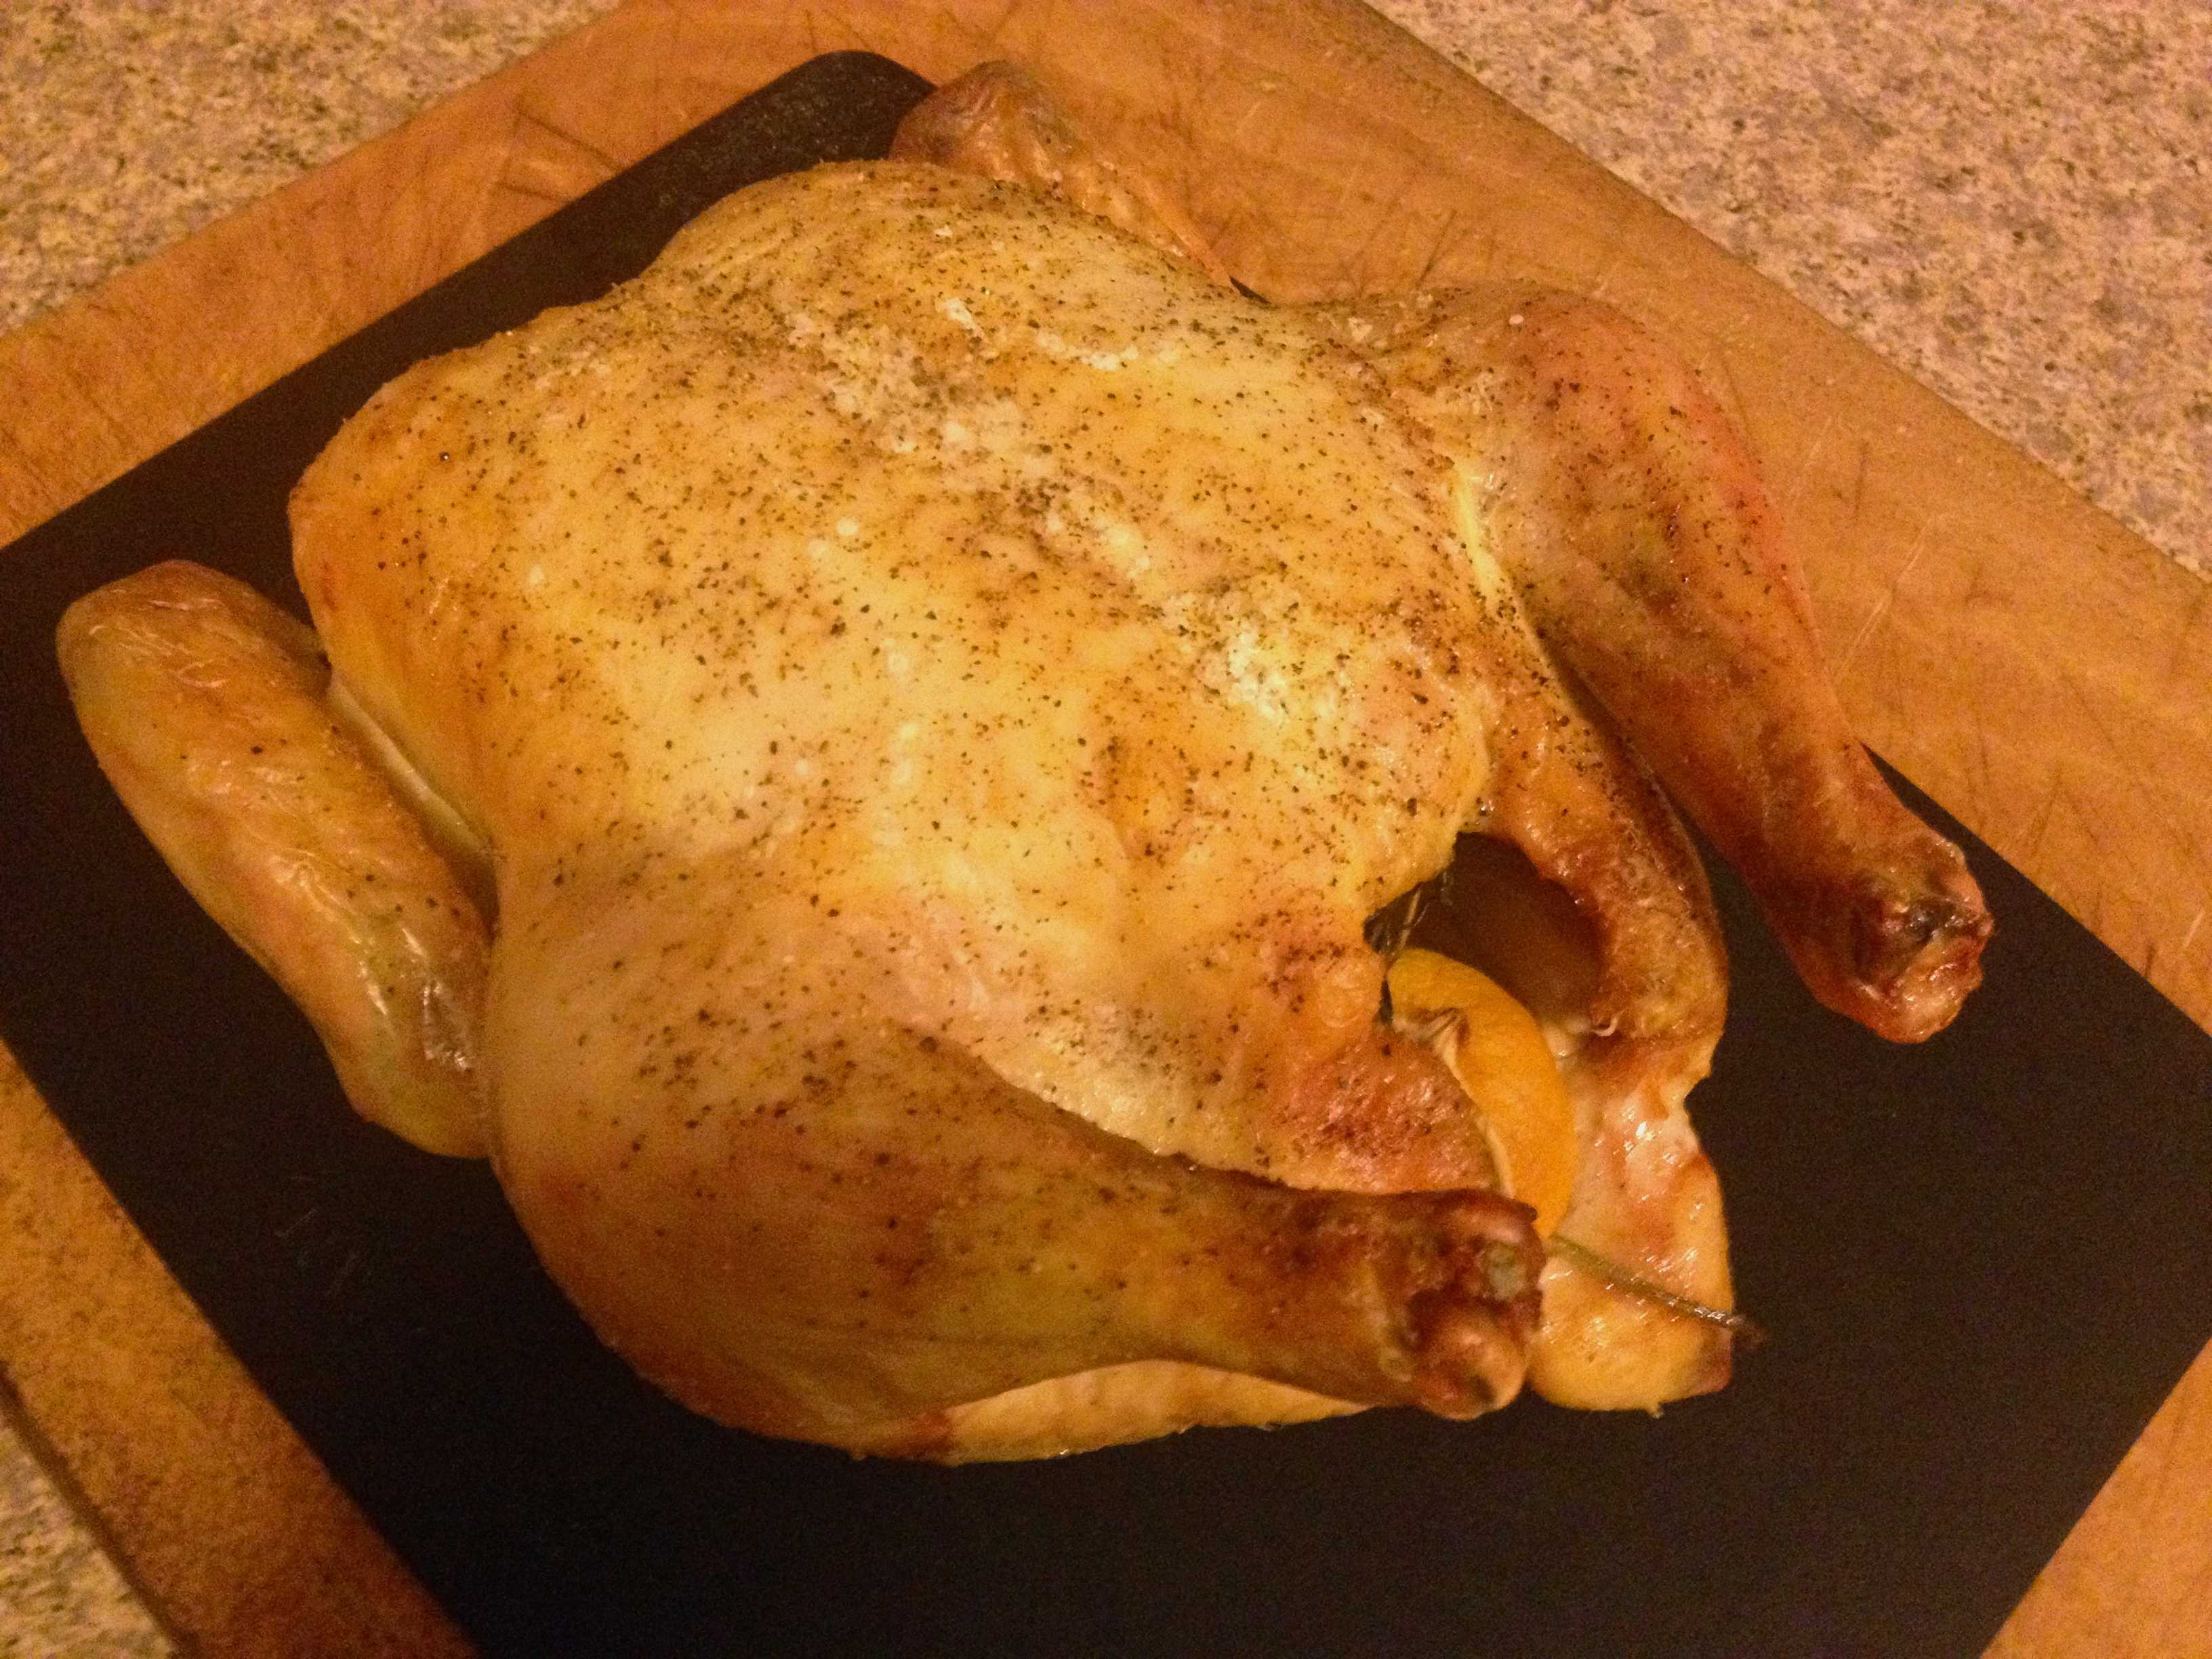
I always assumed that roasting a chicken was a delicate art that I could have learned if only I’d paid attention, but would never be able to master on my own. It’s no Boudin Noir with apples and butter, but a well roasted chicken is a beautiful thing. So, a few years ago I decided it was time to put on my big boy pants and roast my first chicken. All that time I wasted afraid that I couldn’t do it. When I finally drummed up the courage to do it and looked up a recipe, I thought it was wrong. It couldn’t be that simple. Could it?

Simple Roasted Chicken in Cast Iron | Brooklyn Homemaker

It could.

Roasting a chicken is pretty damned simple if you have a few hours before you need to eat. There are a million ways to do it. Some of them are harder than others, but most of them are pretty darn good. I think simplicity is best when it comes to simple foods, so I’ve perfected my favorite way of roasting a chicken to be as simple, and as versatile, as possible.

I used to roast in pyrex, at first laying flat on the bottom, then up on a roasting rack, but things changed when I read about roasting in cast iron and I’ve never gone back. Cast iron heats up more slowly but more evenly than roasting pans or pyrex, and they maintain an even heat for a nice long time. Since it doesn’t overheat as quickly, your chicken’s juices don’t burn off and you can make your gravy or sauce right in the same pan. I like to roast on a bed of vegetables or potatoes to keep the bird from sticking, and then the juices run over and help cook your vegetables.
Simple Roasted Chicken in Cast Iron | Brooklyn Homemaker
This is a really loose recipe, easily tweaked and changed to suit your taste. I like to wash, dry and season my chicken well before roasting and let it sit uncovered in the fridge for a few hours. If you don’t have time for this you can skip it, I just think it makes for a crispier skin. I usually toss some onions and cubed potatoes in the pan under the chicken, but the other day I swapped the potatoes for brussels sprouts and cubed butternut squash and it was truly amazing. You just want to make sure you choose veggies that benefit from low slow roasting, parsnips, carrots, sweet potatoes, apples, you name it. When the chicken is done I take it out and let it rest, tented with aluminum foil, then transfer the veggies to a serving bowl, leaving the juices in the pan for gravy.

Simple Roasted Chicken in Cast Iron | Brooklyn Homemaker

Thickening with a roux is the easiest and quickest way, but if you want to let your chicken rest a little longer you can make a reduction by cooking down your juices and maybe a little white wine, or maybe add some cream or butter for texture.

Give it a shot. It’s not as scary as you might think.

Simple Roasted Chicken in Cast Iron | Brooklyn Homemaker

Simple Ol' Roast Chicken

3 or 4 lb roasting chicken
coarse kosher salt and ground pepper
cubed or bite size veggies such as onions, brussels sprouts, potatoes, winter squash, root vegetables, etc.
herbs, garlic, or quartered lemons or onions for stuffing
olive oil or butter

If making a gravy with roux:
4 tablespoons butter
6 tablespoons flour

Rinse your chicken in cold water and pat it dry with paper towels. Be sure to dry the inside as well as the out. Remove any “extras” that might be inside and discard or freeze for making stock. Wash your hands really well both before and after this. Place your dried chicken on a plate and season all sides with salt and pepper. If you have time, place your chicken uncovered in the refrigerator for two or three hours. If you don’t, set it aside and prepare your pan.

Preheat your oven to 450°F.
Arrange your vegetables in an even layer the bottom of the pan and drizzle with a little olive oil or melted butter and season with salt and pepper. Go easy on the salt if you’re making a reduced sauce so it’s not too salty when it cooks down.
If you like a darker color to your skin you can rub the chicken with olive oil or butter before roasting but I usually skip it.
You can stuff the inside of the chicken with whatever you want. Overstuffing can slow the roasting down so leave some space for air in the cavity.
Place your chicken breast-side-up over your vegetables and roast the chicken for 15 minutes and then reduce the oven temperature to 375°F.
Continue to roast for one hour. A three or three and a half pound chicken should be done by now. For a four pounder you can go another 15 minutes.  If you’re new to this or worried about doneness, check by inserting an instant-read thermometer into the meatiest part of its thigh. You want it to be at least 165°F, but if you’re under you can put it back in for another 5 to 10 minutes and check it again.
Transfer your chicken to a plate and let it rest, tented with aluminum foil, for 15 minutes. Transfer your vegetables to a bowl or dish and make your gravy or sauce. If making gravy, make a roux by melting butter in a separate pan and whisking in flour. Cook over medium heat for 3 or 4 minutes. The amount of juice from you chicken can vary, so gradually whisk a little roux at a time into the liquid, simmer for a bit before adding more, until you reach the desired thickness.


Enjoy kiddos!

Kitchen Backsplash Update

You guys. I have a something to tell you.

For someone who cooks as much as I do, I don’t love my kitchen. In fact I kind of hate it. The lighting sucks and the cabinets are hung really high. Like inconveniently high. I’m 6 feet tall and the bottom of the cabinets is at nose level for me.  It also has a serious lack of storage space, and my guest room is filing up with serving dishes and gadgets like my ice cream maker and slow cooker. But I’ve added shelving and a rolling storage cart, and it functions well enough for me to turn out some pretty delicious things on a regular basis. Mostly I hate my kitchen because it isn’t pretty. It’s outdated and cheap and not at all to my taste.

Chalkboard backsplash update | Brooklyn Homemaker

The floors are a pinky orange 90s faux terra cotta, the countertops are a horrible faux granite laminate in a weird speckled yellowy beige color, the stove top is stained from years of use and scuffed from years of cleaning, the refrigerator is right next to the oven and has a big area where the enamel has been scraped off somehow, there are no windows and no natural light, the overhead lighting makes everything look even more yellow, and the cabinets… the cabinets… are… I can’t even say it… honey oak! The horror!

The worst part is that, as a renter, there isn’t much I can do about most of what’s wrong in there. I can deal with the lack of storage. I’ve been living with tiny kitchens since I moved out of my mom’s house. I can deal with the cabinets being hung at an absurd height. I’m tall-ish. But the bad countertops? I can’t replace them. The honey oak cabinets? I know what it would take to paint them, and paint them correctly so they’d look great for years, but I have this strange desire to get my security deposit back someday. Nothing would make me happier than painting the cabinets white and putting in new countertops but that’s a lot of work and a lot of money to put into an apartment that I don’t own.

When we moved in a few years ago we painted the kitchen, and most of the rest of the house, a soft pale grey. I love the clean modern look that the grey gives our apartment, but next to those horrible countertops and cabinets, and with the terrible yellowish lighting, the grey has never looked great on the walls of the backsplash. I’ve been toying with the idea of putting up white subway tile, but I’m not convinced that it would look any less awkward with all the yellow elements in there, and again, it’s a lot of work and money to improve someone else’s property.

Starting this blog and trying to take attractive photos in my unattractive kitchen has lit a fire under me. I just can’t take it anymore. I need to do SOMETHING with the backsplash. Anything. I am fortunate enough to be able to paint in my apartment, so that’s pretty much my only option. So, I’ve been brainstorming. And thinking. And rethinking. And laying awake at night. Thinking. And then doing some soul searching.

Chalkboard backsplash project | Brooklyn Homemaker

I tried to think of colors that would compliment all the yellow happening in there. If that’s possible? Red’s really not my thing. I’m more into cooler colors. Blues and greens. Something about the idea of a brightly colored “feature wall” as a backsplash kept me up at night. I hate the phrase “pop of color” and that’s where my head kept going. Like it would look like I was trying too hard to look fun and quirky… But if not a solid color, what? I thought about a patterned paint treatment using stencils or something to look like wallpaper, but it just didn’t seem right to me either. Then, finally it came to me!

Chalkboard paint!

IMG_9549

I actually already had a can on hand from a project I did a few months ago. The counters have some black in them so I thought the black walls would compliment rather than clash with them. There’s already a real blackboard hanging on the opposite wall in the kitchen, so I thought the backsplash could look kind of cool with that. Maybe? If I still felt like a pattern would help break up all that black, I could draw one on! And hey, if I hated it, I’d be no worse off than when I started, and would just need to paint over it! I keep saying this, but I’m pretty sure I’m a genius.

Russell left on Friday to visit his sister in L.A. for her birthday. Hi Shannon! Happy birthday! So I set to work.

First I cleared off the counters and removed everything from the walls. Then I scrubbed the walls with hot soapy water. It’s gross the amount of stuff that can go unnoticed on your kitchen walls when you live with bad lighting for a few years. Next I filled any holes with spackle, let it dry, and sanded it smooth. I also lightly sanded the rest of the walls so the paint would really have something to grab on to. I even went ahead and scraped off the failing caulk where the counters met the wall.

Then I got to business. I’ve done a lot of improvements to this apartment over the years so I already had most of what I needed on hand. The paint, brush, roller, tape, spackle, sandpaper, etc. was all in my guest room, patiently waiting to be useful. I thought about painting the adjoining area behind the refrigerator, which I’d painted grey when we moved in, but I decided that no one would see it and that if I didn’t like it, it would be a lot more work to cover it up later. So, using a level as a straight edge, I put a line of painters tape down the wall starting at the outer edge of the hood vent, going all the way down the wall right behind the fridge. I cut in the edges all the way around the project area, then used a roller to fill in the rest.

Chalkboard backsplash project | Brooklyn Homemaker

I thought about painting the outlet covers to match because I was afraid the contrast of white covers against black walls would look weird, but I decided against it. I knew I didn’t want to paint over the outlets themselves, so even if I painted the covers there would still be white outlets inside them. I feel like painted outlets and covers usually make a paint job look sloppy, like the painter was too lazy to take the plates off before they set to work.

The one thing I ended up needing to buy for this project was a tube of caulk. The old caulk was really poorly done, and was so old that it was peeling away anyway. So I scraped it off before I started painting and once the first coat had dried for an hour I piped one thin bead all the way along the gap where the counters meet the wall. If you’ve not done this before, it’s really not difficult. Try your best to pipe a thin even bead, and with a wet finger smooth the line and wipe away any excess as you go.  I made sure to buy paintable white caulk, and when I was cutting in I was able to paint a nice smooth line.

Chalkboard backsplash project | Brooklyn Homemaker

According to the directions on the can, you’re supposed to let chalkboard paint set for a few days before using it. Then you condition the surface by rubbing the whole thing with white chalk and wiping it off with a dry cloth or eraser. This creates a fine layer of chalk dust over the whole surface that makes it easier to erase in the future. It makes the surface a dusty charcoal grey color instead of the deep black it is when you first paint it, but I think it looks great in our kitchen. For the first week you’re not supposed to wipe it down with anything wet or damp, but after that you can clean the surface with a damp cloth as needed.

Chalkboard backsplash project | Brooklyn Homemaker Chalkboard backsplash project | Brooklyn Homemaker

I think it looks amazing and I could not be happier with the results. I was nervous that I wouldn’t like it, but as soon as I had everything back in place I felt happier with the look of the kitchen, and once I started cooking in there I felt like my food looked more attractive against the darker color. This was not a difficult project at all and I think the end product is better than I imagined!

chalkboard backsplash project | Brooklyn Homemaker

What do you think?

chalkboard backsplash project | Brooklyn Homemakerchalkboard backsplash project | Brooklyn Homemakerchalkboard backsplash project | Brooklyn Homemaker

And I know. I really need a real camera. I’m working on it.

UPDATE 1/23/14: Since I have a real camera now, I updated some of the “after” photos. You’re welcome.

Oatmeal Cookies with Cherries, Cocoa Nibs & Chocolate

If you know me then you already know this, but if not, as you read this blog you’re going to learn my dark secret.
I like chocolate. Like, a lot. Most candy I can take or leave. Caramels are cool, especially the salty ones. Gummies aren’t really for me. I don’t want anything to do with nougat. Sugar for the sake of sugar isn’t where my heart is. Chocolate however, is a  different story.

Oatmeal cookies with cherries, cocoa nibs & chocolate | by Brooklyn Homemaker

I hate the word chocoholic. It’s not a real word, and I’m pretty sure it’s a gateway word that, years later, made people think it was okay to say things like “staycation” or “chillax”. I also don’t like this word because it makes it sound like people who love chocolate have a real problem on their hands. I disagree. As far as I know, no one ever had to go to rehab for a chocolate addiction. Not even people with eating disorders can blame all their problems on this one single (delicious) food. Some studies even say that dark chocolate in moderation is good for your heart. I’m sure that this study was funded by the Hershey corporation, but I choose to believe that it’s proven scientific fact and that I’m doing my body a real favor.

Oatmeal cookies with cherries, cocoa nibs & chocolate | by Brooklyn Homemaker

When I was younger, my mom used to keep a chocolate bar in the middle drawer of her vanity, and every so often would sneak a little piece. I was always aware of that chocolate bar, and felt both taunted by the fact that it wasn’t for me, as well as totally bewildered that my mother would just keep it there, eating one small piece at a time, instead of just eating the whole thing over the course of an evening.

Oatmeal cookies with cherries, cocoa nibs & chocolate | by Brooklyn Homemaker

Now that I’m older, it all makes sense. I keep a bar of dark chocolate in my nightstand now, and as a non-smoker, sometimes you just need it in case of emergencies. My husband feels much the same way as I did when I was living with mom, but he stays away because he’s a milk chocolate fan, not because I’m selfish. I switched from milk to dark chocolate long ago, and prefer to spend a little extra on the real thing, rather than grabbing the Hershey’s dark. I think a lot of American’s don’t like the bitterness in dark chocolate, so Hershey’s makes dark chocolate SUPER sweet to mask that bitterness. I don’t know if it’s an acquired taste, or comes with a mature palette, but I love that bitterness.

Oatmeal cookies with cherries, cocoa nibs & chocolate | by Brooklyn Homemaker

These cookies are a chocolate lover’s dream. The original recipe I based these on was for oatmeal raisin cookies. I’ve never been a big fan of raisins so I always swapped the raisins for dried cranberries. Eventually I decided it might be fun to throw some chocolate chips in the mix, but the cranberries were a bit too tart to really go well with the chips. That didn’t discourage me from trying to add chocolate to these cookies though, so the next time I tried swapping dried cherries for the cranberries. I don’t want to toot my own horn, but I’m pretty sure I’m a genius, and I should probably be awarded with a medal of some kind. Chocolate and dried cherries in thick, chewy, buttery, just-sweet-enough, just-a-little-saltier-than-most cookies… Is it hot in here?

Oatmeal cookies with cherries, cocoa nibs & chocolate | by Brooklyn Homemaker

Since I’m not one to stop at perfection, the next time I made these (I’ve been toying with this recipe for years) I used bittersweet chocolate instead of semi-sweet chips, and because I had them around anyway, I tossed in some cocoa nibs. I also reduced the cinnamon, but kept some of it for a slightly spicy mexican chocolate effect. Whoa. You guys. These cookies could not get any better. Even I have to stop somewhere. The dark sweet tart cherries go so well with dark chocolate, and the cocoa nibs add an amazing bitter crunchy fruity cocoa nuttiness. There aren’t words.

If you’re not as big a fan of dark chocolate as I am, you could definitely swap the bittersweet chocolate chips for semi-sweet or milk chocolate.   If you don’t like cocoa nibs, or if you can’t find them, you can skip them. If you swapped them with a cup of toasted pecans I bet you’d be really glad you did. If you’re not familiar with cocoa nibs, never tasted them, or never heard of them, I beg you to try to find them. If you like dark chocolate, you’ll love them. They’re basically cocoa beans that have been hulled and roasted and chopped into small pieces. They’re one step removed from chocolate. The flavor is mostly dark and bitter, not sweet at all, and is a bit similar to a coffee bean. On their own, they’re too much, like eating a spoonful of unsweetened cocoa powder.  In cookies, or oatmeal, or whatever you can think of, especially paired with real chocolate, they’re unbelievable. They’re crunchy and nutty and bring out the dark chocolate bitterness of any other chocolate they’re paired with.

Oatmeal cookies with cherries, cocoa nibs & chocolate | by Brooklyn Homemaker

So, these cookies. You should totally make them.
Before you do though, I’d like to talk to you about cookie scoops. If you don’t have a proper cookie scoop, you should think about getting one. If you make cookies regularly, you NEED one, or probably two or three. They make scooping and portioning your cookies really easy. They also come in really handy for portioning out cupcakes and muffins. If you fill the scoop completely and scrape off any excess all your cookies will be exactly the same size. They’ll bake more evenly since you won’t have any that are thicker or wider than the others, and bonus, they’ll look more professional because of the uniform size. They’re sometimes called portion scoops or portioners, and unlike ice cream scoops, they have numbers stamped on them. The numbers are usually on the scraping arm inside the scoop, but sometimes on the trigger, and they correspond to the number of scoops you can get out of a quart. So, the smaller the number on the scoop, the bigger the cookies will be. I think it makes sense to have a few different sizes if you’re a regular baker. For small cookies, I recommend something in the #60 range, medium #40, and large #20.
For these cookies I used a #24 scoop, which I’d describe as a medium-large size, and works out to be 1.5 oz, or 3 tablespoons.

Okay, so back to the cookies. They’ve got it all. Chocolate. More Chocolate. Tart, Sweet & Fruity Dried Cherries. Butter. Salt. Chewy Oaty Goodness. Come on guys, go preheat your oven, and behold their chewy chocolatey goodness:

Oatmeal cookies with cherries, cocoa nibs & chocolate | by Brooklyn Homemaker

Oatmeal Cookies with Cherries, Cocoa Nibs & Chocolate Chips

  • Servings: About 2 dozen, depending on size
  • Print
adapted from Smitten Kitchen

1 cup (2 sticks) butter, softened
1 cup dark brown sugar, packed (you can use light, but dark adds something)
2 large eggs
1 teaspoon vanilla extract
1 1/2 cup (95 grams) all-purpose flour
1 teaspoon baking soda
1/2 teaspoon ground cinnamon
3/4 teaspoon table salt
3 cups rolled oats
1 cup dried cherries (chopped if large)
1/2 cup cocoa nibs (optional)
1 1/4 cup bittersweet chocolate chips

In a large bowl, cream together the butter, brown sugar, egg and vanilla until smooth. In a separate bowl, whisk the flour, baking soda, cinnamon and salt together. Stir this into the butter/sugar mixture. Stir in the oats and remaining ingredients.

At this point you can either chill the dough for a bit in the fridge and then scoop it, or scoop the cookies onto a sheet and then chill the whole tray before baking them. You could also bake them right away, if you’re impatient, but I do find that they end up slightly less thick. Either way, heat oven to 350°F before you scoop the cookies, so that it’s fully heated when you’re ready to put them in.

The cookies should be two inches apart on a parchment-lined baking sheet. Bake them for 10 to 12 minutes (your baking time can vary), taking them out when golden at the edges but still a little undercooked-looking on top. Let them sit on the hot baking sheet for five minutes before transferring them to a rack to cool.

The Chunkiest Vegetable Soup

Today Brooklyn saw the first snow of the season and I can’t think of a better way to celebrate than with a steaming bowl of soup. Big chunks of tender vegetables, leafy greens and tomato broth are a real treat on a cold day with a nice slice of thick crusty bread.  This soup is so filling and comforting that even the staunchest carnivores won’t miss the meat. I think the cauliflower, cut nice and thick, adds a real meatiness without making it heavy.

Chunkiest vegetable soup | Brooklyn Homemaker

The first time I made this soup Russell and I were trying to challenge ourselves to a three day juice cleanse. It was a few months before our wedding, and up until that point we’d been eating whatever we wanted. In the name of “health”, fitting into our suits, and looking good in photos, we decided to get the most out of our masticating juicer and do a cleanse. We didn’t prepare ourselves beforehand, and just stopped eating solid food cold turkey one morning. Long story short, it didn’t go exactly as planned. Day one was going really well until about dinner time, when we were suddenly crazed with hunger and getting irritable. In a panic, I ran to the grocery store to get something to fill our stomaches. Rather than grabbing a frozen pizza or a bag of Doritos, I decided that a healthy vegan soup would mean we could keep up with our cleanse.

Chunkiest vegetable soup | Brooklyn Homemaker

I grabbed as much fresh organic produce as I could carry, along with a can of pureed tomatoes and some vegetable stock. We feasted on big bowls of hearty soup, savoring every last spoonful. That could have been the end of it, but the next morning we woke up and started our day with juice all over again. We ended up rationalizing that it still counted as a cleanse if the only meals we ate were healthy, vegan, & grain-free. We got through the three days, juicing three or four times each day and finishing it off with a small healthy meal to help us feel human.

Chunkiest vegetable soup | Brooklyn Homemaker

I’m sure that the purists out there would say that we cheated, or that we didn’t complete a real cleanse, but in the end I think it was a total success. We felt amazing afterward and were inspired to eat healthier going forward. I’m sure that the small amounts of sodium and oil in the soup were not ideal for a fast, but if we hadn’t had that bowl of soup that night our cleanse would have ended then and there. Call us weak, but if that was what we needed to keep going, and we felt better afterward, it was worth it.

Chunkiest vegetable soup | Brooklyn Homemaker

I’ve made this soup a few times since, and it’s still just as amazing and filling as that first night. This is a truly delicious hearty meal even when you’re not delirious with hunger. To add a little richness we couldn’t afford during our cleanse, we top our soup with some freshly shaved parmesan, a drizzle of olive oil, and serve it with a thick slice of crusty whole wheat sourdough.

Chunkiest vegetable soup | Brooklyn Homemaker

I think this soup is completely perfect as is, but this recipe can be used as a guideline, and is easily tweaked to fit your taste. If you don’t like kale, switch it up with chard or spinach or whatever you like, or leave the greens out completely. If you don’t like green beans, or corn, or carrots or anything else, skip it. I think the cauliflower is one of my favorite parts of this soup, but you could swap it for potatoes, or sweet potatoes, or beans, or anything else you want. The first time I made this I skipped the seasoning and used a vegetable broth. Now I usually use chicken stock and plenty of salt and pepper, but that’s totally up to you. I haven’t tried it but I think beef broth would be a really nice addition.

Chunkiest vegetable soup | Brooklyn Homemaker

Chunkiest Vegetable Soup

2 tablespoons olive oil
salt & pepper to taste
1 medium onion, diced
3 stalks celery, diced
2 carrots, diced
4 cloves garlic, minced
1 large head cauliflower, cut into bite sized chunks
1 lb green beans, cleaned and cut into 1″ pieces
2 cups frozen corn
3 tablespoons finely chopped parsley, divided
28 oz good canned tomato puree
6 cups chicken (or vegetable) stock
1 medium head of kale, about 3/4 lbs, washed and dried

Heat olive oil in a large heavy bottom stockpot over medium high heat. Add onions, celery & carrots, season with salt and pepper, and saute until tender and just starting to brown, about 5 minutes. Add cauliflower, green beans, and garlic, and continue to brown, stirring occasionally for 10 minutes more. Add corn, 2 tablespoons parsley, tomato puree, and stock and bring to a boil, stirring occasionally. Cover pot, reduce heat, and simmer low for an hour, stirring every so often.

Tear or slice the spines out of your kale and tear the leaves into small rough pieces. Stir into soup and simmer for 10 or 15 minutes more. When the kale is tender, stir in the remaining parsley, taste and adjust seasoning if necessary. Ladle your soup into big bowls and, if desired, grate some parmesan and drizzle a little olive oil over the top, and serve with some crusty bread.