chocolate

cherry & chocolate pudding ice pops

When I was growing up, I used to suck my thumb.

cherry & chocolate pudding ice pops | Brooklyn Homemaker

I didn’t just suck my thumb when I was, say, 3 or 4 though. I sucked my thumb clear until I was 9 years old. Thanks to the wonders of orthodontic technology, you’d never know it to look at me, but it’s true. At the age of 9, I guess I’d had enough teasing from classmates, not to mention nagging from family, and decided it was time to quit. In the same way that some people quit smoking, I quit my thumb-sucking and instantly started eating and developed an obsession with food. I mean, here we are over two decades later, and I’m sharing another recipe for something I can stuff into my face.

cherry & chocolate pudding ice pops | Brooklyn Homemaker

A few years before I gave it up, I got pine sap on my thumb. I honestly don’t remember how old I was, or even how it happened, but I think I was probably about 6 or 7 and that I must have picked up a freshly fallen pine cone or something like that.

I remember that at this age I was well aware of the fact that I was too old to still be sucking my thumb, and that I should probably try to quit, but I was a stubborn little bugger and I wasn’t ready to give it up. I guess I should have taken the sap as motivation or a sign, but nope. I liked having my thumb in my mouth and I wanted to keep it there.

cherry & chocolate pudding ice pops | Brooklyn Homemaker

The problem with trying to suck your thumb when there’s pine sap on it is that pine sap isn’t all that palatable. It’s pretty terrible in fact. Think turpentine, but sticky and stubborn. It’s acrid, pungent, and intensely bitter with a distinct hint of evil poison from hell.

The first time my thumb went into my mouth, I ran into my grandmother’s house screaming and crying that my beloved thumb was coated in horrible sticky awful. Right away, she reached into the freezer and handed me a fudgesicle to help me get the taste out of my mouth while she tried to get the sap off my skin.
My father and grandfather were in the construction and masonry business and always had a big green bar of intensely gritty heavy duty pumice soap sitting on the sink in the laundry room. We went straight back there for a rigorous scrubbing with the Lava soap, but alas, the sticky stuff had staying power. Even with the visible signs of the sap gone, the taste seemed to be permanently attached to my poor little thumb.

cherry & chocolate pudding ice pops | Brooklyn Homemaker

That didn’t seem to keep me from trying to stick my thumb in my mouth though, and it also didn’t stop me from running to Grandma for another fudgesicle. Over and over. Thumb in mouth, awful taste, run to Grandma, fudgesicle. And repeat.

cherry & chocolate pudding ice pops | Brooklyn Homemaker

By the end of the day, the sap flavor may or may not have already been thumb-sucked away, but I knew how to make the most of a bad situation. I’m sure my poor grandmother must have gone through a whole box of fudgesicles that day, though my sister probably got a few of them too.

cherry & chocolate pudding ice pops | Brooklyn Homemaker

To this day, every single time I have a chocolate ice pop, I think of the sap incident. You’d think that the experience might have ruined chocolate popsicles for me, and that I might associate the flavor of pine sap with them, but lucky for me it didn’t work out that way. I guess my love of chocolate, and my love of stuffing my face, outweighed the sap-induced trauma.

cherry & chocolate pudding ice pops | Brooklyn Homemaker

Even now, as a full grown adult human, I can’t resist a good chocolate ice pop. I think the best way to ensure a super chocolatey and creamy pop is to start with a pudding base rather than something like frozen chocolate milk. To turn up the volume, and add something seasonal and healthy-ish, I paired these pops with fresh ripe sweet cherries. Cherry season is fleeting so I want to make sure I get my fill before it’s too late. To be sure they imparted some of their flavor into the pudding, I tossed them, quartered, right into the pudding base as it cooked and thickened on the stove.

cherry & chocolate pudding ice pops | Brooklyn Homemaker

The resulting ice pops are deep, dark, & decadently chocolatey.  They’re just sweet enough, with a thick, rich, and unbelievably creamy texture. There’s a nice subtle hint of bright red cherry flavor, but the fudgey chocolate takes center stage. Hidden in every few creamy bites, or licks, or slurps, or however you choose to eat these; there are bursting little bites of fresh jammy bing cherries. These are the perfect indulgent treat on a hot day, and while there’s something evocative of childhood about chocolate ice pops, the subdued sweetness and the addition of sweet cherries give them a slightly more mature edge.

cherry & chocolate pudding ice pops | Brooklyn Homemaker

Cherry & Chocolate Pudding Ice Pops

  • Servings: makes ten 3-oz ice pops
  • Print
3/4 cups sugar
2 tablespoons cornstarch
pinch salt
1/3 cup Dutch Process cocoa powder
2 1/4 cups milk
1/2 lb sweet cherries, pitted and quartered
3 egg yolks, beaten
2 teaspoons vanilla extract

In a medium saucepan with a heavy bottom, whisk together sugar, salt, cornstarch, & cocoa. Whisk in milk, remove any lumps, and start cooking over medium heat. Add quartered cherries and cook until thickened and bubbly. Continue cooking and stirring regularly for 2 minutes. Remove from heat and gradually stir about 1 cup of milk into the beaten egg yolks. Add yolk mixture to pan, stir, and bring back to a gentile boil. Reduce heat to a simmer and cook and stir for another 2 minutes.

Remove pan from heat and stir in vanilla. Cover and cool for about 20 or 30 minutes. Evenly distribute pudding between 10 3-oz ice pop molds. Add popsicle sticks, cover, and freeze for at least 4 hours or until frozen through. Remove from molds by dipping into warm water or running under a warm tap for 15 to 20 seconds.

devil’s food cupcakes with salted caramel cream cheese icing

So, I was afraid this might happen.

devil's food cupcakes with salted caramel cream cheese icing | Brooklyn Homemaker

I’m back on a cupcake kick again. Last month when I made these, I warned you about my baking in cycles. Well, this month another friend had another birthday at another bar, and another fresh batch of homemade cupcakes crashed the party.

devil's food cupcakes with salted caramel cream cheese icing | Brooklyn Homemaker

I might be getting back on the cupcake train, but as you may have heard, a lot of Americans have had enough and want to get off. In case you’ve been living under a rock, the news broke recently that Crumbs cupcakes has shuttered their doors after being kicked off of the Nasdaq stock market. I’m not going to claim that I also predicted this, but I did say that the cupcake trend was over. And I was right. The Crumbs legacy has come to an end, but that’s not to say that the cupcake’s legacy has. While the trend is over, the cupcake itself is not.

devil's food cupcakes with salted caramel cream cheese icing | Brooklyn Homemaker

So the cupcake is no longer the celebrity of the dessert world. So what? That’s okay. Actually, I’m pretty happy about it. That means that now we can get back to enjoying the cupcake for what it is instead of what it represents. We can get back to just eating cupcakes because they’re good, and fun, and portable, and perfectly portioned; and stop eating them because they’re hip, and trendy, and expensive, and pretty, and because you saw Carrie Bradshaw eating one that one time.

devil's food cupcakes with salted caramel cream cheese icing | Brooklyn Homemaker

While I’m on the subject of eating cupcakes for all the wrong reasons, let’s go back to Crumbs for just a moment. Brace yourself though. I’m about to say something scandalous and potentially polarizing.

Crumbs sucked.

They were just terrible. Like, the worst. I know some people liked them, and I know the media is mourning their loss as they would the loss of a beloved celebrity, but this was one of those tacky celebrities that were famous for being famous, not for having any real talent or substance. People ate Crumbs because they heard that they were great. They saw their friends on Facebook taking a selfie with a cupcake the size of their head. They saw that the chain was everywhere and thought they had to be doing something right, but the only thing Crumbs was doing right was marketing. The cupcakes themselves didn’t live up to the legend, and eventually, finally, that caught up to them.

Crumbs cupcakes were stale and dry and tasteless, that is, unless you consider SWEET a flavor. They were piled high with mountains of thick, pasty, tooth-rottingly sweet frosting, and they were gigantic for no good reason. Those cupcakes could have fed a family of four.

The only thing better than a bad cupcake is a HUGE bad cupcake, right? right? Ugh.

devil's food cupcakes with salted caramel cream cheese icing | Brooklyn Homemaker

If you were one of the Crumbs lovers in the world, I’m truly sorry, but this is a good thing! There are plenty of other bakeries out there making way better cupcakes than Crumbs ever did, so please don’t mourn too hard. The way I see it, the fall of the famous-for-being-famous cupcakes empire is a step forward.  Now we can start our journey away from eating cupcakes because they’re trendy, pretty sugar-bombs, and get back to loving cupcakes for being tasty little single-serving cakes. Delicious, wonderful, festive, easily transported tasty little single-serving cakes.

If you’re like me, rather than hunting for a great bakery, you’d probably prefer to make your own cupcakes. Instead of mourning, why not celebrate by firing up the oven and making something tasty at home?

devil's food cupcakes with salted caramel cream cheese icing | Brooklyn Homemaker

The birthday girl who inspired these cupcakes is crazy about salt. She’s the kind of gal who eats (salted) tortilla chips with a salt shaker in hand. So, for her birthday I thought salted caramel was the obvious way to go. What better way to make our salt-fiend friend happy on her birthday?

Boy did these cupcakes ever deliver. Not only was she was thrilled, but so was everyone else, including the bartender. They combine super chocolatey cake, creamy homemade salted caramel sauce, and a tangy velvety cream cheese icing. Then the cherry on top of it all is a chocolate covered salty pretzel!

devil's food cupcakes with salted caramel cream cheese icing | Brooklyn Homemaker

The cake itself is delightfully chocolatey and just sweet enough; with a soft, moist crumb and a tender, almost springy texture. To pack as much punch into the cake as possible, I injected them with a little bit of caramel sauce using a marinade injector. It sort of melts into and moistens the cake, rather than creating a pocket of caramel. If you don’t want to do this, or don’t have a way to make it happen, it’s totally fine. The cake is really wonderful on it’s own, I just have a tendency to take things further than necessary.

The salted caramel sauce here is super easy to make and completely delicious. It’s creamy and sweet and buttery and rich and pleasantly salty. You’ll want to make it first so it has time to cool down while the rest of the components come together.

As if there wasn’t enough flavor in these cupcakes, I decided to go with a tangy cream cheese icing with plenty of sweet and salty caramel sauce whipped in. The end result is creamy and soft and full of rich caramely punch, backed up by that distinctive cream cheese twang. The one problem with cream cheese icing is that it tends to be so soft that it’s hard to pipe because it wants to kind of sink into itself. You can add more sugar to stiffen it, but then it ends up being too sweet, at least that is, for my taste. If you want to pipe this icing though, I’d recommend refrigerating it for at least an hour beforehand. Otherwise just slather it on with an offset spatula.

Just to drive the sweet and salty point home, I topped each finished cupcake with a salty chocolate covered pretzel, drizzled even more homemade caramel sauce over the top, and finished with a tiny sprinkling of flaky crunchy fleur de sel.

devil's food cupcakes with salted caramel cream cheese icing | Brooklyn Homemaker

Devil's Food Cupcakes with Salted Caramel Cream Cheese Icing

  • Servings: 24-32 cupcakes
  • Print
Salted Caramel Sauce: 
recipe from Brown Eyed Baker2 cups granulated sugar
12 tablespoons unsalted butter, at room temperature, cut into pieces
1 cup heavy cream, at room temperature
1 tablespoon fleur de sel (or any other flaky sea salt)

Add the sugar in an even layer over the bottom of a large heavy saucepan, and heat the sugar over medium-high heat, whisking it as it begins to melt. You’ll see that the sugar will begin to form clumps, but that’s okay. Just whisk regularly-ish and as it continues to cook it will melt back down.
Stop whisking once all of the sugar has melted, and swirl the pan occasionally while the sugar cooks.
Continue cooking until the sugar has reached a deep amber color. It should look almost a reddish-brown, and have a slight toasted aroma. This is the point where caramel can go from perfect to burnt in a matter of seconds, so keep a close eye. If you are using an instant-read thermometer, cook the sugar until it reaches 350 degrees F.
Immediately add the butter all at once. Be careful, as the caramel will bubble up when the butter is added. Whisk the butter into the caramel until it is completely melted.
Remove the pan from the heat and slowly pour the cream into the caramel. Again, be careful because the mixture will once again bubble up.
Whisk until all of the cream has been incorporated and you have a smooth sauce. Add the fleur de sel and whisk to incorporate.
Set the sauce aside to cool for 10 to 15 minutes and then pour into a glass jar or heat proof container to let cool to room temperature. You can refrigerate the sauce for up to 2 weeks. You might have a little extra after making these cupcakes. You won’t mind, I promise.

Devil’s Food Cupcakes
Recipe from Ad Hoc at Home

1 2/3 cups cake flour
1/3 cup plus 1 Tbsp unsweetened dutch process cocoa powder
1 tsp baking soda
1 1/2 cups granulated sugar
1/2 tsp. kosher salt
1 cup buttermilk
1 cup sour cream
3 large eggs, lightly beaten
6 Tbsp melted unsalted butter, cooled
1/2 cup salted caramel sauce, optional

Preheat oven to 350F. Prepare your muffin pan with paper liners. Sift all dry ingredients into the bowl of a stand mixer, place on mixer fitted with paddle attachment. Mix buttermilk and sour cream. In a separate bowl, combine eggs and butter. Alternately add sour cream mixture and egg mixture to dry ingredients with the mixer running on medium low just until mixed. Fill cups 2/3 full with batter. Bake about 20 minutes, turning pan midway through cooking time. The cupcakes are done when a cake tester or toothpick inserted in the middle comes out clean.
Remove cupcakes from the tins and cool to room temperature on a cooling rack. If desired, once cooled, inject centers of cupcakes with a little salted caramel sauce. You can do this using a bismark tip (which is basically an injector tip for a piping bag), a marinade injecting syringe, or by making a small hole with an apple corer or paring knife. Top with salted caramel icing, recipe below.

Salted Caramel Cream Cheese Icing:
recipe from Brown Eyed Baker

1 cup unsalted butter, at room temperature
8 ounces cream cheese, at room temperature
½ cup salted caramel sauce
4 cups powdered sugar

Beat together the butter and cream cheese on medium-high speed for 5 minutes (I like to use the whisk attachment for my KitchenAid stand mixer, but it’s not necessary). Pour in the salted caramel and beat until combined. Reduce the speed to medium-low and slowly add the powdered sugar, a little at a time, until it has all been incorporated. Increase the speed to medium-high and beat for an additional two to three minutes, until light and fluffy.

Garnish:
Salted Caramel Sauce
Fleur de Sel (or other flaky sea salt)
2 to 3 dozen small chocolate covered pretzels

To finish, pipe frosting (I used an Ateco #846 tip) onto the top of each cupcake (or use an offset spatula to spread the frosting). Top each cupcake with a chocolate covered pretzel, drizzle with some additional salted caramel sauce, and sprinkle with a pinch of fleur de sel.

brooklyn blackout cake

I recently went upstate to help my mom out with her new house, and while I was home I took a break to go visit my grandparents.

the rich, dark history of brooklyn blackout cake | Brooklyn Homemaker

My grandfather is a man of few words, and usually contributes little more to dinner table chats than some talk about his vegetable garden. One topic that always gets him talking a blue streak though, is World War II. I don’t know about you, but I think war-time stories are actually pretty fascinating, so when the conversation turned to what life was like for he and his family back then, I was thrilled.

My grandfather was born in Germany in a farming community where he and his family worked building homes and barns for the neighboring farmers. During the war when food was rationed, items like sugar, chocolate, & coffee became rare luxuries that were extremely hard to come by for civilians. Fortunately, my grandfather had family living in the US who would send care packages with items they could trade with their neighbors to help them get by. When my grandfather was fourteen years old his father refused to join the nazi party and was sent away to work in a ball bearing factory in Schweinfurt. This left my grandfather, the oldest child in a large family, in charge. He told me that real coffee was so hard to come by, and in such high demand, that their local butcher once traded them 150 lbs of beef for just one pound of coffee! They grew a lot of their own vegetables, but didn’t usually get to eat much meat, so those coffee care packages meant more to their family than most of us can even understand. After the war my grandfather and many of his siblings moved to the US and settled in upstate New York, where I grew up.

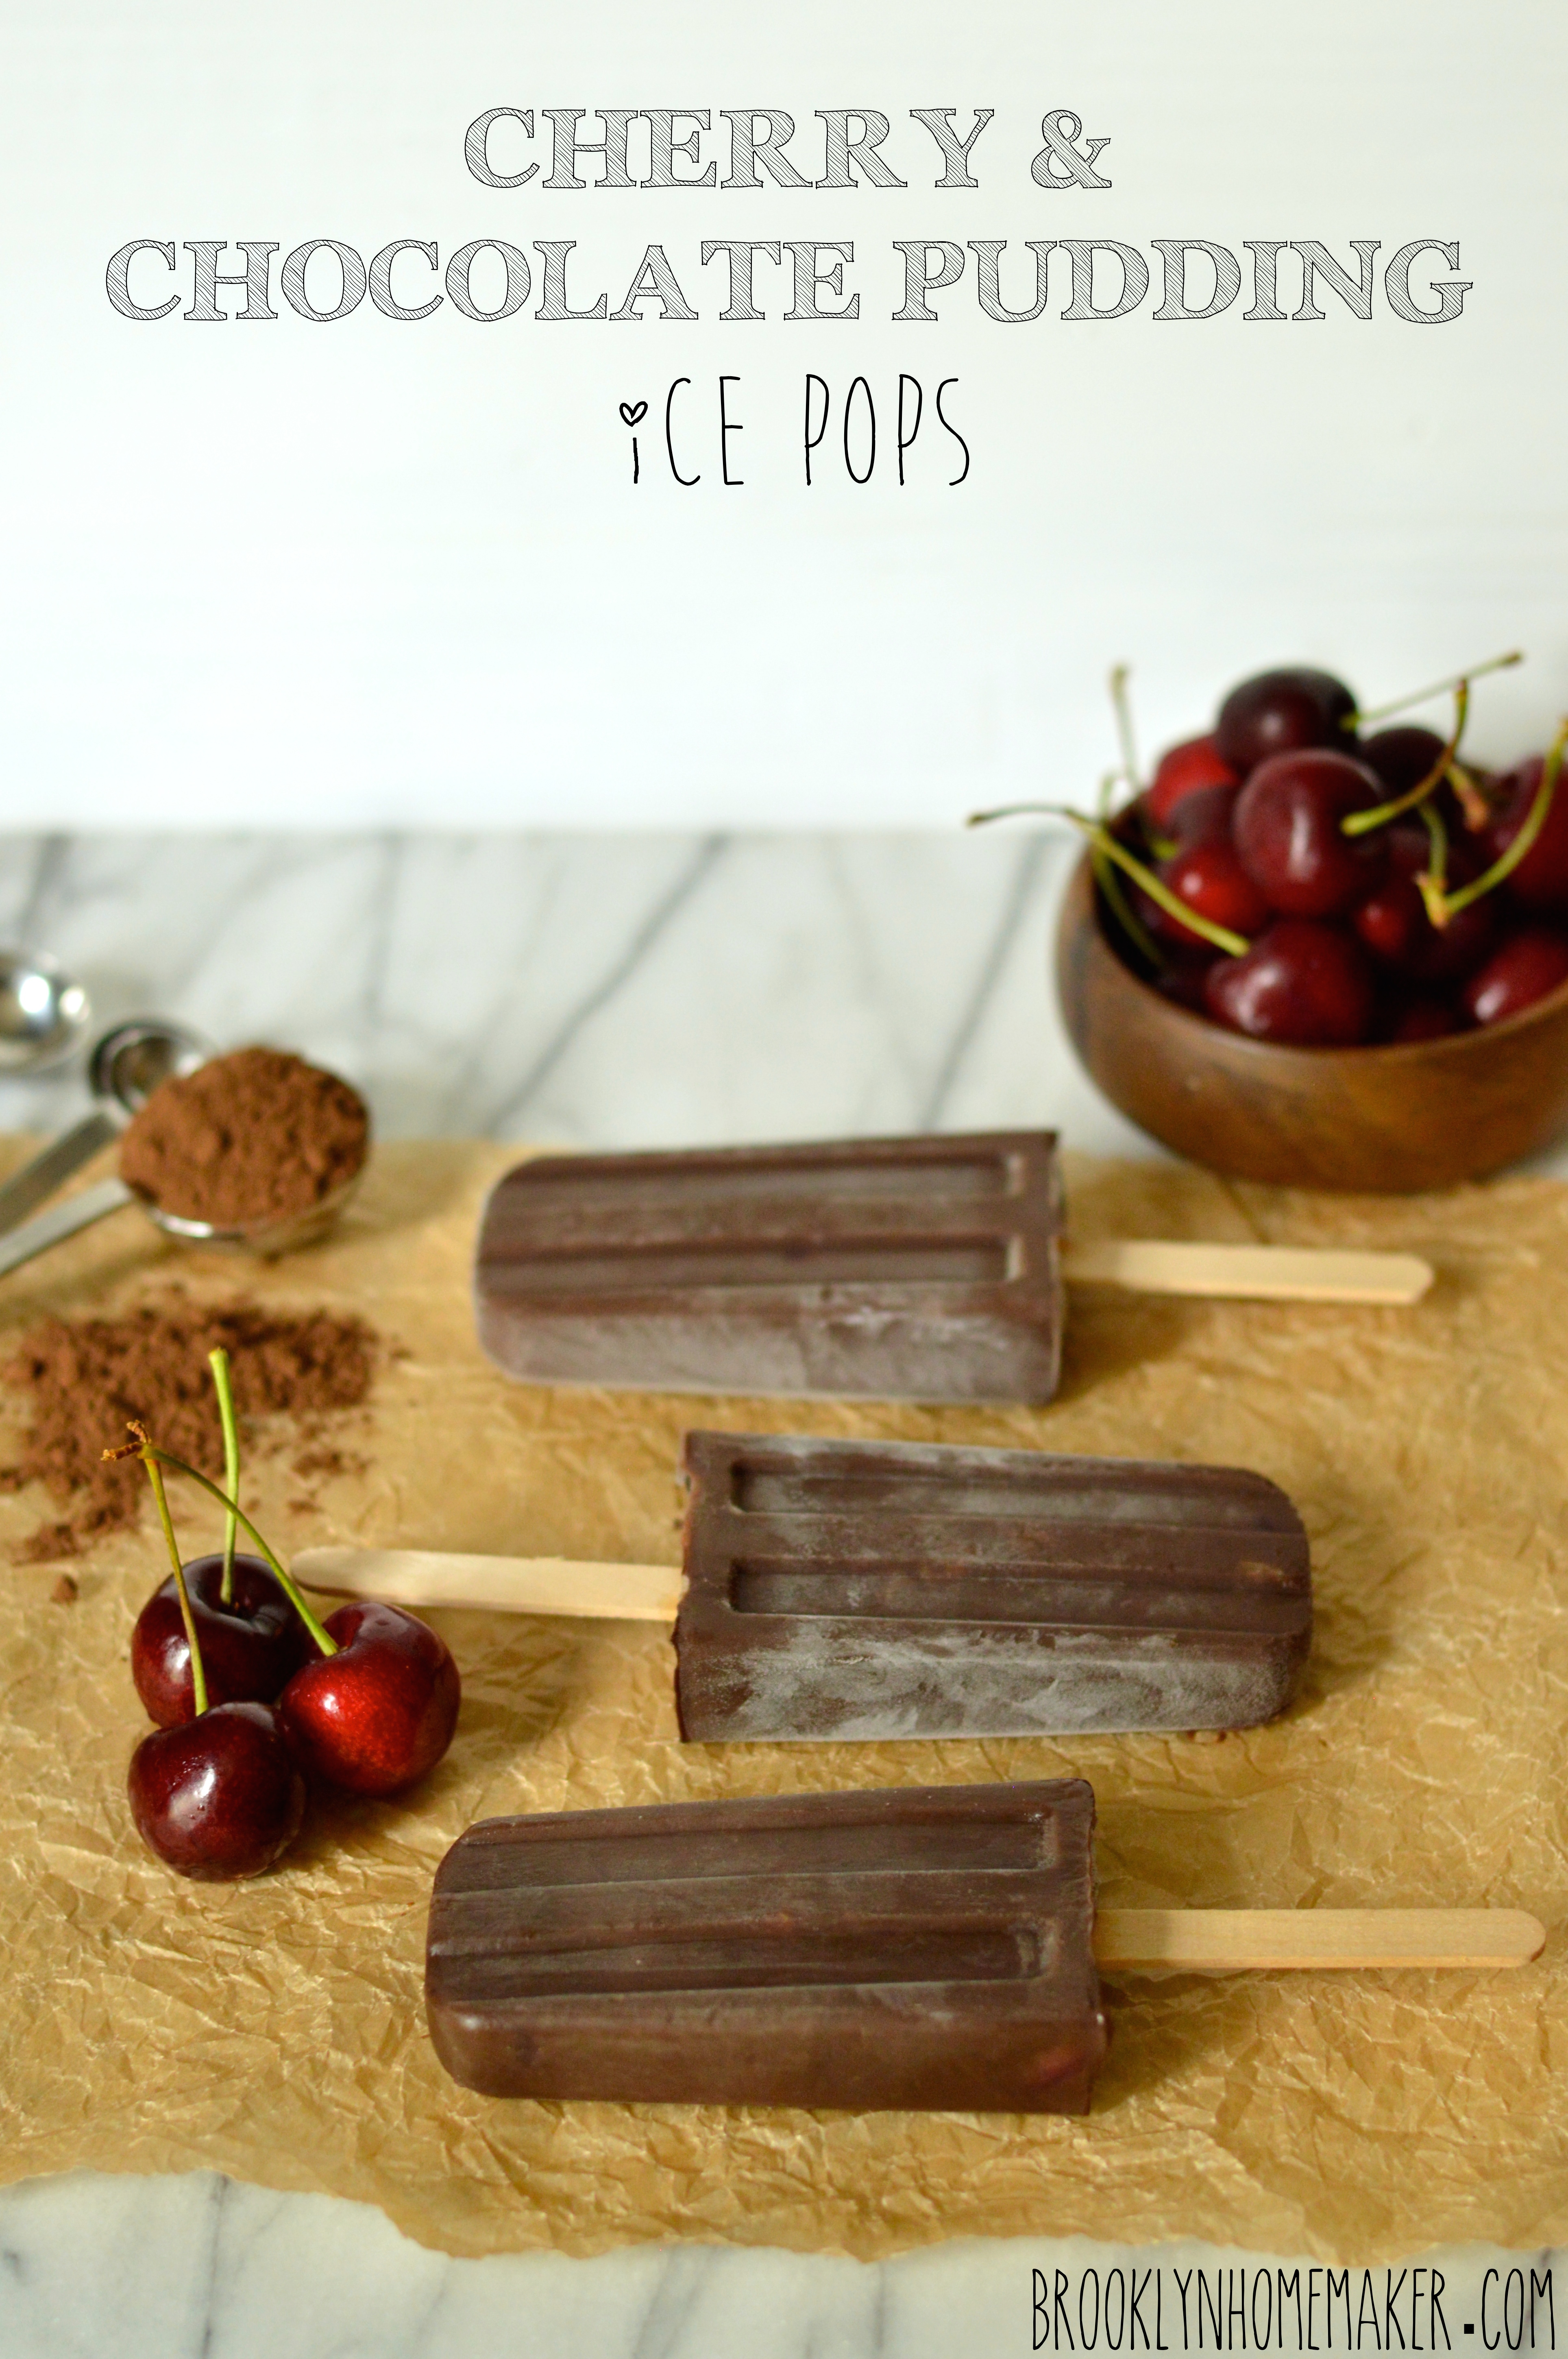
When I heard Grandpa’s story, it reminded me of another story from World War II that I recently read about, the story of the Brooklyn Blackout Cake. I’ve actually been thinking about making this cake and sharing the story with you for a while now, but until my visit home I hadn’t had the inspiration I needed to take on this iconic cake.

the rich, dark history of brooklyn blackout cake | Brooklyn Homemaker

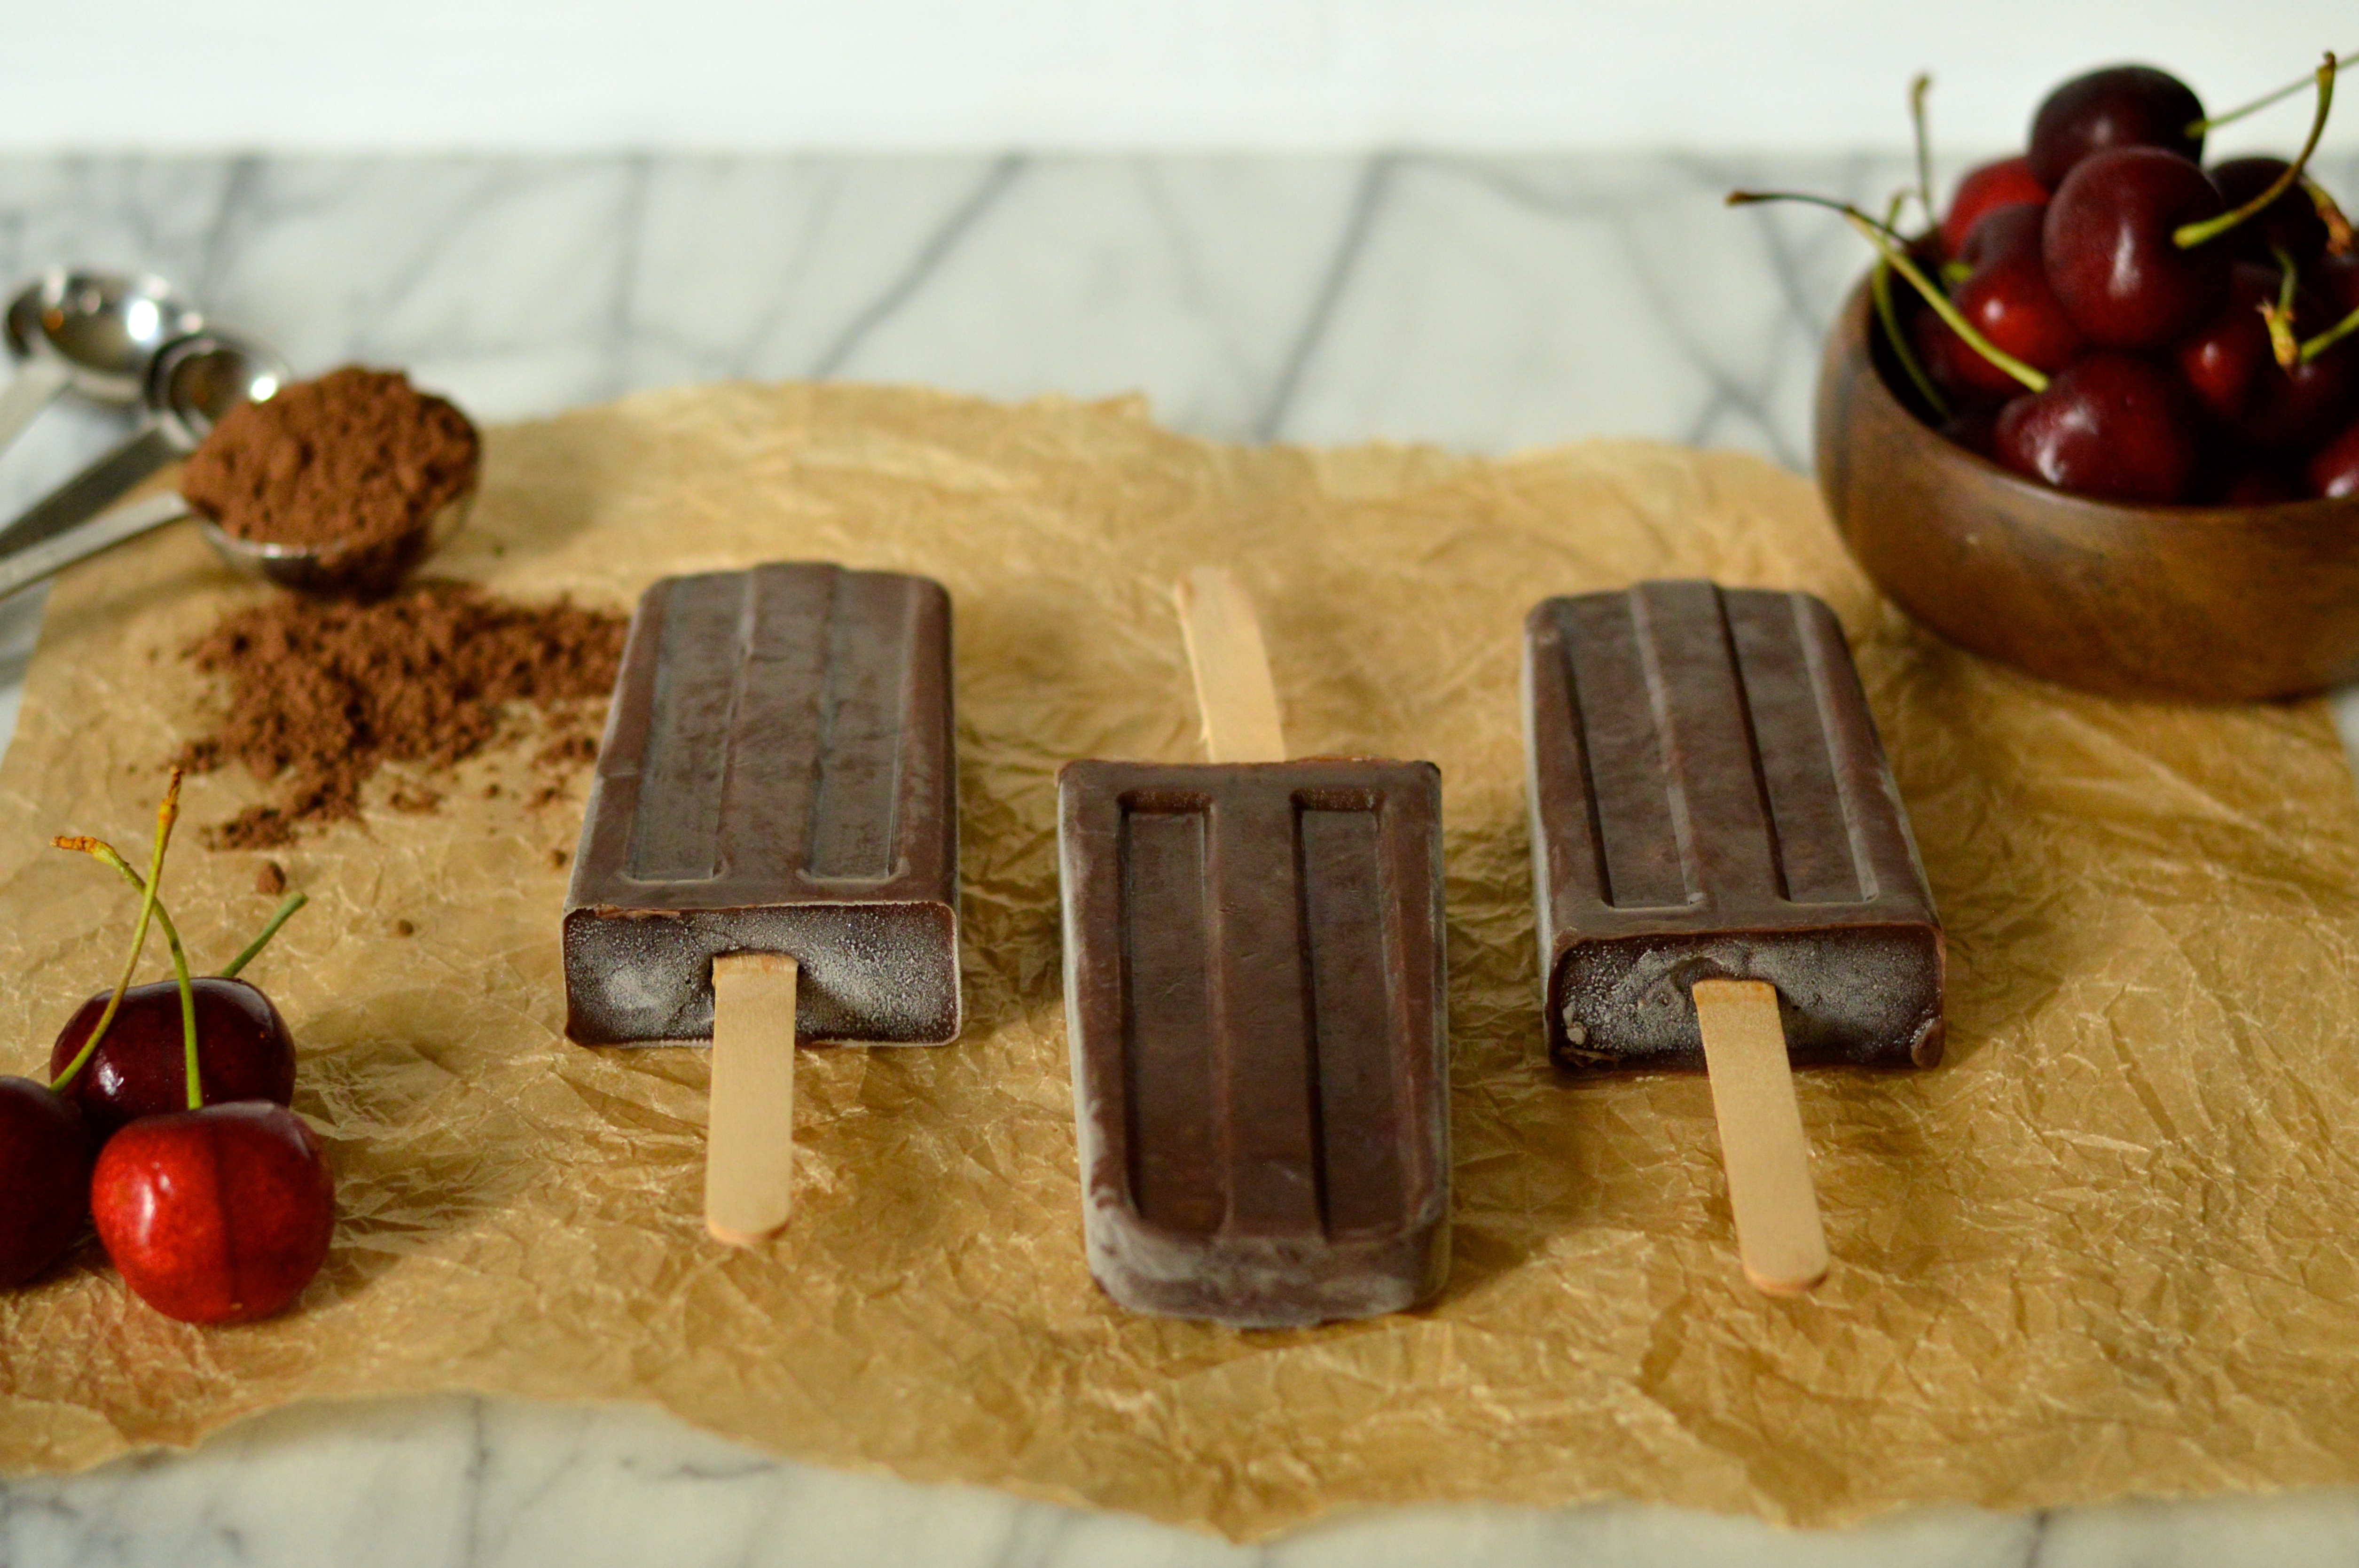
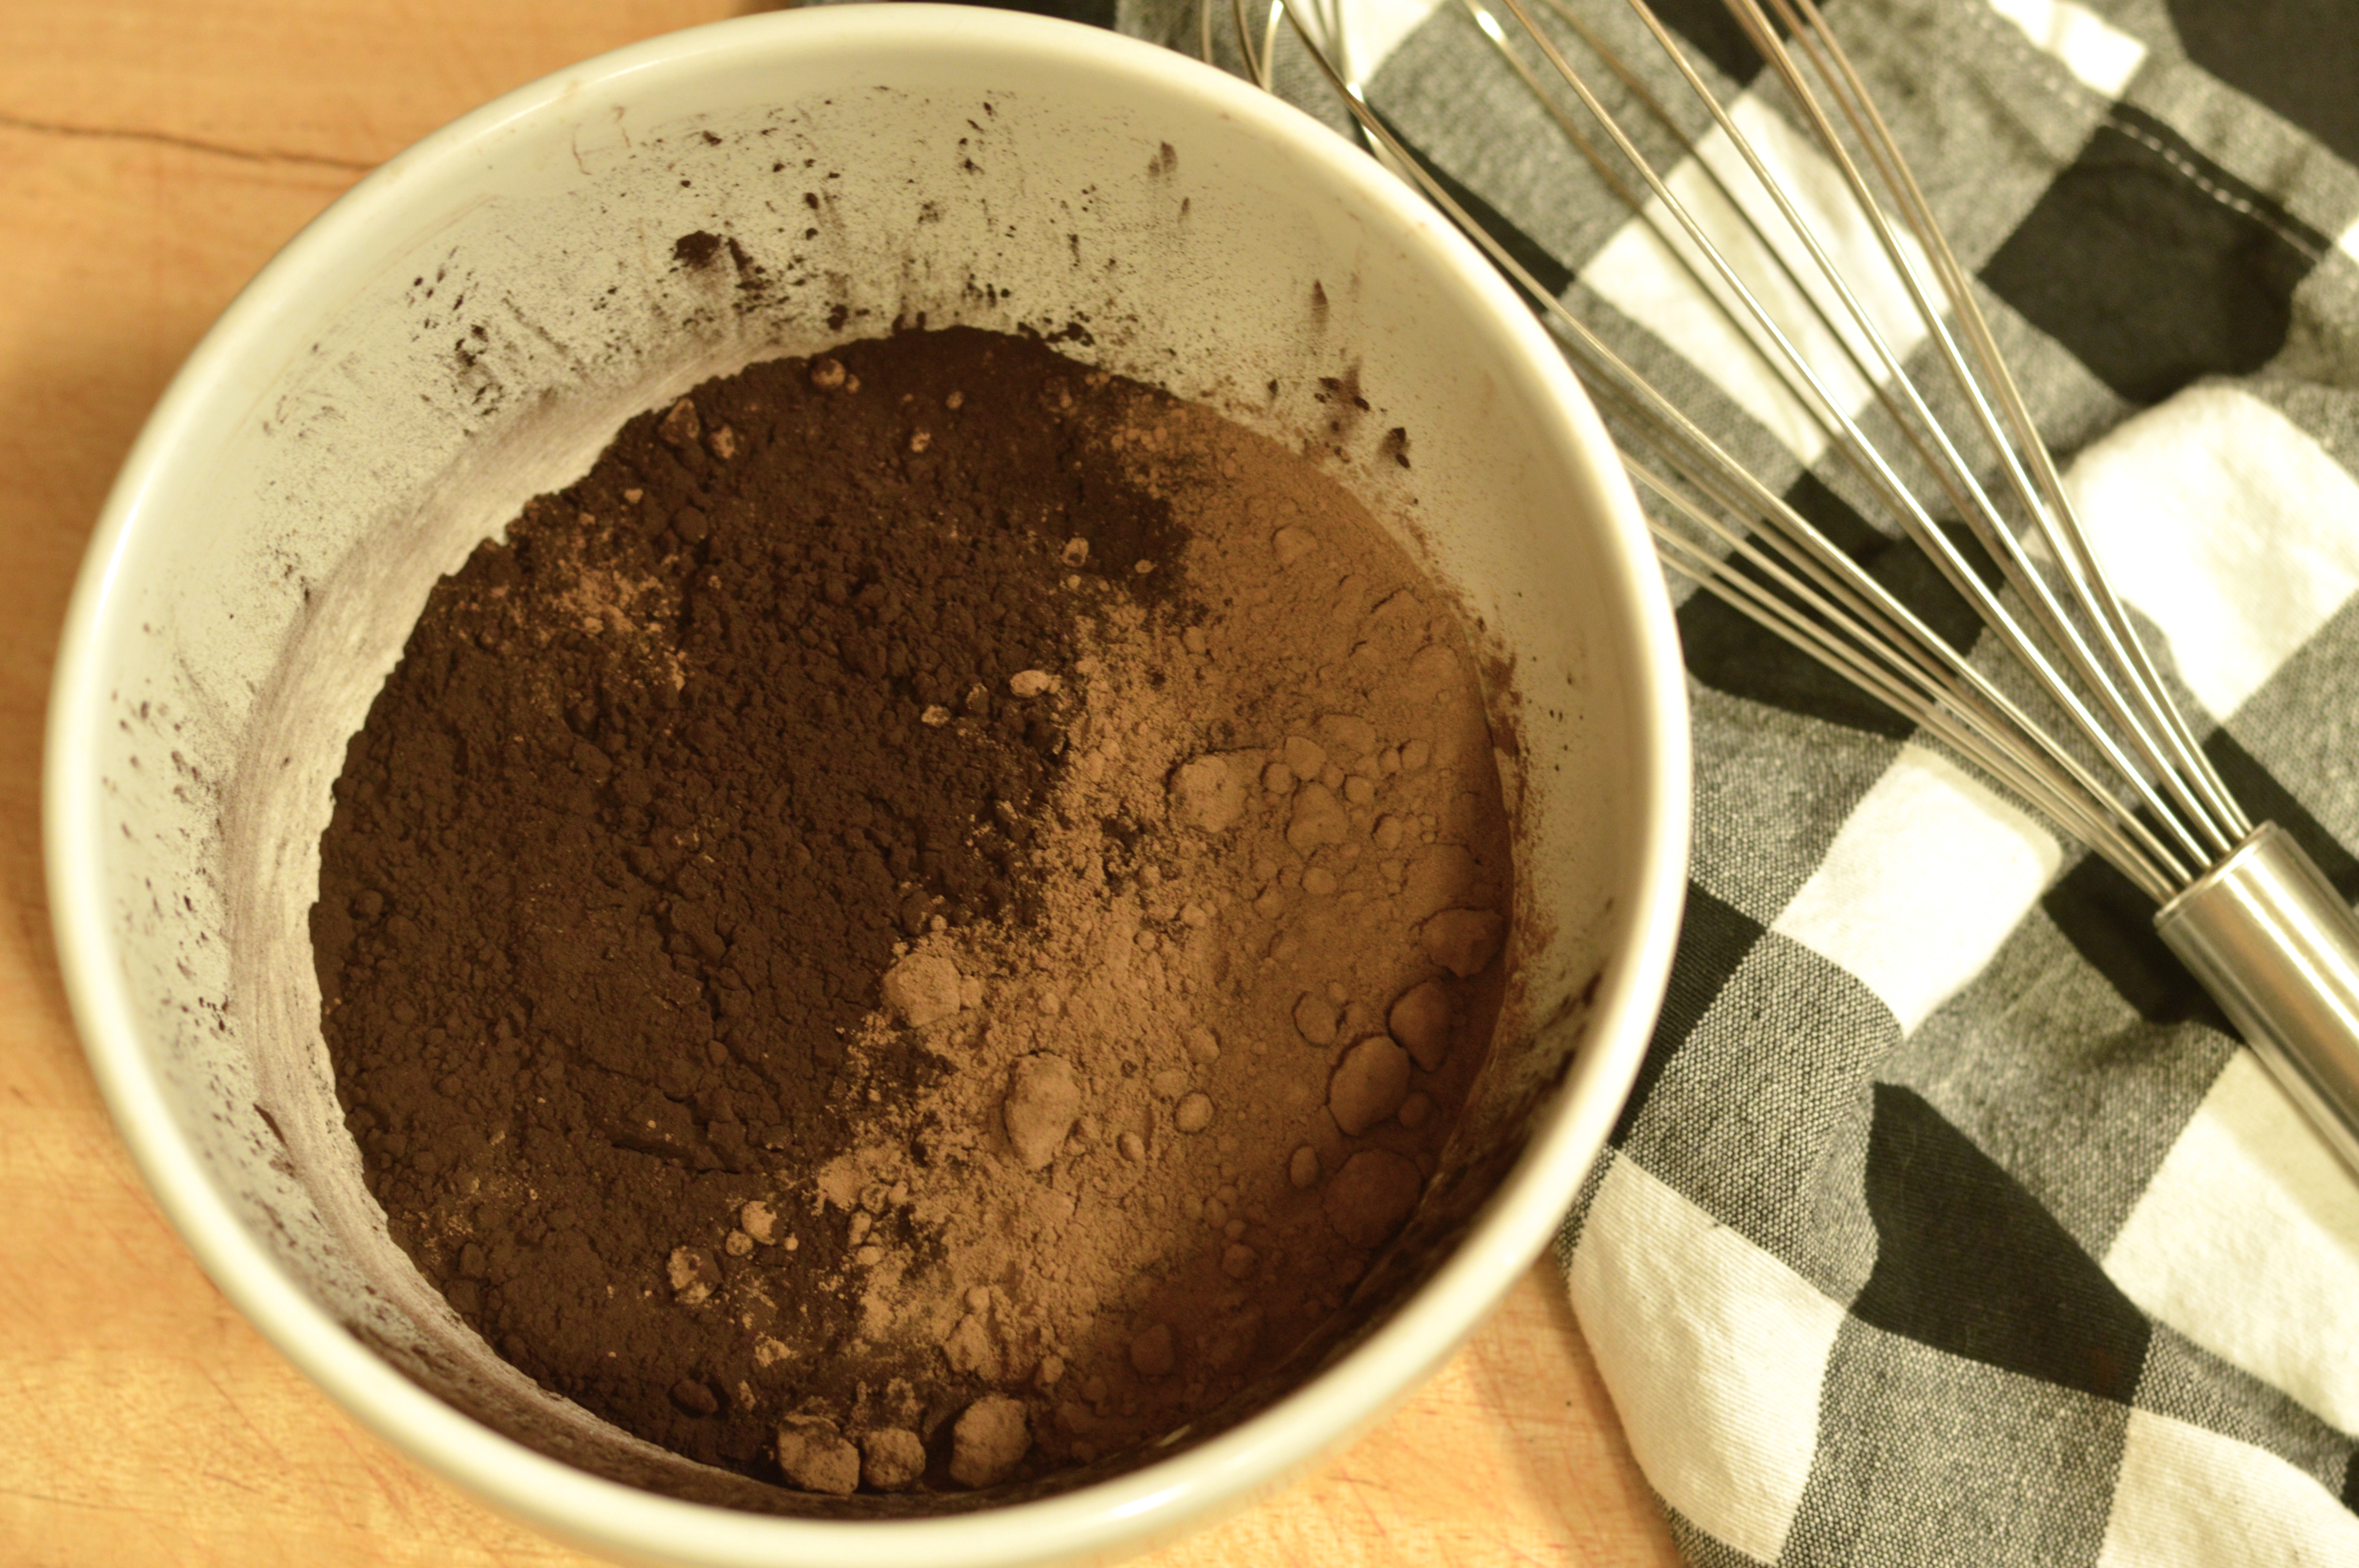
A mix of dutch-process and ultra-dutch black cocoa

In the U.S., just as in Germany, food was being rationed during the war and items like sugar, coffee, & chocolate were hard to come by. Chocolate was especially in short supply because much of what was produced at that time was reserved for the war effort and sent to the front. In Brooklyn, the Rockwood chocolate factory was so busy making chocolate for the war that they became the second-largest chocolate maker in the country, second only to Hershey’s. Rockwood’s government contracts made up so much of their business in fact, that about a decade or so after the war ended and the contracts expired, the company went out of business.

the rich, dark history of brooklyn blackout cake | Brooklyn Homemaker

Workers in the Brooklyn Navy Yard, only a few blocks from the chocolate factory, were surrounded by the constant smell of chocolate drifting over from Rockwood, which was a huge tease since they had such limited access to chocolate bars. At the peak of the war, the Brooklyn Navy Yard was one of the most important naval warship building yards in the U.S., and employed over 70,000 people working in shifts 24 hours a day. The navy yard was so important to the war effort that enemy U-boats would sneak through the waters around New York hoping to sink some of the completed ships as they sailed out.

Battleships usually left the yard at night under the cover of darkness, but New York’s bright lights served as an accidental backdrop to the black silhouette of moving ships. After a few tankers were sunk in New York Harbor in January of 1942, the Civilian Defense Corps decided action needed to be taken to protect the ships. Temporary blackout drills were common in European cities to protect them from air raids, but in June 1942 much of New York, especially Brooklyn, went through a permanent ‘dim-out’ that lasted through to the end of the war. City lights were turned off, windows were covered with heavy material, and vehicles drove at night without headlights or street lamps, all to make sure no light could be seen from enemy U-boats. Even the lights of Time’s Square and the Coney Island amusement park went dark through the war. 

the rich, dark history of brooklyn blackout cake | Brooklyn Homemaker

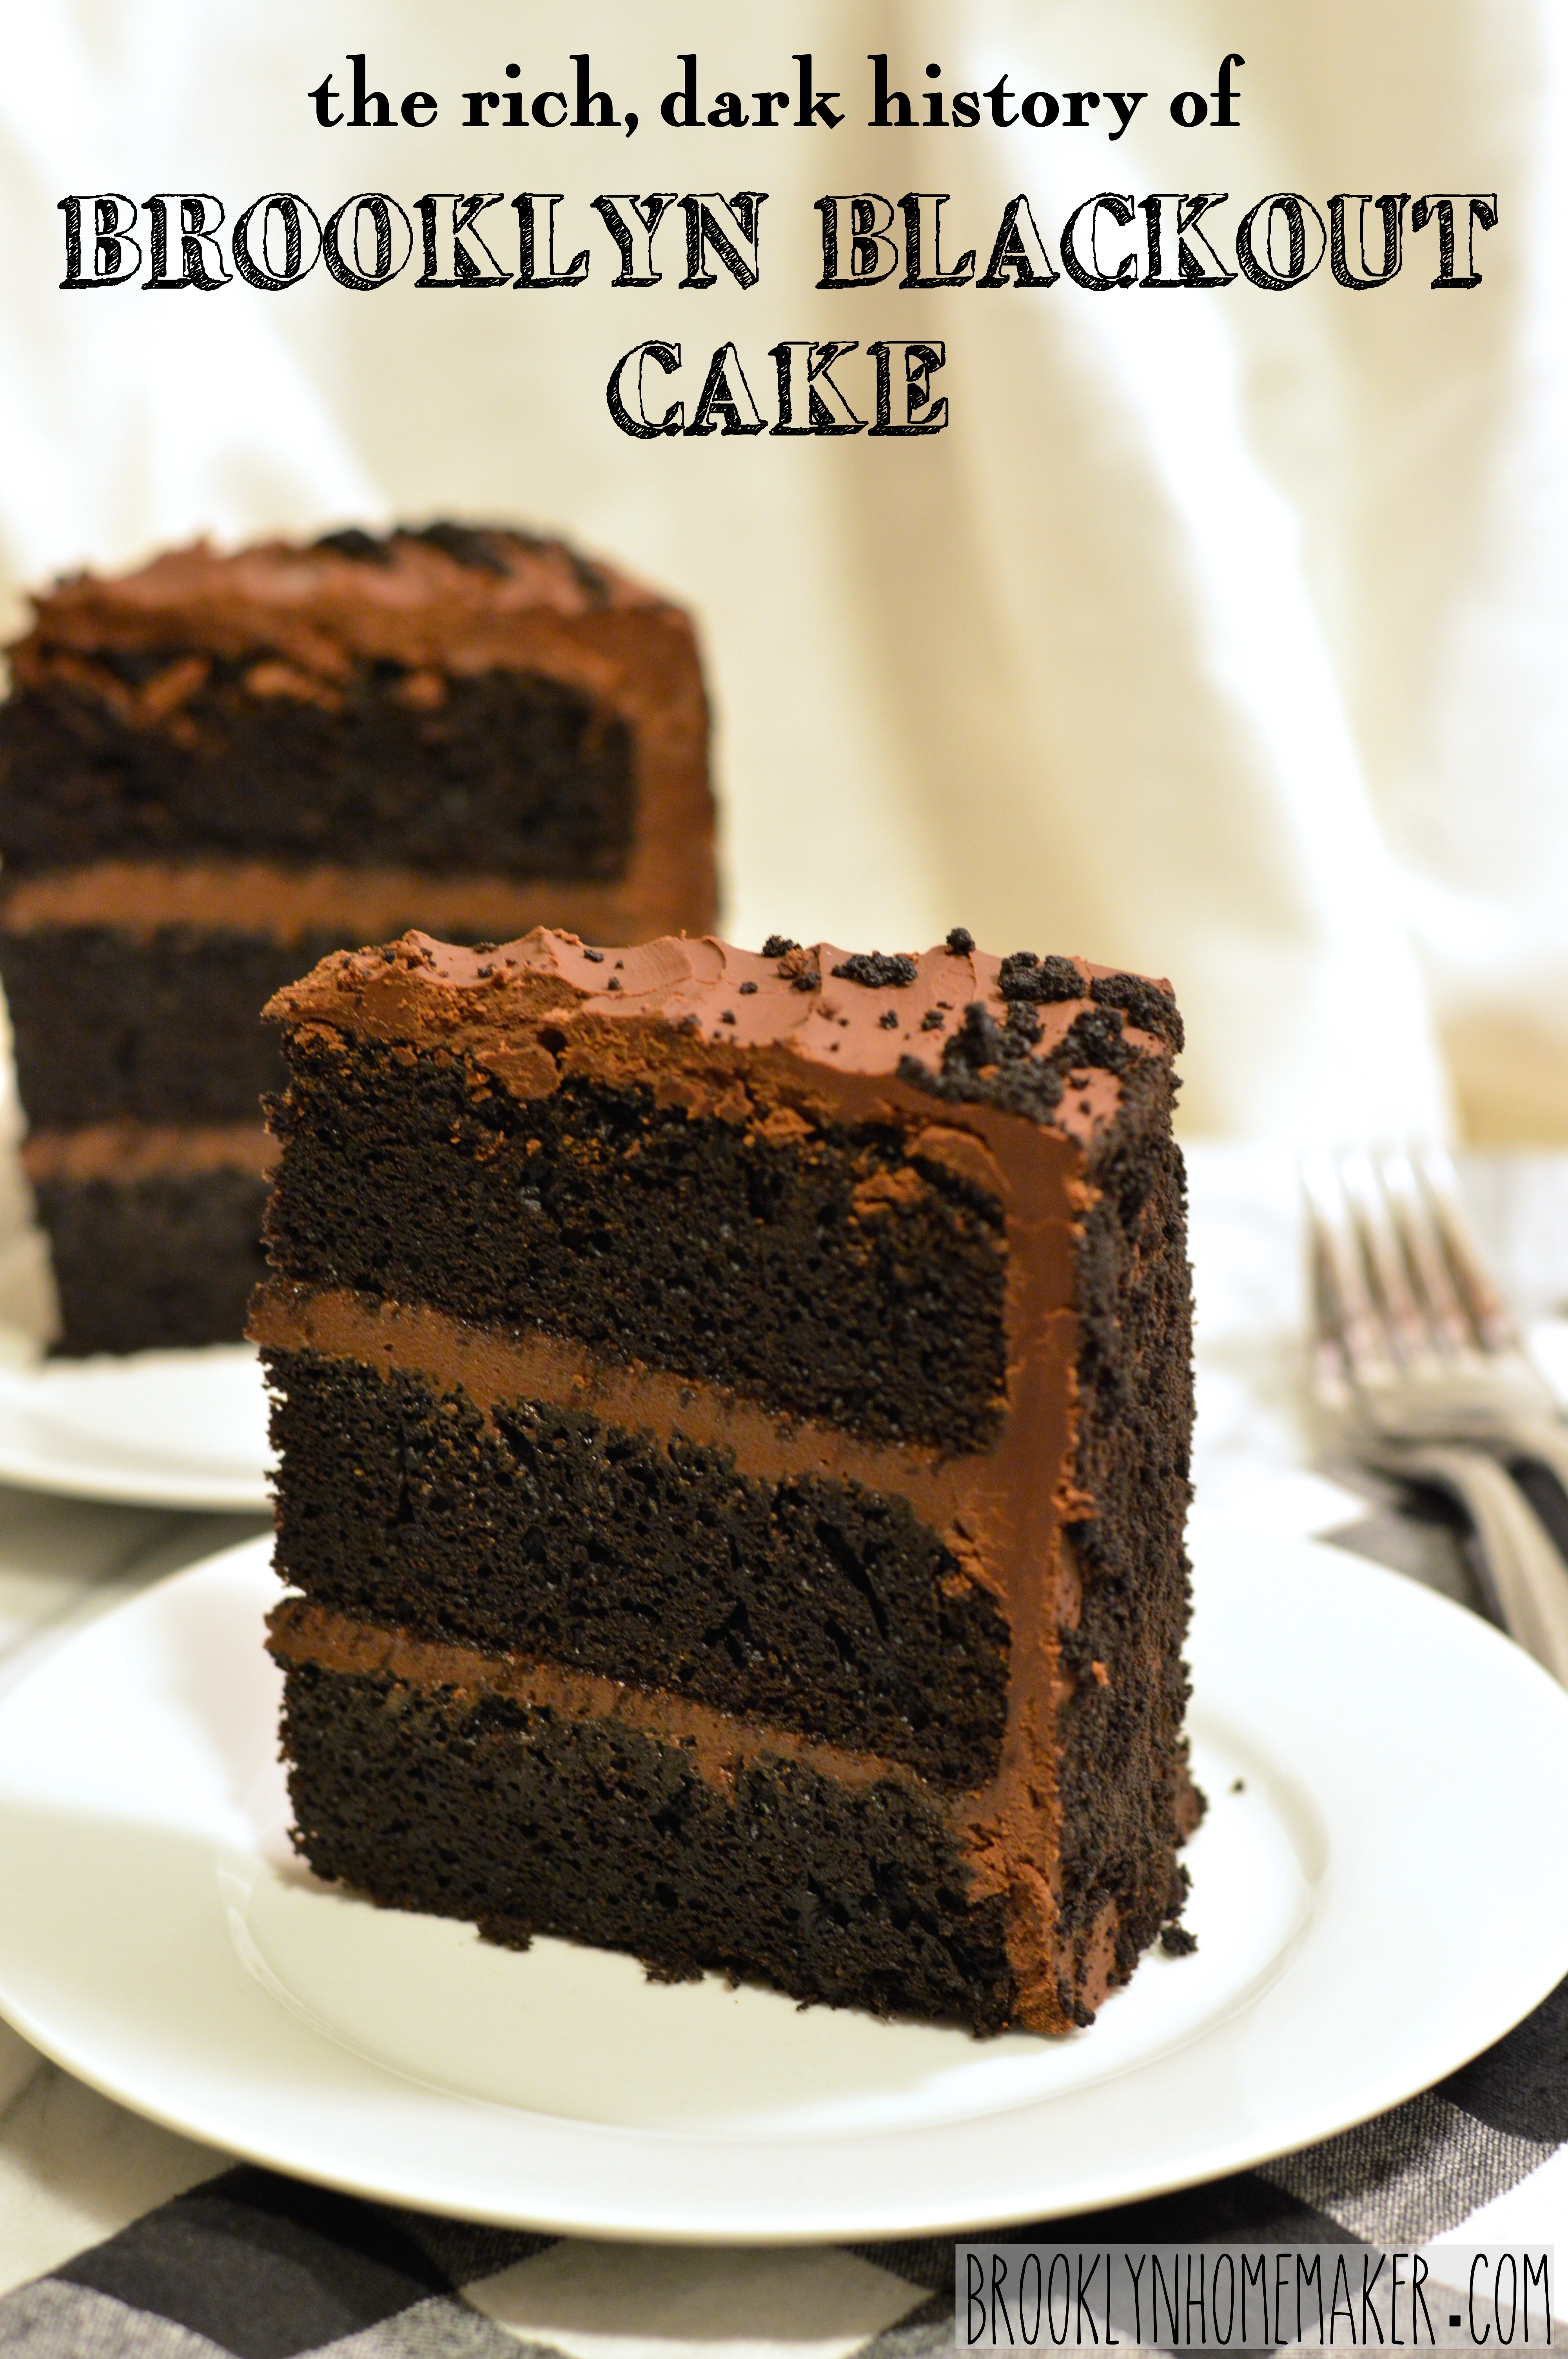
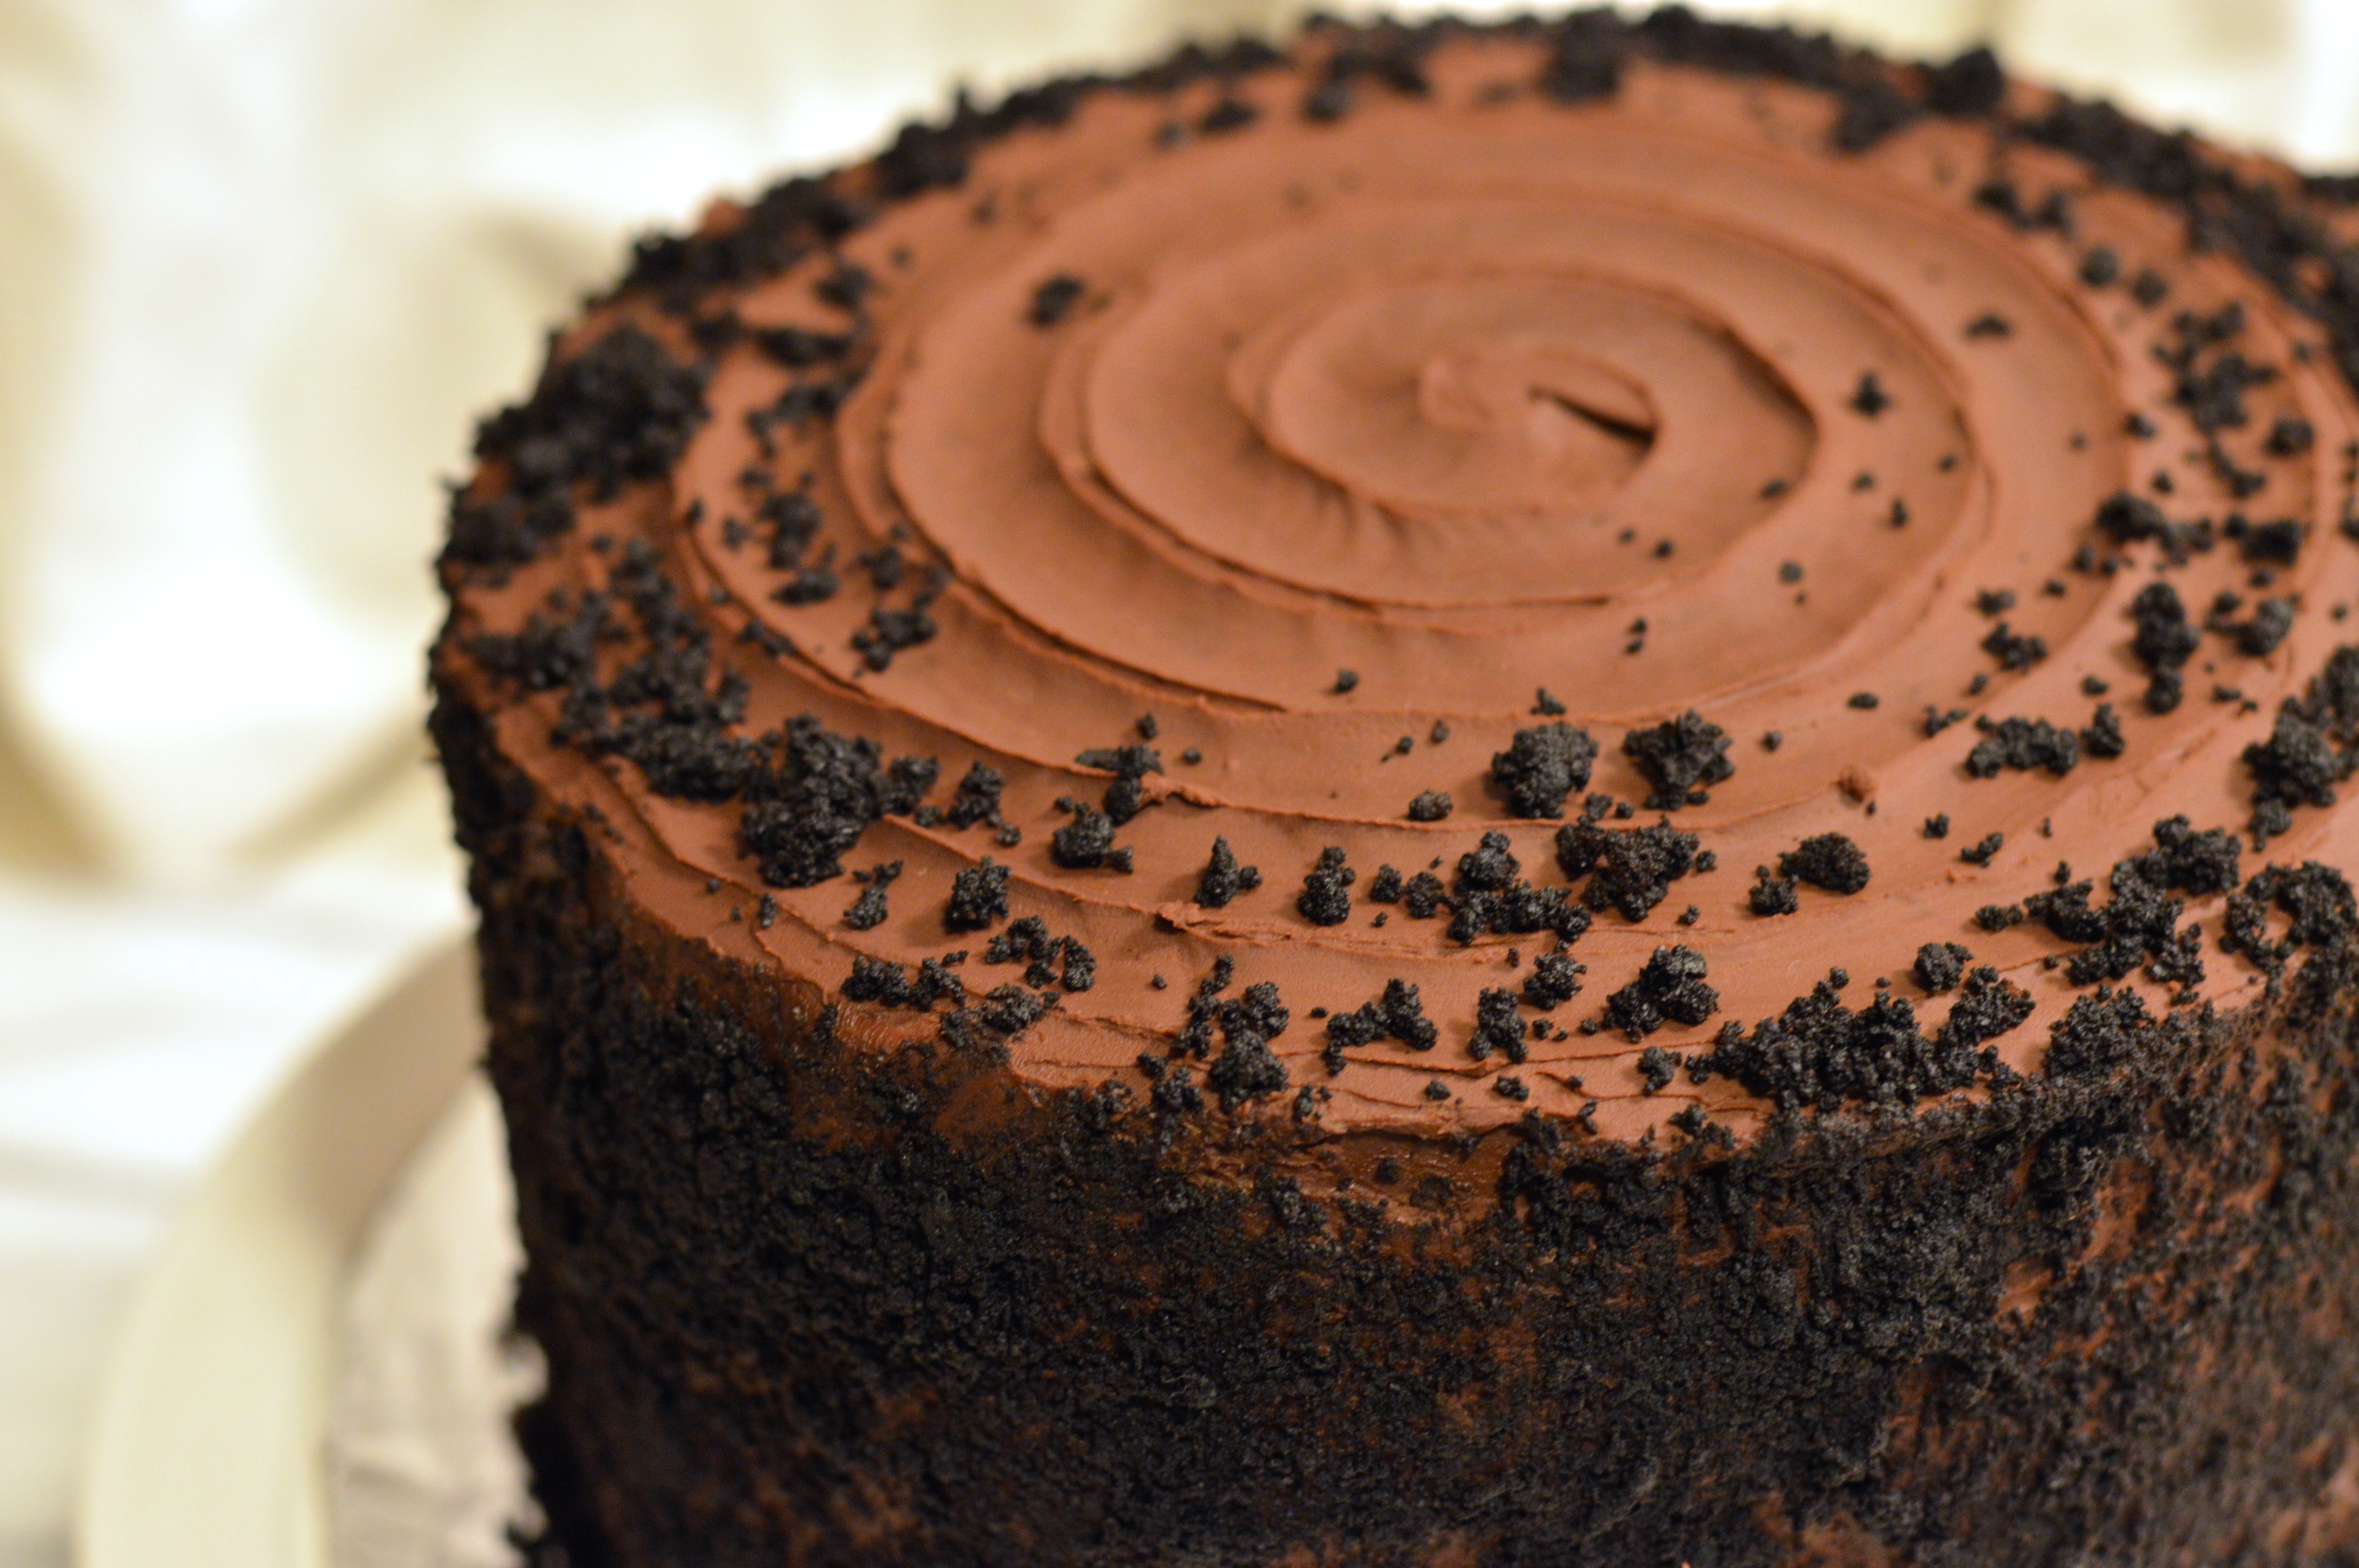
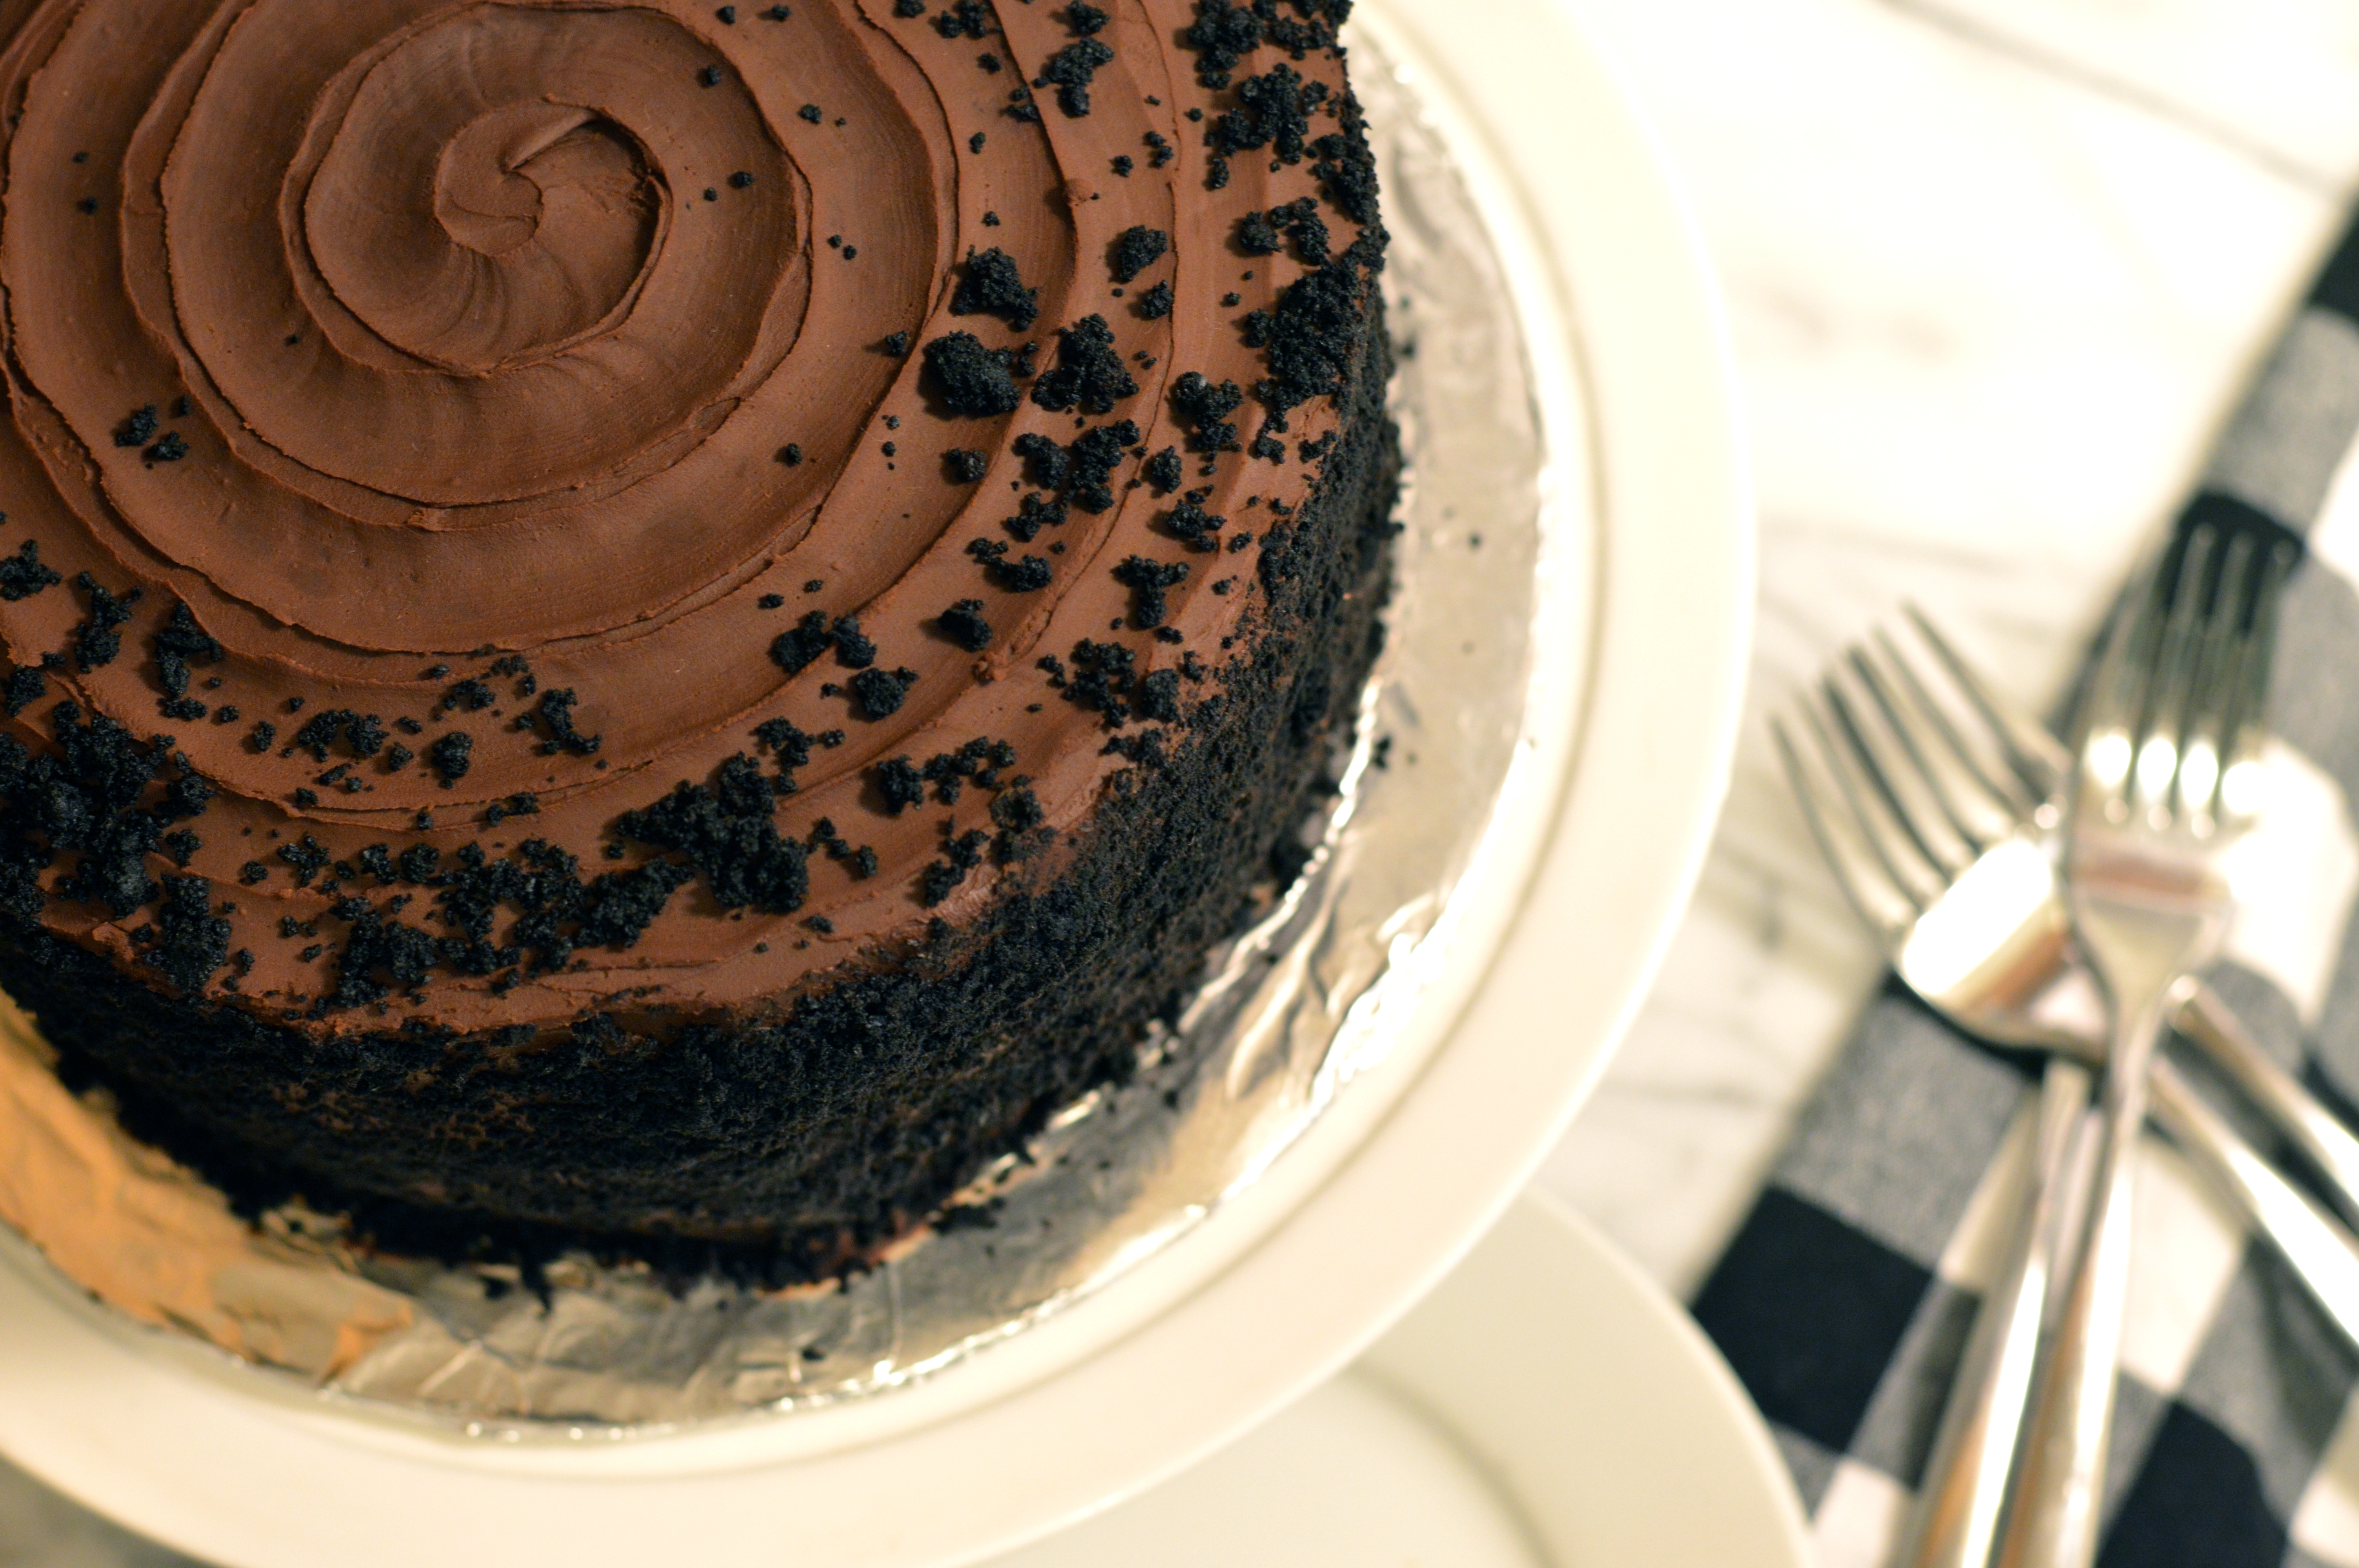
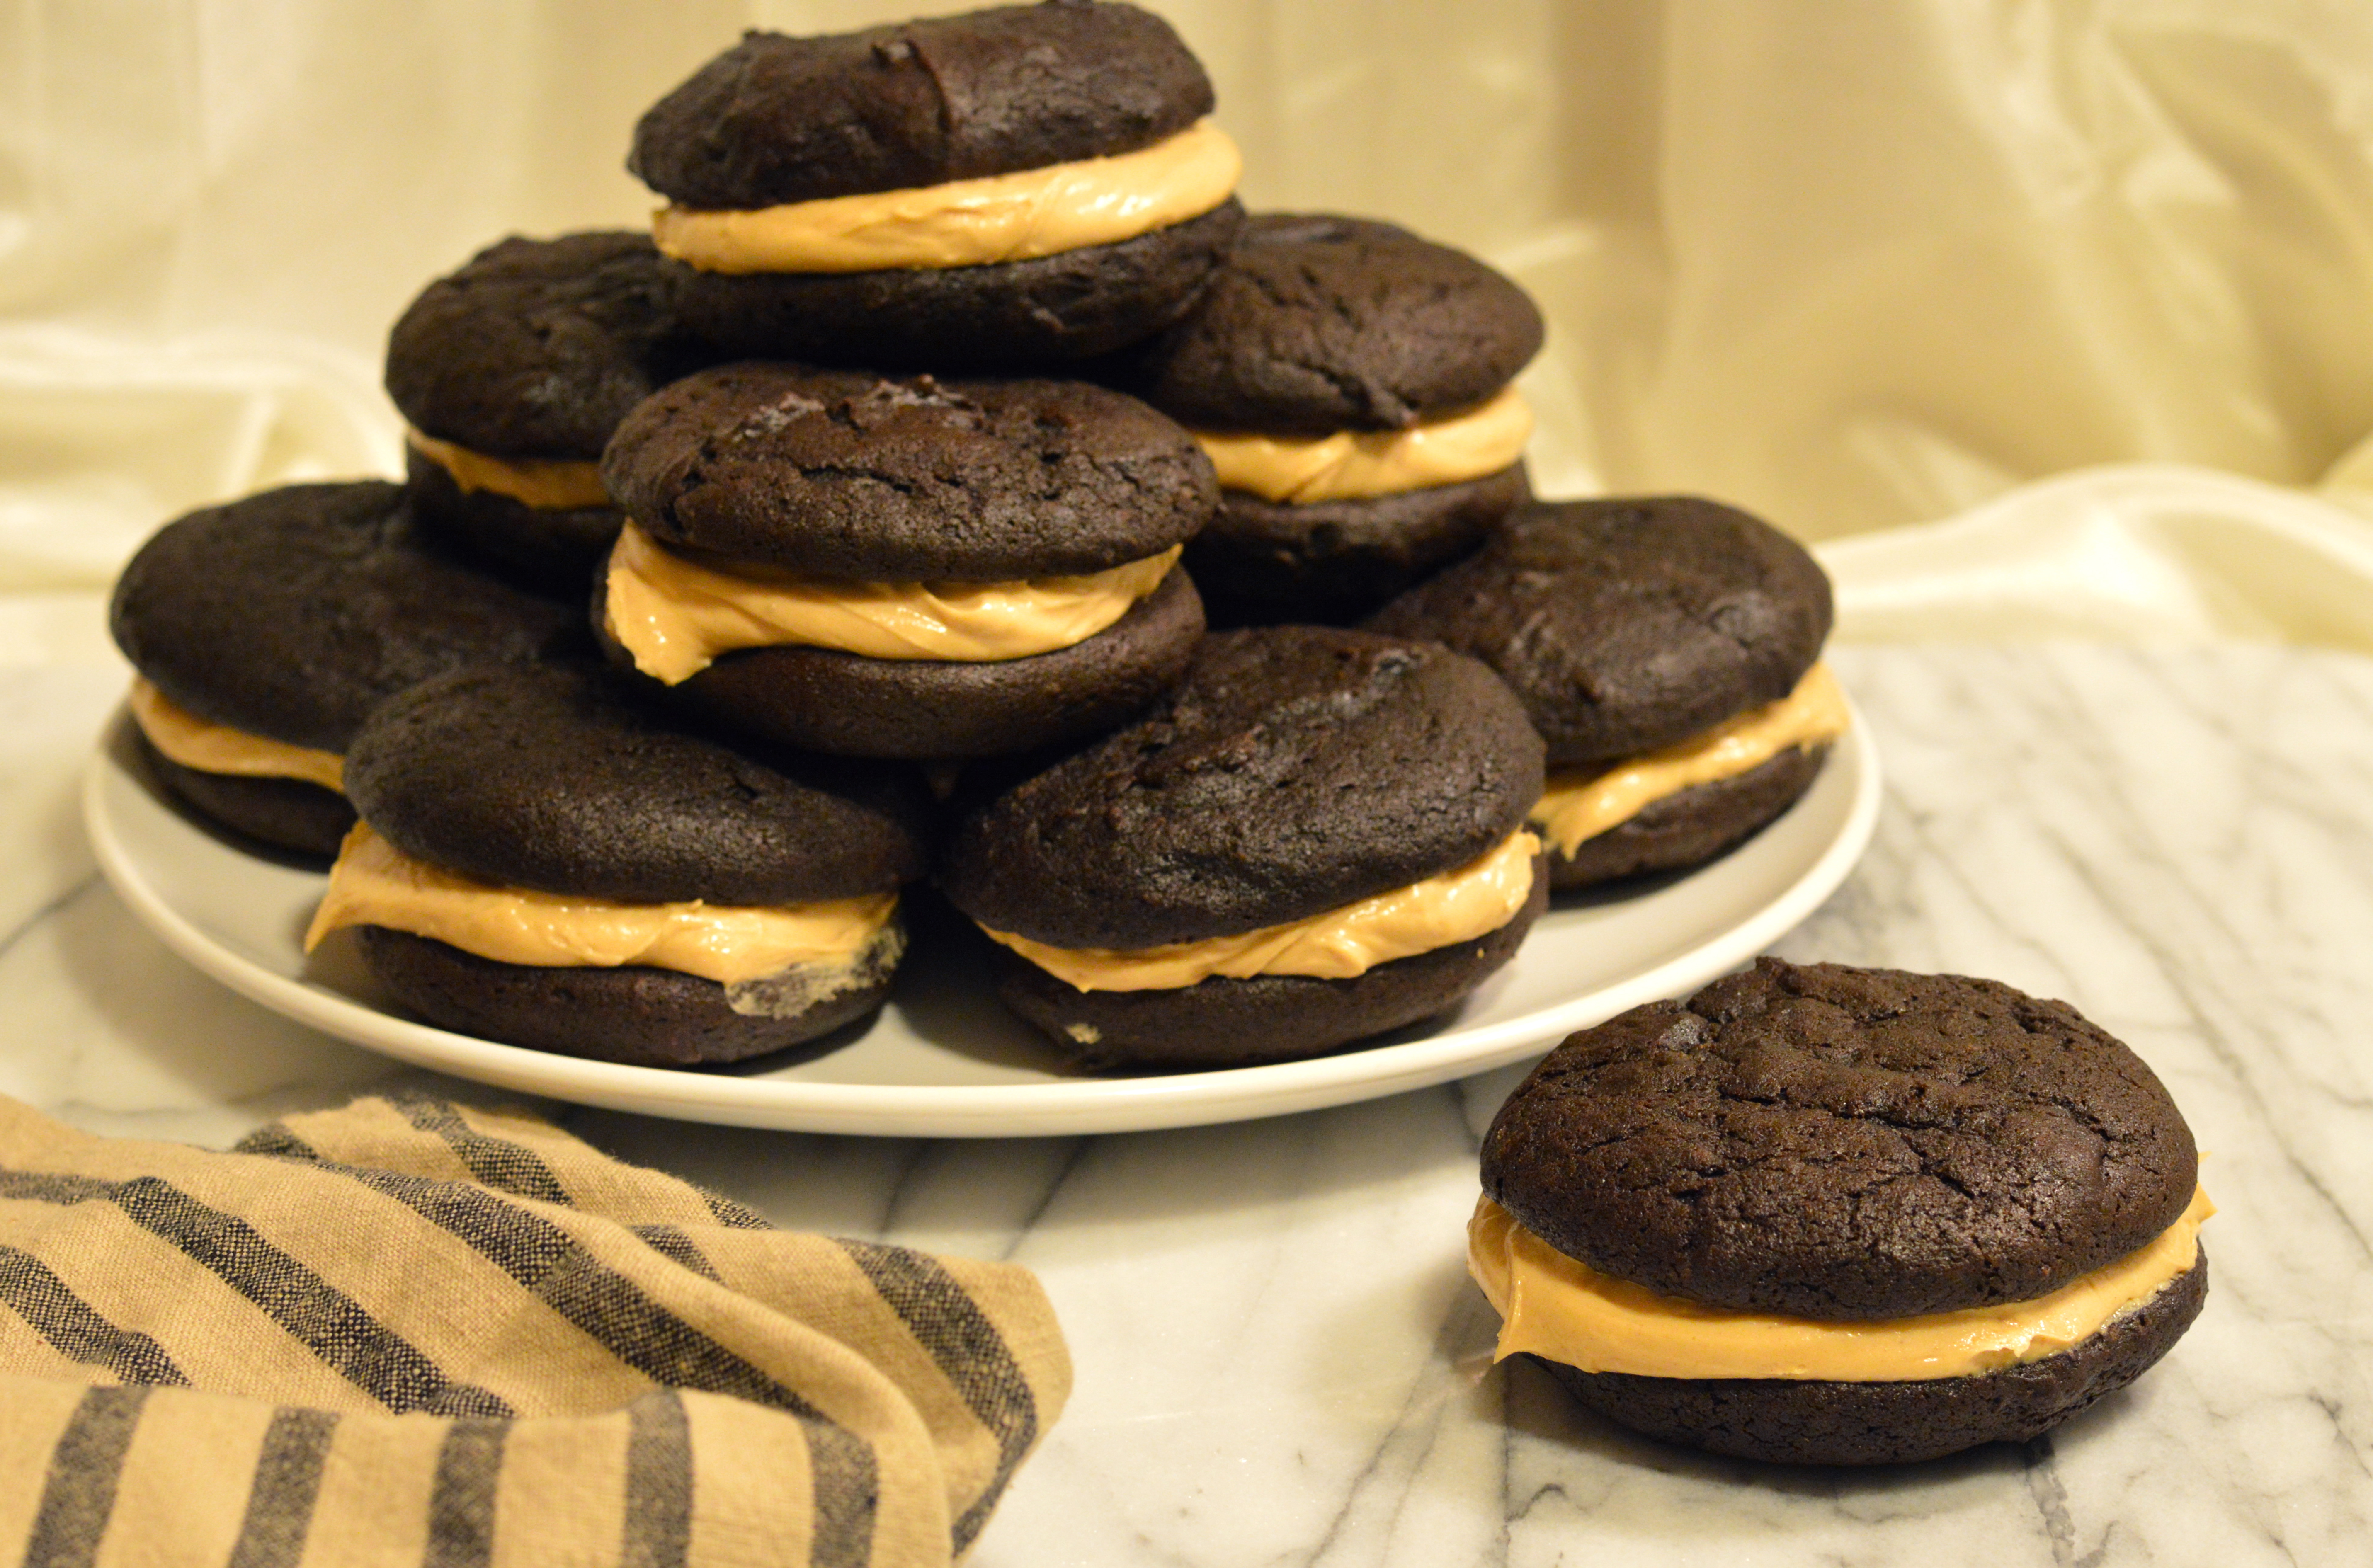
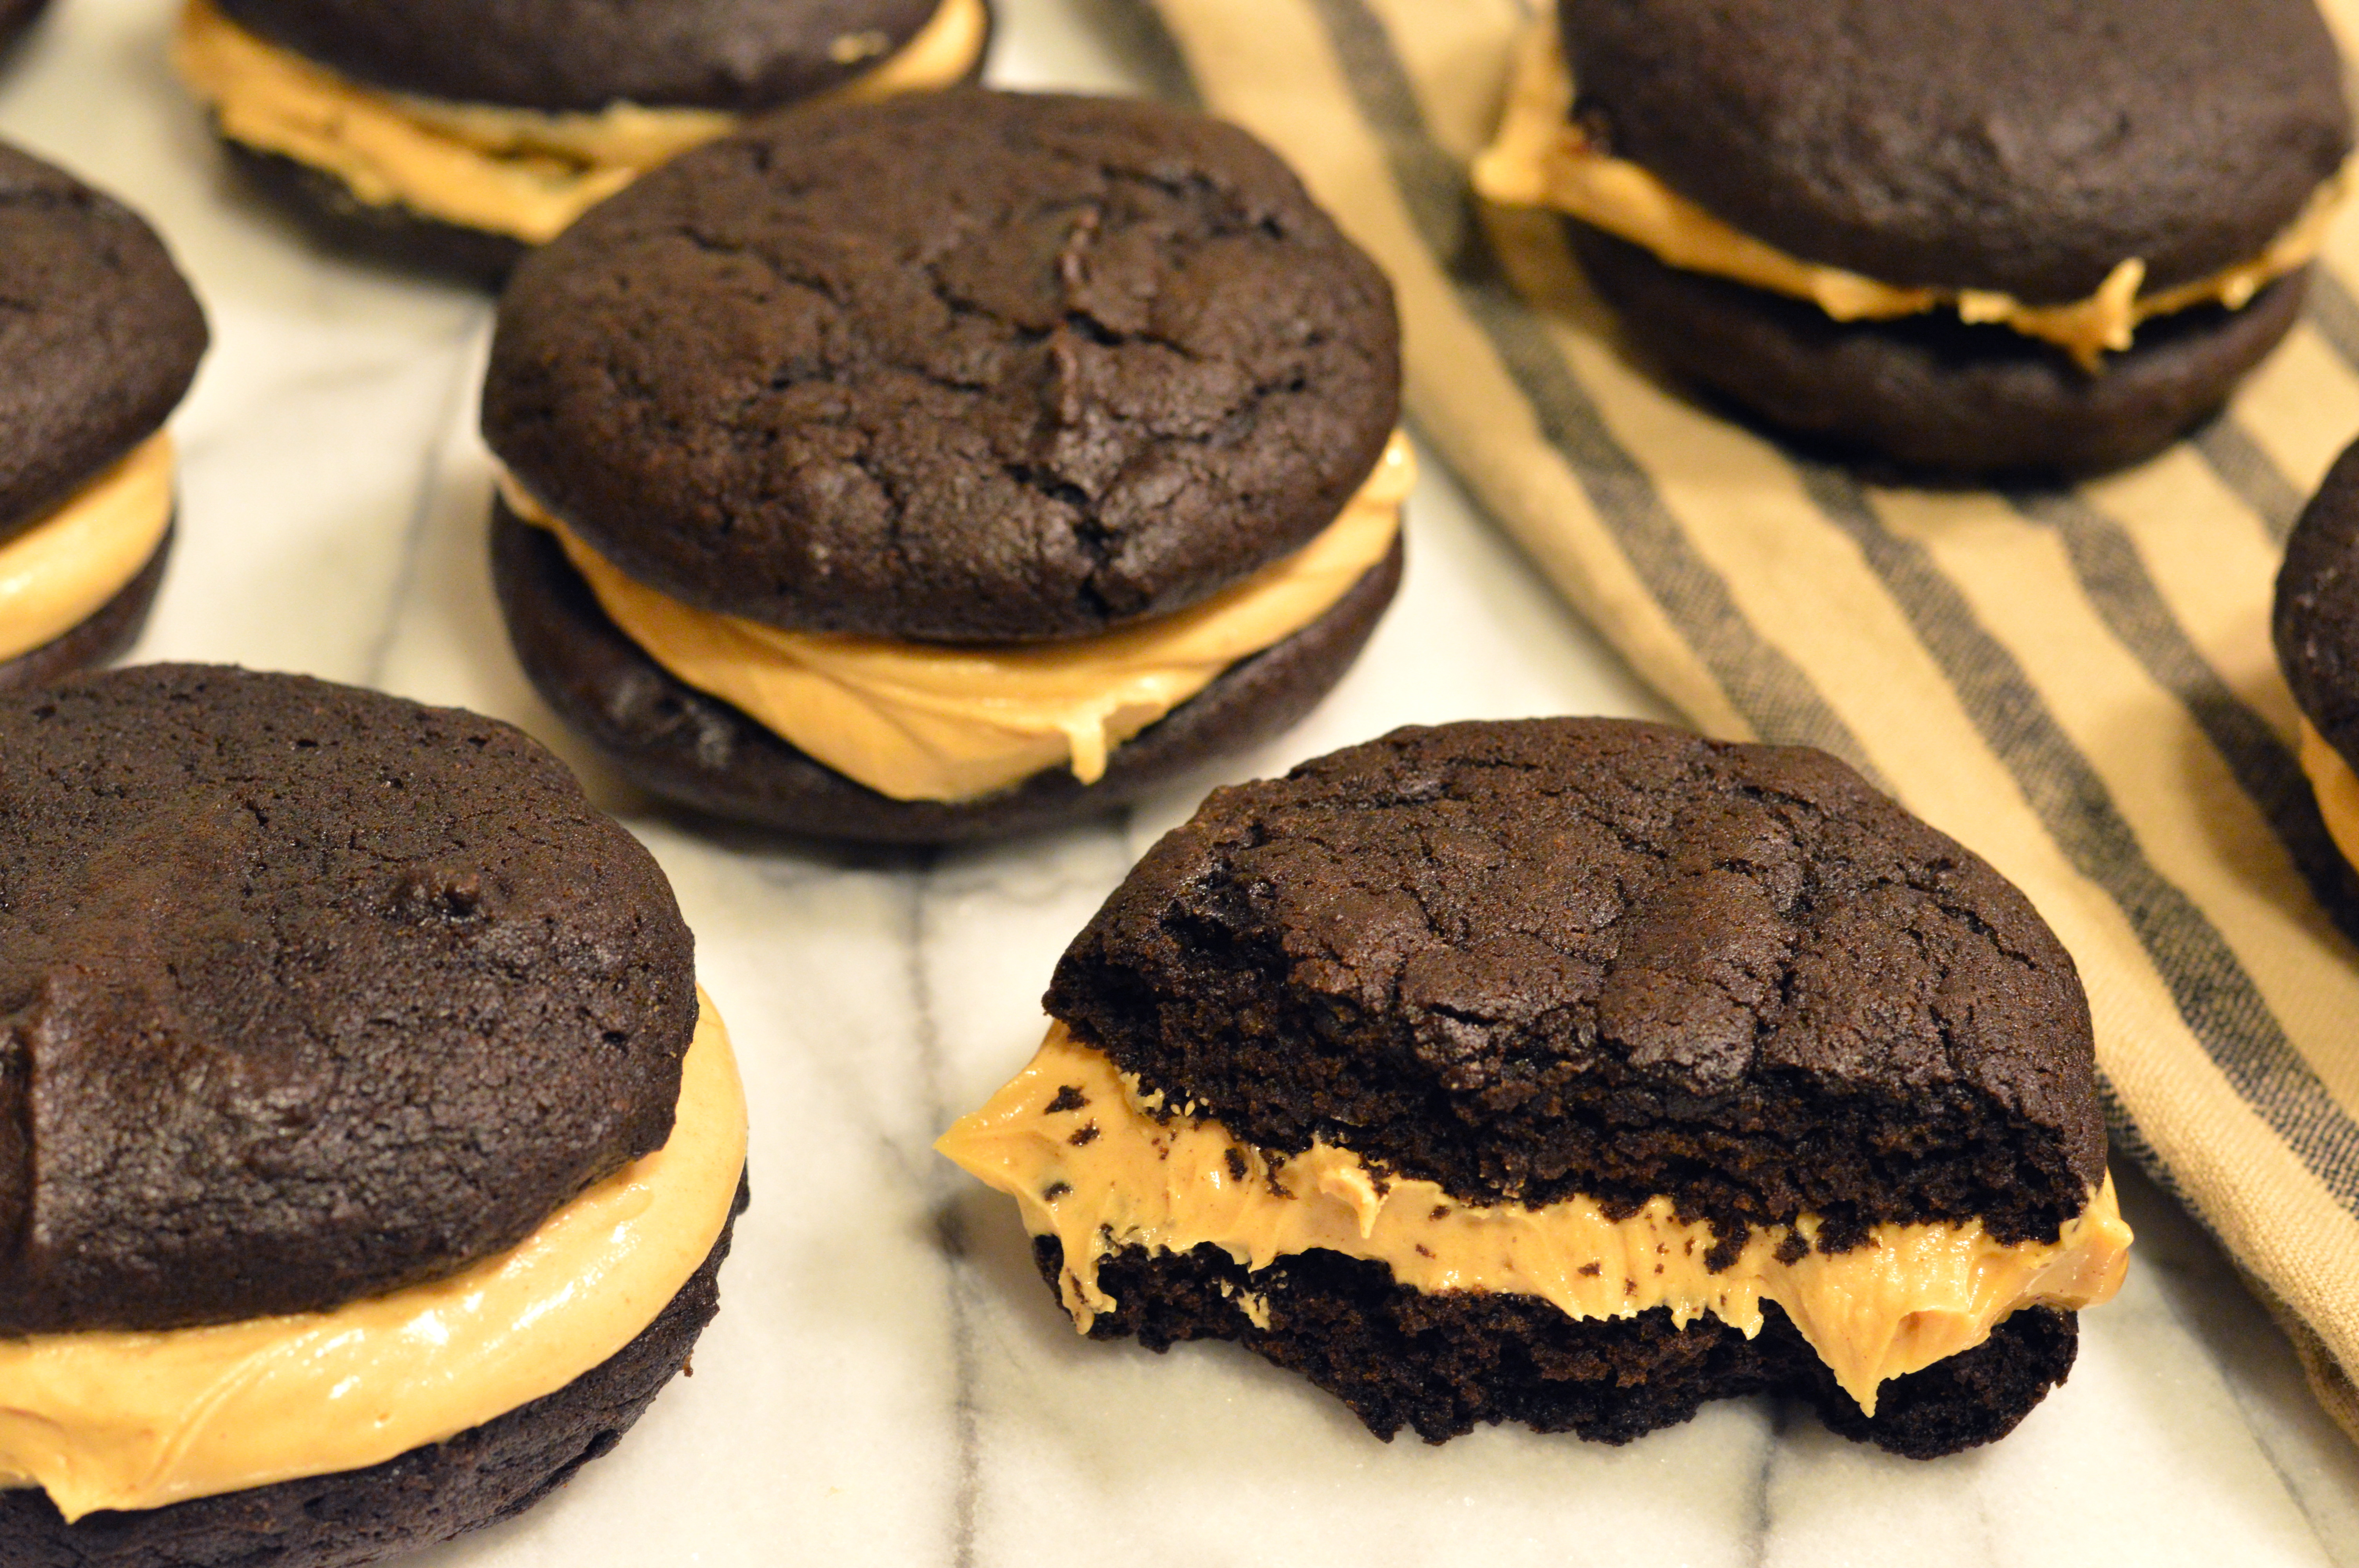
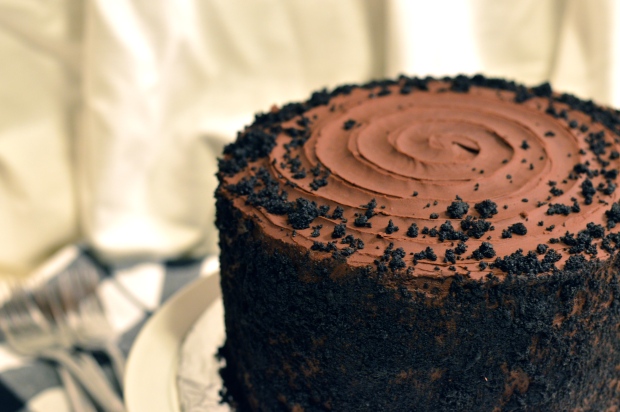
During Brooklyn’s blackout era, there was another chocolate confection maker near the Navy Yard, and this one was open to the public. Ebinger’s Bakery opened their first store in 1898 and soon swelled to a baking institution with 54 locations throughout Brooklyn and Queens. They made all of their treats from scratch daily, and gave their shops an air of authenticity by hiring shop girls with German accents. Before the war they were selling a pudding-filled three-tiered dark chocolate cake, but when the Civilian Defense Corps instituted their lights out policy, Ebinger’s decided to name their cake the “Brooklyn Blackout Cake” to show their support for the city they called home. Whether it was the deep dark chocolate-on-chocolate flavor, or their close proximity to the Navy Yard where workers were constantly smelling chocolate they couldn’t have, the cake was a huge hit. The name stuck well after the war and the cake became an iconic confection, well-known all over the country even though the Ebinger’s chain never left New York. 

the rich, dark history of brooklyn blackout cake | Brooklyn Homemaker

Unfortunately, a few decades later, Ebinger’s fell victim to a consumer obsession with diets and health, poor business management, and the country’s fascination with convenient supermarket shopping. The short shelf life and unhealthy ingredients in their home-baked treats couldn’t compete, and Ebinger’s went out of business on August 27, 1972. Their secret family recipes were never released, and though many have tried to replicate them, no one knows the exact details of those original recipes.

the rich, dark history of brooklyn blackout cake | Brooklyn Homemaker

Since they went bust more than a decade before I was born, I’ve never actually tasted a genuine Ebinger’s Brooklyn Blackout Cake. If you’re looking for the real, true, authentic recipe, you’ve come to the wrong place. Many bakeries and blogs have tried their best to come up with a close approximation, but since I’ve never tasted the real thing, I decided I was within my rights to take some liberties.
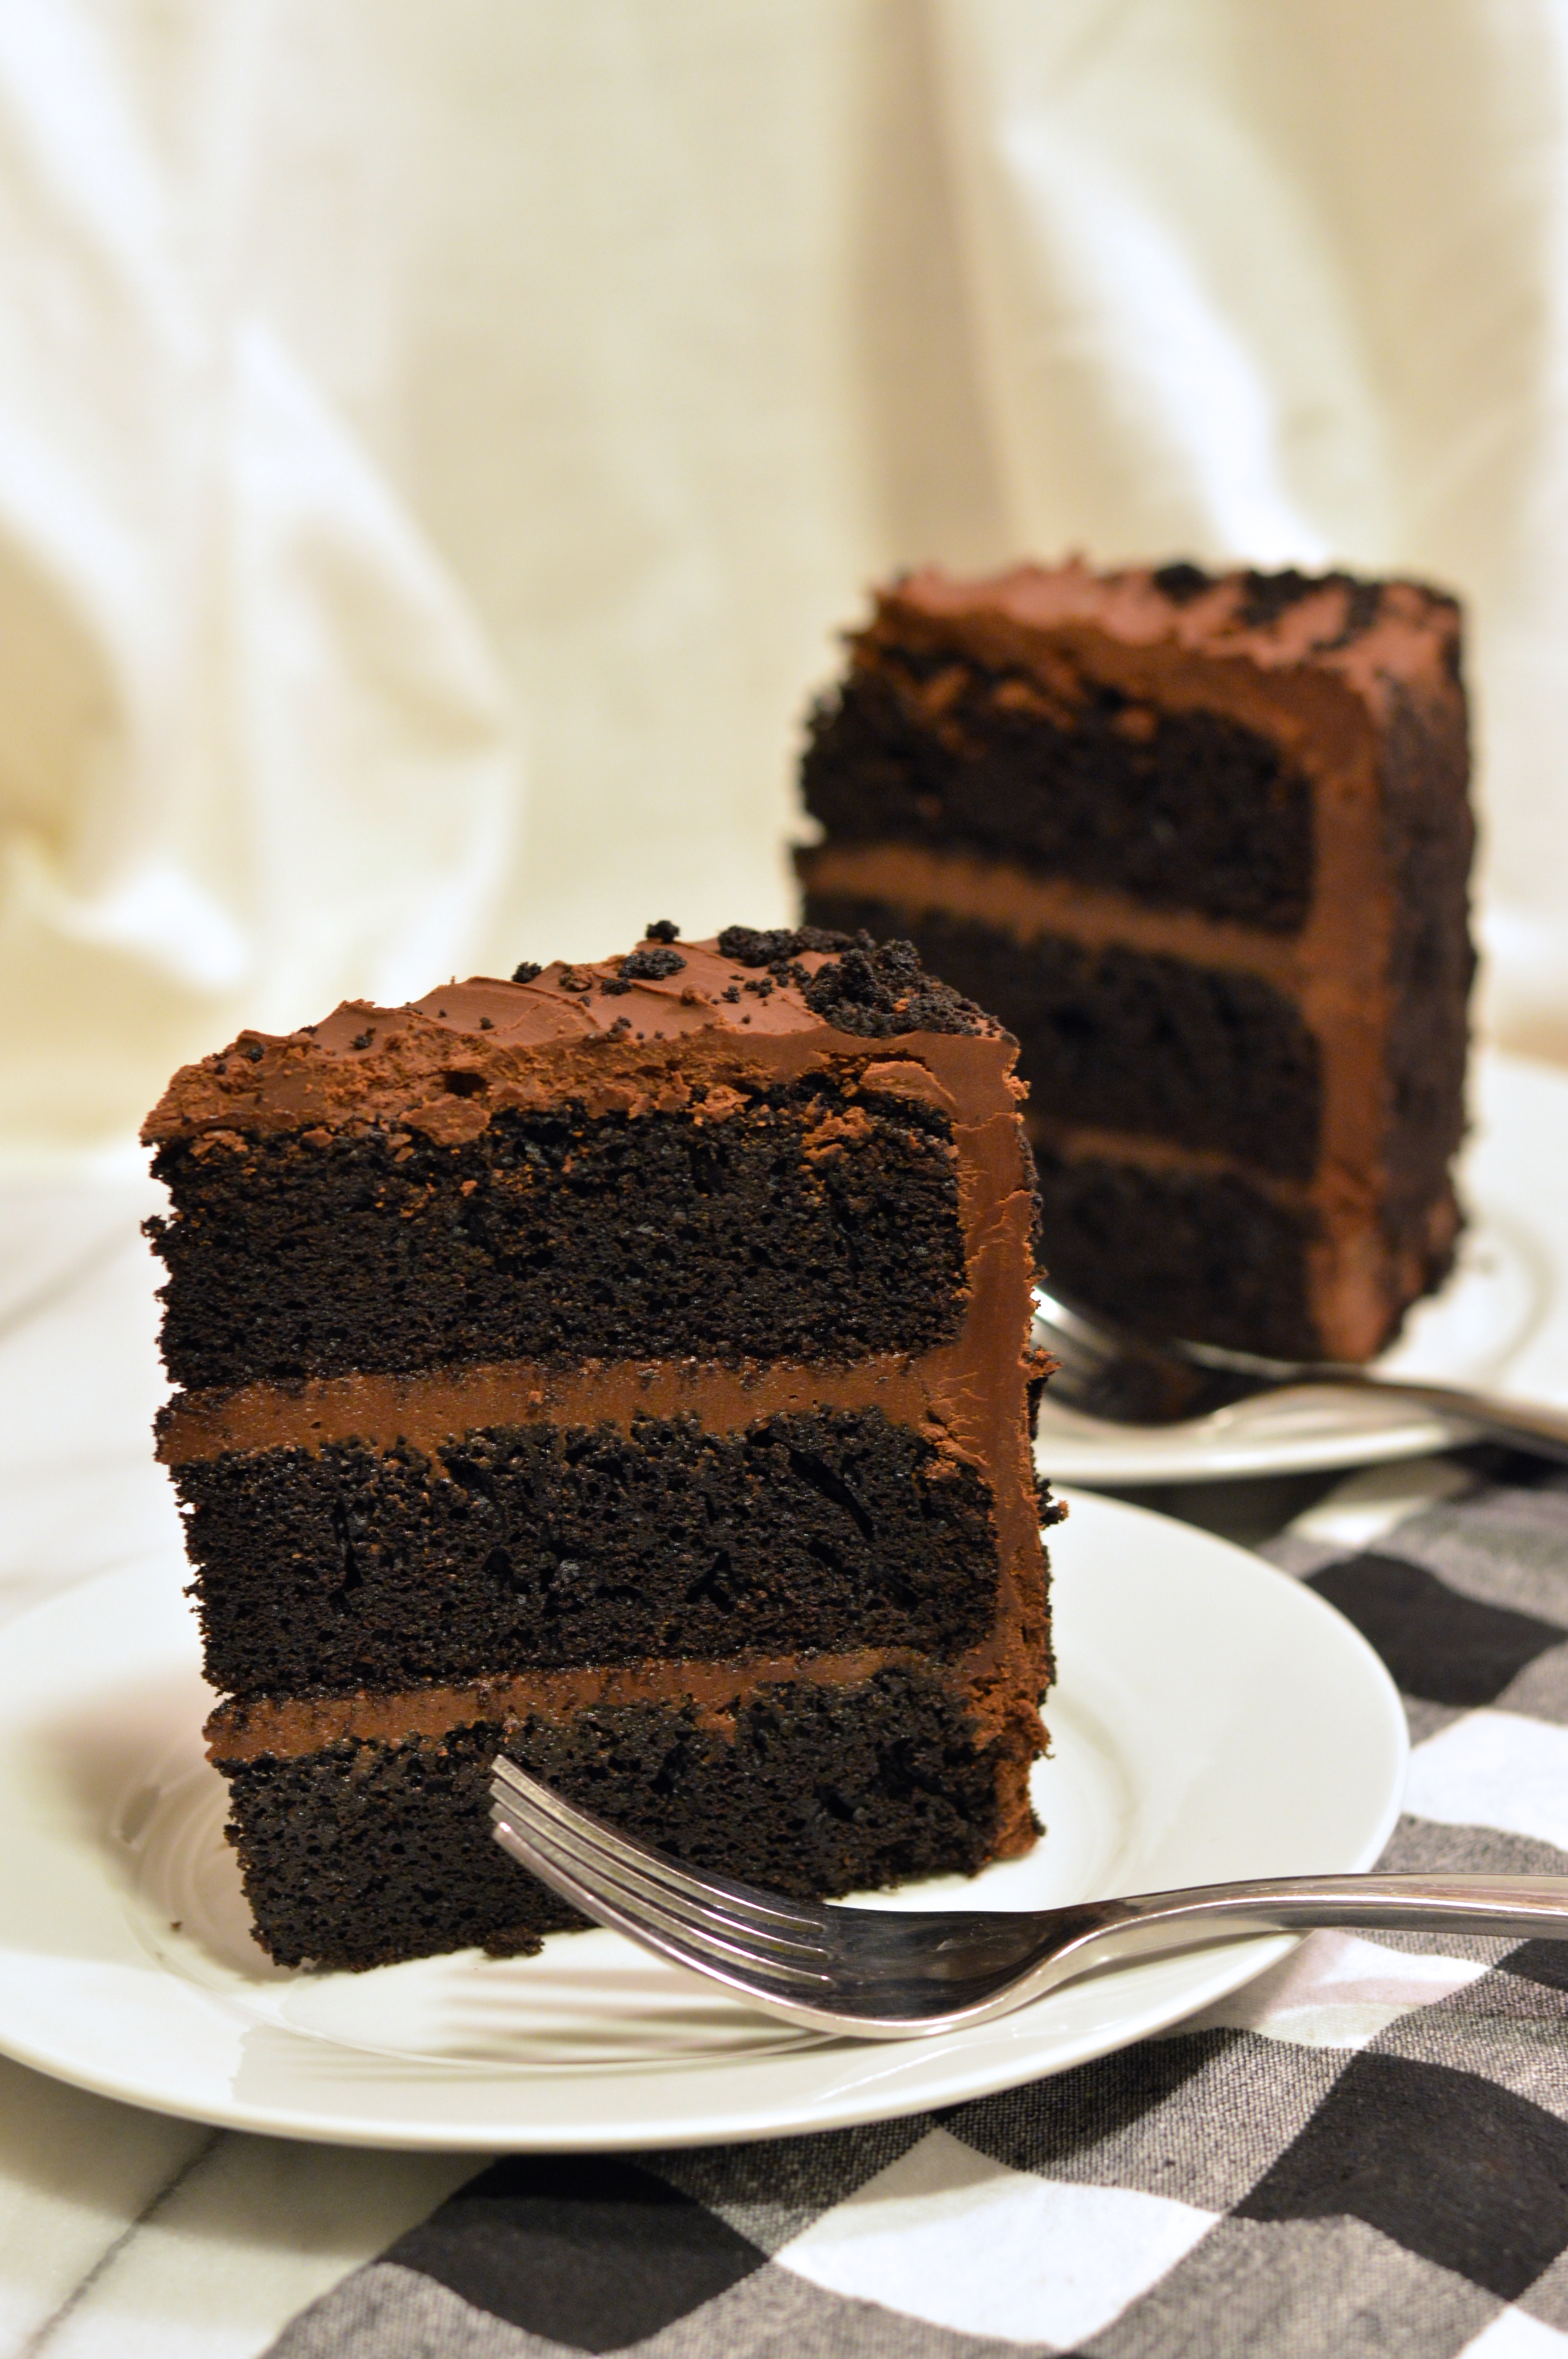
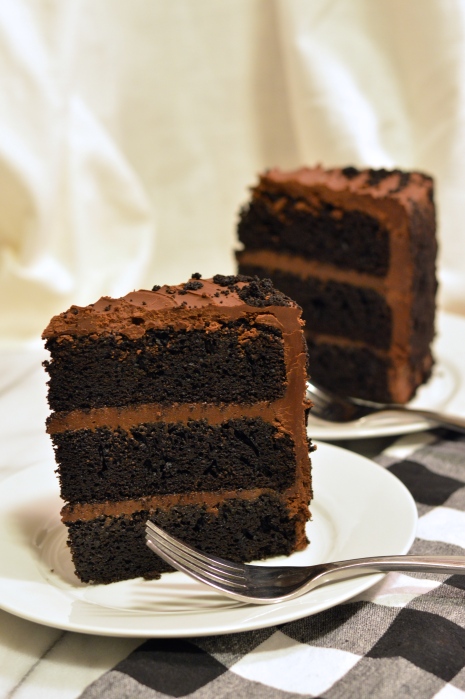
According to food historian Molly O’Neill, a true Brooklyn Blackout Cake consists of “…three layers of devil’s food cake sandwiching a dark chocolate pudding with chocolate frosting and sprinkled with chocolate cake crumbs.” I followed her guideline, but went ahead and used my own recipes for the three components.

the rich, dark history of brooklyn blackout cake | Brooklyn Homemaker

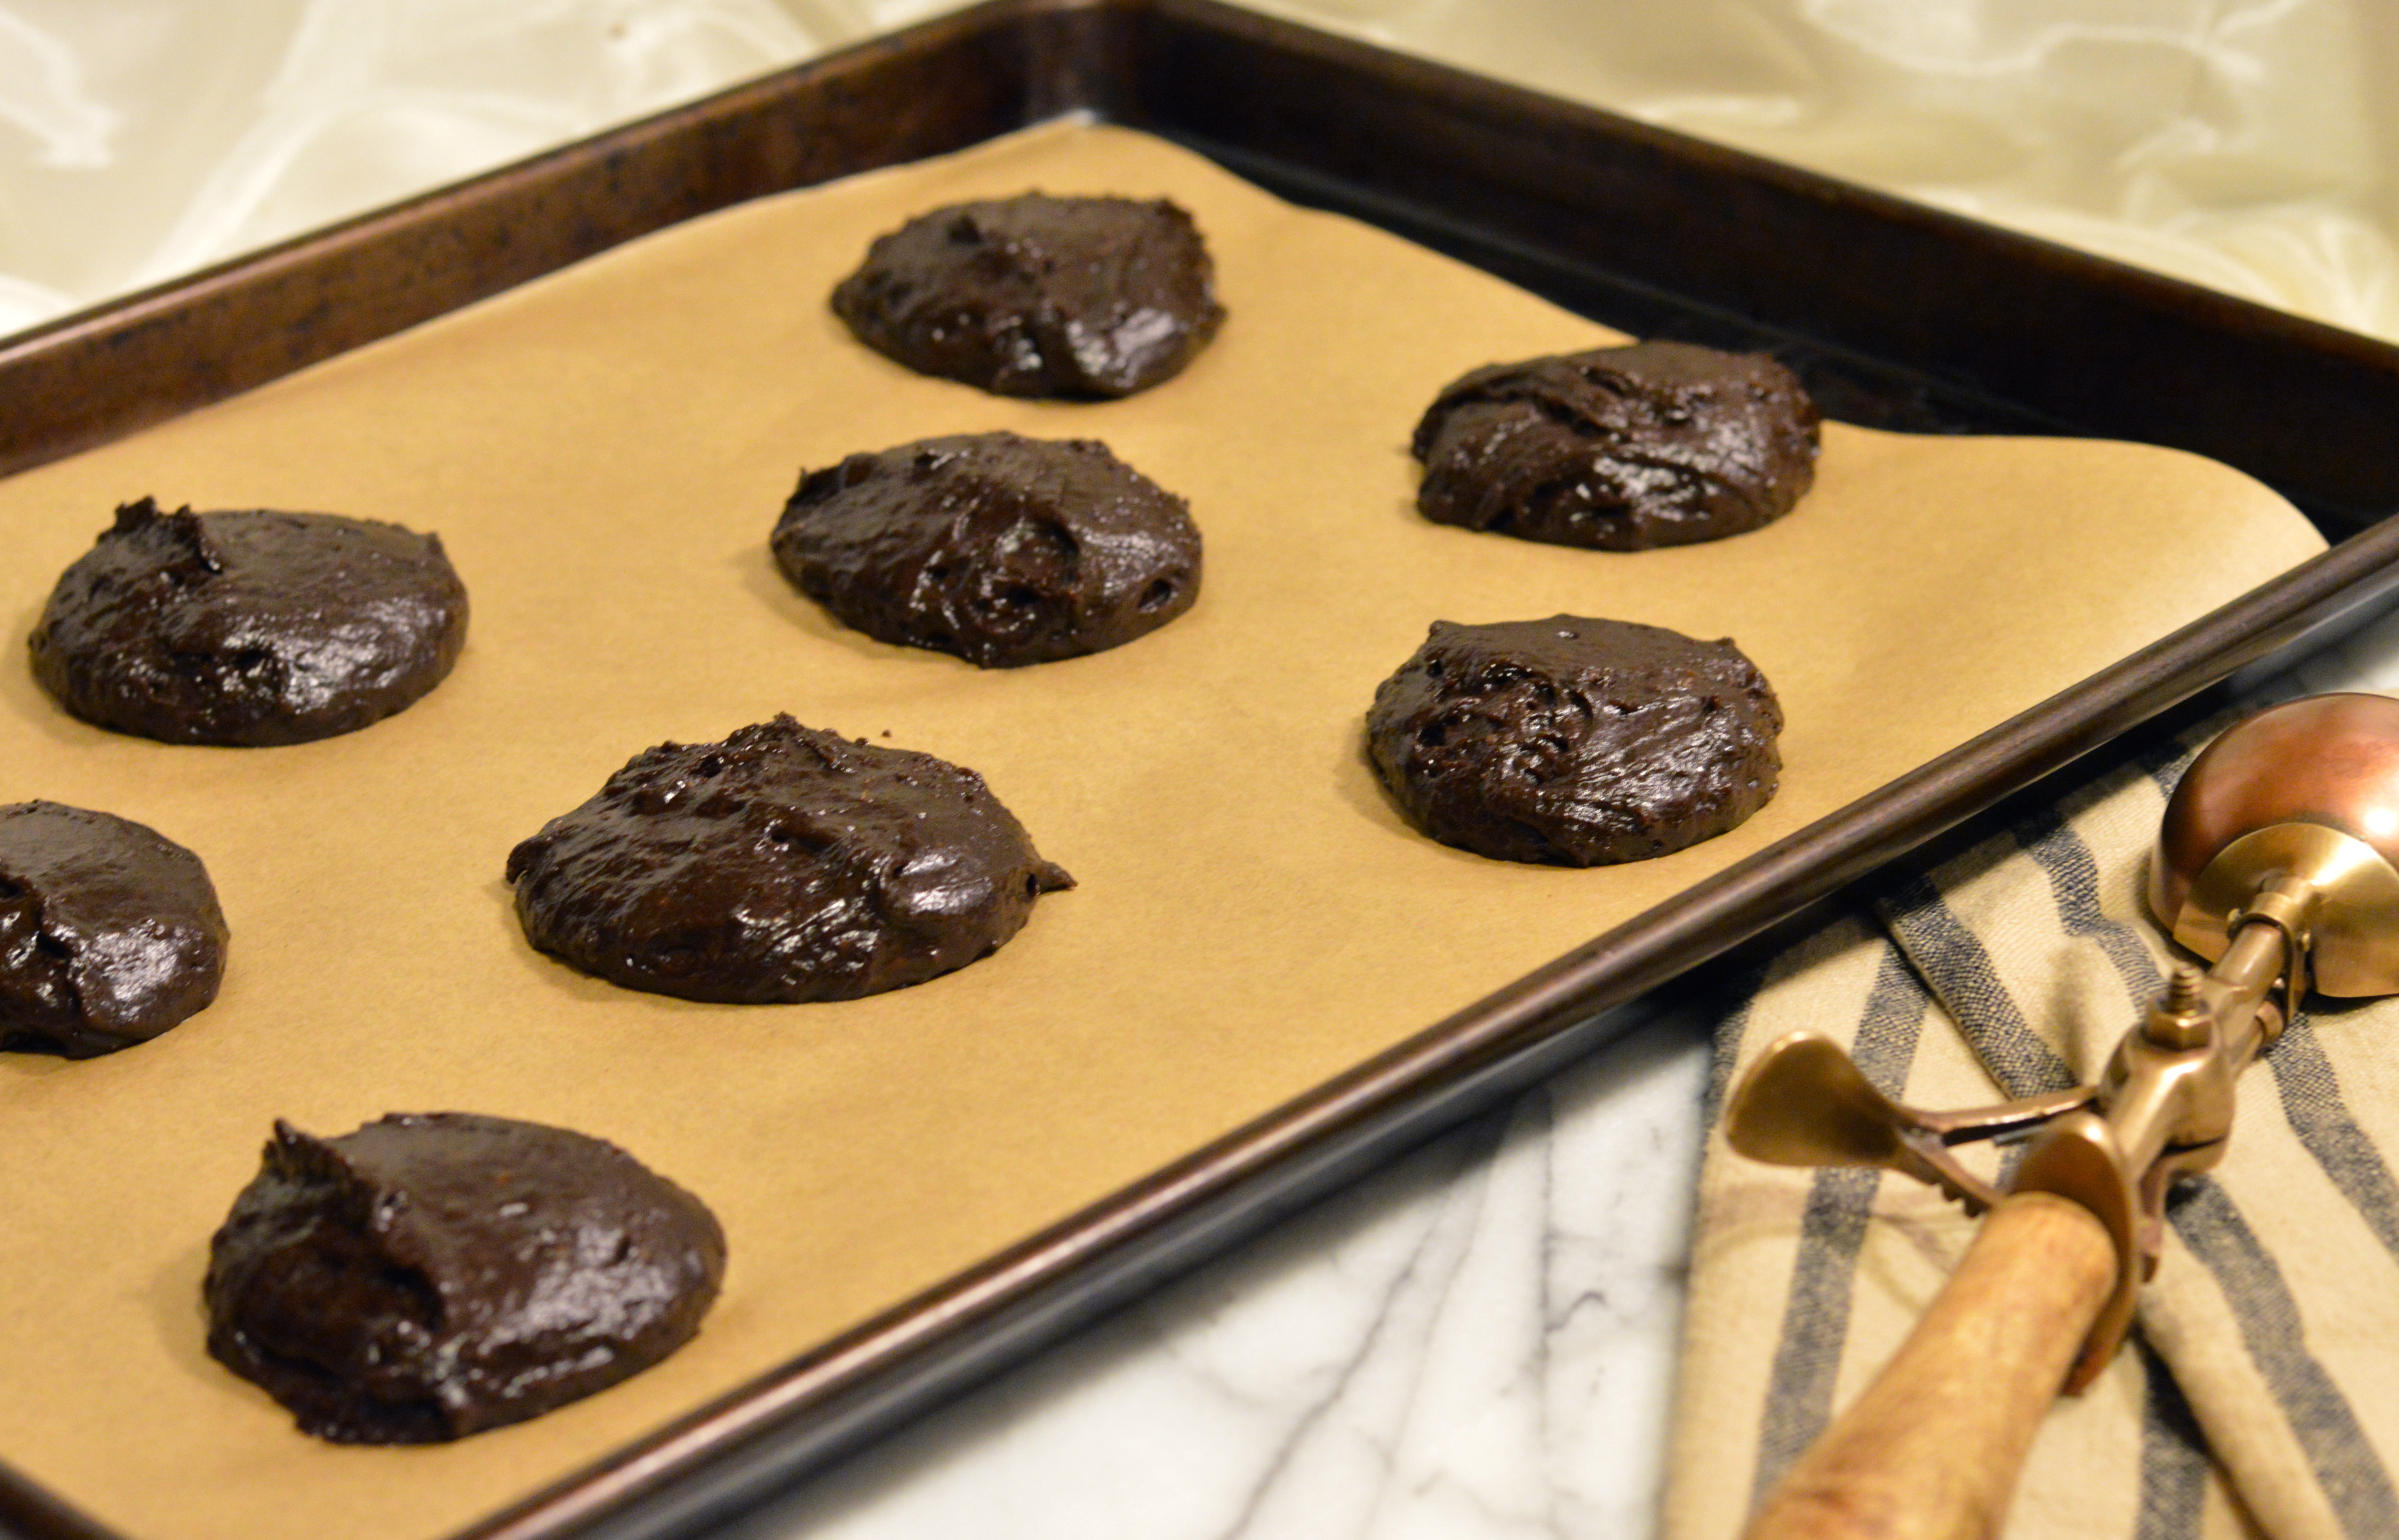
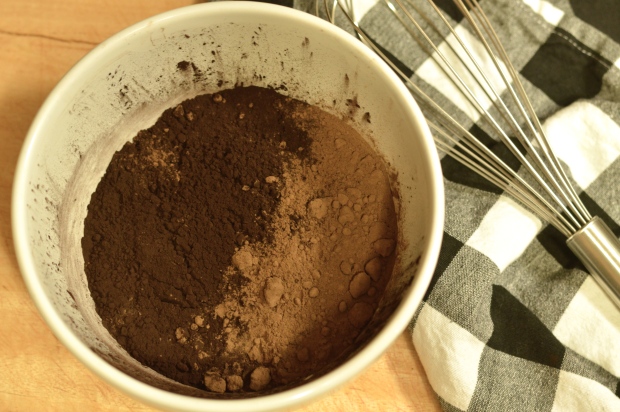
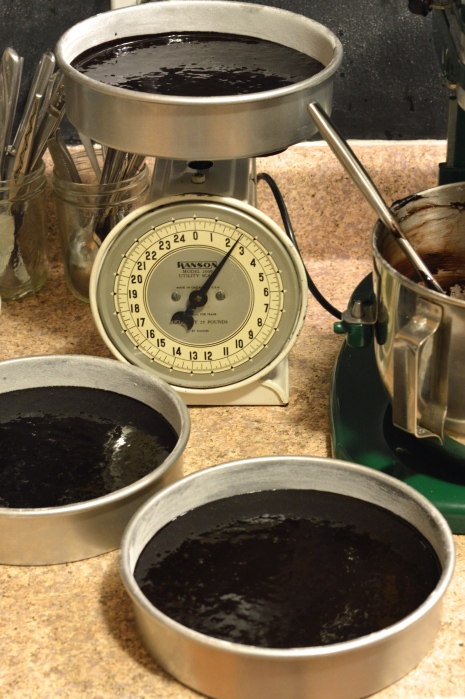
I used my favorite recipe for Devil’s Food Cake but, in place of natural cocoa, I substituted a mix of dutch-process cocoa and ultra-dutched black cocoa to give the cake a deep dark “blackout” flavor. If you’re not familiar with black cocoa, it’s what’s used in Oreos to give them their iconic dark chocolate flavor. It can sometimes be a bit overpowering in a cake though, so I mixed it with dutch-process cocoa to mellow it out a bit. The end result is an impossibly chocolatey cake that is literally black in color. If you don’t have or can’t find black cocoa (available here), feel free to just use dutch-process cocoa. I’m positive you’ll have amazing results either way. 

the rich, dark history of brooklyn blackout cake | Brooklyn Homemaker

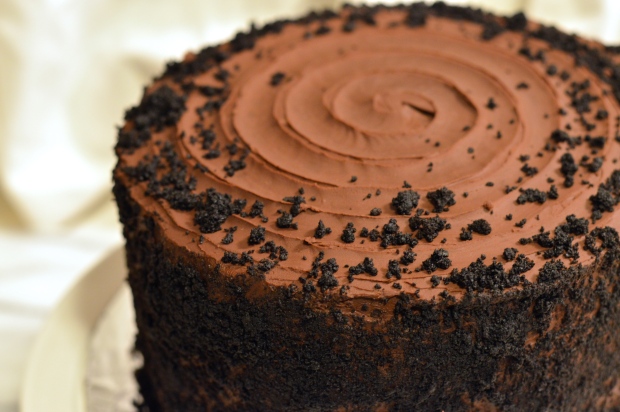
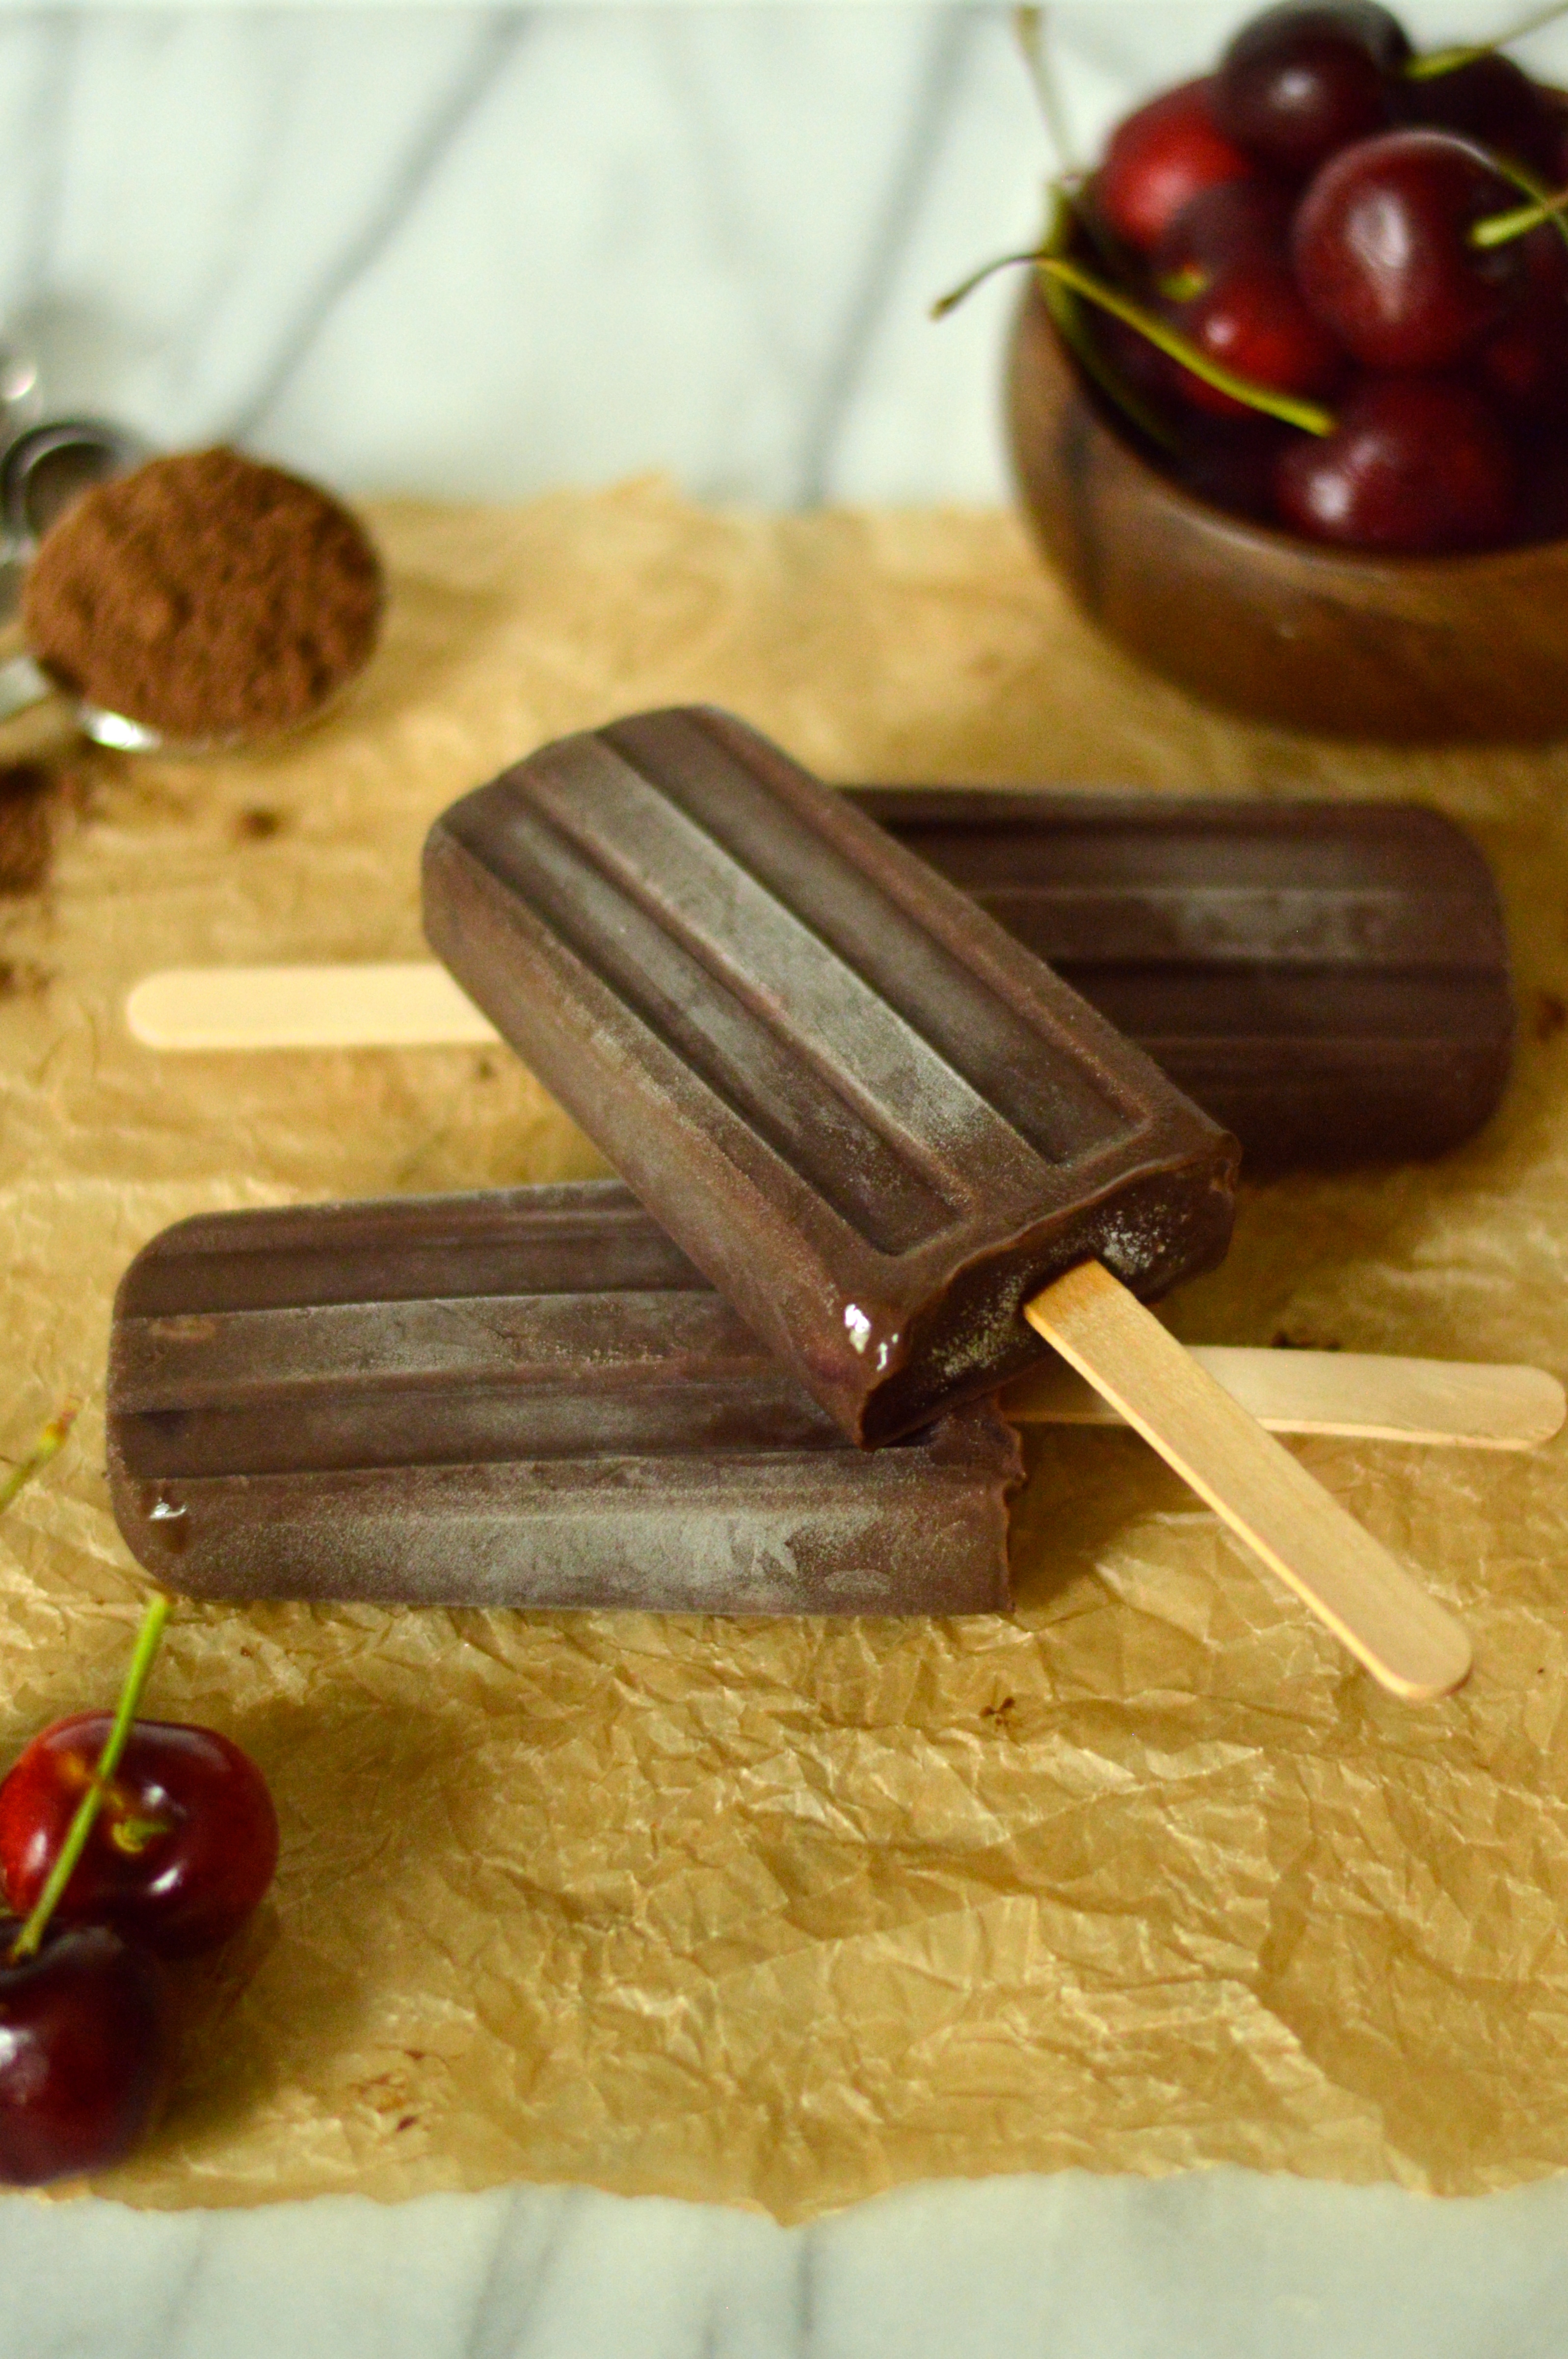
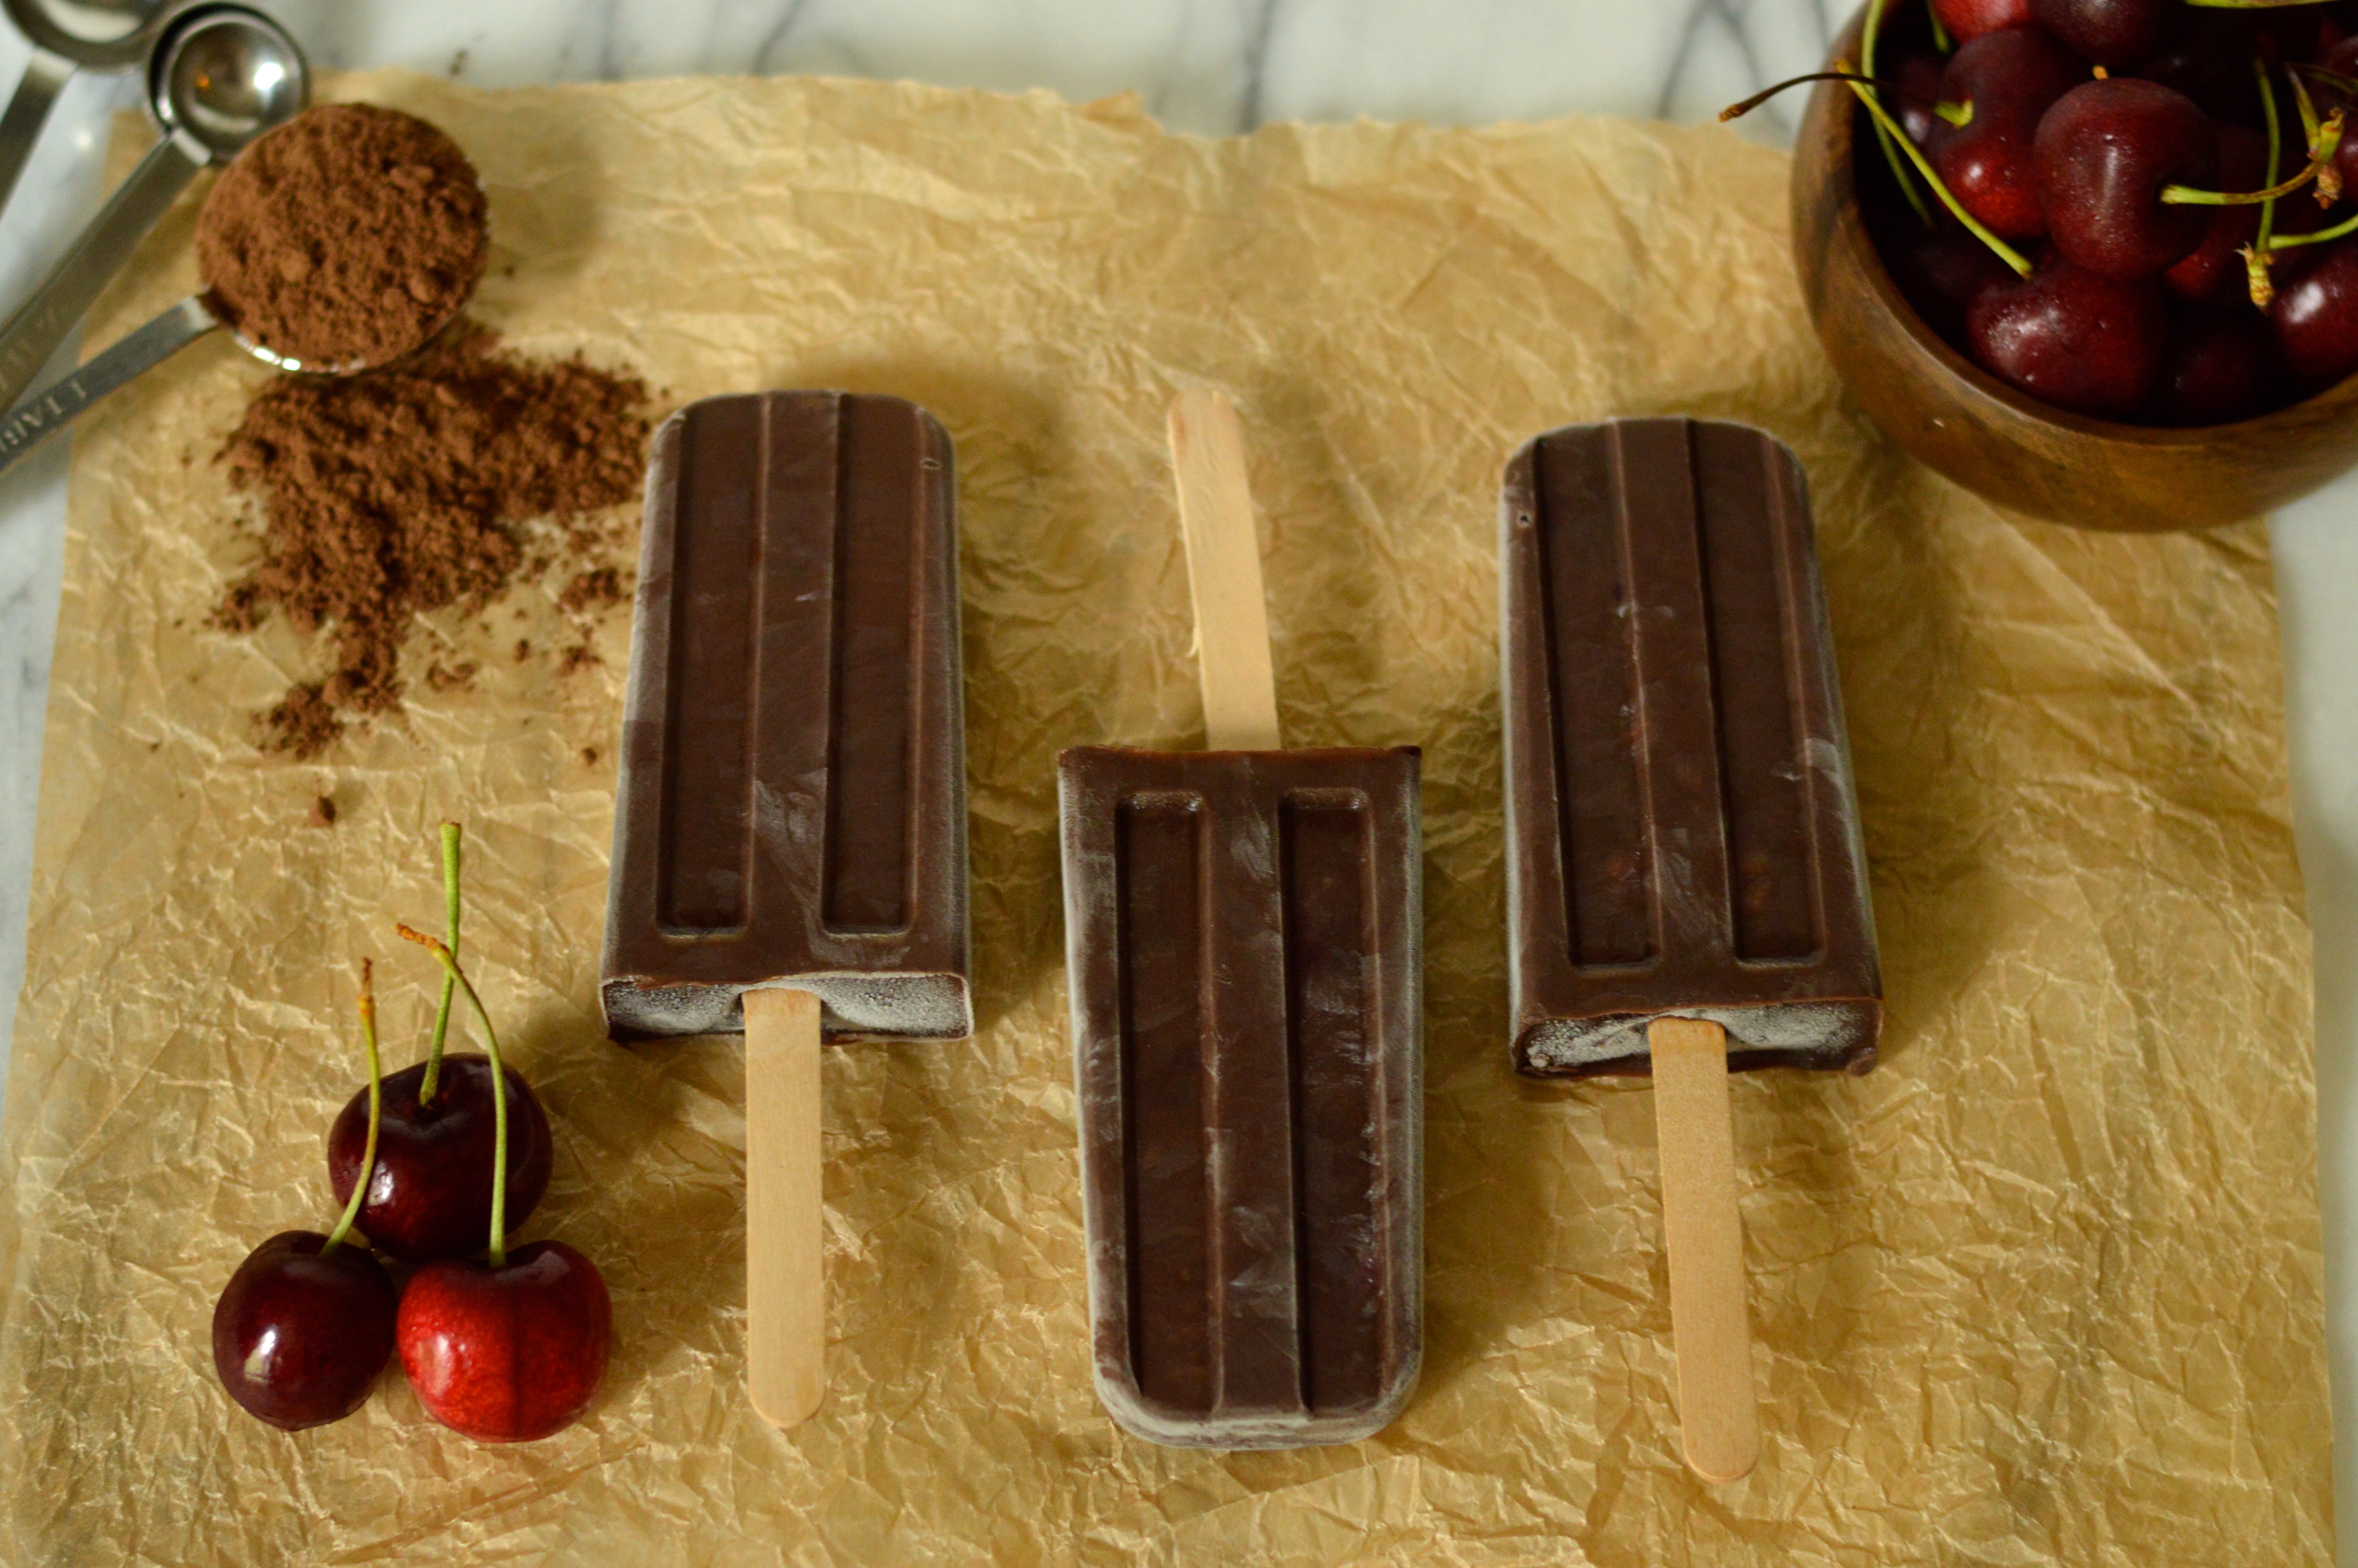
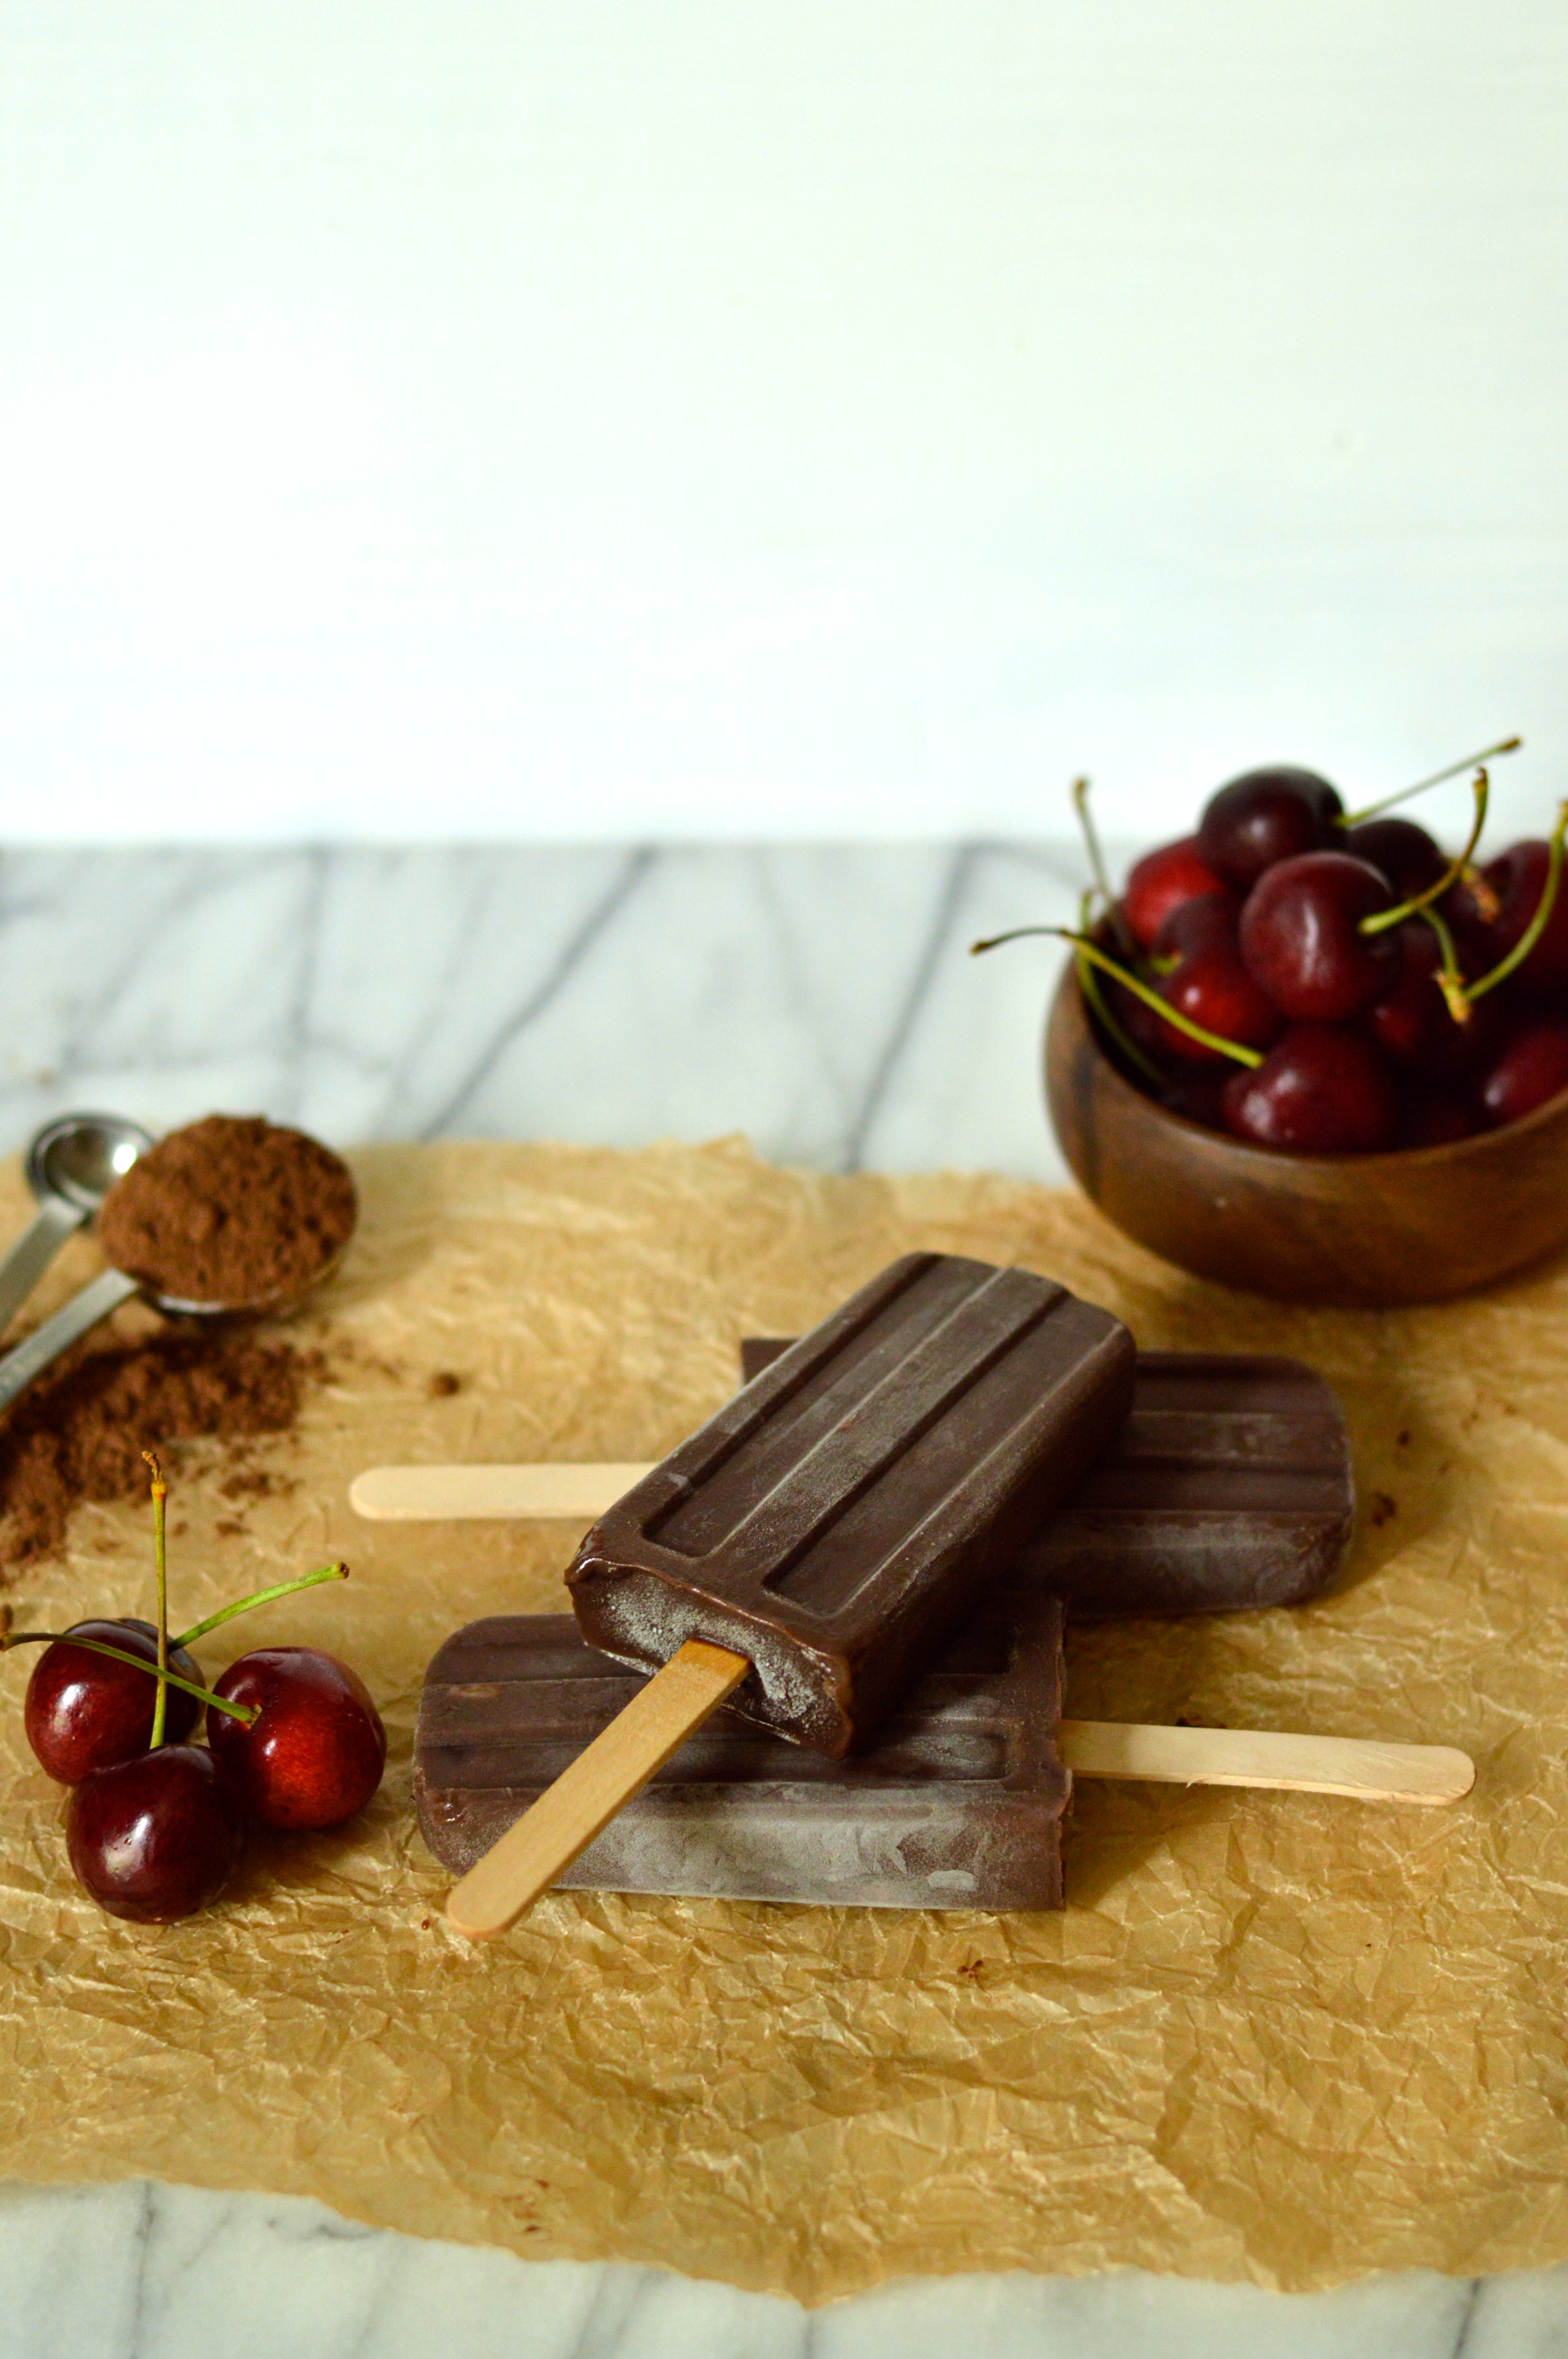
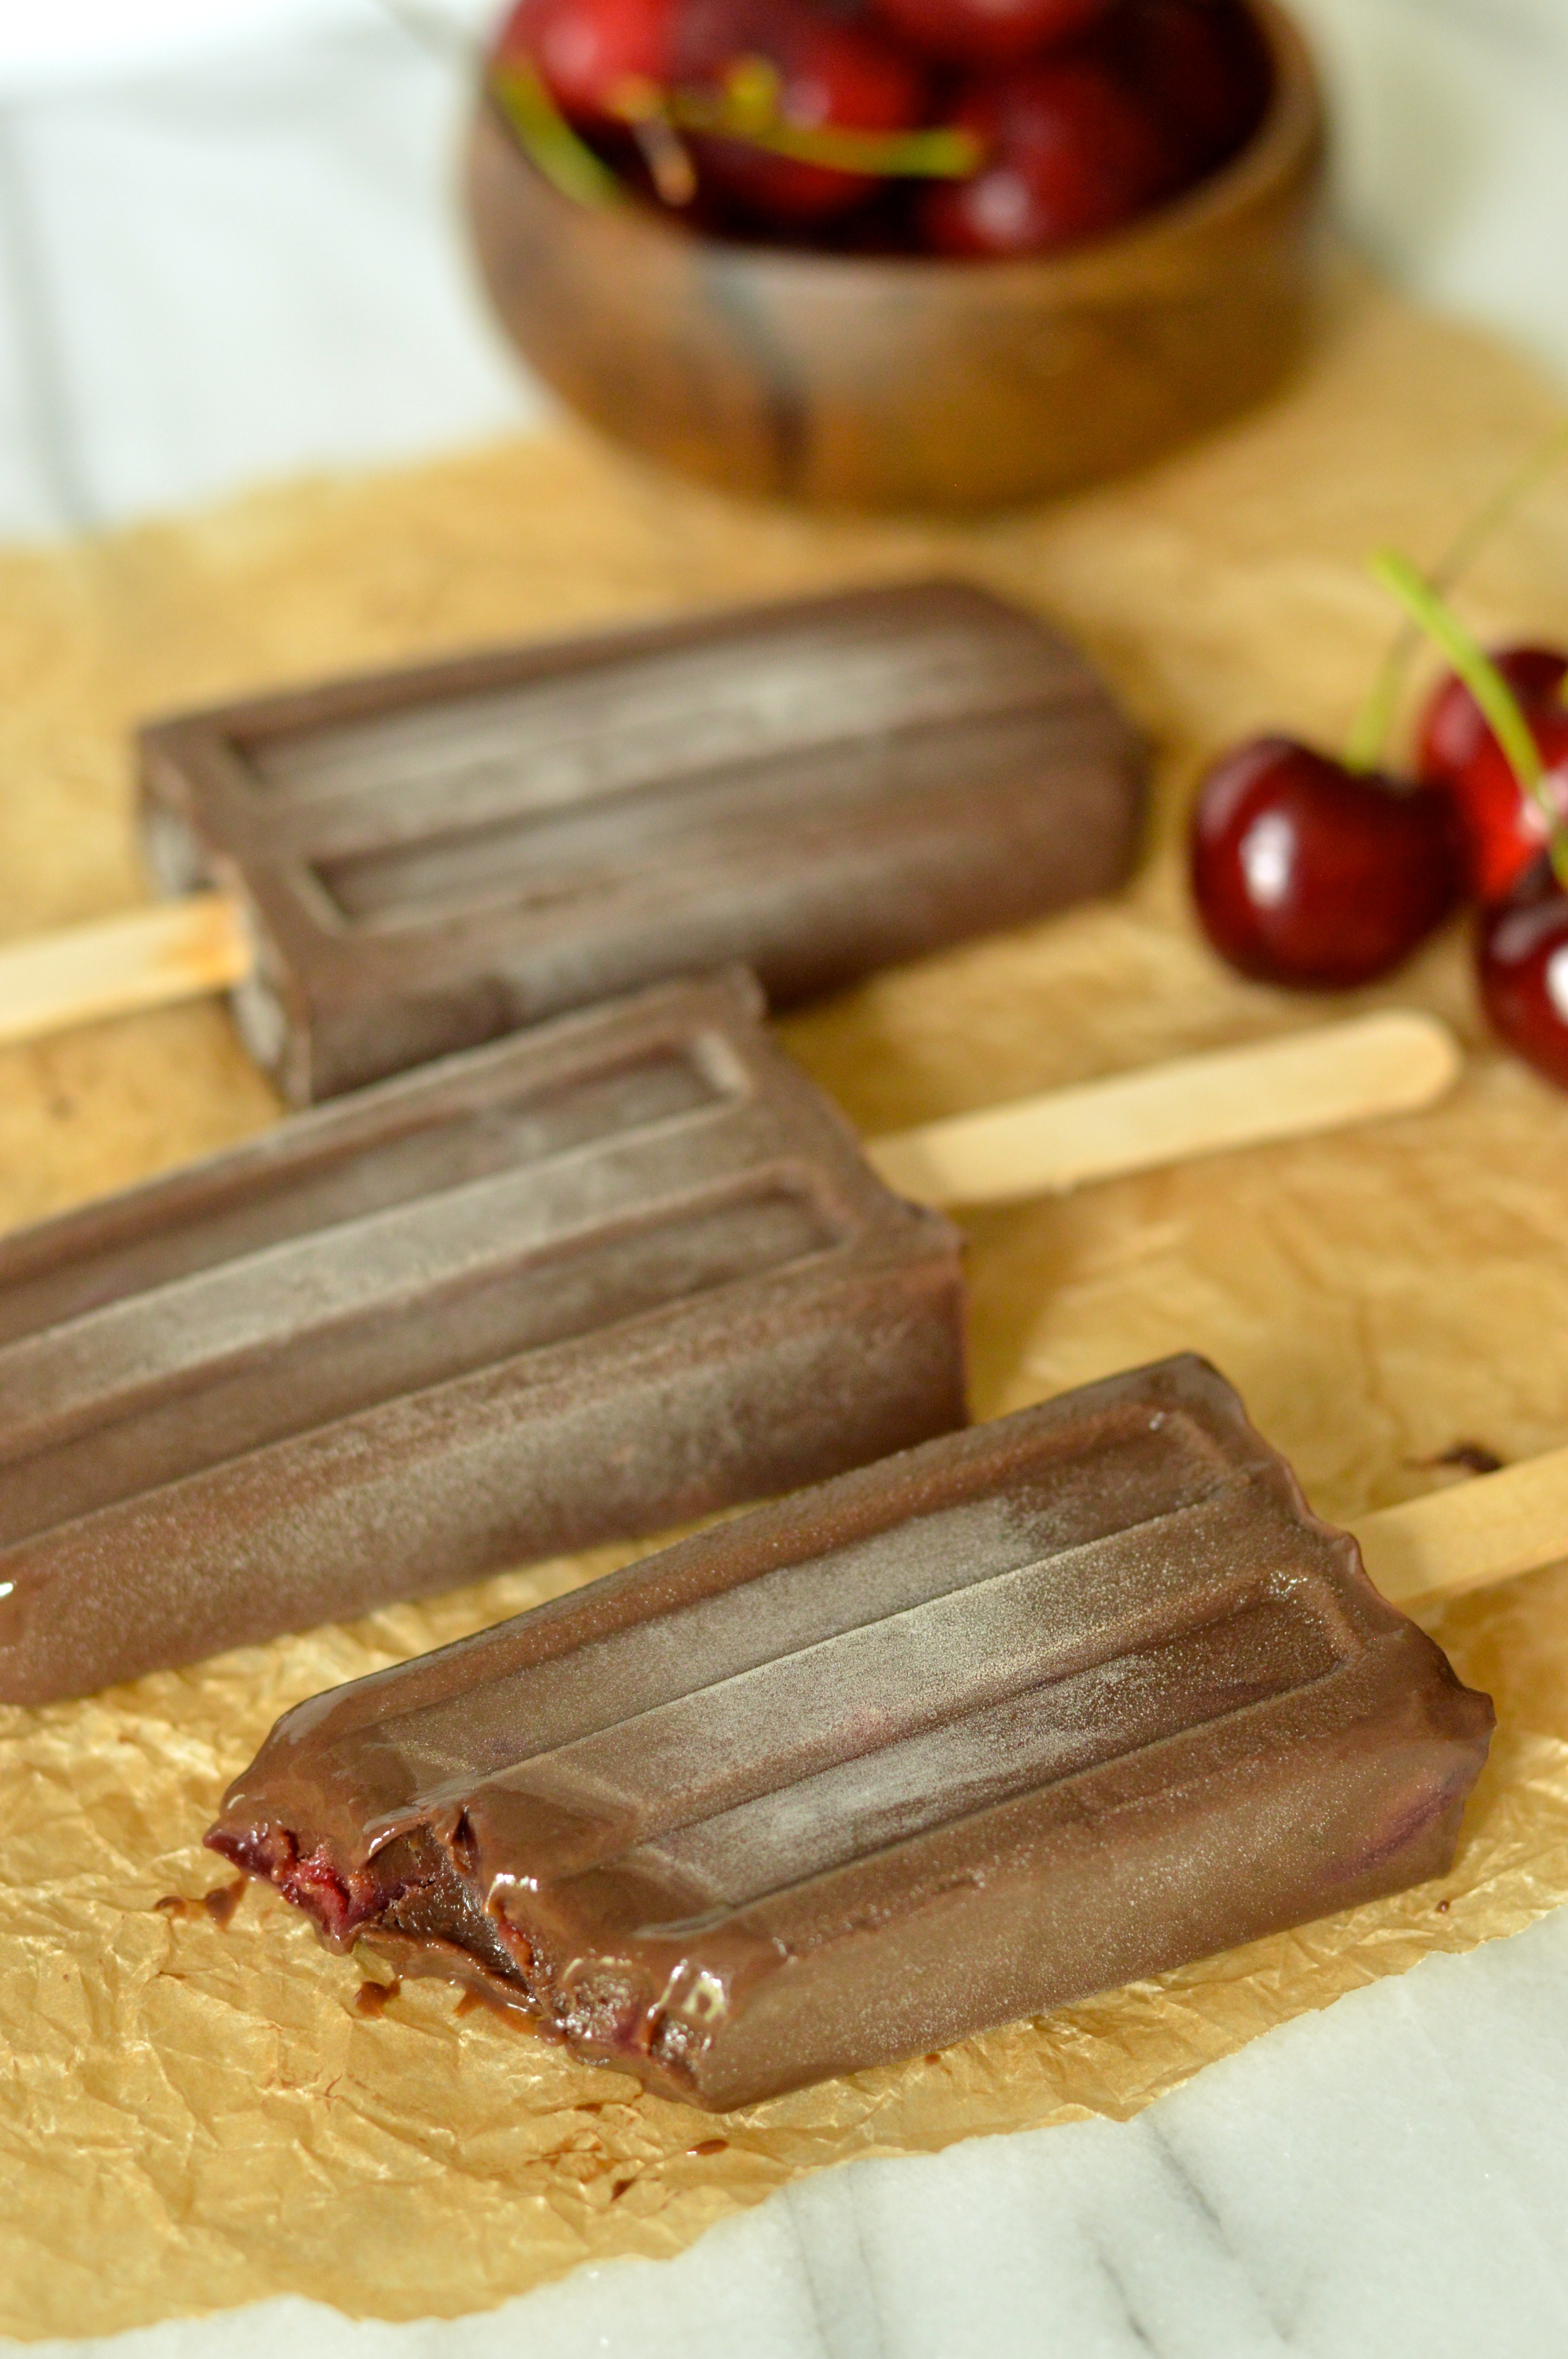
For the pudding filling, I decided to add some espresso powder to deepen the chocolate flavor, and to bring a bit of coffee into the cake that I was inspired to bake by my grandfather’s story. If you’re not a coffee fan you could leave it out, but together with the other components, you get just a subtle hint of coffee that backs up the dark chocolatiness of the rest of the cake. To top it all off, I iced the cake with a thick, rich dark chocolate ganache. Then I covered the sides of the cake with crumbs while leaving most of the top clean to show off a swirled design in the icing.

the rich, dark history of brooklyn blackout cake | Brooklyn Homemaker

When making a layer cake, especially one consisting of more than two layers, I think it’s really important to level each layer of cake before assembly. I think it makes for a much more professional looking, impressive, and beautiful cake. I also like that you get an opportunity to taste the cake before serving to be certain no mistakes were made. Luckily, in this recipe, the excess cake gets put to good use too.

the rich, dark history of brooklyn blackout cake | Brooklyn Homemaker

To be perfectly honest, this cake is a LOT of work. Ebinger’s was making this in commercial production bakeries with lots of help, but making this yourself is a bit of an undertaking. If you’re up for the challenge though, the end result is unbelievably delicious, incredibly moist, and outrageously chocolatey. If you are as big of a fan of chocolate as I am, you’ll go crazy for this cake.

the rich, dark history of brooklyn blackout cake | Brooklyn Homemaker

Brooklyn Blackout Cake


Black Devil’s Food Cake
makes three 8-inch layers

butter and flour for pans
3/4 cups dutch process cocoa powder
3/4 cups ultra-dutched black cocoa powder *see note
1 1/2 cups hot water
3 1/4 cups cake flour
1 1/4 teaspoons coarse salt
1 teaspoon baking powder
1 teaspoon baking soda
2 cups peanut oil or vegetable oil
1 cup granulated sugar
1 1/4 cup packed brown sugar
4 large eggs
4 teaspoons vanilla extract
1 cup buttermilk

Preheat oven to 350 degrees. Butter three 8 inch round cake pans, line bottoms with parchment paper, butter paper, and dust pans with flour. Whisk together cocoa powders and hot water until smooth.

Sift together flour, salt, baking powder, and baking soda; set aside. Beat oil and sugars together on medium-low speed until combined.
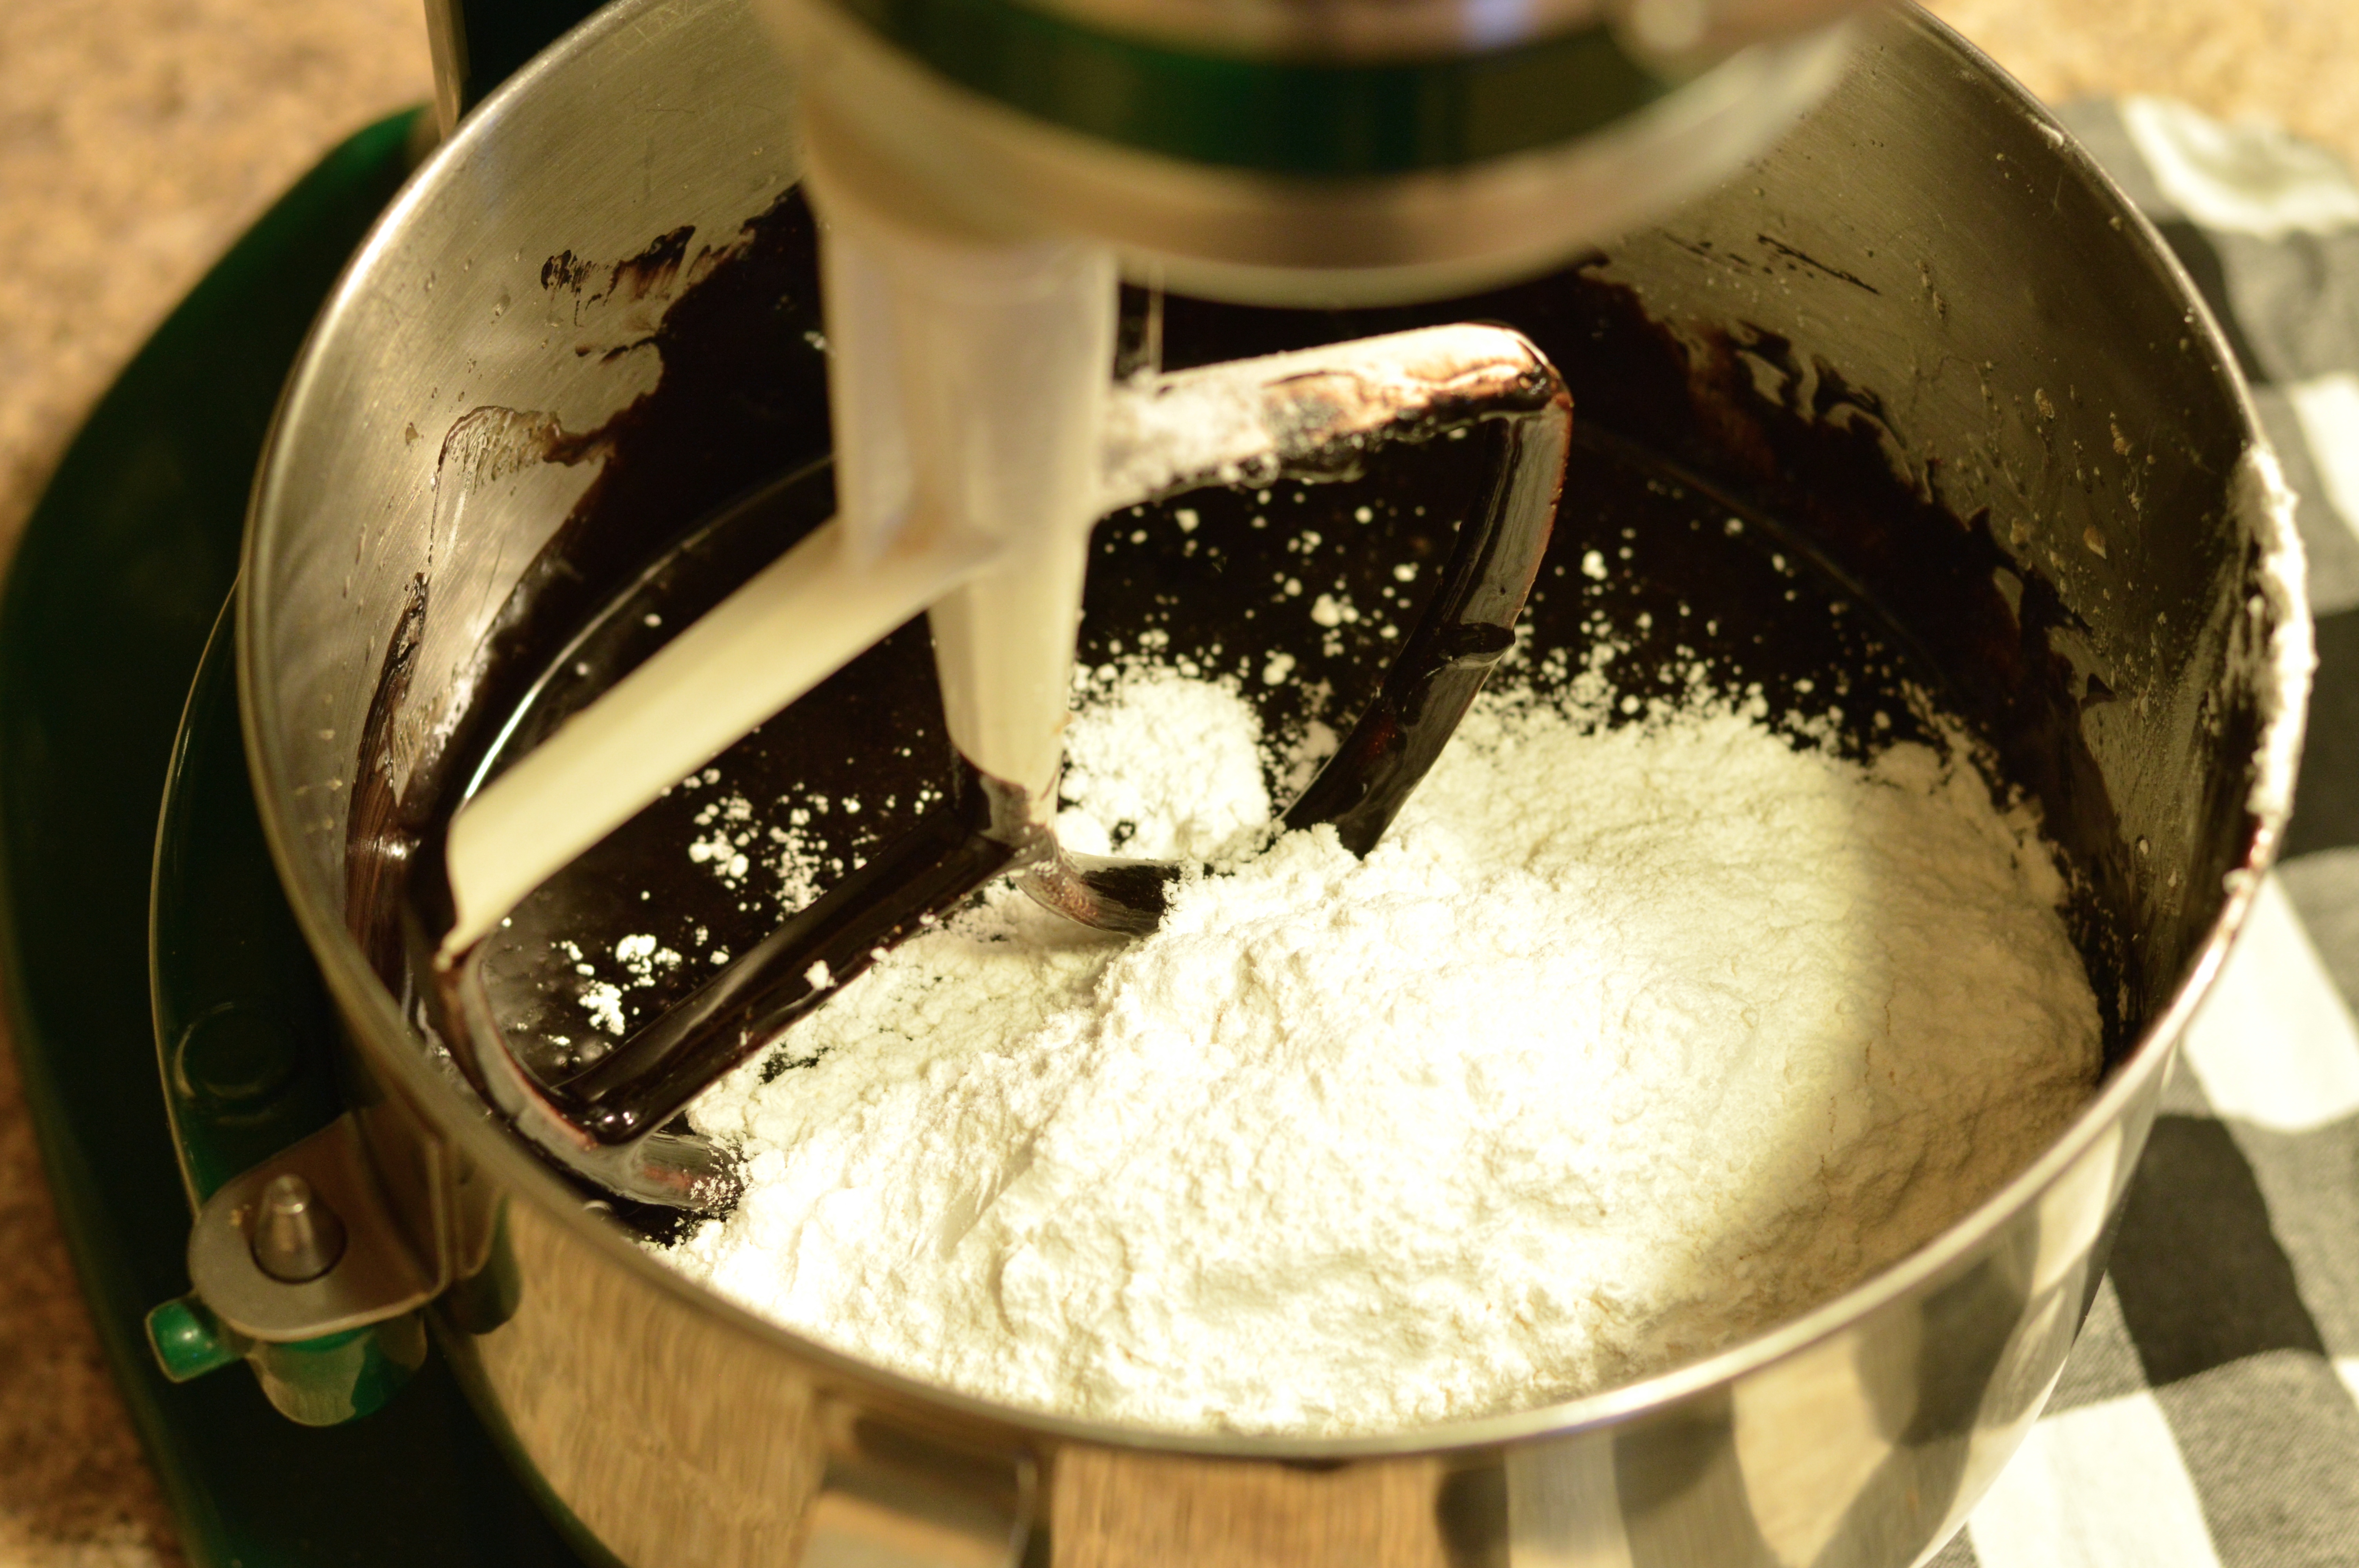
Add eggs, one at a time, beating after each addition. Beat in vanilla and cocoa mixture. Reduce speed to low. Add flour mixture in two batches, alternating with buttermilk and beginning and ending with flour. Beat until just combined.
Divide batter between pans, and bake until a cake tester inserted into centers comes out clean, 40 to 45 minutes. Transfer pans to a wire rack to cool for 15 minutes. Invert cakes onto rack, peel off parchment, and let cool completely.

*if you don’t have (or can’t find) black cocoa, you can just use all dutch-process instead (for a total of 1 1/2 cups cocoa)

Chocolate Pudding Filling

1/2 cup sugar
2 tablespoons cornstarch
1/4 teaspoon salt
2 teaspoons espresso powder
1-1/2 cups whole milk
3 ounces good dark chocolate, chopped
1 teaspoon vanilla extract

In a small heavy saucepan, mix sugar, cornstarch, espresso powder and salt. Whisk in milk. Cook and stir over medium heat until thickened and bubbly. Reduce heat to low; cook and stir 2 minutes longer. Remove from heat and stir in chocolate until melted. Transfer to a bowl; stir in vanilla. Cool slightly, stirring occasionally. Press plastic wrap onto surface of pudding. Refrigerate, covered, at least 2 hours or until cold.

Chocolate Ganache Icing

1 1/2 cup heavy cream
1/4 cup sugar
1/4 teaspoon kosher salt
12 oz good dark chocolate, chopped
2 teaspoons vanilla

Heat cream, sugar, and salt over medium heat until just on the verge of boiling. Place chopped chocolate in a heat proof bowl and pour hot cream over it making sure all chocolate is submerged. Let sit for 2 or 3 minutes, and whisk until completely smooth and incorporated. Add vanilla and whisk well. Cover and cool until thick and spreadable. You can try to speed this up in the refrigerator, but check it frequently and be careful not to let it get too cold or it won’t be spreadable.

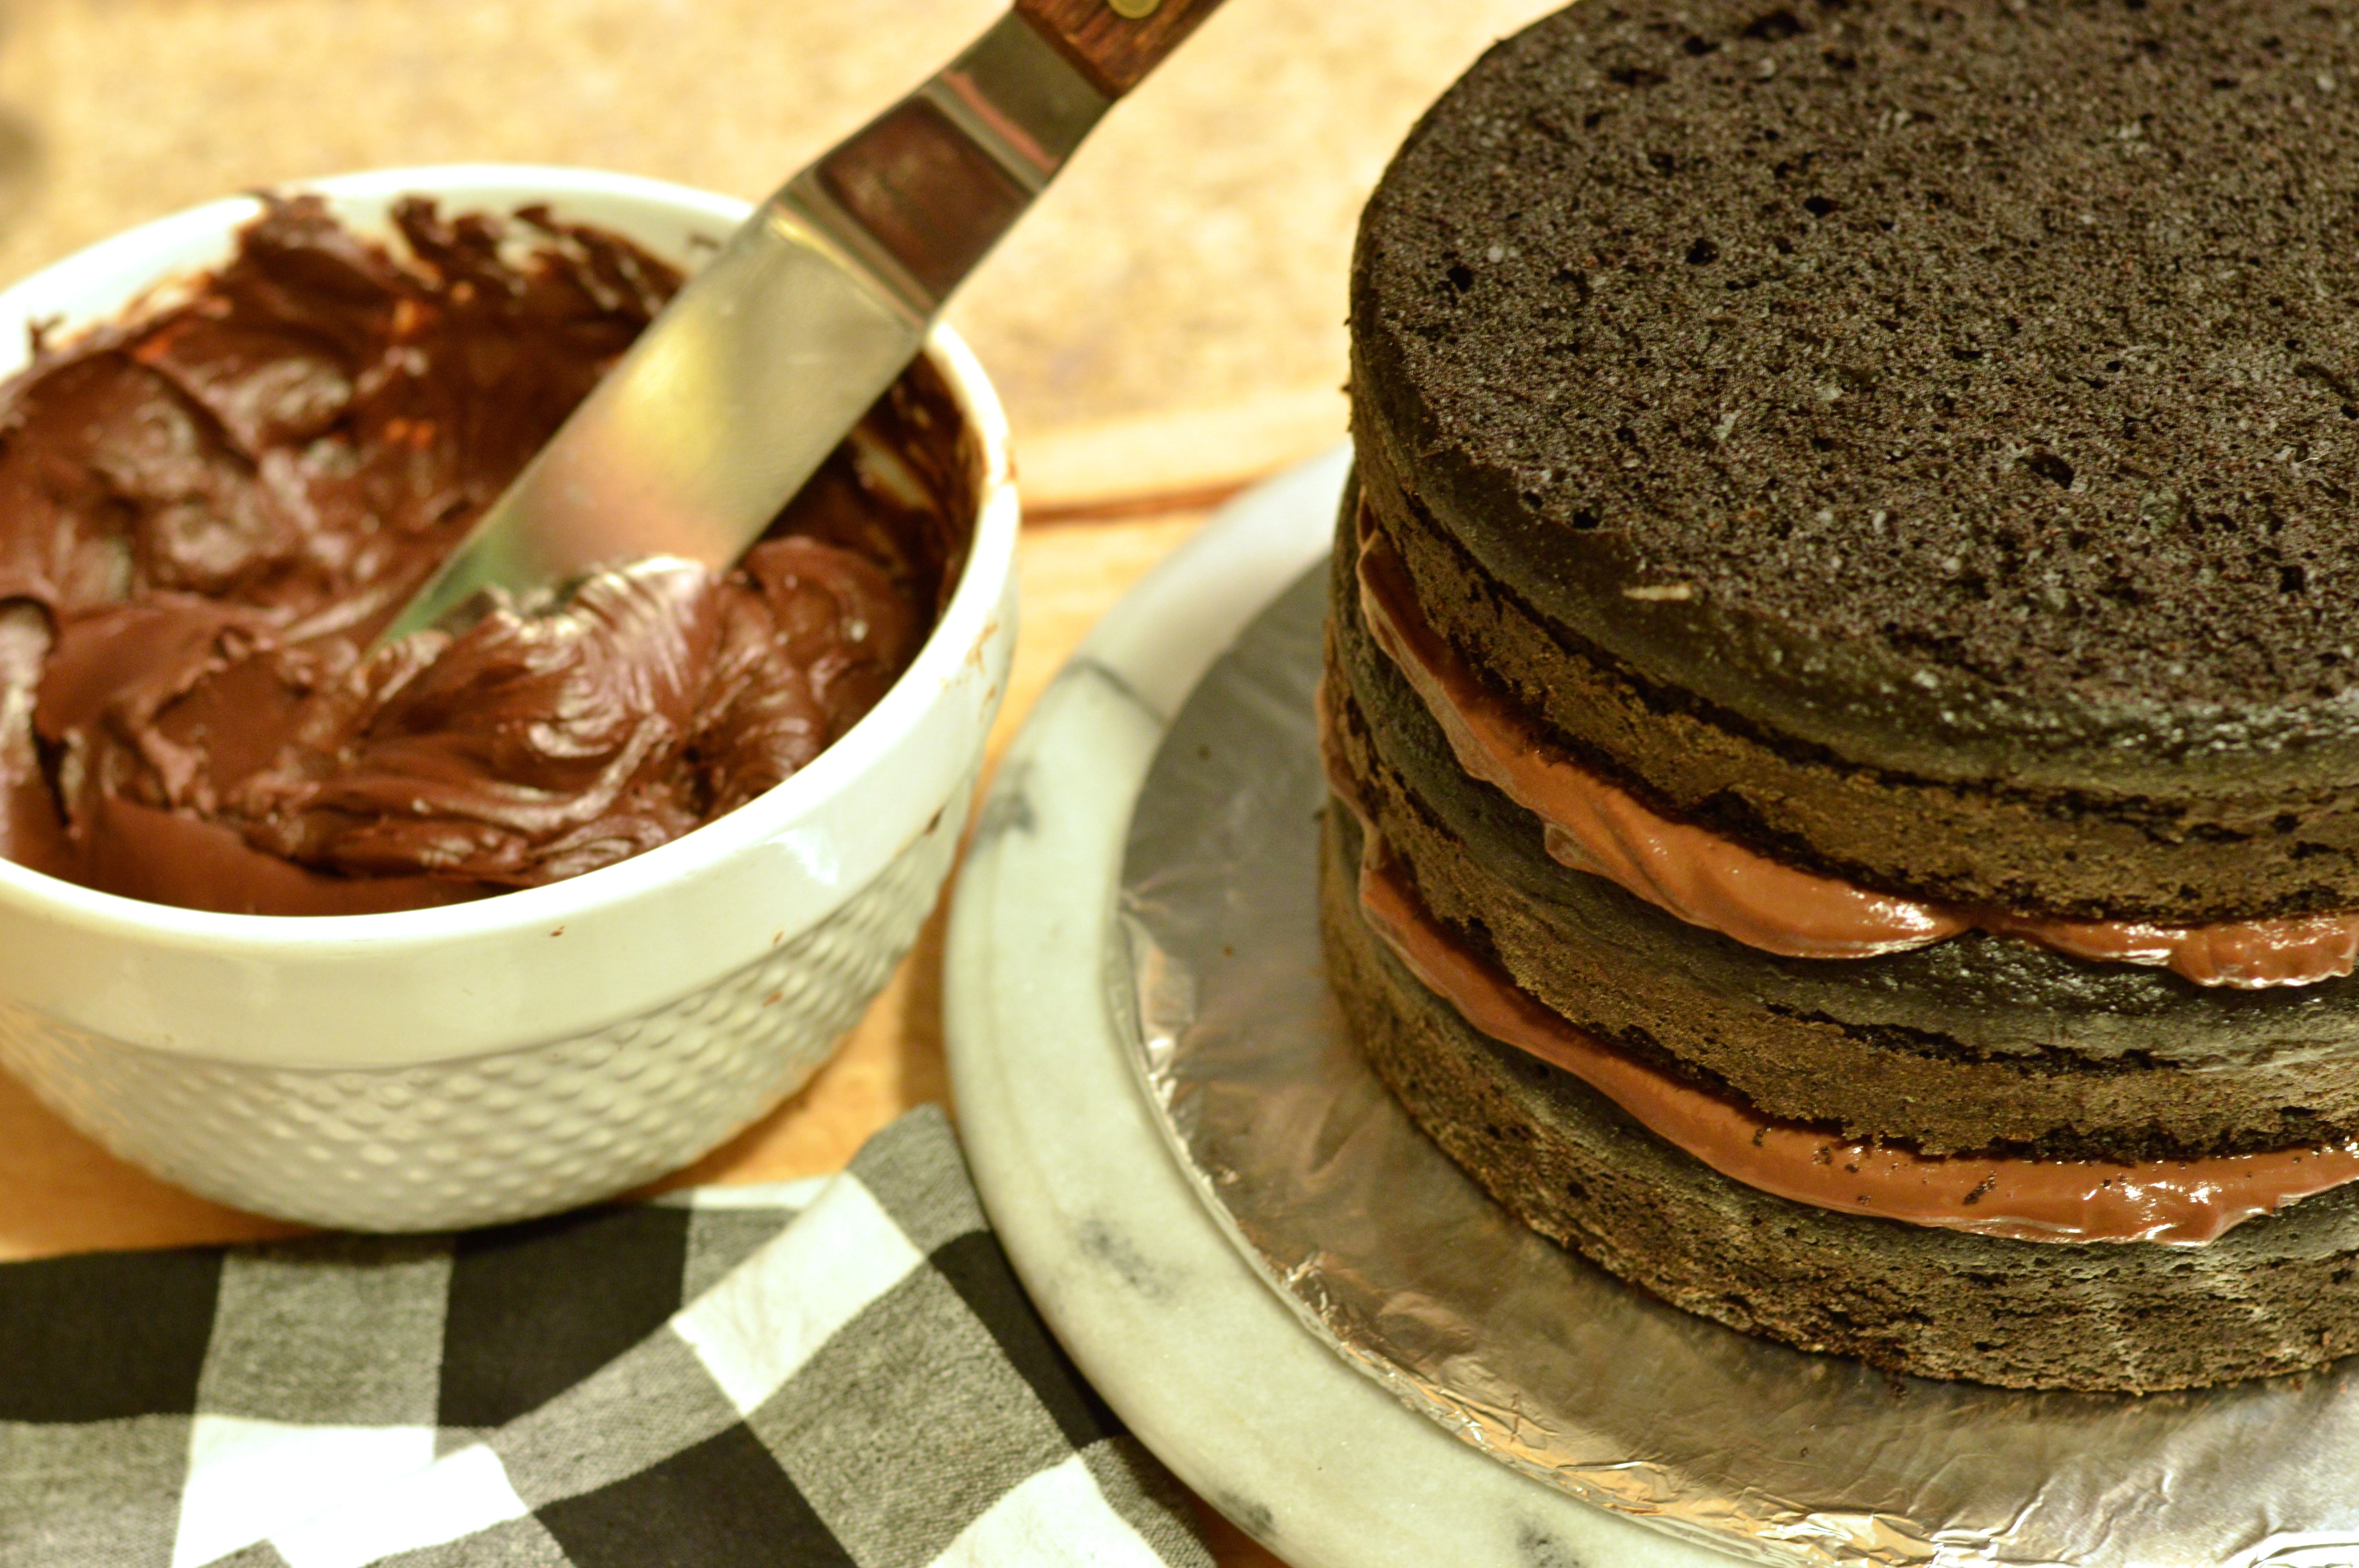
To assemble cake, make sure all layers, filling & icing are cool or cold. Remove the domed tops of the cake layers with a cake leveler or sharp bread knife. With clean hands, crumble up reserved cake domes into fine, relatively even crumbs, and reserve for decorating use. Place one layer on a cake plate, serving plate, or cake board. Evenly spread half of the pudding over the first layer. Top with another layer and remaining pudding. Top with third layer.

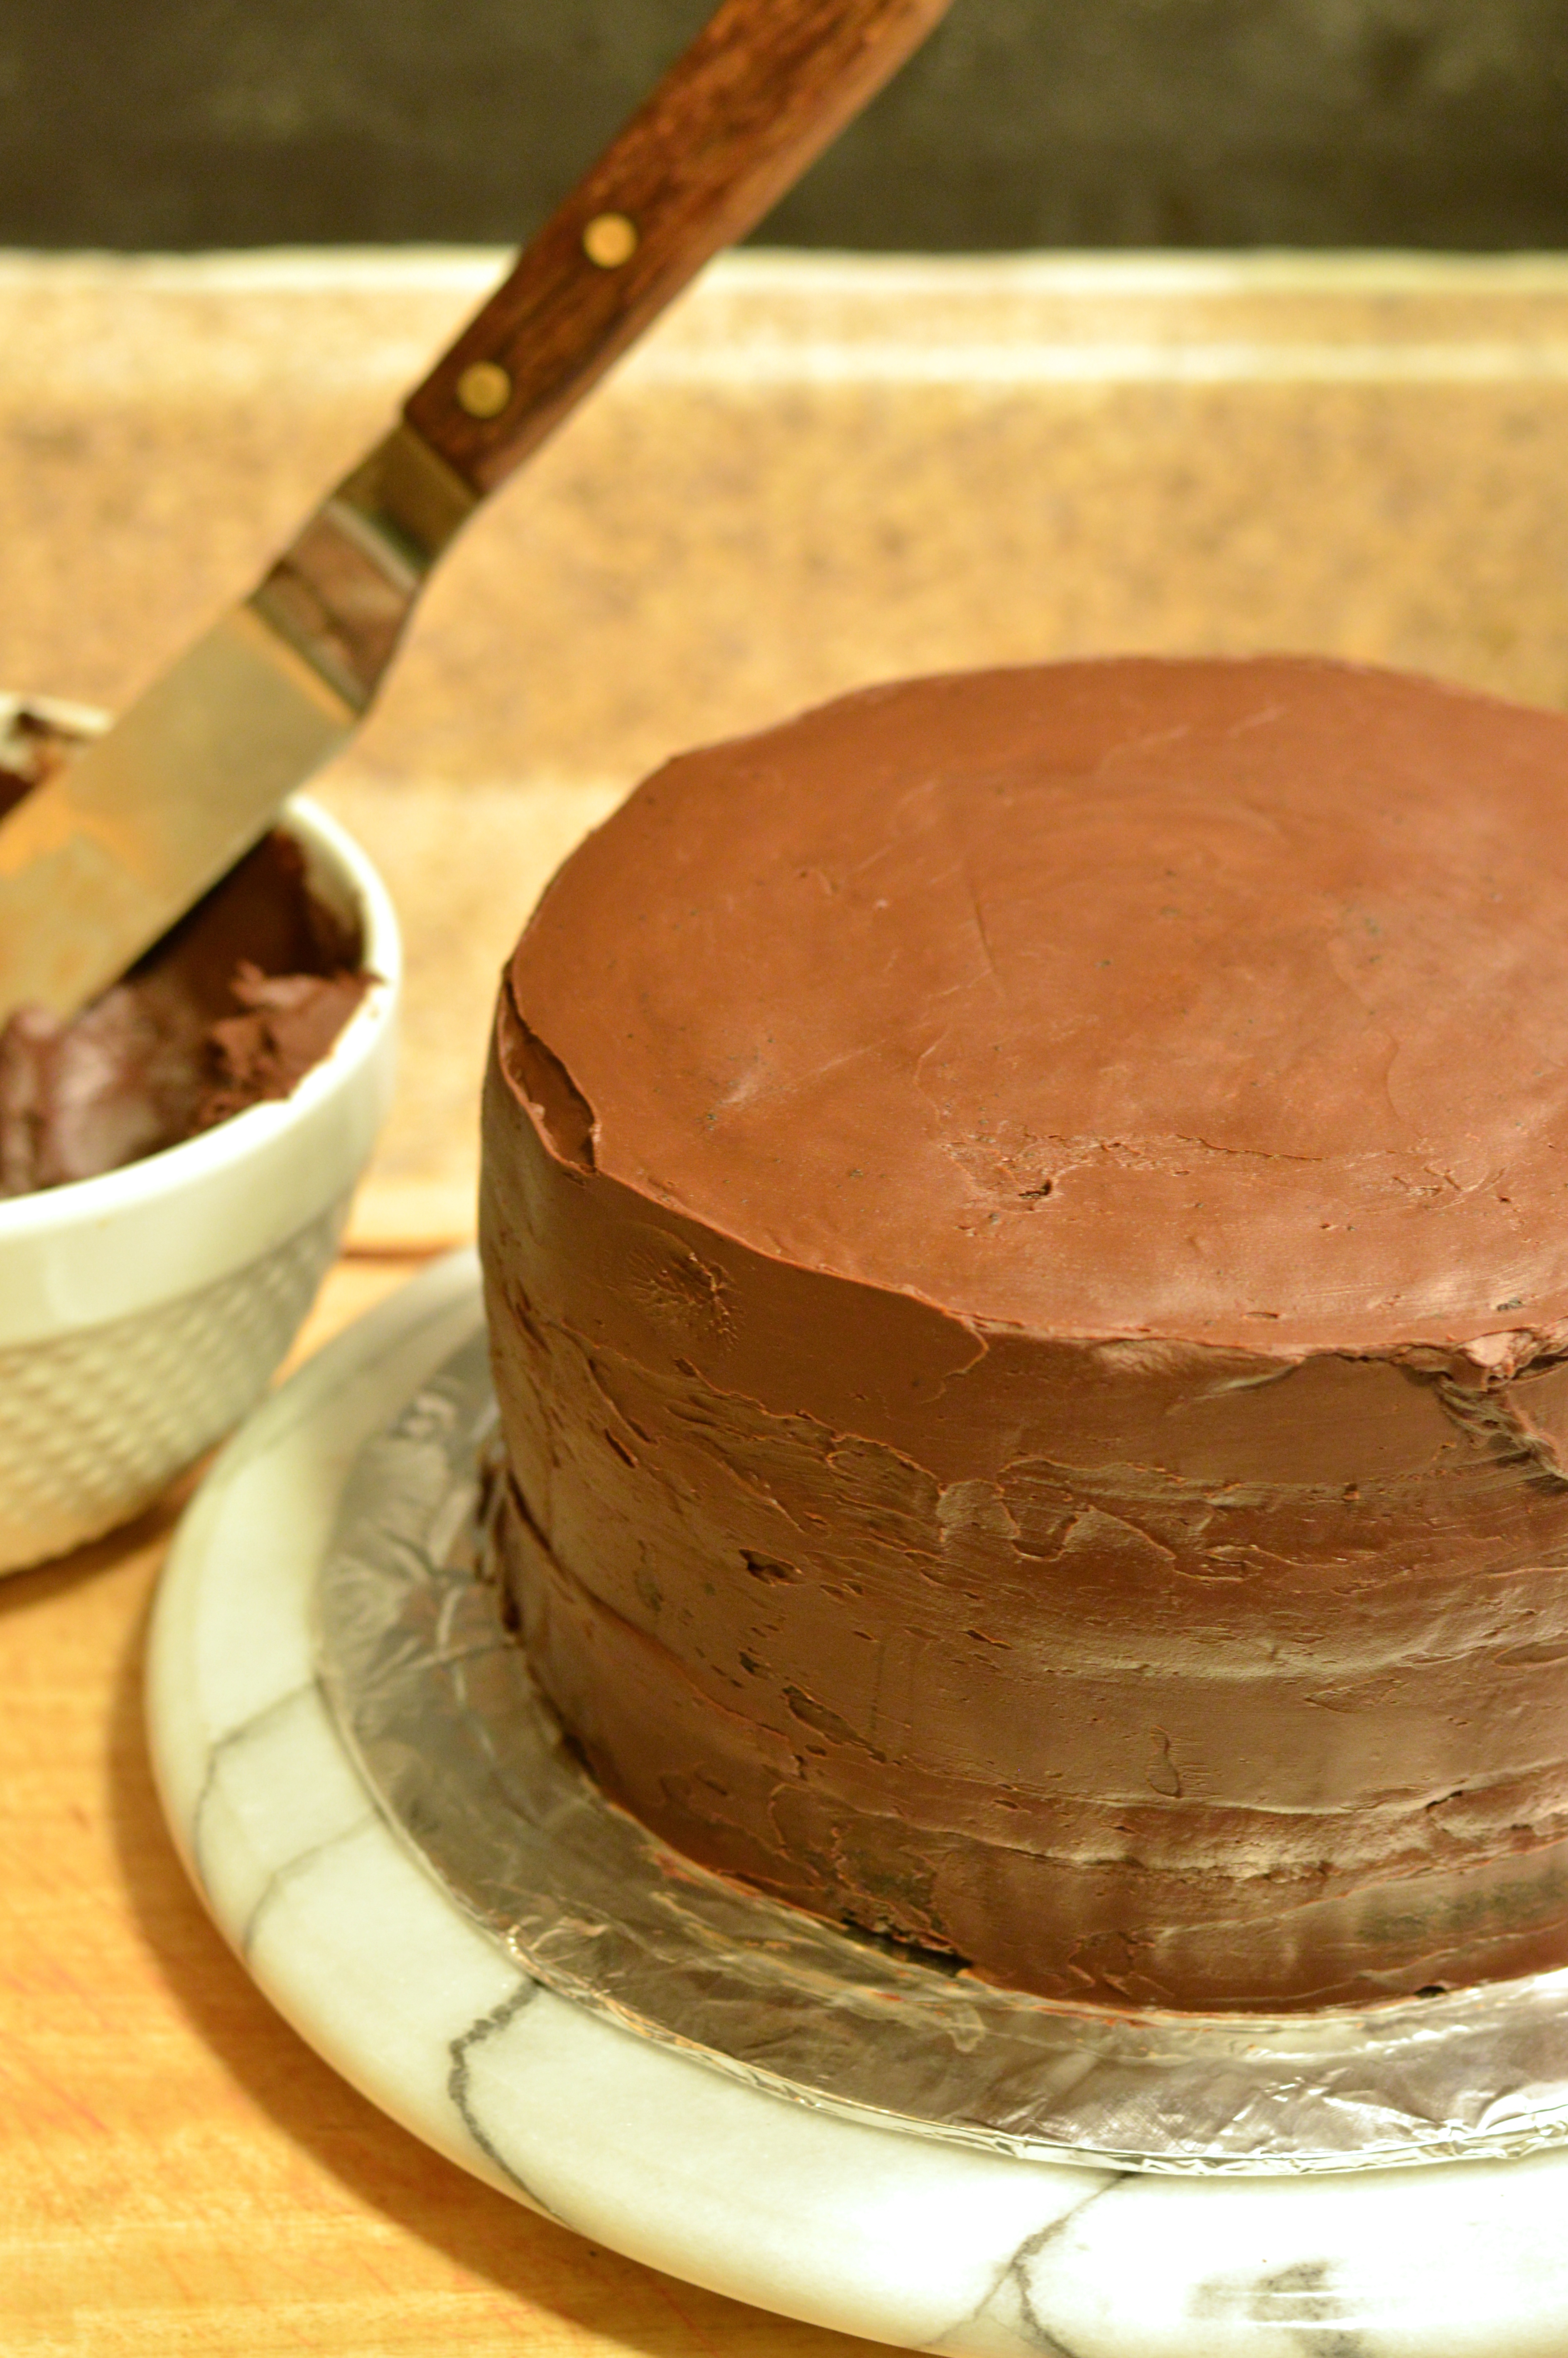
With an icing spatula, spread a thin layer of ganache over top and sides of cake, trying not to squish the pudding out from between the layers. This should take about 1/3 of your ganache. Be sure to fill in any gaps between layers and make the sides and top smooth and flat as possible. This thin layer of icing is referred to as the “crumb coat” and is meant to seal in any crumbs so they’re not seen in your final layer of icing. Refrigerate cake for 15 minutes. Spread most (or all) of remaining ganache evenly over top and sides of cake, trying to get as smooth a surface as possible. If desired, reserve some ganache for piped decoration, otherwise, slather it all on. Press the crumbs against sides of the cake until the sides are well covered. You can decorate the top with a swirl design using a small icing spatula, leave it flat and smooth, pipe a border or design, or cover the top with more crumbs.

This cake is at it’s best the day it’s baked, but can be covered and refrigerated for up to 2 days. If refrigerated, it will need to come up to room temperature before serving.

chocolate peanut butter whoopie pies

Russell had oral surgery a few days ago and immediately developed quite a sweet tooth. Nothing like eating cookies and ice cream after spending hundreds on dental work! He was craving chocolate and peanut butter and asked me to make some buckeyes that I used to make when I worked for a cupcake shop. I thought it might be more fun to put a peanut buttery twist on traditional whoopie pies, and made a batch of chocolate peanut butter whoopie pies to satisfy his craving. Needless to say, they really hit the spot.

chocolate peanut butter whoopie pies | Brooklyn Homemaker

In case you’ve been living under a rock somewhere, a whoopie pie is a sandwich cookie made up of two cake-like cookies with a creamy filling between them. Whoopie pies are very popular in the Northeast and New England and, depending on the region, they sometimes go by the names black moon, gob, bob, or “BFO” for Big Fat Oreo. Although they probably originated in the Northeast, they’ve spread throughout the US in the past few decades and are well-known and well-loved all over the country. Traditionally they’re made of some kind of rich chocolate cake and filled with a creamy white vanilla or marshmallow filling. In recent years new varieties have popped up, including red velvet or pumpkin with cream cheese filling, or chocolate with fillings like peanut butter, mint, or caramel buttercream.

chocolate peanut butter whoopie pies | Brooklyn Homemaker

The history of the whoopie pie is something of a mystery. Many regions lay claim to their origins, but there is not enough evidence to prove any one area as their true birthplace. Handheld filled sandwich cakes were popular in Victorian era Europe, and whoever really invented the whoopie pie mostly likely borrowed the idea from these European treats. Victorian sandwich cakes were usually made of sponge cake filled with jam or cream, and were often cut into small slices or slivers and served with tea. Whatever their origins, America’s whoopie pies are decidedly less refined.

chocolate peanut butter whoopie pies | Brooklyn Homemaker

Many people agree that whoopie pies were invented by the Amish of Pennsylvania dutch country. The popular belief in this area is that these cookies were invented in Amish and Pennsylvania German culture and the recipe was passed down through generations without leaving any official paper trail. The legend has it that an Amish homemaker probably used some leftover cake batter to make cookies for her children, topped them with some buttercream, and liked the results so much that she shared the recipe with the surrounding community. The claim is that Amish mothers would pack the cookies into their children’s lunch bags and, on finding them, the kids would shout “Whoopie!”
Today these cookies are commonly sold in Amish country stores and farm stands throughout Pennsylvania and no trip to this region is complete without indulging on a traditional Amish whoopie pie.

chocolate peanut butter whoopie pies | Brooklyn Homemaker

The Berwick Cake Co. in Boston, Massachusetts also claims to have invented this treat. They claim to have started selling whoopie pies in the 1920s or 30, but the oldest printed reference to Berwick making whoopie pies is a newspaper ad from 1950.  Although the bakery closed years ago, the brick building still has the words “Whoopee! Pies” painted on its side. Whether Berwick invented them or not, many people believe they have commercial, rather than Amish, origins. These people believe that a production bakery probably used up some leftover cake batter and came up with a handheld cake by baking the batter on a pan like a cookie.

chocolate peanut butter whoopie pies | Brooklyn Homemaker

The state of Maine also lays a claim to the origins of the whoopie pie. Labadie’s bakery in Lewiston, Maine claims to have been making the confectionery since 1925, but many others think that the idea probably made its way to Maine from another state. Some people believe that the cookie traveled with some Amish groups that left Pennsylvania and moved to Maine. Others say that the whoopie pie came to Maine in the 1930s when a cook book featuring a recipe for a whoopie pie with marshmallow cream filling was published and distributed in New England by the Durkee Mower Company, the manufacturer of Marshmallow Fluff.
Whether whoopie pies were invented in Maine or not, the people of Maine take this cookie very seriously.  In 2011, the Maine State Legislature entertained the idea of naming the whoopie pie the official state dessert, but ultimately decided to name it the “Official State Treat”, choosing wild Maine blueberry pie as the state dessert instead.

chocolate peanut butter whoopie pies | Brooklyn Homemaker

The size of whoopie pies varies greatly depending on the region as well. Especially in Pennsylvania, some whoopie pies are huge sandwich sized confections that can feed two or more people. Other areas produce individual sized cookies, and recently some areas have started making bite sized mini whoopie pies.
The whoopie pies I made aren’t the huge Pennsylvania style, but they’re not the bite-sized variety either. I used a #24 portion scoop, about 3 tablespoons, and my pies ended up being about the serving size of a cupcake. This recipe made 12 finished sandwich cookies for me, but depending on the size you make them, your yield may be much different from mine. If you do decide you want to make your cookies a different size, you may need to adjust your cooking time by a few minutes.

chocolate peanut butter whoopie pies | Brooklyn Homemaker

This recipe produces a deep dark & chocolatey cookie. The addition of a healthy dose of coffee adds even more depth to the dark chocolate notes, and the combination of brown sugar, oil and buttermilk give it a wonderful chewy, moist and pillowy soft texture. Even without the filling, this cookie is phenomenal, and I “accidentally” baked an odd number of cookies and was forced, against my will I might add, to eat one on its own.
The real star here though is the peanut butter buttercream. It’s ultra smooth and creamy, just a little bit salty, a little more sweet, and crazy peanut buttery. It might be a bit too soft and loose to serve on super hot summer days, but this time of year it’s perfect. Briefly refrigerating the finished whoopie pies will help set the filling so it doesn’t smoosh out the sides when you bite down. The combination of these rich chocolate cakes with the sweet smooth creamy peanut buttery goodness of this filling is better than you can even imagine. Are you drooling yet? I  am.

chocolate peanut butter whoopie pies | Brooklyn Homemaker

Chocolate Peanut Butter Whoopie Pies

  • Servings: approximately 12 cookies
  • Print
Adapted from Baked Explorations

3½ cups all-purpose flour
¼ teaspoon salt
1¼ teaspoons baking powder
1¼ teaspoons baking soda
¾ cup dark unsweetened cocoa powder
2 teaspoons instant espresso powder
1/2 cup hot coffee
2 cups firmly packed light brown sugar
3/4 cups peanut or canola oil
1 large egg, room temperature
1 teaspoon pure vanilla extract
1/2 cup buttermilk, room temperature, shaken

Preheat oven to 350° F.  Line 2 baking sheets with parchment paper.
In a large bowl, whisk together the flour, salt, baking powder, and baking soda, and set aside.
In another large bowl, whisk together the cocoa and espresso powder. Add the hot coffee and 1/2 cup hot water and whisk until both powders are completely dissolved.
In a medium bowl, stir the brown sugar and oil together. Add this to the cocoa mixture and whisk until combined. Add the egg, vanilla and buttermilk and whisk until smooth. Using a rubber spatula to gently fold the dry ingredients into the wet ingredients. Make sure to scrape down the sides and the bottom of the bowl as you fold.
Use a portion scoop with to drop heaping tablespoons of the dough onto the prepared baking sheets about 1-inch apart. Bake for 10 to 15 minutes, until the cookies are just starting to crack on top and a toothpick inserted into the center of a cookie comes out clean. Let the cookies cool completely on the pans while you make the filling (recipe below).
Turn half of the cookies so the flat side faces up, and distribute the filling evenly between the overturned cookies using a portion scoop, piping bag, or icing spatula. Top the buttercream with another cookie and press down gently so the filling spreads to the edges of the cookies. Refrigerate for at least 30 minutes to set the filling, and let the cookies come back to room temperature for 30 minutes before serving. Whoopie pies will keep for up to 3 days in the fridge, on a parchment-lined baking sheet covered with plastic wrap.

Peanut Butter Buttercream

1 cup creamy peanut butter
12 tablespoons (1 1/2 sticks) unsalted butter, softened
1 1/4 cups confectioners’ sugar

With the paddle attachment of a stand mixer, cream the softened butter and peanut on high-speed until completely blended and smooth. Add sugar and, on low-speed, mix until combined. Turn up to high and beat until fluffy.