Like sands through the hourglass, so are the days of our lives.

Forgive me.
My mother watched a lot of soaps when I was growing up.
What I’m trying to say is, time is marching on and I’m officially older now than I was when I wrote my last post.
About two weeks ago I celebrated my birthday.
Those of you who’ve been reading along with me for a bit probably know that I look at my birthday as an excuse to make a big ass fancy layer cake.
I’ve heard it all before about how I’m not “supposed to” bake my own birthday cake, but the fact of the matter is that I enjoy baking a good cake almost as much as I enjoy eating one. A grocery store birthday cake pales in comparison to what I can bake myself, and I’d rather bake my own cake than shell out good money for something I’m not going to love.
I bake so many bundt cakes around here that I also relish the opportunity to go all out with sky high layers of cake stacked up with fillings and icings and glazes and decorations and candles, so that kind of seals the deal for me. I bake my own birthday cake, and I like it. So there.
You’ll also know, if you’ve been reading along with me for a while, that I have a tendency to get inside my own head and overthink things. Like seriously overthink things.
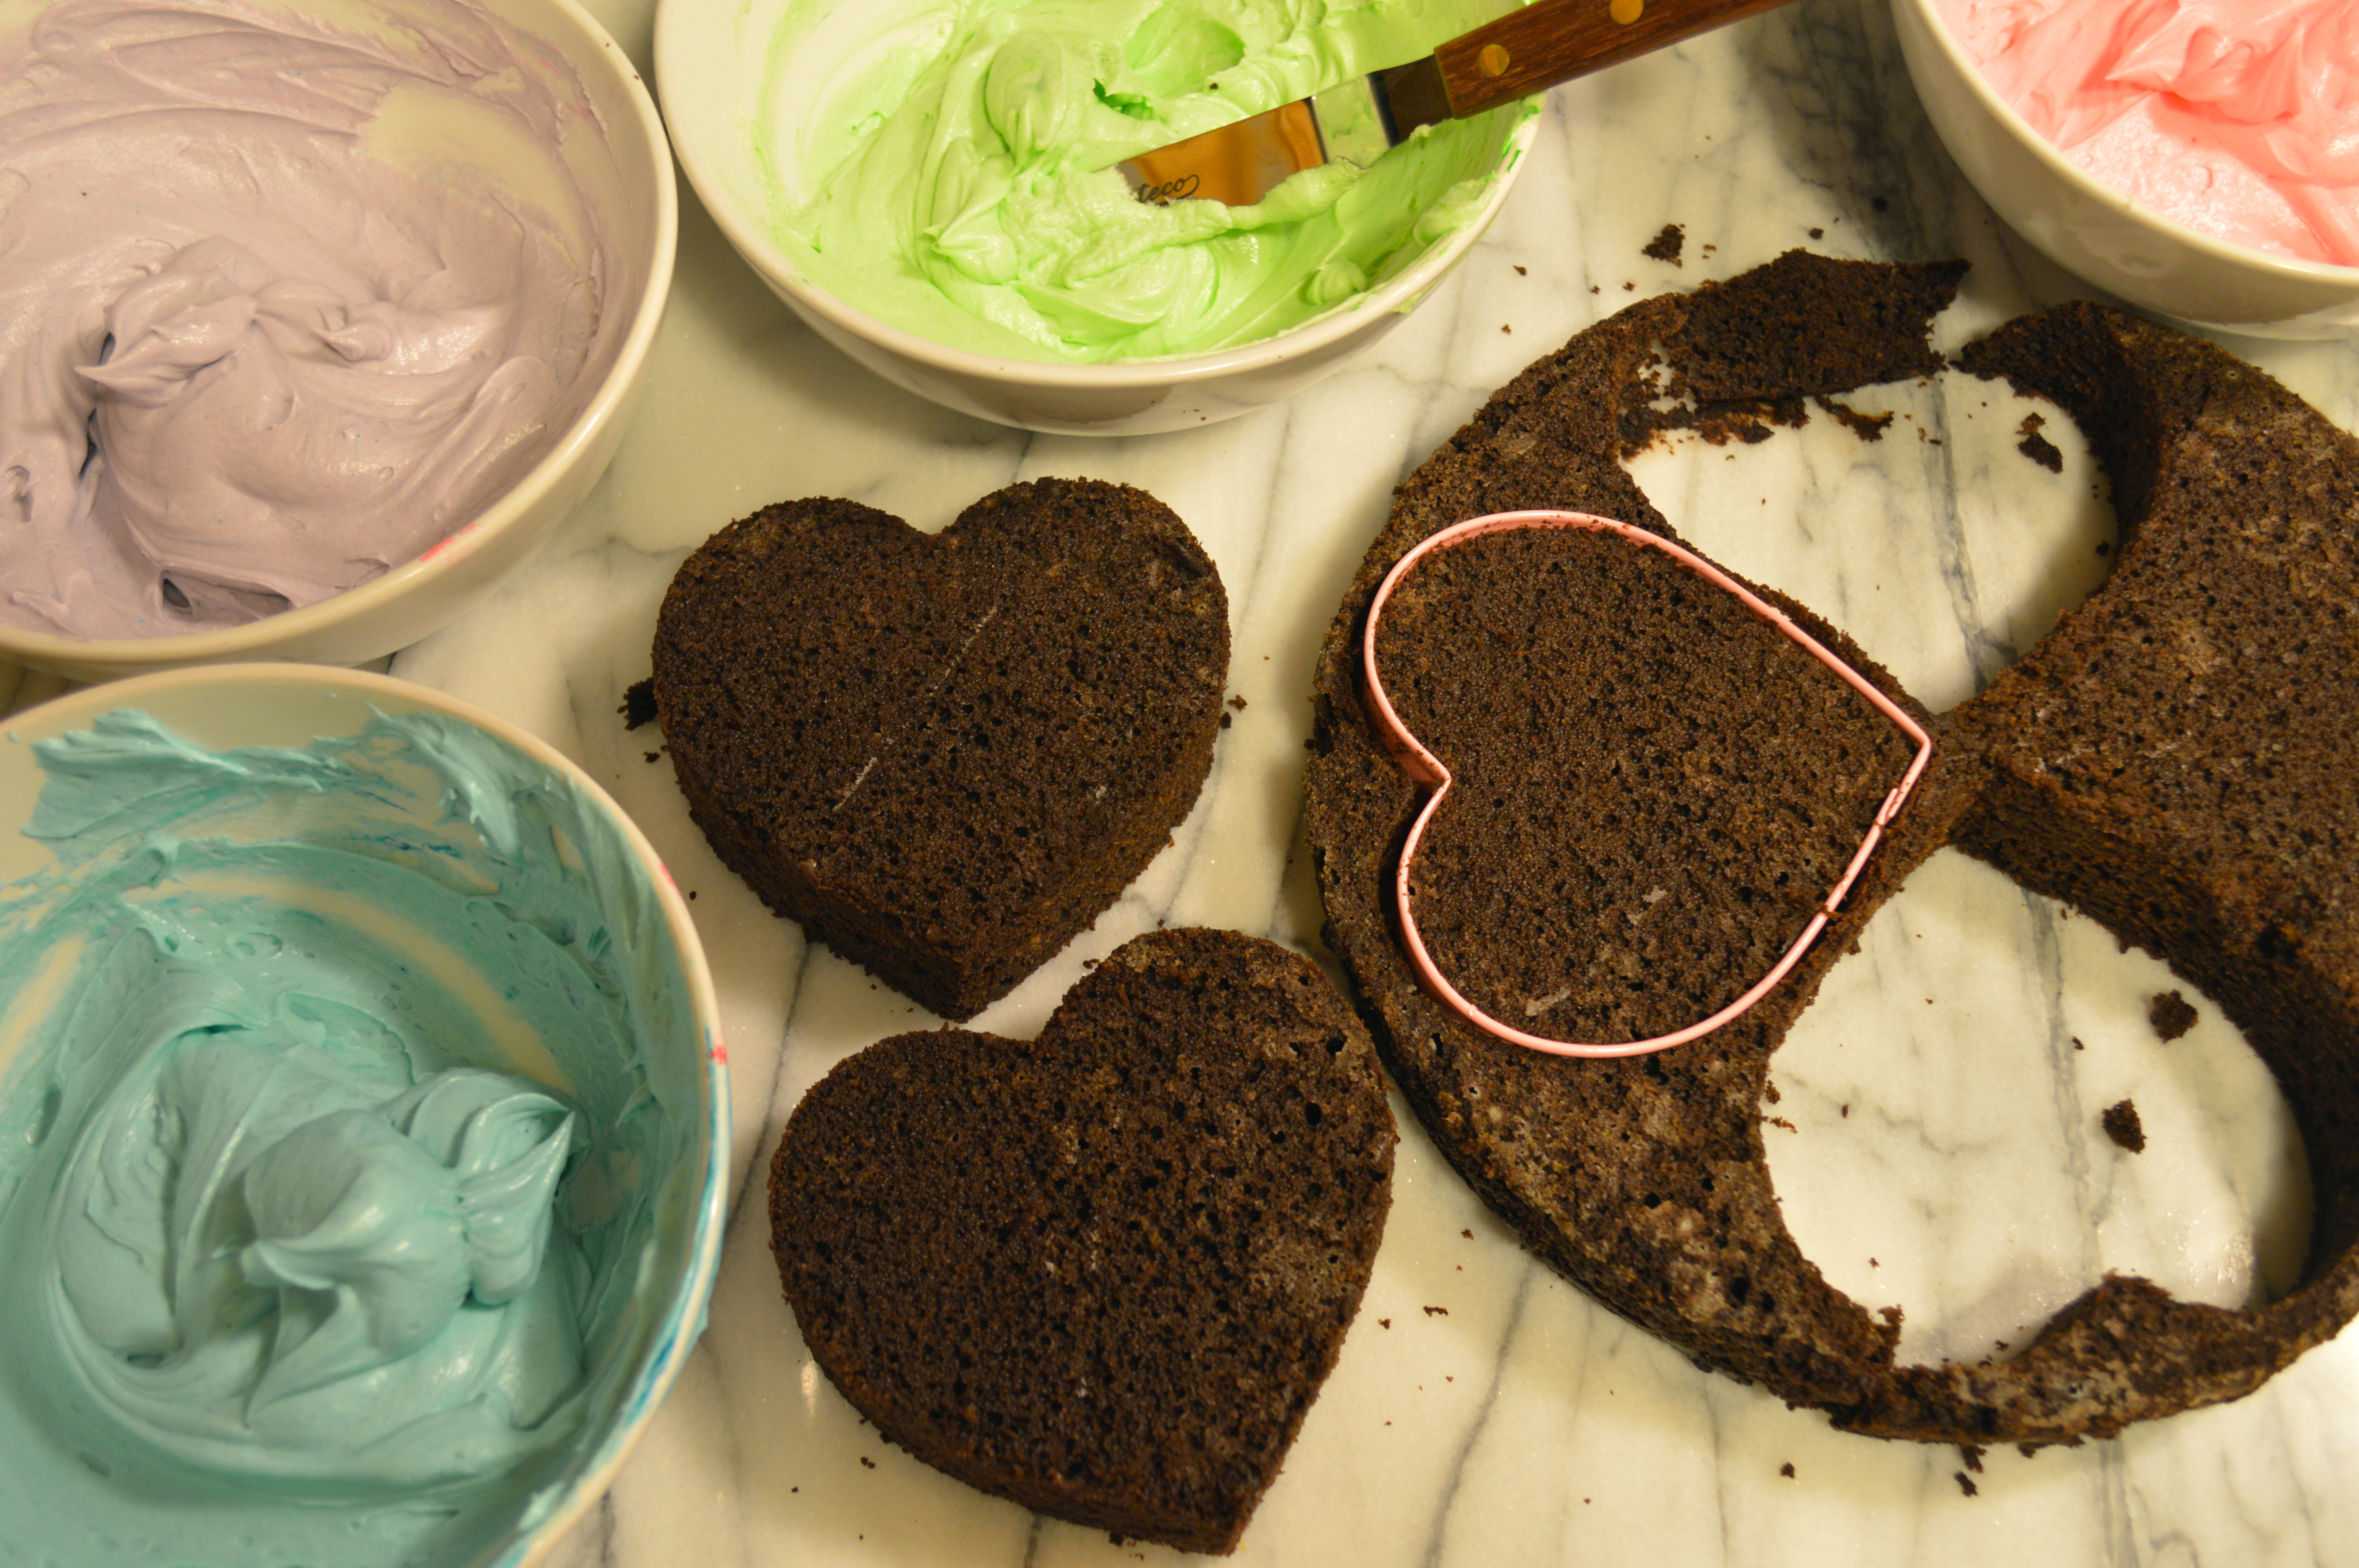
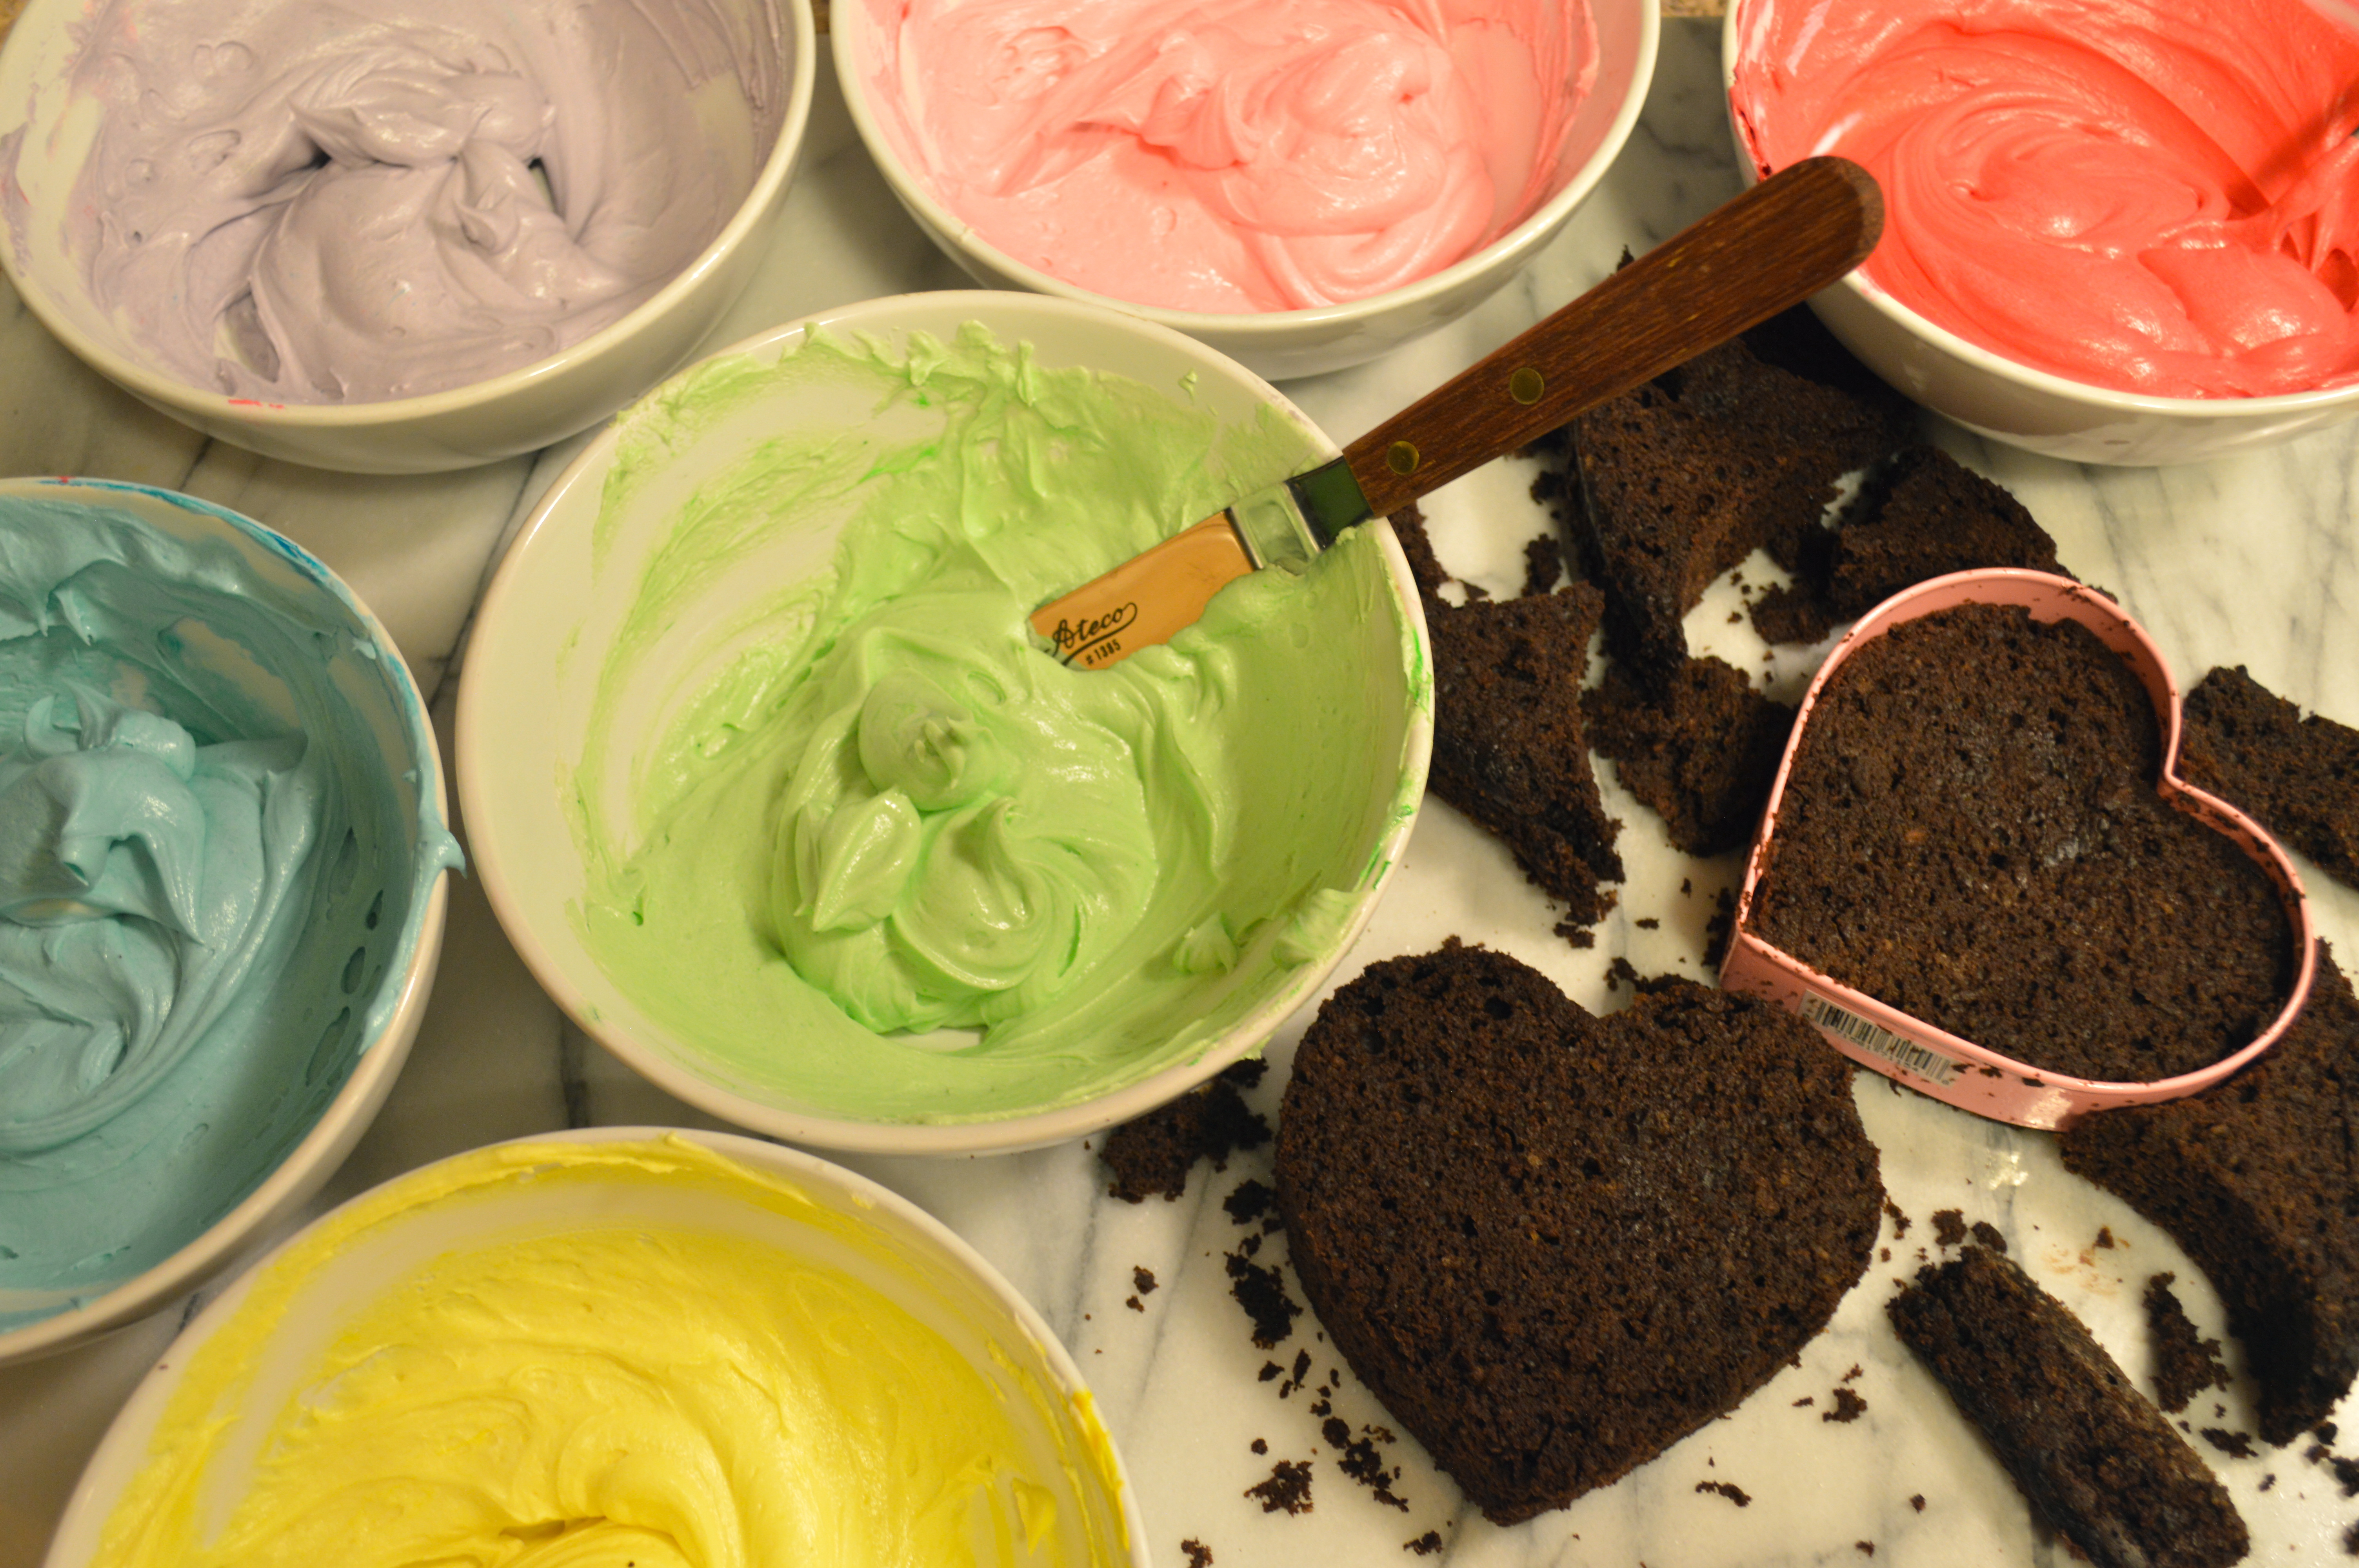
To that end, I’ll be the first to confess that I’ve been planning this cake for at least 6 months. Initially I was thinking about posting this cake, or at least a version of it, around Christmas. When that didn’t work out I thought I’d make it for Russell’s birthday in January. That didn’t end up happening either, so I’ve been sitting on the idea ever since.
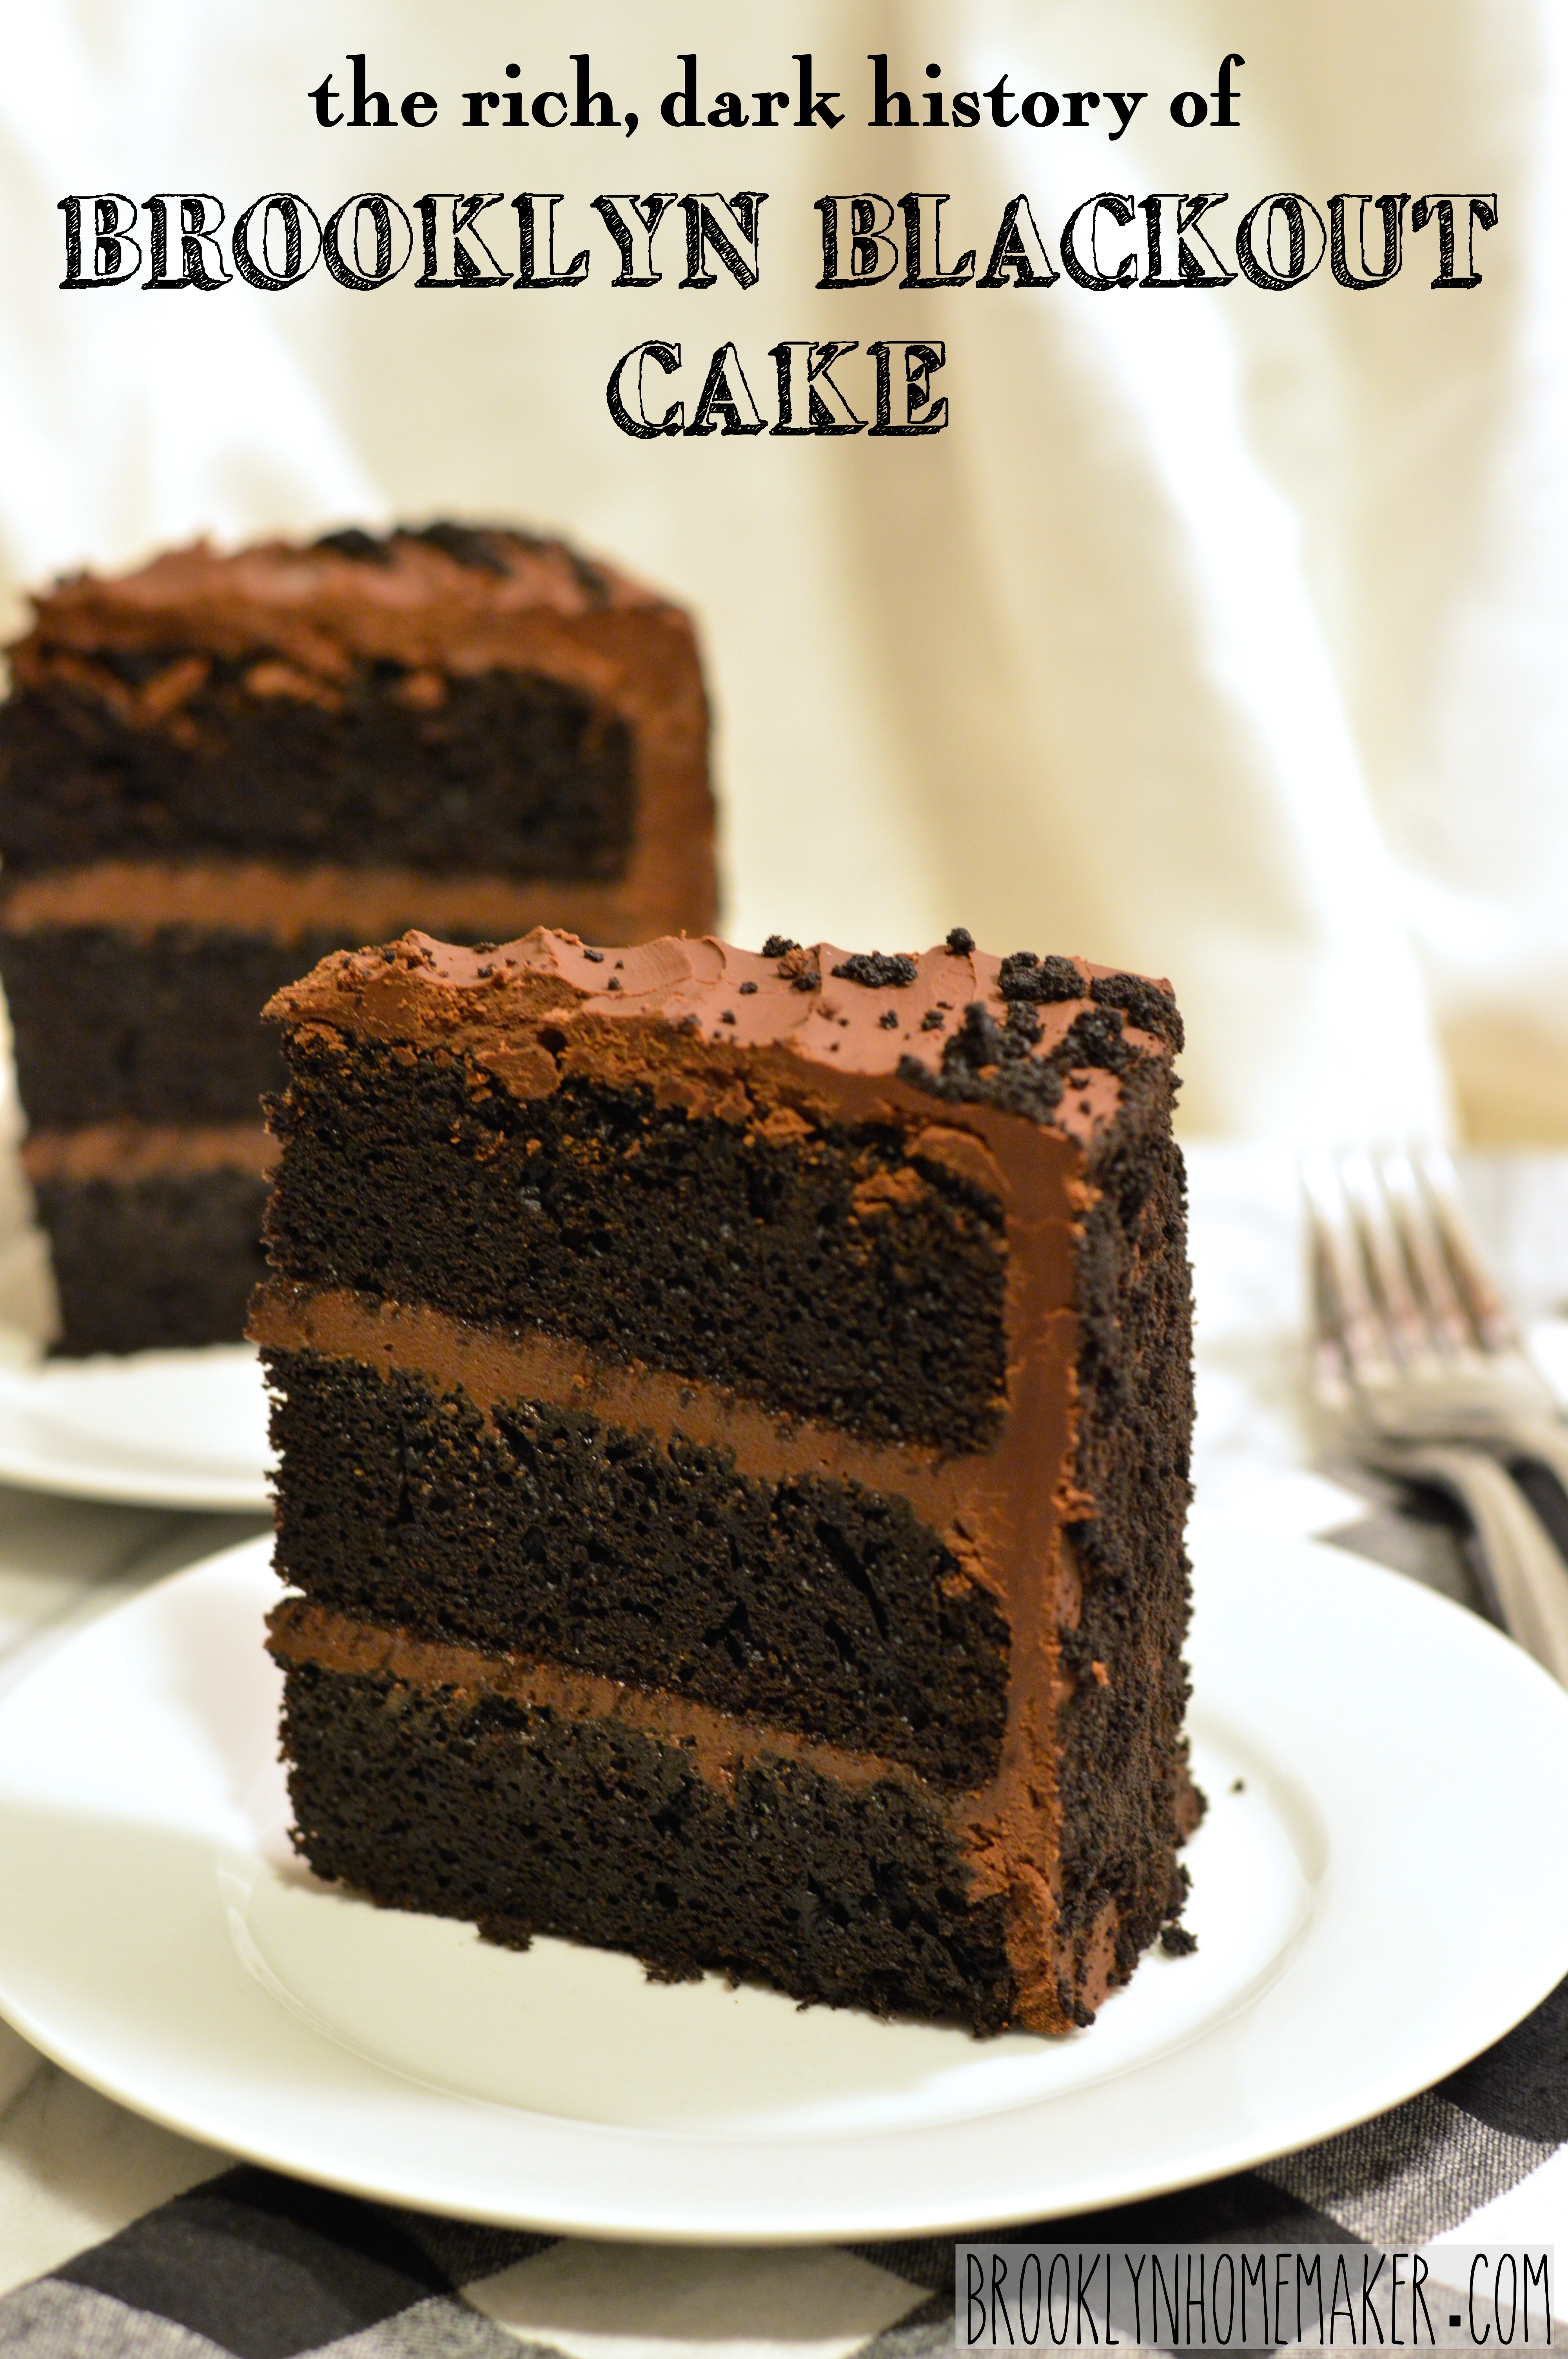
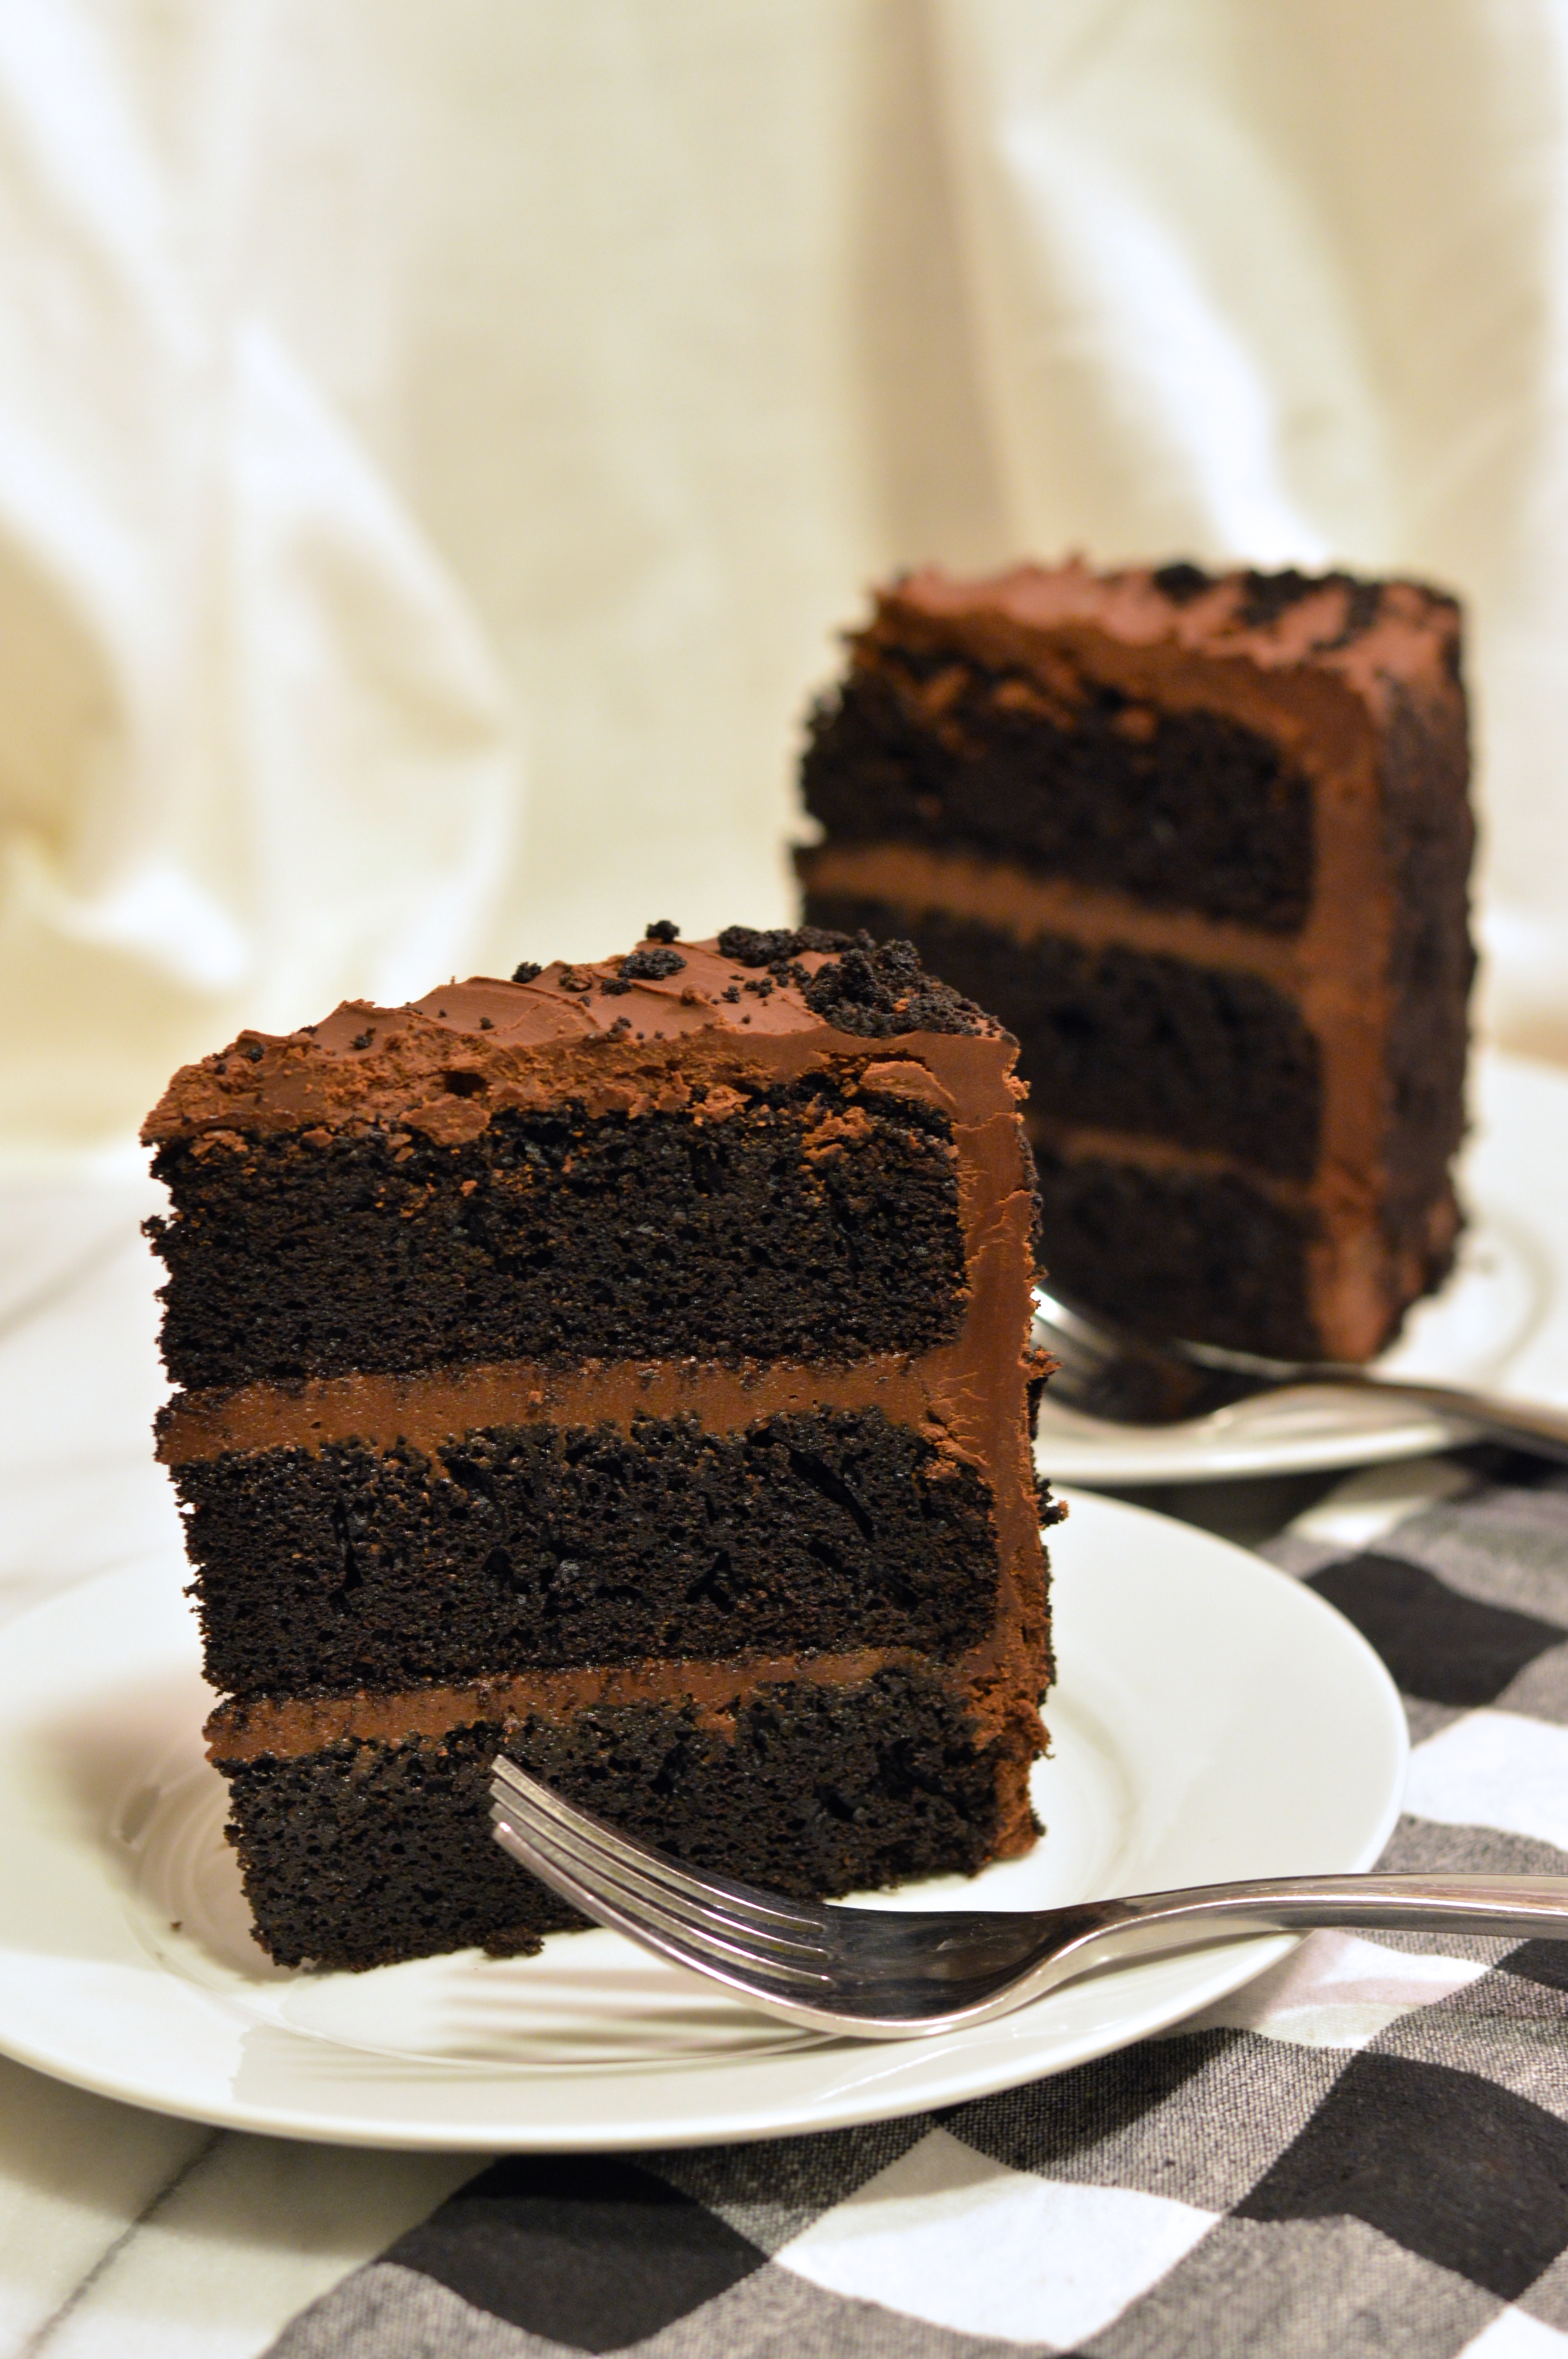
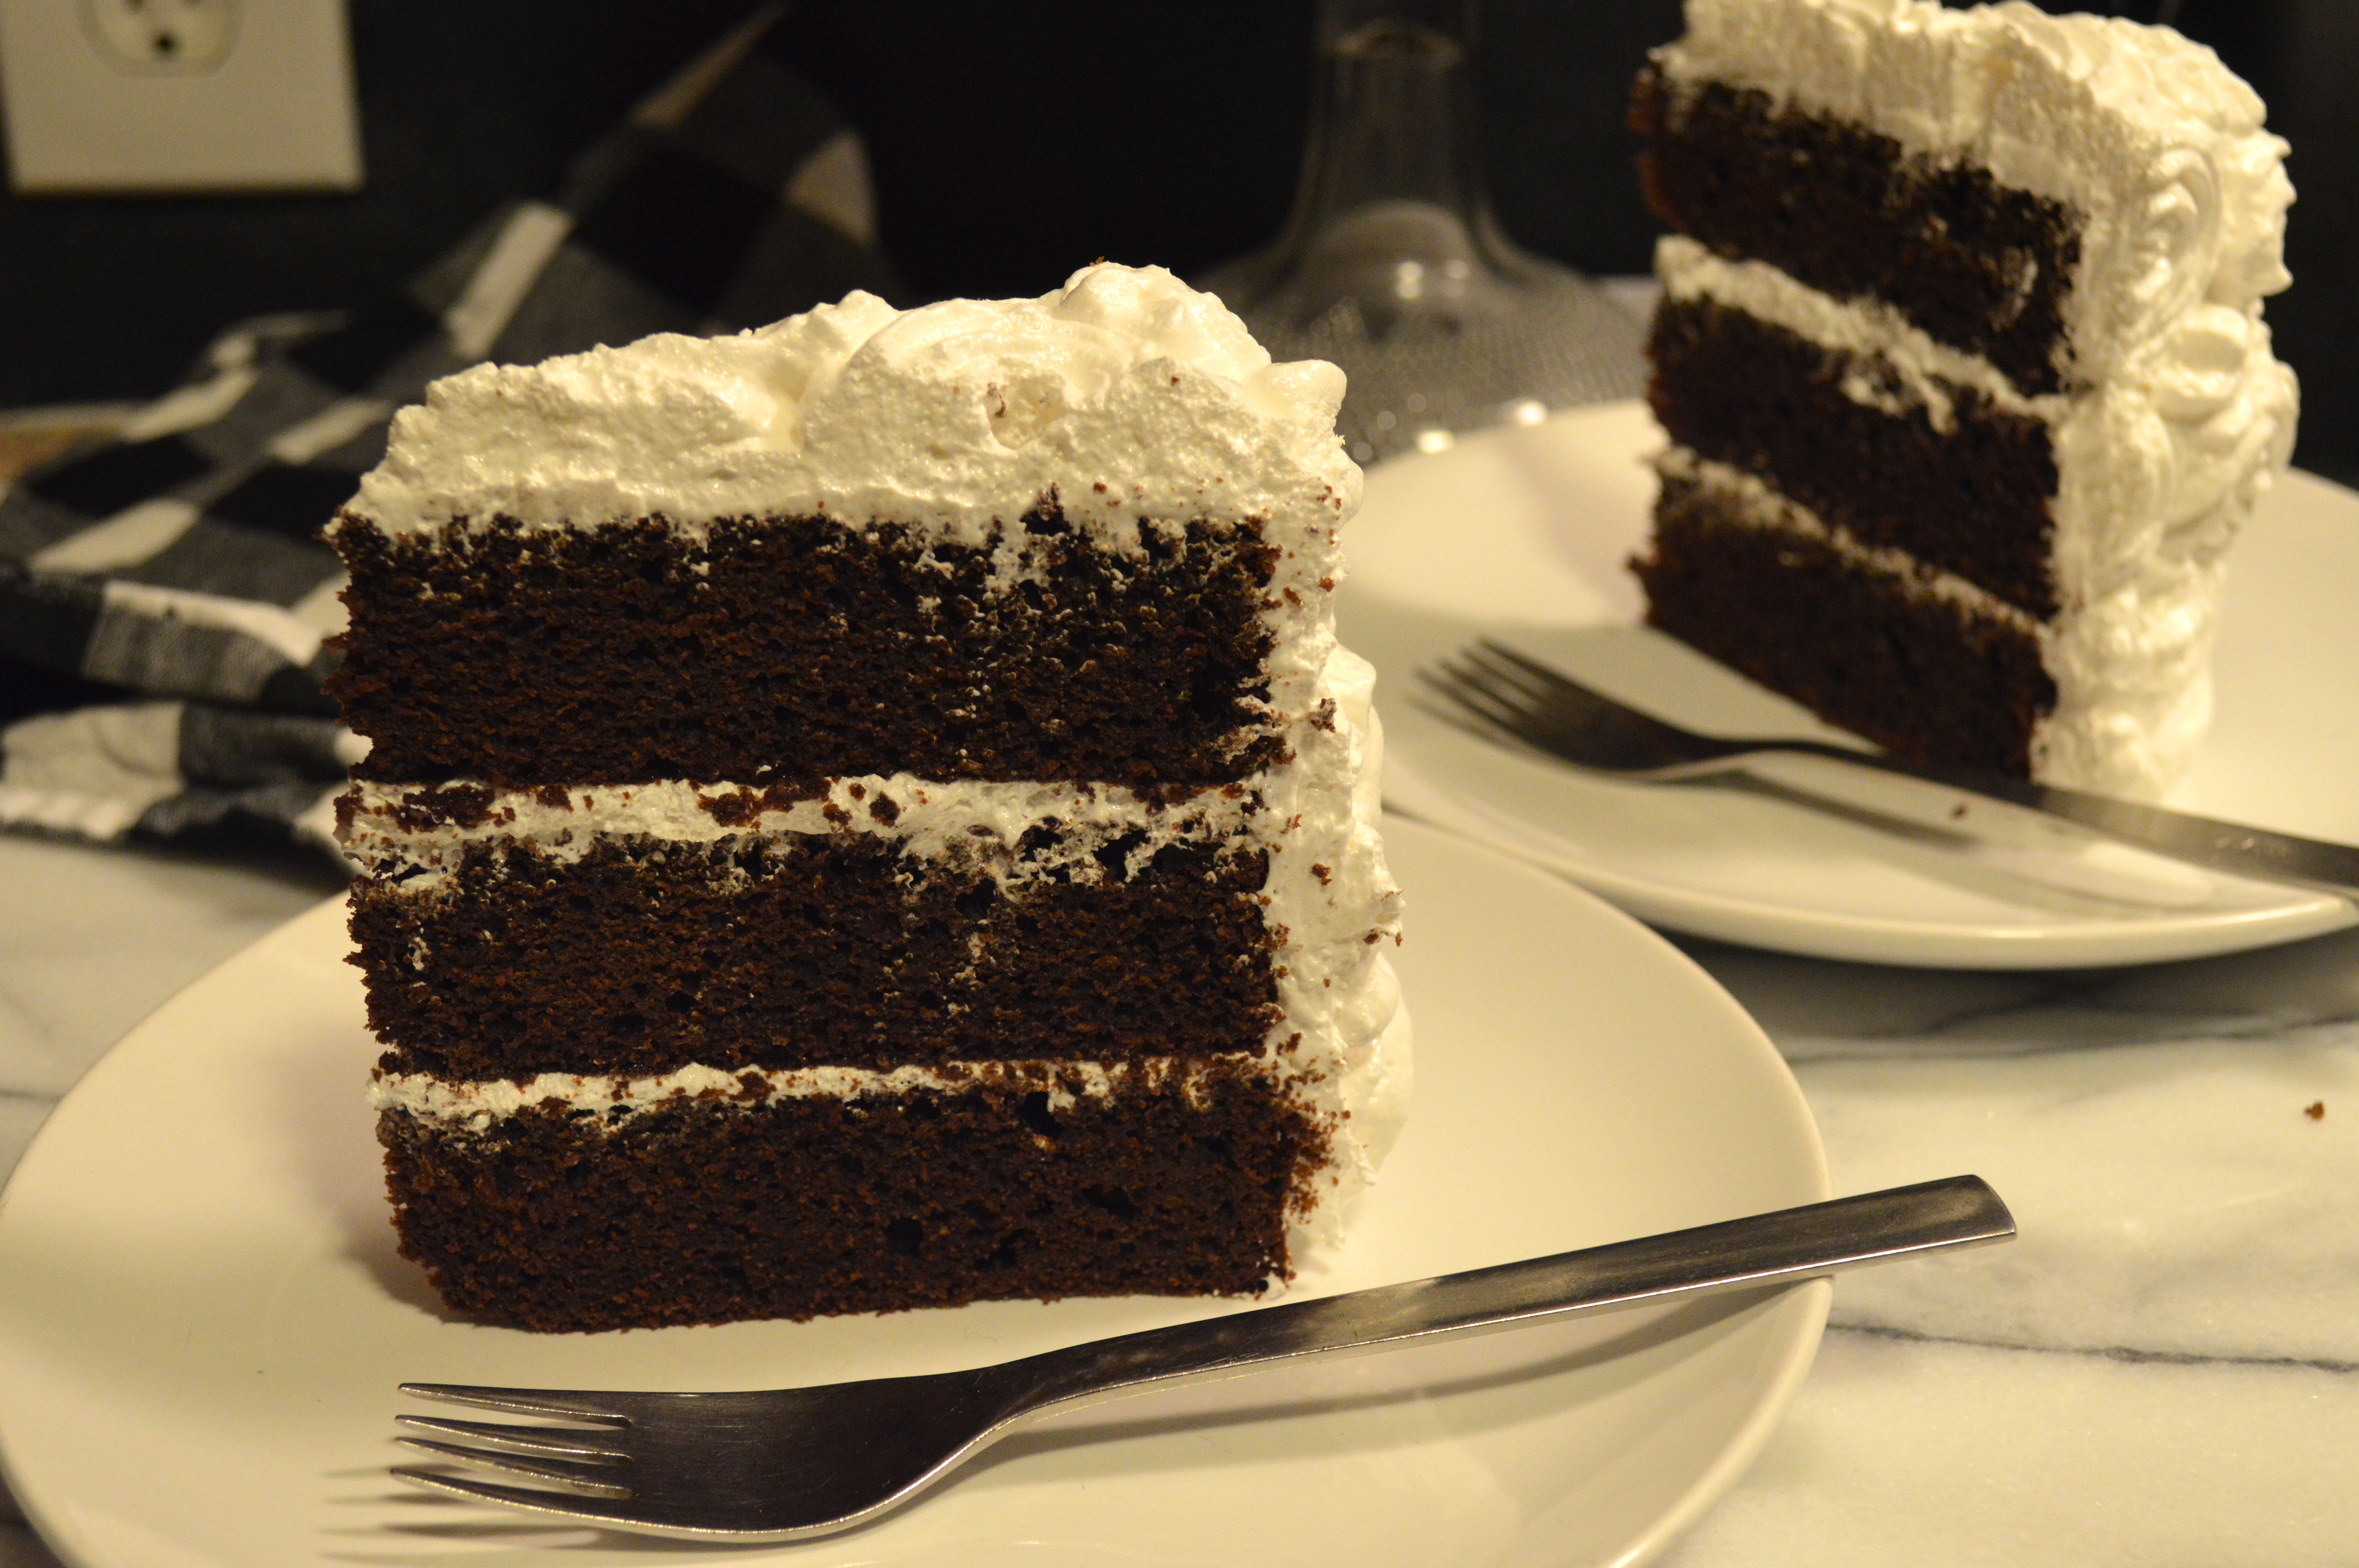
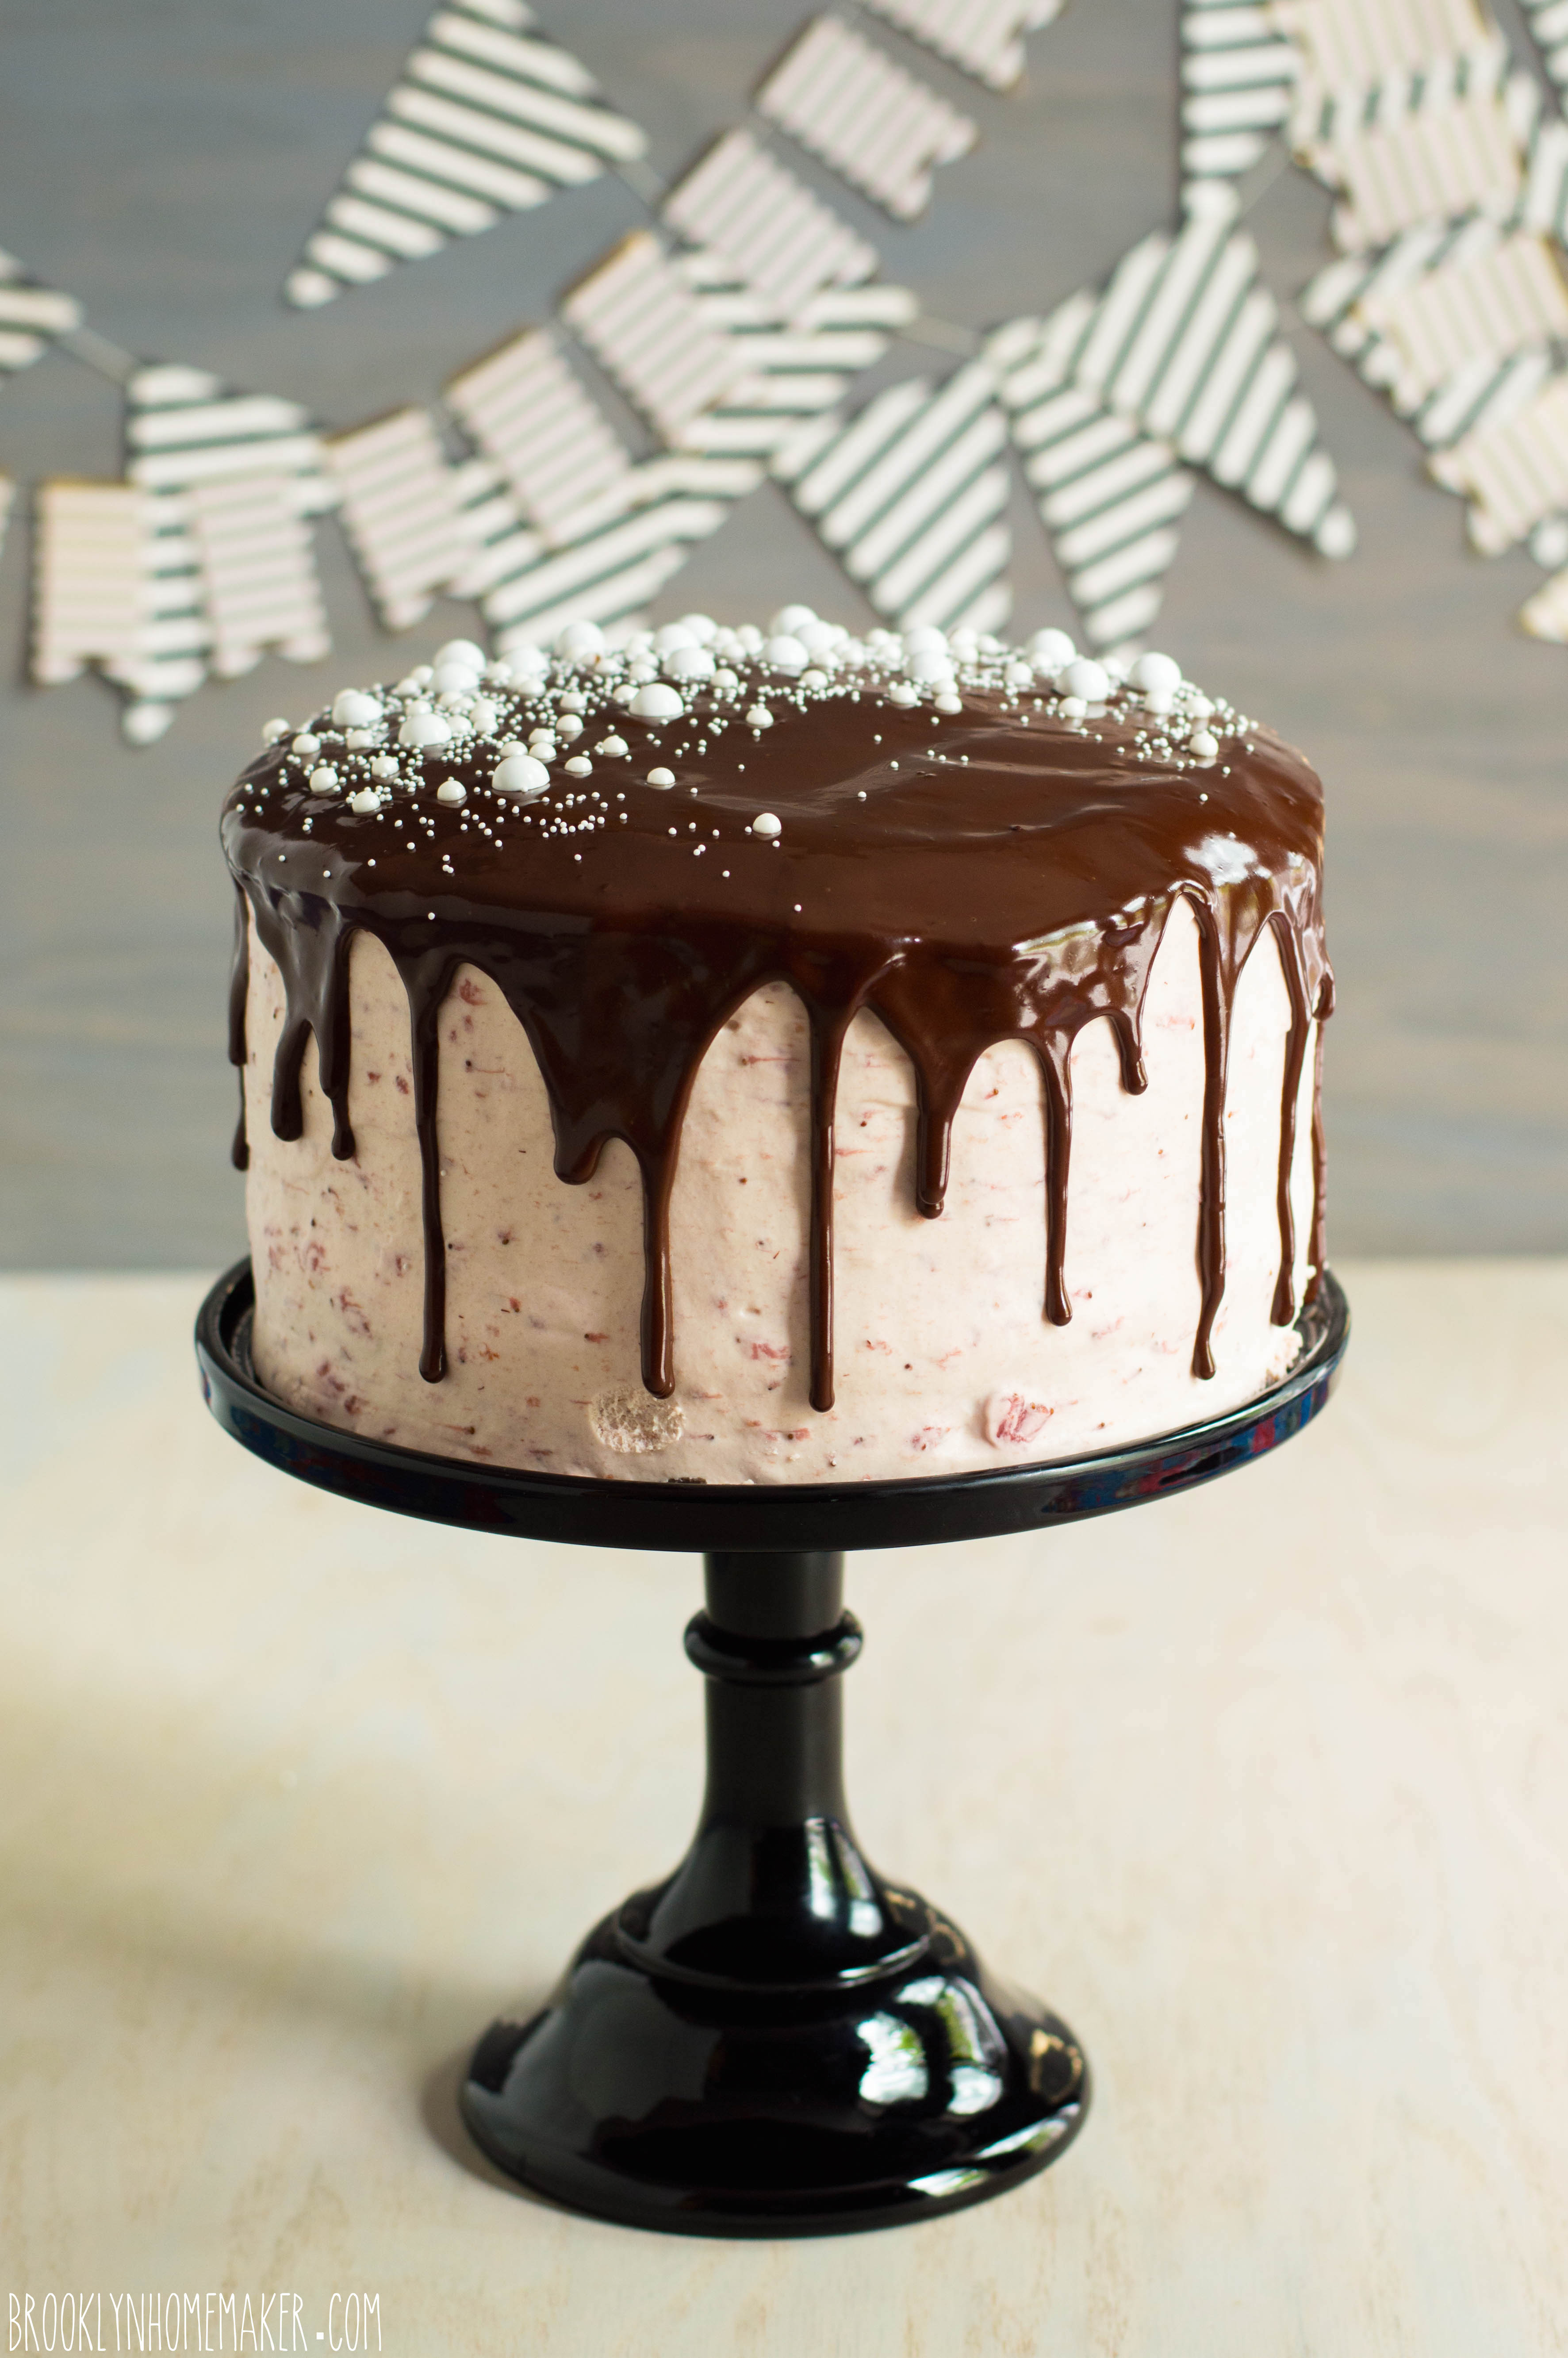
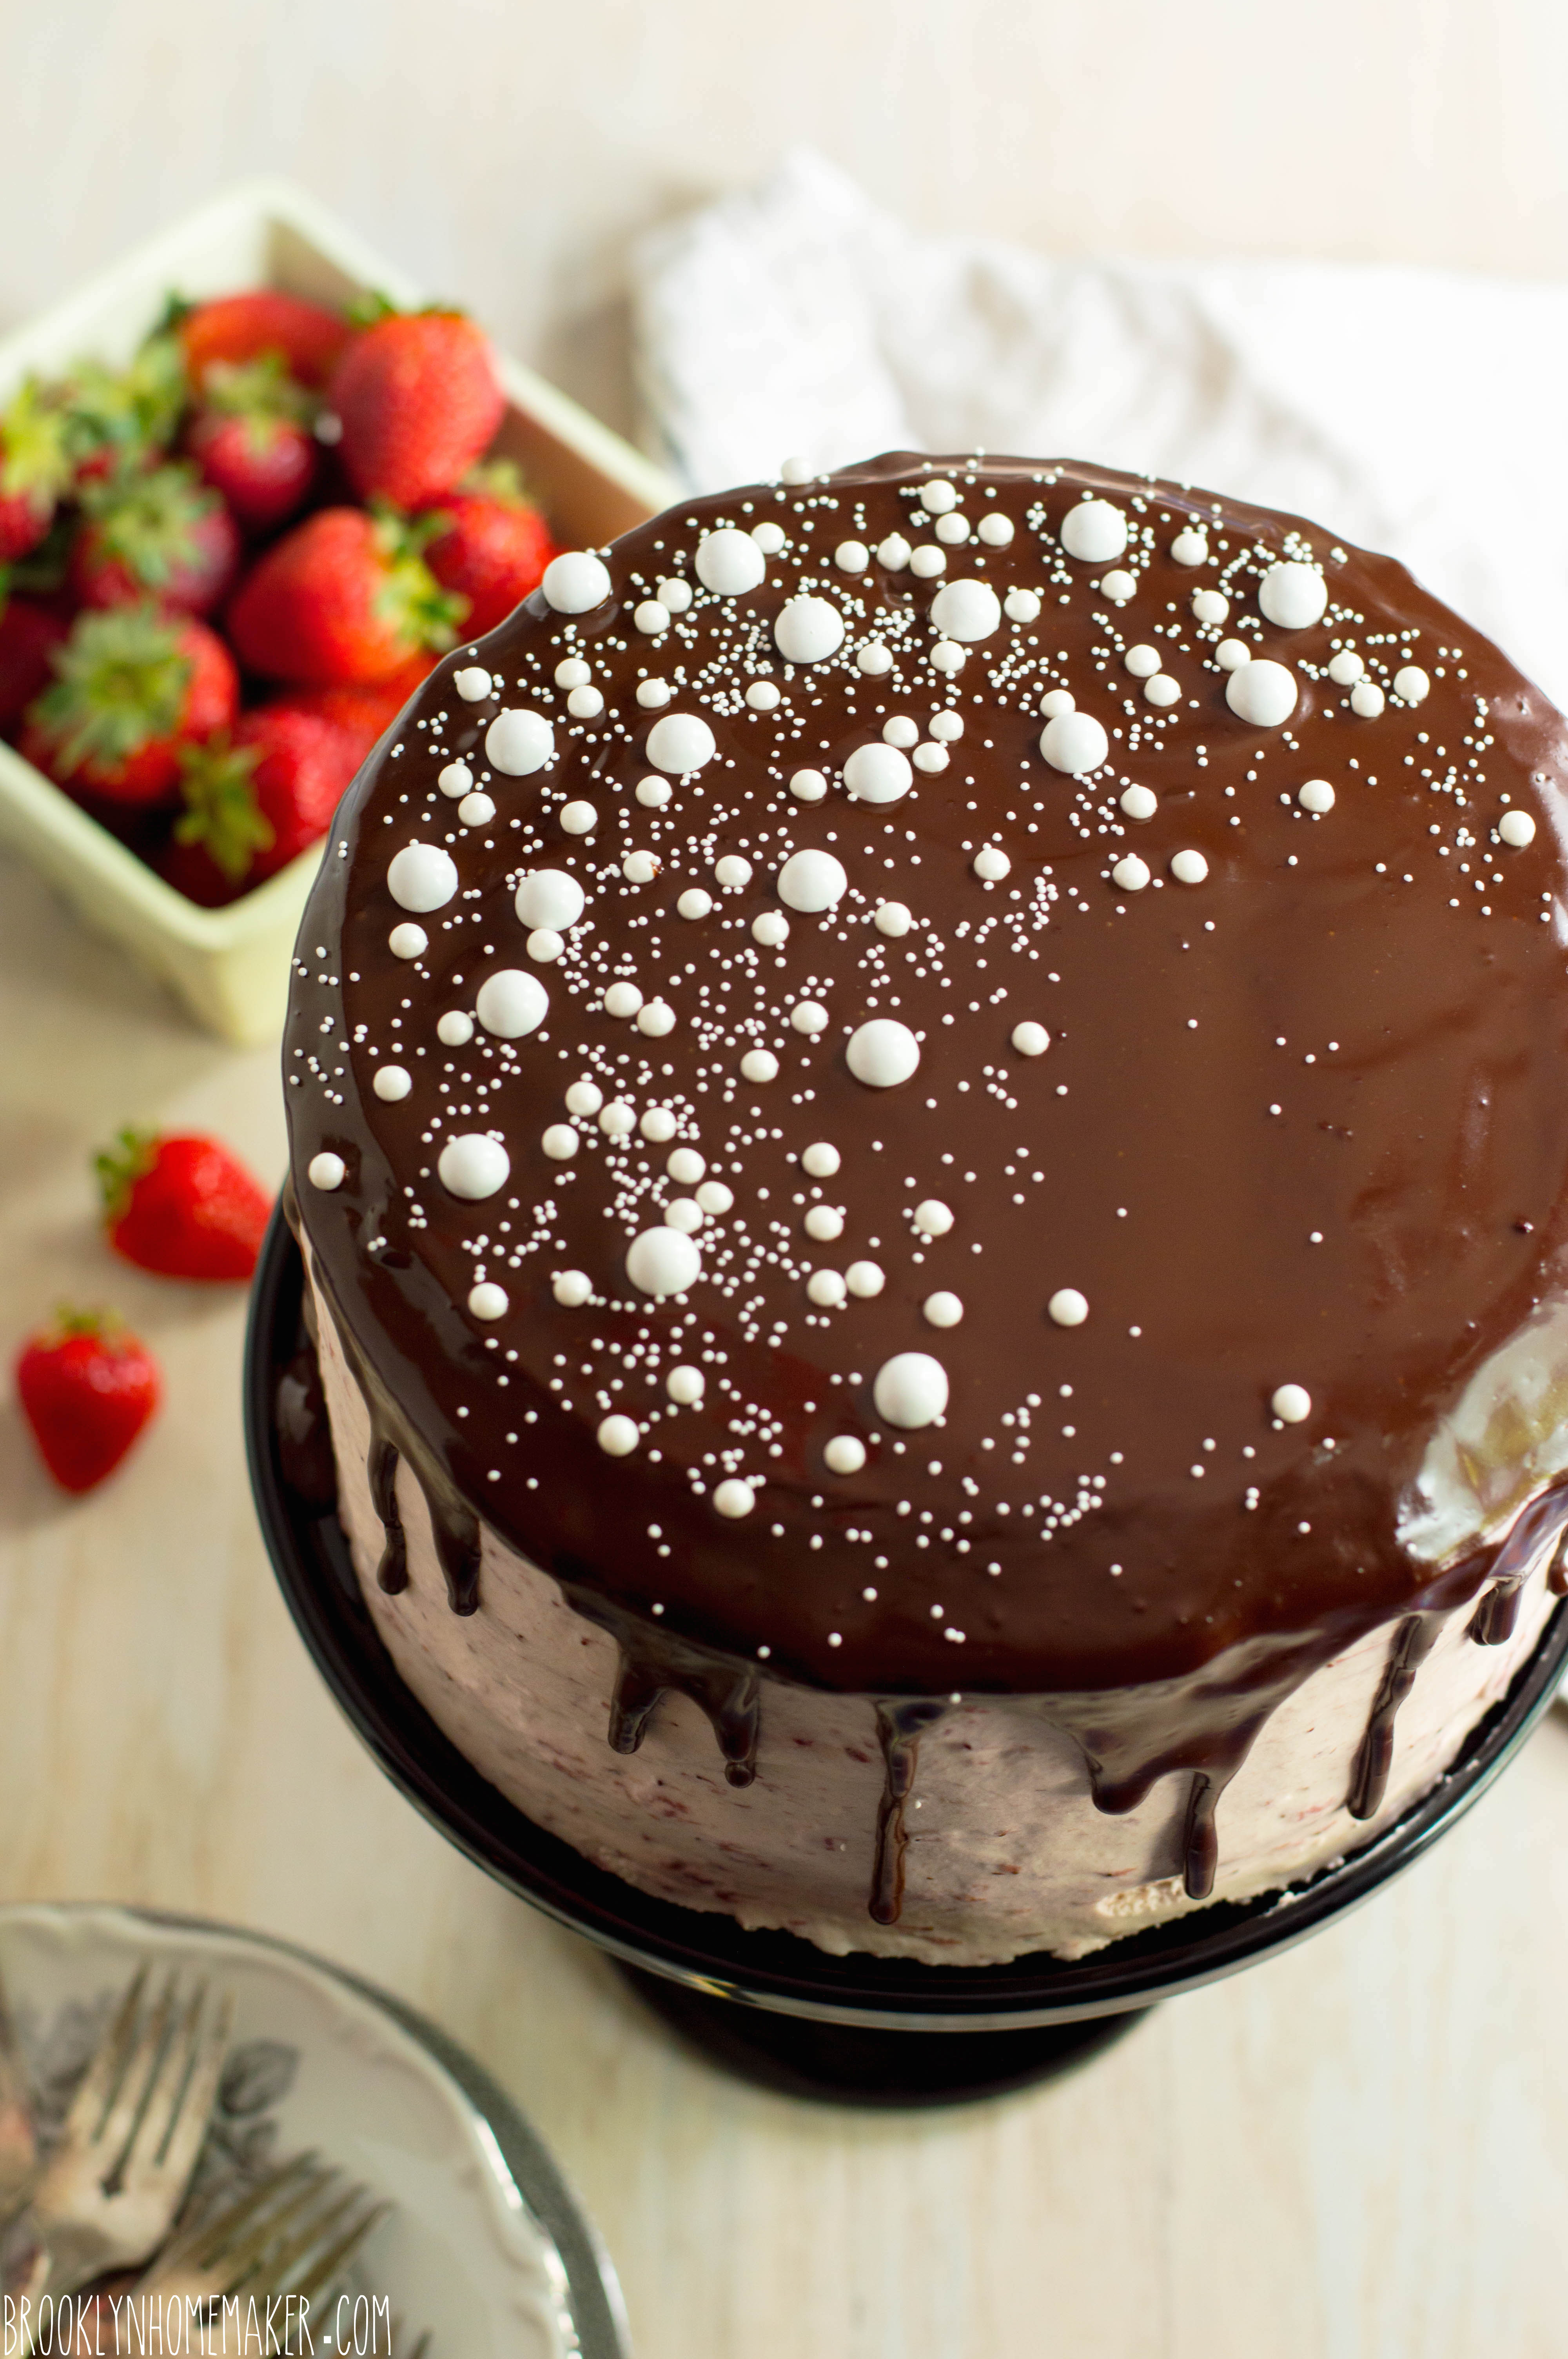
My initial thought was a high contrast black and white cake with layers of deep dark chocolate cake, bright white icing, and glossy dark chocolate ganache. In some circles on the internet this contrasting black on white on black cake is called a “Tuxedo Cake”. Considering my name is Tux, I was all over that business.
Thing is, something magical happened along the way that made me rethink the white in my “tuxedo”.
A few months ago some friends came to visit us, one of whom happens to be from England and also happened to be celebrating a birthday while he was here. Before his wife finished the sentence, “Tomorrow’s his birth…”, I was in the kitchen preheating the oven.
They were out of the house a lot while they were here, off doing the tourist circuit, and since I didn’t know exactly when they’d be around I opted for cupcakes rather than a big formal layer cake. Since I was baking cupcakes, and since our friend is British, I wanted to go for a kind of American kid’s birthday party theme.
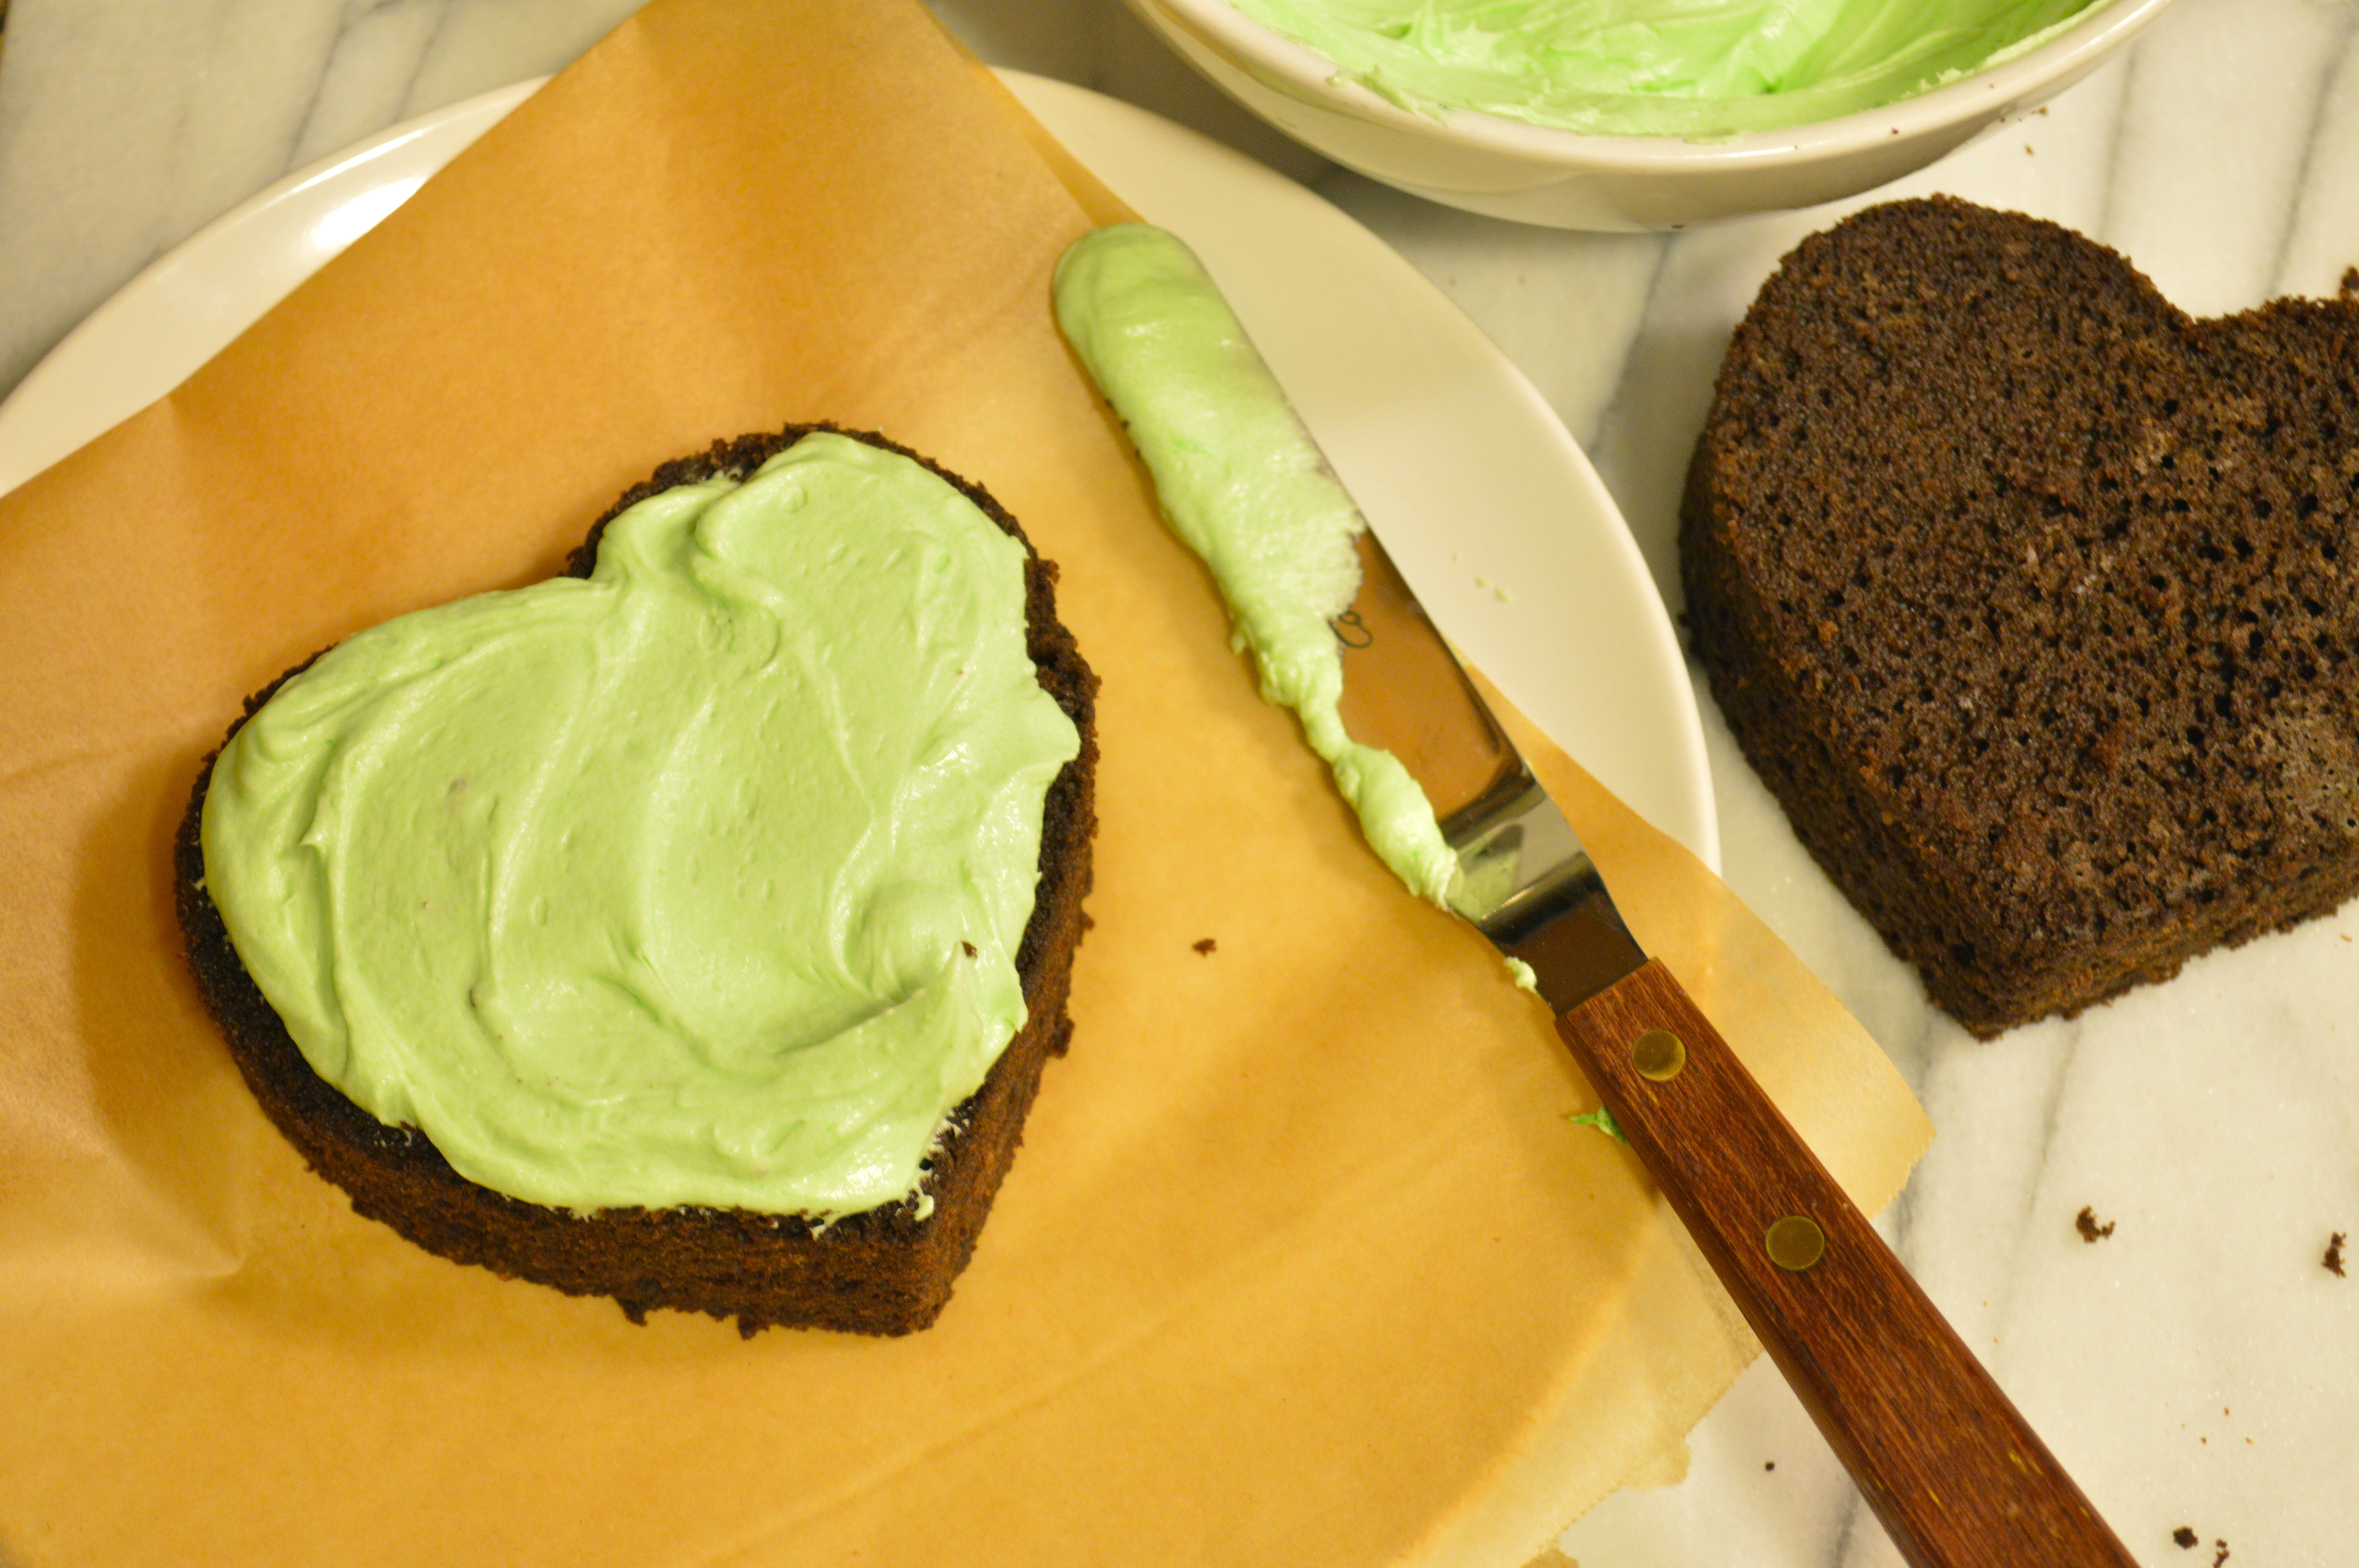
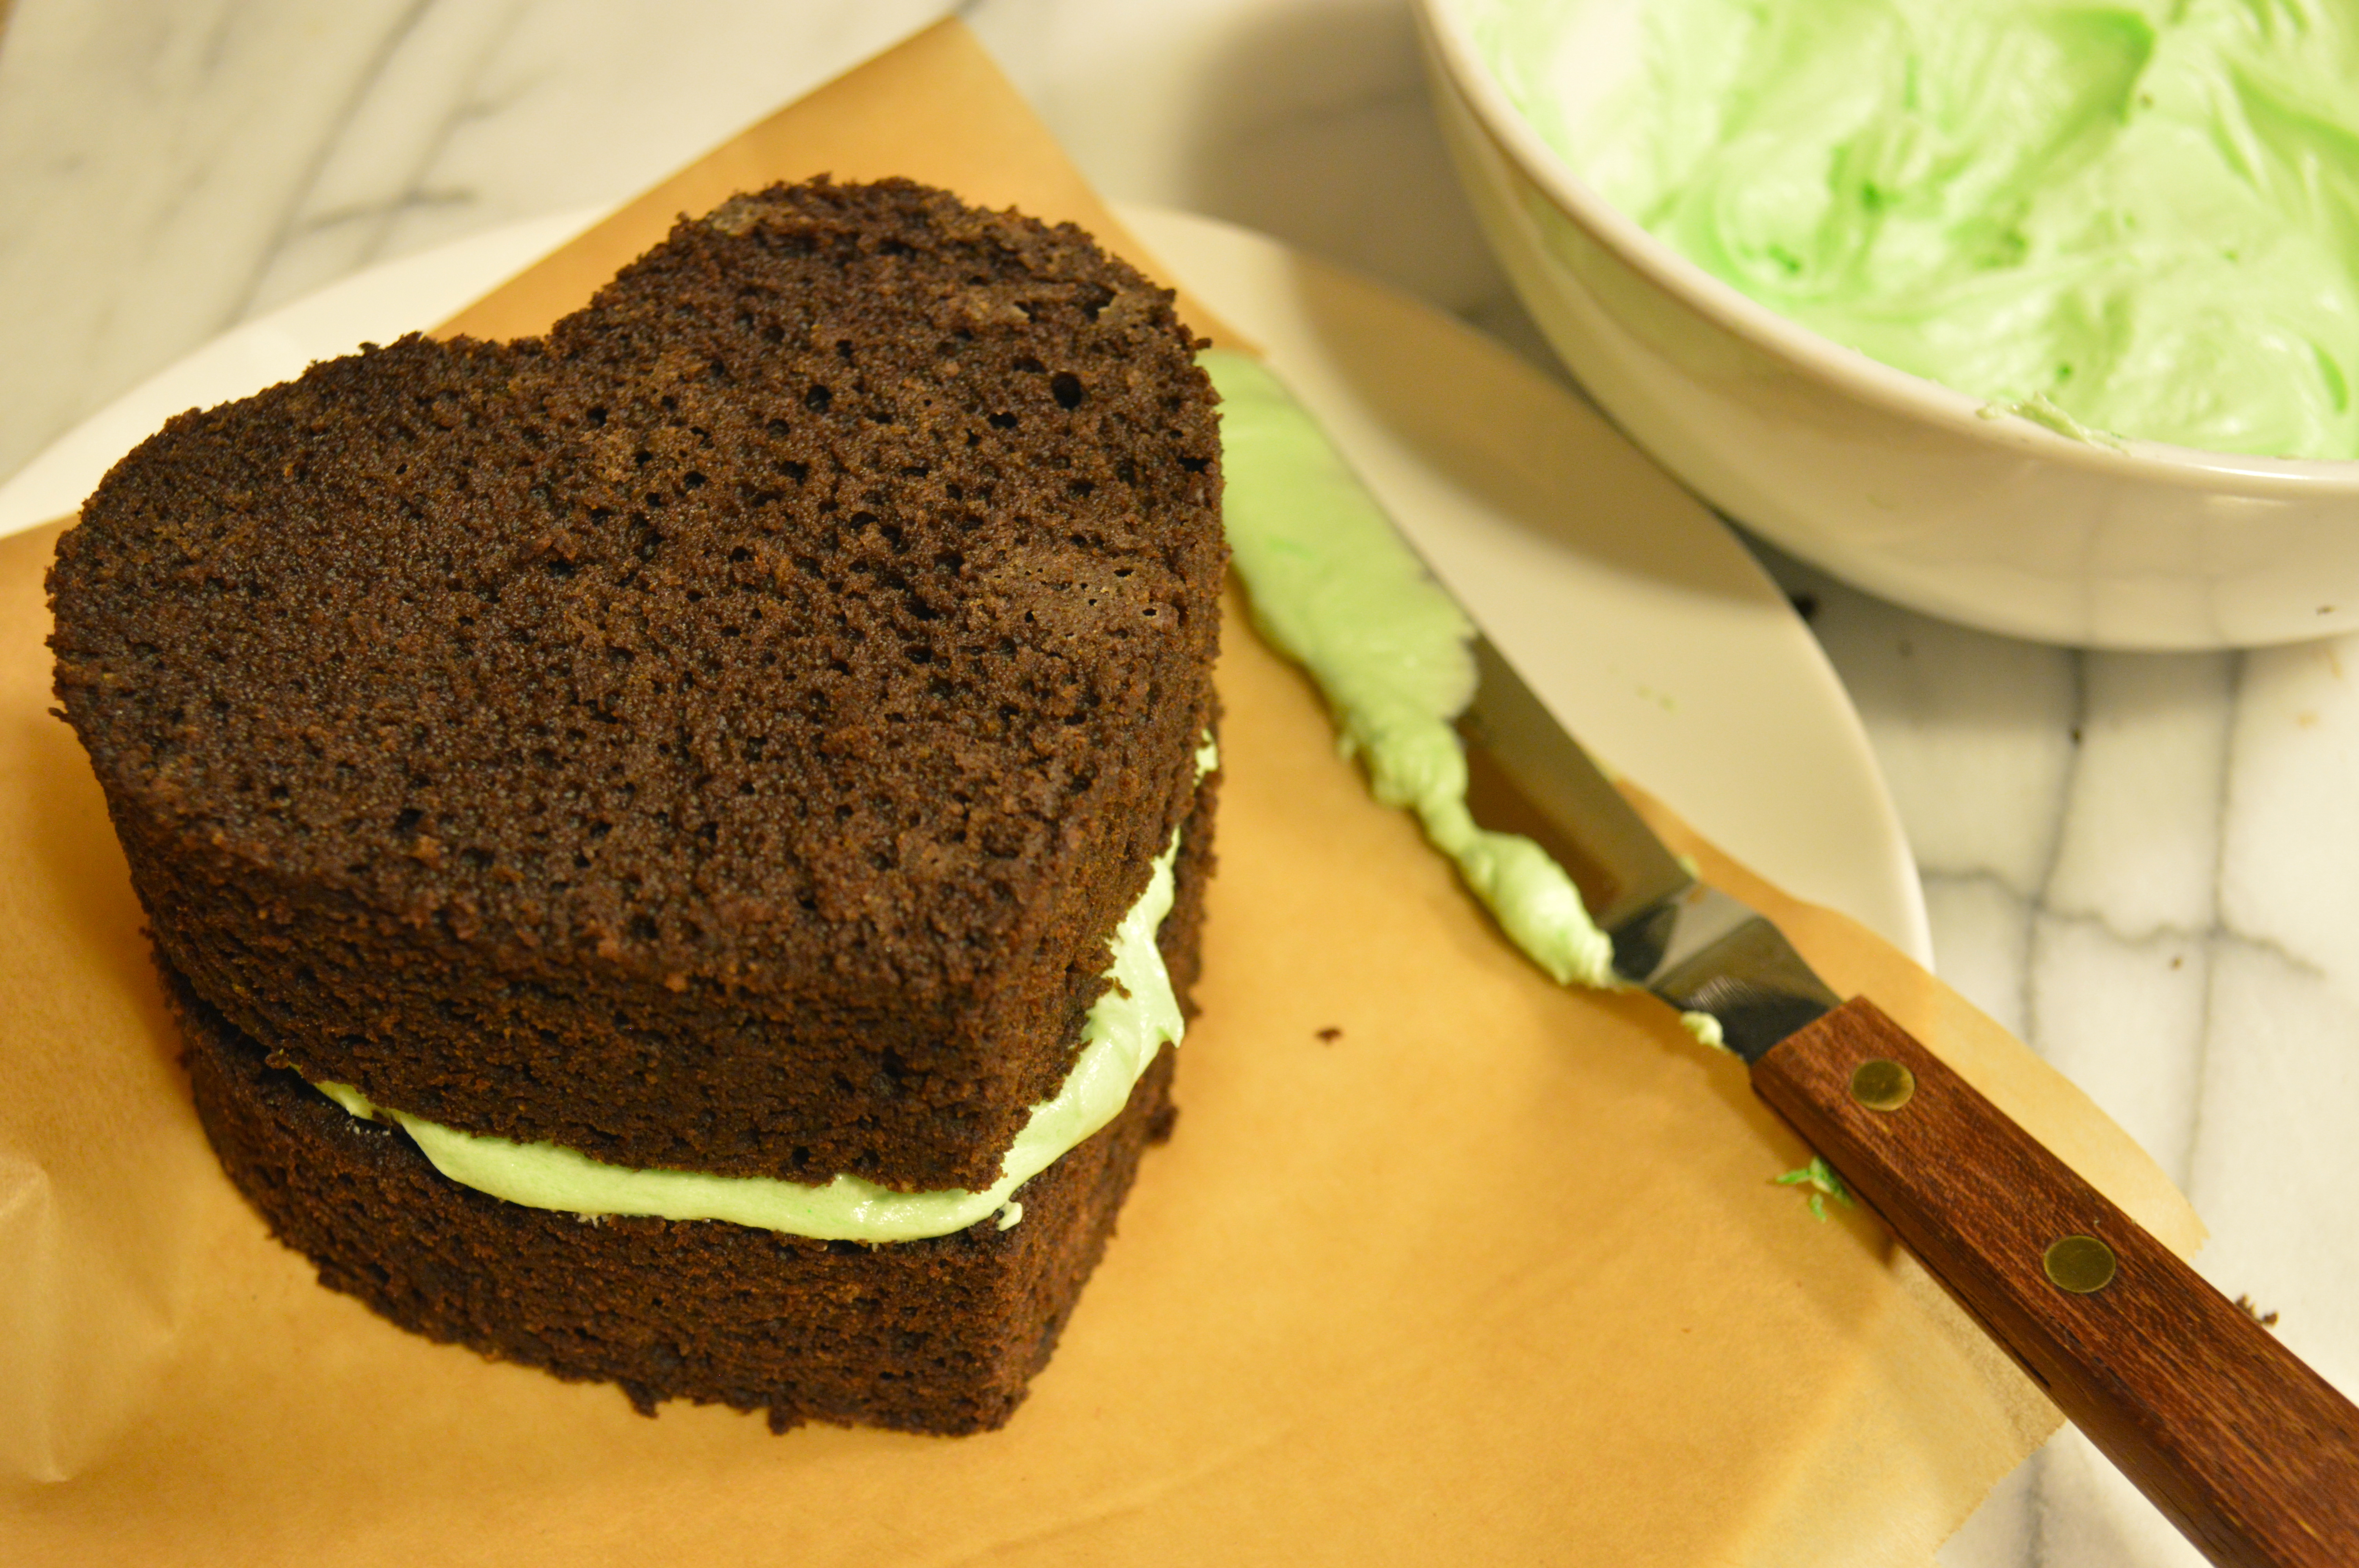
I decided to reimagine my funfetti cake recipe as cupcakes, but wanted to skip the American buttercream frosting and go for something a bit more subtle and a bit less sugary. I thought I’d adapt the mascarpone icing from the gingersnap icebox cake I made last December, but add some strawberries to it to make it fit better with the funfetti cake.
(Have I mentioned that I have a tendency to overthink things sometimes?)
To concentrate the flavor of the strawberries and make them less watery I decided to cook them down a bit with some sugar before mixing them into the icing.
At first I worried that I’d cooked the strawberries too long and was disappointed that they ended up tasting kind of jammy rather than super fresh like I’d hoped, but I forged ahead anyway and once I’d mixed them into the mascarpone and whipped cream…
HOLY SHIT.
Where do I begin?
This icing basically tastes like the freshest, creamiest strawberry ice cream you’ve ever had, but with the texture of fluffy whipped cream. It’s stable enough to be used as a cake icing as well, and just sweet enough to bring out the sweetness of the strawberries without being overly sugary or cloying.
After one bite, all of my big birthday cake plans changed.
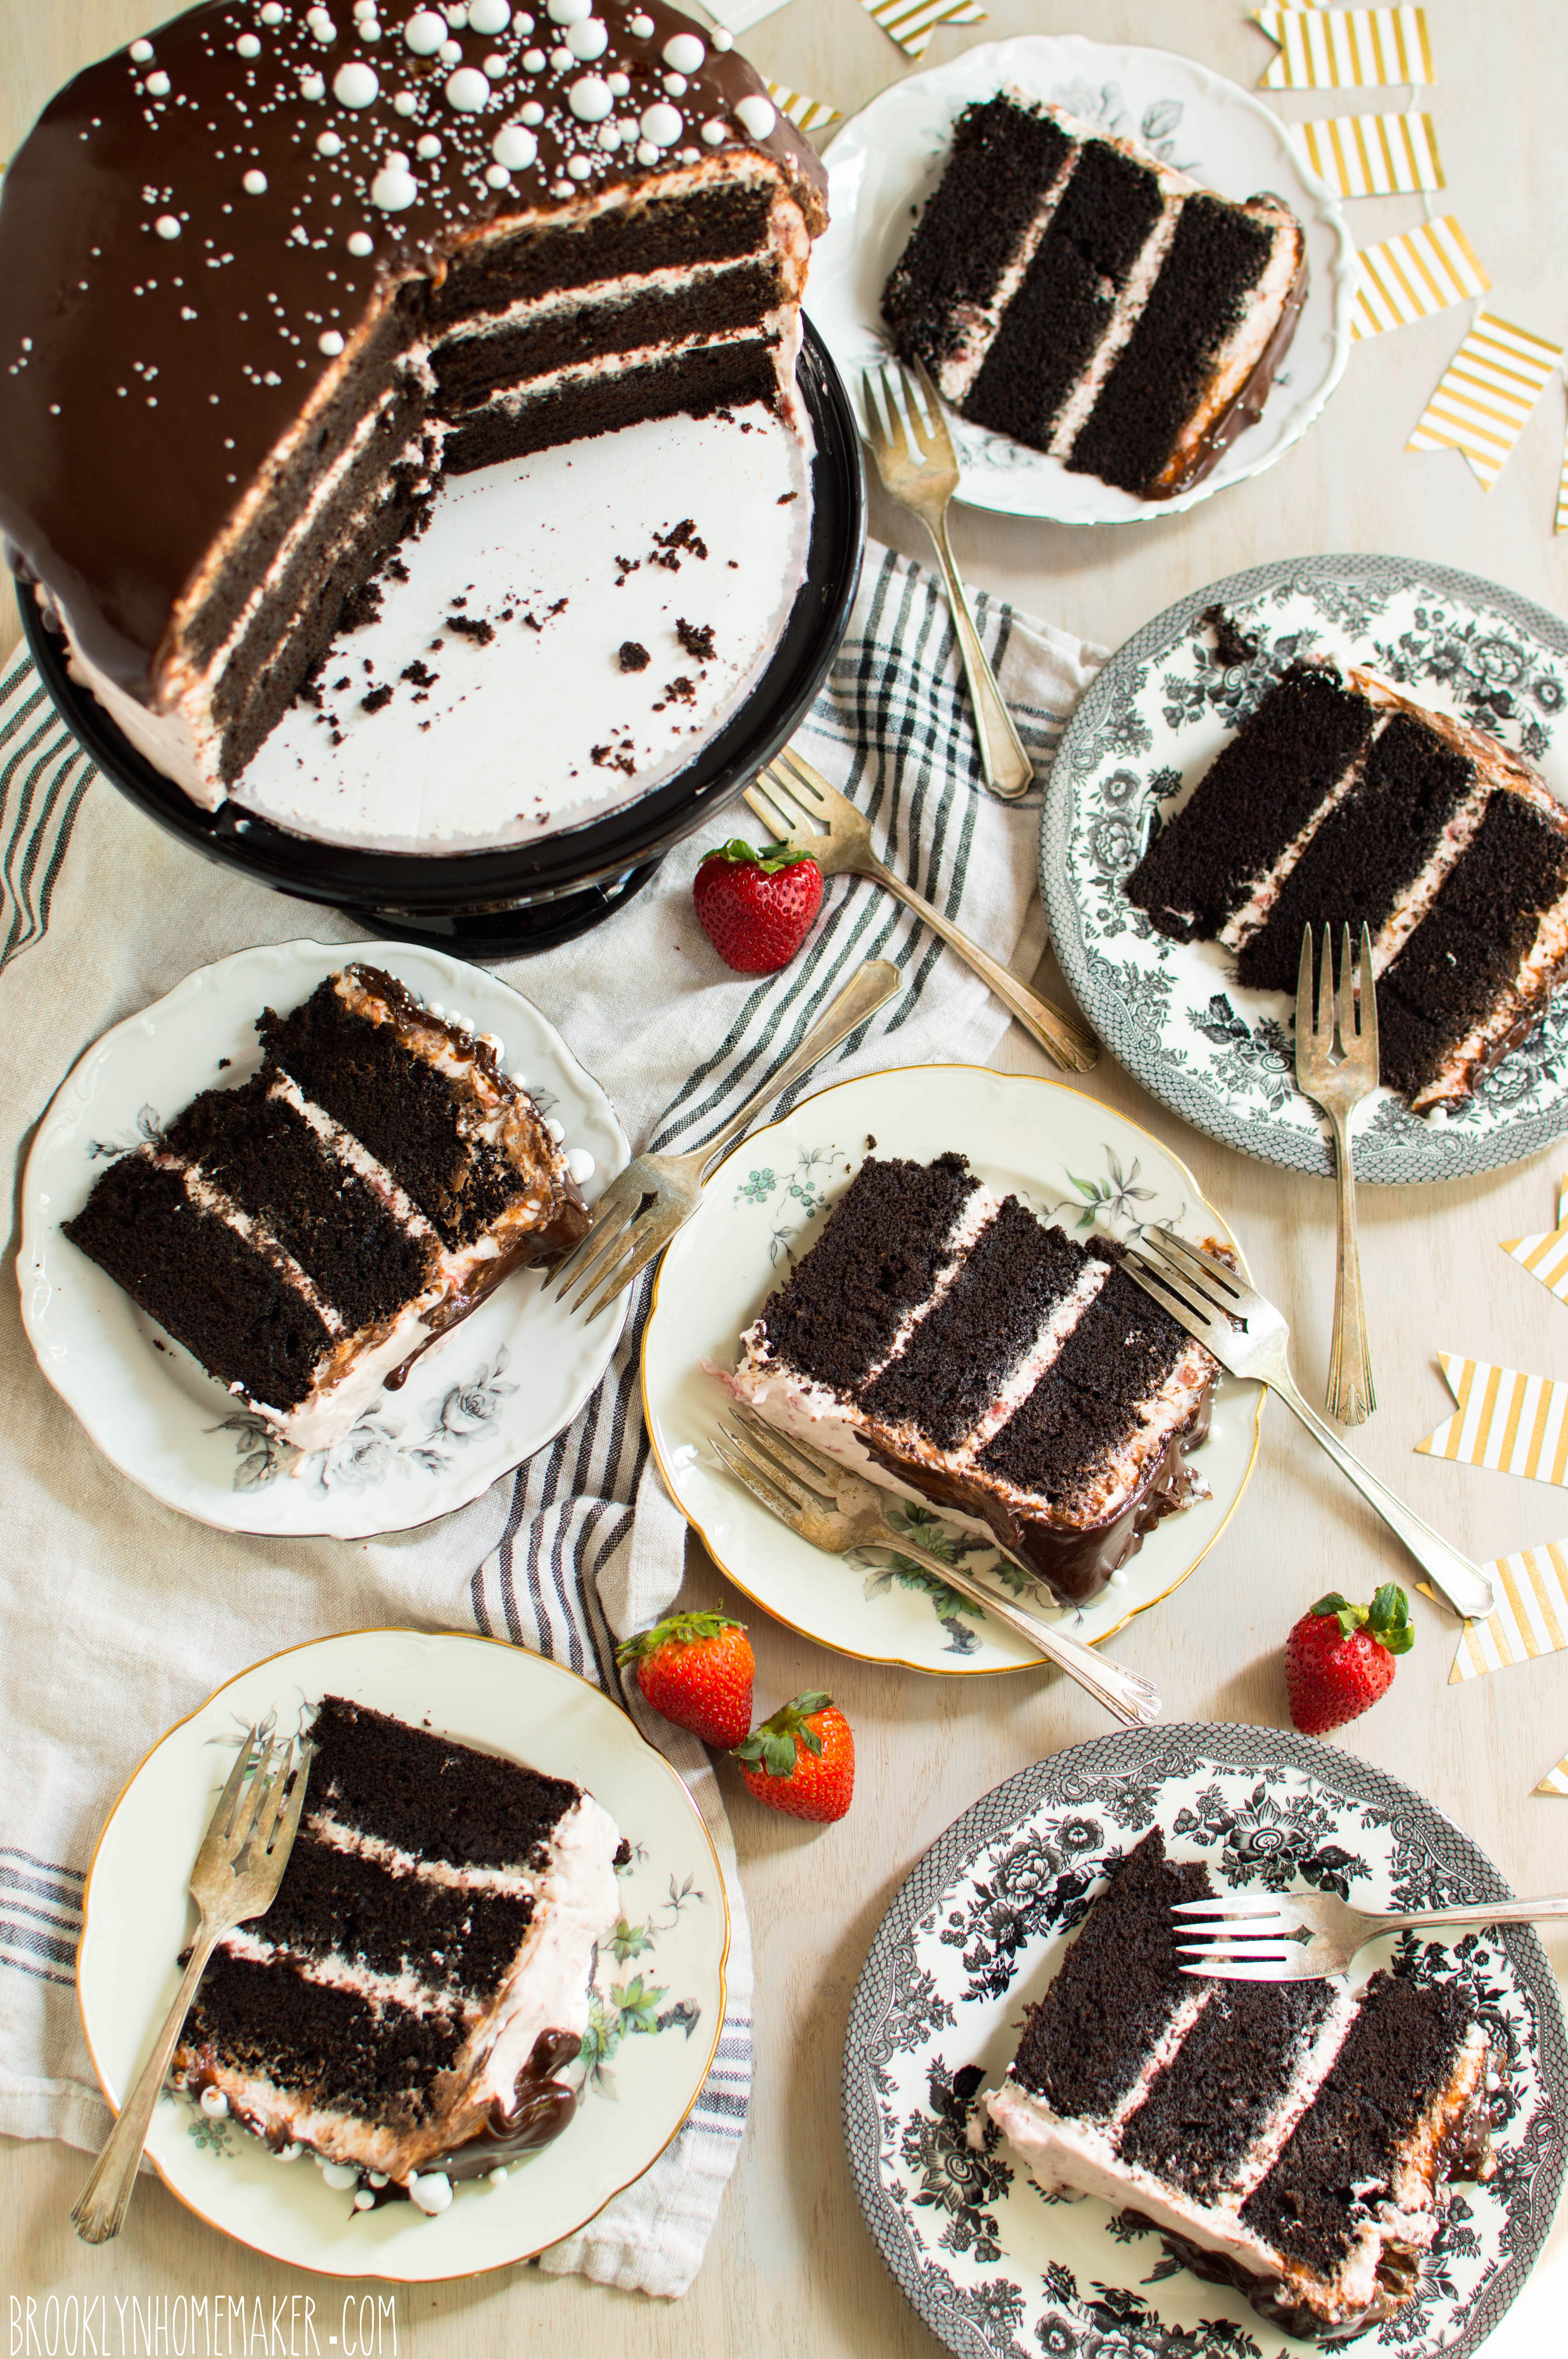
My black and white tuxedo cake would be getting a chichi pink makeover.

As much as I’d like to, you can’t have an entire birthday party and serve nothing but cake, so with the cake as the pièce de résistance we decided to have a barbecue. An amazing sustainably sourced organic butcher recently opened near us, so we got a bunch of homemade bratwurst for the grill and called the whole shindig a “sausage party”.
Still on our German kick after our recent trip to Berlin, we went all out with German potato salad, and gurkensalit (cucumber salad), sauerkraut, and whole grain german mustard. I even drank beer for the night! (I usually stick to wine or whiskey).
The food was a huge hit, and while the bratwurst put up a good fight trying to be the star of the (sausage) party, my foppish pink tuxedo cake definitely stole the show!
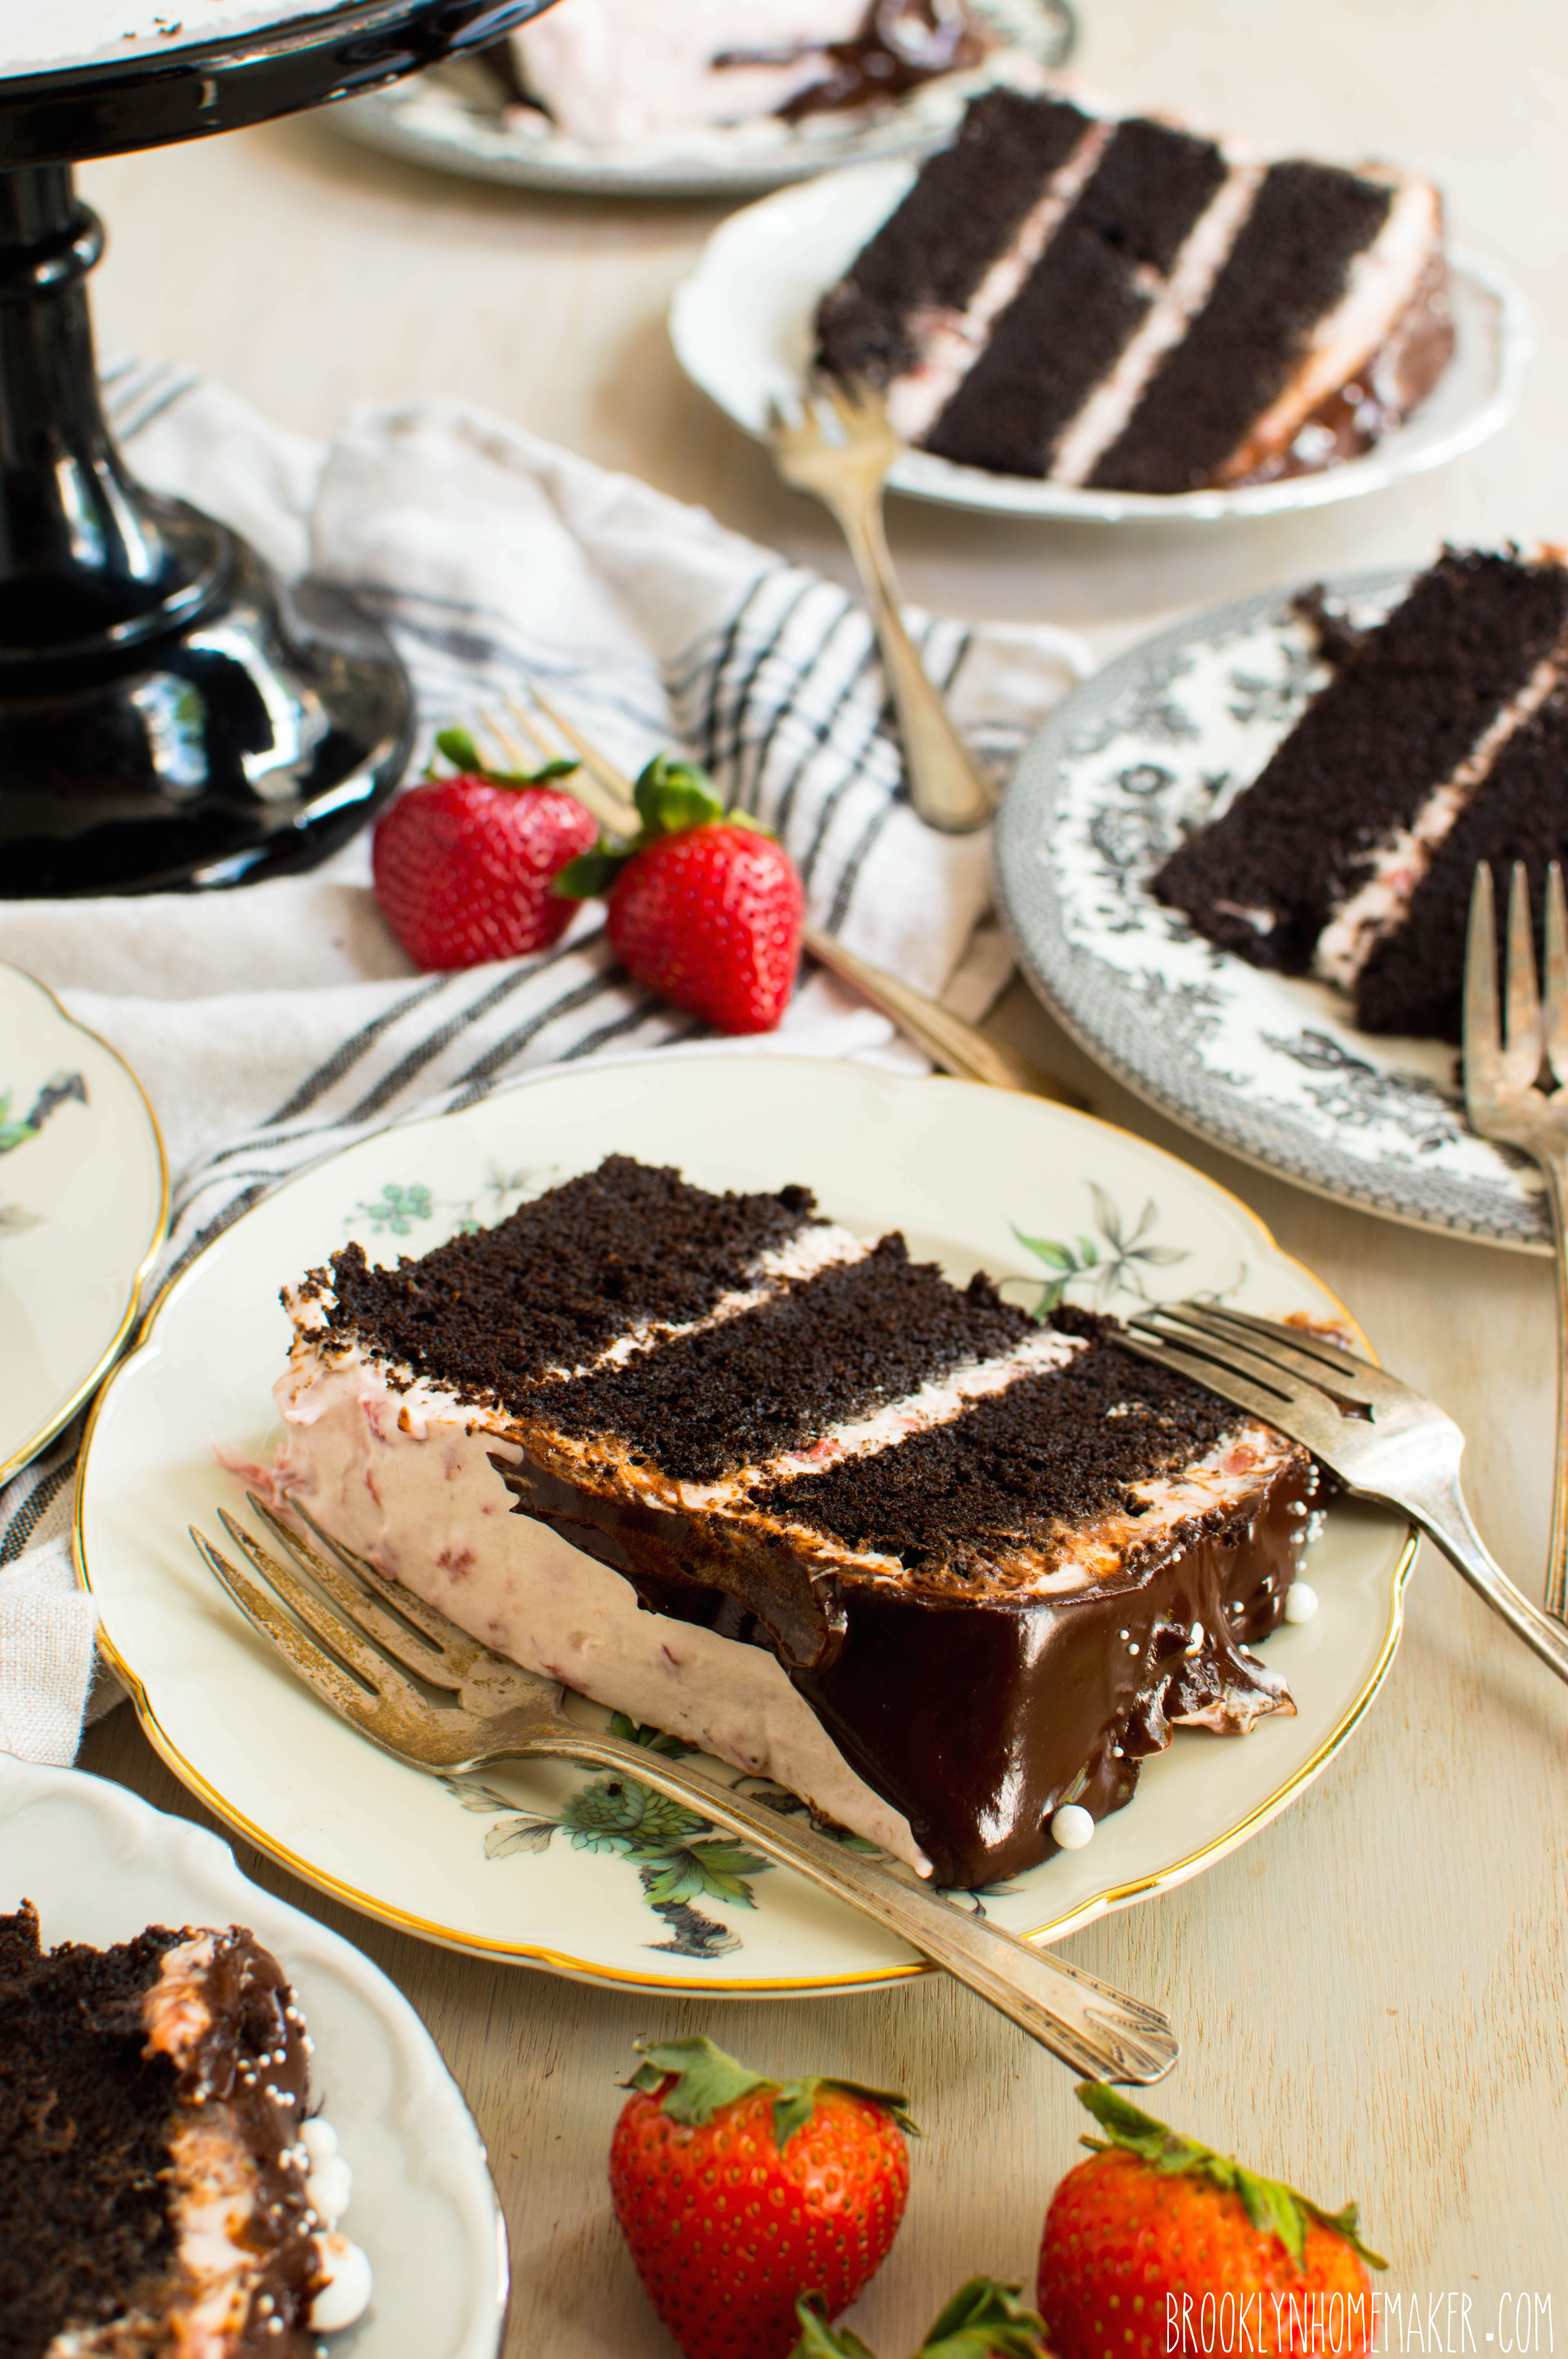
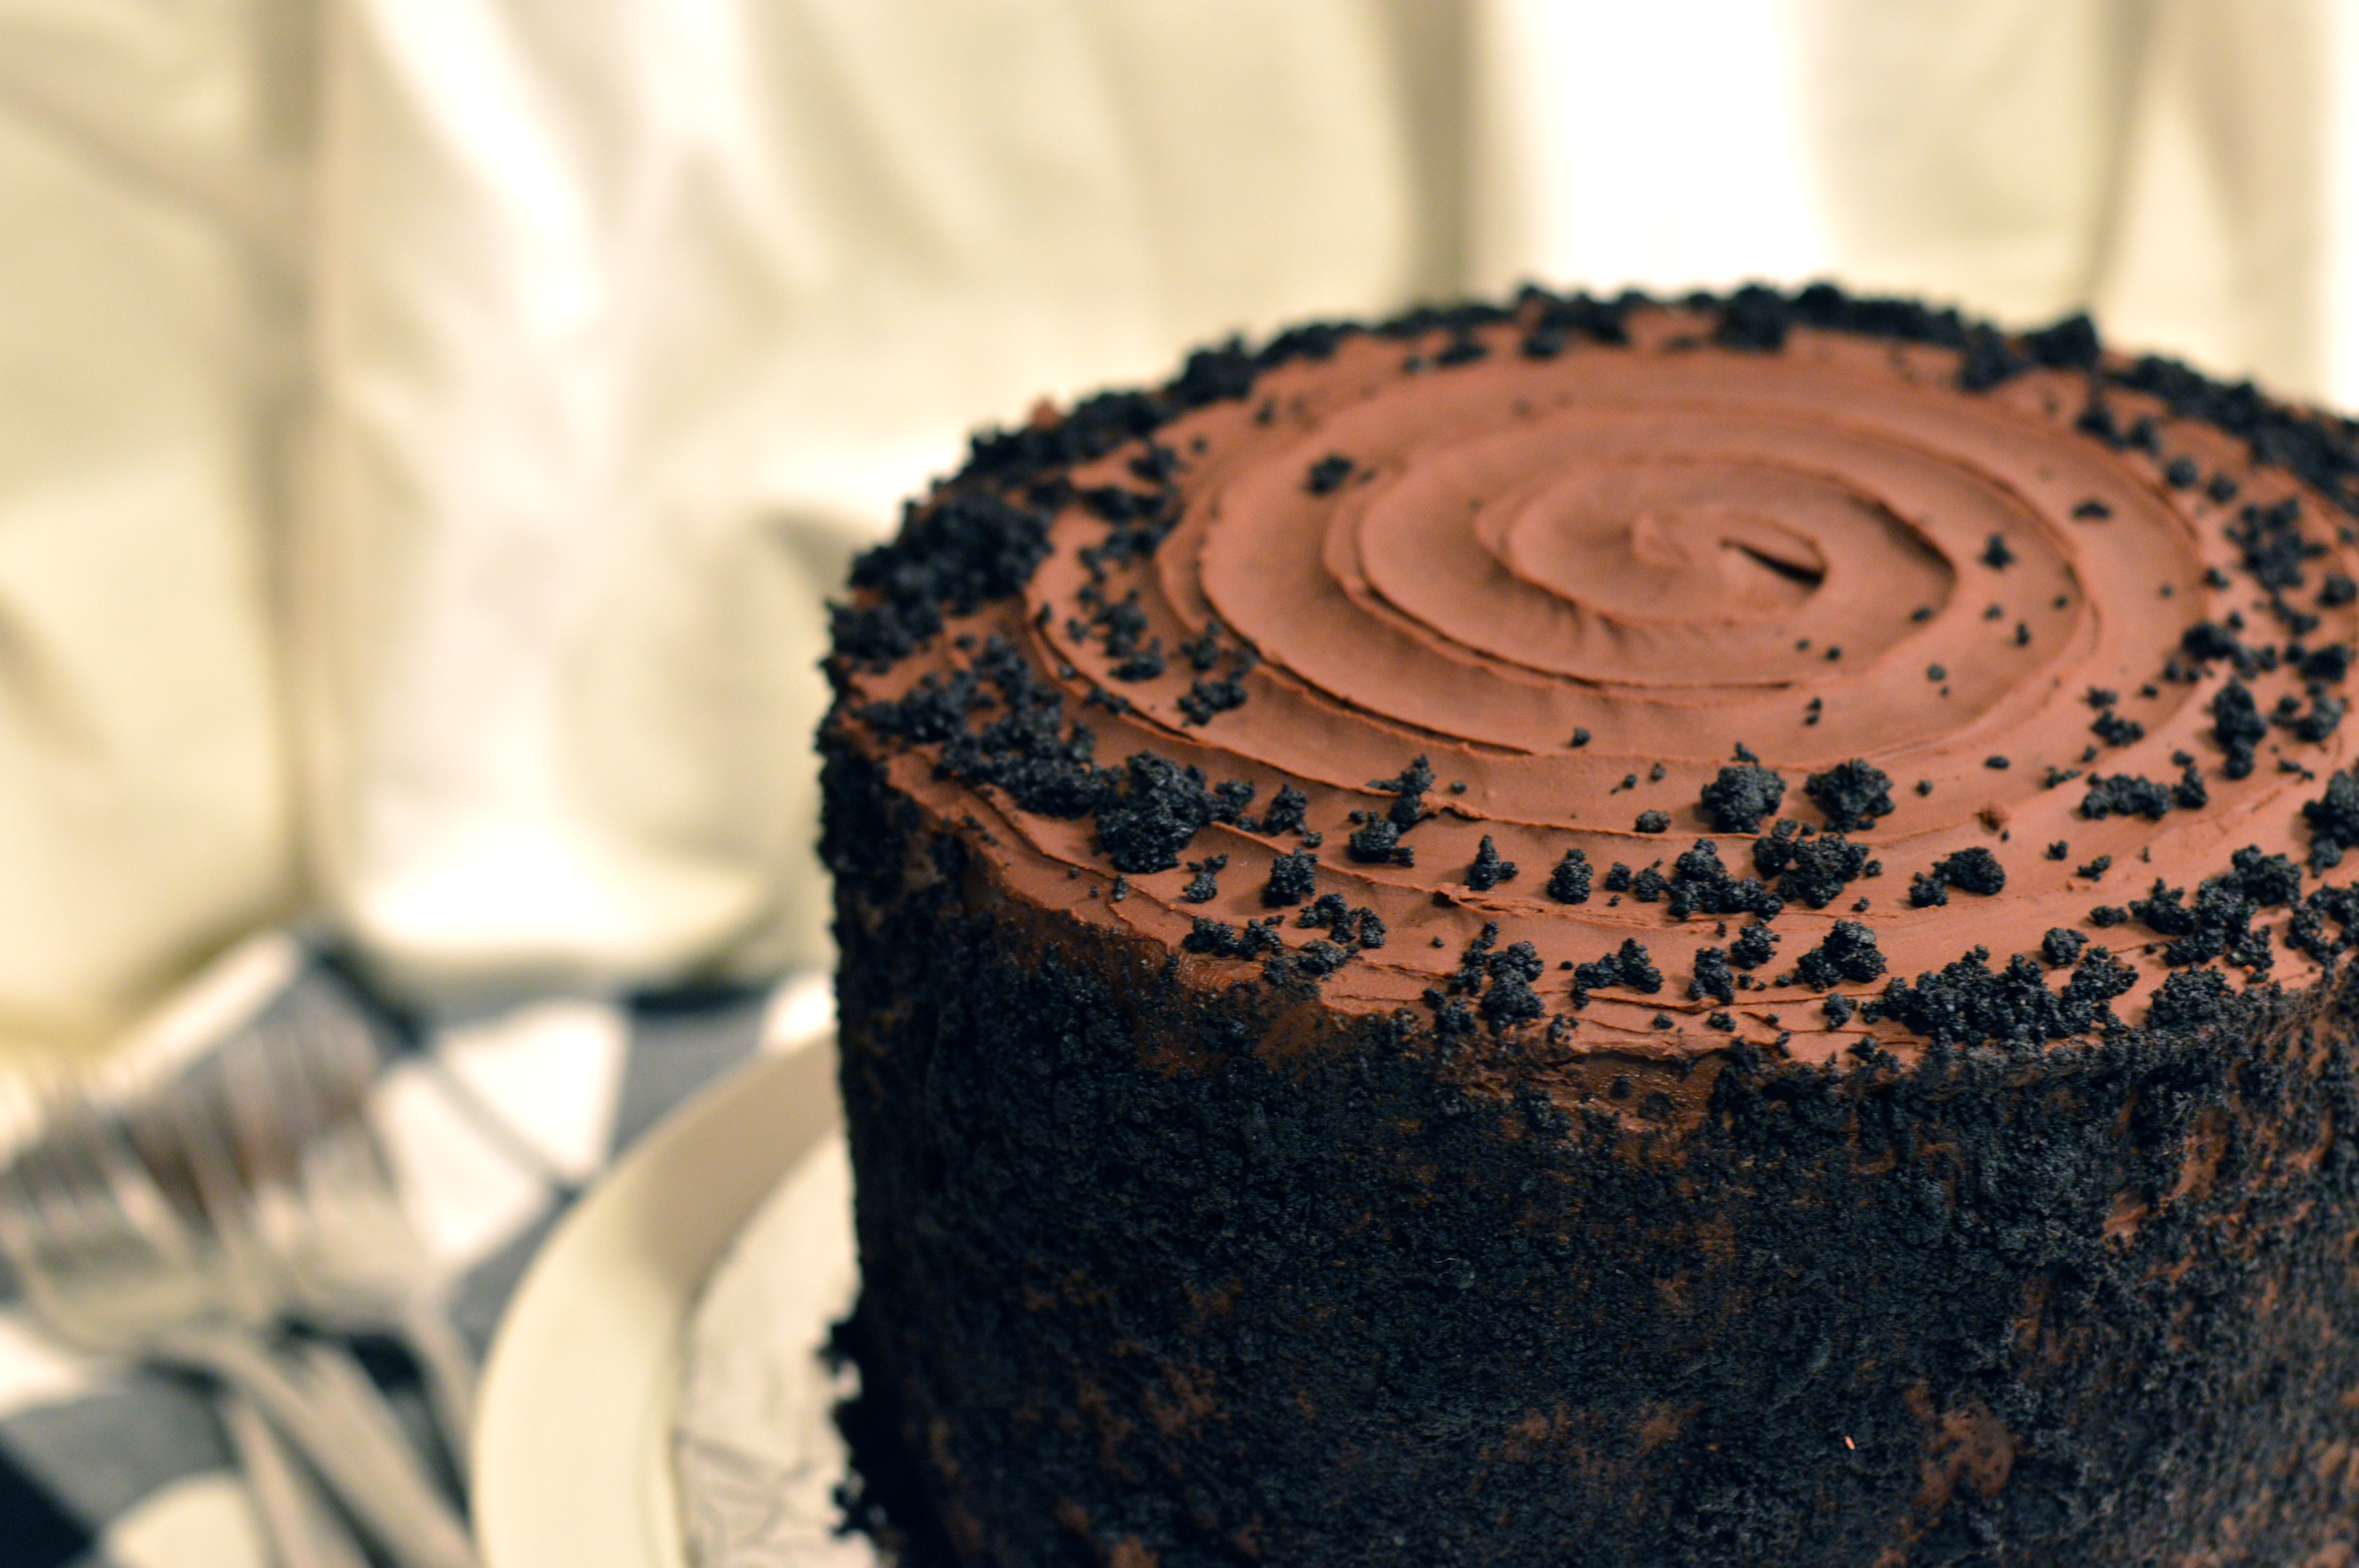
The tender layers of devil’s food cake are nothing less than super rich and incredibly moist slices of dark chocolate heaven. The strawberry mascarpone icing is ethereally fluffy and impossibly creamy, and even though the strawberries are cooked down, the icing tastes bright and fresh and summery. The dark chocolate ganache is velvety and perfectly rich and bittersweet, with a lovely glossy finish thanks to a touch of honey.
To top it all off and make it feel even fancier and ever-so-slightly gaudy, I added some white candy beads in varying sizes to the top of the shiny dark ganache. You don’t have to if you don’t want to, but why on earth wouldn’t you want to?
Chocolate Tuxedo Cake with Strawberry Mascarpone Icing and Glossy Ganache
adapted from Brooklyn Homemaker
makes three 8-inch layers
butter and flour for pans
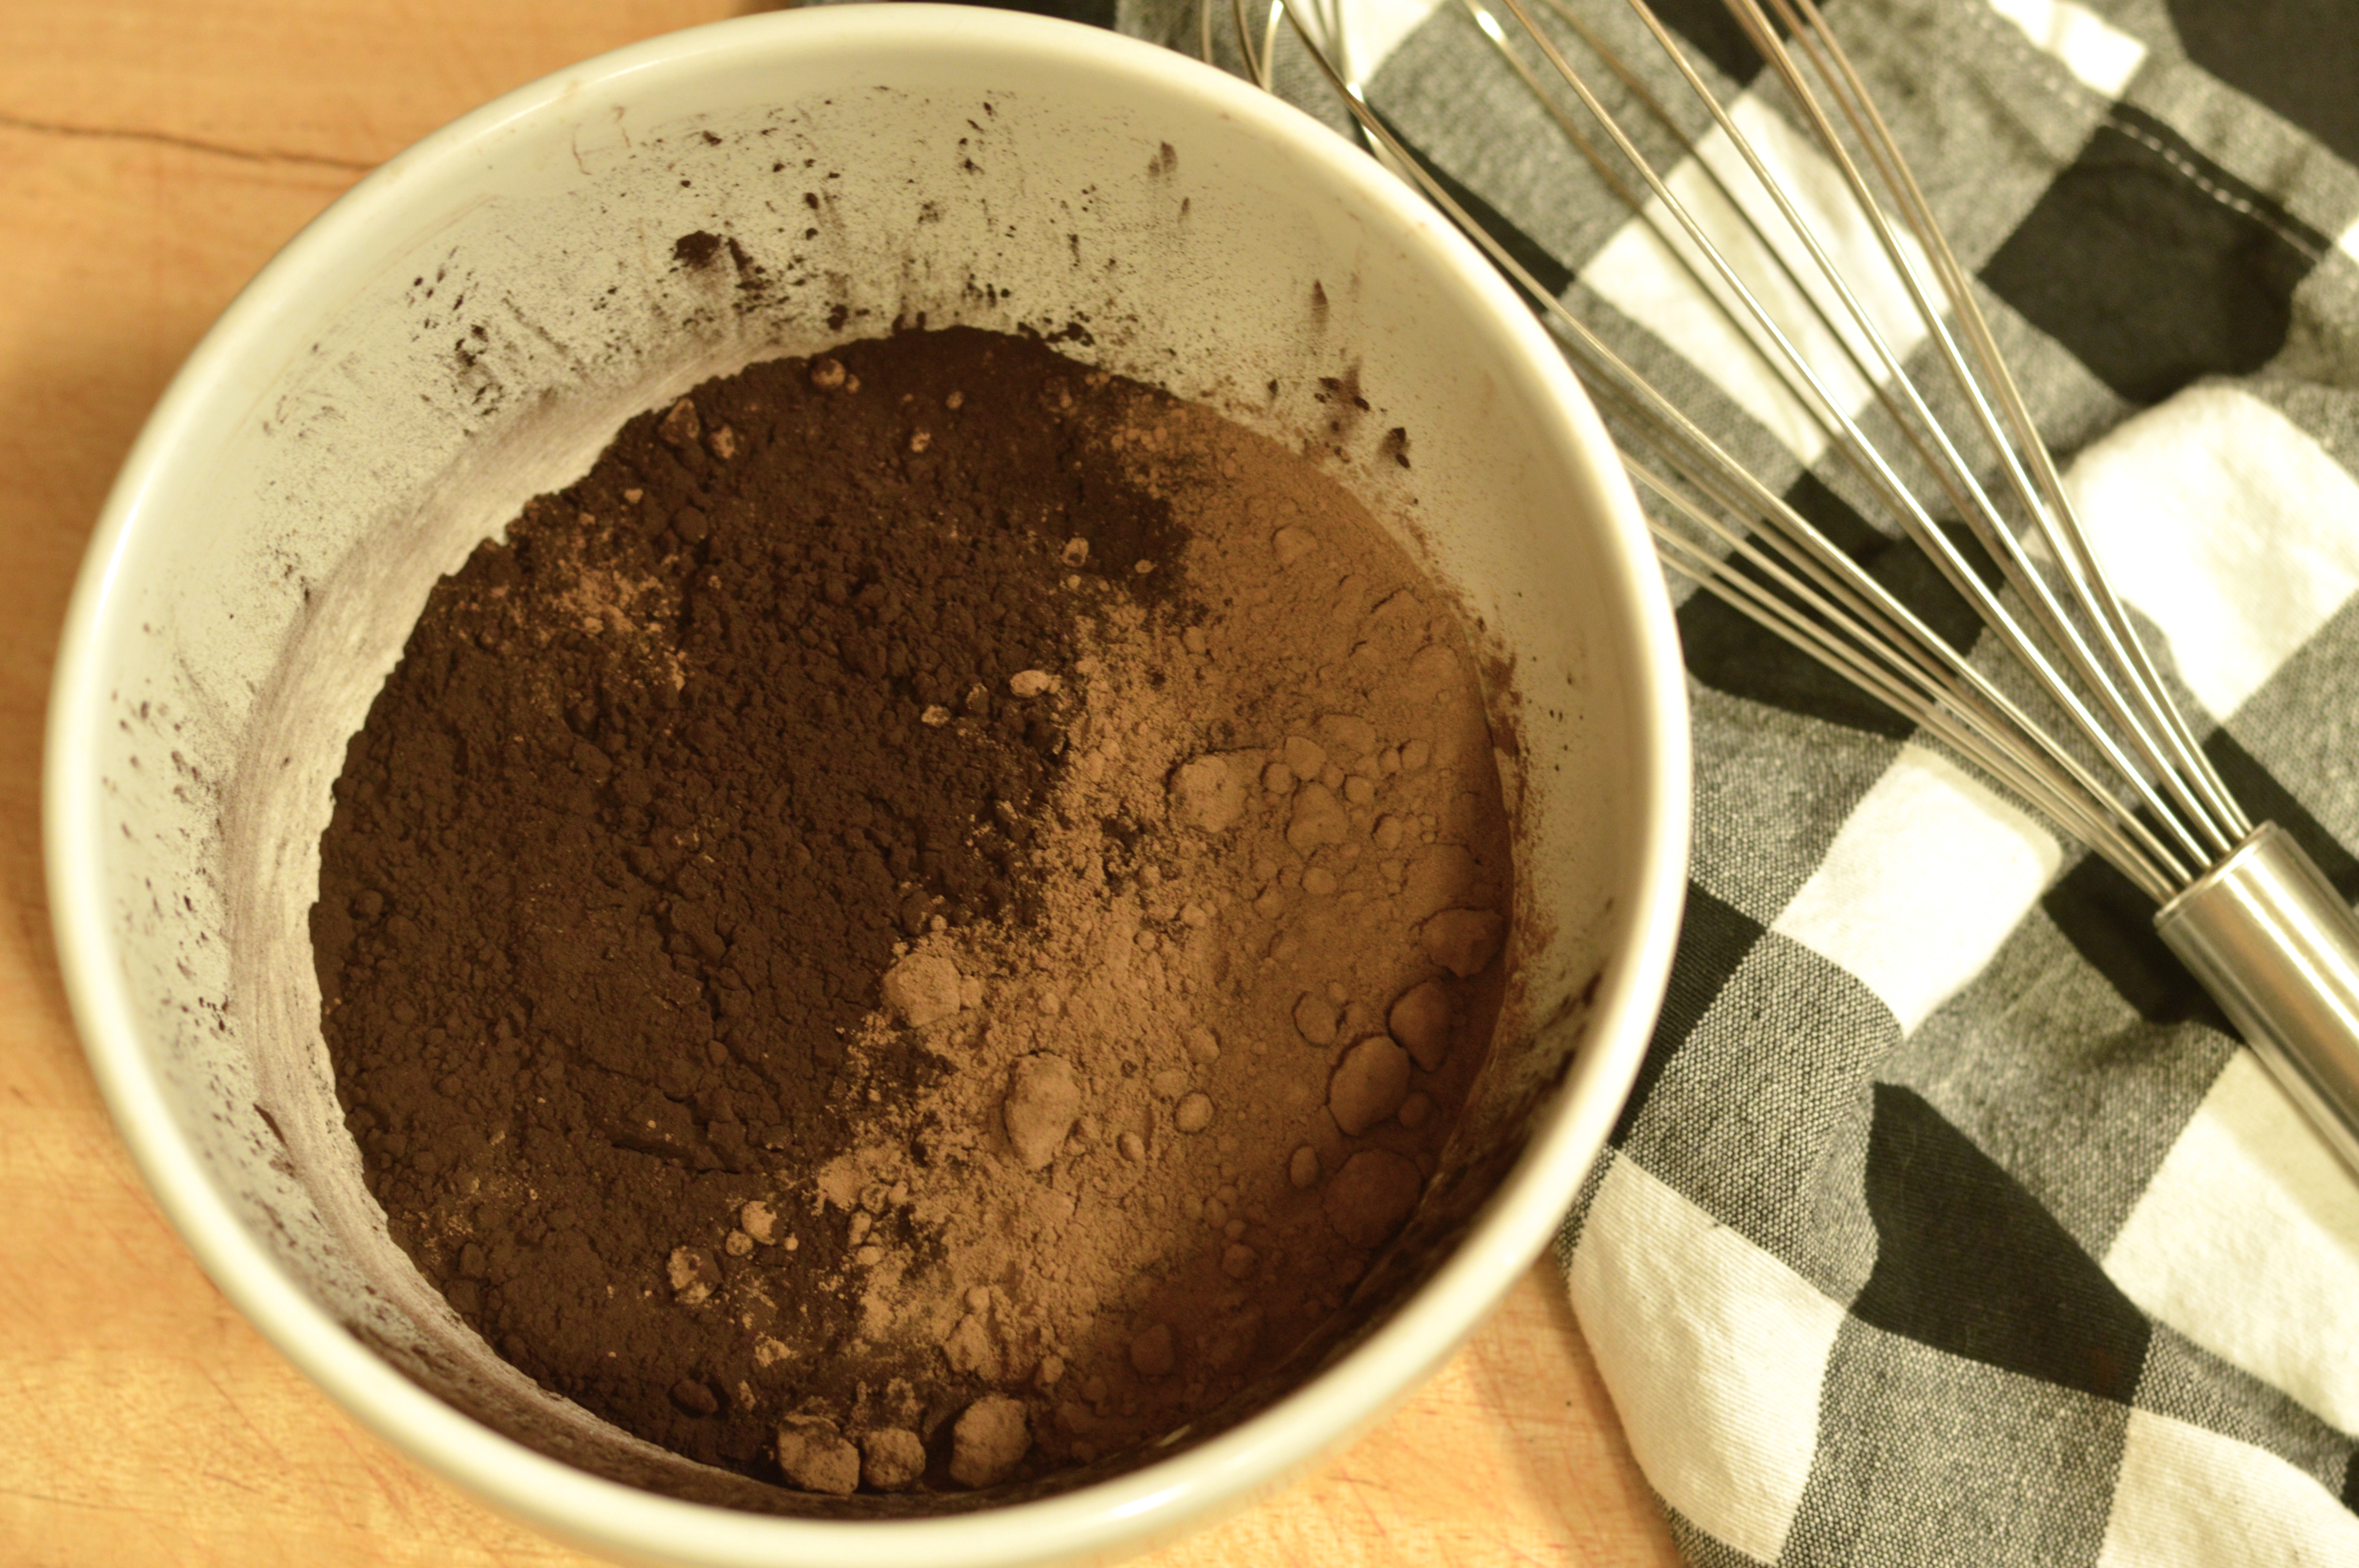
1 1/2 cups unsweetened natural cocoa powder (I used Double Dutch Process)
1 1/2 cups hot water (or hot brewed coffee for a richer flavor)
3 1/4 cups cake flour
1 1/4 teaspoons coarse salt
1 teaspoon baking powder
1 teaspoon baking soda
1 cup (2 sticks) unsalted butter, melted and slightly cooled
1 cups peanut oil or vegetable oil
1 cup granulated sugar
1 1/4 cup packed brown sugar
4 large eggs
4 teaspoons vanilla extract
1 cup buttermilk
Preheat oven to 350 degrees.
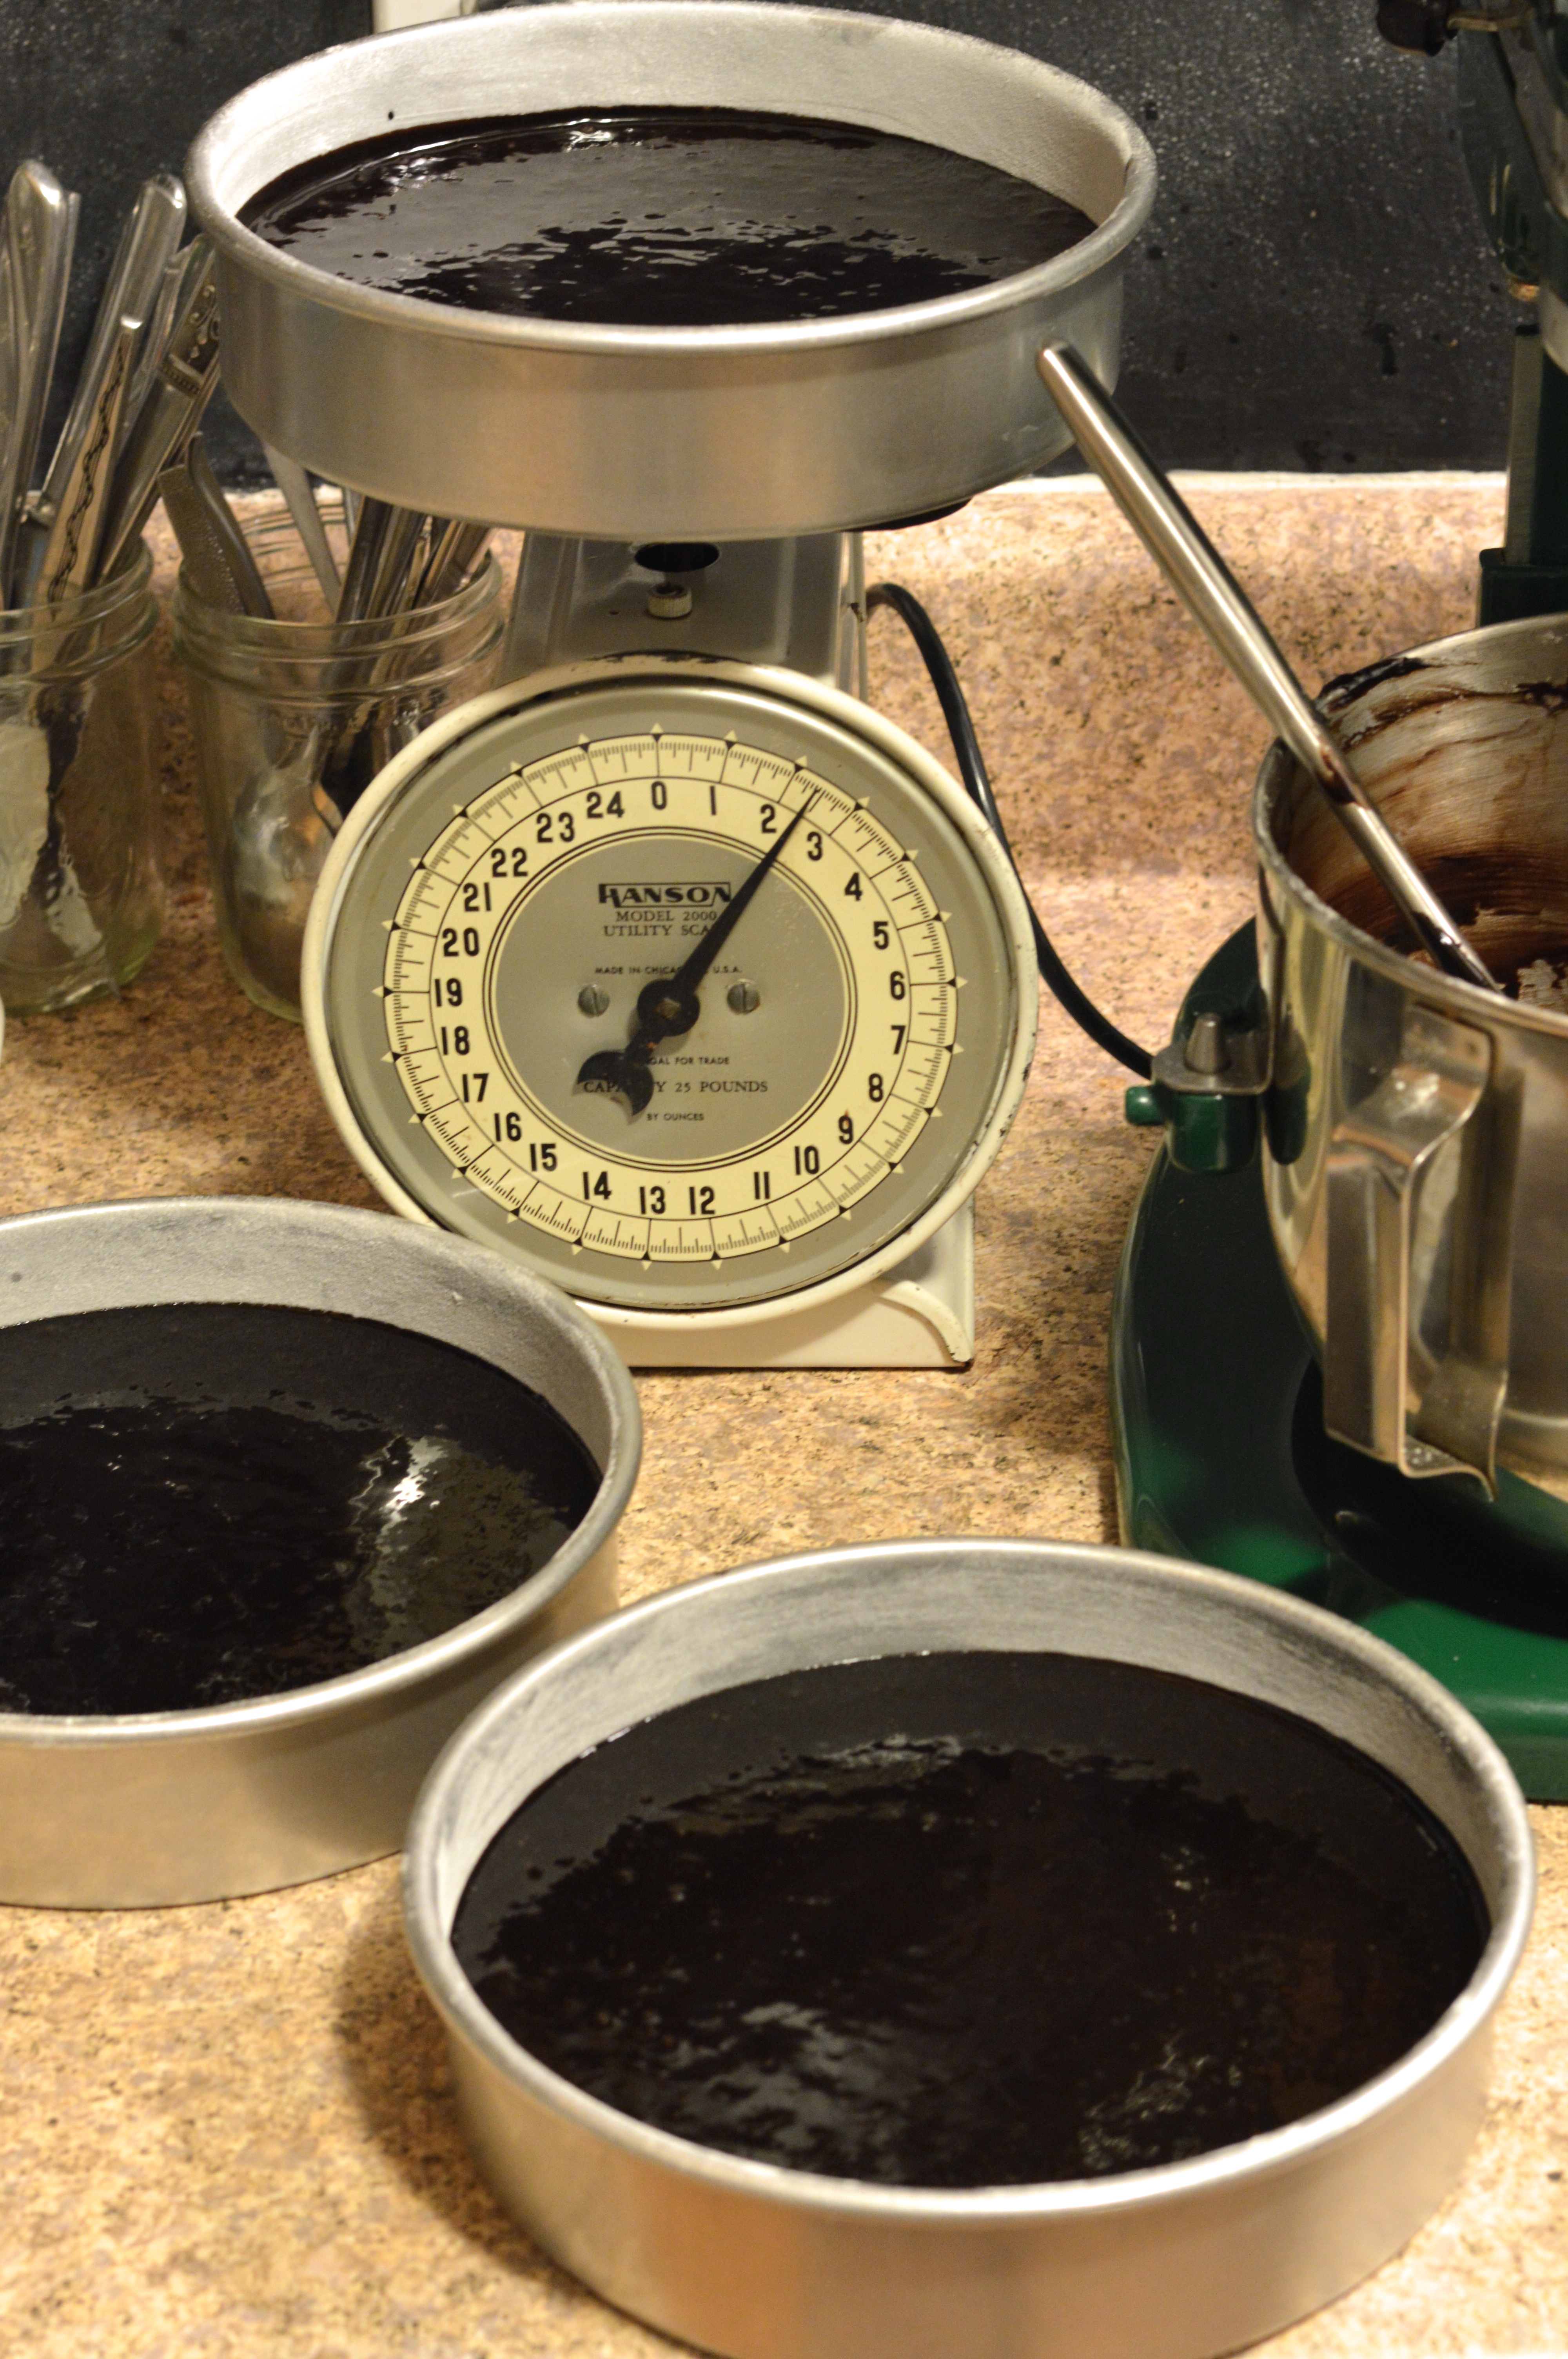
Butter three 8 inch round cake pans, line bottoms with parchment paper, butter paper, and dust pans with flour.
Whisk together cocoa powder and hot water (or coffee) until smooth and set aside.
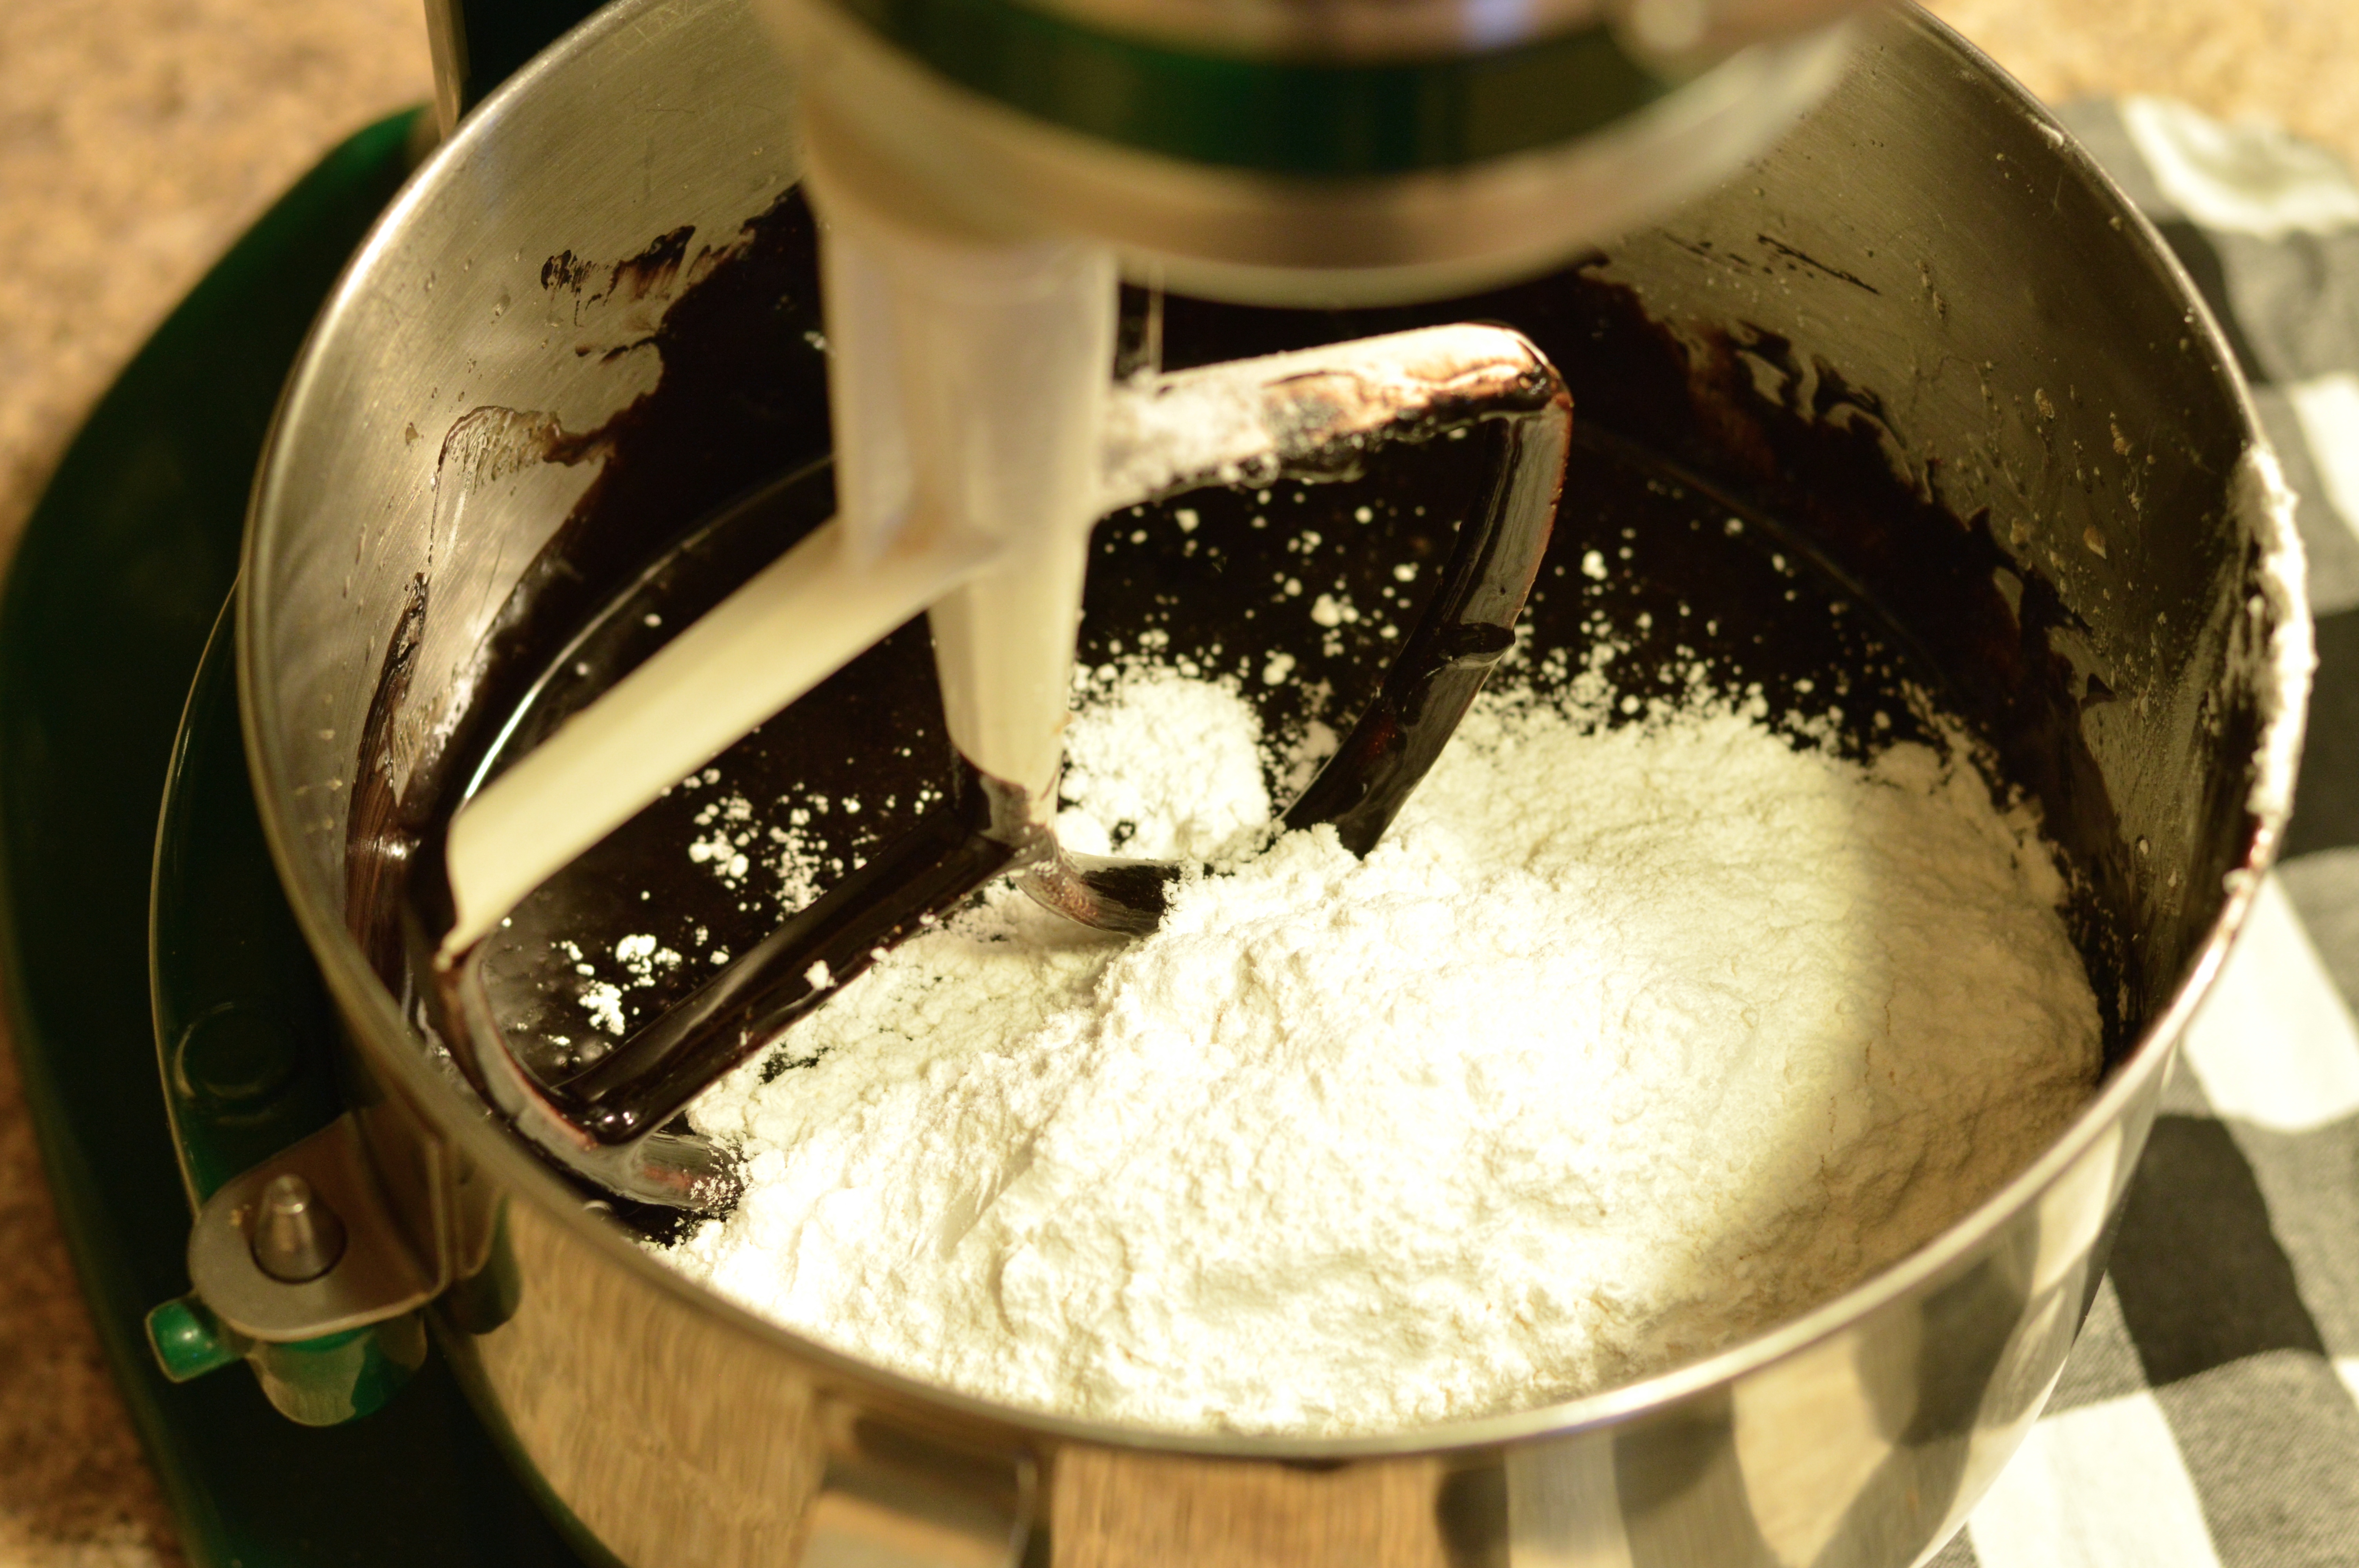
Sift together flour, salt, baking powder, and baking soda; set aside.
Beat melted butter, oil, and sugars together on medium-low speed until combined.
Add eggs, one at a time, beating after each addition.
Beat in vanilla and cocoa mixture. Reduce speed to low.
Add flour mixture in three batches, alternating with buttermilk and beginning and ending with flour. Beat until just combined.
Divide batter between pans, and bake until a cake tester inserted into centers comes out clean, 40 to 45 minutes.
Transfer pans to a wire rack to cool for 30 minutes. Invert cakes onto rack, peel off parchment, and let cool completely.
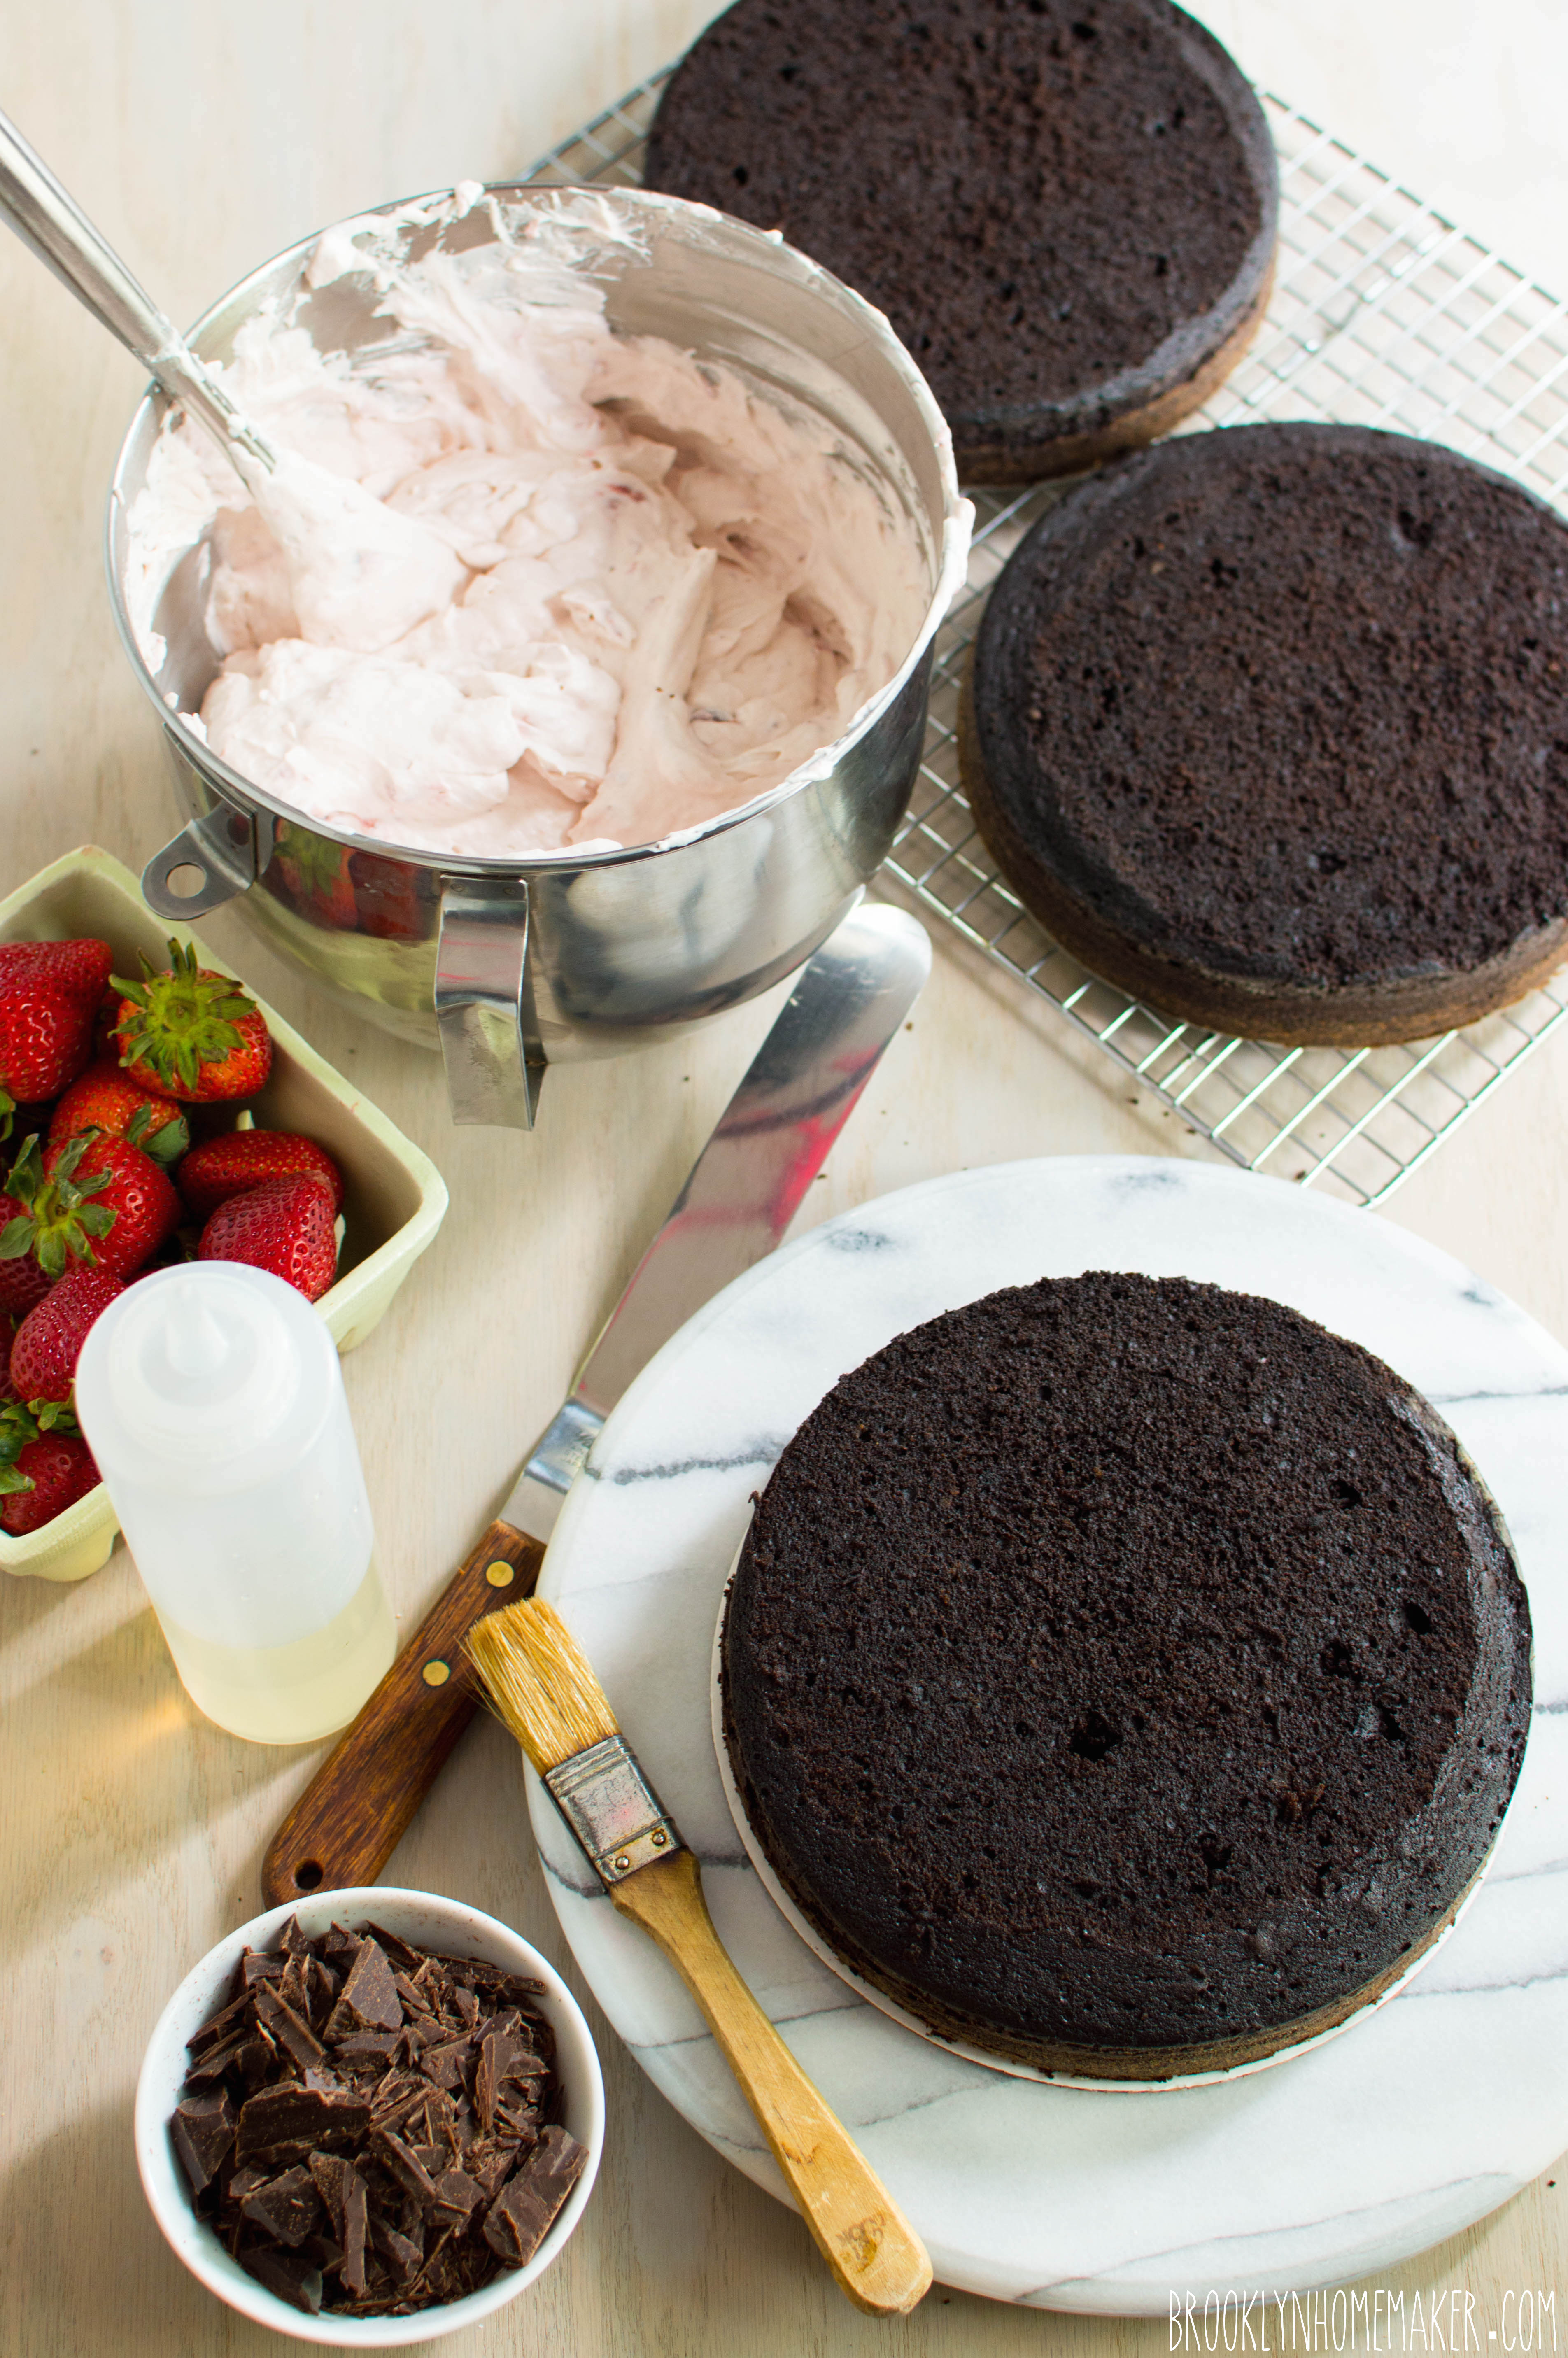
To achieve a perfectly flat, professional looking cake, you’ll want to slice the very tops of the cakes off to make each layer completely flat and level. You can do this using a very sharp bread knife, or a cake leveler.
If you’re not assembling cakes right away, individually wrap each layer tightly in plastic wrap to prevent drying. Layers can be stored in the refrigerator for a day or two, or frozen (wrapped in plastic wrap first, then aluminum foil) for up to two weeks.
Simple Syrup: (optional)
1/2 cup water
1/2 cup sugar
Combine both ingredients in a small saucepan and heat over high heat, stirring until sugar dissolves completely. Remove from heat and cool completely.
Strawberry Mascarpone Icing:
1 lb ripe strawberries
3/4 cup sugar
3 cups cold heavy cream
1 tablespoon vanilla extract
8 oz mascarpone cheese
pinch of salt
Hull and finely chop strawberries and place in a medium saucepan with sugar. Stir to combine and once the strawberries begin to give off liquid, transfer pan to the stovetop over medium high heat. Bring to a rolling boil and reduce to a low boil. Cook for about 30 minutes, stirring occasionally, until thick and syrupy and reduced by about half.
Transfer to a heatproof bowl, cover and refrigerate until completely cool. You can place it in the freezer if you’re in a hurry, but stir often and don’t let it actually freeze.
If preferred, you can substitute 1 1/2 cups good quality store bought strawberry jam to save yourself some time.
Whip cream with a mixer on high just until stiff peaks form. Add vanilla, salt, mascarpone, and strawberry mixture and beat until well combined and mixture stiffens back up. This should only take about 30 to 60 seconds. Don’t over mix or the mascarpone can become grainy. If you’re not using your icing right away you can store it in the refrigerator, but you may want to whip it for another 30 seconds just before icing the cake.
Glossy Ganache Drizzle:
4 oz good quality dark chocolate (60% works well)
1/2 cup + 2 tablespoons heavy cream
1 tablespoon honey
pinch salt
Chop chocolate into small, easily melted pieces and place in a heat proof bowl.
Heat heavy cream, honey, & salt in a small saucepan just until it comes to a light boil, and immediately pour directly over chocolate. Wait 2 to 3 minutes before stirring until completely smooth and melted and free of lumps. If the mixture seems very hot still it may melt the icing as you pour it so wait a few minutes for it to cool slightly. Do not let it get too cool or it will not drizzle nicely and may look messy.
*Do not make the ganache until the cake is completely iced and ready to decorate.
Decorations: (optional)
Various sizes of white candy beads, including:
white sixlets
white candy pearls (sometimes called dragees)
white nonpareils
Assemble cake:
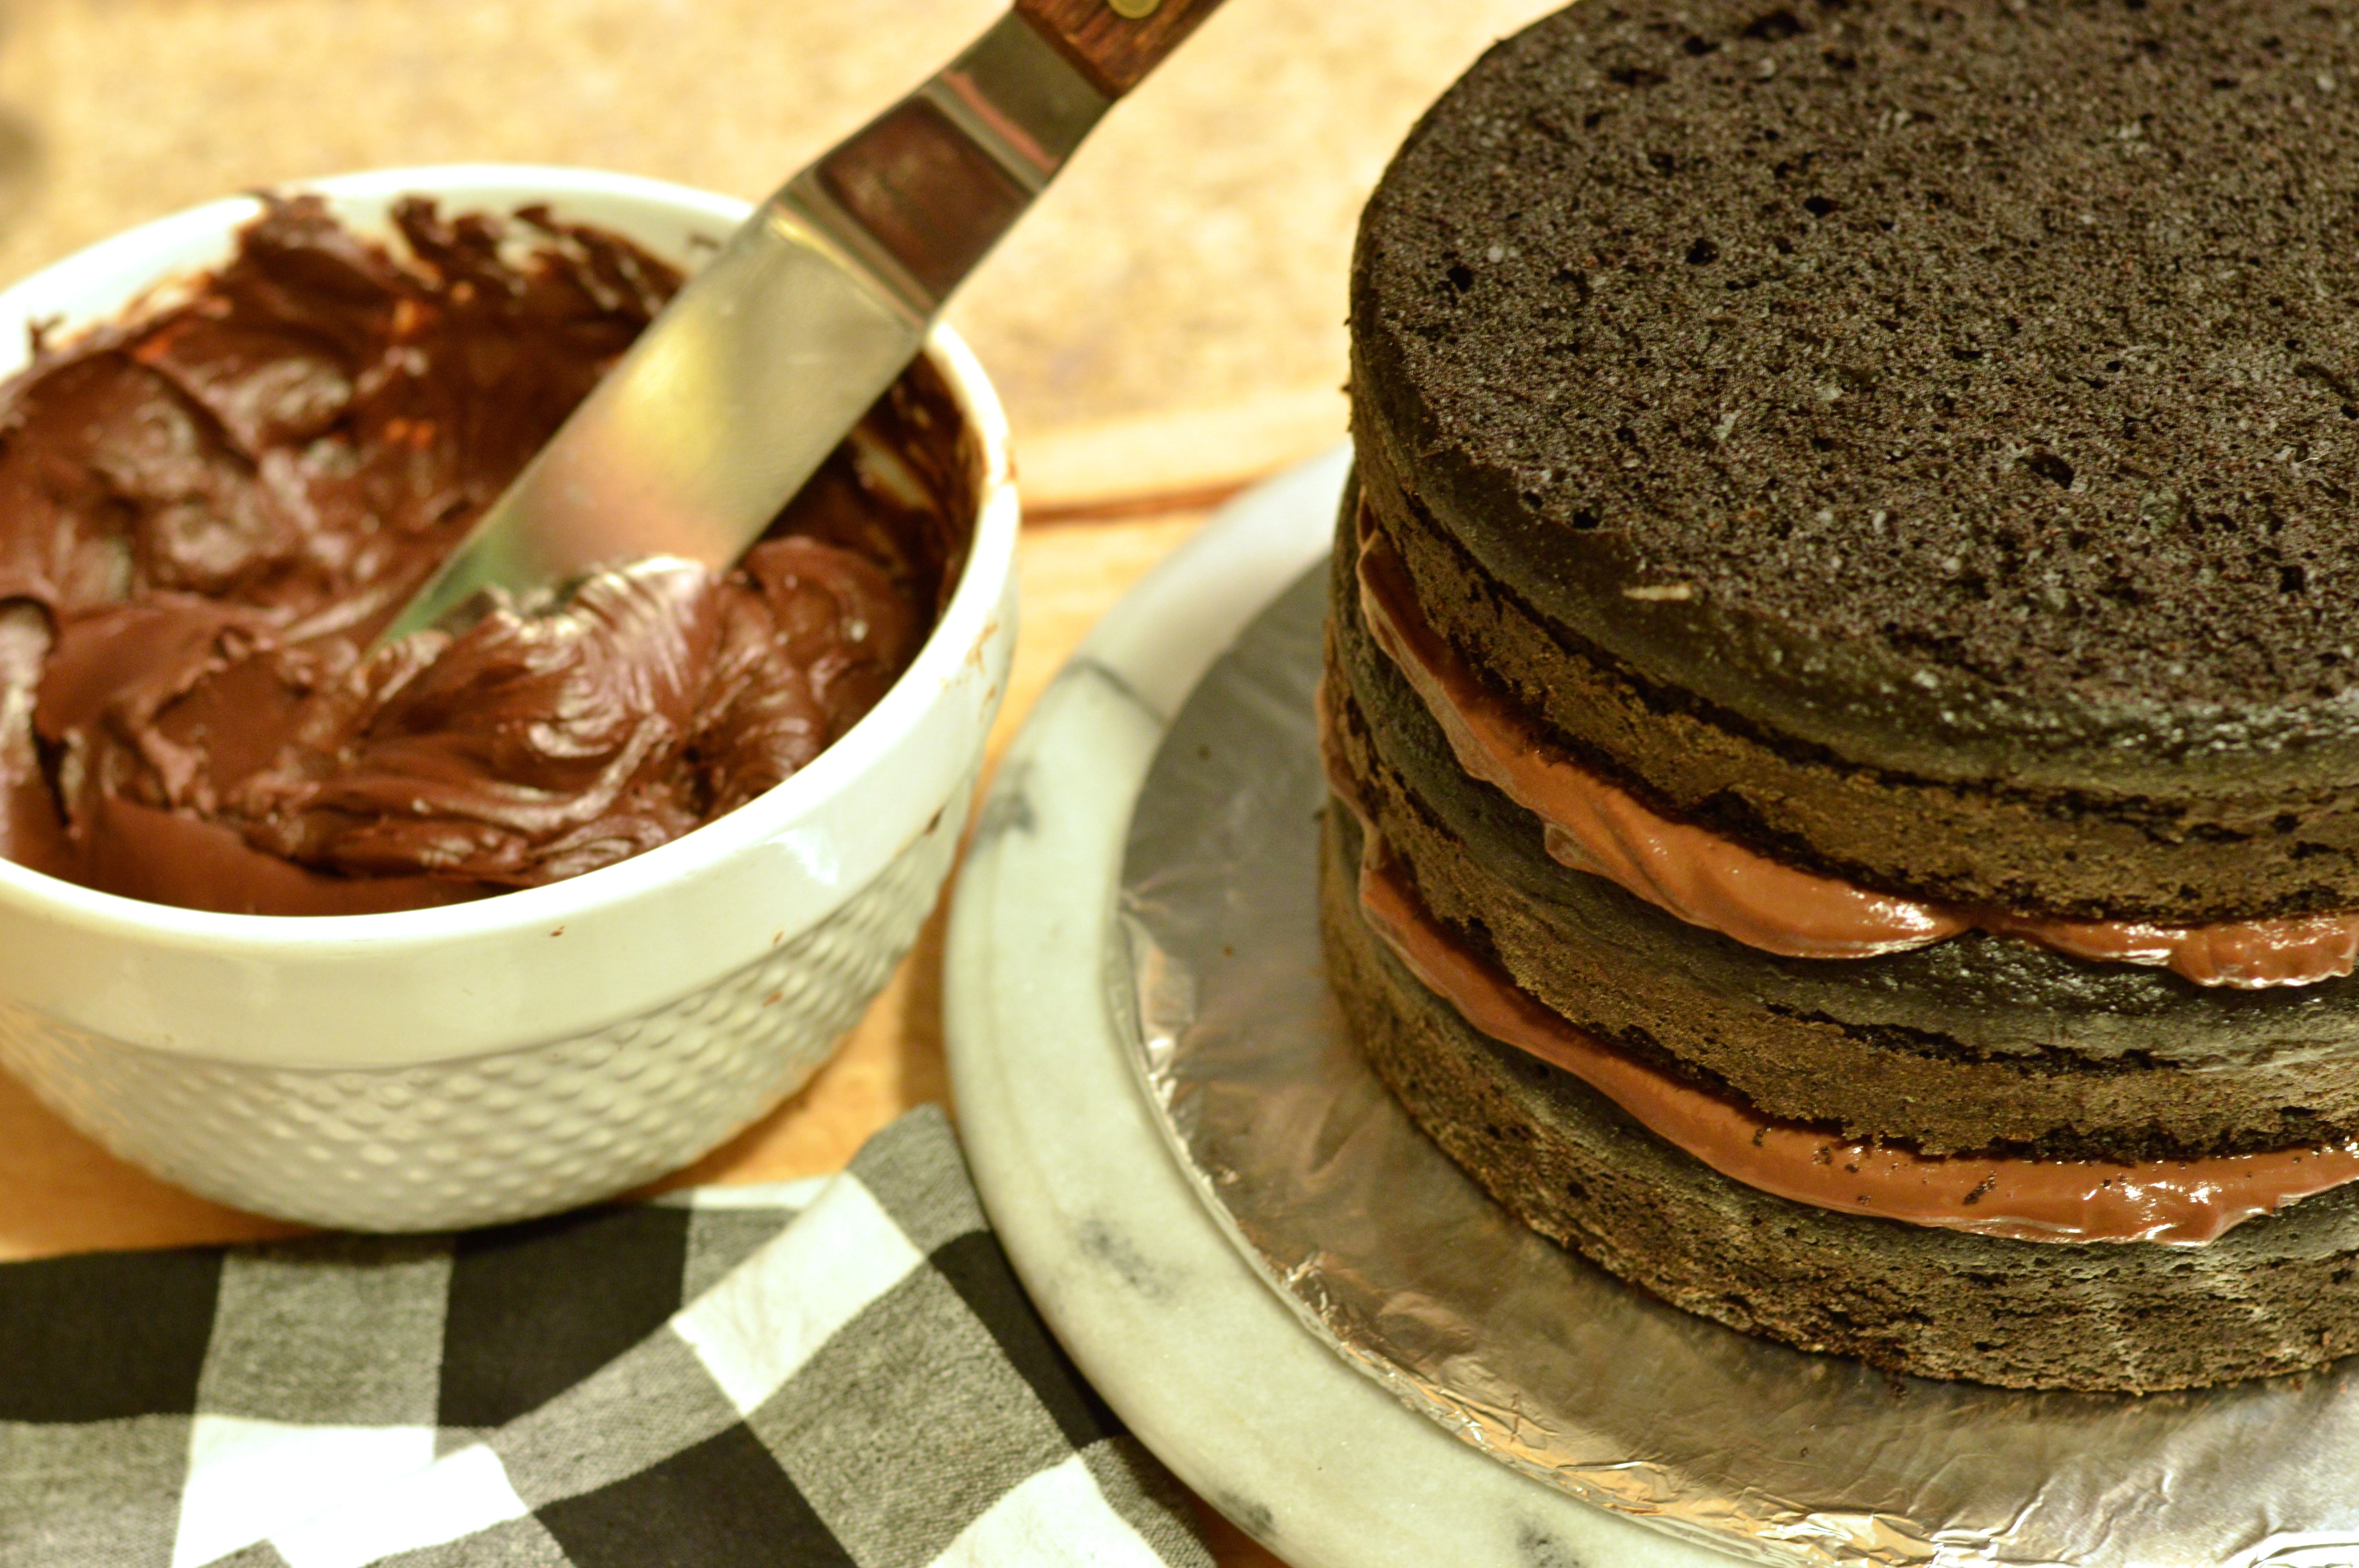
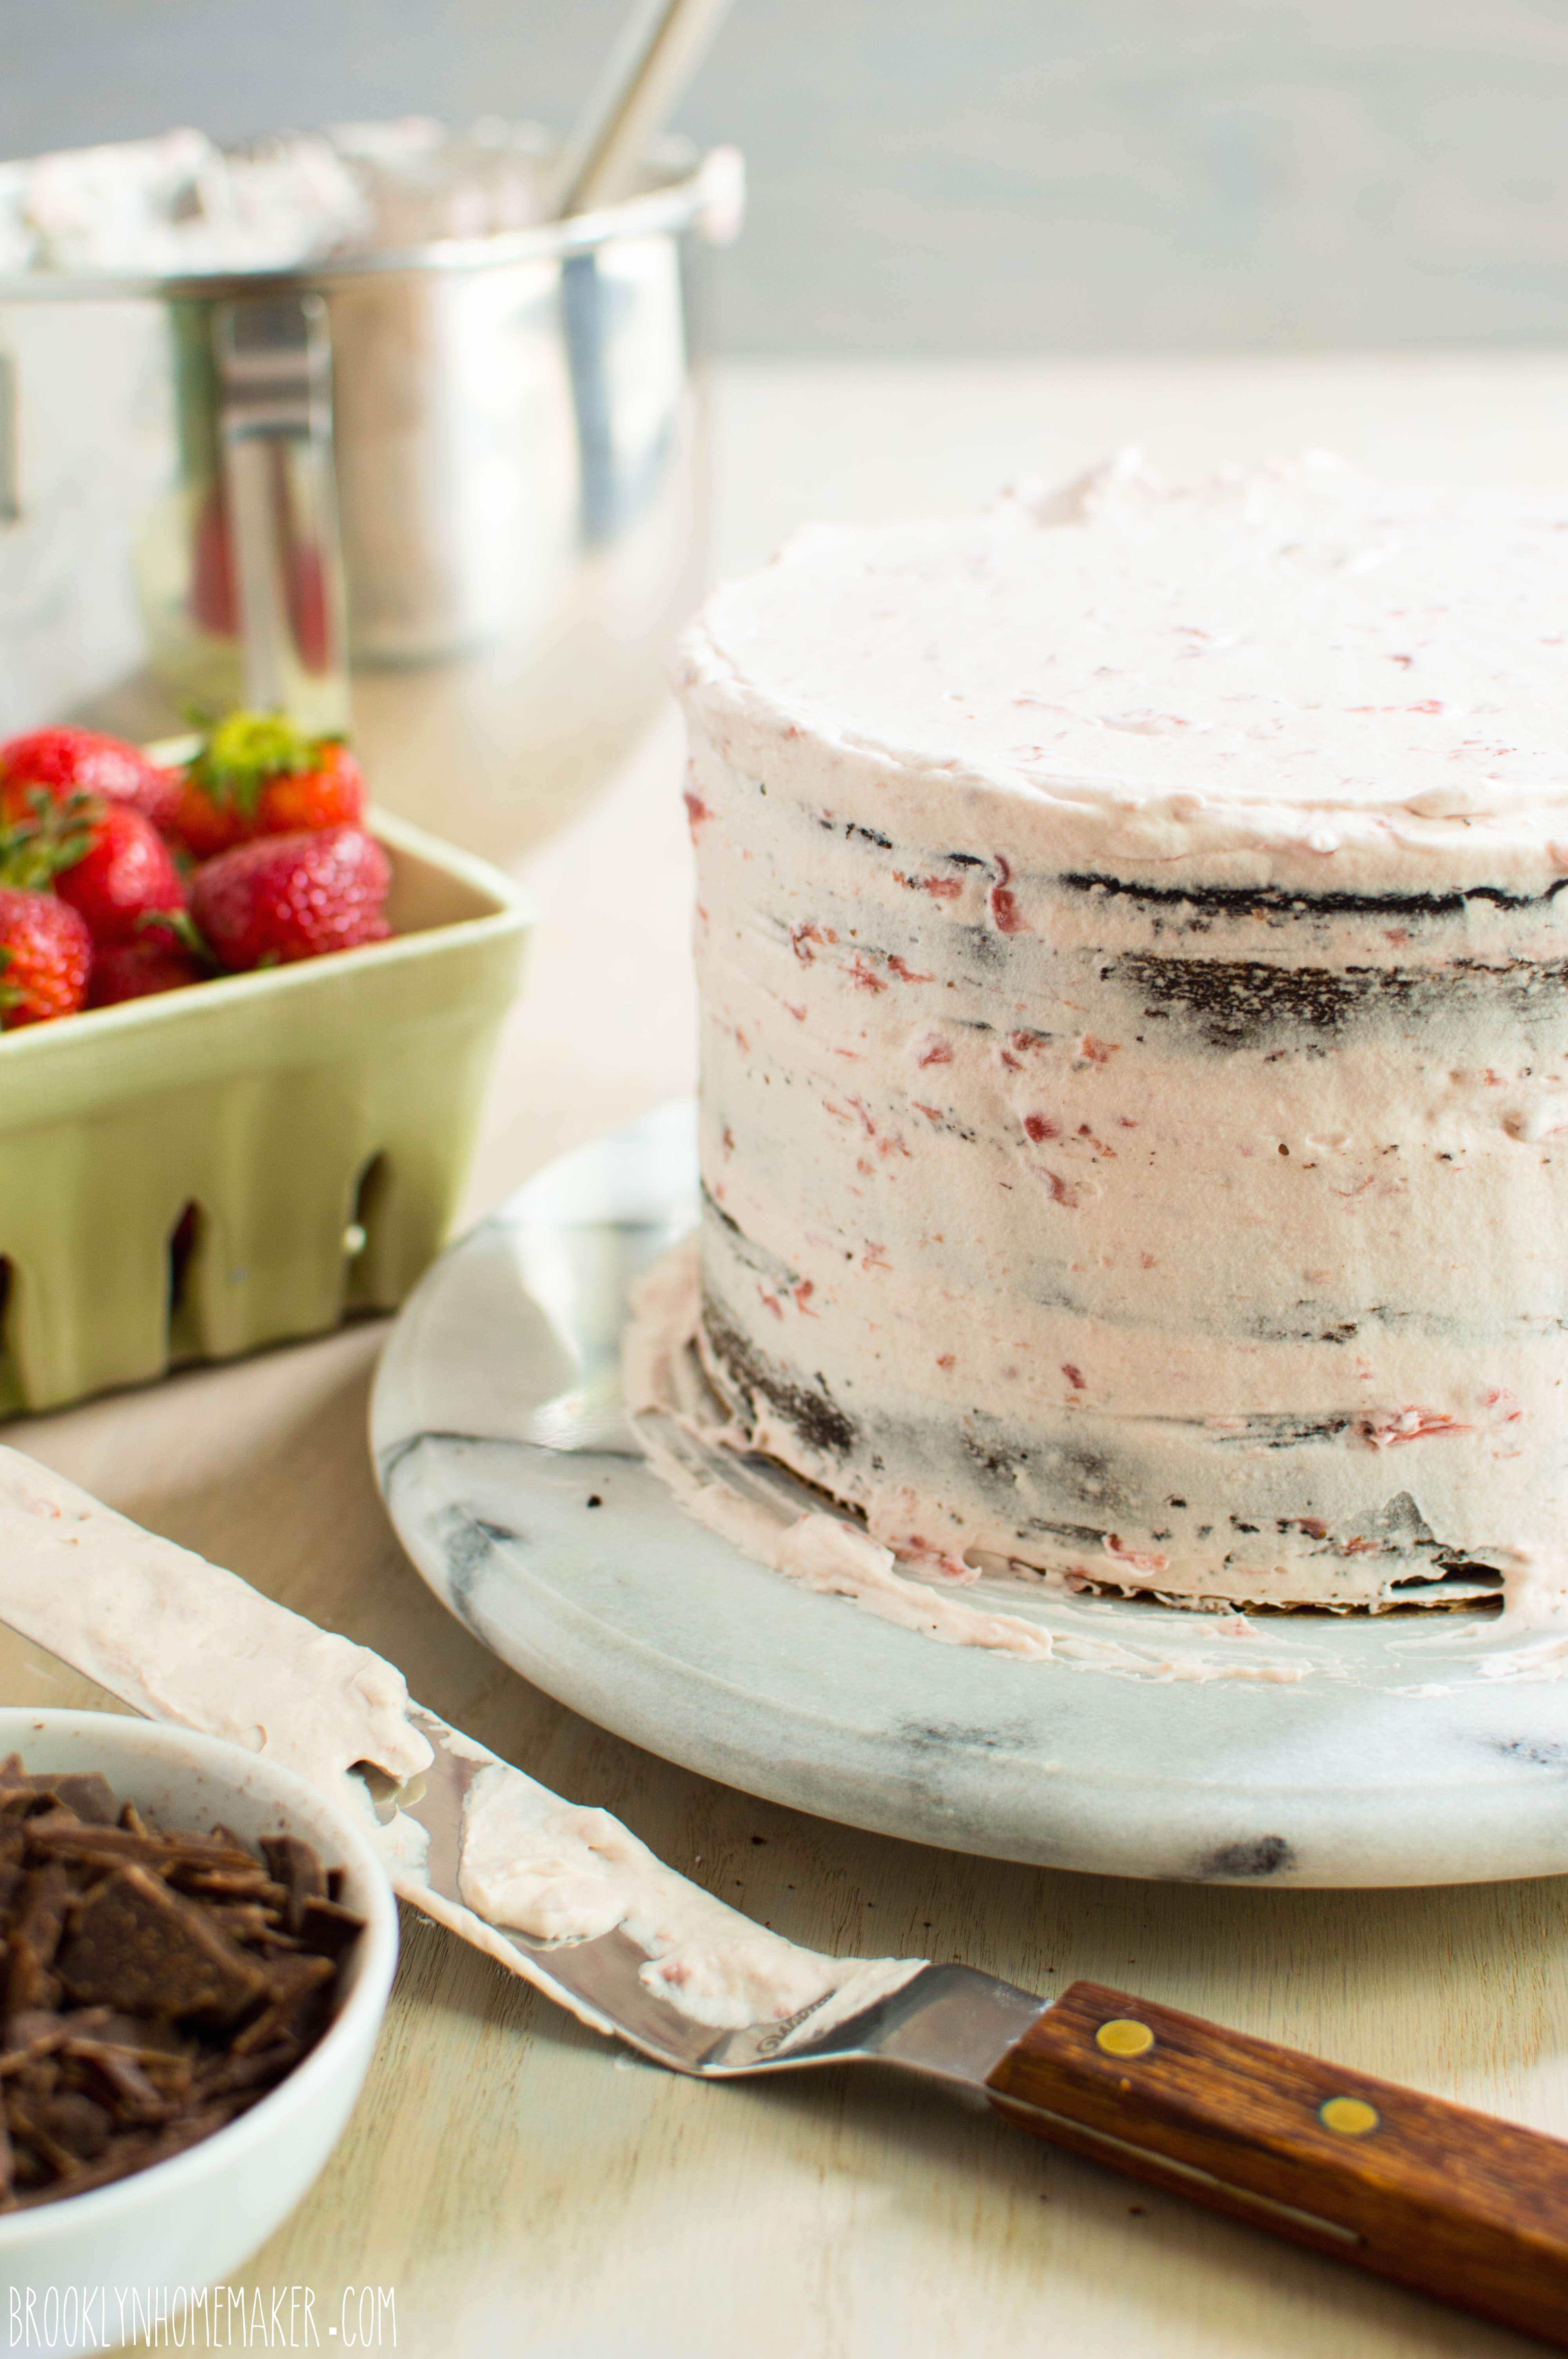
Place the first cake layer on an 8″ cardboard cake round, serving plate, or cake stand. Using a cake round will make it easier to ice and decorate, especially if you have a revolving turntable for decorating (I use a lazy suzan, but you can also just spin your plate or cake stand while you work).
Using a squeeze bottle or pastry brush, evenly distribute 2 or 3 tablespoons of simple syrup over the top of the cake layer. This step isn’t completely necessary but helps ensure the cake stays incredibly moist. It’s especially helpful if you’re using cake you stored in the fridge or freezer for a few days, or if you plan to wait a day or two before serving the cake.
Once the syrup has absorbed into the cake, place about 2 cups or so of icing on the first layer and spread it smooth and even using an icing spatula. It’s okay if it spreads out past the edge of the cake layer a bit. Add the next layer of cake, looking from directly over the top and from eye level at the cake to make sure each layer is directly one above the other, rotating the cake to be certain. Repeat with the simple syrup and icing again, then add the third and final layer and repeat again. Using the same amount of icing as before, start with the top of the cake but spread the icing thinner and work some of it down the sides of the cake to completely cover the whole cake in a thin, smooth, even coat of icing. This first layer of icing is called the crumb coat, and it seals the cake and keeps crumbs from being visible in the outer layer of icing.
Place the cake in the refrigerator for about 30 minutes to help set the icing and firm up the cake.
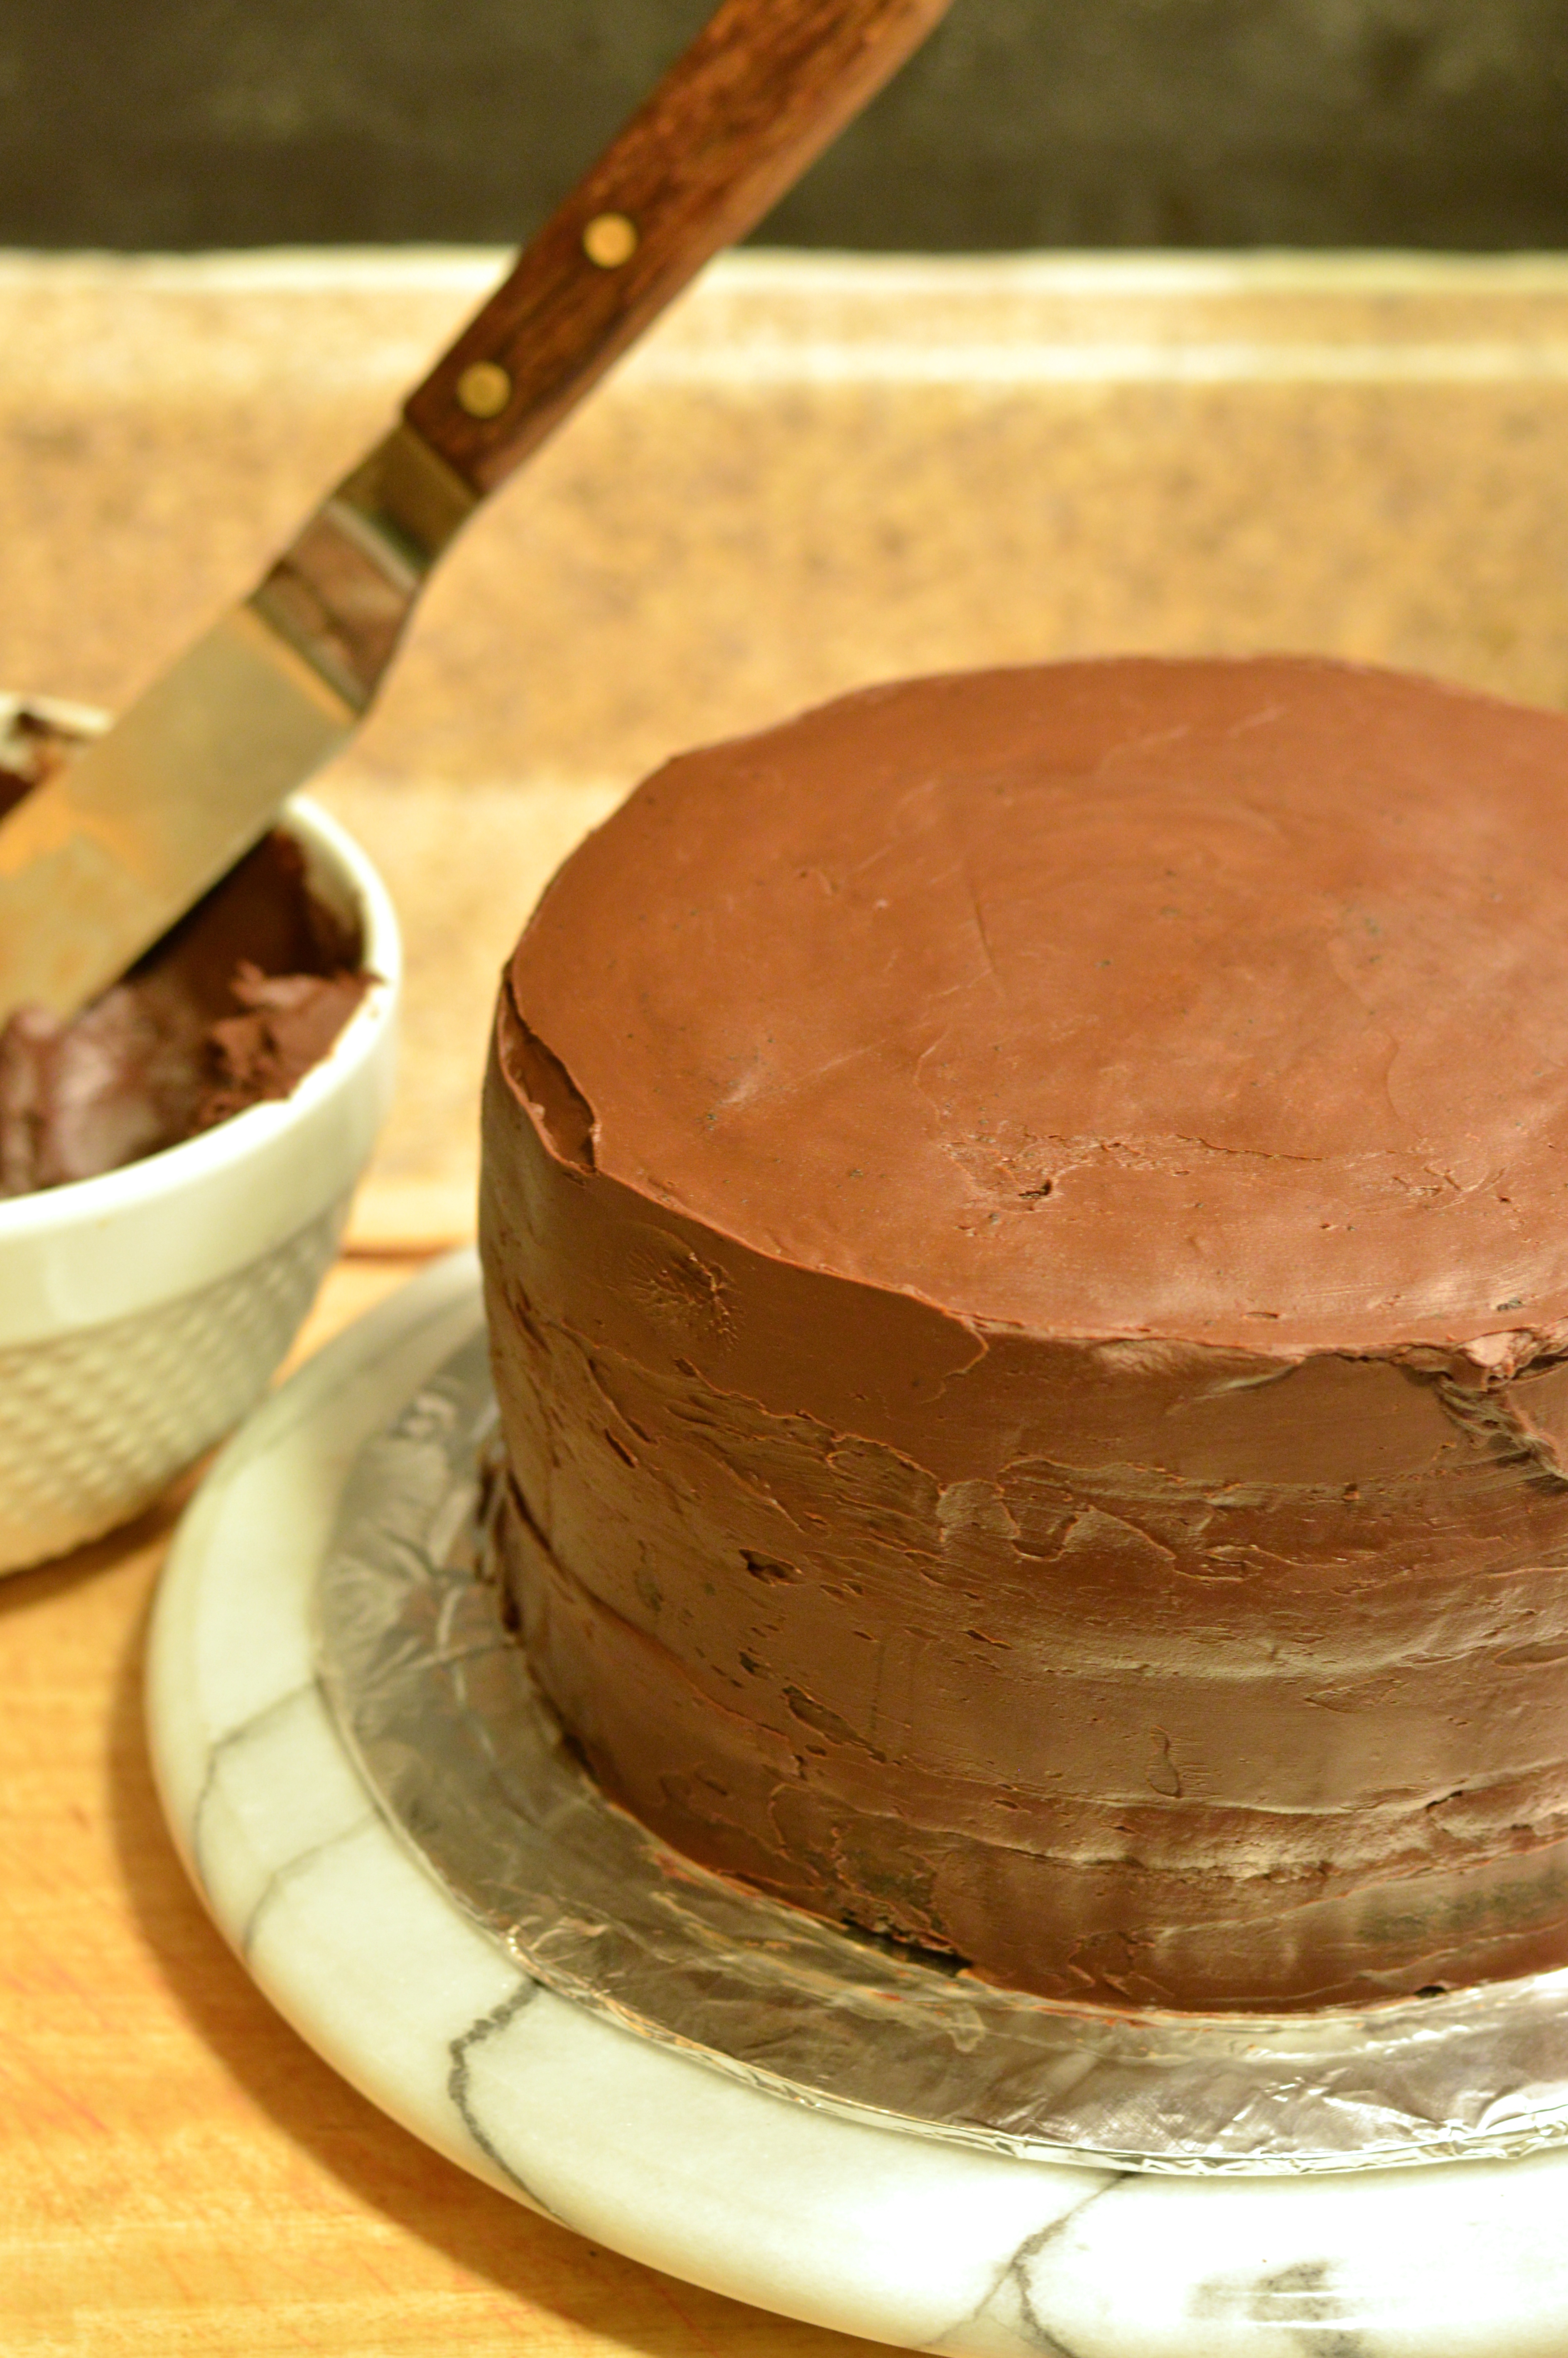
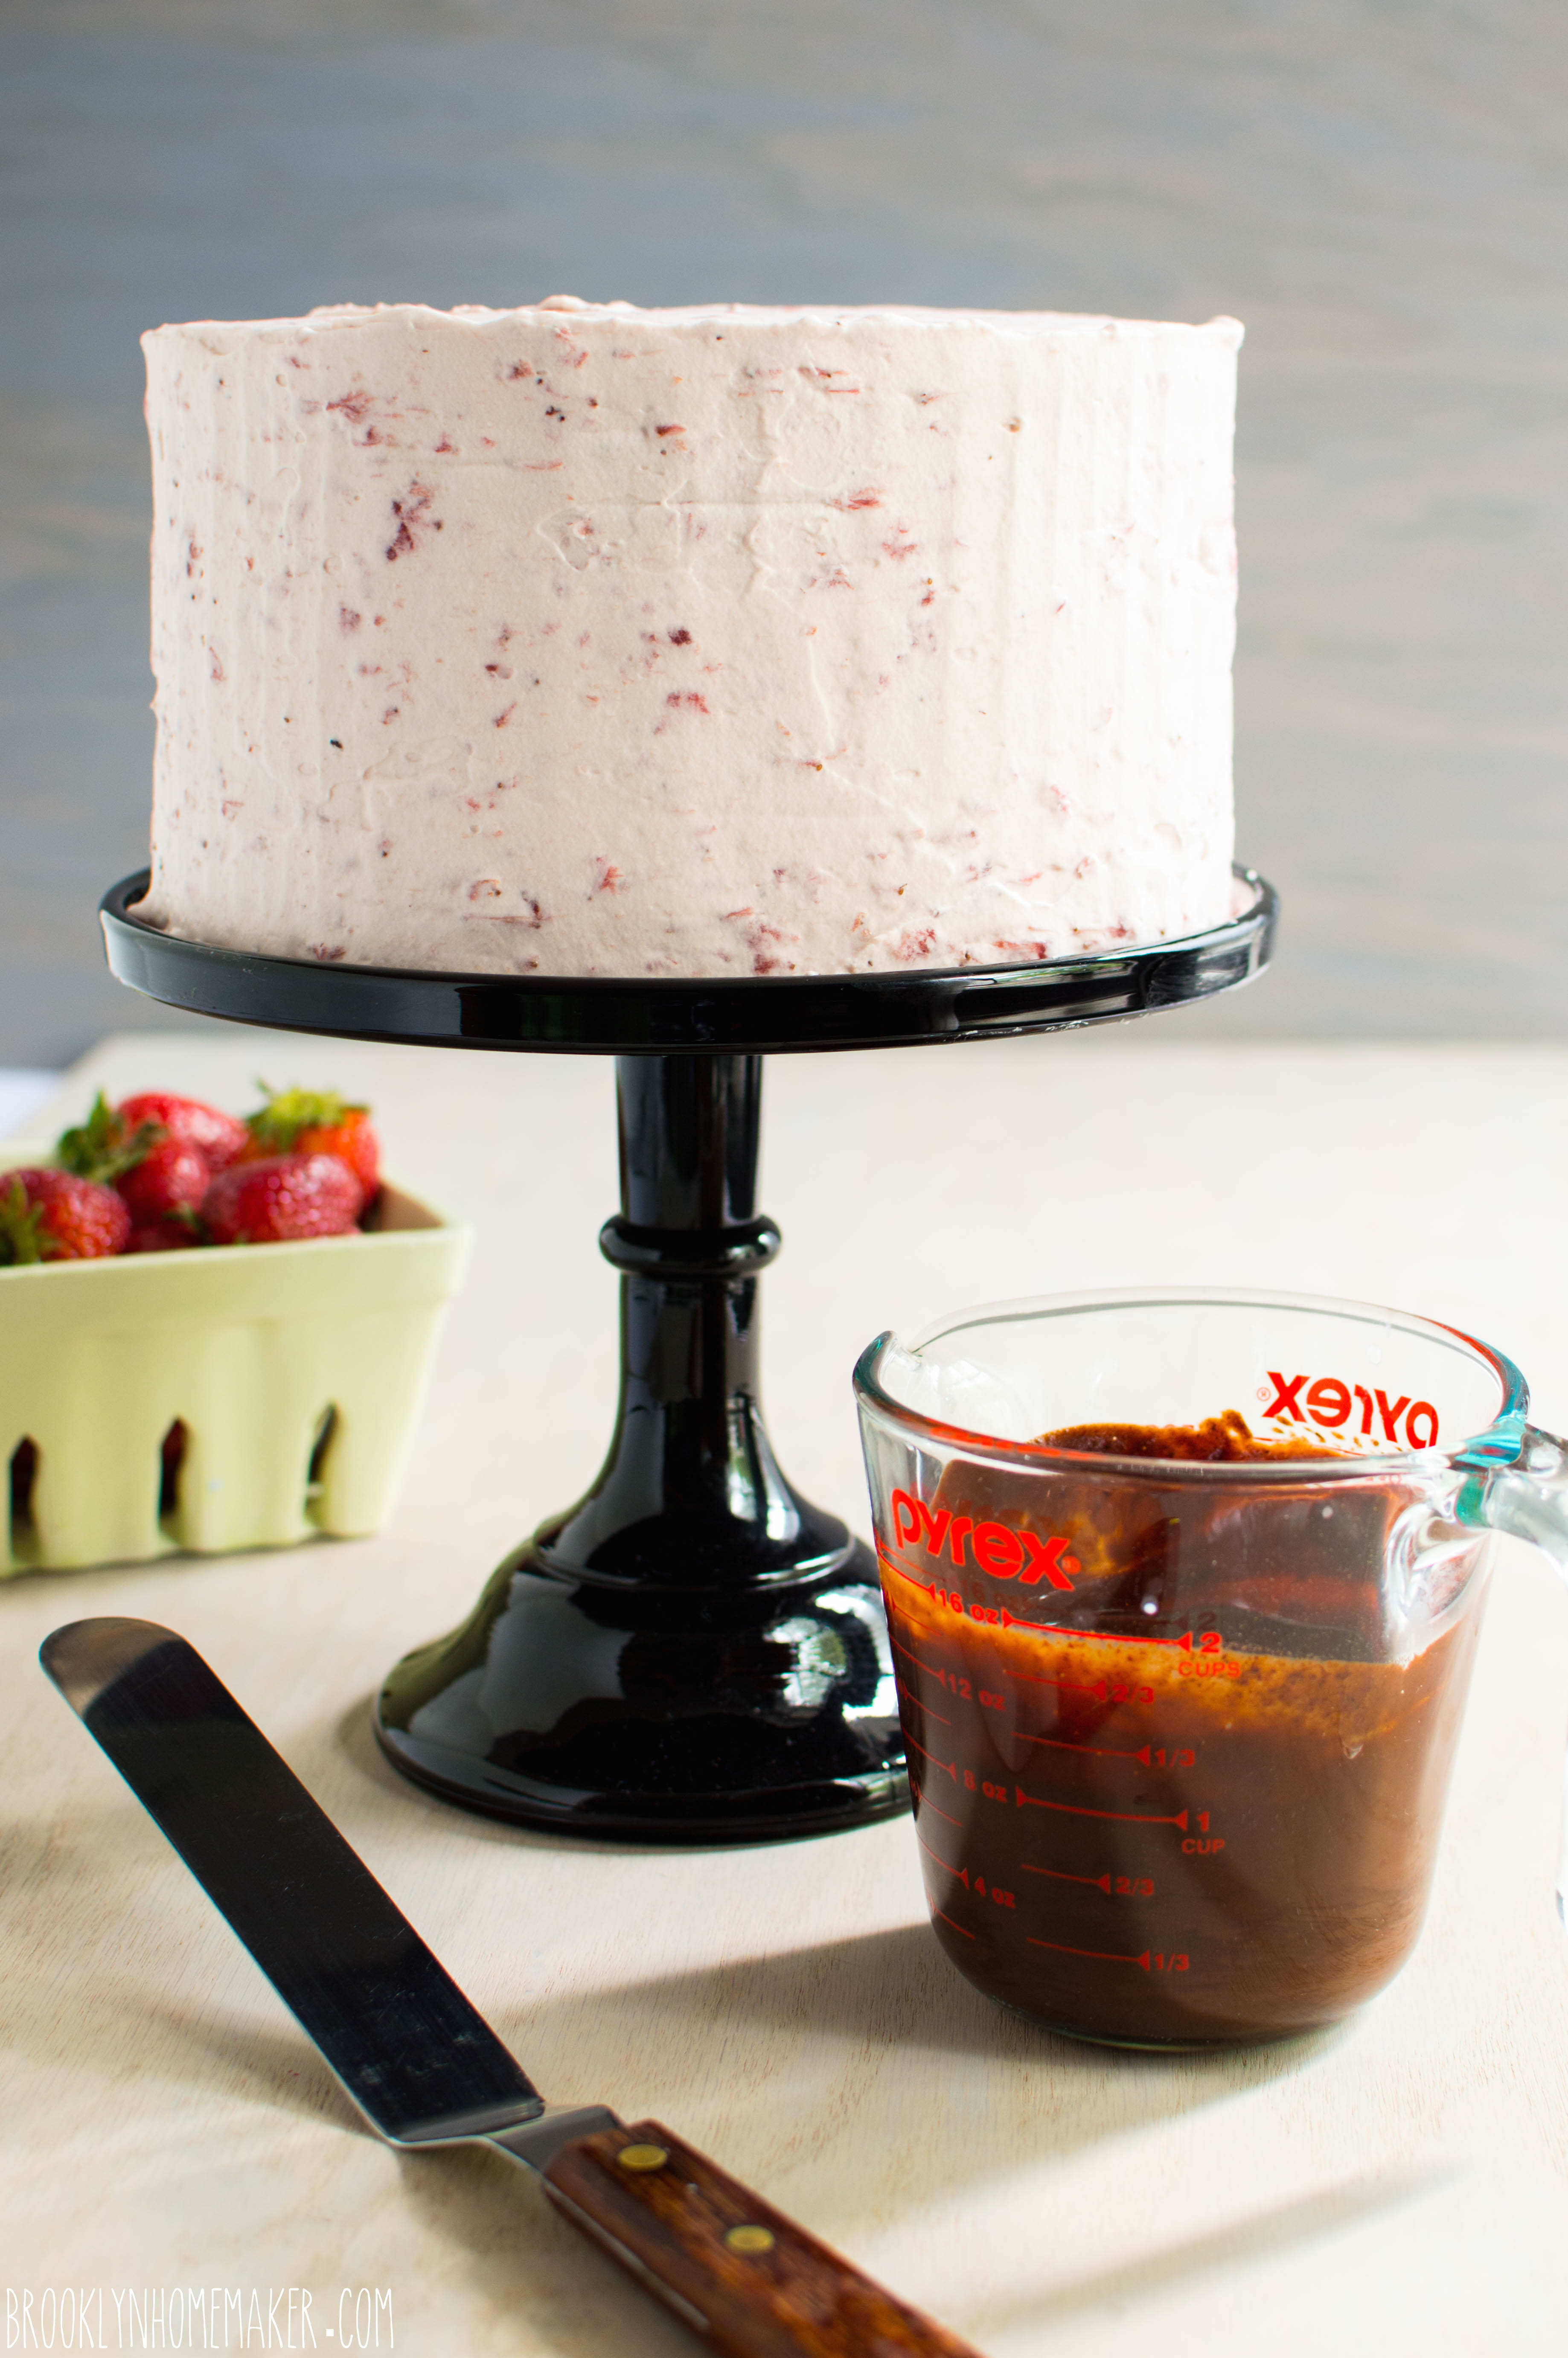
After 30 minutes top the cake with about 3 to 4 cups more icing and spread it over the whole cake the same way you did the crumb coat. Start by smoothing the top and slowly work the icing down the sides to cover the cake completely. Try to get the icing as completely smooth as possible with straight sides and a flat, level top. You may have some icing left over, and I couldn’t blame you if you ate some of it with a spoon. Refrigerate the cake again for another 30 minutes (or up to a day).
Make your ganache just before you’re ready to remove the cake from the fridge.
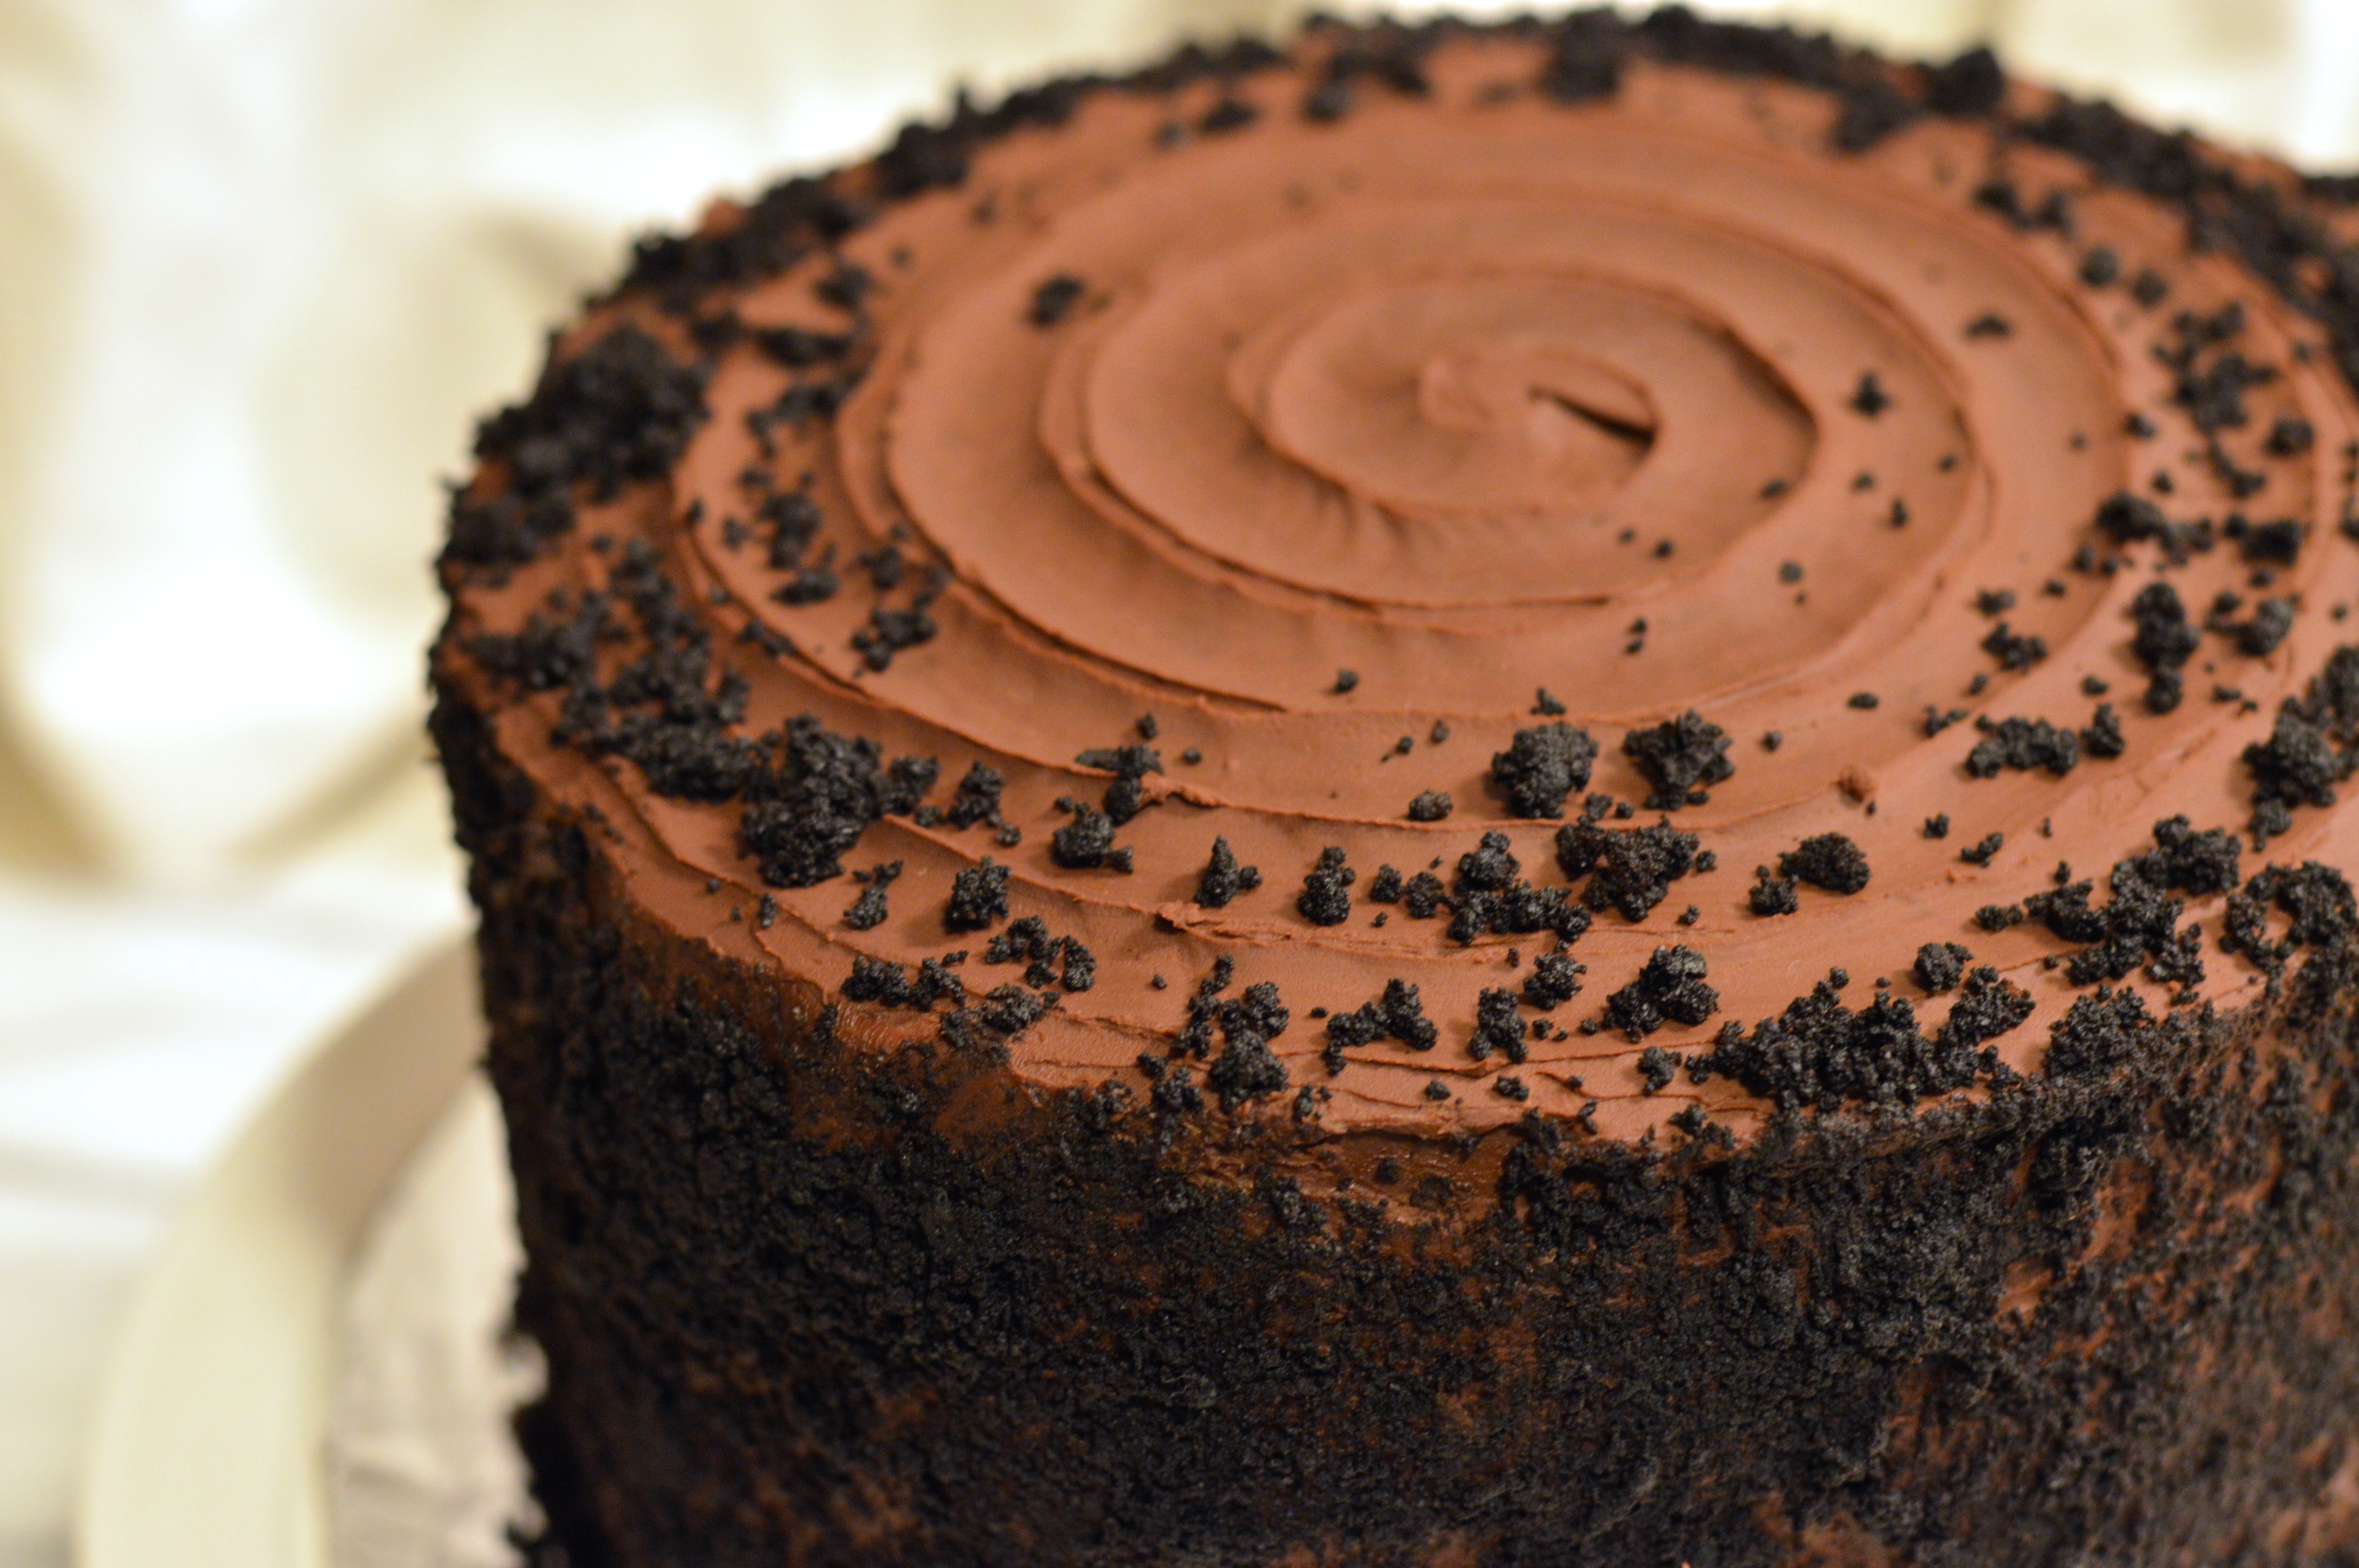
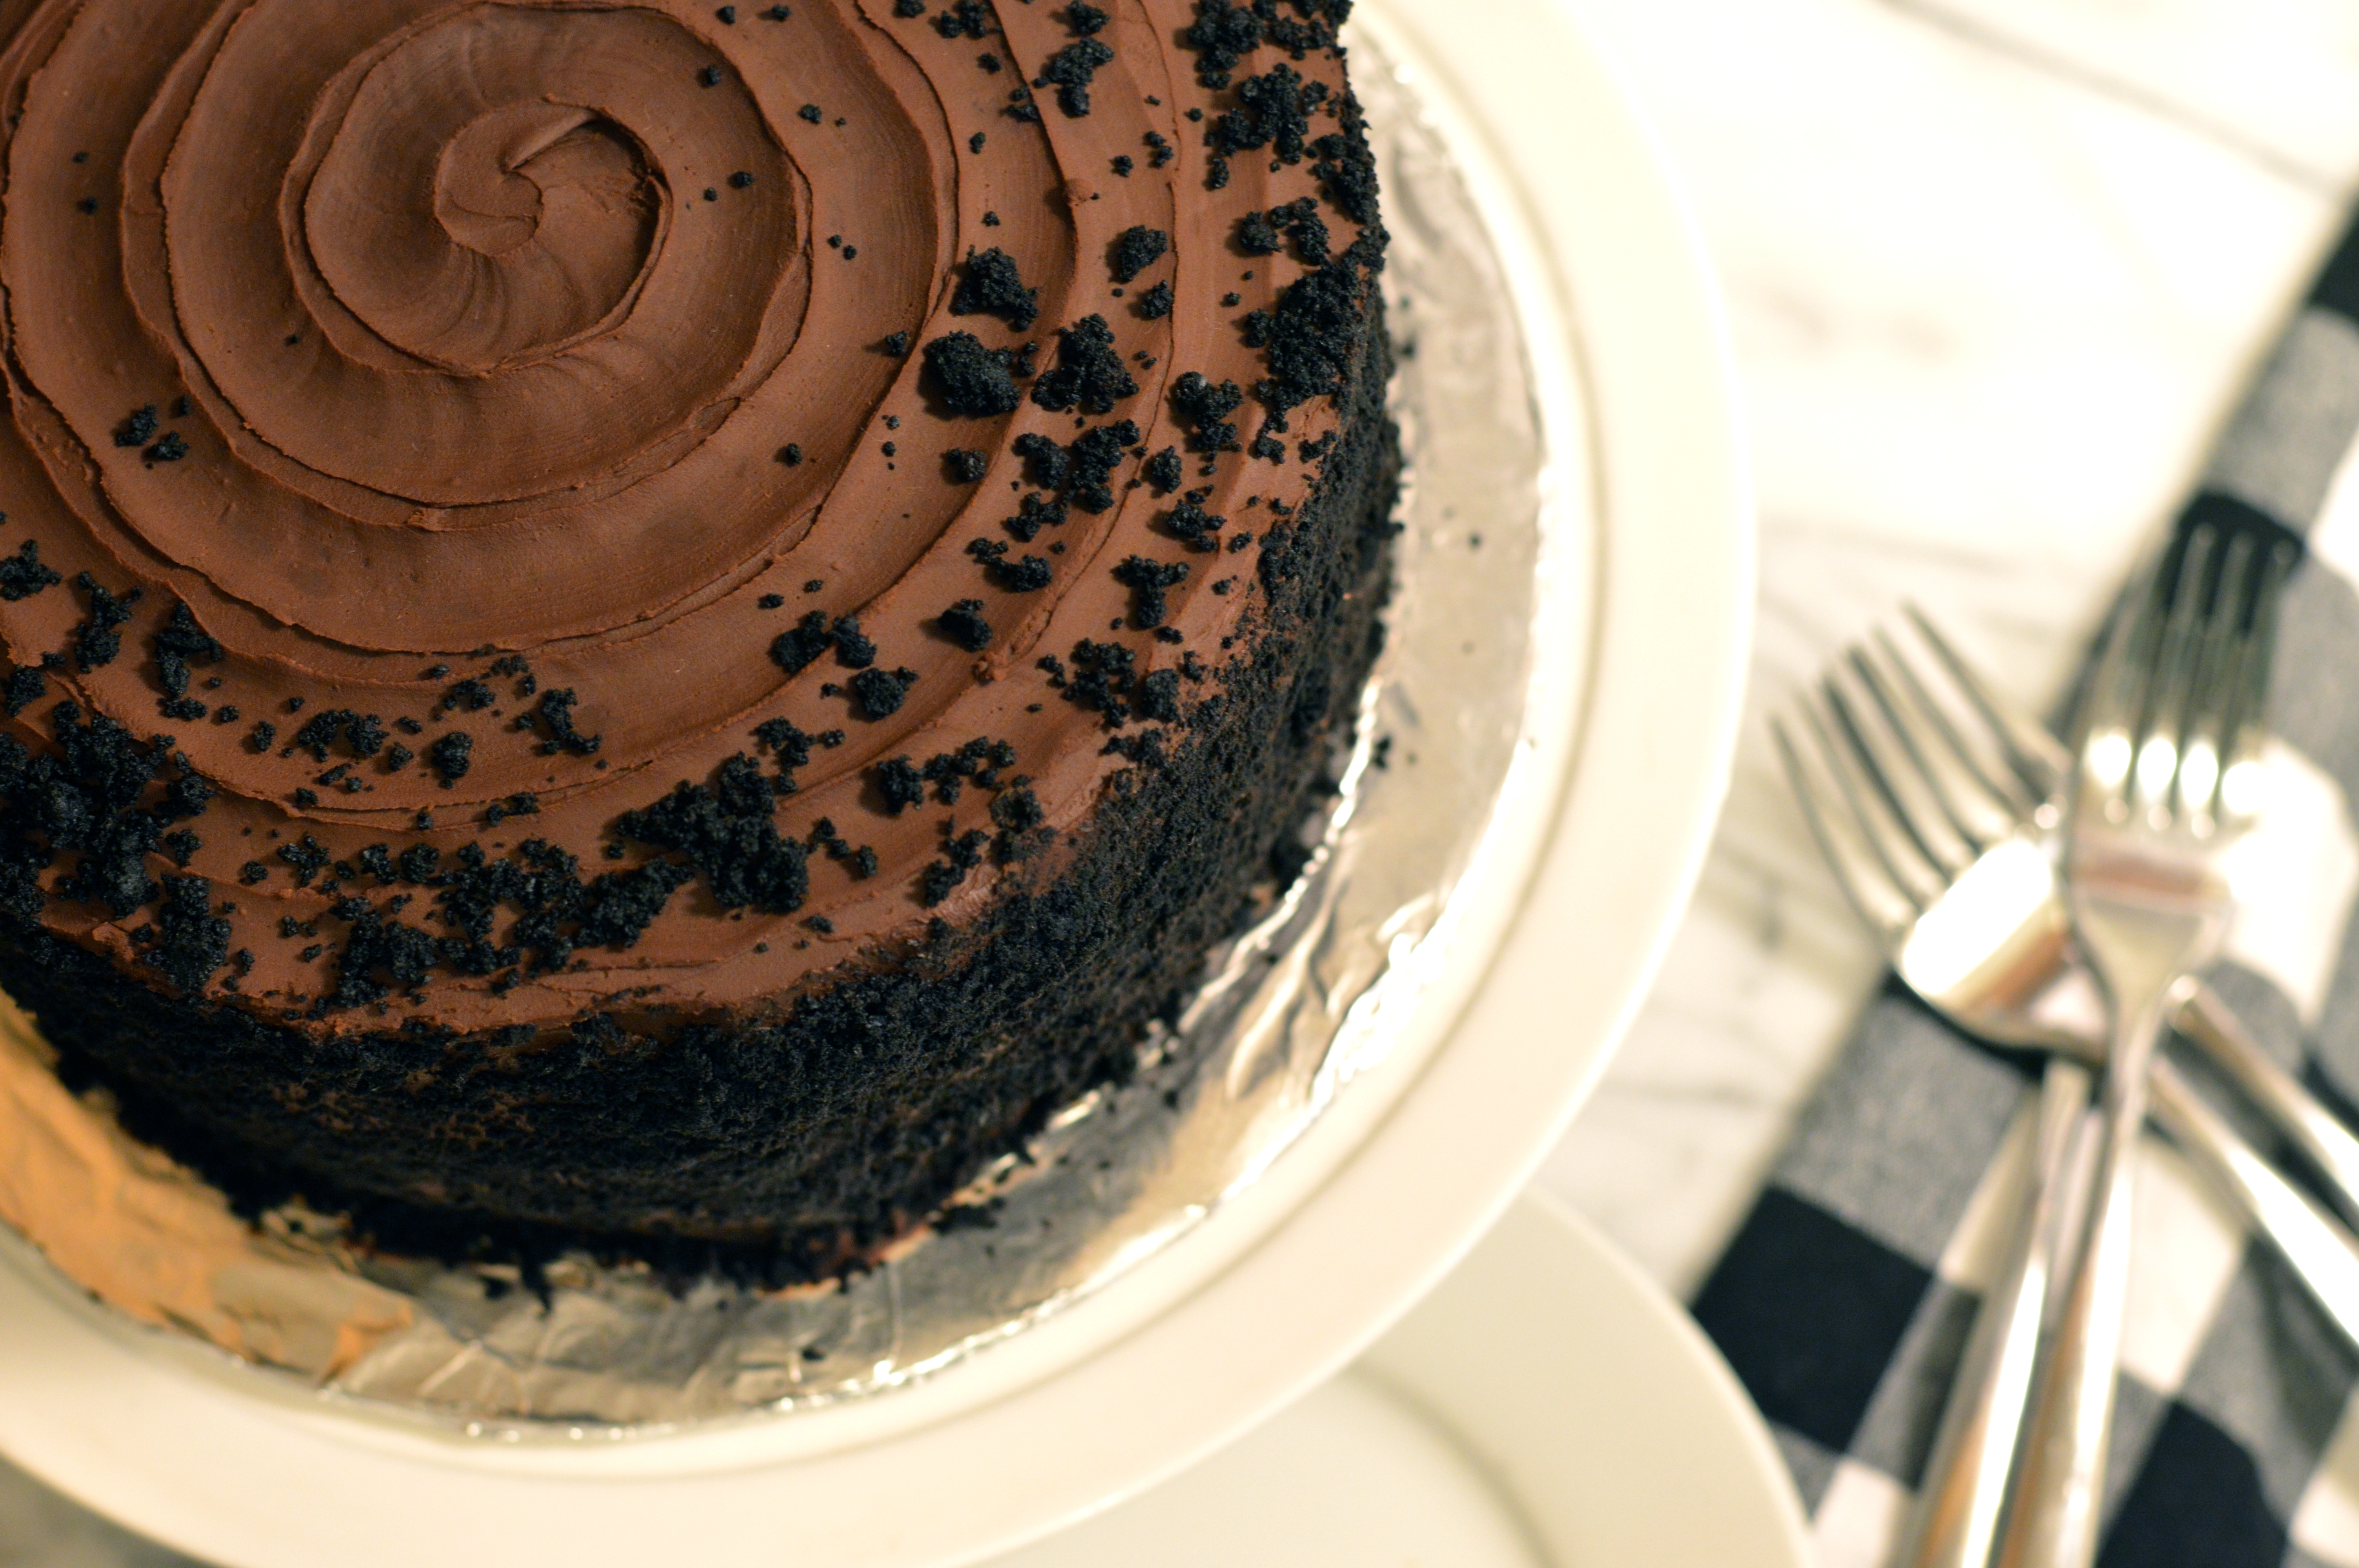
I find it easier to get an even, professional looking drizzle by slowly pouring the ganache just around the outer edge of the top of the cake, while slowing rotating the cake. Once you’re happy with the amount of drizzle coming down the sides, use the remaining ganache to fill in the center of the top of the cake, smoothing it flat with a clean icing spatula before the ganache sets.
If you’d like to add decorations to the top of the cake, be sure to add them before the ganache sets. I used a mix a mix of multiple sizes of white candy beads, about 2 to 3 tablespoons of each, starting with the largest size and finishing with the smallest.
This cake will keep well in a cake saver at room temperature for a day or two if the weather is not too hot or humid. Otherwise, cover tightly and store in the refrigerator for up to 3 days.
If refrigerating, bring cake to room temperature at least an hour before serving.