Desserts

orange glazed roasted butternut squash bread

It’s been a minute I know. I’m sorry.

orange glazed roasted butternut squash bread | Brooklyn Homemaker

I think this little two week break is the longest I’ve ever gone between posts since I started this whole adventure. I promise that I have a very good reason for for my little hiatus.

orange glazed roasted butternut squash bread | Brooklyn Homemaker

I’ve been working on giving my kitchen a little facelift. I told you a few weeks ago that I wanted to change a few things in there, and your comments and encouragement gave me the strength to take action on a project I’ve wanted to tackle for years but never did. I don’t want to give anything away just yet, but rest assured things are looking rather different in there.

orange glazed roasted butternut squash bread | Brooklyn Homemaker

I’ve still got a bit of work to do, but I hope to be able to give you a peek at the progress in a week or two. Right now though, the kitchen is a total mess, and Russell and I have been surviving on delivery pizzas, tacos, and Thai food. I really can’t wait to get back in there and start cooking again, and get back into the swing of things over here too.

orange glazed roasted butternut squash bread | Brooklyn Homemaker

Luckily, I had the foresight to make one last treat before the disarray began. I’ve been so distracted over the past few weeks though, that it’a just taken me this long to get around to posting the recipe.

orange glazed roasted butternut squash bread | Brooklyn Homemaker

This cold weather has me craving some homey comforting sweet bread, with a healthy dose of warm spice. At first I was thinking about making pumpkin bread, but on a whim I decided to try it with butternut squash instead. Butternut squash, roasted and pureed, has much the same texture as pureed pumpkin, but has a brighter, fresher, sweeter flavor.

orange glazed roasted butternut squash bread | Brooklyn Homemaker

To compliment that brightness and sweetness, I added a bit of fresh orange zest to the recipe. I kept the cinnamon in the recipe for the traditional warmth, but in place of nutmeg I substituted a bit of ground ginger and clove to compliment the citrus.  Then I topped the whole thing with a thick orange glaze.

orange glazed roasted butternut squash bread | Brooklyn Homemaker

This loaf is incredibly moist and tender, with a wonderfully homey and satisfying flavor. It’s such a fun yet familiar twist on traditional pumpkin bread. The warm spice is perfectly suited to the flavor of the earthy roasted butternut squash, and the orange zest adds a lovely touch of brightness. The bread itself is so perfect on it’s own that it doesn’t even really need the glaze, and would be just as good with a simple swipe of soft unsalted butter.

I added the glaze to boost the citrus flavor, but I have to admit that I found it just a bit too sweet for my taste. My sweet tooth just prefers something a bit more subtle. If you think you’re like me and might prefer a more refined sweetness, you could skip the glaze altogether if you like. You could also try using less sugar to make a thinner glaze, or even try a cream cheese icing instead. If you like a nice dessert-like sweetness though, just make the glaze as is. Either way, a slice of bread will be heaven with your morning coffee or perfect as a treat at the end of the day.

orange glazed roasted butternut squash bread | Brooklyn Homemaker

Orange Glazed Roasted Butternut Squash Bread

  • Servings: Makes 2 loaves
  • Print
adapted from Once Upon a Chef

Bread:
1 small to medium butternut squash
2 teaspoons peanut or vegetable oil
2 cups all-purpose flour
1 teaspoon baking soda
1/2 teaspoon baking powder
1/2 teaspoon salt
zest of 1 orange
1 teaspoon ground cinnamon
3/4 teaspoon ground cloves
1/2 teaspoon ground ginger
1 3/4 cups sugar
1 1/2 sticks (3/4 cup) unsalted butter, melted
2 large eggs

Glaze (optional):
zest of 1 orange
1/4 cup fresh squeezed orange juice
2 cups confectioners (powdered) sugar, sifted

Preheat oven to 400 degrees. Cut the butternut squash in half lengthwise and remove seeds. Rub flesh with oil and place cut side down on a parchment lined baking sheet. Roast for 35 to 40 minutes or until soft when pushed with a finger. Cool until cool enough to handle.
Peel the skin off the outside of the squash, and puree the flesh in a blender or food processor, or in a bowl using an immersion blender.
Measure out 2 cups of puree and save the rest for another use, or feed it to your dogs.

Reduce oven to 325 degrees. Butter and flour two 8 ½” x 4 ½” loaf pans.
Combine flour, salt, baking powder, baking soda, orange zest, and spices in a bowl. Whisk until well combined and set aside.
In another bowl, mix together sugar, melted butter, and squash puree. Whisk in eggs, one at a time, until well combined. Fold squash mixture into flour mixture until combined.
Turn batter into prepared pans, dividing evenly, and bake for about 65 – 75 minutes, or until cake tester inserted in center comes out clean. Let loaves cool in pan about 10 minutes, then turn out on wire rack to cool completely.

Once the loaves are cooled, whisk together the glaze ingredients until smooth and free of lumps. Pour over the loaves and smooth the top. Let the glaze set for a bit before slicing.

toasted coconut lime bundt cake with chili lime glaze #bundtbakers

I’ve been in a bit of a funk so far this year, and I think the first BundtBakers of 2015 is just the thing to pull me out of it.

toasted coconut lime bundt cake with chili lime glaze | Brooklyn Homemaker

The theme this month, chosen by the amazing Terri of Love and Confections, is Coconut! What better inspiration to get me back into the swing of things than a delicious and versatile tropical fruit? Thank you Terri! I needed that!!!

toasted coconut lime bundt cake with chili lime glaze | Brooklyn Homemaker

The first thing that I thought of when I saw this month’s theme was an idea I had last year for a cake that didn’t really pan out the first time around.

toasted coconut lime bundt cake with chili lime glaze | Brooklyn Homemaker

The theme in June of last year was “tropical”, and at the time I was going through a bit of an Asian food phase. I thought it could be really fun and interesting to try to translate the savory flavors of tropical southeast asian Thai curry into a sweet bundt cake, so I went to work experimenting. I love Thai coconut curries with lime and ginger, so I used that flavor profile as my inspiration for a bundt with coconut, lime, and ginger as the stars of the show. I also really wanted to see how far I could push the idea of Thai curry in dessert form, so I wanted to use some curry paste too.

toasted coconut lime bundt cake with chili lime glaze | Brooklyn Homemaker

Thai curry paste usually consists of things like lemongrass, kaffir lime, galangal (a spicy Asian type of ginger), chilies, and spices. If I had an unlimited source of time and money I probably would have made my own paste using these classic Thai ingredients. Although these flavors might be sort of unusual and unexpected in a cake, I think it could have worked out really well.

Without unlimited time and money though, I decided to grab a jar of store-bought Thai green curry paste which, unfortunately, also contains ingredients like shallots and garlic. Needless to say, shallots and garlic don’t really work well in desserts, even if you’re trying to be inventive and avant-garde.

toasted coconut lime bundt cake with chili lime glaze | Brooklyn Homemaker

I knew the minute my experimental bundt came out of the oven that something wasn’t right. Despite having only used two teaspoons of curry paste, when I opened the oven door the first thing that hit my nose was garlic. The flavor of the cake wasn’t quite as off as the smell, but that hint of garlic and shallot was still lurking in the background of every bite.

There were a few elements of the cake that worked really well, especially the flavor combination of coconut and lime, and the spicy Thai chili infused lime glaze that I used on top. In the end though, I decided to ditch the idea, and a few days later I came up with a hibiscus lime bundt that was met with rave reviews.

toasted coconut lime bundt cake with chili lime glaze | Brooklyn Homemaker

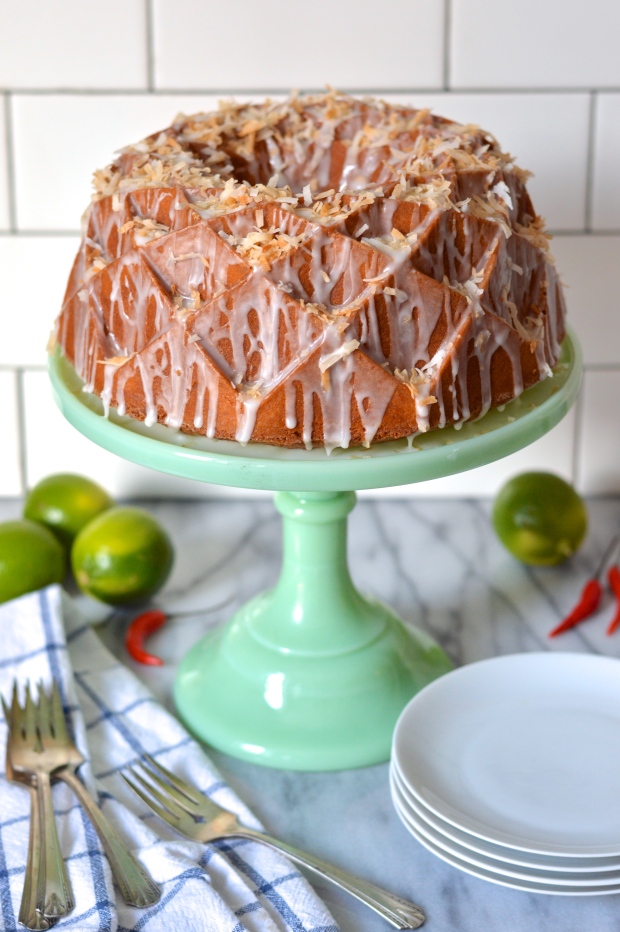
Fast forward to 2015, and I’ve finally found a good reason to revisit that ill-fated Thai curry cake. I decided to forego the curry paste altogether, and I actually skipped the ginger too. I knew that I loved the combination of lime and coconut, so this time I toasted the coconut and paired it with coconut milk and lime zest and juice.

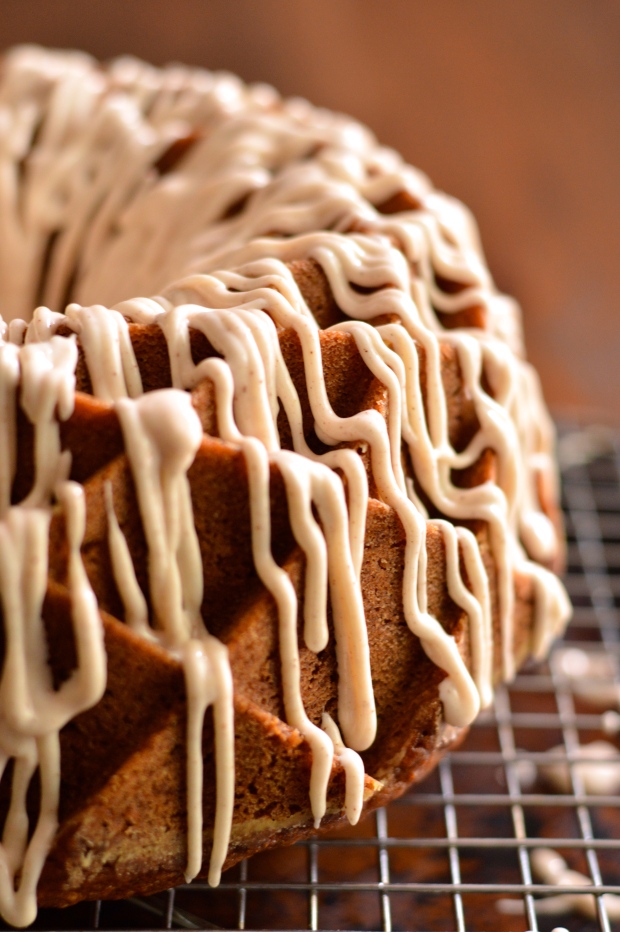
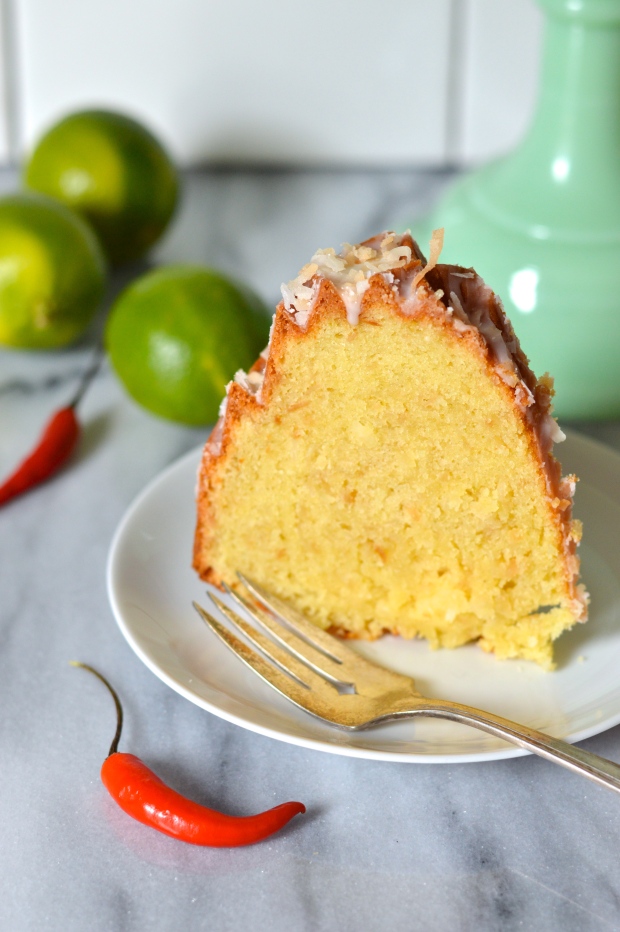
As a nod to the Thai cake, I decided to keep the chili infused lime glaze. Thai bird’s beak chilies are SUPER spicy, so a little goes a long way to add a nice heat to this sweet glaze. I sliced a few chilies in half and steeped them in a combination of lime juice and coconut milk, then I removed the chilies and mixed in some powdered sugar. The resulting glaze actually is quite spicy, but there’s so little glaze in each bite of cake that the heat is barely noticeable.

toasted coconut lime bundt cake with chili lime glaze | Brooklyn Homemaker

I’m so glad that I decided to revisit this cake. I took some of it to work with me and let the compliments rain down upon me. I’m actually TERRIBLE at receiving compliments, unless they’re food related. “Moist!”, “Delicious!”, “Bursting with flavor!”. Keep ’em coming folks!

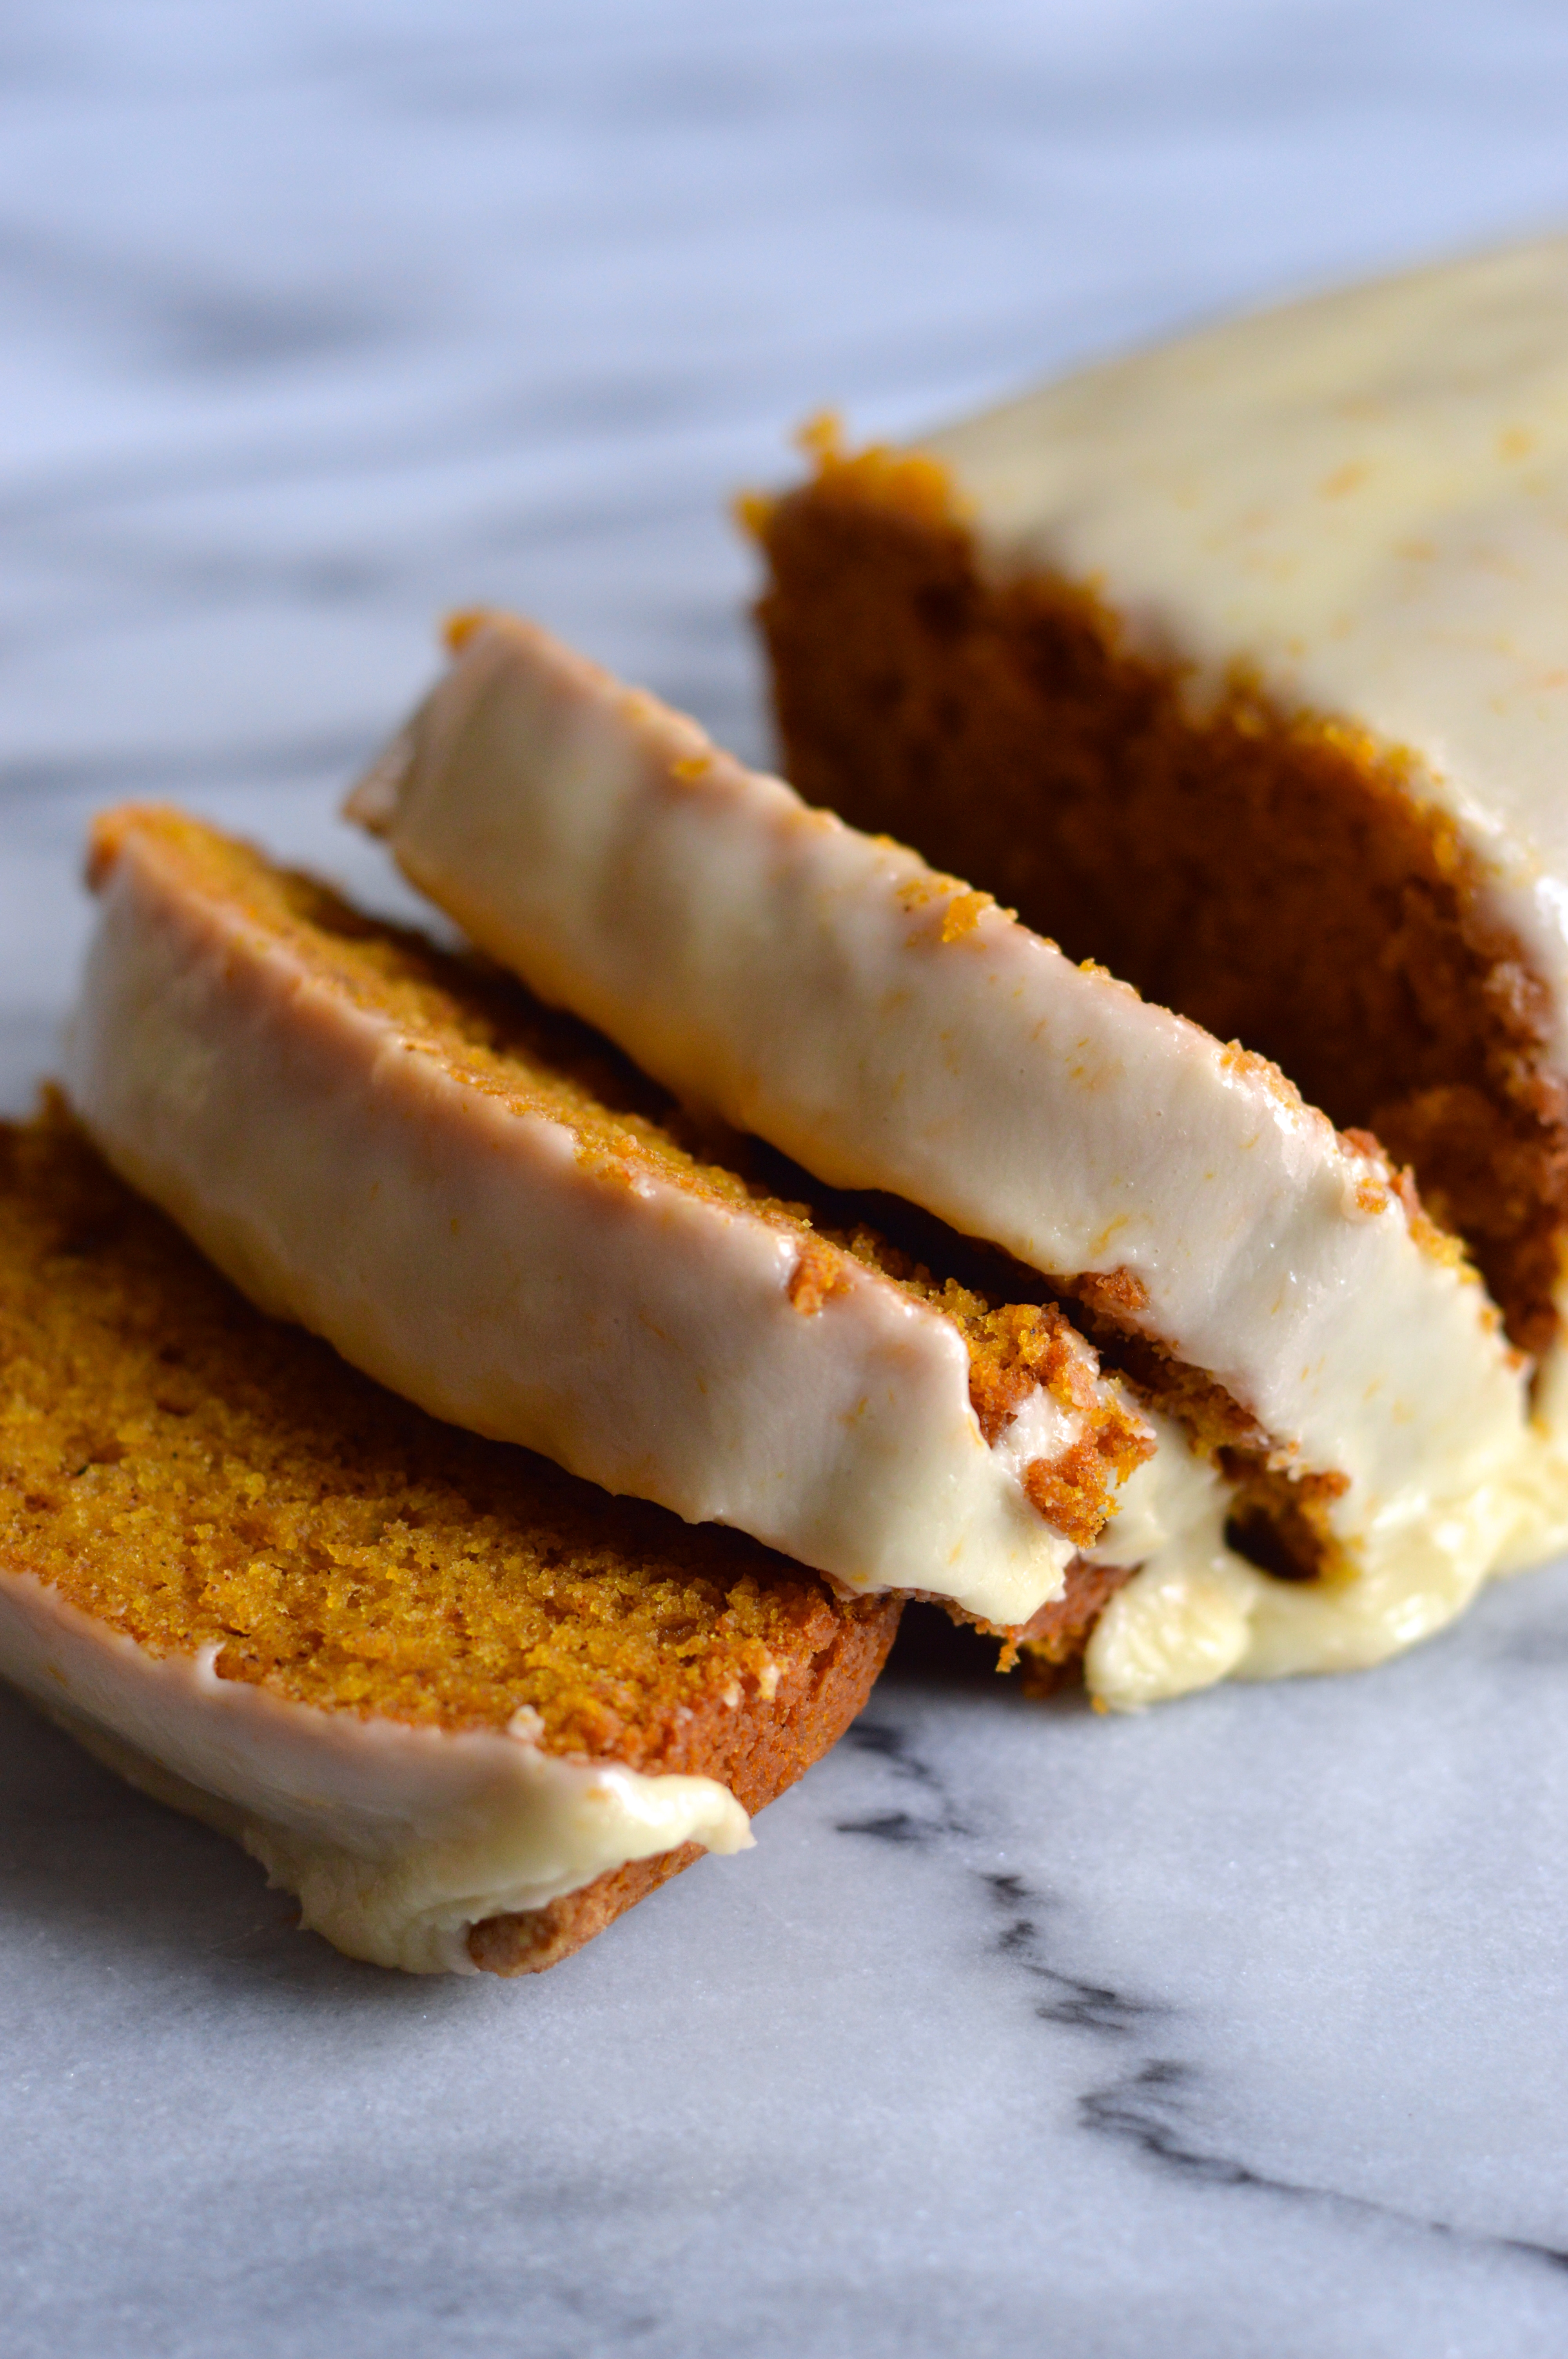
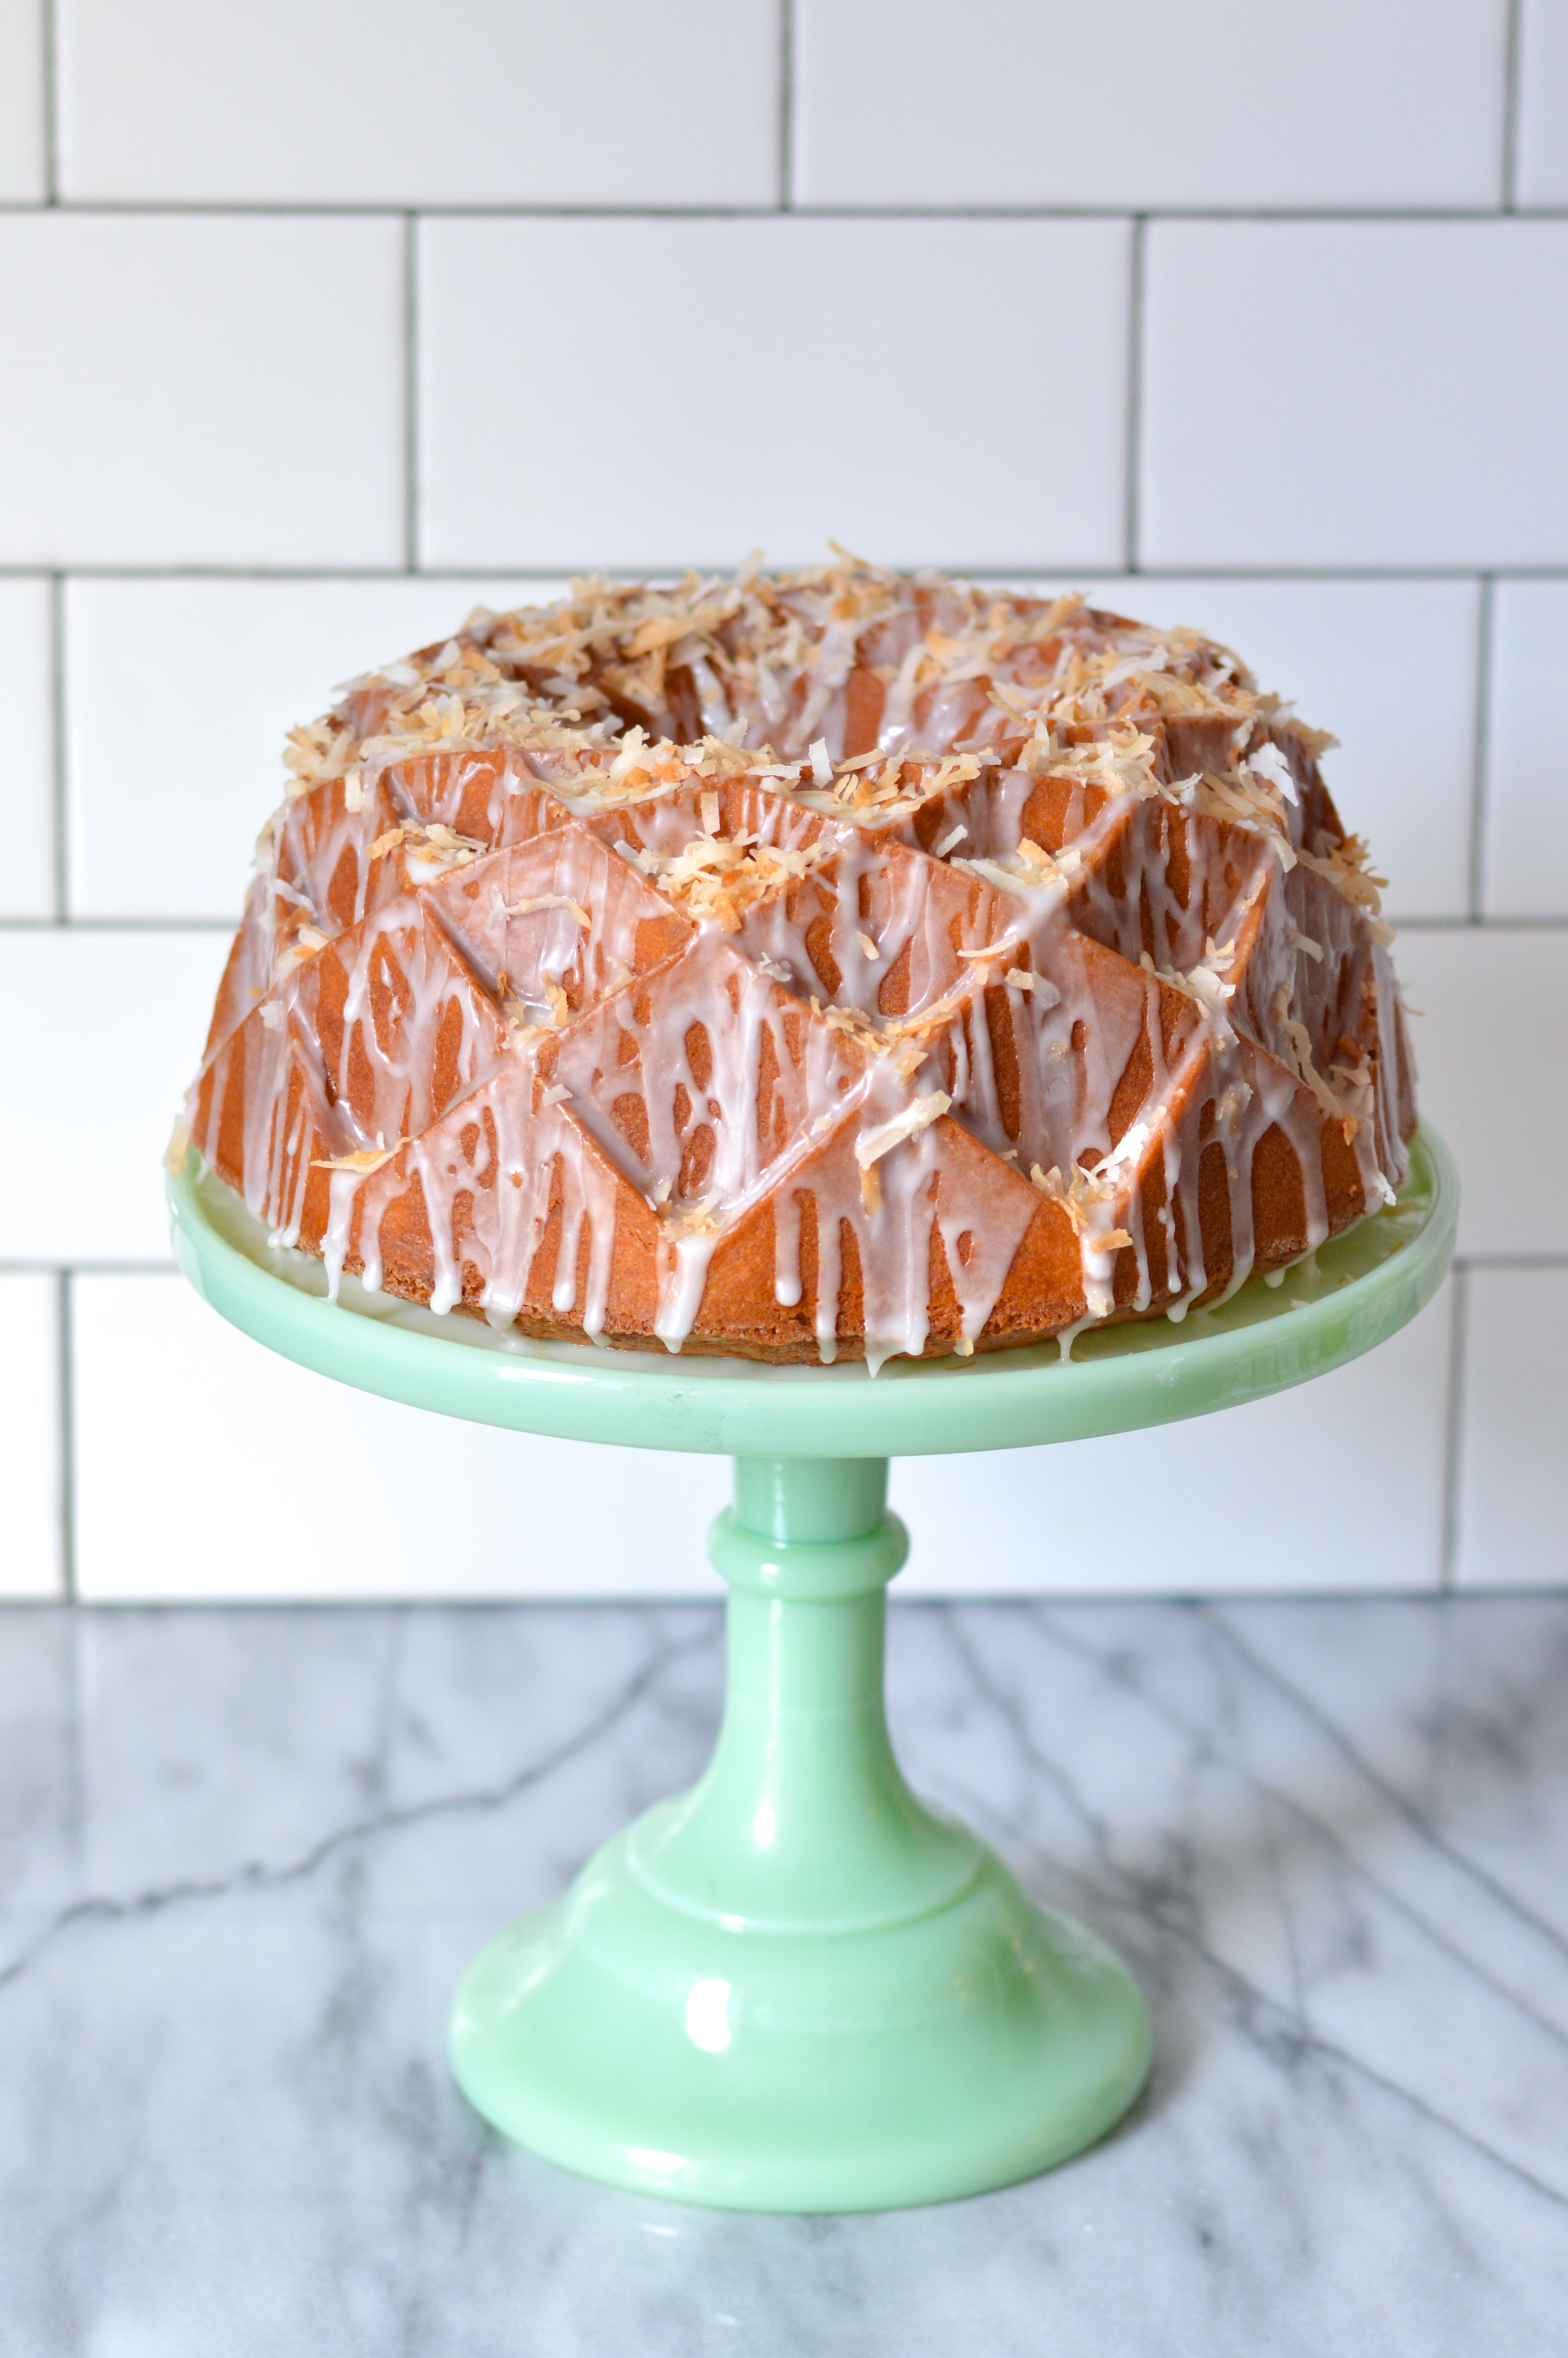
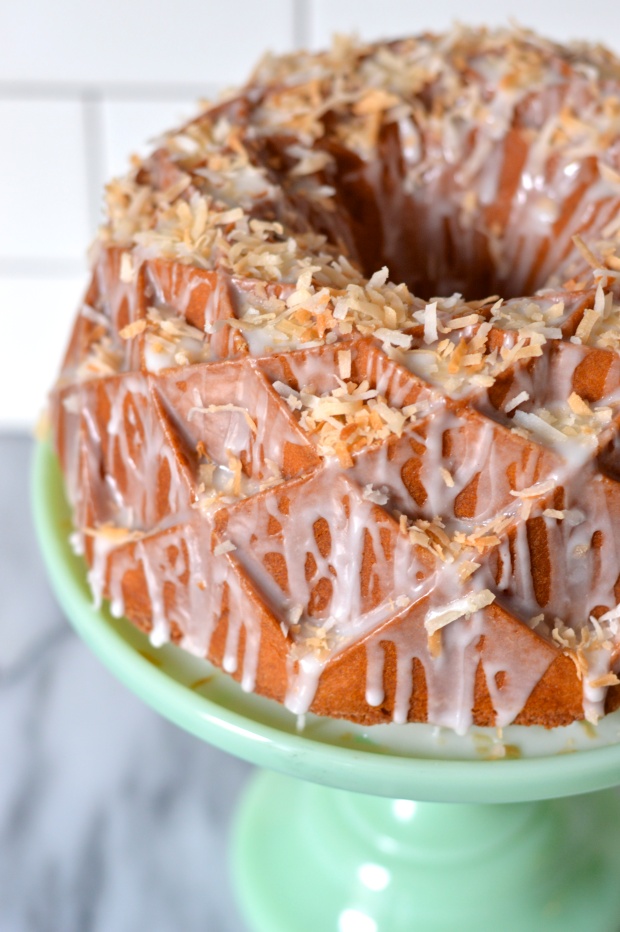
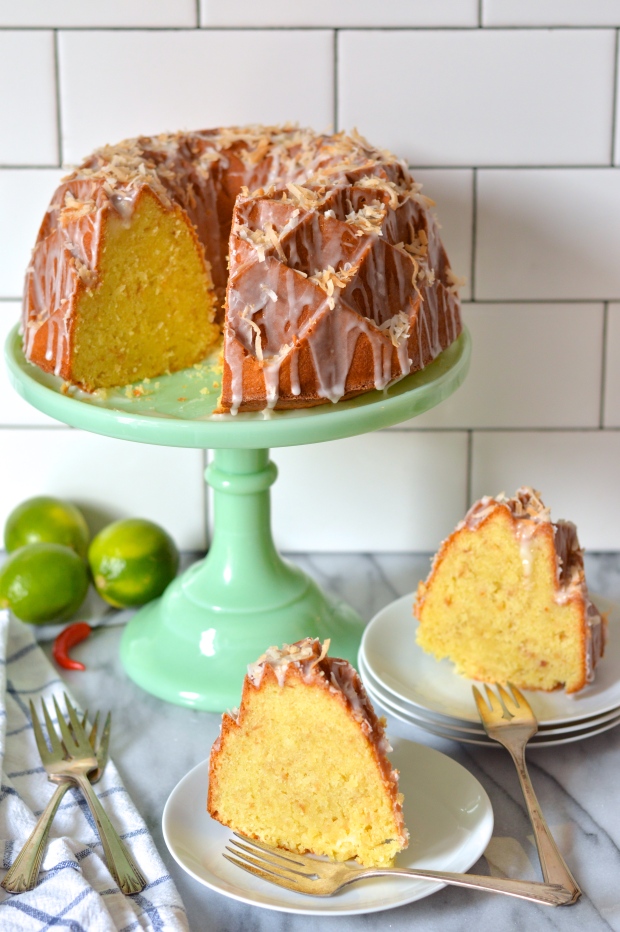
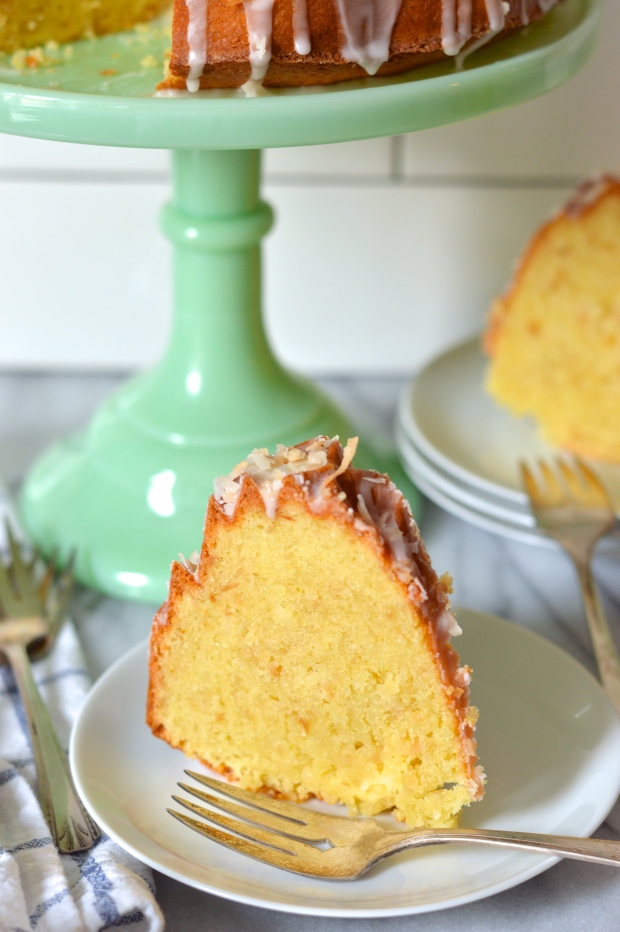
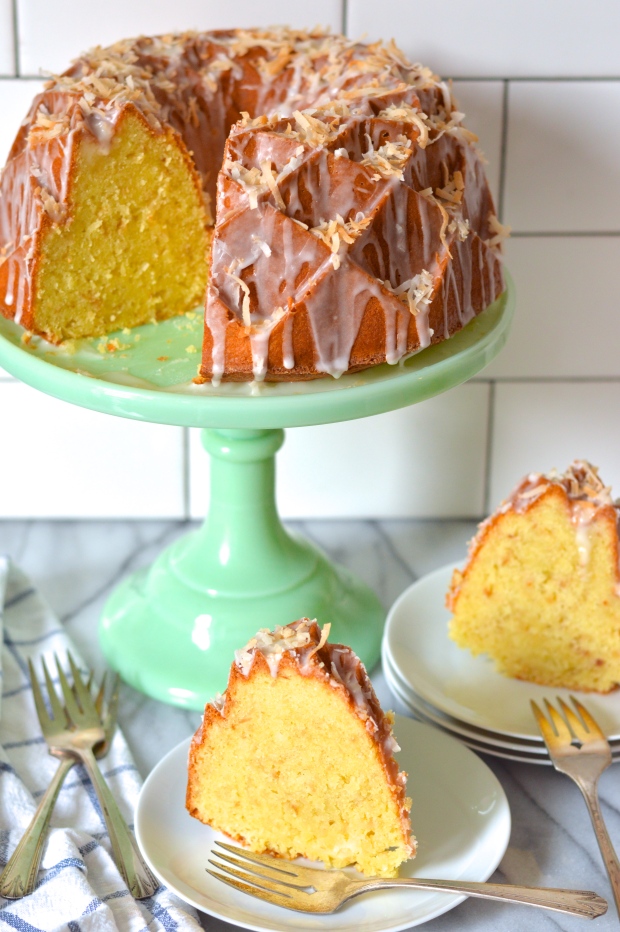
The toasted coconut and coconut milk take center stage in this moist, delicious, bursting-with-flavor cake; and the lime juice and zest help to brighten things up and emphasize the tropical feeling. The crumb is soft and tender, thanks to the addition of corn starch, with a pleasant density indicative of any good bundt cake.

The glaze is fruity and tropical with a really interesting heat and flavor from the Thai bird’s beak chilies. If you aren’t feeling as frisky as I was, you can certainly leave the chilies out and this glaze recipe would still work really well. You could also swap them for a habanero if you want the heat but can’t find Thai chilies.

toasted coconut lime bundt cake with chili lime glaze | Brooklyn Homemaker

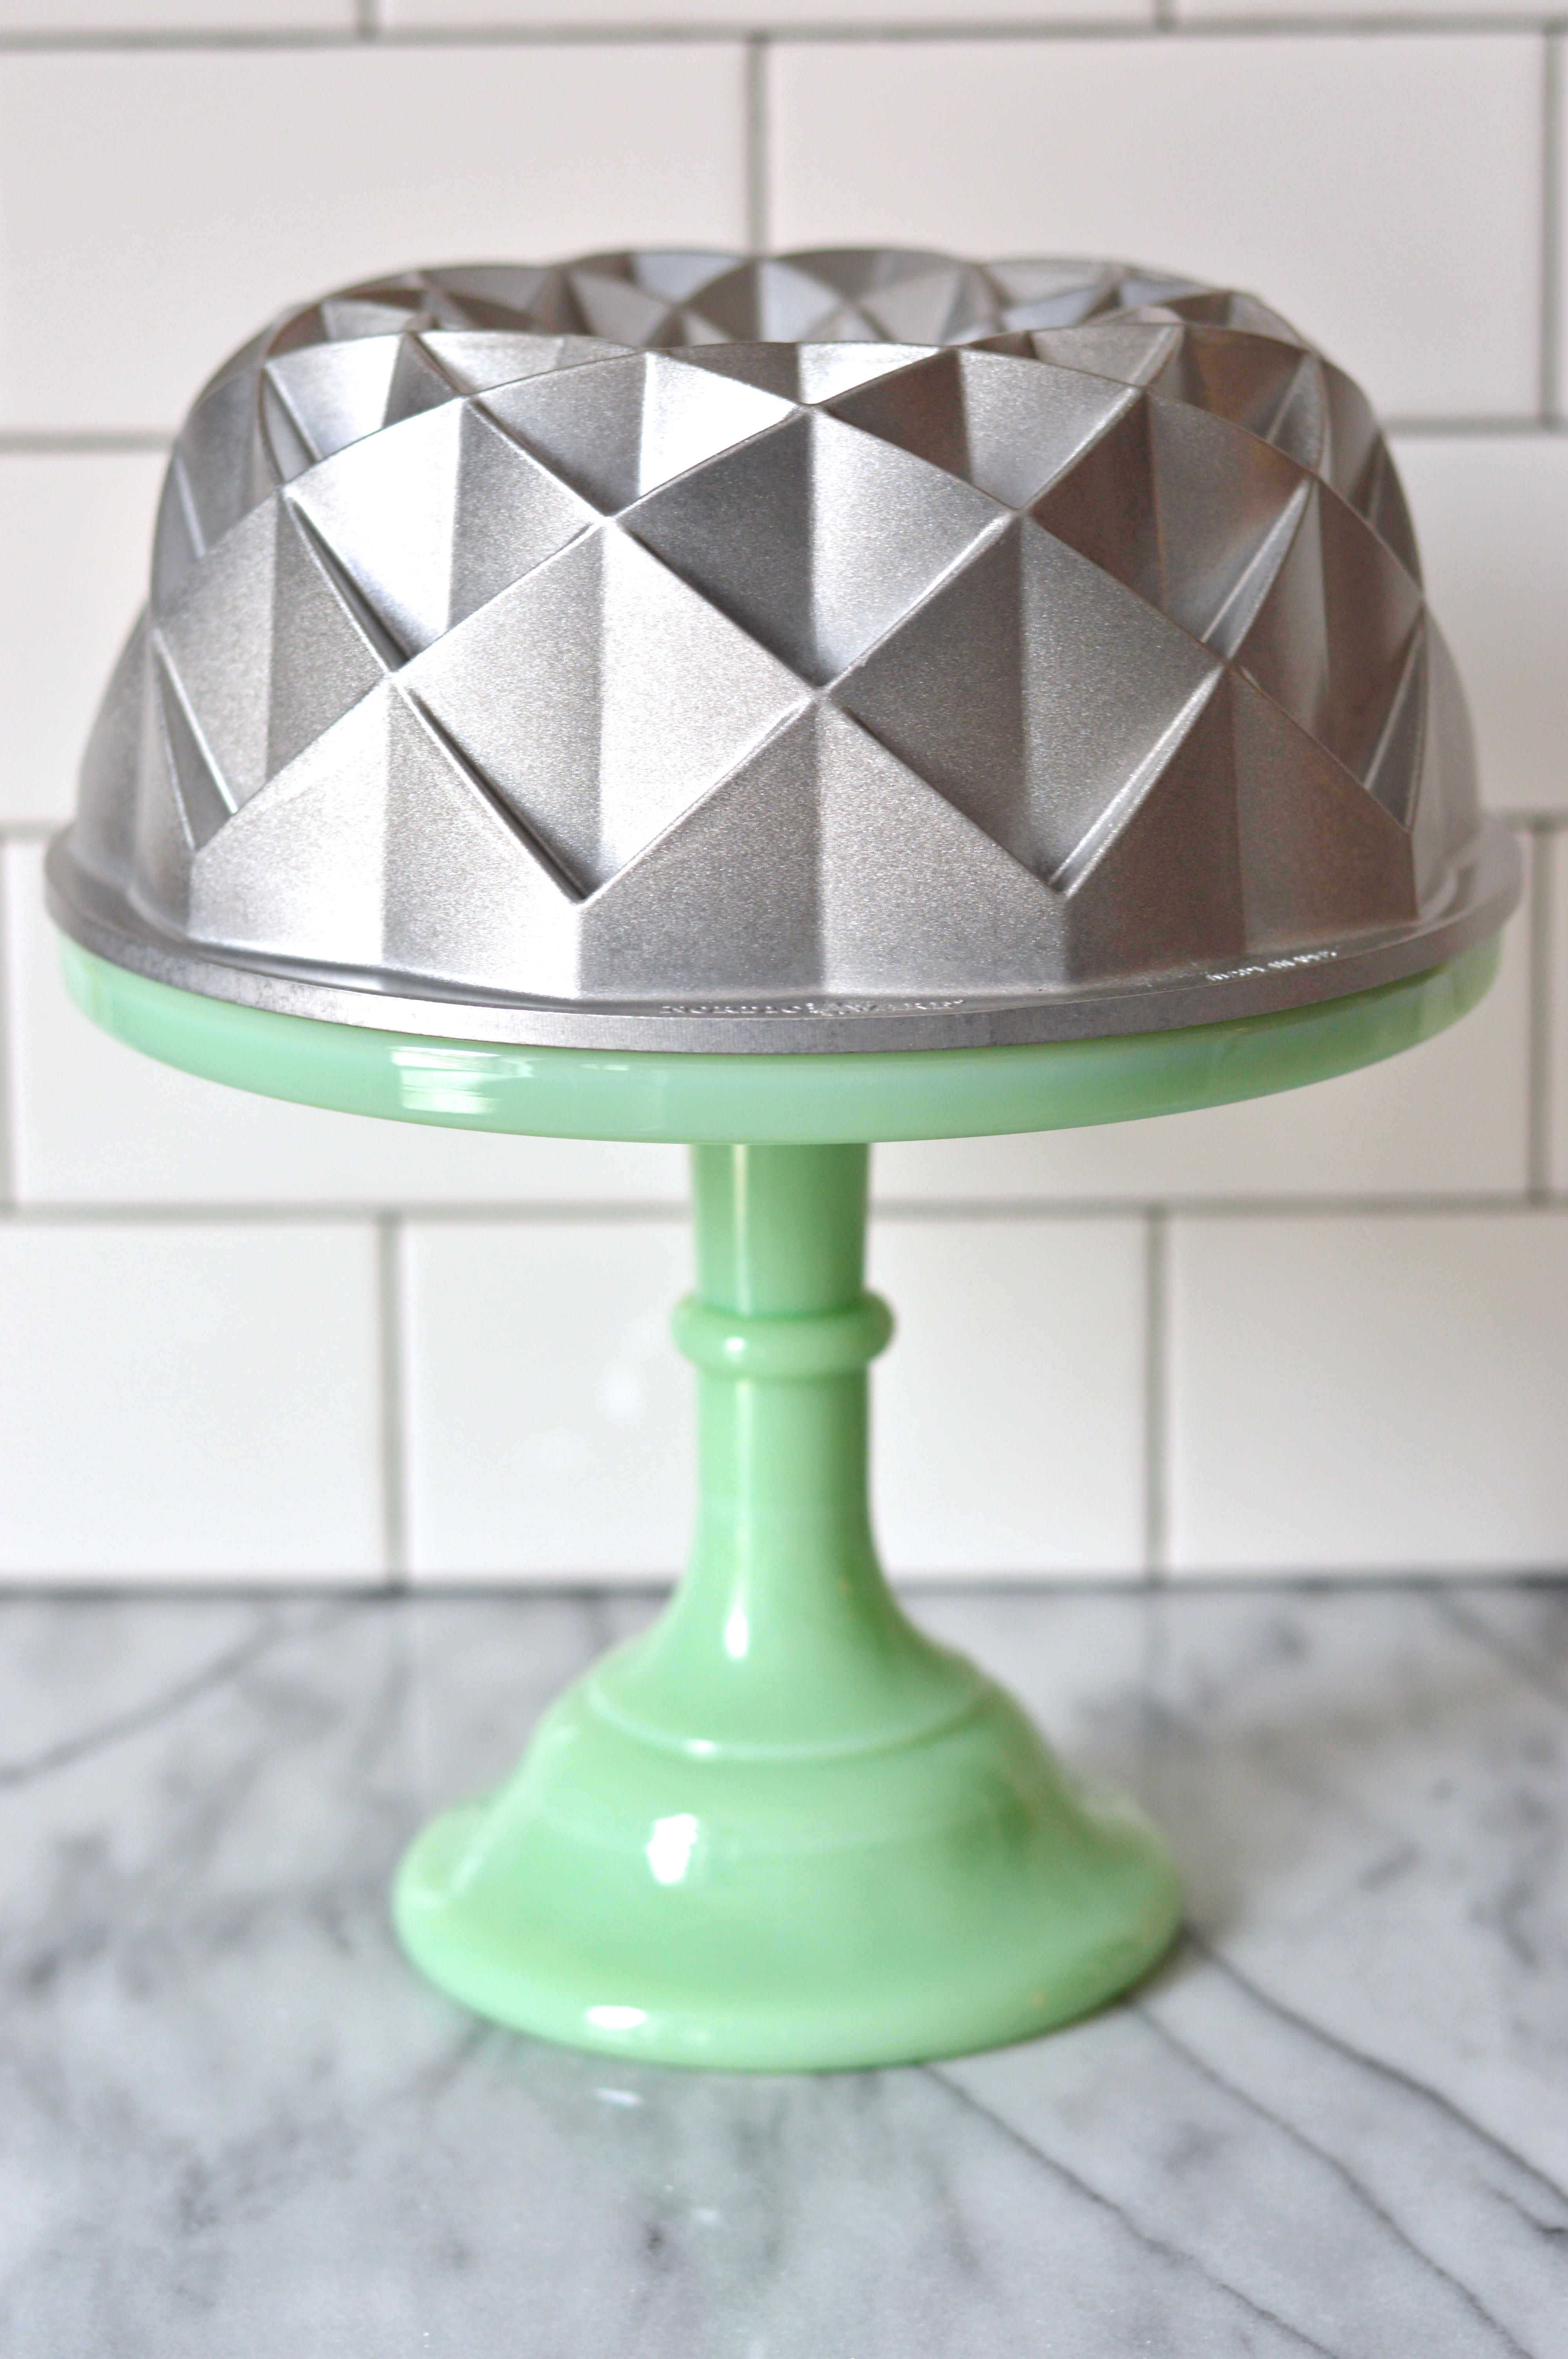
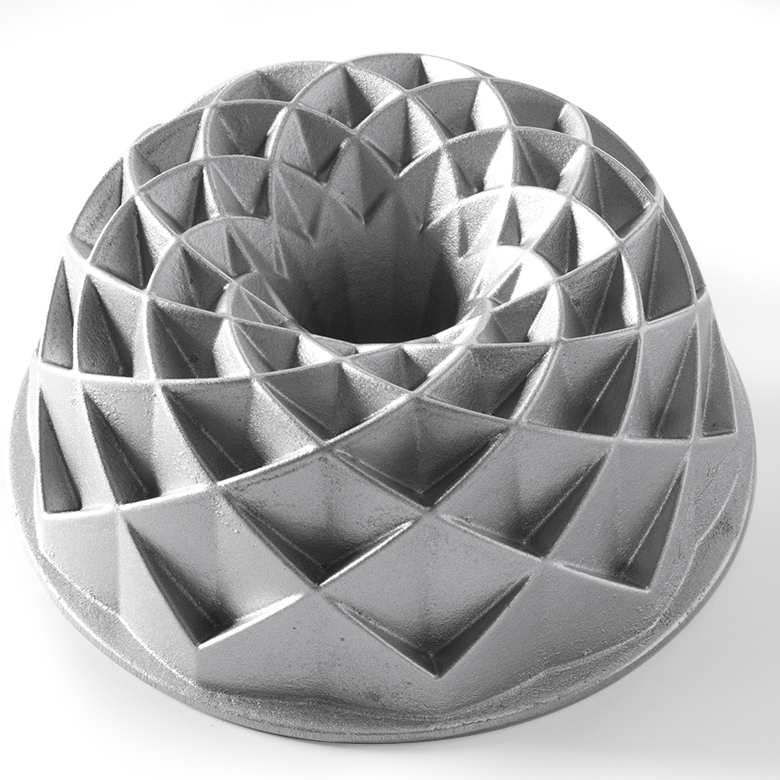
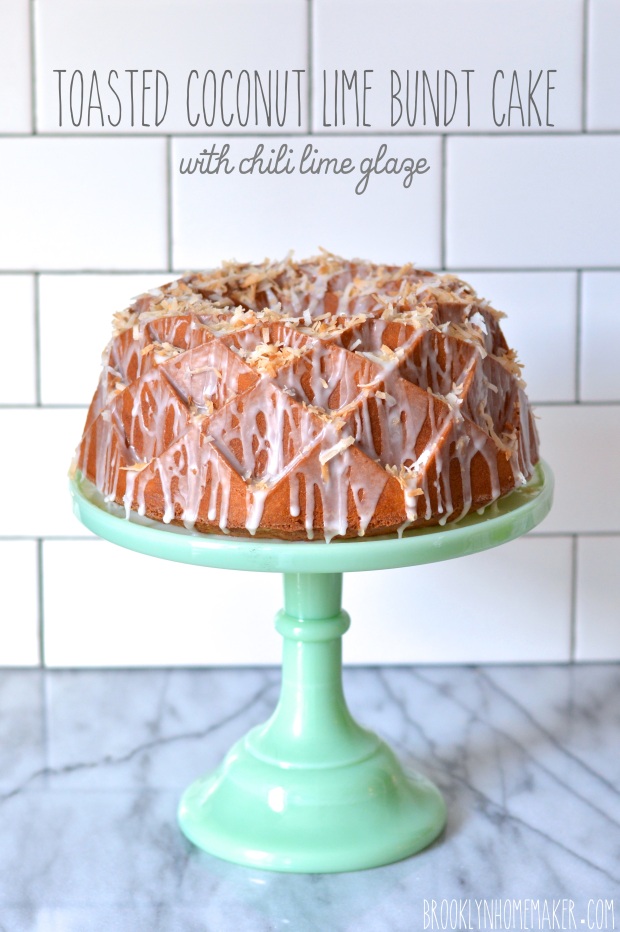
I also want to mention that the pan I used to make this cake is the Nordic Ware Jubilee pan. I love the elegant curves and modern lines of this pan and it’s quickly become one of my favorite bundt shapes. If you’d like to get your hands on a Jubilee pan, check out my latest giveaway for a chance to win one of your very own! Sorry folks, this giveaway is only open to people with a mailing address in the US (within the contiguous 48). Good luck!

Make sure you keep scrolling down past the recipe to check out all the other amazing coconut creations everyone came up with this month. I’m drooling!

toasted coconut lime bundt cake with chili lime glaze | Brooklyn Homemaker

Toasted Coconut Lime Bundt Cake with Chili Lime Glaze

adapted from Taste and Tell

3 cups shredded sweetened coconut
1 cup butter, at room temperature
2½ cups granulated sugar
4 limes
3¼ cups all-purpose flour
⅓ cup cornstarch
1 teaspoon baking powder
1 teaspoon salt
1 teaspoon vanilla extract
1 teaspoon coconut extract
6 large eggs
1 (13.5 oz) can unsweetened coconut milk

2 cups powdered sugar
3 thai bird’s eye chilies *see note

Preheat oven to 350ºF. Grease and flour a 10 to 12 cup bundt pan.
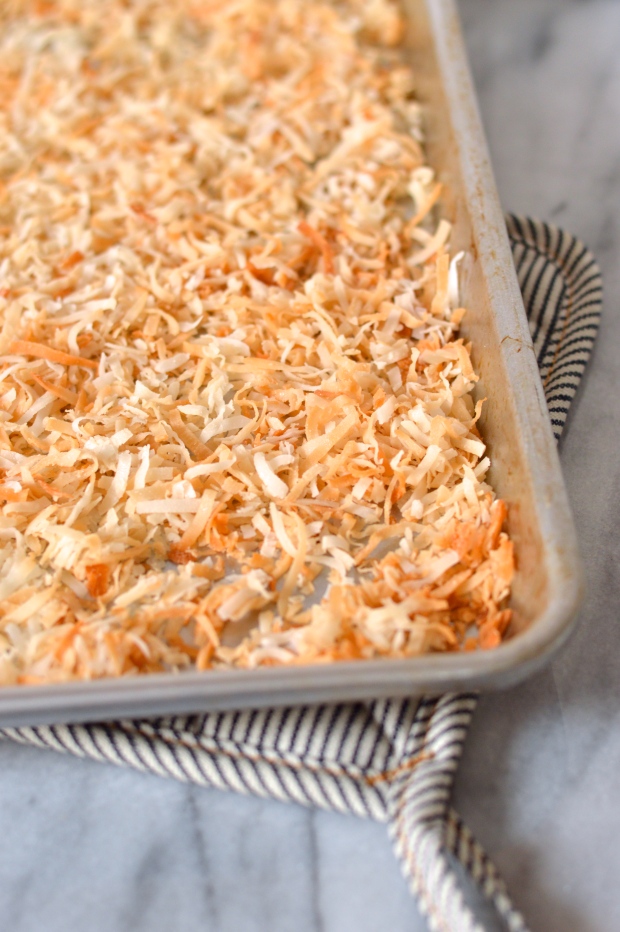
Spread shredded coconut in an even layer on a sheet pan and toast until golden and fragrant, about 15 minutes. Check every few minutes and stir around if necessary to promote even toasting and prevent burning.
Zest and juice the limes. Reserve the juice and add the zest to the bowl of a stand mixer along with the softened butter and sugar. Cream on high speed until light and fluffy, about 3-5 minutes.
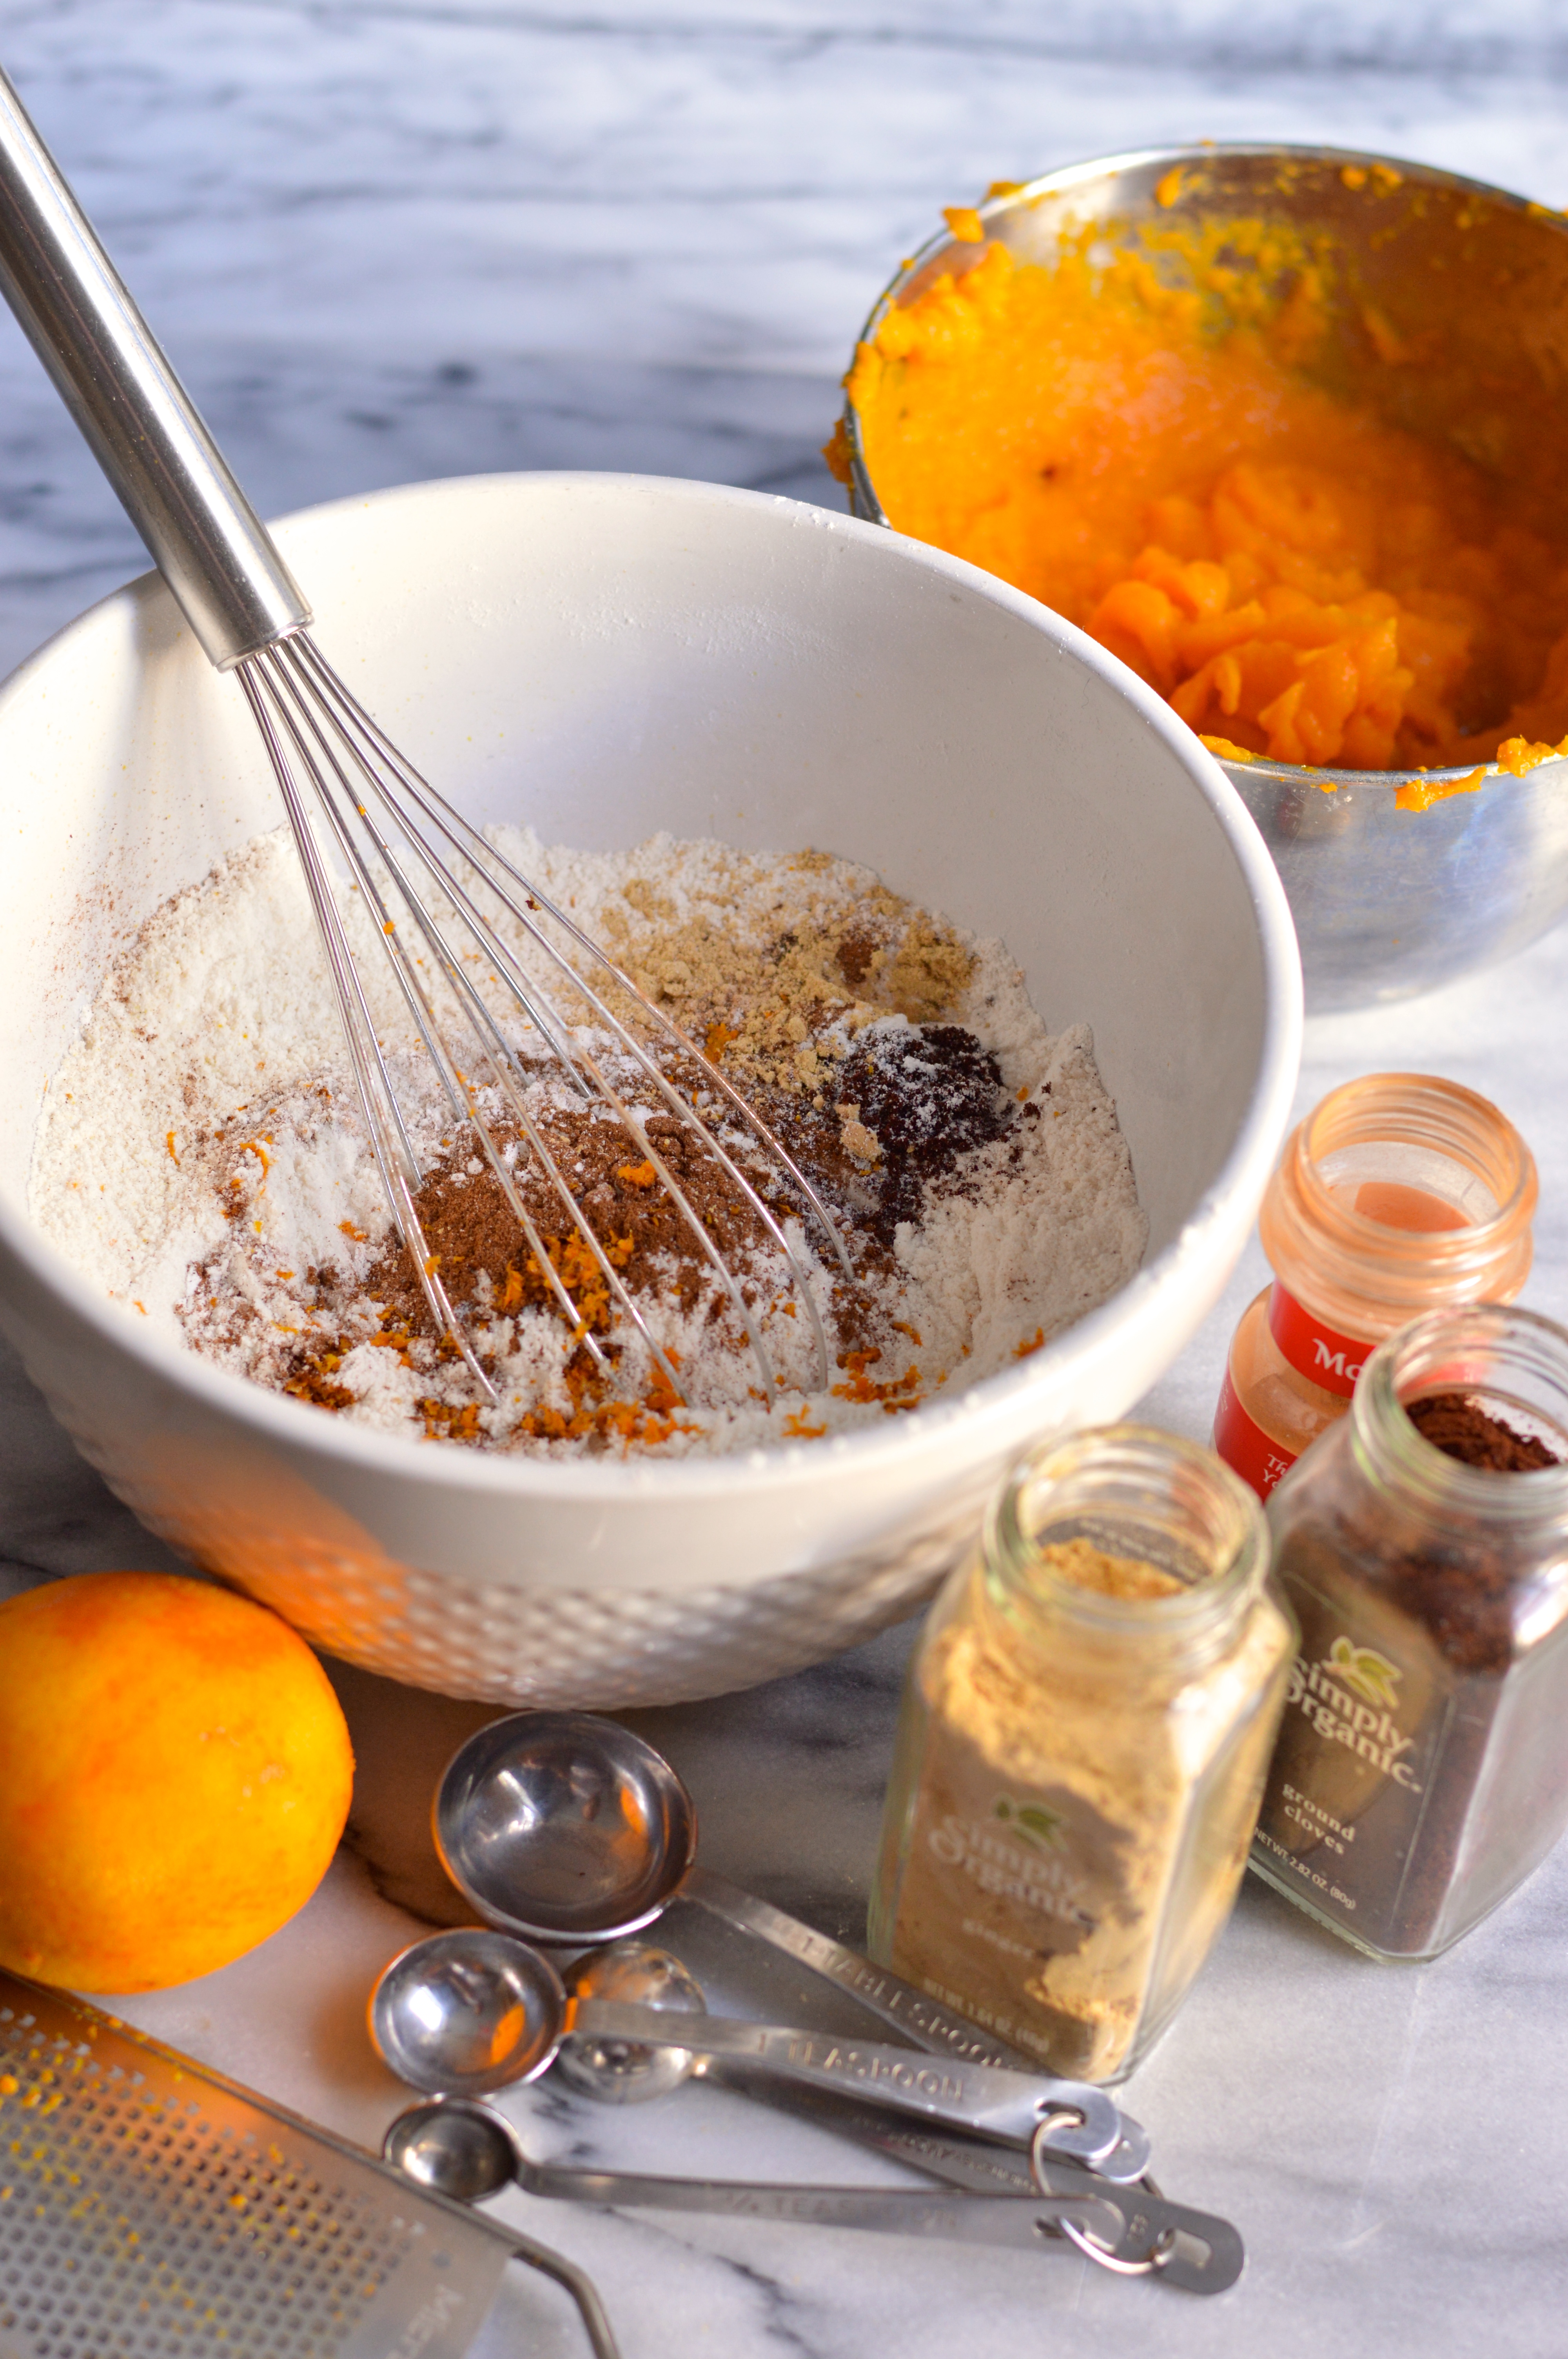
In a medium bowl, whisk together the flour, cornstarch, baking powder and salt.
With the mixer on low add the eggs, one at a time, along with the vanilla and coconut extract, scraping down the sides of the bowl after each addition.
In a small bowl, measure out and mix together 1 1/2 cups coconut milk and 1/4 cup lime juice. Reserve the remaining coconut milk and lime juice for the glaze. With the mixer on low, alternate additions of flour and coconut milk, starting and ending with flour.
Scrape the sides of the bowl and stir in 2 1/2 cups of the toasted coconut. Reserve remaining coconut for garnish. Pour the batter into the prepared bundt pan and level the batter with a spatula.
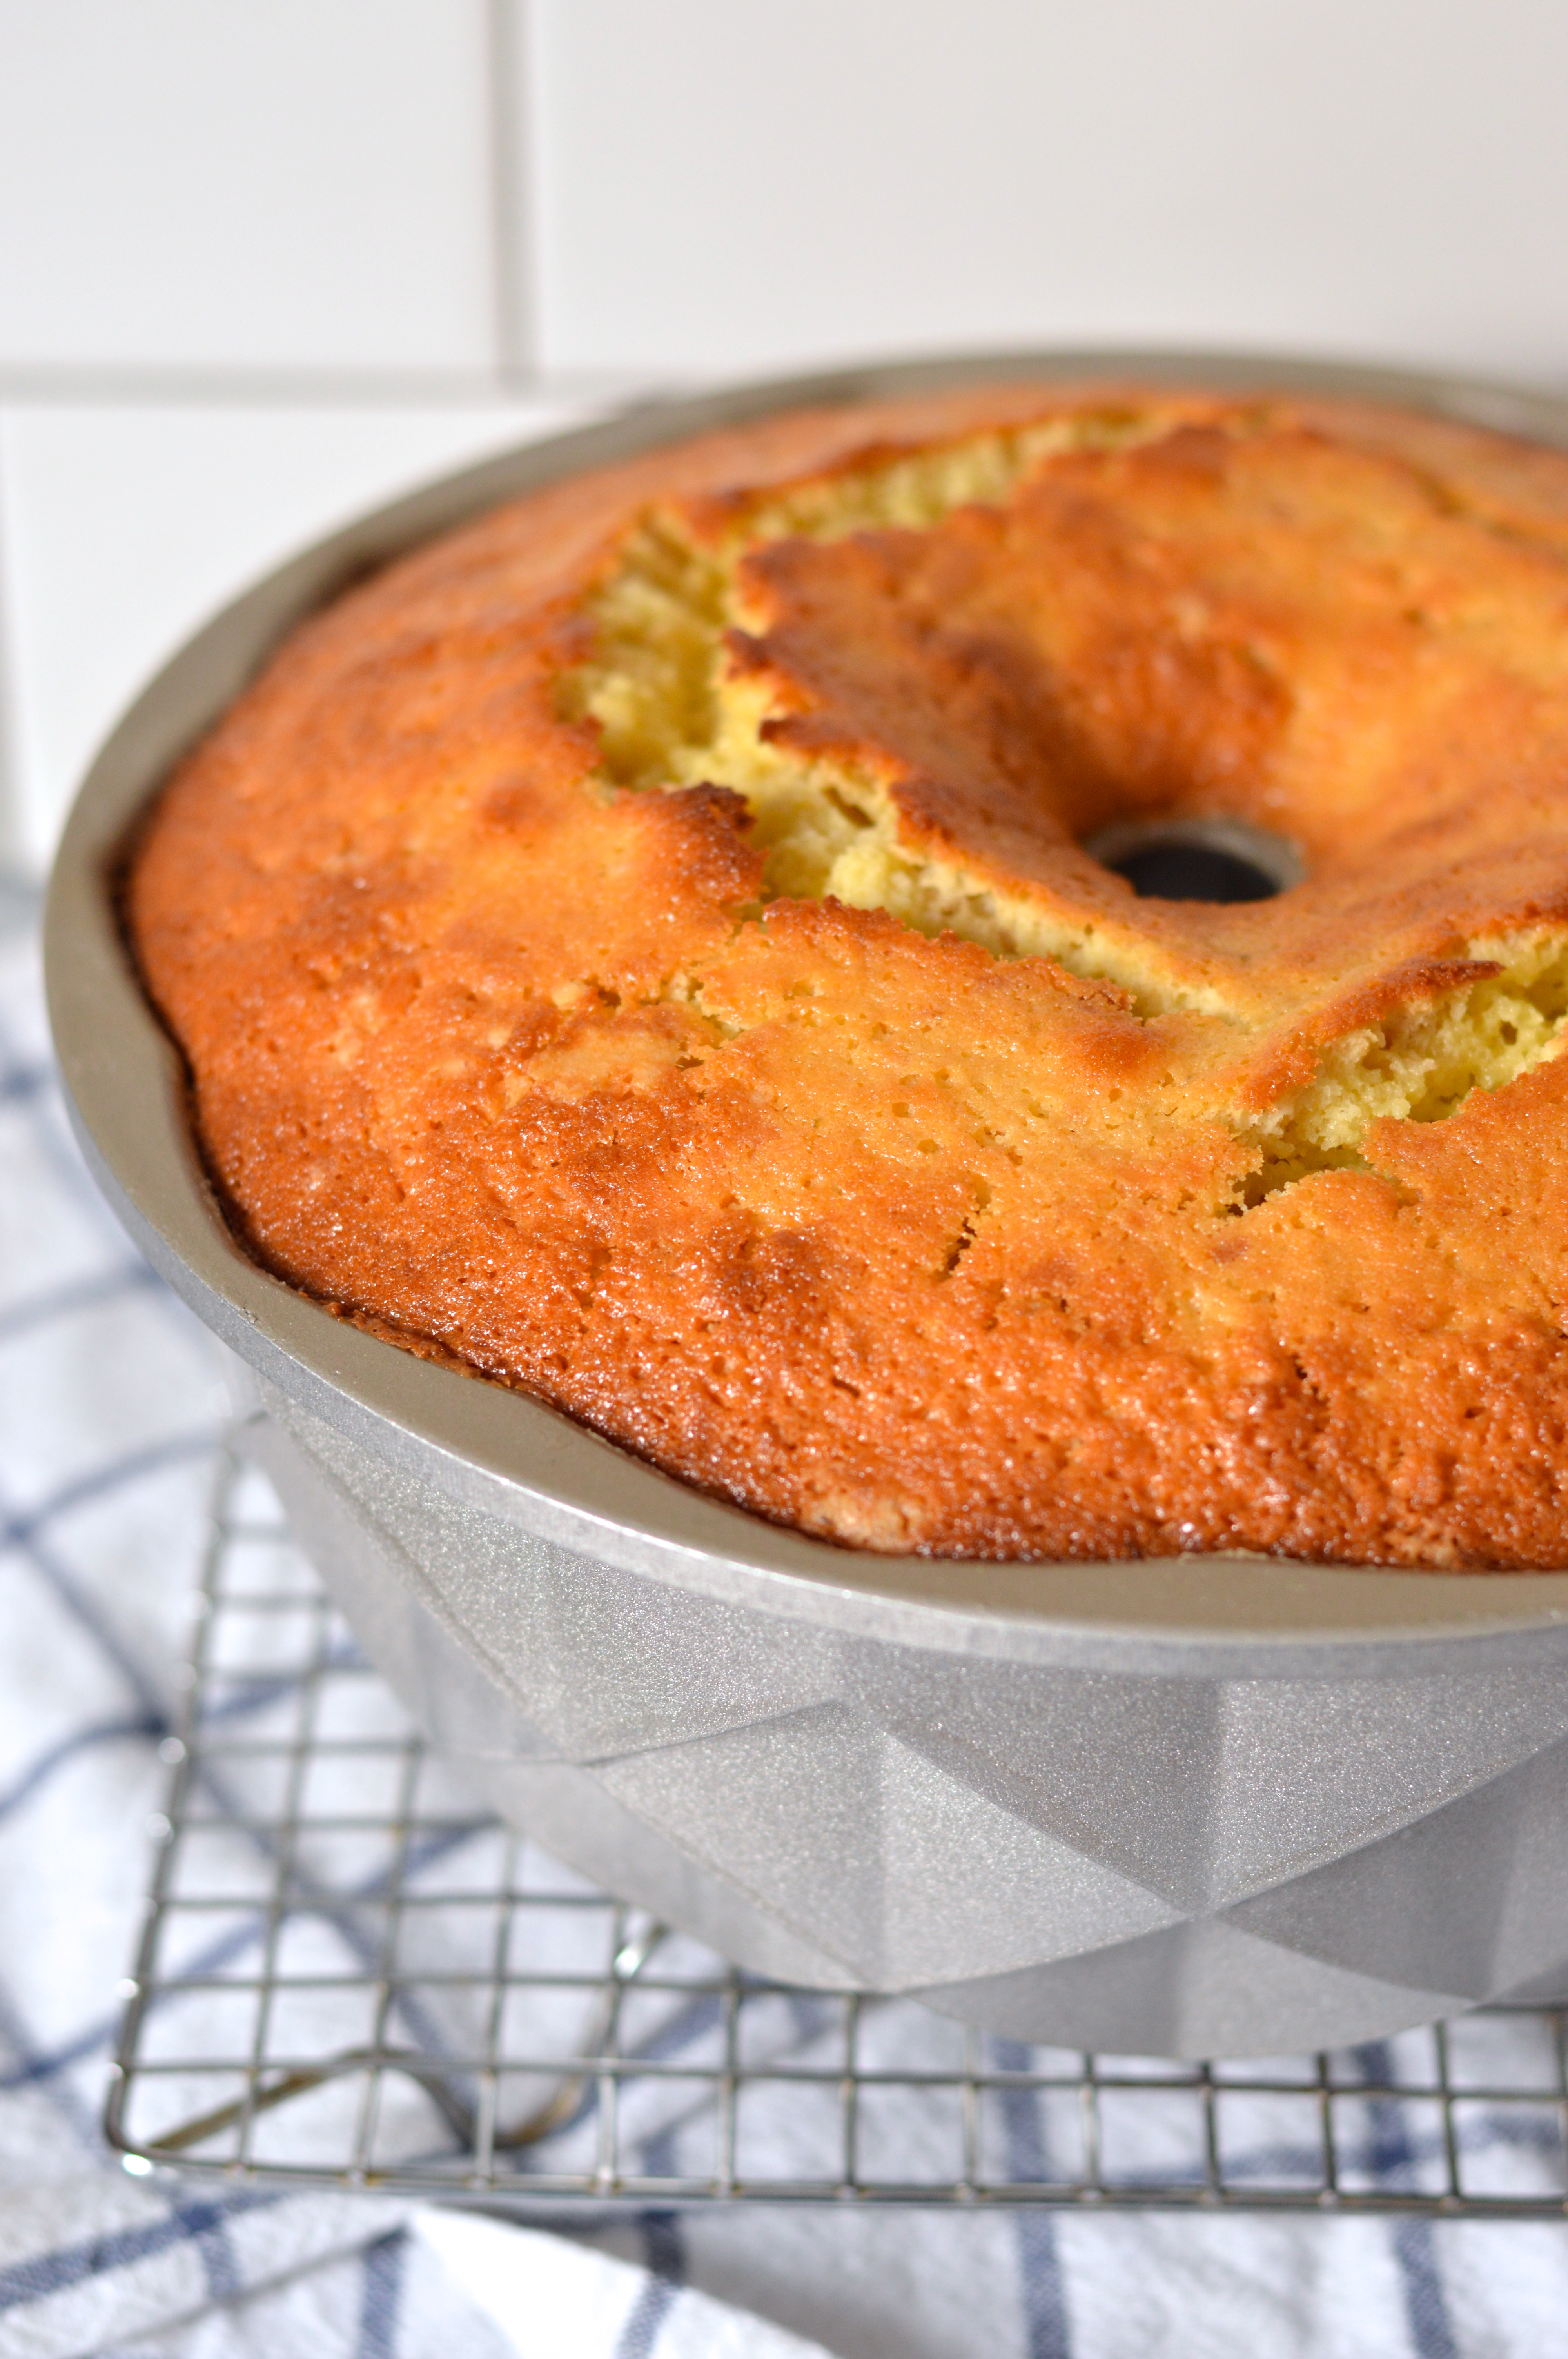
Bake in the center of the oven for about 60 to 65 minutes or until a cake tester inserted in the middle comes out clean. Cool the cake for 30 minutes, then turn out onto a cooling rack and cool until room temperature.

While the cake is baking, combine the remaining 1/4 cup lime juice and 1/4 cup coconut milk in a small saucepan. Remove the stems and slice the Thai chilies in half lengthwise. Add to the coconut lime liquid and place over a medium high flame just until the mixture comes to a low boil. Remove from heat and let steep while cake bakes and cools. Wash your hands well after handling the sliced chilies.
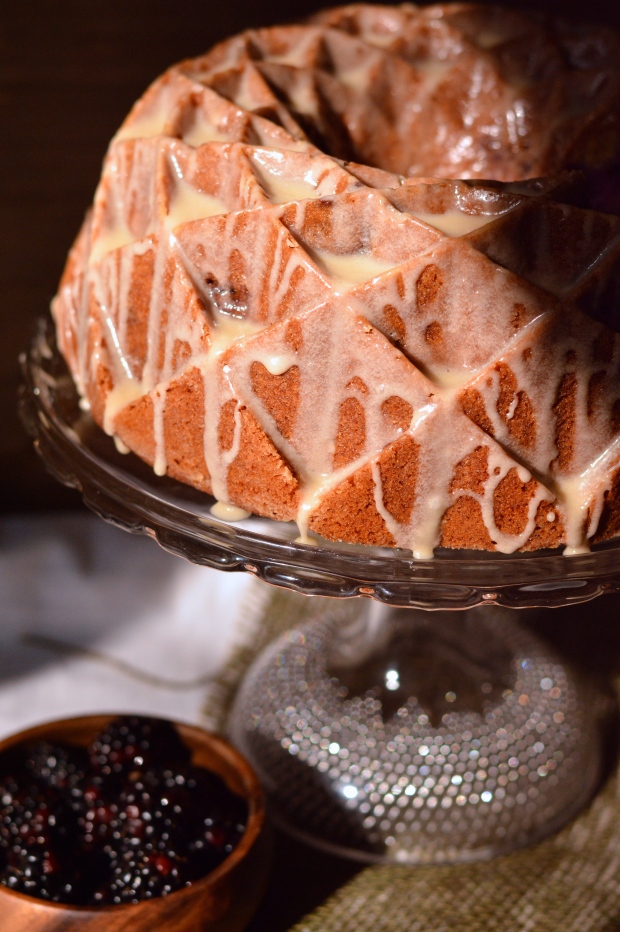
To make the glaze, strain the coconut lime chili liquid through a fine mesh strainer into a small bowl. Whisk in powdered sugar until smooth and free of lumps. Drizzle the glaze over the cooled cake and immediately sprinkle with remaining 1/2 cup of toasted coconut.

*cooks note: If you can’t find fresh Thai chilies, you may be able to find dried ones in the asian foods section. If that’s a no go, you can try using another type of very spicy chili, like a habanero, instead. I think 1 habanero chili would be enough. You could also skip them if you want.
Be sure to wash your hands well immediately after handling these extremely spicy chilies.

toasted coconut lime bundt cake with chili lime glaze | Brooklyn Homemaker

Can you believe all these mouthwatering coconut cakes? I wish I could taste each and every one!

Almond Joy Bundtlettes from Sew You Think You Can Cook
Candy Bar Chocolate Coconut Bundt Cake from Love and Confections
Chocolate Italian Cake from Magnolia Days
Coconut & Banana Bundt Cake from Just One Bite Baking
Coconut Banana Bundt Cake from Basic N Delicious
Coconut Carrot Bundt Cake from Media Racion Doble, Por Favor
Coconut Cream Bundt Cake from Adventures in All Things Food
Coconut Hummingbird Bundt Cake from Patty’s Cake
Coconut Milk Bundt Cake from I Love Bundt Cakes
Coconut Milk Bundt Cake from Un Mordisco Un Pecado
Coconut Oil Pound Cake from The Spiced Life
Coconut Sugar Banana Cake from A Kingdom for a Cake
Cranberry and Coconut Bundt Cake from La Cocina de Aisha
Cranberry, Orange and Coconut Bundt Cake from Kids & Chic
German Chocolate Bundt Cake from The Freshman Cook
Glazed Chocolate Macaroon Bundt Cake from Food Lust People Love
Gluten-free Coconut Orange Bundt Cake with Coconut Whipped Cream from Cassie’s Kitchen
Gizzada Mini Bundts from Passion Kneaded
Key Lime and Chocolate Chip Bundt Cake from Eat, Drink and Be Mighty
Key Lime Coconut Cream Bundt from A Day in the Life on the Farm
Mini Samoa Bundt Cakes from Making Miracles
Orange & Coconut Bundt Cake from Living the Gourmet
Oreo Coconut Bundt Cake from Indian Curries/Stew
Pina Colada Bundt Cake from Jane’s Adventures in Dinner
Rhubarb n Rose Coconut Frosted Bundt Cake from Baking in Pyjamas
Rum Bundt Cake with Coconut and Lime from Bourbon and Brown Sugar
Toasted Coconut and Sweet Potato Bundt from Tea and Scones
Toasted Coconut Lime Bundt Cake with Chili Lime Glaze from Brooklyn Homemaker

BundtBakers

.
Interested in learning more about us? #BundtBakers is a group of Bundt loving bakers who get together once a month to bake Bundts with a common ingredient or theme. We take turns hosting each month and choosing the theme/ingredient. You can see all our of lovely Bundts by following our Pinterest board right here. Links are also updated after each event on the BundtBaker home page here.

If you are a food blogger and would like to join us, just send an email with your blog URL to foodlustpeoplelove@gmail.com. If you are just a lover of Bundt baking, you can find all of our recipe links by clicking our badge above or on our group Pinterest board.

Nordic Ware bundt pan giveaway!

UPDATE: CONTEST HAS ENDED! Winner will be contacted by email

Good news everyone!

Nordic Ware Jubilee bundt pan giveaway | Brooklyn Homemaker

The amazing folks at Nordic Ware have offered to giveaway one of their beautiful Jubilee bundt pans to a reader of Brooklyn Homemaker. Nordic Ware invented the bundt pan, and I use their heavy duty cast aluminum line of pans for all of my bundt baking adventures.

Nordic Ware Jubilee bundt pan giveaway | Brooklyn Homemaker

Nordic Ware has been around since 1947, and has been making all of their cookware right here in the US. If you want to know more about Nordic Ware and the birth story of the bundt pan, check out my the brief bundt history I posted back in July, along with my recipe for roasted cherry kugelhopf.

Nordic Ware Jubilee bundt pan giveaway | Brooklyn Homemaker

Not to toot my own horn, but I’ve been around the bundt baking block, and I have to say their pans are the absolute best! Their cast aluminum line is sturdy and heavy enough to bake really evenly, and I’ve never had any trouble with dry edges or over (or under) cooking in spots. Even though some of their bundt pans are very intricately designed, my cakes have always come out without a hitch, thanks to their excellent non-stick coating (along with a healthy coating of butter or cooking spray).

spiced harvest bundt cake with cream cheese glaze | Brooklyn Homemaker

The swirled diamond shape of the Jubilee bundt pan was inspired by the diamond jubilee, and the resulting pan has a gorgeous beauty that’s both modern and classic. Just to be sure that you fully comprehend the stunning good looks of this pan, I’m going to fill this post with my favorite photos of cakes I’ve baked in the Jubilee. The diamond shapes aren’t just there for looks either! They create little pockets in your cakes that collect soaks, glazes, and icings; resulting in cakes that are just as moist and delicious as they are beautiful!

honey glazed blackberry cornmeal bundt cake | Brooklyn Homemaker

If you like big bundts and you cannot lie, please check out the contest rules below, and comment on this post for your chance to win your very own Jubilee bundt pan from Nordic Ware!

So exciting!!!

Nordic Ware Jubilee bundt pan giveaway | Brooklyn Homemaker

Contest rules:

Entries will be accepted until, and contest will end on, Tuesday January 20th, at 6PM EST.

To enter, please follow these links and “like” both Brooklyn Homemaker and Nordic Ware on facebook. Then come back and leave the comment “I like big bundts!” on this post, and tell me what type of bundt you’ll bake first if you win!

Only one comment per entrant, please.  Sorry, but immediate family is excluded. The winning pan can only be shipped within the contiguous United States, so entrants must live or have a mailing address within the lower 48. Winner will be chosen, using a random number generator, from the total number of comments when the contest comes to a close. Winner will be contacted via email for shipping information.

pistachio and dark chocolate chunk cookies with brown butter and fleur de sel

I realize that a lot of you are probably all cookie’d out right about now, but I just had to squeeze one more cookie recipe in before the end of the year.

I’d say that I’m sorry, but no one should every apologize for making cookies.

pistachio and dark chocolate chunk cookies with brown butter and fleur de sel | Brooklyn Homemaker

I gathered the makings of this recipe with the intention of making them on Christmas day, but it didn’t really work out that way.

pistachio and dark chocolate chunk cookies with brown butter and fleur de sel | Brooklyn Homemaker

The days leading up to Christmas tend to be pretty stressful in my world, so when it comes to the actual holiday itself I try to take it pretty easy. Russell and I spent the day at home with the dogs, opening presents, calling friends and family, watching Murder, She Wrote, and eating everything in sight. Since it’s just the two of us, I thought that making some cookies would be a fun activity we could do together during the day. I didn’t want to do anything too fussy or involved like cutouts, but thought a fancied up chocolate chip cookie could be the perfect holiday treat.

pistachio and dark chocolate chunk cookies with brown butter and fleur de sel | Brooklyn Homemaker

The ham I was making for dinner, along with some roasted broccoli and sweet potato gratin, had other plans though. I was not thinking ahead at all and didn’t take the fact that the ham would be cooking at a low temperature for several hours into consideration.

We weren’t yet ready for cookie time when the ham went into the oven, and when it came out we feasted and immediately fell deep into a food coma, so our cookie plans were (temporarily) abandoned.

pistachio and dark chocolate chunk cookies with brown butter and fleur de sel | Brooklyn Homemaker

Later that evening we aaaaaalmost rallied and went for it, but opted instead for another glass of wine and mouthful of chocolate from our stockings.

pistachio and dark chocolate chunk cookies with brown butter and fleur de sel | Brooklyn Homemaker

In the end it may have been a good thing that we didn’t make these on Christmas day. For one thing, we had plenty of chocolate in our stockings. For another, making them a few days later also meant that I was able to photograph the process and share them with you. These babies are so delicious and perfect that I’m actually pretty thrilled to get to share them.

This post was brought to you by a salty little Christmas ham and a holiday food coma.

pistachio and dark chocolate chunk cookies with brown butter and fleur de sel | Brooklyn Homemaker

Browning the butter for this recipe requires some extra time since it needs to firm back up after it’s melted and browned, but I promise you it’s worth it. Browning butter deepens and intensifies everything that’s already great about butter, and then adds a toasty nuttiness. Taking the time to toast the pistachios before adding them to the cookies also helps to intensify the nutty goodness. It’s all about building layers of flavor here.

pistachio and dark chocolate chunk cookies with brown butter and fleur de sel | Brooklyn Homemaker

When it comes to chocolate chip cookies, I’m definitely of the “go big or go home” school of thought. I usually like to use a #24 portion scoop, which works out to 1.5 oz (or 3 tablespoons) of dough. I love portion scoops for drop cookies because it makes it really quick and easy to get all of your cookies the same size and shape. If you don’t have a portion scoop, you can certainly measure out 3 tablespoons of dough to see how it should look and then try to make the rest of your cookies match that size.

You can easily use a smaller portion scoop, or make smaller cookies if you want, you’ll just need to adjust your baking time accordingly to avoid over-baking.

pistachio and dark chocolate chunk cookies with brown butter and fleur de sel | Brooklyn Homemaker

I know there are a jillion chocolate chip cookies out there on the internets, but I beg you to give these a try. You can thank me later.

I brought some to work with me and two of my coworkers separately came to tell me that these cookies have the perfect texture for chocolate chip cookies. They’re soft and chewy in the center, with perfect crispy crusty golden edges.
The brown butter and toasted pistachios are the perfect rich nutty compliment to the sweet and bitter dark chocolate, and the briny minerally crunchy fleur de sel is the perfect finish to every bite. They’re buttery, chocolatey, sweet, salty, and completely wonderful. I could go on, but you’re just going to have to make them and see for yourself.

pistachio and dark chocolate chunk cookies with brown butter and fleur de sel | Brooklyn Homemaker

Pistachio and Dark Chocolate Chunk Cookies with Brown Butter and Fleur de Sel

  • Servings: about 2 1/2 dozen cookies, depending on size
  • Print
adapted from Martha Stewart

18 tablespoons unsalted butter (2 sticks + 2 tablespoons)
1 cup unsalted shelled pistachios
2 1/4 cups all-purpose flour
1/2 teaspoon baking soda
1/2 cup granulated sugar
1 cup packed dark brown sugar
1 teaspoon salt
2 teaspoons pure vanilla extract
2 large eggs
2 cups (about 10 to 12 ounces) roughly chopped good dark chocolate, or good quality dark chocolate chips or chunks
1 tablespoon (ish) fleur de sel or other crunchy finishing salt

In a small heavy-bottom saucepan, brown the butter over medium high heat until golden to deep brown, should take about 10 or 15 minutes. Watch carefully once it starts to brown to avoid burning. Pour out into a heat-proof dish, trying to leave the burnt solids behind, and refrigerate until soft but beginning to firm. If it solidifies, you can remove and leave out until soft.
If you want to skip this step, you can simply use 2 sticks of softened unsalted butter.

Preheat oven to 350 degrees. Arrange pistachios on a baking sheet in a single layer, and toast for about 5 or 6 minutes, or until they smell toasty and nutty. Cool and roughly chop.

Whisk together the flour and baking soda in a small bowl and set aside. Combine the cooled brown butter with both sugars in the bowl of an electric mixer fitted with the paddle attachment. Beat on medium speed until light and fluffy, about 3 to 5 minutes. Reduce the speed to low and add the salt, vanilla, and eggs. Beat until well mixed, about 1 minute. Add flour and mix until just combined. Stir in the chocolate and toasted pistachio.

Scoop dough out using a portion scoop and place about 2 inches apart on baking sheets lined with parchment paper. I used a #24 scoop, which works out to about 3 tablespoons of dough per cookie. If you make smaller cookies you’ll need to reduce the baking time by a few minutes, but you’ll have more cookies in the end. Sprinkle each cookie with a small pinch of fleur de sel.

Bake until cookies are golden around the edges, but still soft in the center, around 11 to 13 minutes. Remove from oven, and let cool on baking sheet 1 to 2 minutes. Transfer to a wire rack, and let cool completely. Store cookies in an airtight container at room temperature up to 1 week.