seasonal

spicy peanut carrot and cabbage salad

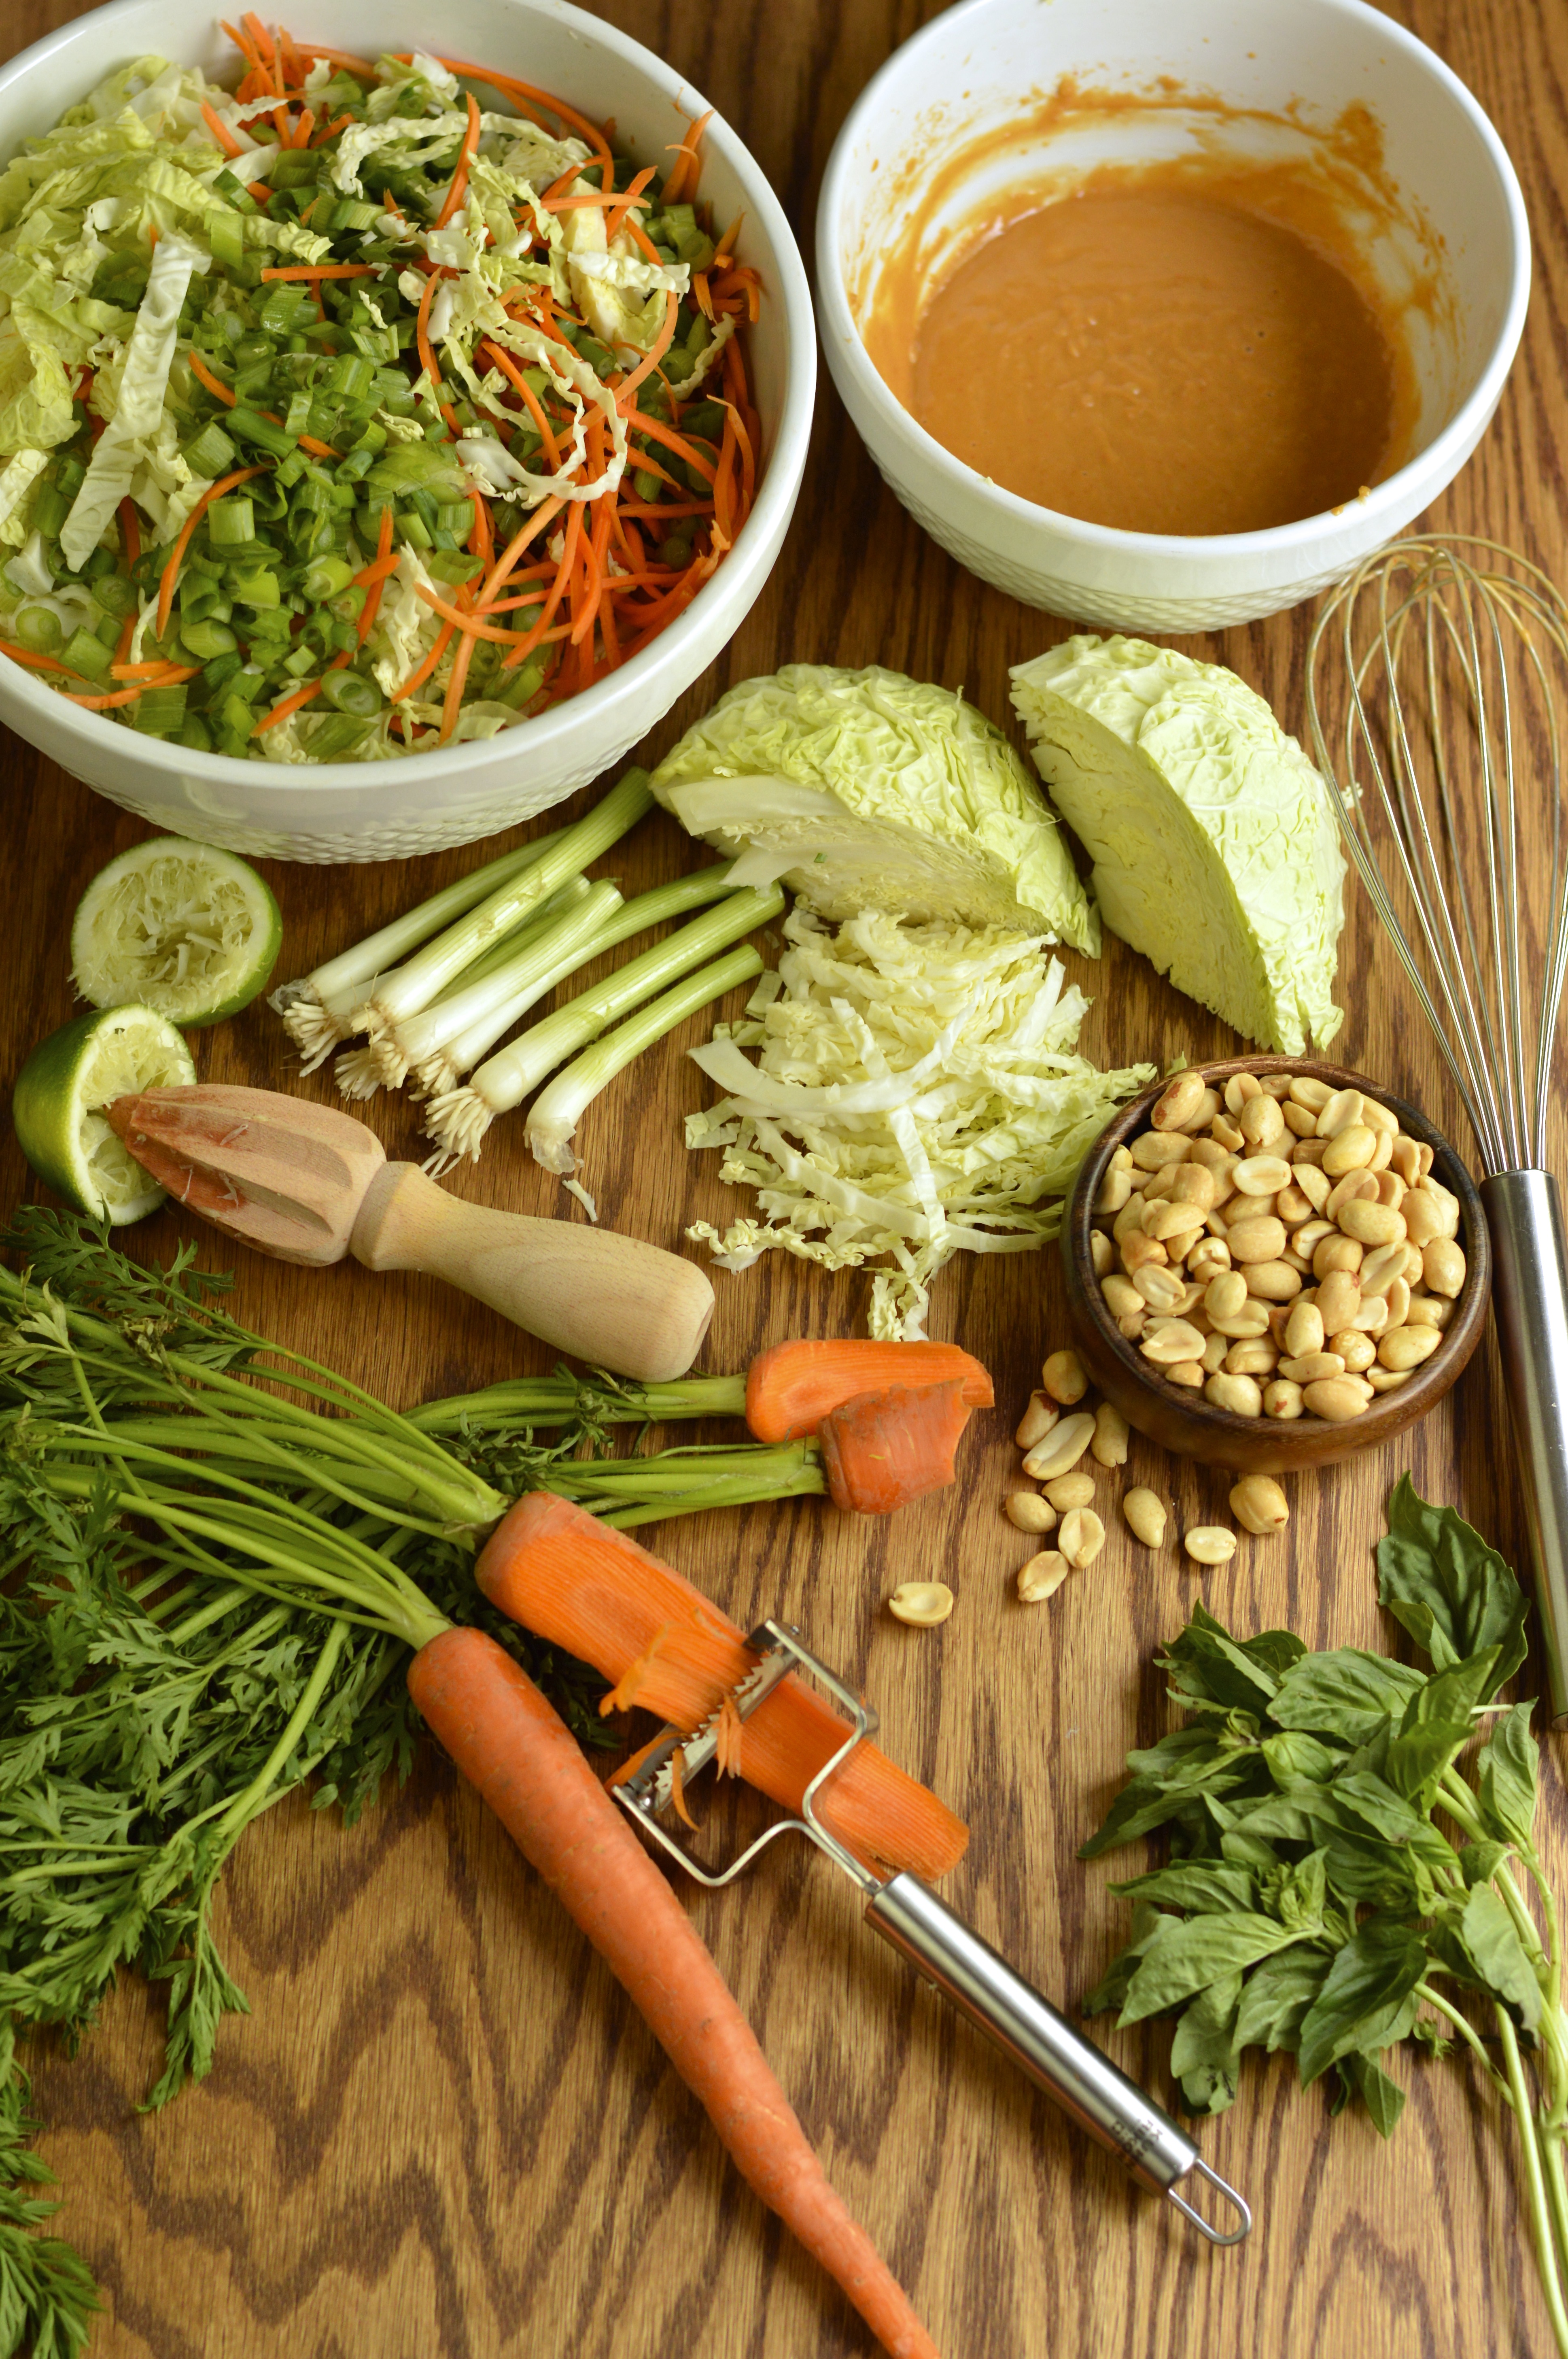
I’m sure that I’ve said this before, but one of my favorite little kitchen gadgets is a simple julienne peeler.

carrot and cabbage salad with spicy peanut dressing | Brooklyn Homemaker

The one I have is a sturdy dishwasher-safe stainless model by Kuhn Rikon that I found at Whisk for about $20, but there are a lot of other options out there on the market. The basic idea is sort of similar to a regular vegetable peeler, but with teeth running along the blade so that in one motion you end up with perfectly julienned strips of whatever you’re using it on.

carrot and cabbage salad with spicy peanut dressing | Brooklyn Homemaker

I’ve also used vegetable spiralizers that produce similar results, and while spiral slicers offer more options and variation, my julienne peeler is sturdier, smaller, and cheaper than even the smallest handheld spiral slicer.

Although it has tons of uses, my favorite use for this nifty little guy is to peel strips of carrot for salads, slaws, asian dishes, and garnishes.

carrot and cabbage salad with spicy peanut dressing | Brooklyn Homemaker

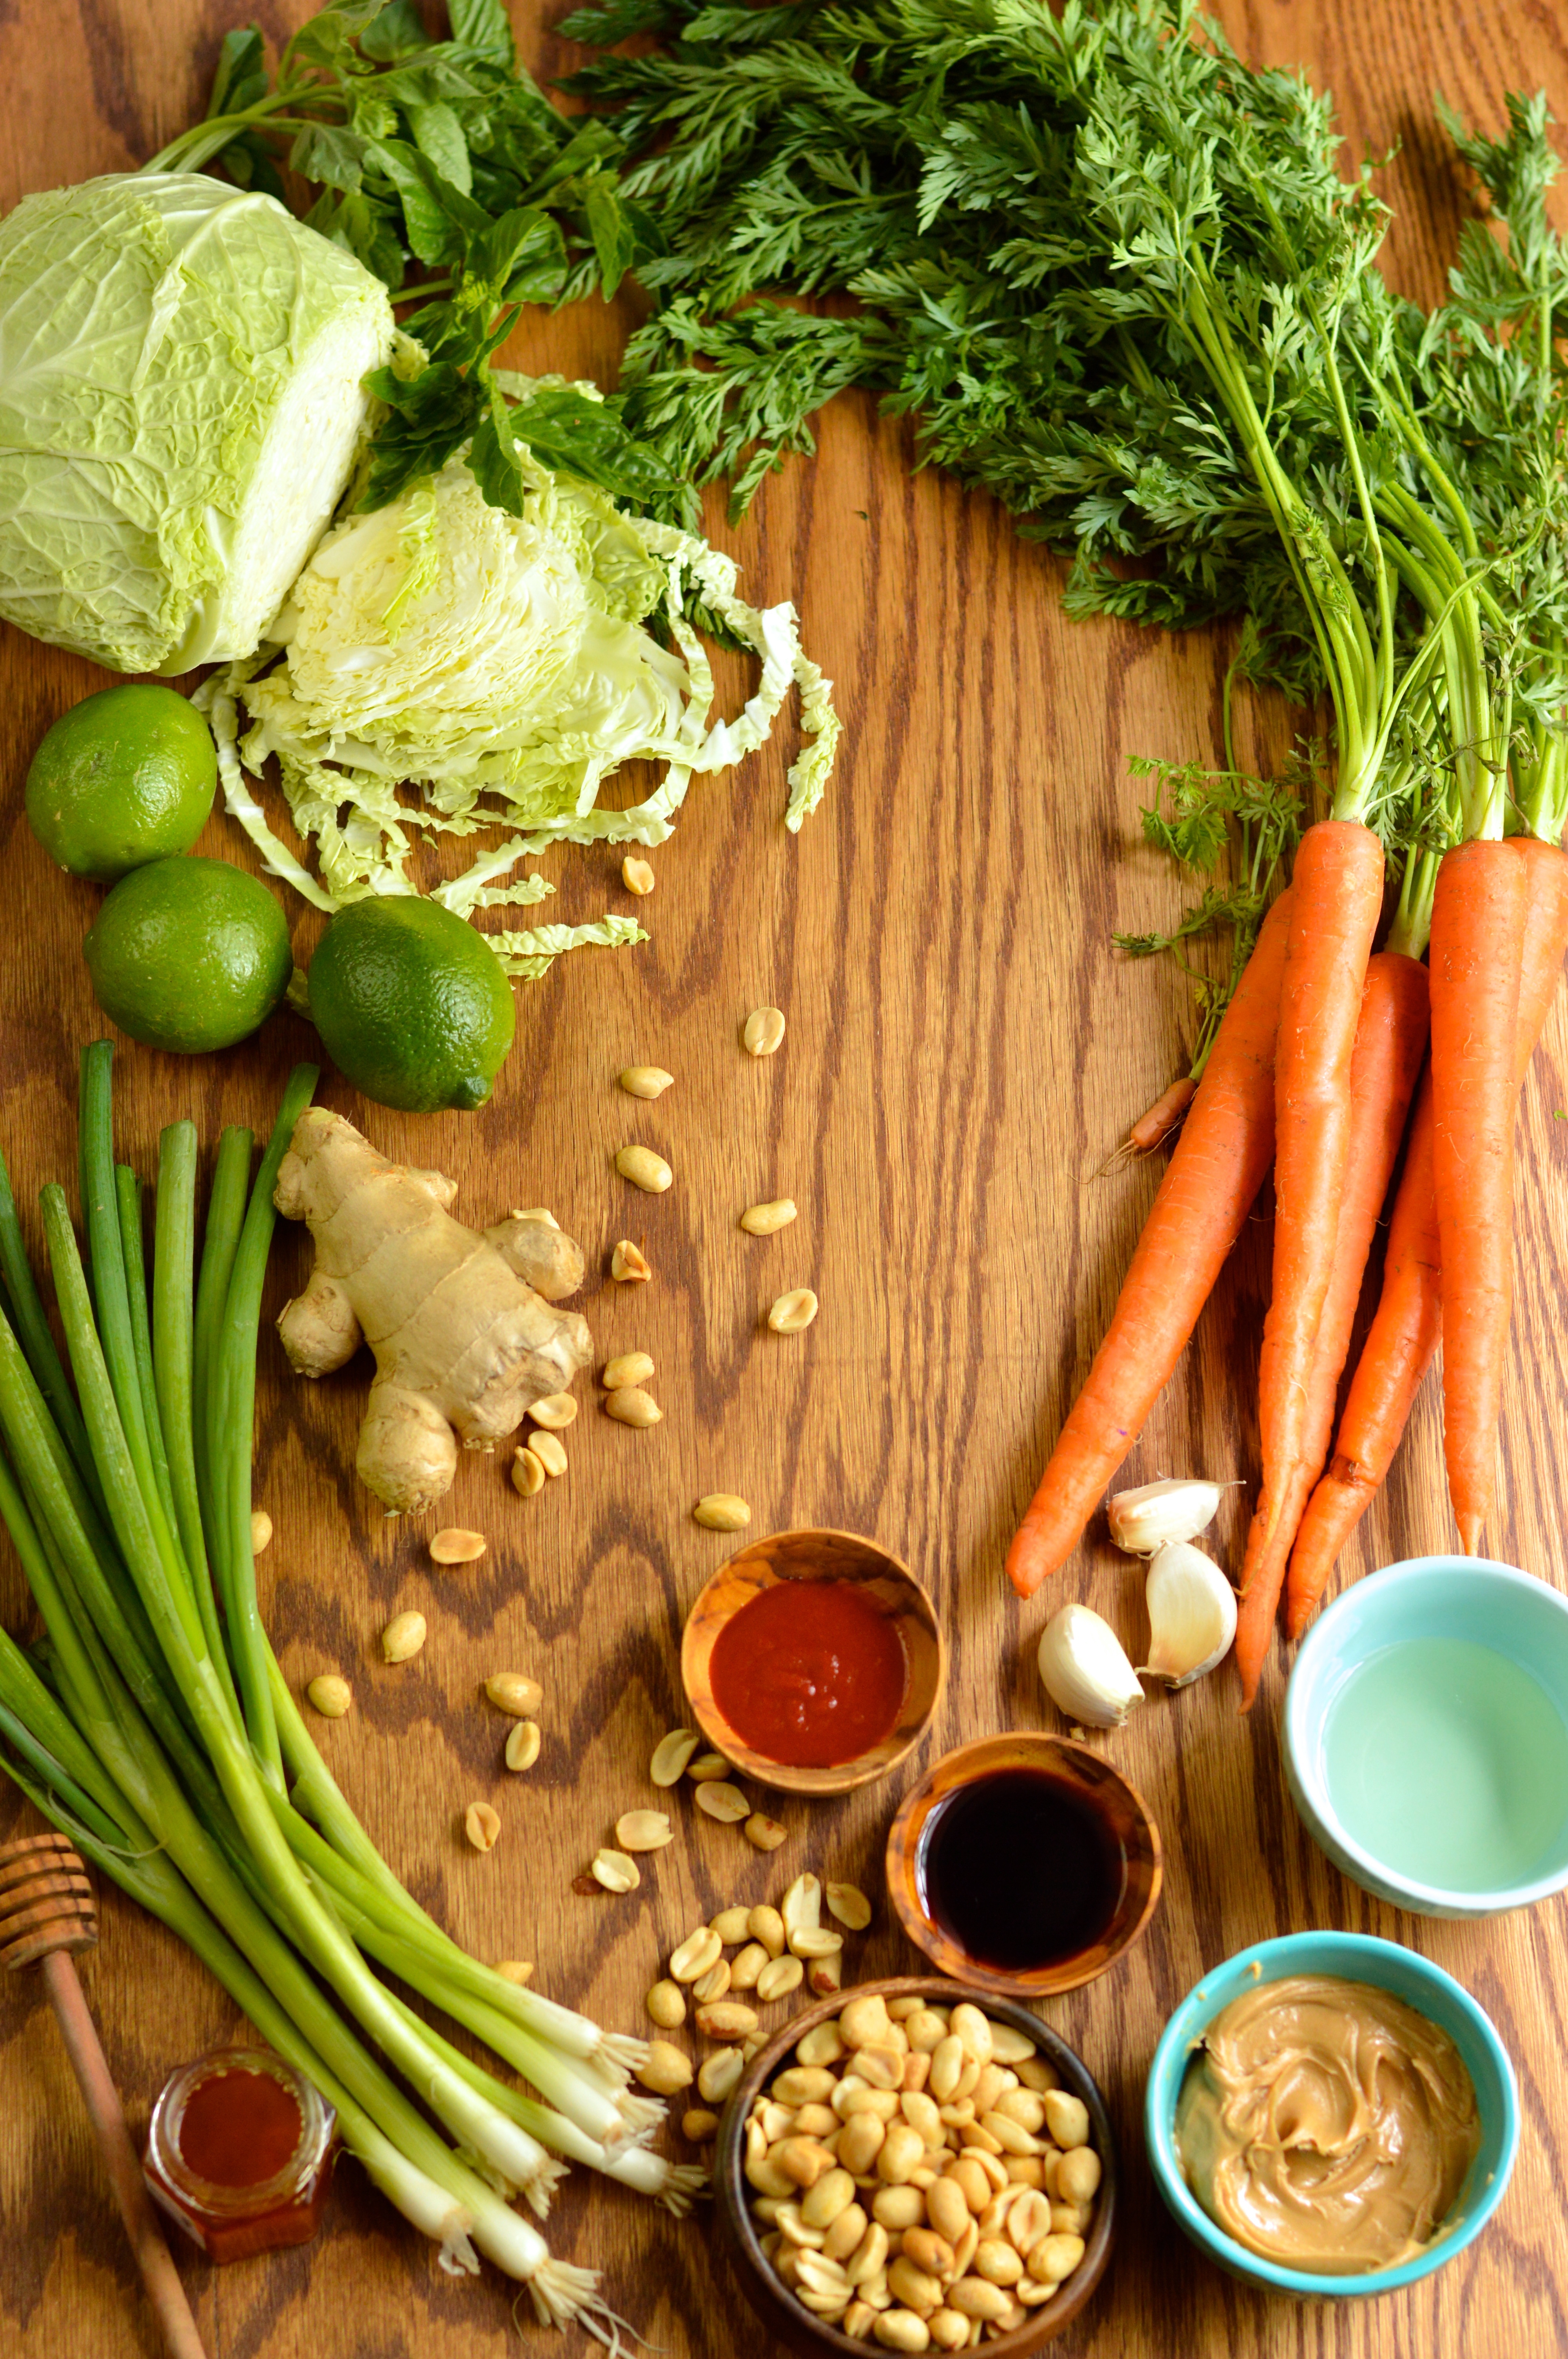
Now that the weather is warming up I’ve been looking for light summery (I know we’re not quite there yet, but a man can dream) salads and cold dishes to eat on hot days. One of my favorite warm weather meals is a soba noodle salad with lots of veggies and a spicy peanut dressing.

carrot and cabbage salad with spicy peanut dressing | Brooklyn Homemaker

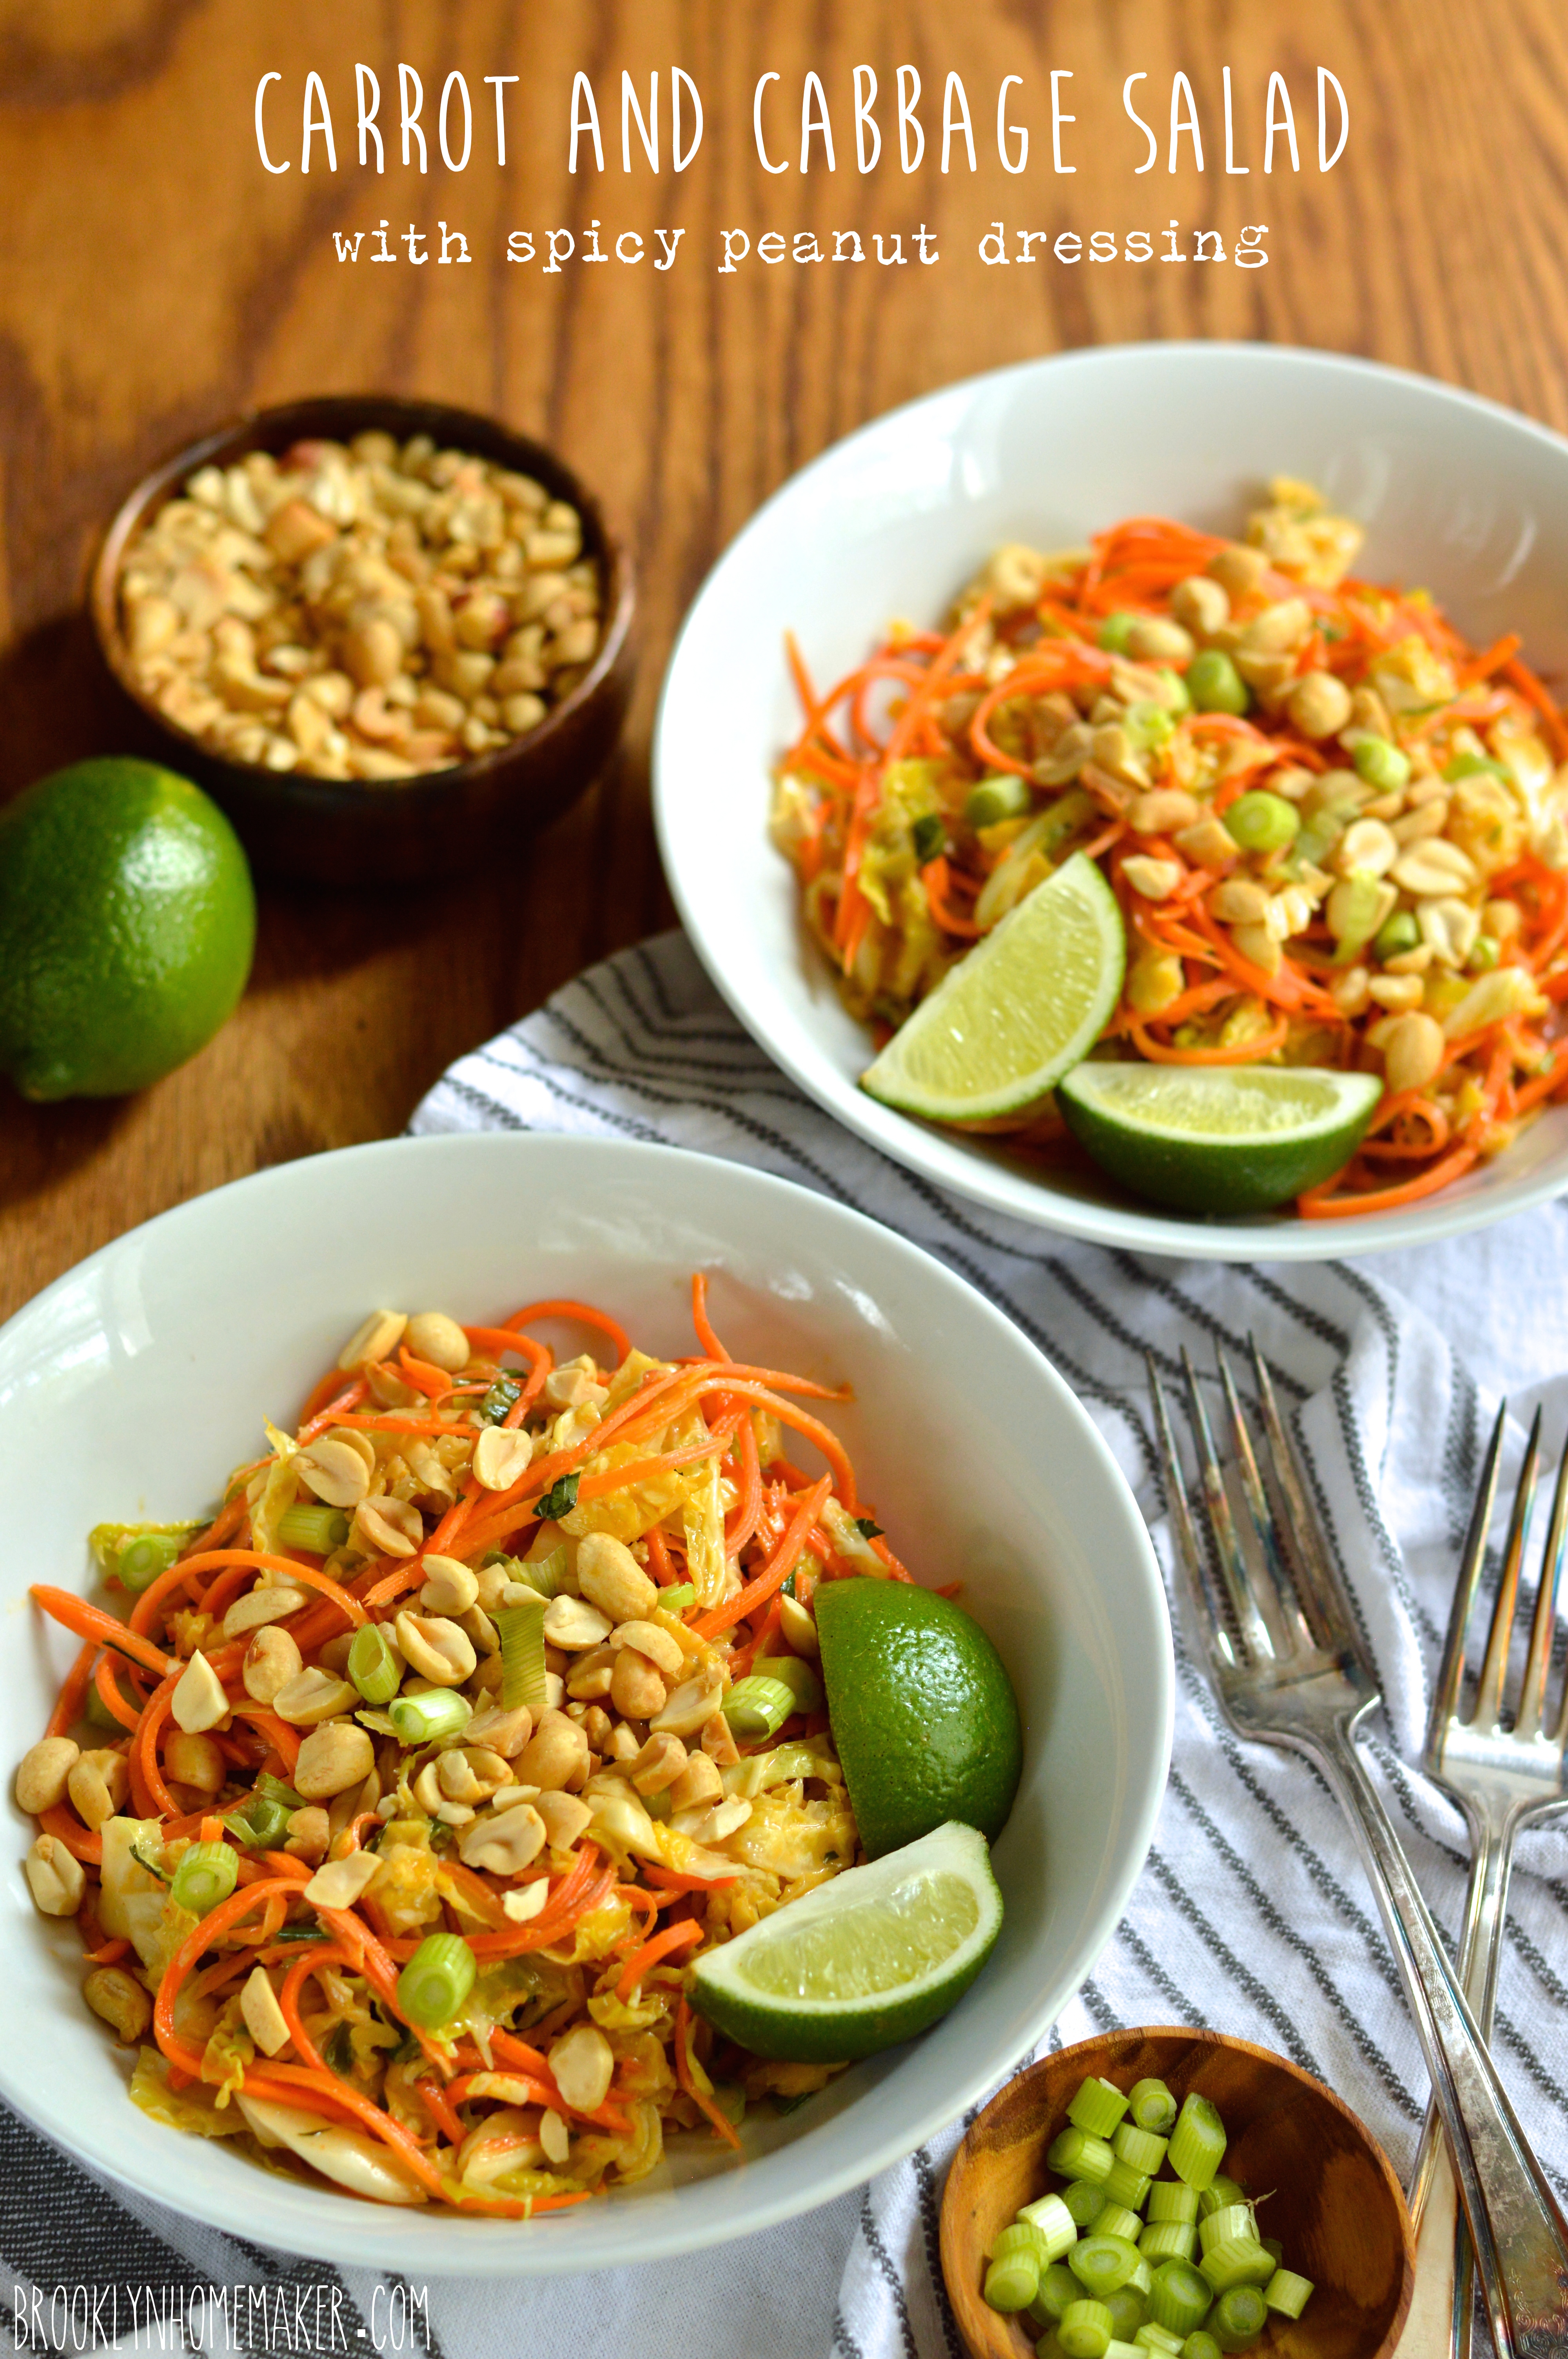
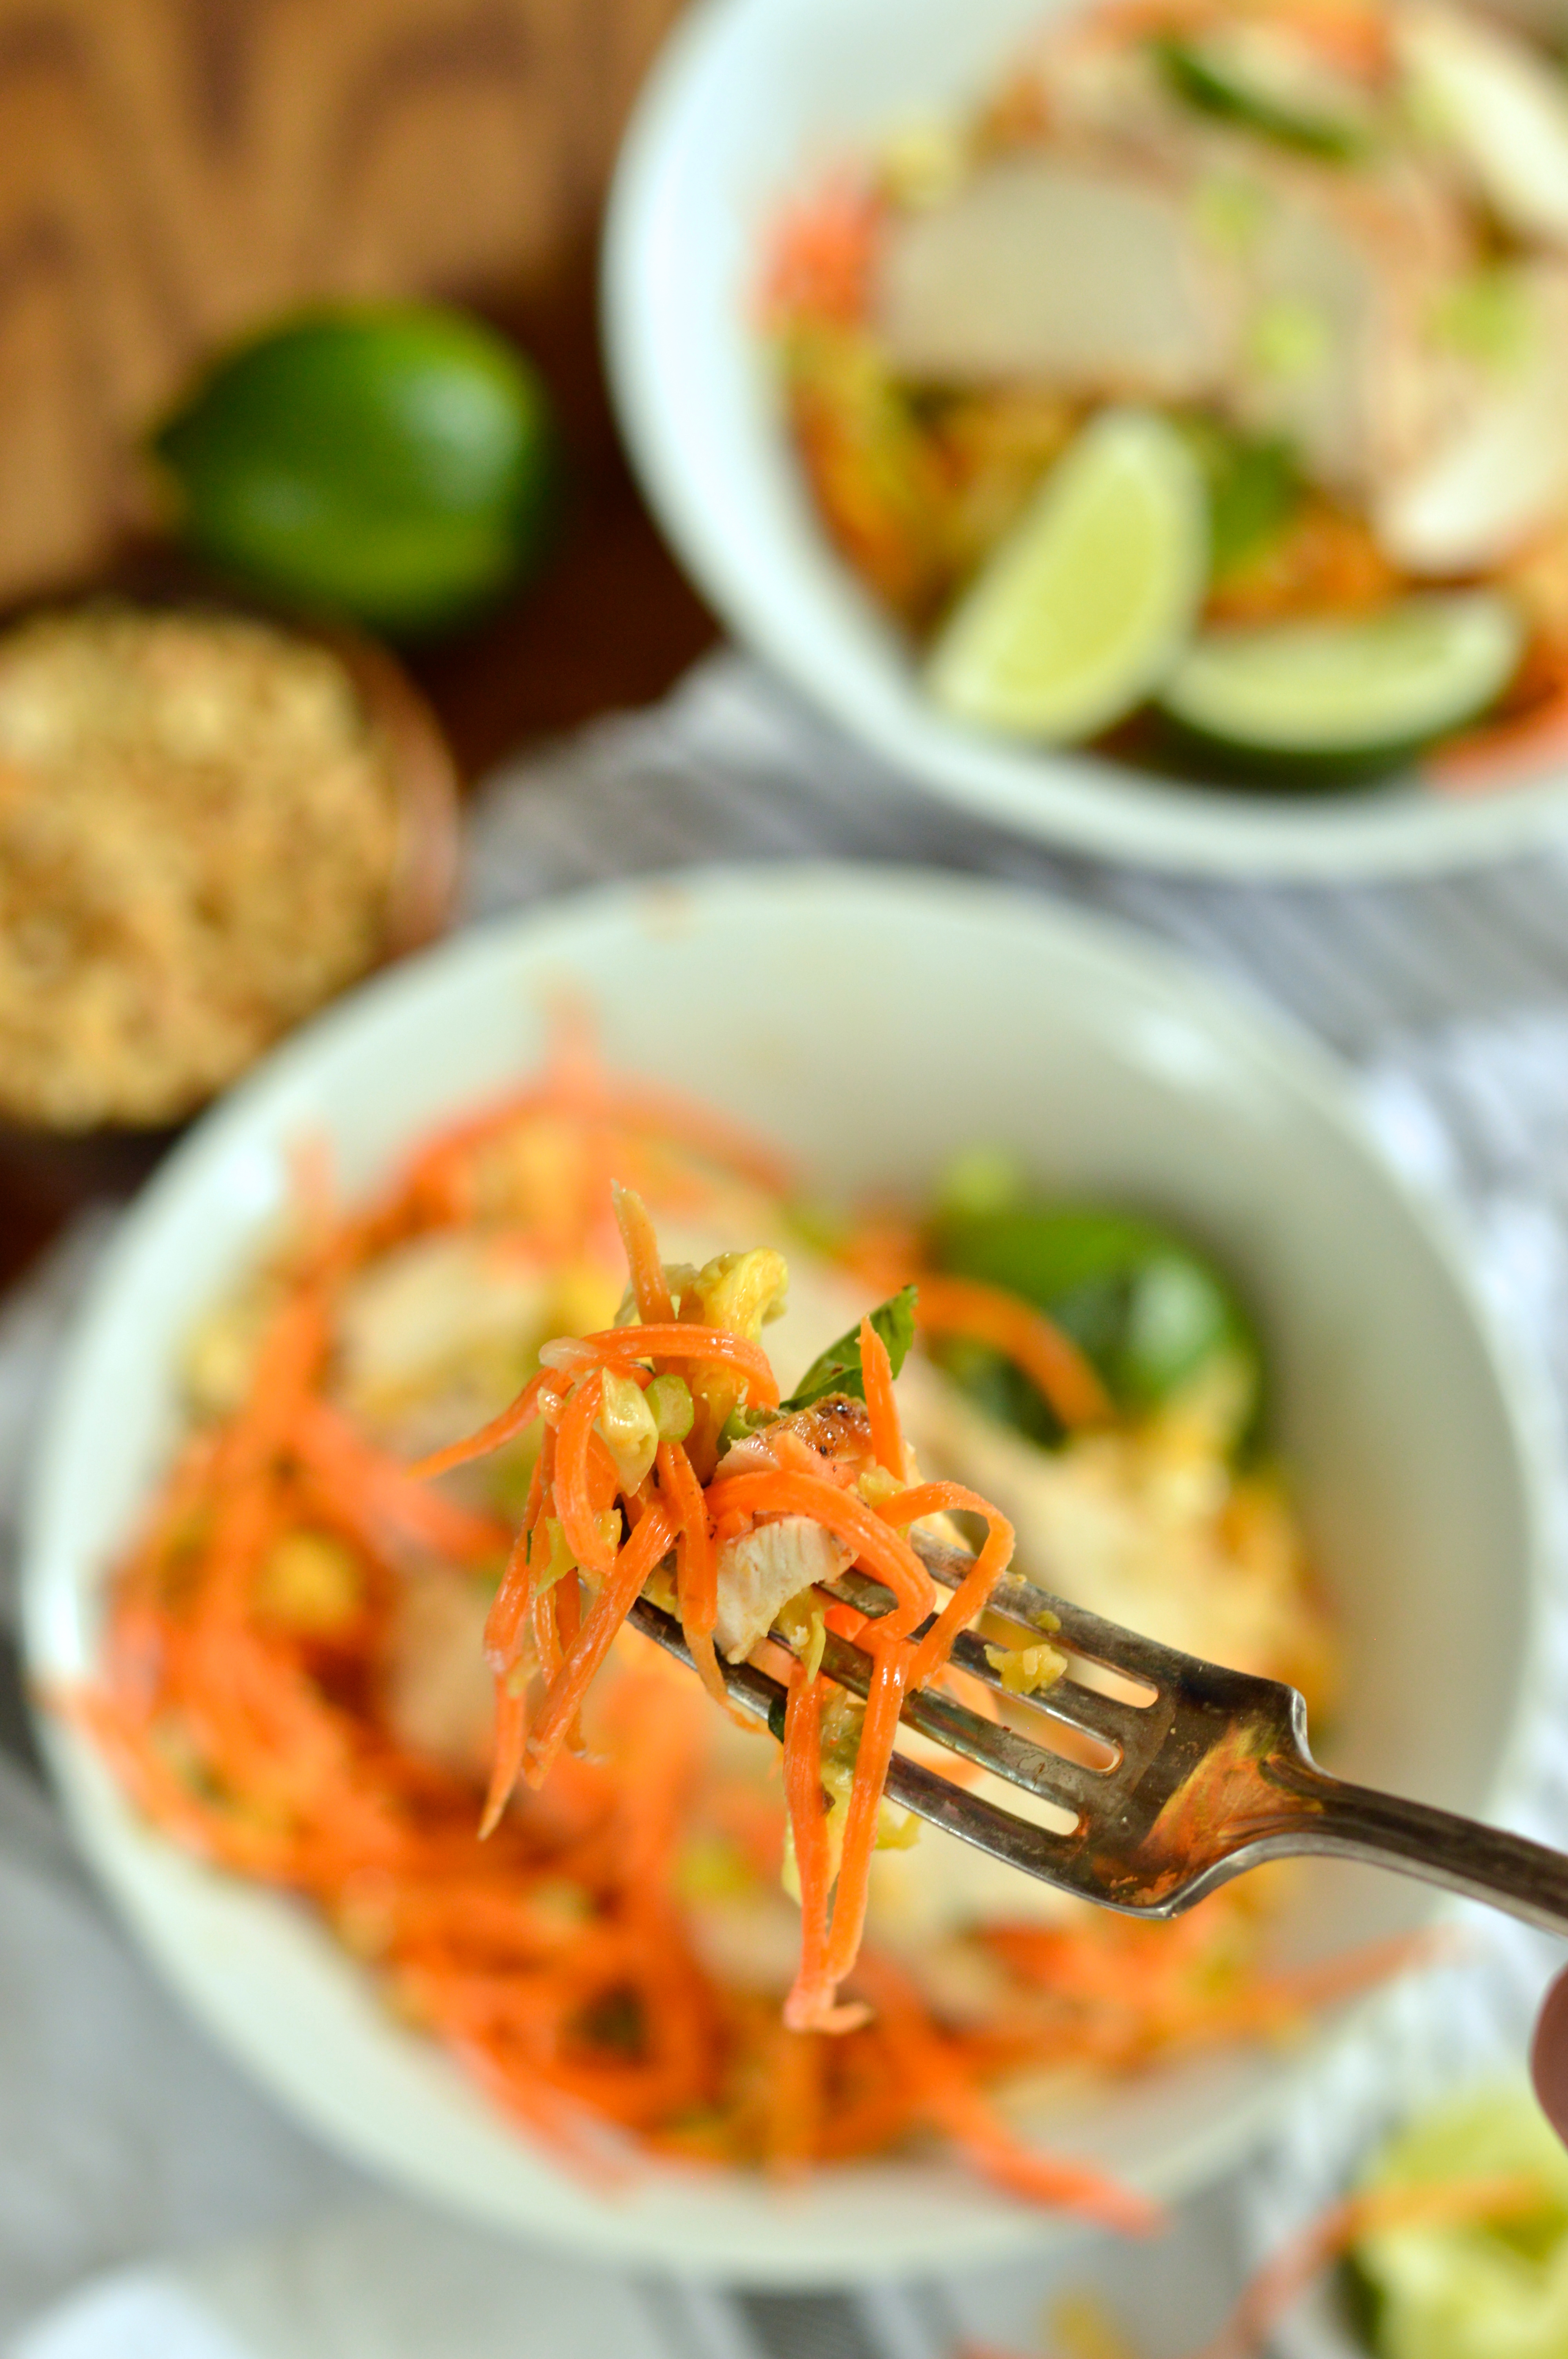
I was thinking about making that very dish, it’s one that I make a variation on at least once or twice every summer, but I thought it might be fun to try it without the noodles this time. Instead of the cold soba noodles I opted for long thin julienned strips of fresh carrot, and thinly shredded savoy cabbage.

carrot and cabbage salad with spicy peanut dressing | Brooklyn Homemaker

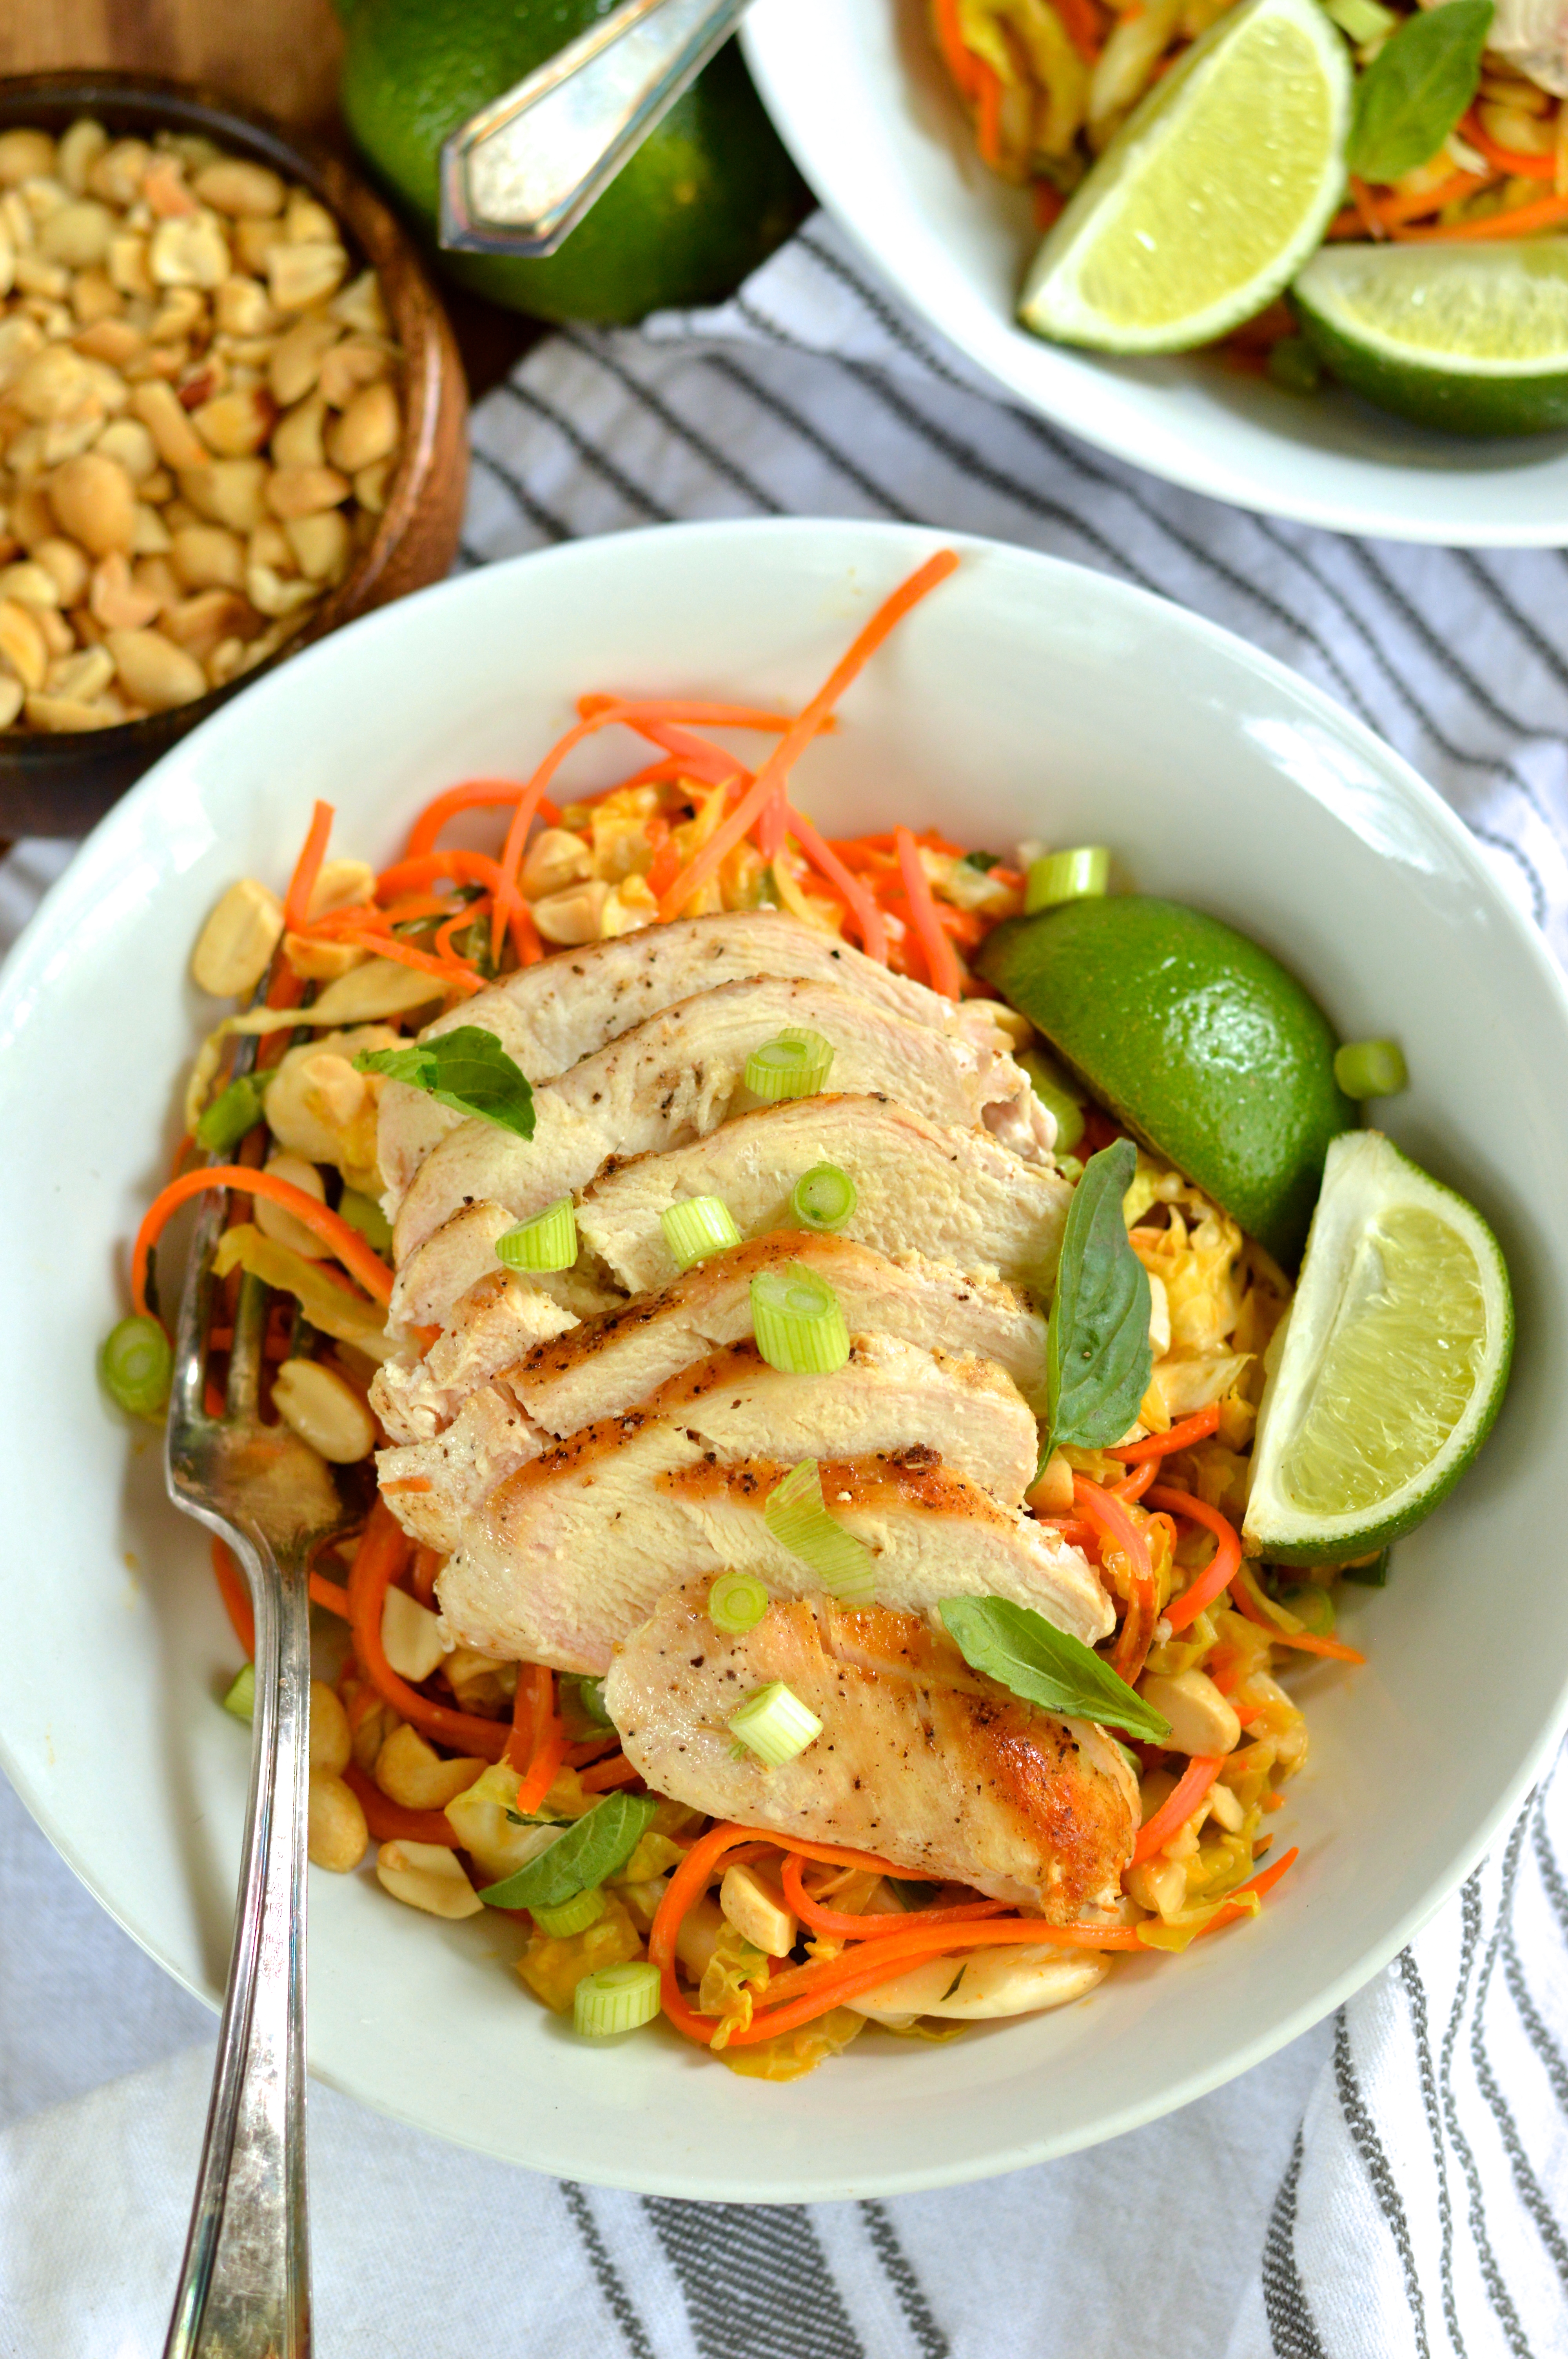
If you’re looking to add a little extra protein to this salad I think that laying some thinly sliced grilled chicken breast or lean steak over the top makes for a gorgeous presentation. To make things even simpler, you could just pull the meat off of a store bought rotisserie chicken and toss it all together with the other ingredients. My local grocery store recently started doing air-chilled organic chickens on their rotisserie too, which I think is a really nice option to have. Easy, delicious, and good quality!

If you wanted to keep the salad vegetarian, I think some roasted chickpeas would also be a really nice option!

carrot and cabbage salad with spicy peanut dressing | Brooklyn Homemaker

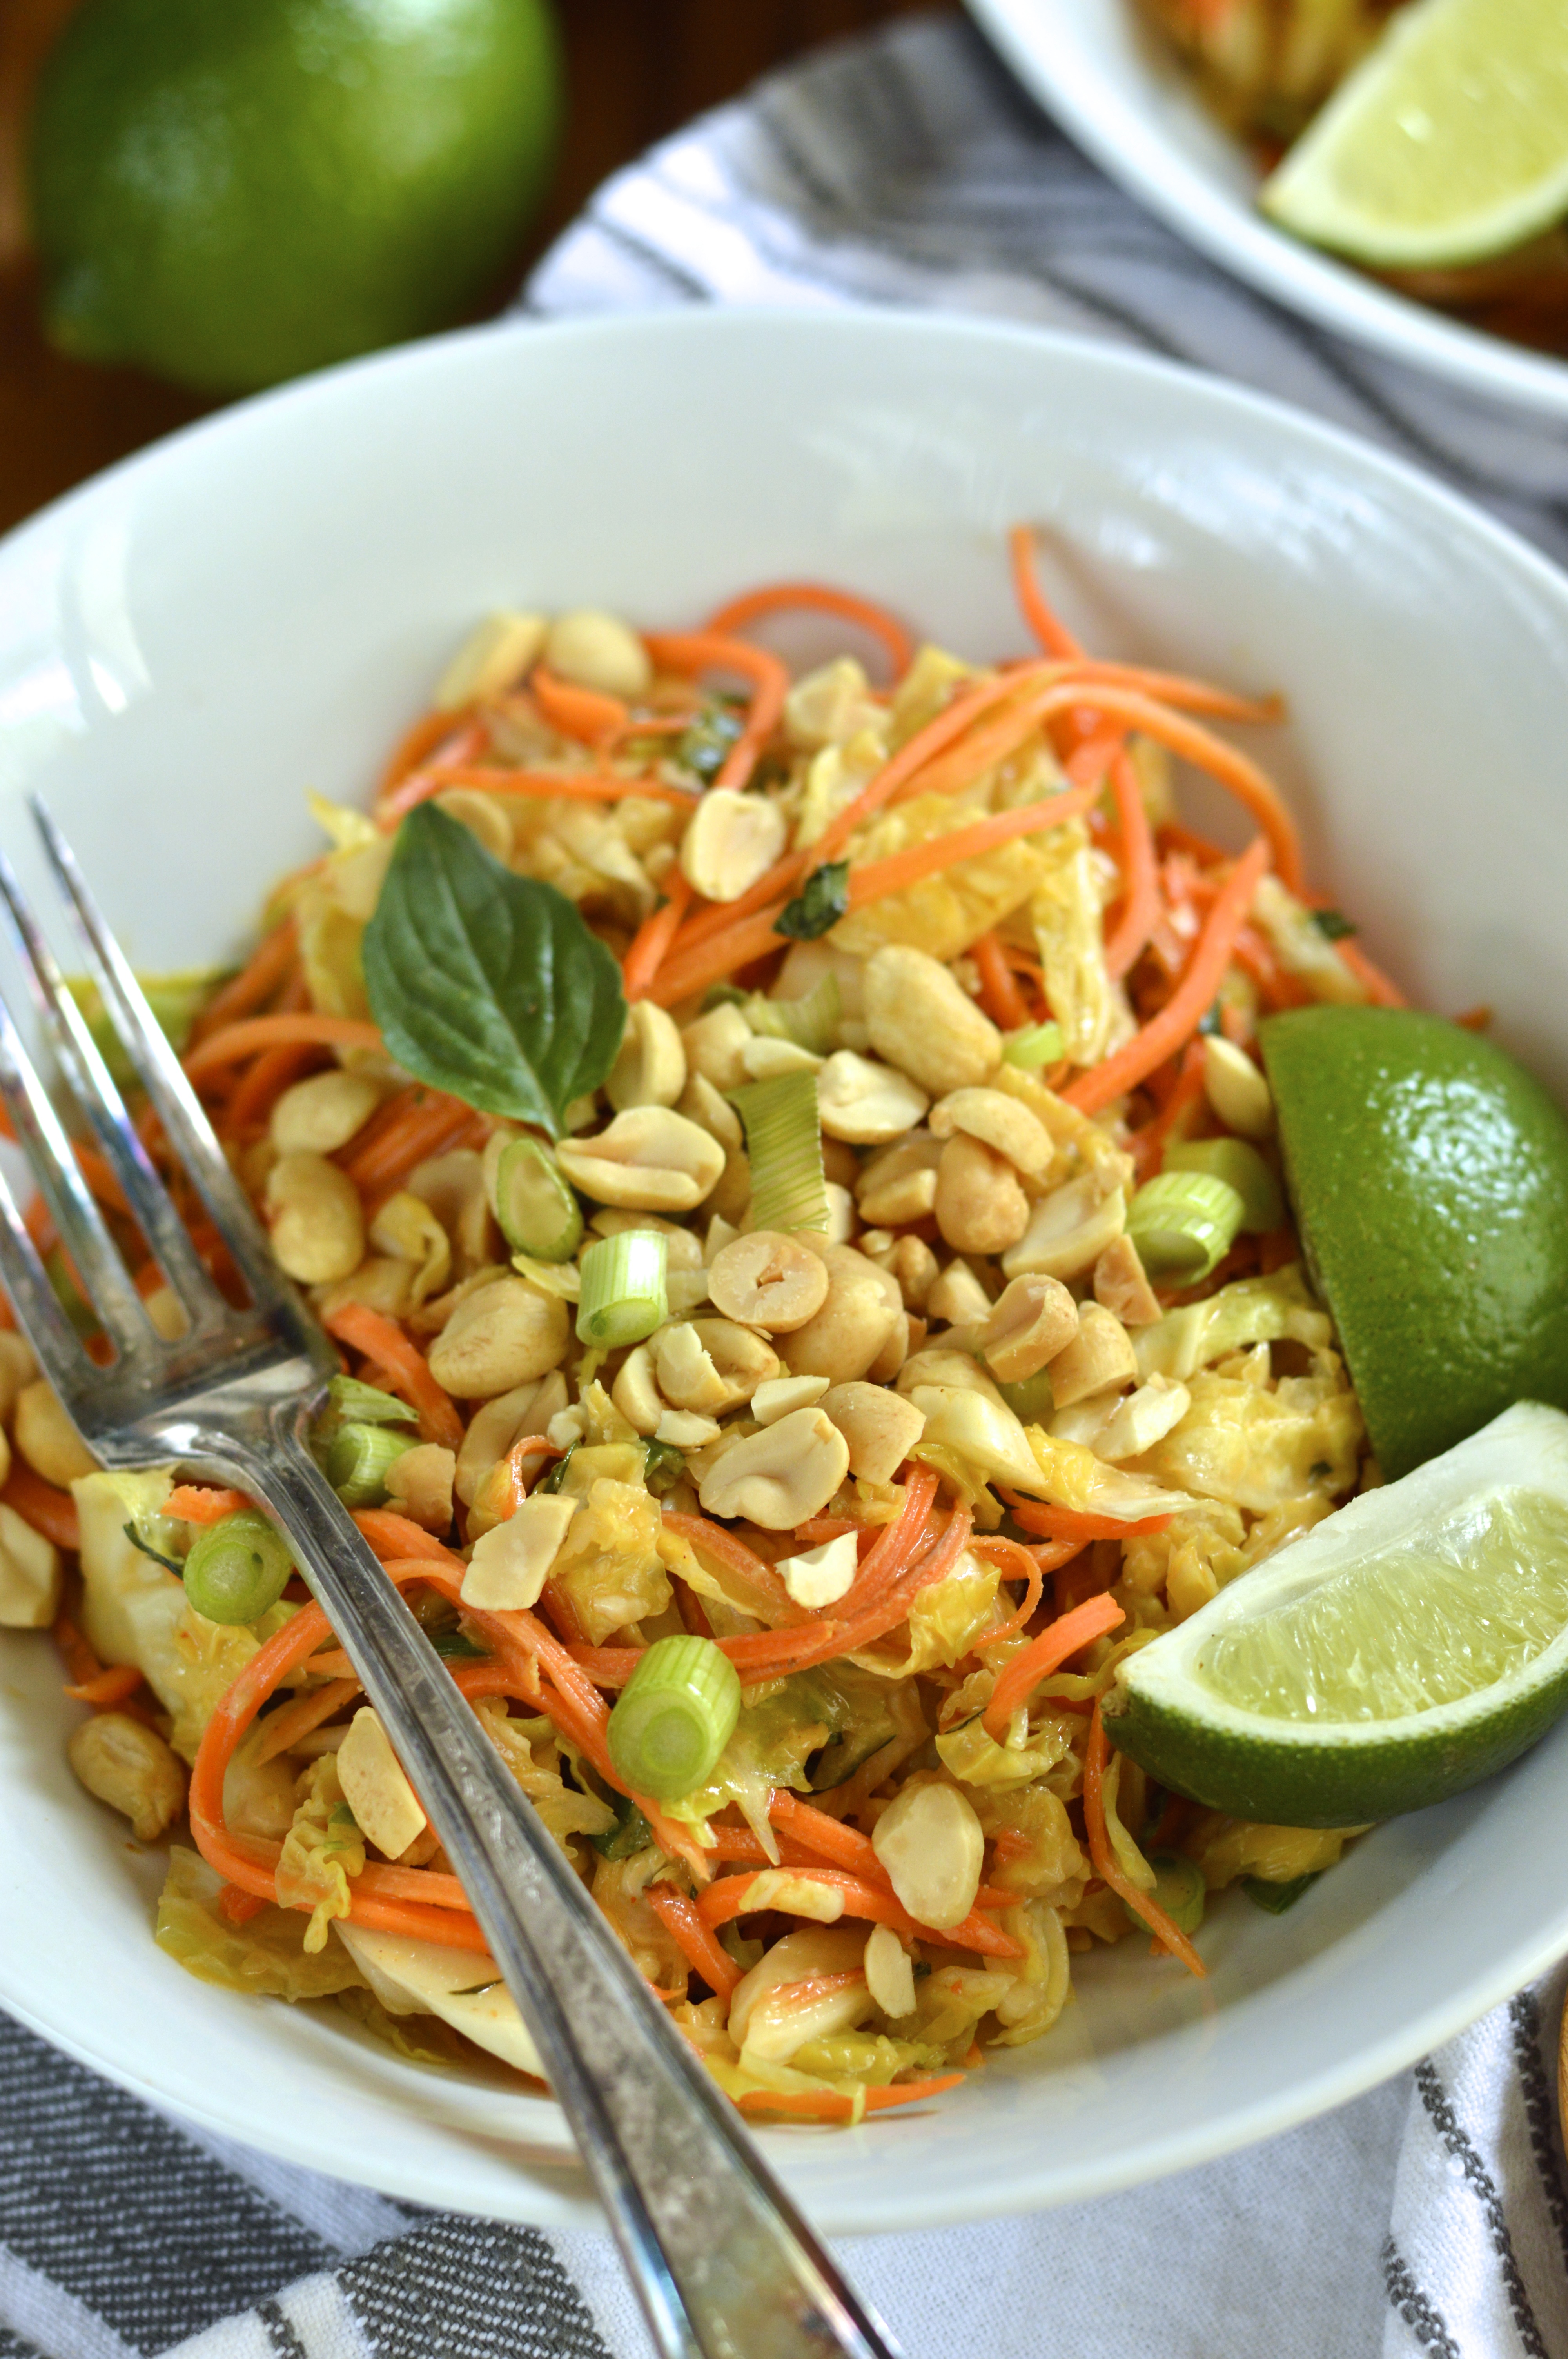
Added protein or not, this salad is pretty stellar.

The cabbage and carrot softens ever so slightly but still offers a pleasant crunch in every bite. The peanut dressing is thick and creamy and ever so slightly spicy and tangy from the vinegar and lime juice. The green onions and basil add even more green earthiness and flavor, and the toasted peanuts add great texture and flavor. It’s the perfect meal for the warm weather to come, and keeps well for a day in the refrigerator if you want to pack it for lunch. It would also be the perfect make-ahead meal for a picnic!
If you do decide to make it ahead, just be sure to wait to add the toasted peanuts until serving or they can absorb the oils in the dressing and lose their crunch.

carrot and cabbage salad with spicy peanut dressing | Brooklyn Homemaker

Carrot and Cabbage Salad with Spicy Peanut Dressing

Dressing:
1/4 cup smooth peanut butter (reduced sugar or sugar free is best)
3 tablespoons rice wine vinegar
1 teaspoon sesame oil
2 tablespoons olive oil
1 tablespoons low sodium soy sauce
1 teaspoon honey (optional)
2 teaspoons sriracha sauce
1 garlic clove, finely minced or crushed
2 teaspoons fresh ginger, finely grated
2 tablespoons fresh lime juice, plus wedges of an additional lime for serving

Salad:
4 cups thinly shredded savoy cabbage, loosely packed (about half a head)
3 cups julienned or shredded carrots, loosely packed (about 4-6 large carrots)
1/2 cup scallions, thinly sliced
1/4 cup fresh basil leaves, sliced or torn
1/4 cup unsalted peanuts, toasted or pre-roasted

Combine all dressing ingredients in a medium bowl and whisk until smooth and lump free. If using sweetened peanut butter, taste before adding the honey.

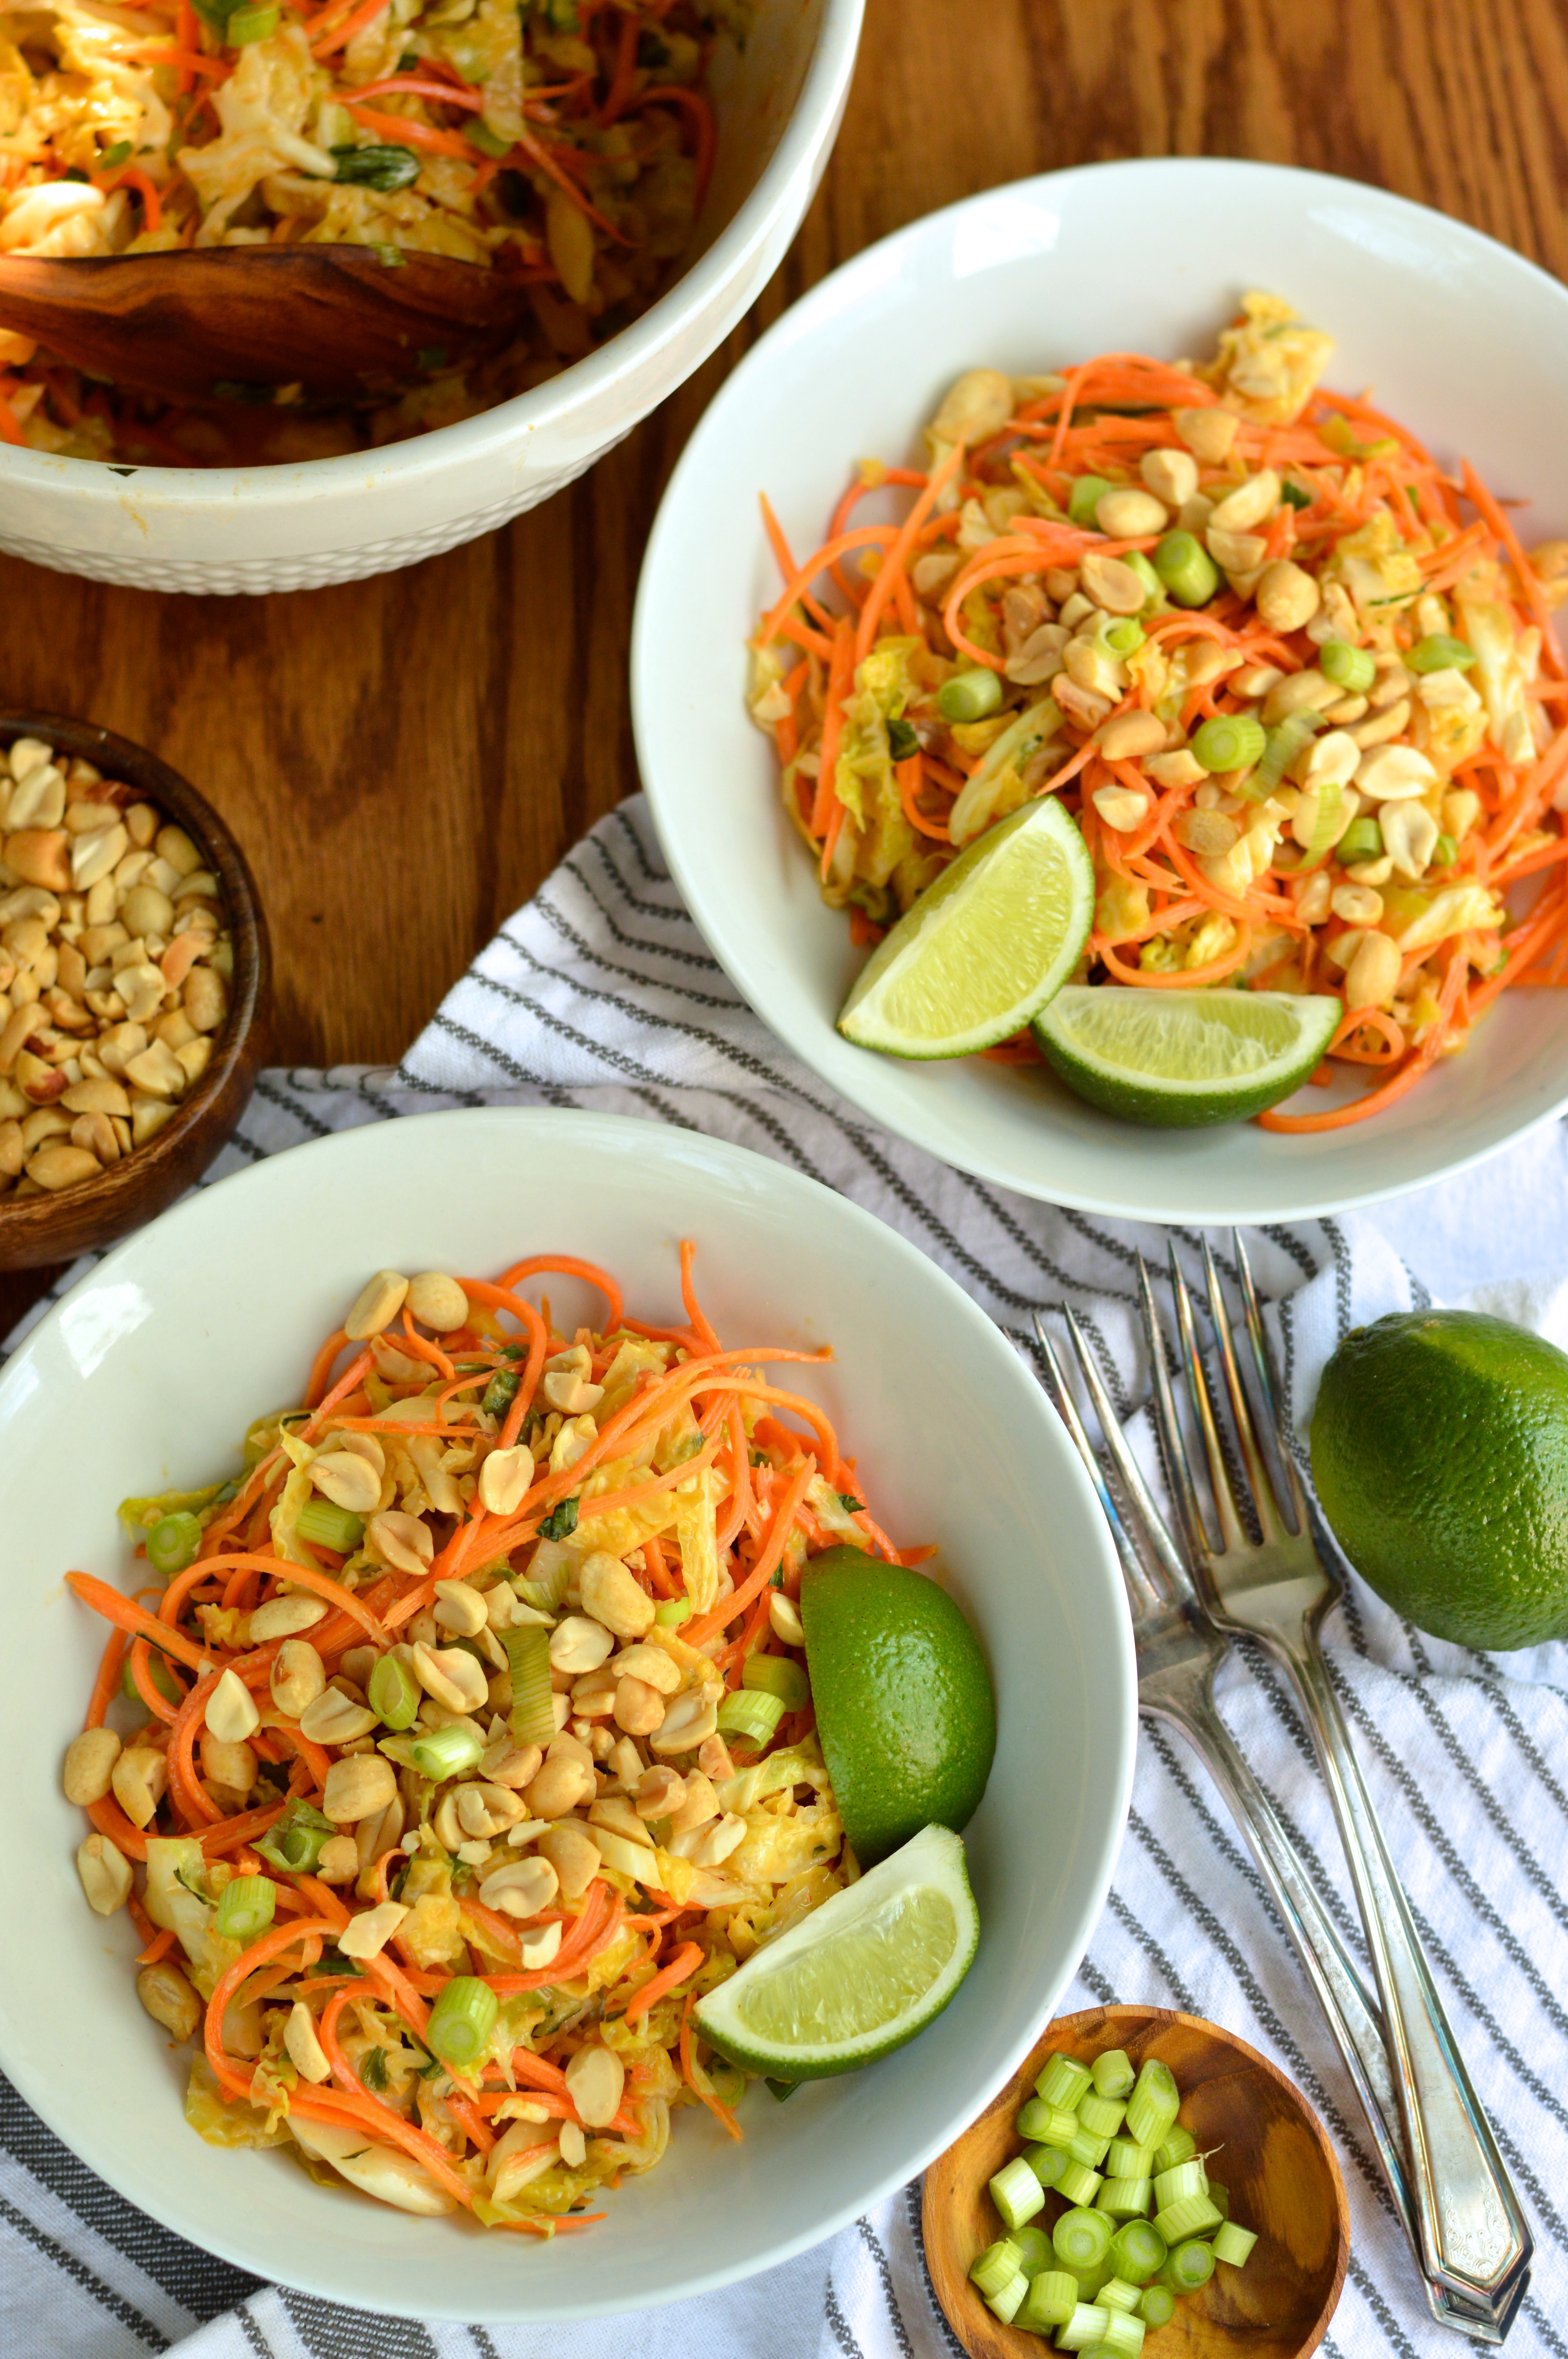
Combine the salad ingredients in a large bowl. If making ahead, reserve the peanuts and wait to add until just before serving. Pour the dressing over the top of the salad and toss like mad until well combined. It may seem like there isn’t enough dressing but the cabbage will begin to wilt once tossed and the dressing will stretch. Of course, if you like a heavily dressed salad you can increase the dressing recipe. Serve with lime wedges if desired

Salad will keep, refrigerated and well covered, for at least a day.

If desired, top with thinly sliced lean steak or chicken breast, or toss with pulled rotisserie chicken meat or roasted chickpeas.

grilled shrimp tacos

I think that it’s officially safe to the warm weather is here to stay!

grilled shrimp tacos with cilantro pesto and jalapeno crema | Brooklyn Homemaker

This spring has been all over the place when it comes to the weather. One day it’s sunny & gorgeous, and the next day it’s grey & freezing. It’s a very hard life we lead here in Brooklyn.

grilled shrimp tacos with cilantro pesto and jalapeno crema | Brooklyn Homemaker

I actually made these tacos two or three weeks ago, but the very next day the weather took a turn and I felt weird posting them when it was so chilly outside.
The day I made them was absolutely gorgeous though, and Russell and I had the day to ourselves to wander Brooklyn and frolic in the sunshine.

grilled shrimp tacos with cilantro pesto and jalapeno crema | Brooklyn Homemaker

So frolic we did.

grilled shrimp tacos with cilantro pesto and jalapeno crema | Brooklyn Homemaker

We walked into Williamsburg and found a cute little place to have brunch, and afterward we went to a local nursery and got some new plants for the yard. It was still pretty early in the season so they didn’t have a huge selection, and our yard has the perfect combination of total shade, no hose hook-up, and super dry crappy soil; so we have to be careful about what we plant. About 60% of what I experiment with back there doesn’t make it through the first year, but we’re hoping the pachysandra we picked up will be hardy enough to survive our humble little wasteland.
So… fingers crossed!
After that we stopped by an old family fish market to get some shrimp to grill for dinner.

grilled shrimp tacos with cilantro pesto and jalapeno crema | Brooklyn Homemaker

When Russell makes fish tacos he usually makes a quick sauce with plain greek yogurt and sriracha, but this time I wanted to try something fun and a little different. I made a quick cilantro pesto to marinate the shrimp, and then made a jalapeño crema to add some creamy zip.

Both these sauces are super simple and easy to make if you have a food processor, so don’t be intimidated that you have to make two sauces. I also recommend skewering the shrimp to make them easier to flip on the grill and make sure they don’t fall through into the fire, but if you don’t have skewers it’s not impossible to grill the shrimp without them.

grilled shrimp tacos with cilantro pesto and jalapeno crema | Brooklyn Homemaker

My playing around really paid off. The shrimp came out tender, smoky, herby, tangy and perfect. Grilling them over a charcoal fire rather than gas definitely adds a lot of extra smokiness, but if you have a gas grill you can add a smoke box with wood chips to replicate the same flavor.

The bright fresh red cabbage adds a really nice crunch, and the jalapeño crema adds a welcome creaminess with a hint of spice. Mine actually wasn’t very spicy at all, but that will depend on your jalapeños. A nice squeeze of bright fresh lime juice and you’re in shrimp taco heaven!

grilled shrimp tacos with cilantro pesto and jalapeno crema | Brooklyn Homemaker

grilled shrimp tacos with cilantro pesto

3 cloves garlic
2 cups fresh cilantro, lightly packed
1/4 cup olive oil
2 tablespoons lime juice
1/2 teaspoon salt
1/2 teaspoon freshly ground black pepper
1 lb jumbo shrimp, peeled and deveined, tails removed
1/2 cup sour cream or Mexican crema
1/2 teaspoon lime juice
2 seeded jalapeños
1/2 teaspoon salt
1 cup shredded red cabbage
corn tortillas
1 lime cut into wedges

To make the cilantro pesto combine garlic, cilantro, olive oil, lime juice, salt, & pepper in a food processor and process until completely smooth. Transfer to a large bowl with shrimp and toss to combine. Cover and refrigerate for at least an hour or two, or overnight.
Clean the food processor and make the crema. Combine the sour cream or crema, lime juice, salt, and jalapeño and process until completely smooth.

I recommend using skewers to make the shrimp easier to flip and keep them from falling into the grill. If using wooden skewers make sure to soak them in water for an hour before use so they don’t burn up.

Add 5 or 6 shrimp to each skewer and try to leave as much of the pesto on them as possible. Grill the shrimp over a medium to high flame until just cooked through, flipping once. This should only take 3 or 4 minutes per side but that will depend on the heat in your grill. Warm your tortillas over the grill too, just until soft and warm, about a minute per side.

Assemble the tacos with two to three shrimp each, a sprinkle of shredded cabbage, a drizzle of crema, and a squeeze of fresh lime.

strawberry rhubarb skillet cake

You guys. I have a confession to make.
I’m the world’s WORST blogger.

strawberry rhubarb skillet cake | Brooklyn Homemaker

It’s been sunny and warm for the past few days and I had to draaaag myself indoors to write this post. I’ve really wanted nothing more than to lay out in the yard after work and snuggle puppies and drink rosé.
Russell’s been visiting family in LA and I should be taking this opportunity to catch up on my writing, but once the sun goes down and the spring chill sets back in, I’d rather be watching reruns of the Walking Dead or RuPaul’s Drag Race with a pint of pistachio ice cream.

strawberry rhubarb skillet cake | Brooklyn Homemaker

In addition to laziness and springtime distractions, I’ve also fallen victim to springtime cravings. The arrival of warm weather and green leaves makes me crave fresh produce and bright spring berries like crazy. I mentioned last week that as much as I crave these foods, local production hasn’t caught up to my cravings just yet and so far the produce at the green markets leaves a bit to be desired.

strawberry rhubarb skillet cake | Brooklyn Homemaker

I’ve been trying to hold out, but the other day I caved. I’m really the worst.

Just awful.

strawberry rhubarb skillet cake | Brooklyn Homemaker

Wandering the aisles of the grocery store the other day I stumbled across a big bucket filled with rhubarb stalks. Conveniently located behind the rhubarb were stacks and stacks of organic strawberries fresh from the freight truck.

I tried to resist, but their strawberry siren song was too much for me and I circled the produce section twice before finding them in my basket at the checkout line.

strawberry rhubarb skillet cake | Brooklyn Homemaker

Truth be told, I had no damned clue what I would do with my pre-season berries and rhubarb but I just HAD to have them. There aren’t many things in this world that I love more than a strawberry rhubarb pie, but a pie is so filling-centric that I know I need to wait for strawberry season proper to go that route.

In terms of flavor, nothing beats a berry that was ripened in the sun, in season, a few miles (or footsteps) from your home. These bright red little berries however, fresh off the truck from California, travelled a looooong way before finding their way onto the shelves at the Food Town in Williamsburg, Brooklyn. They were pretty durn good, especially after not tasting a fresh strawberry for months, but they tasted nowhere near as fresh and flavorful as they will in a few short weeks.

strawberry rhubarb skillet cake | Brooklyn Homemaker

Tart rhubarb and a healthy bit of sugar would help doctor up my lackluster berries, but in this case they would need to be more of an accent flavor and less of the main attraction. I needed to come up with a recipe that would elevate them and let them shine without expecting too much of them.

strawberry rhubarb skillet cake | Brooklyn Homemaker

It didn’t take me long to think of a rustic skillet cake I made last summer, with caramelized peaches and cornmeal. Perfect! I didn’t want to go the cornmeal route this time, but the basic idea was spot on. I’d cook the sliced berries with the rhubarb, a bit of butter, and some sugar; and then I’d pour them over a tender buttermilk cake baked in a big ol’ cast iron skillet.

strawberry rhubarb skillet cake | Brooklyn Homemaker

This cake is perfect.

In another week or two, when strawberries are actually in season here, this will definitely be happening again because then it’ll be even more perfect than it’s current state of perfection.

Topped with fresh barely sweetened whipped cream, it’s like a jammy little slice of strawberry shortcake.
Rustic and unfussy. Sweet and tart. Fluffy and tender. The cooked strawberry rhubarb is sweet and bright and jammy and fresh. The cake is just sweet enough and a tiny bit tart from the lemon and buttermilk. It’s buttery and light and moist and just…

perfect.

strawberry rhubarb skillet cake | Brooklyn Homemaker

Strawberry Rhubarb Skillet Cake

adapted from Joy the Baker

Strawberry Rhubarb filling:
1 cup sliced rhubarb (from about 3 stalks)
2 cups hulled and quartered strawberries
2 tablespoons unsalted butter
3 tablespoons sugar
pinch of salt

Cake:
1/4 cup + 1 tablespoon unsalted butter
zest of one lemon
2 1/2 cups all-purpose flour
1 tablespoon baking powder
1/2 cup plus 2 tablespoons granulated sugar
1/2 teaspoon salt
2 large eggs
1 1/4 cups buttermilk
1/4 cup lemon juice
1 teaspoon pure vanilla extract
2 to 3 tablespoons turbinado sugar or coarse finishing sugar

Preheat oven to 350 and move a rack to the center position.

Combine strawberries, rhubarb, 2 tablespoons butter, 2 tablespoons sugar, and pinch of salt in an 11 or 12 inch skillet.* Place over a medium high flame and cook, stirring frequently, until fruit is soft and coming apart and juices have reduced to a thick syrup, about 10 to 15 minutes. Do not let juices burn.

Scrape strawberry rhubarb mixture into a bowl to cool and scrape skillet clean with a silicone spatula. It’s okay if a little residue remains.
Melt butter in skillet and pour out all but 1 tablespoon to cool. Coat skillet evenly with remaining tablespoon. Add lemon zest to cooling butter and stir to combine.

In a medium bowl, whisk together flour, baking powder, salt and sugar.  Set aside.
In a small bowl or large measuring cup, whisk together buttermilk, lemon juice, eggs, vanilla and butter.

Make a well in the dry ingredients and pour in the buttermilk mixture all at once.  Stir with a silicone spatula just until combined, scraping the sides of the bowl until there are no dry pockets of flour. Do not over mix.  Pour batter into the prepared skillet and spread (or shake) smooth.  Dot the batter with strawberry mixture as evenly as possible, and sprinkle generously with turbinado sugar.

Bake for 20-25 minutes, or until a toothpick or cake tester inserted in the center of the cake comes out clean.  Allow cake to cool for at least 30 minutes before serving. If desired, serve with a generous dollop of lightly sweetened whipped cream or a light dusting of powdered sugar.

Cake will last, removed from skillet and well wrapped in the refrigerator, for up to 3 days.

*If you don’t have a cast iron skillet you can cook the strawberries and melt the butter in any pan you have, and use an 11-inch round tart or quiche pan, or a 9×13-inch pan for the cake. The batter may spread more thin so you’ll need to keep a close eye on it in the oven.

orange glazed roasted butternut squash bread

It’s been a minute I know. I’m sorry.

orange glazed roasted butternut squash bread | Brooklyn Homemaker

I think this little two week break is the longest I’ve ever gone between posts since I started this whole adventure. I promise that I have a very good reason for for my little hiatus.

orange glazed roasted butternut squash bread | Brooklyn Homemaker

I’ve been working on giving my kitchen a little facelift. I told you a few weeks ago that I wanted to change a few things in there, and your comments and encouragement gave me the strength to take action on a project I’ve wanted to tackle for years but never did. I don’t want to give anything away just yet, but rest assured things are looking rather different in there.

orange glazed roasted butternut squash bread | Brooklyn Homemaker

I’ve still got a bit of work to do, but I hope to be able to give you a peek at the progress in a week or two. Right now though, the kitchen is a total mess, and Russell and I have been surviving on delivery pizzas, tacos, and Thai food. I really can’t wait to get back in there and start cooking again, and get back into the swing of things over here too.

orange glazed roasted butternut squash bread | Brooklyn Homemaker

Luckily, I had the foresight to make one last treat before the disarray began. I’ve been so distracted over the past few weeks though, that it’a just taken me this long to get around to posting the recipe.

orange glazed roasted butternut squash bread | Brooklyn Homemaker

This cold weather has me craving some homey comforting sweet bread, with a healthy dose of warm spice. At first I was thinking about making pumpkin bread, but on a whim I decided to try it with butternut squash instead. Butternut squash, roasted and pureed, has much the same texture as pureed pumpkin, but has a brighter, fresher, sweeter flavor.

orange glazed roasted butternut squash bread | Brooklyn Homemaker

To compliment that brightness and sweetness, I added a bit of fresh orange zest to the recipe. I kept the cinnamon in the recipe for the traditional warmth, but in place of nutmeg I substituted a bit of ground ginger and clove to compliment the citrus.  Then I topped the whole thing with a thick orange glaze.

orange glazed roasted butternut squash bread | Brooklyn Homemaker

This loaf is incredibly moist and tender, with a wonderfully homey and satisfying flavor. It’s such a fun yet familiar twist on traditional pumpkin bread. The warm spice is perfectly suited to the flavor of the earthy roasted butternut squash, and the orange zest adds a lovely touch of brightness. The bread itself is so perfect on it’s own that it doesn’t even really need the glaze, and would be just as good with a simple swipe of soft unsalted butter.

I added the glaze to boost the citrus flavor, but I have to admit that I found it just a bit too sweet for my taste. My sweet tooth just prefers something a bit more subtle. If you think you’re like me and might prefer a more refined sweetness, you could skip the glaze altogether if you like. You could also try using less sugar to make a thinner glaze, or even try a cream cheese icing instead. If you like a nice dessert-like sweetness though, just make the glaze as is. Either way, a slice of bread will be heaven with your morning coffee or perfect as a treat at the end of the day.

orange glazed roasted butternut squash bread | Brooklyn Homemaker

Orange Glazed Roasted Butternut Squash Bread

  • Servings: Makes 2 loaves
  • Print
adapted from Once Upon a Chef

Bread:
1 small to medium butternut squash
2 teaspoons peanut or vegetable oil
2 cups all-purpose flour
1 teaspoon baking soda
1/2 teaspoon baking powder
1/2 teaspoon salt
zest of 1 orange
1 teaspoon ground cinnamon
3/4 teaspoon ground cloves
1/2 teaspoon ground ginger
1 3/4 cups sugar
1 1/2 sticks (3/4 cup) unsalted butter, melted
2 large eggs

Glaze (optional):
zest of 1 orange
1/4 cup fresh squeezed orange juice
2 cups confectioners (powdered) sugar, sifted

Preheat oven to 400 degrees. Cut the butternut squash in half lengthwise and remove seeds. Rub flesh with oil and place cut side down on a parchment lined baking sheet. Roast for 35 to 40 minutes or until soft when pushed with a finger. Cool until cool enough to handle.
Peel the skin off the outside of the squash, and puree the flesh in a blender or food processor, or in a bowl using an immersion blender.
Measure out 2 cups of puree and save the rest for another use, or feed it to your dogs.

Reduce oven to 325 degrees. Butter and flour two 8 ½” x 4 ½” loaf pans.
Combine flour, salt, baking powder, baking soda, orange zest, and spices in a bowl. Whisk until well combined and set aside.
In another bowl, mix together sugar, melted butter, and squash puree. Whisk in eggs, one at a time, until well combined. Fold squash mixture into flour mixture until combined.
Turn batter into prepared pans, dividing evenly, and bake for about 65 – 75 minutes, or until cake tester inserted in center comes out clean. Let loaves cool in pan about 10 minutes, then turn out on wire rack to cool completely.

Once the loaves are cooled, whisk together the glaze ingredients until smooth and free of lumps. Pour over the loaves and smooth the top. Let the glaze set for a bit before slicing.