You guys. I did it again.
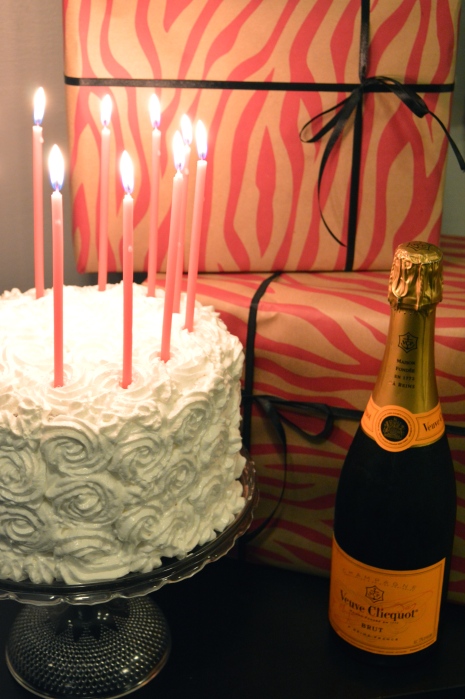
I baked my own birthday cake.
I know that some people gasp in horror or baulk at the very idea of such a thing. On one’s birthday, one is supposed to just sit back and enjoy the day without having to lift a finger.
But, you know what, one thing that I enjoy even more than eating cakes, is baking cakes! Especially if doing so means that I get to share them with people I love.
And guess what else. I could never find a cake in a bakery that would be as good as a cake that I could bake myself, and even if I found one, I couldn’t afford it!
So, tradition be damned, I bake my own birthday cakes.
And I like it!
As my birthday was approaching, the weather finally started to warm up here in New York after what felt like an endless grey & chilly spring. To celebrate both the arrival of warm weather and my advanced age, we decided to invite a bunch of friends and have a big festive bbq in our suddenly green backyard.
I plotted and planned out my menu, scouring the internet for recipes for sides, salads, mains, and options for vegetarians. Russell even asked his family from San Diego to ship us a box of avocados from their own avocado tree, so that we could offer our guests a big ol’ bowl of the freshest guacamole in Brooklyn.
Of course, I knew that I wanted my birthday cake to be the pièce de résistance. It’s been so long since I’ve done a big festive layer cake that I also wanted to come up with something that I hadn’t really ever done before.
Nothing says Summer quite like s’mores.
Amirite?
Especially for a bbq or a backyard party, there’s clearly nothing better to round out an evening. I still love them to this day (duh), but it’s almost impossible not to think of childhood when eating them. Even though these days I’m usually making them over the leftover embers from my charcoal grill, they instantly transport me to campfires in the woods of upstate New York, with multiple marshmallows skewered on gnarled sticks found on the ground or ripped from a low-hanging branch.
Of course, like any good fat kid, when I was young I was super impatient to heat up those marshmallows as quickly as possible so I could get those s’mores into my face on the double. I learned pretty early on though, that the chalky texture and acrid flavor of that burnt sugar shell isn’t actually all that pleasant, even when sandwiched between melty chocolate and crisp graham crackers.
So, at a younger age than most kids (or adults for that matter), I figured out that slow and steady wins the race when it comes to building s’mores. A slow roast, with a steady rotation far from the flames, produces a vastly superior marshmallow with a soft, gooey center and a delicate toasty caramelized crust. The last time I went camping with my sister and her kids, my nephews actually poked fun at me for how long I take to toast my marshmallows. What can I say, I’m a perfectionist. Or neurotic. Potato, Potahto.
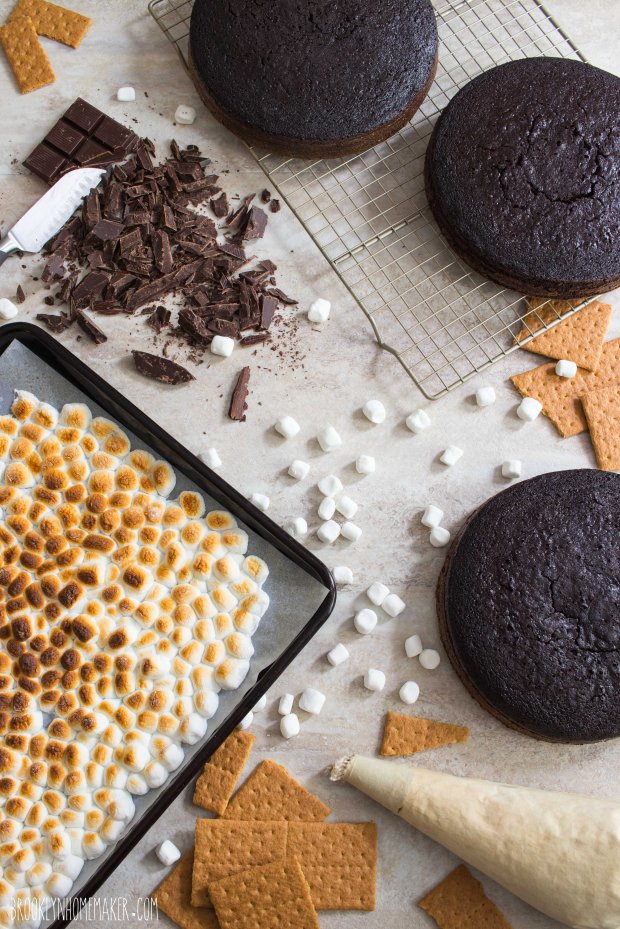
I suppose that slow and steady toasting is sort of a metaphor for building this cake. I’m not going to sugar coat things (lol) and tell you that this is an “easy” or “quick” recipe for novice bakers. It takes time and effort and has multiple steps and components. It’s basically four recipes in one, with 3 layers of cake, a flavored icing, a multi-step filling, a ganache drizzle, decorations on top, and long set of assembly instructions.
If you’re patient and determined though, and have a fair understanding of layer cake construction, all the effort definitely pays off in the end. I promise you that this cake is seriously incredible.
Unfortunately my birthday bbq never actually happened. Just as my excitement about the party was reaching it’s peak, the weather forecast started showing rain in the future. I tried not to panic and just kept telling myself that the weather changes so quickly in New York that by the weekend the forecast could be completely different.
I went ahead with planning and recipe testing my cake, but once I was sure that the recipe was solid and all the elements really worked together, I was also sure that it was time to start cancelling on our guests. A few nights before the big day I was home alone and actually started to pout and feel sorry for myself. I’d put all this work in for nothing and I had no clue what I’d end up doing on my birthday. After a few minutes though, I snapped out of it and decided that bbq or no bbq, I was going to have a good time.
I already had an amazing cake recipe, and after all that work to perfect it, I needed to show it off. I invited a small group of close friends to brunch not far from our place, and told everyone that afterward we’d be heading back to our apartment for cake and Cards Against Humanity. And guacamole!
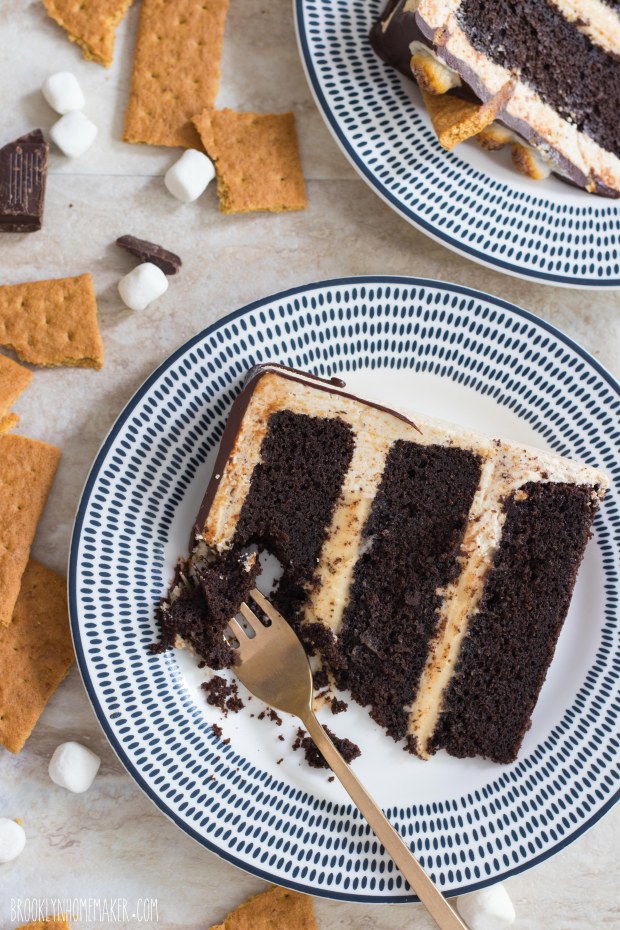
Multiple people took one bite and their faces lit up and told me that it actually tasted like real s’mores, almost as if they weren’t expecting something that looks so pretty to also actually taste great too. They clearly underestimated me!
Russell even told me, repeatedly, that it’s one of the best desserts I’ve ever made, and kept going back into the bowl to steal stray spoonfuls of the marshmallow filling while I was stacking the layers. Actually my mom did the same exact thing when I was trying out the filling recipe for the first time!
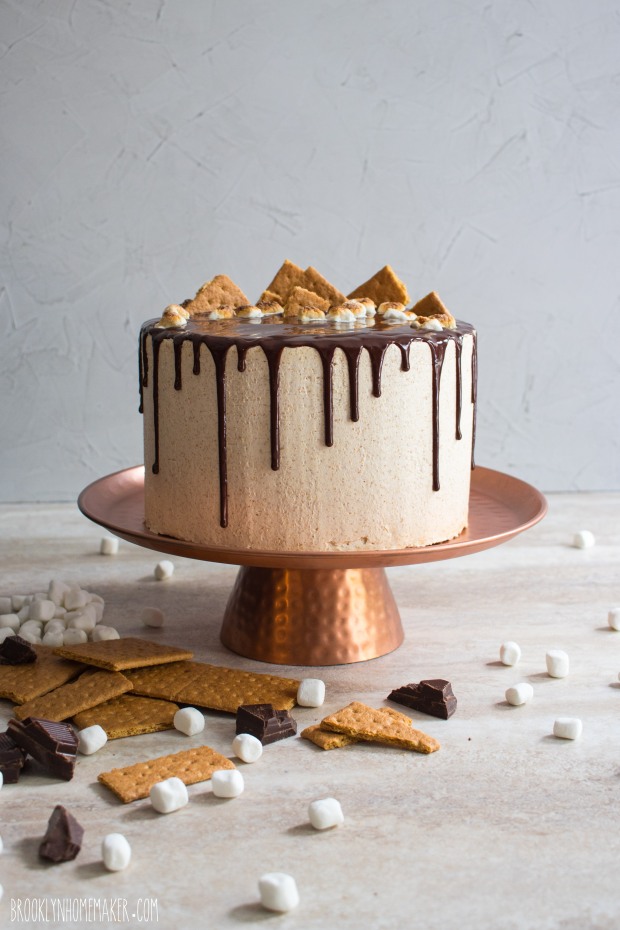
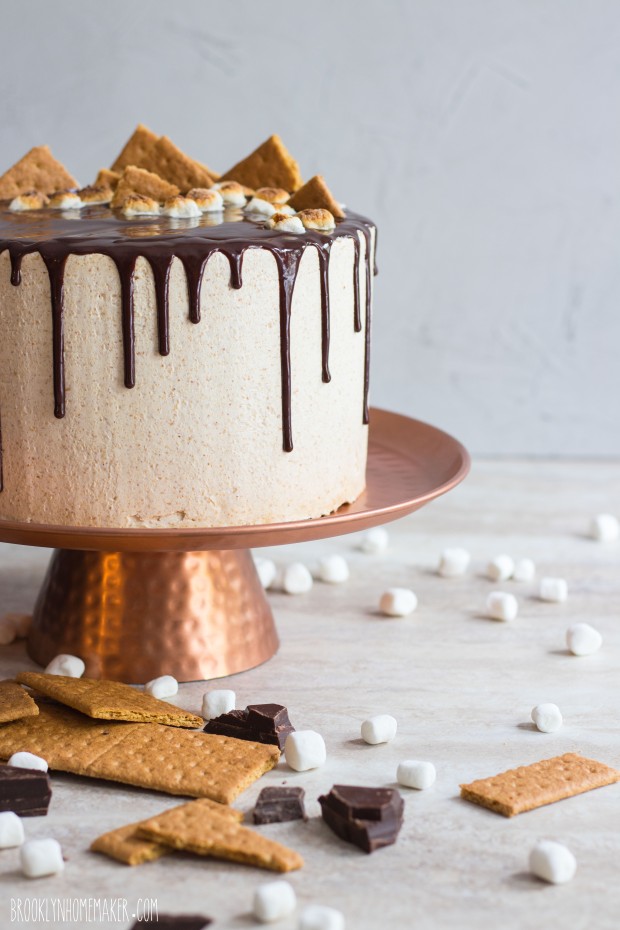
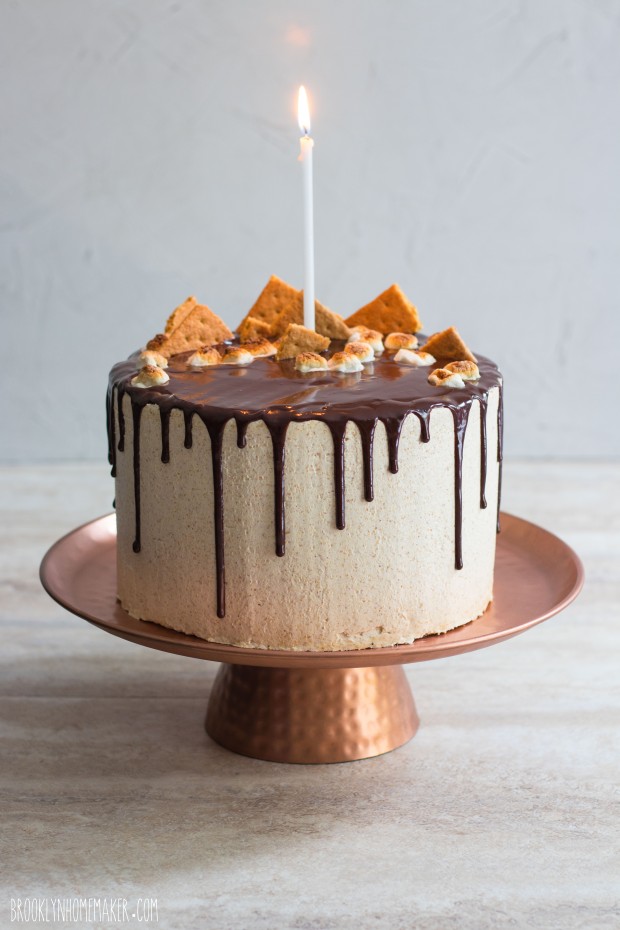
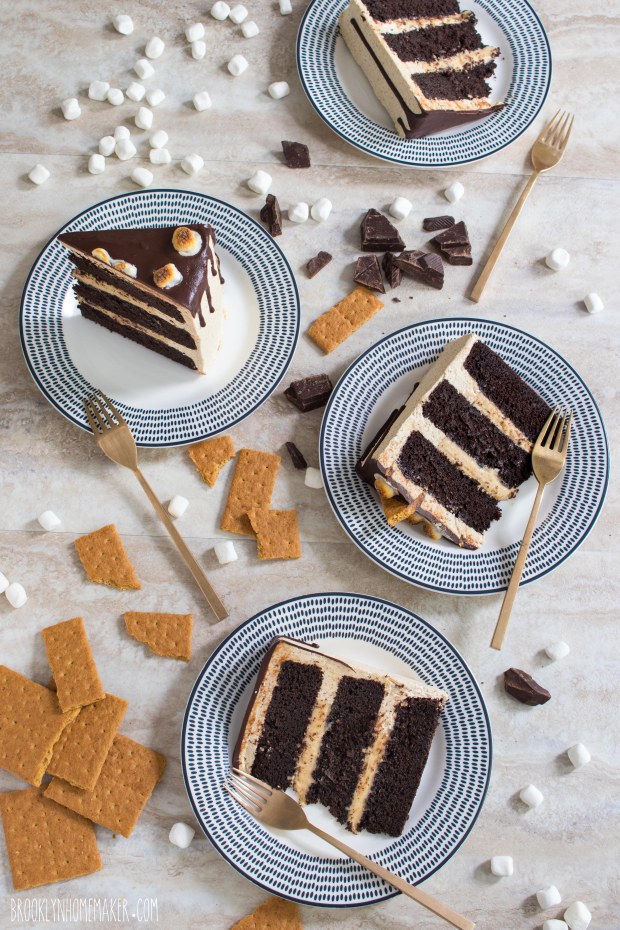
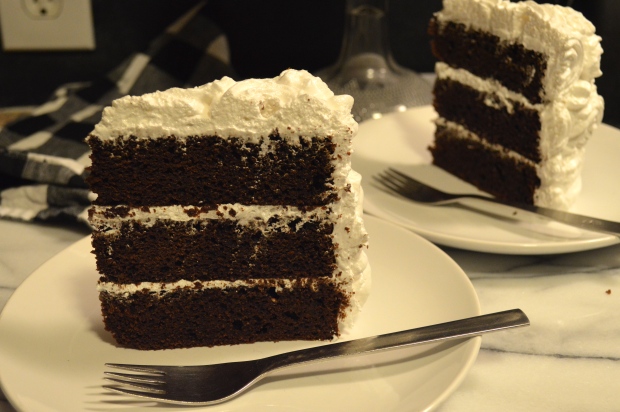
The layers of cake are moist, tender, and richly chocolatey thanks to double dutch cocoa, strong coffee, and real butter. The toasted marshmallow filling is made from actual marshmallows rather than marshmallow spread, so it genuinely has the rich flavor and gooey texture of a warm marshmallow right off the stick. Once the layers are stacked, everything gets enrobed in a velvety swiss meringue buttercream loaded with graham cracker crumbs and just a hint of cinnamon. As if all that weren’t enough, rich dark chocolate ganache is the… umm… icing on the cake. In addition to the cocoa flavor from the devil’s food layers, the ganache adds that melty chocolate flavor you know and expect from s’mores. The only thing missing here is the camp fire and the sticks!
I promise you that this show-stopping cake really does taste as good as it looks. Better even!
If you’re up for the challenge, it’s definitely worth the effort.
S'mores Layer Cake
makes three 8-inch layers
butter and flour (or baking spray) for pans
1 1/2 cups unsweetened natural cocoa powder (I used Double Dutch Process)
1 1/2 cups hot brewed coffee (or hot water if preferred)
3 1/4 cups cake flour
1 1/4 teaspoons coarse salt
1 teaspoon baking powder
1 teaspoon baking soda
1 cup (2 sticks) unsalted butter, melted and slightly cooled
1 cups peanut oil or vegetable oil
1 cup granulated sugar
1 1/4 cup packed brown sugar
4 large eggs
4 teaspoons vanilla extract
1 cup buttermilk
Preheat oven to 350 degrees.
Butter three 8 inch round cake pans, line bottoms with parchment paper, butter paper, and dust pans with flour.
Whisk together cocoa powder and coffee (or hot water) until smooth and set aside.
Sift together flour, salt, baking powder, and baking soda; set aside.
Beat melted butter, oil, and sugars together on medium-low speed until combined.
Add eggs, one at a time, beating after each addition.
Beat in vanilla and cocoa mixture. Reduce speed to low.
Add flour mixture in three batches, alternating with buttermilk and beginning and ending with flour. Beat until just combined.
Divide batter evenly between the three pans, and bake until a toothpick or cake tester inserted into centers comes out clean, 40 to 45 minutes.
Transfer pans to a wire rack to cool for 30 minutes. Invert cakes onto rack, peel off parchment, and let cool completely.
To achieve a perfectly flat, professional looking cake, you’ll want to slice the very tops of the cakes off to make each layer completely flat and level. You can do this using a very sharp bread knife, or a cake leveler.
If you’re not assembling cakes right away, individually wrap each layer tightly in plastic wrap to prevent drying. Layers can be stored in the refrigerator for a day or two, or frozen (wrapped in plastic wrap first, then aluminum foil) for up to two weeks.
Graham Cracker Swiss Meringue Buttercream Icing:
Adapted from “Layered” by Tessa Huff
3/4 cup egg whites (I used pasteurized egg whites from a carton)
1 1/2 cups sugar
2 cups (4 sticks) unsalted butter, at room temperature (cut into 1 tablespoon slices)
2 teaspoons pure vanilla extract
1 cup graham cracker crumbs
1/2 teaspoon ground cinnamon
Place the egg whites and sugar in a very clean bowl of a stand mixer and whisk them together by hand to combine. Fill a medium saucepan with an inch or two of water and bring to a simmer over medium to medium-high heat. Place the mixer bowl over the saucepan to create a double boiler. Be sure that the bottom of the bowl doesn’t directly touch the water, and that the water doesn’t reach a full boil.
Heat the egg whites until they register 160F on a candy thermometer, whisking regularly to avoid cooking the whites. As soon as they’re at the correct temperature, carefully attach the mixer bowl to the stand mixer and add the whisk attachment.
Beat the egg whites on high speed for 8 to 10 minutes until they hold stiff peaks and the outside of the bowl is cooled to room temperature. Stop the mixer and swap the whisk attachment for the paddle.
On low speed, add the butter, a few tablespoons at a time, waiting for it to incorporate before adding more. Once all the butter is mixed in, add the vanilla extract and mix in to incorporate. Turn the mixer up to medium-high and beat until the buttercream is smooth and silky, about 3 to 5 minutes.
If the mixture starts to look curdled, just keep beating. It’ll come together.
If the whites were still too warm when the butter was added and the buttercream is too thin and soupy, refrigerate the bowl in 10 minute bursts until it’s cool (but not cold) and beat again until smooth.
Once smooth, add the graham cracker crumbs and cinnamon and beat in to incorporate.
Toasted Marshmallow Filling:
10 oz mini marshmallows
1 stick unsalted butter
1/3 cup heavy cream
1 cup powdered sugar
Line a sheet pan with parchment paper and spray the paper with cooking spray or rub with butter. Reserve 1/2 cup of mini marshmallows, and spread the rest on the tray in a single layer.
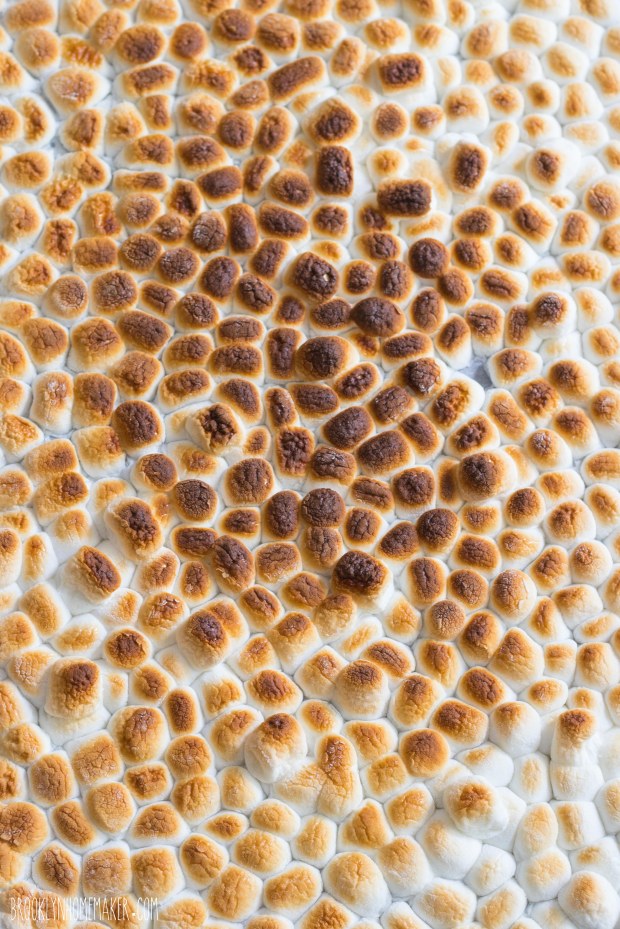
Toast the marshmallows under the broiler in your oven, rotating the pan if necessary to promote even browning. Keep a close eye on the pan, as this should only take a few minutes but the exact time will depend on the strength of your broiler and how close the pan is to it. The marshmallows should mostly be a dark toasty brown, but not burned. Watch them like a hawk through the oven door.
Let the marshmallows cool to room temperature before proceeding, and they should peel off the greased parchment in one single sticky layer.
Place the toasted marshmallows in a medium saucepan along with the unsalted butter. Heat over medium to medium-high heat, stirring regularly, until the marshmallows are all melted and completely combined with the butter.
Transfer the marshmallow mixture to the bowl of a stand mixer and beat in heavy cream and powdered sugar. Transfer the bowl to the refrigerator and let cool completely, then beat again to loosen the mixture up a little. The mixture will be a bit stiff and sticky, but should be soft enough to spread.
Glossy Ganache Drizzle:
4 oz good quality dark chocolate (60% works well)
1/2 cup + 2 tablespoons heavy cream
1 tablespoon honey
pinch salt
Chop chocolate into small, easily melted pieces and place in a heat proof bowl.
Heat heavy cream, honey, & salt in a small saucepan (or microwave save bowl) just until it comes to a light boil, and immediately pour directly over chocolate. Wait 2 to 3 minutes before stirring until completely smooth and melted and free of lumps. If the mixture seems very hot still it may melt the icing as you pour it so wait a few minutes for it to cool slightly. Do not let it get too cool or it will not drizzle nicely and may look messy.
*Do not make the ganache until the cake is completely iced and ready to decorate.
Decorations: (optional)
Remaining 1/2 cup mini marshmallows
Broken pieces of graham crackers
Toast the remaining mini marshmallow on a sprayed or buttered parchment lined baking sheet in the same way they were toasted for the marshmallow filling. Try to space them out on the pan so they don’t all touch, and toast them to a lighter brown than you did for the filling. It’ll be easier to decorate with individual marshmallows, and they’ll melt less if they’re only lightly toasted.
You probably won’t use the whole 1/2 cup, but it’s nice to have more than you’ll need so you can choose the nicest looking ones.
Assemble cake:
Place the first cake layer on an 8″ cardboard cake round, serving plate, or cake stand. Using a cake round will make it easier to ice and decorate, especially if you have a revolving turntable for decorating (I use a lazy suzan, but you can also just spin your plate or cake stand while you work).
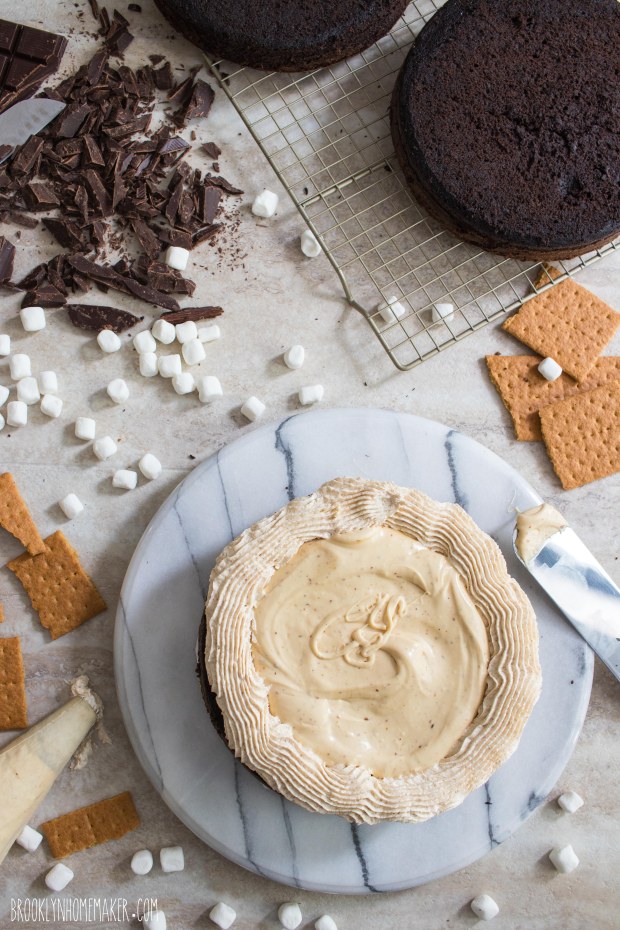
Fit a piping bag with a large round or star tip and fill with a cup or two of the graham cracker buttercream. Pipe a thick dam of icing around the outside of the cake to contain the marshmallow filling. This will ensure that the filling stays in place and doesn’t squish out when the layers are stacked.
Place half of the toasted marshmallow filling in the center of the cake and spread it smooth and even using an icing spatula. Add the next layer of cake, looking from directly over the top and from eye level at the cake to make sure each layer is directly one above the other, rotating the cake to be certain. Repeat the same procedure with the buttercream dam and the other half of the marshmallow filling, then add the third and final layer of cake and check for straightness again. Using about half of the remaining icing, crumb coat your cake (If you have any icing left in the piping bag, empty it out and use that too). Starting with the top of the cake, spread the icing thin and work some of it down the sides of the cake to completely cover the whole thing in a thin, smooth, even coat of icing. This first layer of icing seals the cake and keeps crumbs from being visible in the outer layer of icing. It may seem like unnecessary trouble, but it really is worth it to get a smooth professional finish on the icing.
Place the cake in the refrigerator for about 30 minutes to an hour to help set the icing and firm up the cake.
Spread the remaining buttercream over the whole cake the same way you did the crumb coat. Start by smoothing the top and slowly working the icing down the sides to cover the cake completely. Try to get the icing as completely smooth as possible with straight sides and a flat, level top. I use a long offset icing spatula. Refrigerate the cake again for at least another 30 minutes (or up to a day).
Make your ganache just before you’re ready to remove the cake from the fridge.
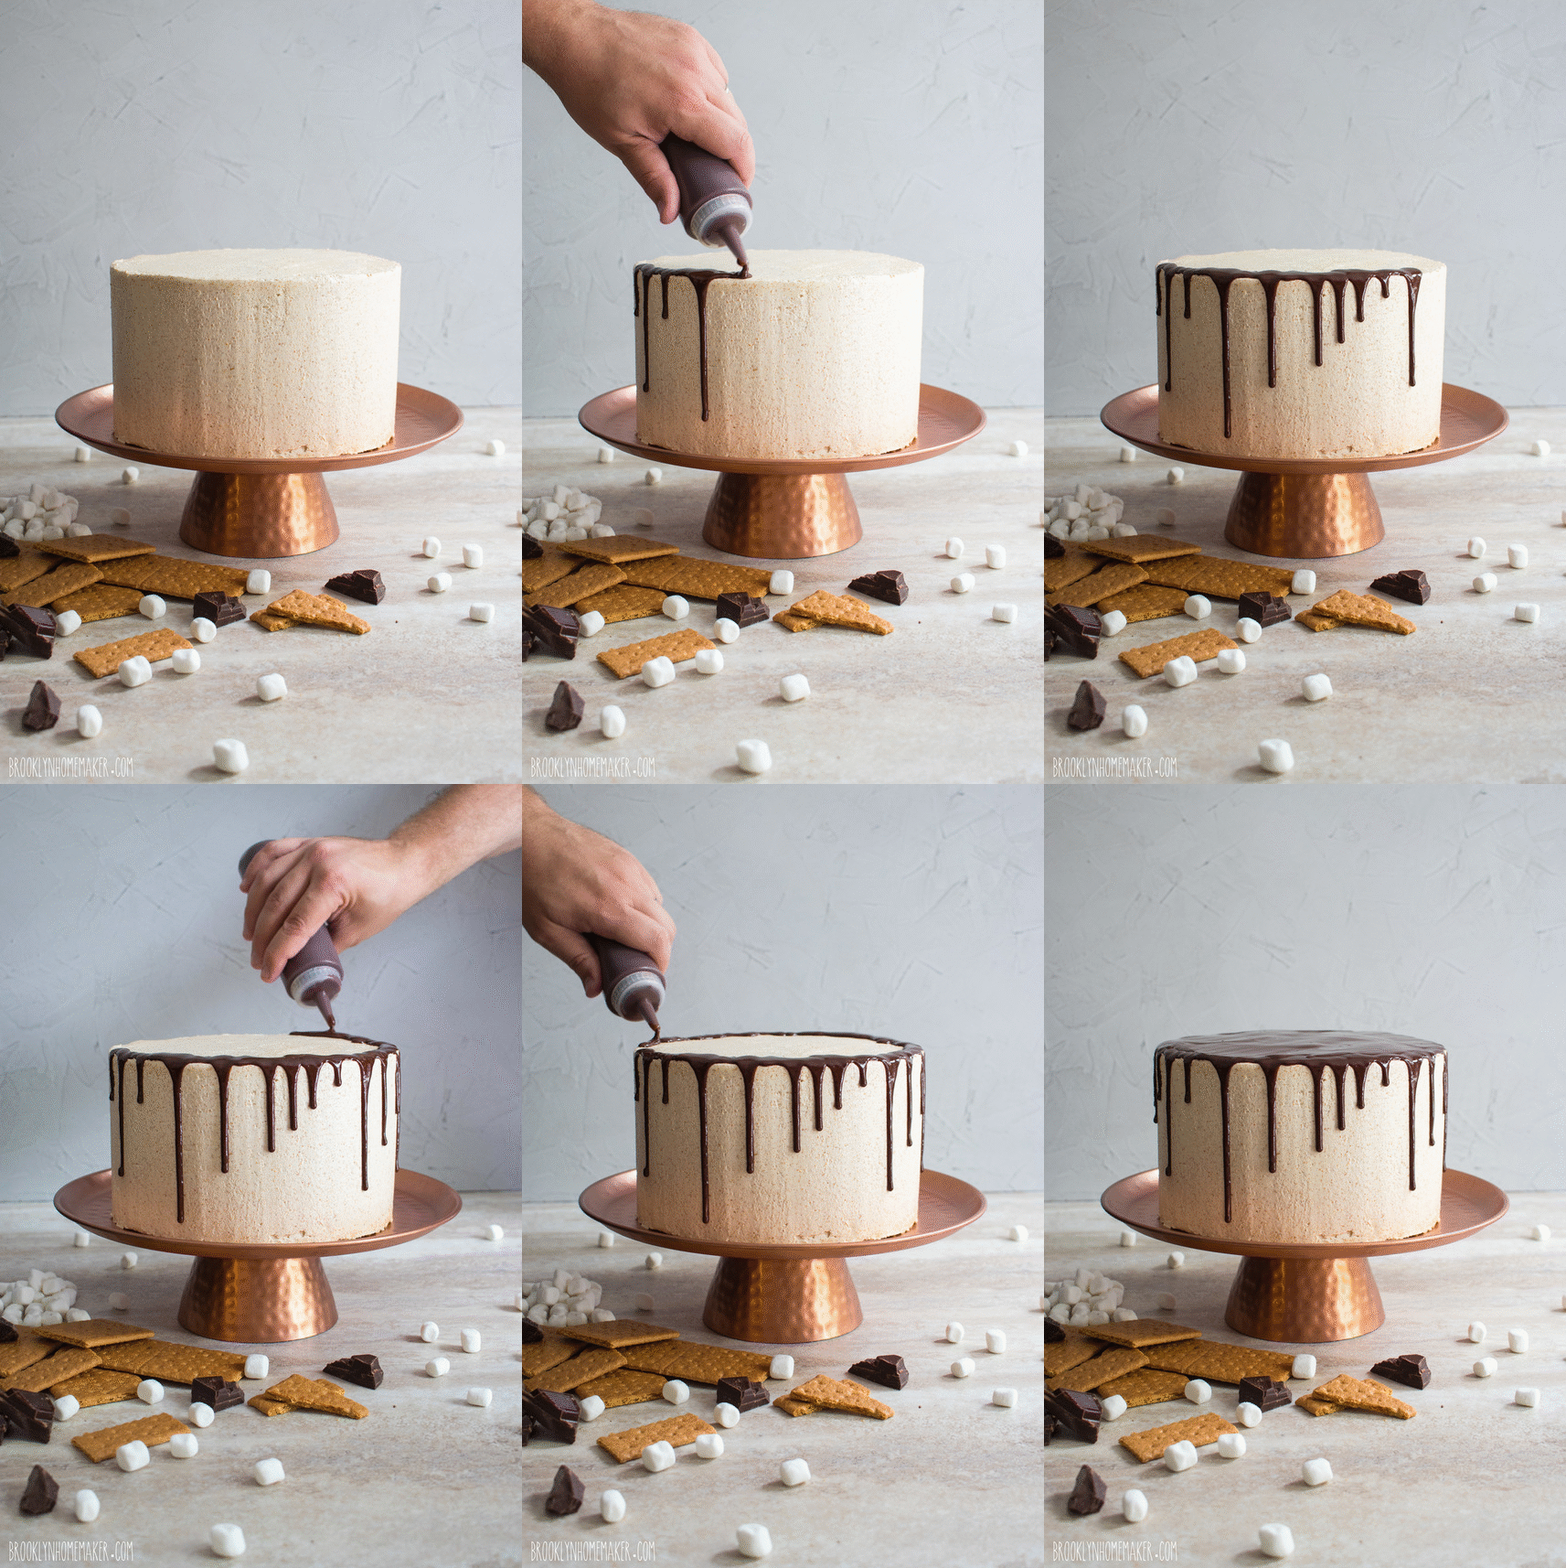
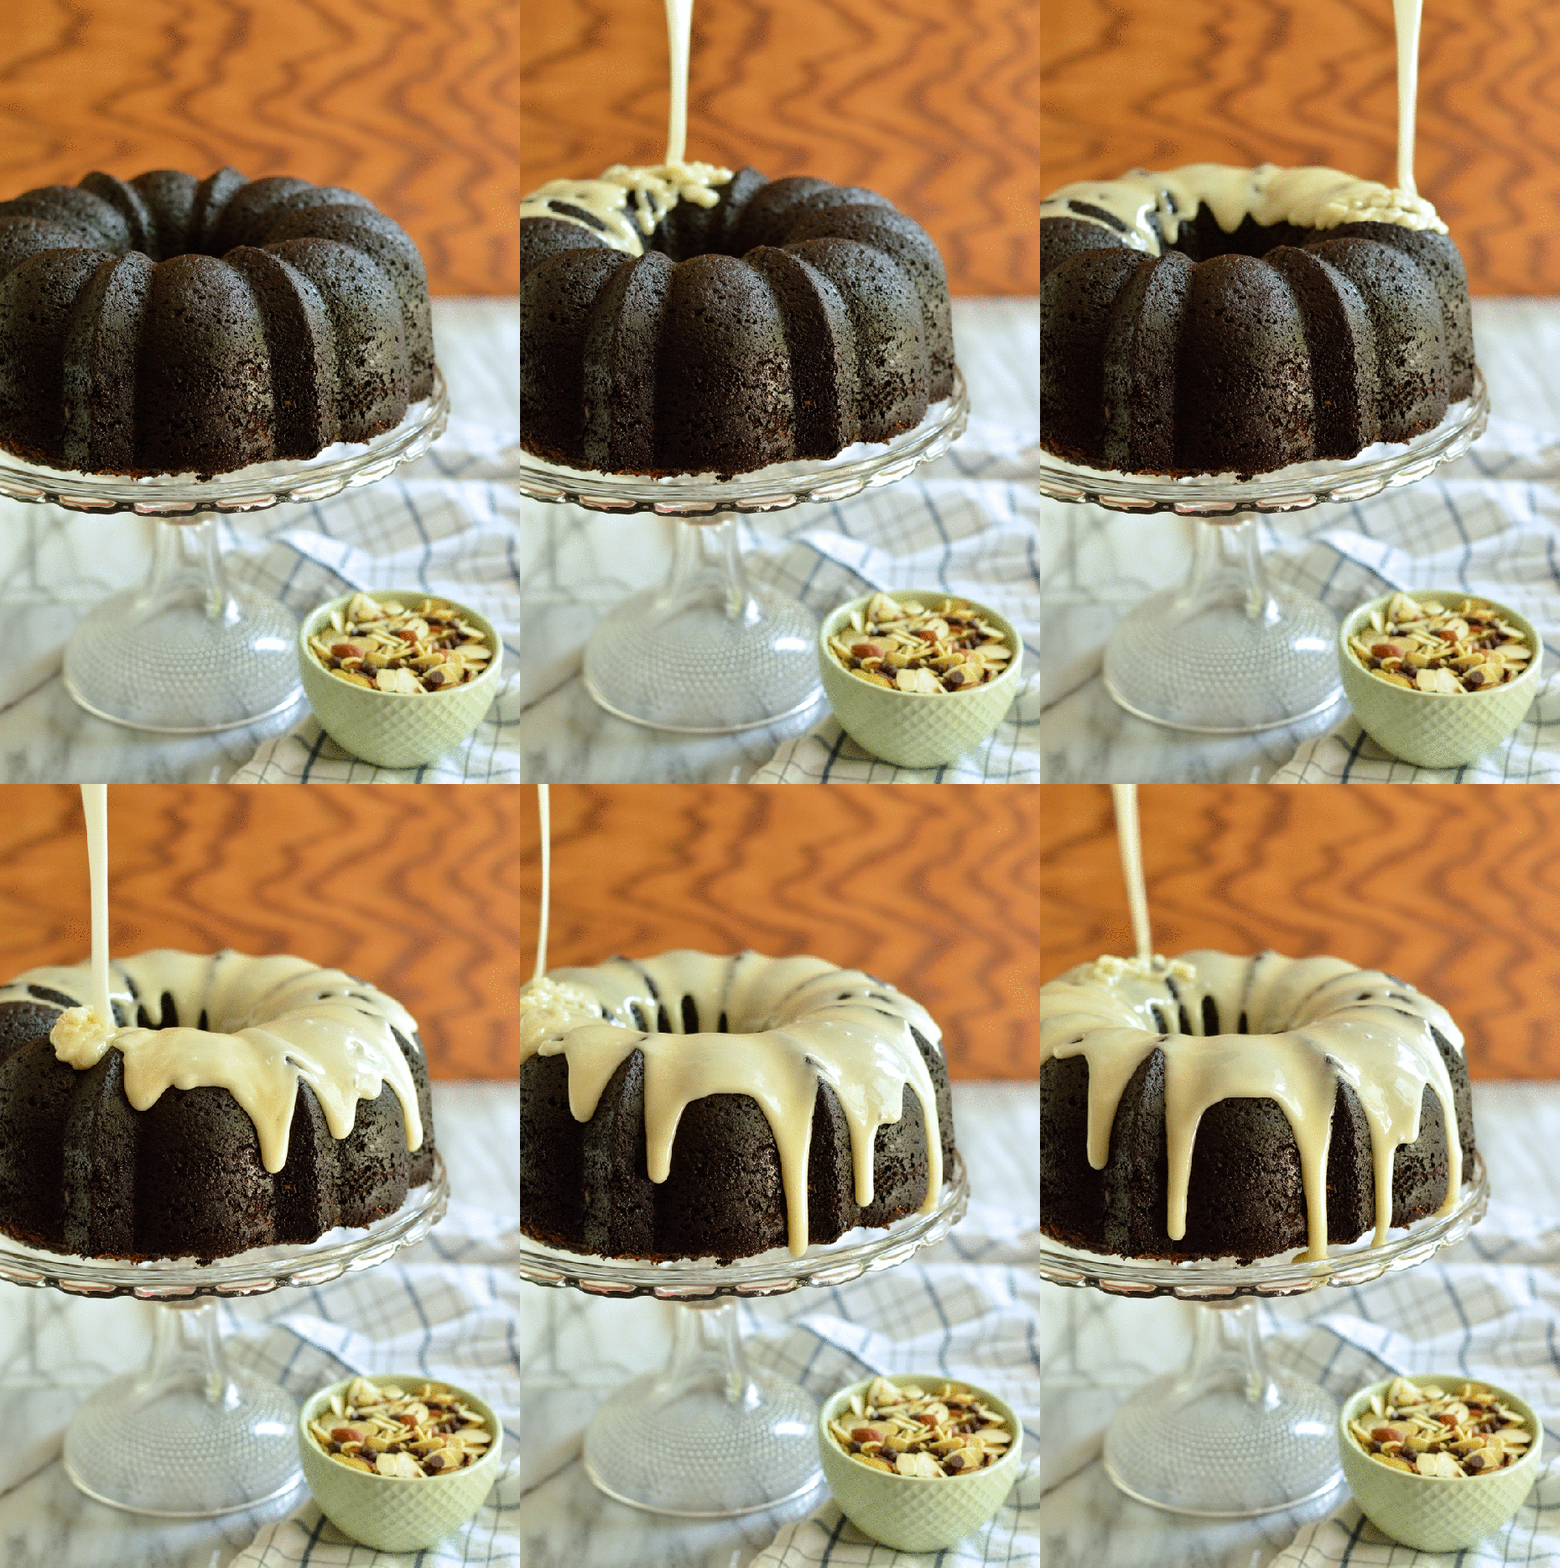
It’s not necessary, but I find it easier to get an even, professional looking drizzle with a squeeze bottle. Slowly add the ganache just around the outer edge of the top of the cake so that it drips in some places. Slowly rotate the cake to do the entire outside edge. Once you’re happy with the amount of drizzle coming down the sides, fill in the center of the top of the cake with ganache, smoothing it flat with a clean icing spatula before the ganache sets.
If you’d like to add decorations to the top of the cake, be sure to add them before the ganache sets.
This cake will keep well in a cake saver at room temperature for a day or two if the weather is not too hot or humid. Otherwise, cover tightly and store in the refrigerator for up to 3 days.
If refrigerating, bring cake to room temperature at least two hours before serving.
