Author: Tux | Brooklyn Homemaker

A food and lifestyle blog focused on gussied up american classics, baked goods with a history, and schnauzer babies.

strawberry rhubarb skillet cake

You guys. I have a confession to make.
I’m the world’s WORST blogger.

strawberry rhubarb skillet cake | Brooklyn Homemaker

It’s been sunny and warm for the past few days and I had to draaaag myself indoors to write this post. I’ve really wanted nothing more than to lay out in the yard after work and snuggle puppies and drink rosé.
Russell’s been visiting family in LA and I should be taking this opportunity to catch up on my writing, but once the sun goes down and the spring chill sets back in, I’d rather be watching reruns of the Walking Dead or RuPaul’s Drag Race with a pint of pistachio ice cream.

strawberry rhubarb skillet cake | Brooklyn Homemaker

In addition to laziness and springtime distractions, I’ve also fallen victim to springtime cravings. The arrival of warm weather and green leaves makes me crave fresh produce and bright spring berries like crazy. I mentioned last week that as much as I crave these foods, local production hasn’t caught up to my cravings just yet and so far the produce at the green markets leaves a bit to be desired.

strawberry rhubarb skillet cake | Brooklyn Homemaker

I’ve been trying to hold out, but the other day I caved. I’m really the worst.

Just awful.

strawberry rhubarb skillet cake | Brooklyn Homemaker

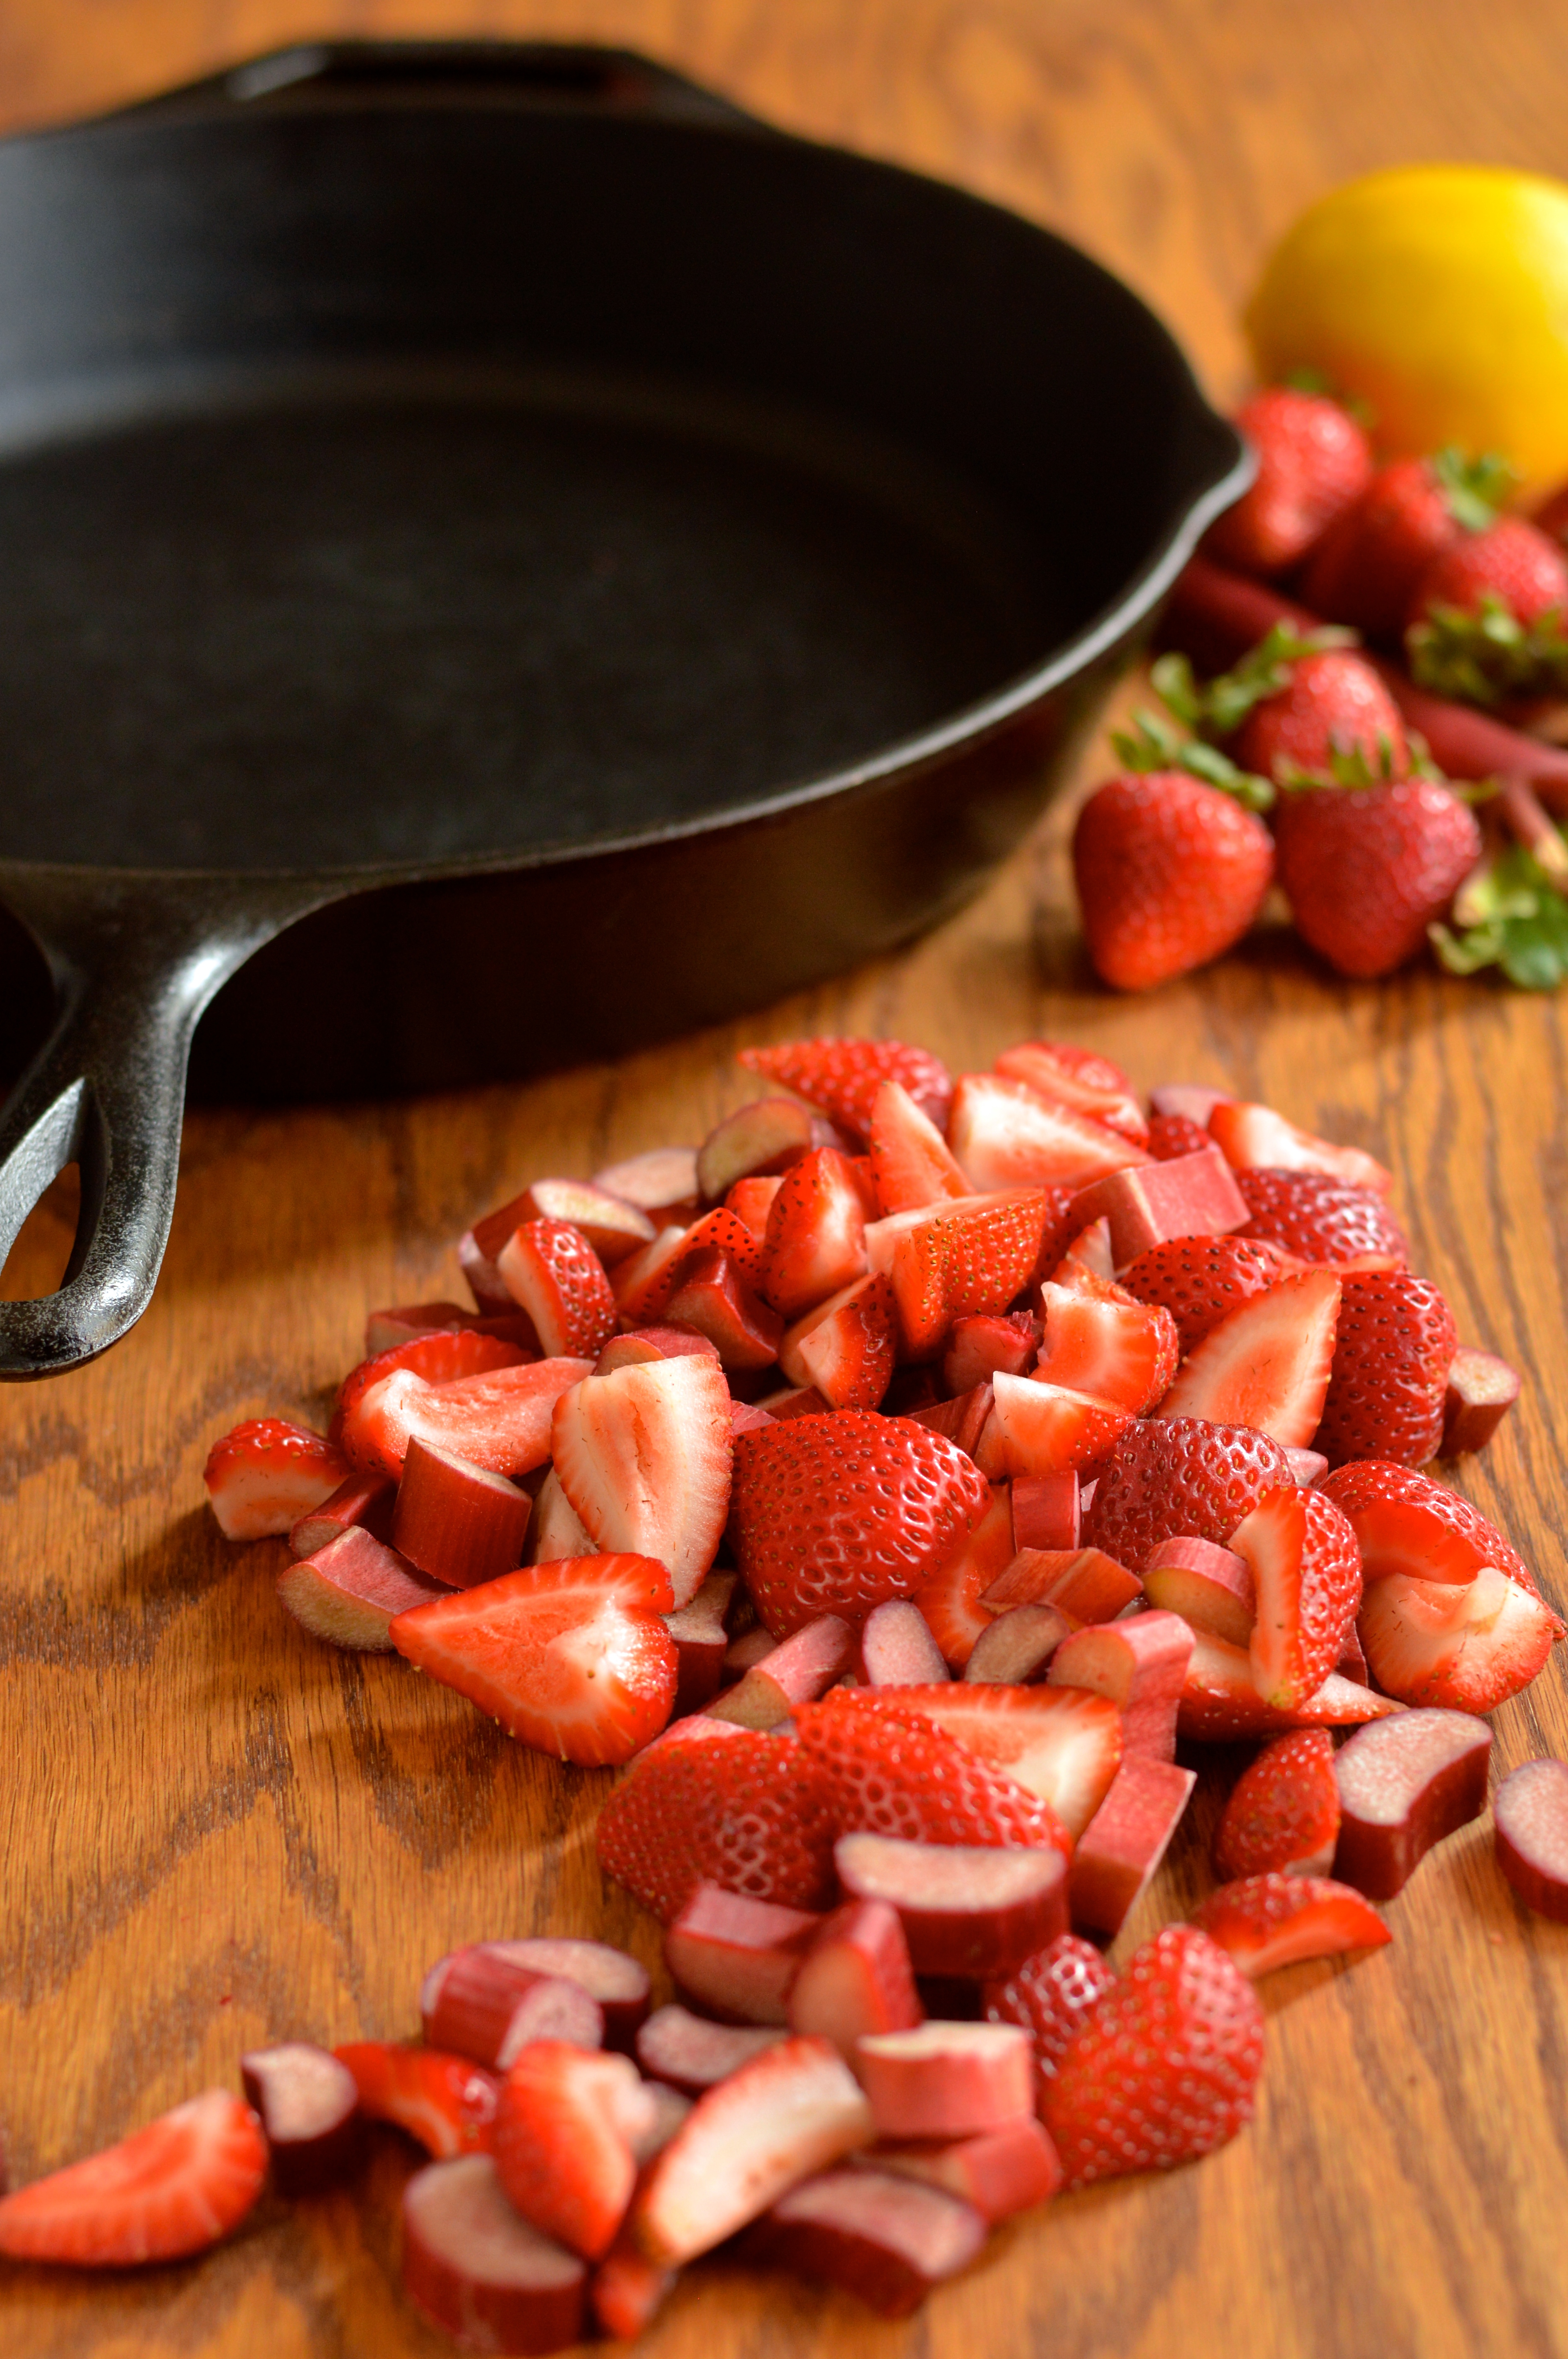
Wandering the aisles of the grocery store the other day I stumbled across a big bucket filled with rhubarb stalks. Conveniently located behind the rhubarb were stacks and stacks of organic strawberries fresh from the freight truck.

I tried to resist, but their strawberry siren song was too much for me and I circled the produce section twice before finding them in my basket at the checkout line.

strawberry rhubarb skillet cake | Brooklyn Homemaker

Truth be told, I had no damned clue what I would do with my pre-season berries and rhubarb but I just HAD to have them. There aren’t many things in this world that I love more than a strawberry rhubarb pie, but a pie is so filling-centric that I know I need to wait for strawberry season proper to go that route.

In terms of flavor, nothing beats a berry that was ripened in the sun, in season, a few miles (or footsteps) from your home. These bright red little berries however, fresh off the truck from California, travelled a looooong way before finding their way onto the shelves at the Food Town in Williamsburg, Brooklyn. They were pretty durn good, especially after not tasting a fresh strawberry for months, but they tasted nowhere near as fresh and flavorful as they will in a few short weeks.

strawberry rhubarb skillet cake | Brooklyn Homemaker

Tart rhubarb and a healthy bit of sugar would help doctor up my lackluster berries, but in this case they would need to be more of an accent flavor and less of the main attraction. I needed to come up with a recipe that would elevate them and let them shine without expecting too much of them.

strawberry rhubarb skillet cake | Brooklyn Homemaker

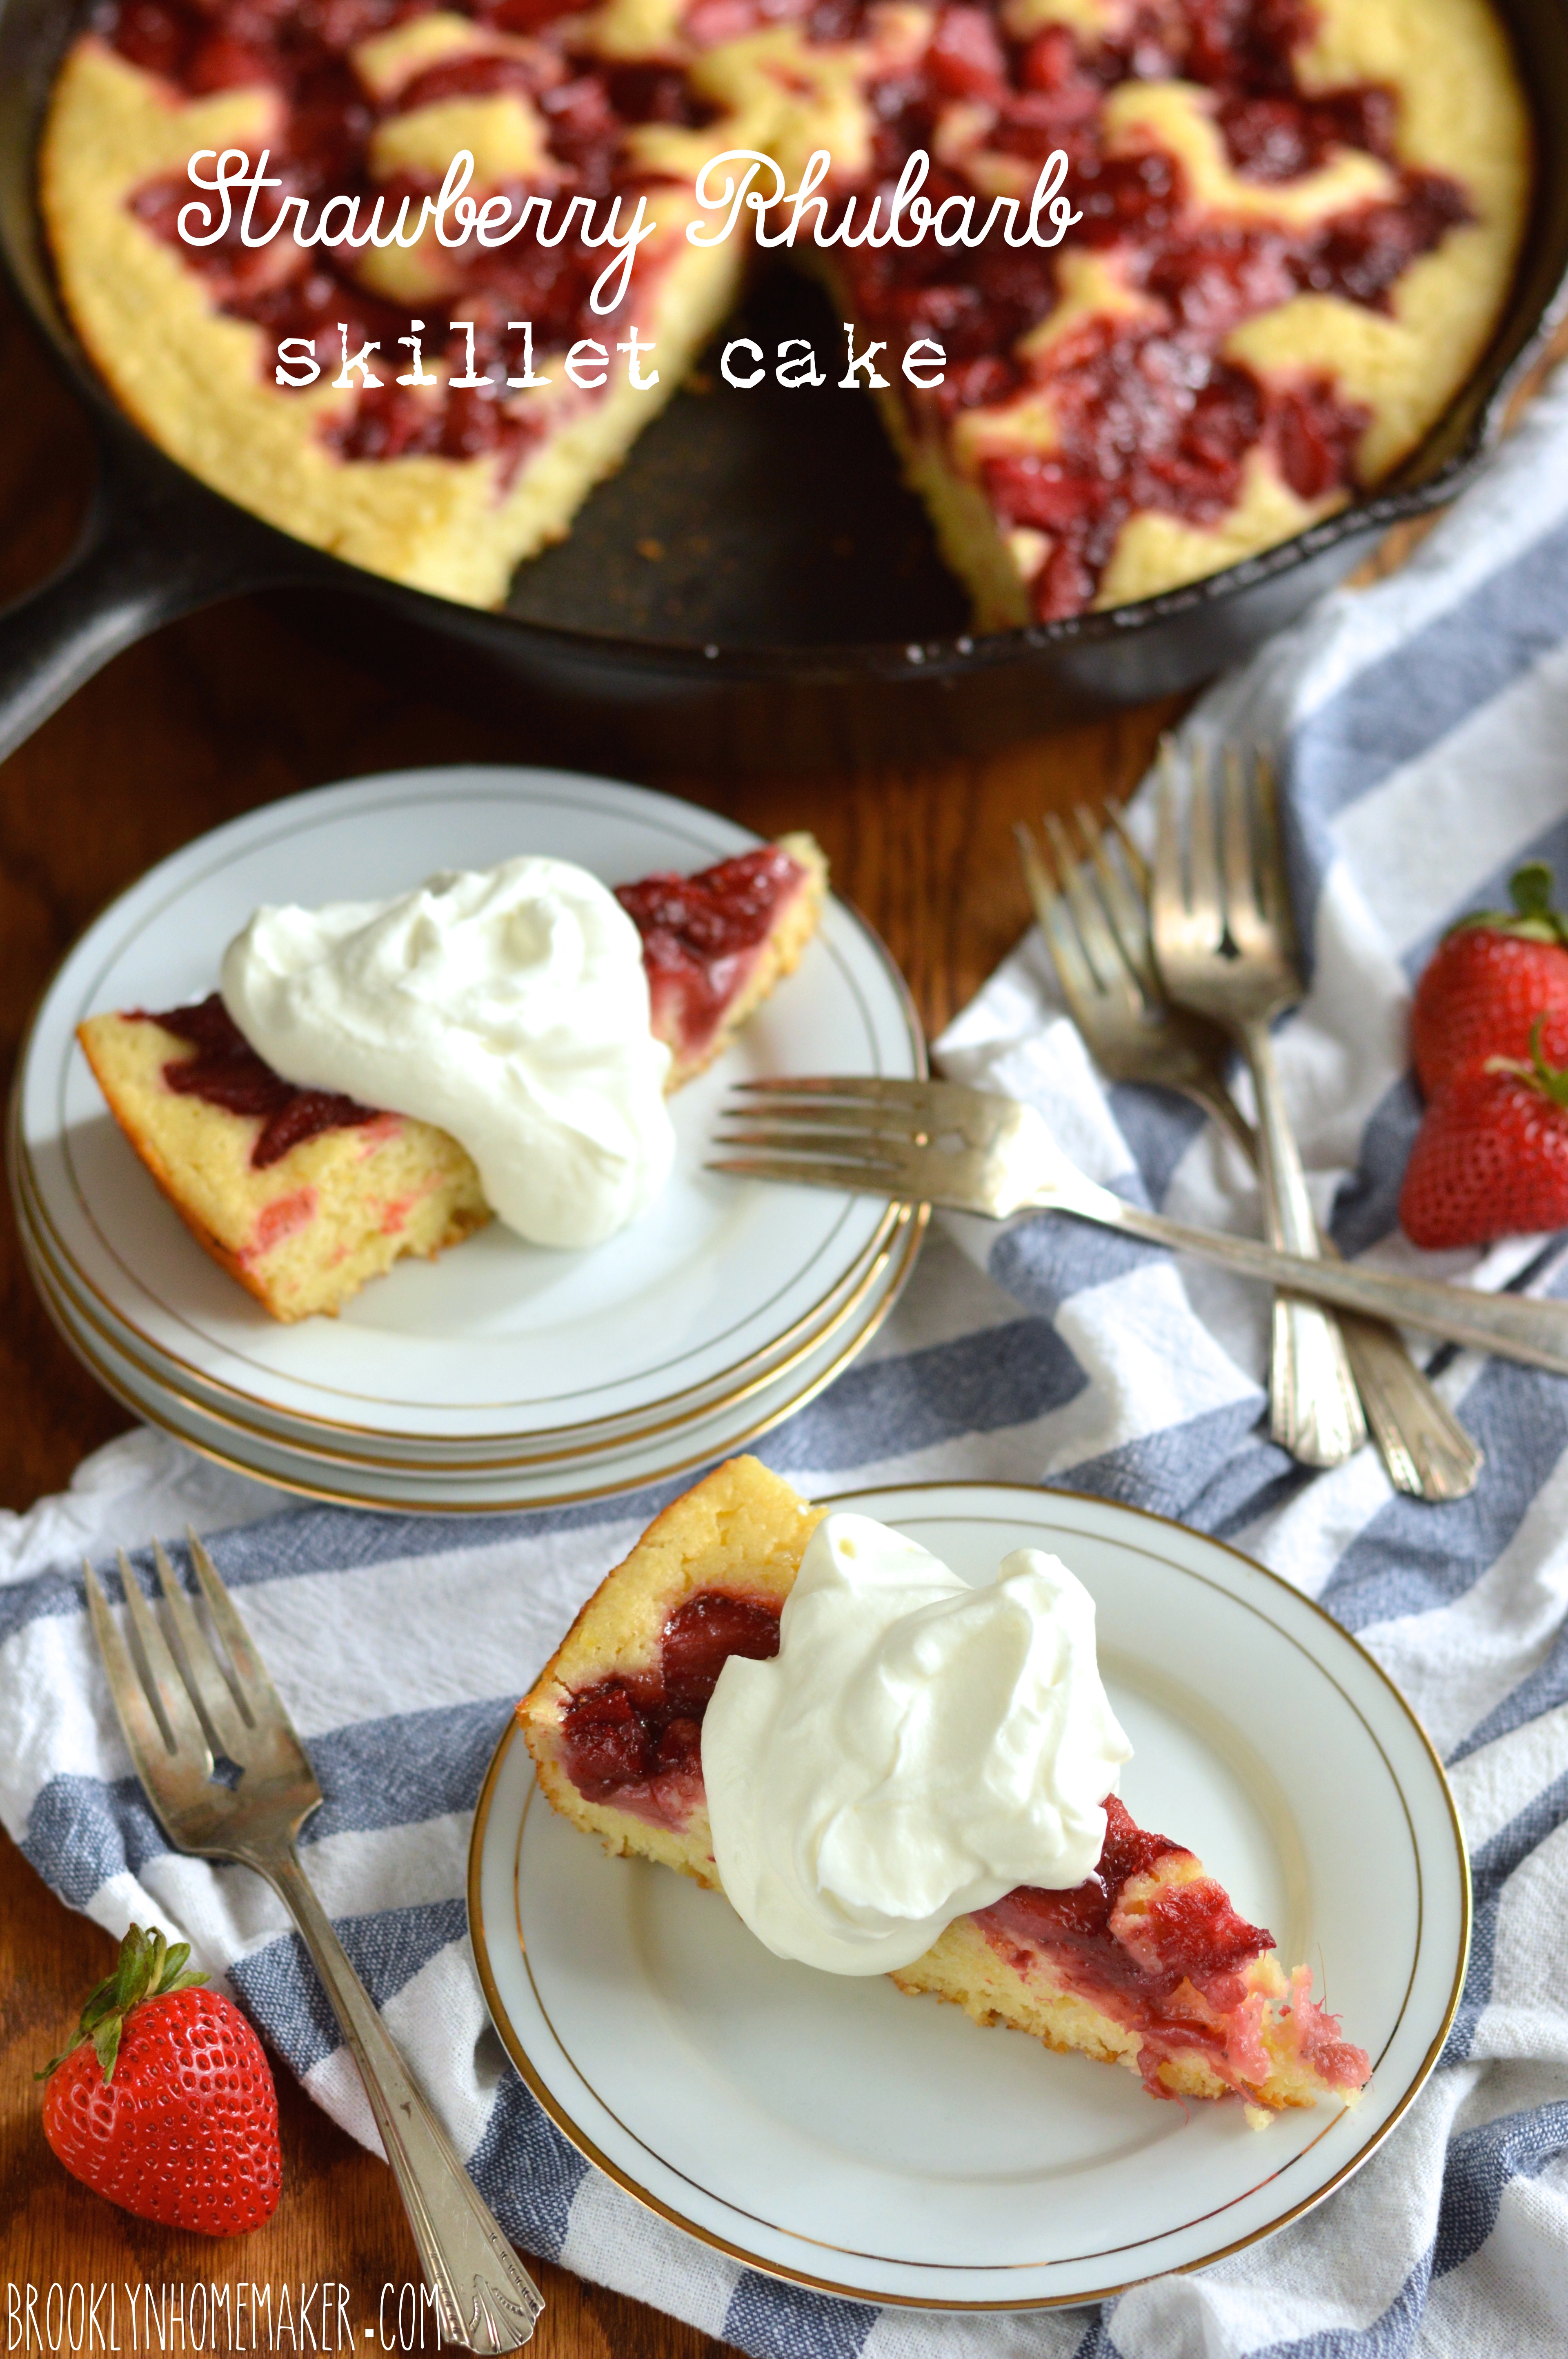
It didn’t take me long to think of a rustic skillet cake I made last summer, with caramelized peaches and cornmeal. Perfect! I didn’t want to go the cornmeal route this time, but the basic idea was spot on. I’d cook the sliced berries with the rhubarb, a bit of butter, and some sugar; and then I’d pour them over a tender buttermilk cake baked in a big ol’ cast iron skillet.

strawberry rhubarb skillet cake | Brooklyn Homemaker

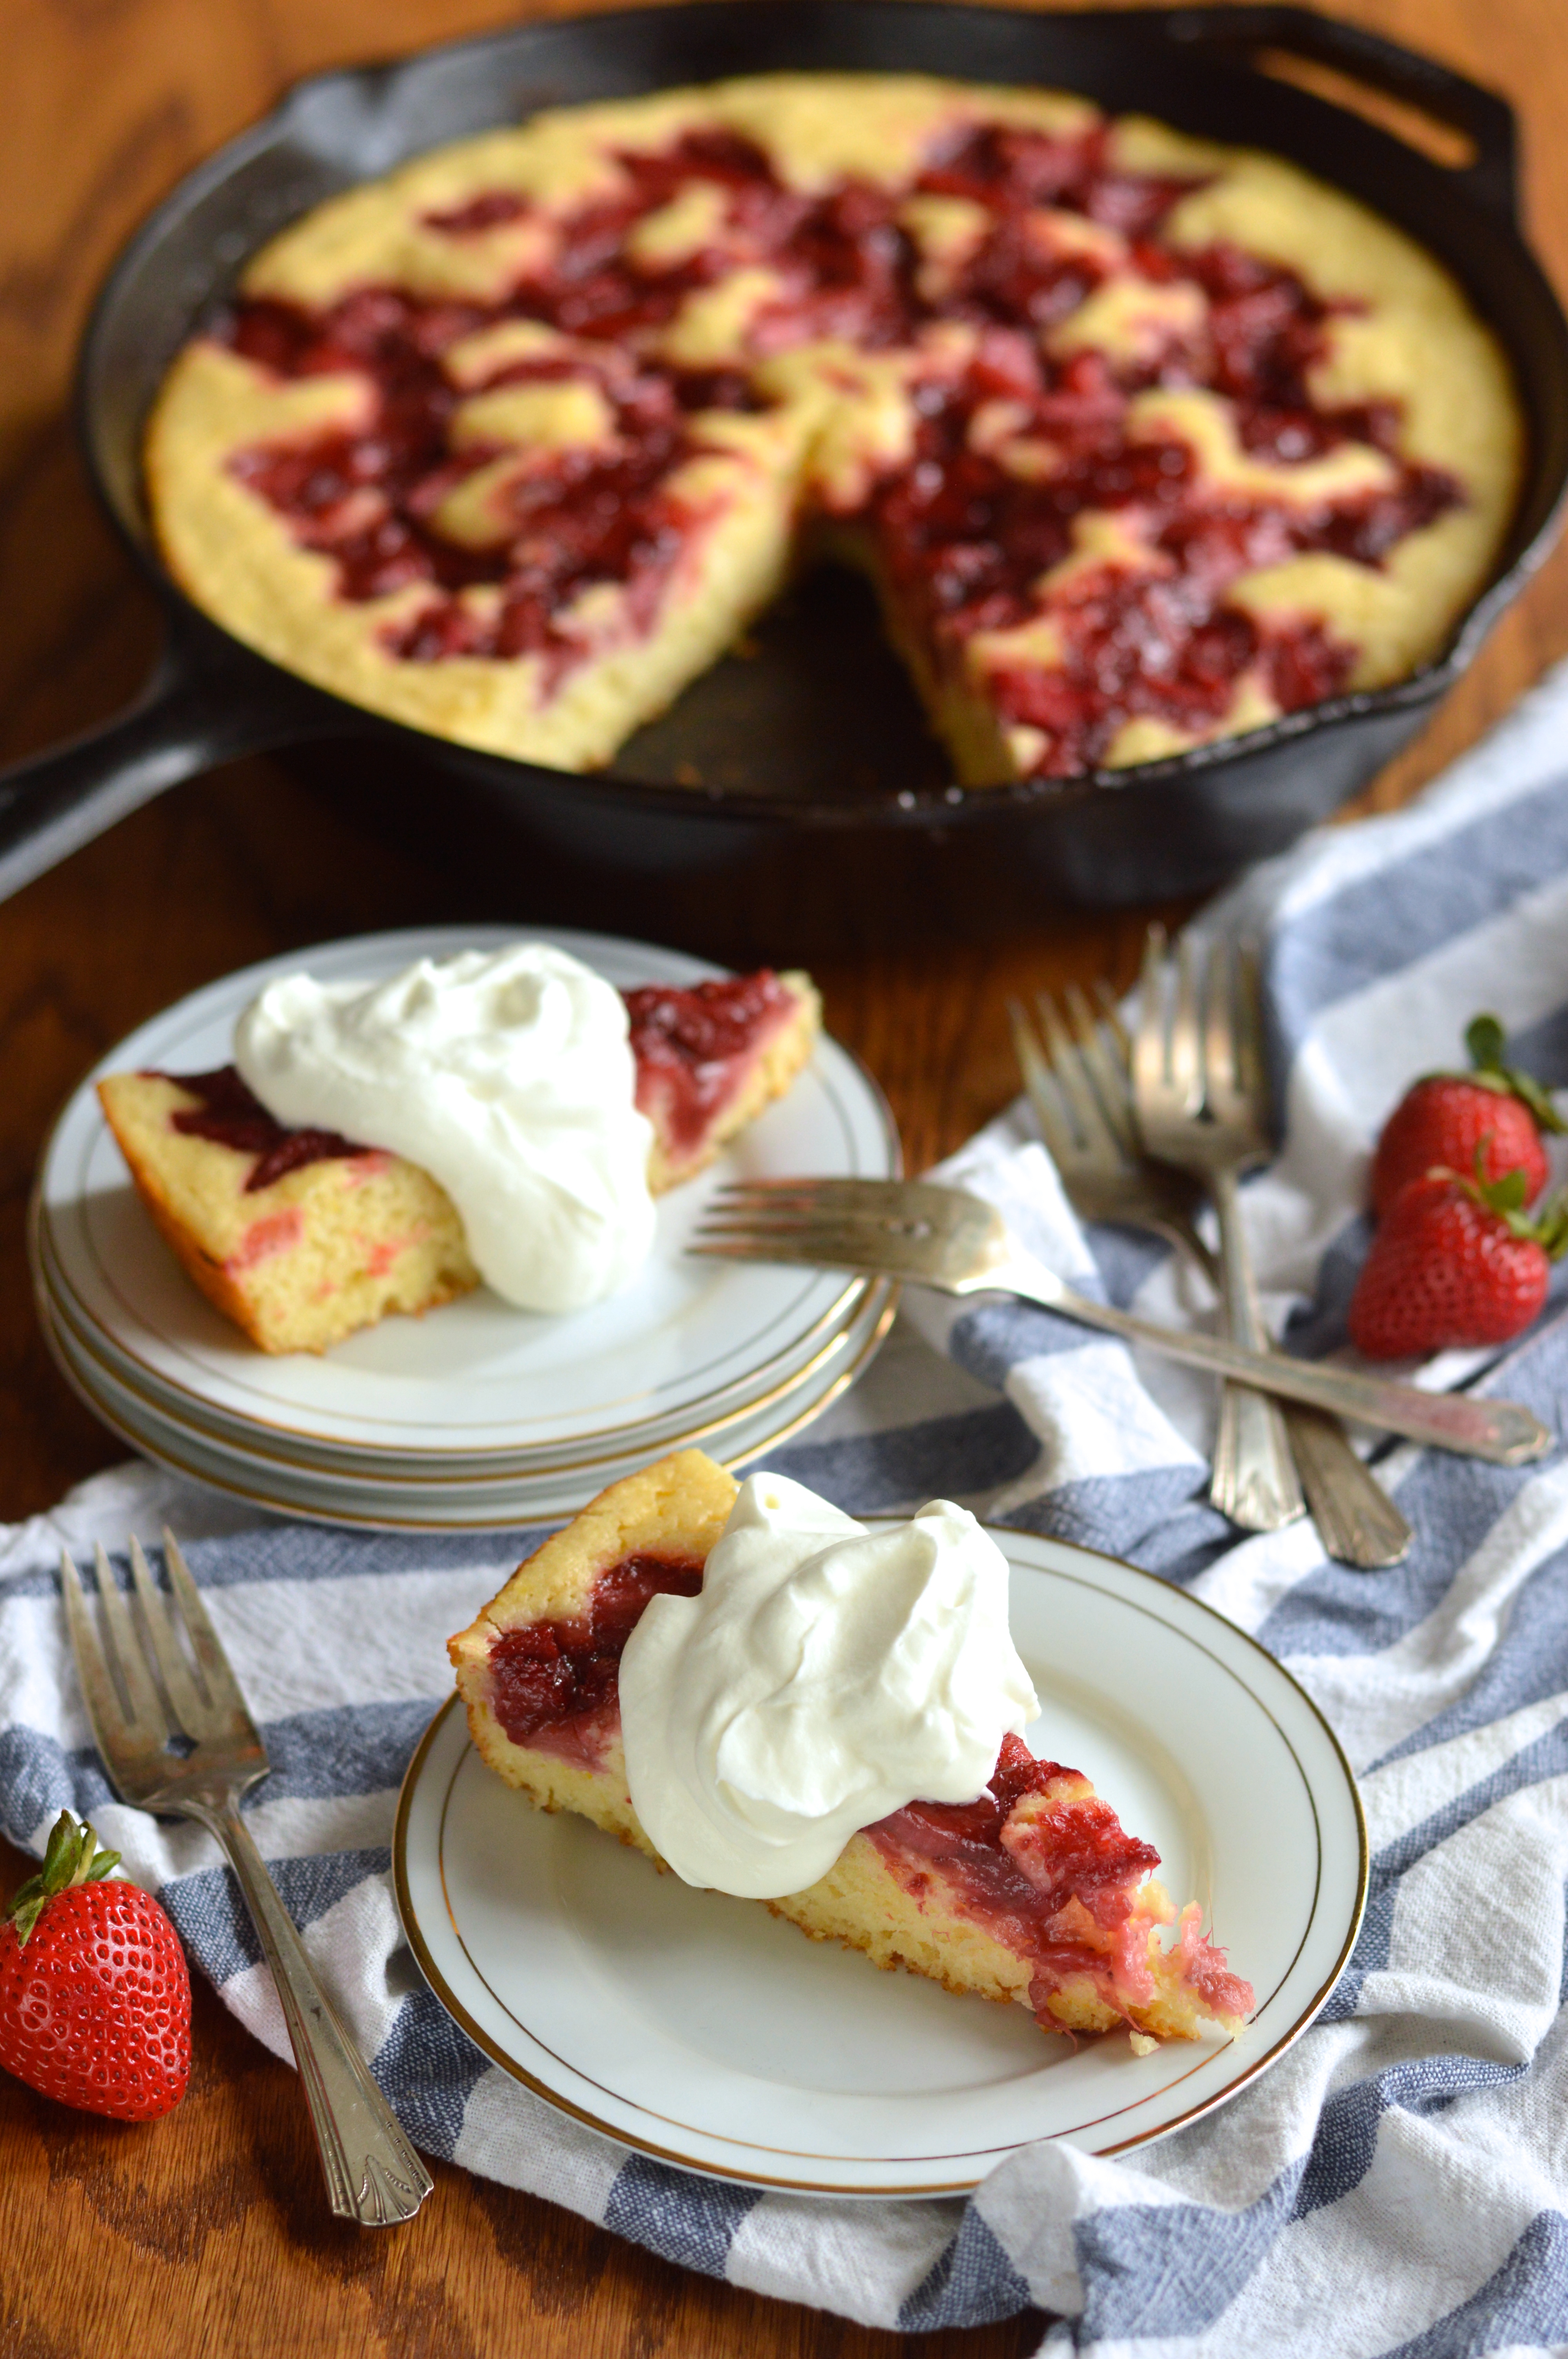
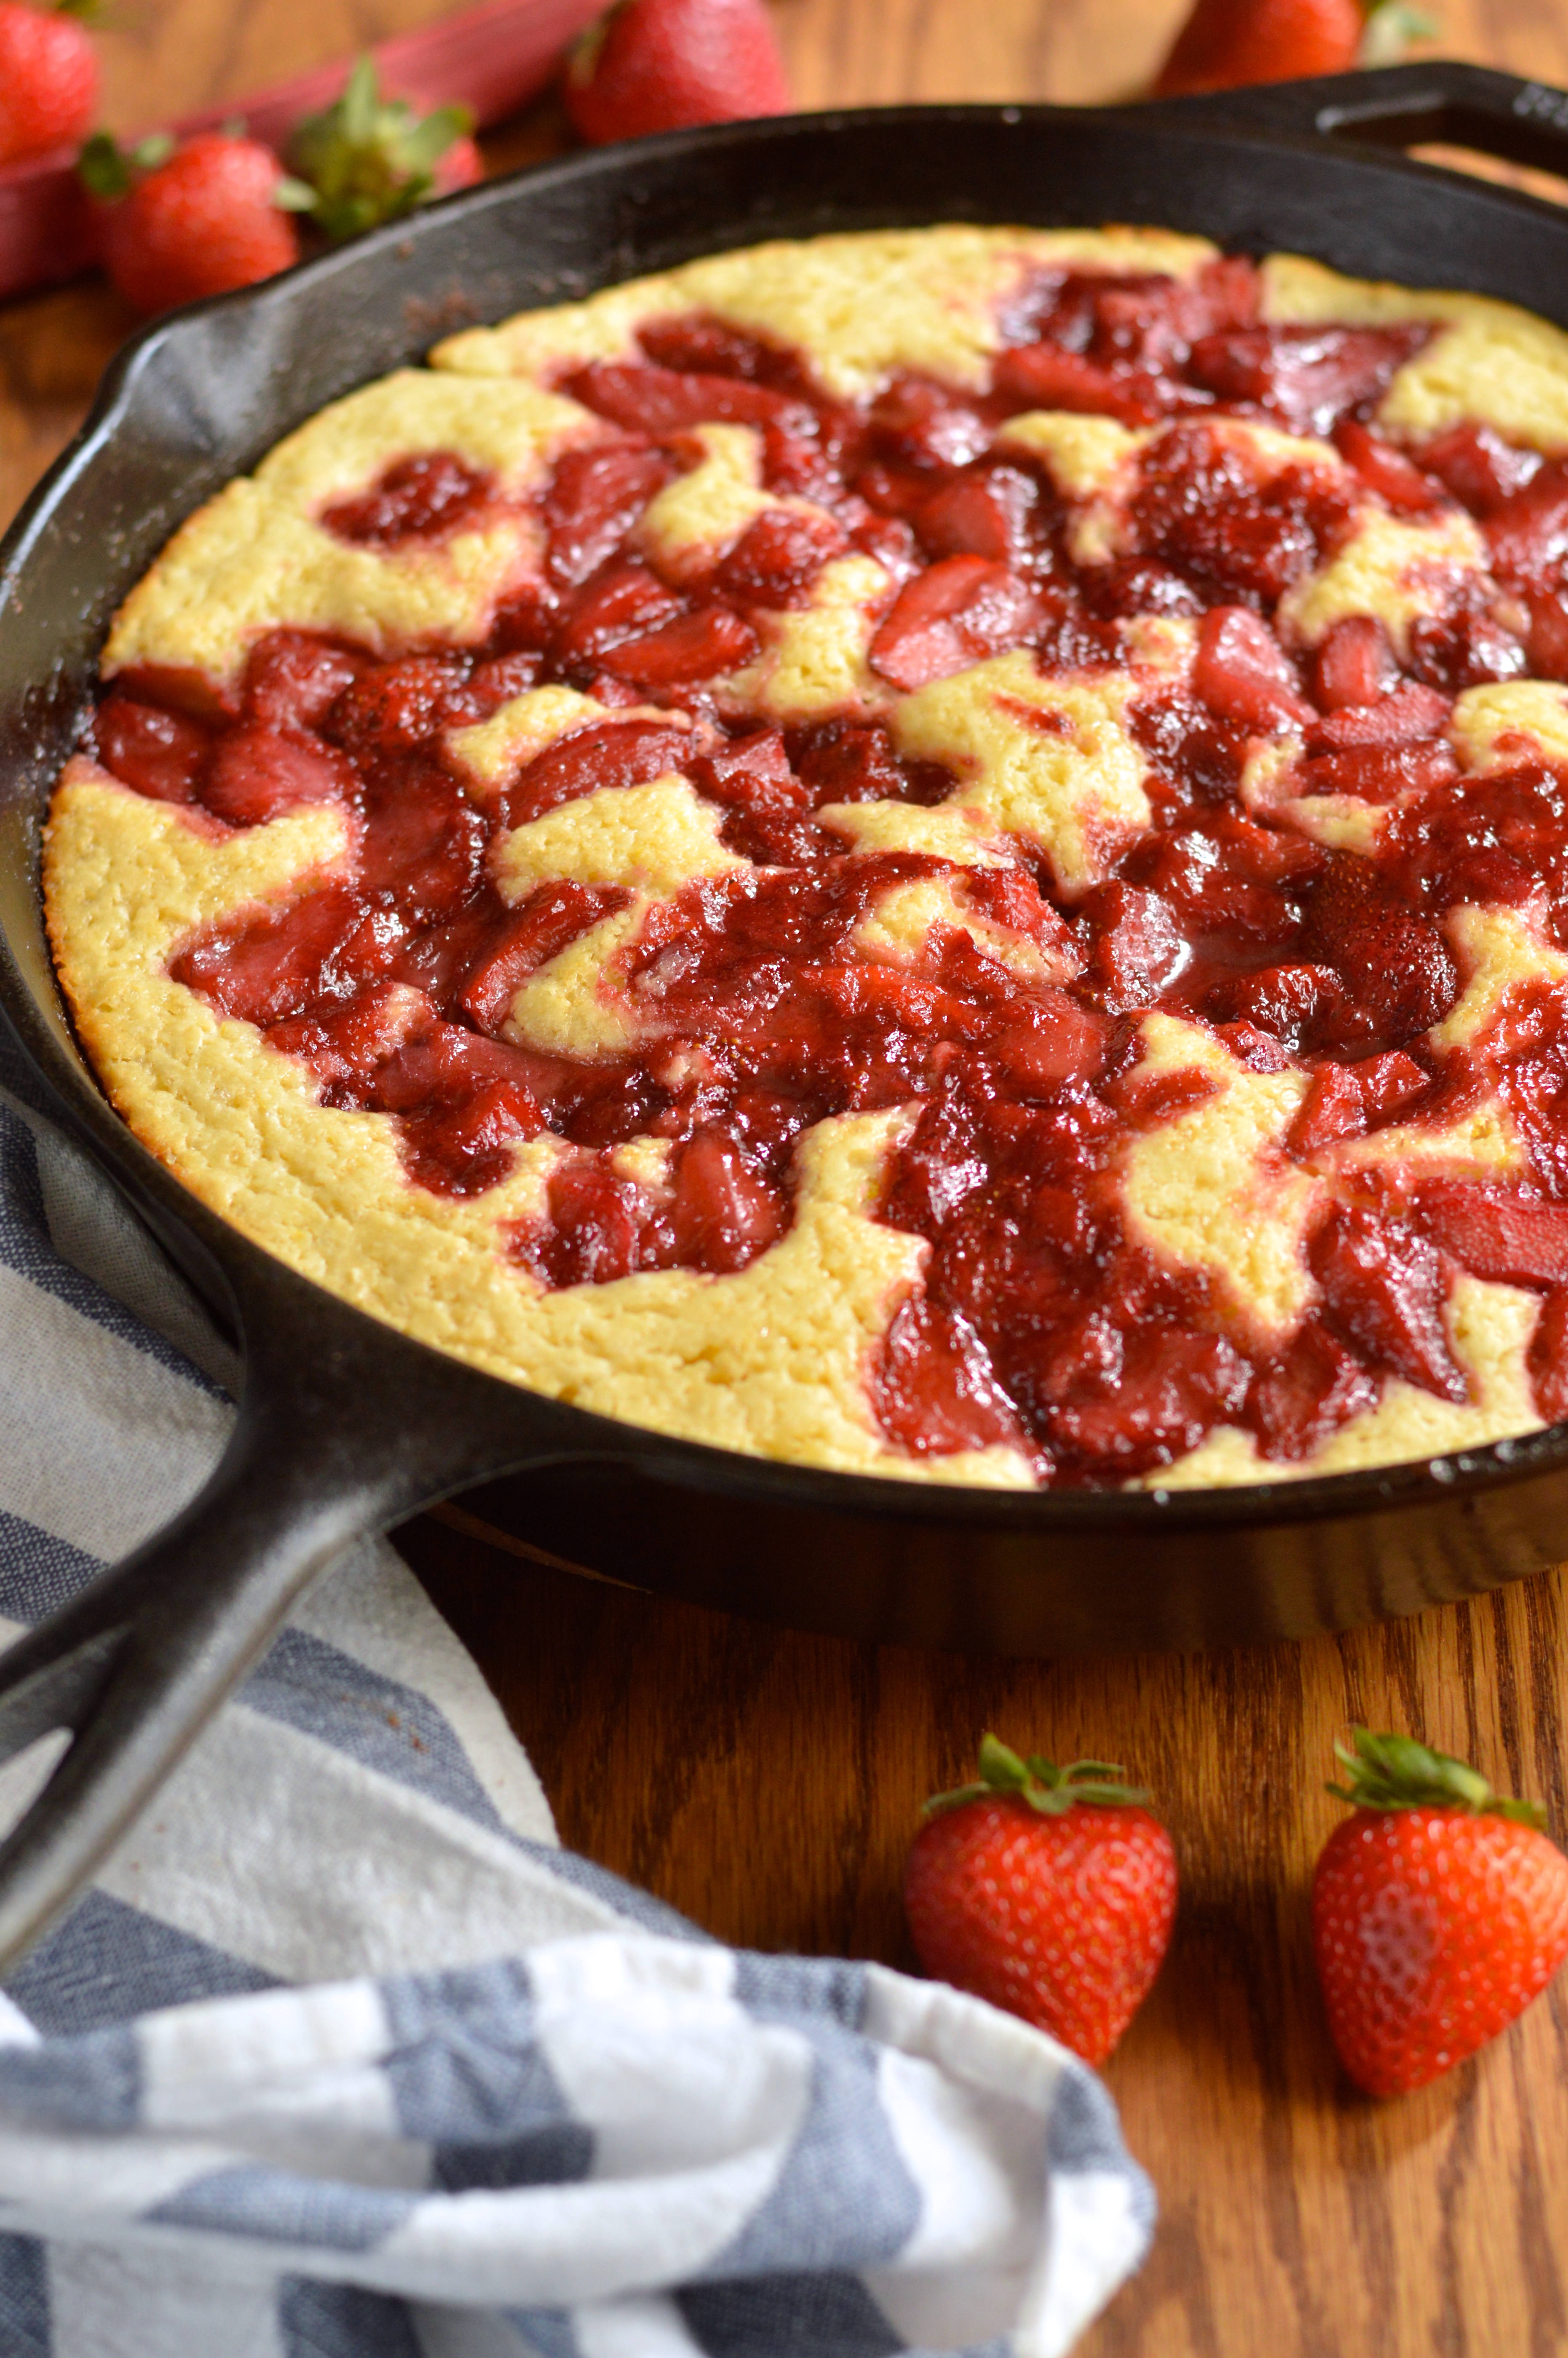
This cake is perfect.

In another week or two, when strawberries are actually in season here, this will definitely be happening again because then it’ll be even more perfect than it’s current state of perfection.

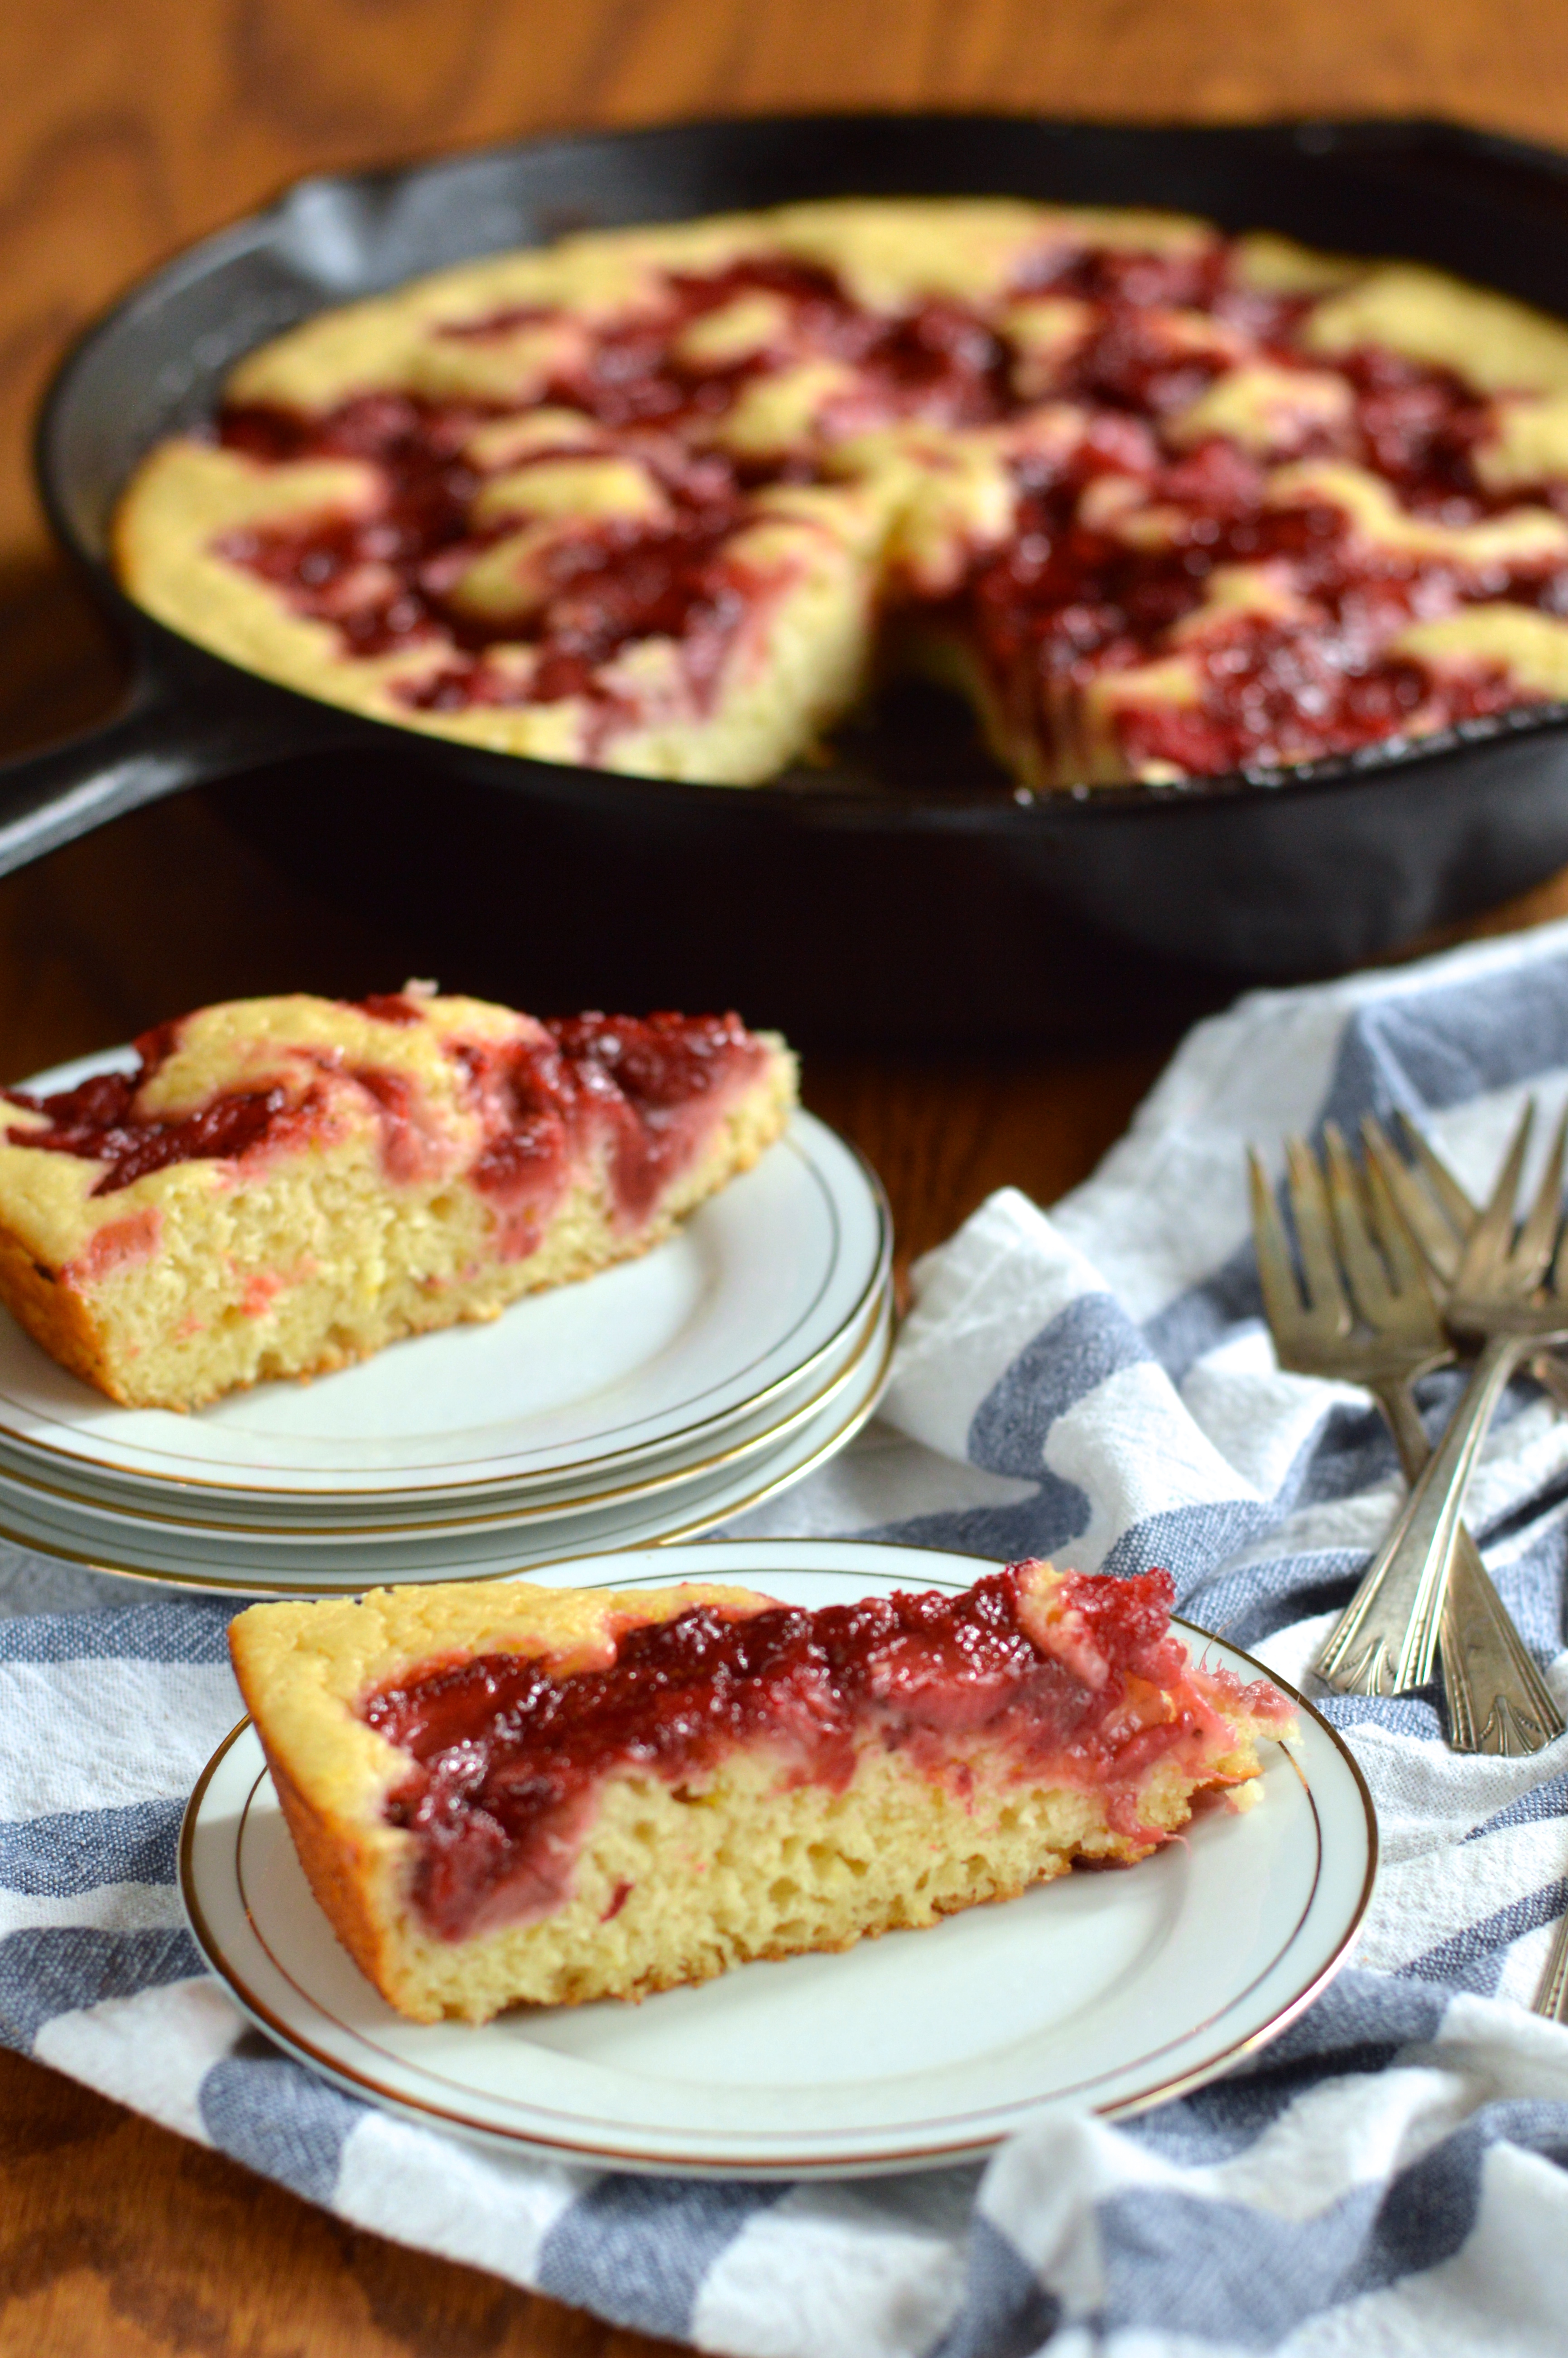
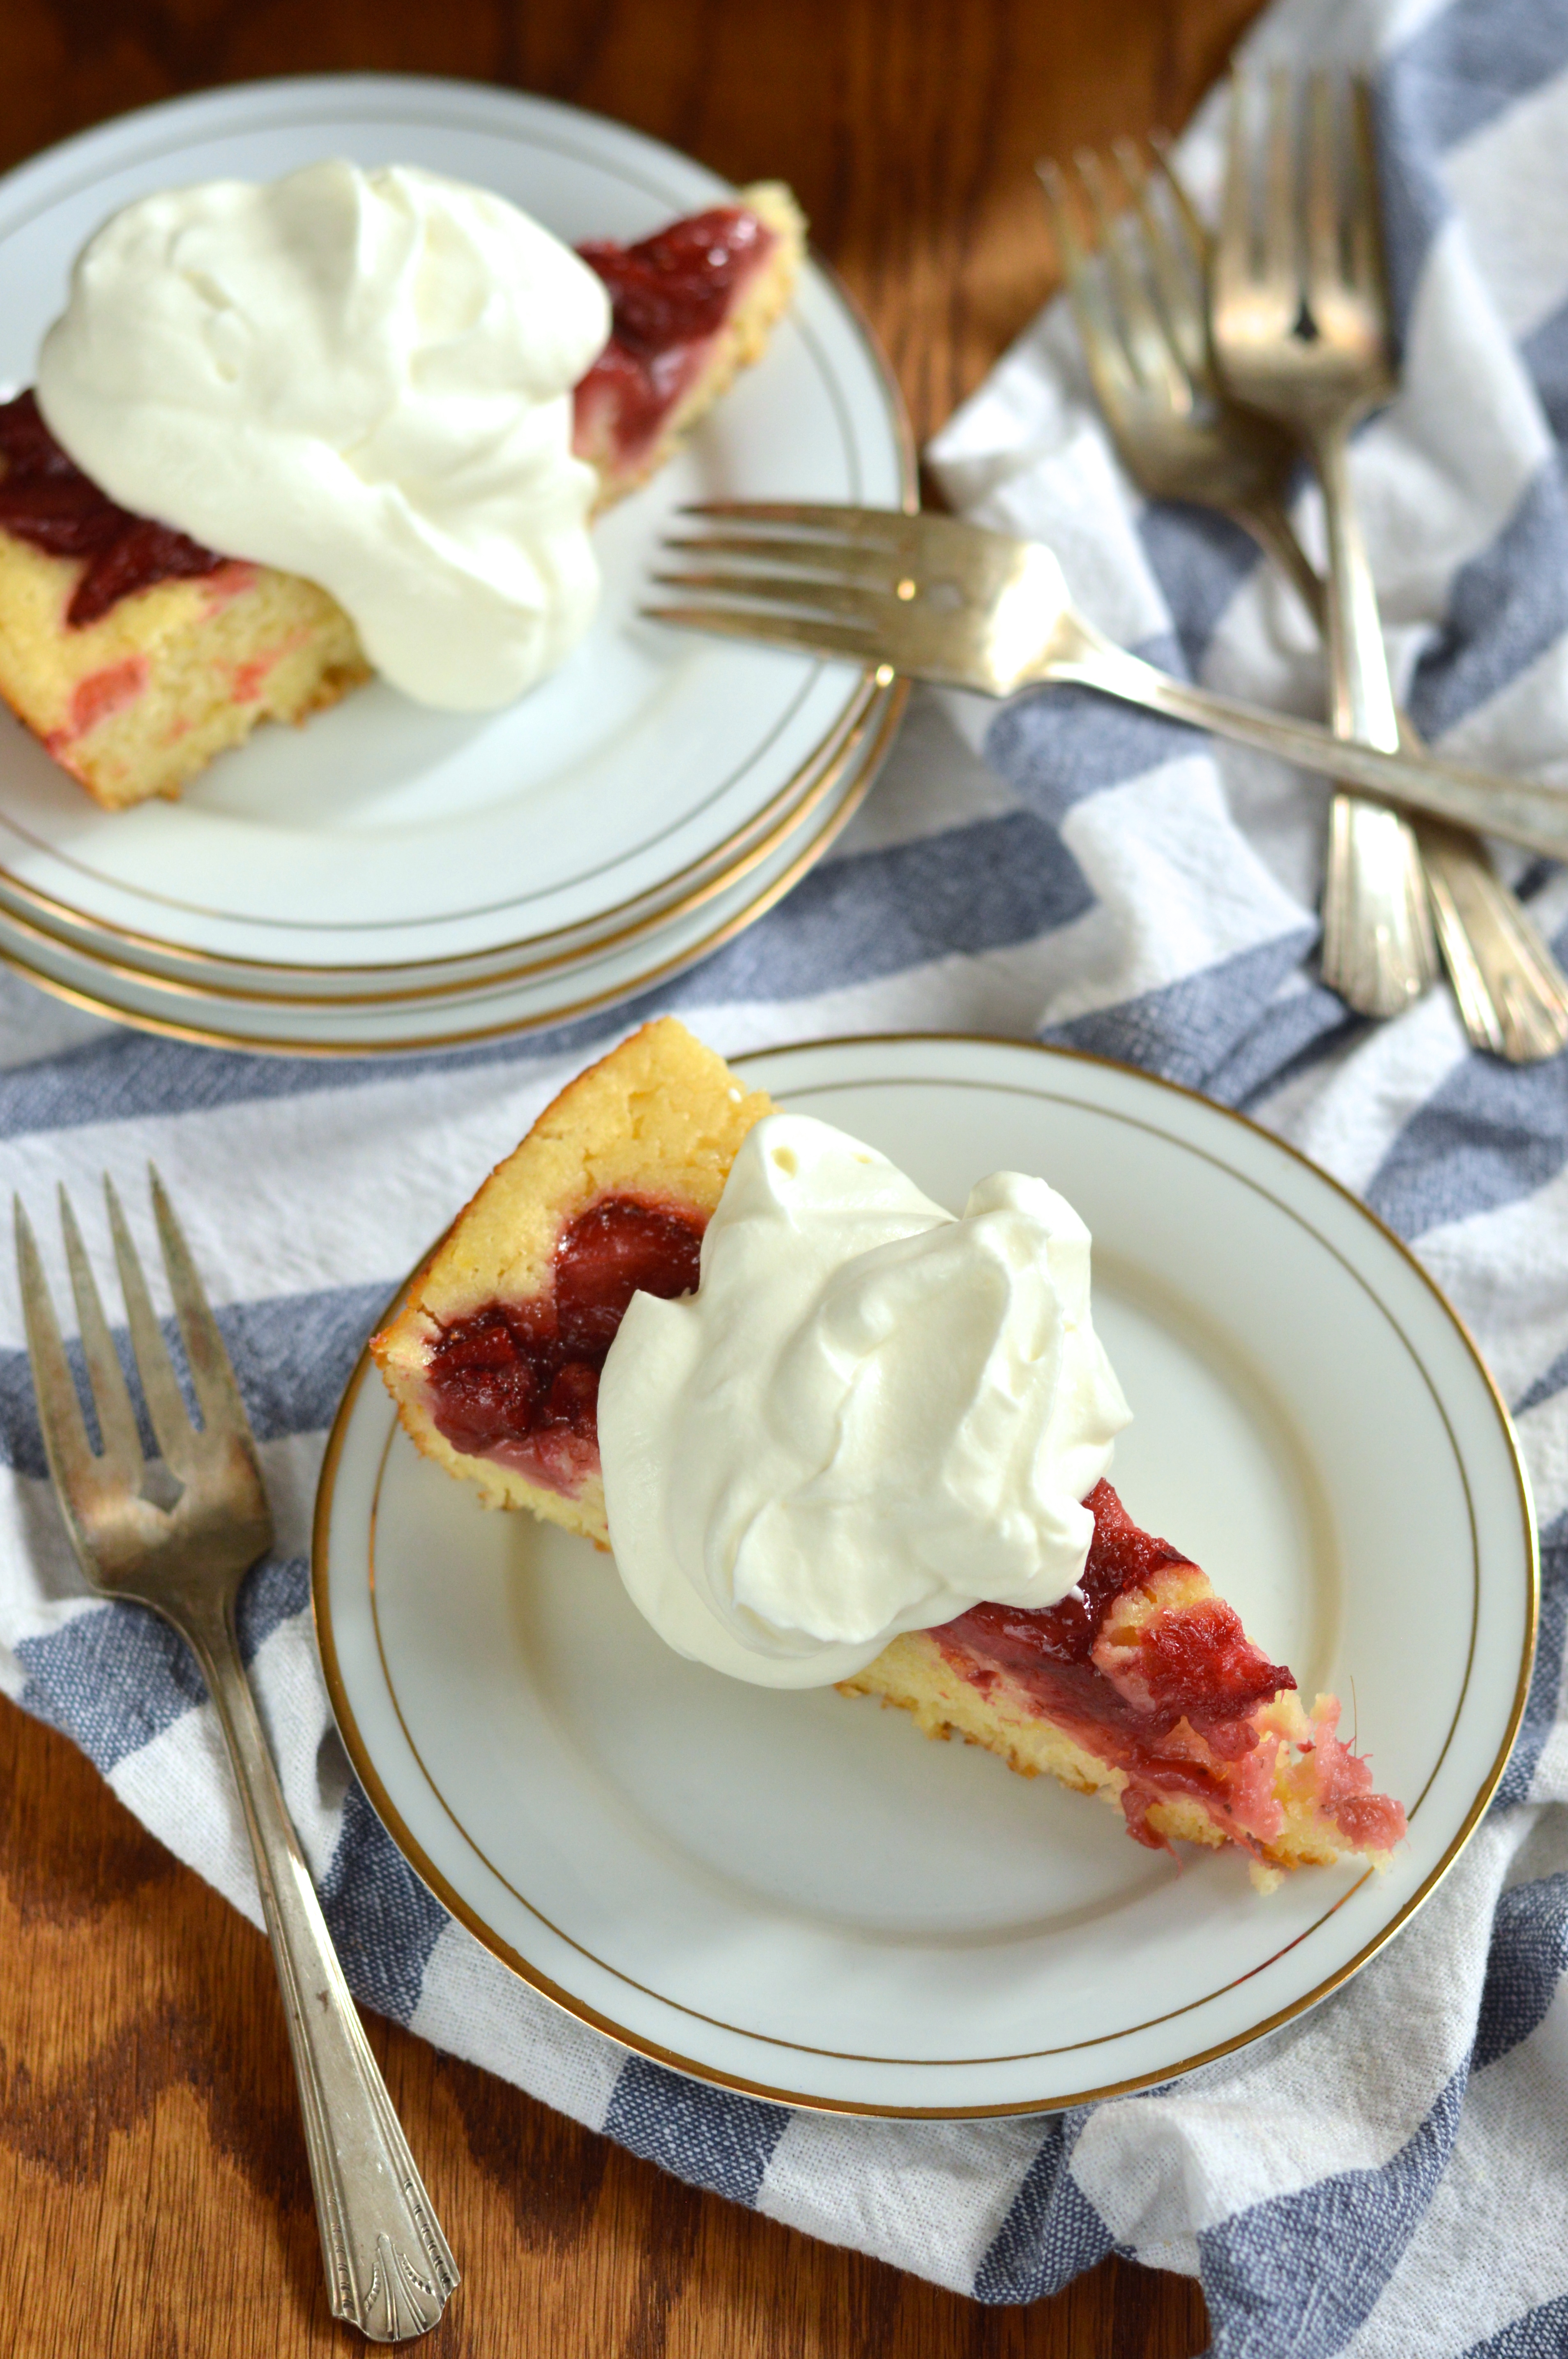
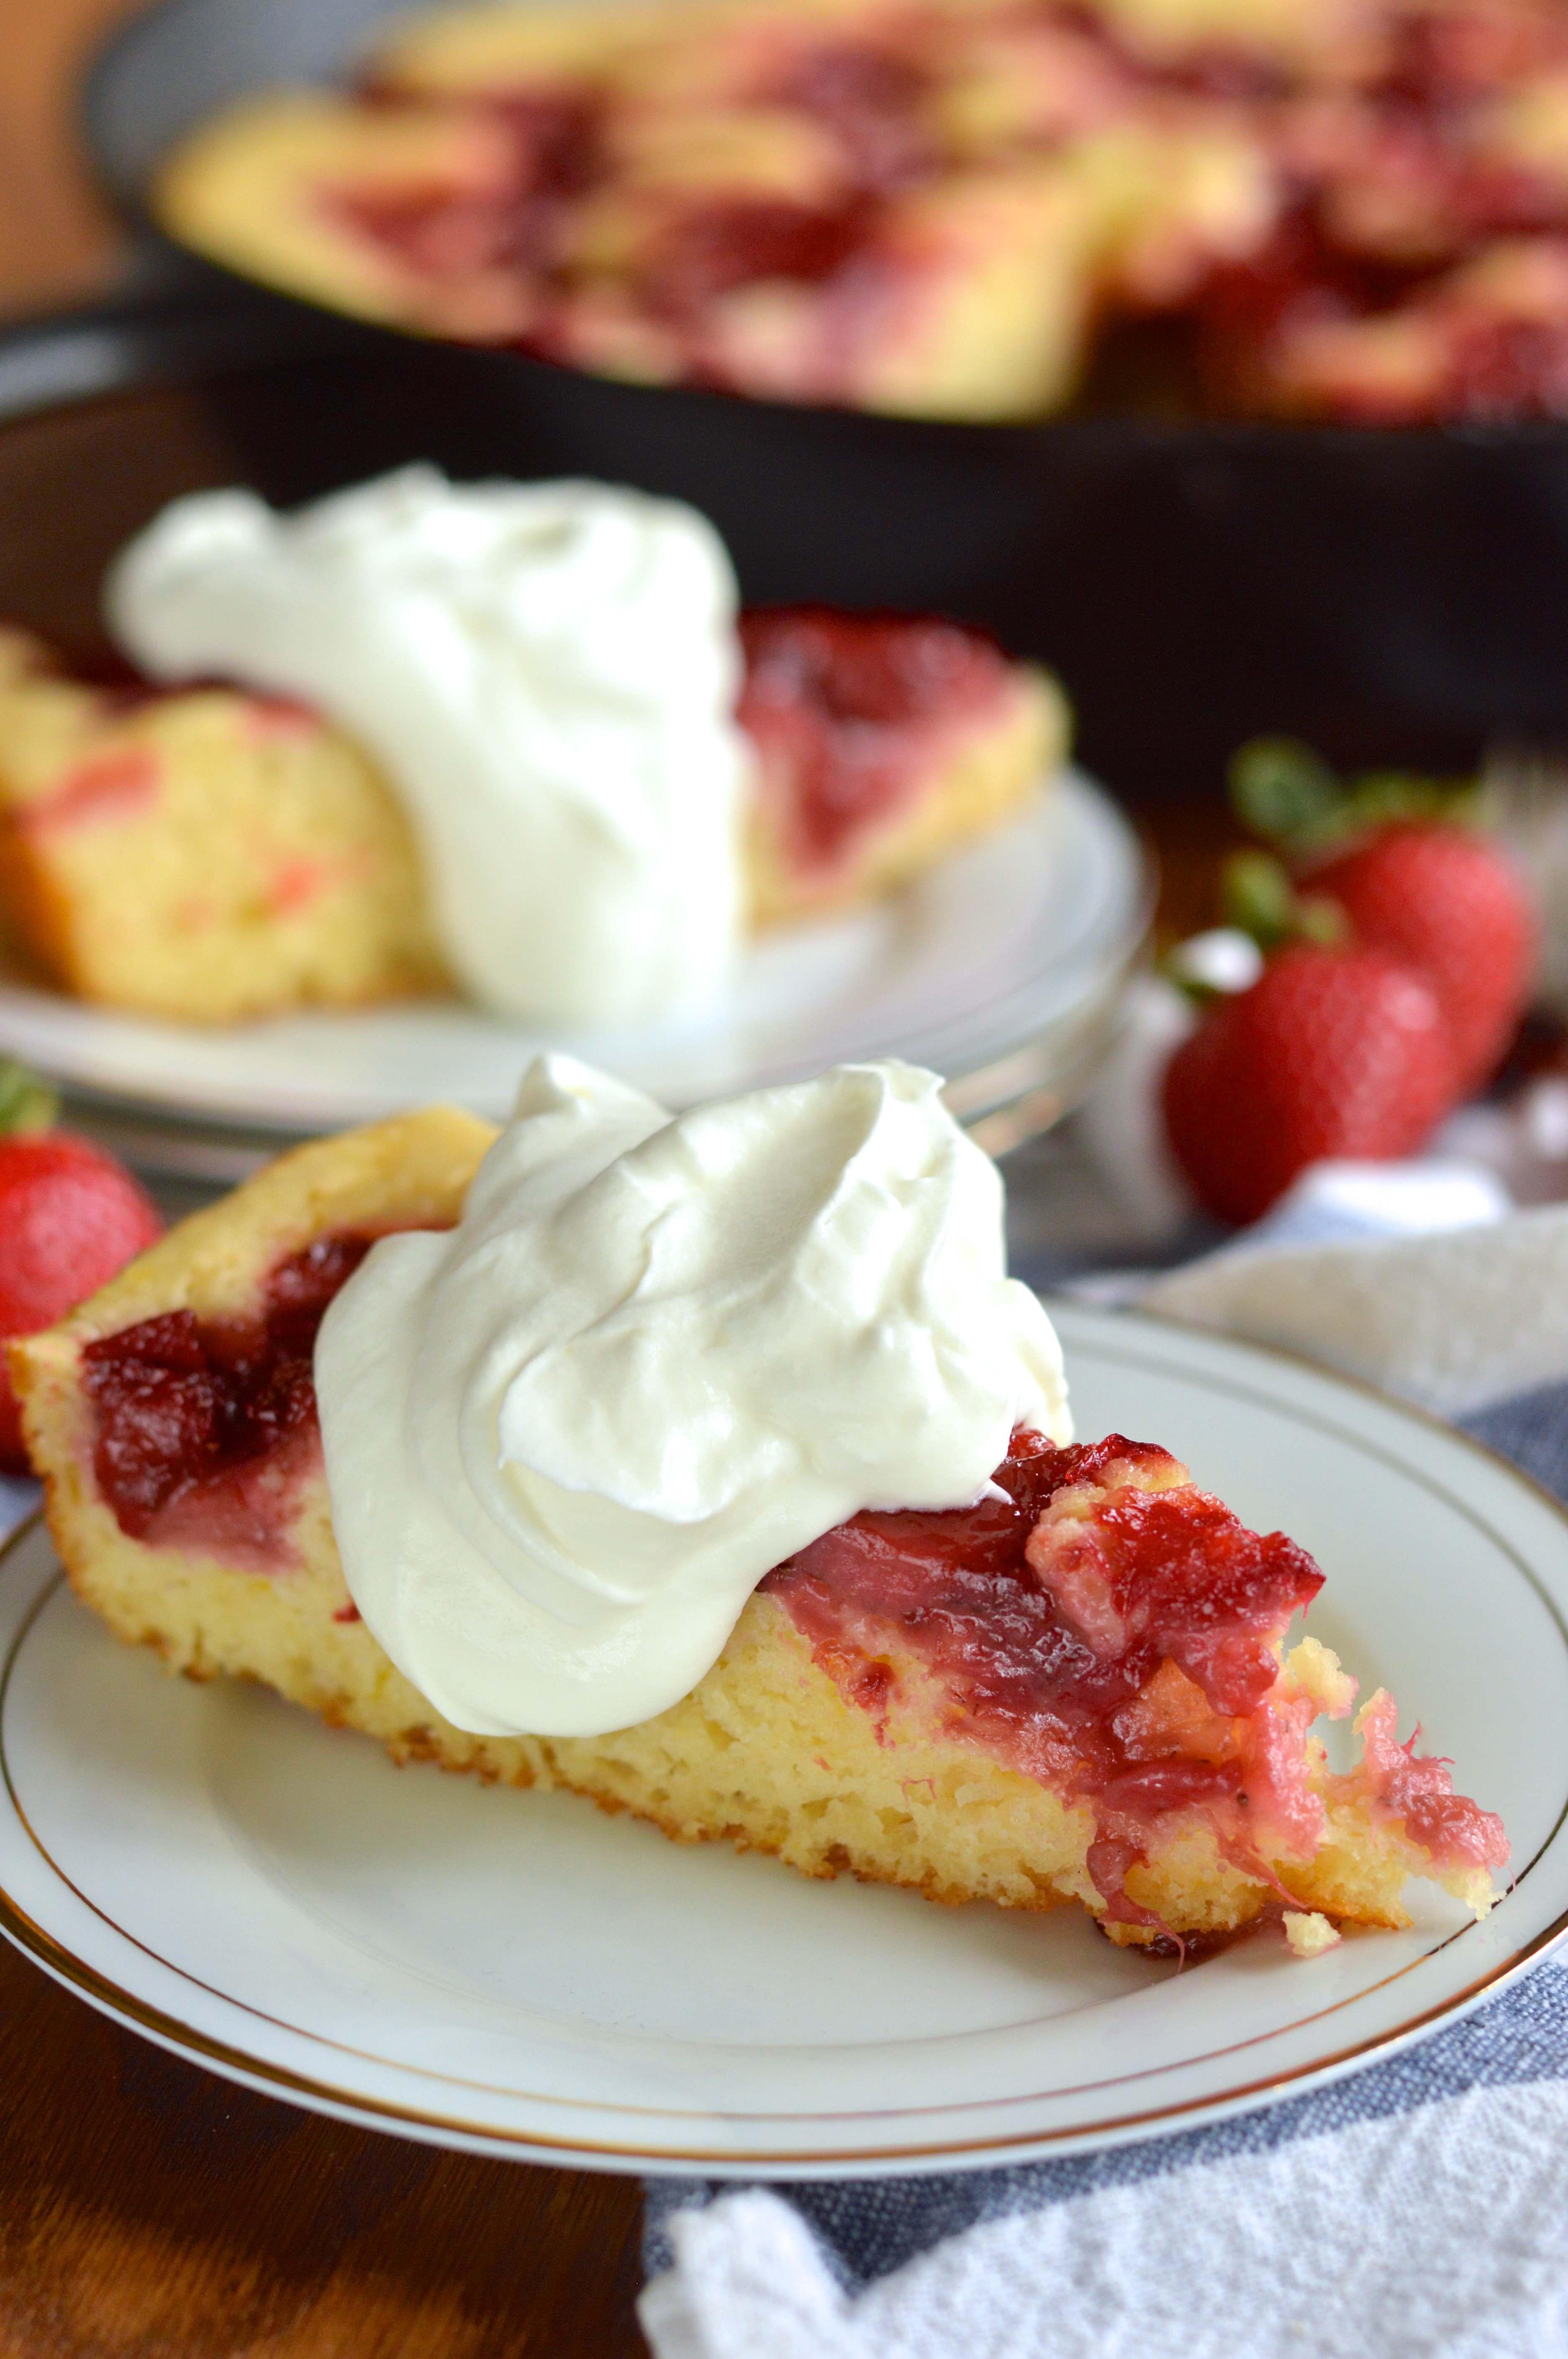
Topped with fresh barely sweetened whipped cream, it’s like a jammy little slice of strawberry shortcake.
Rustic and unfussy. Sweet and tart. Fluffy and tender. The cooked strawberry rhubarb is sweet and bright and jammy and fresh. The cake is just sweet enough and a tiny bit tart from the lemon and buttermilk. It’s buttery and light and moist and just…

perfect.

strawberry rhubarb skillet cake | Brooklyn Homemaker

Strawberry Rhubarb Skillet Cake

adapted from Joy the Baker

Strawberry Rhubarb filling:
1 cup sliced rhubarb (from about 3 stalks)
2 cups hulled and quartered strawberries
2 tablespoons unsalted butter
3 tablespoons sugar
pinch of salt

Cake:
1/4 cup + 1 tablespoon unsalted butter
zest of one lemon
2 1/2 cups all-purpose flour
1 tablespoon baking powder
1/2 cup plus 2 tablespoons granulated sugar
1/2 teaspoon salt
2 large eggs
1 1/4 cups buttermilk
1/4 cup lemon juice
1 teaspoon pure vanilla extract
2 to 3 tablespoons turbinado sugar or coarse finishing sugar

Preheat oven to 350 and move a rack to the center position.

Combine strawberries, rhubarb, 2 tablespoons butter, 2 tablespoons sugar, and pinch of salt in an 11 or 12 inch skillet.* Place over a medium high flame and cook, stirring frequently, until fruit is soft and coming apart and juices have reduced to a thick syrup, about 10 to 15 minutes. Do not let juices burn.

Scrape strawberry rhubarb mixture into a bowl to cool and scrape skillet clean with a silicone spatula. It’s okay if a little residue remains.
Melt butter in skillet and pour out all but 1 tablespoon to cool. Coat skillet evenly with remaining tablespoon. Add lemon zest to cooling butter and stir to combine.

In a medium bowl, whisk together flour, baking powder, salt and sugar.  Set aside.
In a small bowl or large measuring cup, whisk together buttermilk, lemon juice, eggs, vanilla and butter.

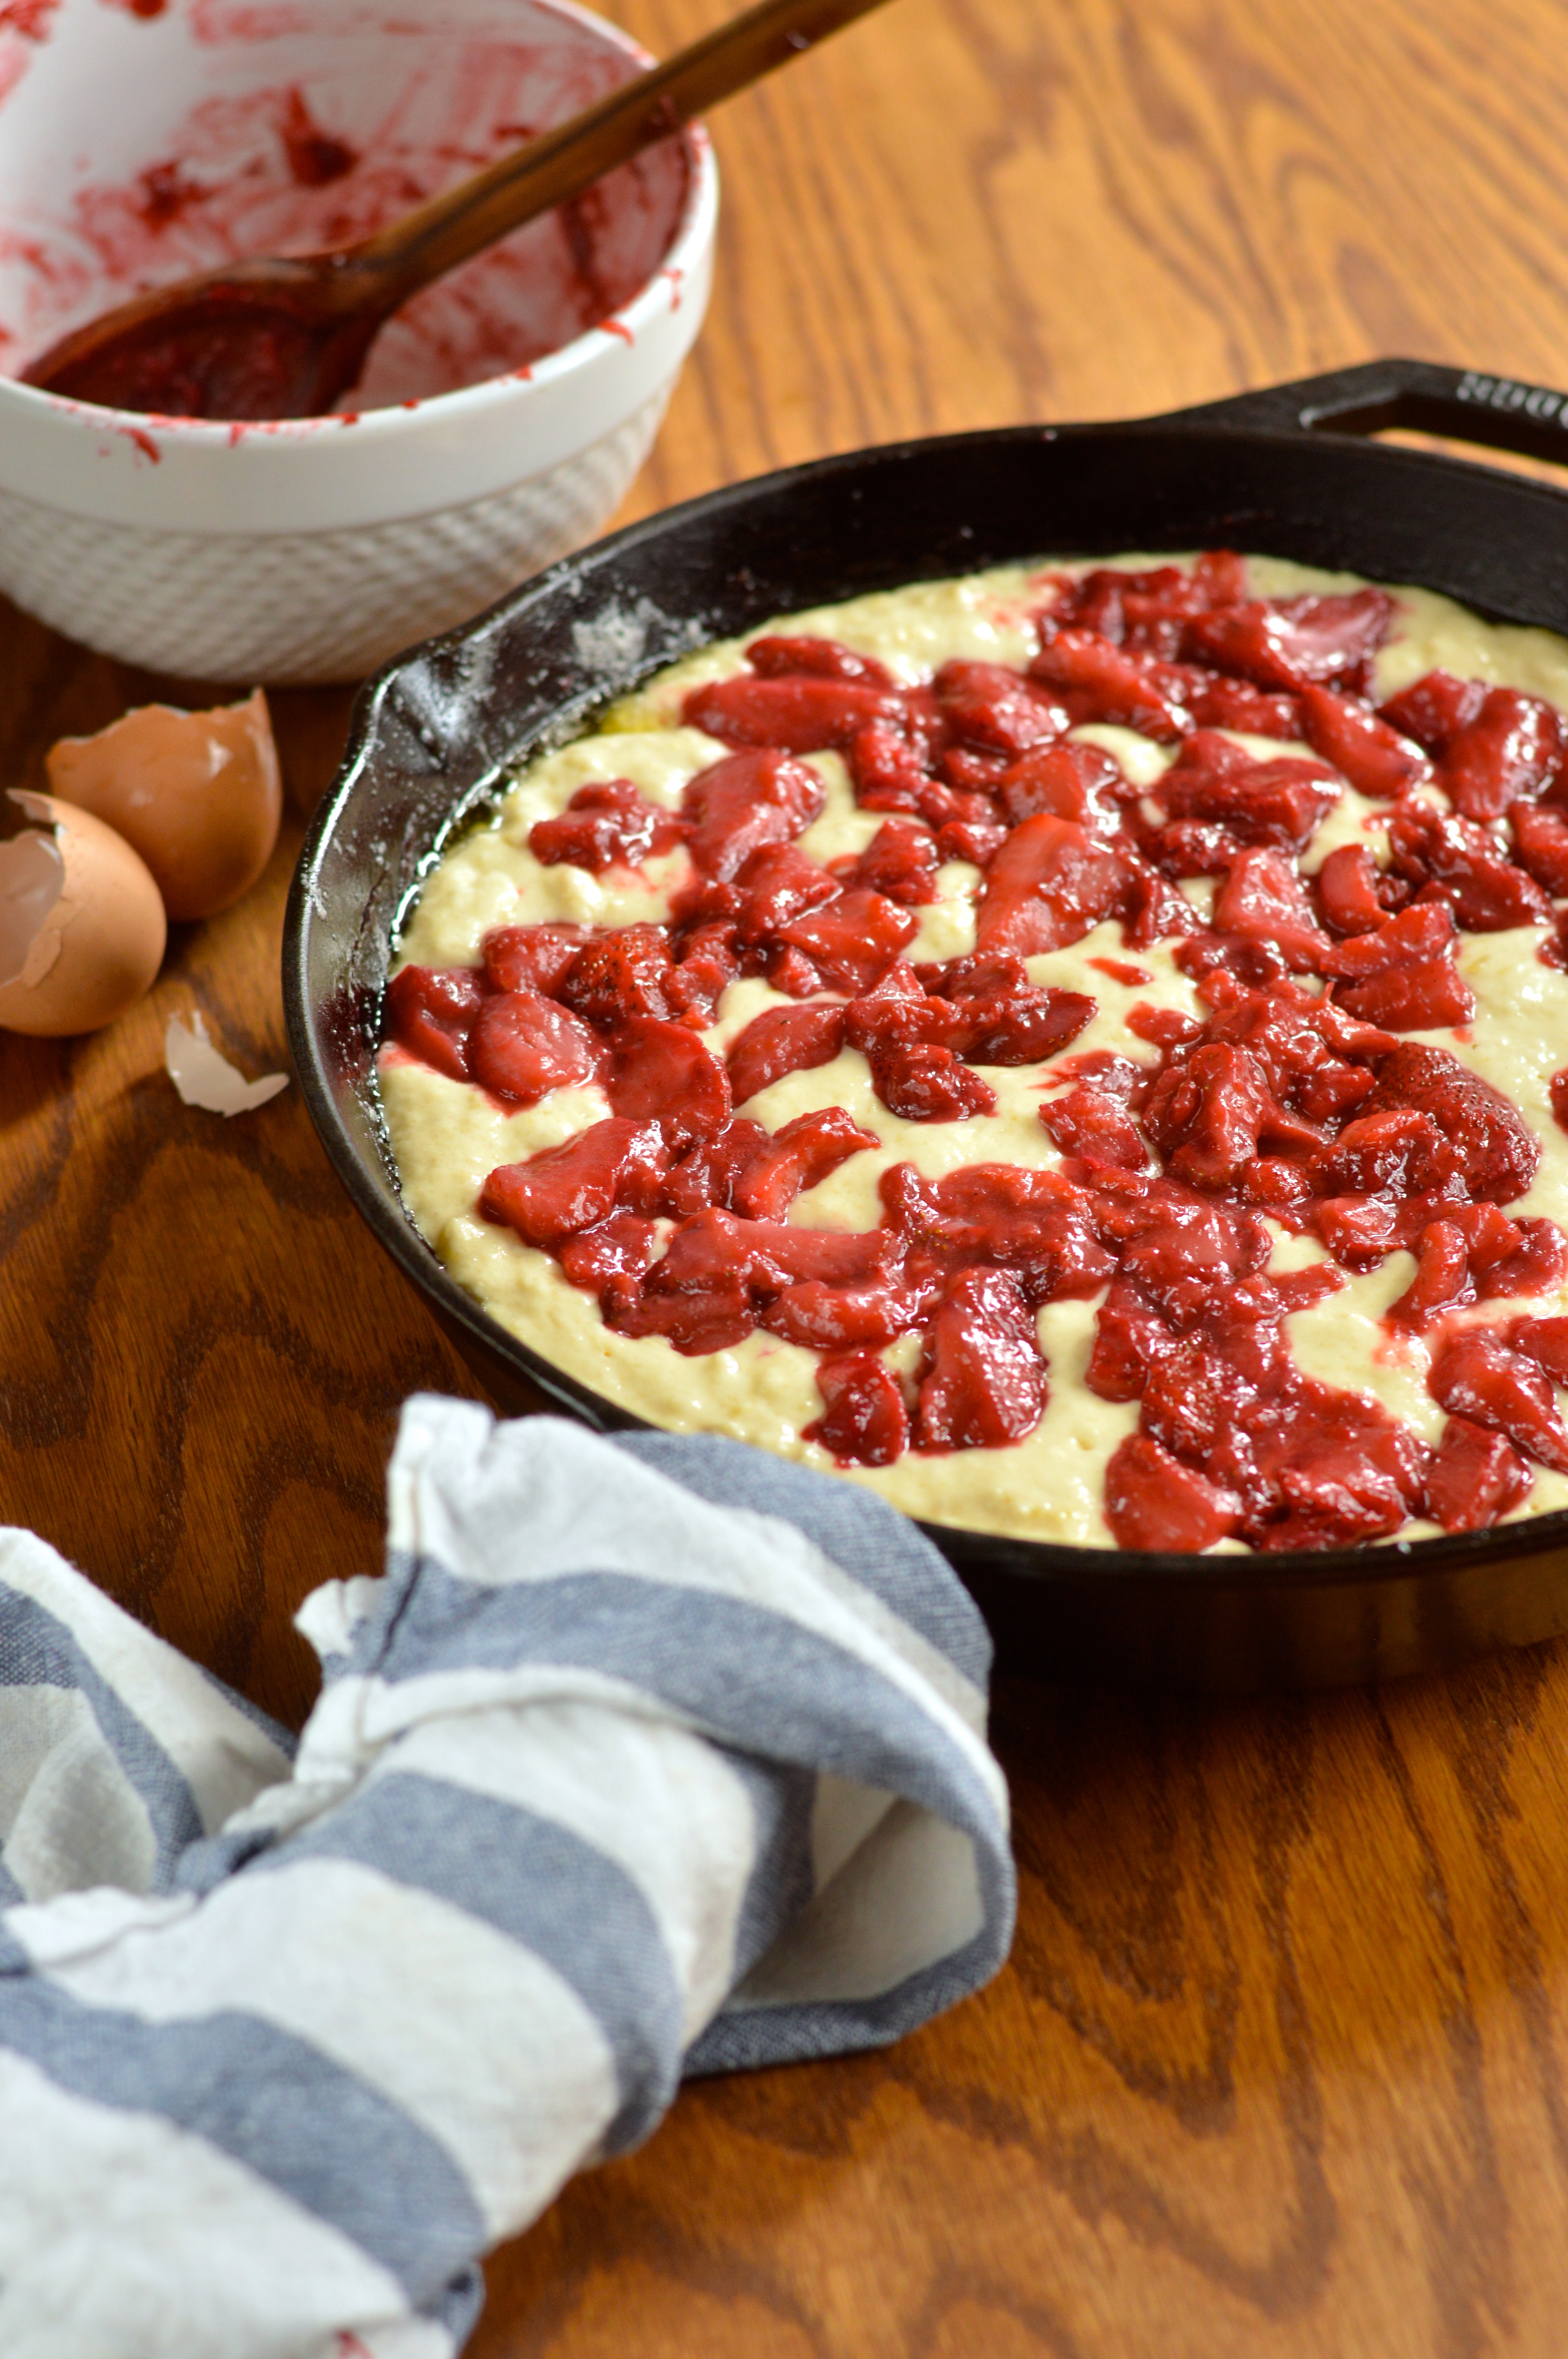
Make a well in the dry ingredients and pour in the buttermilk mixture all at once.  Stir with a silicone spatula just until combined, scraping the sides of the bowl until there are no dry pockets of flour. Do not over mix.  Pour batter into the prepared skillet and spread (or shake) smooth.  Dot the batter with strawberry mixture as evenly as possible, and sprinkle generously with turbinado sugar.

Bake for 20-25 minutes, or until a toothpick or cake tester inserted in the center of the cake comes out clean.  Allow cake to cool for at least 30 minutes before serving. If desired, serve with a generous dollop of lightly sweetened whipped cream or a light dusting of powdered sugar.

Cake will last, removed from skillet and well wrapped in the refrigerator, for up to 3 days.

*If you don’t have a cast iron skillet you can cook the strawberries and melt the butter in any pan you have, and use an 11-inch round tart or quiche pan, or a 9×13-inch pan for the cake. The batter may spread more thin so you’ll need to keep a close eye on it in the oven.

roasted cauliflower and cheddar soup

Spring is finally in full swing and the dogs and I are over the freaking moon.

roasted cauliflower and cheddar soup | Brooklyn Homemaker

While the trees are bursting with buds and daffodils are blooming like it’s their job, local produce hasn’t seemed to catch up just yet. New York’s farmers markets boast plenty of local meat and dairy, and tables overflowing with brightly colored annual flowers, but sweet juicy berries and bright green vegetables still need a few weeks to soak up the warm sunshine.

roasted cauliflower and cheddar soup | Brooklyn Homemaker

True to form, this spring has been toying with me and my frail emotions. Temperatures one day are soaring into the 70s, and the next they’re dipping back into the 40s. One day we have ample sunshine, the next it’s pouring rain.

roasted cauliflower and cheddar soup | Brooklyn Homemaker

On one of the cold and rainy days I was craving soup, as one does. With no local produce to choose from, I was off to the grocery store to try to find something fresh-ish and hopefully organic that I could turn into a warm satisfying soup. I also had a healthy stash of amazing Irish cheddar that was leftover after a book signing event at work, so I wanted to try to incorporate some of that cheesy goodness.

roasted cauliflower and cheddar soup | Brooklyn Homemaker

It didn’t take me long in the produce aisle to come up with a plan. What better vegetable for a thick warm filling soup than cauliflower? It’s available year round, goes great with cheddar and warm flavors, and is perfect for a rich and roasty soup.

roasted cauliflower and cheddar soup | Brooklyn Homemaker

This soup is really simple to make and definitely hits the spot on a rainy day, no matter what time of year. The fresh woodsy thyme adds a touch of green herbal freshness, and the white wine adds a crisp brightness that feels very appropriate for spring or summer. Roasting the cauliflower before pureeing it deepens and concentrates its earthy flavor, and the sharp cheddar adds a nice zippy tang without feeling heavy or overwhelming.

Pull up a bowl, tear into a nice crusty loaf of bread, and park yourself in front of the window and watch the rain come down.

roasted cauliflower and cheddar soup | Brooklyn Homemaker

Roasted Cauliflower and Cheddar Soup

  • Servings: 6 to 8 -ish
  • Print
2 heads of cauliflower
2 tablespoons olive oil
salt and pepper, to taste
2 tablespoons butter
1 medium to large onion, chopped
1/8 teaspoon cayenne pepper (optional)
1/8 teaspoon smoked paprika
5 to 6 sprigs of fresh thyme
1 cup dry white wine
6 cups low sodium chicken stock
8 oz sharp cheddar, grated

Preheat oven to 400. Chop cauliflower into rough large florets. Toss in olive oil, season with salt and pepper, and arrange in a single layer on a parchment lined baking sheet. Roast until brown and golden, about 30 or 40 minutes.

Preheat a stockpot over medium high heat and bring butter to a sizzle. Add onion, cayenne, paprika, thyme, and salt and pepper to taste. Sauté until tender and translucent, 5 to 10 minutes. Add white wine and reduce by at least half. Add chicken stock and bring to a boil. Add roasted cauliflower, bring back to a boil, and cook for 10 minutes. Remove from heat and remove thyme sprigs. Add cheddar and puree until silky smooth, using either an immersion blender or working in batches in a standing blender. Taste and adjust seasoning if necessary.

Serve with a drizzle of olive oil, a small handful of grated cheddar, and a big hunk of crusty bread.

graham cracker bundt cake with key lime cheesecake swirl #bundtbakers

I’m sorry, but I really hate the phrase, “made it by the skin of my teeth”

graham cracker bundt cake with key lime cheesecake swirl | Brooklyn Homemaker

A) Seriously, how gross is that?
B) What the heck does that even mean? Teeth don’t have skin.
Unless we’re talking about gums here, in which case, that’s even weirder/grosser/more nonsensical.

Anyway, even though I don’t like or understand that saying, in this case it’s true. I made it. Just in the nick of time.

graham cracker bundt cake with key lime cheesecake swirl | Brooklyn Homemaker

If you’ve been paying attention, you already know that my oven has been broken (along with my heart). My landlord, in tandem with Brooklyn’s slowest appliance repair company, have been taking their sweeeeeeet time fixing it.

As difficult as going oven-less has been for me, my biggest concern through this whole agonizing experience has been that I might not be able to bake along with the bundt bakers this month. It may have been painful to have cookies taken off the menu and chicken taken out of the oven and put on the back burner (literally), but DO NOT mess with my bundts. I’ve baked a bundt cake each and every month since I found this rag-tag (though truly well organized) team of bakers, and having to bow out because of an ancient apartment oven and a foot-dragging repairman was seriously bumming me out.

graham cracker bundt cake with key lime cheesecake swirl | Brooklyn Homemaker

Luckily the repair man pulled through at the eleventh hour. On Monday he came through with the backordered fuse in hand and within an hour my baby was back in working order. I was at work at the time, but Russell was filling me in from home and once the oven was purring again we were sending jubilant texts back and forth for the rest of the day. I was like a giddy school girl. 16 days with no oven can do that to a guy.

graham cracker bundt cake with key lime cheesecake swirl | Brooklyn Homemaker

With no time to spare, I assembled the ingredients for my cake and set to work. The lovely Anshie of Spice Roots is our group’s host this month, and she chose “Hidden Surprise” as our theme (which is appropriate, because my ability to even make this cake was a total surprise!).
The idea was to bake a cake with a filling or ingredient inside that isn’t visible until it’s sliced. From the outside it looks like any ordinary cake, but once sliced a whole universe of delicious is revealed.

graham cracker bundt cake with key lime cheesecake swirl | Brooklyn Homemaker

At first I was having a really difficult time deciding what to do with this theme. My mind immediately went toward berries and chocolate, but in my experience berries always want to sink through the batter and settle into what, once un-molded, is the top of the cake. That wouldn’t really be much of a surprise would it? I pawed at a few other ideas in my head but nothing really seemed to take.

That all changed about two weeks ago when I caught a nasty bug and couldn’t get off the couch for a few days.

When I was growing up, my grandmother always prescribed the same “medicine” whenever I was sick. The patient always needed canned chicken noodle soup, plain vanilla ice cream, warm ginger ale, and graham crackers. Now that I’m older the chicken soup seems to make sense, but the vanilla ice cream just seems like a bad idea. I don’t really get the warm part of the ginger ale, but I guess the lack of ice was supposed to be easier on the stomach, and I suppose graham crackers are easy on an upset tummy too.
To this day, whenever I get sick, I always crave these things. Once I was well enough to actually eat, I went through an entire box of graham crackers in like two days. All that was left was a small trail of graham cracker crumbs.

graham cracker bundt cake with key lime cheesecake swirl | Brooklyn Homemaker

That’s when it hit me, what if I made a cake using crushed graham cracker crumbs in place of some of the flour?
And what better flavor to pair with graham cracker crumbs than key lime pie?
Better yet, key lime CHEESECAKE!!!

Surprise!

graham cracker bundt cake with key lime cheesecake swirl | Brooklyn Homemaker

I can’t accurately describe how amazing this cake is. Words like moist, tender, flavorful, warm, & homey come to mind to describe the graham cracker cake, but really don’t do it justice. This cake is out of this world. Why hasn’t this been done before? If it has, why haven’t I been informed? Graham cracker cake, filling or not, is something I’d like to be buried with. Hillary should choose graham cracker cake as her running mate. Seriously. Clinton/ Graham Cracker Cake/ 2016.

I could have paired this cake with any number of fillings and knocked it out of the park. Chocolate and marshmallow “S’mores” cake would have been amazing, but KEY LIME CHEESECAKE was a real stroke of genius. Seriously, out of this world. I want to use words like tangy, rich, creamy, silky, & decadent; but like I said, words cannot describe the otherworldly levels of deliciousness happening inside this cake.

Go make this. Now.
(you can thank me later)

graham cracker bundt cake with key lime cheesecake swirl | Brooklyn Homemaker

Graham Cracker Bundt Cake with Key Lime Cheesecake Swirl

  • Servings: 12 to 16-ish
  • Print
Filling:
1/4 cup sugar
1 (8-ounce) package cream cheese, softened
pinch of salt
1 large egg
4 tablespoons key lime juice
finely grated zest of 1 lime

Cake:
1 1/2 cups all-purpose flour (plus more for pan)
1 1/2 cups finely crushed graham cracker crumbs (plus more for topping)
1 teaspoon baking powder
1 teaspoon baking soda
1 teaspoon salt
1 cup unsalted butter, softened (2 sticks, plus more for pan)
1/2 cup granulated sugar
1/2 cup firmly-packed brown sugar
2 teaspoons vanilla extract
3 eggs
1 1/4 cup buttermilk

Glaze:
4 oz cream cheese, softened
2 tablespoons key lime juice
pinch of salt
1 cup powdered (confectioners) sugar
2 to 3 tablespoons milk

Preheat oven to 350 and move the rack to the center position.  Generously butter and flour a 10 to 12 cup bundt pan. Tap out extra flour and refrigerate.

To make the filling; cream sugar, softened cream cheese, and salt together in a stand mixer (or in a large bowl with an electric hand mixer) on high speed. Beat until fluffy and completely free of lumps, about 2 to 3 minutes. Reduce speed to low, add egg, and mix to combine. Add lime juice and zest and mix to combine. Scrape filling out into a small bowl and set aside. Wash bowl or at least scrape it out well.

In a medium bowl, whisk together graham cracker crumbs, flour, baking soda, baking powder, & salt. Set aside. In the same bowl as before, cream the butter with sugars on high speed until pale, light, & fluffy; about 4 to 5 minutes. Add vanilla and eggs, one at a time, beating on low to combine after each addition. On low speed, alternate three additions of flour and two additions buttermilk, beginning and ending with flour, scraping the bowl between additions. Do not over-mix. Scrape batter out into prepared pan and use your spatula to push the thick batter up the walls of the pan to create a well in the center.
Pour the filling into the center of the well, and use a small icing spatula or butter knife to swirl the filling into the cake batter. Try to avoid scraping the bottom or sides of the pan.
Bake the cake for 50-60 minutes, or until a cake tester or toothpick inserted in the center of the cake comes out clean. Cool on a wire rack for 20 minutes before turning out of the pan onto the rack to cool completely.

To make the glaze, beat the softened cream cheese until smooth and lump free. Scrape down the sides of the bowl and add lime juice and salt. Beat again until smooth and lump free. Add powdered sugar and beat on low speed until combined. Add milk, 1 tablespoon at a time, until desired consistency is reached. (I used all 3 tablespoons)

Pour or drizzle glaze evenly over the top of the cake and sprinkle a few tablespoons of graham cracker crumbs over the top.
Cake should keep, tightly covered at room temperature, for about 3 days. If you refrigerate it bring it back up to room temperature before serving.

graham cracker bundt cake with key lime cheesecake swirl | Brooklyn Homemaker

Are your taste buds ready for a few more delicious surprises? There are a whole lot of tasty secrets hidden within these recipes y’all. Check it out.

.

BundtBakers

.
Interested in learning more about us? #BundtBakers is a group of Bundt loving bakers who get together once a month to bake Bundts with a common ingredient or theme. We take turns hosting each month and choosing the theme/ingredient. You can see all our of lovely Bundts by following our Pinterest board right here. Links are also updated after each event on the BundtBaker home page here.

If you are a food blogger and would like to join us, just send an email with your blog URL to foodlustpeoplelove@gmail.com. If you are just a lover of Bundt baking, you can find all of our recipe links by clicking our badge above or on our group Pinterest board.

creole red jambalaya with chicken, shrimp, & andouille

Last Saturday when I got home from work I started making dinner.

creole red jambalaya with chicken, shrimp, & andouille | Brooklyn Homemaker

I cut up some broccoli, crisped up some bacon, made a béchamel, boiled some noodles, and grated a heaping pile of aged Irish cheddar. After mixing all the ingredients for my homemade macaroni & cheese together I turned the oven on to preheat while I melted a little butter for my bread crumb topping.

With the weighty casserole ready to go into the oven to bubble and crisp, I reached down to open the oven door. That’s when I noticed it wasn’t hot.
Panic.

creole red jambalaya with chicken, shrimp, & andouille | Brooklyn Homemaker

Though you wouldn’t know if from the number of baked goods I turn out of my kitchen, I have been having trouble with my oven for over a year. I won’t get into all the specifics, but it basically starts to preheat but will turn off before coming to temperature. After months of dealing with it I finally figured out that if I switched on the range it would trick the oven to turning back on and I’d be in business.
That is, until the night that I had a big dish of macaroni and cheese waiting to bake. No amount of trickery or tinkering could induce my ancient apartment oven to turn on.

A broken oven. My worst nightmare.
I wanted to cry.

creole red jambalaya with chicken, shrimp, & andouille | Brooklyn Homemaker

I wrapped the macaroni and cheese up and put it into the refrigerator, crossing my fingers that it would miraculously work again the next day. Nope.

Of course my landlord is dragging feet his feet about getting it fixed too. Doesn’t he know who I am?

creole red jambalaya with chicken, shrimp, & andouille | Brooklyn Homemaker

A few days later we finally got a repair man in to take a look. After less than five minutes of tinkering he blithely says, “Oh it’s just a blown fuse.”
I had just enough time to breath a sigh of relief before he continued, “Of course I don’t have one with me, and it’s out of stock. We’ll have to order it. We’ll call you in a few days.”
Way to toy with my fragile emotions Mr. Evil Repair Man. After he left I microwaved a bowl of never-baked macaroni and cheese and cried into it.

Another day passed before I heard back from them, and just my luck, this tiny stupid fuse is backordered from the manufacturer and they don’t know when it’ll be back in stock. What are the chances?
When it’s my oven we’re talking about? 100%.

creole red jambalaya with chicken, shrimp, & andouille | Brooklyn Homemaker

I could use this as an opportunity to make no-bake recipes and experiment with any number of savory stove top recipes. But, of course in the absence of my oven, all I want to do is bake. I even want to bake things I would normally do on the stove top! I’m suddenly overwhelmed by cravings for baked eggs, roasted chicken, twice baked potatoes, roasted cauliflower. My urge to bake cookies, usually strong enough already, is suddenly all consuming. I’m overcome with worry that I won’t be able to participate in this month’s #bundtbakers, which is fast approaching.

Wallowing rather than overcoming, I can’t think of a single thing that I could share here that wouldn’t require a functional oven. Forget the fact that at least half or more of the recipes I’ve posted up until now haven’t.

creole red jambalaya with chicken, shrimp, & andouille | Brooklyn Homemaker

Then, one morning I wake up and suddenly I NEED to make jambalaya. I consult my favorite recipe to make a few tweaks. I consult other recipes to see what else could be improved on. Oddly enough, I discover a few recipes that call for the jambalaya to be assembled on the stovetop and finished in the oven! WHAT?!?! WHY!?!!?! Okay, forget that. Back to the original stovetop recipe I was looking at.

creole red jambalaya with chicken, shrimp, & andouille | Brooklyn Homemaker

My recipe hunt turned up so many different variations on jambalaya that I decided to turn to Wikipedia for some clarification. As it turns out, there are actually three distinct varieties of jambalaya, depending on the regions they come from and the ingredients used.

The style I made is called a red Creole jambalaya, or a city Creole jambalaya. This is the most common style, and the main difference between this and other varieties is the use of tomatoes. The less common rural Creole jambalaya is almost identical but uses no tomatoes in the recipe. The third, and even less common variety is the Cajun or “white” jambalaya, in which the rice is cooked in broth separately from the meat and vegetables and combined just before serving.

Most people believe Creole red jambalaya was created as a way to make Spanish Paella without using saffron which was very hard to come by at the time. Tomatoes were added in place of the saffron for flavor, but eventually the other two styles came about without the tomatoes.

creole red jambalaya with chicken, shrimp, & andouille | Brooklyn Homemaker

The house smells completely heavenly while this bubbles away on the stovetop (and not in the oven), and the flavor could not be more amazing. Tender rice, perfectly cooked shrimp, soft cooked vegetables, and andouille with a nice bit of bite. The fresh herbs, crushed tomatoes, and spices combine to make one of the most flavorful dishes I’ve had in a good long time. Using smoked paprika really makes a difference to impart a nice smoky depth to the dish and the cayenne adds a welcome bit of heat.

Depending on how spicy you like things, the heat level can definitely be adjusted to your taste. I like mine quite spicy so I used the full teaspoon of cayenne. One teaspoon might not sound like much, but a little goes a long way and gave this big pot of jambalaya some serious heat. Feel free to scale it back to 1/2 or even 1/4 teaspoon if you can’t take the heat, but I beg you not to skip it altogether or you’re not doing it right!

creole red jambalaya with chicken, shrimp, & andouille | Brooklyn Homemaker

Creole Red Jambalaya with Chicken, Shrimp, & Andouille

  • Servings: about 8 to 10
  • Print
adapted from Spoon Fork Bacon for the Fix

1 tablespoon olive oil (or bacon grease, if you have it, will add a bit of welcome smokiness)
12 to 16 oz. Andouille sausage, thinly sliced
1 lb boneless skinless chicken thighs, cut into small bite sized cubes
1 medium yellow onion, diced
1 red bell pepper, seeded and diced
1 green bell pepper, seeded and diced
2 to 3 ribs of celery, diced (about 1/2 cup)
4 garlic cloves, minced
1 1/2 cups of corn kernels (fresh is best but frozen is fine)
2 cups long grain rice
2 tablespoons parsley, finely chopped
1 tablespoon thyme, minced
2 1/2 teaspoons smoked paprika
1/4 to 1 teaspoon ground cayenne pepper (to your taste)
2 teaspoons cumin
1 (15 oz) can, crushed tomatoes
3 cups chicken stock
1 lb. shrimp, cleaned peeled and deveined

garnish:
fresh thyme, parsley, or green onion

Preheat 1 tablespoon of oil or grease in a heavy stockpot or dutch oven over medium-high heat. Brown andouille for about 5 minutes, remove from oven, leaving grease, and set aside.
Add chicken thighs, season with salt and pepper, and cook about 5 minutes. They don’t need to be cooked through, just have a bit of color on them. Remove and set aside with sausage
Add onions, bell peppers, and celery and sauté for 4 to 5 minutes or until onions barely begin to look translucent.  Season with salt and pepper. Stir in garlic and corn and continue to sauté for 2 minutes more.
Add rice, herbs and spices and sauté for 4 to 5 minutes. Season well with salt and pepper.
Stir in crushed tomatoes, stock, chicken thighs, and sausage. Bring mixture to a boil, then reduce the heat to simmer and cover. Cook for about 15 to 20 minutes or until cooked about 2/3 of the way, then add shrimp by gently pressing shrimp slightly into the mixture. DO NOT STIR while rice is cooking.
Cover again and continue to simmer for 7 to 10 minutes or until rice is cooked through and the liquid has evaporated.
Gently toss jambalaya together to incorporate shrimp and fluff the rice. Top with chopped parsley or sliced green onion, and serve.