Chicken Pot Pie with Buttermilk Biscuit Crust

Updated with new photos and a slightly revised recipe on 9/29/2014 here.

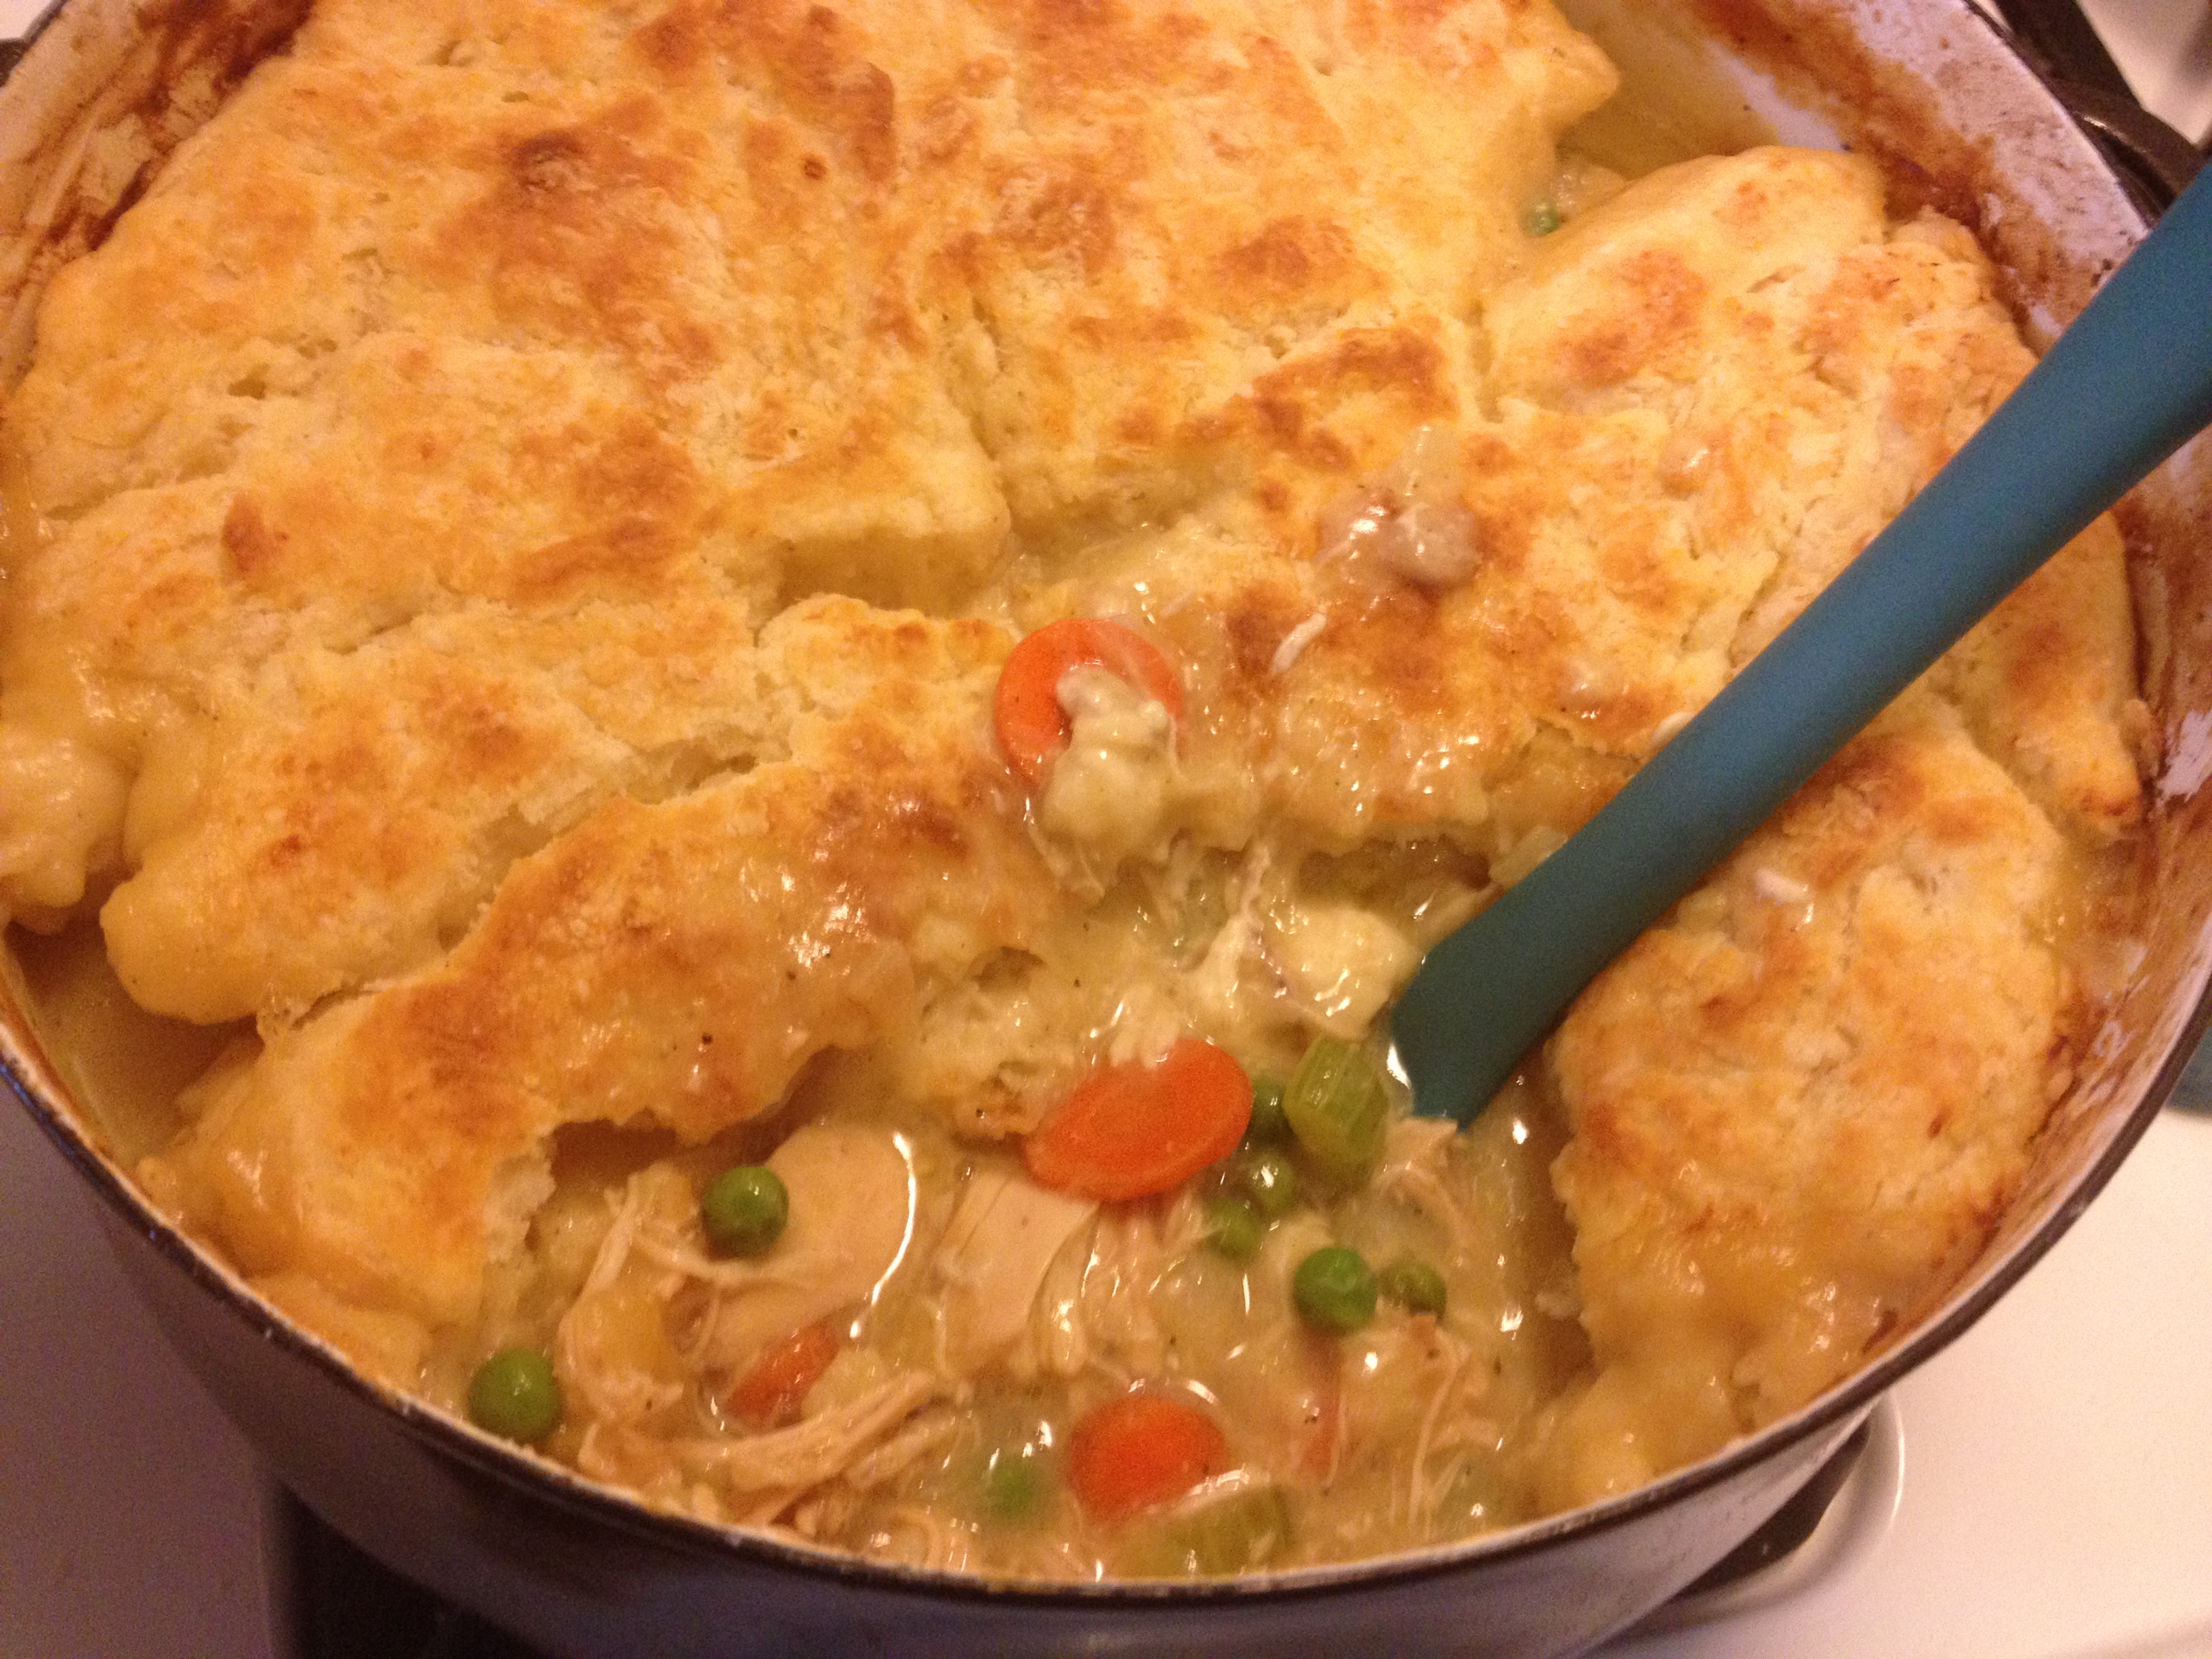
This is not your standard chicken pot pie. There is only top crust here, just resting on top of the filling; and this is no standard pastry crust, but a thick island of tender buttermilk biscuit. If you wanted to complicate things, this could be called a chicken and biscuits pie, or maybe a southern style chicken pot pie. To me, this is what chicken pot pie is supposed to be. This is chicken pot pie the way my grandmother made it, and this was the meal of choice for me and my sisters on birthdays and special occasions.

chicken pot pie with buttermilk biscuit crust | Brooklyn Homemaker

This was a staple of my childhood and making it is an exercise in nostalgia. When Grandma made it she would boil chicken breasts in bouillon, thicken with a flour & water slurry, add some canned peas and carrots, and top it with Bisquick. When I was learning to cook this was one of the first recipes I tried to master, and as I became a better cook the recipe started to change.

chicken pot pie with buttermilk biscuit crust | Brooklyn Homemaker

The recipe I’m sharing with you is very different from the one Grandma used to make, but the end result is just as homey and comforting. This is not a quick weeknight dinner, but more of an all-Sunday-in-your-PJs kind of meal. Making fresh chicken stock is probably the biggest change between Grandma’s recipe and mine. I like to start late in the morning, browning the chicken, adding some aromatics, and letting it simmer slow and low for a couple of hours while I go about my day.

For this recipe I used a whole chicken that came cut up and wrapped from my grocery store, but you can use whatever chicken you like. I think a whole chicken or a mix of breasts and thighs will give you the most flavorful end product, but if you or your family only like breast meat, use all breasts. If you’re like me and roast a lot of chickens at home, odds are that you might have some bones or gizzards lying around in the freezer. That’s not weird is it? Anyway, if you do, toss them in too.

chicken pot pie with buttermilk biscuit crust | Brooklyn Homemaker

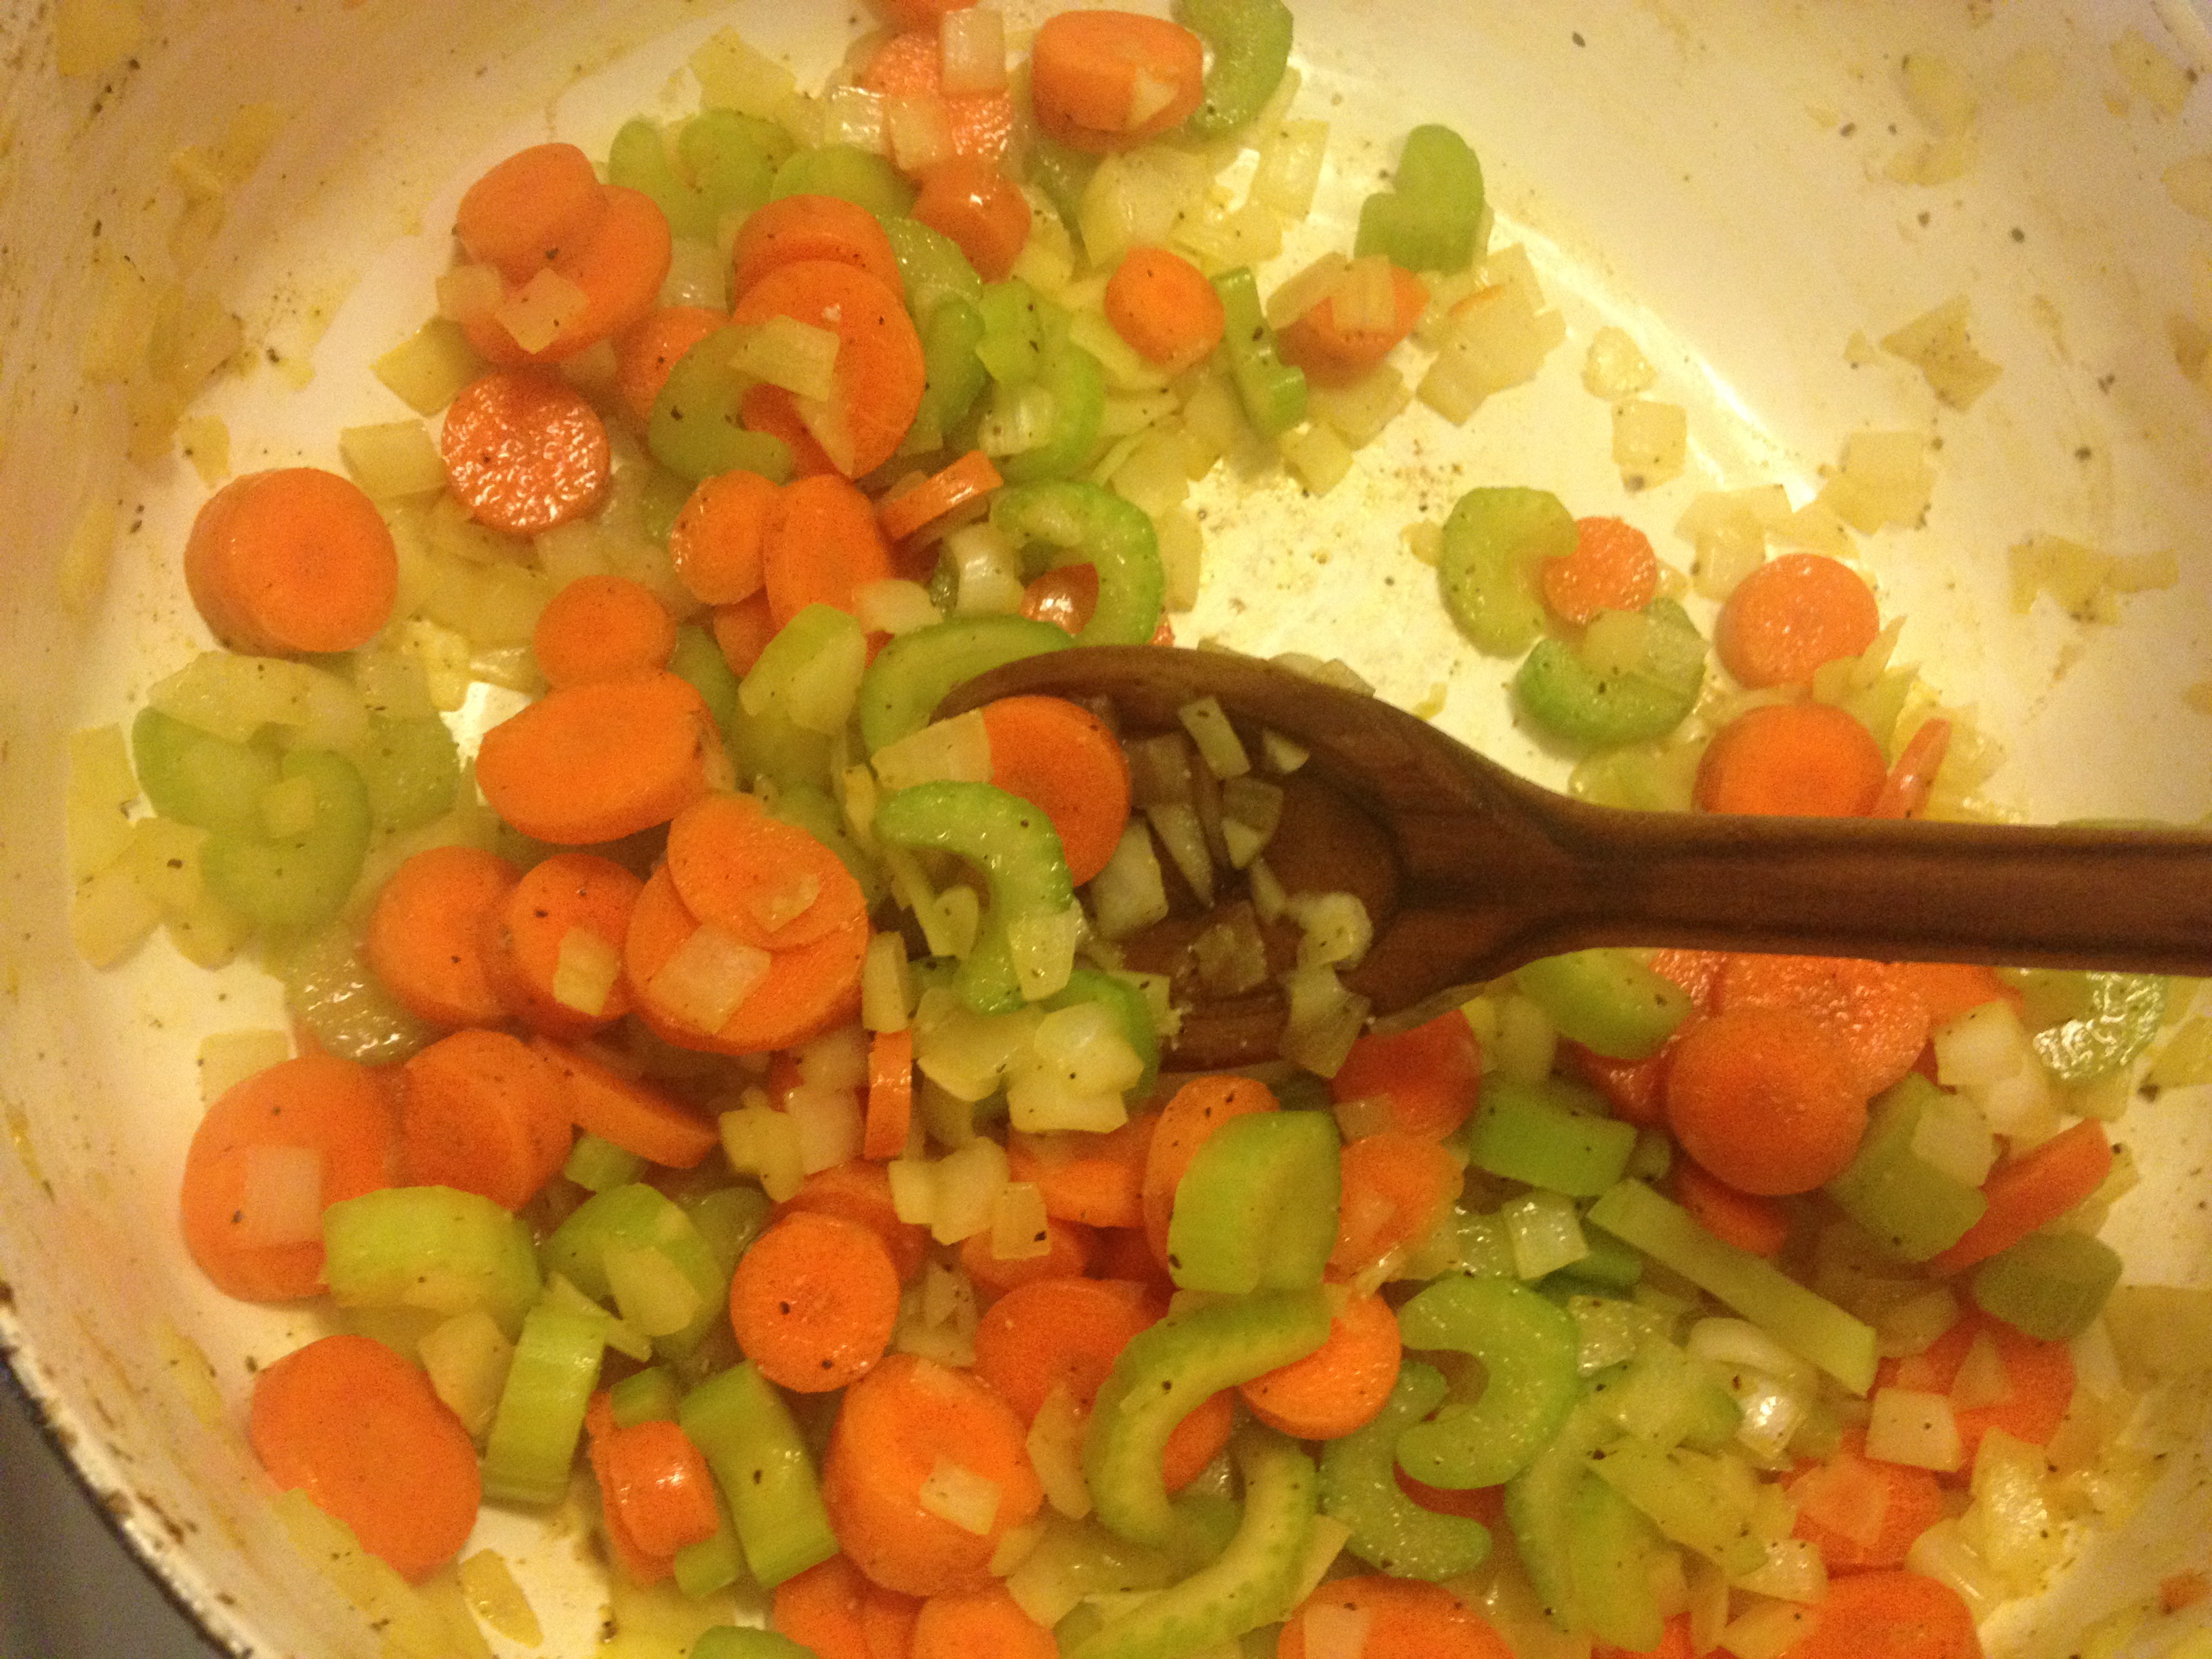
Next I go for fresh veggies, cut rough and rustic, and brown them in the same pan that was used for stock. This is by no means a one dish meal, but unless you want to transfer it to a pretty oven safe bowl for baking and serving, this whole meal from start to finish can be cooked in one pot. After the veggies are cooked I thicken the stock with a roux, add everything back to the pan along with some frozen peas, and top the whole thing with one giant buttermilk biscuit. I think that the gravy should be super thick to work well as a pot pie, so a roux is a perfect solution. With the amount of flour needed to thicken this recipe, you’d be able to taste the raw flour if you used the flour and water method.

chicken pot pie with buttermilk biscuit crust | Brooklyn Homemaker

Don’t be afraid to make your own biscuits from scratch. If you mess them up, they’re usually still pretty good; and once you master them, you’ll wonder what you were doing with your life before. If you don’t have a pastry blender you can use a food processor, or a fork, or even your hands. If you don’t have cream of tartar, don’t freak. It helps the biscuits rise and get super fluffy, but they’ll still be great without it. The buttermilk however is a must. Trust me.

chicken pot pie with buttermilk biscuit crust | Brooklyn Homemaker

By the way, this recipe is also PERFECT for leftover turkey. I have a hunch you might have some soon. Pull the meat off first and make your stock with the bones and any extra bits and pieces. Tada!

chicken pot pie with buttermilk biscuit crust | Brooklyn Homemaker

Chicken Pot Pie with Buttermilk Biscuit Crust

filling:
4-5 lbs of chicken pieces, skin-on, bone-in. *see note
salt & pepper
2 tablespoon olive oil, divided
1 bay leaf
2 onions, 1 large, 1 small
3 carrots
3 celery stalks
1 1/2 cups frozen peas
10 tablespoons butter
1 cup flour

biscuit crust:
3 cups flour
4 teaspoons baking powder
1 teaspoon salt
1 tablespoon sugar
3/4 teaspoon cream of tartar
12 tablespoons (1 1/2 sticks) butter
1 1/4 cups buttermilk

Make the filling:
Generously season your chicken with salt and pepper. In a large (at least 6 qt) heavy stockpot or dutch oven, heat 1 tablespoon olive oil over medium high heat. Add your chicken parts and brown them for about 5 minutes on each side. This doesn’t have to be perfect, it’s just to add flavor, but you can do this in stages if everything won’t fit. Roughly chop 1 small onion (skin on), 1 carrot, & 1 celery stalk (leaves on), and add to pot along with one bay leaf. Top with 8 cups of water, and cover the pot. Turn the heat down to medium and bring to a boil. Once the pot reaches a boil, turn the heat down again and let the pot simmer for at least an hour. If you have the time, another hour at a low simmer will only help build the flavor of your stock.

Remove pot from heat and let cool for 10 minutes or until you’re comfortable handling it. Using a large colander fitted inside a larger bowl, strain out the stock. You can use a strainer or sieve to skim the stock for anything that got through the colander. Measure out 6 cups of stock and keep any remaining for another use. Cover and set aside.

Let the chicken pieces cool for about 30 minutes or until you can handle them. You can use this time to chop the remaining vegetables for the next step. Remove the bones and skin from the chicken and discard along with boiled veggies & bay leaf. Pull the chicken into bite sized pieces and be careful to find and remove any small remaining bones. Place your cooked chicken in a bowl, cover and set aside.

Wipe your pot clean. You don’t have to wash it, just make sure there’s nothing in there you don’t want in the finished product. Dice the large onion, and cut your remaining carrots and celery into small pieces.  Heat remaining tablespoon of oil over medium high heat and add your chopped vegetables. Season with salt & pepper and cook until onions and celery are translucent and carrots are completely tender. Transfer to the bowl with the pulled chicken.

Back in your pot, melt the butter (you could also use some chicken fat skimmed from your stock) and whisk in flour. Cook until the flour just barely starts to brown. Slowly whisk in about half a cup of your stock, making sure there are no lumps of roux. Repeat twice more and then add remaining stock.  Whisk out any lumps and bring to a boil, whisking regularly. When the gravy is well thickened, remove from heat, taste and adjust your seasoning if necessary. Add the chicken, cooked vegetables & frozen peas.  Set aside.  If your pot is oven safe you can bake your pie in it, or you can transfer to an oven safe bowl for a nicer presentation.

Make the biscuit crust:
Preheat oven to 450 degrees.
In a large bowl sift together flour, baking powder, sugar, salt & cream of tartar. Using a pastry blender, cut the butter into the flour until it resembles coarse pea-sized crumbs. Form a well in the center of the bowl and in buttermilk. Use a fork to stir until just moistened. Do not over mix.

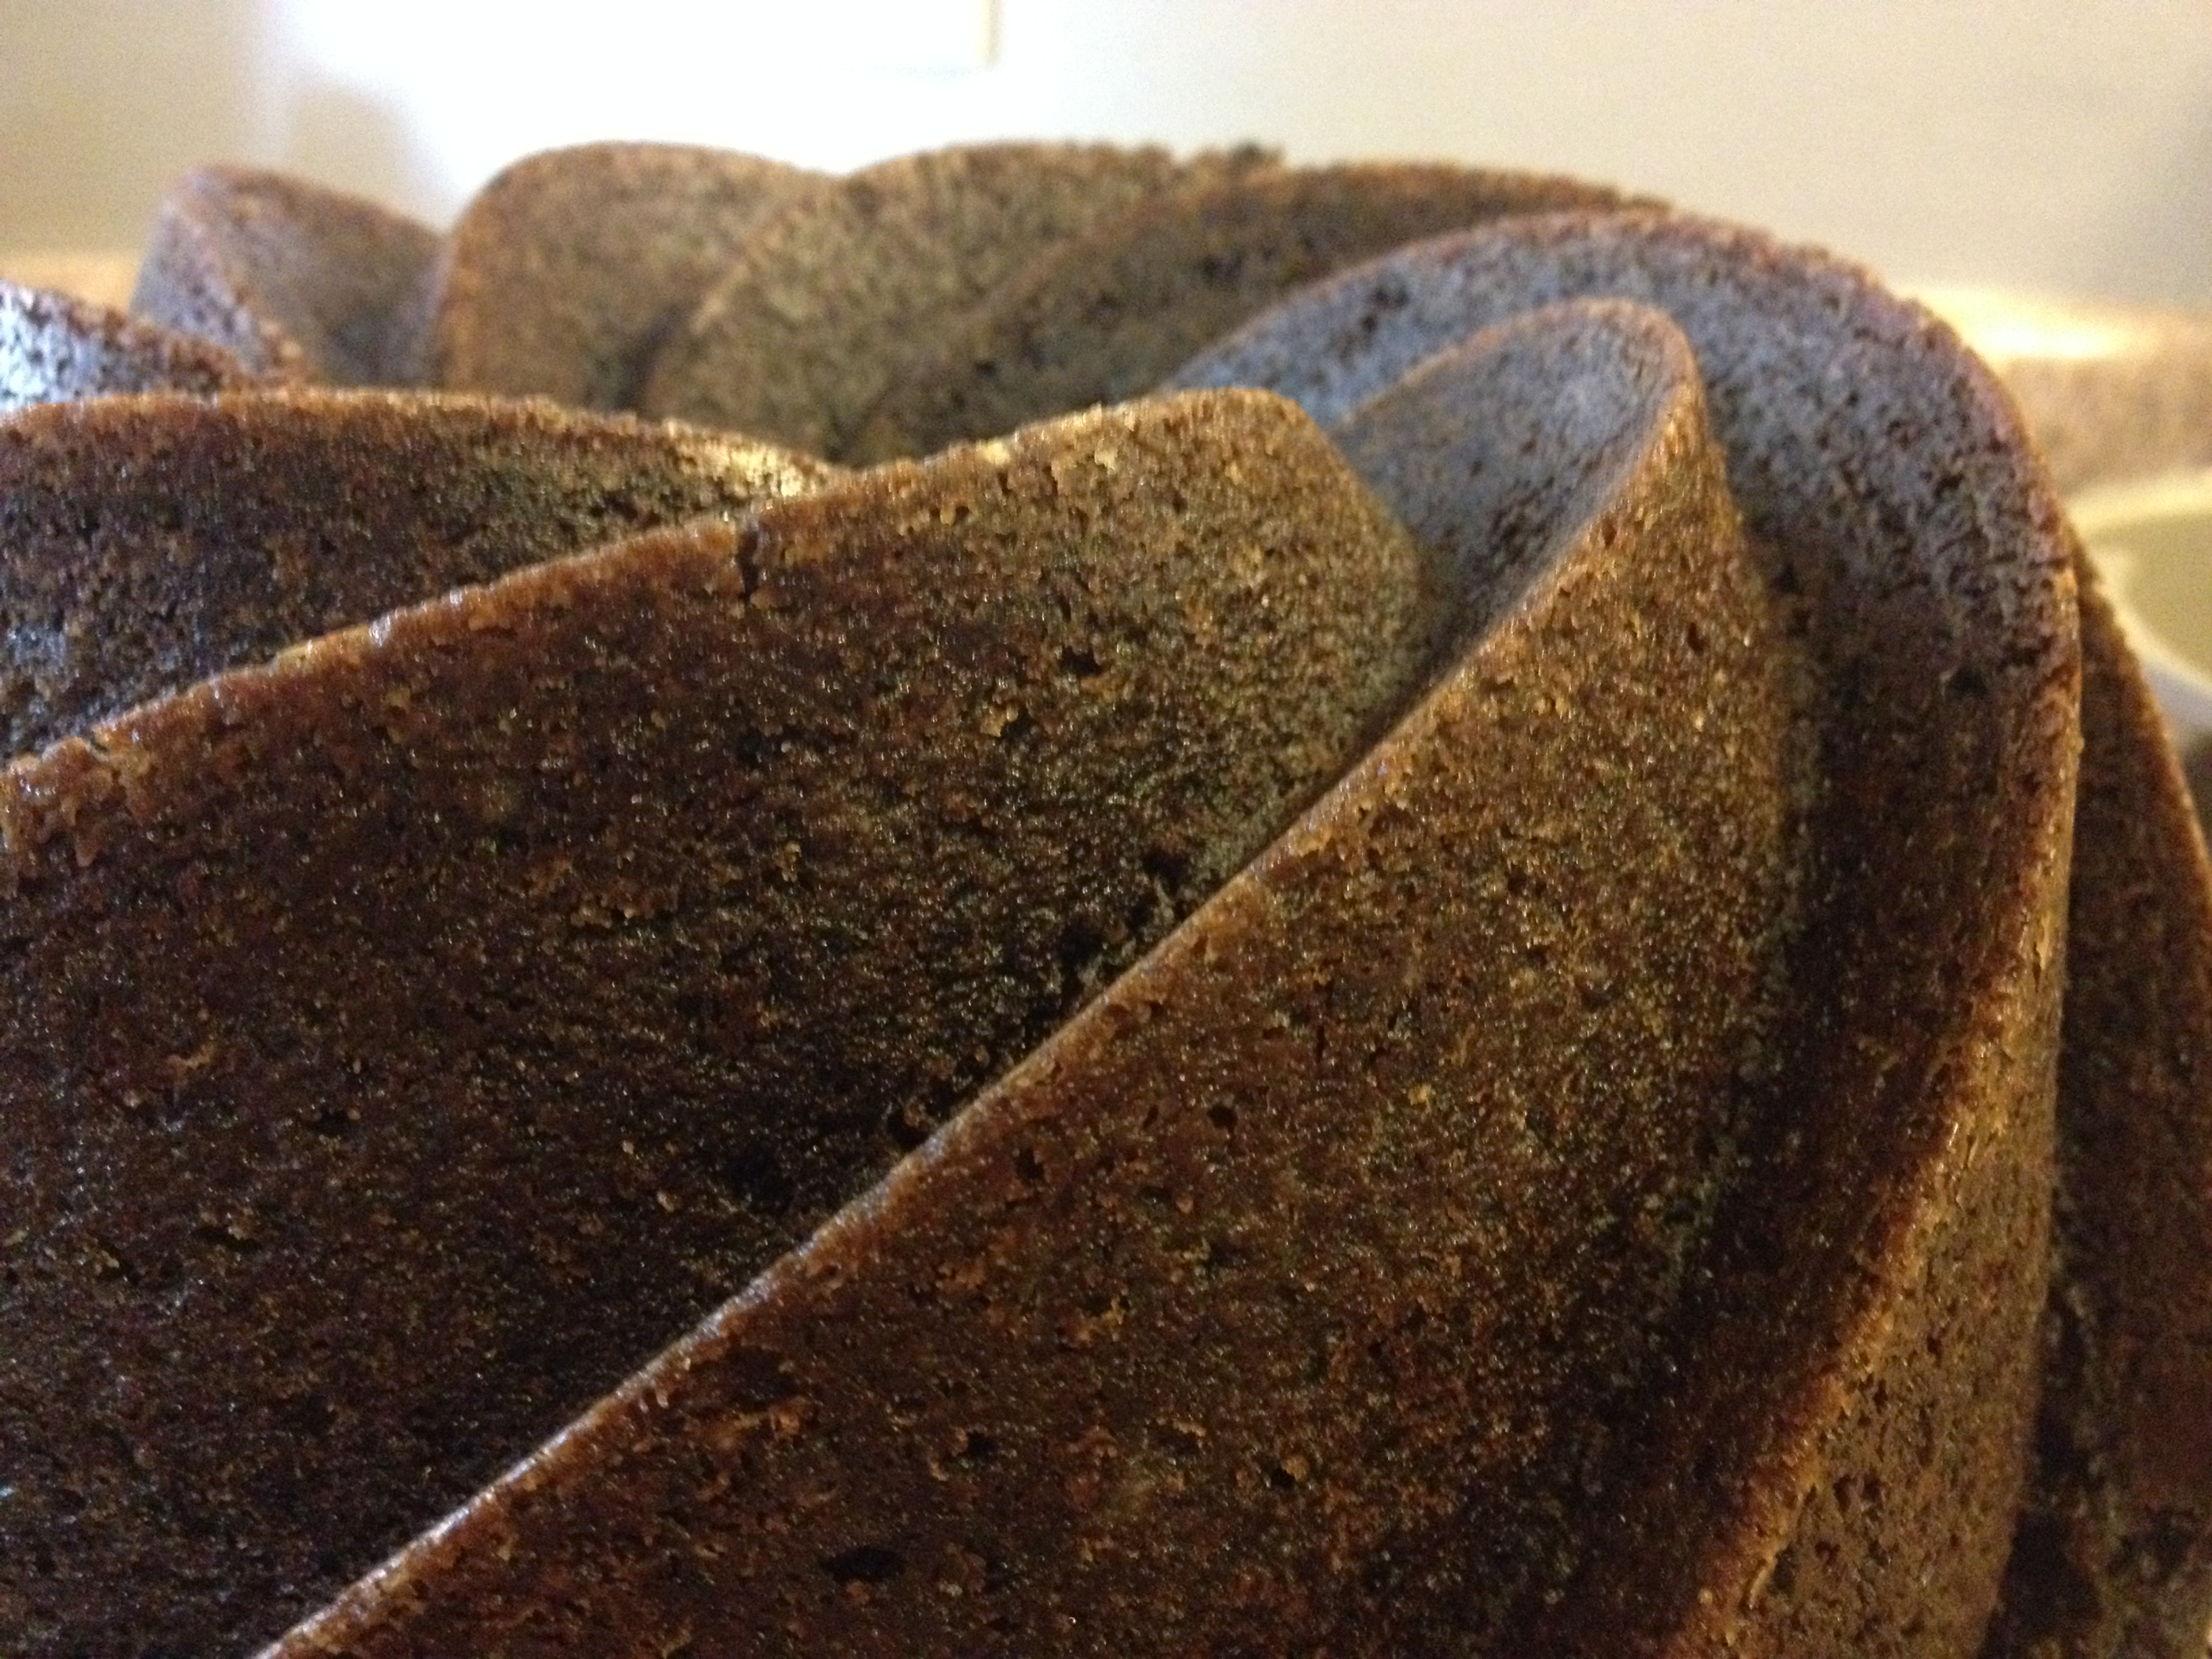
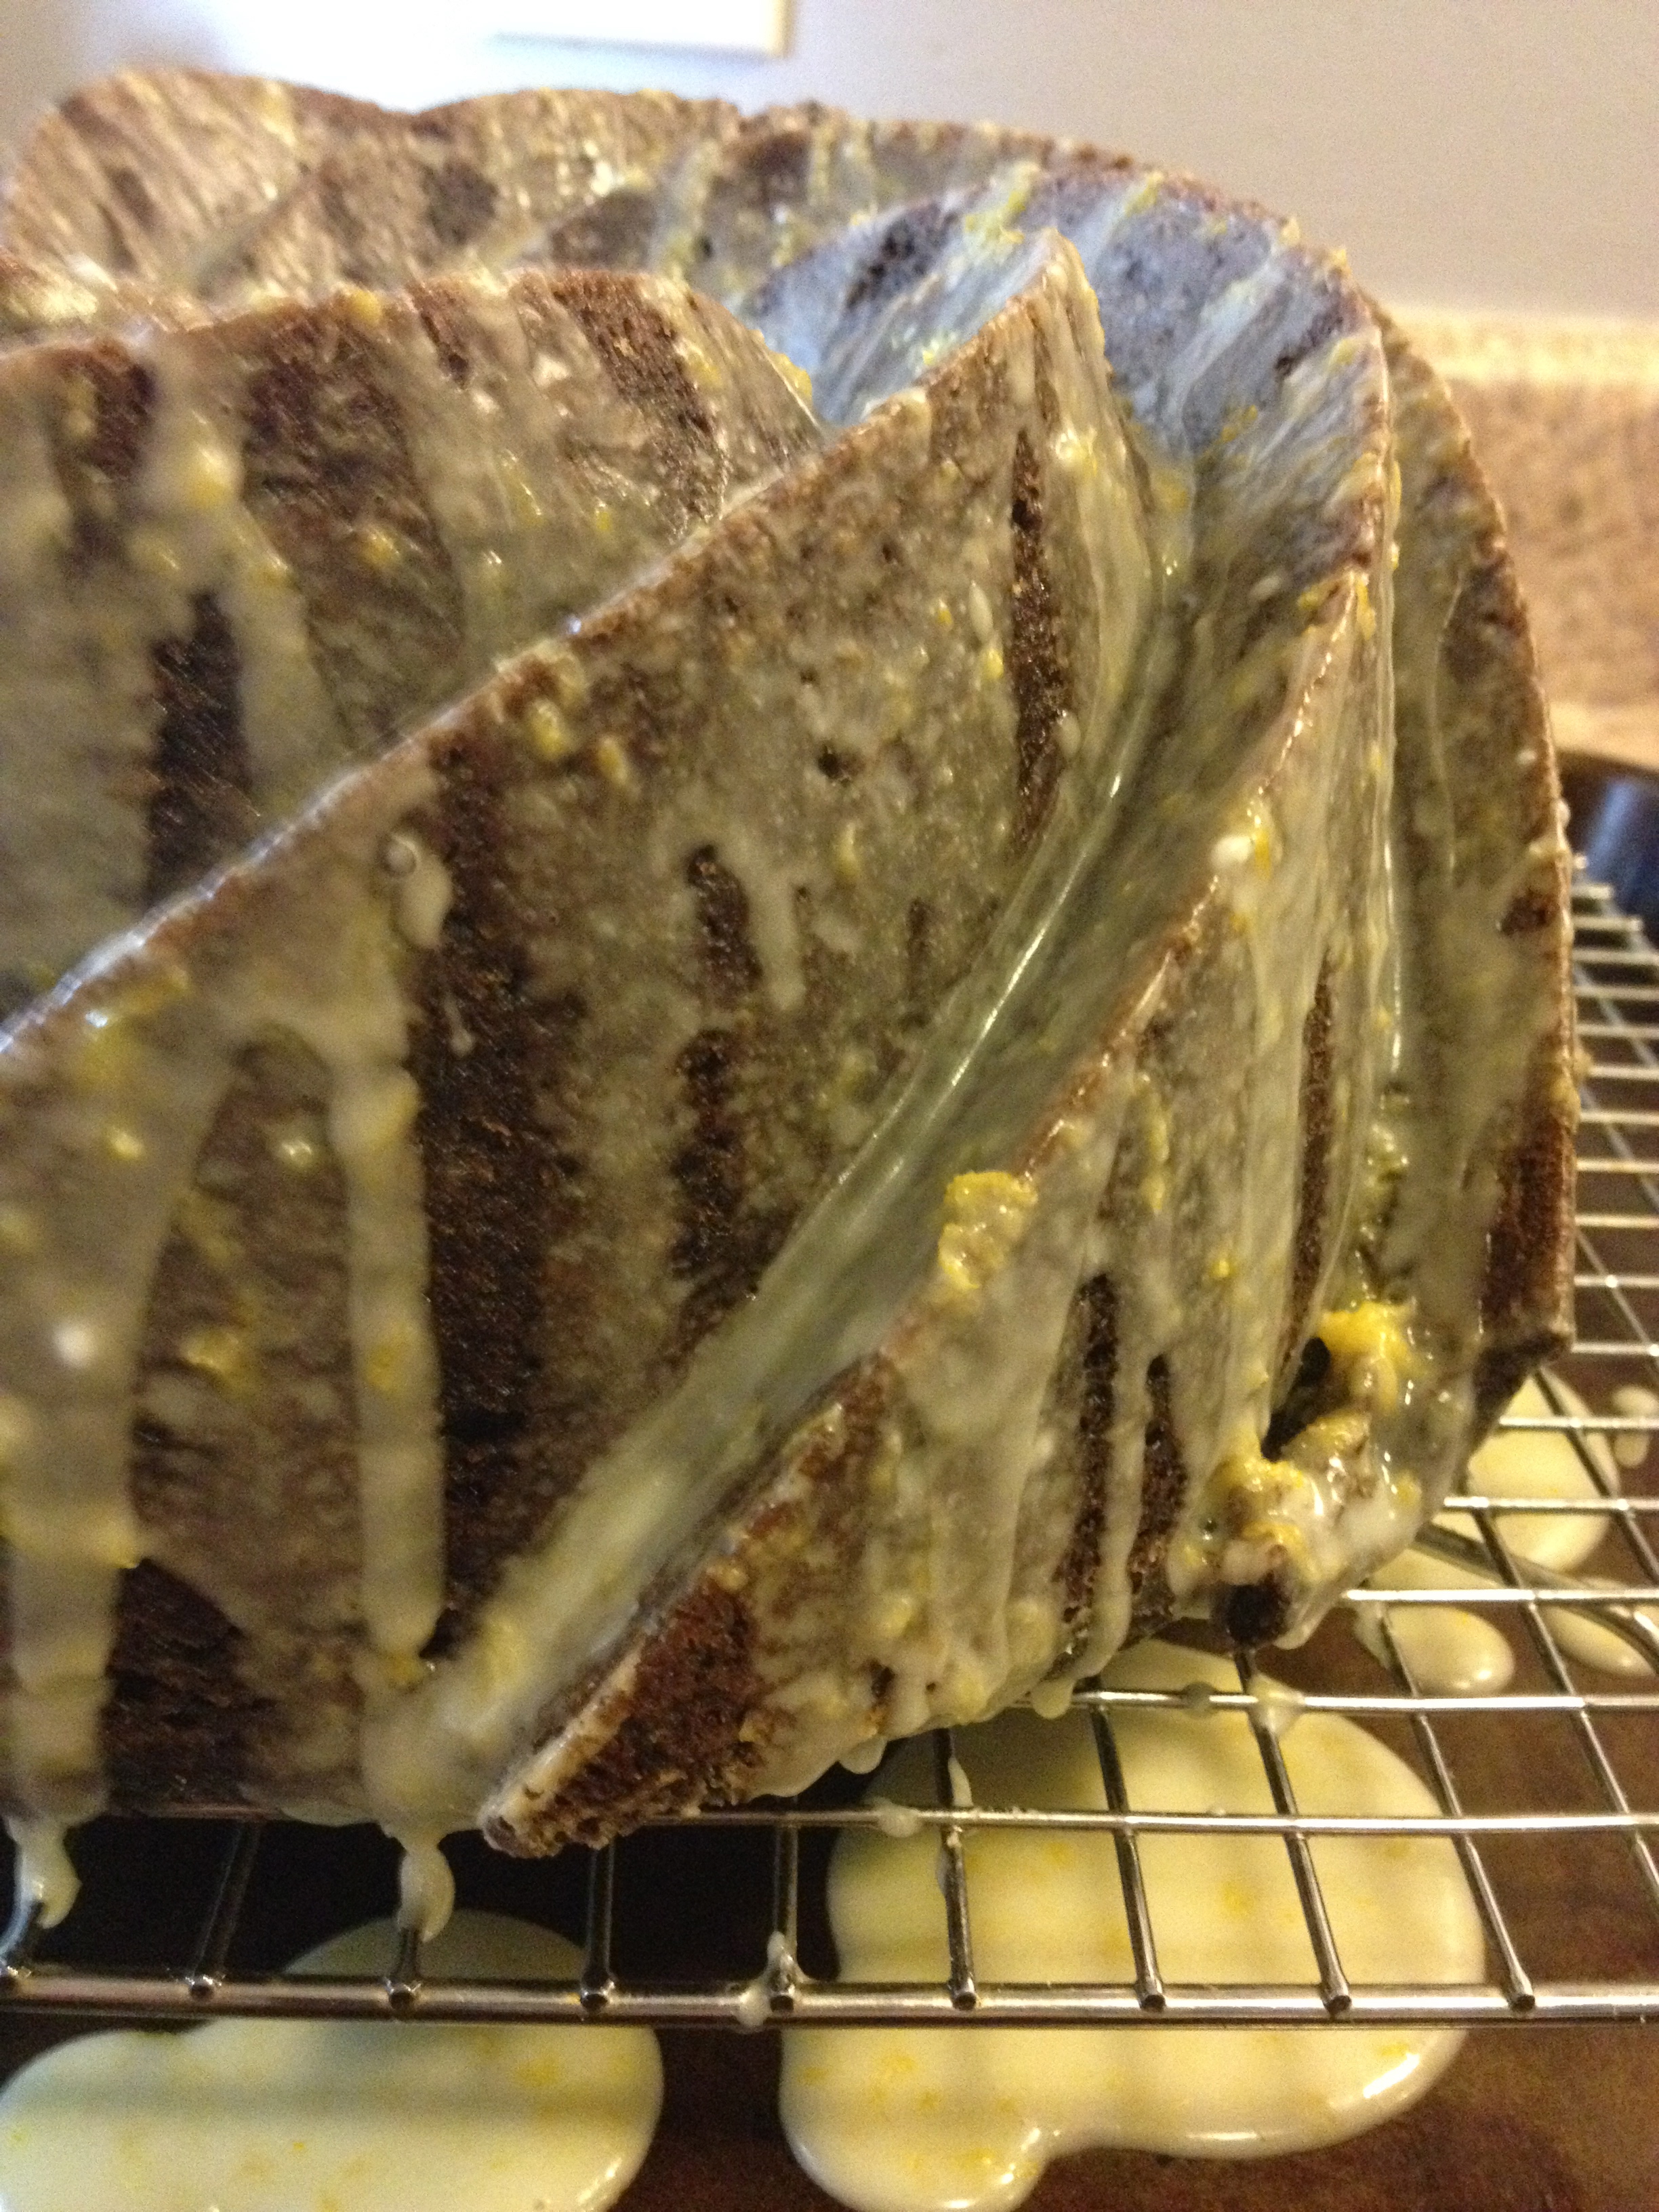
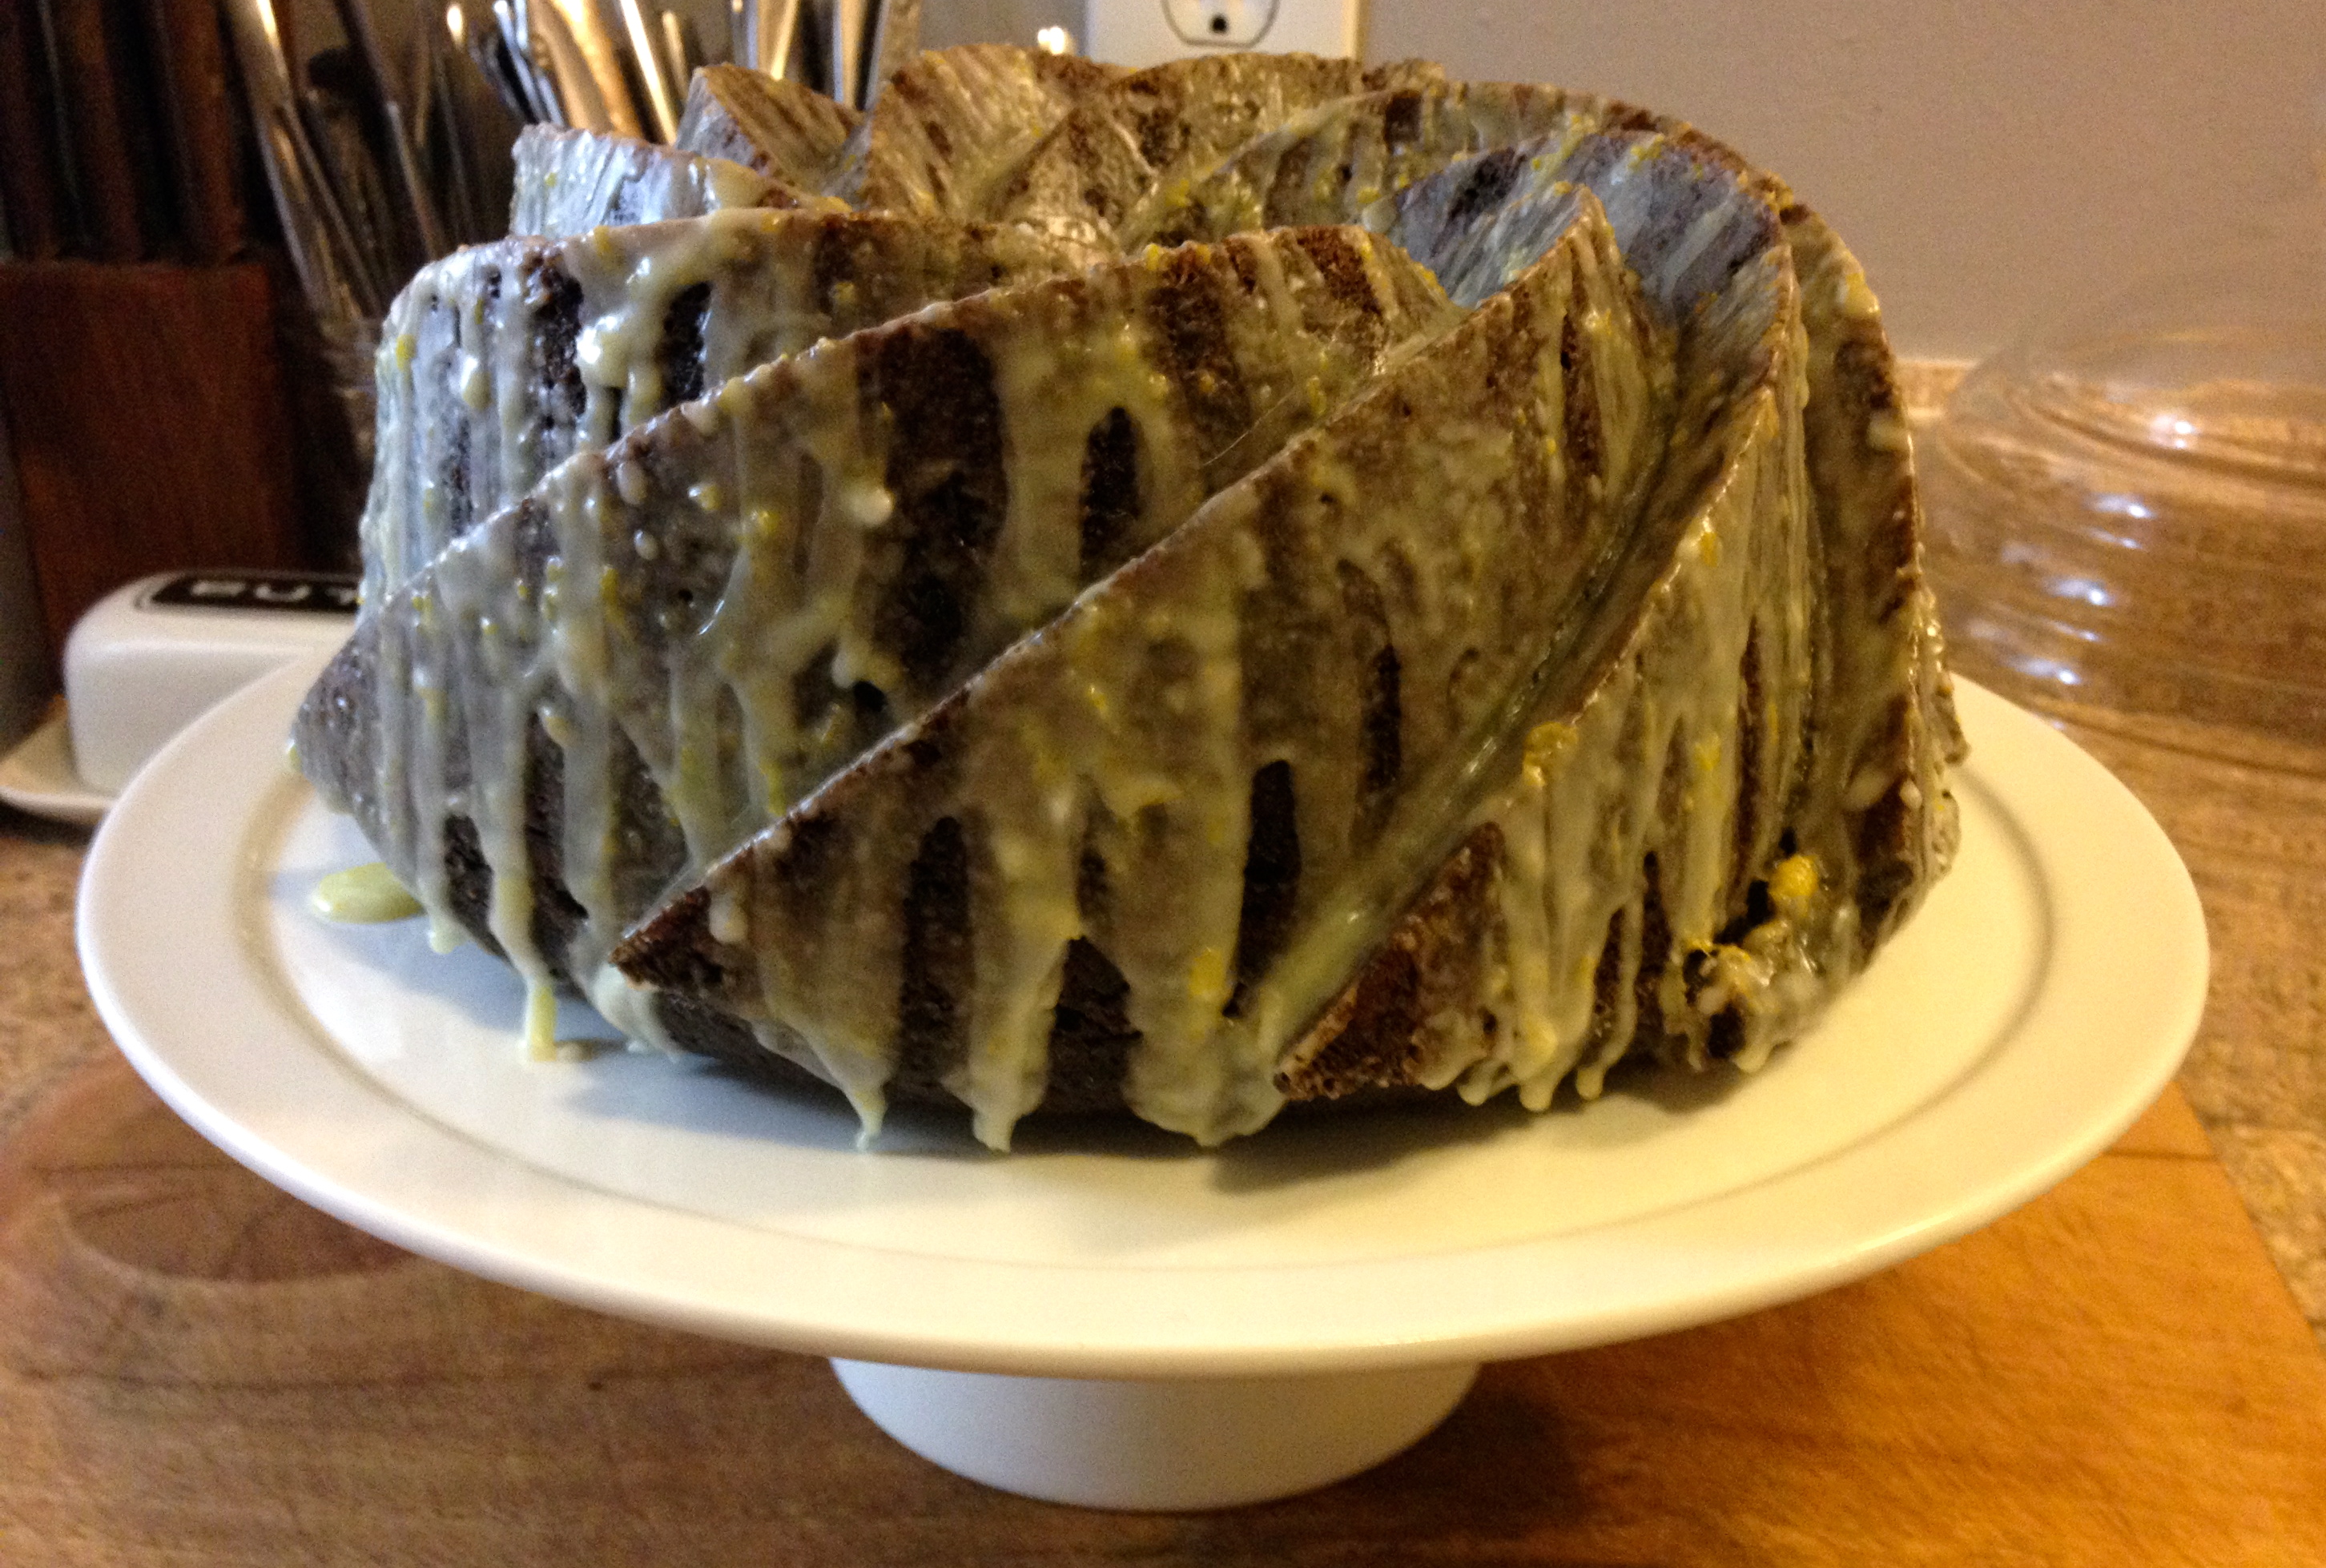
Turn the dough out onto a floured work surface and knead lightly 5 or 6 times, or until it just holds together. Pat or lightly roll dough out to 1/2 of an inch. Form a circle about the size of a your pot or bowl.  If you have any remaining dough you can cut it into biscuits and bake separately. You can double the biscuit recipe if you definitely want more on the side. Carefully transfer your biscuit round to the top of your filling and score it with an X in the center using a sharp knife. Bake for 25-30 minutes or until the crust is golden and the filling is bubbling. Any extra biscuits should be rolled to 3/4 of an inch and baked on a sheet pan for 10 to 12 minutes or until golden.

Remove from oven and allow it to cool for 15 minutes before serving. Serve with a nice chunk of crust.

*You can use whatever parts you like best, but I think an entire chicken, cut up into pieces, is perfect. If you like all white meat, use all breasts. If you can’t find an entire chicken cut up and don’t want to get into butchering, I think a mix of breasts and thighs has the best flavor.

Chocolate Orange Bundt Cake

I love a Bundt cake. I really do. Maybe it’s because they remind me of my childhood, or my grandmother, or maybe it’s because they have the ability to be elegant and un-fussy all at once. To me, baking a bundt is so much simpler than leveling, filling, crumb coating, refrigerating, icing, and decorating a layer cake, After baking a bundt you just let it cool, turn it out, and either pour on a glaze or dust with confectioner’s sugar. Despite their simplicity, they can still have the same impact when you want to wow your guests.

chocolate orange bundt cake | Brooklyn Homemaker

When I was coming up with the idea for this cake I knew I wanted a rich chocolatey base flavor, but wanted to add a little something extra to take it to another level. At first I was thinking about cherries or fresh berries, but I started thinking about those Terry’s chocolate oranges that were popular about a decade ago and I knew what I had to do. I scoured the internet for recipes but the best I could come up with were marble cakes with swirls of chocolate and orange flavored yellow cake, and that was definitely not what I was looking for. I wanted this to be a CHOCOLATE cake with a capital C-H-O-C-O-L-A-T-E, and for it to be completely perfumed with that sweet bright orange flavor.

chocolate orange bundt cake | Brooklyn Homemaker

I ended up deciding to take some liberties with a recipe for a super moist chocolate buttermilk cake. The original called for brewed coffee to enhance the chocolate flavor, but I decided to swap the coffee for fresh orange juice and zest, and add some more chocolate for good measure. I did keep the buttermilk though, which always gives anything that goes into the oven a beautiful flavor.

chocolate orange bundt cake | Brooklyn Homemaker

My only complaint about buttermilk is that I can never find it in a pint carton. In my area it only comes in quarts, and no matter how much baking I do, I always have a ton left over. Even though it’s delicious in baking, on its own, not so much. The only person I’ve ever known who actually drank buttermilk was my great-grandmother Nana. Her real name was Opal but I only knew her as Nana. She was from Little Rock by way of England, and she loved a tall glass of buttermilk. I tried some with her once when I was a kid and decided there was something VERY wrong with Nana’s pallet.  It wasn’t until later in life that I realized it’s potential to completely transform baked goods.
I used to use what I needed and let the rest hang out in the fridge, hoping I’d need it again before it went bad, but nine times out of ten I’d end up admitting defeat and tossing it a week or two later. About a year or two ago I read somewhere that buttermilk freezes well, and my life was forever changed.  You must be patient though, maybe even try to think ahead, and let the buttermilk thaw on its own. Frozen buttermilk takes on a really funky texture when microwaved.

chocolate orange bundt cake | Brooklyn Homemaker

I sometimes hear that people are afraid of bundt cakes, that they’re afraid they’ll fall apart or stick to the pan. My advice is to be very thorough and liberal when you butter and flour the pan, and to let the cake cool before you try to un-mold it. I use a paper towel when I’m buttering and go over the pan twice to make sure I haven’t missed any corners or detail. Don’t be afraid of using too much butter. Embrace the butter.

chocolate orange bundt cake | Brooklyn Homemaker

For this cake I used the Nordic Ware Heritage bundt pan. You can find it here if you’re interested. As if a traditional bundt pan weren’t impressive enough, this pan adds a modern twist to the classic shape. The lines of this cake just make it impossibly stylish.

chocolate orange bundt cake | Brooklyn Homemaker

Just look at those ridges. Look at those clean lines. So fancy. It looks like a craggy mountain when sliced.

chocolate orange bundt cake | Brooklyn Homemaker

I think the golden glaze with bright little specks of orange zest looks really beautiful against this almost black super-chocolatey cake. The recipe I adapted this cake from called for a thick bittersweet chocolate and sour cream glaze, but I thought a simple powdered sugar glaze would compliment and enhance the delicate citrus flavor of the cake instead of competing.

chocolate orange bundt cake | Brooklyn Homemaker

In case I forgot to mention it, this cake is GOOOOOD. It really delivers in the chocolate department, the oil and buttermilk keep it unbelievably moist, and the orange juice and zest add a sunny sweetness that permeates the cake. The smell alone is enough to get you going when you cut into it. Going. Going.

chocolate orange bundt cake | Brooklyn Homemaker

Gone.

chocolate orange bundt cake | Brooklyn Homemaker

Chocolate Orange Bundt Cake

adapted from Joy the Baker

For the Cake:
1 1/4 cups orange juice
2 Tablespoons orange zest
3/4 cup Dutch process cocoa powder
2 1/4 cups sugar
1 1/4 teaspoons kosher salt
2 1/2 teaspoons baking soda
2 whole eggs
1 egg yolk
1 1/4 cups buttermilk
1 cup plus 2 Tablespoon canola oil
1 1/2 teaspoons vanilla extract
2 1/2 cups, plus 2 Tablespoons all-purpose flour, sifted
1 cup mini chocolate chips or finely chopped bittersweet chocolate

For the Glaze:
2 cups confectioners’ sugar
1/4 cup fresh orange juice
2 tablespoons orange zest

Place an oven rack in the center of the oven and preheat to 350 degrees F.
Liberally butter and flour a 10 to 12 cup Bundt pan and set aside.

make the cake batter:
Whisk orange juice and cocoa powder in a small saucepan and bring to a boil, whisking frequently. Remove from heat, whisk in zest, and let come to room temperature.

In the bowl of a stand mixer with a whisk attachment, mix together sugar, salt, baking soda, eggs and egg yolk on low for about 1 minute. Add the buttermilk, oil and vanilla extract and mix on low again for another minute.

Add the flour and mix on medium speed for 2 minutes.  Add the cooled cocoa mixture and mix on medium speed for 3 minutes.  Mix in chocolate chips on low. The batter will be very loose.  Pour into the prepared cake pan and bake for 55-65, or until a cake tester or toothpick inserted in the cake comes out clean.

Let the cake cool completely in the pan and then invert onto a cooling rack.

make the orange glaze:
Add confectioner’s sugar and zest to orange juice and whisk until you can’t see any lumps. I like to do this in a glass measuring cup with a spout so you can pour the glaze easily.

Place a baking sheet under the cooling rack your cake is on. Pour the glaze over the Bundt cake, covering it completely. If you have leftover glaze, go back in for another coat.  Transfer to a cake plate or platter by gently sliding the cake off the rack, use a thin spatula to help lift it if necessary. Leave at room temperature until ready to serve. The glaze will harden and form a sort of candy shell and keep the cake inside crazy moist.

Home Style Pizza with Shaved Brussels Sprouts and Capicola

When I was growing up there were two different categories of pizza. There was the kind you got at a Pizzeria, which in upstate New York usually meant New York style or something similar but slightly thicker, and then there was pizza at Grandma’s house.

Homestyle pizza with shaved brussels sprouts and capicola | Brooklyn Homemaker
Any meal at Grandma’s house was special, and when I was growing up I considered my grandmother to be the worlds greatest cook. But then, what kid didn’t? Pizza night at Grandma’s was always especially exciting because dinner was served on paper towels so we didn’t have set the table, and we got to drink Pepsi on ice instead of milk with dinner. Grandma’s pizza was thick and bready, topped with bagged grated mozzarella, and Hormel pepperoni or fresh crumbles of sweet Italian sausage. She baked it in a jelly roll pan with dried oregano and lots of sauce.

Homestyle pizza with shaved brussels sprouts and capicola | Brooklyn Homemaker

This type of thick crusty pizza goes by many names, Sicilian style, Detroit style, even Grandma style, but I just call it home style. As I grew up and started cooking myself, I experimented with pizza a lot. Over time I realized that I always enjoy New York style pizza from a pizzeria better than when I make it myself, but nothing beats a bready square slice of homestyle pizza to make me feel relaxed and take me back to my childhood.

Homestyle pizza with shaved brussels sprouts and capicola | Brooklyn Homemaker
Since then my tastes have changed a bit, and while I sill love my grandmother’s pizza, I do things quite a bit differently from the way she does. I prefer a whole wheat crust now. Since the pizza is so much like focaccia I go all out and make it as bready as possible. The toppings usually change but I always load the pizza with fresh veggies and freshly grated mozzarella. One of my favorite things to do is to slice cherry or grape tomatoes in half lengthwise and put them, cut side up, on top of everything else before sending the pizza to the oven. The tomatoes get slightly browned and caramelized and go soft and warm in the middle. There’s just something about that that gets me going.

Homestyle pizza with shaved brussels sprouts and capicola | Brooklyn Homemaker

This particular pizza was inspired by a pizza I had a Roberta’s in Bushwick a few years ago. Their pizza was thin, crispy, and charred on the bottom, with shaved Brussels sprouts and a German cured ham called Speck. I kept the shaved Brussels sprouts but subbed the Speck for Capicola. Prosciutto works great here too. I’ve also added my cherry tomatoes, some thinly sliced red onion for spice, and make an easy garlic butter and oil spread instead of red sauce.

Homestyle pizza with shaved brussels sprouts and capicola | Brooklyn Homemaker

Home Style Pizza with Shaved Brussels Sprouts and Capicola

Whole Wheat Pizza Dough: (adapted from Martha Stewart)
1 1/2 cups warm water
2 packets active dry yeast
1/4 cup olive oil, plus more for bowl
2 tablespoons sugar
2 teaspoons coarse Kosher salt
2 cups all-purpose flour, plus more for kneading
2 cups whole-wheat flour

Garlic Butter and Oil Spread:
2 tablespoons butter
2 tablespoons olive oil
2 cloves garlic
1/4 teaspoon red pepper flakes (optional)
1/8 teaspoon ground pepper
1/8 teaspoon coarse kosher salt
1/4 teaspoon dried oregano

Toppings:
1/2 a pint of grape tomatoes cut in half lengthwise
1 very small red onion cut into very thin strips
5 or 6  large Brussels sprouts, shaved (I like to cut the bottoms off and shave them on a mandolin)
12 oz of grated mozzarella cheese
2 to 3 oz of thinly sliced capicola or prosciutto, torn into small strips

Whole Wheat Pizza Dough:
Place water in a large bowl; sprinkle with yeast. Let stand until foamy, about 5 minutes. Brush another large bowl with oil.

In bowl with yeast, whisk sugar, oil, and salt. Stir in flours with a wooden spoon until a sticky dough forms. Transfer to oiled bowl; brush top of dough with oil. Cover bowl with plastic wrap; let stand in a warm spot until dough has doubled in size, about 1 hour. The dough can be divided into two balls for a thin crust pizza, or will make one homestyle pizza. The dough also freezes well. Use the time while the dough is rising to make your garlic spread and get your toppings ready.

Preheat oven to 450° F. Turn dough out onto a well floured surface and knead until smooth, about 15 or 20 seconds. Allow the dough to rest for 10 minutes.

Sprinkle a 17×11 jelly roll pan with corn meal or flour and stretch the dough to the edges of the pan. Press the pizza into the edges to form a thin crust around the outside of the pizza.

Garlic Butter and Oil Spread:
In a small bowl melt butter in microwave with olive oil. Finely mince or crush the garlic and mix into the warm butter and oil mixture with all remaining ingredients. I try to make this while the pizza dough is rising, or at least 20 minutes or so ahead so that the oil can take on all the other flavors.

Assemble the pizza:
Brush the dough with the garlic oil spread, leaving the edge of the crust dry. Sprinkle about 3/4 of the cheese over the pizza, evenly layer the remaining toppings, and finish with the last of the cheese. Bake on the top rack of the oven for 12 to 15 minutes, or until the crust is crisp and the cheese and toppings are just beginning to brown. With a spatula, carefully slide the pizza out of the pan onto a cutting board and divide into 12 slices.

Aunt Sassy Cake

Well hello there! Welcome to Brooklyn Homemaker!
I’m Tux. I live in Bushwick, Brooklyn with my husband Russell and our two miniature schnauzers, Doris and Betty. Nothing makes me happier than cooking, baking, and making our home a beautiful comfortable place.

Over the weekend we hosted a brunch for our friends who were recently engaged to discuss wedding planning, and see if they wanted to take any of our wedding supplies off our hands and free ups some space in our guest room. After brunch and a few cocktails I sliced into a cake I’d baked and our friends DEMANDED that I start blogging. They would not take no for an answer and all my excuses and what if’s were ignored and met with more insistence. This is not the first time I’ve been told I should blog, and It’s not the first time I’ve considered it. I’m really good at talking myself out of things in the name of being “realistic”, but my friends helped me break through that this weekend. I don’t know if it was their enthusiasm, the unearthly delicious cake, or the multiple cocktails consumed over the course of a few hours, but here I am.
As much as I love cooking, especially baking, turning a bag of groceries into a meal is not my only interest. Since blogging tends to be an exercise in self-indulgence, I’ve decided that I’m not going to limit the subject of Brooklyn Homemaker to any one subject. Along with cooking, I also love interior design, gardening, furniture restoration, event planning and party hosting, and a number of other things that manifest themselves in my life and home on a daily basis. I’d love nothing more than to share all of those interests with you here, so please, keep coming back and seeing what I’m up to!

So here I am, writing my first official post on Brooklyn Homemaker.
After months of drooling over photos of Baked’s Aunt Sassy Cake, I decided to go for it. It was clear from the recipe that this cake was to be saved for a special occasion, and from the day this cookbook came into my home I would look a this recipe and think, one day. This past weekend, one day finally came and I have to say that this 3 layer pistachio cake with honey buttercream was worth the wait.

Aunt Sassy Cake | Pistachio cake with honey buttercream | Brooklyn Homemaker

This cake is filled with ground pistachios but somehow manages to be heavenly light and fluffy thanks to the addition of whipped egg whites that are folded in at the end. Be careful not to over mix the batter after they’re combined or you can squeeze out some of that airy lightness. The fluffiness of this cake really takes it to an almost ethereal place, so you want to make sure keep it as light as possible.

Aunt Sassy Cake | Pistachio cake with honey buttercream | Brooklyn Homemaker

Full disclosure: I had a little bit of trouble getting my cakes out of the pans. I have pre-cut parchment rounds that fit 9 inch pans, but had to cut my own for the 8 inchers and they came out a little too small and they didn’t reach the edges of the pans. Since this cake is so fluffy and moist it wants to stick to the pans, so I’d suggest taking the extra time to make sure your parchment fits properly so you can get it out. They came out mostly fine but one of the layers got a little bit stuck and I had to do some quick cake surgery to get it back together. Once the crumb coat went on the cake everything was hidden.  I firmly believe that beyond keeping a cake from drying out, icing helps hide a multitude of sins. That was certainly true with this cake, and when the cake was sliced there was no telling that anything had happened.
I brought my icing opinions up during brunch and may have inadvertently made the bride-to-be think twice about her dream for a naked wedding cake. I think naked cakes can be gorgeous, but if the cake layers are not completely perfect the cake will look messy, and if the cake isn’t super moist it can dry out since it’s not encased in layers of fat and sugar.

Aunt Sassy Cake | Pistachio cake with honey buttercream | Brooklyn Homemaker

Speaking of layers of fat and sugar, the honey buttercream icing on this cake is unbelievable. This is not like any icing I’ve ever made before, but I will definitely be making it again. This is a cooked icing with an end result similar to a meringue buttercream, stable and thick, but at the same time creamy and smooth. Instead of cooked egg whites though, this frosting uses flour for thickening. It’s a similar concept to the old school Ermine icing traditional for red velvet cake, but instead of just boiling the flour and milk, the sugar also gets boiled in this recipe. This means that the sugar completely dissolves and begins to cook so that gluten isn’t the only thing thickening this icing. Once the boiled milk mixture is whipped cool, unsalted butter is whipped in until silky smooth. Last, a bit of honey goes in with vanilla to add some depth and an almost floral quality.

Aunt Sassy Cake | Pistachio cake with honey buttercream | Brooklyn Homemaker

Obviously I took these pictures with my iPhone. I know they’re not great, but they’re the only evidence I have of the amazing Aunt Sassy Cake. Now that I’m going to start blogging I’m looking into buying a real camera, but I need to weigh my options and see what I can afford and what would work best for my needs. I live in a railroad apartment with no window and no natural light in my kitchen, so that can be tough. I also have a benign tremor in my hands that means I have a very slight but rapid shake that makes getting a camera to focus challenging. Does anyone out there have any suggestions?

Aunt Sassy Cake

  • Servings: makes one 8 inch 3 layer cake, serves 12-16ish
  • Print
Adapted, just barely, from Baked Explorations, page 165

Cake:
1 cup shelled pistachios (plus 1/3 cup for decorating)
2 1/2 cups cake flour
3/4 cup all-purpose flour
1 tablespoon baking powder
1 teaspoon baking soda
3/4 teaspoon salt
1 cup (2 sticks) unsalted butter, softened
1 3/4 cups sugar
1 tablespoon pure vanilla extract
1 large egg
3 large egg whites, at room temperature
1 1/2 cups ice-cold water
1/4 tsp cream of tartar

Honey Vanilla Buttercream:
1 1/2 cups sugar
1/3 cup all-purpose flour
1 1/2 cups whole milk
1/3 cup heavy cream
1 1/2 cups (3 sticks) unsalted butter, soft but cool, cut into small pieces
1 teaspoon pure vanilla extract
3 tablespoon honey

Make the cake:
Preheat the oven to 325° F. Butter three 8-inch round cake pans, line the bottoms with parchment rounds, butter the parchment, and lightly dust with flour. Knock out any excess flour.

Pulse the pistachios in a food processor until they are coarsely chopped. Reserve about 2 tablespoons of coarsely chopped pistachios in a large bowl. Process the rest of the pistachios until they are almost powdery. Stir the pistachio powder in with the reserved coarse pistachios; add the flours, baking powder, baking soda and salt; and whisk well to combine.

In the bowl of a stand mixer fitted with the paddle attachment, beat the butter on medium speed until light and creamy, about 3 or 4 minutes. Add the sugar and vanilla and beat until fluffy, about 3 minutes. Scrape down the sides of the bowl, add the whole egg, and beat until just combined. Turn the mixture to low.

In a measuring cup, measure out 1 1/2 cups ice water. Add the flour mixture to the mixer in three parts, alternating with the ice water, beginning and ending with the flour mixture. For each addition, turn the mixer to low to add ingredients, then up to medium speed for a few seconds until incorporated. Scrape down the bowl, then mix on low-speed for a few more seconds.

In a medium bowl, whisk the egg whites and cream of tartar until soft peaks form (I promise you can handle doing this by hand. Don’t be intimidated, it should only take 5 minutes max, probably less). Do not over beat. Gently fold the egg whites into the batter.

Divide the batter among the prepared pans and smooth the tops. Bake for 40-45 minutes, rotating the pans halfway through the baking time, until a toothpick or cake tester inserted into the center of the cakes comes out clean. Transfer cakes to a wire rack and let cool for at 20 to 30 minutes. Line your cooling rack with parchment and turn the cakes out onto the rack. Let cool completely. Remove the parchment rounds.

Make the honey vanilla buttercream:
In a medium sized heavy-bottomed saucepan, whisk the sugar and flour together. Add milk and cream and cook over medium heat whisking regularly, until the mixture comes to a boil and thickens, about 10 to 15 minutes.

Transfer the mixture to the bowl of a standing mixer with paddle attachment. Beat on high until cool (this should take about 10 or 15 minutes of mixing). You may want to cover the mixer with a towel to keep the mixture from splashing your kitchen. Add the softened butter and mix until thoroughly incorporated. Increase the speed to medium-high and beat until frosting is light and fluffy, 1 to 2 minutes.

Add the vanilla and honey and mix until combined. If the icing is too soft, you can put the bowl in the refrigerator to chill slightly, then beat again until it is proper consistency. If the icing is too firm, you can set the bowl over a pot of very gently simmering water and beat with a wooden spoon until it is the proper consistency.

Assemble the cake:
Place one cake layer on a serving platter. If necessary, trim the top with a cake leveler or sharp serrated knife to create a flat surface. Evenly spread just over a cup of icing on top. Add the next layer, trim and frost it with the same amount of icing, then add the third layer. Spread a very thin layer of frosting over the sides and top of the cake and put it in the refrigerator for about 30 minutes to firm up. (This is known as the crumb coating and will help keep loose cake crumbs from showing in the final layer of icing.) Spread the sides and top of the cake with the remaining icing. Garnish the cake with crushed pistachios and refrigerate it for 15 minutes to it firm up before serving. If you want to refrigerate it longer before serving, take it out to come up to room temperature at least an hour or two before serving.

This cake will keep well in a cake saver at room temperature for up to 3 days, if the weather is not too hot or humid. Otherwise, put the cake saver in the refrigerator for up to 3 days.