cake

Red Velvet Cake with Ermine Icing

Okay so here’s the thing about red velvet… I don’t get it.

I used to work at a cupcake shop for a while, and our red velvet cupcakes were probably the best selling item on the menu. People went nuts for those cupcakes. Every day just as many red velvet cupcakes were baked as were all the other flavors combined, and on most days the red velvets were sold out before anything else. I thought most of the cupcakes there were phenomenal, but the red velvet was probably my least favorite. It was kind of bland, with no distinct flavor beside the cream cheese icing swirled on top. Not enough vanilla to be vanilla cake, so little cocoa flavor that I’m not convinced any was actually used. There were plenty of tastier and more interesting flavors to choose from, and I could never figure out why people always went for the red velvets. Are people really just into red velvet because it’s red? There has to be more to it than just the color right?

red velvet cake with ermine icing | Brooklyn Homemaker

Curiosity got the best of me and I started doing some digging on the internet. It turns out that the history of red velvet, the roots of it’s popularity and the original recipe, are pretty tough to nail down. There are almost as many stories about the origins of red velvet as there are recipes for “real” red velvet. “Real” red velvet means very different things to different people.

I’d always heard that red velvet cake originally turned “red” because of a chemical reaction between acid in buttermilk or vinegar and natural cocoa powder. This wouldn’t actually turn a cake RED, but it would, supposedly, produce a very slight reddish hue in a cocoa cake. The same is supposed to be true of the origins of devil’s food cake, but with a lot more cocoa. This sounded believable-ish to me, so in my mind the real “original” red velvet cake was supposed to be deep reddish brown, with a slight cocoa flavor, and of course, topped with cream cheese icing.

red velvet cake with ermine icing | Brooklyn Homemaker

Once I started digging though, I started running into some problems. First there were the various origin stories. Some people think the cake was invented in Canada by the wife of a wealthy department store president, others convinced that this quintessential southern cake was invented in the south, and others still are certain that it was invented at the Waldorf Astoria Hotel in New York City.

Then there were the recipes. Everyone believes that their red velvet recipe is the one true way it should be done. Google “real red velvet” and you’re going to come up with some wildly varied recipes. There are also a lot of “rules” about red velvet out there, many of them conflicting with the rules of the next guy. Most of the rules dictate something about the color, flavor, or icing of this iconic cake.

red velvet cake with ermine icing | Brooklyn Homemaker

According to the internets, the color of red velvet should always come from artificial color. If you don’t pour in the red food color, it’s not red velvet. Also, red velvet cake should never contain artificial color. If you’re using red food color, you’re doing it wrong. The color should come from cocoa powder and buttermilk, or vinegar, or both. The truth is that the red in red velvet cake needs a boost, but not from food color. Along with the cocoa and acid reaction, an additional boost of red should come from red wine. Actually it should come from beet juice.

Red velvet cake should have a very specific flavor profile that should not be messed with. It seems that red velvet cake is supposed to be a mildly chocolatey cocoa cake, since the red color comes mostly from natural cocoa’s reaction with acidic ingredients. Also, red velvet cake should have only a very slight, almost indistinguishable, cocoa flavor, since the color of this cake should be the star and too much cocoa would muddy the color. At the same time, recipes for red velvet cake should never contain any cocoa powder. Red velvet cake is a bright red buttermilk cake and cocoa would ruin both the color and flavor of this beloved cake.

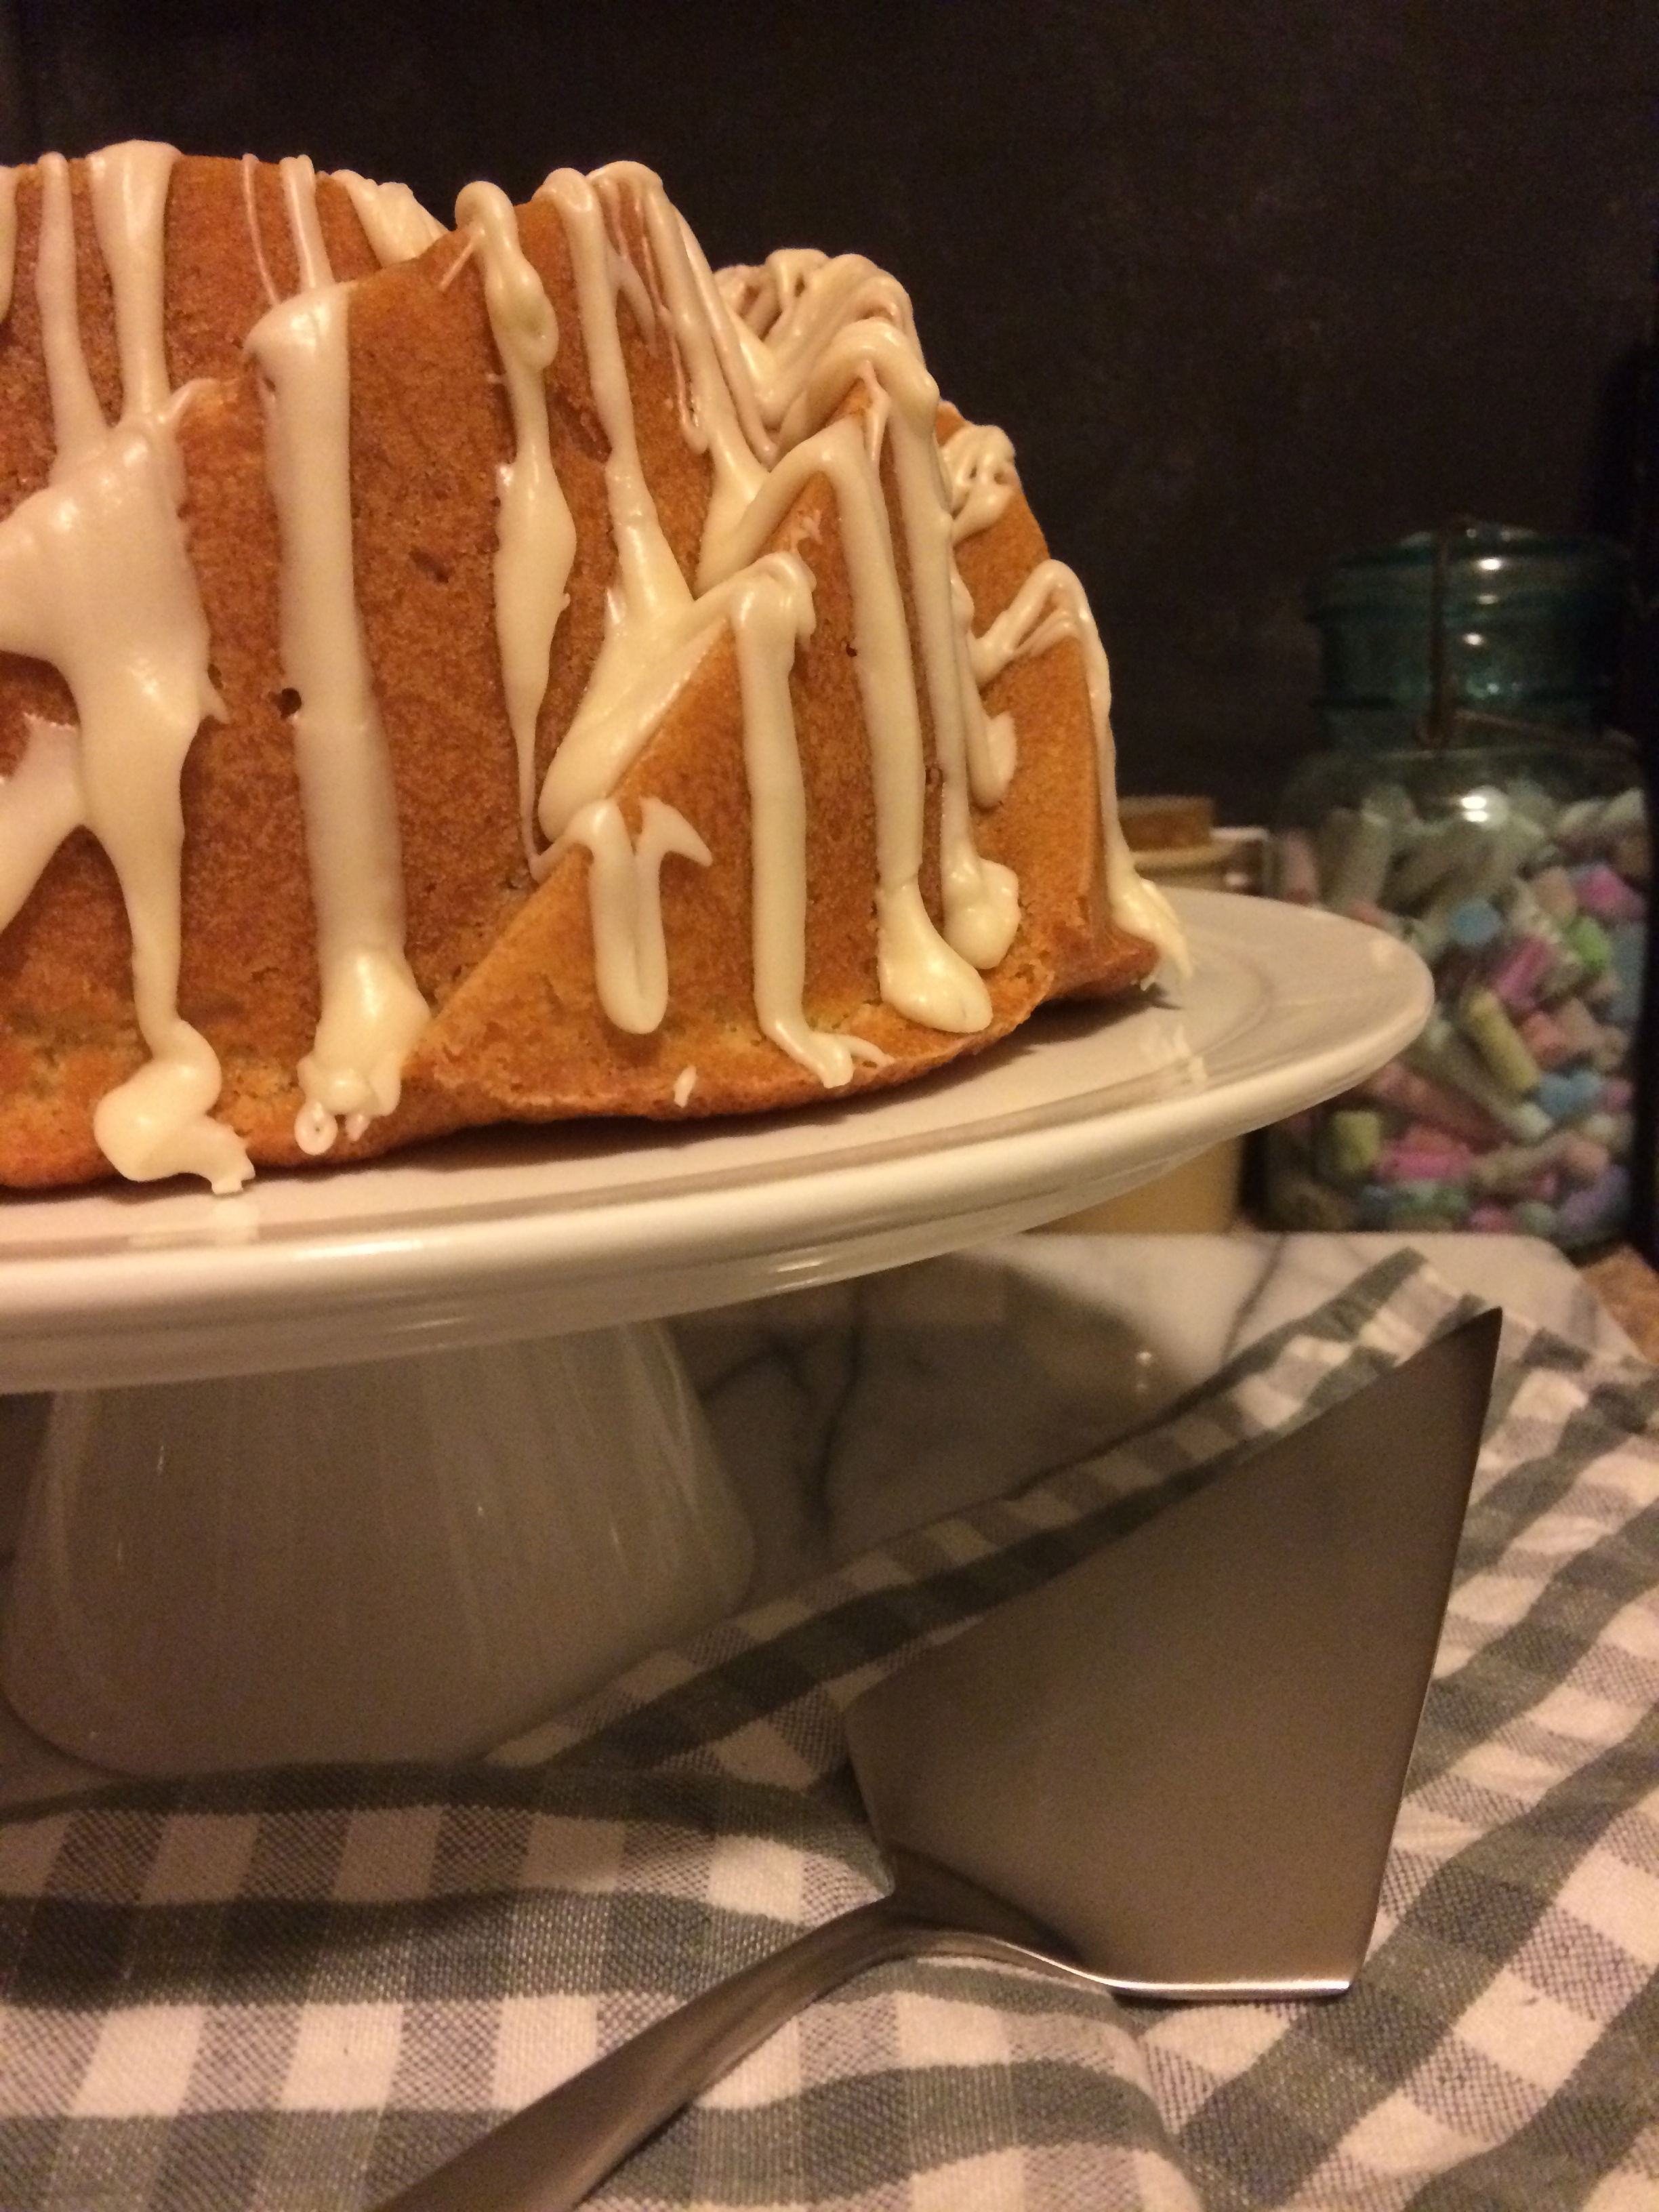
The one thing I thought everyone agreed on was the icing. Everyone knows that red velvet cake calls for tangy cream cheese icing, always. Well, yeah. It turns out that some people think that the OG icing for red velvet was ermine icing, also known as butter roux icing, or boiled milk icing.

red velvet cake with ermine icing | Brooklyn Homemaker

Once I started weeding through the conflicting stories and varied rules and recipes, I started to uncover some facts. It seems that the name most likely evolved as the public’s tastes in sweets were changing at the turn of the last century. At first the name was mostly symbolic and never really had anything to do with the color of the cake.

In the late 1800s what we know as brown sugar used to be commonly known as red sugar. Any cake that used finely ground cake flour and had a fine crumb was referred to as a “Velvet” cake. So, at that time any cake with “red sugar” and fine cake flour could be referred to as a red velvet, but no one was really going crazy for red velvet yet, and there is little evidence of any printed recipes for anything like what we have today. At that time natural cocoa was the most commonly available cocoa on the market. Unlike today’s more common dutch process cocoa, the PH of natural cocoa does cause a chemical reaction with acid causing a very slight reddish hue. Devil’s food cake made with natural cocoa would have a slight reddish hue to the deep dark chocolate cake, and that is most likely the origin of that name. Red velvet cake is devil’s food’s less chocolatey cousin, but again, the cake was never really RED. At the time, these cocoa cakes were often referred to as “mahogany cakes”.

It wasn’t until the depression that red velvet cake turned truly red. Food additive and extract companies were struggling at the time because most Americans were cutting back on such luxury items. As a way to boost sales, the Adams Extract Company started marketing their food coloring and flavorings by giving out recipes for a truly red red velvet cake, complete with color photo, in grocery stores. That was when red velvet started taking off, especially in the south. The popularity waxed and waned for generations, and then there was the groom’s cake in Steel Magnolias. Boom. Everyone knew and wanted red velvet. And then a decade or so later, the cupcakes shops started popping up and pushing the red velvet on us.

red velvet cake with ermine icing | Brooklyn Homemaker

I’m no historian, and I don’t claim to know that any of what I’ve read is the absolute truth, but this seems like the most likely story. Unfortunately I haven’t been able to dig up the depression era recipe that made red velvet the popular cake that it is today. So, the “real” recipe still seems to be something of a mystery, but based on the history I think that natural cocoa is as important to the recipe as the red food color.

red velvet cake with ermine icing | Brooklyn Homemaker

Another point of contention is the icing. I’d always heard, and believed, that cream cheese was king when it came to red velvet cakes, and I was shocked to find out that this wasn’t always so. Cream cheese icing wasn’t really common with red velvet until the mid-twentieth century. Before that the traditional topping for red velvet was a creamy and light icing made by cooking milk and flour together, and whipping into creamed sugar and butter. It can be called Butter Roux frosting or Ermine frosting. In the south this icing was very popular because it’s whipped texture is similar to whipped cream, but it’s much more heat stable and keeps better.

red velvet cake with ermine icing | Brooklyn Homemaker

When I set out to bake my first red velvet cake, I knew I had plenty of recipes to choose from but had to decide which one would produce the cake that I wanted to end up with. I kept going back to natural cocoa and buttermilk but decided that adding red color was just fine with me. So, I checked in with my favorite food blog, Smitten Kitchen, and guess what, she had a recipe that sounded like exactly what I was looking for. I also decided I wanted to ditch the cream cheese icing and go back to the traditional ermine icing.

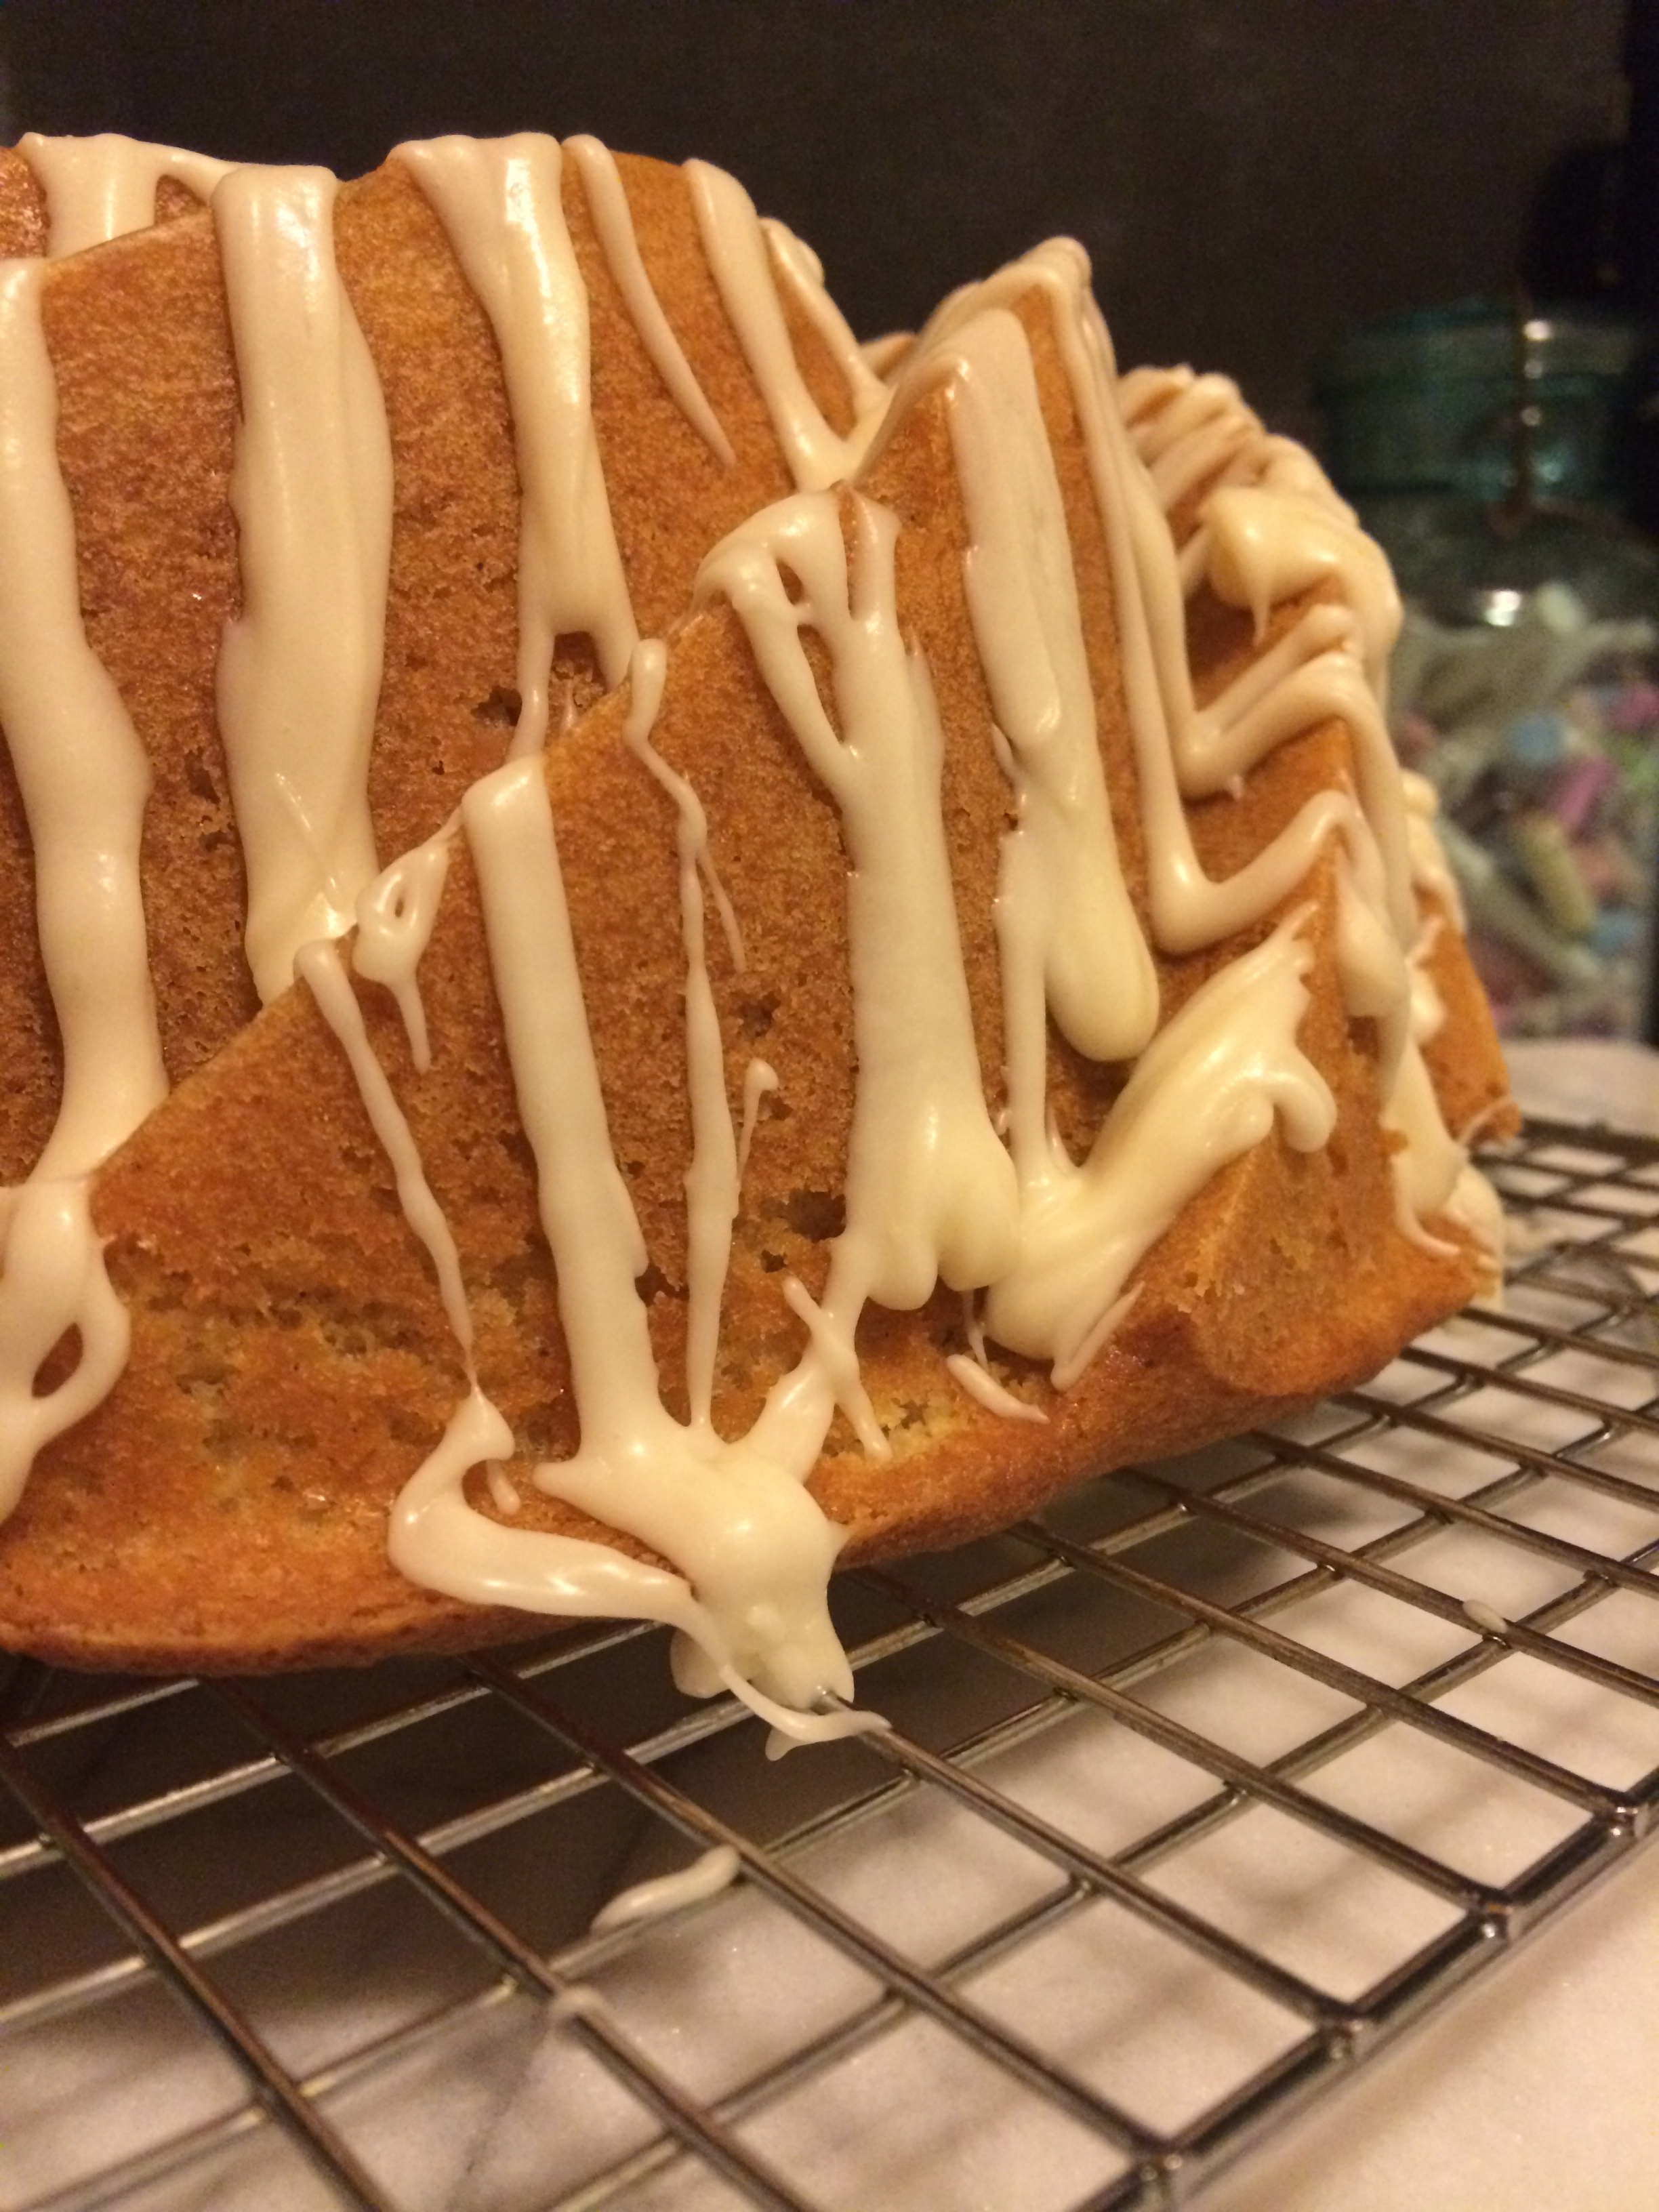
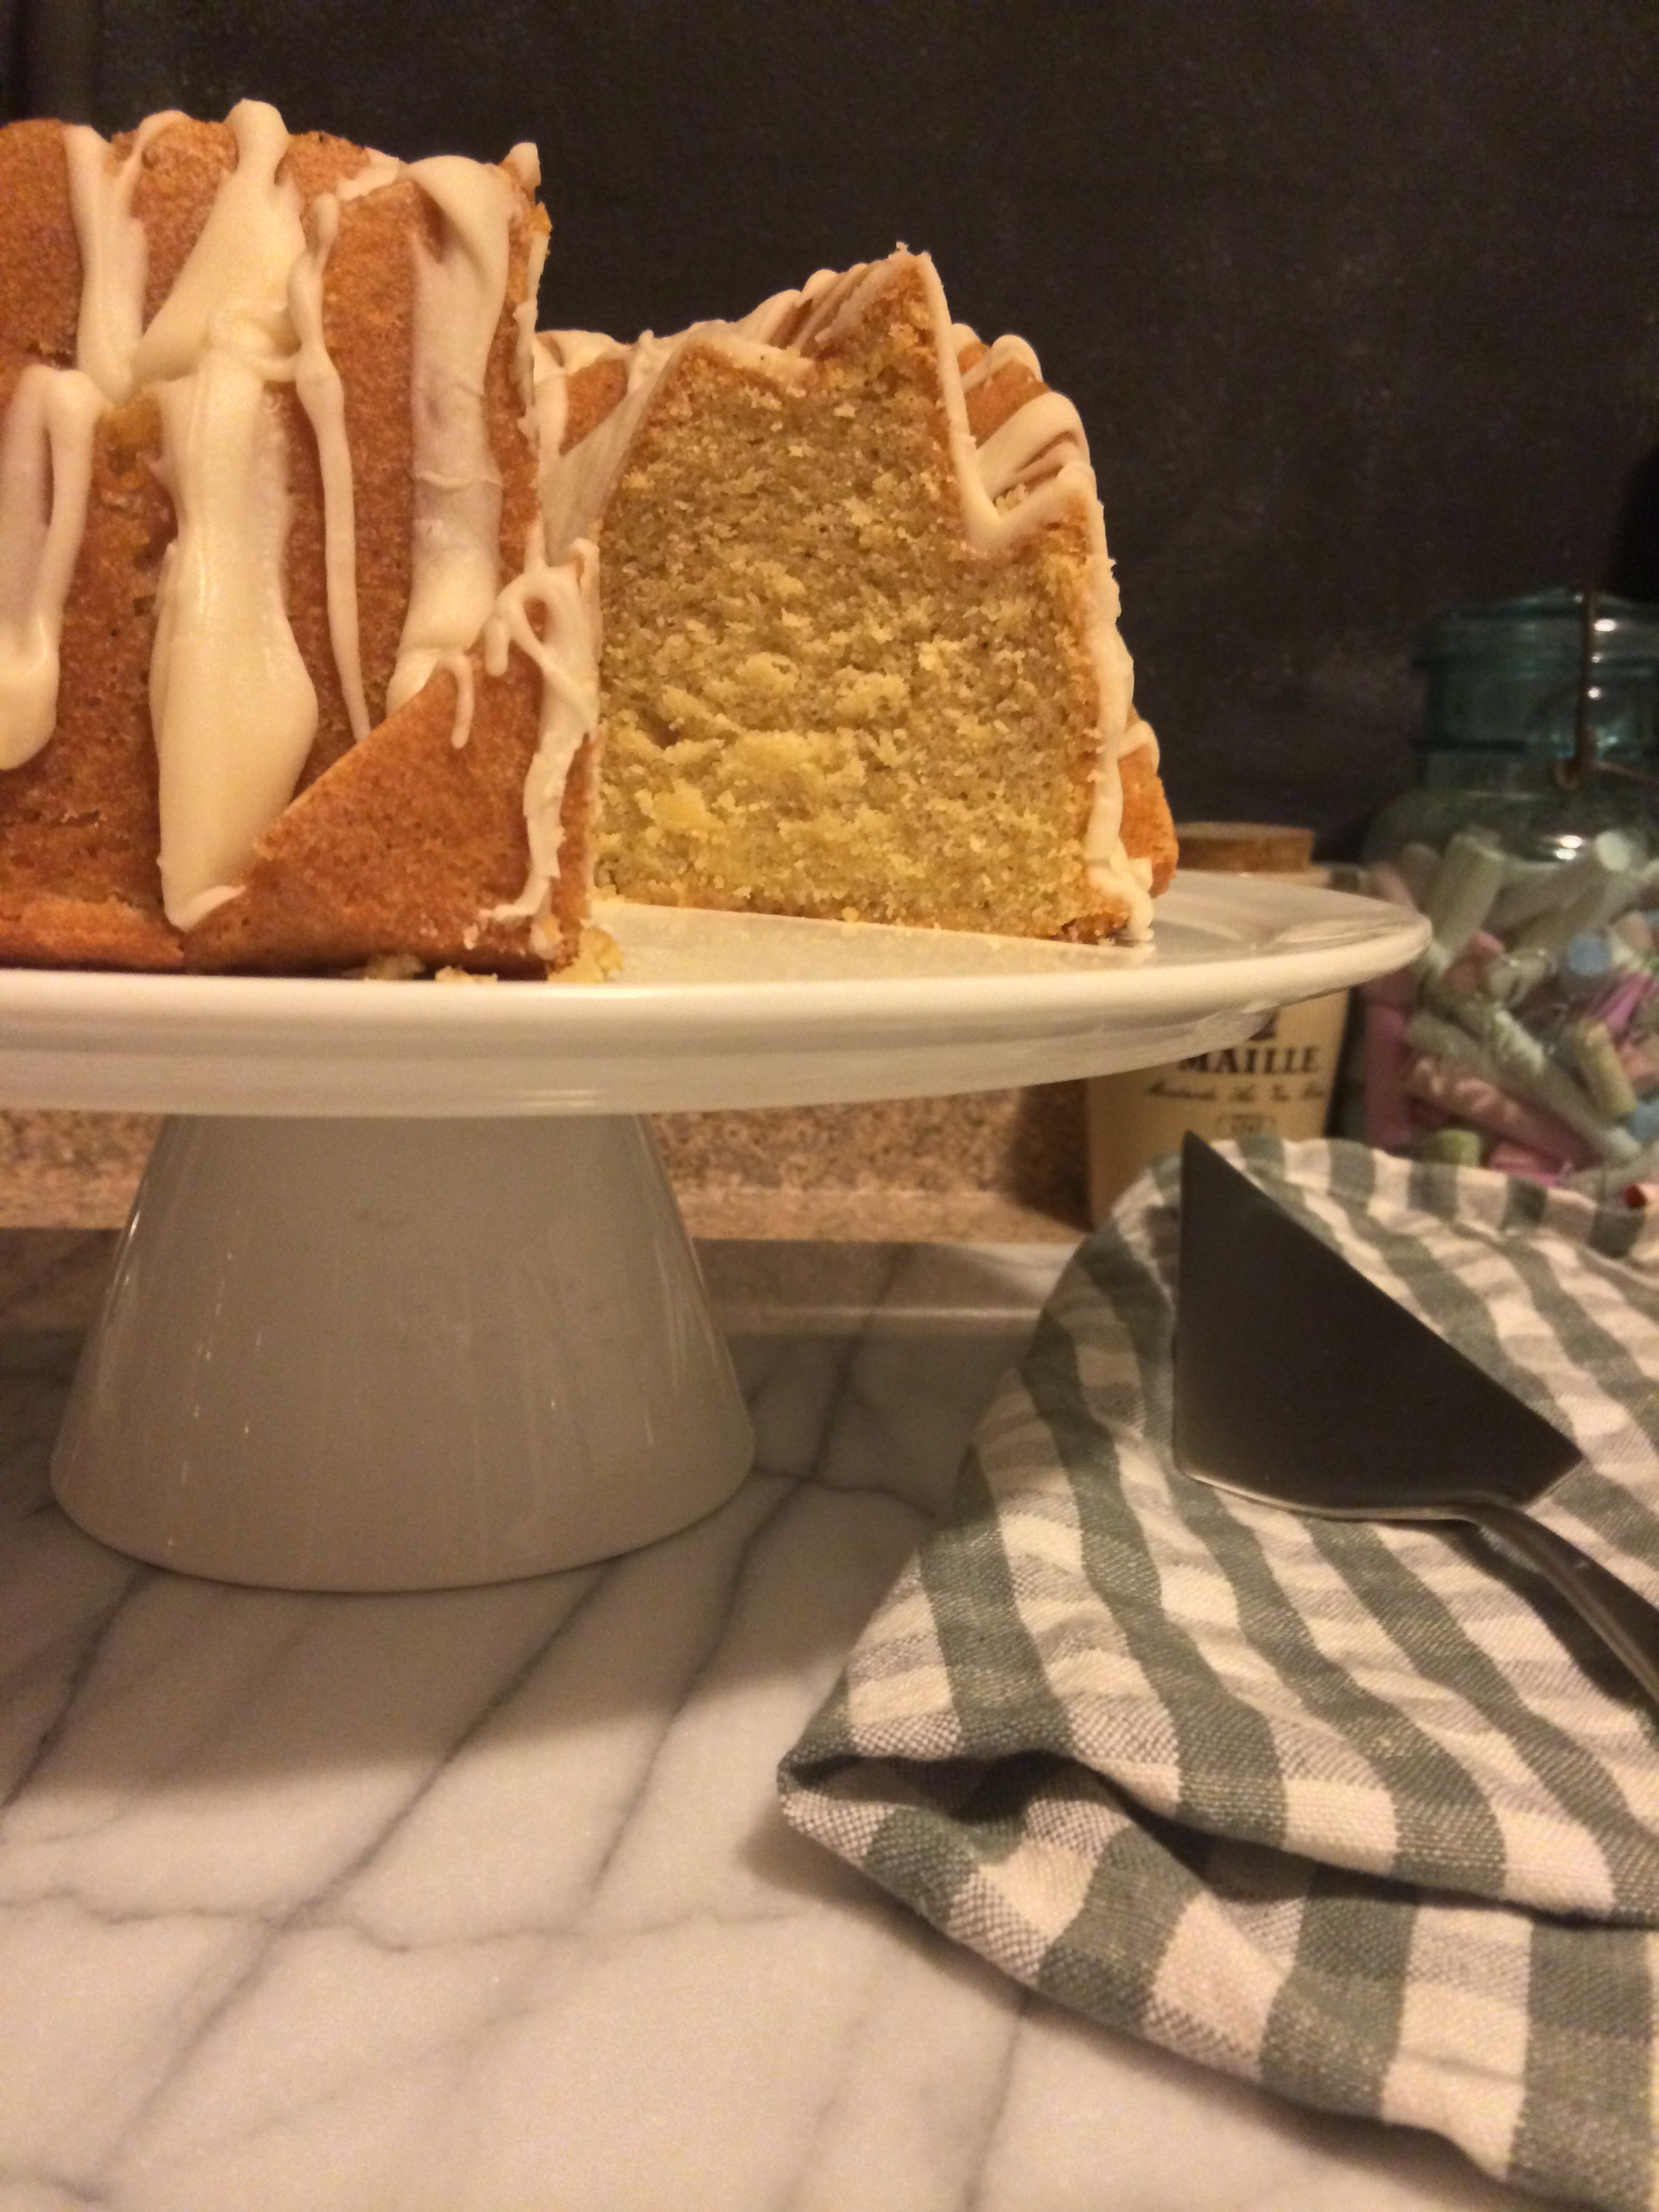
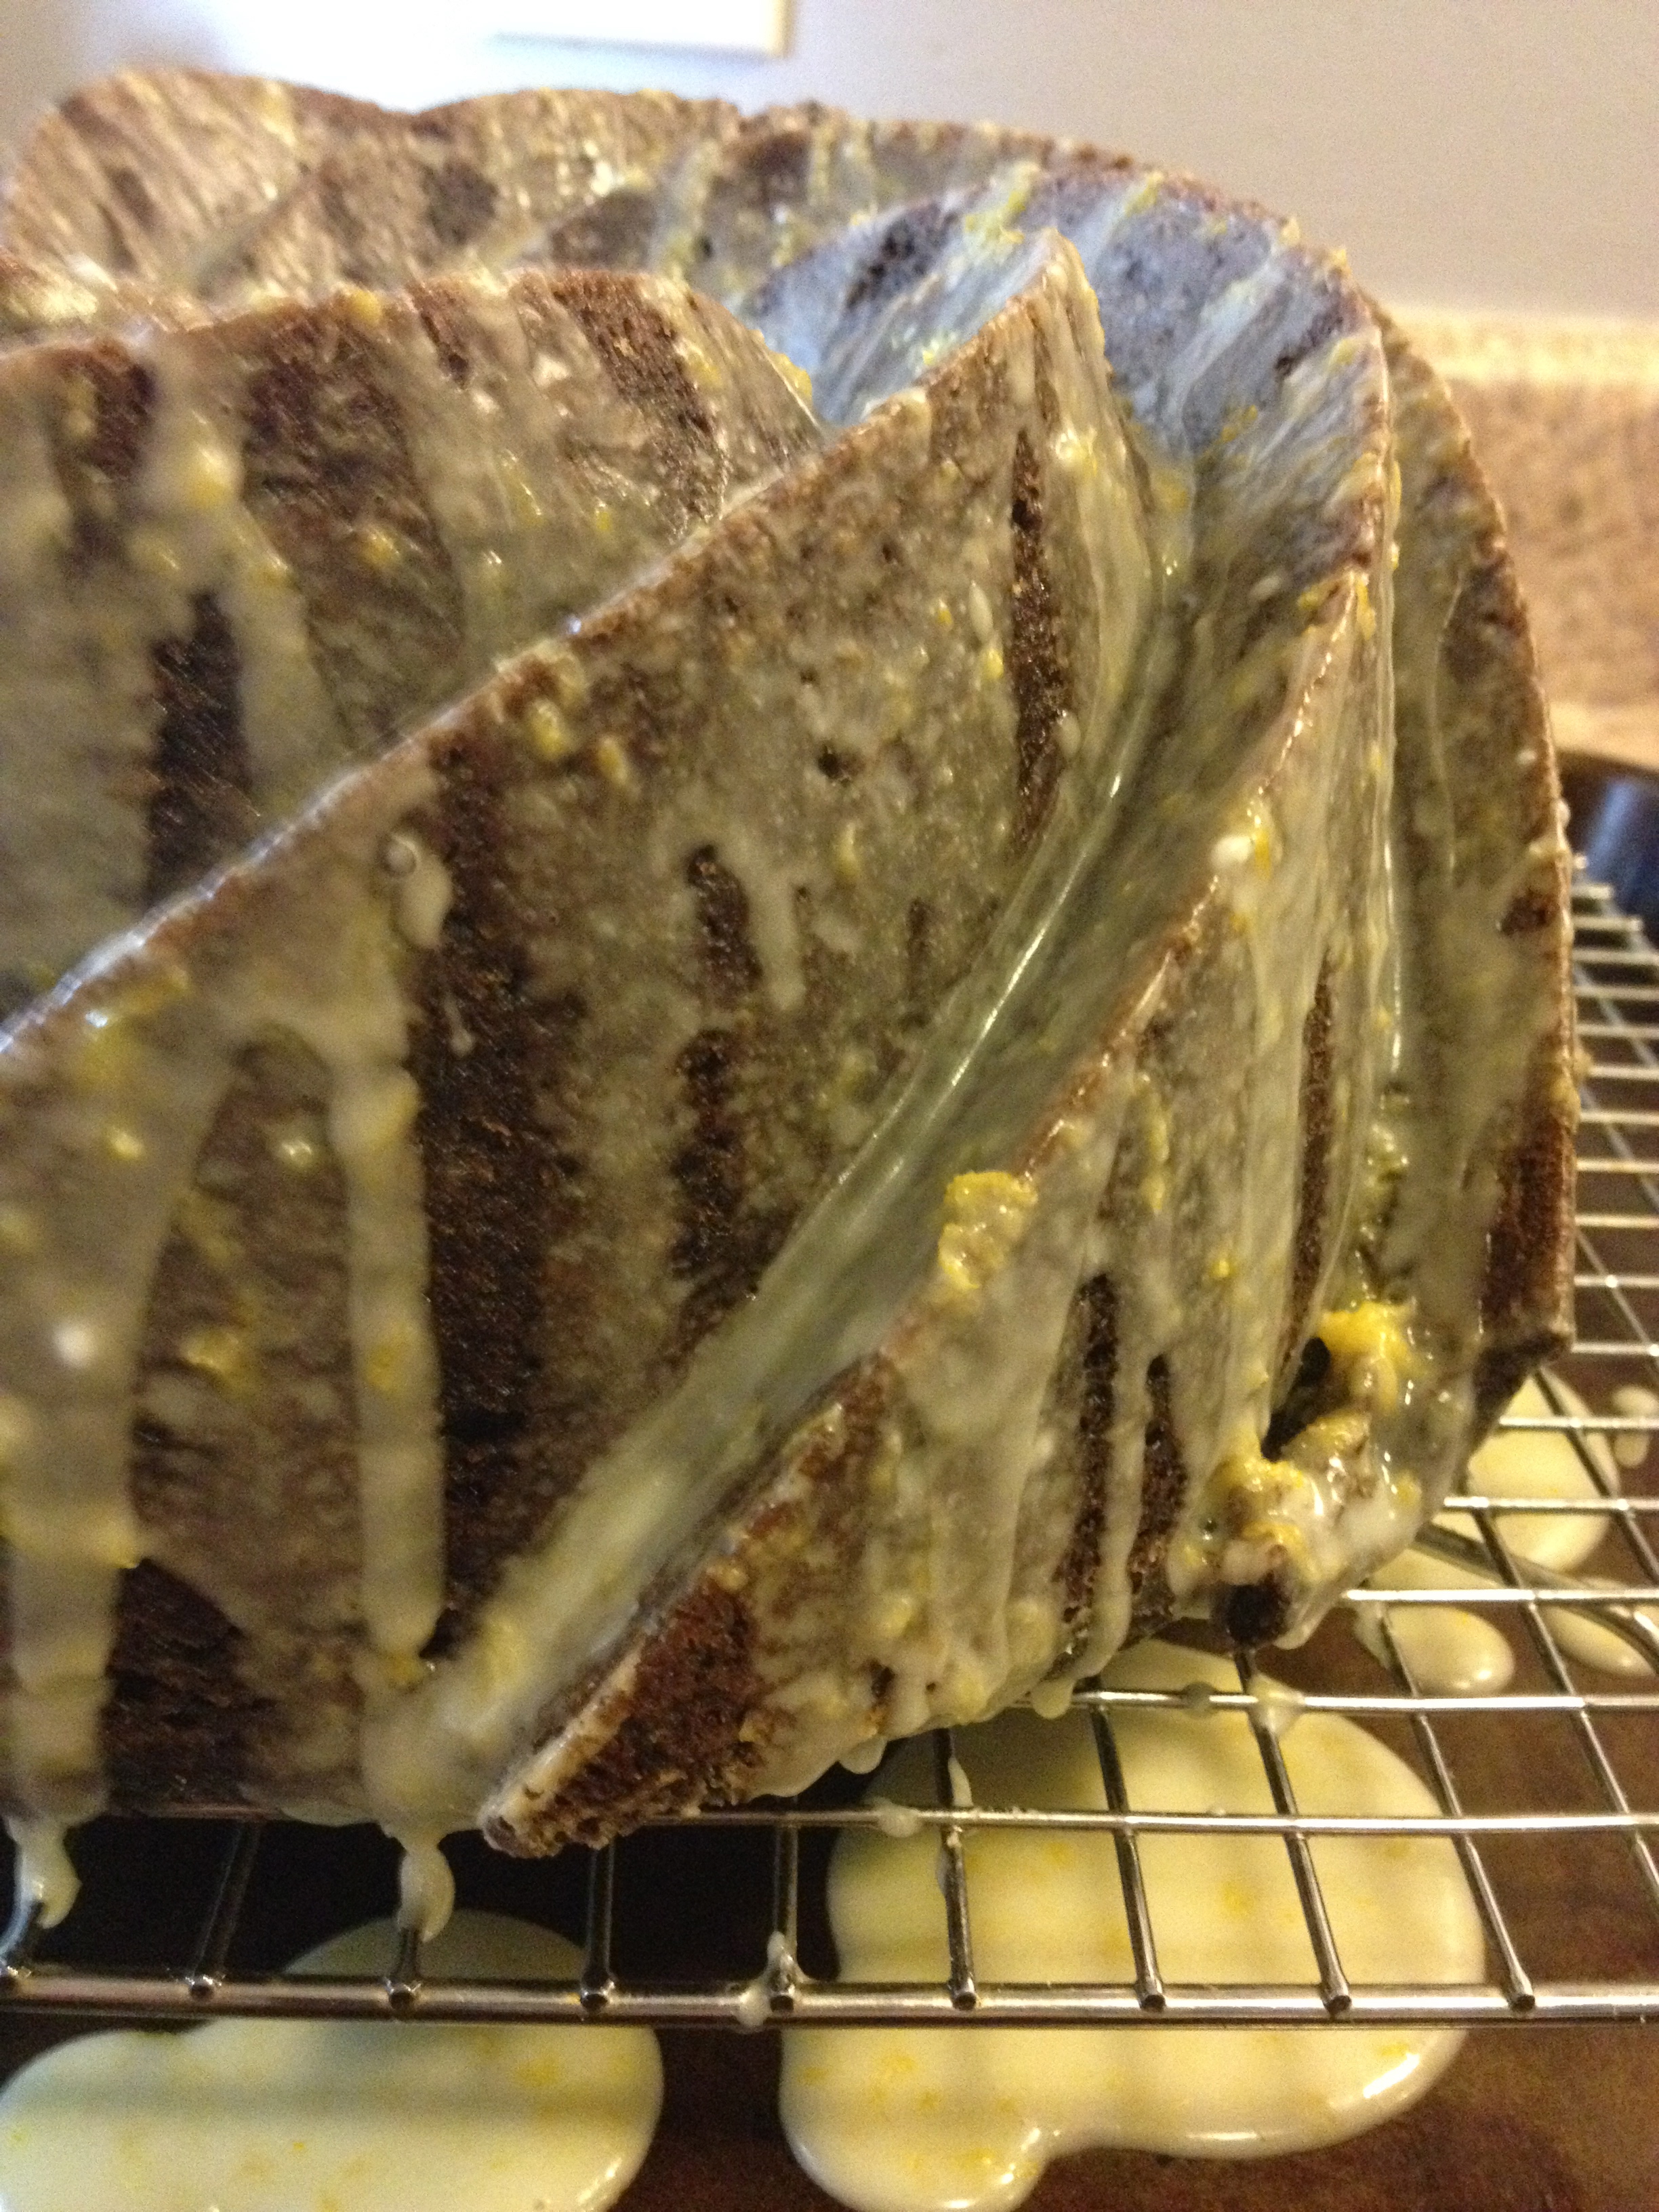
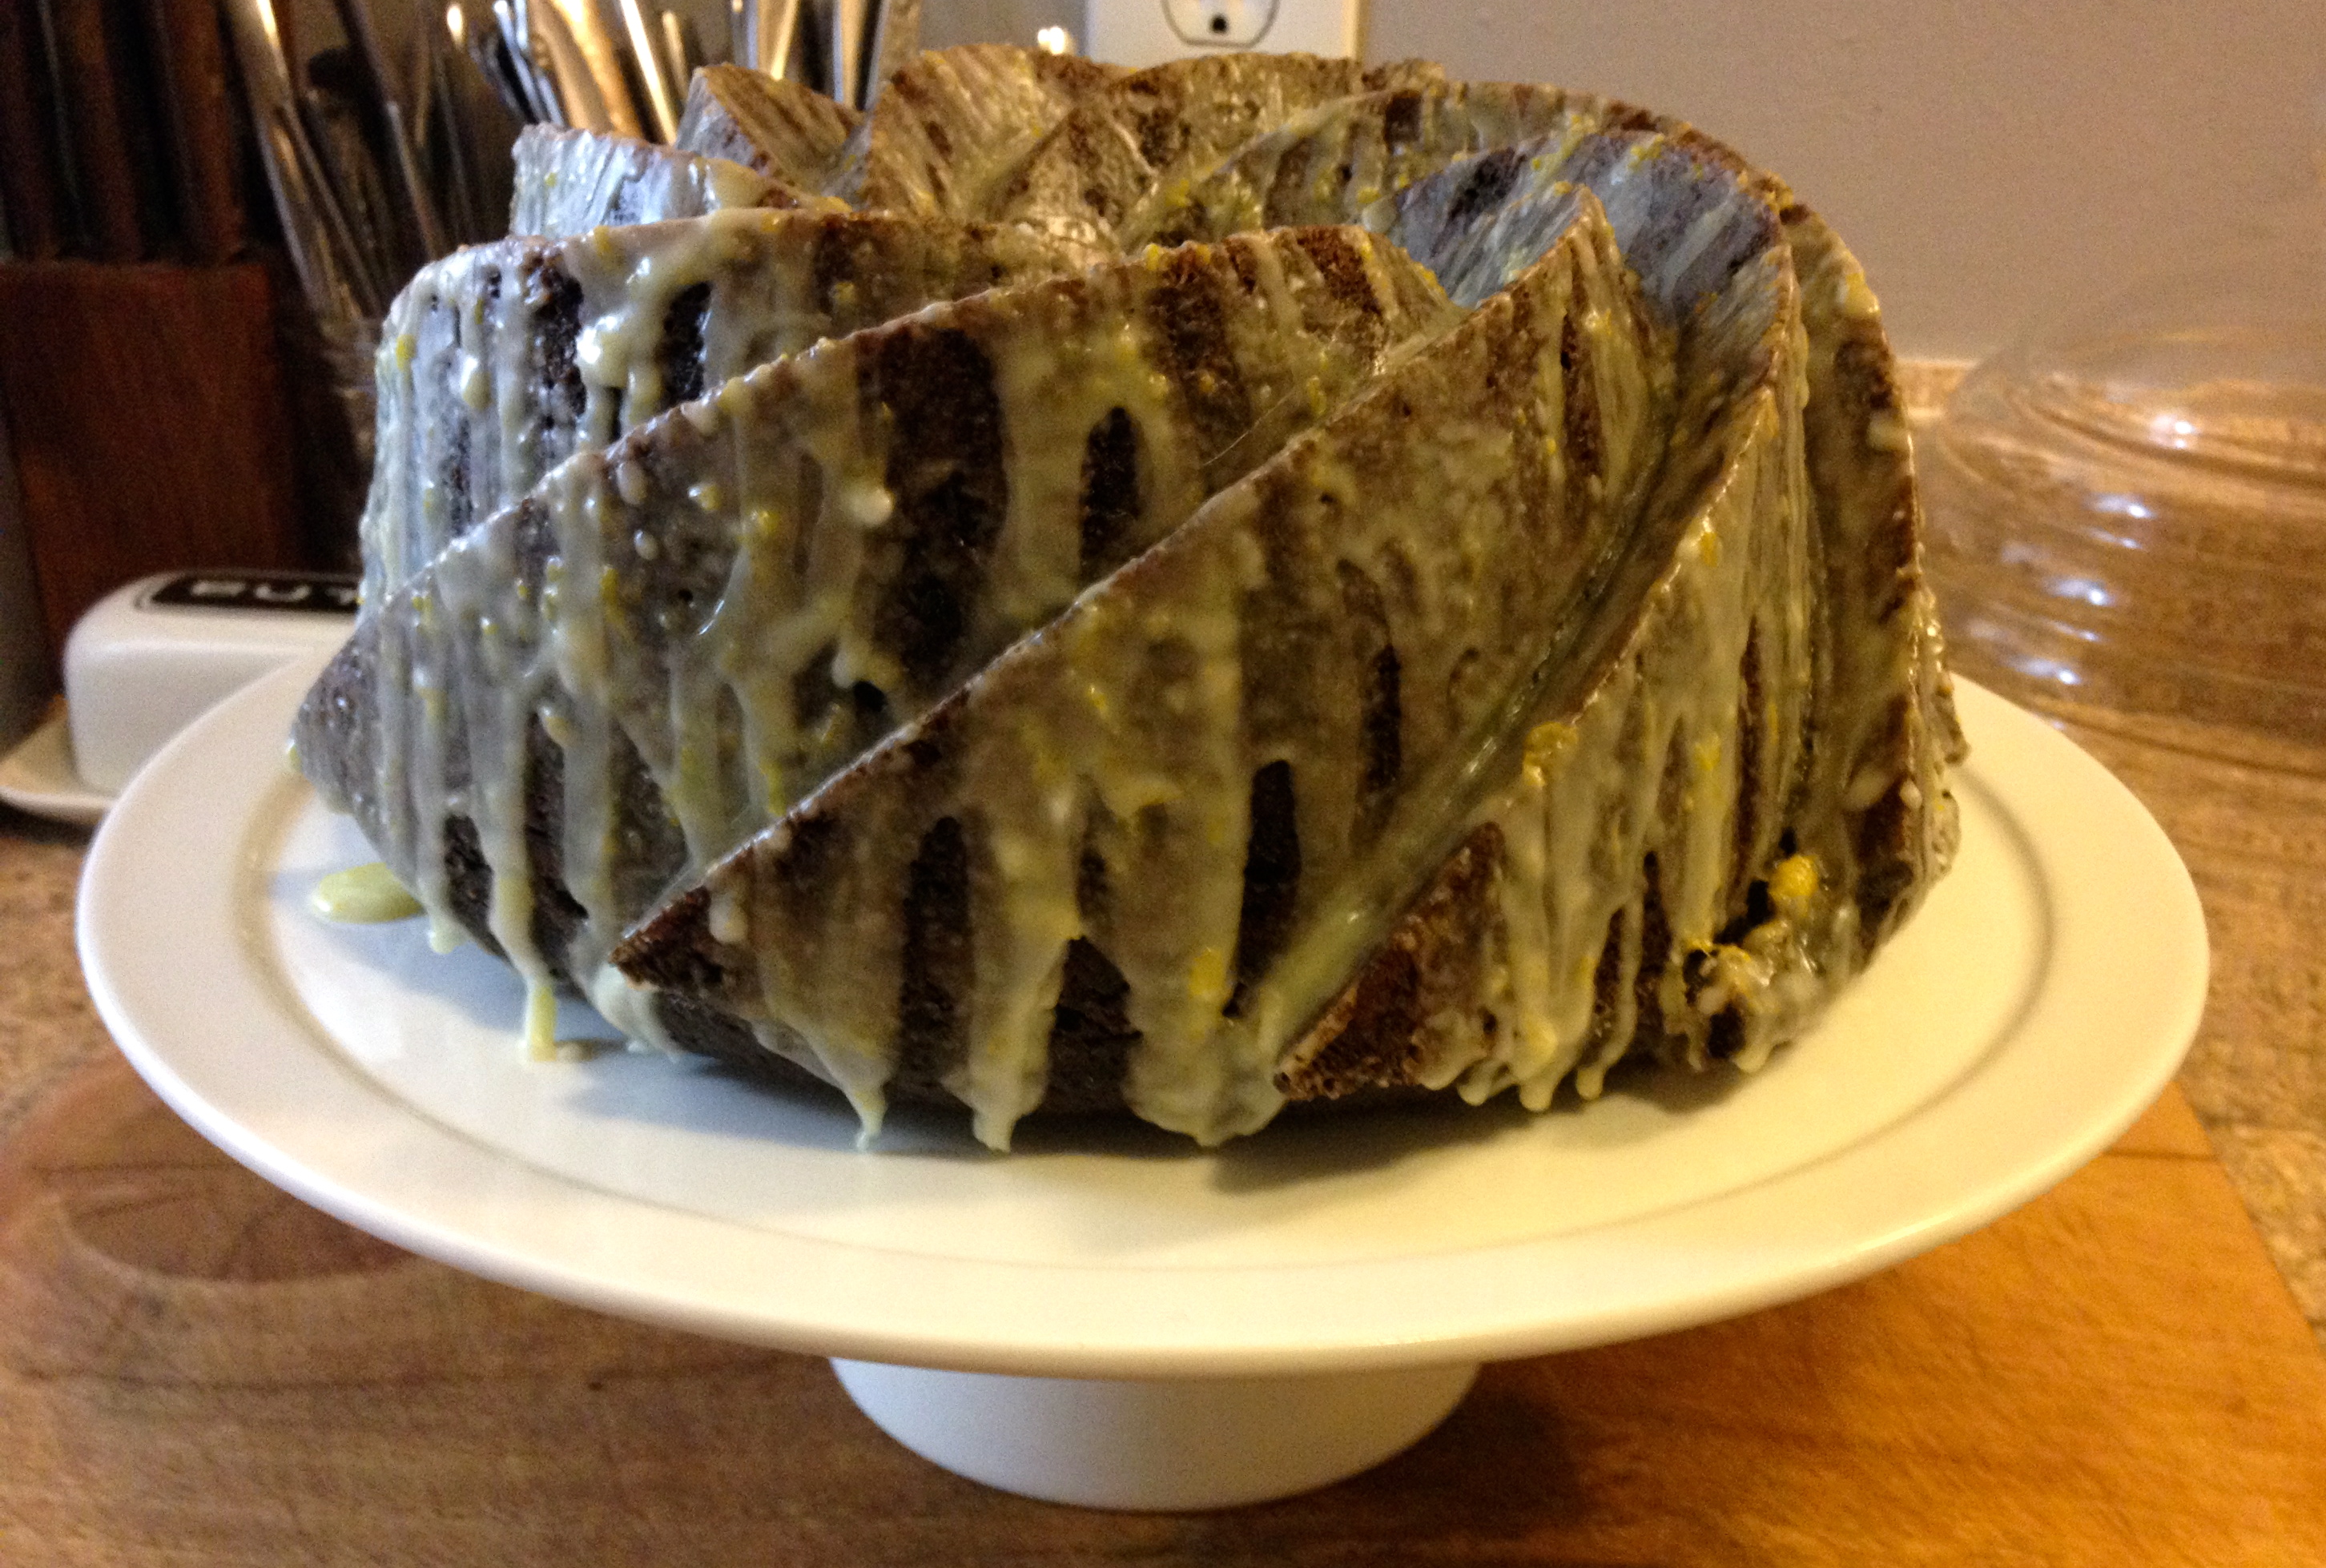
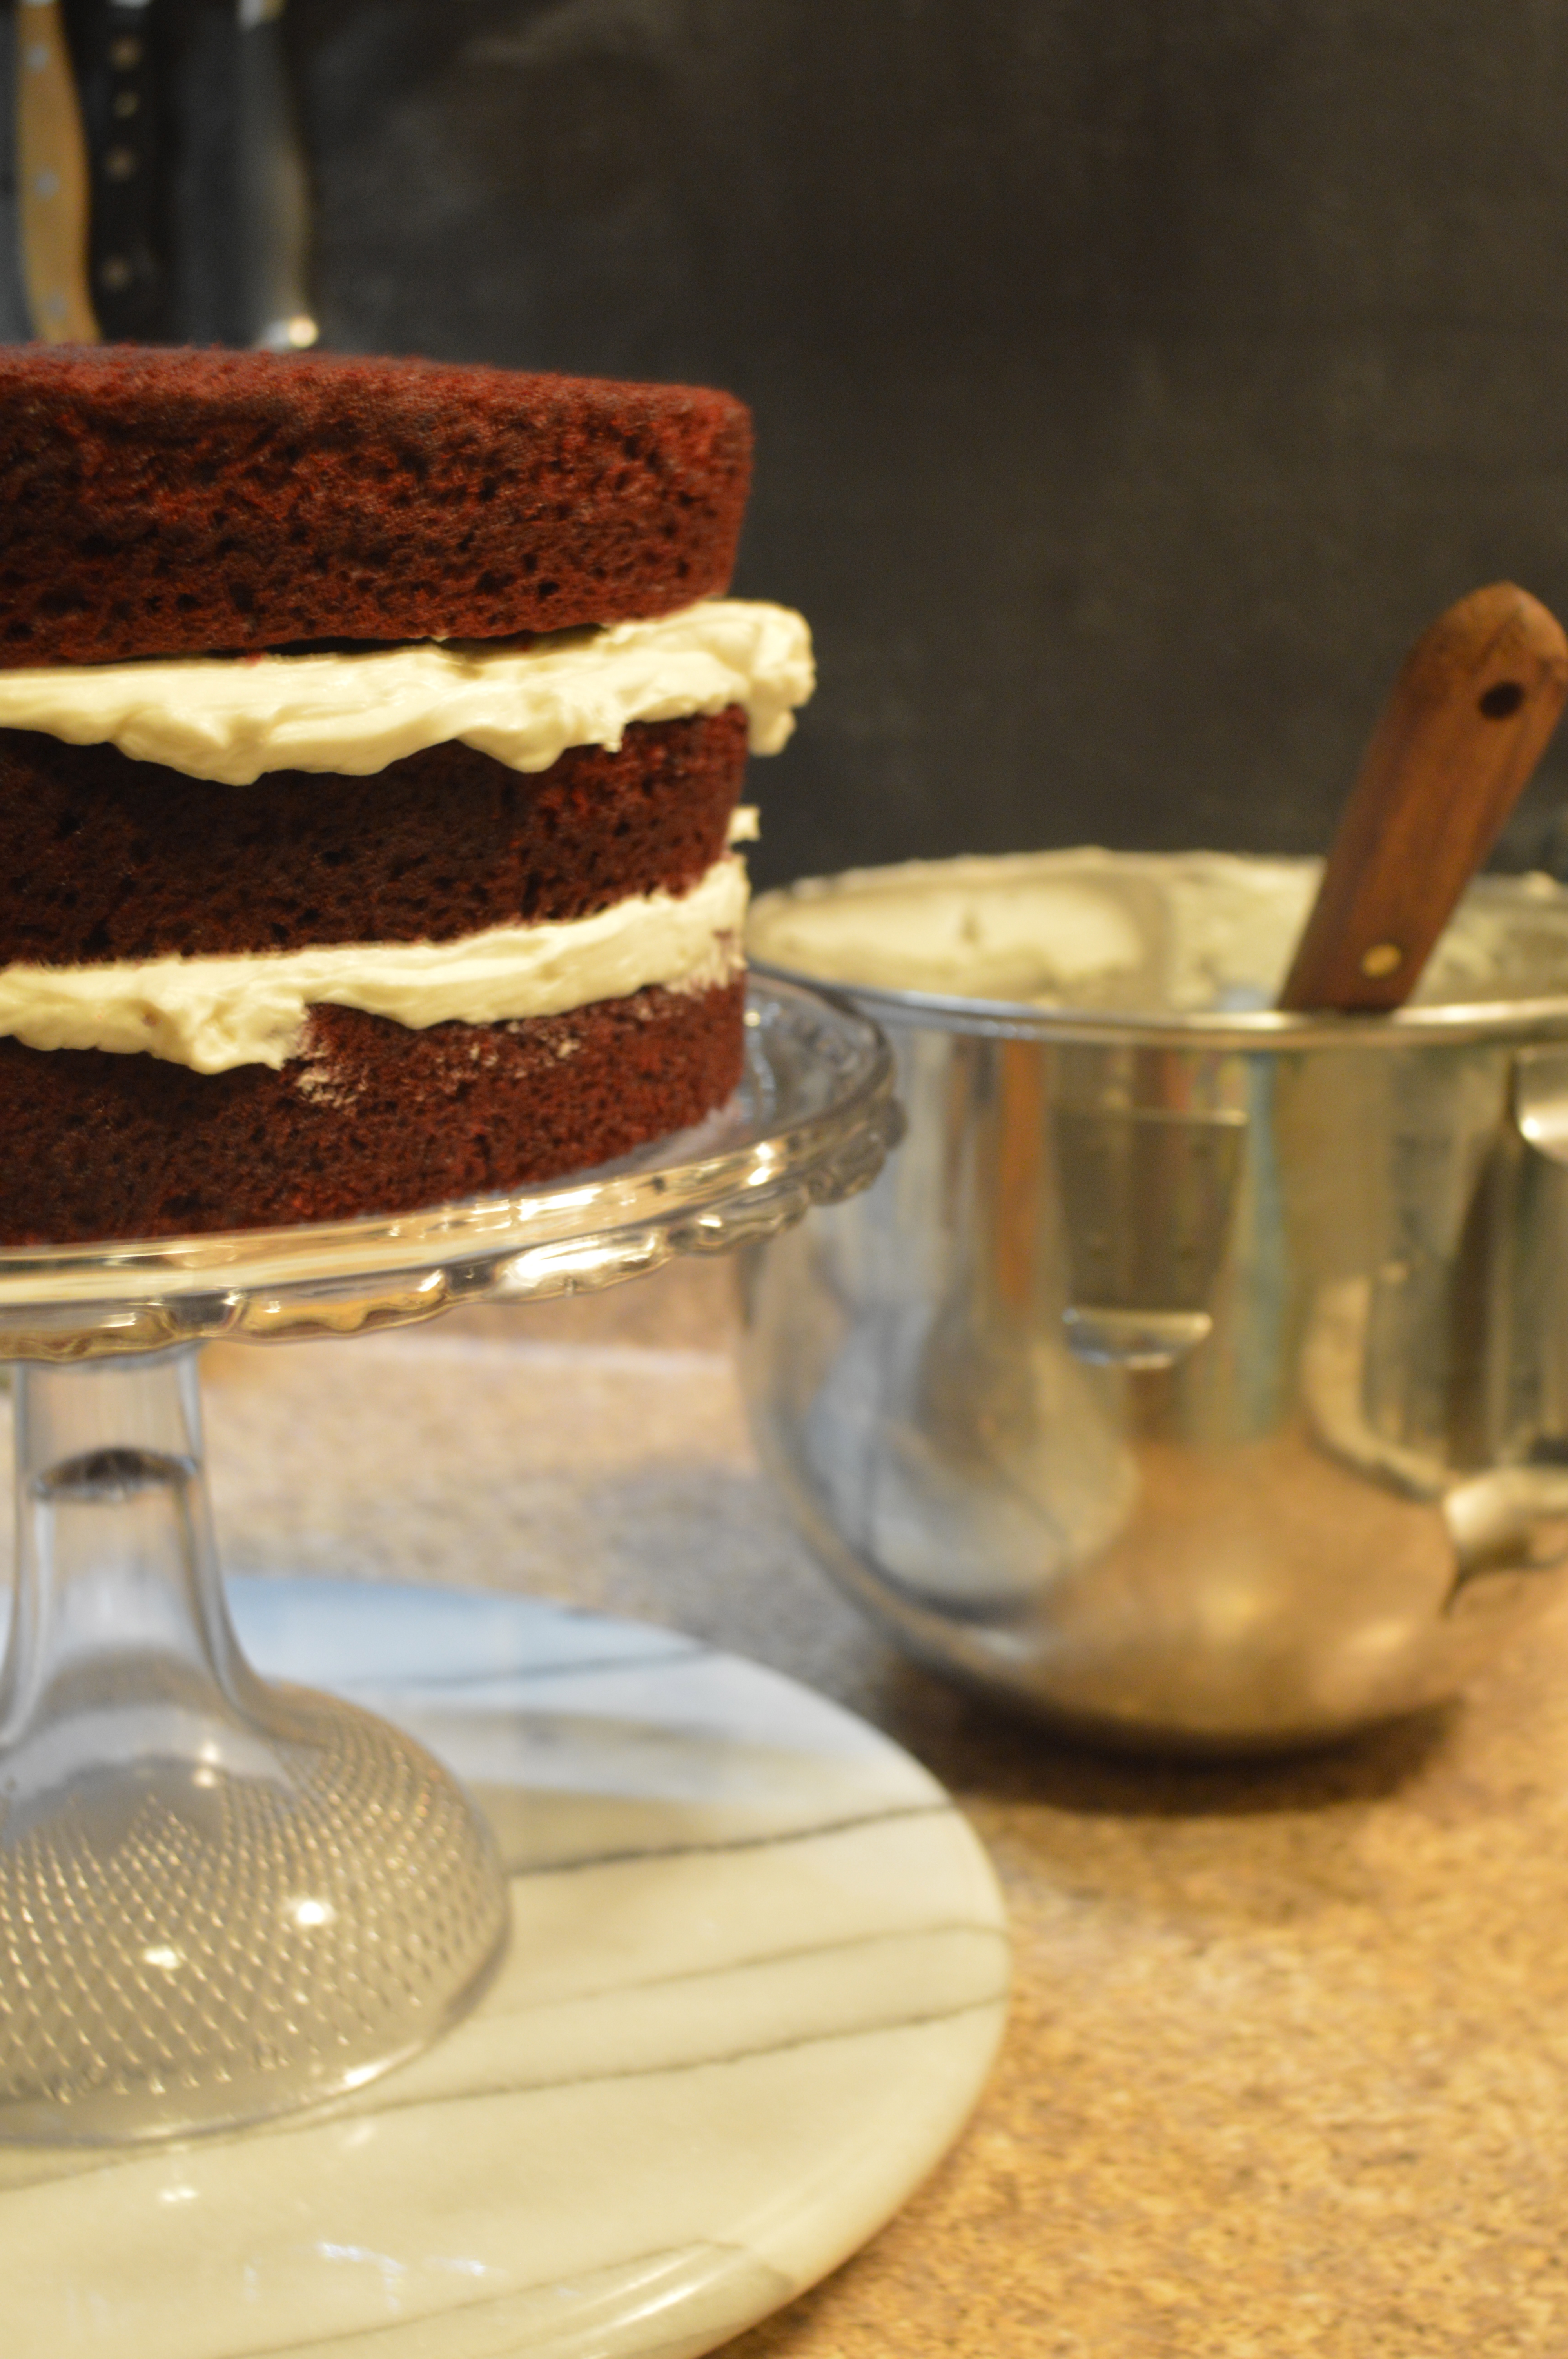
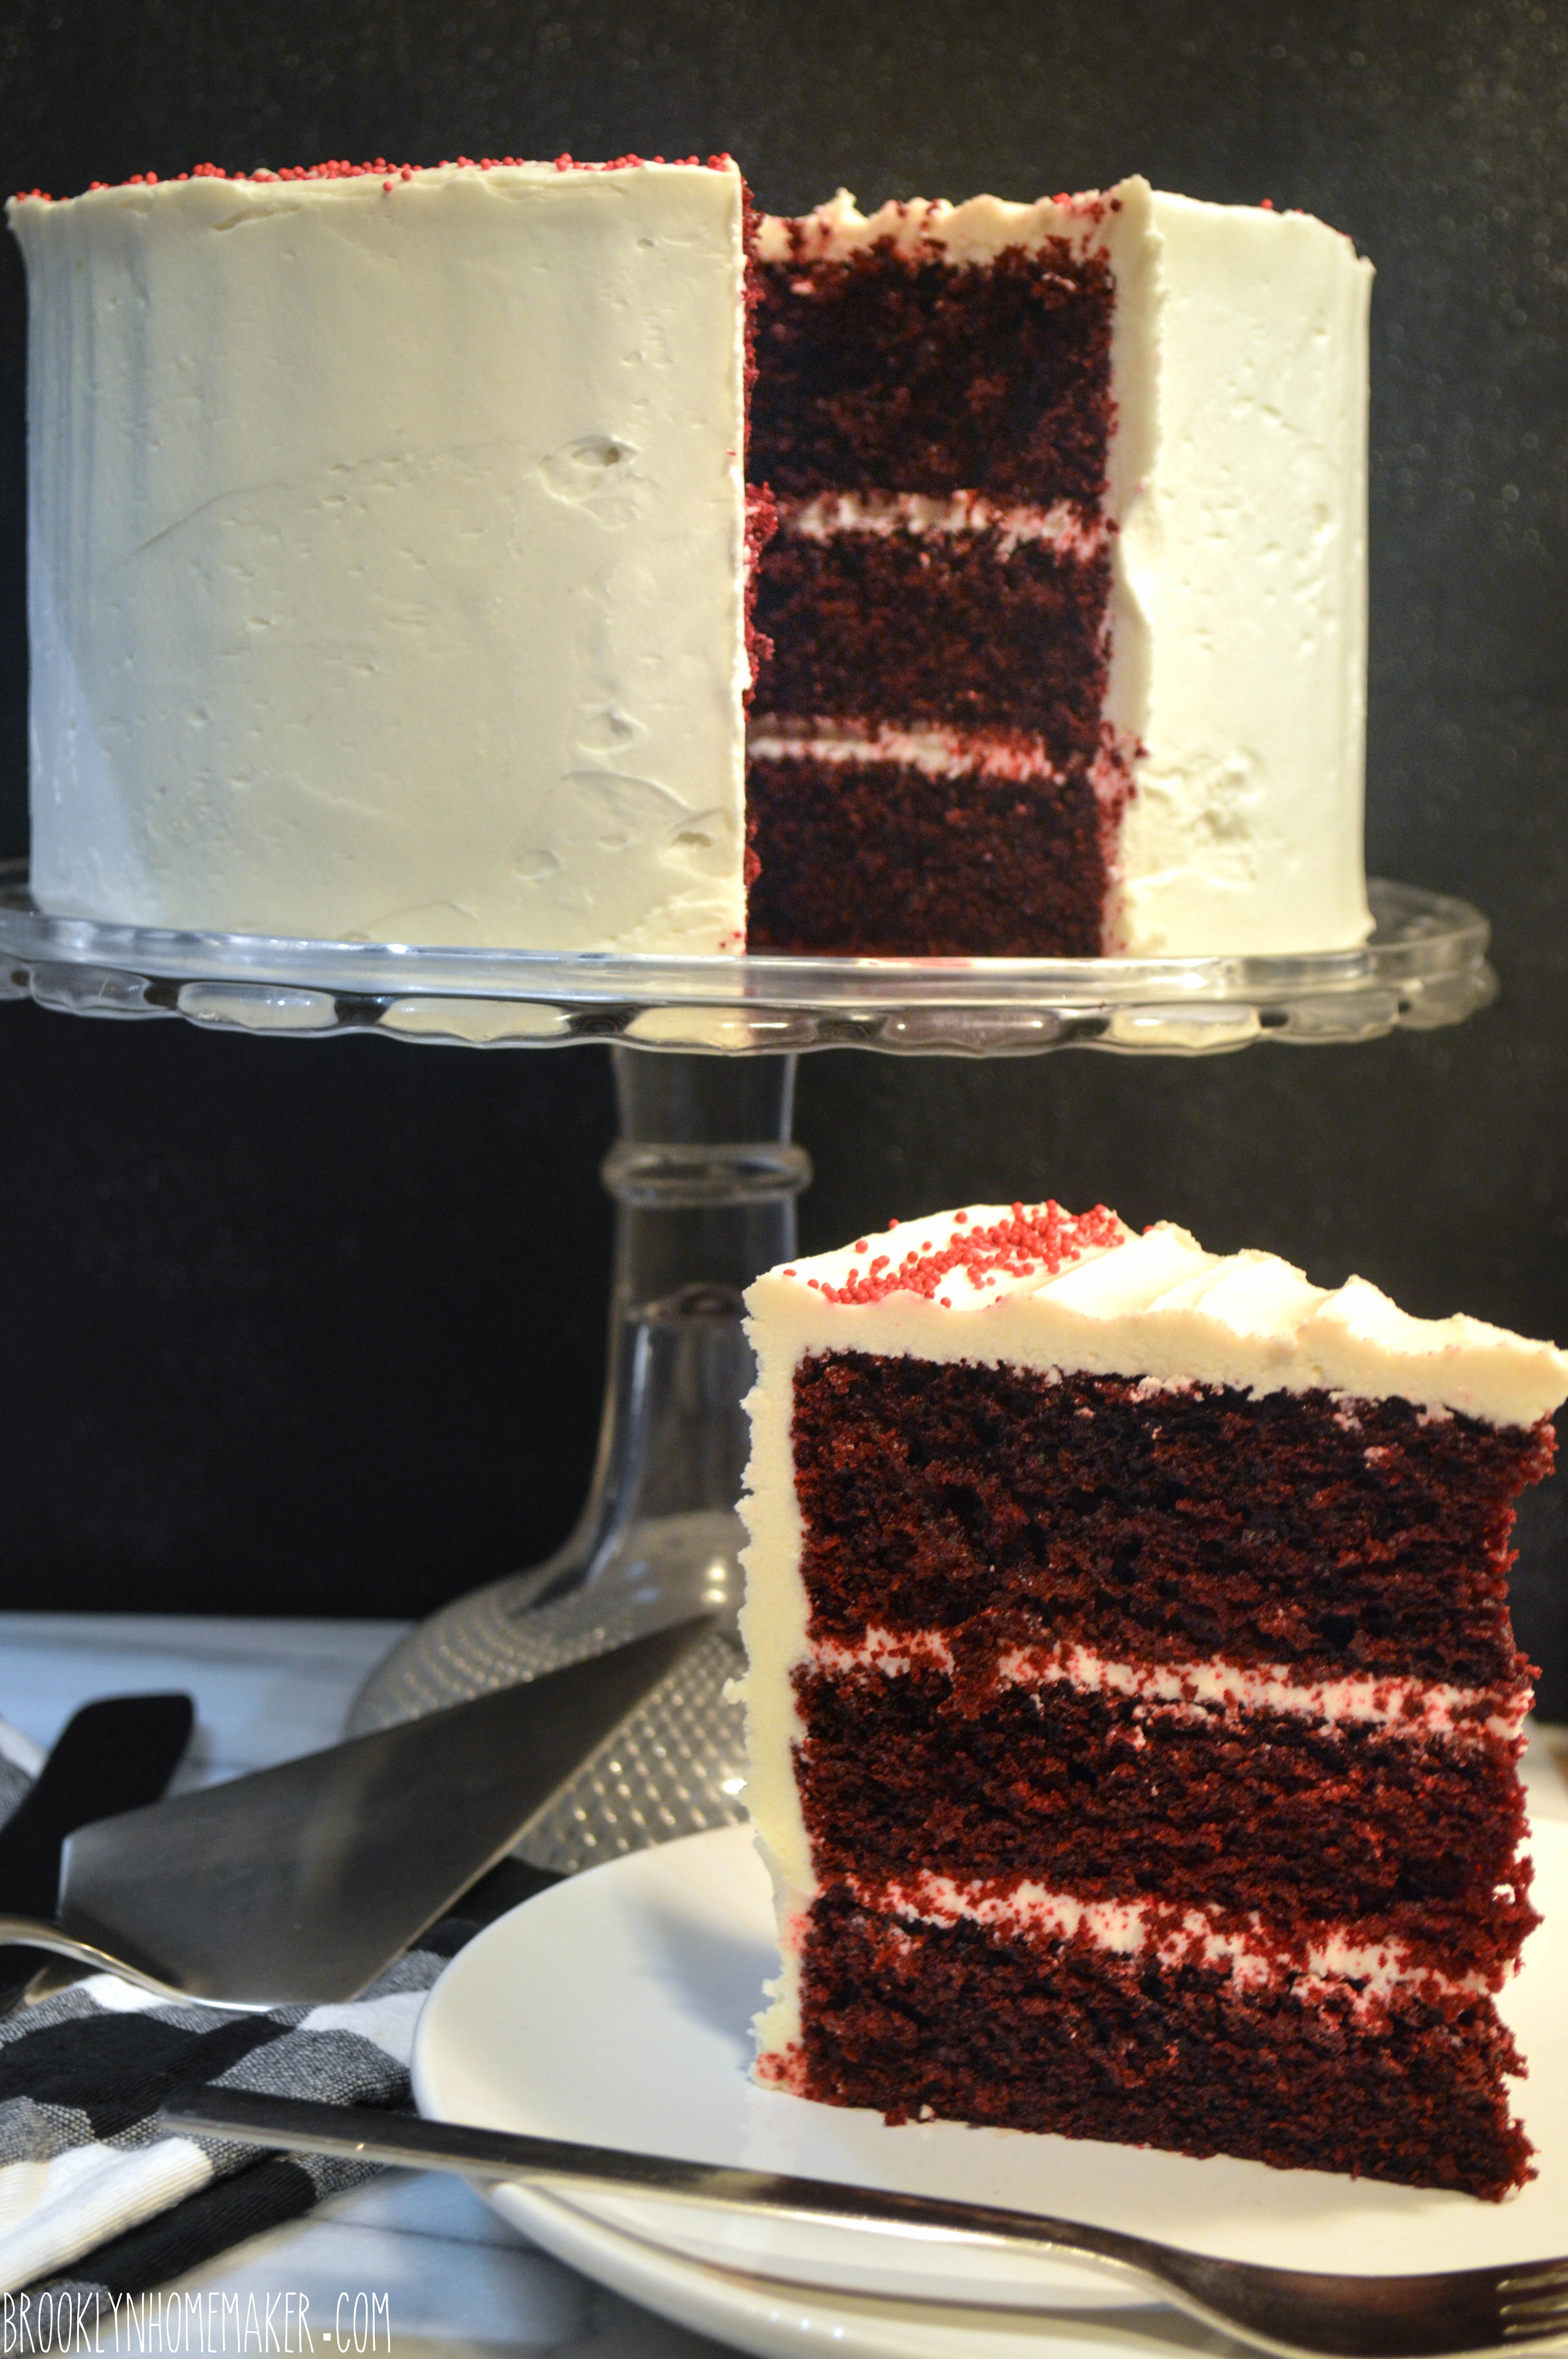
This recipe calls for a LOT of red food color. At first I thought it might be a typo. It’s not. Since there is more cocoa in this recipe than most, a lot of food color is needed to bring the red forward over the brown. Well. This cake is red alright. The batter before baking is literally beet red. It gets a bit darker in the oven, but even still, the finished cake is a deep dark RED. Pretty much the color you’d see if you sliced into an armadillo. Just sayin’.

red velvet cake with ermine icing | Brooklyn Homemaker

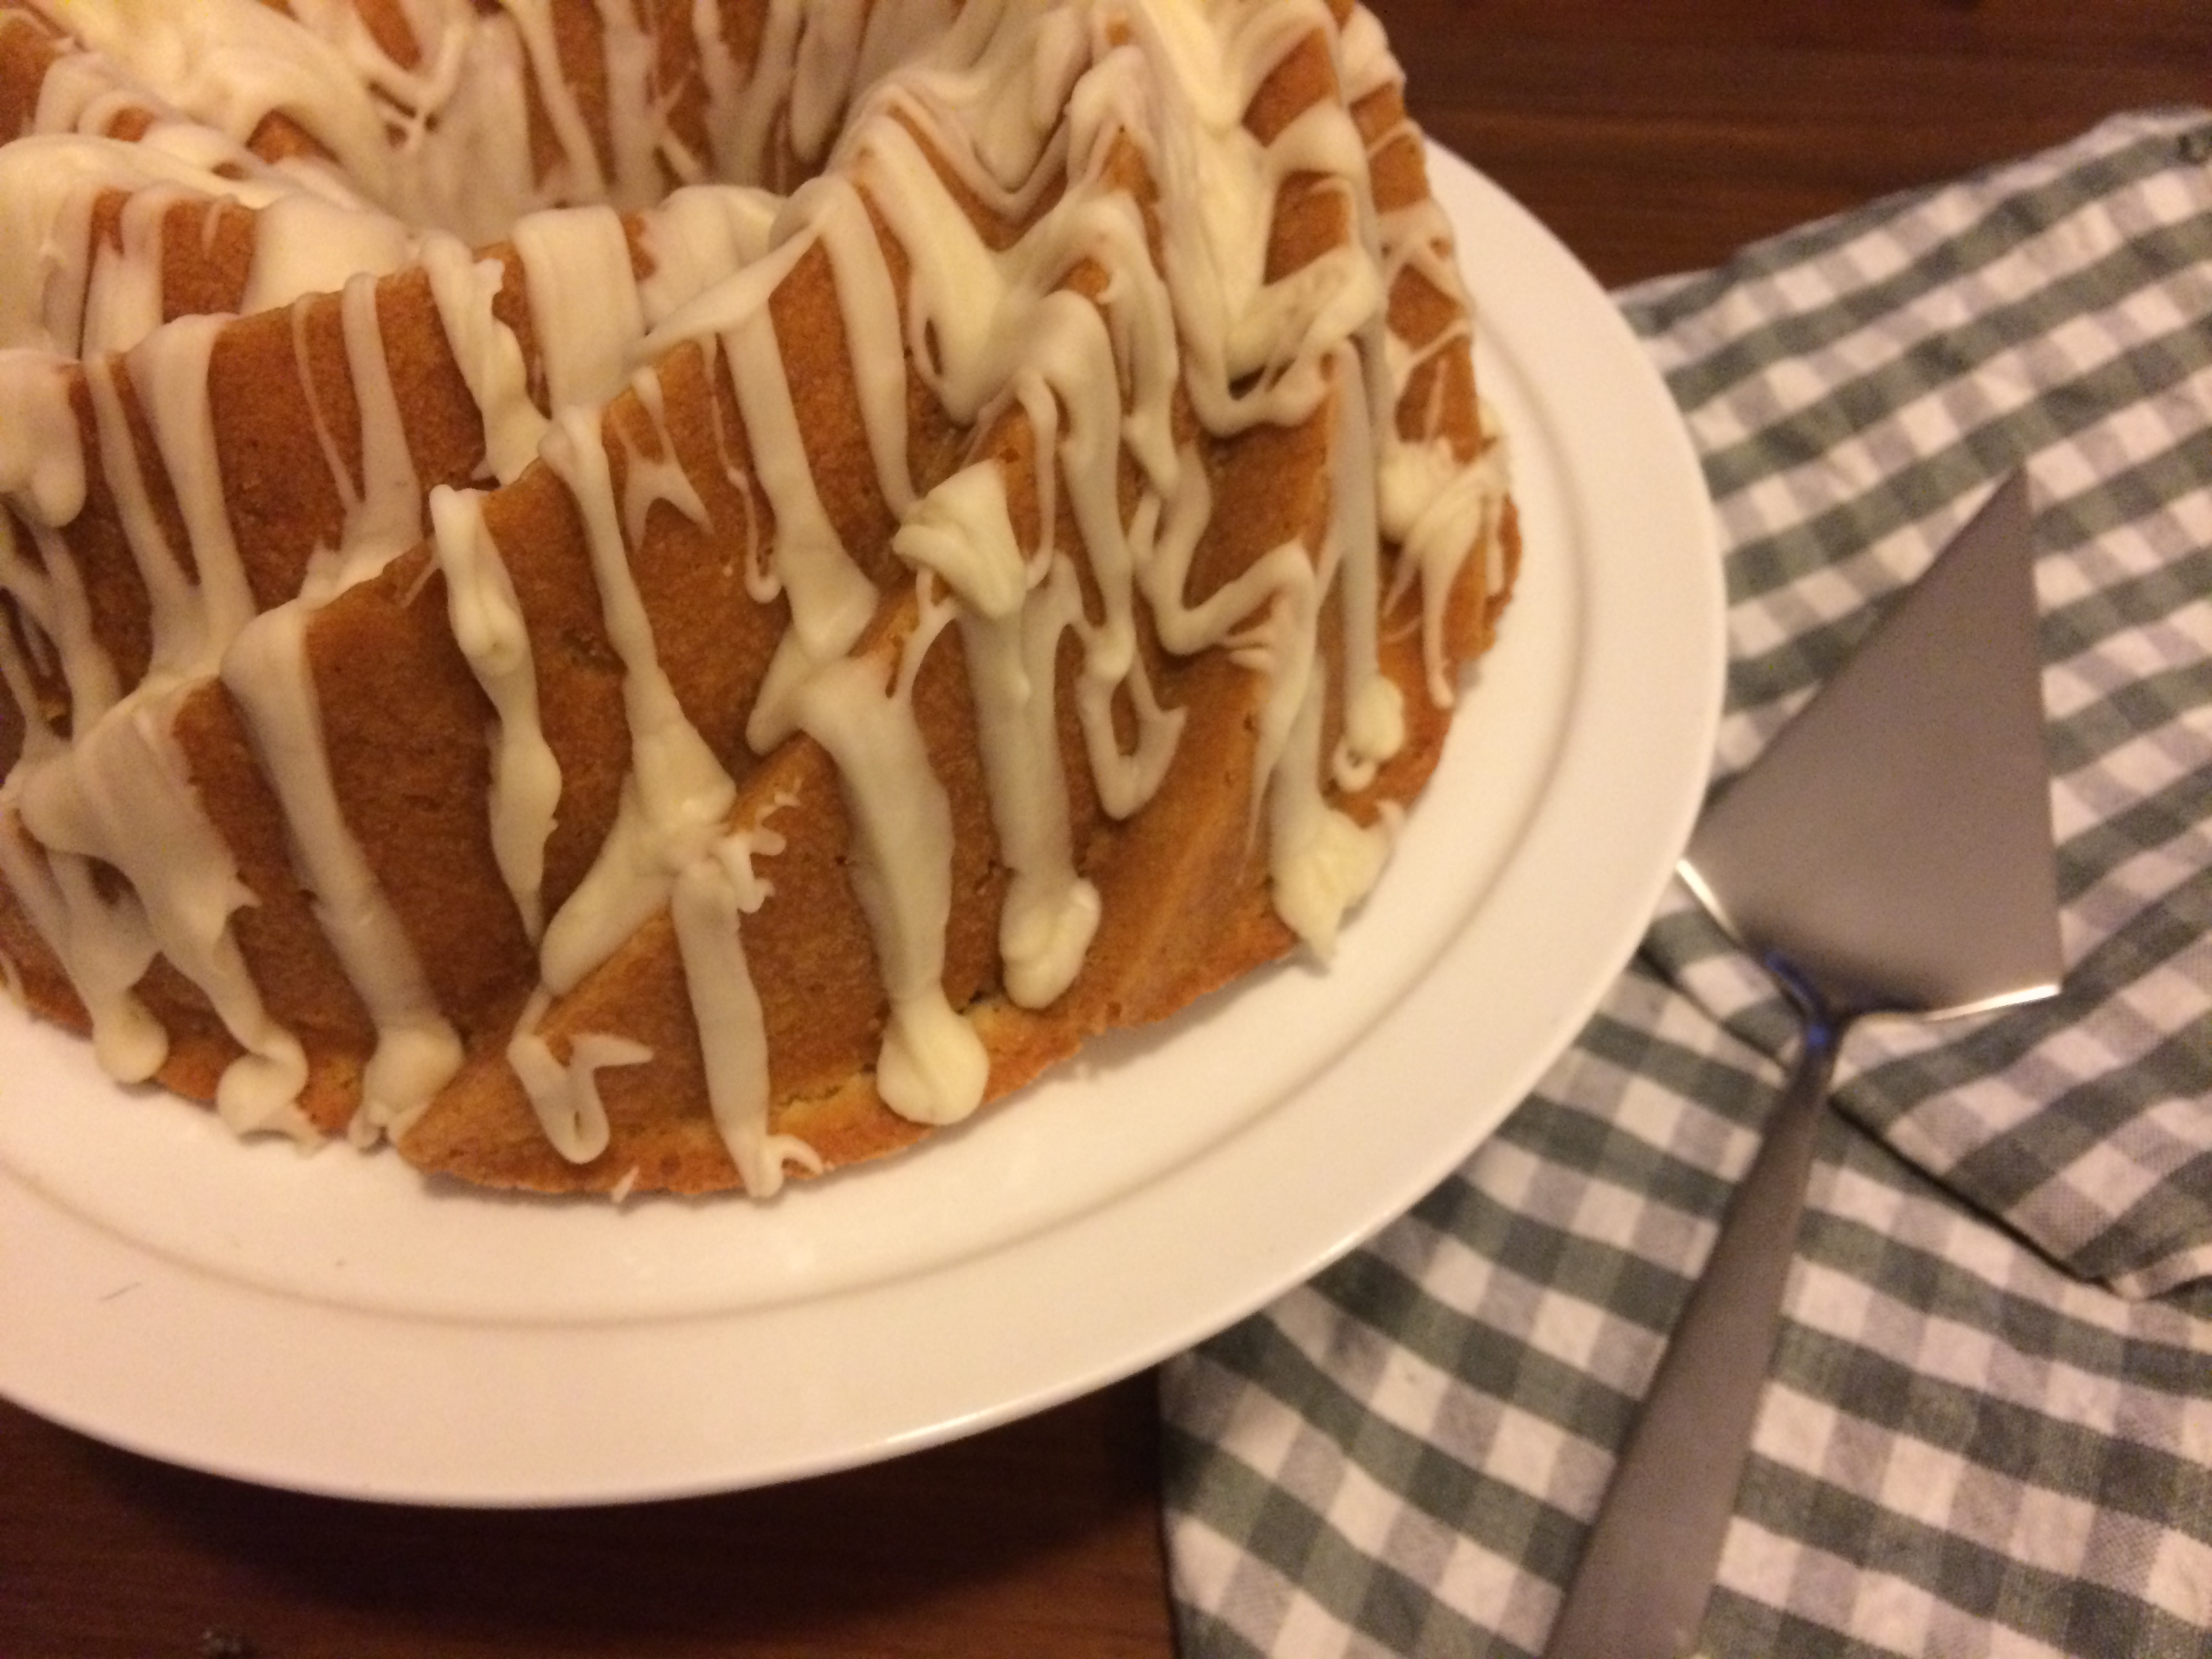
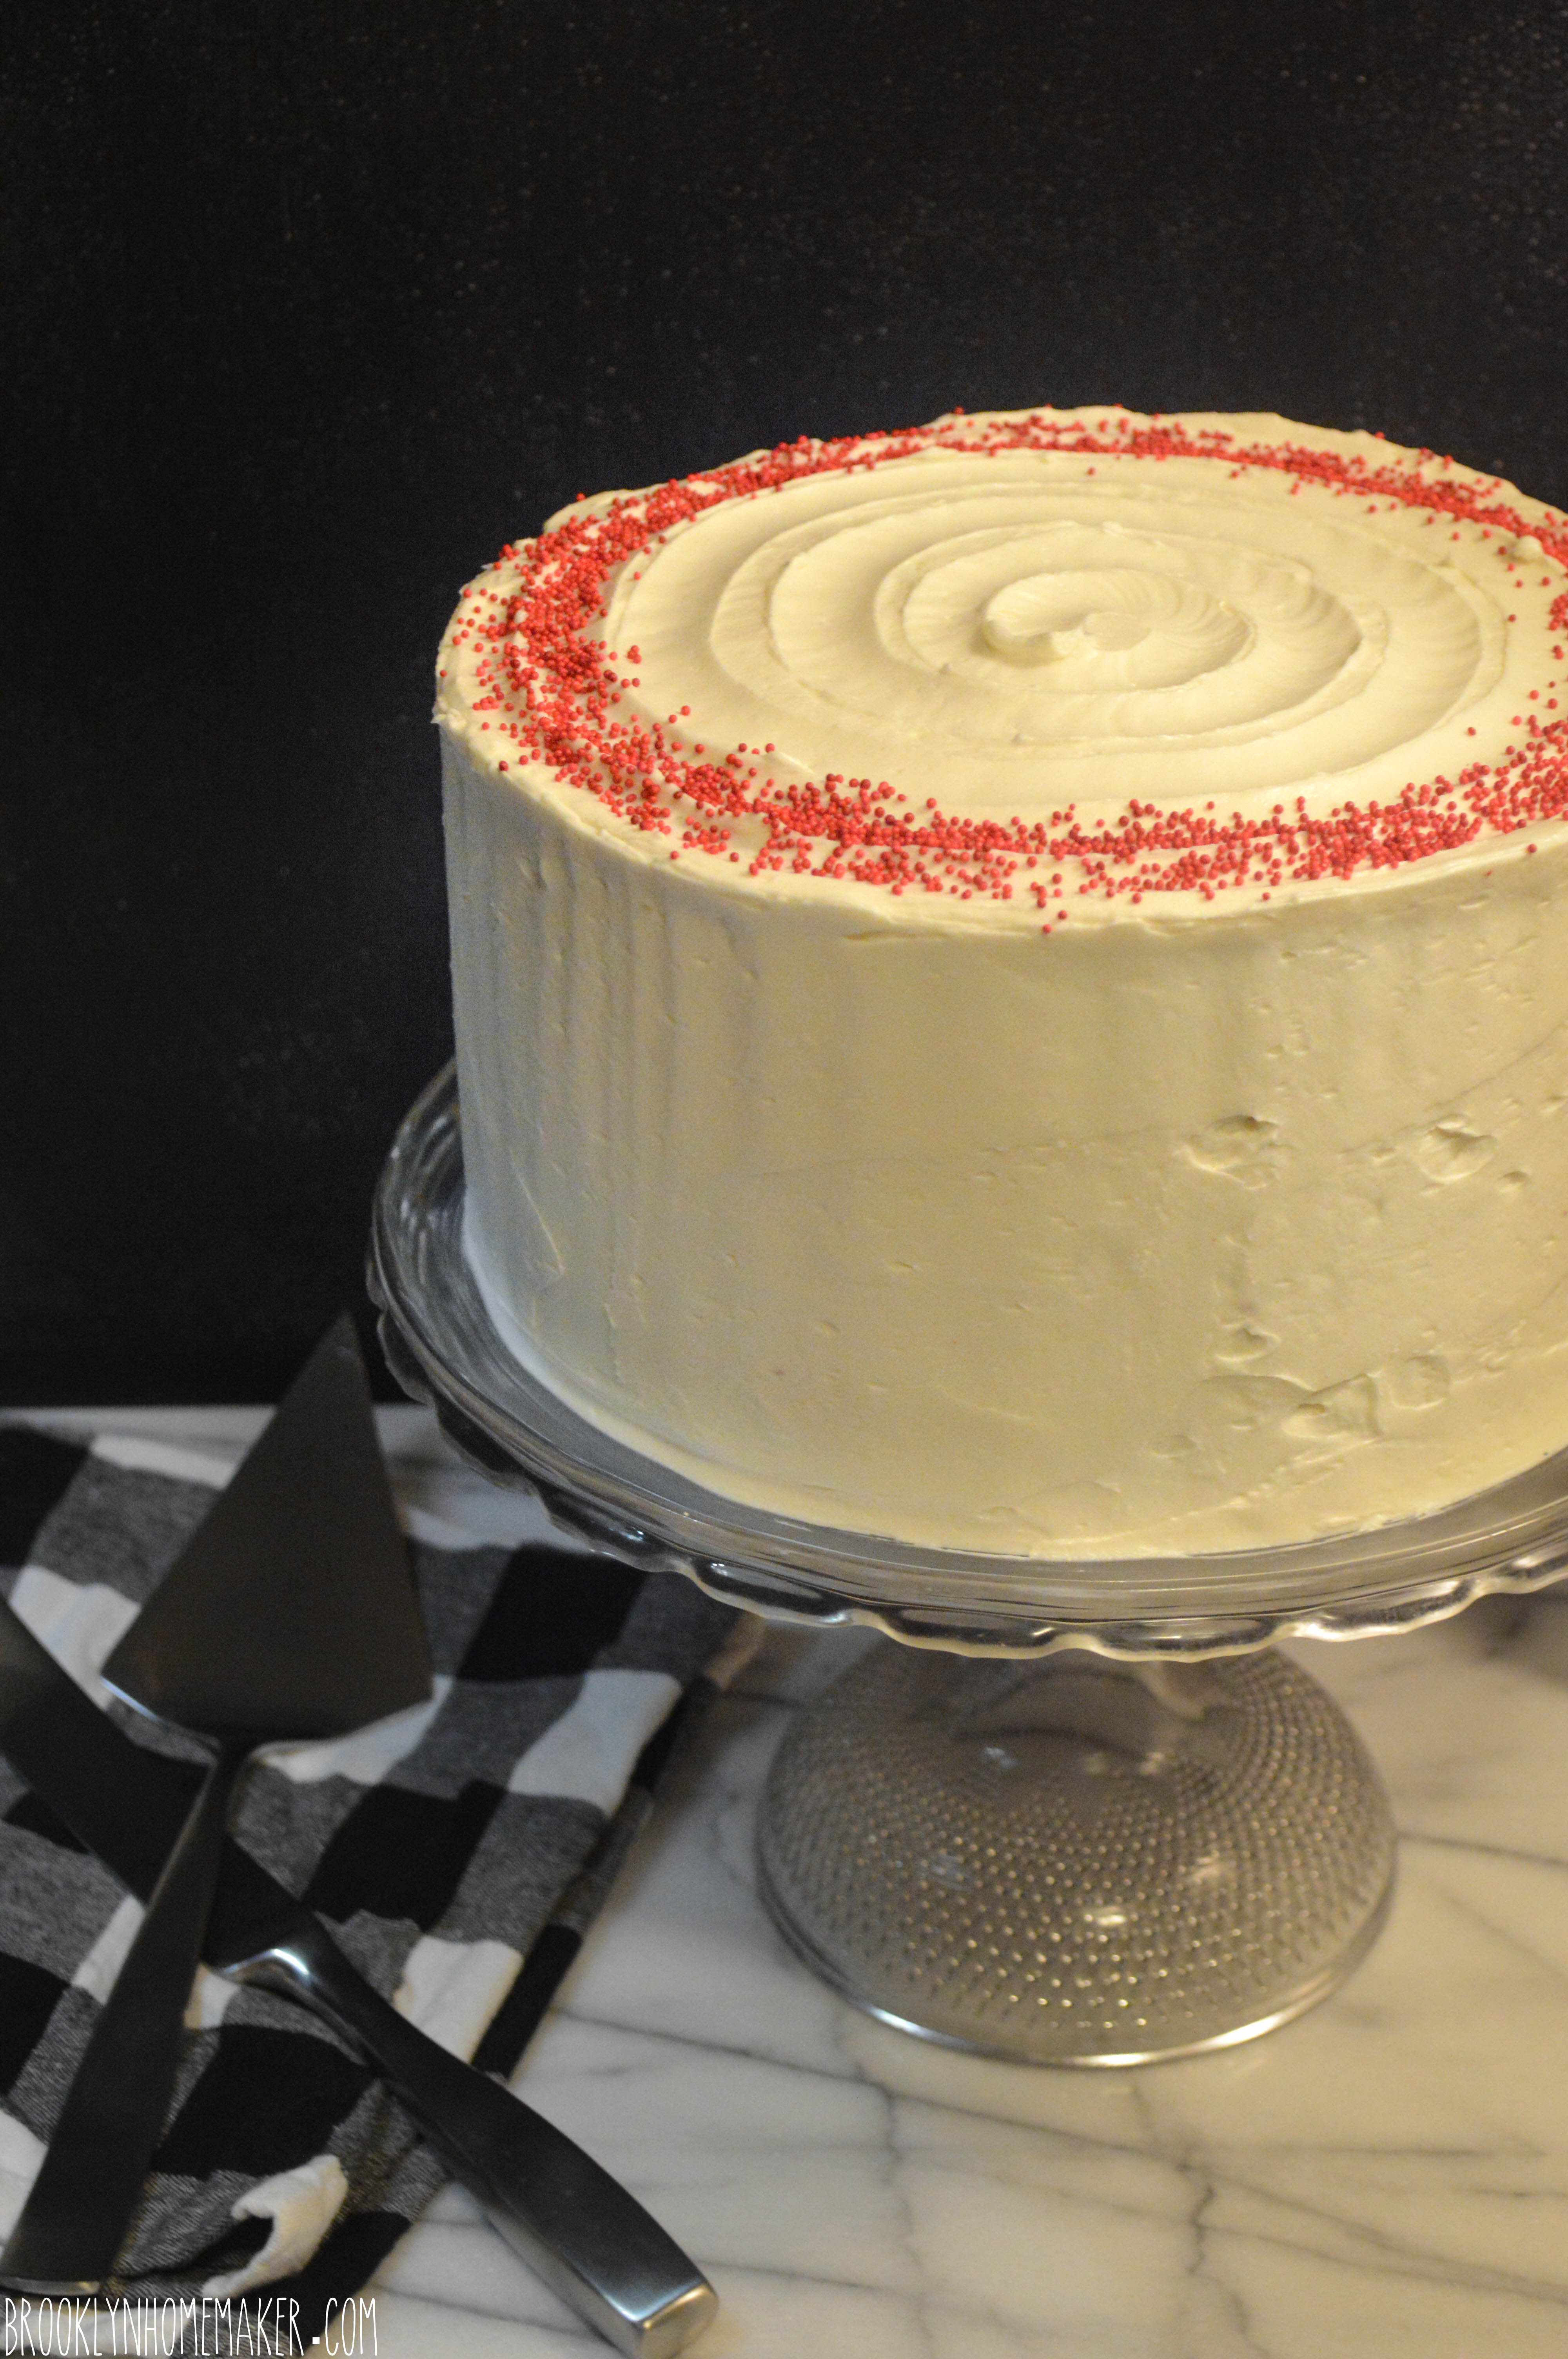
As a former red velvet naysayer, I have to admit that this cake is pretty amazing. The texture is perfect, super moist, with a very delicate light & fluffy crumb from the cake flour. You can definitely taste the cocoa, even though it doesn’t really scream chocolate. It also has a really pleasant delicate tang from the buttermilk and vinegar, which I think would be completely lost if I’d gone with the modern traditional cream cheese icing instead of the ermine. I totally love this icing, btw. It’s much easier to make than a meringue buttercream, but has a very similar stability, mouth feel and texture. It is easy to work with, frosts smoothly and tastes whipped, creamy, light and just sweet enough.

To be perfectly honest, if I’m going to make a cocoa cake I’d like even more chocolate flavor, and even though it’s kind of fun, the amount of food color that goes into this recipe makes me ever-so-slightly uncomfortable. If I’m baking a cake for me, I think I’d rather go for a devil’s food cake, which I think would be delicious (and beautiful) with this same icing. But for special occasions, or for people who love red velvet, this cake is a force to be reckoned with. Perfectly moist & fluffy, with just enough cocoa and buttermilk, and red red RED!

red velvet cake with ermine icing | Brooklyn Homemaker

Red Velvet Cake

  • Servings: makes one 3 layer 8 inch cake, feeds 12-16ish
  • Print
adapted from Smitten Kitchen

2 tablespoons butter
3 1/2 cups cake flour
1/2 cup unsweetened natural cocoa (not Dutch process)
1 1/2 teaspoons salt
2 cups peanut or canola oil
2 1/4 cups granulated sugar
3 large eggs
6 tablespoons (3 ounces) red food coloring (or 1 teaspoon red gel food coloring dissolved in 6 tablespoons of water)
1 1/2 teaspoons vanilla
1 1/4 cup buttermilk
2 teaspoons baking soda
1 tablespoon white vinegar

Preheat oven to 350 degrees. Place teaspoon of butter in each of 3 round 8-inch layer cake pans and place pans in oven for a few minutes until butter melts. Remove pans from oven, brush interior bottom and sides of each with butter and line bottoms with parchment.

Whisk cake flour, cocoa and salt in a bowl.

Place oil and sugar in bowl of an electric mixer and beat at medium speed until well-blended. Beat in eggs one at a time. With machine on low, very slowly add red food coloring, being careful it doesn’t splash. Add vanilla. Add flour mixture alternately with buttermilk in two batches. Scrape down bowl and beat just long enough to combine.

Place baking soda in a small dish, stir in vinegar and add to batter with machine running. Beat for 10 seconds.

Divide batter among pans, place in oven and bake until a cake tester comes out clean, 40 to 45 minutes. Let cool in pans 20 minutes. Then remove from pans, flip layers over and peel off parchment. Cool completely, and level layers with a cake leveler or sharp bread knife. Fill and crumb coat with ermine icing, and place in refrigerator for 30 minutes or more. Then ice and decorate as desired with remaining icing.

Ermine Icing
adapted from Tasty Kitchen 

7  tablespoons flour
1 1/2 cups milk
2  teaspoons vanilla
1 1/2 cup softened unsalted butter
1 1/2 cup Granulated Sugar

In a small saucepan, whisk flour into milk and heat, stirring constantly, until it thickens. You want it to be very thick, almost like brownie batter. Remove from heat and let it cool to room temperature. It must be completely cool before you use it in the next step. Stir in vanilla.

While the mixture is cooling, cream the butter and sugar together until light and fluffy. You don’t want any sugar graininess left. Then add the completely cooled milk/flour/vanilla mixture and beat the living daylights out of it. If it looks separated, you haven’t beaten it enough! Beat it until it all combines and resembles whipped cream.

Spiced Citrus Bundt Cake with Buttered Whiskey Glaze

Blogging is hard work you guys.  Who knew?

The first thing you think of when you read a food blog is, well, the food. But there’s a lot more that goes into blogging than just making food. You have to be able to sit down and write something, and you want it to be written well enough that someone will want to read it. Being able to write for an audience and have your writing be relatable and engaging is a challenge of it’s own. I definitely don’t want to be responsible for any eye-roll-induced headaches.

You also want to be able to photograph your food, and photograph it well enough that the food will look appealing and will make people want to make it themselves. Beyond having your food look nice in a picture, it should taste great too. I would never want to recommend a recipe I don’t stand behind. I could make a beautiful looking meal that tasted terrible, and no one would know until they tried to make it themselves. But what would be the point of blogging about food that isn’t any good? I want to share recipes with you that you’ll love and that you’ll want to make for your family and friends and keep on file to make again and again in years to come.

spiced citrus bundt cake with buttered whiskey glaze | Brooklyn Homemaker

There’s also a certain amount of pressure, probably self imposed, but also probably better for the blog, to post unique and original recipes. I’d rather share something interesting, something that gives me bragging rights, than to post a recipe I copied word for word and ingredient for ingredient from someone or somewhere else. Every once in a while a recipe is so good that tweaking would be completely unnecessary, such as the Aunt Sassy Cake that was my very first post, and of course when I find such a recipe I definitely want to share it with you. For the bulk of my posts though, the meat and potatoes if you will, I want to be able to say, “Why yes I did think this up all on my own, thankyouverymuch.”

spiced citrus bundt cake with buttered whiskey glaze | Brooklyn Homemaker

Over the 15+ years I’ve been cooking, I’ve learned enough to be completely confident toying with recipes to put my own spin on them. I think that most home cooks feel more comfortable making a savory meal their own than changing baking recipes. With a savory meal you can toss in a dash of this, a sprig of that, a splash of this other thing, and if you have a little experience and comfort with it, you’ll usually end up with something good, and sometimes something great. This makes cooking more exciting, and what keeps me wanting to get back in the kitchen to cook for myself and my husband.

When it comes to baking, it gets more complicated. Baking is about formulas and chemical reactions. It’s about math and science. Flour, sugar, leavening, fat & liquid; when combined in the correct proportions, should result in a tasty end product. If you get the ratio wrong though, you can end up with something heavy and flat, or dry, or burnt, or falling apart, or tasteless, or bad tasting. I am no pastry chef, and I won’t claim to be able to come up with a cake recipe from nowhere without needing at least a point of reference. I will say that I’ve been doing this long enough now that I’m comfortable toying with flavors and ingredients in my baking.  If I have an idea in my head for a cake with a certain flavor, I try to find a similar recipe that’s tried and true, and tweak it to try to make it my own.

spiced citrus bundt cake with buttered whiskey glaze | Brooklyn Homemaker

When I dreamed up this cake I was thinking about cold weather, cocktails with friends, and the smells and flavors of the holidays. I was thinking of citrus and spice and a little nip of something to warm you up. I started by finding a recipe for an orange pound cake  that I could convert. A bundt cakes tends to be slightly denser than a layer cake, so pound cake recipes usually translate well. Once I found a recipe that I thought would work well, I set to changing a few things to put my twist on it. I wanted to add a layered citrus flavor so I swapped some of the orange zest and juice for lemon. I also wanted a hint of warm homey spice, so I added some cinnamon and clove, some cardamom and bit of ginger for kick.

spiced citrus bundt cake with buttered whiskey glaze | Brooklyn Homemaker

Well. Sometimes things don’t always work out the way you expect them to. I’m not entirely sure what went wrong, but the first time around, this was a big ol’ failure with a capital FAIL. The flavor of the cake was great, with the perfect levels of citrus and spice, but the cake itself was dry dry dry. Like a loaf of bread. The original recipe called for an orange simple syrup to be brushed on the cake as it came out of the oven.  With a flat loaf-shaped pound cake it’s easy to brush on a syrup and let it soak into the cake, but with a bundt the syrup would run down the sloped sides and puddle on the bottom. I skipped the syrup, assuming wrongly that it was added mostly to boost the orange flavor and not needed to add moisture. Beyond being dry, I also thought the cake was just a bit too sweet for my taste, and if I’d used the syrup it would have been even sweeter still.

I knew though, that the idea for the cake was solid, the flavors worked really well together, and the cake was actually really pretty to boot. So, rather than admit defeat and move on, I decided it was time to try, try again. The next evening after work I went back in for another round, zesting and creaming and sifting and mixing. I dialed down the sugar just a touch, and added a bit more liquid, boosting both the citrus juice and the buttermilk for flavor. I also think that while butter adds the best flavor, cakes baked with oil usually end up impossibly moist, so I increased the amount of fat just a bit and swapped some of the butter for oil. I’ve played with this recipe so much now that I consider it completely my own.

spiced citrus bundt cake with buttered whiskey glaze | Brooklyn Homemaker

Boy did my determination pay off.  I was definitely able to fix the dryness issue, and now the cake is perfectly moist with a tender bite. This cake has it all. Good looks. Great flavor. Perfect texture. The total package. The combination of citrus and spice is comforting and somehow nostalgic. Cold weather always makes me want citrus. There’s something familiar and old fashioned about eating oranges shipped from warmer climates when the weather in the northeast is cold and windy. There is a reason that grocery stores start filling up with tangerines right around Christmas. This time of year you can usually start to find citrus married with spice too. Lemon and ginger tea, clove studded oranges, cinnamon sticks and citrus boiled on the stove to potpourri your home. Classic flavors people, now in cake form.

spiced citrus bundt cake with buttered whiskey glaze | Brooklyn Homemaker

Then we have the whiskey glaze. The flavors of butter and whiskey drizzled over this cake is amazing. They marry incredibly well with the cold weather flavors of the citrus and spices, bringing to mind the flavors of a hot toddy. I used Bulliet rye, because that’s what I had on hand, but it would be amazing with Bourbon too. It’s easy to make, just a simple matter of melting some butter, mixing it with whiskey and whisking in confectioner’s sugar until there are no lumps. I melted the butter in the microwave in a pyrex measuring cup, and mixed the glaze up in the same cup for easy pouring.

The one word of warning is that this glaze is seriously boozey. Three tablespoons of whiskey might not seem like much, but there’s isn’t much else to this so the alcohol is front and center. It isn’t overwhelming since there’s just a small amount of it on each bite, but it definitely is an “adult” addition to this cake. If you want this to be a more family friendly recipe, or if you don’t like whiskey, skip it! A simple citrus glaze would be really great and just as easy- just whisk together some confectioners sugar and orange or lemon juice, maybe some zest too.

spiced citrus bundt cake with buttered whiskey glaze | Brooklyn Homemaker

So go take some butter and eggs out of the fridge and let them come up to room temperature. Don’t kid yourself. Don’t stop yourself. You know you want to make this cake, so just give in and make it. It’s delicious and perfectly moist, and it has whiskey on top. In a couple hours you’re going to eat this cake, you’re going to eat it real good. Like this:

spiced citrus bundt cake with buttered whiskey glaze | Brooklyn Homemaker

Spiced Citrus Bundt Cake with Buttered Whiskey Glaze

finely grated zest of 3 large oranges
finely grated zest of 3 lemons
2 cups granulated sugar
1 1/2 sticks (3/4 cup) unsalted butter, at room temperature
1/2 cup peanut or vegetable oil
4 large eggs, at room temperature
3 cups all-purpose flour
1 teaspoon ground cinnamon
1 teaspoon ground ginger
1/2 teaspoon ground cloves
1/4 teaspoon ground cardamom
1/2 teaspoon baking powder
1/2 teaspoon baking soda
1 teaspoon kosher salt
1/2 cup fresh orange juice
1/4 cup fresh lemon juice
1 cup buttermilk, at room temperature
1 teaspoon pure vanilla extract

Buttered Whiskey Glaze (optional):
3 tablespoons good whiskey
3 tablespoon melted butter
1 1/4 cup confectioners’ sugar, sifted

Directions
Preheat the oven to 350 degrees. Generously grease and flour a 10-12 cup bundt pan.

With the paddle attachment in an electric mixer, mix your citrus zests and sugar together on low for 3 minutes, or until the sugar is golden yellow and you can smell the citrus from across your kitchen. Add the soft butter and cream with the sugar for about 5 minutes, or until light and fluffy.  On low speed, add the oil and then the eggs, one at a time, until just combined.

In a large bowl, sift together the flour, baking powder, baking soda, salt, and spices. In another bowl, combine the orange and lemon juices, buttermilk, and vanilla. Add the flour and buttermilk mixtures alternately to the batter, beginning and ending with the flour. Pour batter into pan and tap on the counter to even the batter and remove air bubbles. Bake for 50 minutes to an hour, until a cake tester comes out clean.

Allow cake to cool for an hour or more before turning out onto a cooling rack. To make the glaze mix the melted butter and whiskey together in a small bowl. Whisk in confectioner’s sugar and continue to whisk until combined and free of lumps. If too thick, you can add a few more drops of whiskey to thin it for easy pouring. Pour over the top of the completely cooled cake and allow the glaze to dry before serving.

Chocolate Orange Bundt Cake

I love a Bundt cake. I really do. Maybe it’s because they remind me of my childhood, or my grandmother, or maybe it’s because they have the ability to be elegant and un-fussy all at once. To me, baking a bundt is so much simpler than leveling, filling, crumb coating, refrigerating, icing, and decorating a layer cake, After baking a bundt you just let it cool, turn it out, and either pour on a glaze or dust with confectioner’s sugar. Despite their simplicity, they can still have the same impact when you want to wow your guests.

chocolate orange bundt cake | Brooklyn Homemaker

When I was coming up with the idea for this cake I knew I wanted a rich chocolatey base flavor, but wanted to add a little something extra to take it to another level. At first I was thinking about cherries or fresh berries, but I started thinking about those Terry’s chocolate oranges that were popular about a decade ago and I knew what I had to do. I scoured the internet for recipes but the best I could come up with were marble cakes with swirls of chocolate and orange flavored yellow cake, and that was definitely not what I was looking for. I wanted this to be a CHOCOLATE cake with a capital C-H-O-C-O-L-A-T-E, and for it to be completely perfumed with that sweet bright orange flavor.

chocolate orange bundt cake | Brooklyn Homemaker

I ended up deciding to take some liberties with a recipe for a super moist chocolate buttermilk cake. The original called for brewed coffee to enhance the chocolate flavor, but I decided to swap the coffee for fresh orange juice and zest, and add some more chocolate for good measure. I did keep the buttermilk though, which always gives anything that goes into the oven a beautiful flavor.

chocolate orange bundt cake | Brooklyn Homemaker

My only complaint about buttermilk is that I can never find it in a pint carton. In my area it only comes in quarts, and no matter how much baking I do, I always have a ton left over. Even though it’s delicious in baking, on its own, not so much. The only person I’ve ever known who actually drank buttermilk was my great-grandmother Nana. Her real name was Opal but I only knew her as Nana. She was from Little Rock by way of England, and she loved a tall glass of buttermilk. I tried some with her once when I was a kid and decided there was something VERY wrong with Nana’s pallet.  It wasn’t until later in life that I realized it’s potential to completely transform baked goods.
I used to use what I needed and let the rest hang out in the fridge, hoping I’d need it again before it went bad, but nine times out of ten I’d end up admitting defeat and tossing it a week or two later. About a year or two ago I read somewhere that buttermilk freezes well, and my life was forever changed.  You must be patient though, maybe even try to think ahead, and let the buttermilk thaw on its own. Frozen buttermilk takes on a really funky texture when microwaved.

chocolate orange bundt cake | Brooklyn Homemaker

I sometimes hear that people are afraid of bundt cakes, that they’re afraid they’ll fall apart or stick to the pan. My advice is to be very thorough and liberal when you butter and flour the pan, and to let the cake cool before you try to un-mold it. I use a paper towel when I’m buttering and go over the pan twice to make sure I haven’t missed any corners or detail. Don’t be afraid of using too much butter. Embrace the butter.

chocolate orange bundt cake | Brooklyn Homemaker

For this cake I used the Nordic Ware Heritage bundt pan. You can find it here if you’re interested. As if a traditional bundt pan weren’t impressive enough, this pan adds a modern twist to the classic shape. The lines of this cake just make it impossibly stylish.

chocolate orange bundt cake | Brooklyn Homemaker

Just look at those ridges. Look at those clean lines. So fancy. It looks like a craggy mountain when sliced.

chocolate orange bundt cake | Brooklyn Homemaker

I think the golden glaze with bright little specks of orange zest looks really beautiful against this almost black super-chocolatey cake. The recipe I adapted this cake from called for a thick bittersweet chocolate and sour cream glaze, but I thought a simple powdered sugar glaze would compliment and enhance the delicate citrus flavor of the cake instead of competing.

chocolate orange bundt cake | Brooklyn Homemaker

In case I forgot to mention it, this cake is GOOOOOD. It really delivers in the chocolate department, the oil and buttermilk keep it unbelievably moist, and the orange juice and zest add a sunny sweetness that permeates the cake. The smell alone is enough to get you going when you cut into it. Going. Going.

chocolate orange bundt cake | Brooklyn Homemaker

Gone.

chocolate orange bundt cake | Brooklyn Homemaker

Chocolate Orange Bundt Cake

adapted from Joy the Baker

For the Cake:
1 1/4 cups orange juice
2 Tablespoons orange zest
3/4 cup Dutch process cocoa powder
2 1/4 cups sugar
1 1/4 teaspoons kosher salt
2 1/2 teaspoons baking soda
2 whole eggs
1 egg yolk
1 1/4 cups buttermilk
1 cup plus 2 Tablespoon canola oil
1 1/2 teaspoons vanilla extract
2 1/2 cups, plus 2 Tablespoons all-purpose flour, sifted
1 cup mini chocolate chips or finely chopped bittersweet chocolate

For the Glaze:
2 cups confectioners’ sugar
1/4 cup fresh orange juice
2 tablespoons orange zest

Place an oven rack in the center of the oven and preheat to 350 degrees F.
Liberally butter and flour a 10 to 12 cup Bundt pan and set aside.

make the cake batter:
Whisk orange juice and cocoa powder in a small saucepan and bring to a boil, whisking frequently. Remove from heat, whisk in zest, and let come to room temperature.

In the bowl of a stand mixer with a whisk attachment, mix together sugar, salt, baking soda, eggs and egg yolk on low for about 1 minute. Add the buttermilk, oil and vanilla extract and mix on low again for another minute.

Add the flour and mix on medium speed for 2 minutes.  Add the cooled cocoa mixture and mix on medium speed for 3 minutes.  Mix in chocolate chips on low. The batter will be very loose.  Pour into the prepared cake pan and bake for 55-65, or until a cake tester or toothpick inserted in the cake comes out clean.

Let the cake cool completely in the pan and then invert onto a cooling rack.

make the orange glaze:
Add confectioner’s sugar and zest to orange juice and whisk until you can’t see any lumps. I like to do this in a glass measuring cup with a spout so you can pour the glaze easily.

Place a baking sheet under the cooling rack your cake is on. Pour the glaze over the Bundt cake, covering it completely. If you have leftover glaze, go back in for another coat.  Transfer to a cake plate or platter by gently sliding the cake off the rack, use a thin spatula to help lift it if necessary. Leave at room temperature until ready to serve. The glaze will harden and form a sort of candy shell and keep the cake inside crazy moist.

Aunt Sassy Cake

Well hello there! Welcome to Brooklyn Homemaker!
I’m Tux. I live in Bushwick, Brooklyn with my husband Russell and our two miniature schnauzers, Doris and Betty. Nothing makes me happier than cooking, baking, and making our home a beautiful comfortable place.

Over the weekend we hosted a brunch for our friends who were recently engaged to discuss wedding planning, and see if they wanted to take any of our wedding supplies off our hands and free ups some space in our guest room. After brunch and a few cocktails I sliced into a cake I’d baked and our friends DEMANDED that I start blogging. They would not take no for an answer and all my excuses and what if’s were ignored and met with more insistence. This is not the first time I’ve been told I should blog, and It’s not the first time I’ve considered it. I’m really good at talking myself out of things in the name of being “realistic”, but my friends helped me break through that this weekend. I don’t know if it was their enthusiasm, the unearthly delicious cake, or the multiple cocktails consumed over the course of a few hours, but here I am.
As much as I love cooking, especially baking, turning a bag of groceries into a meal is not my only interest. Since blogging tends to be an exercise in self-indulgence, I’ve decided that I’m not going to limit the subject of Brooklyn Homemaker to any one subject. Along with cooking, I also love interior design, gardening, furniture restoration, event planning and party hosting, and a number of other things that manifest themselves in my life and home on a daily basis. I’d love nothing more than to share all of those interests with you here, so please, keep coming back and seeing what I’m up to!

So here I am, writing my first official post on Brooklyn Homemaker.
After months of drooling over photos of Baked’s Aunt Sassy Cake, I decided to go for it. It was clear from the recipe that this cake was to be saved for a special occasion, and from the day this cookbook came into my home I would look a this recipe and think, one day. This past weekend, one day finally came and I have to say that this 3 layer pistachio cake with honey buttercream was worth the wait.

Aunt Sassy Cake | Pistachio cake with honey buttercream | Brooklyn Homemaker

This cake is filled with ground pistachios but somehow manages to be heavenly light and fluffy thanks to the addition of whipped egg whites that are folded in at the end. Be careful not to over mix the batter after they’re combined or you can squeeze out some of that airy lightness. The fluffiness of this cake really takes it to an almost ethereal place, so you want to make sure keep it as light as possible.

Aunt Sassy Cake | Pistachio cake with honey buttercream | Brooklyn Homemaker

Full disclosure: I had a little bit of trouble getting my cakes out of the pans. I have pre-cut parchment rounds that fit 9 inch pans, but had to cut my own for the 8 inchers and they came out a little too small and they didn’t reach the edges of the pans. Since this cake is so fluffy and moist it wants to stick to the pans, so I’d suggest taking the extra time to make sure your parchment fits properly so you can get it out. They came out mostly fine but one of the layers got a little bit stuck and I had to do some quick cake surgery to get it back together. Once the crumb coat went on the cake everything was hidden.  I firmly believe that beyond keeping a cake from drying out, icing helps hide a multitude of sins. That was certainly true with this cake, and when the cake was sliced there was no telling that anything had happened.
I brought my icing opinions up during brunch and may have inadvertently made the bride-to-be think twice about her dream for a naked wedding cake. I think naked cakes can be gorgeous, but if the cake layers are not completely perfect the cake will look messy, and if the cake isn’t super moist it can dry out since it’s not encased in layers of fat and sugar.

Aunt Sassy Cake | Pistachio cake with honey buttercream | Brooklyn Homemaker

Speaking of layers of fat and sugar, the honey buttercream icing on this cake is unbelievable. This is not like any icing I’ve ever made before, but I will definitely be making it again. This is a cooked icing with an end result similar to a meringue buttercream, stable and thick, but at the same time creamy and smooth. Instead of cooked egg whites though, this frosting uses flour for thickening. It’s a similar concept to the old school Ermine icing traditional for red velvet cake, but instead of just boiling the flour and milk, the sugar also gets boiled in this recipe. This means that the sugar completely dissolves and begins to cook so that gluten isn’t the only thing thickening this icing. Once the boiled milk mixture is whipped cool, unsalted butter is whipped in until silky smooth. Last, a bit of honey goes in with vanilla to add some depth and an almost floral quality.

Aunt Sassy Cake | Pistachio cake with honey buttercream | Brooklyn Homemaker

Obviously I took these pictures with my iPhone. I know they’re not great, but they’re the only evidence I have of the amazing Aunt Sassy Cake. Now that I’m going to start blogging I’m looking into buying a real camera, but I need to weigh my options and see what I can afford and what would work best for my needs. I live in a railroad apartment with no window and no natural light in my kitchen, so that can be tough. I also have a benign tremor in my hands that means I have a very slight but rapid shake that makes getting a camera to focus challenging. Does anyone out there have any suggestions?

Aunt Sassy Cake

  • Servings: makes one 8 inch 3 layer cake, serves 12-16ish
  • Print
Adapted, just barely, from Baked Explorations, page 165

Cake:
1 cup shelled pistachios (plus 1/3 cup for decorating)
2 1/2 cups cake flour
3/4 cup all-purpose flour
1 tablespoon baking powder
1 teaspoon baking soda
3/4 teaspoon salt
1 cup (2 sticks) unsalted butter, softened
1 3/4 cups sugar
1 tablespoon pure vanilla extract
1 large egg
3 large egg whites, at room temperature
1 1/2 cups ice-cold water
1/4 tsp cream of tartar

Honey Vanilla Buttercream:
1 1/2 cups sugar
1/3 cup all-purpose flour
1 1/2 cups whole milk
1/3 cup heavy cream
1 1/2 cups (3 sticks) unsalted butter, soft but cool, cut into small pieces
1 teaspoon pure vanilla extract
3 tablespoon honey

Make the cake:
Preheat the oven to 325° F. Butter three 8-inch round cake pans, line the bottoms with parchment rounds, butter the parchment, and lightly dust with flour. Knock out any excess flour.

Pulse the pistachios in a food processor until they are coarsely chopped. Reserve about 2 tablespoons of coarsely chopped pistachios in a large bowl. Process the rest of the pistachios until they are almost powdery. Stir the pistachio powder in with the reserved coarse pistachios; add the flours, baking powder, baking soda and salt; and whisk well to combine.

In the bowl of a stand mixer fitted with the paddle attachment, beat the butter on medium speed until light and creamy, about 3 or 4 minutes. Add the sugar and vanilla and beat until fluffy, about 3 minutes. Scrape down the sides of the bowl, add the whole egg, and beat until just combined. Turn the mixture to low.

In a measuring cup, measure out 1 1/2 cups ice water. Add the flour mixture to the mixer in three parts, alternating with the ice water, beginning and ending with the flour mixture. For each addition, turn the mixer to low to add ingredients, then up to medium speed for a few seconds until incorporated. Scrape down the bowl, then mix on low-speed for a few more seconds.

In a medium bowl, whisk the egg whites and cream of tartar until soft peaks form (I promise you can handle doing this by hand. Don’t be intimidated, it should only take 5 minutes max, probably less). Do not over beat. Gently fold the egg whites into the batter.

Divide the batter among the prepared pans and smooth the tops. Bake for 40-45 minutes, rotating the pans halfway through the baking time, until a toothpick or cake tester inserted into the center of the cakes comes out clean. Transfer cakes to a wire rack and let cool for at 20 to 30 minutes. Line your cooling rack with parchment and turn the cakes out onto the rack. Let cool completely. Remove the parchment rounds.

Make the honey vanilla buttercream:
In a medium sized heavy-bottomed saucepan, whisk the sugar and flour together. Add milk and cream and cook over medium heat whisking regularly, until the mixture comes to a boil and thickens, about 10 to 15 minutes.

Transfer the mixture to the bowl of a standing mixer with paddle attachment. Beat on high until cool (this should take about 10 or 15 minutes of mixing). You may want to cover the mixer with a towel to keep the mixture from splashing your kitchen. Add the softened butter and mix until thoroughly incorporated. Increase the speed to medium-high and beat until frosting is light and fluffy, 1 to 2 minutes.

Add the vanilla and honey and mix until combined. If the icing is too soft, you can put the bowl in the refrigerator to chill slightly, then beat again until it is proper consistency. If the icing is too firm, you can set the bowl over a pot of very gently simmering water and beat with a wooden spoon until it is the proper consistency.

Assemble the cake:
Place one cake layer on a serving platter. If necessary, trim the top with a cake leveler or sharp serrated knife to create a flat surface. Evenly spread just over a cup of icing on top. Add the next layer, trim and frost it with the same amount of icing, then add the third layer. Spread a very thin layer of frosting over the sides and top of the cake and put it in the refrigerator for about 30 minutes to firm up. (This is known as the crumb coating and will help keep loose cake crumbs from showing in the final layer of icing.) Spread the sides and top of the cake with the remaining icing. Garnish the cake with crushed pistachios and refrigerate it for 15 minutes to it firm up before serving. If you want to refrigerate it longer before serving, take it out to come up to room temperature at least an hour or two before serving.

This cake will keep well in a cake saver at room temperature for up to 3 days, if the weather is not too hot or humid. Otherwise, put the cake saver in the refrigerator for up to 3 days.