Author: Tux | Brooklyn Homemaker

A food and lifestyle blog focused on gussied up american classics, baked goods with a history, and schnauzer babies.

Pfeffernusse

My family background is mostly German. Both sides of my family have German origins, but my paternal grandfather is the most recent to have moved to the US, having immigrated after WWII. I remember when I was younger he would spend hours on the phone speaking German to his brothers and sisters, most of whom all live spread throughout upstate New York. Christmas was always a time when they would send each other gifts that reminded them of home, and that time of year meant my grandparents house would be filled with all kinds of German treats.

pfeffernusse | Brooklyn Homemaker

Grandpa had an ever growing collection of beer steins that his cousins would send him from Germany. When my sisters and I turned 21 we started trying to find his favorite types of German liqueurs (he’s a fan of the sweet stuff) like Kirschwasser and Barenjager. My grandmother never really cared much for German food or cooking, so the German edibles around the house tended to be candies, cookies and cakes. One of his favorites was Stollen, a bready yeasted fruitcake filled with marzipan, candied fruit and nuts, and usually covered in powdered sugar or a thick white glaze.  I never really developed a taste for Stollen, but another one of his favorites, Pfeffernusse, I absolutely love.

pfeffernusse |Brooklyn Homemaker

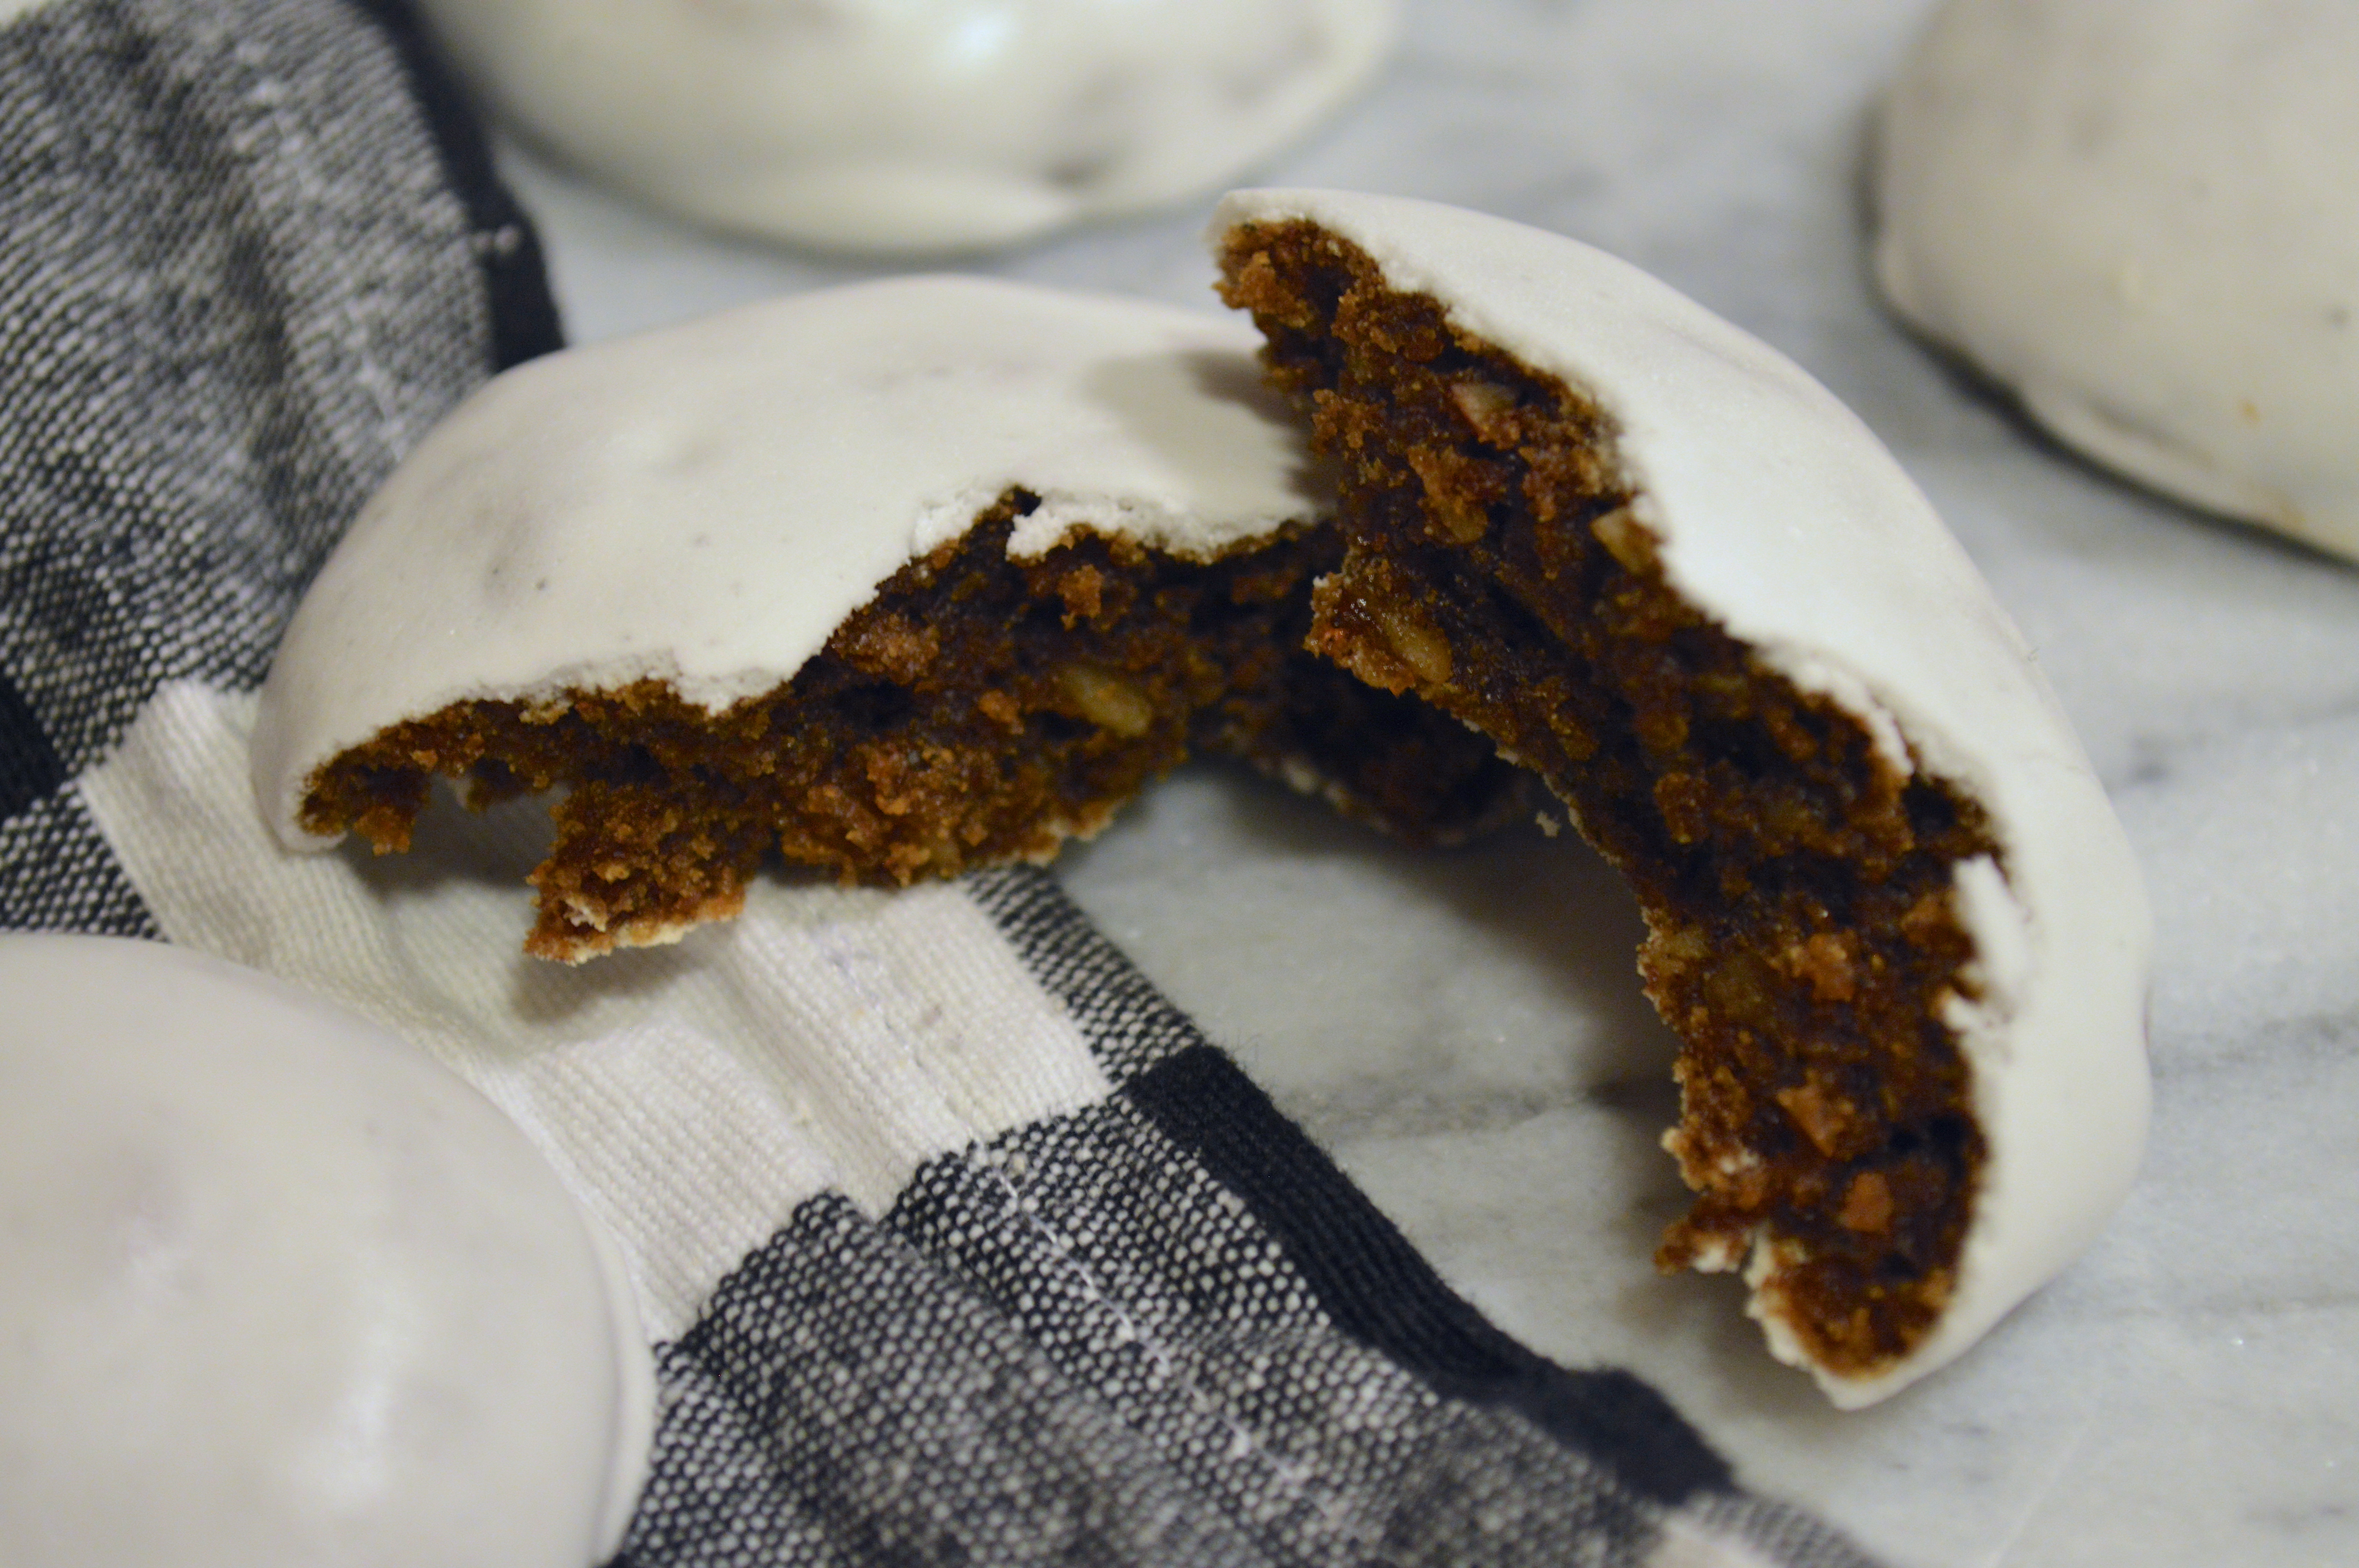
Pfeffernusse, AKA Peppernuts, is a strongly flavored European spice cookie. It’s kind of similar to a strong gingerbread in flavor, but with a bit less ginger, and with finely ground black pepper instead. Pfeffernusse traditionally has some ground or finely chopped nuts in it, along with citrus zest, molasses and brandy. Some say this is an acquired taste, but I just think it’s not what people expect when they pick them up. Either way, this is an amazing underrated cookie that you will love if you give it a chance. They have a very subtle sweetness with a pleasant old-world holiday spice flavor. They also have a really fun name. Just say it out loud. Pfeffernusse. Pfeffernusse. Pfeffernusse!

pfeffernusse |Brooklyn Homemaker

There are a lot of pfeffernusse recipes out there, but this one is as close to traditional as I could find. A lot of recipes I found didn’t have enough spice, many of them skipped the nuts and citrus, and most omitted the brandy. This recipe, from the Joy of Cooking, is just what I was hoping for. Store bought pfeffernusse can sometimes be a bit dry, but this recipe produces a moist, chewy and cakey cookie. It’s got a very respectable amount of spice, the molasses and brandy flavors really come through with the citrus close behind, and the soft almonds give it a bit of texture.

pfeffernusse | Brooklyn Home

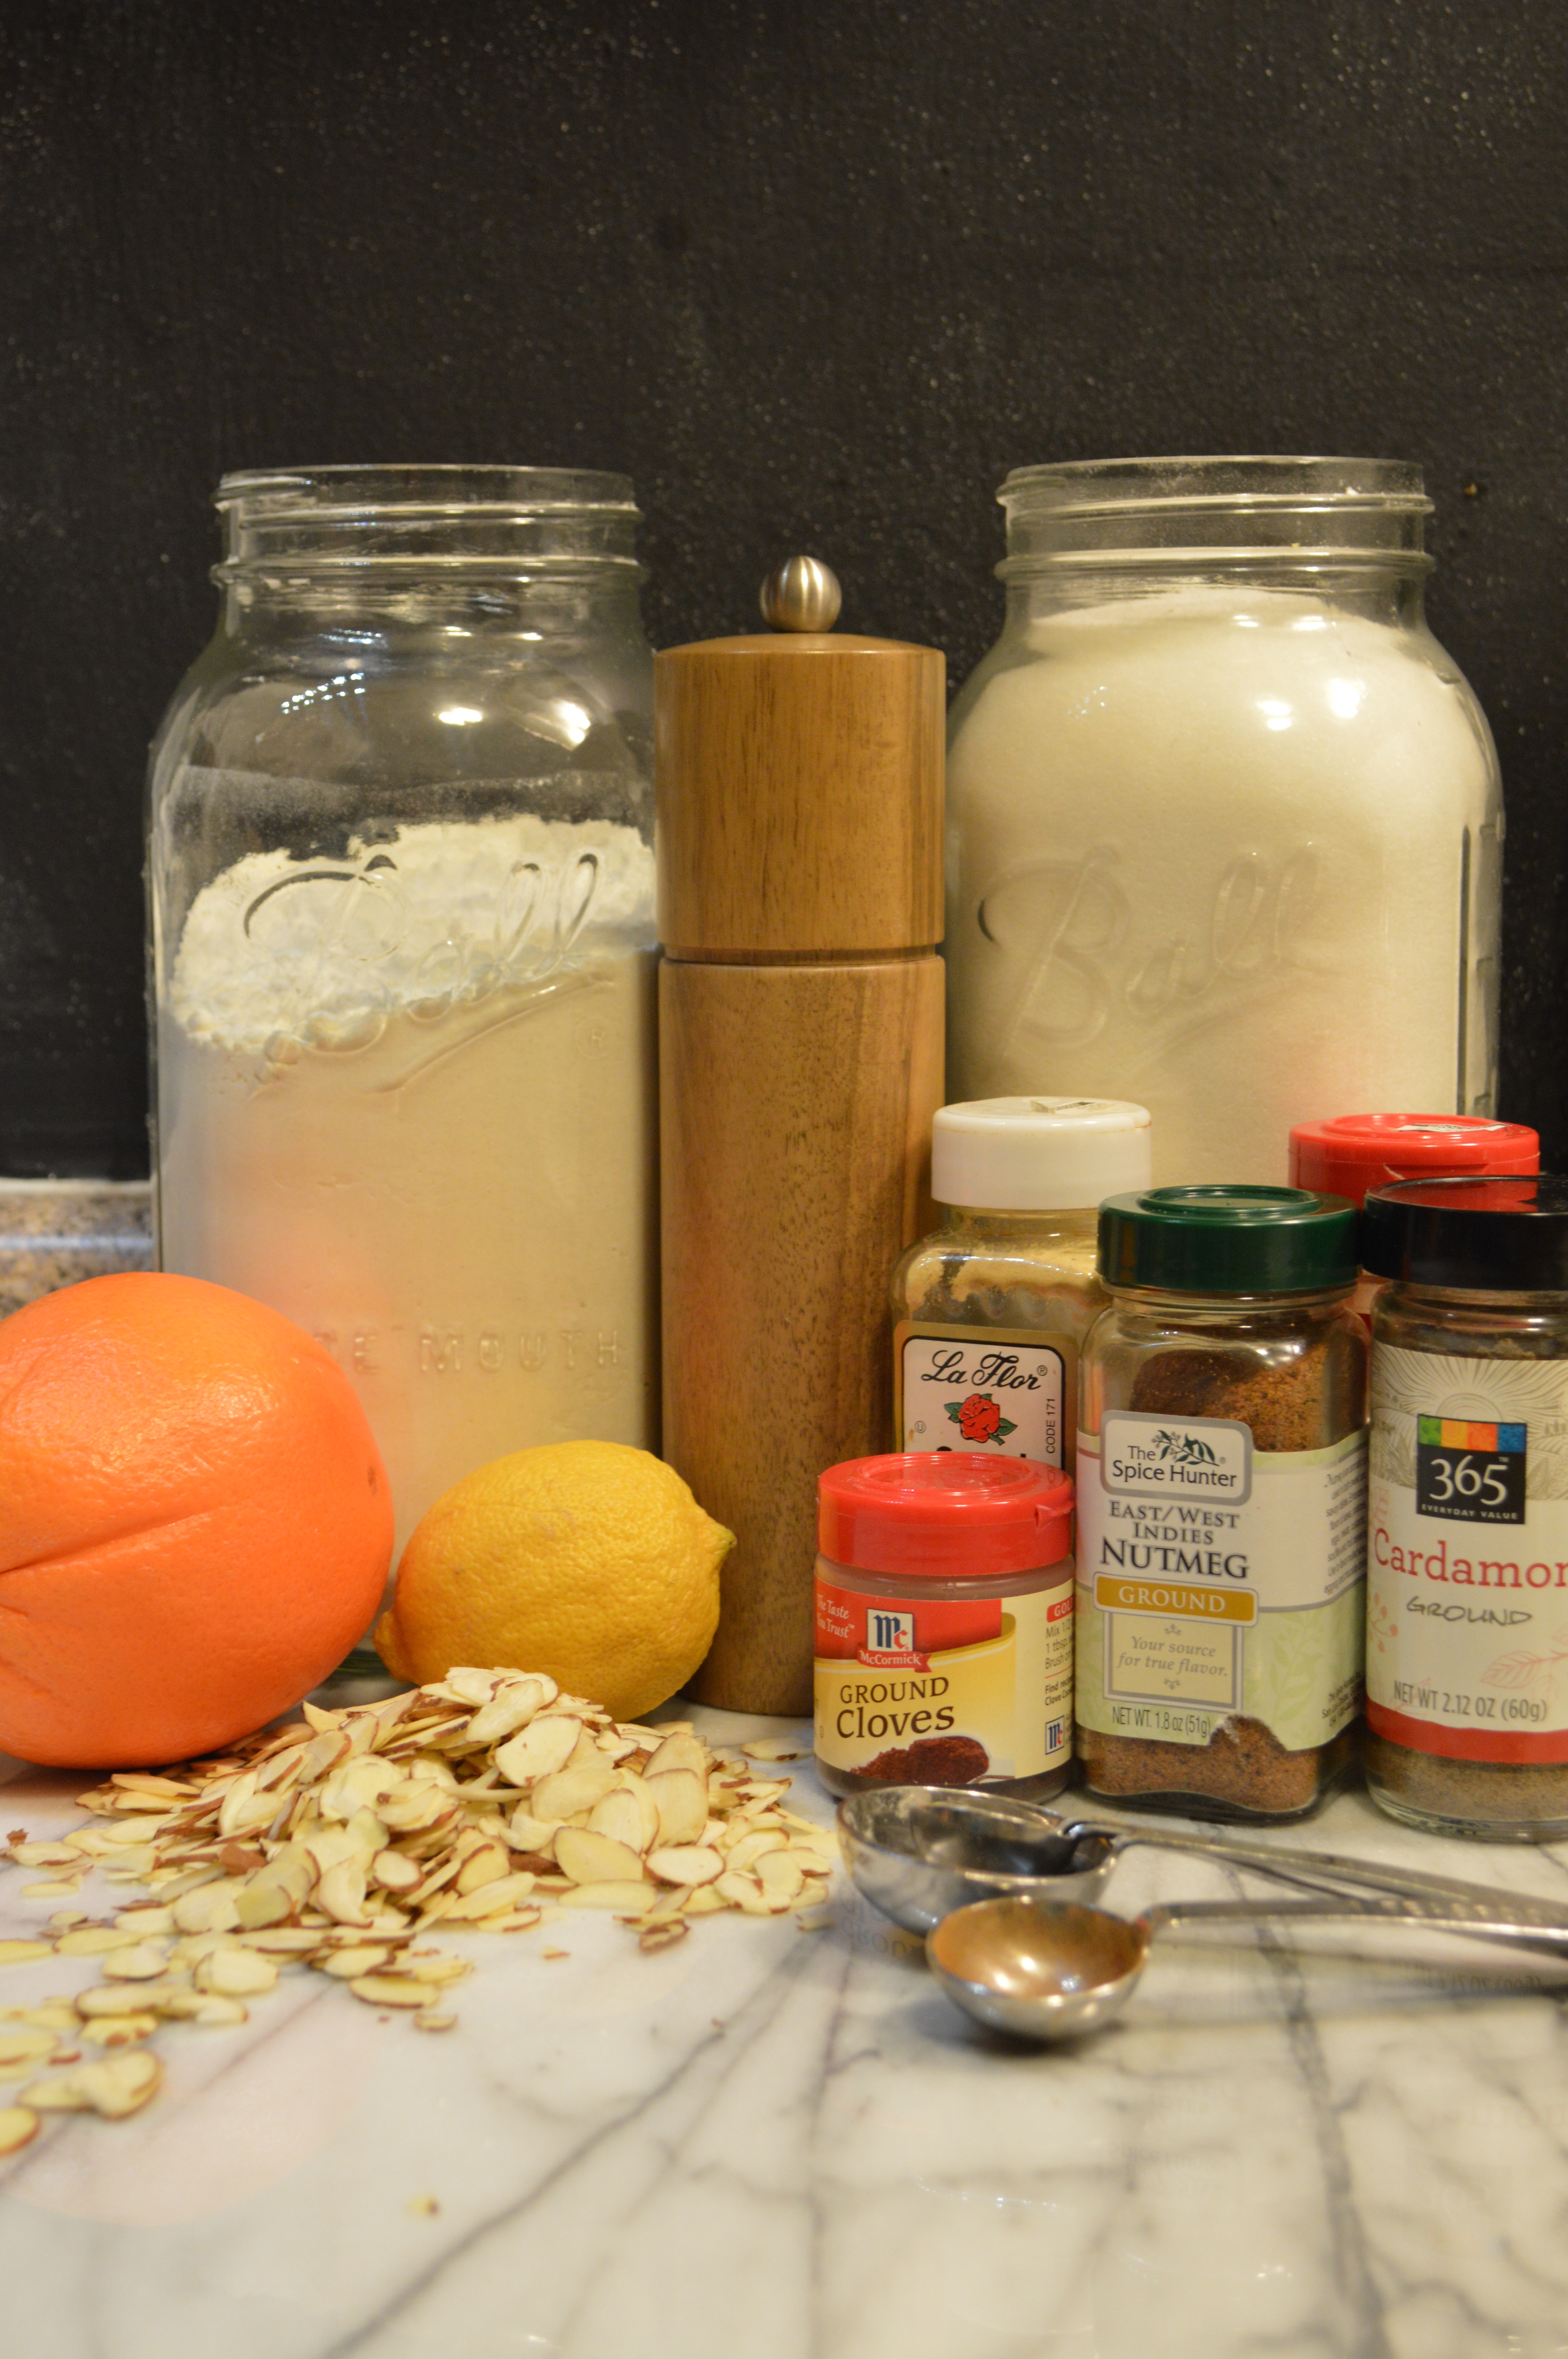
The list of ingredients in this recipe is substantial, with many different spices going into this cookie to give it it’s distinctive flavor. One spice you might not have in your cabinet is cardamom, but I implore you to try to find it. It has an exotic floral citrus flavor and is slightly reminiscent of cinnamon & ginger. It goes really well in spice cakes and similar desserts, especially desserts with apples. I love to add it to apple pie, and when I used to make apple butter I considered it my secret ingredient. As for the brandy in this recipe, it mostly bakes off in the oven, but imparts a great flavor and adds moisture, so I definitely wouldn’t skip it. If you don’t have brandy and don’t want to buy it to use a few tablespoons, you could sub it with another alcohol like rum or bourbon. Orange liqueur could be nice too but might make the cookies too sweet so you might want to reduce the sugar a tablespoon or two. I wouldn’t use Irish or Scotch whiskey because the flavor can be too strong or even smoky.

pfeffernusse | Brooklyn Homemaker

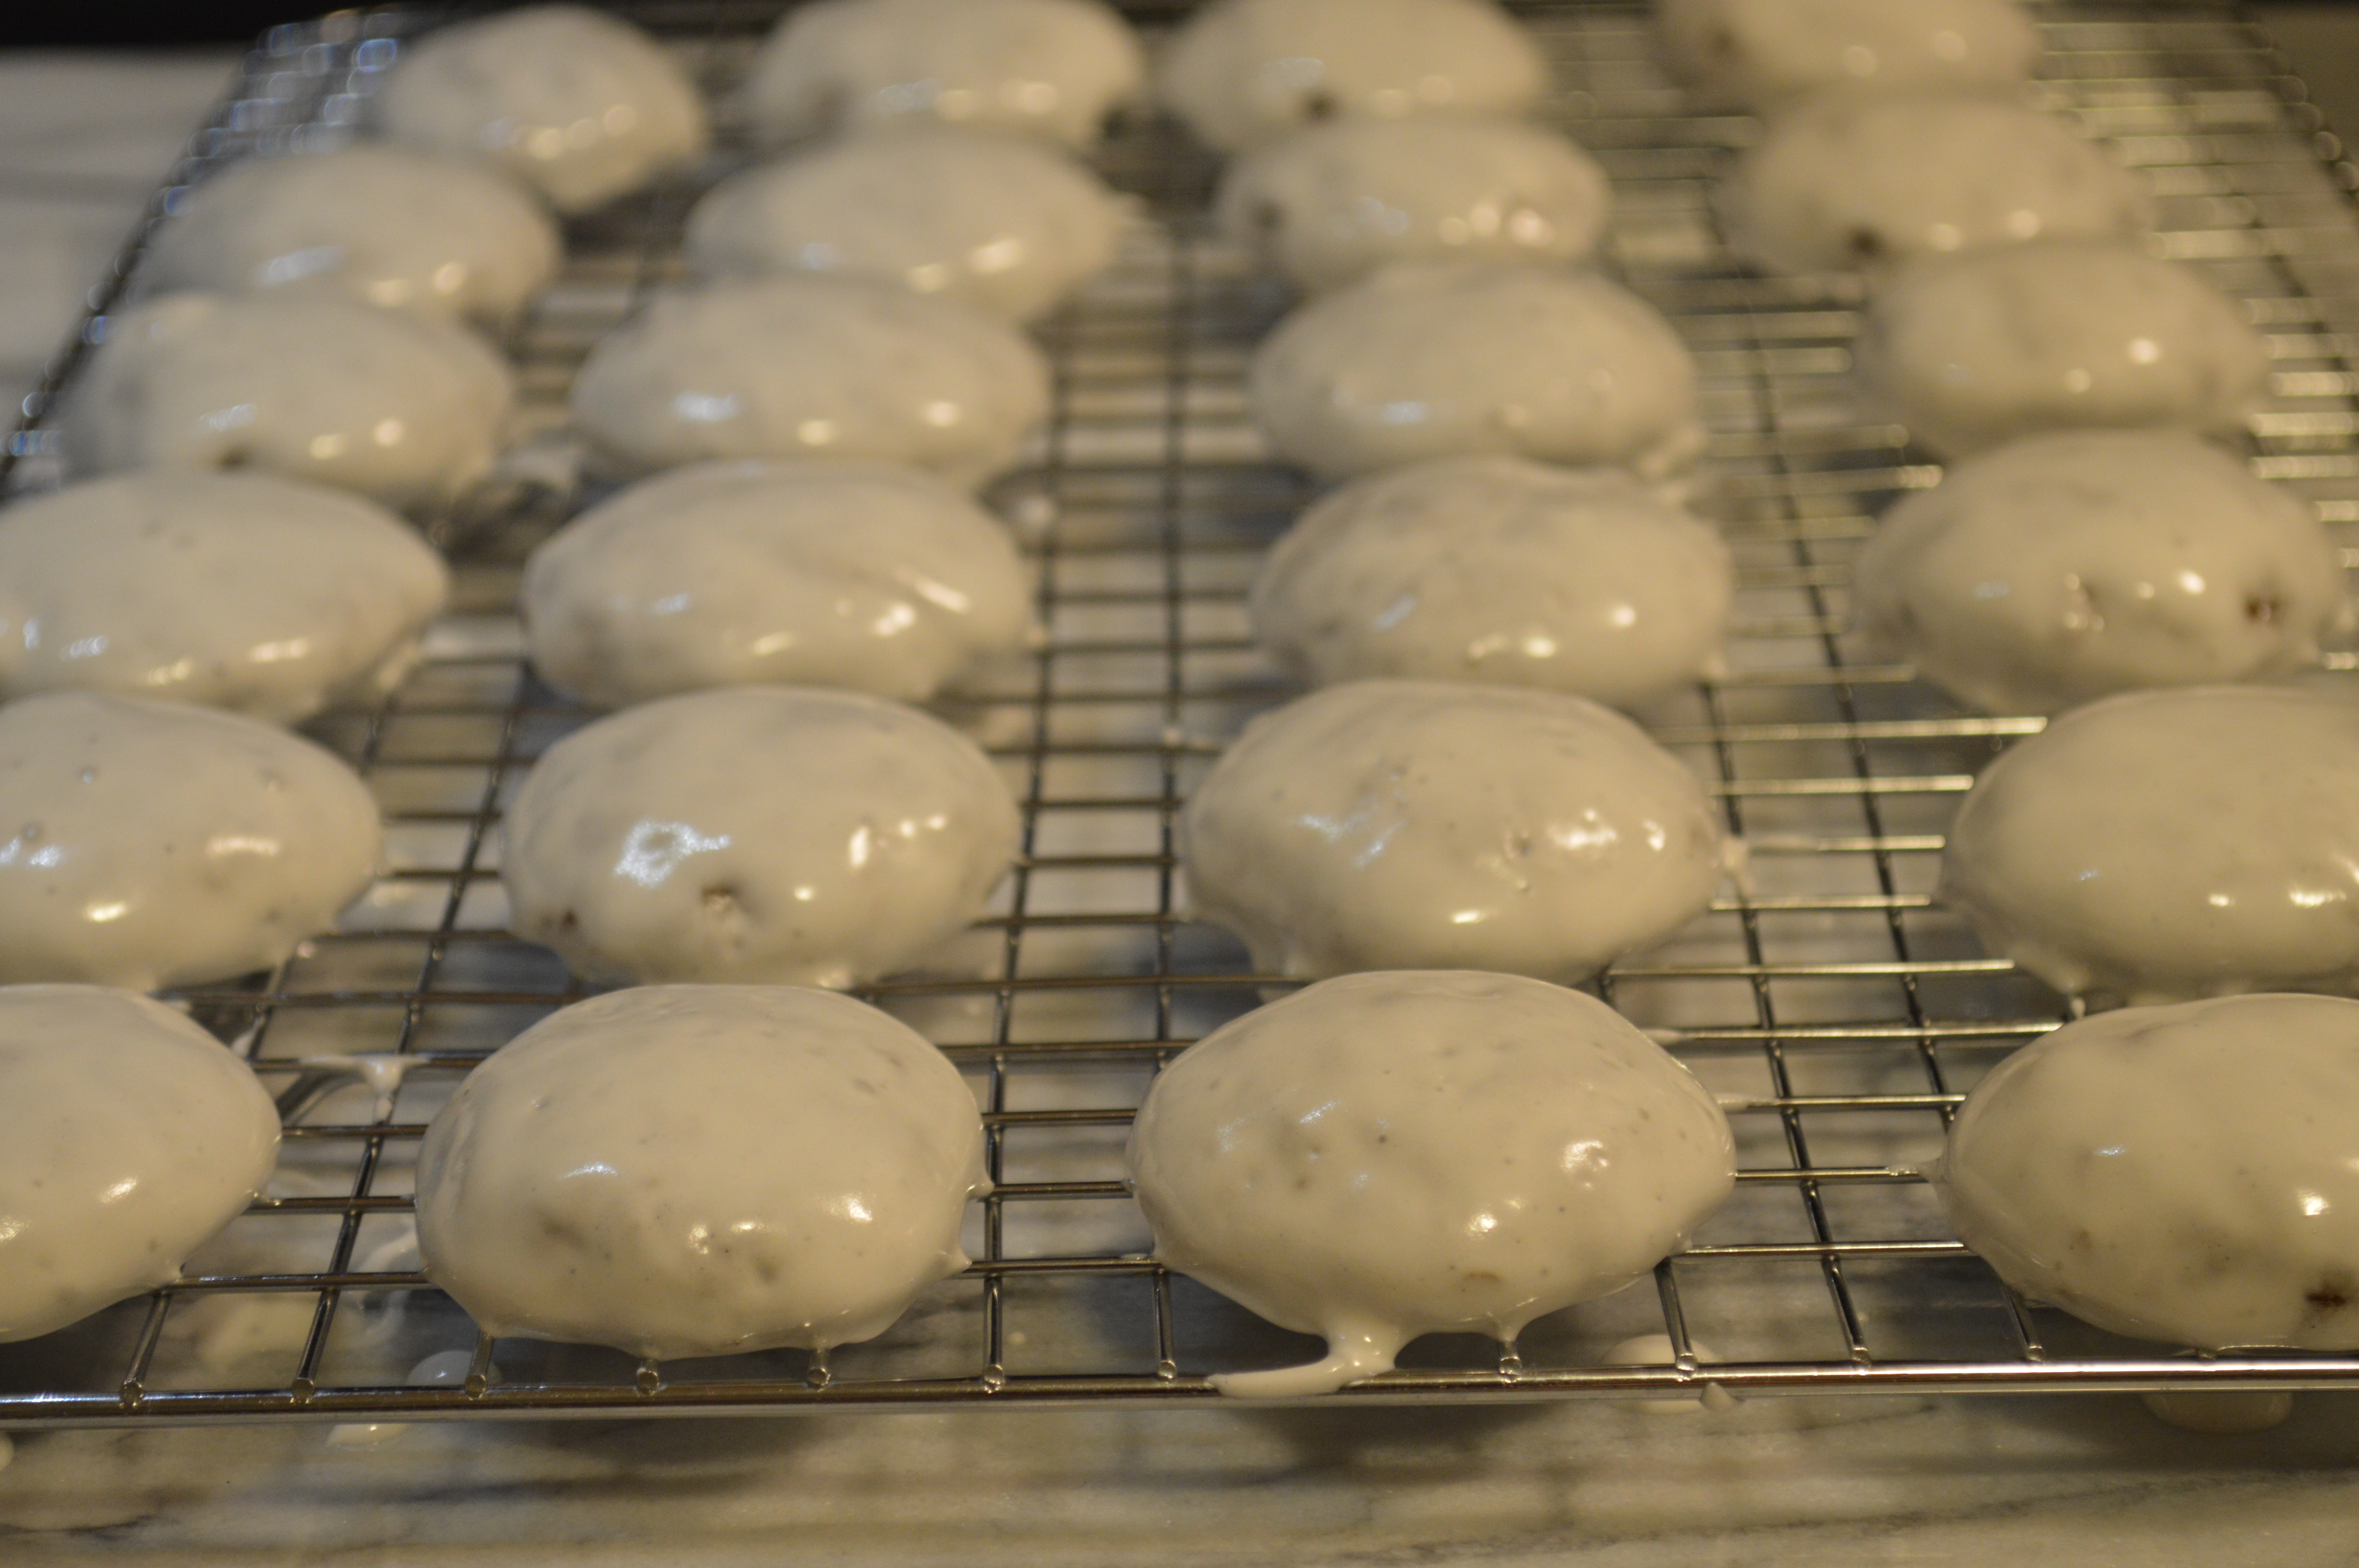
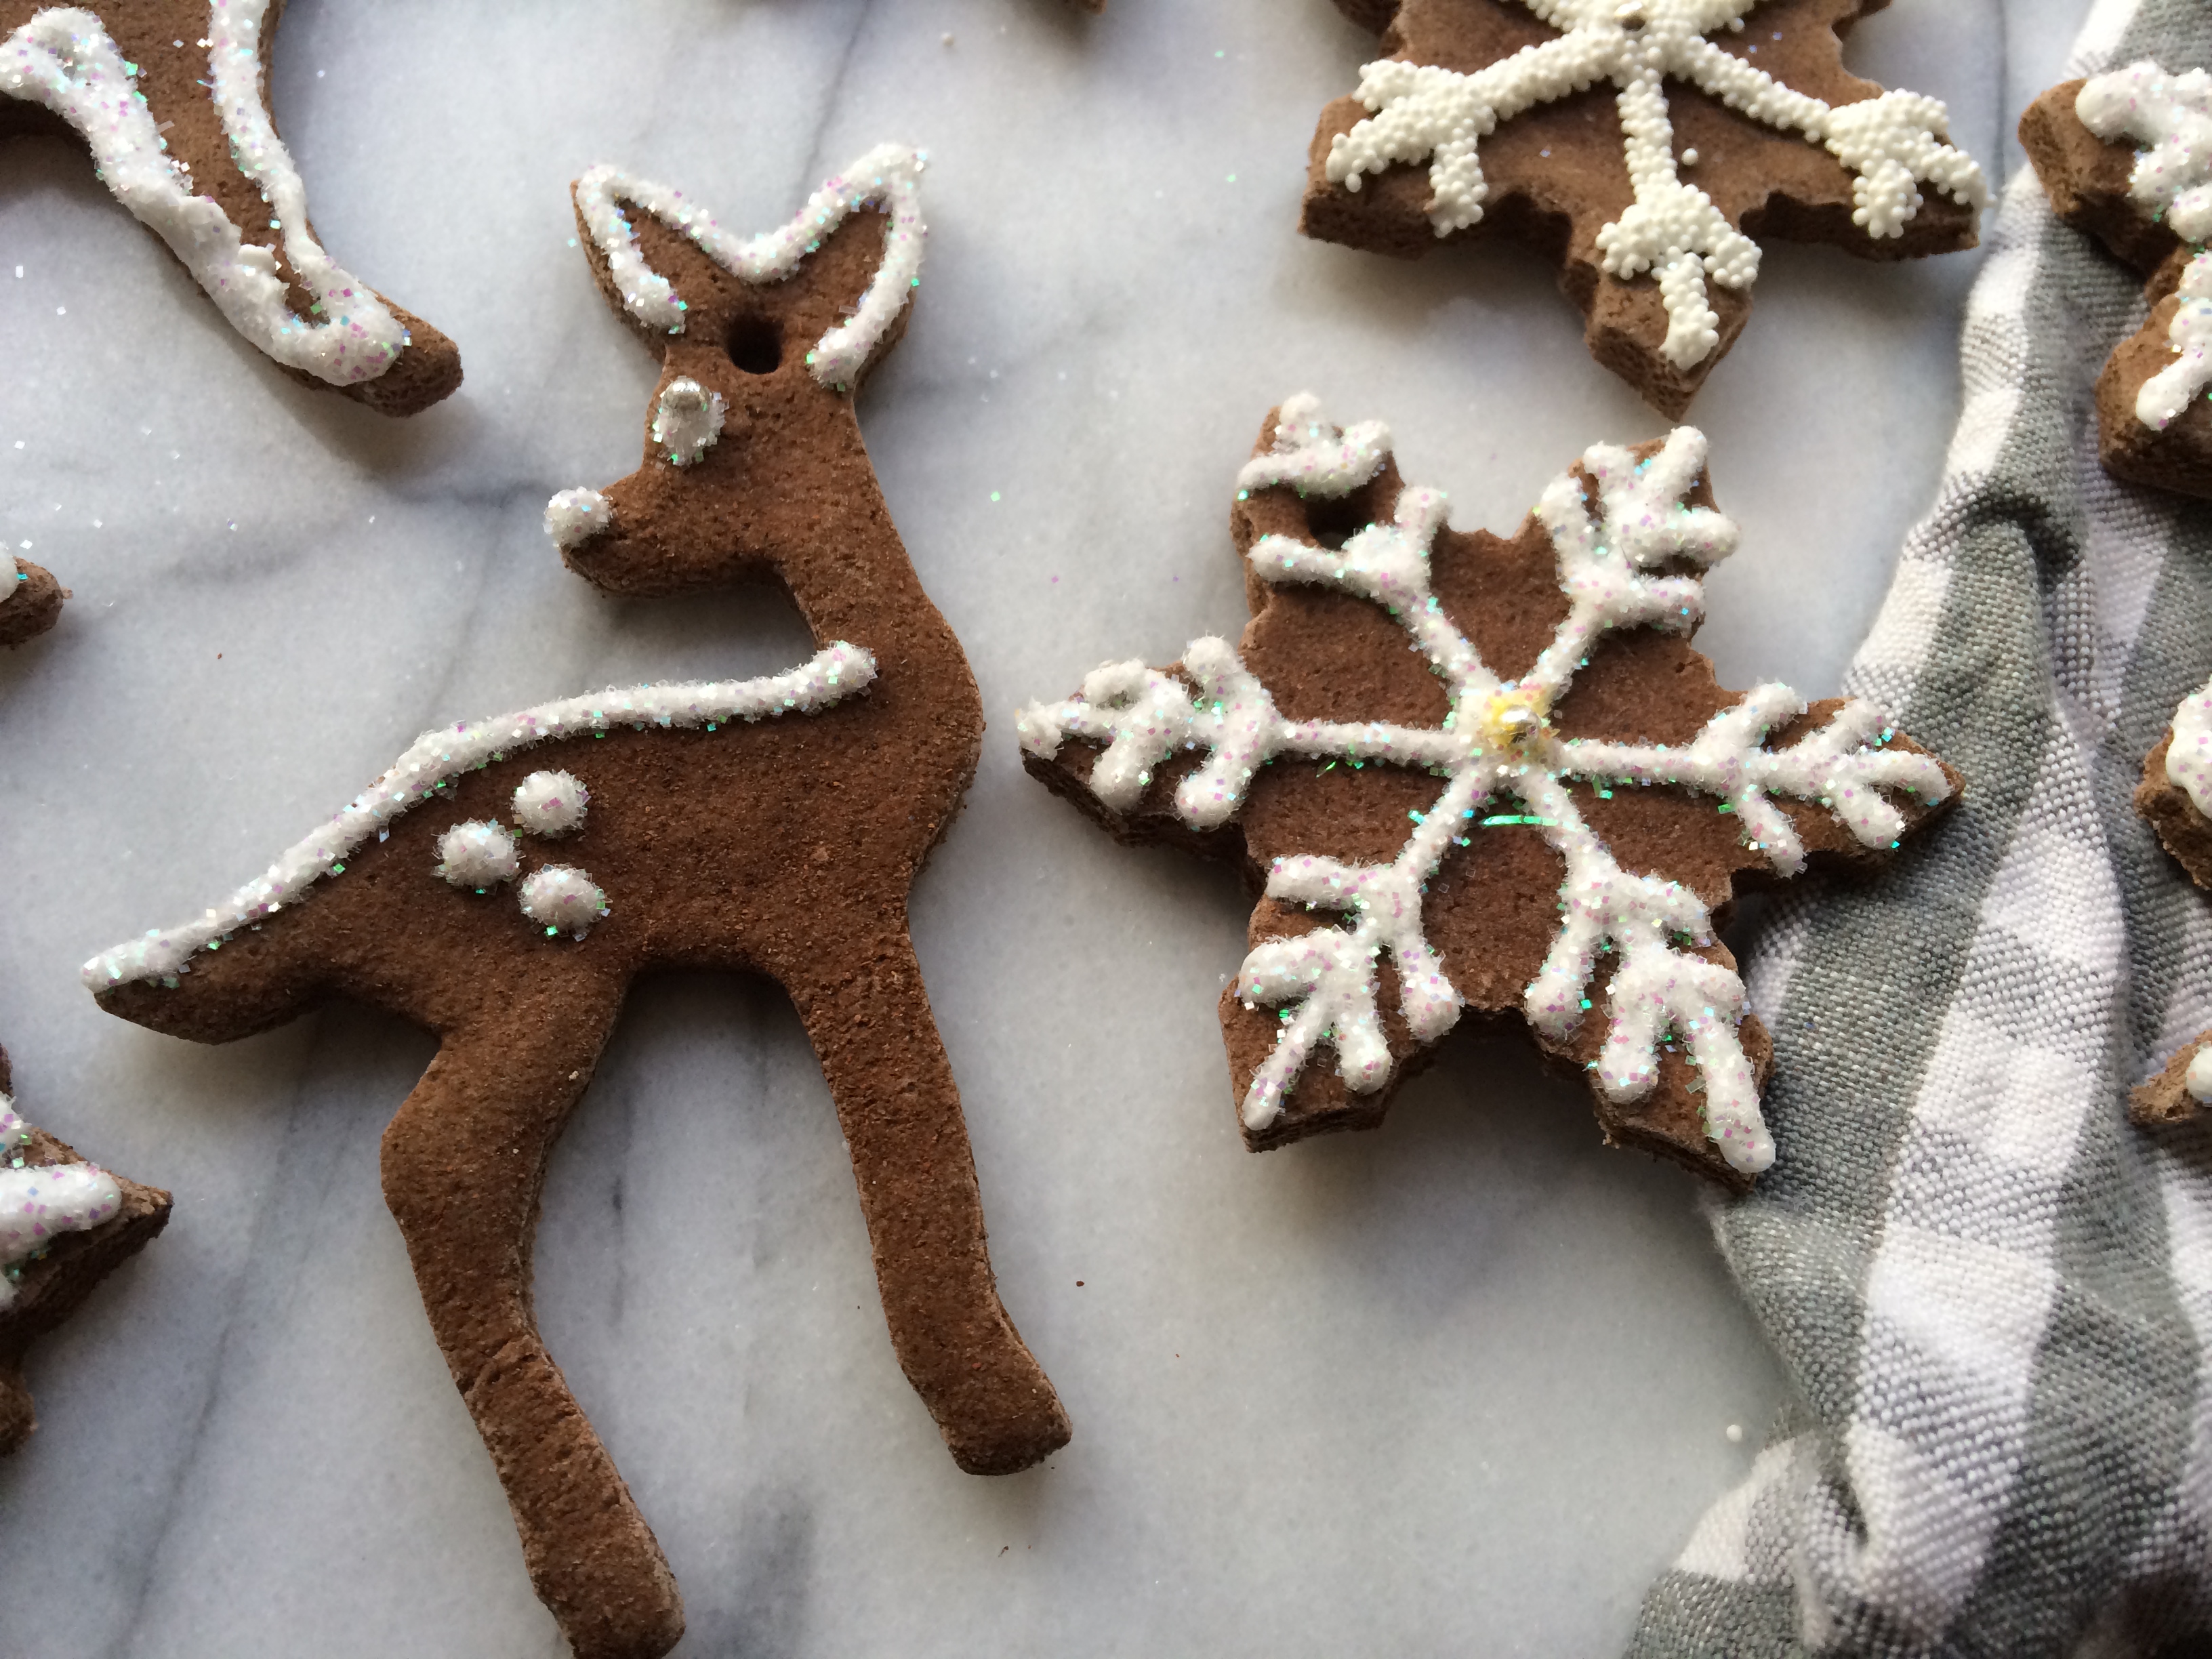
Most Pfeffernusse recipes I found called for them to be rolled warm through confectioners sugar. I’ve had them this way and they’re delicious, but I remember the cookies my grandfather eating when I was young having a stiff white shell of glaze, so that’s what I wanted. After a bit of searching I found what I was after. When you whip this glaze up it resembles marshmallow fluff, but thinner. You basically dip the whole cookie into it, let the excess drip off, and then dry the glaze in the oven while it’s cooling. Once the glaze has hardened you’re good to go. To dip these cookies I attempted to be dainty and polite, using a slotted spoon, but I quickly realized this was a job for clean hands. You’ll have it everywhere, and it’s sticky, but it’s so worth it. Once all your cookies are dipped you transfer them back to your baking sheet to dry. I used a small offset icing spatula, but a large butter knife should work well too.

pfeffernusse | Brooklyn Homemaker

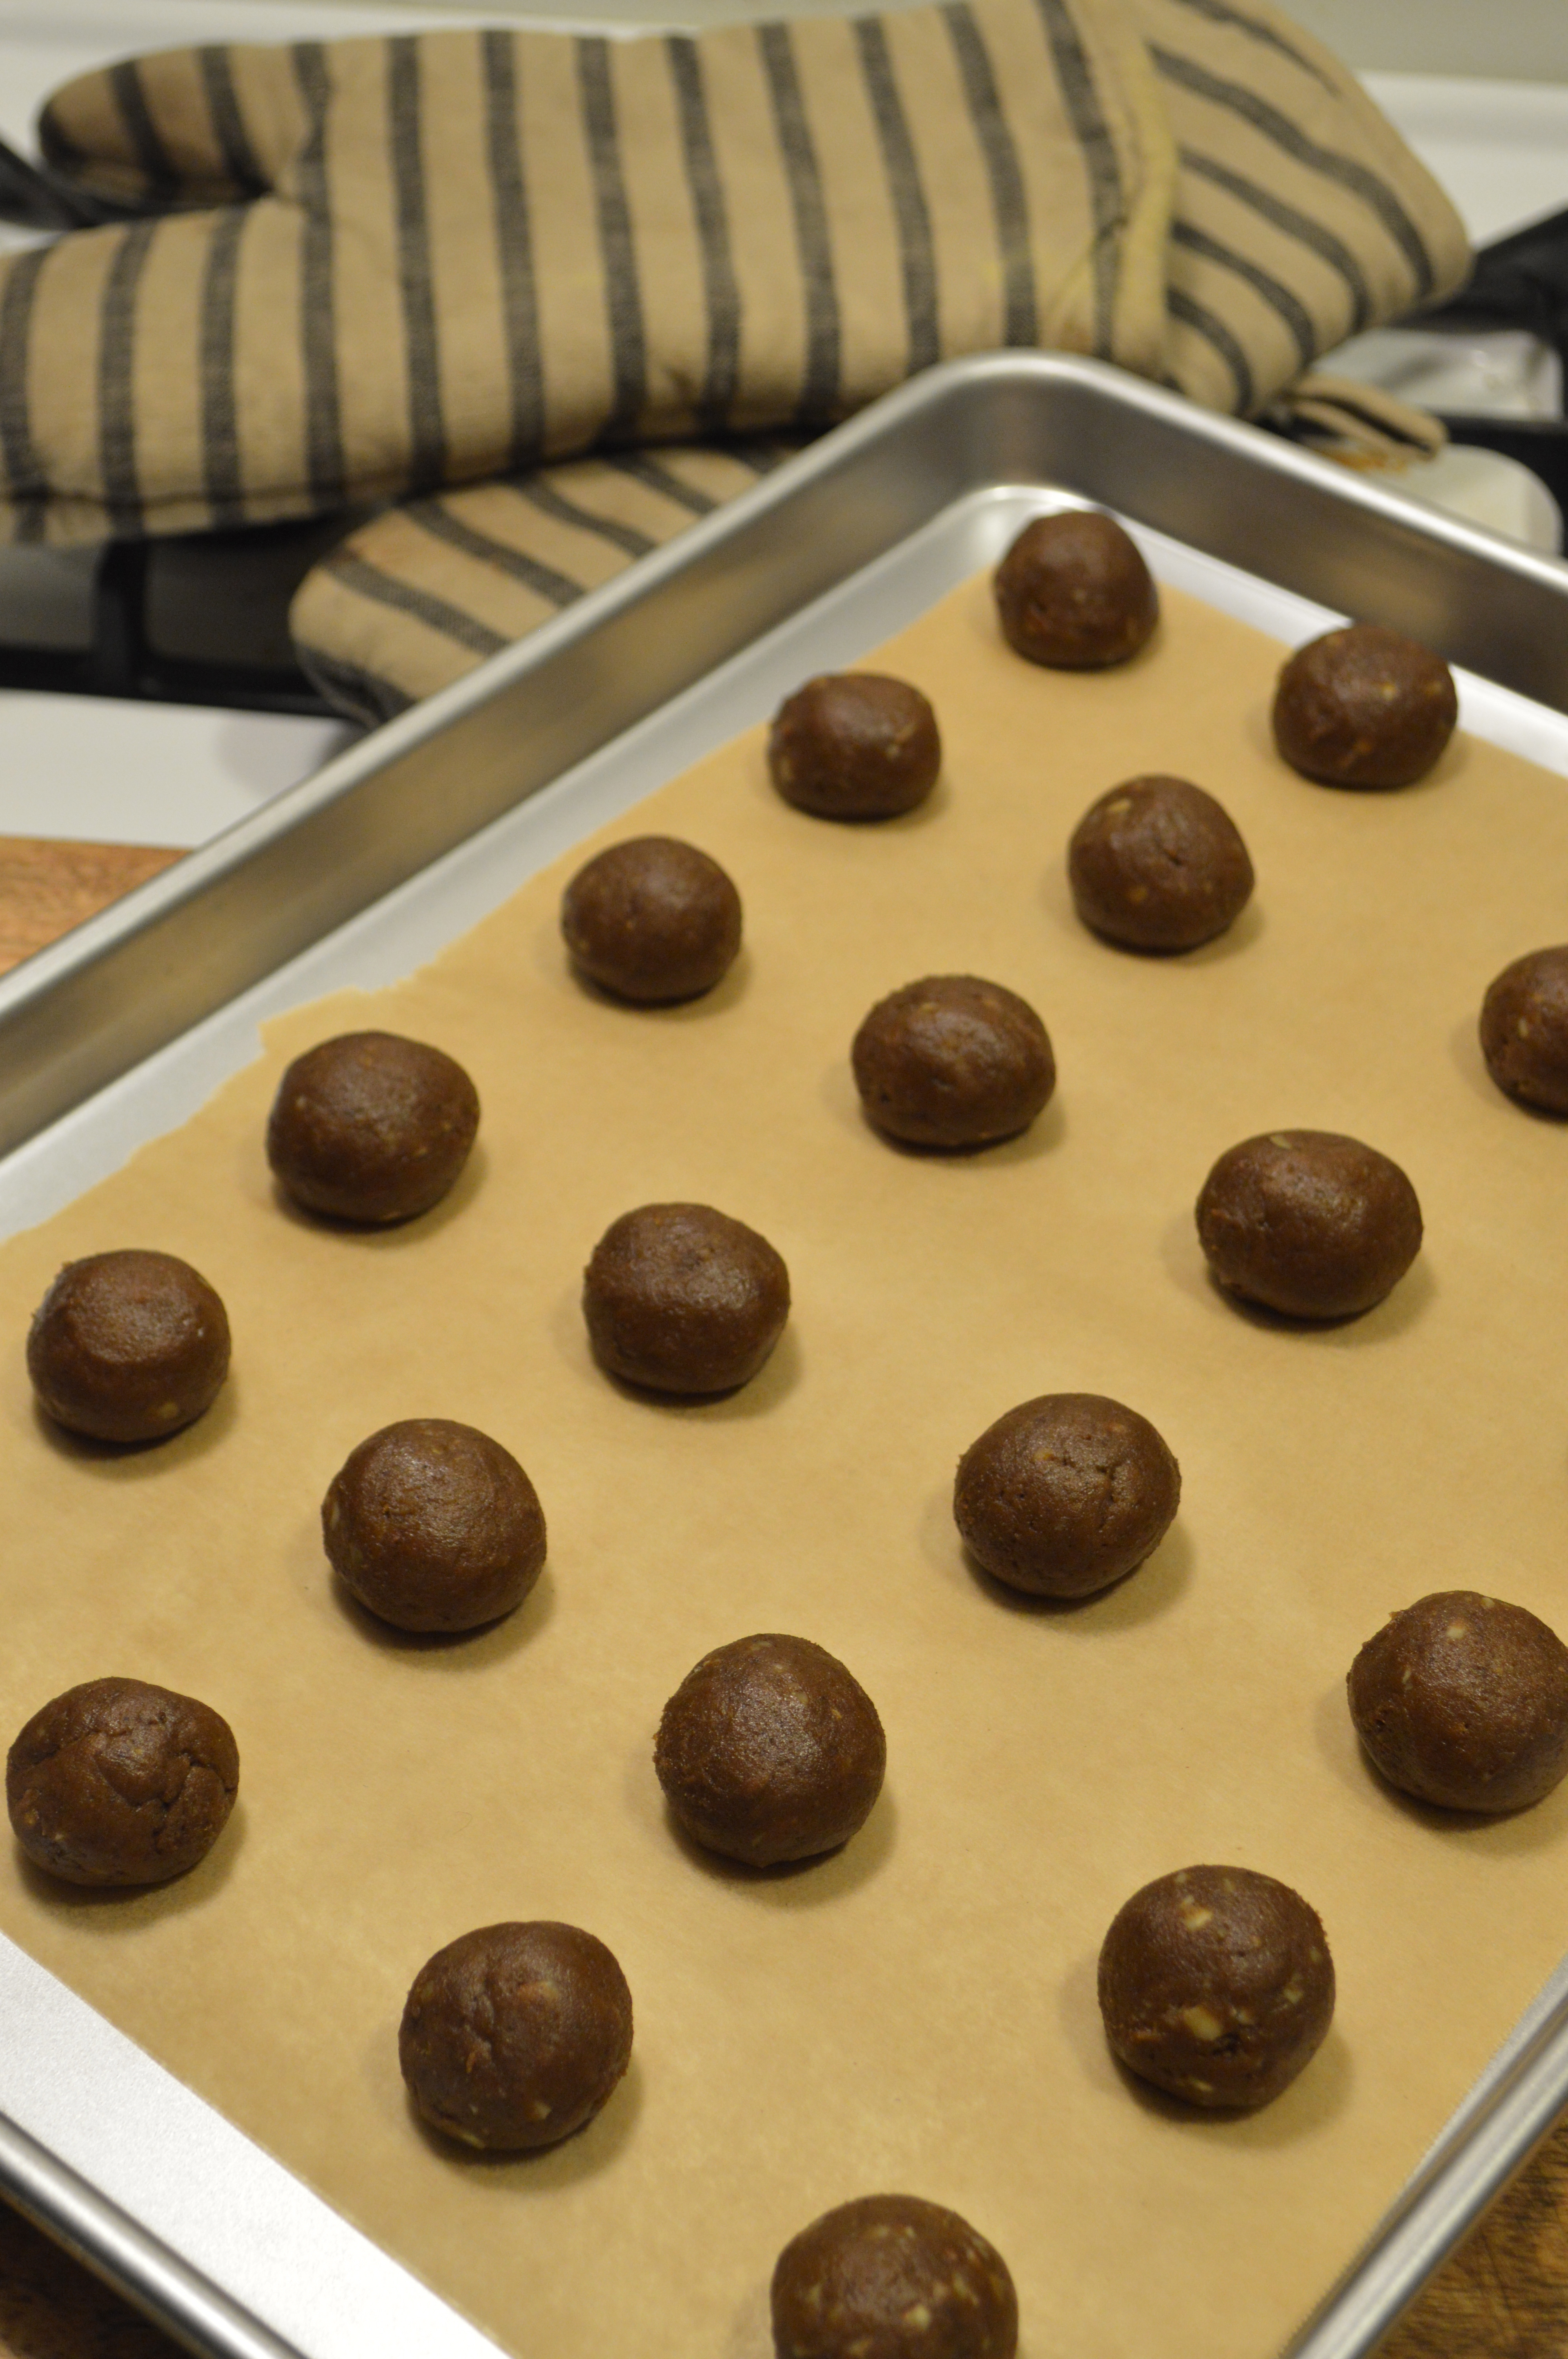
If you’re looking for a new cookie recipe for the holidays, look no further. These cookies are said to be a favorite of Kris Kringle’s and they’re about to become one of yours. They might be a little unexpected, but most people with a grown up pallet will appreciate this European holiday treat. Anyone who enjoys spice cakes and gingerbread will surely fall in love with pfeffernusse. Traditionally they’re a small cookie, about an inch across when baked, but I made mine just slightly larger. I used a #60 cookie scoop, or about a tablespoon of dough for each cookie. I’d say a more traditional size would be about 2 teaspoons of dough, which would give you a few more finished cookies. They store and travel really well, so they’re perfect for taking home to family for Christmas, for sharing with friends at a cookie swap party, giving as gifts, or even mailing to the grandparents. They even improve with a few days age, so making ahead is a good idea, and they stay fresh for two weeks or more, so you might want to make extras!

pfeffernusse | Brooklyn Homemaker

Pfeffernusse

  • Servings: about 4 dozen 1.5 inch cookies
  • Print
Adapted from Joy of Cooking

2 cups plus 2 tablespoon all purpose flour
1/2 teaspoon baking powder
1/4 teaspoon baking soda
1/4 teaspoon salt
2 teaspoons ground cinnamon
1 teaspoon ground cardamom
1/2 teaspoon ground cloves
1/2 teaspoon grated or ground nutmeg
1/2 teaspoon ground ginger
1/2 teaspoon freshly ground black pepper
1/2 cup softened unsalted butter
1 cup sugar
2 large egg yolks (whites reserved for glaze)
1/2 cup finely chopped sliced or slivered almonds
2 teaspoons finely grated lemon zest
2 teaspoons finely grated orange zest
6 tablespoons molasses
6 tablespoons brandy (or rum or whiskey if you don’t have brandy)

Glaze:
3 egg whites
1 1/2 cups confectioners sugar

Whisk together flour, baking soda, baking powder, and spices in a medium bowl. With an electric mixer beat butter and sugar until very fluffy. Add egg yolk and beat until well combined. Stir in almonds and citrus zests, and scrape bowl. In a small bowl mix the brandy and molasses. Alternate stirring in flour mixture and brandy mixture until combined. Cover and refrigerate for at least 8 hours, up to 2 days, to allow flavors to blend together.

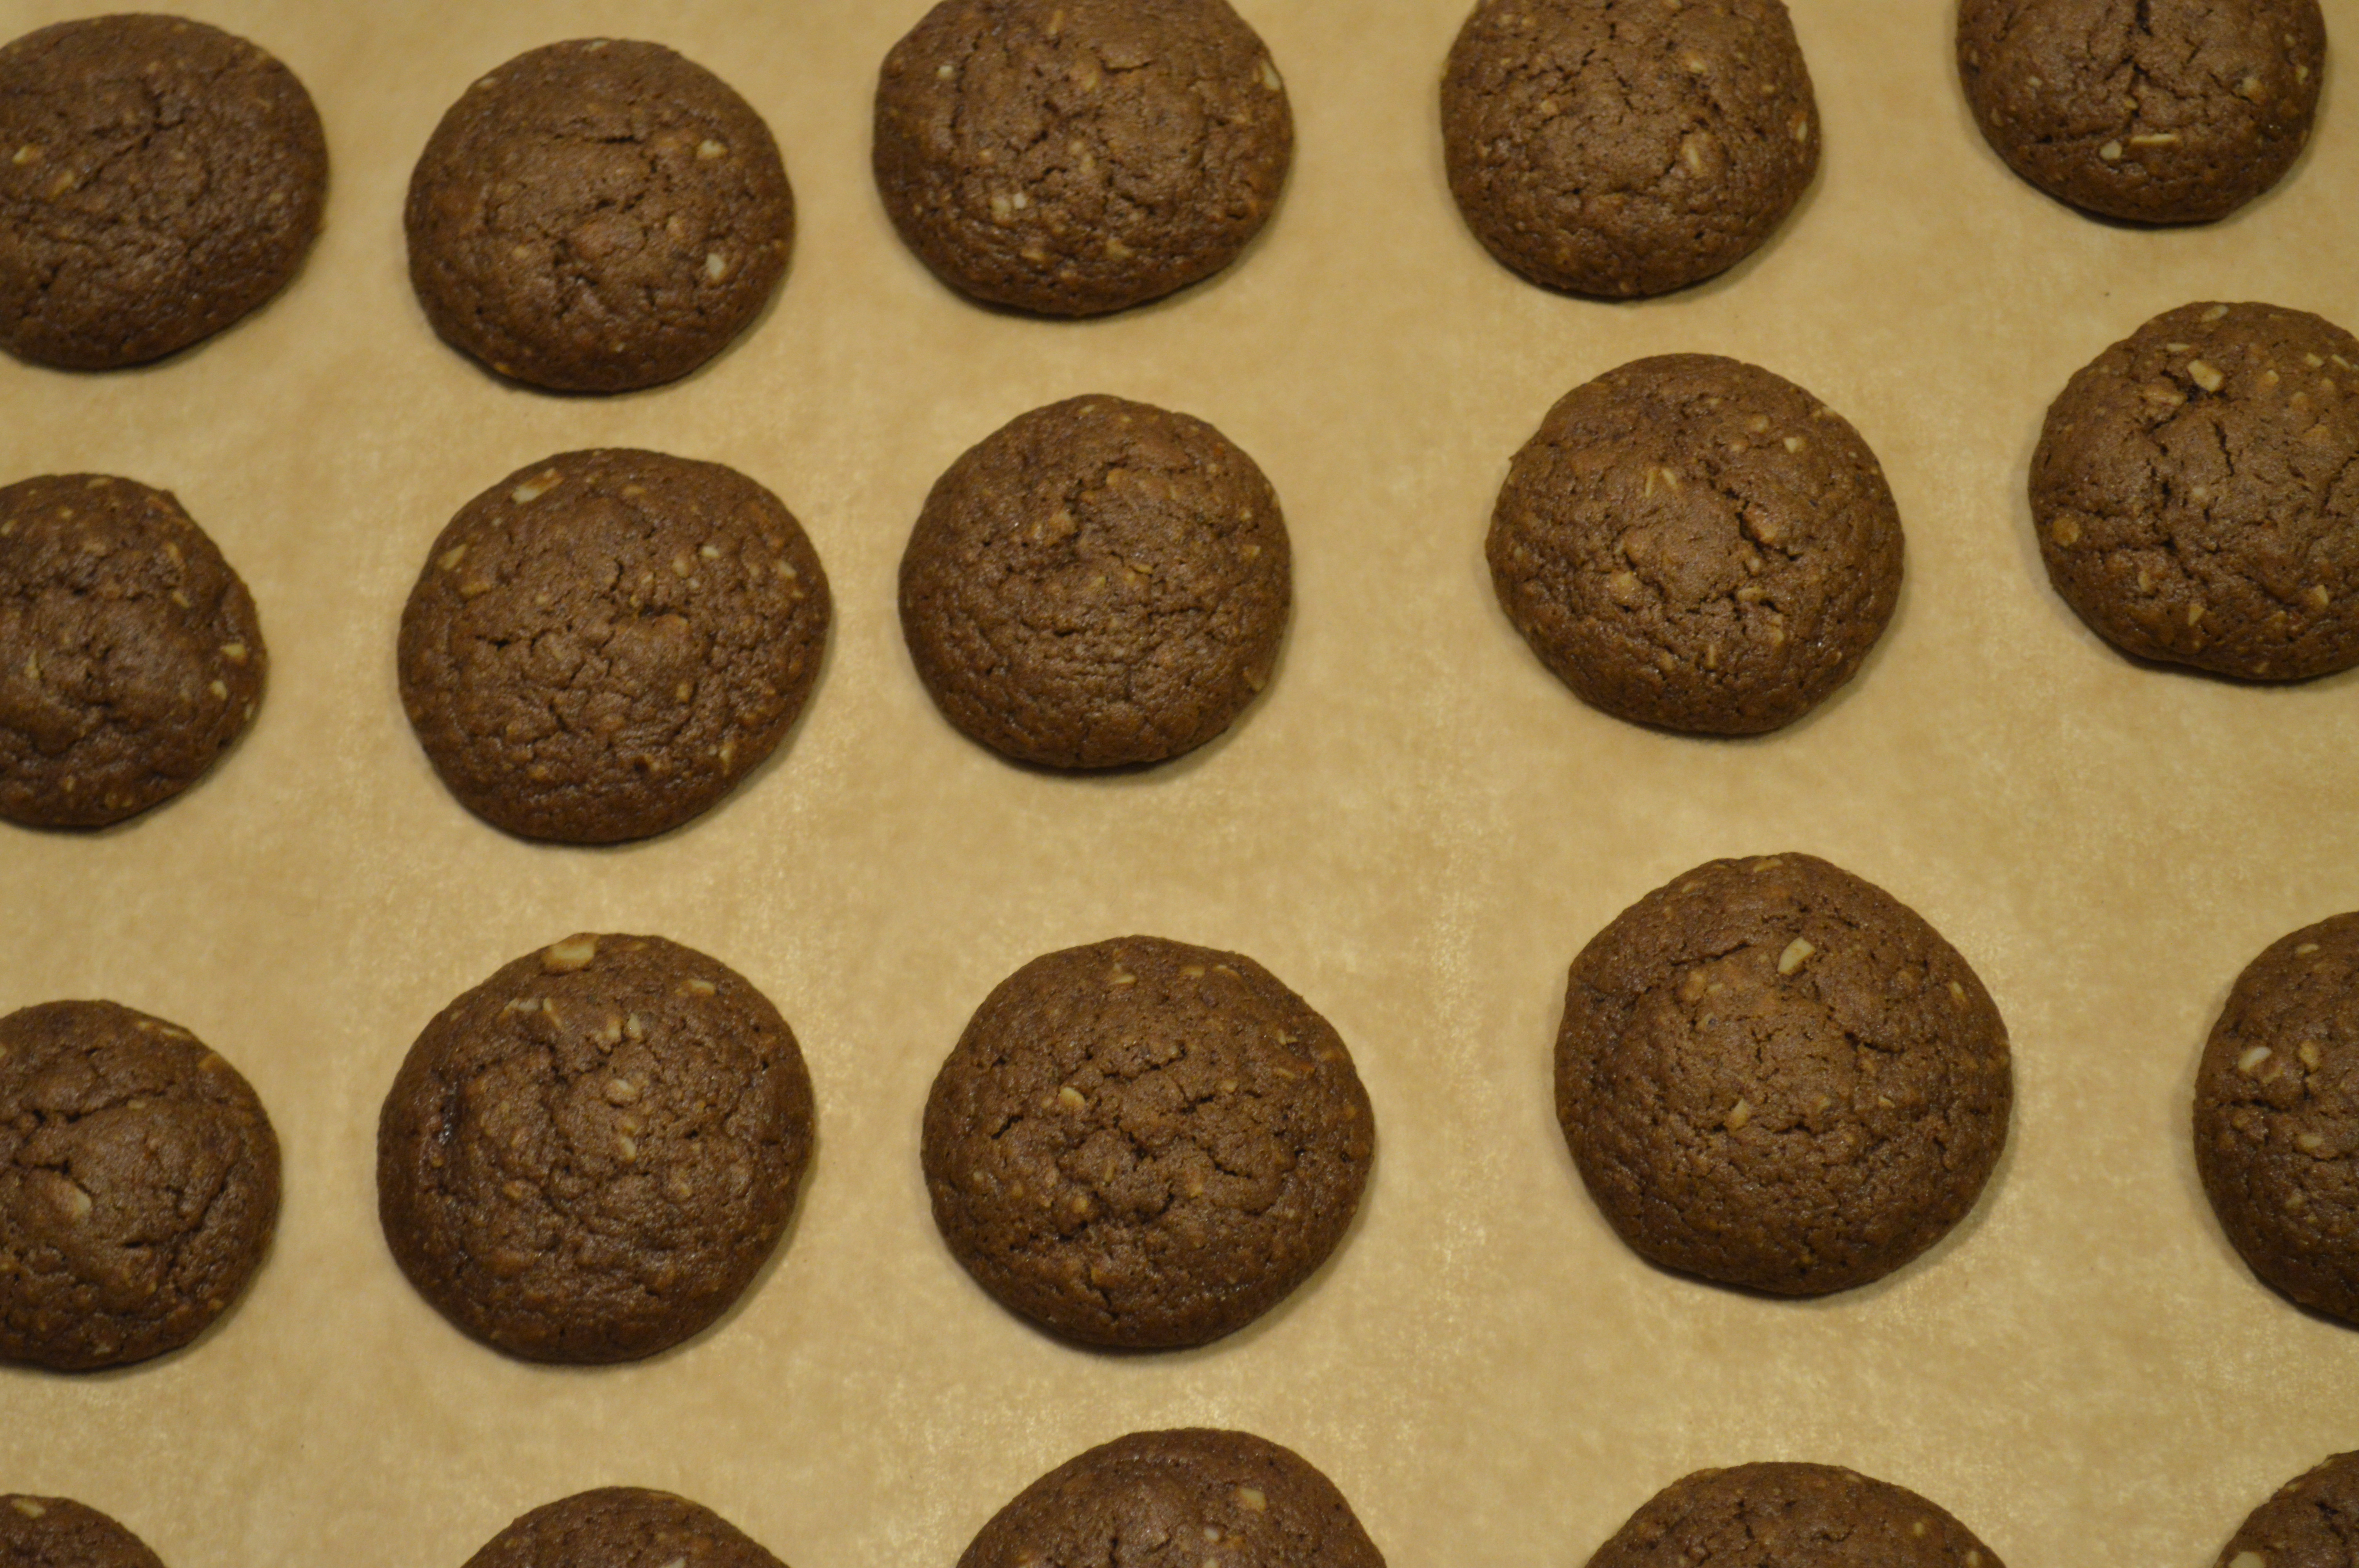
Preheat your oven to 350 degrees and line cookie sheets with parchment paper. Scoop about a tablespoon of dough, I used a #60 scoop, and roll into a ball in your hands. Line up cookies about an inch away from each other on your parchment. Refrigerate for 10 minutes or more, then bake, 1 sheet at a time, for 12-14 minutes or until lightly browned and no longer wet looking on top. Let cool for about 5-10 minutes before dipping in glaze.

To make your glaze, whip your egg whites to stiff peaks with an electric mixer. Slowly mix in confectioners sugar, and whip until completely combined with no lumps. With clean hands, dip your still warm cookies into the glaze and completely cover them. Let glaze drip back into the bowl and transfer cookies to a wire rack to allow any excess glaze to drip off. Once all your cookies are glazed transfer them back to your parchment lined pan and put them back in the still warm oven with the door open just a crack. Let the glaze dry in the oven for 5-10 minutes and transfer the pan to the counter. Let the glaze harden completely, for an hour or more, before serving or storing. If storing immediately, turn the cookies over and let the bottoms dry for an hour before stacking, and divide layers with parchment or wax paper to avoid sticking.

Mixed Green Salad with Seared Chicken & Orange Vinaigrette

After the red velvet cake post last week I thought I should attempt to share something healthy-ish. You know, something that doesn’t call for 2 cups of oil and multiple sticks of butter. If you based any ideas of what my diet might look like on my blog posts, you’d probably think 75% of what I ate was cake. Well. I really like cake. What can I say? No, really though, I promise I eat real food sometimes too.

mixed green salad with pears, snap peas, seared chicken & orange vinaigrette | Brooklyn Homemaker

If I’ve had a busy day at work, or have very little time to get dinner together, I think a nice big salad with a bunch of stuff it is a really good way to go. You can buy pre-washed greens, and even bottled dressing if you like. Then just cook off some protein, usually steak or chicken in my house, while you prepare all your veggies. Now, I’m really not into the idea of eating a salad, or any meal for that matter, just because it’s healthy. I could definitely stand to lose a few pounds, but I think as long as I eat fresh homemade food, and balance the sweets with plenty of vegetables, I’ll be just fine. I don’t want to go to all the trouble of making a something if it doesn’t taste like anything. I like my food to be full flavor, so when it comes to salads I tend to go all out and load them up with all kinds of good things.

mixed green salad with pears, snap peas, seared chicken & orange vinaigrette | Brooklyn Homemaker

A hearty filling salad can be really easy to make with a wide variety of vegetables, and I usually like to throw in some fruit for sweetness. I generally like to do a few laps through the produce department and see if anything calls out to me. For this salad, I really had no preconceived ideas of what I wanted when I walked into the grocery store, but before I knew it I had something taking shape. I grabbed some chicken breast, a beautiful red bell pepper, a half pound of sugar snap peas, and some nice ripe bosc pears and I was almost finished. I thought a light citrusy dressing would tie everything together so I picked up a big naval orange, and I figured the salad could use something rich with a little crunch so I grabbed a shallot to fry up. All that was left was some organic spring mix and I was good to go.

If I’m eating a salad as my dinner I like it to have a lot going on to make it feel like a substantial meal.  I try to follow a very loose formula of a few different veggies or fruit mixed into some greens with a protein. I usually like to add some richness to my salads with something just a bit fatty and salty. This can be some crispy bacon bits or chewy lardons, a bit of crumbled or shredded cheese, a handful of toasted nuts or seeds, or even just a creamy dressing. A little bit of fat goes a long way to make a salad feel more filling and complete. For this salad I decided some fried shallots would serve my needs just fine.

mixed green salad with pears, snap peas, seared chicken & orange vinaigrette | Brooklyn Homemaker

When I got home I washed all my produce and set to work. I made up a sweet & slightly spicy vinaigrette with the zest and juice from my orange and a tiny bit of cayenne pepper. Then I sliced my pepper and pear into thin strips and cut the stem ends off of my snap peas. I thought a carrot would be a welcome addition and I had plenty at home so I decided to go for it. Grated carrots are great in salads, but I love to have super long, super thin strips of carrots. A few months ago I picked up a julienne peeler and now it’s seriously my new favorite kitchen tool. The one I use is made by Kuhn Rikon and is available here. It makes light easy work of cutting carrots into long, thin, even strips. This can be done on a mandolin cutter, but sometimes carrots and other harder vegetables can be tough to get through the teeth and blade on a mandolin with your fingers in tact. If you have the skills to pay the bills, you can also do this with a knife, but I think it’s much faster and easier with the julienne peeler.

mixed green salad with pears, snap peas, seared chicken & orange vinaigrette | Brooklyn Homemaker

After I had my veggies ready to go I set to work pan frying my shallot. I sliced it into very thin discs, separated those with my fingers and dredged them in generously seasoned flour. Then, in a cast iron skillet, I fried them in a few tablespoons of olive oil until they were nice and brown and crunchy. I’m sure that thinly sliced shallots would be great in the salad raw, or you could skip them all together, but fried they add just a touch of saltiness and caramelized crunchiness to an otherwise super light meal. When they were done I transferred them to a paper towel lined plate, and in the same skillet I seared my chicken breasts until well browned and cooked through.

When searing your chicken, or searing anything for that matter, it’s best not to use a non-stick pan. Non-stick pans are not designed to withstand long periods of high heat, no matter what material they’re made of. Teflon, nano-ceramic, it don’t matter. If you want a good pan you can sear in I’d recommend a cast iron skillet or a stainless steel saute pan. Of course, you’ll need to use a bit more butter or oil to cook in these pans, but you can get them screaming hot and not worry about negatively affecting the utility.

Many people tell me they’re intimidated by having to care for and maintain a cast iron skillet, but I promise you it’s not difficult. Most cast iron skillets sold today come pre-seasoned and ready to use, and maintaining the seasoning is pretty simple. There is tons of information on the internet about cast iron care, and it becomes second nature once you get the hang of it.

mixed green salad with pears, snap peas, seared chicken & orange vinaigrette | Brooklyn Homemaker

It would be really easy to change this salad to fit your taste by swapping some ingredients out for others. I think it was pretty damned tasty as is though. While fresh, light and healthy, this salad was totally satisfying. Along with the bitterness of the mixed greens, you have a few layers of flavor all tossed together and complimenting each other. There’s sweetness from pepper, peas, carrots & pears. Then there’s the sweet and tangy spice of the vinaigrette, the rich salty crunch of the shallots, and the hearty meatiness of the sliced chicken breast. While this salad might not be something you can throw together in 5 minutes- it is something that can easily be assembled and ready to eat in well under an hour, and I think it makes a great weeknight supper.

mixed green salad with pears, snap peas, seared chicken & orange vinaigrette | Brooklyn Homemaker

Mixed Green Salad with Pears, Snap Peas, Seared Chicken & Orange Vinaigrette


1/4 cup extra virgin olive oil, plus 3 tablespoons divided
2 teaspoon cider vinegar
1 teaspoon honey
1 clove garlic
1 large orange
1/8 teaspoon ground cayenne pepper (optional)
salt and pepper
1 shallot
2 tablespoons of flour
4 small skinless boneless chicken breasts
1/2 lb sugar snap peas
1 red bell pepper
1 ripe bosc pear
1 large carrot
5 oz package spring mix

To make the vinaigrette measure out 1/4 cup olive oil, vinegar & honey into a small bowl. Finely zest orange and grate garlic (you can use your zester) and add to bowl. Juice the orange into the bowl, add cayenne pepper and whisk together. Taste and season with salt and pepper. Taste again.

Heat 3 tablespoons olive oil in a heavy cast iron or stainless steel pan over medium high heat. Slice shallot into thin disks and separate rings with your fingers. In a small tupperware with a lid (or ziploc bag) season flour with salt and pepper. Add shallots and shake until well coated. Distribute shallots over pan evenly and, stirring every so often, fry them until they’re brown and crunchy but not burnt. Remove with a spoon and drain on a paper towel lined plate.

Turn the pan up to high and get it super hot. The remaining oil will smoke a bit. Season both sides of chicken breasts with salt and pepper, and add to pan. Cook on high for 5-7 minutes per side, or until fully cooked and nicely browned. Remove from pan and let rest for 5 minutes before slicing into thin strips.

While chicken is cooking, remove stem ends from snap peas, and slice bell pepper into thin strips. Cut the ends off your pear, slice in half, and scoop out center and seeds with a spoon. Slice into thin strips. Using a julienne peeler, mandolin, knife or grater, cut carrot into very thin long strips. In a large bowl add spring mix, peas, pepper, pear & carrots, and toss well with vinaigrette. Divide between plates and top with fried shallots and sliced chicken breast.

Red Velvet Cake with Ermine Icing

Okay so here’s the thing about red velvet… I don’t get it.

I used to work at a cupcake shop for a while, and our red velvet cupcakes were probably the best selling item on the menu. People went nuts for those cupcakes. Every day just as many red velvet cupcakes were baked as were all the other flavors combined, and on most days the red velvets were sold out before anything else. I thought most of the cupcakes there were phenomenal, but the red velvet was probably my least favorite. It was kind of bland, with no distinct flavor beside the cream cheese icing swirled on top. Not enough vanilla to be vanilla cake, so little cocoa flavor that I’m not convinced any was actually used. There were plenty of tastier and more interesting flavors to choose from, and I could never figure out why people always went for the red velvets. Are people really just into red velvet because it’s red? There has to be more to it than just the color right?

red velvet cake with ermine icing | Brooklyn Homemaker

Curiosity got the best of me and I started doing some digging on the internet. It turns out that the history of red velvet, the roots of it’s popularity and the original recipe, are pretty tough to nail down. There are almost as many stories about the origins of red velvet as there are recipes for “real” red velvet. “Real” red velvet means very different things to different people.

I’d always heard that red velvet cake originally turned “red” because of a chemical reaction between acid in buttermilk or vinegar and natural cocoa powder. This wouldn’t actually turn a cake RED, but it would, supposedly, produce a very slight reddish hue in a cocoa cake. The same is supposed to be true of the origins of devil’s food cake, but with a lot more cocoa. This sounded believable-ish to me, so in my mind the real “original” red velvet cake was supposed to be deep reddish brown, with a slight cocoa flavor, and of course, topped with cream cheese icing.

red velvet cake with ermine icing | Brooklyn Homemaker

Once I started digging though, I started running into some problems. First there were the various origin stories. Some people think the cake was invented in Canada by the wife of a wealthy department store president, others convinced that this quintessential southern cake was invented in the south, and others still are certain that it was invented at the Waldorf Astoria Hotel in New York City.

Then there were the recipes. Everyone believes that their red velvet recipe is the one true way it should be done. Google “real red velvet” and you’re going to come up with some wildly varied recipes. There are also a lot of “rules” about red velvet out there, many of them conflicting with the rules of the next guy. Most of the rules dictate something about the color, flavor, or icing of this iconic cake.

red velvet cake with ermine icing | Brooklyn Homemaker

According to the internets, the color of red velvet should always come from artificial color. If you don’t pour in the red food color, it’s not red velvet. Also, red velvet cake should never contain artificial color. If you’re using red food color, you’re doing it wrong. The color should come from cocoa powder and buttermilk, or vinegar, or both. The truth is that the red in red velvet cake needs a boost, but not from food color. Along with the cocoa and acid reaction, an additional boost of red should come from red wine. Actually it should come from beet juice.

Red velvet cake should have a very specific flavor profile that should not be messed with. It seems that red velvet cake is supposed to be a mildly chocolatey cocoa cake, since the red color comes mostly from natural cocoa’s reaction with acidic ingredients. Also, red velvet cake should have only a very slight, almost indistinguishable, cocoa flavor, since the color of this cake should be the star and too much cocoa would muddy the color. At the same time, recipes for red velvet cake should never contain any cocoa powder. Red velvet cake is a bright red buttermilk cake and cocoa would ruin both the color and flavor of this beloved cake.

The one thing I thought everyone agreed on was the icing. Everyone knows that red velvet cake calls for tangy cream cheese icing, always. Well, yeah. It turns out that some people think that the OG icing for red velvet was ermine icing, also known as butter roux icing, or boiled milk icing.

red velvet cake with ermine icing | Brooklyn Homemaker

Once I started weeding through the conflicting stories and varied rules and recipes, I started to uncover some facts. It seems that the name most likely evolved as the public’s tastes in sweets were changing at the turn of the last century. At first the name was mostly symbolic and never really had anything to do with the color of the cake.

In the late 1800s what we know as brown sugar used to be commonly known as red sugar. Any cake that used finely ground cake flour and had a fine crumb was referred to as a “Velvet” cake. So, at that time any cake with “red sugar” and fine cake flour could be referred to as a red velvet, but no one was really going crazy for red velvet yet, and there is little evidence of any printed recipes for anything like what we have today. At that time natural cocoa was the most commonly available cocoa on the market. Unlike today’s more common dutch process cocoa, the PH of natural cocoa does cause a chemical reaction with acid causing a very slight reddish hue. Devil’s food cake made with natural cocoa would have a slight reddish hue to the deep dark chocolate cake, and that is most likely the origin of that name. Red velvet cake is devil’s food’s less chocolatey cousin, but again, the cake was never really RED. At the time, these cocoa cakes were often referred to as “mahogany cakes”.

It wasn’t until the depression that red velvet cake turned truly red. Food additive and extract companies were struggling at the time because most Americans were cutting back on such luxury items. As a way to boost sales, the Adams Extract Company started marketing their food coloring and flavorings by giving out recipes for a truly red red velvet cake, complete with color photo, in grocery stores. That was when red velvet started taking off, especially in the south. The popularity waxed and waned for generations, and then there was the groom’s cake in Steel Magnolias. Boom. Everyone knew and wanted red velvet. And then a decade or so later, the cupcakes shops started popping up and pushing the red velvet on us.

red velvet cake with ermine icing | Brooklyn Homemaker

I’m no historian, and I don’t claim to know that any of what I’ve read is the absolute truth, but this seems like the most likely story. Unfortunately I haven’t been able to dig up the depression era recipe that made red velvet the popular cake that it is today. So, the “real” recipe still seems to be something of a mystery, but based on the history I think that natural cocoa is as important to the recipe as the red food color.

red velvet cake with ermine icing | Brooklyn Homemaker

Another point of contention is the icing. I’d always heard, and believed, that cream cheese was king when it came to red velvet cakes, and I was shocked to find out that this wasn’t always so. Cream cheese icing wasn’t really common with red velvet until the mid-twentieth century. Before that the traditional topping for red velvet was a creamy and light icing made by cooking milk and flour together, and whipping into creamed sugar and butter. It can be called Butter Roux frosting or Ermine frosting. In the south this icing was very popular because it’s whipped texture is similar to whipped cream, but it’s much more heat stable and keeps better.

red velvet cake with ermine icing | Brooklyn Homemaker

When I set out to bake my first red velvet cake, I knew I had plenty of recipes to choose from but had to decide which one would produce the cake that I wanted to end up with. I kept going back to natural cocoa and buttermilk but decided that adding red color was just fine with me. So, I checked in with my favorite food blog, Smitten Kitchen, and guess what, she had a recipe that sounded like exactly what I was looking for. I also decided I wanted to ditch the cream cheese icing and go back to the traditional ermine icing.

This recipe calls for a LOT of red food color. At first I thought it might be a typo. It’s not. Since there is more cocoa in this recipe than most, a lot of food color is needed to bring the red forward over the brown. Well. This cake is red alright. The batter before baking is literally beet red. It gets a bit darker in the oven, but even still, the finished cake is a deep dark RED. Pretty much the color you’d see if you sliced into an armadillo. Just sayin’.

red velvet cake with ermine icing | Brooklyn Homemaker

As a former red velvet naysayer, I have to admit that this cake is pretty amazing. The texture is perfect, super moist, with a very delicate light & fluffy crumb from the cake flour. You can definitely taste the cocoa, even though it doesn’t really scream chocolate. It also has a really pleasant delicate tang from the buttermilk and vinegar, which I think would be completely lost if I’d gone with the modern traditional cream cheese icing instead of the ermine. I totally love this icing, btw. It’s much easier to make than a meringue buttercream, but has a very similar stability, mouth feel and texture. It is easy to work with, frosts smoothly and tastes whipped, creamy, light and just sweet enough.

To be perfectly honest, if I’m going to make a cocoa cake I’d like even more chocolate flavor, and even though it’s kind of fun, the amount of food color that goes into this recipe makes me ever-so-slightly uncomfortable. If I’m baking a cake for me, I think I’d rather go for a devil’s food cake, which I think would be delicious (and beautiful) with this same icing. But for special occasions, or for people who love red velvet, this cake is a force to be reckoned with. Perfectly moist & fluffy, with just enough cocoa and buttermilk, and red red RED!

red velvet cake with ermine icing | Brooklyn Homemaker

Red Velvet Cake

  • Servings: makes one 3 layer 8 inch cake, feeds 12-16ish
  • Print
adapted from Smitten Kitchen

2 tablespoons butter
3 1/2 cups cake flour
1/2 cup unsweetened natural cocoa (not Dutch process)
1 1/2 teaspoons salt
2 cups peanut or canola oil
2 1/4 cups granulated sugar
3 large eggs
6 tablespoons (3 ounces) red food coloring (or 1 teaspoon red gel food coloring dissolved in 6 tablespoons of water)
1 1/2 teaspoons vanilla
1 1/4 cup buttermilk
2 teaspoons baking soda
1 tablespoon white vinegar

Preheat oven to 350 degrees. Place teaspoon of butter in each of 3 round 8-inch layer cake pans and place pans in oven for a few minutes until butter melts. Remove pans from oven, brush interior bottom and sides of each with butter and line bottoms with parchment.

Whisk cake flour, cocoa and salt in a bowl.

Place oil and sugar in bowl of an electric mixer and beat at medium speed until well-blended. Beat in eggs one at a time. With machine on low, very slowly add red food coloring, being careful it doesn’t splash. Add vanilla. Add flour mixture alternately with buttermilk in two batches. Scrape down bowl and beat just long enough to combine.

Place baking soda in a small dish, stir in vinegar and add to batter with machine running. Beat for 10 seconds.

Divide batter among pans, place in oven and bake until a cake tester comes out clean, 40 to 45 minutes. Let cool in pans 20 minutes. Then remove from pans, flip layers over and peel off parchment. Cool completely, and level layers with a cake leveler or sharp bread knife. Fill and crumb coat with ermine icing, and place in refrigerator for 30 minutes or more. Then ice and decorate as desired with remaining icing.

Ermine Icing
adapted from Tasty Kitchen 

7  tablespoons flour
1 1/2 cups milk
2  teaspoons vanilla
1 1/2 cup softened unsalted butter
1 1/2 cup Granulated Sugar

In a small saucepan, whisk flour into milk and heat, stirring constantly, until it thickens. You want it to be very thick, almost like brownie batter. Remove from heat and let it cool to room temperature. It must be completely cool before you use it in the next step. Stir in vanilla.

While the mixture is cooling, cream the butter and sugar together until light and fluffy. You don’t want any sugar graininess left. Then add the completely cooled milk/flour/vanilla mixture and beat the living daylights out of it. If it looks separated, you haven’t beaten it enough! Beat it until it all combines and resembles whipped cream.

“Gingerbread” Salt Dough Ornaments

When I was young my mom came up with an idea for my sister and I to make homemade christmas gifts without spending a lot of money. She made up a batch of dough, we rolled it out, and cut out cute Christmas shapes with cookie cutters. This wasn’t cookie dough though, it was salt dough. At the time I didn’t know the name of it, or even what was in it, but I knew we weren’t supposed to eat it. I can only imagine how hard that was for me at seven years old.   Salt dough is very simple to make, basically just flour, salt and water, and when you bake it it becomes very hard and will last forever if you keep it dry and clean.

"gingerbread" salt dough ornaments | Brooklyn Homemaker

Before we baked our “cookies”, we poked holes in the tops of each shape with a straw. After they came out of the oven we painted them with brightly colored craft paint, and strung through a piece of ribbon. Mom painted our names and the dates on the backs of each of them, and we had personalized handmade Christmas ornaments that we gave away to our family as gifts. My grandmother had those ornaments hanging on her tree each and every year until she stopped putting it up when we went away to college.

"gingerbread" salt dough ornaments | Brooklyn Homemaker

It turns out that salt dough has been around for centuries and can be traced back to ancient Egypt. Flour and water is mixed with salt as a preservative and the dough can be worked with kind of like clay. Then it’s baked at a low temperature for long enough to remove all the moisture and harden the finished product.  Some people use salt dough to make elaborate sculptures and creations, but most people use it for children’s crafts. The dough is easy to make, easy to work with, non-toxic, and can be made from things most people already have at home.

"gingerbread" salt dough ornaments | Brooklyn Homemaker

At work last year we were coming up with ideas for our Christmas window and I thought it might be fun to make a grown-up version of these ornaments. We sell a lot of bakeware so I thought it would be really cute to have pretty sugar cookie snowflakes hanging in the window. I wanted them to look as real as possible, so I used real royal icing and sprinkles to decorate them. They came out beautiful and I packed them up in boxes and took them to work with me.

To my dismay, much of the detailed royal icing piping started to flake off of the cookies when we tried to hang them. I’m not exactly sure what went wrong but I’m certain it had something to do with the super high salt content. We still had enough in tact that we were still able to use them in the window, and the display was absoultely beautiful. No one would have guessed that there had been any problems, but I learned a valuable lesson. Real royal icing on salt dough fake cookies is a big fat NO.

"gingerbread" salt dough ornaments | Brooklyn Homemaker

This year I decided to give salt dough another go, but knew I should look for a better “icing” solution. I wanted to recreate the look and texture of royal icing, but using a more permanent medium. My first thought was puff paint. In the 90s you couldn’t walk down the street without tripping over a tube of puff paint, but in 2013 it seems like it’s impossible to find. I’m sure that big craft stores sell it, but I don’t have a car and couldn’t get to a craft store. I tried using some white caulk that I had leftover from my kitchen backsplash project, but the consistency was too thick and it was difficult to work with. After that I decided to try calling the local art supply store and see if they had any suggestions. They pointed me toward a product called light molding paste, which has almost the same consistency as frosting. I tried using it as is, piping it from a pastry bag with small round tip (or writing tip) and it piped out really nicely. Sprinkles and glitter stuck to it really well too, and I got some really nice results using it. The only issue I had was that it’s slightly thicker than royal icing, more like frosting, and doesn’t smooth out the way royal icing does. Since molding paste is water soluble, I tried thinning it out just slightly with water to get a thinner consistency.

"gingerbread" salt dough ornaments | Brooklyn Homemaker

I’m so glad I called that art store. This stuff was perfect. It was very easy to thin out to the consistency I wanted, and piped just like the real thing. It was easy to work with, and simple soap and water cleaned it up with no trouble. It dried nice and hard too and stayed stuck to the salt dough with no problems. I’m assuming that puff paint would probably work well too- but this stuff was truly ideal. I’d definitely recommend it if you want to try this project yourself. You can find it at any art supply store and they have it at the big craft stores too. I used Golden brand, and it’s important that you get the light molding paste.  Since I didn’t completely cover my ornaments I didn’t use much either. I bought the smallest container the store had, and after decorating probably about 30+ ornaments I still have half a jar left.

"gingerbread" salt dough ornaments | Brooklyn Homemaker

Since I wanted my ornaments to look like gingerbread cookies and not sugar cookies, I decided to color the dough. I could have used food color or paint, but I wanted to try to achieve a more natural molasses and spice kind of brown color. I also thought that it would be great if the finished ornaments had a nice gingerbready smell, so I decided to use spices to color my dough. In my test batch I used ginger, nutmeg, clove and cinnamon. It smelled amazing in the oven, but after a long slow bake they didn’t smell like much after they cooled. I noticed that the best gingerbread color came from the cinnamon, so when I made the next batch I skipped the other spices all together.  You can use more or less depending on how dark you’d like the dough, but cinnamon is really all you need to get the color right. My advise would be to use the cheapest cinnamon money can buy. Go to the dollar store and buy the flavorless stuff you’d never actually want to bake with. Don’t waste the good stuff on these. You need a lot of it to get the color right, and you’re never going to get to eat these “cookies”.

I also noticed in my test batch that in the first half hour of baking the salt comes to the surface of the dough, bleaching out the exposed surface and fading the color I worked so hard to get right. The side that was facing down and wasn’t exposed to the air was fine though, and once most of the moisture had baked off they could be flipped and continued baking didn’t bleach the other side. So, when I made my second batch I baked them with the side I wanted to decorate facing down. Bingo!

You should totally do that too.

"gingerbread" salt dough ornaments | Brooklyn Homemaker

To decorate the ornaments I fitted a disposable pastry bag with a Wilton #3 tip and filled it with my thinned light molding paste. Then I piped out a thin even line and made some designs. Some ornaments were just outlined, others got lines and dots, some had intricate snowflake designs, but you can do whatever you like. If you’ve never used a piping bag and pastry tip, I’d definitely recommend some practice before you dive into this project. This is permanent so you want them to be pretty near perfect. I promise it’s not as scary as you might think. Just twist the top of the bag closed so your “icing” doesn’t squeeze out the top when you put pressure on the bag. Then hold your tip a small distance from your ornament and squeeze the bag with slight and even pressure. Patience and practice. You could also just “frost” your ornaments instead without thinning the molding paste and they would still look realistic and pretty.
Before the molding paste dried I covered the ornaments with glitter, nonpareils & dragees. I found a glitter that looked similar to a product I’ve seen in a cake decorating store- so the cookies still look very realistic.  I worked with a just a few ornaments at a time to make sure the molding paste didn’t dry before I put the glitter on it. Then I just shook the glitter off and set the finished ornament on a tray to dry. I completely covered each ornament in glitter, and was able to re-use the leftover glitter for the next batch of ornaments, over and over until I was finished.

Word of warning: Glitter is pretty but it’s also the devil. There is glitter everywhere. I’ve vacuumed, mopped, rinsed, showered, and scrubbed multiple times and I still see glitter everywhere. It on my floors, in the rug, on the counters, even on me. It’s been days and I still catch customers at work looking at me funny and realize I have glitter in my beard.

"gingerbread" salt dough ornaments | Brooklyn Homemaker

I couldn’t be happier with the results.

They came out beautiful. They really do look very similar to the real thing, and they look gorgeous on my tree. I’m really glad that I went with white decorations for them too. I’m sure that adding some color to the molding paste would be easy and the results would be beautiful, but these simple white ornaments go perfectly with our apartment. The white pops against the brown “cookies”, and they look chic, timeless and modern all at once. These photos don’t do them justice when the lights are on. They’re all sparkly and stuff!

You should definitely give this a try. Your Christmas tree will thank you. And then you will thank me. (You’re welcome.)

"gingerbread" salt dough ornaments | Brooklyn Homemaker

Gingerbread Salt Dough Ornaments

  • Servings: Makes about 15-20 (inedible) ornaments
  • Print
1 cup flour
1/2 cup salt
1/2 cup water
4-6 tablespoons cinnamon, or more, depending on how dark you want your dough

Preheat oven to 250 degrees. Mix all ingredients together in a medium bowl. If you want plain (non-gingerbread) dough, or want to color the dough, leave out the cinnamon. Knead the dough a few times on a lightly floured surface to be sure it’s well mixed and has a smooth consistency. Knead in more cinnamon if you want a darker color or more flour if dough feels too sticky. Lightly coat with flour (or cinnamon) and roll dough out to about 1/8 to 1/4 inch thick. These “cookies” will not rise at all- so make them as thick as you’d like the finished product to be. Cut into desired shapes, and cut a small hole with a straw or piping tip.  Transfer to a parchment lined baking sheet, making sure the side you want to decorate is face down. Bake for 2-3 hours or until completely dry.

Allow the ornaments to cool completely. Using a pastry bag with a small writing tip, pipe on desired design with light molding paste. Puff paint should also work well for this. Decorate with glitter, small beads, or whatever you like. If you’re only using this for one season, sprinkles and candies work too. Allow “icing” to dry completely, for at least 4 hours. If desired, spray with a matte sealer and let dry according to directions. String some ribbon or bakers twine, tie a knot or bow and you’re ready to decorate!

*Update: This didn’t happen to my ornaments, but one reader said her ornaments bubbled up in the oven. I read up on it and learned that this can happen if they dry too fast or if the oven temp is too high, so I’d suggest getting an oven thermometer to be sure your oven doesn’t go above 250. To be extra careful, you may even want to try baking them at a 225 for a longer period of time.