decor

a little yardening

I’m aware that yardening isn’t actually a word (yet), but I don’t actually care. Our outdoor space doesn’t have a solid identity or clearly defined purpose, so rather than fight it, I just let it be what it wants to be, a yarden.

a little "yarden" tour from Brooklyn Homemaker!

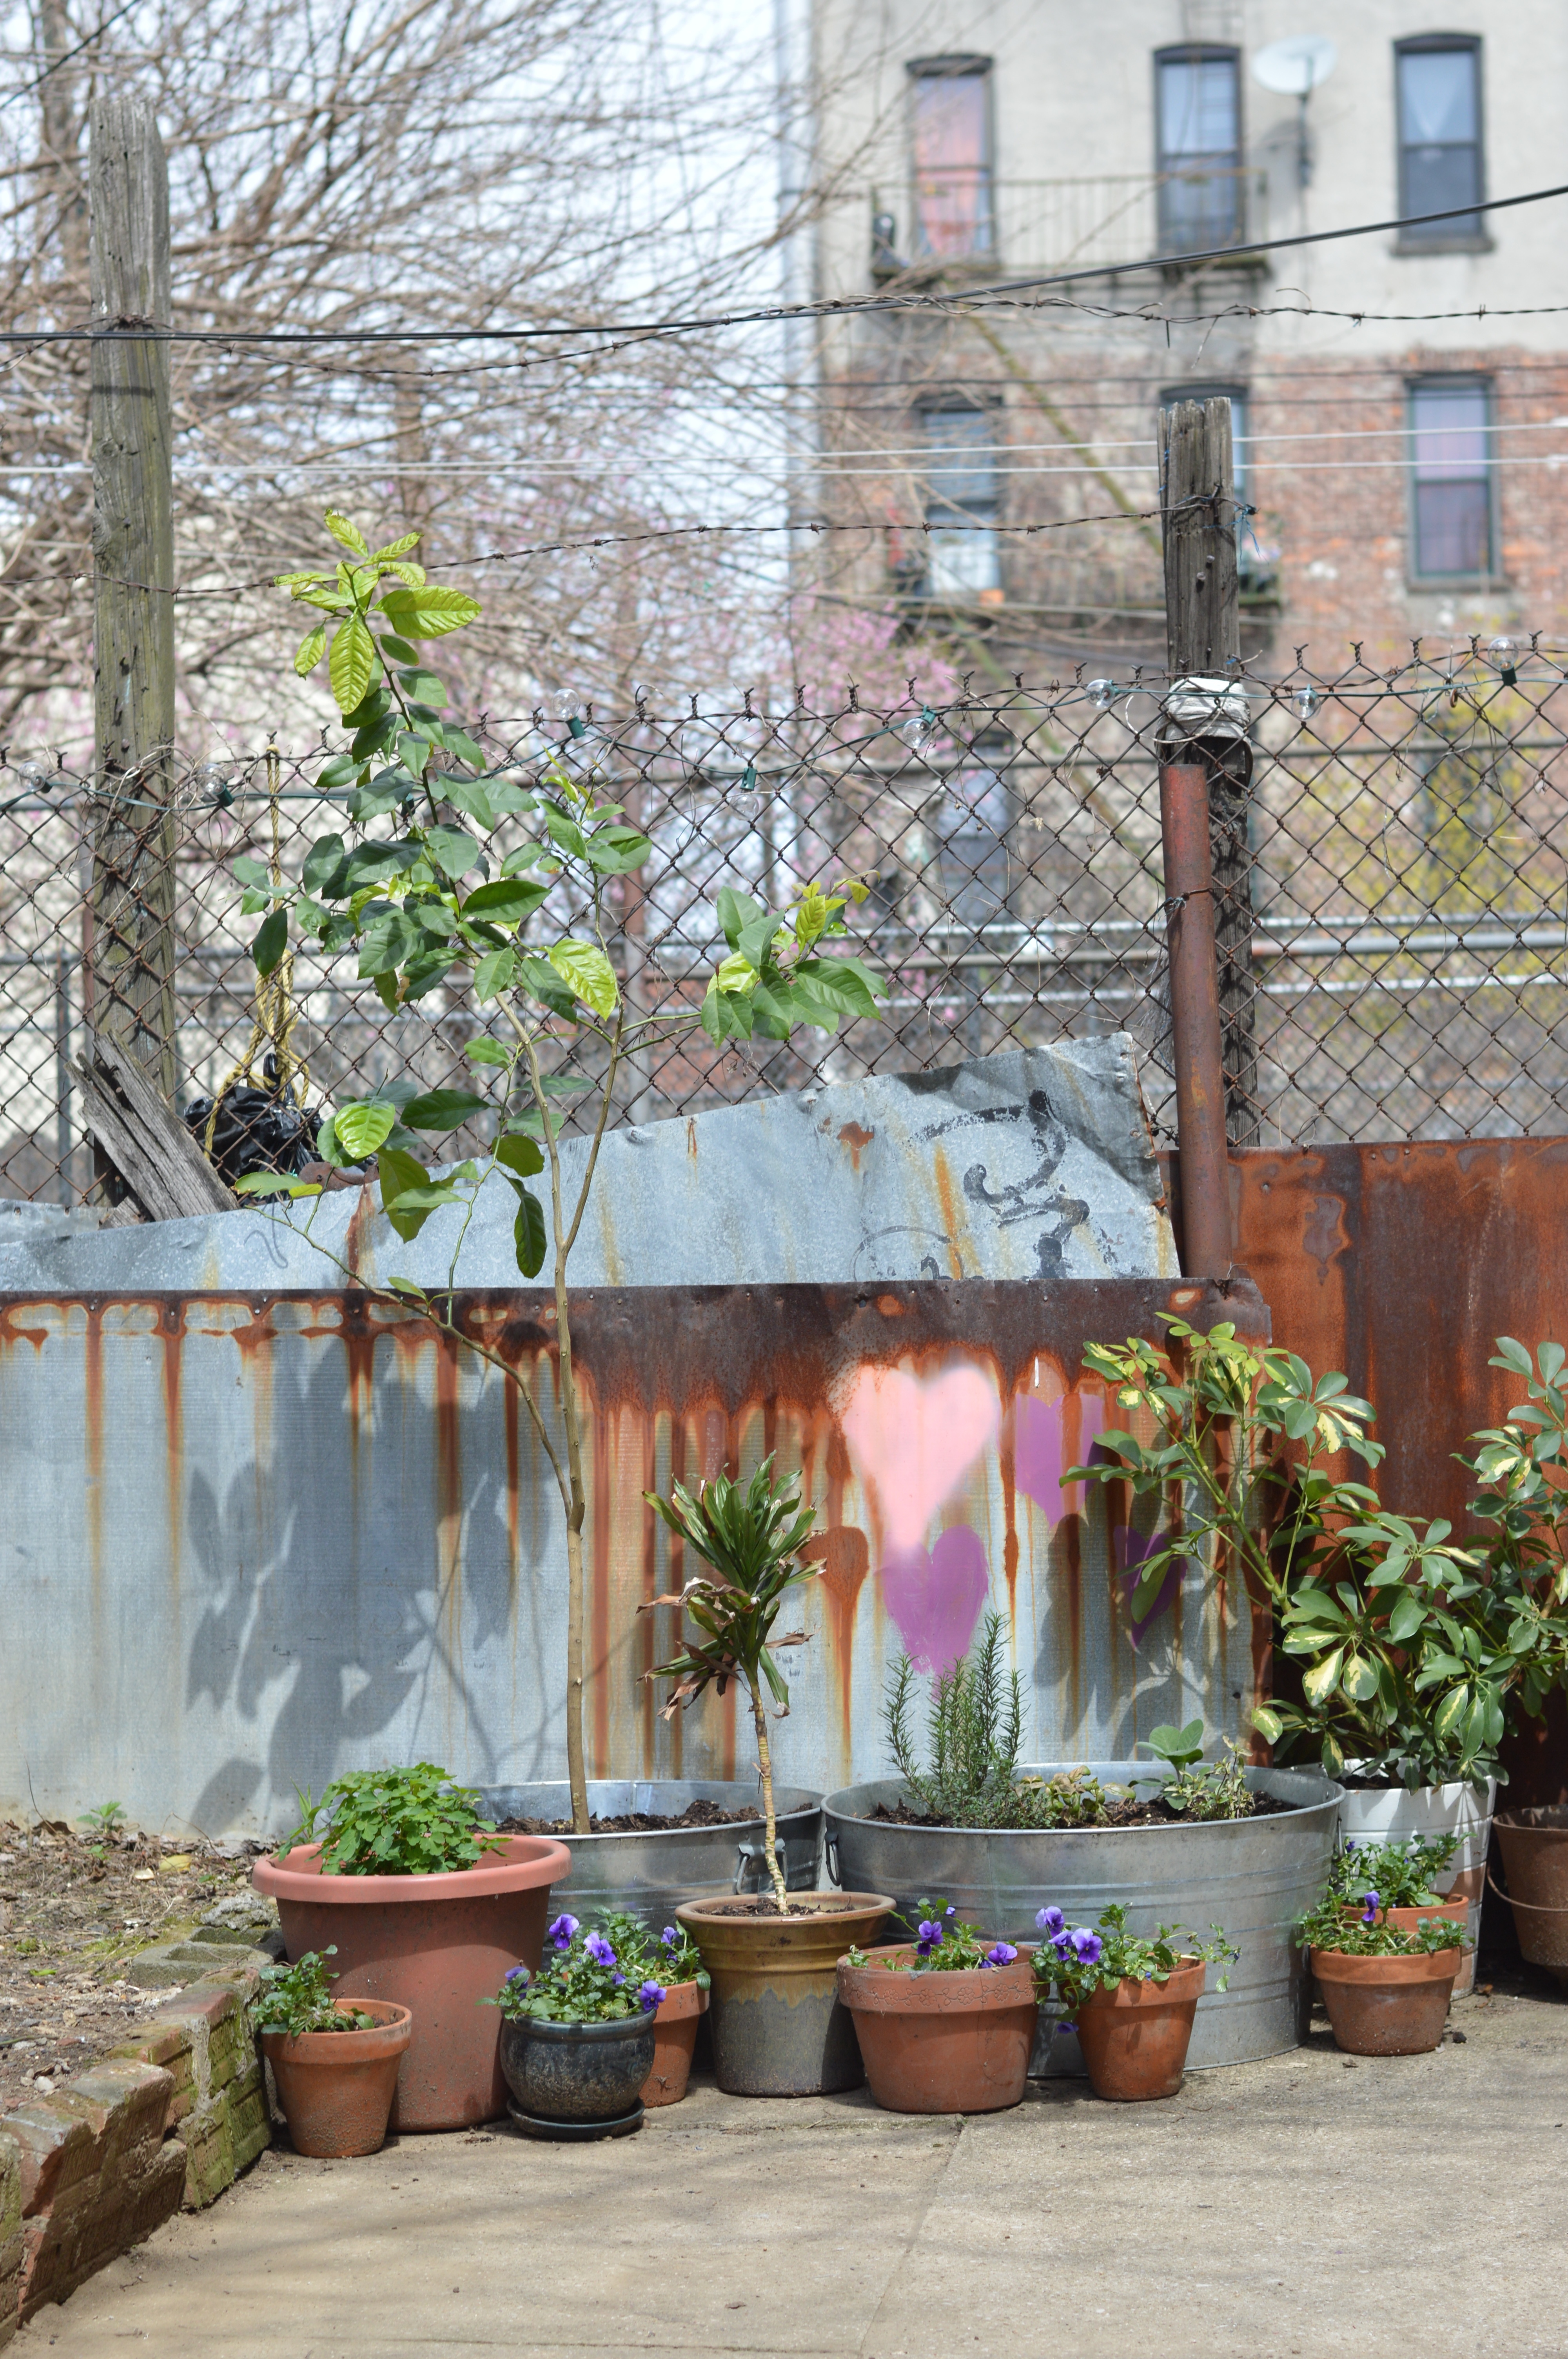
Easter Sunday was warm and sunny here in Brooklyn so we spent the bulk of our day in the yarden and I thought I’d tell you a little bit about the space. I plan to do some work back there this year so I thought it would be nice to give you some back story and show you what it looks like now (and what it used to look like). About half of the outdoor space is made up of a cement patio, which is pretty great for entertaining, and a mix of exposed dirt and a few plants that I’m trying desperately to keep alive. There isn’t enough sun to sustain grass, so it’s not quite a “yard”, and there aren’t enough thriving plants or well-defined beds to call it a “garden” so I just combine the two terms and there you have it: Yarden.

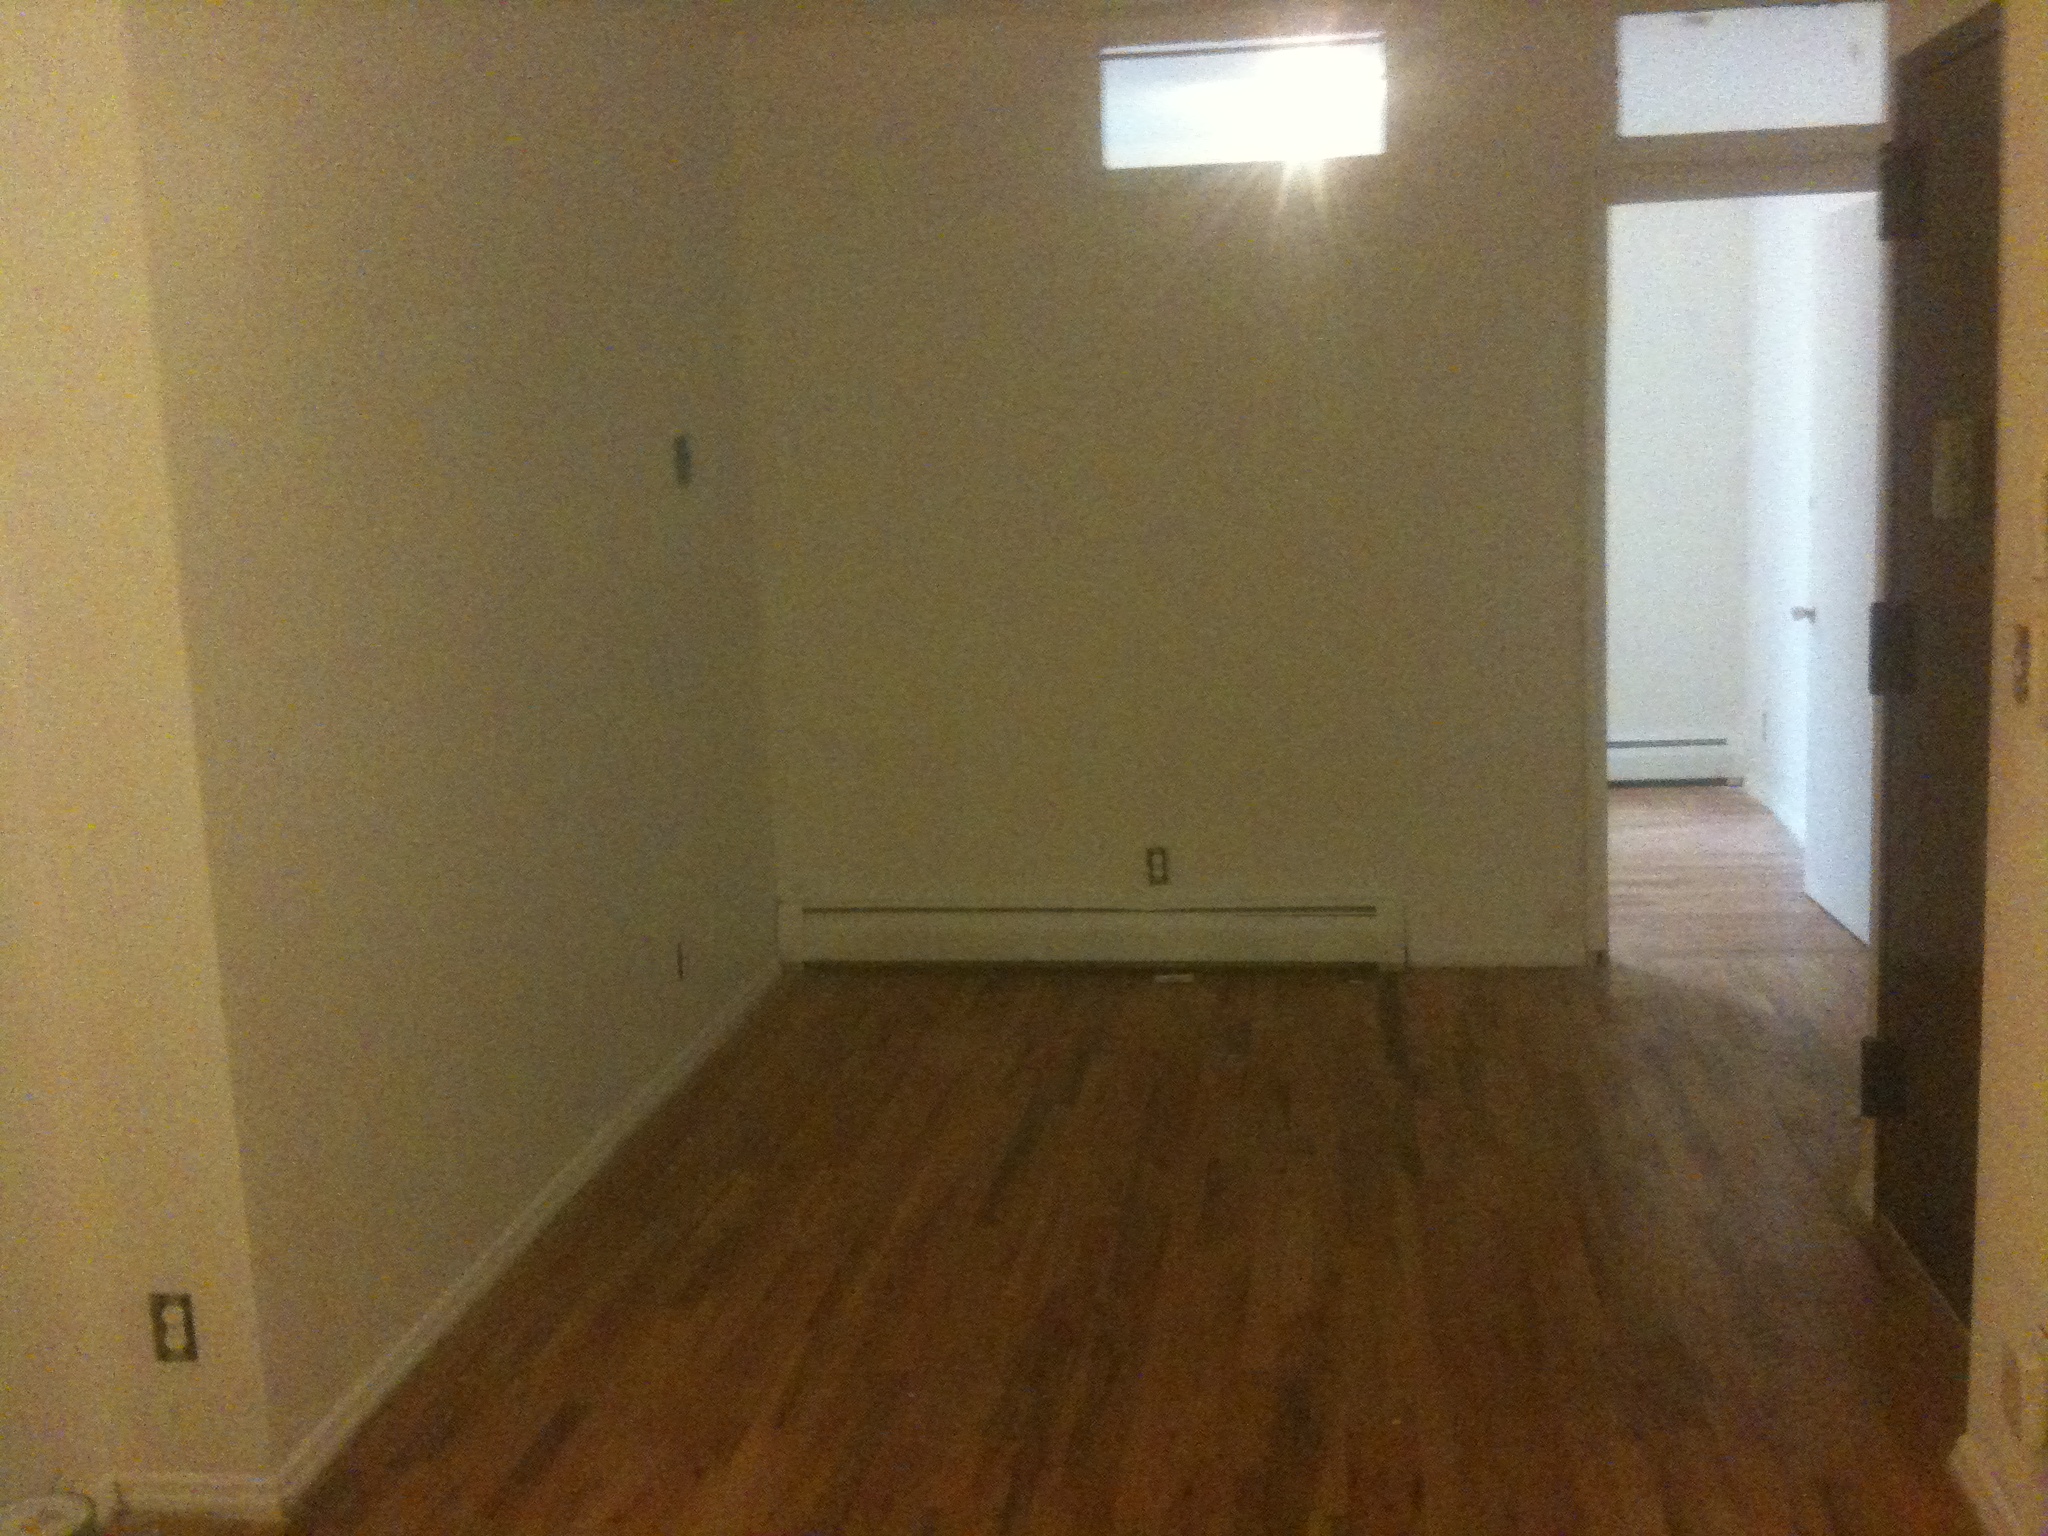
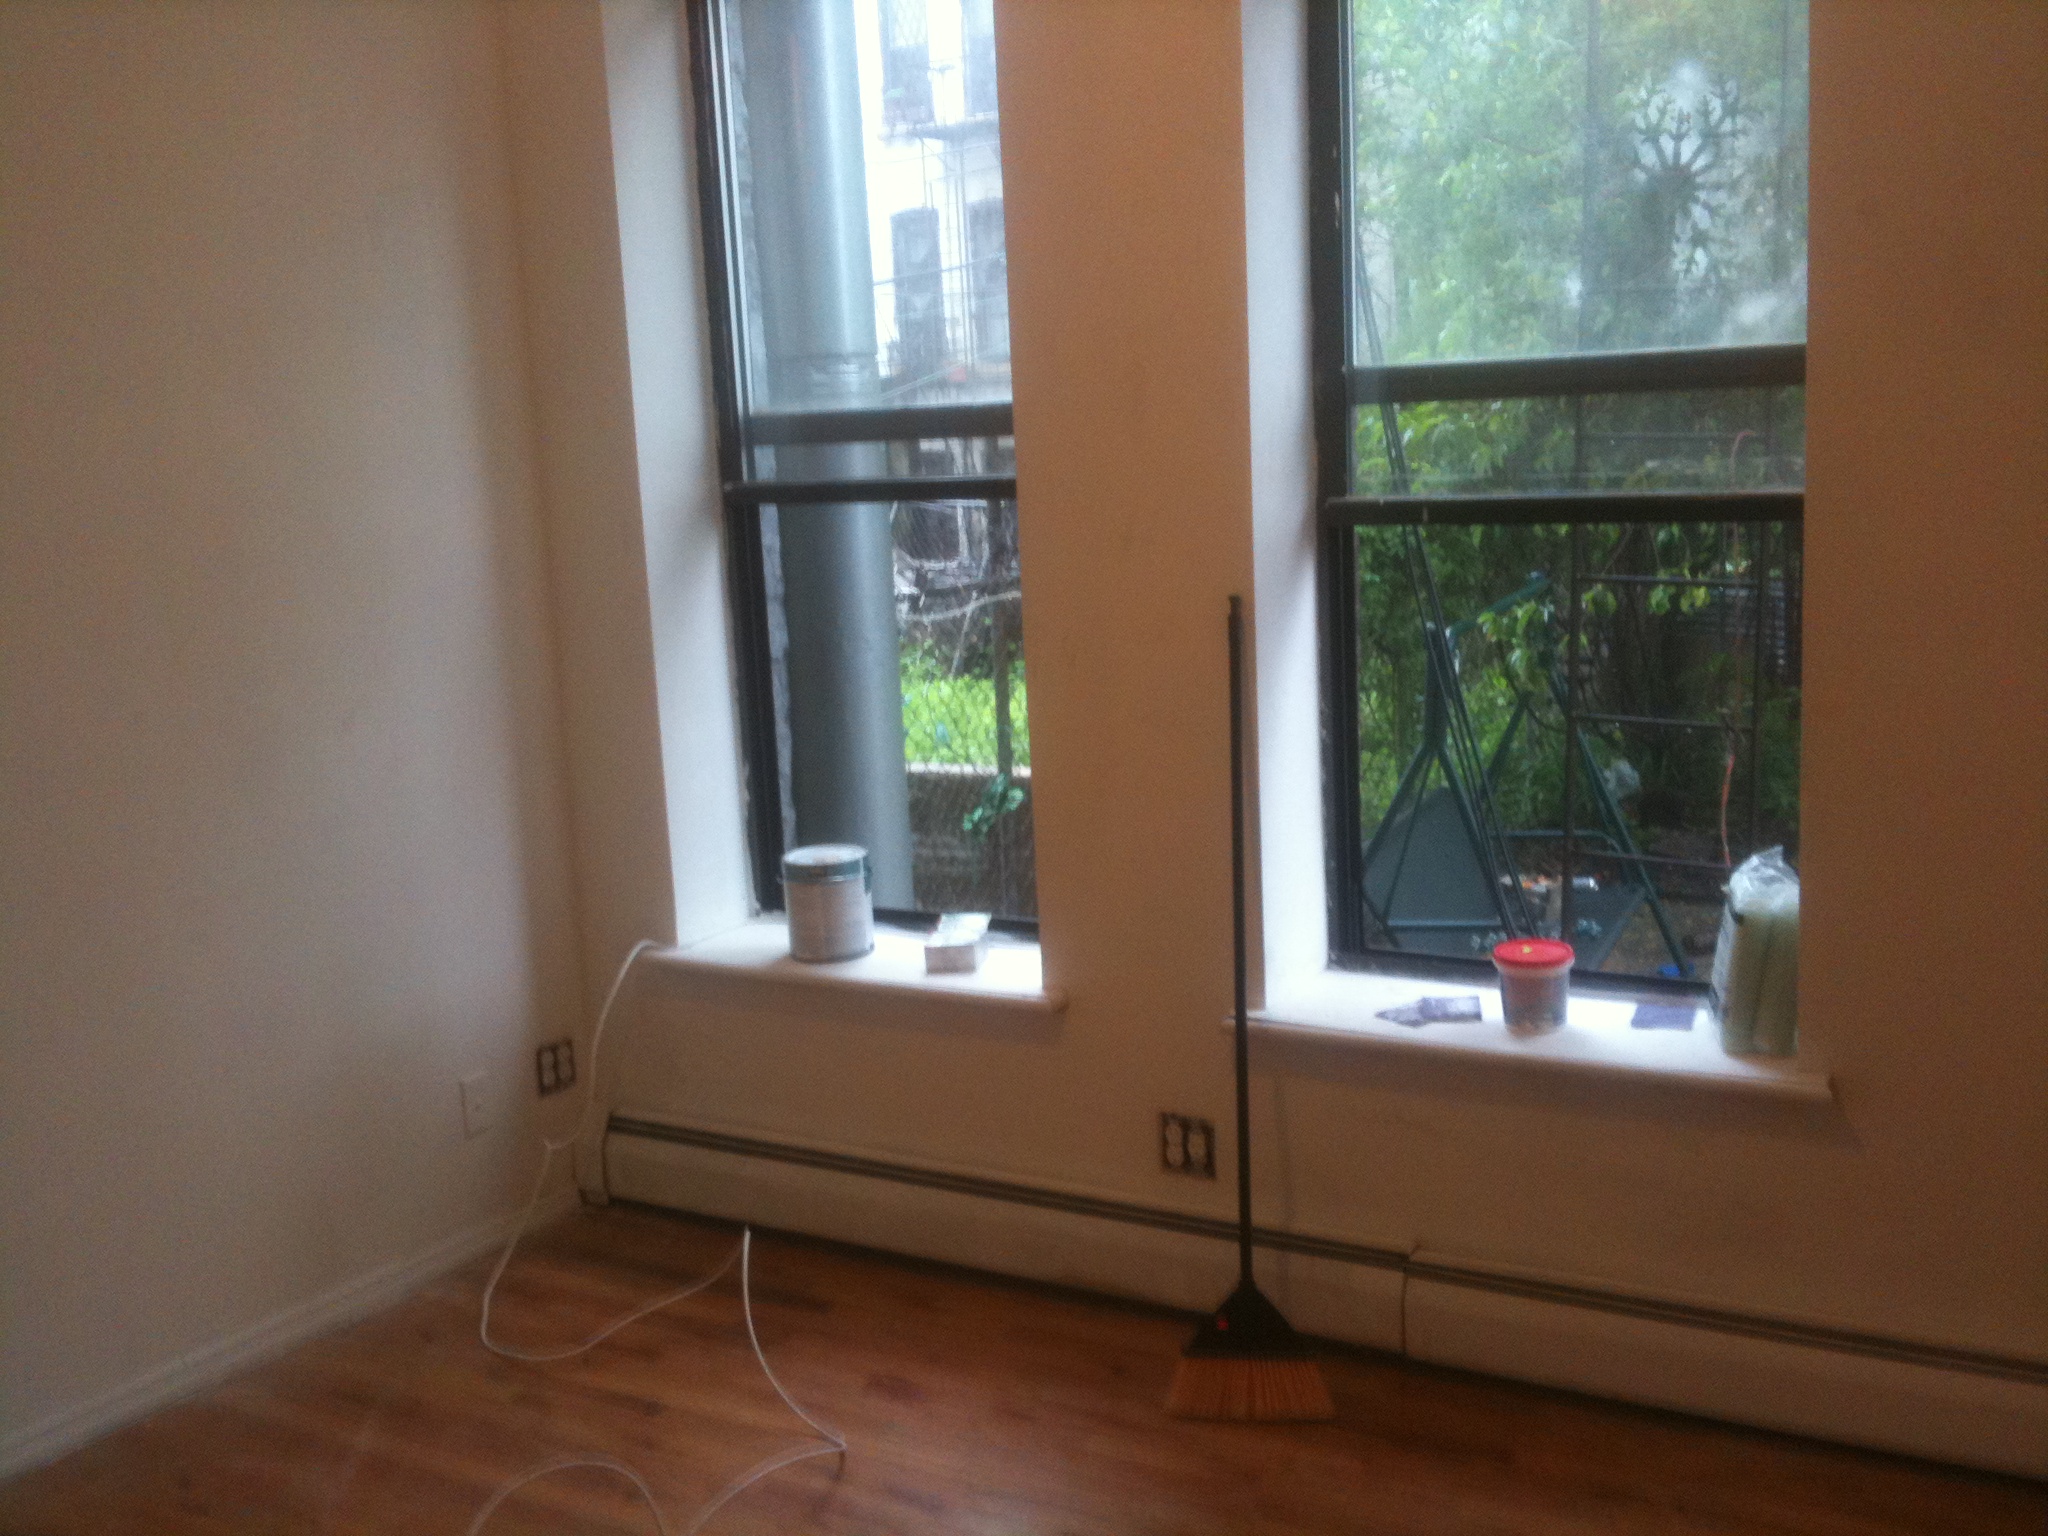
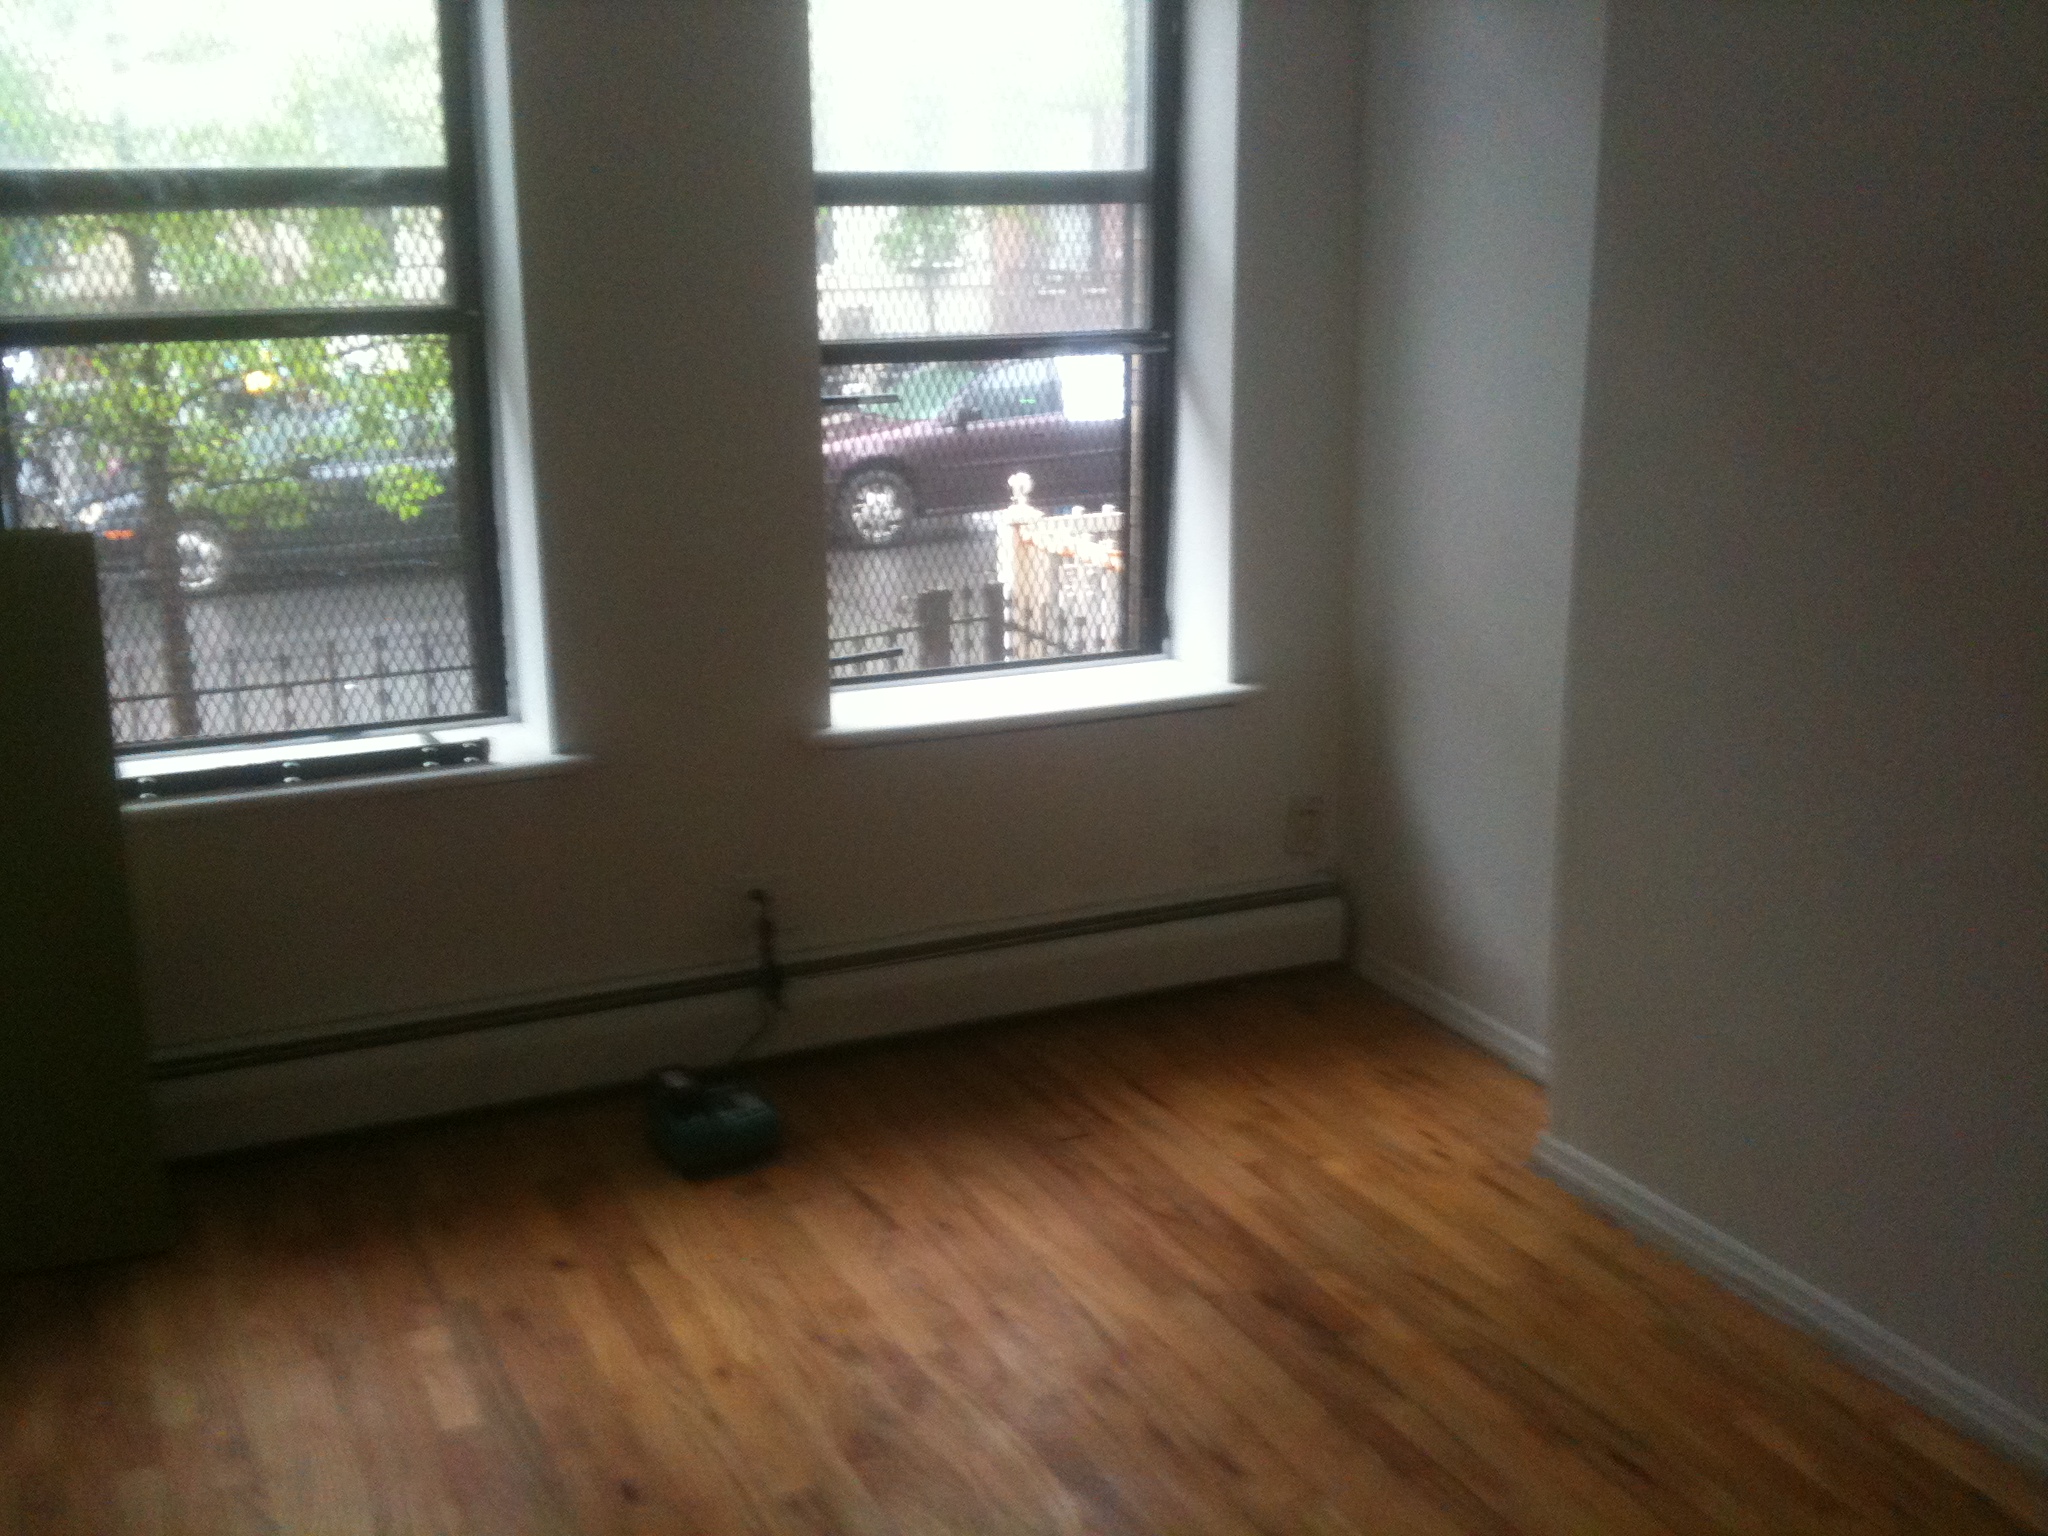
When we chose our apartment, one of the biggest selling points was that we would have access to some outdoor space.  The house was a mess, as we discussed here, but the garden space was even worse. We knew it was going to be a lot of work, but the (relative) affordability, the prospect of outdoor entertaining, the size of the outdoor space, and the possibility of getting a dog, made us move quickly to sign the lease.

 backyard "before" | Brooklyn Homemaker

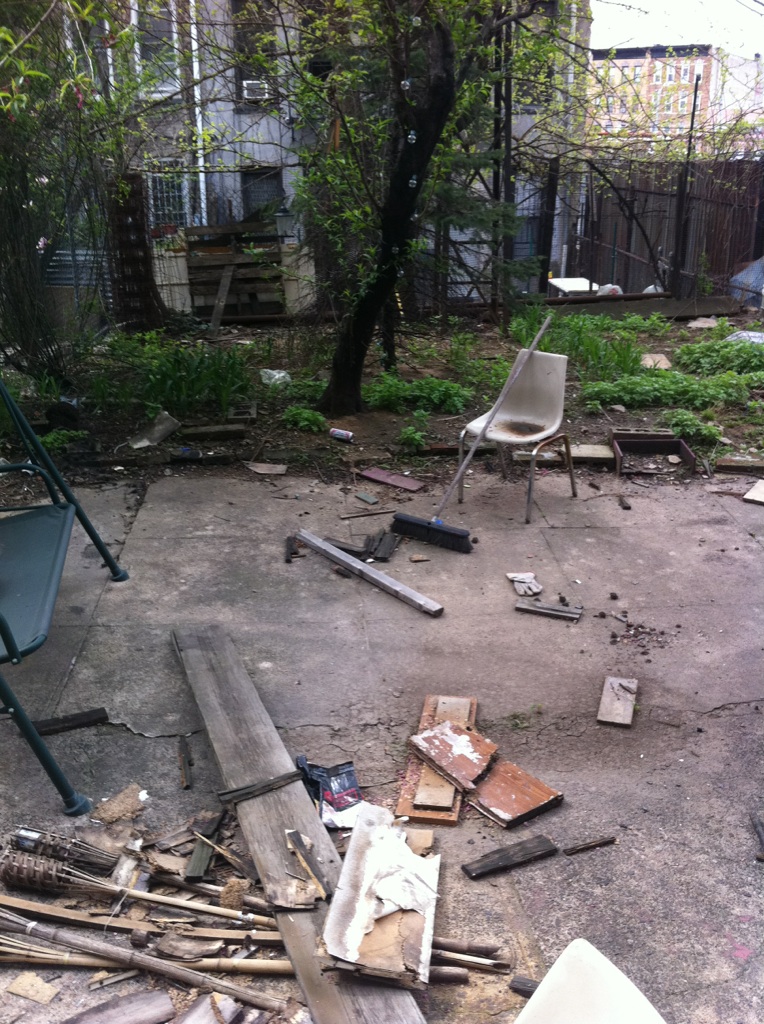
The first time we came to check out our apartment it was late in the spring, but the weeds had already grown high enough to disguise the heaps of nasty lurking back there. We arranged our lease agreement to give us access to our new place 15 days before we needed to leave our old digs. We used the bulk of that time to deep clean and paint the interior, but on a few occasions we ventured into the back yard to investigate. We immediately realized we hadn’t been paying very close attention on our first visit. We knew there was a lot of crud back there, some of it was in plain sight from our bedroom, but as we went further out into the garden area we realized it was much worse than we thought. I don’t know if the previous tenants were criminally insane, or just slobs or what; but there were literal bags of garbage, like big black contractor bags full of yuck, hiding between the weeds. Once we started clearing the tangle of weeds all sorts of disgustingness started turning up. Beyond bagged garbage, there were also rotting stuffed animals, rotting outdoor furniture cushions, rotting articles of clothing, rotting pieces of wood, rusting sheets of metal, various plastic bags and toys, and lots and lots of broken glass. LOTS of broken glass.

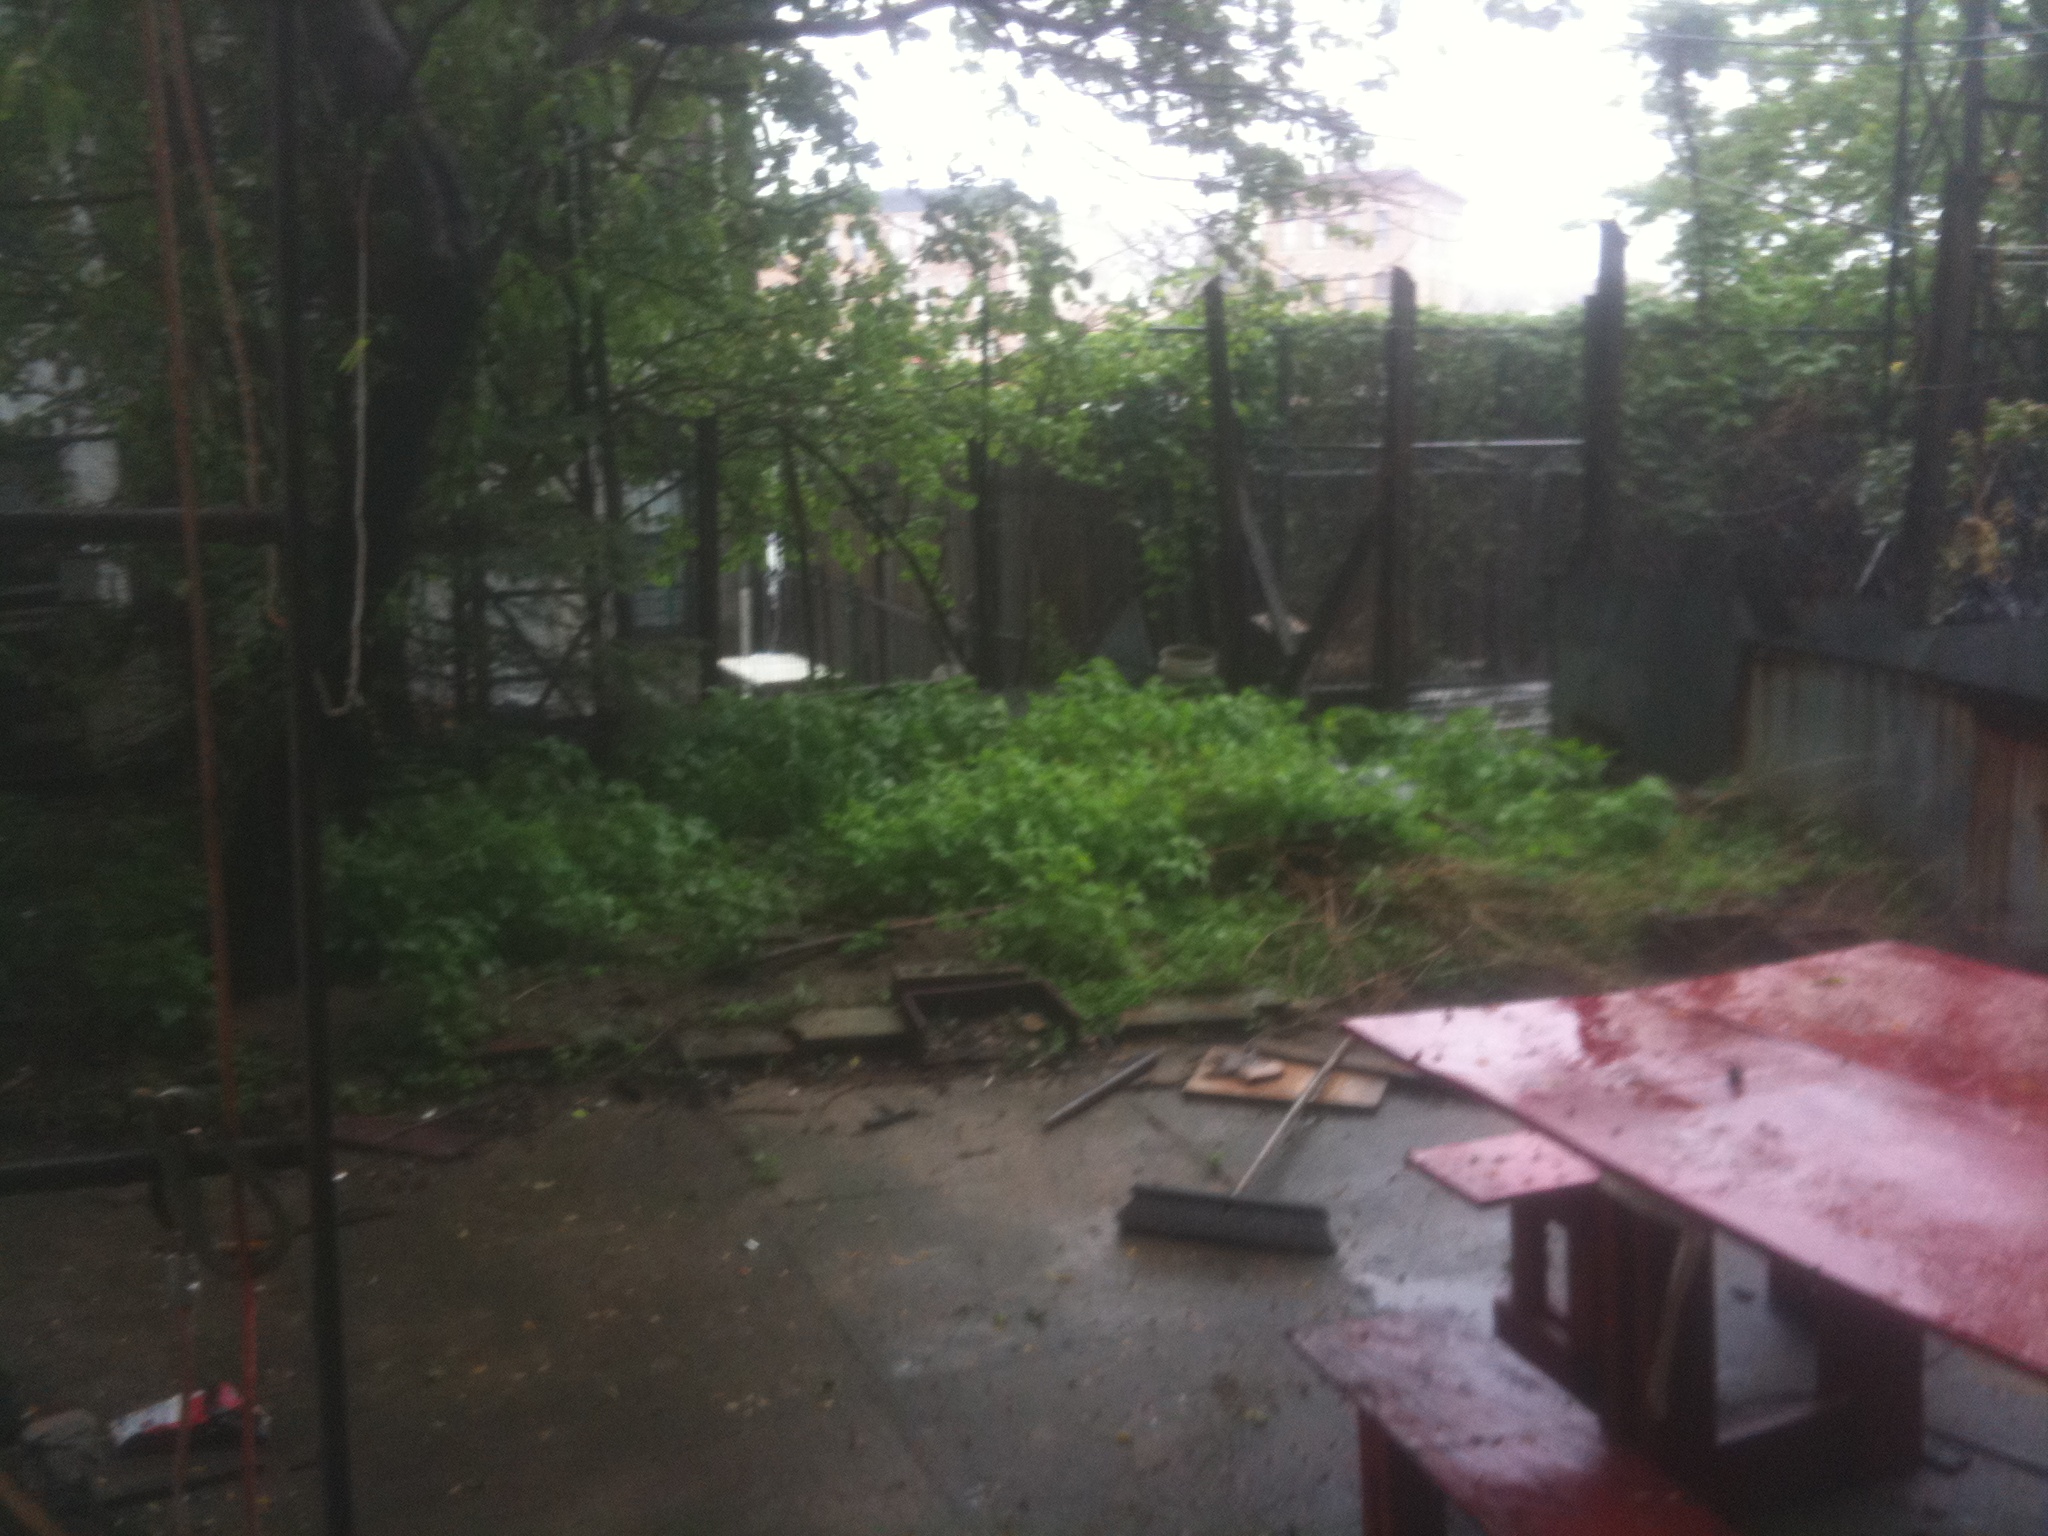
When it came to the plant life back there, there was (and still is) a huge old mulberry tree that basically shades the entire yard and drops big juicy disgusting mulberries all over for about a month out of our short summer, along with a small dying fur tree that I ended up deciding to cut down, a sickly plum tree that always tries to produce fruit that never quite gets ripe before they rot and fall off the branches, a gigantic climbing rose vine that was plagued with some kind of mildew which caused the flowers to shrivel and die before blooming, a large patch of old day lilies that refused to flower, and a 3 foot high jungle of assorted weeds. My first order of business was to cut down the dying fur tree and cut back and dig out the rose vine, which was so large and old that it had started to grow into the plum tree and choke it out. Once I got the vine out of the way, I also had to do some major trimming to the plum tree in the hopes of nursing it back to health.

backyard "before" | Brooklyn Homemaker

I’m no gardening expert, so the past few years have been a bit of trial and error. Even cleaned up and tidy, our outdoor space is a challenge. The two horrible words that have turned my green(ish) thumb into a brown(ish) one are… DRY SHADE. We have no connection for a hose, and the soil refuses to hold onto moisture. It’s full of sand and weird construction materials (I’m still digging up bricks and chunks of cement), and tends to go bone-dry very quickly in the summer. The mulberry tree shades about 95% of the yard so anything that needs good sun refuses to thrive. In the beginning I was simply focusing on the shade aspect and planting things like ferns and other lush leafy shade plants, but the dry soil has caused the untimely deaths of MANY innocent plants. A few things have done alright, but one of the only things that seems happy back there are hostas. This year I’ve decided to focus my attention on planting a jungle of big leafy hostas in many sizes and colors, so the yard at least appears to be lush and healthy. I’ve also been researching drought tolerant shade plants a lot recently, so hopefully I’ll have some better luck this summer than I have previously.

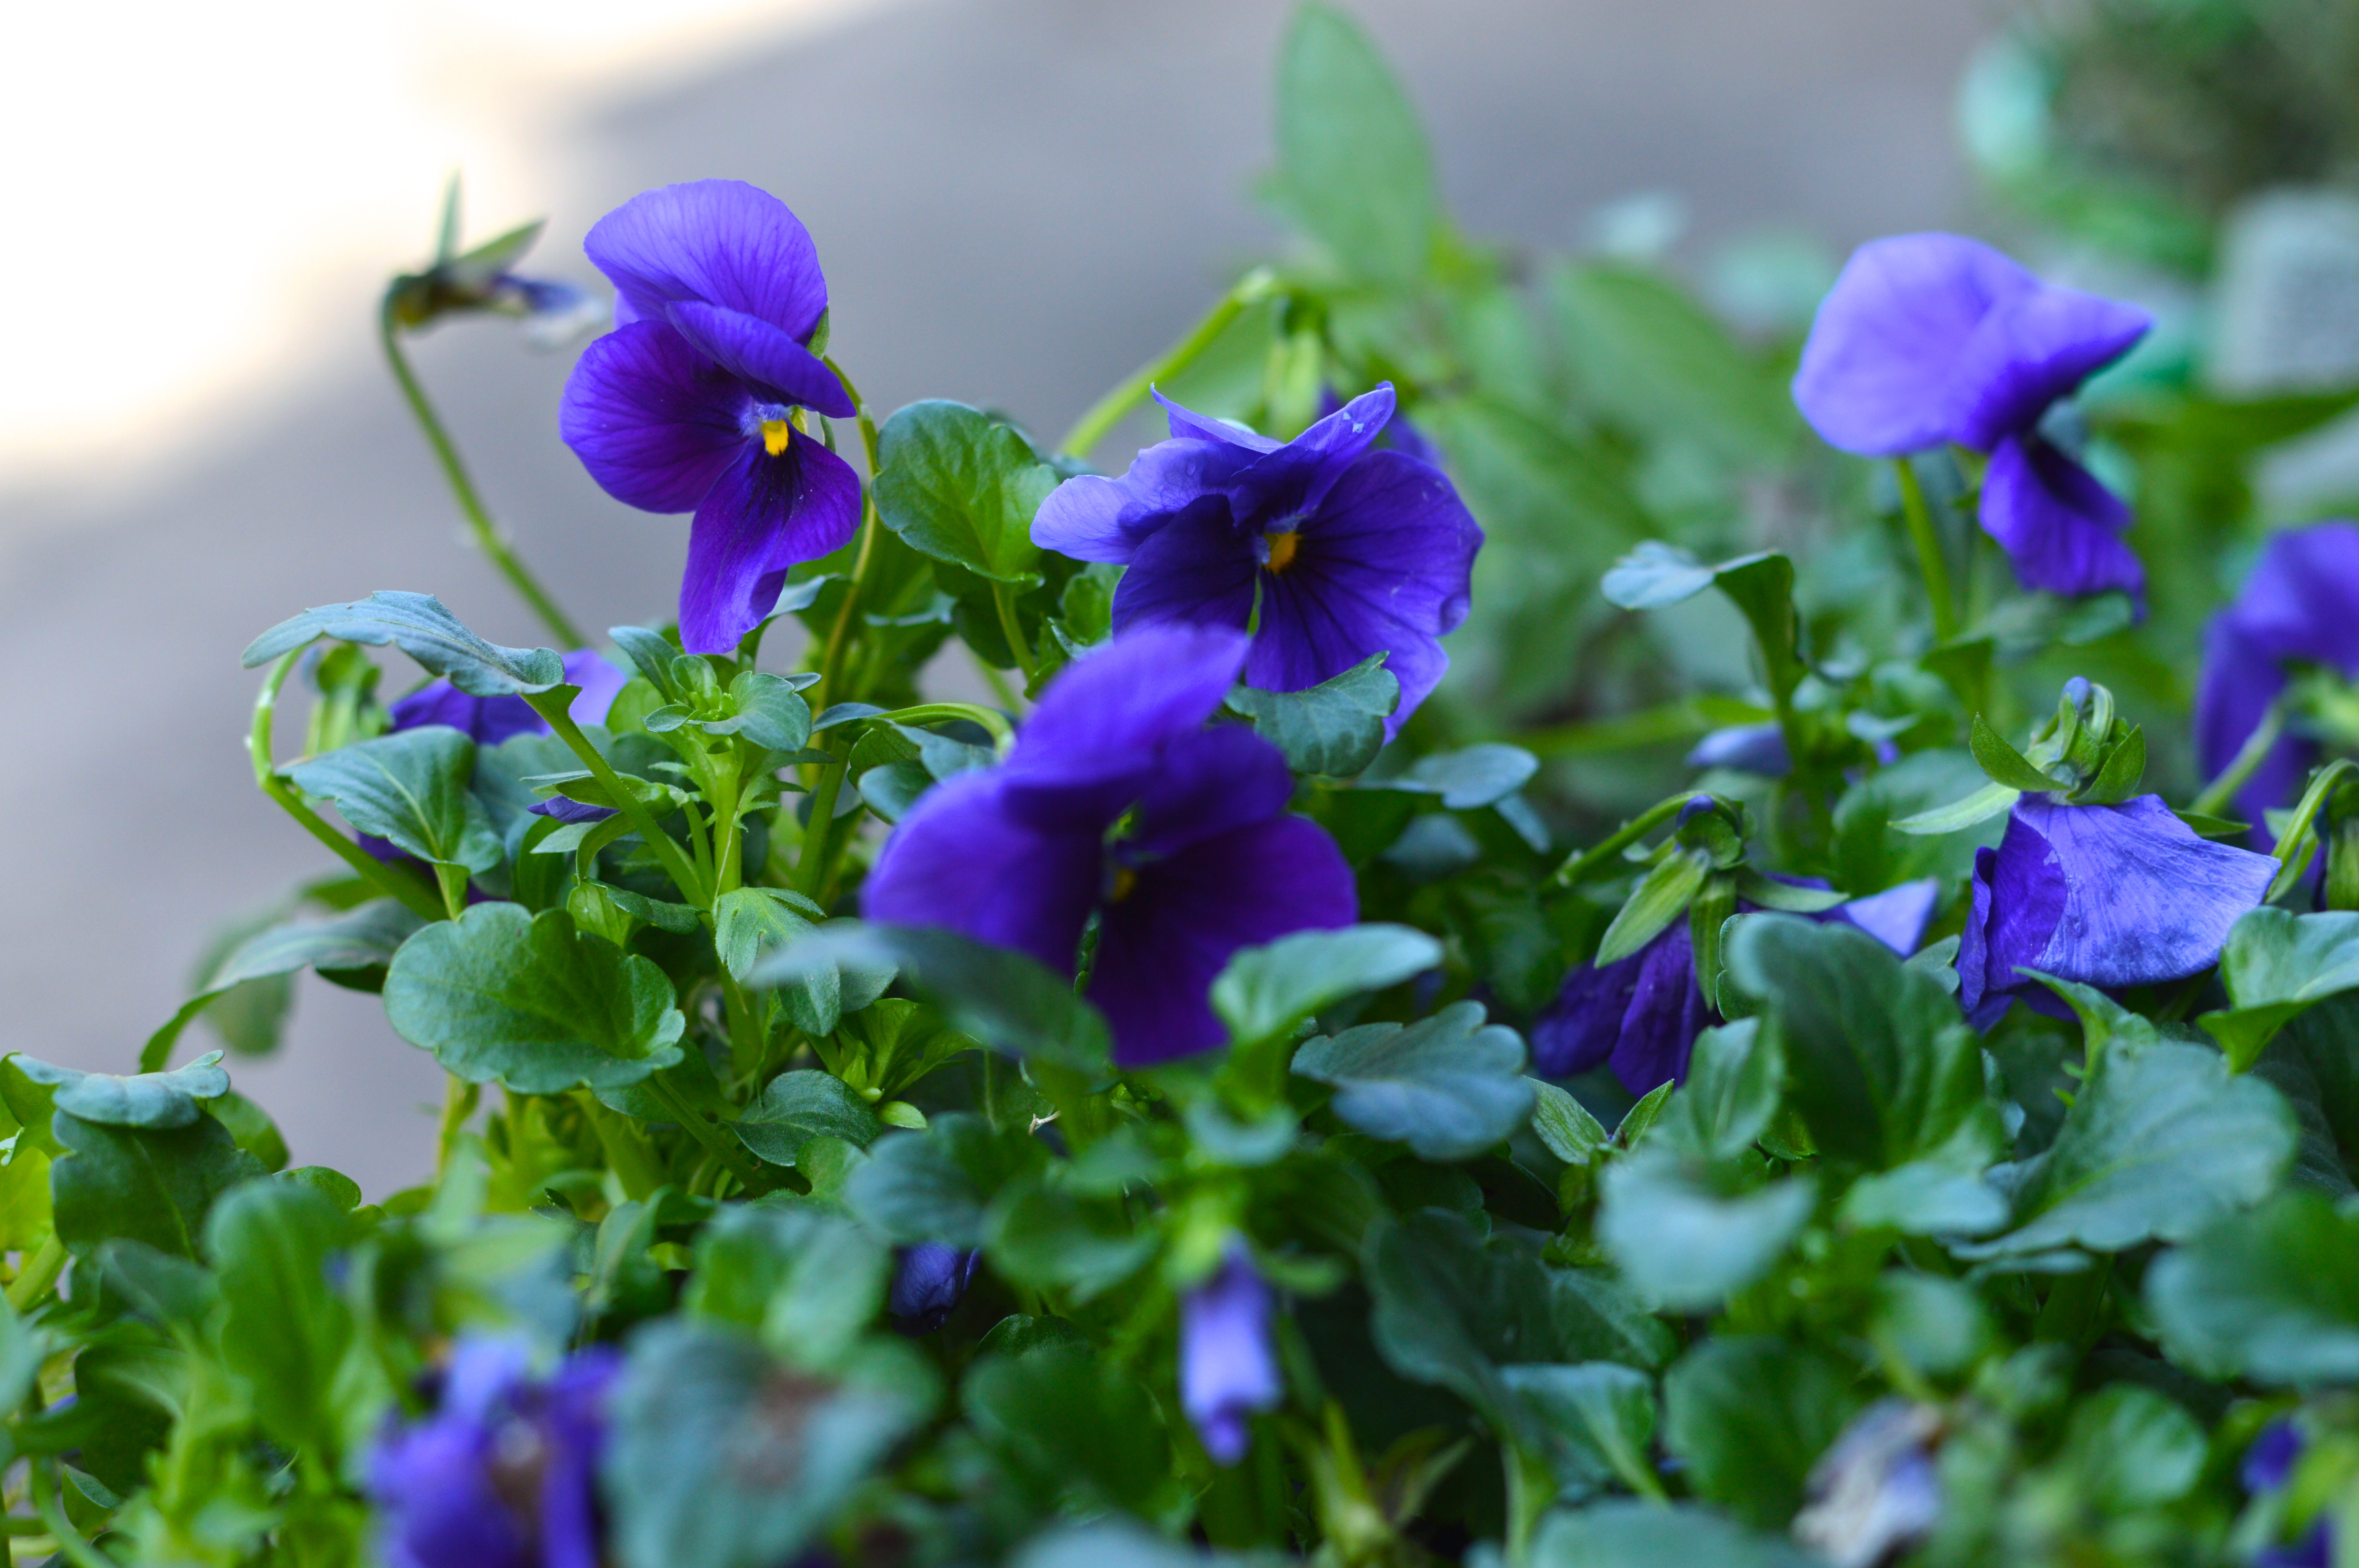
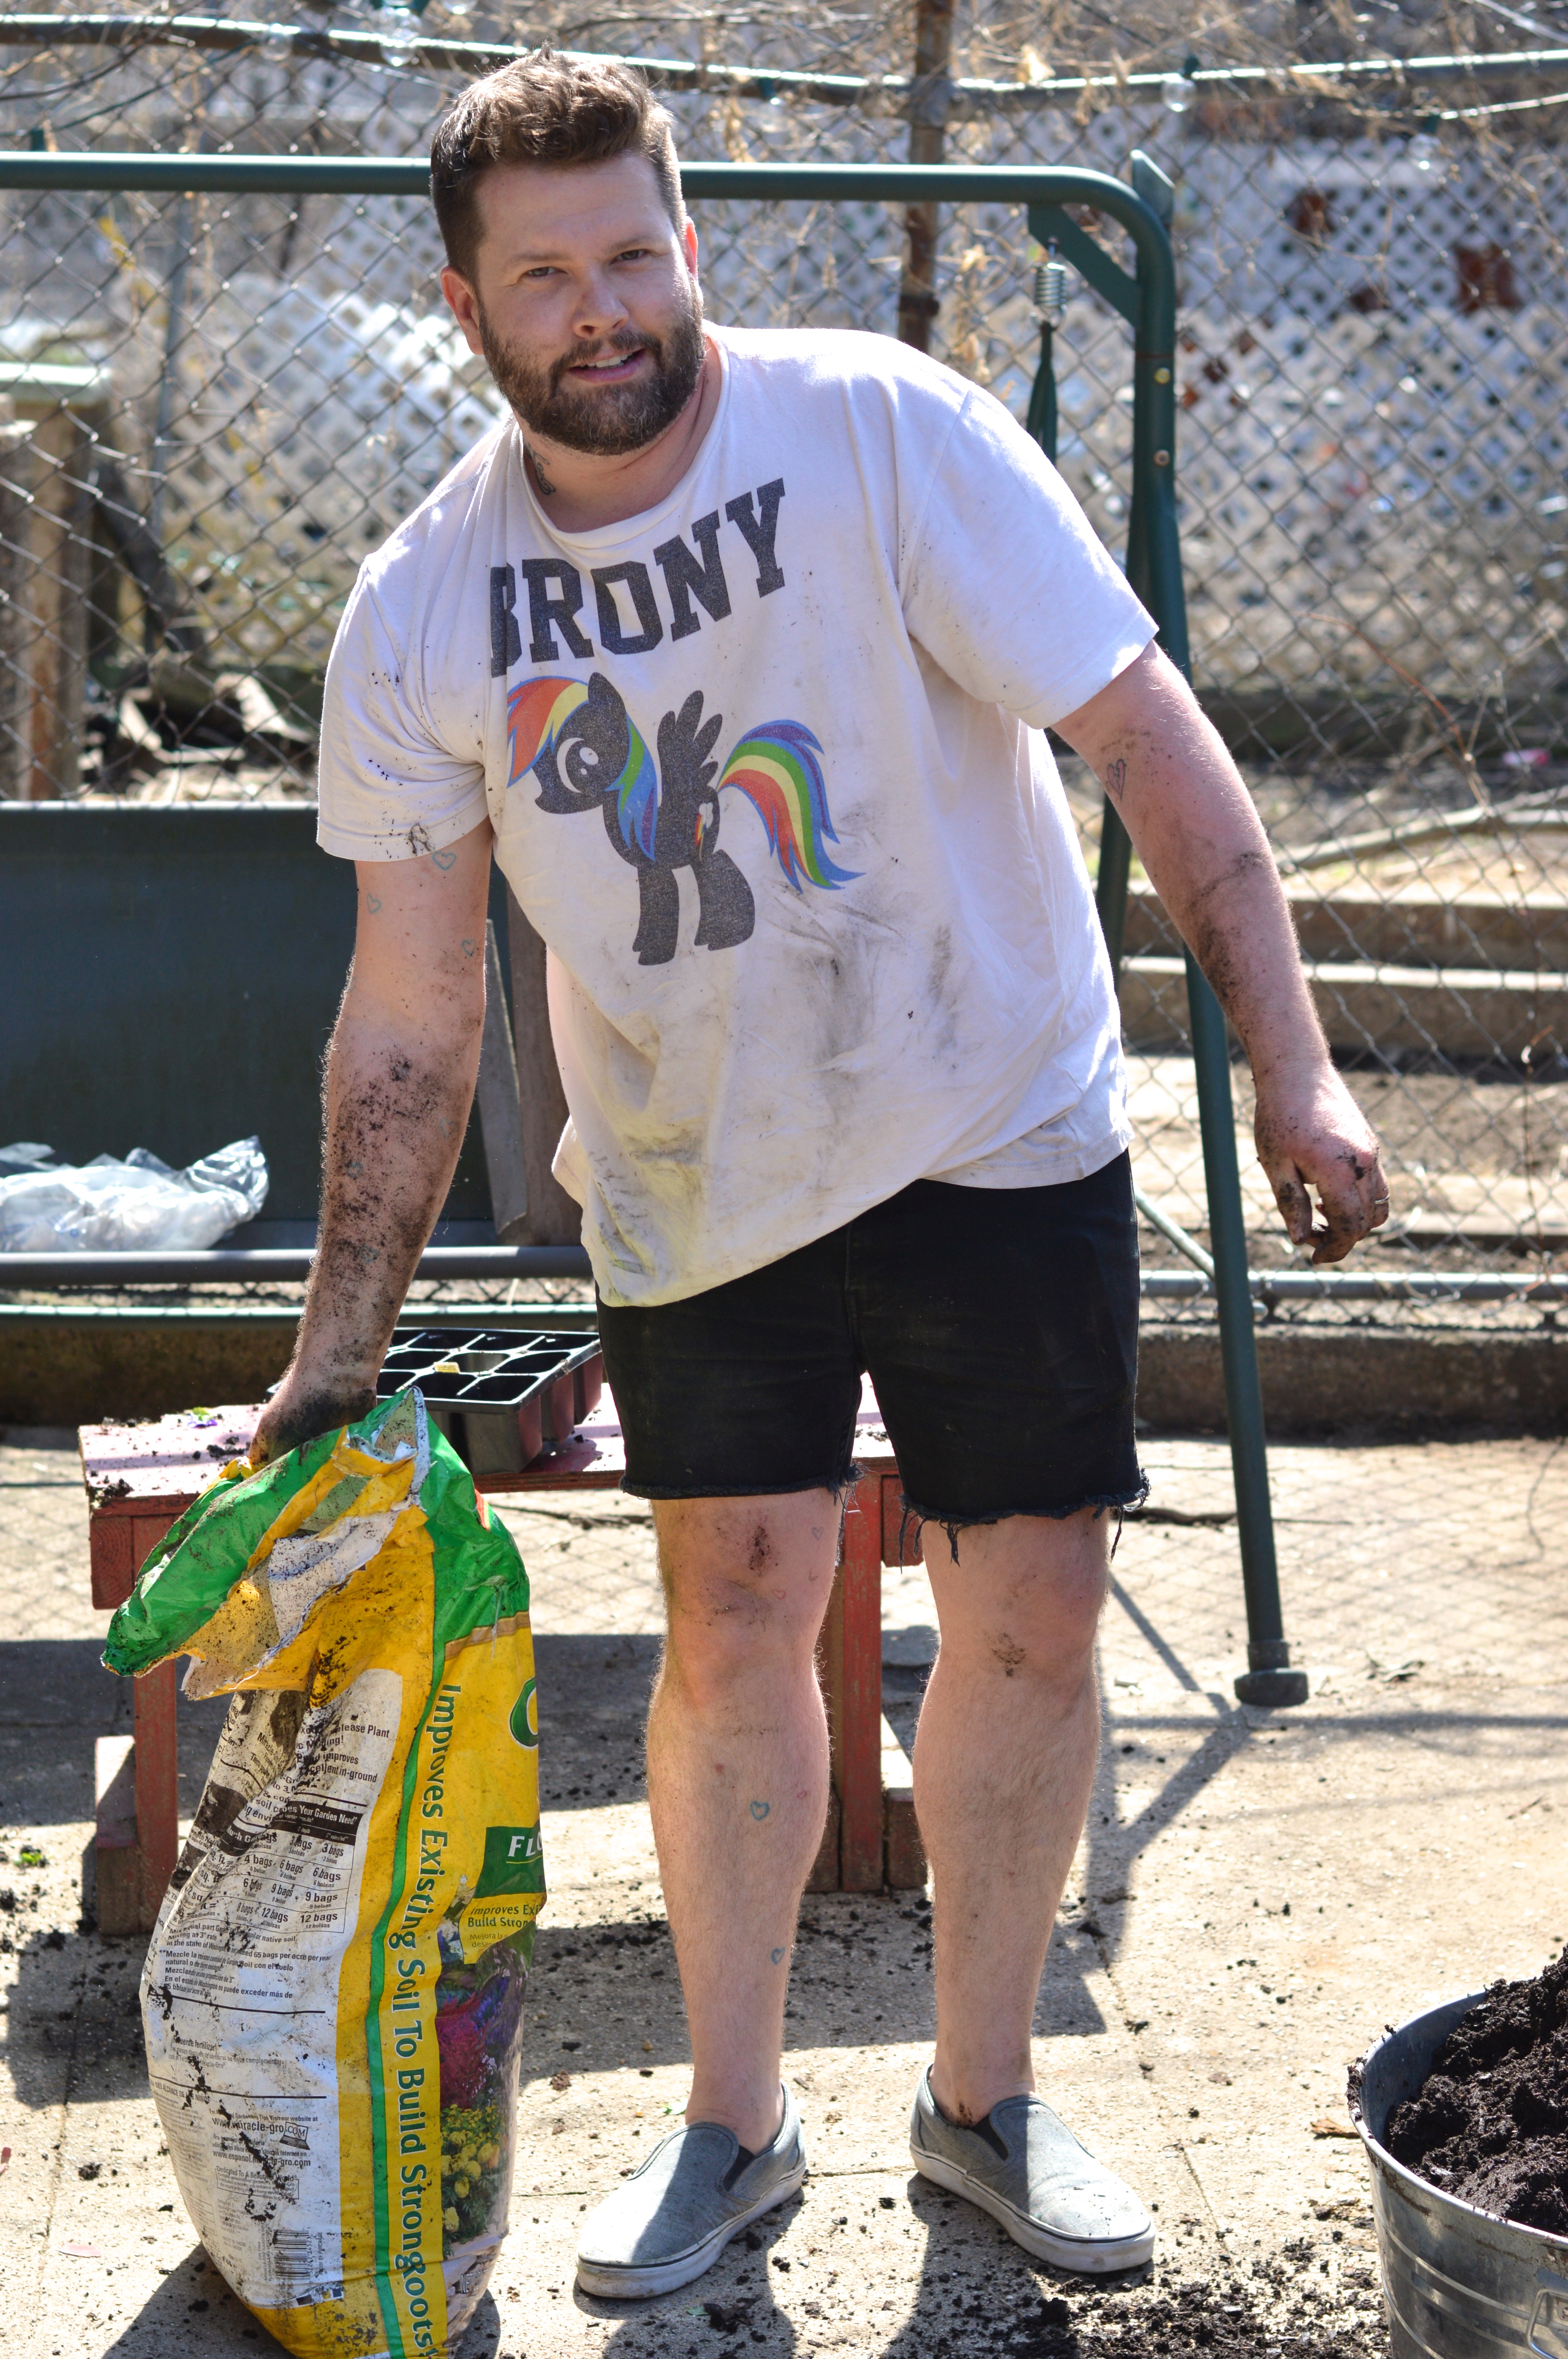
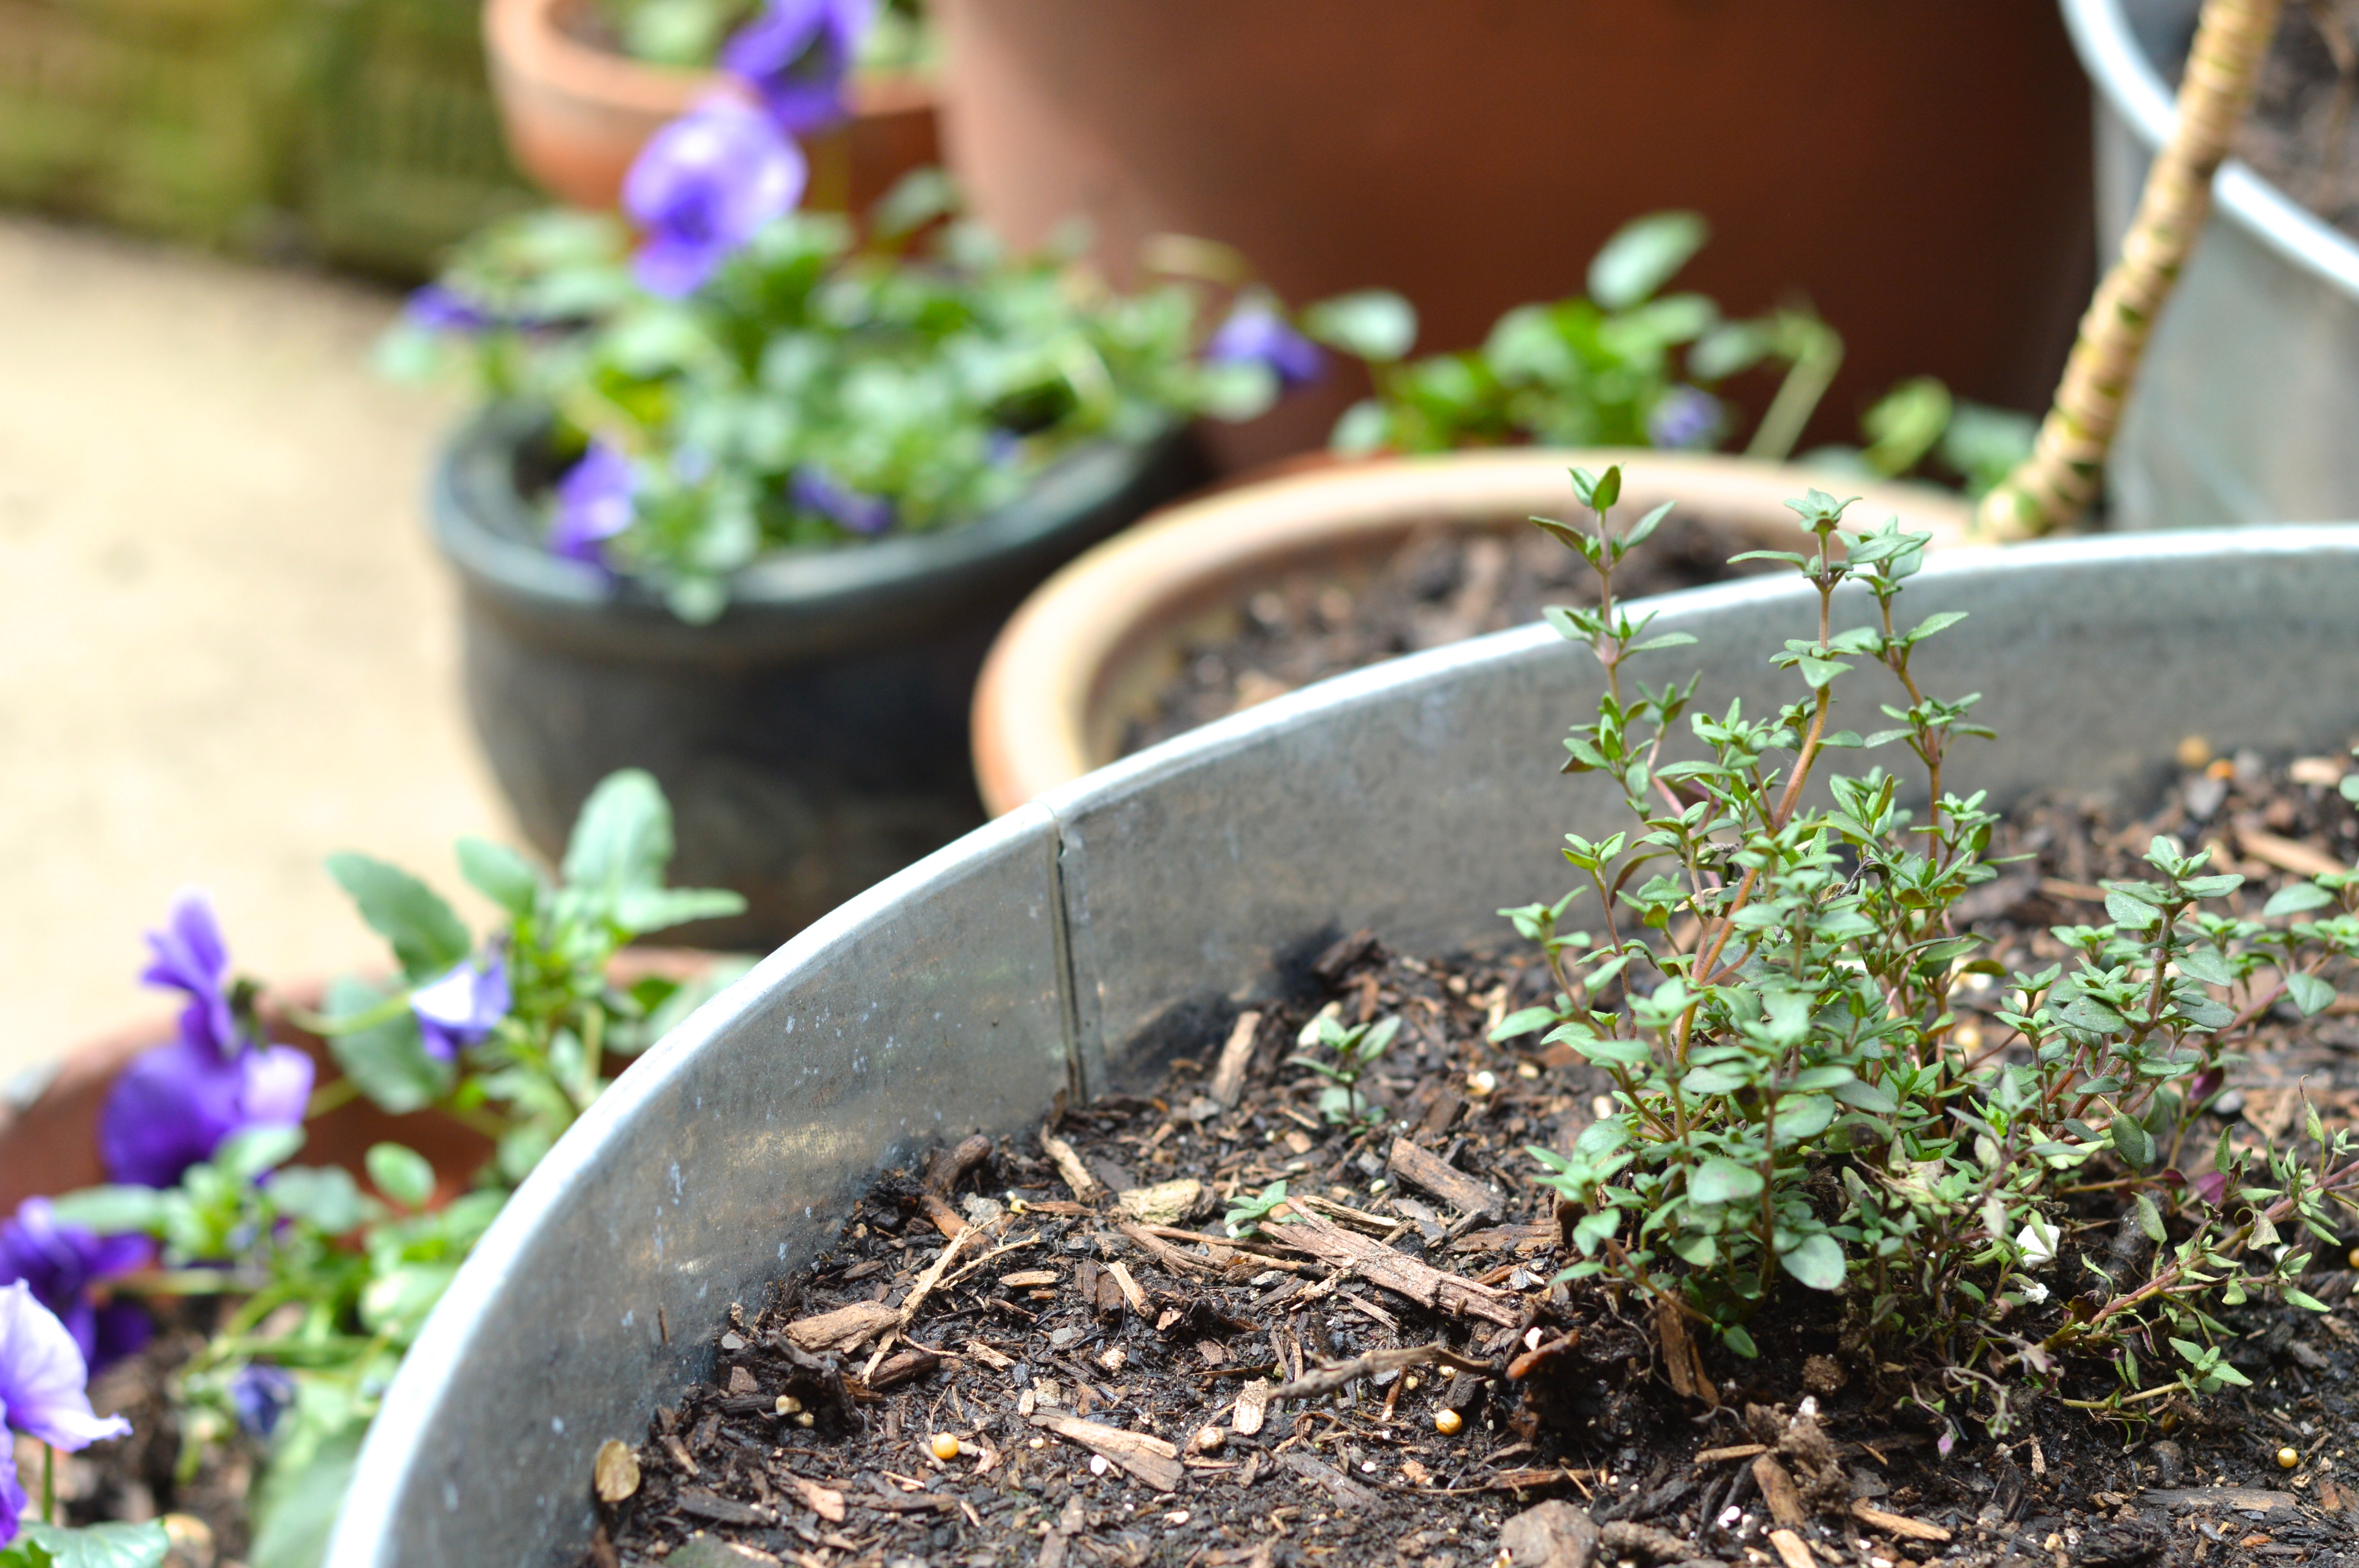
To get the year started right, Russell and I recently took a trip to the farmers market hoping to find some new plants, a flat of annuals, and maybe some herbs to plant in containers. Unfortunately it was a bit too early for plants at the market so we went to Home Depot to see what we could find there instead. Even there it was too early for most things, but we were able to find some pretty purple pansies and a few herbs.

a little yarden tour | Brooklyn Homemakera little yarden tour | Brooklyn Homemaker

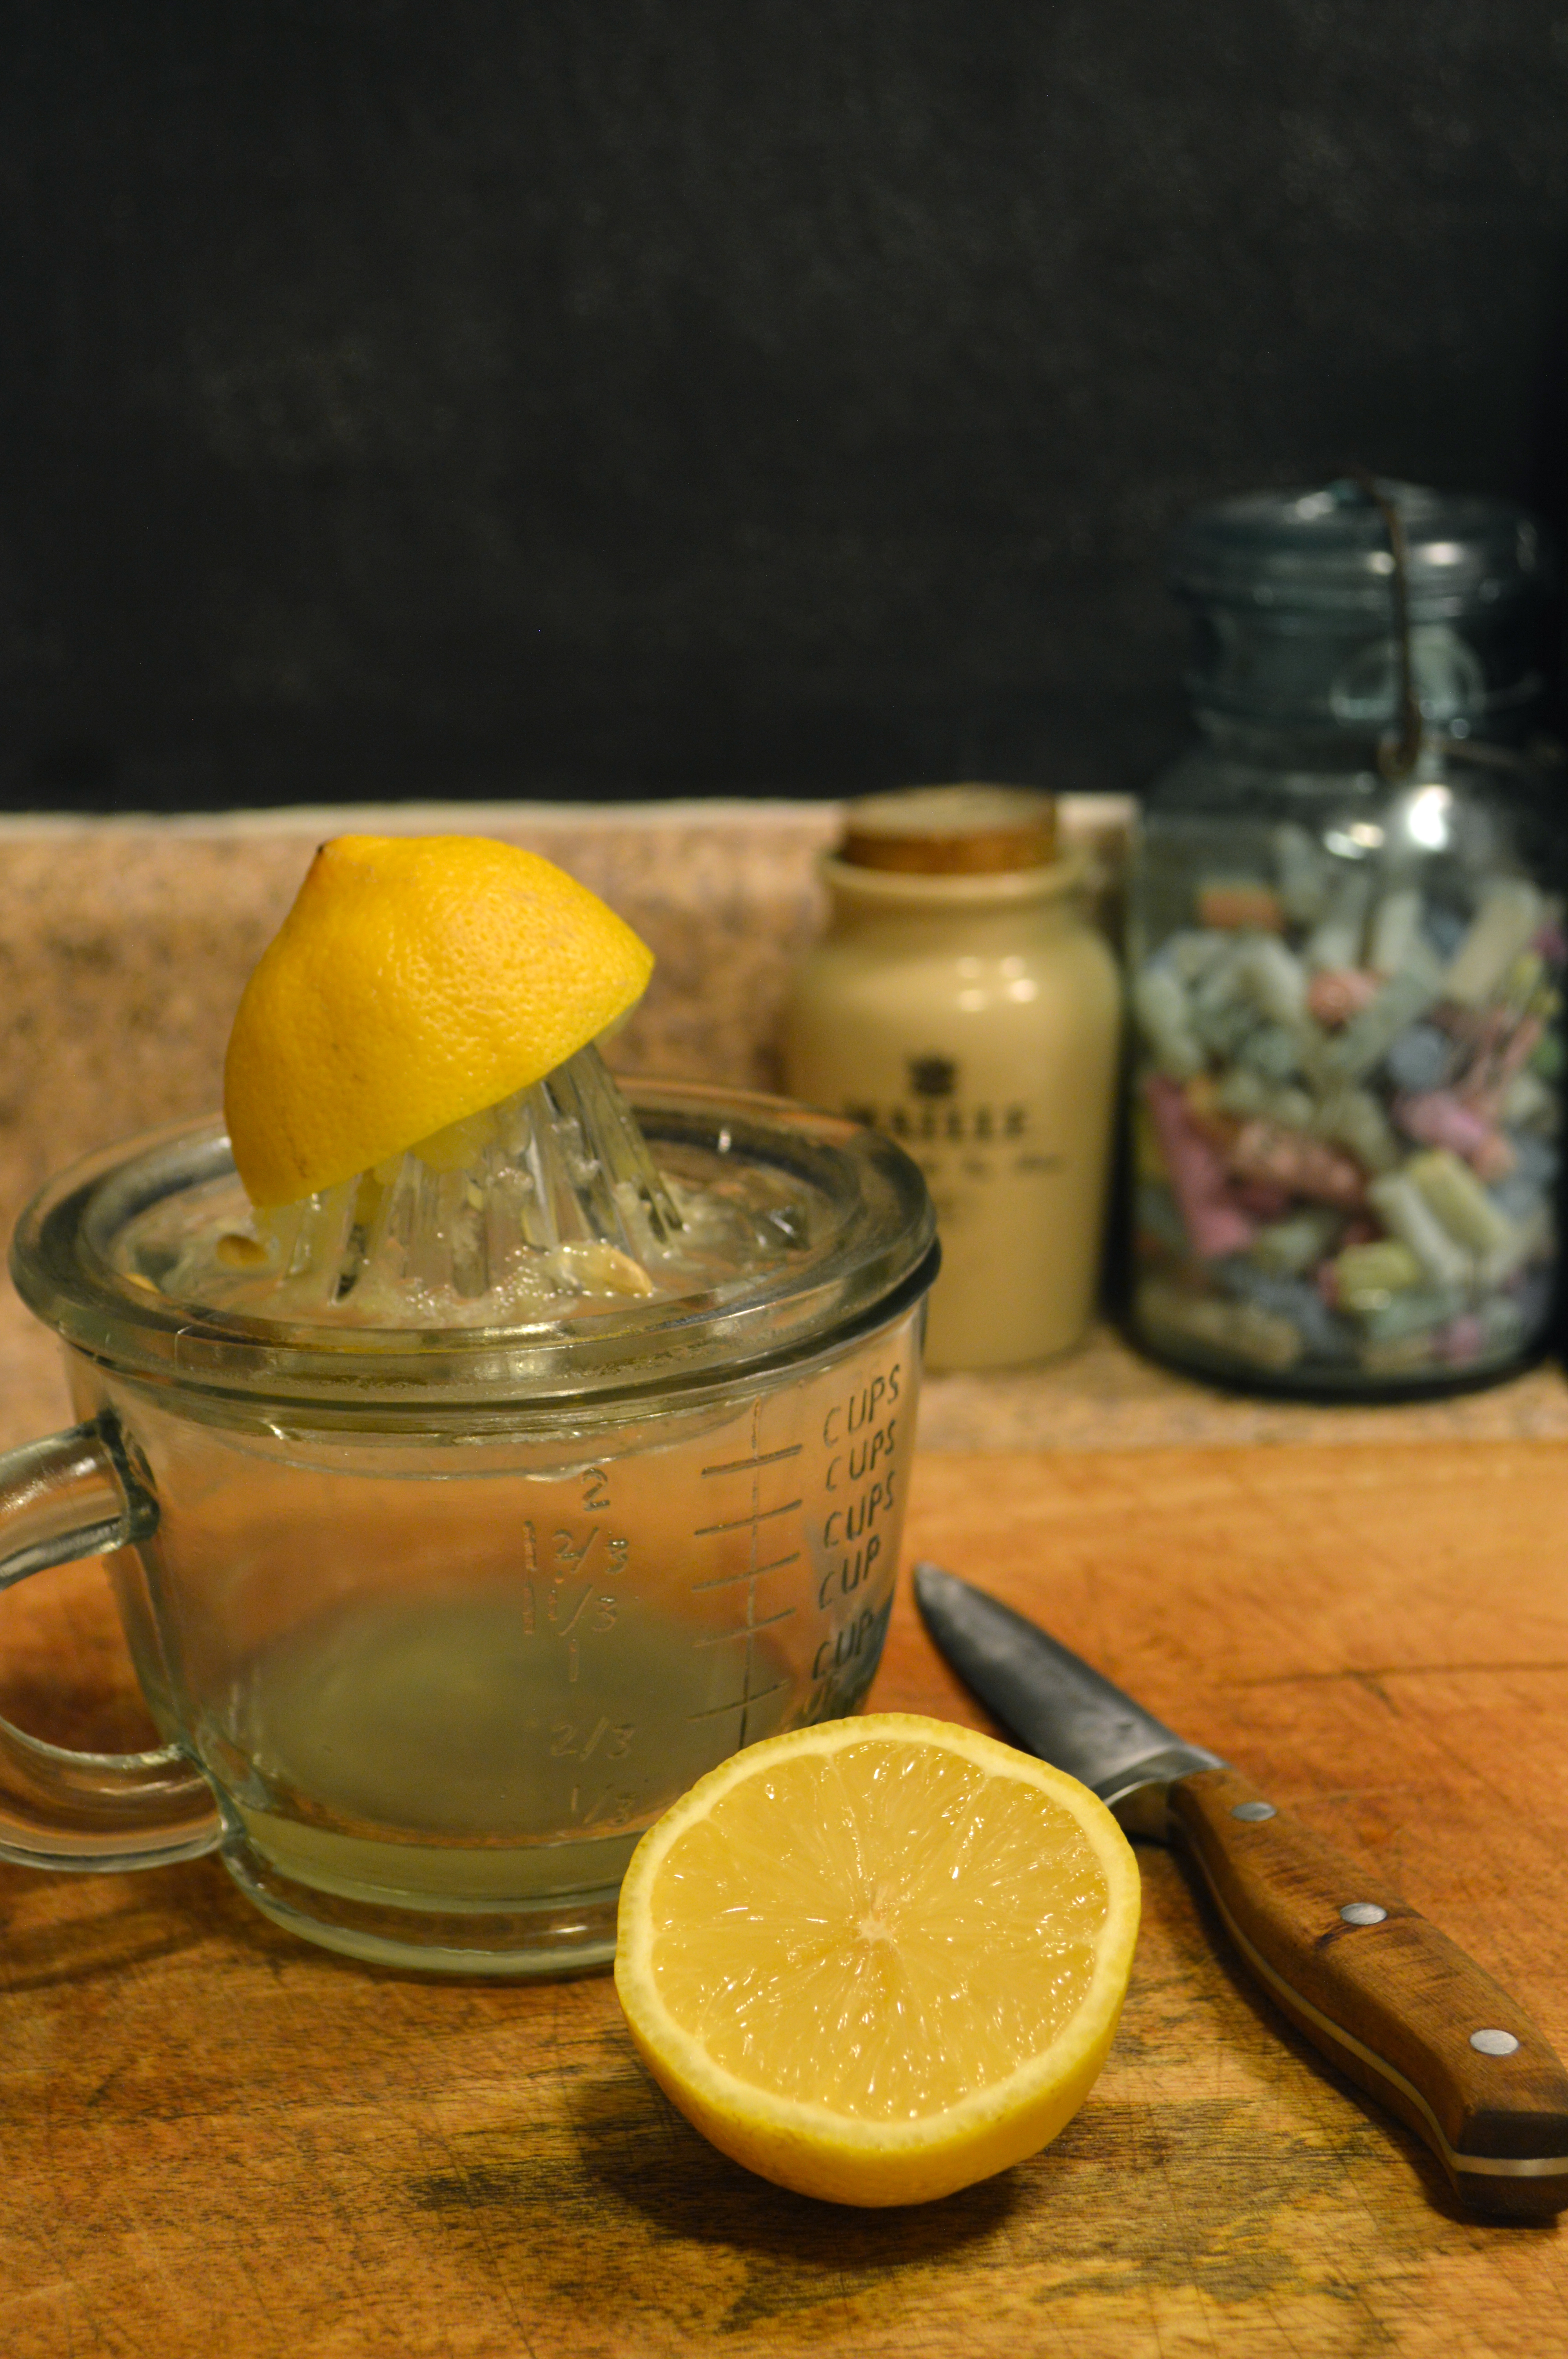
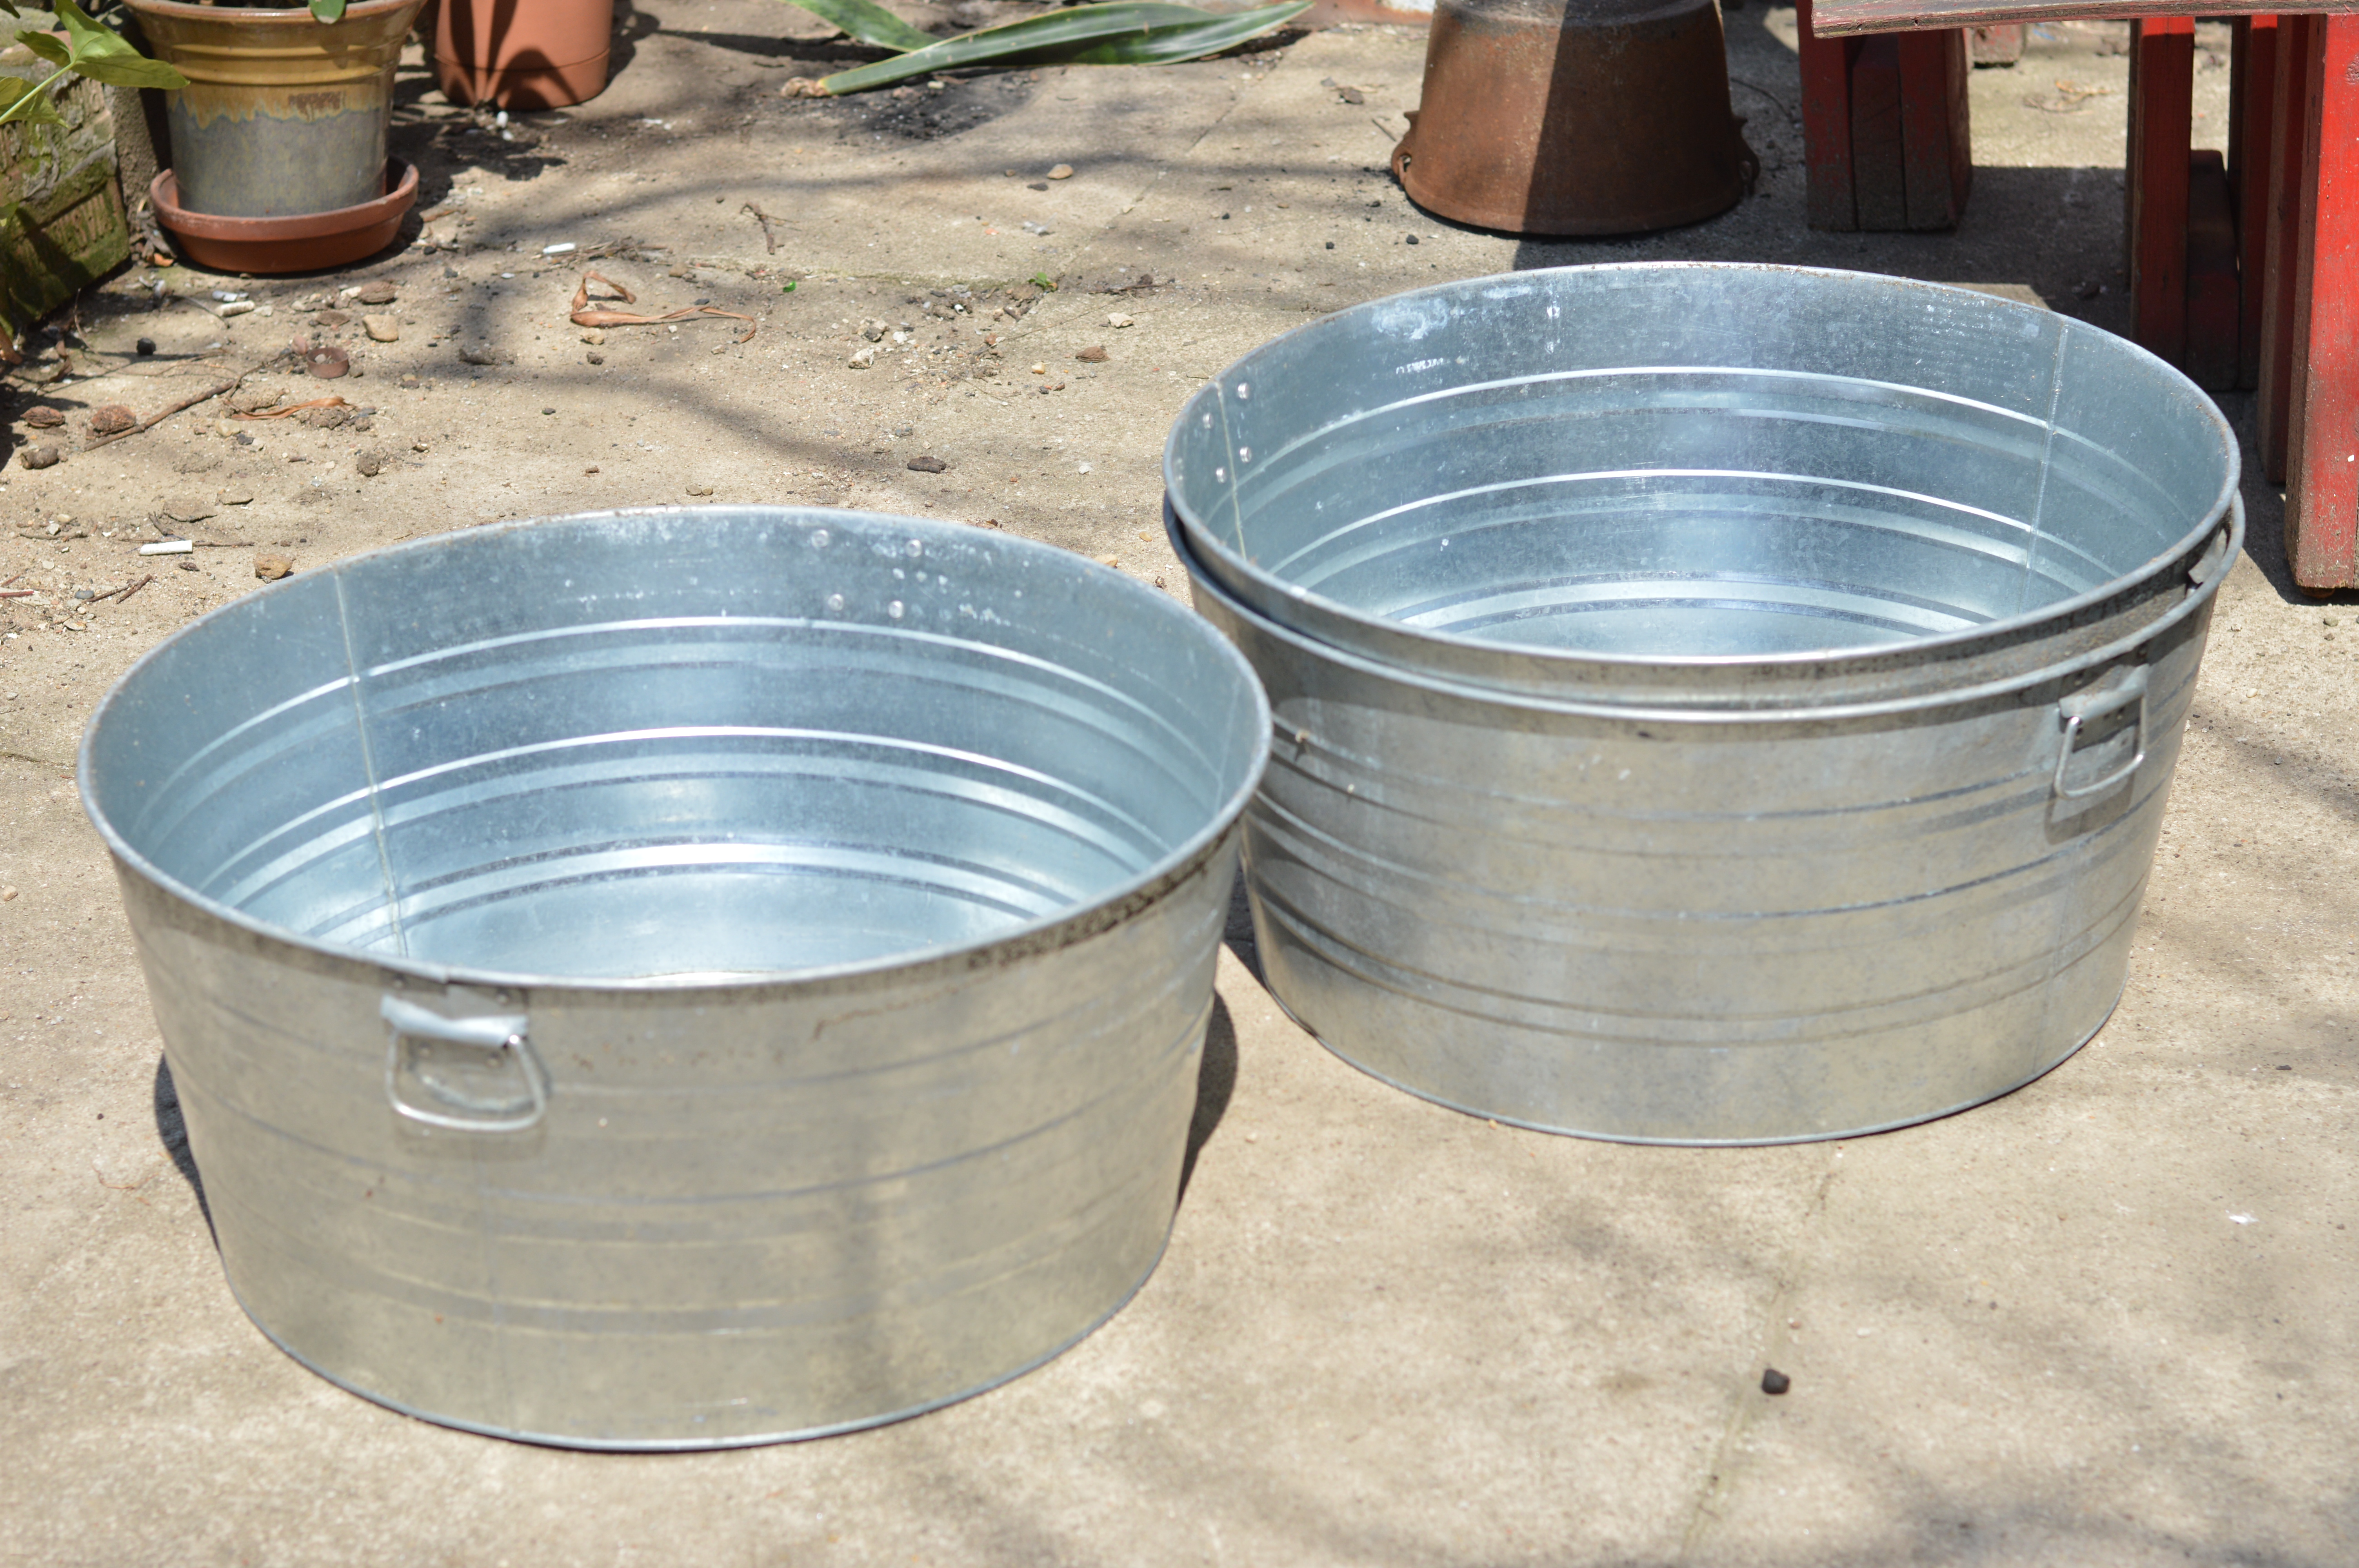
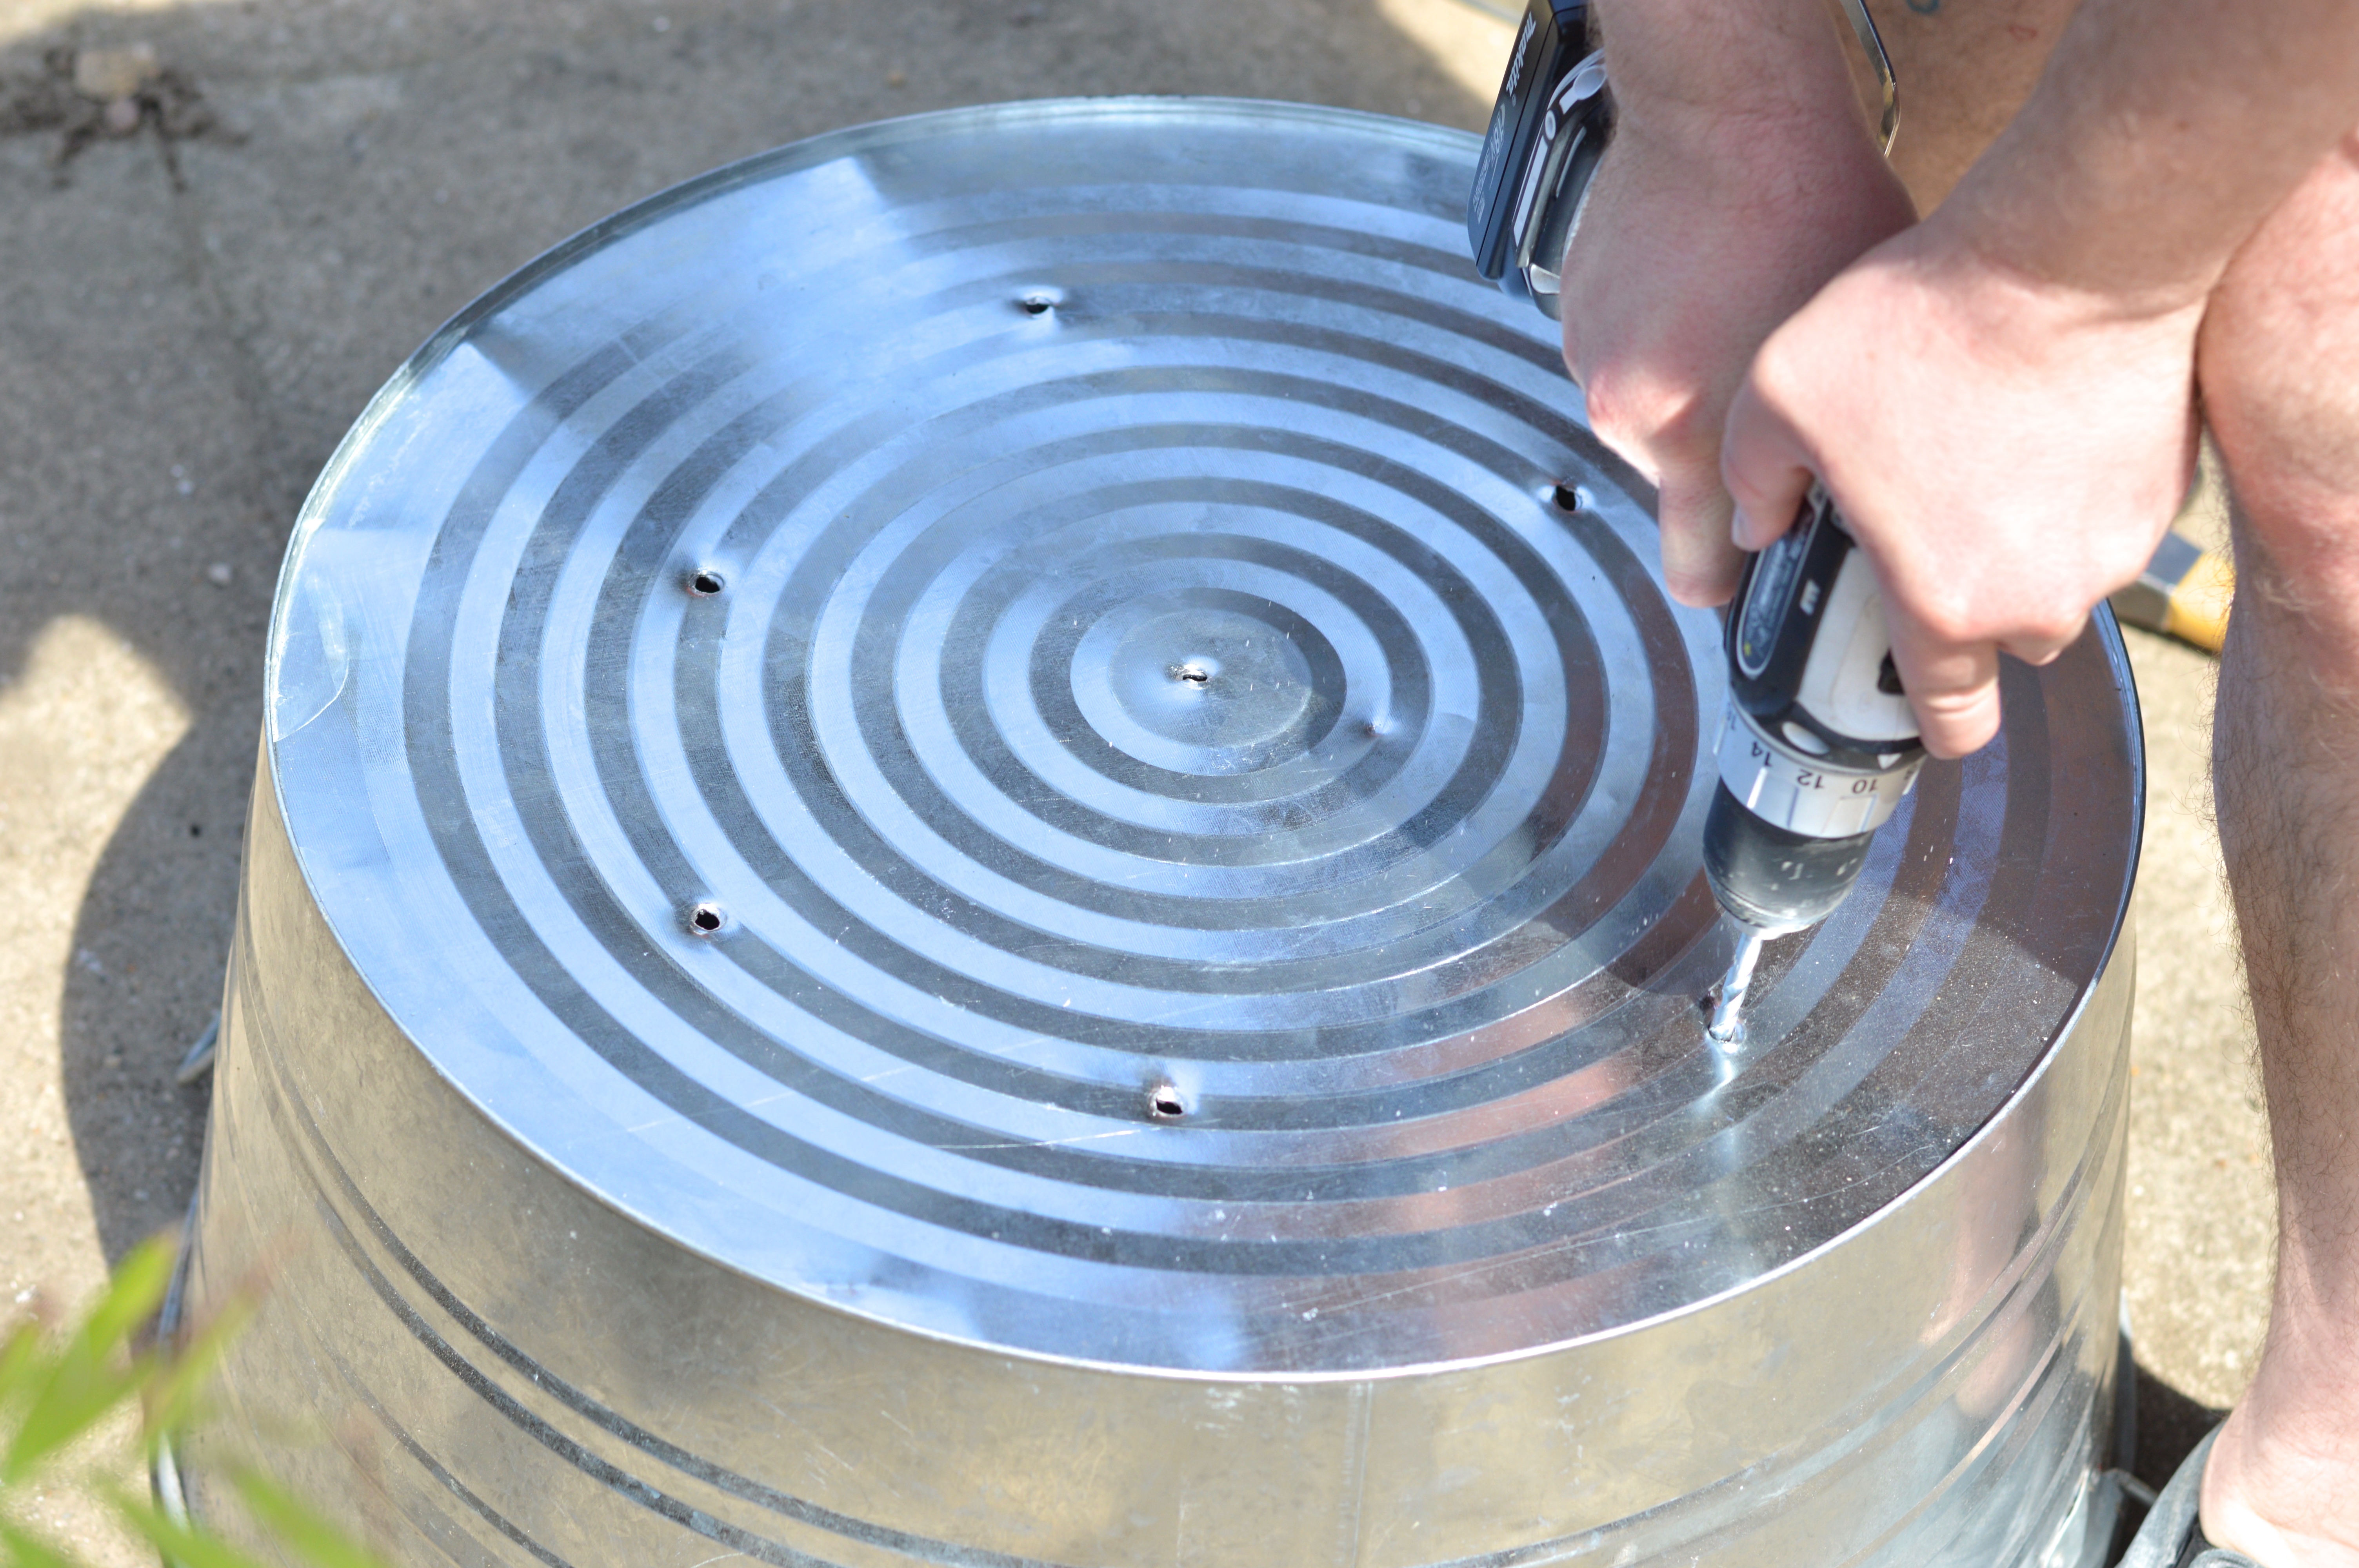
When we were married last summer we used some big galvanized aluminum pails at the bar as ice buckets, and after the wedding we hung onto them. We also bought some nice rich garden soil to fill them with and have been hoarding it under our stairs and waiting for spring. So, when we came back from our plant hunt we busted out the drill and made some drain holes in the bottoms of three of the pails to turn them into planters.  I decided to use one of them to re-pot a lemon tree I planted from seed several years ago. It’s never given me any fruit, and since it needs to live in a pot and come indoors for the winters, I don’t know if it ever will. Regardless, I really like my little tree and decided it was time to give her a bigger home this year.

a little yarden tour | Brooklyn Homemakera little yarden tour | Brooklyn Homemakera little yarden tour | Brooklyn Homemakera little yarden tour | Brooklyn Homemakera little yarden tour | Brooklyn Homemakera little yarden tour | Brooklyn Homemaker

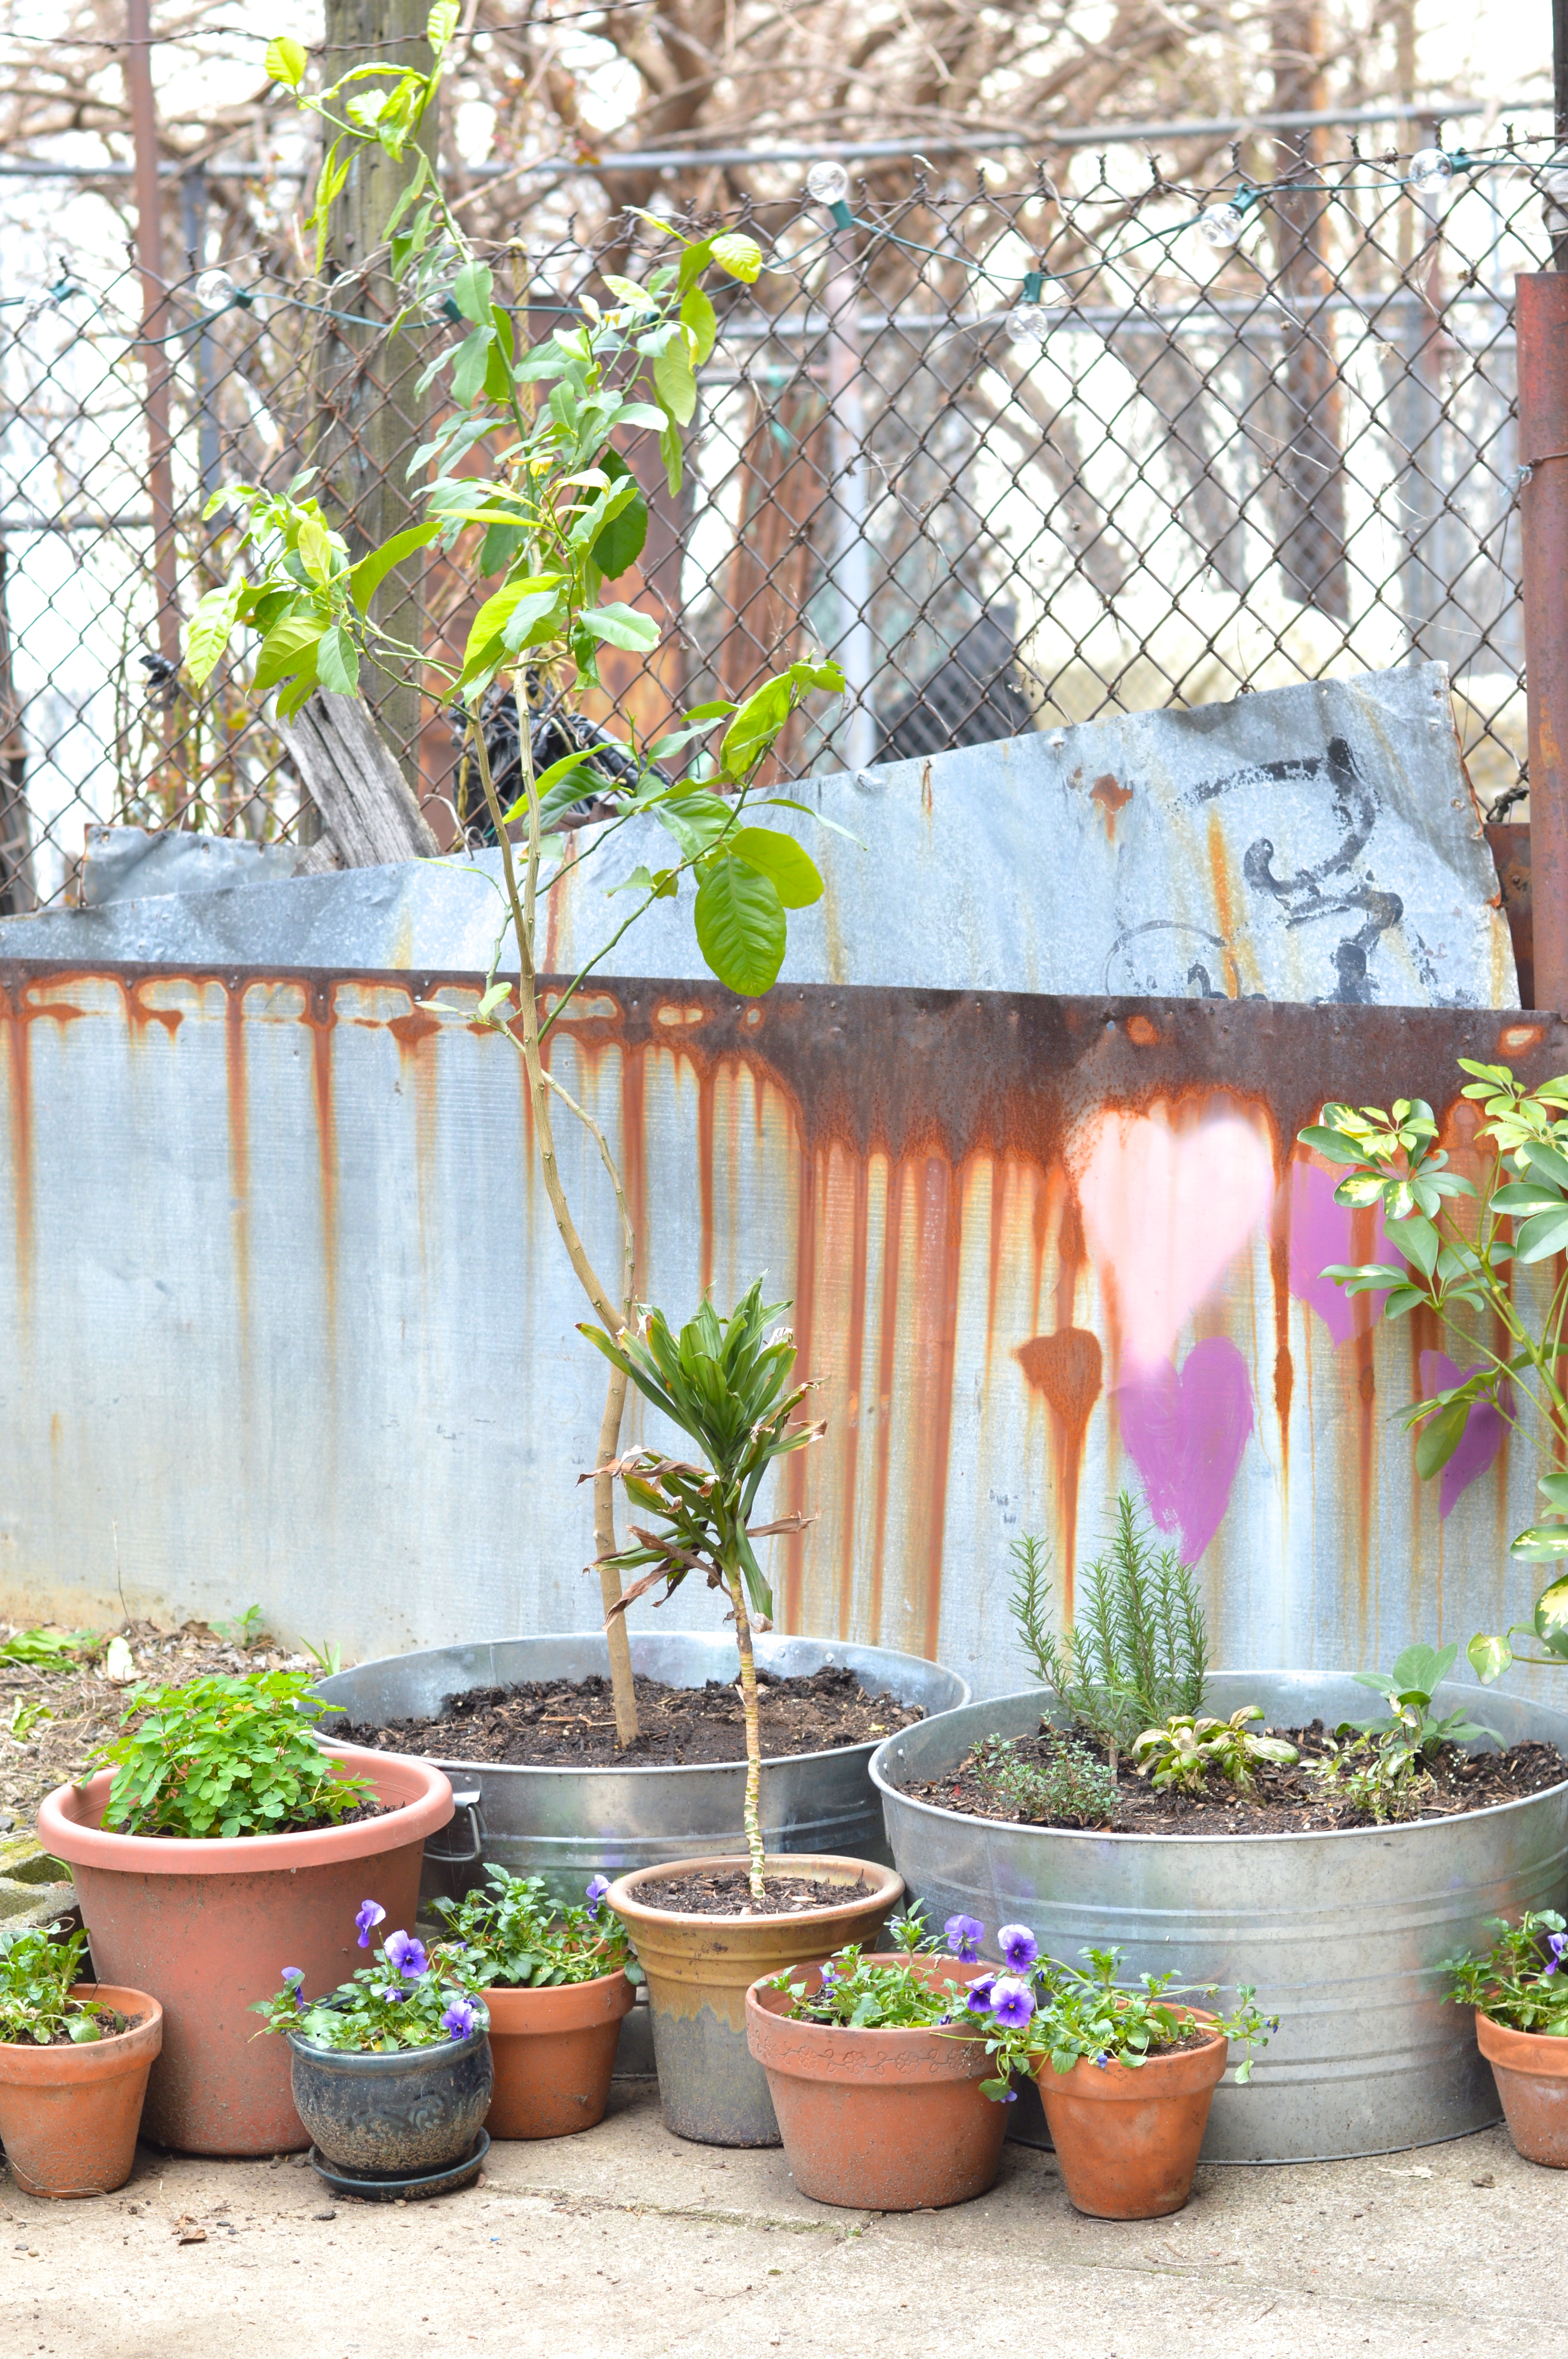
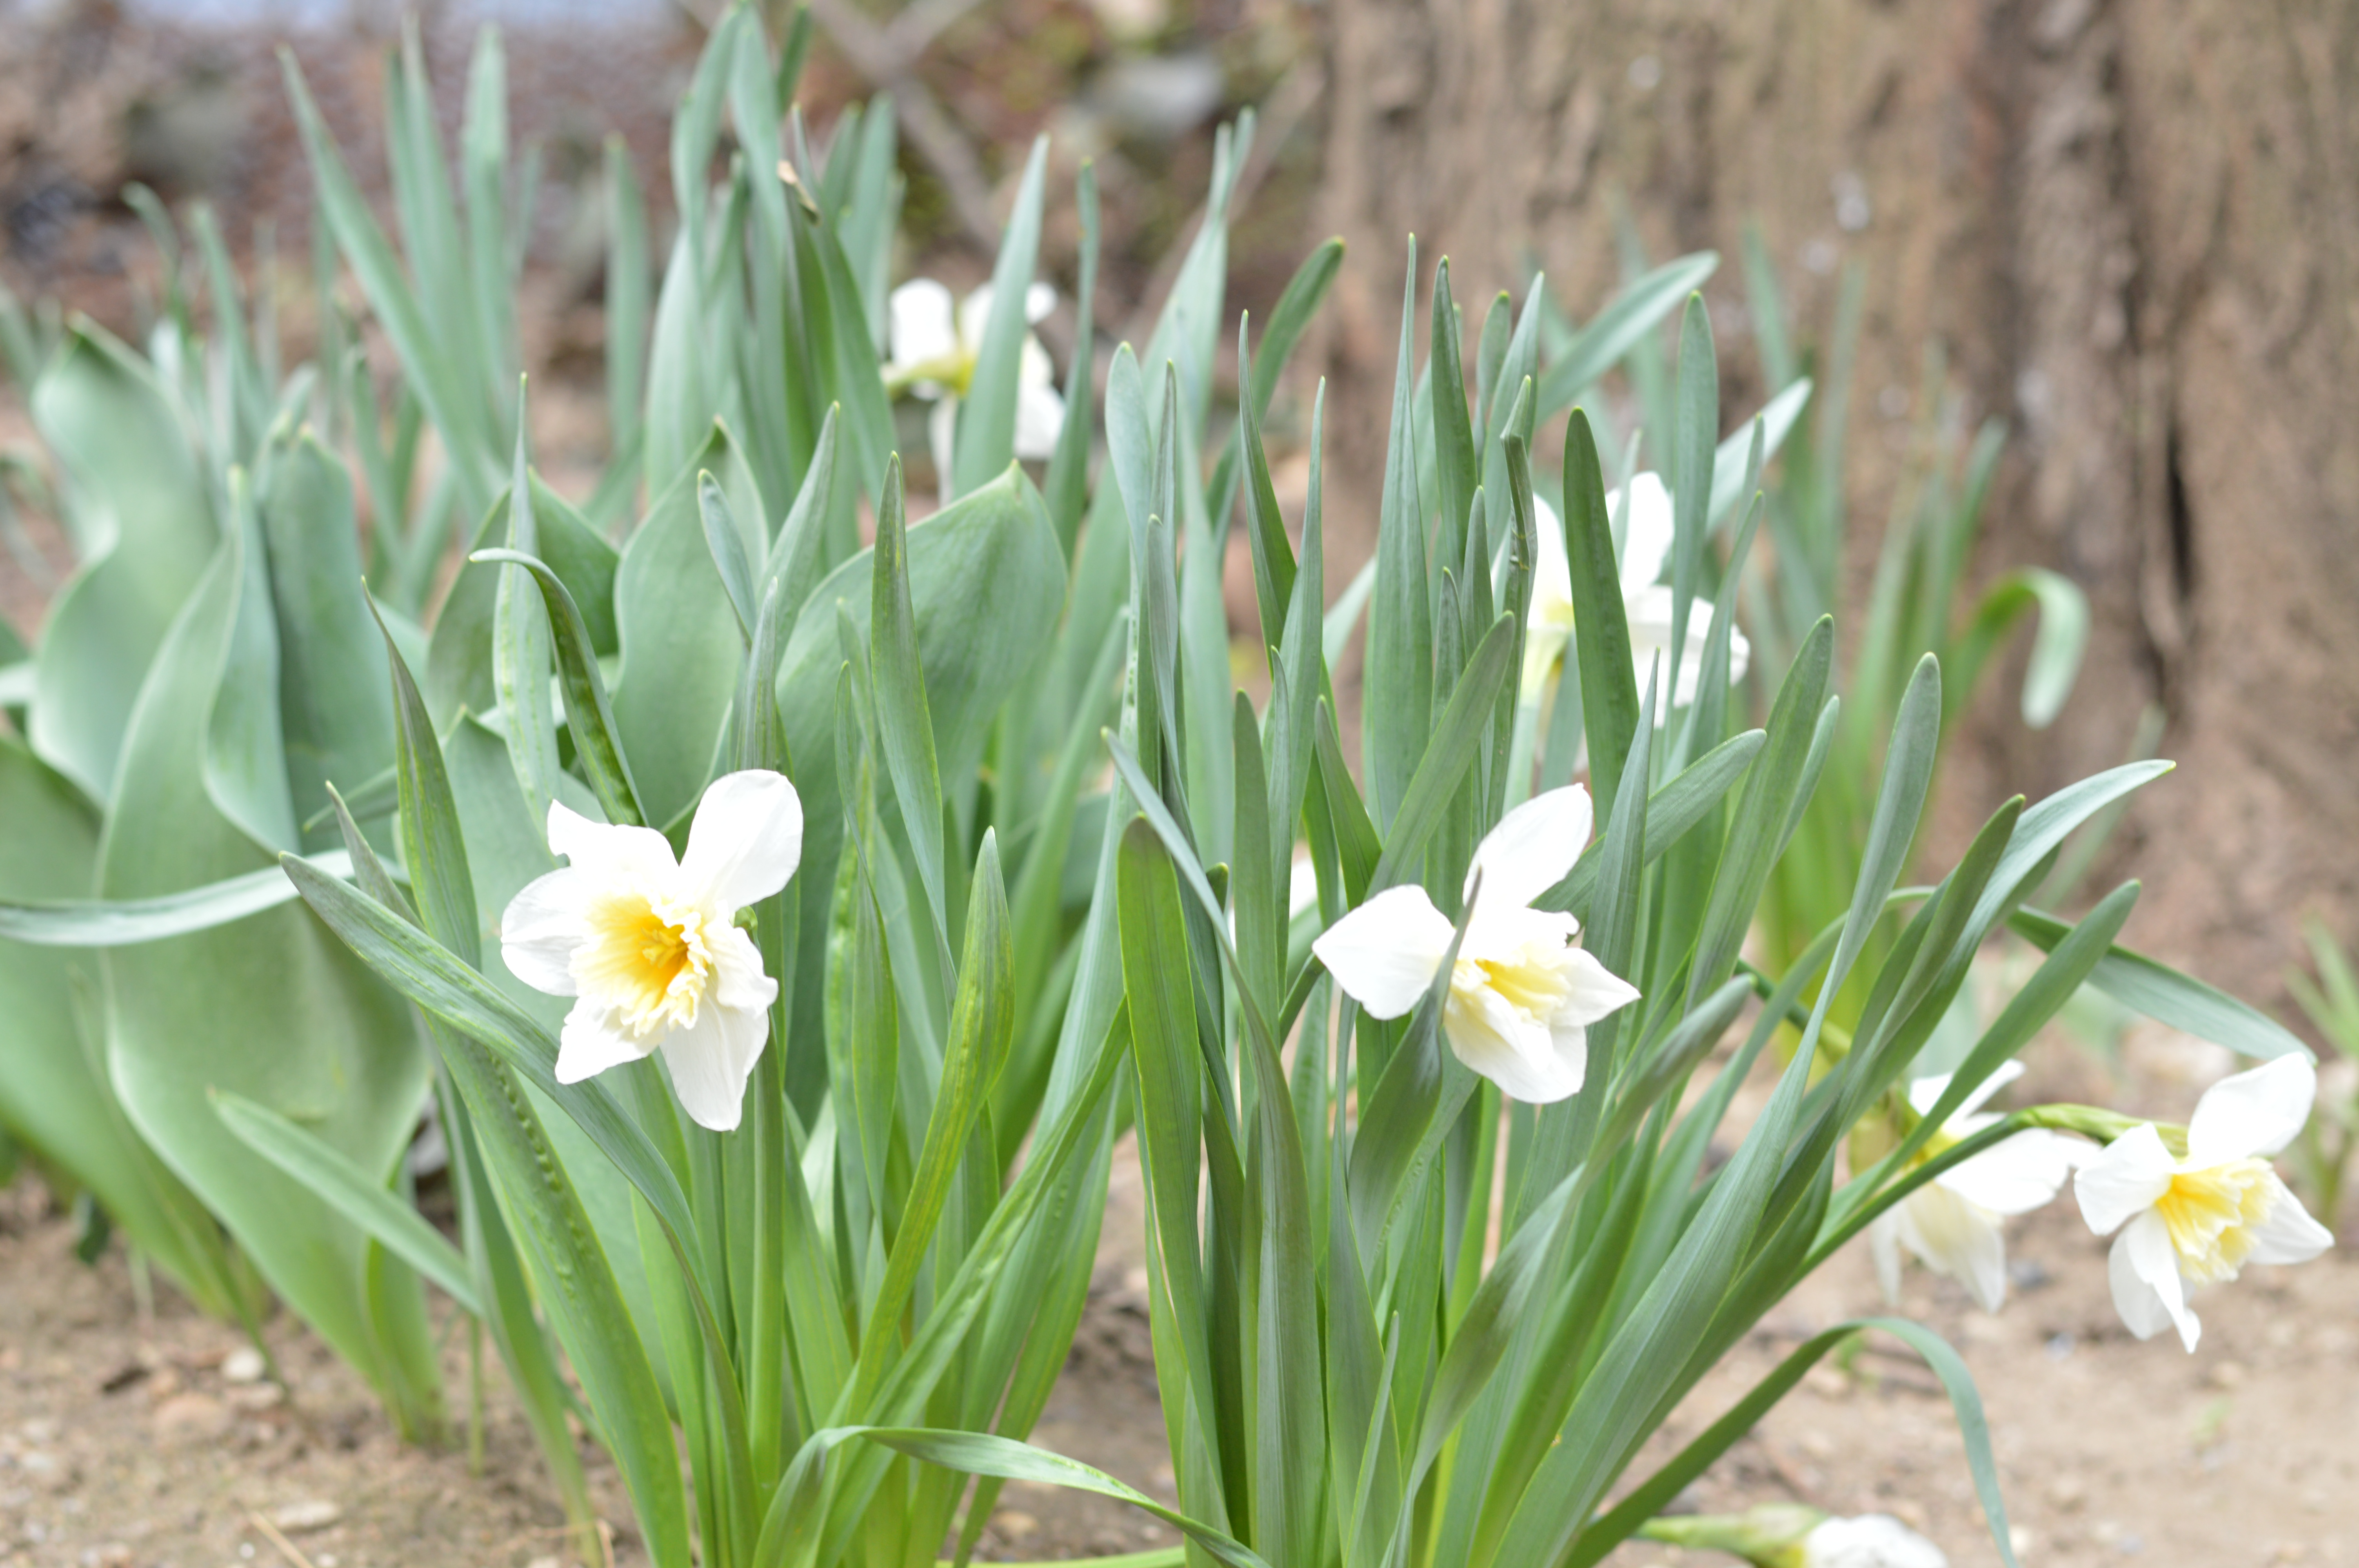
Now that things are warming up, the few plants that have survived the arid conditions are starting to poke their heads up to say hi. We have a few daffodils in bloom and the spiky points of the hostas are starting to push their way up through the soil. We’ve also done our best to improve the soil with composting, and the day lilies are doing better now too. For now they’re short and grassy looking, but a few of them flowered last year so I’m hoping this summer they’ll be even more productive.

It’s a bit too early to do much of anything else, but I hope to set to work beautifying the yard in the coming weeks. For now we’re doing our best to clean up anything the wind may have blown into the yard over the winter, make sure anything that is coming up is happy and healthy, and tidy up the patio space as much as possible.

a little yarden tour | Brooklyn Homemakera little yarden tour | Brooklyn Homemakera little yarden tour | Brooklyn Homemakera little yarden tour | Brooklyn Homemaker

As for the furniture and entertaining aspect of our outdoor space, we have a few chairs and benches and a swinging love seat that was back there when we took the apartment. There used to be a big table back there too, but it was really poorly built and basically fell apart over the winter, so we’re hoping to replace that very soon. When we first moved in the only way to access the yarden from our apartment was by hopping down onto a chair from our bedroom window, which is about 4 feet from the cement below.  For the first few years we and all of our guests would climb out the window and hop down onto that chair. We used to have to lean way out the window to set the dogs on the chair so they could go out and do the things they needed to do back there. Much alcohol has been consumed out there since we’ve moved in so, as you can imagine, there have been a few spills and tumbles. Thankfully none of our friends were ever seriously injured! My amazing mom came to visit last summer and helped me build a set of stairs, and we could not be more happy or grateful to have them. It’s hard to imagine a time without them now, but they have improved the function of the space more than you’ll ever know!

a little yarden tour | Brooklyn Homemakera little yarden tour | Brooklyn HomemakerDSC_0011

So there you have it, our humble little yarden.

Have any of you been working on any yard work our outdoor projects lately? Do you have any horror stories about disgusting yards, challenging soil conditions, or drunken tumbles out apartment windows?

at home with Brooklyn Homemaker

I’ve been saying since the beginning that Brooklyn Homemaker is not a food blog, but a blog highlighting all of my interests and activities. As much as I love cooking (and eating) I also want to share my interests and abilities beyond my skills in the kitchen. Looking back, I realize that about 95% of what I’ve posted so far have been recipes and stories about food and how it relates to my life, but I promise that every once in a while you’ll see something else from me.

The truth is that unless we move to a new apartment, I will probably always post more recipes than other topics. I cook every day, but after three plus years in this apartment I’ve done most of what needs doing here. It’s (mostly) at a point where we’re happy with it and don’t need or plan to change much. I am the kind of person who doesn’t stop at perfection though, so odds are that there will continue to be the occasional changes and updates to our humble little palace and the decor and furnishings within.

Today though, I thought it might be a fun departure to let you into my home and give you the grand tour.

First, the before photos:

apartment before | Brooklyn Homemaker

Our apartment is what’s referred to in New York, and most large old cities, as a “converted railroad.” For those of you non-New Yorkers, a railroad apartment is long and narrow, like a train car, with windows on either end. There are no interior windows because the building is sandwiched up against other buildings, so the only exterior walls face the front and back of the building. When most railroad apartments were built over a century ago they usually had two bedrooms at one end, with a living space in the interior, and the kitchens and bathrooms on the other end. They were built as tenement housing for low-income families, and the bedrooms were set up so that you had to walk through one to access the other. Today though, most of these apartments are rented to young people with roommates that don’t want to have to walk through one another’s bedrooms to access the rest of the apartment. Many have been renovated to move the bedrooms to either end, with the living space moving into the interior. Hence the term “converted railroad”. Our apartment was most likely converted in the mid 90s, based on the materials used for flooring and fixtures.

apartment before | Brooklyn Homemaker

When we moved into this place it was a real mess. These photos are terrible and don’t do the level of UGLY justice at all. I’m really really sorry about these photos, btw. We never planned to share them with anyone other than each other, but here we are. It never occurred to us that I might someday want to share them on the internets, but at this point I’m just glad we thought to take any before photos at all.

apartment before | Brooklyn Homemaker

We signed the lease after the first of the month and negotiated to not start our lease until the 15th. Our lease at our previous apartment didn’t end until the end of the month so that gave us 15 days to get in and do what we could before moving in. We painted practically every surface; walls, ceilings, baseboards, you name it, in every room but the guest room. Sorry, but you won’t be seeing the guest room today, but if we ever do decide to paint in there you’ll get very familiar with that space.

Before we moved in the place had been “freshly painted” with the cheapest ugliest white paint money can buy, with no effort to take tacks or nails out of walls or patch any holes before breaking out the rollers. They also didn’t bother to put down drop-cloth before painting and we spent plenty of time on our knees trying to clean off all the paint splattered on our hardwood floors. The kitchen was especially disgusting and took two full days of scrubbing and bleaching and scouring and crying to get it to a place that didn’t make us want to vom. Don’t even get me started on the backyard. Words can’t describe the level of gross that was happening back there, but I’m going to save that for another post.

apartment before | Brooklyn Homemaker

The thing is, we knew this apartment was going to be a project when we took it. The part of Brooklyn we live in is still (relatively) affordable but we knew that any place we were going to find in our price range was going to be a project. We knew we wanted a first floor apartment with access to a backyard because we knew a puppy was in our future, and even with all the work this place needed, it was worth it to us. If this place were in a different neighborhood or was in the state it’s in currently, it easily could have gone for twice what it did when we signed the lease. And, let’s be honest, I actually love a project. As much as I love complaining about it now, I enjoyed every minute of the torture involved in making our apartment what it is today. I only wish I were putting this sweat equity into my own home instead of improving someone else’s property.

So, without further ado, our apartment:

living room | at home with Brooklyn Homemaker | Brooklyn Homemakerliving room | at home with Brooklyn Homemaker | Brooklyn Homemaker

This is our living room. We chose a pale grey paint for three of our walls, and decided to break it up with a dark turquoise, if that’s a thing. It reads as navy in photos, but I promise it’s a dark blue/green. We also painted a black faux picture rail about a foot below our ceiling to visually break up the space and add interest to the walls. We did the same thing in our bedroom, btw.

Our sofa was the first piece of furniture we bought for this apartment. We picked it out and arranged for delivery from Macy’s before we even moved in. Down the line we might want a sectional, but I like the style of it and it looks nice in the room.

living room | at home with Brooklyn Homemaker | Brooklyn Homemaker

The mid-century end tables were found at Junk in Williamsburg. They were in kind of rough shape when we found them but were cheap so we didn’t mind giving them a little love to bring them back to life. Refurbishing them could have been another post, but this happened before Brooklyn Homemaker and I didn’t think to get any good photos of that process. I basically followed the steps as laid out over at Manhattan Nest, and once I had the materials it was actually fairly easy and made such a difference in making those old tables shine. The one decent photo I did manage to get was of the brass handles, and what they looked like before and after cleaning them with Brasso. It turns out that the main ingredient in Brasso is magic. Behold:

mid century brass hardware| before and after Brasso | Brooklyn Homemaker

While I was cleaning the tables I noticed they were made by the Lane furniture company and, after some research on their serial numbers, I discovered they were made in 1960. They’re in such great shape for their age and they were such an amazing score for the price.

living room | photo gallery wall |Brooklyn Homemakerliving room | photo gallery wall |Brooklyn Homemaker

This gallery wall is made up of old black and white photos of our families and it continues to grow as we find cool new frames and ask our parents and grandparents for more photos.

bar cabinet and seating | living room | Brooklyn Homemakerbar cabinet and seating | living room | Brooklyn Homemaker

We used to have a dining table and chairs in this space but we never used it and it usually wound up as a place to collect coats and bags and mail and crap. We probably sat and ate at the table once or twice in the whole time we had it, and the rest of the time it was just a placeholder that always looked like hell. The seating area that’s there now is so much more comfortable and attractive and wonderful. It’s really wonderful. Really.

The yellow chair on the right is a vintage mid-century platform rocker we bought at a yard sale upstate, and the blue chair was a wedding gift we bought each other from West Elm. Also from West Elm is the bar cabinet between the chairs. We just got this and we totally love it. It fits perfectly in the space and ties the room together in a way we’ve never been able to do before we found it. It also houses all our wine and cocktail glassware and gave us an excuse to start hoarding bottles of fancy booze. Woot woot.

ball jar dry storage in the kitchen | Brooklyn Homemakershelving and storage cart in the kitchen | Brooklyn Homemaker

Since moving in we’ve added this storage cart and metal Ikea shelving in the kitchen. This kitchen has a serious lack of counter space and storage for anyone who cooks regularly, and especially for someone who likes to cook the way I do. The shelving and cart have helped alleviate both those issues, but haven’t cured the storage problem completely. A lot of our serving ware and specialty gadgets have ended up hiding in our guest room.

chalkboard backsplash in kitchen | Brooklyn Homemakerchalkboard backsplash in kitchen | Brooklyn Homemaker chalkboard backsplash in kitchen | Brooklyn Homemaker

You’re already familiar with the chalkboard backsplash, but I thought you’d be happy to see it again.

kitchen and living room view | Brooklyn Homemakervintage spring scales on fridge | Brooklyn Homemaker

I like to collect vintage kitchen spring scales. The most recent addition is this beautiful rusty old egg scale Russell gave me for Christmas. It was used to weigh eggs to determine their size for sale. So cool.

Bedroom and schnauzers | at home with Brooklyn Homemaker | Brooklyn Homemaker

Here’s our boudoir. Oooooh.

Hunting is big in my family and, while I’m not a hunter myself, I do enjoy some taxidermy. Say hello to Barnard. Doris and Betty also wanted to say hi, so say hello to them too. The chandelier was painted white when I bought it but I thought our bedroom could use some color so I picked up a can of spray paint and went to town. Hot pink town.

bedding, side tables and lamps | Brooklyn Homemaker
bedroom side table lamp | Brooklyn Homemaker|

Those lamps by the way, here’s what they used to look like:

bedside lamps before | at home with Brooklyn Homemaker | Brooklyn Homemaker

When Russell saw them at the Salvation Army we actually had an argument about whether he could take them home or not. I refused to let him buy them, and we left without them, but about an hour later he won and made me go back. I refused to let them into our bedroom until he let me paint them, and he was reluctant but eventually agreed. He took a trip to see family in LA one weekend and one can of glossy white spray paint with primer later, they look like fancy white porcelain and we get compliments on them all the time.
God they used to be ugly though. Russell still insists they looked better before. He’s out of his mind. So ug.

taxidermy over bed | Brooklyn Homemaker
at home with Brooklyn Homemaker | Brooklyn Homemaker

That black skull is actually a piggie bank, and I love it more that you’ll ever know. The dresser was given to us by a friend when we moved in. It was painted white by someone who gave it to her, but when it came to us it was looking a bit too chabby chic for our taste. I painted it with some black lacquer oil paint and I think it makes our room look really chic.

antique dresser painted black | Brooklyn Homemaker

So, that’s our place. Thanks for visiting!

I’d like to invite you into our bathroom soon too, but I’m saving that for another post. You’ll just have to wait to find out why.

“Gingerbread” Salt Dough Ornaments

When I was young my mom came up with an idea for my sister and I to make homemade christmas gifts without spending a lot of money. She made up a batch of dough, we rolled it out, and cut out cute Christmas shapes with cookie cutters. This wasn’t cookie dough though, it was salt dough. At the time I didn’t know the name of it, or even what was in it, but I knew we weren’t supposed to eat it. I can only imagine how hard that was for me at seven years old.   Salt dough is very simple to make, basically just flour, salt and water, and when you bake it it becomes very hard and will last forever if you keep it dry and clean.

"gingerbread" salt dough ornaments | Brooklyn Homemaker

Before we baked our “cookies”, we poked holes in the tops of each shape with a straw. After they came out of the oven we painted them with brightly colored craft paint, and strung through a piece of ribbon. Mom painted our names and the dates on the backs of each of them, and we had personalized handmade Christmas ornaments that we gave away to our family as gifts. My grandmother had those ornaments hanging on her tree each and every year until she stopped putting it up when we went away to college.

"gingerbread" salt dough ornaments | Brooklyn Homemaker

It turns out that salt dough has been around for centuries and can be traced back to ancient Egypt. Flour and water is mixed with salt as a preservative and the dough can be worked with kind of like clay. Then it’s baked at a low temperature for long enough to remove all the moisture and harden the finished product.  Some people use salt dough to make elaborate sculptures and creations, but most people use it for children’s crafts. The dough is easy to make, easy to work with, non-toxic, and can be made from things most people already have at home.

"gingerbread" salt dough ornaments | Brooklyn Homemaker

At work last year we were coming up with ideas for our Christmas window and I thought it might be fun to make a grown-up version of these ornaments. We sell a lot of bakeware so I thought it would be really cute to have pretty sugar cookie snowflakes hanging in the window. I wanted them to look as real as possible, so I used real royal icing and sprinkles to decorate them. They came out beautiful and I packed them up in boxes and took them to work with me.

To my dismay, much of the detailed royal icing piping started to flake off of the cookies when we tried to hang them. I’m not exactly sure what went wrong but I’m certain it had something to do with the super high salt content. We still had enough in tact that we were still able to use them in the window, and the display was absoultely beautiful. No one would have guessed that there had been any problems, but I learned a valuable lesson. Real royal icing on salt dough fake cookies is a big fat NO.

"gingerbread" salt dough ornaments | Brooklyn Homemaker

This year I decided to give salt dough another go, but knew I should look for a better “icing” solution. I wanted to recreate the look and texture of royal icing, but using a more permanent medium. My first thought was puff paint. In the 90s you couldn’t walk down the street without tripping over a tube of puff paint, but in 2013 it seems like it’s impossible to find. I’m sure that big craft stores sell it, but I don’t have a car and couldn’t get to a craft store. I tried using some white caulk that I had leftover from my kitchen backsplash project, but the consistency was too thick and it was difficult to work with. After that I decided to try calling the local art supply store and see if they had any suggestions. They pointed me toward a product called light molding paste, which has almost the same consistency as frosting. I tried using it as is, piping it from a pastry bag with small round tip (or writing tip) and it piped out really nicely. Sprinkles and glitter stuck to it really well too, and I got some really nice results using it. The only issue I had was that it’s slightly thicker than royal icing, more like frosting, and doesn’t smooth out the way royal icing does. Since molding paste is water soluble, I tried thinning it out just slightly with water to get a thinner consistency.

"gingerbread" salt dough ornaments | Brooklyn Homemaker

I’m so glad I called that art store. This stuff was perfect. It was very easy to thin out to the consistency I wanted, and piped just like the real thing. It was easy to work with, and simple soap and water cleaned it up with no trouble. It dried nice and hard too and stayed stuck to the salt dough with no problems. I’m assuming that puff paint would probably work well too- but this stuff was truly ideal. I’d definitely recommend it if you want to try this project yourself. You can find it at any art supply store and they have it at the big craft stores too. I used Golden brand, and it’s important that you get the light molding paste.  Since I didn’t completely cover my ornaments I didn’t use much either. I bought the smallest container the store had, and after decorating probably about 30+ ornaments I still have half a jar left.

"gingerbread" salt dough ornaments | Brooklyn Homemaker

Since I wanted my ornaments to look like gingerbread cookies and not sugar cookies, I decided to color the dough. I could have used food color or paint, but I wanted to try to achieve a more natural molasses and spice kind of brown color. I also thought that it would be great if the finished ornaments had a nice gingerbready smell, so I decided to use spices to color my dough. In my test batch I used ginger, nutmeg, clove and cinnamon. It smelled amazing in the oven, but after a long slow bake they didn’t smell like much after they cooled. I noticed that the best gingerbread color came from the cinnamon, so when I made the next batch I skipped the other spices all together.  You can use more or less depending on how dark you’d like the dough, but cinnamon is really all you need to get the color right. My advise would be to use the cheapest cinnamon money can buy. Go to the dollar store and buy the flavorless stuff you’d never actually want to bake with. Don’t waste the good stuff on these. You need a lot of it to get the color right, and you’re never going to get to eat these “cookies”.

I also noticed in my test batch that in the first half hour of baking the salt comes to the surface of the dough, bleaching out the exposed surface and fading the color I worked so hard to get right. The side that was facing down and wasn’t exposed to the air was fine though, and once most of the moisture had baked off they could be flipped and continued baking didn’t bleach the other side. So, when I made my second batch I baked them with the side I wanted to decorate facing down. Bingo!

You should totally do that too.

"gingerbread" salt dough ornaments | Brooklyn Homemaker

To decorate the ornaments I fitted a disposable pastry bag with a Wilton #3 tip and filled it with my thinned light molding paste. Then I piped out a thin even line and made some designs. Some ornaments were just outlined, others got lines and dots, some had intricate snowflake designs, but you can do whatever you like. If you’ve never used a piping bag and pastry tip, I’d definitely recommend some practice before you dive into this project. This is permanent so you want them to be pretty near perfect. I promise it’s not as scary as you might think. Just twist the top of the bag closed so your “icing” doesn’t squeeze out the top when you put pressure on the bag. Then hold your tip a small distance from your ornament and squeeze the bag with slight and even pressure. Patience and practice. You could also just “frost” your ornaments instead without thinning the molding paste and they would still look realistic and pretty.
Before the molding paste dried I covered the ornaments with glitter, nonpareils & dragees. I found a glitter that looked similar to a product I’ve seen in a cake decorating store- so the cookies still look very realistic.  I worked with a just a few ornaments at a time to make sure the molding paste didn’t dry before I put the glitter on it. Then I just shook the glitter off and set the finished ornament on a tray to dry. I completely covered each ornament in glitter, and was able to re-use the leftover glitter for the next batch of ornaments, over and over until I was finished.

Word of warning: Glitter is pretty but it’s also the devil. There is glitter everywhere. I’ve vacuumed, mopped, rinsed, showered, and scrubbed multiple times and I still see glitter everywhere. It on my floors, in the rug, on the counters, even on me. It’s been days and I still catch customers at work looking at me funny and realize I have glitter in my beard.

"gingerbread" salt dough ornaments | Brooklyn Homemaker

I couldn’t be happier with the results.

They came out beautiful. They really do look very similar to the real thing, and they look gorgeous on my tree. I’m really glad that I went with white decorations for them too. I’m sure that adding some color to the molding paste would be easy and the results would be beautiful, but these simple white ornaments go perfectly with our apartment. The white pops against the brown “cookies”, and they look chic, timeless and modern all at once. These photos don’t do them justice when the lights are on. They’re all sparkly and stuff!

You should definitely give this a try. Your Christmas tree will thank you. And then you will thank me. (You’re welcome.)

"gingerbread" salt dough ornaments | Brooklyn Homemaker

Gingerbread Salt Dough Ornaments

  • Servings: Makes about 15-20 (inedible) ornaments
  • Print
1 cup flour
1/2 cup salt
1/2 cup water
4-6 tablespoons cinnamon, or more, depending on how dark you want your dough

Preheat oven to 250 degrees. Mix all ingredients together in a medium bowl. If you want plain (non-gingerbread) dough, or want to color the dough, leave out the cinnamon. Knead the dough a few times on a lightly floured surface to be sure it’s well mixed and has a smooth consistency. Knead in more cinnamon if you want a darker color or more flour if dough feels too sticky. Lightly coat with flour (or cinnamon) and roll dough out to about 1/8 to 1/4 inch thick. These “cookies” will not rise at all- so make them as thick as you’d like the finished product to be. Cut into desired shapes, and cut a small hole with a straw or piping tip.  Transfer to a parchment lined baking sheet, making sure the side you want to decorate is face down. Bake for 2-3 hours or until completely dry.

Allow the ornaments to cool completely. Using a pastry bag with a small writing tip, pipe on desired design with light molding paste. Puff paint should also work well for this. Decorate with glitter, small beads, or whatever you like. If you’re only using this for one season, sprinkles and candies work too. Allow “icing” to dry completely, for at least 4 hours. If desired, spray with a matte sealer and let dry according to directions. String some ribbon or bakers twine, tie a knot or bow and you’re ready to decorate!

*Update: This didn’t happen to my ornaments, but one reader said her ornaments bubbled up in the oven. I read up on it and learned that this can happen if they dry too fast or if the oven temp is too high, so I’d suggest getting an oven thermometer to be sure your oven doesn’t go above 250. To be extra careful, you may even want to try baking them at a 225 for a longer period of time.

Kitchen Backsplash Update

You guys. I have a something to tell you.

For someone who cooks as much as I do, I don’t love my kitchen. In fact I kind of hate it. The lighting sucks and the cabinets are hung really high. Like inconveniently high. I’m 6 feet tall and the bottom of the cabinets is at nose level for me.  It also has a serious lack of storage space, and my guest room is filing up with serving dishes and gadgets like my ice cream maker and slow cooker. But I’ve added shelving and a rolling storage cart, and it functions well enough for me to turn out some pretty delicious things on a regular basis. Mostly I hate my kitchen because it isn’t pretty. It’s outdated and cheap and not at all to my taste.

Chalkboard backsplash update | Brooklyn Homemaker

The floors are a pinky orange 90s faux terra cotta, the countertops are a horrible faux granite laminate in a weird speckled yellowy beige color, the stove top is stained from years of use and scuffed from years of cleaning, the refrigerator is right next to the oven and has a big area where the enamel has been scraped off somehow, there are no windows and no natural light, the overhead lighting makes everything look even more yellow, and the cabinets… the cabinets… are… I can’t even say it… honey oak! The horror!

The worst part is that, as a renter, there isn’t much I can do about most of what’s wrong in there. I can deal with the lack of storage. I’ve been living with tiny kitchens since I moved out of my mom’s house. I can deal with the cabinets being hung at an absurd height. I’m tall-ish. But the bad countertops? I can’t replace them. The honey oak cabinets? I know what it would take to paint them, and paint them correctly so they’d look great for years, but I have this strange desire to get my security deposit back someday. Nothing would make me happier than painting the cabinets white and putting in new countertops but that’s a lot of work and a lot of money to put into an apartment that I don’t own.

When we moved in a few years ago we painted the kitchen, and most of the rest of the house, a soft pale grey. I love the clean modern look that the grey gives our apartment, but next to those horrible countertops and cabinets, and with the terrible yellowish lighting, the grey has never looked great on the walls of the backsplash. I’ve been toying with the idea of putting up white subway tile, but I’m not convinced that it would look any less awkward with all the yellow elements in there, and again, it’s a lot of work and money to improve someone else’s property.

Starting this blog and trying to take attractive photos in my unattractive kitchen has lit a fire under me. I just can’t take it anymore. I need to do SOMETHING with the backsplash. Anything. I am fortunate enough to be able to paint in my apartment, so that’s pretty much my only option. So, I’ve been brainstorming. And thinking. And rethinking. And laying awake at night. Thinking. And then doing some soul searching.

Chalkboard backsplash project | Brooklyn Homemaker

I tried to think of colors that would compliment all the yellow happening in there. If that’s possible? Red’s really not my thing. I’m more into cooler colors. Blues and greens. Something about the idea of a brightly colored “feature wall” as a backsplash kept me up at night. I hate the phrase “pop of color” and that’s where my head kept going. Like it would look like I was trying too hard to look fun and quirky… But if not a solid color, what? I thought about a patterned paint treatment using stencils or something to look like wallpaper, but it just didn’t seem right to me either. Then, finally it came to me!

Chalkboard paint!

IMG_9549

I actually already had a can on hand from a project I did a few months ago. The counters have some black in them so I thought the black walls would compliment rather than clash with them. There’s already a real blackboard hanging on the opposite wall in the kitchen, so I thought the backsplash could look kind of cool with that. Maybe? If I still felt like a pattern would help break up all that black, I could draw one on! And hey, if I hated it, I’d be no worse off than when I started, and would just need to paint over it! I keep saying this, but I’m pretty sure I’m a genius.

Russell left on Friday to visit his sister in L.A. for her birthday. Hi Shannon! Happy birthday! So I set to work.

First I cleared off the counters and removed everything from the walls. Then I scrubbed the walls with hot soapy water. It’s gross the amount of stuff that can go unnoticed on your kitchen walls when you live with bad lighting for a few years. Next I filled any holes with spackle, let it dry, and sanded it smooth. I also lightly sanded the rest of the walls so the paint would really have something to grab on to. I even went ahead and scraped off the failing caulk where the counters met the wall.

Then I got to business. I’ve done a lot of improvements to this apartment over the years so I already had most of what I needed on hand. The paint, brush, roller, tape, spackle, sandpaper, etc. was all in my guest room, patiently waiting to be useful. I thought about painting the adjoining area behind the refrigerator, which I’d painted grey when we moved in, but I decided that no one would see it and that if I didn’t like it, it would be a lot more work to cover it up later. So, using a level as a straight edge, I put a line of painters tape down the wall starting at the outer edge of the hood vent, going all the way down the wall right behind the fridge. I cut in the edges all the way around the project area, then used a roller to fill in the rest.

Chalkboard backsplash project | Brooklyn Homemaker

I thought about painting the outlet covers to match because I was afraid the contrast of white covers against black walls would look weird, but I decided against it. I knew I didn’t want to paint over the outlets themselves, so even if I painted the covers there would still be white outlets inside them. I feel like painted outlets and covers usually make a paint job look sloppy, like the painter was too lazy to take the plates off before they set to work.

The one thing I ended up needing to buy for this project was a tube of caulk. The old caulk was really poorly done, and was so old that it was peeling away anyway. So I scraped it off before I started painting and once the first coat had dried for an hour I piped one thin bead all the way along the gap where the counters meet the wall. If you’ve not done this before, it’s really not difficult. Try your best to pipe a thin even bead, and with a wet finger smooth the line and wipe away any excess as you go.  I made sure to buy paintable white caulk, and when I was cutting in I was able to paint a nice smooth line.

Chalkboard backsplash project | Brooklyn Homemaker

According to the directions on the can, you’re supposed to let chalkboard paint set for a few days before using it. Then you condition the surface by rubbing the whole thing with white chalk and wiping it off with a dry cloth or eraser. This creates a fine layer of chalk dust over the whole surface that makes it easier to erase in the future. It makes the surface a dusty charcoal grey color instead of the deep black it is when you first paint it, but I think it looks great in our kitchen. For the first week you’re not supposed to wipe it down with anything wet or damp, but after that you can clean the surface with a damp cloth as needed.

Chalkboard backsplash project | Brooklyn Homemaker Chalkboard backsplash project | Brooklyn Homemaker

I think it looks amazing and I could not be happier with the results. I was nervous that I wouldn’t like it, but as soon as I had everything back in place I felt happier with the look of the kitchen, and once I started cooking in there I felt like my food looked more attractive against the darker color. This was not a difficult project at all and I think the end product is better than I imagined!

chalkboard backsplash project | Brooklyn Homemaker

What do you think?

chalkboard backsplash project | Brooklyn Homemakerchalkboard backsplash project | Brooklyn Homemakerchalkboard backsplash project | Brooklyn Homemaker

And I know. I really need a real camera. I’m working on it.

UPDATE 1/23/14: Since I have a real camera now, I updated some of the “after” photos. You’re welcome.