bundt cake

basic bundt series: buttermilk pound cake

Hi there friends! Long time no see!

basic bundt series | buttermilk pound cake | Brooklyn Homemaker

As you’ve probably noticed, I’ve basically dropped off the face of the planet recently. Ever since diving head first into the renovations of Maxwell’s last summer, I’ve been posting less and less frequently and lately I’ve been thinking a lot about what I want out of my lil’ ol blog and how much time and energy I want to put into it. Things have definitely calmed down now that Maxwell’s is up and running (and doing pretty darned well, thanks for asking), but rather than jumping from that project right back into blogging the way I used to, I’ve been taking some time for myself lately and trying to enjoy the summer.

We recently bought a car (it’s used guys, we’re not that bougie) and after 10 full years in Brooklyn, the city suddenly seems sooo much smaller and more accessible than it used to. Rather than staying home to bake and photograph fruit pies on a beautiful Summer days, we’ve been piling in the car and taking field trips to parks, beaches, stores, and points of interest that are a real pain in the arse to reach by subway or bus. We’ve even taken the dogs up to the Hudson Valley for a few little hiking trips, and went to the Adirondacks for a long weekend in Lake Placid for my birthday. Hence, for the first time ever, I didn’t post any cake recipe for my birthday this year.

basic bundt series | buttermilk pound cake | Brooklyn Homemaker

I’m really not trying to gloat here guys, I just want to let you know that even though I haven’t been posting nearly as frequently lately, you’re still on my mind.

Like, a lot.

basic bundt series | buttermilk pound cake | Brooklyn Homemaker

I got into blogging because I love food, especially baking and historic recipes and random food trivia; but as it turns out, blogging is A LOT of work and actually pretty pricey as hobbies go. Taking a little time for myself has given me some new perspective and helped me realize that I can’t keep up with the pace that I initially set for myself, and that’s okay. I need and deserve a life outside of blogging and I can’t beat myself up if I fall behind on posting. As much as I’d love to post constantly, life gets in the way. I’m sure you understand.

basic bundt series | buttermilk pound cake | Brooklyn Homemaker

Anyway, worrying about all this actually of made me want to stay away entirely, but with every letter I type I feel a weight being lifted off my shoulders and it’s honestly helping me remember how much I loved doing this in the first place. I know I could have just made the decision to step back on my own and just quietly moved on with my life, but if I’m not oversharing can I really even call myself a blogger at all? I mean… Probably not right?

Long story short, I guess what I’m trying to say here is that you’re probably going to see less of me around here going forward, but that doesn’t mean I don’t love you.

basic bundt series | buttermilk pound cake | Brooklyn Homemaker

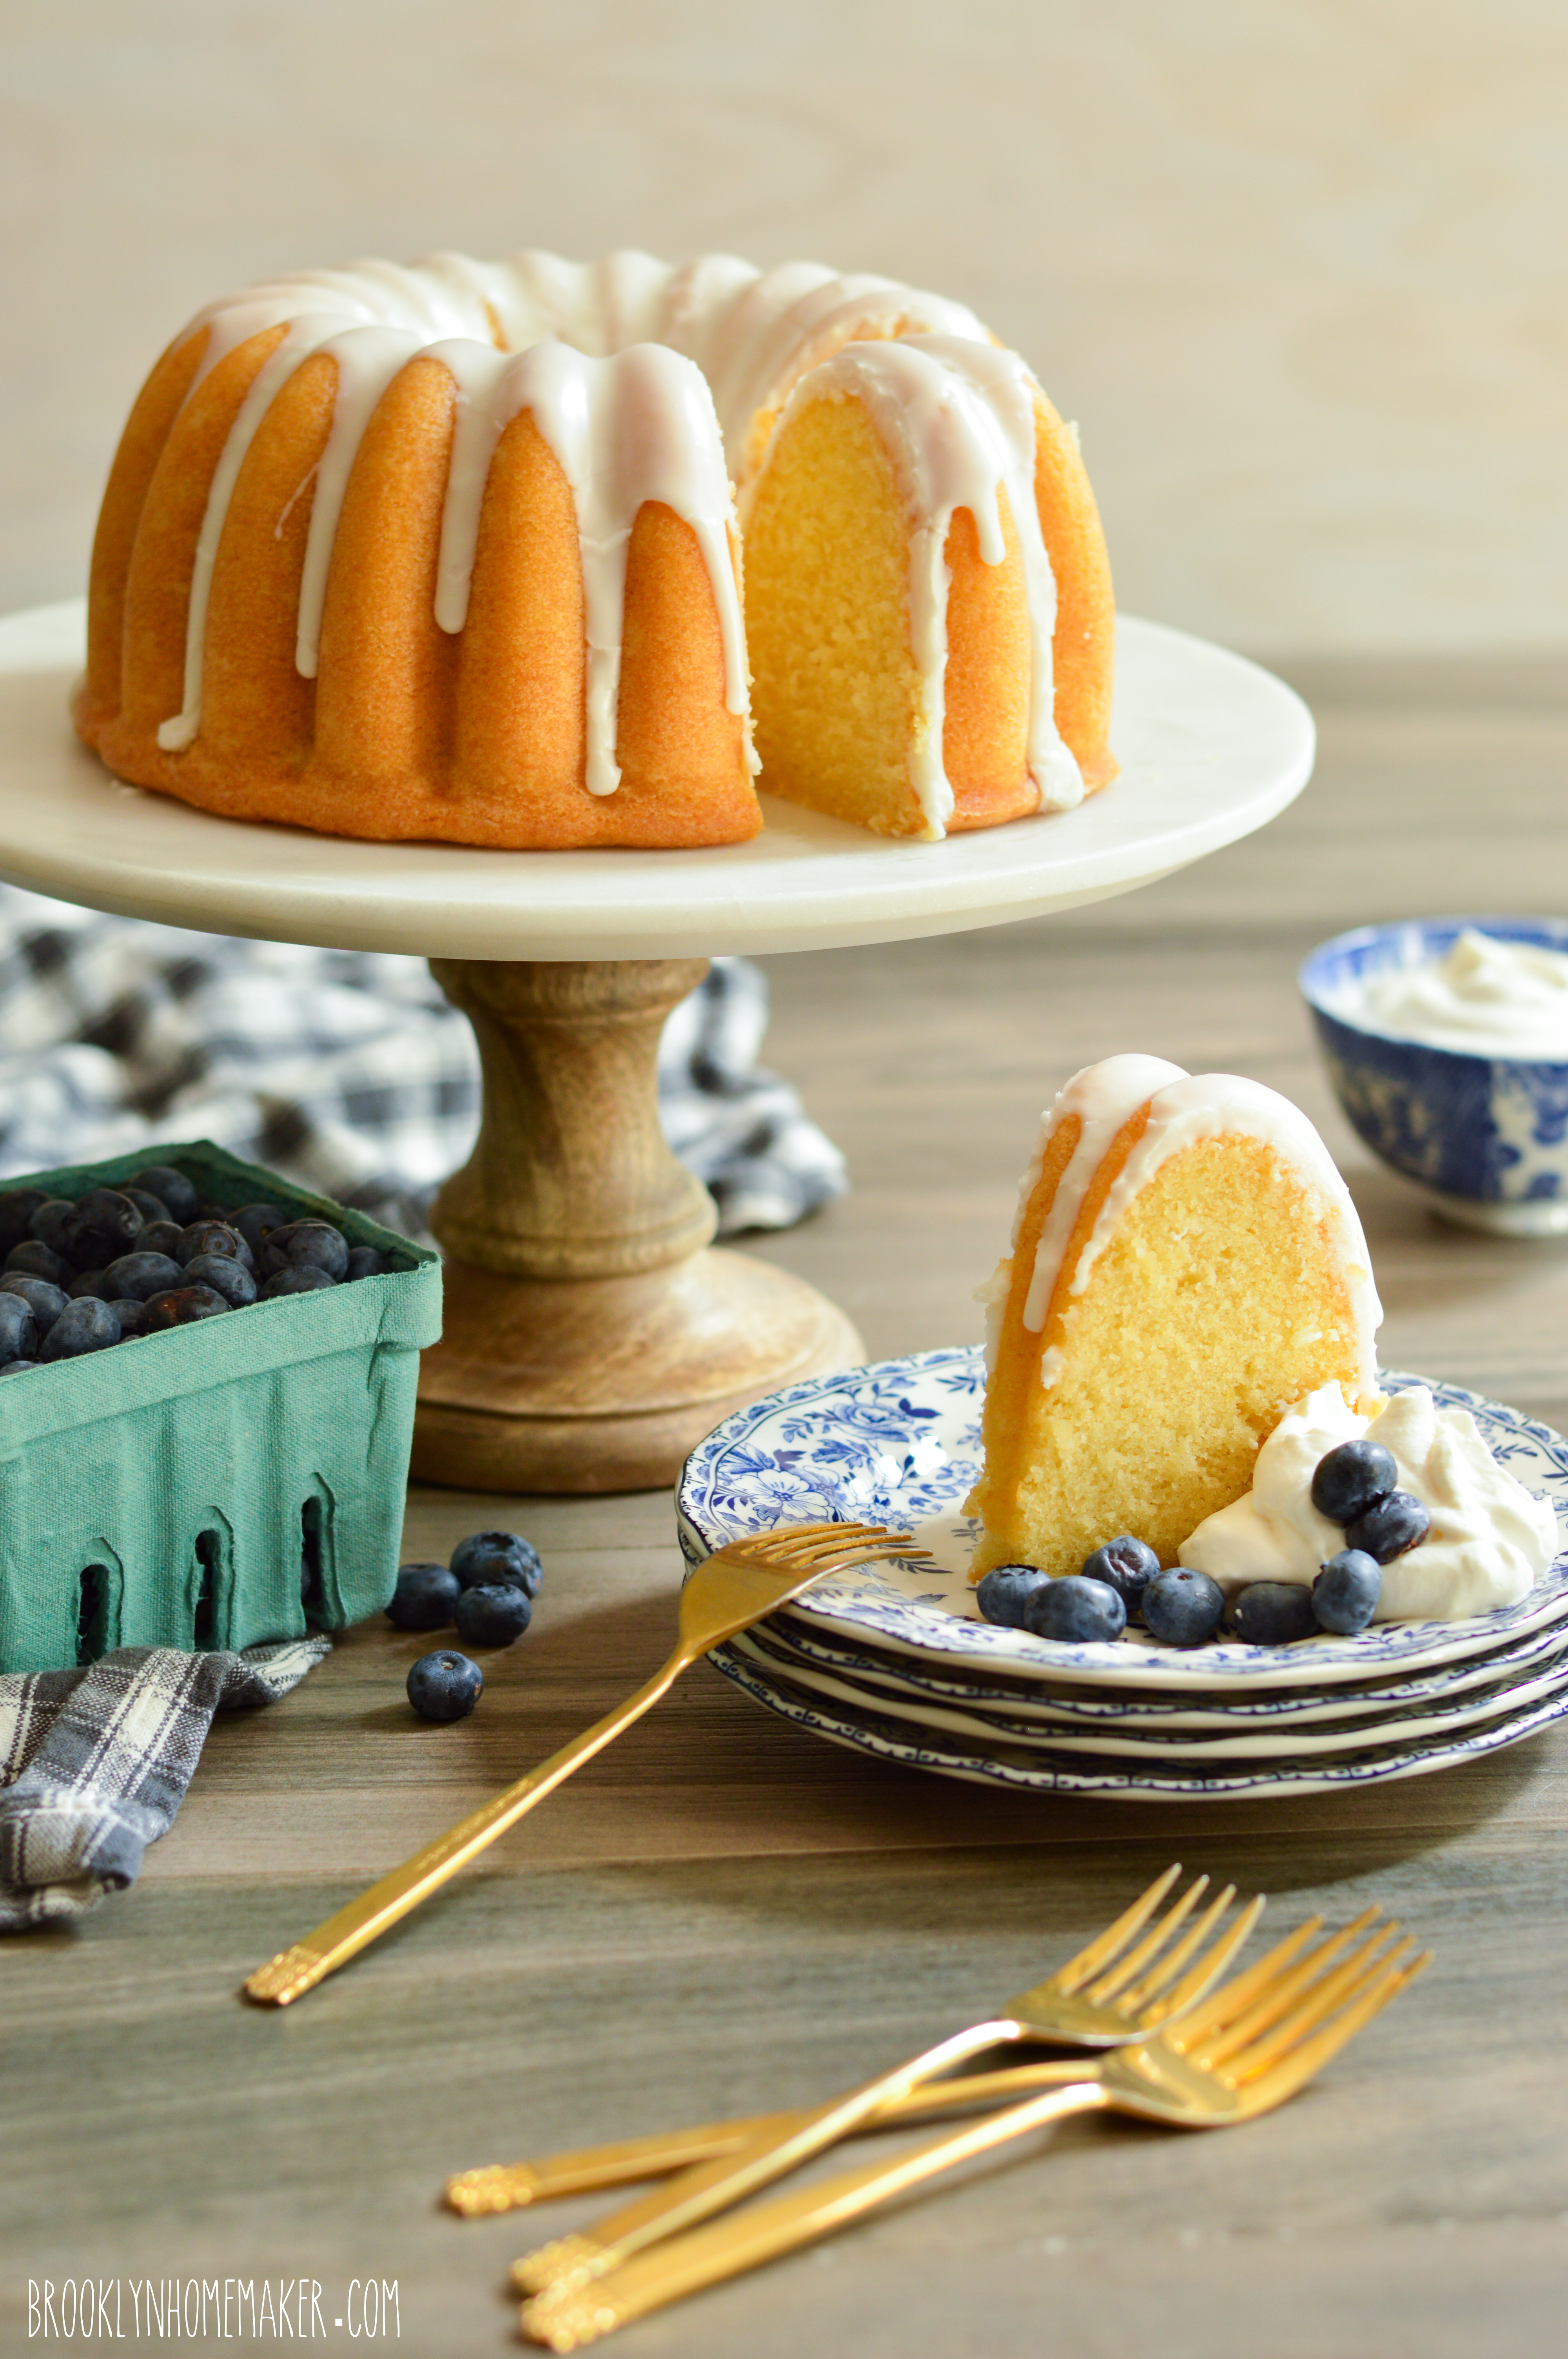
One thing that really helped me get back into the swing of things and re-discover my love for This Old Blog™ was baking one of my absolute favorite things in the whole wide world, the magnificent, magical bundt cake!

I’m sure that you know by now that I have an unnatural love for bundt cakes. A love that may even be illegal in certain states.
While I absolutely relish the interesting & creative challenges thrown my way by the #bundtbakers group over the past few years, I’ve been thinking lately that I’d really like to spend some time perfecting some simpler, easier, more traditional bundt cakes with a broader appeal and a more familiar flavor profile.

I still plan on getting jiggy with the #bundtbakers every now and again, but for the first time in several years I’d like to share some cakes that don’t necessarily fit in with their creative themes.

basic bundt series | buttermilk pound cake | Brooklyn Homemaker

I’m hoping to eventually follow this post up with a an entire series of bundt cake recipes featuring simple, familiar flavors; vanilla, lemon, chocolate, spice, etc.
The basic bundt series.

Get it?

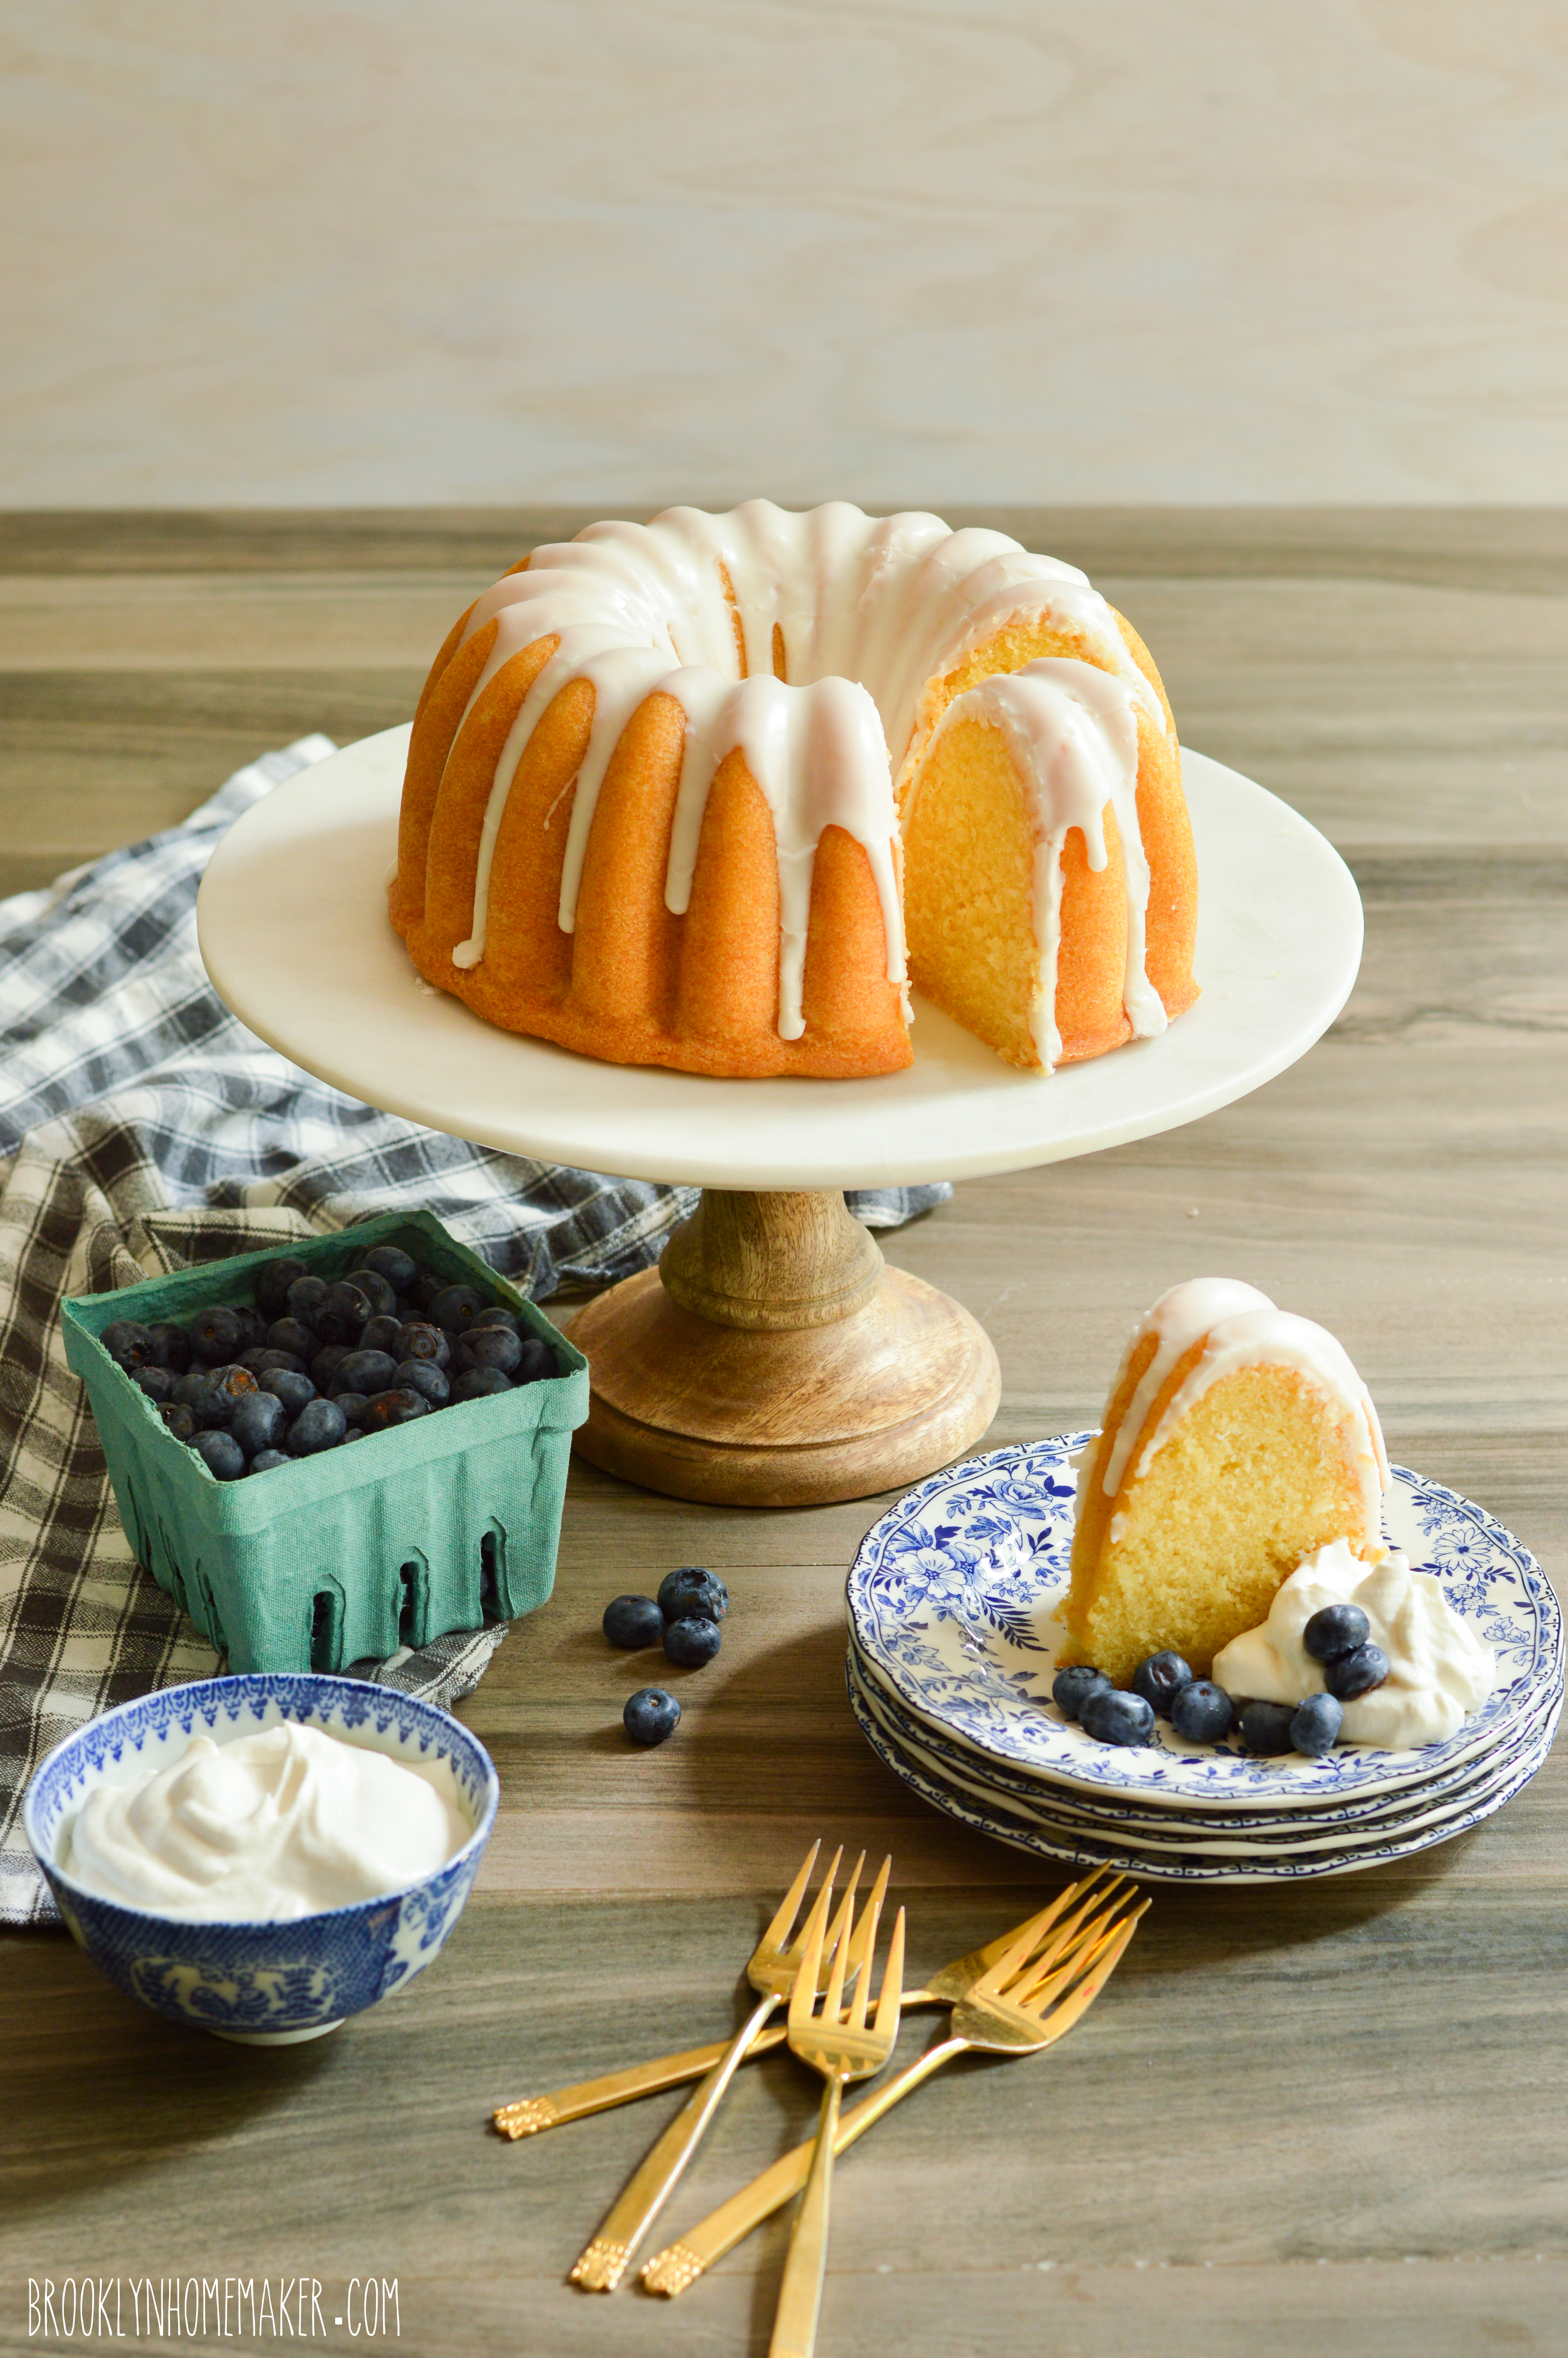
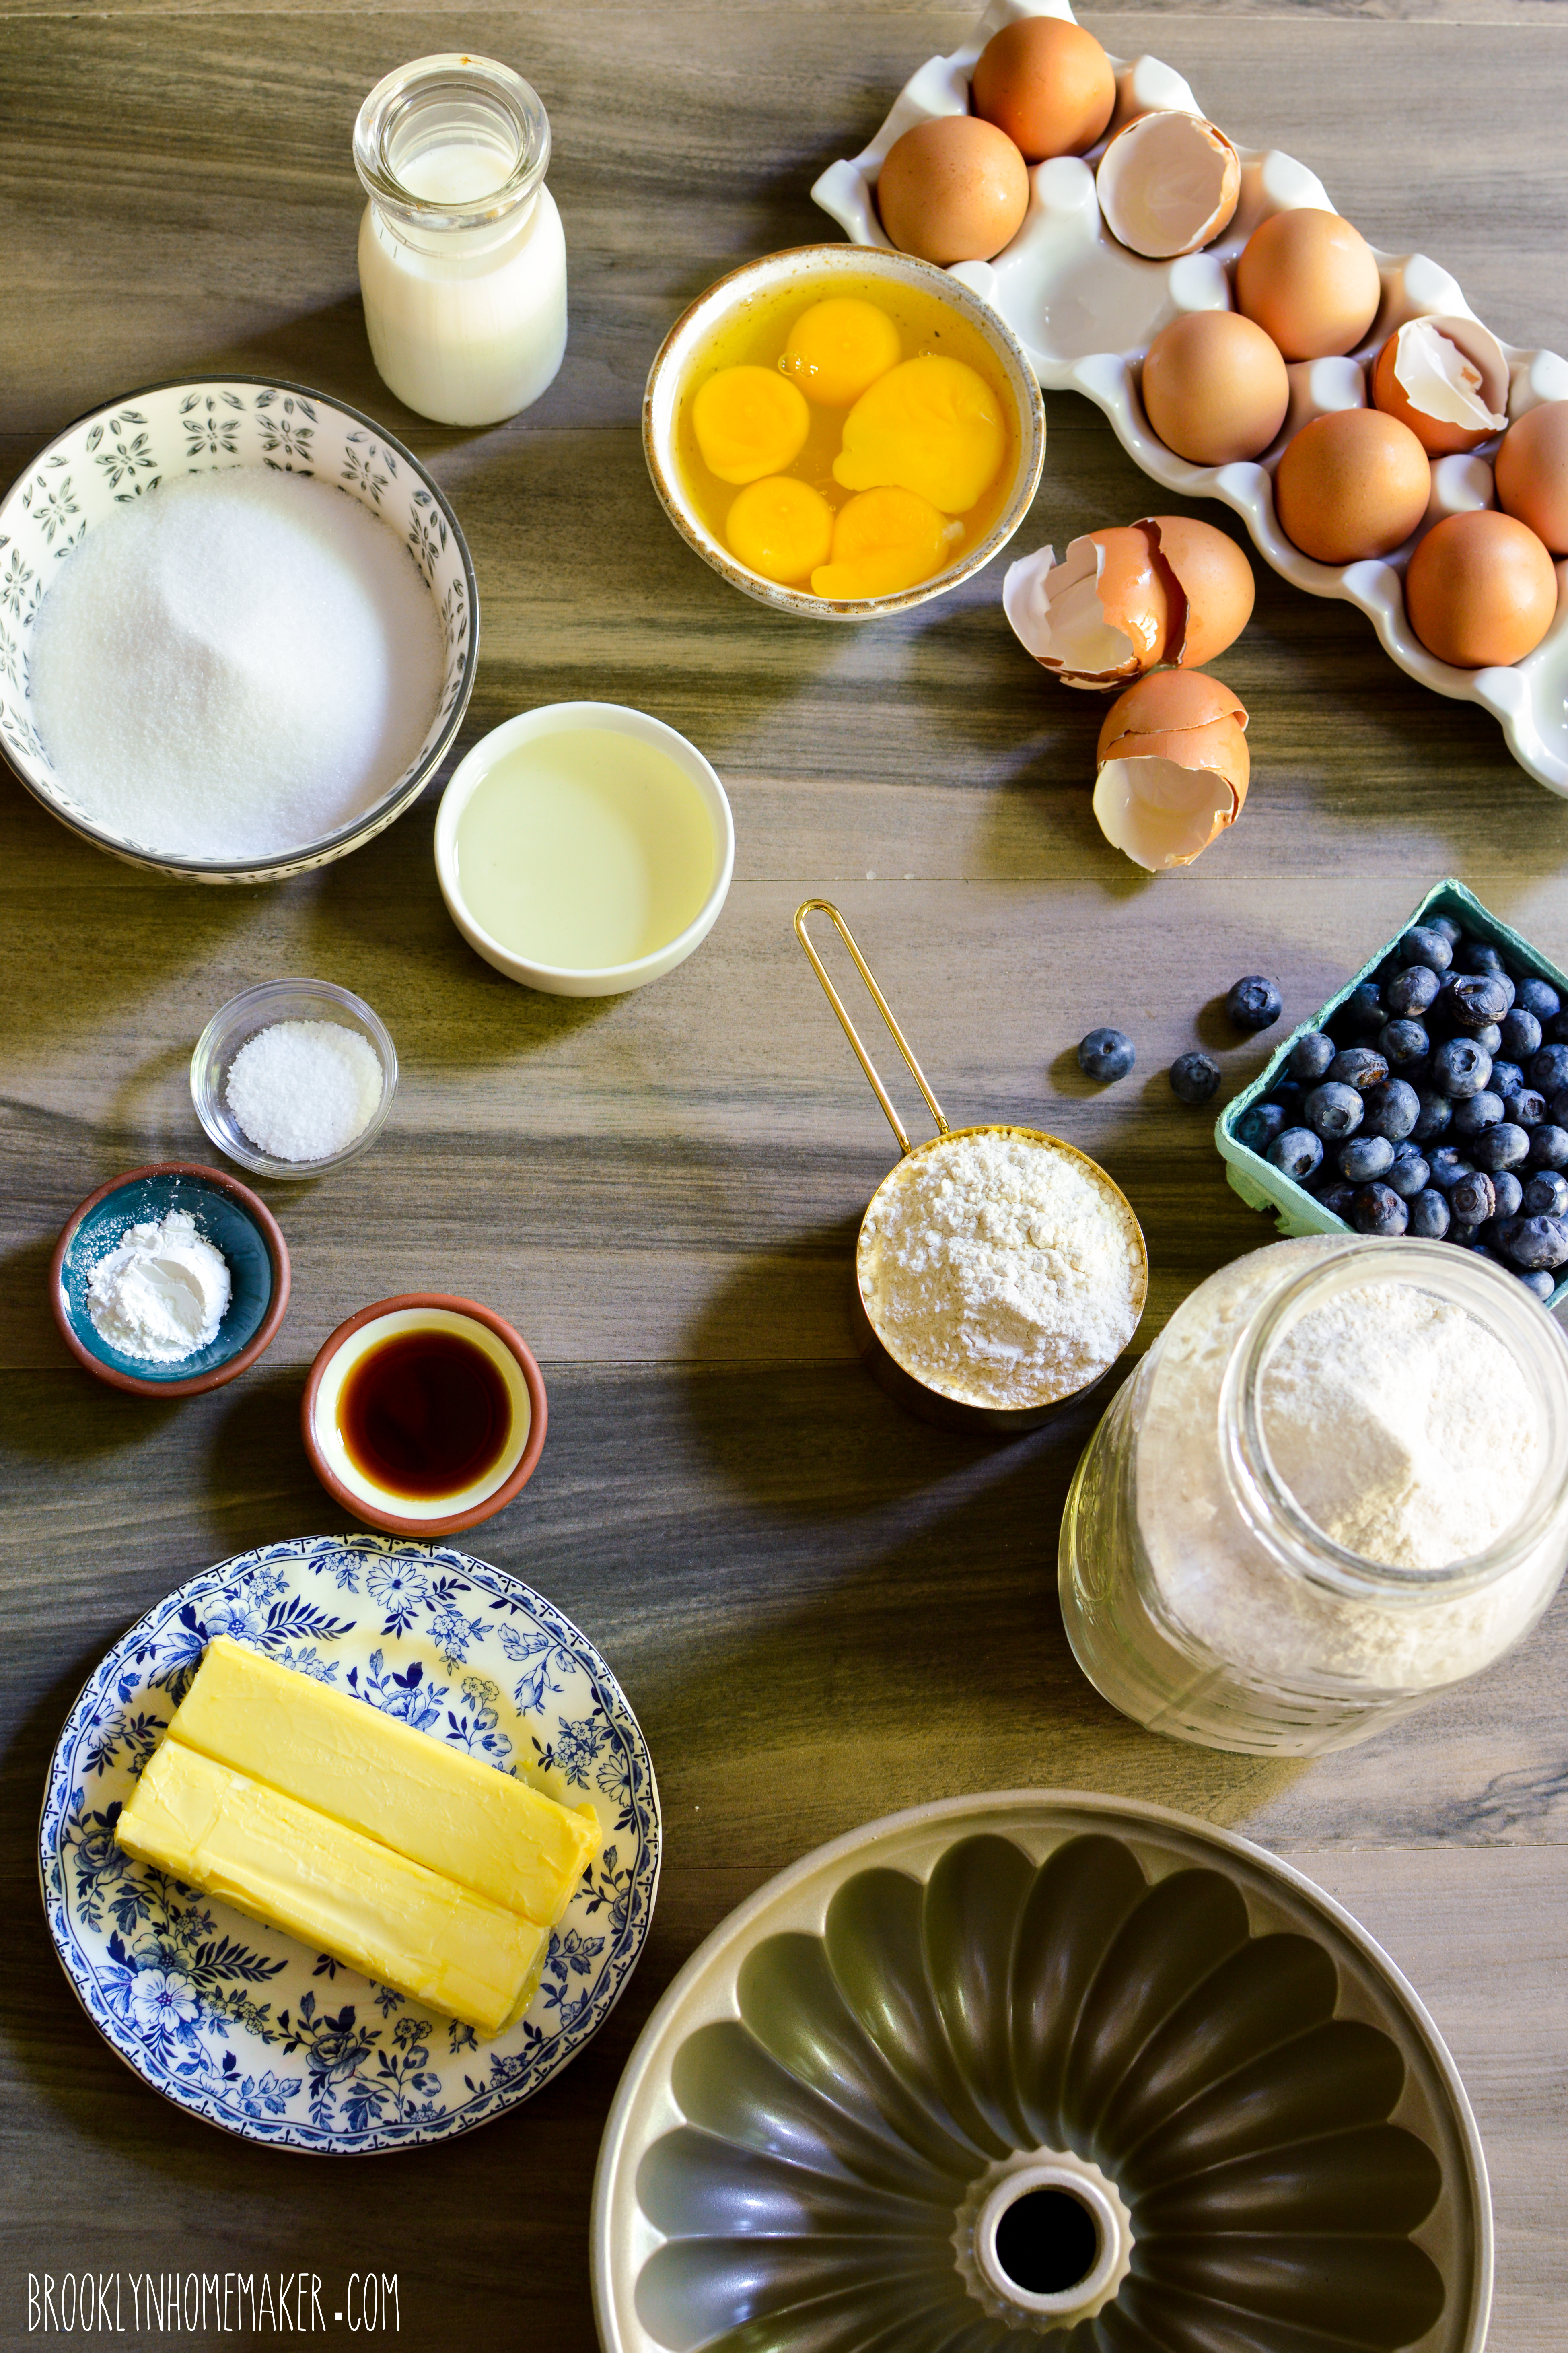
To kick the whole thing off, I thought I’d go with the simplest, and most potentially versatile cake that I could think of. The plain ol’ pound cake. Butter. Eggs. Buttermilk. Vanilla.
Heaven.

basic bundt series | buttermilk pound cake | Brooklyn Homemaker

This cake is delicately sweet and super buttery. Since the butter is the standout flavor in this recipe, I’d recommend springing for the best you can find. I promise it’s worth the extra buck or two.

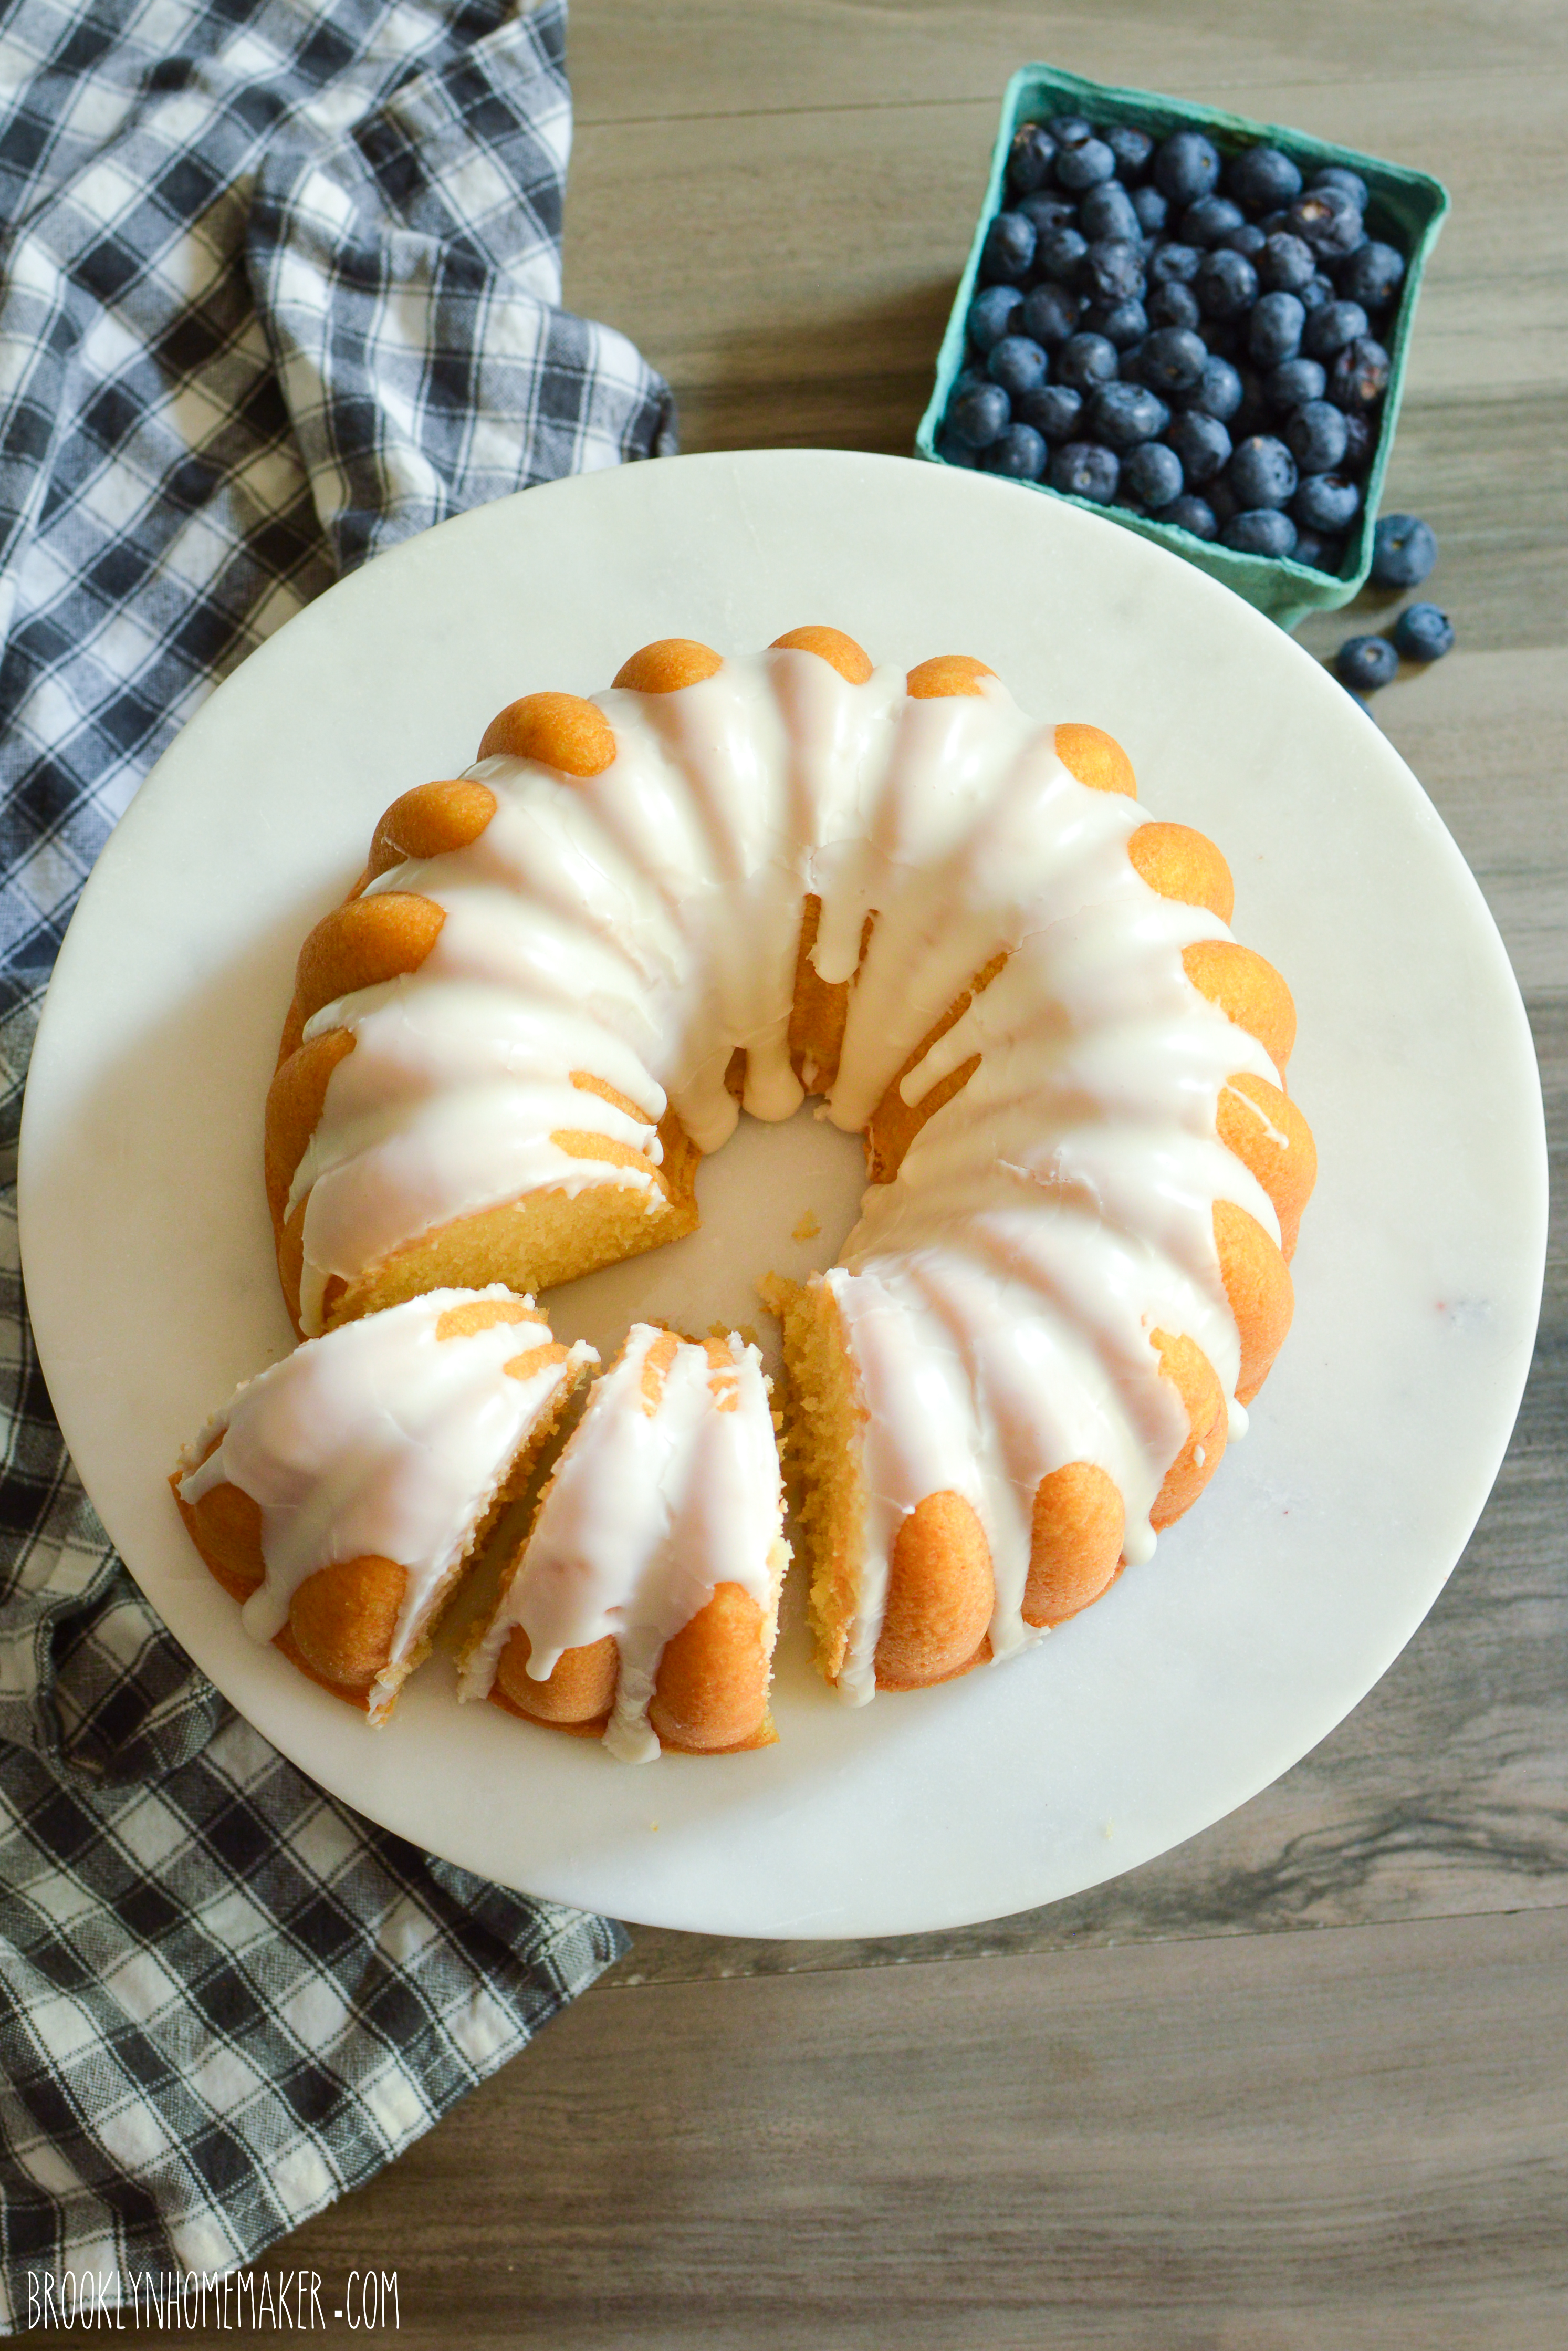
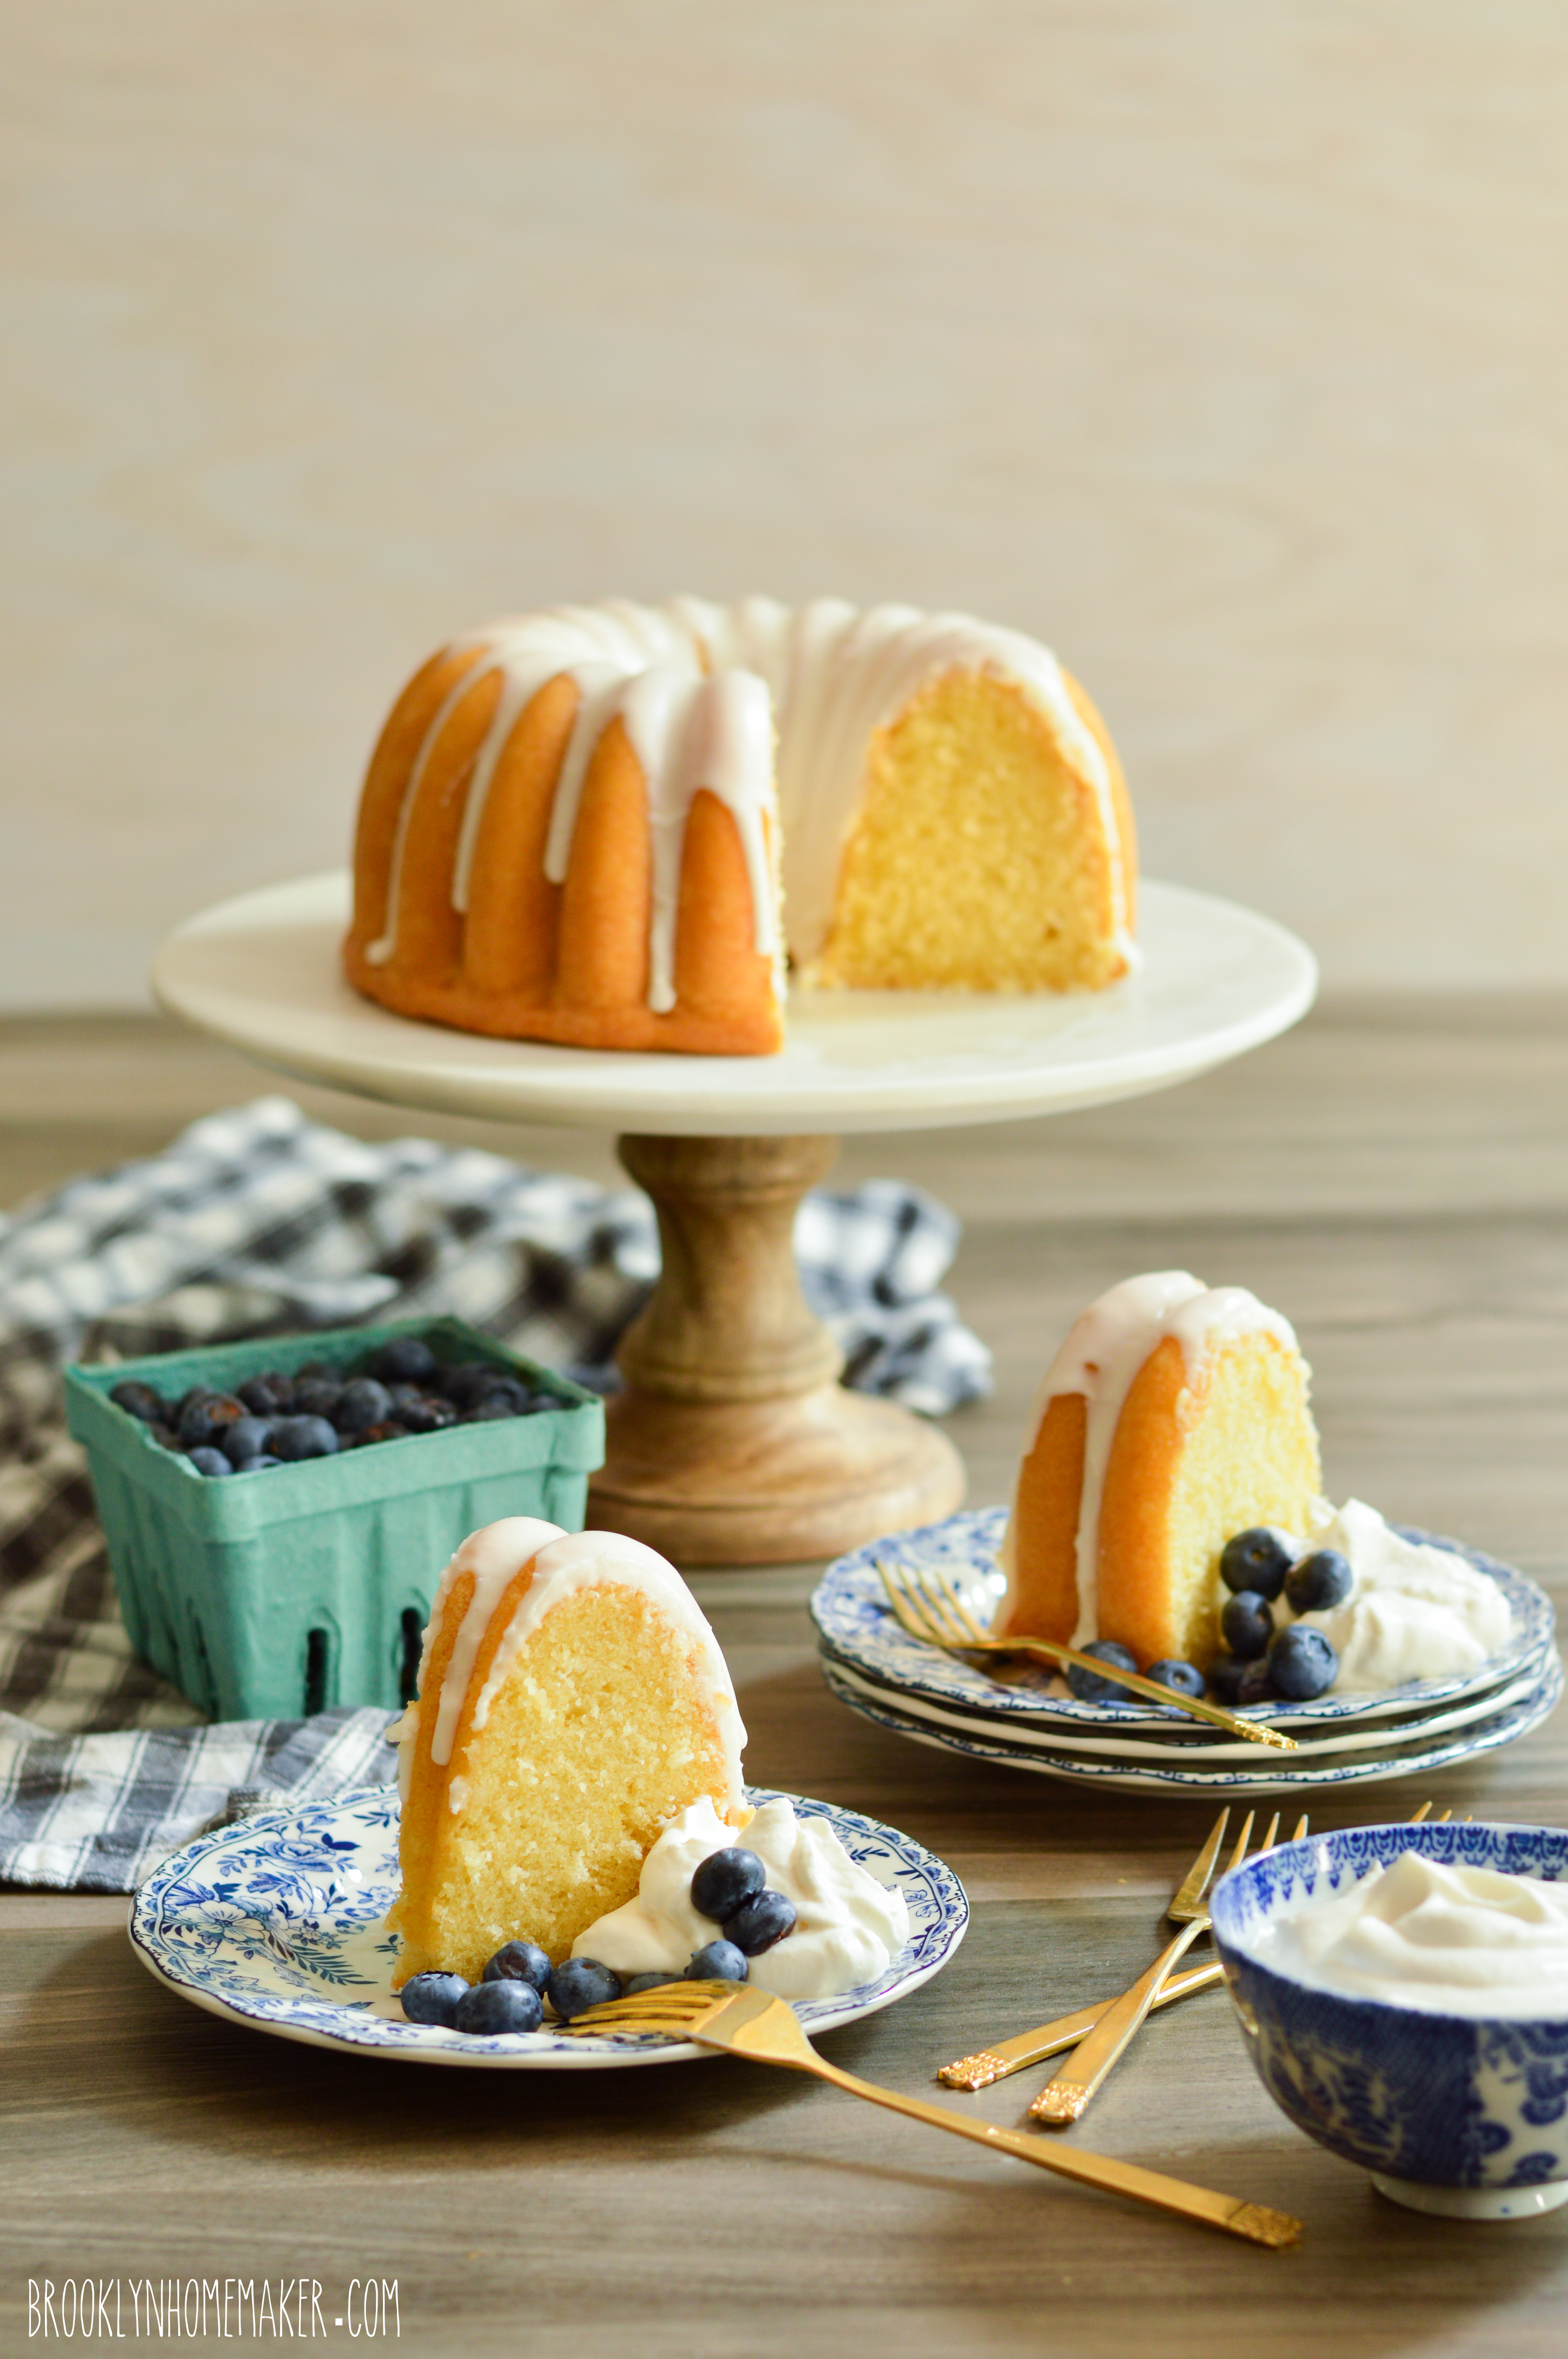
Because I use buttermilk rather than sour cream, this recipe is a little lighter and more delicate than some other pound cakes you may have had, but I actually prefer it this way. As a cake rather than a loaf, sliced thick and served with fresh fruit, I think the lighter crumb is just the ticket.
In the Summer a big thick slice of pound cake is heaven with fresh whipped cream and macerated strawberries or fresh ripe blueberries.

If you want to kick this cake up to the next level though, feel free to experiment a little!
This recipe is the perfect base for almost any flavor you could want to pair with it. Add a few tablespoons of your favorite booze to add another layer of flavor. Toss in a cup of fresh (or frozen) berries to make a fruity, summery pound cake. Instead of fruit, why not stir in a cup of chocolate chips and some chopped walnuts? Or infuse the butter (or buttermilk) with tea leaves, lavender flowers, fresh herbs, or dried spices. You could even stir some fresh citrus zest into the sugar before creaming it into the butter.
Once you get the basics down, the skies the limit folks!

basic bundt series | buttermilk pound cake | Brooklyn Homemaker

buttermilk pound cake bundt

1 cup (2 sticks) best quality unsalted butter, at room temperature
1/4 cup peanut oil (or vegetable oil)
1 1/2 cups sugar
5 large eggs
2 1/2 cups all purpose flour
2 teaspoons baking powder
1 1/2 teaspoons salt
3/4 cup buttermilk
1 tablespoon vanilla extract

Preheat oven to 325 F. Butter and lightly flour a 10-12 cup bundt pan. Tap out excess flour. Refrigerate pan until ready for use.

Beat butter in the bowl of a stand mixer until very light, about a minute or two. Scrape the sides of the bowl with a silicone spatula and add oil and beat until smooth and combined. Add sugar and beat until fluffy and pale, about 3 minutes.
Add eggs, 1 at a time, mixing just until combined.
In a separate bowl, whisk together flour, baking powder and salt. Mix vanilla into buttermilk.
Alternate additions of the flour and buttermilk mixtures to the butter, beginning and ending with flour. Scrape the bowl after each addition. Do not over-mix.

Pour batter into prepared pan, leaving at least an inch from the top of the pan. Tap the pan on the counter several times to smooth out the batter and remove any air bubbles.
Bake for about 55 minutes, give or take 5 minutes, or until a toothpick or cake tester comes out clean from the center of the cake. Depending on the size and shape of your pan though, this time may change. I’d recommend checking on your cake around the 40 minute mark just to be sure it doesn’t overcook.

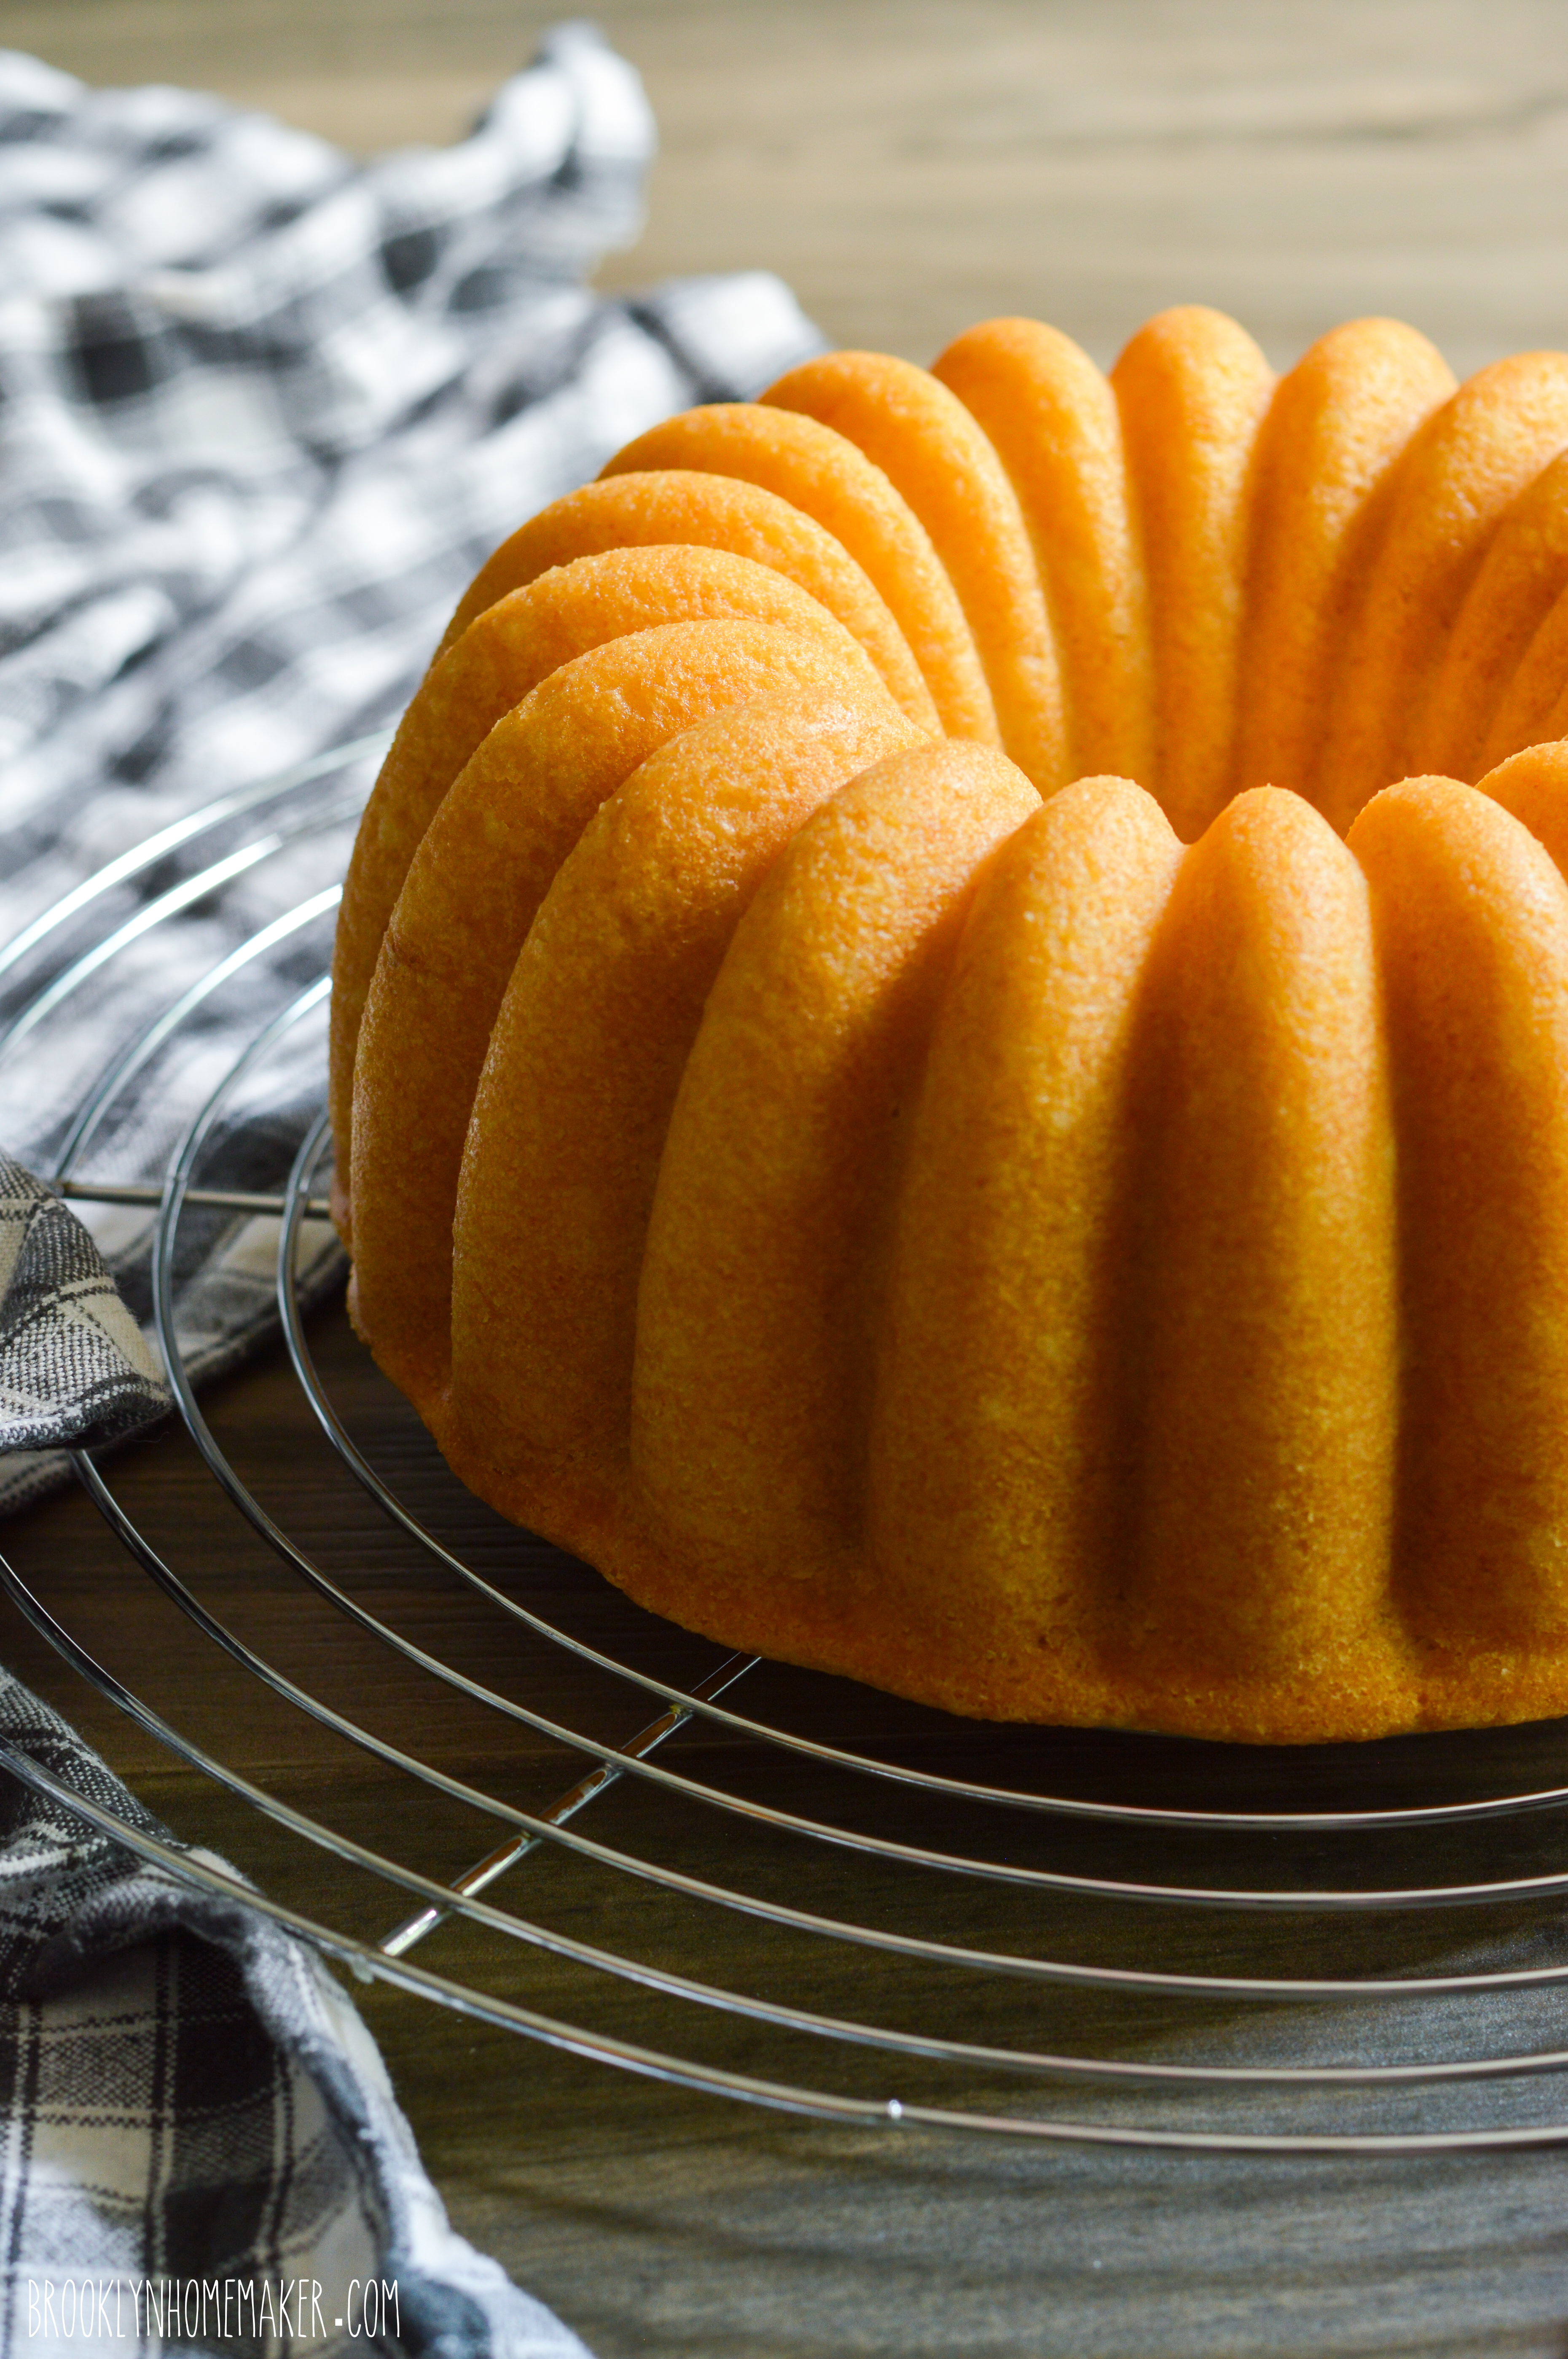
Cool for 30 minutes on a wire rack before turning out of pan. Turn out onto the rack and cool completely before glazing.

Best Simple Bundt Cake Glaze:
1 1/2 cups powdered sugar
1 teaspoon vanilla extract
2 to 2 1/2 tablespoons half & half

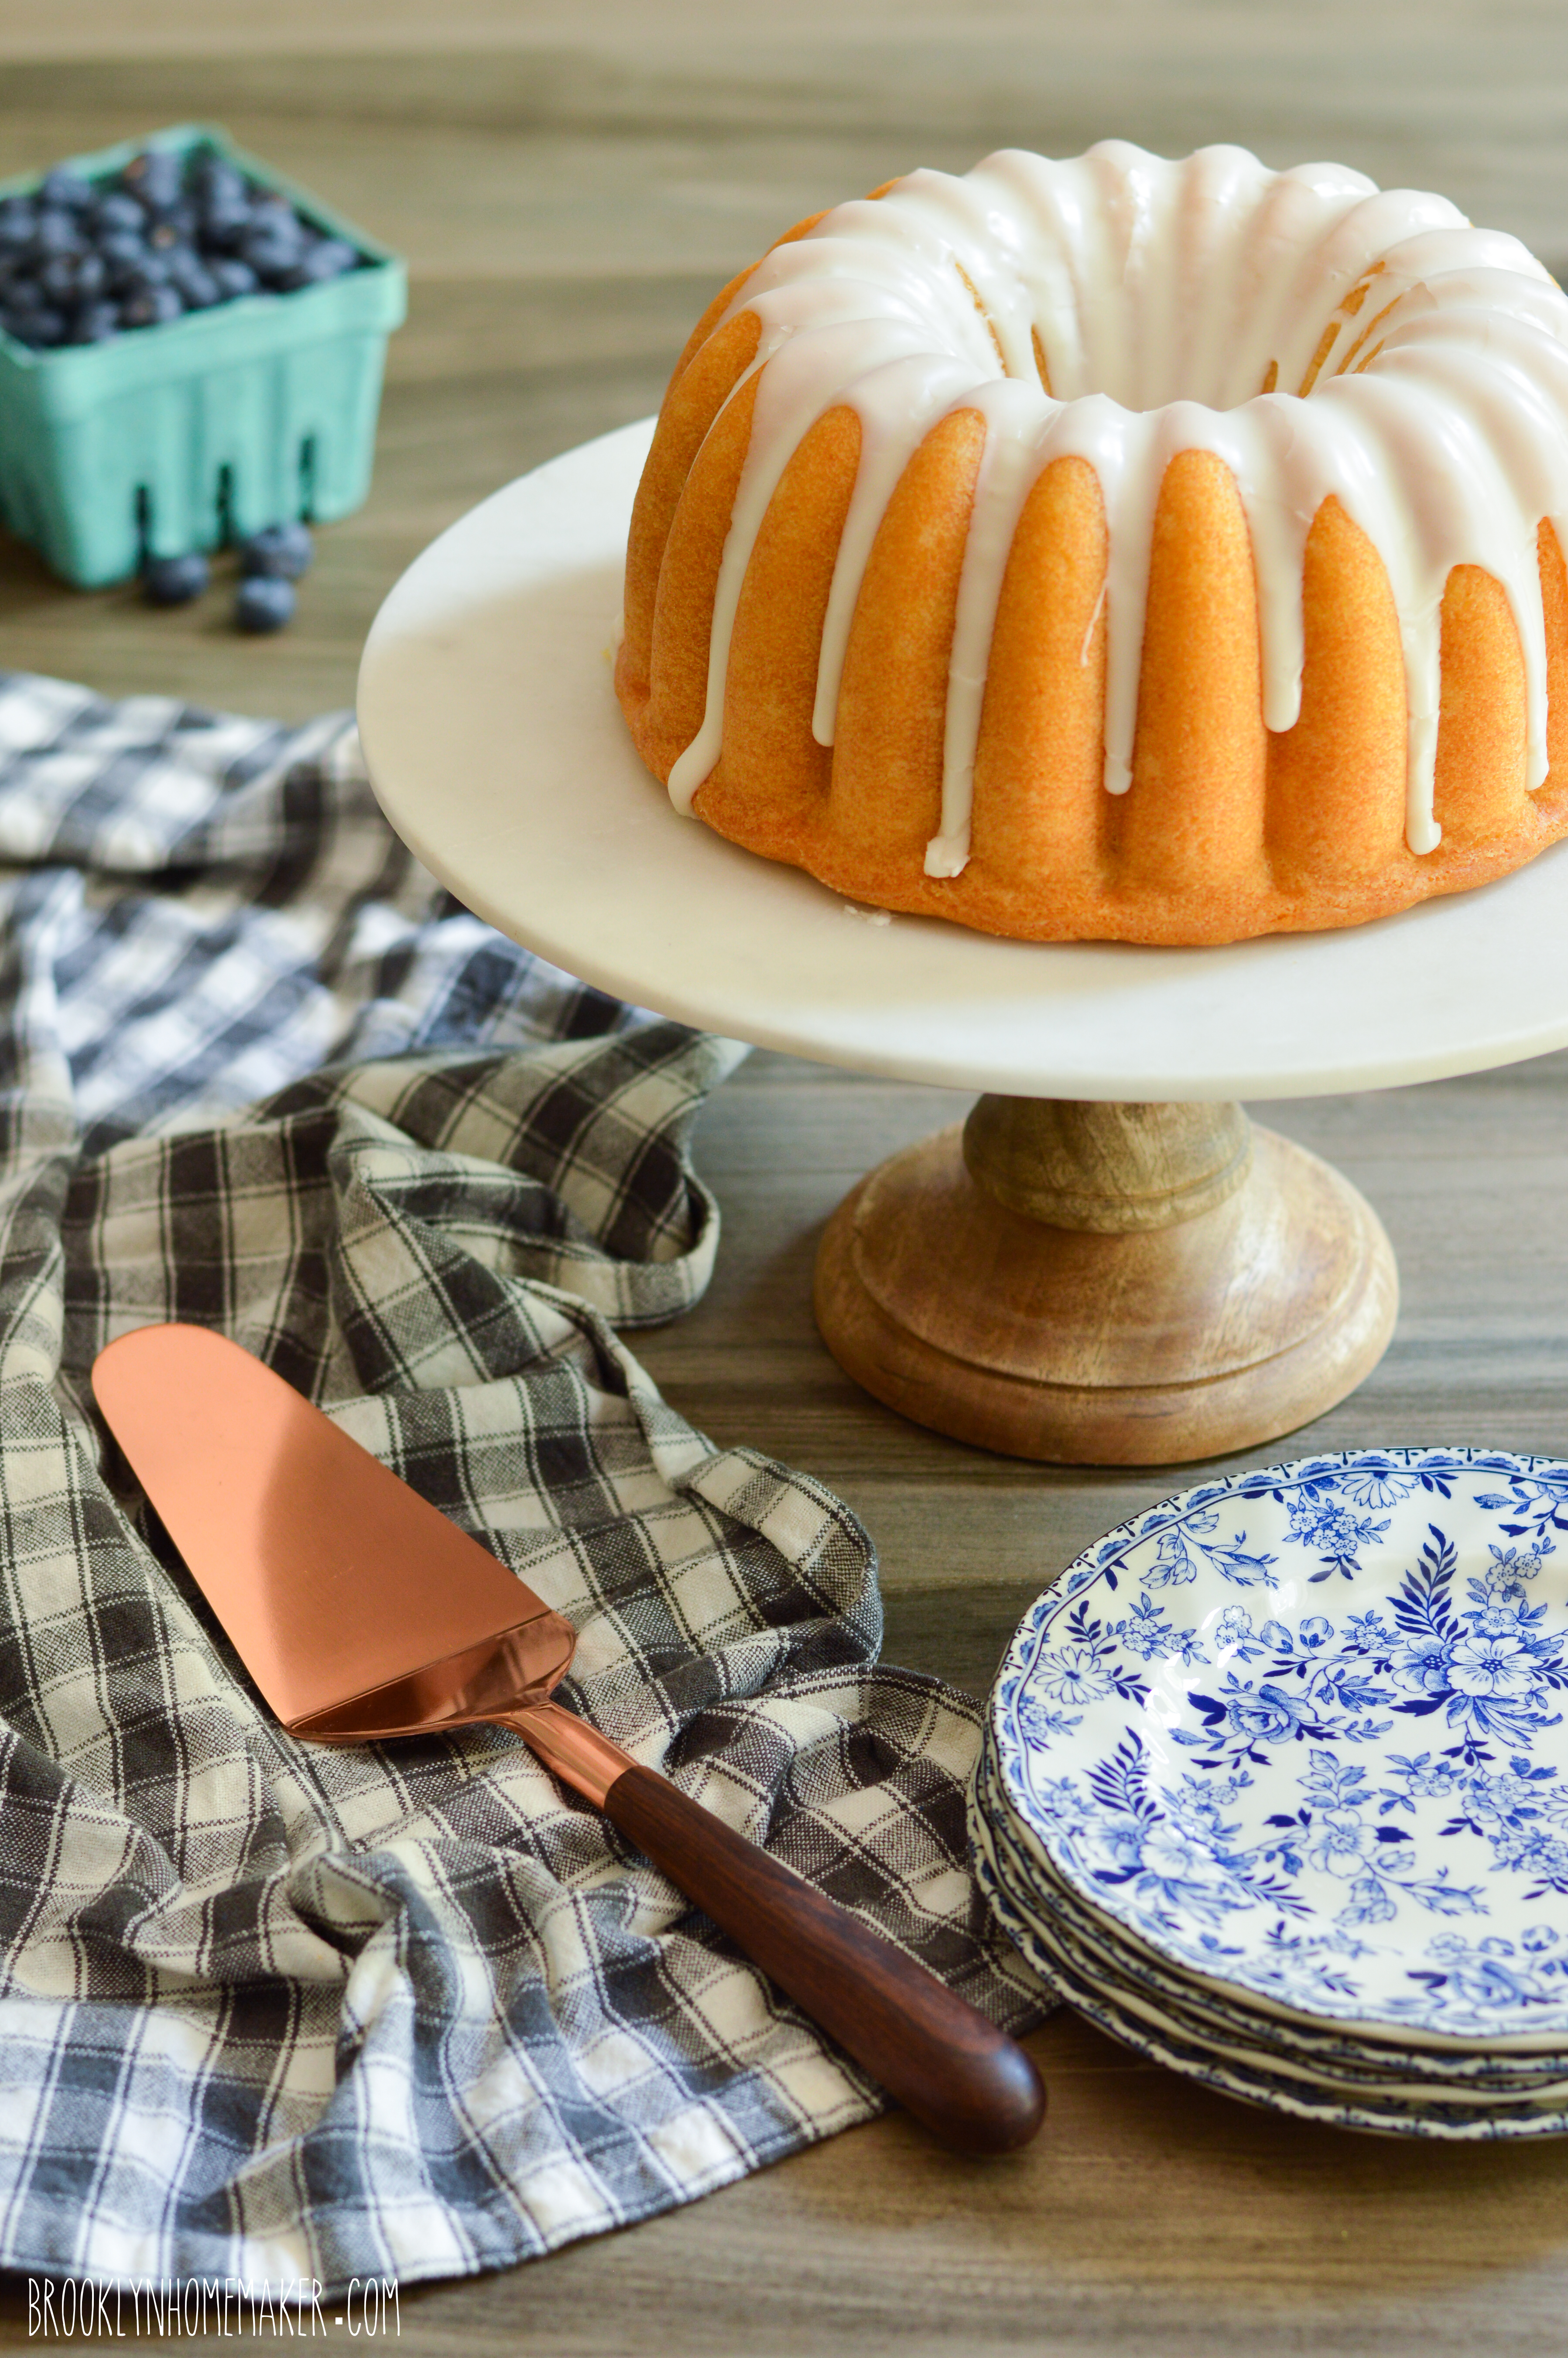
Mix sugar, vanilla, and 2 tablespoons half & half together in a small bowl. Mix until completely smooth and free of lumps. You want the glaze to be very thick so it doesn’t slide right off the cake, but it does need to be liquid enough that it pours smoothly. If necessary, thin the glaze out with more half & half, adding only about 1/2 a teaspoon at a time to avoid thinning it too much.

Pour the glaze in a steady stream over the center of the cake. Place a pan under the rack just in case the glaze drips. Let the glaze harden for at least 30 minutes before slicing.

Cake can be store, tightly covered at room temperature, for about 3 days.

Advertisement

spicy gingerbread bundt cake with caramelized white chocolate ganache #bundtbakers

When it comes to being a food blogger, there’s a lot of pressure to come up with “original” recipes.

spicy gingerbread bundt with caramelized white chocolate ganache | Brooklyn Homemaker

Thing is, there ain’t much out there that ain’t been tried before. Odds are that any flavors you’re considering combining have probably already been combined before by someone else, somewhere else.

spicy gingerbread bundt with caramelized white chocolate ganache | Brooklyn Homemaker

When Laura from Baking in Pyjamas chose “winter wonderland” as our #bundtbakers theme this month, my very first thought was of a deep, dark, super spicy gingerbread bundt cake. There is nothing in the world that says winter holidays to me more than the combination of warm spices and molasses.

The problem? Everybody and their uncle is posting gingerbread cake recipes right now (and have been every December since the advent of the food blog). As much as I wanted to bake some dark, dense, spicy, & chewy gingerbread for myself, I decided that I should probably try to come up with something a bit more unique.

Life is hard sometimes you guys.

 spicy gingerbread bundt with caramelized white chocolate ganache | Brooklyn Homemaker

After a bit more brainstorming, I remembered the caramelized white chocolate I’d read about on my friend Lindsay’s ice cream blog, If the Spoon Fits.

Now, before you start with the whole “white chocolate is gross/too sweet/boring/stupid/not chocolate” comments, hear me out. When you take the time to slowly caramelize good white chocolate in the oven with a sprinkle of flaky sea salt, it transforms into something completely new and exciting and magical. The sugars in the chocolate caramelize and the cocoa butter gets richer and deeper and almost butterscotch-y. While it still has the texture of white chocolate, the flavor is much closer to a rich and creamy salted caramel.

When Lindsay first posted about it I was a bit skeptical that white chocolate could really be THAT GOOD, but I made a mental note and filed it away for a rainy day. A winter wonderland themed bundt cake seemed like the perfect rainy day opportunity to bust it out.

caramelized white chocolate | Brooklyn Homemaker

I had faith in Lindsay that the flavor would be great, but I felt like I’d want a bit more texture and interest so I decided to add some nuts. Almonds, walnuts, or pecans would have been ideal choices for flavor and crunch, but I decided that roasted chestnuts would be sooooo much more winter wonderland-y.

Oddly enough, even though my Grandfather has two giant old chestnut trees in his yard, as best I can remember I’ve never actually eaten a chestnut and had no clue what they tasted like. I called my Grandmother to ask her about it, and she confirmed that even though they’re in the yard, she’d never attempted to eat or cook with them. I remember their spiky green outer shells littering the yard when I was a kid, but I think the squirrels always made away with most of the nuts inside. Maybe that’s why they never really made it into the house.

spicy gingerbread bundt with caramelized white chocolate ganache | Brooklyn Homemaker

So, not knowing what to expect, I went to the store and picked up a jar of expensive fancy pants French chestnut puree, along with a pound of whole chestnuts that I wanted to try to oven roast.

Oh lord what a mess.

Did you know that roasted chestnuts can explode if you don’t score the shell in the right place?
I wish I were joking.
After oven roasting them according to Martha’s instructions, I noticed that one of my chestnuts hadn’t opened at the score line. A few minutes after it came out of the oven, I poked the unopened chestnut with a knife. I’m not really sure why I did it, but it was definitely a mistake.
There was a loud POP like the sound of a sealed soda bottle being run over by a car (Is that a sound everyone knows, or is that just because I live in Brooklyn?). Anyways, the two halves of the shell went flying across the kitchen in opposite directions, one landing on my dish rack and the other on the floor in front of the refrigerator. The chestnut meat itself practically vaporized into a fine, hot, sticky chestnut dust that sprayed all over my kitchen; sticking to the oven, the walls, the side of the fridge, the counters, cabinets, and floor. A bit later I walked past the mirror and found chestnut dust covering my beard and stuck to my cheeks and forehead. Yesterday I was in the kitchen and happened to glance up and notice there was chestnut dust all over the ceiling.

After the initial shock of the whole thing, I just stood there laughing like crazy for a good 10 minutes before I cleaned up the mess. Luckily there were a few whole chestnuts left that I could use, so I peeled one open and tasted it.

Sooooo….

Ummmm….

Can anyone tell me why people like chestnuts? I was expecting something, oh, I don’t know, nutty?
But no. This thing was bland and flavorless while also being oddly sweet, with a soft, pasty, almost bready texture rather than the satisfying nutty crunch I was anticipating.

I eventually decided that I must just be missing something because I’m not used to them, so I wanted to forge ahead. Since the roasted chestnuts wouldn’t have the crunch and texture I was hoping for, I decided to just go for flavor and mix the chestnut puree into the cake batter instead.

Ugh. You guys. There are entire songs devoted to chestnuts this time of year. I just don’t get it.

The chestnut puree made the cake rubbery, dense, slightly bitter, and strangely grey-ish.
FML.

spicy gingerbread bundt with caramelized white chocolate ganache | Brooklyn Homemaker

A few days later I considered baking a new caramelized white chocolate cake with some crunchier, nuttier nuts, but ultimately my first cake was such a traumatic experience from start to finish that I couldn’t bring myself to try again.

After some soul searching, (Is it weird that my life is filled with so much bundt-related soul searching?) I decided to scrap the whole thing and go back to the gingerbread cake I’d wanted to make in the first place. Who cares if a bajillion other people have already made similar cakes? As long as I enjoy it and stand behind the recipe, why not?

Since I’d already gotten more white chocolate, and really was impressed with the caramel-y flavor, I decided to go ahead and use it to make a ganache glaze for the cake.

spicy gingerbread bundt with caramelized white chocolate ganache | Brooklyn Homemaker

After that first cake, it felt SO DAMNED GOOD to have this one turn out so well.

Having grown up with traditional spicy German Christmas cookies like pfeffernusse and lebkucken, I like my gingerbread super dark and spicy so I use lots of molasses and plenty of spice. I even like to use a touch of ground black pepper for a bit more heat, and along with the dried ginger I like to stir some little chewy chunks of crystallized ginger into the batter right at the end.

The caramelized white chocolate ganache takes some time to make, but it adds a lovely sweet, salty, caramel-y touch that perfectly compliments the rich, deep flavors of the cake.

If you like gingerbread, especially dark, dense, spicy, chewy, old-world gingerbread; you’re going to flip for this cake. It’s unbelievable right out of the oven, but the best part is that it even improves with age so it can (and should!) be made a day or two ahead. After a few days it seems even more tender, moist, and flavorful than it did when I first sliced it for these photos.

Please be sure to scroll down past the recipe to see all the other winter wonderland themed bundts the other #bundtbakers came up with this month!

spicy gingerbread bundt with caramelized white chocolate ganache | Brooklyn Homemaker

Spicy Gingerbread Bundt Cake with Caramelized White Chocolate Ganache

  • Servings: 12 to 16-ish
  • Print
2 1/2 cups all-purpose flour
1 teaspoons baking powder
1/2 teaspoon baking soda
1/2 teaspoon salt
2 to 3 tablespoons ground ginger (depending on how spicy you like it)
1 1/2 teaspoons ground cinnamon
1/2 teaspoon ground cloves
1/2 teaspoon freshly grated nutmeg
1/2 teaspoon finely ground black pepper
1 cup molasses (not blackstrap)
3/4 cup water
1/2 cup (1 stick) unsalted butter, room temperature
1/2 cup vegetable oil
1 1/2 cups packed dark brown sugar
3 large eggs
1/3 cup finely chopped crystallized ginger

Preheat the oven to 350°F. Butter and flour a 10- to 12-cup bundt-style pan.

In a large bowl whisk together the flour, salt, baking soda, baking powder, and spices. Set aside. In a separate bowl, whisk together the molasses and water and set aside. 

In the bowl of a stand mixer, beat together the butter, oil, and sugar until light and fluffy, about 2 to 3 minutes. Add the eggs one at a time, beating well and scraping the bottom and sides of the bowl after each addition.

Add the flour mixture in three additions alternately with the molasses water, starting and ending with the flour. Add the chopped crystallized ginger with the last addition of flour, and mix just until smooth. Do not over-mix. 

Pour the batter into the prepared pan, smooth the top, and bake for 55 to 65 minutes, or until a cake tester inserted into the center comes out clean.

Cool in the pan on a wire rack for at least 20 minutes, then turn the cake out onto the rack to cool completely. If desired, make the caramelized chocolate while the cake cools. Recipe below. 

I recommend baking this cake a day or two ahead. It improves with age! Cake can be kept in an airtight container at room temperature for up to three days.

*note: It is totally normal and okay if this cake sinks a little bit in the center.

.

Caramelized White Chocolate Ganache Glaze:
Adapted from David Lebovitz

8 oz good quality white chocolate (must have real cocoa butter)
2 tablespoons vegetable oil
1/2 teaspoon coarse kosher salt
1/4 cup heavy cream

Optional decorations: white nonpareils, white dragees, white sixlets

Turn the oven down to 250F

If the white chocolate is in a block or bar, chop it into coarse pieces. Spread the white chocolate in an even layer on a rimmed baking sheet and heat for ten minutes.

Remove it from the oven, add the oil, and spread it out with a clean, dry spatula.

Continue to cook for and additional 30-60 minutes, stirring and spreading every 10 minutes. At some points it may look lumpy and chalky, but keep stirring and it will smooth out and caramelize. Once the chocolate reaches a deep golden brown, remove from the oven, scrape into a bowl or large measuring cup, and whisk in the salt and heavy cream until completely smooth and free of lumps.

Once the cake is completely cool drizzle the still slightly warm ganache over the cake and, if desired, top with optional decorations before it cools and sets.

spicy gingerbread bundt with caramelized white chocolate ganache | Brooklyn Homemaker

These wonderful wintery bundts are definitely putting me in the Holiday spirit this year! Thank you Laura for choosing such a perfect theme for the month of December!

BundtBakers
.

#BundtBakers is a group of Bundt loving bakers who get together once a month to bake Bundts with a common ingredient or theme. Follow our Pinterest board right here. Links are also updated each month on the BundtBakers home page.

roasted pear and walnut spice cake bundt #bundtbakers

Whoa. I just realized that I haven’t baked a bundt cake since April.

roasted pear and walnut spice cake bundt | Brooklyn Homemaker

This has been one hell of a year, both personally with the Maxwell’s build out and opening, and for the country as a whole. This election cycle really has consumed me, chewed me up and spit me out, and just when I thought it would all finally be over, it seems like we’re in for even more struggle and strife.

While things may feel a little disheartening right now, life must go on, and getting back into the kitchen and revving up the ol’ stand mixer certainly helps me feel centered and whole again.

roasted pear and walnut spice cake bundt | Brooklyn Homemaker

I’m so so thrilled that Lauren from Sew You Think You Can Cook chose pears as our inspiration for the #bundtbakers this month. Thank you so much Lauren! Not only do I absolutely love pears on their own, there’s also something especially cozy and satisfying about baking with fall fruit pear-ed (har har) with warm homey spices.

With Thanksgiving only a week away, a pear bundt cake is just what the doctor ordered.

roasted pear and walnut spice cake bundt | Brooklyn Homemaker

I have a confession to make though.
I haven’t always liked pears.

My grandfather has always had several fruit and nut trees on his property, and when I was little I thought pears were absolutely disgusting. I don’t know if it was the grainy texture, or the thick sandy skin, or what, but to be perfectly honest I didn’t care for a lot of the bounty of grandpa’s garden.

I was truly a child of the 80’s, and a lot of my culinary influence during my formative years came from spending time in my grandmother’s kitchen. She is a product of her generation, and Grandma’s food philosophy came from the atomic-age desire for shiny, new, packaged convenience foods rather than the back-to-earth approach many of us prefer today. As a kid in Grandma’s kitchen, packaged food was celophane-wrapped, sterilized heaven to me, and I couldn’t get enough of it. Give me a box of doughnuts, a bag of chips, a can of soup, a bottle of soda, and a grilled cheese sandwich made with plastic-wrapped processed “cheese food”, bagged sliced white bread, and margarine from a tub.
Who wants to have to pick and wash fresh fruits and vegetables from outside with all the dirt and bees and bugs, when the fridge is stocked with Cool Whip and Velveeta that’s clean and delicious and ready to eat?

roasted pear and walnut spice cake bundt | Brooklyn Homemaker

Not me.
That’s who.

I did like Grandpa’s strawberries and plums, but even the strawberries had to be scrubbed and sliced and covered in sugar before I deemed them edible.

roasted pear and walnut spice cake bundt | Brooklyn Homemaker

Obviously my tastes have changed over the years, and as an adult I’ll take a ripe juicy pear, still warm from the sun, over a tub of chemically Cool Whip any day of the week.

As a kid, trips to my grandparents house filled me with excitement because I knew the cupboards were bursting with store-bought chips and cookies and doughnuts. These days I still get excited when I get to visit my grandparents, but now it’s because I know grandpa will load me up with sagging grocery bags filled with dirty bell peppers, lopsided butternut squash, fuzzy warm peaches, or sun-ripened tomatoes when I get ready to leave.

roasted pear and walnut spice cake bundt | Brooklyn Homemaker

When I was planning my bundt for this month, I knew that I really wanted the pears to be the stars of the show. My first instinct was to chop or cube or grate them just like apples into a traditional spice cake for flavor and added moisture, but somehow that didn’t seem like it was “enough”. My pears deserved better than playing second fiddle to cinnamon.

Determined to leave the pears whole (or at least halved) inside the cake, I decided to poach them in a bourbon ginger syrup. They smelled like heaven in the poaching liquid and I couldn’t help myself from sneaking spoonfuls of batter from the pan before it went into the oven. I was congratulating myself on a job well done before the cake even started to rise, and I couldn’t wait to get it out of the oven and see the autumnal perfection I’d come up with.

Aaaaaaand…

It was an absolute disaster.

The pears soaked up too much moisture in the poaching liquid, releasing it back into the cake to create a jiggly bundt with the weirdest almost blubbery texture I’ve ever had the misfortune to put in my mouth. As the cake cooled it sagged and the cake separated from the pears and slumped into a wobbly mess on the plate.

So, back to the drawing board. I knew I’d need a thicker, denser batter, and I obviously needed to find a way to pull moisture out of the pears before baking them into the cake. With poaching out of the question, I decided to try dry roasting the pears so they’d be tender but slightly dried out before going into the batter. Thankfully, it worked out beautifully and I think the pears are almost as happy about it as I am.

roasted pear and walnut spice cake bundt | Brooklyn Homemaker

You’ll want to use the smallest pears you can find for this recipe, because if they’re too big or tall they’ll take up too much room in the pan. They might cause the batter to run over in the oven, or could stick out the top of the cake and cause it to sit unevenly when plated. I also think that Bosc pears are the only variety firm and sturdy enough to stand up to being roasted, handled, and baked in this way without turning to mush or falling apart.

The bit of extra effort in roasting the pears and toasting the walnuts really pays off when you slice down into the cake to reveal a perfect cross-section of a whole pear (depending on where you slice).
And the flavor? Fuggitaboudit. Warm spices, tender roasted pears, crunchy toasted walnuts, buttery tender brown sugar spice cake, and a thick and tangy cream cheese glaze.
I mean. Come on.

This is basically THE perfect fall cake, and it would make an excellent addition to your Thanksgiving spread to boot. If you’re looking for even more fall inspiration and pear-y wonderfulness, make sure you scroll down past the recipe to see what the other #bundtbakers came up with this month!

roasted pear and walnut spice cake bundt | Brooklyn Homemaker

Roasted Pear and Walnut Spice Cake

  • Servings: 8 to 12-ish
  • Print
4 to 5 small firm Bosc pears, depending on the size of your pan
1 1/4 cups chopped walnuts
2 1/4 cups all-purpose Flour
1 teaspoon baking powder
1/4 teaspoon baking soda
1 teaspoon salt
1 tablespoon cinnamon
2 teaspoons ginger
1 teaspoons cardamom (optional)
1/2 teaspoon nutmeg
1/2 teaspoon cloves
1 cup buttermilk
2 teaspoons vanilla extract
1 cup (16 tablespoons) unsalted butter, softened
1 1/2 cups dark brown sugar, packed
3 large eggs

Cream Cheese Glaze:
4 ounces (1/2 package) cream cheese, softened
1 cup powdered sugar
1 teaspoon vanilla extract
2 to 4 tablespoons milk

Preheat the oven to 350°F. Lightly butter and flour a 10 to 12 cup bundt pan, refrigerate.

Peel pears, slice in half, and scoop out seeds with a melon baller or spoon. Place cut side up on a parchment lined baking sheet and bake for 20 minutes. Flip and bake 15 minutes more. Remove from oven and set aside to cool.

Spread walnuts in an even layer on a small baking sheet and toast for 5 to 8 minutes, or until they smell toasty. Do not let them burn. Set aside to cool. Reserve 1/4 cup for topping the cake.

Whisk flour, baking powder, baking soda, salt, & spices together in a bowl. Set aside. Mix vanilla into buttermilk and set aside.
In a the bowl of and electric mixer, beat together the butter and brown sugar until light and fluffy, about 3 to 5 minutes. Add the eggs one at a time, beating for a minute or two and scraping the sides and bottom of the bowl between additions.
Alternate additions of flour and buttermilk, mixing on low just until combined, and scraping the bowl between each addition. Start and end with flour so there are 3 additions of flour and 2 of buttermilk. Stir in 1 cup walnuts until evenly distributed.

Pour about 3/4 of the batter into the prepared pan, and tap the pan on the counter to remove air bubbles. Push pear halves into the batter, top side facing down into the bottom of the pan, arranging them so the cut halves face each other as a whole pear. Arrange pears so they’re evenly spaced around the pan. Spread remaining batter over the top, leaving at least half an inch of room for the cake to rise so it doesn’t overflow in the oven. It’s okay if the pears stick out of the batter a bit, as the cake should rise around them. Bake for 50 to 55 minutes, until a cake tester or toothpick inserted in the center comes out clean.
Remove the cake from the oven, and cool in the pan for 30 minutes before turning it out onto a rack to cool completely.

While the cake cools, make the glaze.
In the bowl of a stand mixer, beat the cream cheese until it’s fluffy and smooth. Add the powdered sugar, vanilla, and 4 tablespoons of milk and blend until there are no lumps. If necessary, add more milk, a tablespoon at a time, beating after each addition until the glaze reaches the desired drizzle-able consistency. It should be about the consistency of thick melted ice cream to drizzle correctly.

Place a tray under cake and cooling rack to catch any drips. Pour glaze over cake and let the glaze work its way down the side, tapping the tray on the counter if necessary. Top with toasted walnuts.

Well covered in an airtight container, this cake should keep at room temperature about 2 days, or longer in the fridge. Just make sure to serve it at room temperature if you refrigerate it.

roasted pear and walnut spice cake bundt | Brooklyn Homemaker

The bundt bakers really outdid themselves this month, and all these perfect pear cakes have my mouth watering like crazy!

BundtBakers
 .
You can see all our of lovely Bundts by following our Pinterest board. Updated links for all of our past events and more information about #BundtBakers, can be found on our home page.

dark chocolate & oreo mini skull cakes

When I was a kid, Halloween was my absolute favorite holiday.

dark chocolate & oreo mini skull cakes | Brooklyn Homemaker

I mean, I’ve always loved Thanksgiving too, for the food of course, but as a young kid Halloween was the freakin’ best. Turkey and pumpkin pie are great and all but costumes and candy, and running around at night like a little lunatic with fake vampire teeth? Grandma’s cornbread dressing couldn’t hold a candle…

I’ve had countless costumes over the years, but I’ll never forget an especially uncomfortable year dressed as Frankenstein with tons of sticky green makeup and itchy stick-on eyebrows and neck bolts. After that, the simpler and more elegant Dracula was definitely my go to.
Each year I’d get a new costume complete with fangs, cape, and gold medallion, and as a young gay boy I already had all the crisp white button downs and black dress pants that were required but not included with the costume.  (No jeans and T-shirt for this little sissy boy!)
I think it really was the dressed up, fancy man aspect of Dracula that appealed to me most year after year, and it wasn’t until I found my grandma’s old wig in her bathroom closet that the appeal started to wear off…

dark chocolate & oreo mini skull cakes | Brooklyn Homemaker

These days I usually spend most of the month of October thinking up all sorts of witty, hysterical costumes that I could wear, but never do. The last time I dressed up was for work, about 4 years ago. I’d just started working at Whisk slinging fancy kitchen gear, and we all came up with this hilarious plan to come to work dressed as a Food Network star.
Group costumes are the best! What could go wrong?!?!

A few days later I show up to work in full Ina Garten regalia, and oops! Everyone either forgot or didn’t have time to get their costumes together.  One person, who usually works from home, loved the idea and actually did come in for an hour or two dressed as Alton Brown (essentially dressed as an older, nerdier version of himself) to take pictures, but everyone else either didn’t dress up or threw something else together at the last minute.
As I stood there working my full shift in an oversized navy blouse, huge clip on pearl earrings, lipstick, and an itchy bob wig; I vowed never again to be duped by allure of an amazing group costume idea.

I haven’t dressed up since.
Womp Womp.

dark chocolate & oreo mini skull cakes | Brooklyn Homemaker

Even though I’m too old for trick-or-treating and haven’t put on a costume in years, I really do still have a special place in my heart for Halloween.

I like to imagine that some day in the future I’ll be the type of adult who’s famous among his circle of friends for hosting amazing costume parties that are talked about for years to come. Basically I dream of one day throwing Halloween parties just like the ones on Roseanne, complete with decorations so elaborate and costumes so perfectly spot-on that everyone I know will try, and fail, to one-up me year after year.
By the way, am I the only one who’s ever wondered how the lower middle class Connor family, who always seemed to have trouble paying their bills on time, came up with all the money for their costumes and decorations?
I guess it doesn’t matter, but, like, that stuff ain’t cheap!

dark chocolate & oreo mini skull cakes | Brooklyn Homemaker

With all my dreams of Halloween entertaining one-upmanship, the minute I saw this adorable haunted skull cakelet pan, I knew that I HAD to have it.

You all know I love Nordic Ware. I’ve told you more than once twice three times (a lady), but after finally having a chance to use this pan you’ll have to excuse me as I wax poetic once again.

Nordic Ware has been making exceptional cookware and bakeware right here in the US for 70 years now, and even after all this time they’re still a family owned company. The bundt pan is by far their most famous and most popular product, but they also specialize in all sorts of elaborate and festively shaped baking pans. No one can compare to their quality and selection, and ALL of their pans are sturdy, heavy duty, ultra-non-stick, and unbelievably durable.
I should know! I put their pans through the ringer!

dark chocolate & oreo mini skull cakes | Brooklyn Homemaker

There is so much detail in these little skulls that I was worried it wouldn’t read once the cakes were baked, or that I’d have problems getting the cakes out cleanly from all the intricate details face and teeth. At this point I should have known that I had no need to worry. These little cakes released like a dream and all that detail came across with amazing definition in the finished cakes.

There’s actually so much detail in these little cakes, that even though I tried decorating them in several ways, I found that my favorite cakes were the simplest, with just a double coat of thin sugary glaze. Of course you can decorate them however you choose, but I really think the simpler, the better. In fact, as much as I love the creepy look of the bright red chocolate candy eyes, I worry that even they take away from the scary perfection of the little cakes as they were straight out of the pan.

dark chocolate & oreo mini skull cakes | Brooklyn Homemaker

The recipe below, simply adapted from my favorite chocolate bundt cake recipe, makes 12 mini skulls, or 2 pans worth. If you only have 1 pan, make sure you wash the pan really well between batches. I also recommend that you dry it well and throw it in the fridge or freezer for a few minutes before reapplying the butter and cocoa. Otherwise the pan will be warm from being washed and the butter will melt and make a mess when you try to dust it with cocoa.
If you don’t have this pan at all, you can get it here, or you can just make this recipe in one 10 cup bundt pan. It won’t be as scary to look at, but it’ll certainly taste just as chocolatey and delicious!

By the way, if you’ve never tried this trick before, using cocoa powder works just as well as flour to prevent the cakes from sticking to the pan, but helps the cakes look extra dark and chocolatey, rather than the dusty uneven look flour sometimes gives to the outside of chocolate cakes.

dark chocolate & oreo mini skull cakes | Brooklyn Homemaker

The flavor of these little cakes is deep dark chocolate perfect with a super tender and moist crumb. Thanks to that simple powdered sugar glaze, these little cakes almost taste like a reeeeeally good moist chocolate doughnut.

The Oreos, complete with cream (don’t use boxed crumbs!), add a really nice touch, especially if you leave some in nice big chunks so they don’t melt and disappear into the batter. Essentially you just want to put them in a plastic bag and crush ’em up with your hands or whack at them with a rolling-pin until there are no whole cookies left, but you still have lots of bigger pieces.

Now tell me, what kid (or adult) could resist a super moist chocolate cake filled with oreo cookie crumbs? Especially one in the shape of a cute-yet-terrifying little skull???

dark chocolate & oreo mini skull cakes | Brooklyn Homemaker

Dark Chocolate & Oreo Mini Skull Cakes

adapted from Joy the Baker

For the Cake:
1 1/4 cups strong hot coffee
3/4 cup Dutch process cocoa powder (I used “Double Dutch Cocoa“) plus extra for pan
2 1/2 cups sugar
1 1/4 teaspoons kosher salt
2 teaspoons baking soda
2 whole eggs
1 egg yolk
1 1/4 cups buttermilk
1 cup peanut oil or any neutral vegetable oil
2 teaspoons vanilla extract
3 cups all-purpose flour
2 cups (about 1 package) roughly crushed oreos (NOT oreo cookie crumbs, you want the cream too)

For the Glaze:
2 cups powdered sugar
1/4 cup milk
1 teaspoon vanilla extract

For decorating (all optional):
Red M&Ms
Sanding or decorating sugar (black, red, or silver)
white mini nonpareils
More crushed Oreos

Place an oven rack in the center of the oven and preheat to 350 degrees F.
Brush a skull cakelet pan (* see note) with softened butter, and dust with cocoa powder, tapping out any excess.

Whisk coffee and cocoa together in a bowl together until free of lumps and set aside.
In the bowl of a stand mixer with a whisk attachment, mix together sugar, salt, baking soda, eggs and egg yolk on low for just one minute. Add the buttermilk, oil and vanilla extract and mix on low again for another minute.
Add the flour and mix on medium speed for 2 minutes more. Add the cocoa mixture and mix on medium speed for 3 minutes. Finally, stir in the roughly crushed Oreos just until evenly distributed throughout. The batter will seem quite loose and liquid, it’s supposed to, don’t worry.
Pour half of the batter into the prepared cake pan, filling each cavity about 3/4 of the way up. This recipe makes two pans worth of batter. If you have two pans, you can bake them both at once, or once the first batch is out of the pan you can wash, dry, and cool the pan in the fridge before reapplying butter and cocoa and baking the remaining batter.
Bake for 20-30, or until a cake tester or toothpick inserted in the cake comes out clean.

Let the cake cool for at least 15 minutes before inverting onto a cooling rack.

To make the glaze:
Whisk the powdered sugar, milk, and vanilla together in a medium bowl until smooth and free of lumps.

To glaze and decorate:
After some trial and error I found that the easiest way to glaze the cakelets was to pick up them up by the base and dip them into the glaze like a doughnut. Remove from the glaze, let drip dry, and turn over to dry on a cooling rack. I actually liked the look of the glaze best when the cakes were glazed twice. If you want to double glaze, wait for the first coat to dry five minutes or so before dipping again.
If you’d like to decorate with sanding sugar, crushed Oreos, or mini nonpareils, sprinkle them over the cakes before your final coat of glaze has dried. If desired, add red chocolate candies in the eye sockets.

*Note: If you don’t have a skull cakelet pan this recipe makes 1 (less spooky but equally delicious) bundt cake in a 10 cup bundt pan. A bundt will need to bake for about 55 to 65 minutes .