mascarpone

nectarines and cream icebox cake

Why hello there friends! Remember me???

nectarines and cream icebox cake | Brooklyn Homemaker

Yes it’s me! Tux!

I’m back! (well, sort of.)

nectarines and cream icebox cake | Brooklyn Homemaker

Russell and I are still plugging away at the project I mentioned in my last post, and while we’re (hopefully) nearing the finish line, we’ve still got plenty of work to do so I’m not exactly back for good. I just happened to get a little down time recently and I couldn’t bare to stay away from you for one more second!

I’ve missed you guys SO MUCH that I jumped at the opportunity to get back in the kitchen when I finally had a moment to myself. We’ve been so completely consumed with our project in the past few months that my poor kitchen has felt almost as neglected as all of you probably have.

nectarines and cream icebox cake | Brooklyn Homemaker

As it turns out though, my little bit of down time just happened to fall smack dab in the middle of our SECOND heat wave in the past couple months. For almost two weeks the daily weather forecast included “Excessive Heat Warnings”, and the city even set up “cooling stations” for the sick and elderly without air conditioning to be able to escape (and survive) the oppressive daytime temperatures.

To make matters even worse, unlike my brown-lawned family upstate, we’ve also had plenty of rain (and thunder and lightning) here in Brooklyn so along with the heat we’ve also had plenty of soupy, steamy, thick, and swampy humidity. In other words, we’ve just been sweating our butts off here in Brooklyn!

nectarines and cream icebox cake | Brooklyn Homemaker

As you can imagine, that meant that turning the oven on to bake a cake has been sort of out of the question.

nectarines and cream icebox cake | Brooklyn Homemaker

With actual baking off the table, my first thought was to make some kind of ice cream or frozen something-or-other to help cool us off and keep me as far as possible from the oven. It didn’t take me long to realize though, that I hadn’t thought far enough ahead and my ice cream maker bowl requires overnight freezing before I could even get started.
I briefly considered popsicles but I couldn’t seem to get inspired. What I really wanted to do was bakeor at least make something that felt as homey and satisfying as something fresh from the oven. I’d been out of the kitchen and away from my oven for so long that my head kept going back to the idea of a fruity crisp or crumble or skillet cake.

Then it suddenly hit me!
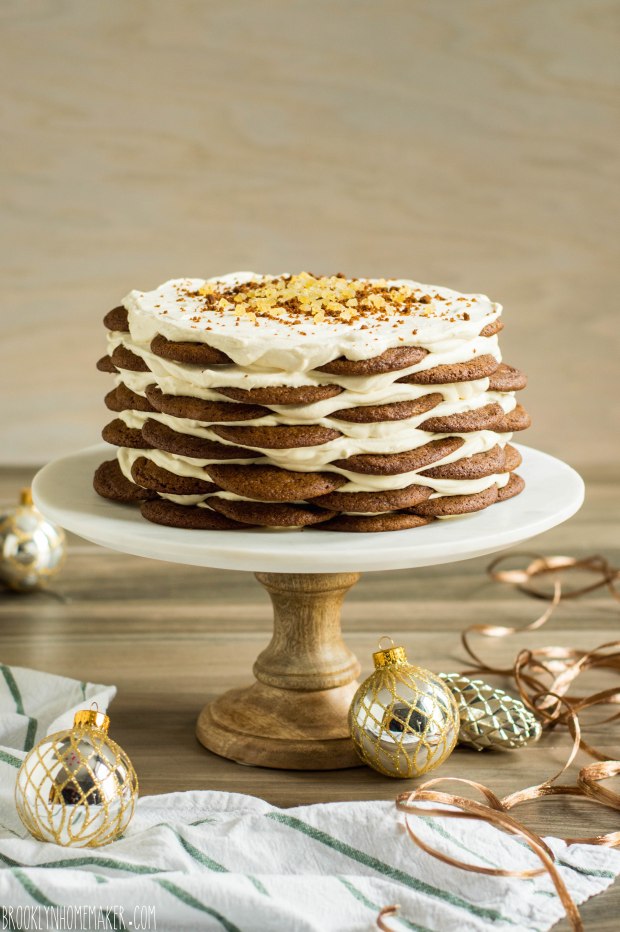
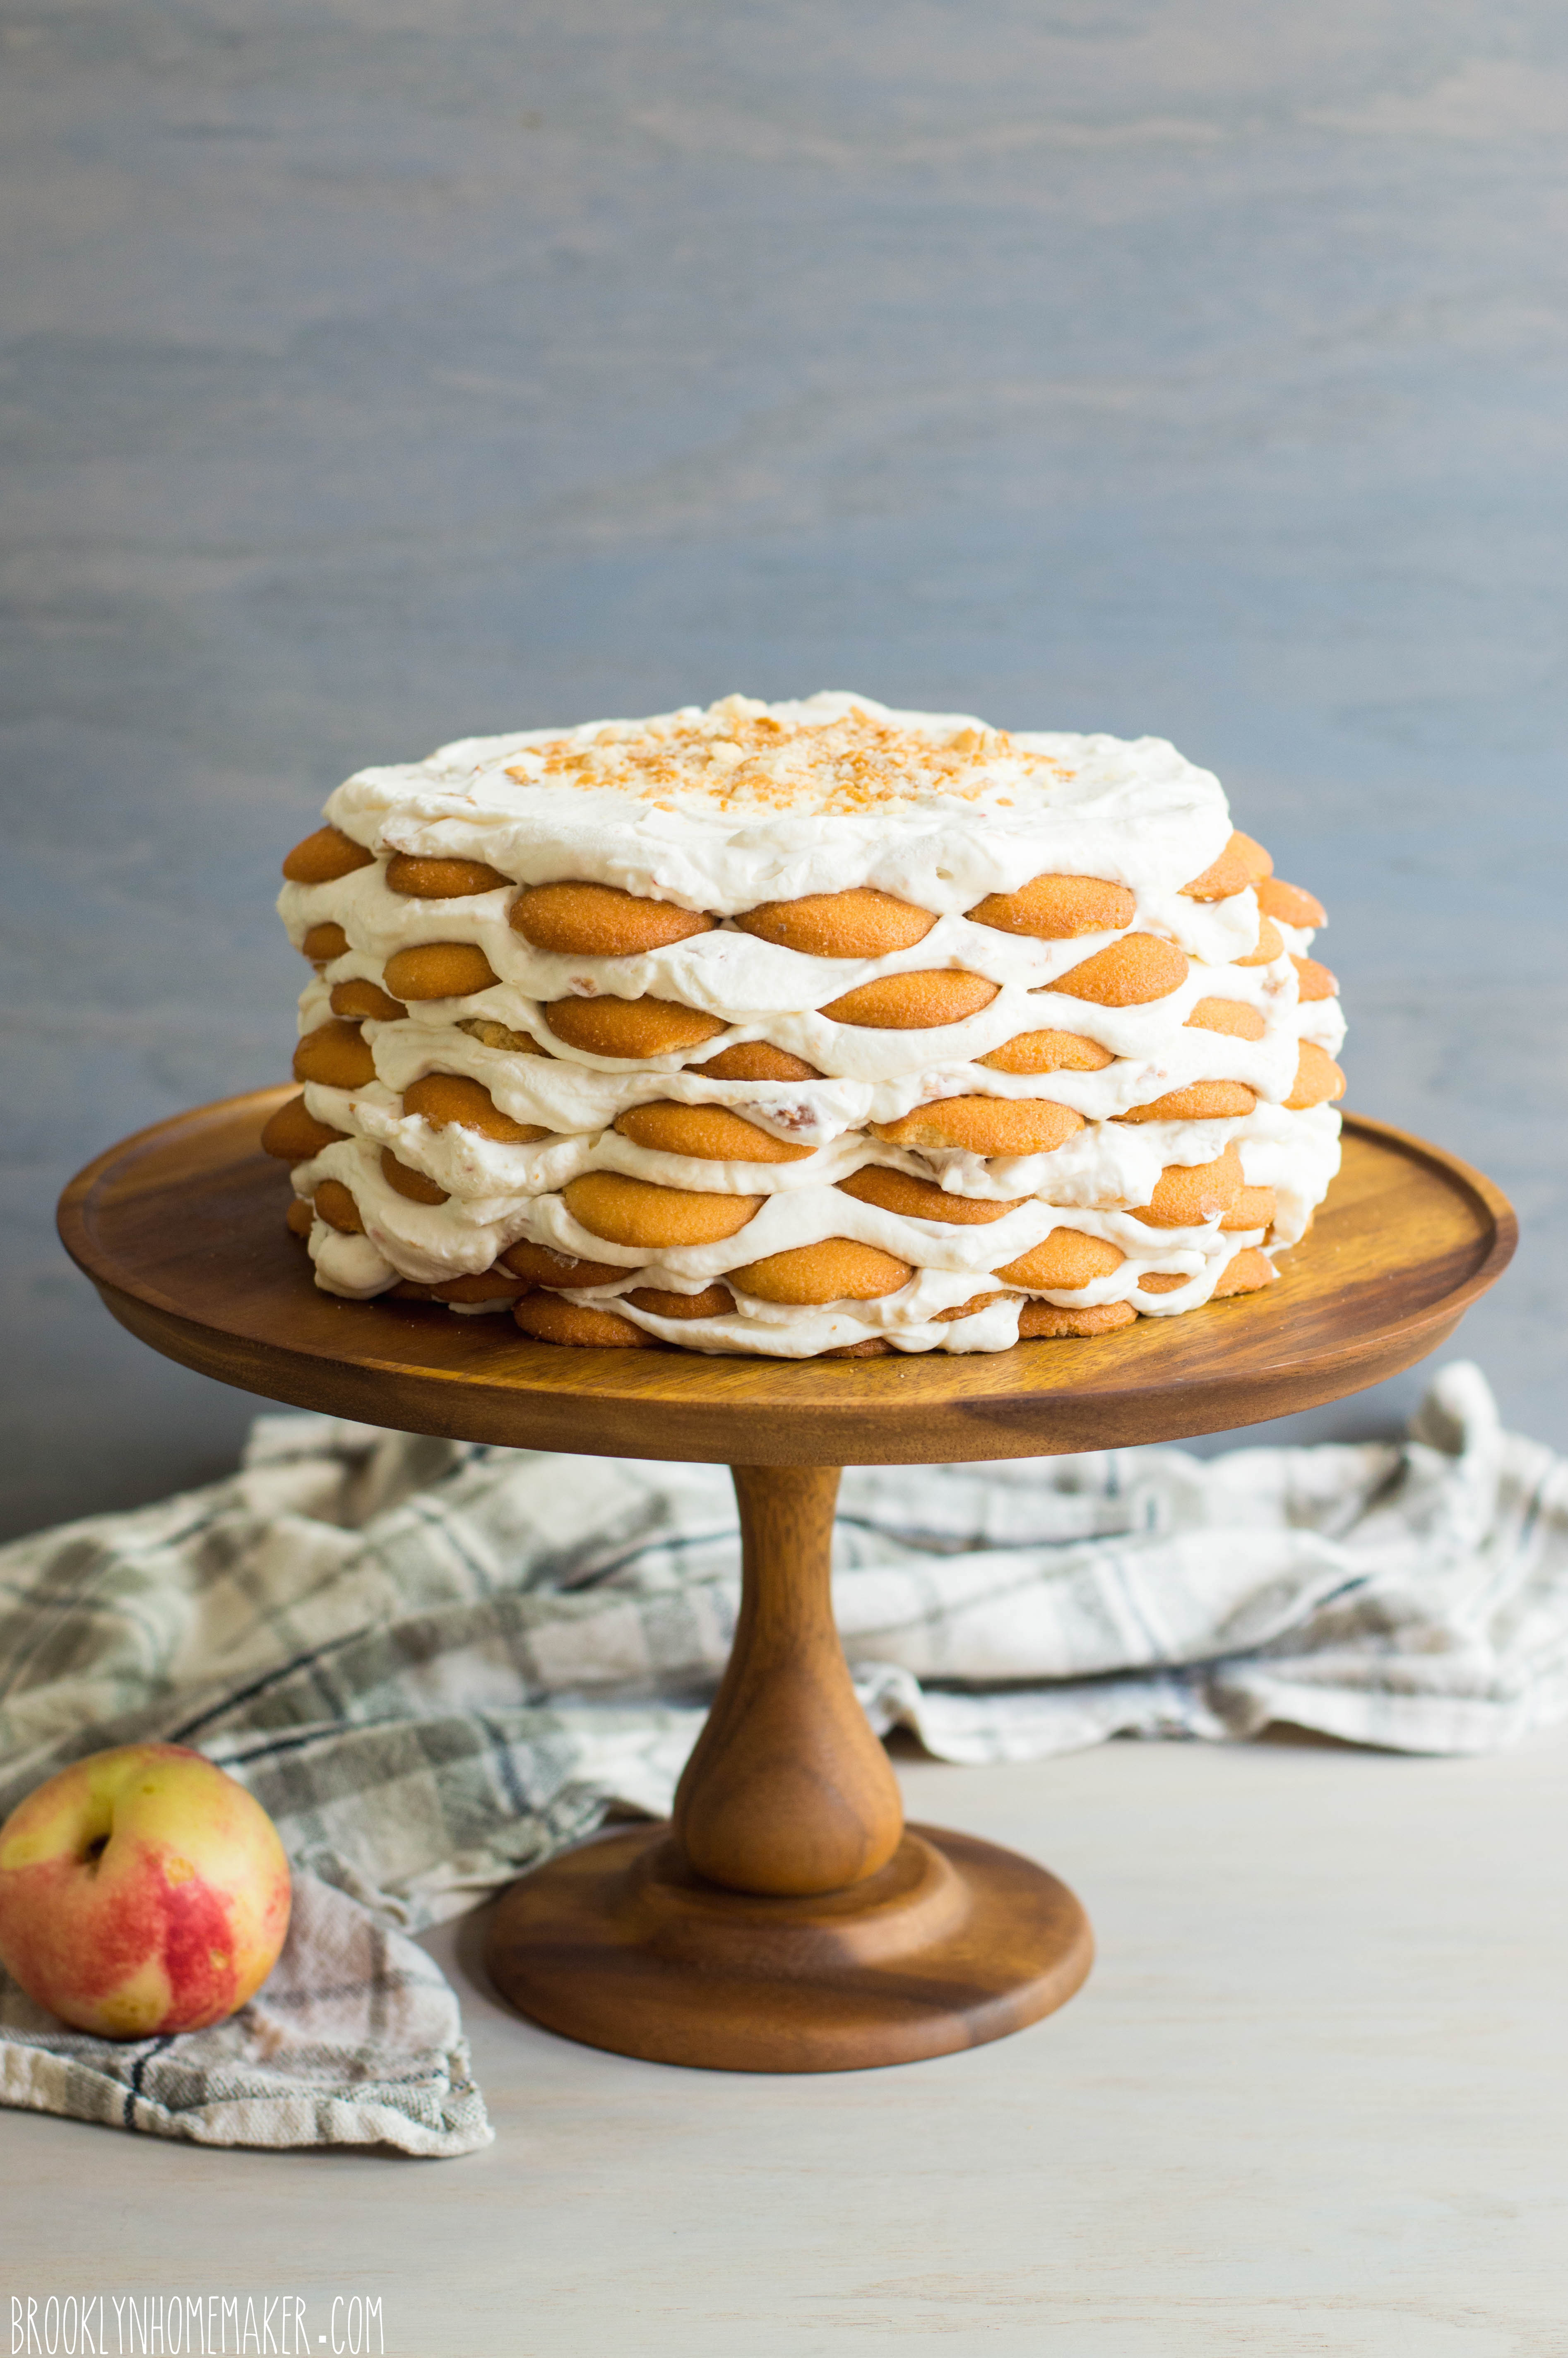
Icebox cake!

nectarines and cream icebox cake | Brooklyn Homemaker

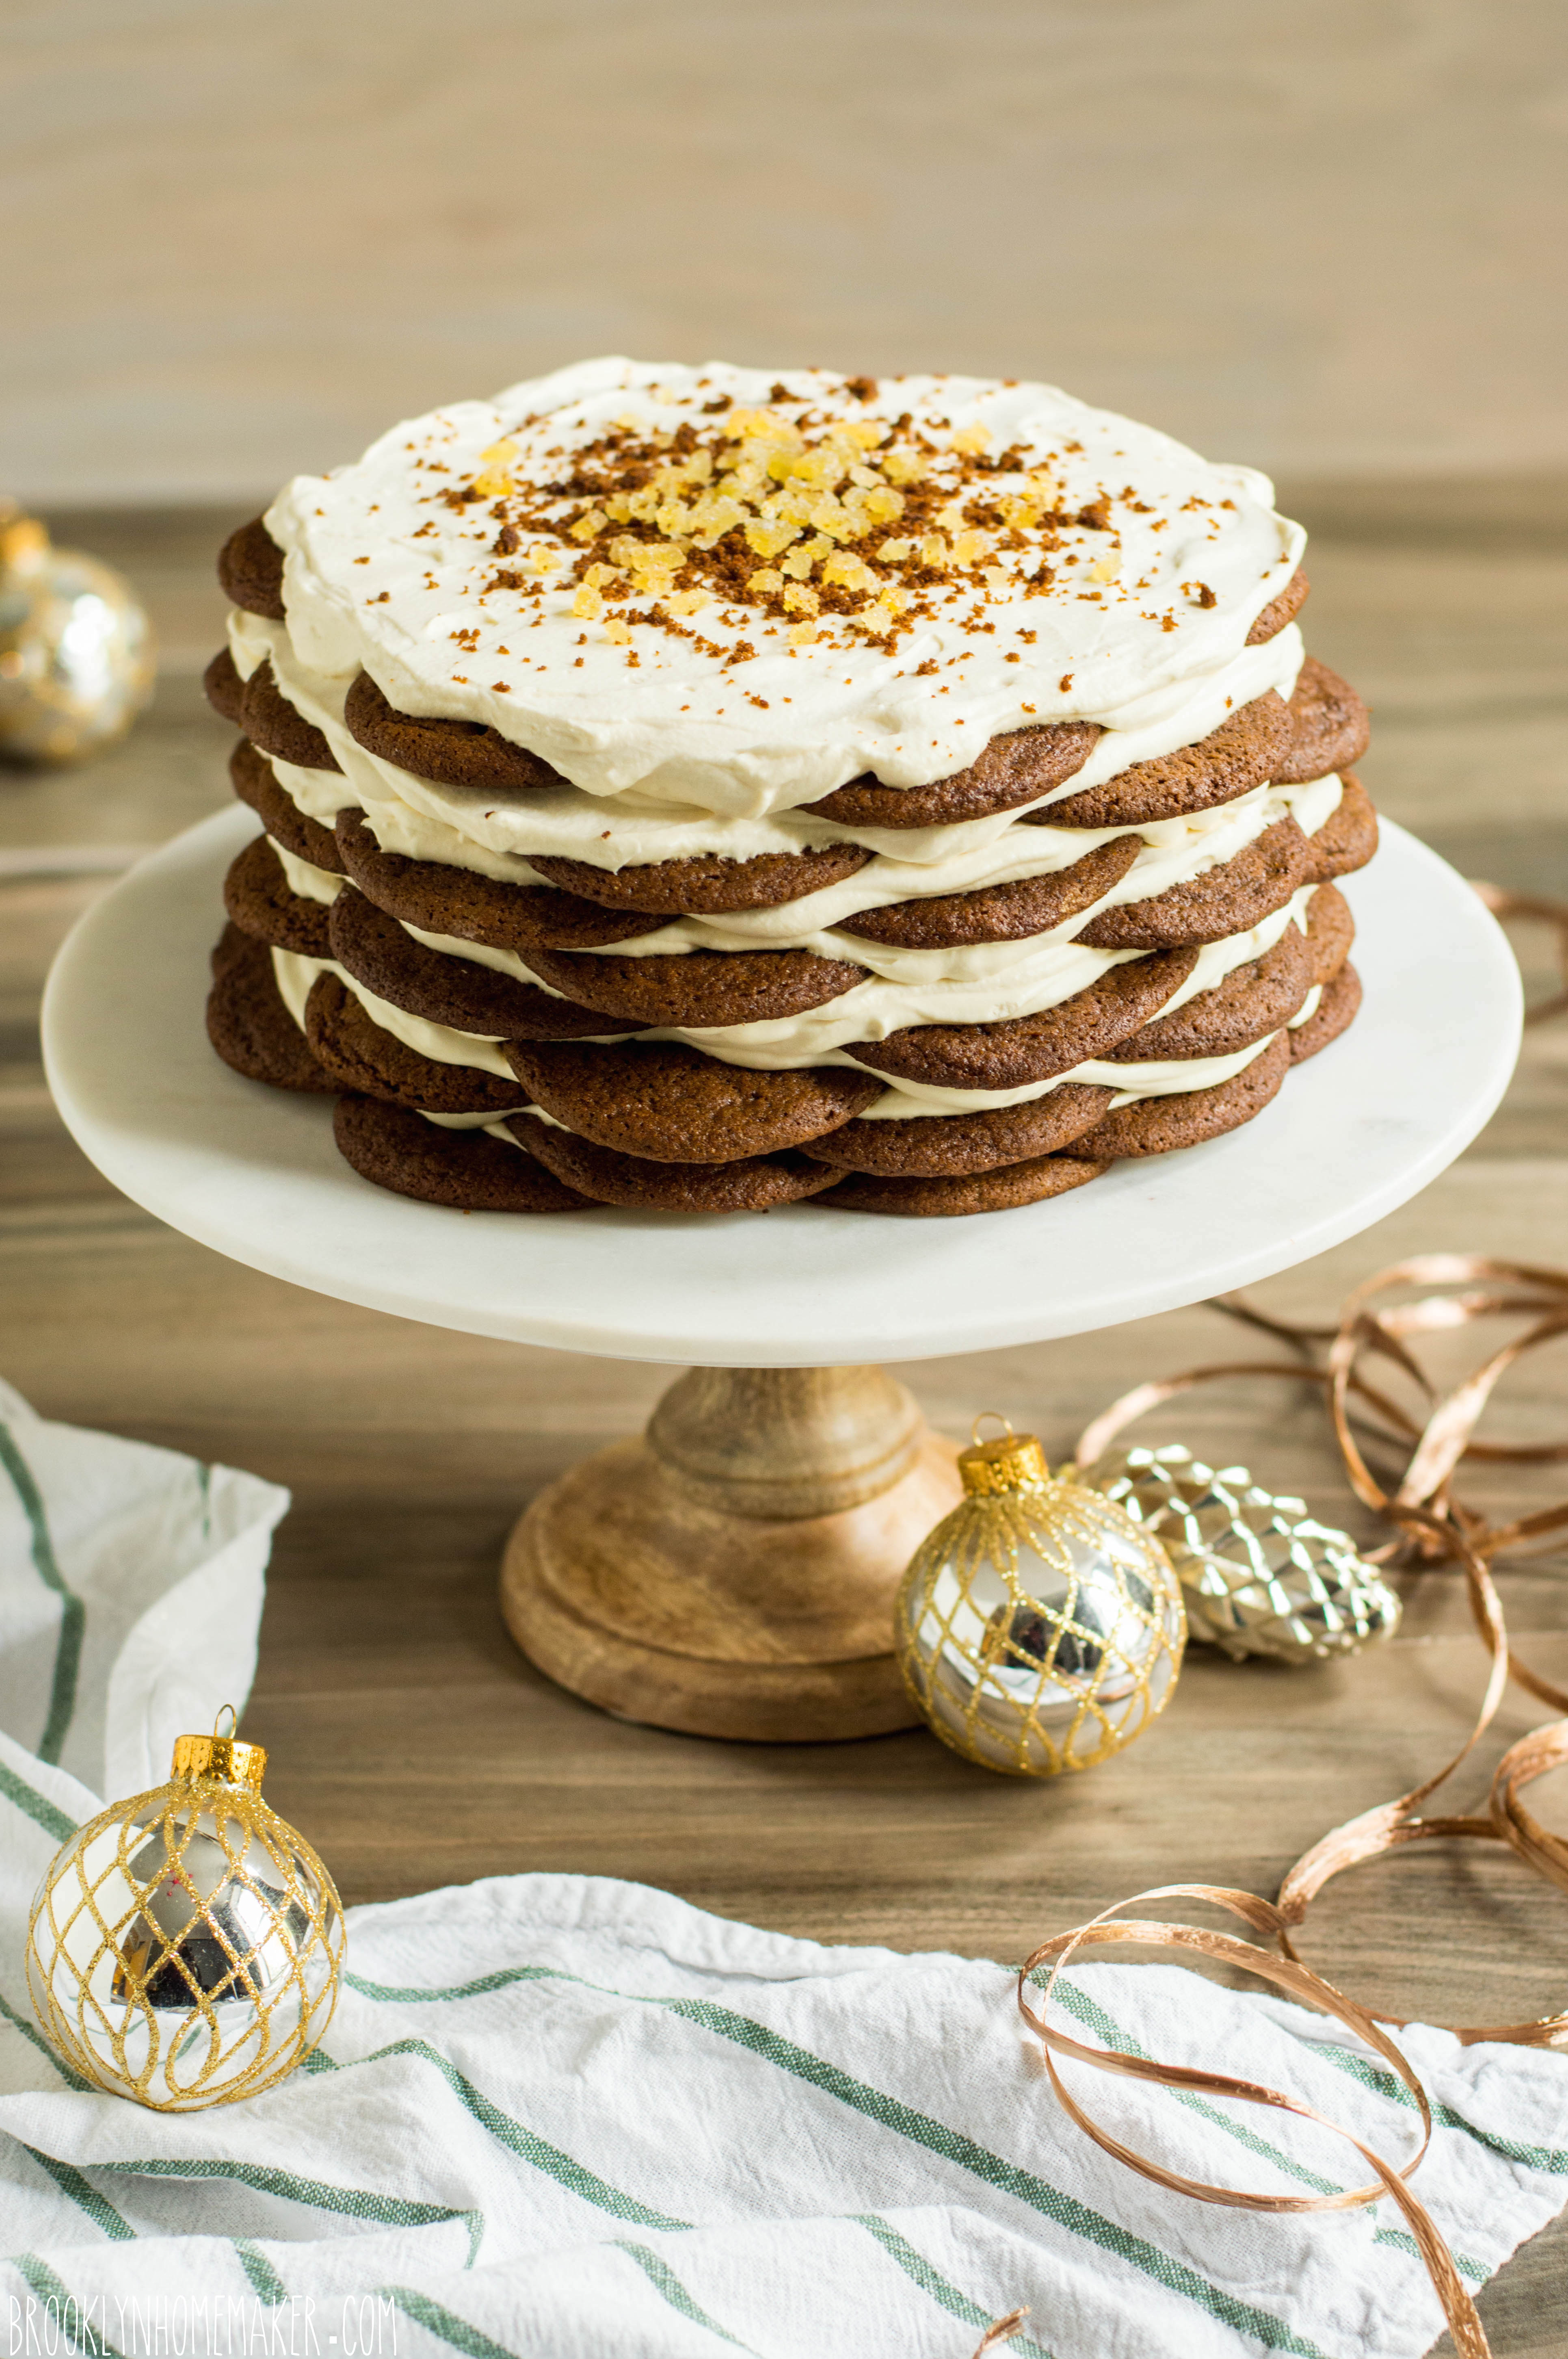
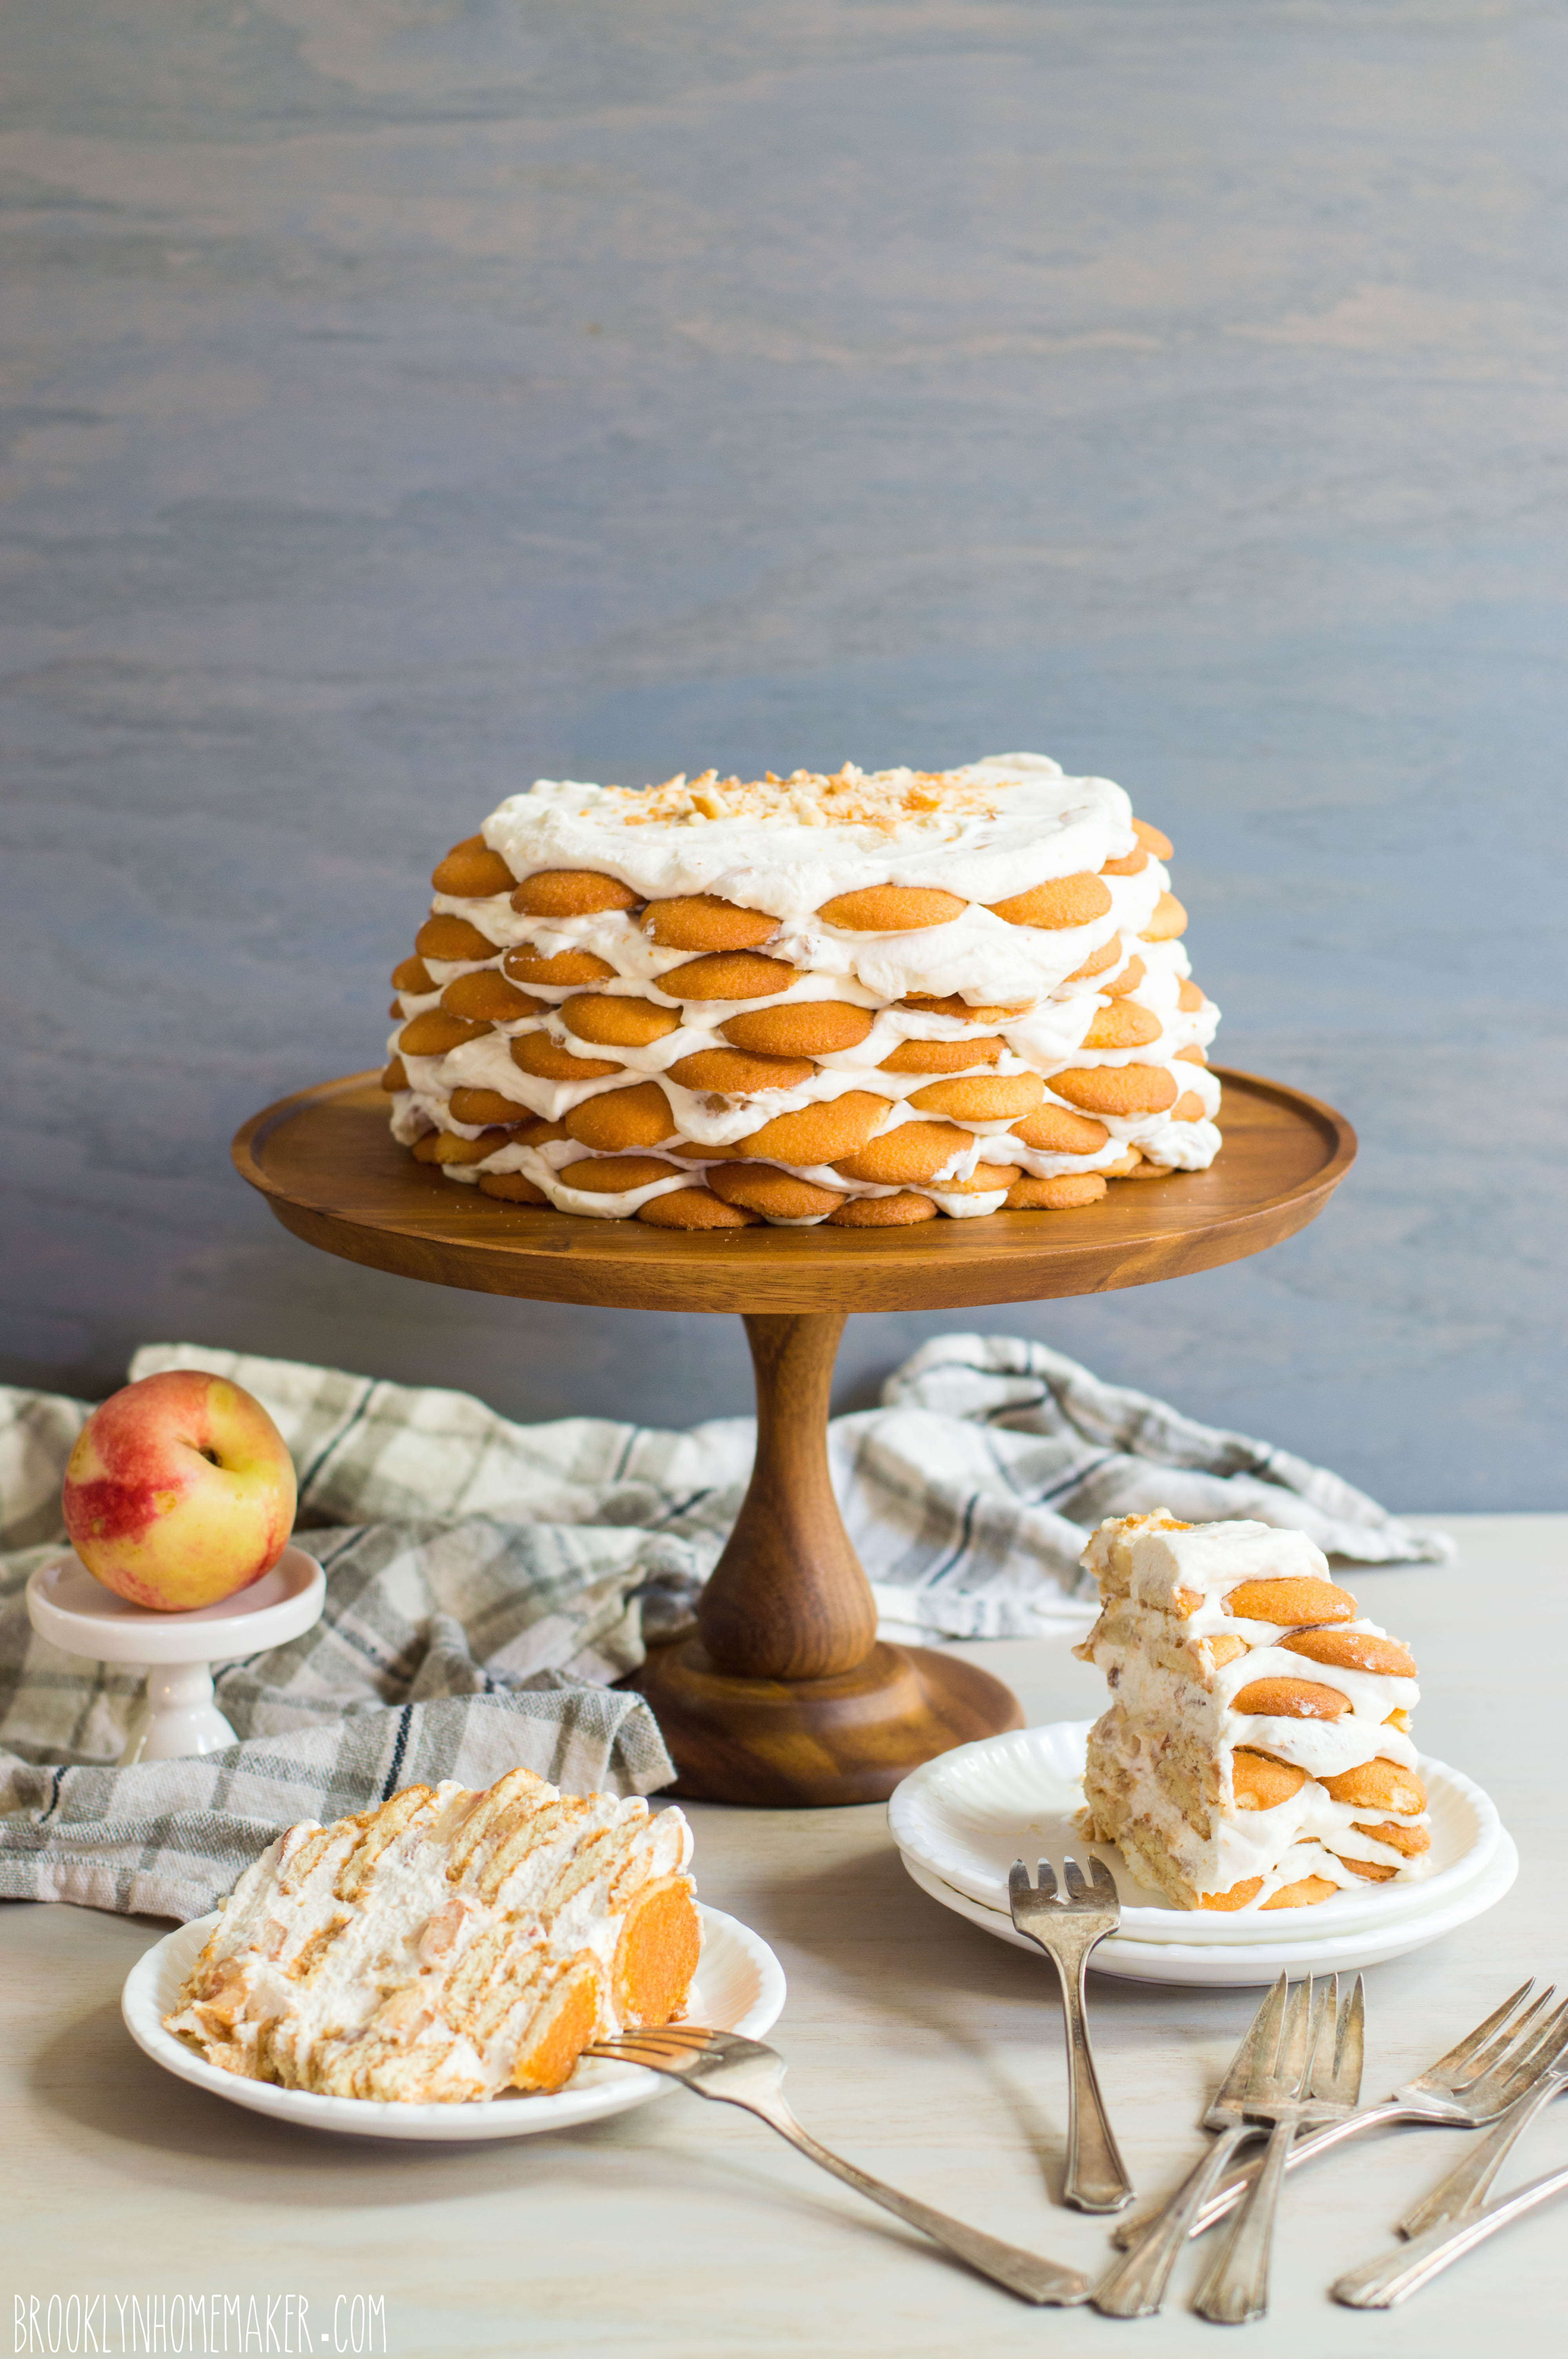
If you’re not familiar with an icebox cake, the concept is fairly simple. You layer thin crisp cookies with whipped cream and let the whole thing set up in the refrigerator (or icebox as it were). While the cake sets up, moisture is pulled from the whipped cream, softening the cookies and firming the cream until the whole thing is transformed into a dreamy, wonderful, lick-the-plate-clean dessert with a perfectly cake-like sliceable texture.

The original recipe has been around since the first world war and was most likely inspired by similar desserts like the Charlotte or the Trifle. The first icebox cakes were made with thin chocolate wafer cookies that are increasingly difficult to find (Smitten Kitchen has a recipe if you want to make your own), but these days you can basically make them with any thin, crisp cookies you like.
The filling options these days are just as limitless as the cookies, so I knew I’d find a way to make something bright and summery and satisfying.

nectarines and cream icebox cake | Brooklyn Homemaker

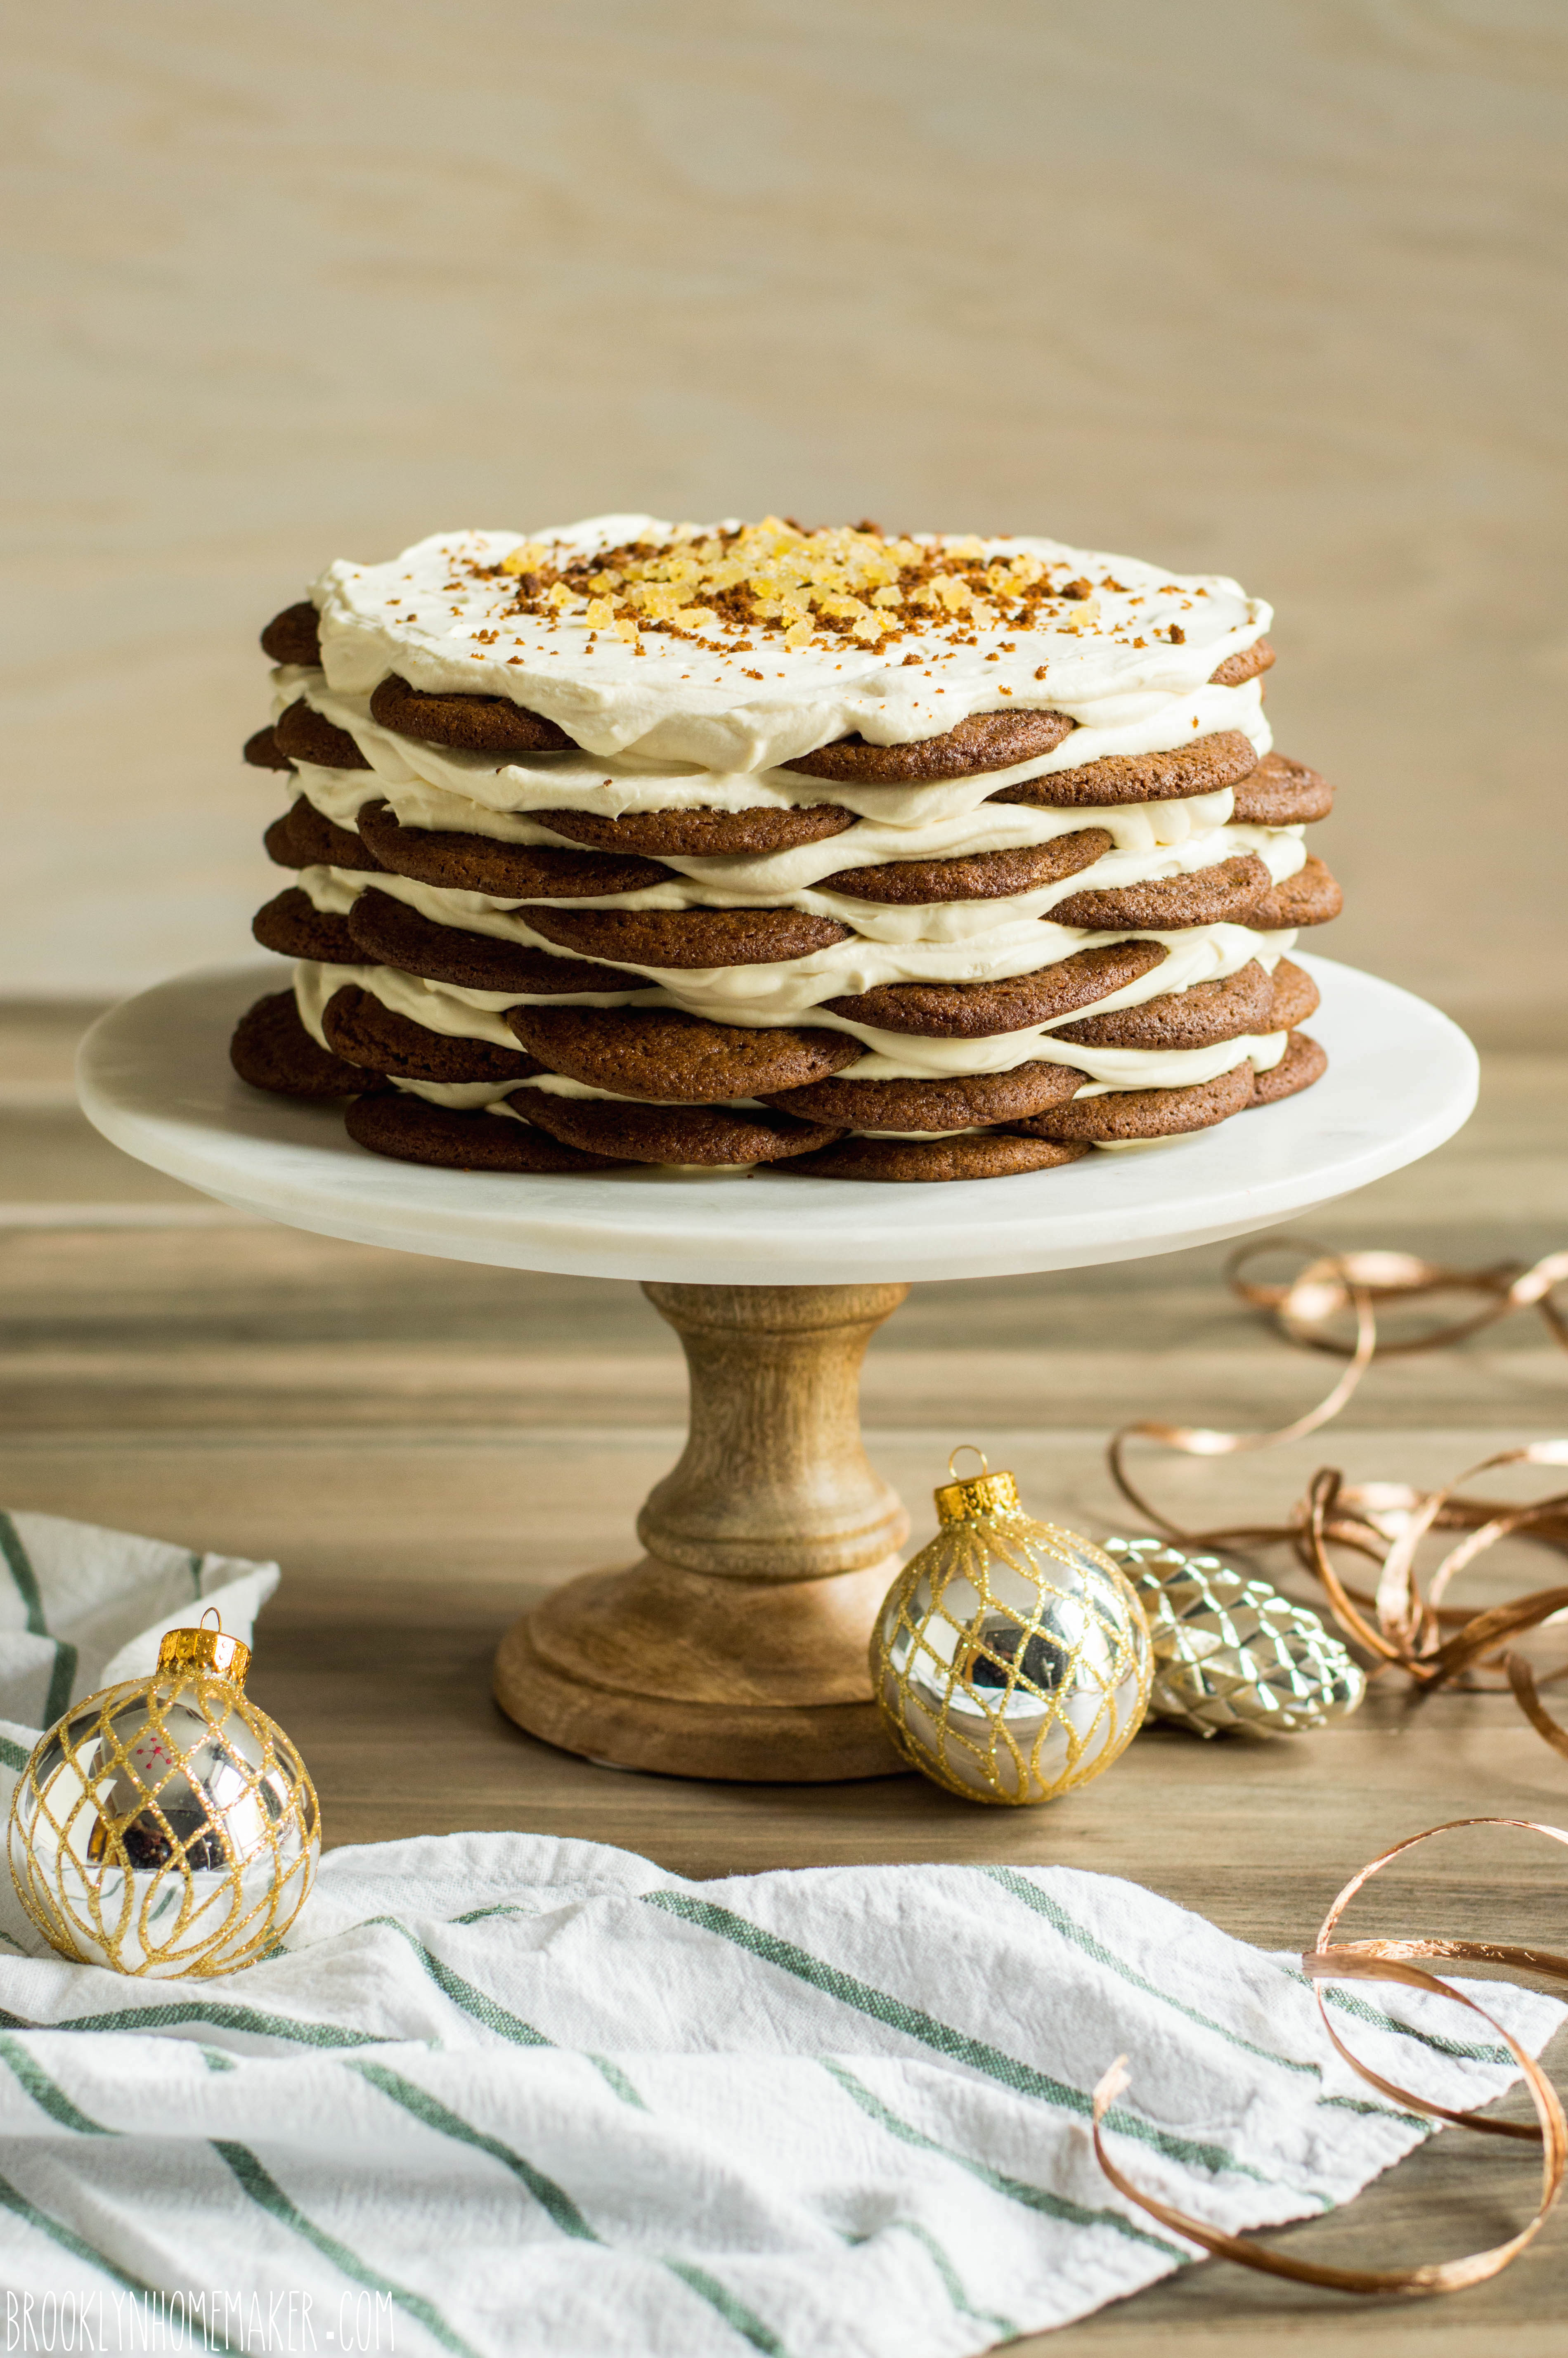
I wish I had some sepia-colored story about the nostalgic icebox cakes my grandmother used to make me as a boy growing up in the countryside in 1764, but the truth is that I’d never even tasted icebox cake until I made one with gingersnaps and maple cream this past December.

Even though I didn’t grow up with them, they feel every bit as homey and comforting as the bundt cakes that I actually did grow up eating in grandma’s kitchen in the country. While they’re relatively new to me, I would bet that a few more icebox cakes will turn up on the pages of Brooklyn Homemaker in the years to come. They just have that folksy days-of-yore feeling that lets me wistfully imagine joyful, touching family moments that never actually happened.

Not to mention they’re also freakin’ delicious, and crazy simple to put together.
If you can whip cream and open a box of cookies, you can make an icebox cake. They’re actually much simpler than I myself would normally go for, and the last time I made one I went the extra mile and made my own gingersnaps as the base of the cake. (You know I’m a glutton for punishment.)

This time around though, I wanted to take it easy, keep it simple, and highlight the other ingredients I wanted to feature in this simple summery creation.

nectarines and cream icebox cake | Brooklyn Homemaker

Russell and I signed up for a CSA from Local Roots earlier this summer, but of course that was before we knew how busy we were about to get. We’ve been loving every ounce of fresh, local, seasonal produce, but it can sometimes be a challenge to find uses for everything without letting anything go to waste.

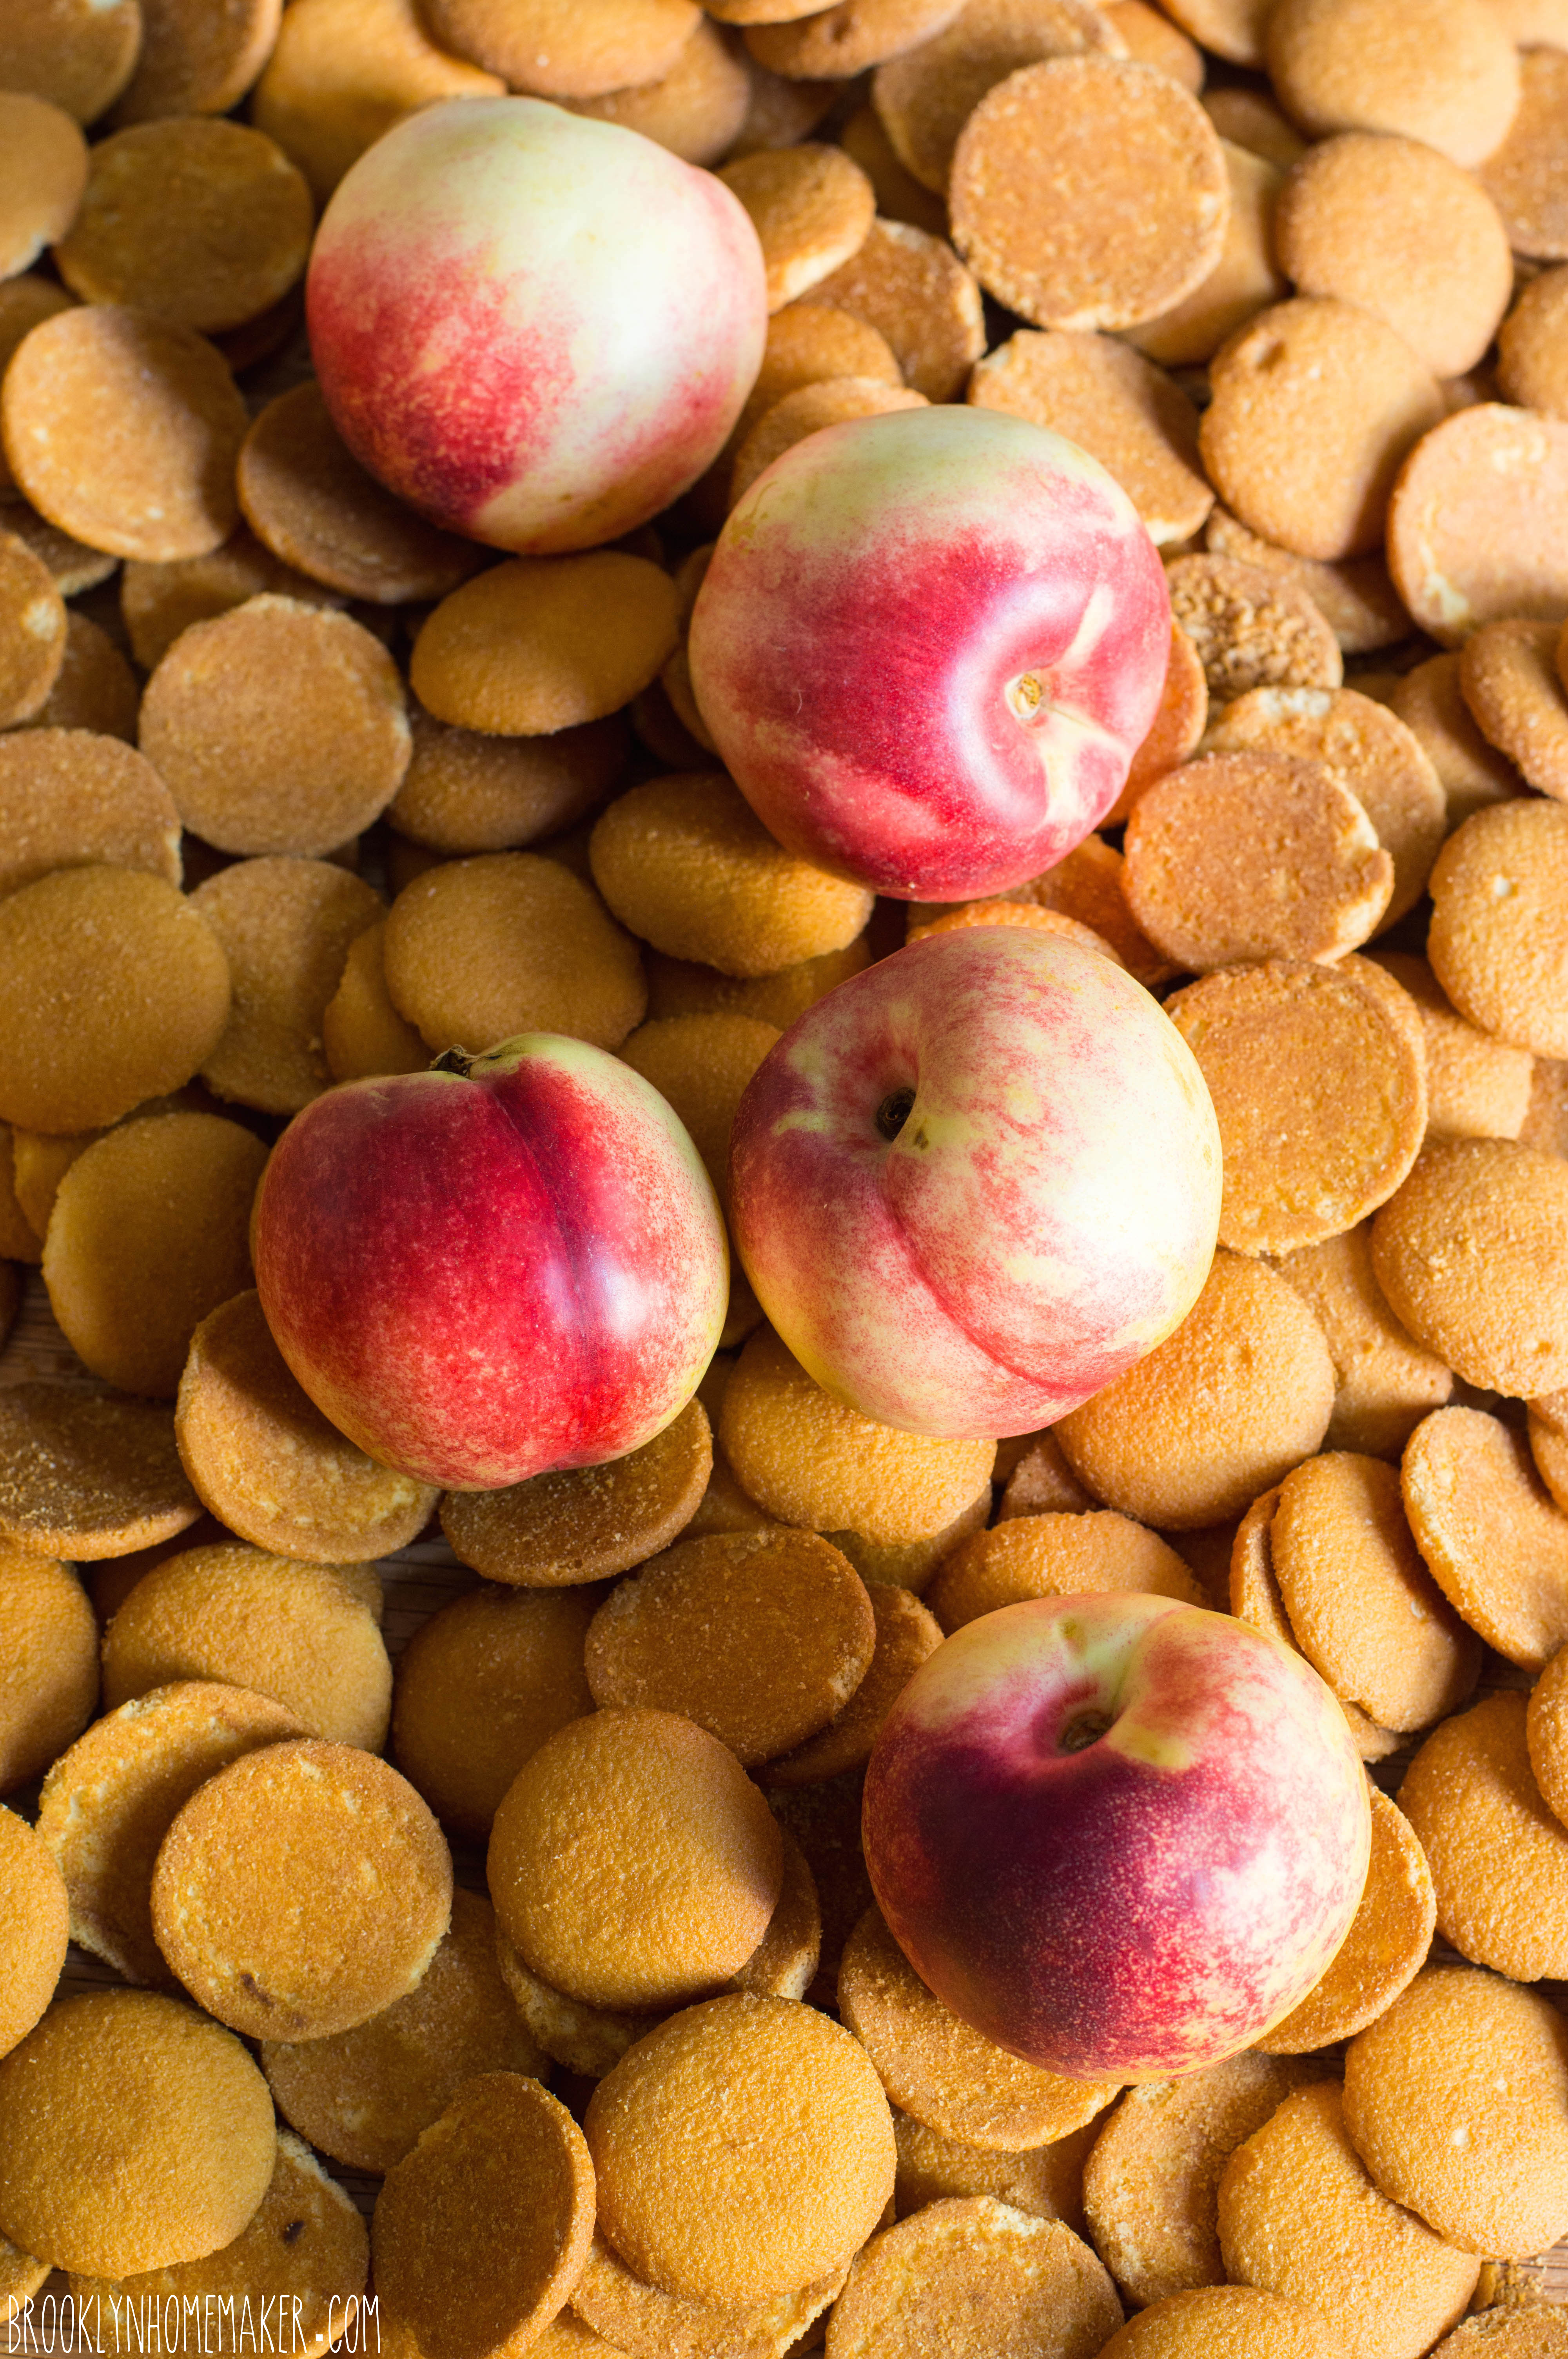
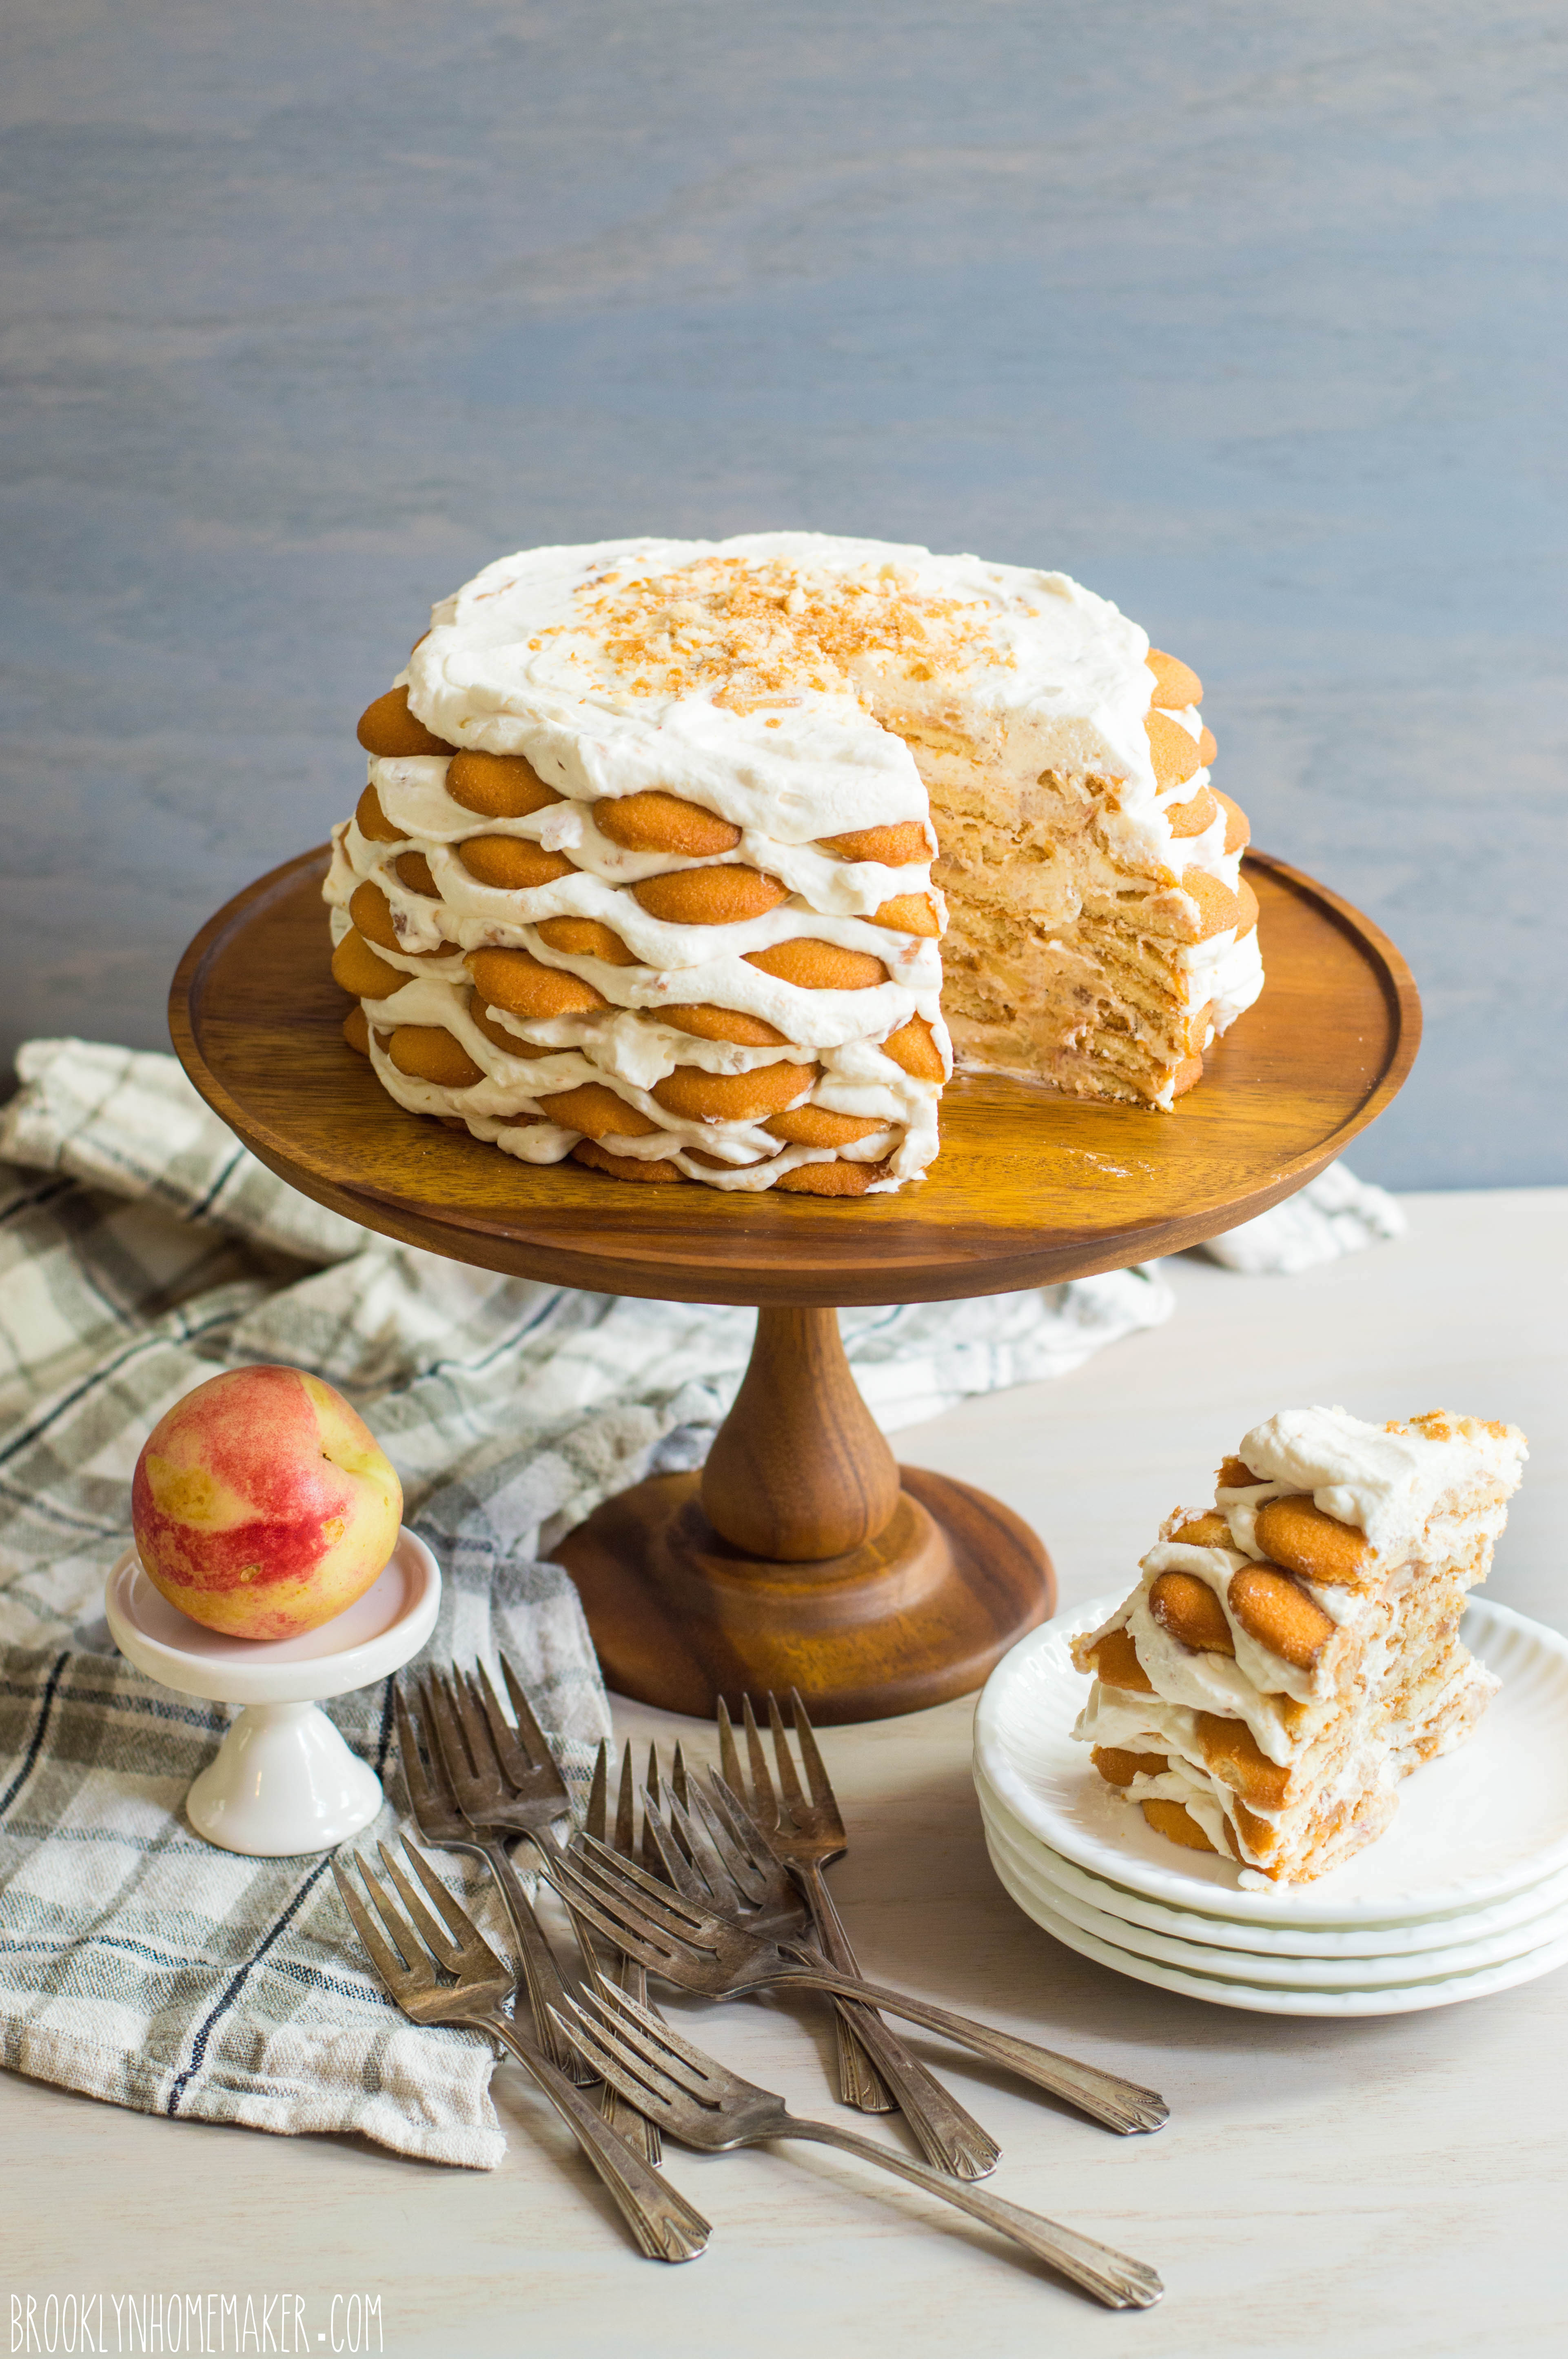
We’ve been getting pounds and pounds of white nectarines in the past few weeks, so I really wanted to do something special with them. What could be better than giving them the peaches and cream treatment with vanilla wafer cookies and mascarpone thickened whipped cream?

Nectarines and peaches are so similar in flavor and texture that you could substitute peaches without affecting the flavor of the recipe much at all. The white nectarines we had from our CSA though had a crisper, slightly more acidic zing to them than a standard peach, which I thought was a nice compliment to the richness of the cream. Honestly though, you could swap them out for strawberries or cherries and this cake would still be a little summery slice of heaven.

nectarines and cream icebox cake | Brooklyn Homemaker

Nectarines and Cream Icebox Cake

2 lbs nectarines (or peaches), peeled, pitted, and roughly chopped
3/4 cup sugar
pinch of salt
2 tablespoons orange liqueur, such as Cointreau (optional) *see note
2 1/2 cups cold heavy cream
8 oz mascarpone at room temperature
Two 11 oz packages of vanilla wafer cookies, such as Nilla Wafers

Combine roughly chopped nectarines with sugar, salt, and orange liqueur in a medium bowl. Stir to combine and macerate for at least 15 to 20 minutes.

Meanwhile, in the bowl of an electric mixer fitted with the whisk attachment, whip the heavy cream on high just until it begins to thicken and form soft peaks. Add the mascarpone and beat on low speed until almost smooth, about 30 seconds. Scrape down the sides and fold to incorporate. Add the macerated chopped nectarines and beat on low for 30 to 60 seconds and scrape down the sides and fold again. Increase the speed to medium high and beat until the mixture is thick and holds firm peaks, another 30 to 60 seconds. Do NOT over-beat or the cream can become waxy and the mascarpone can become grainy.

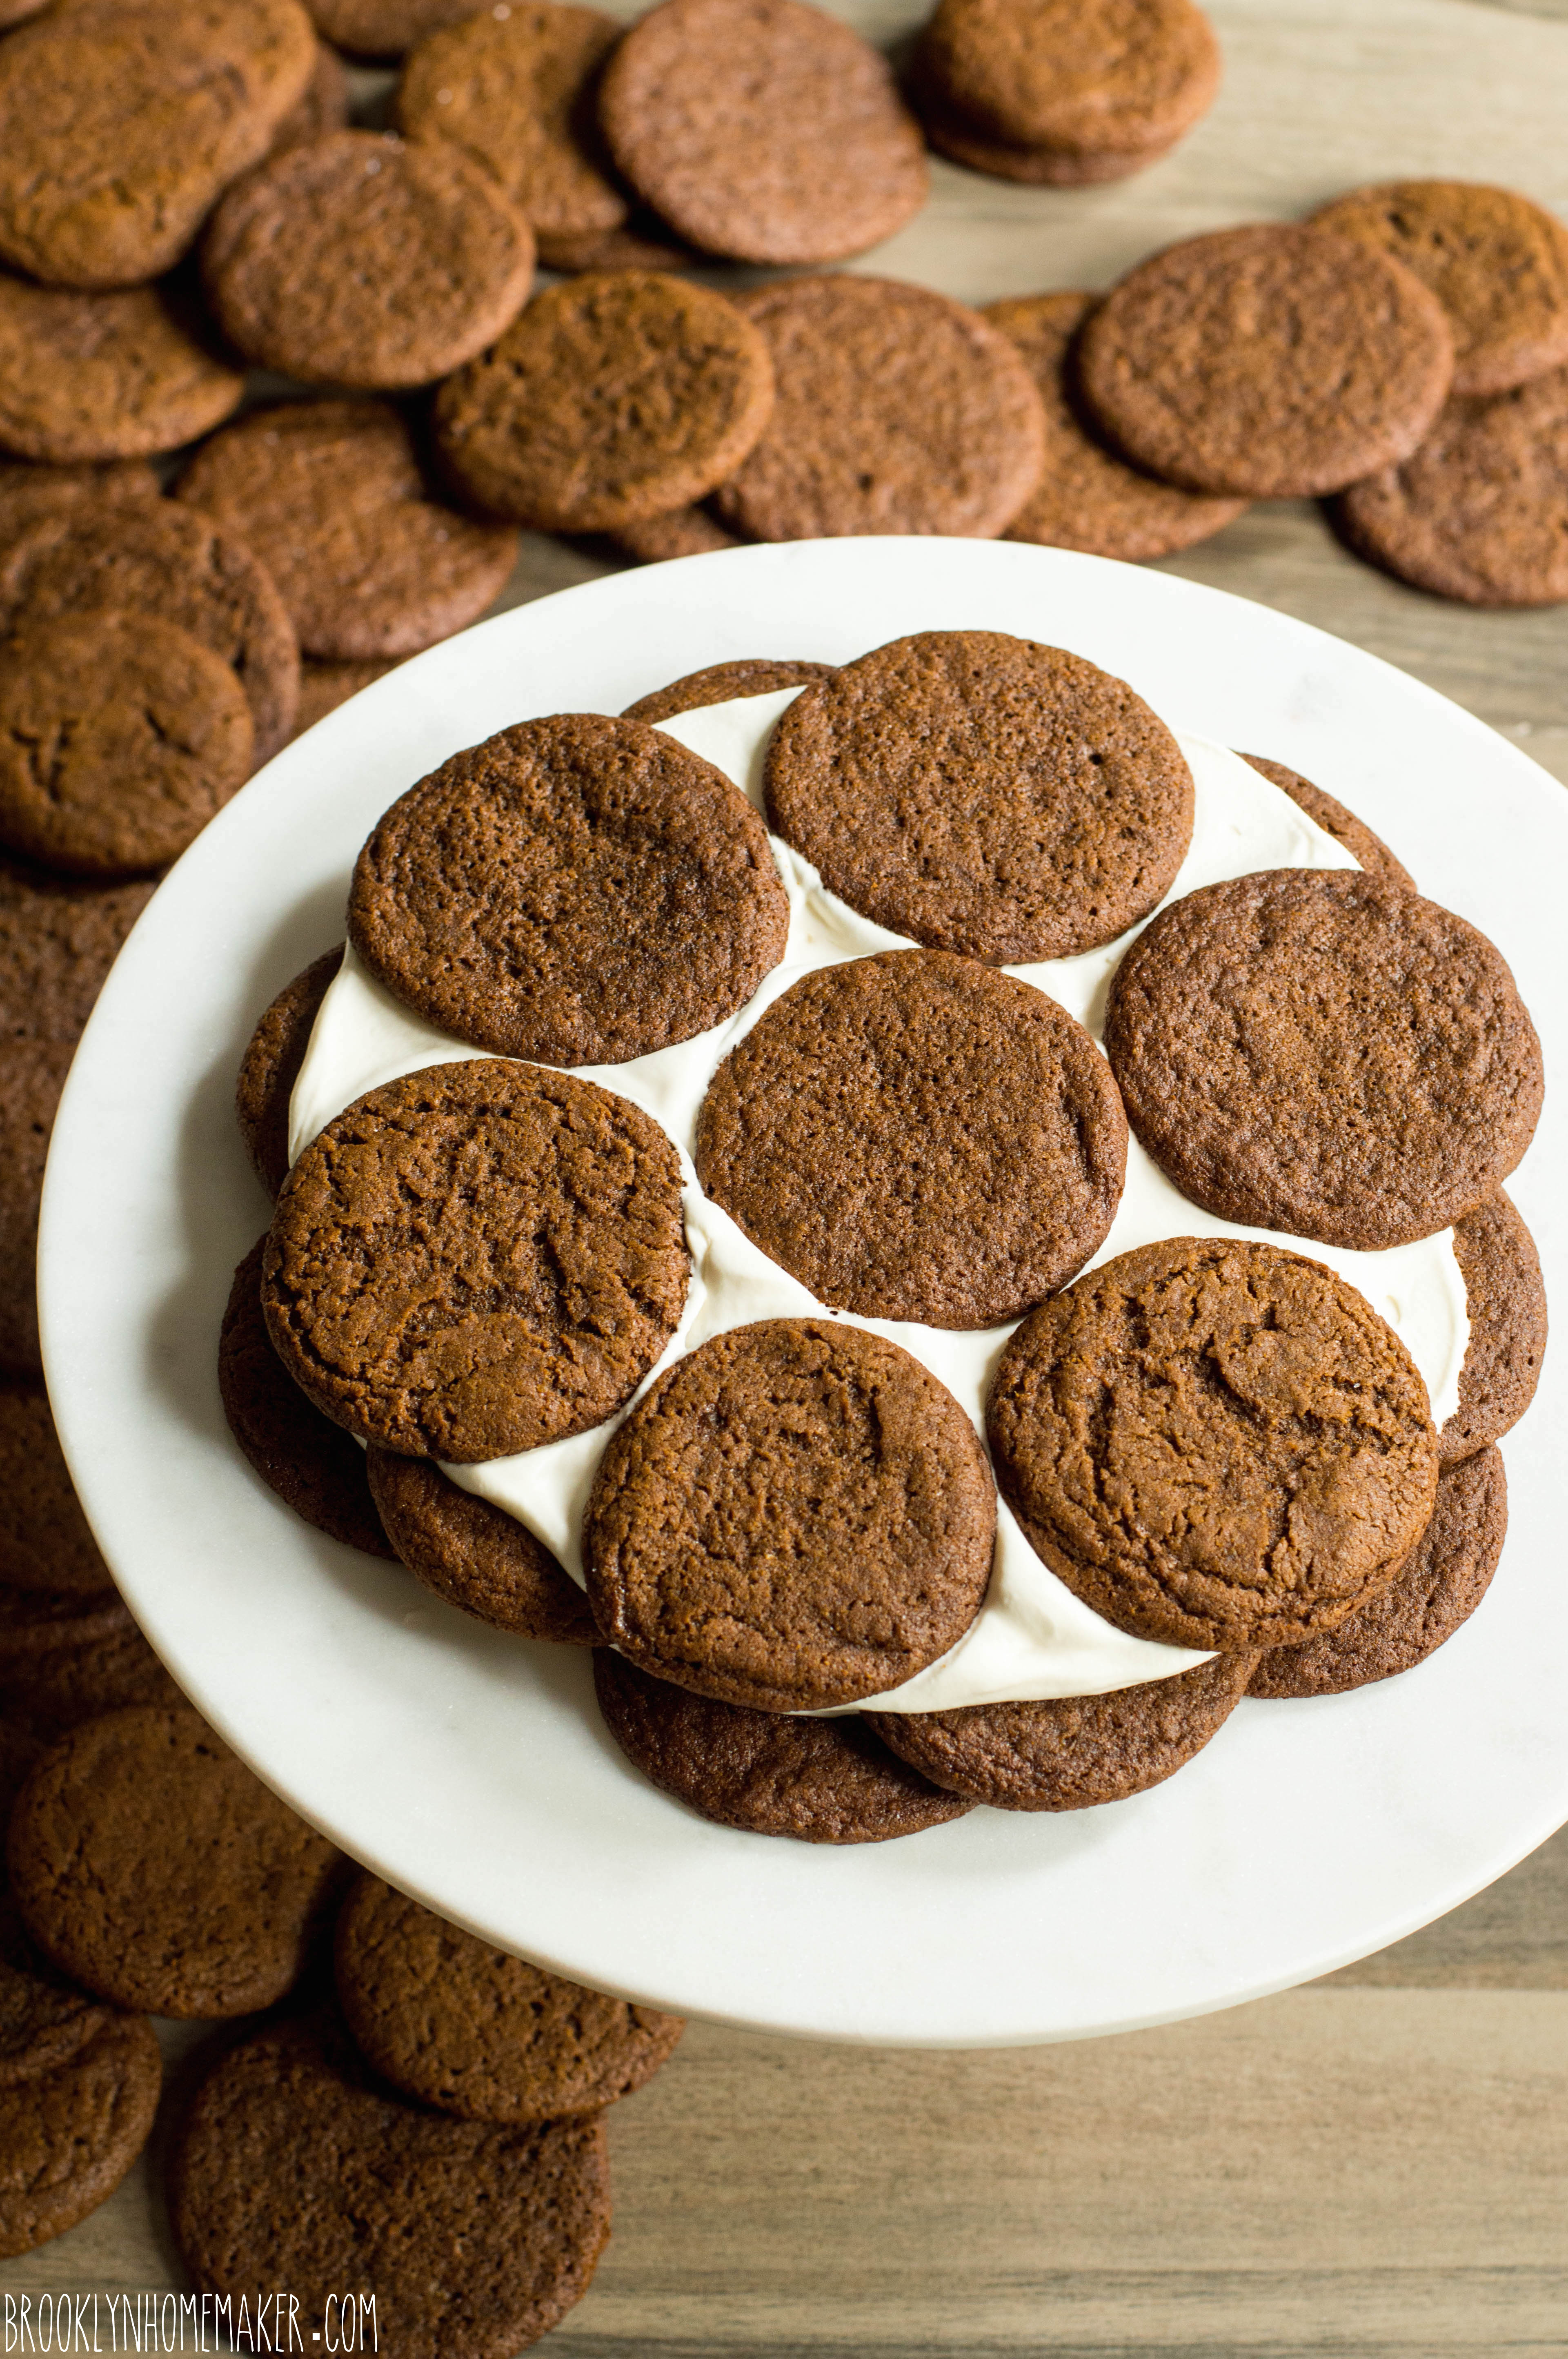
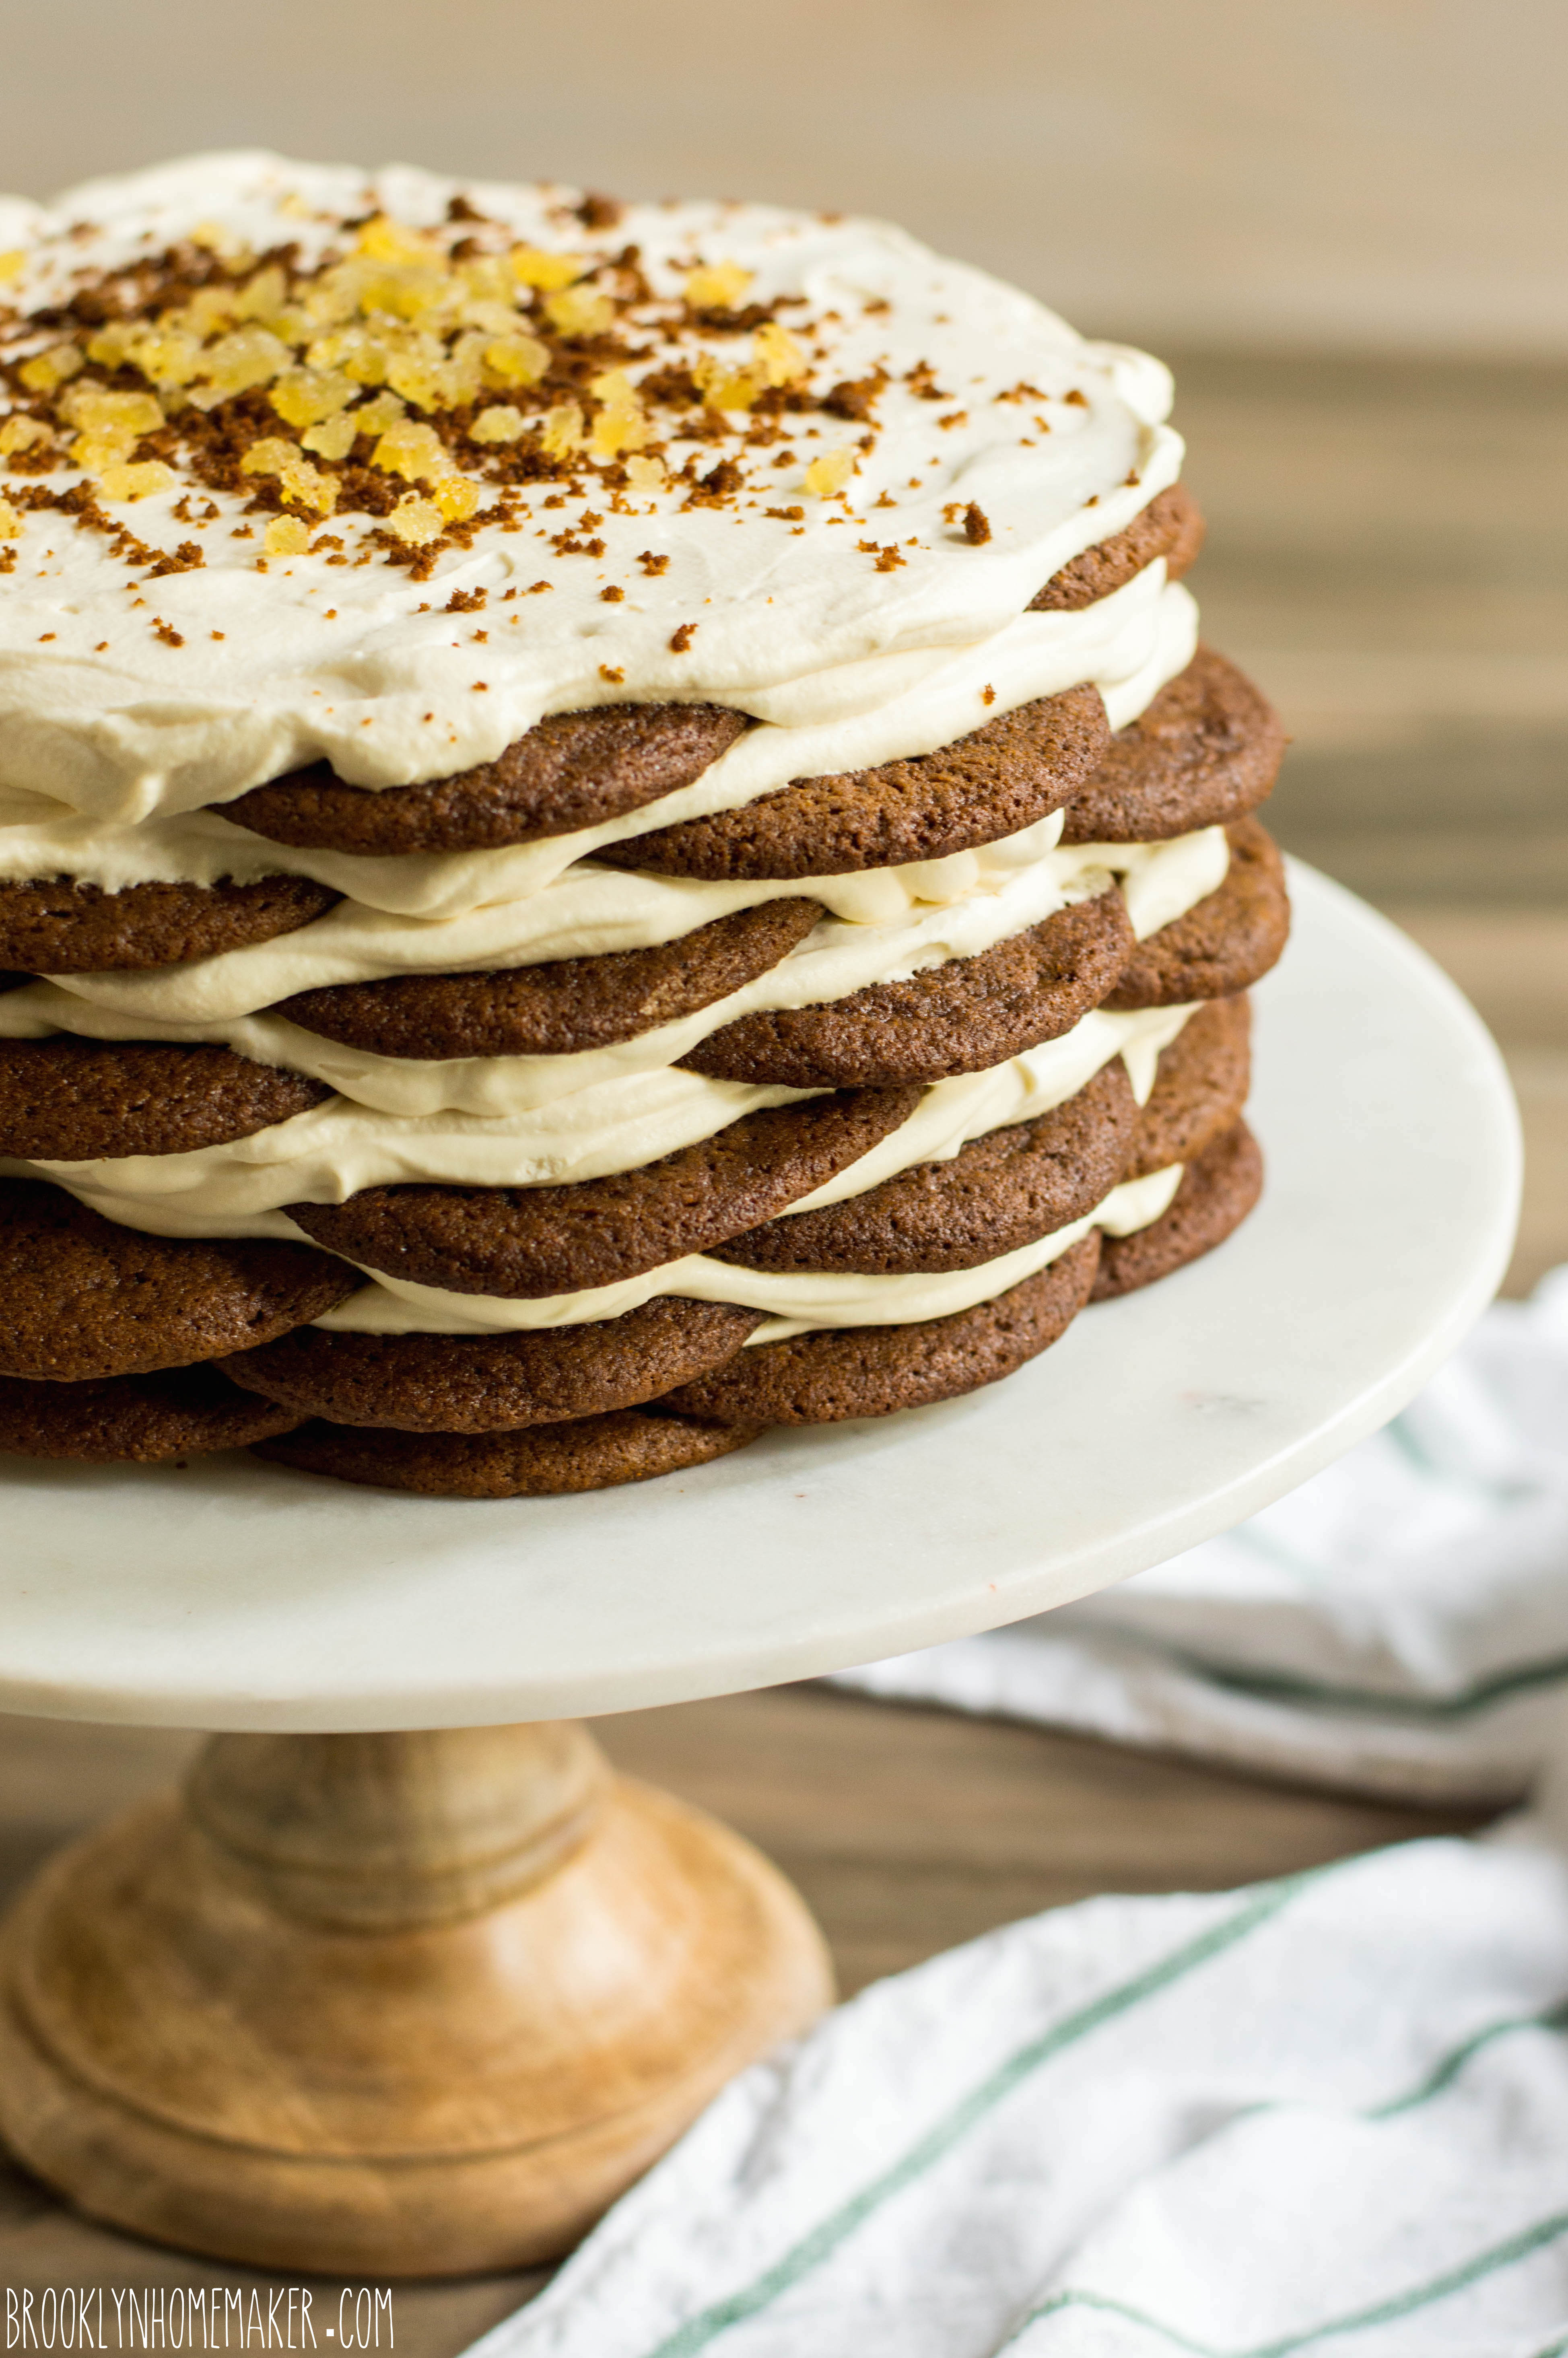
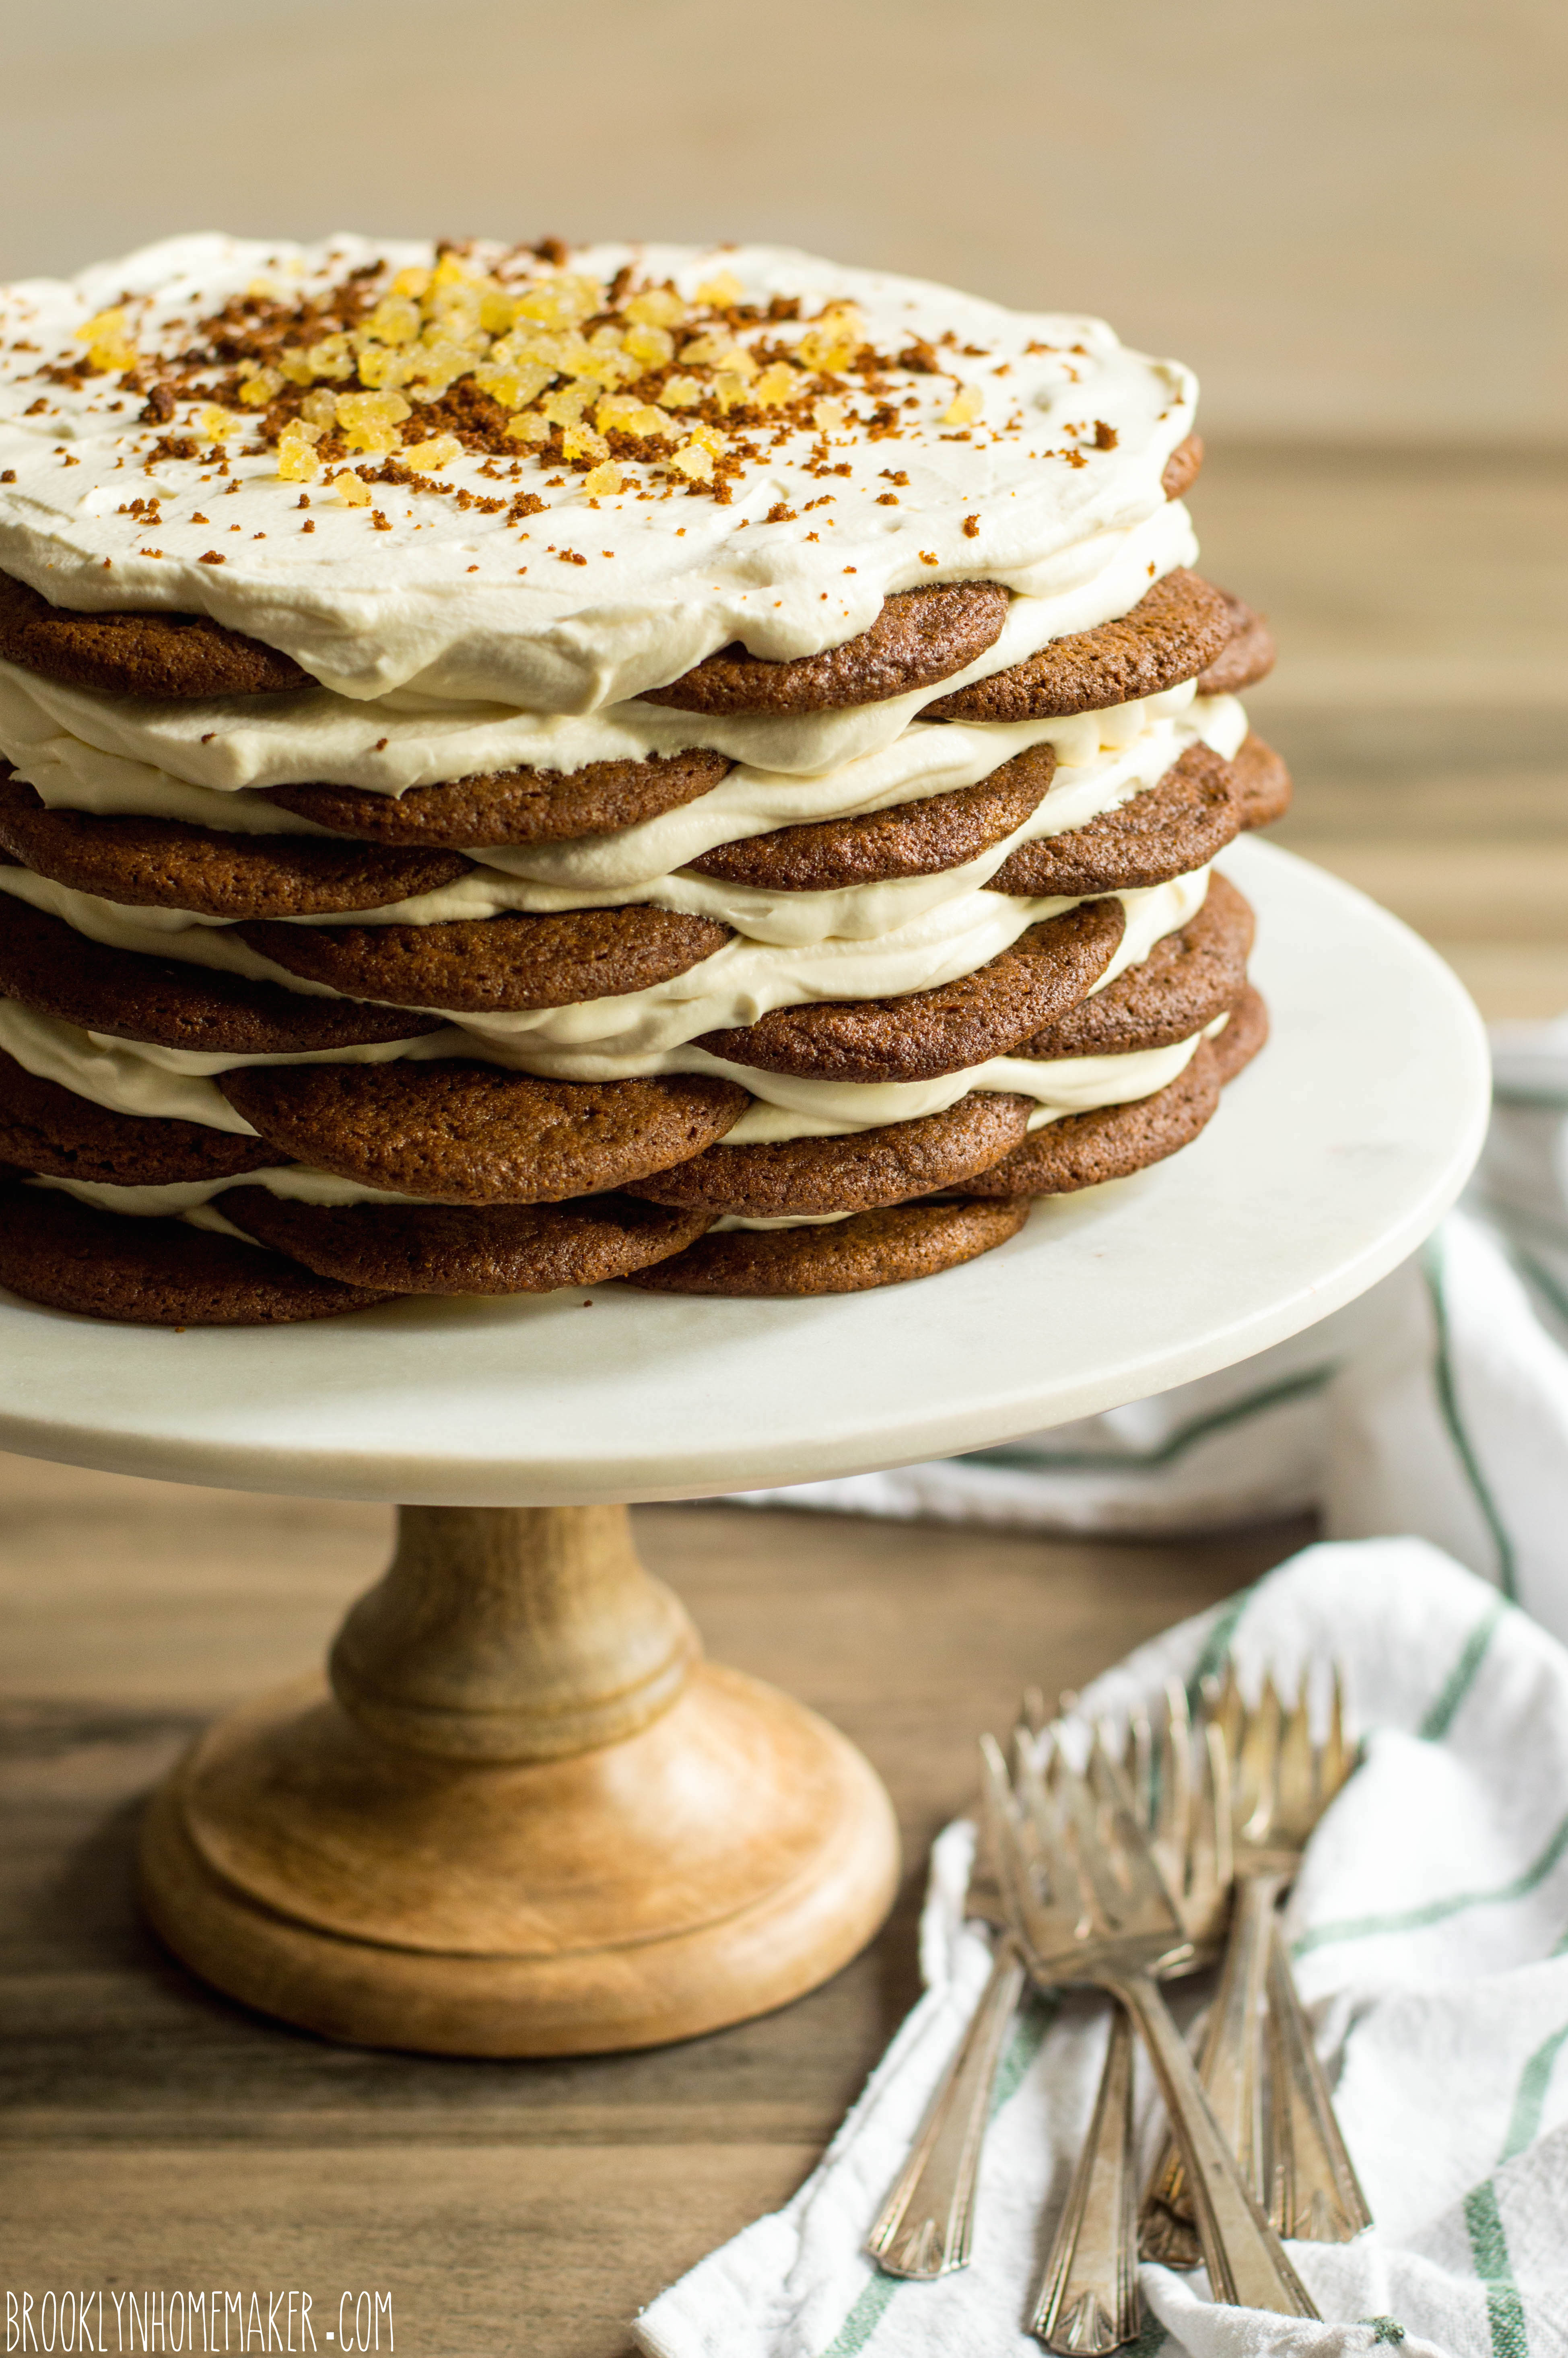
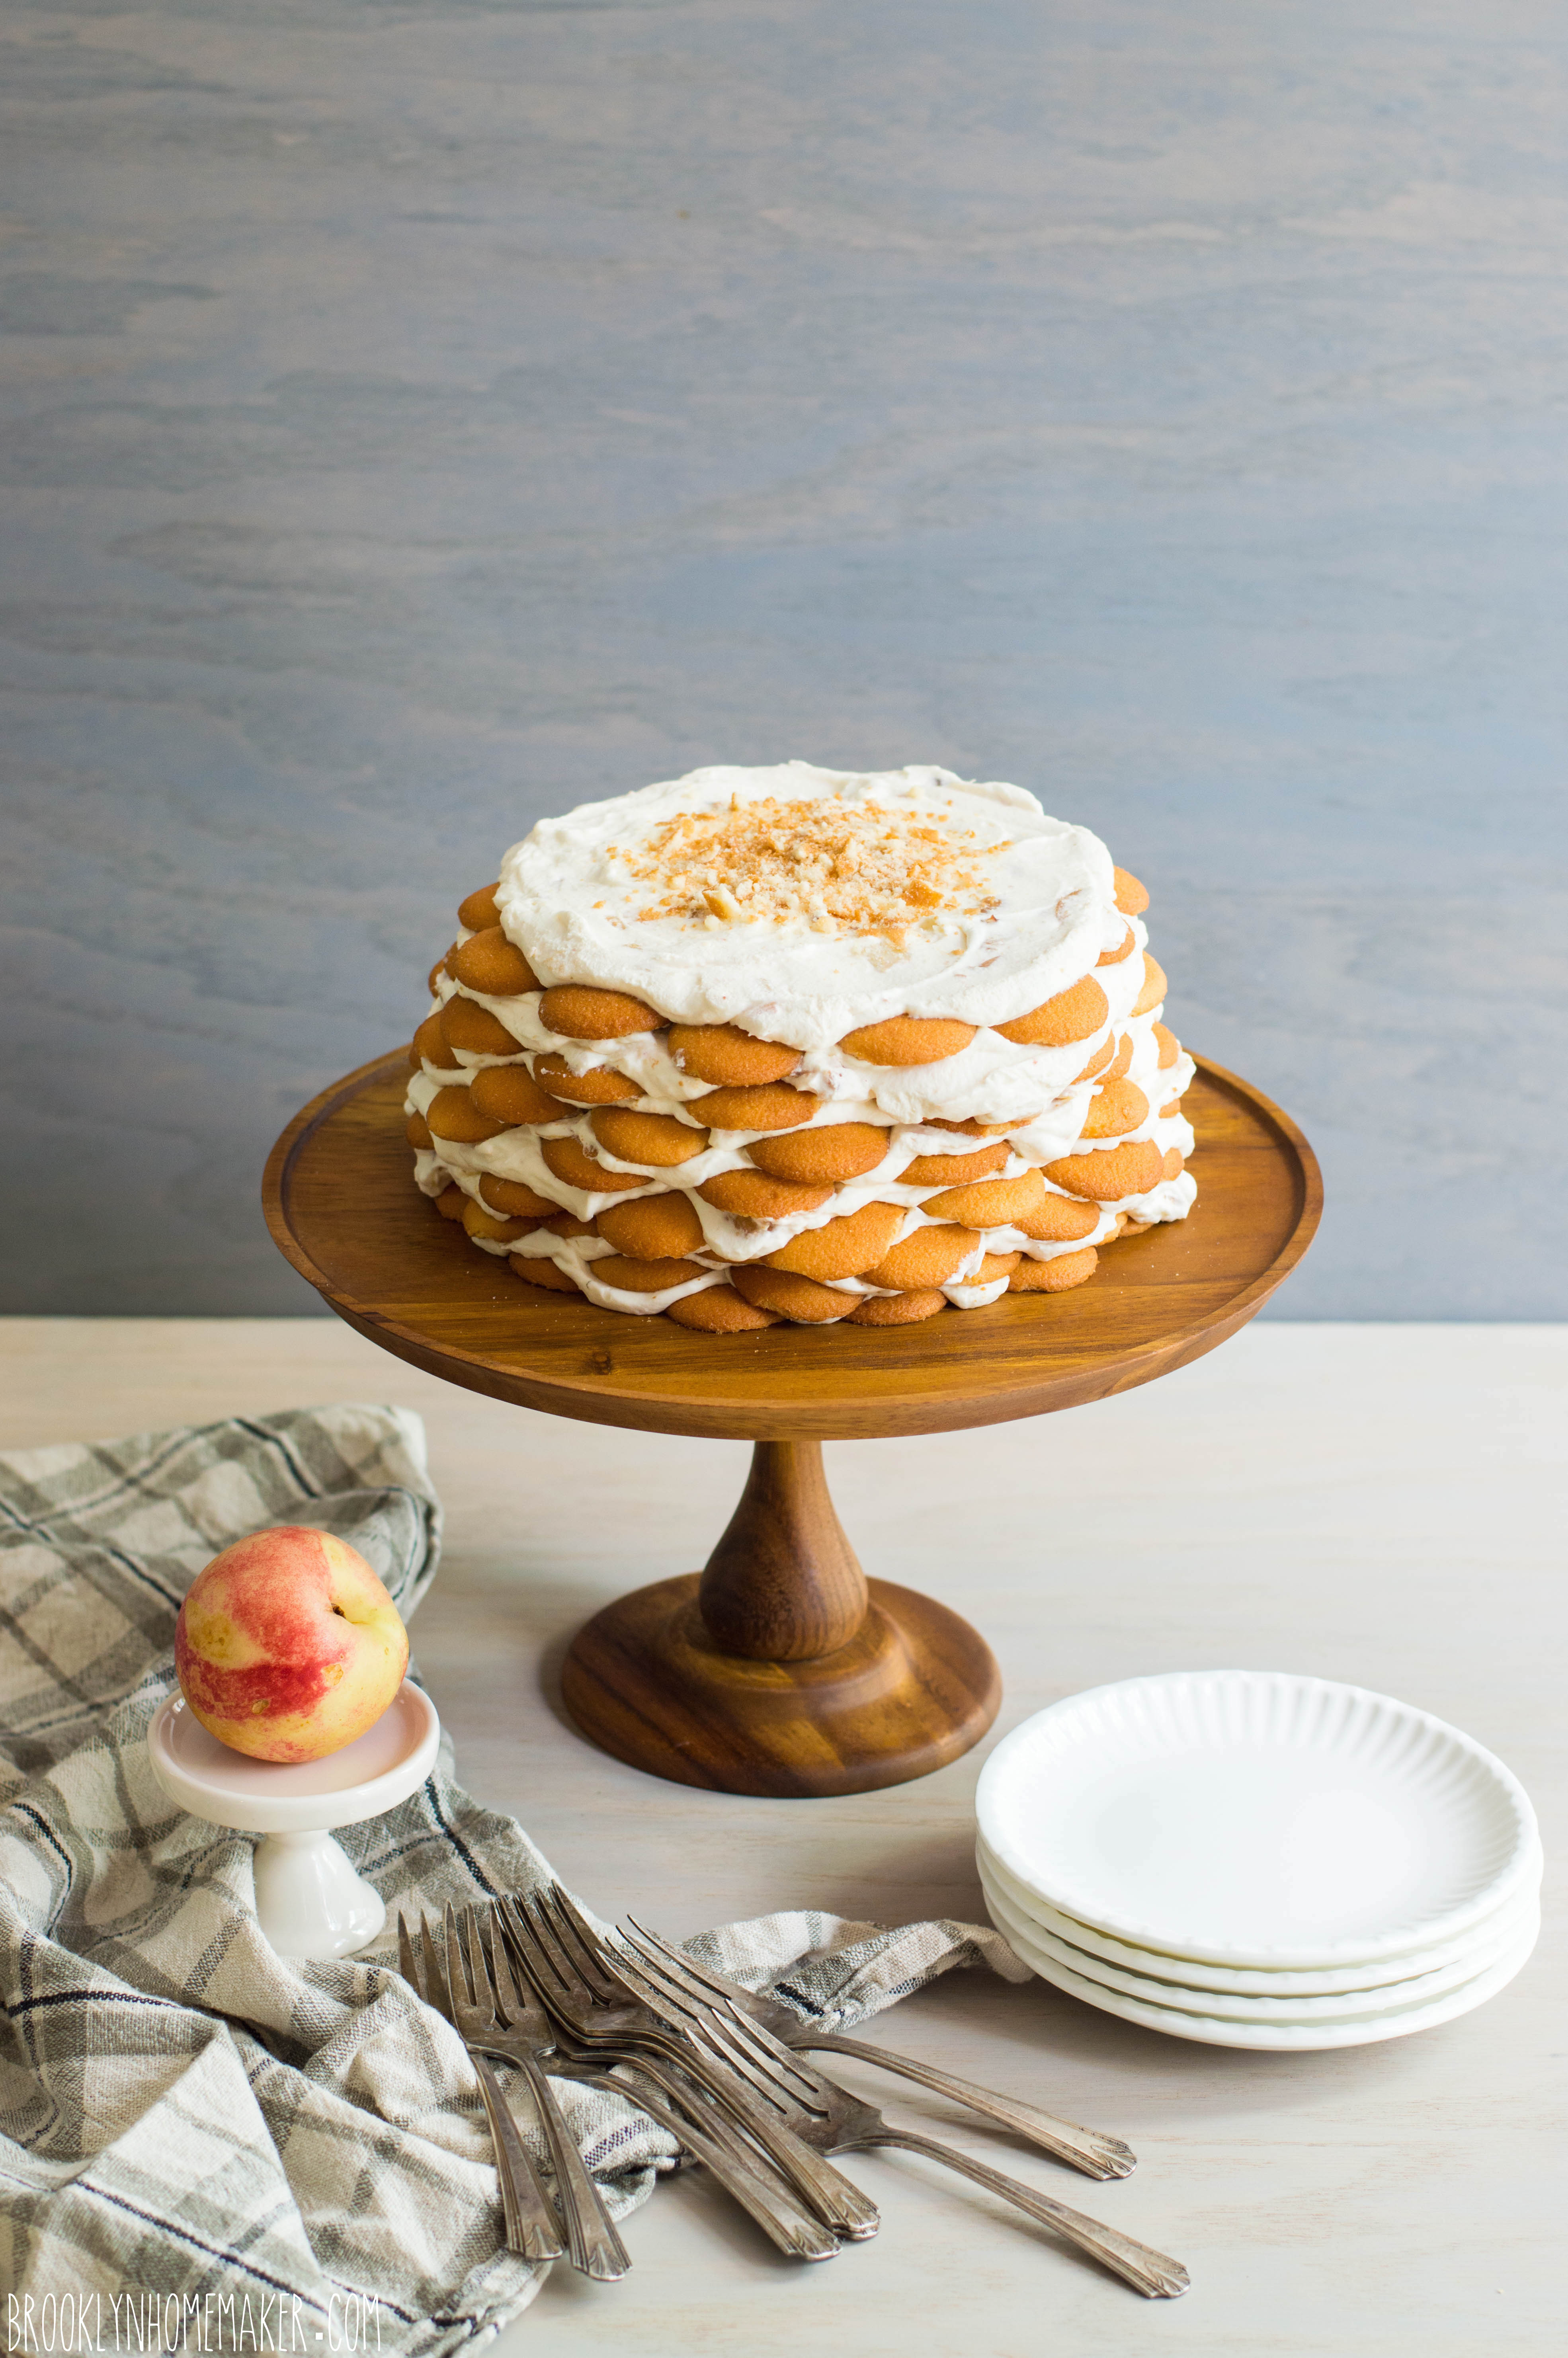
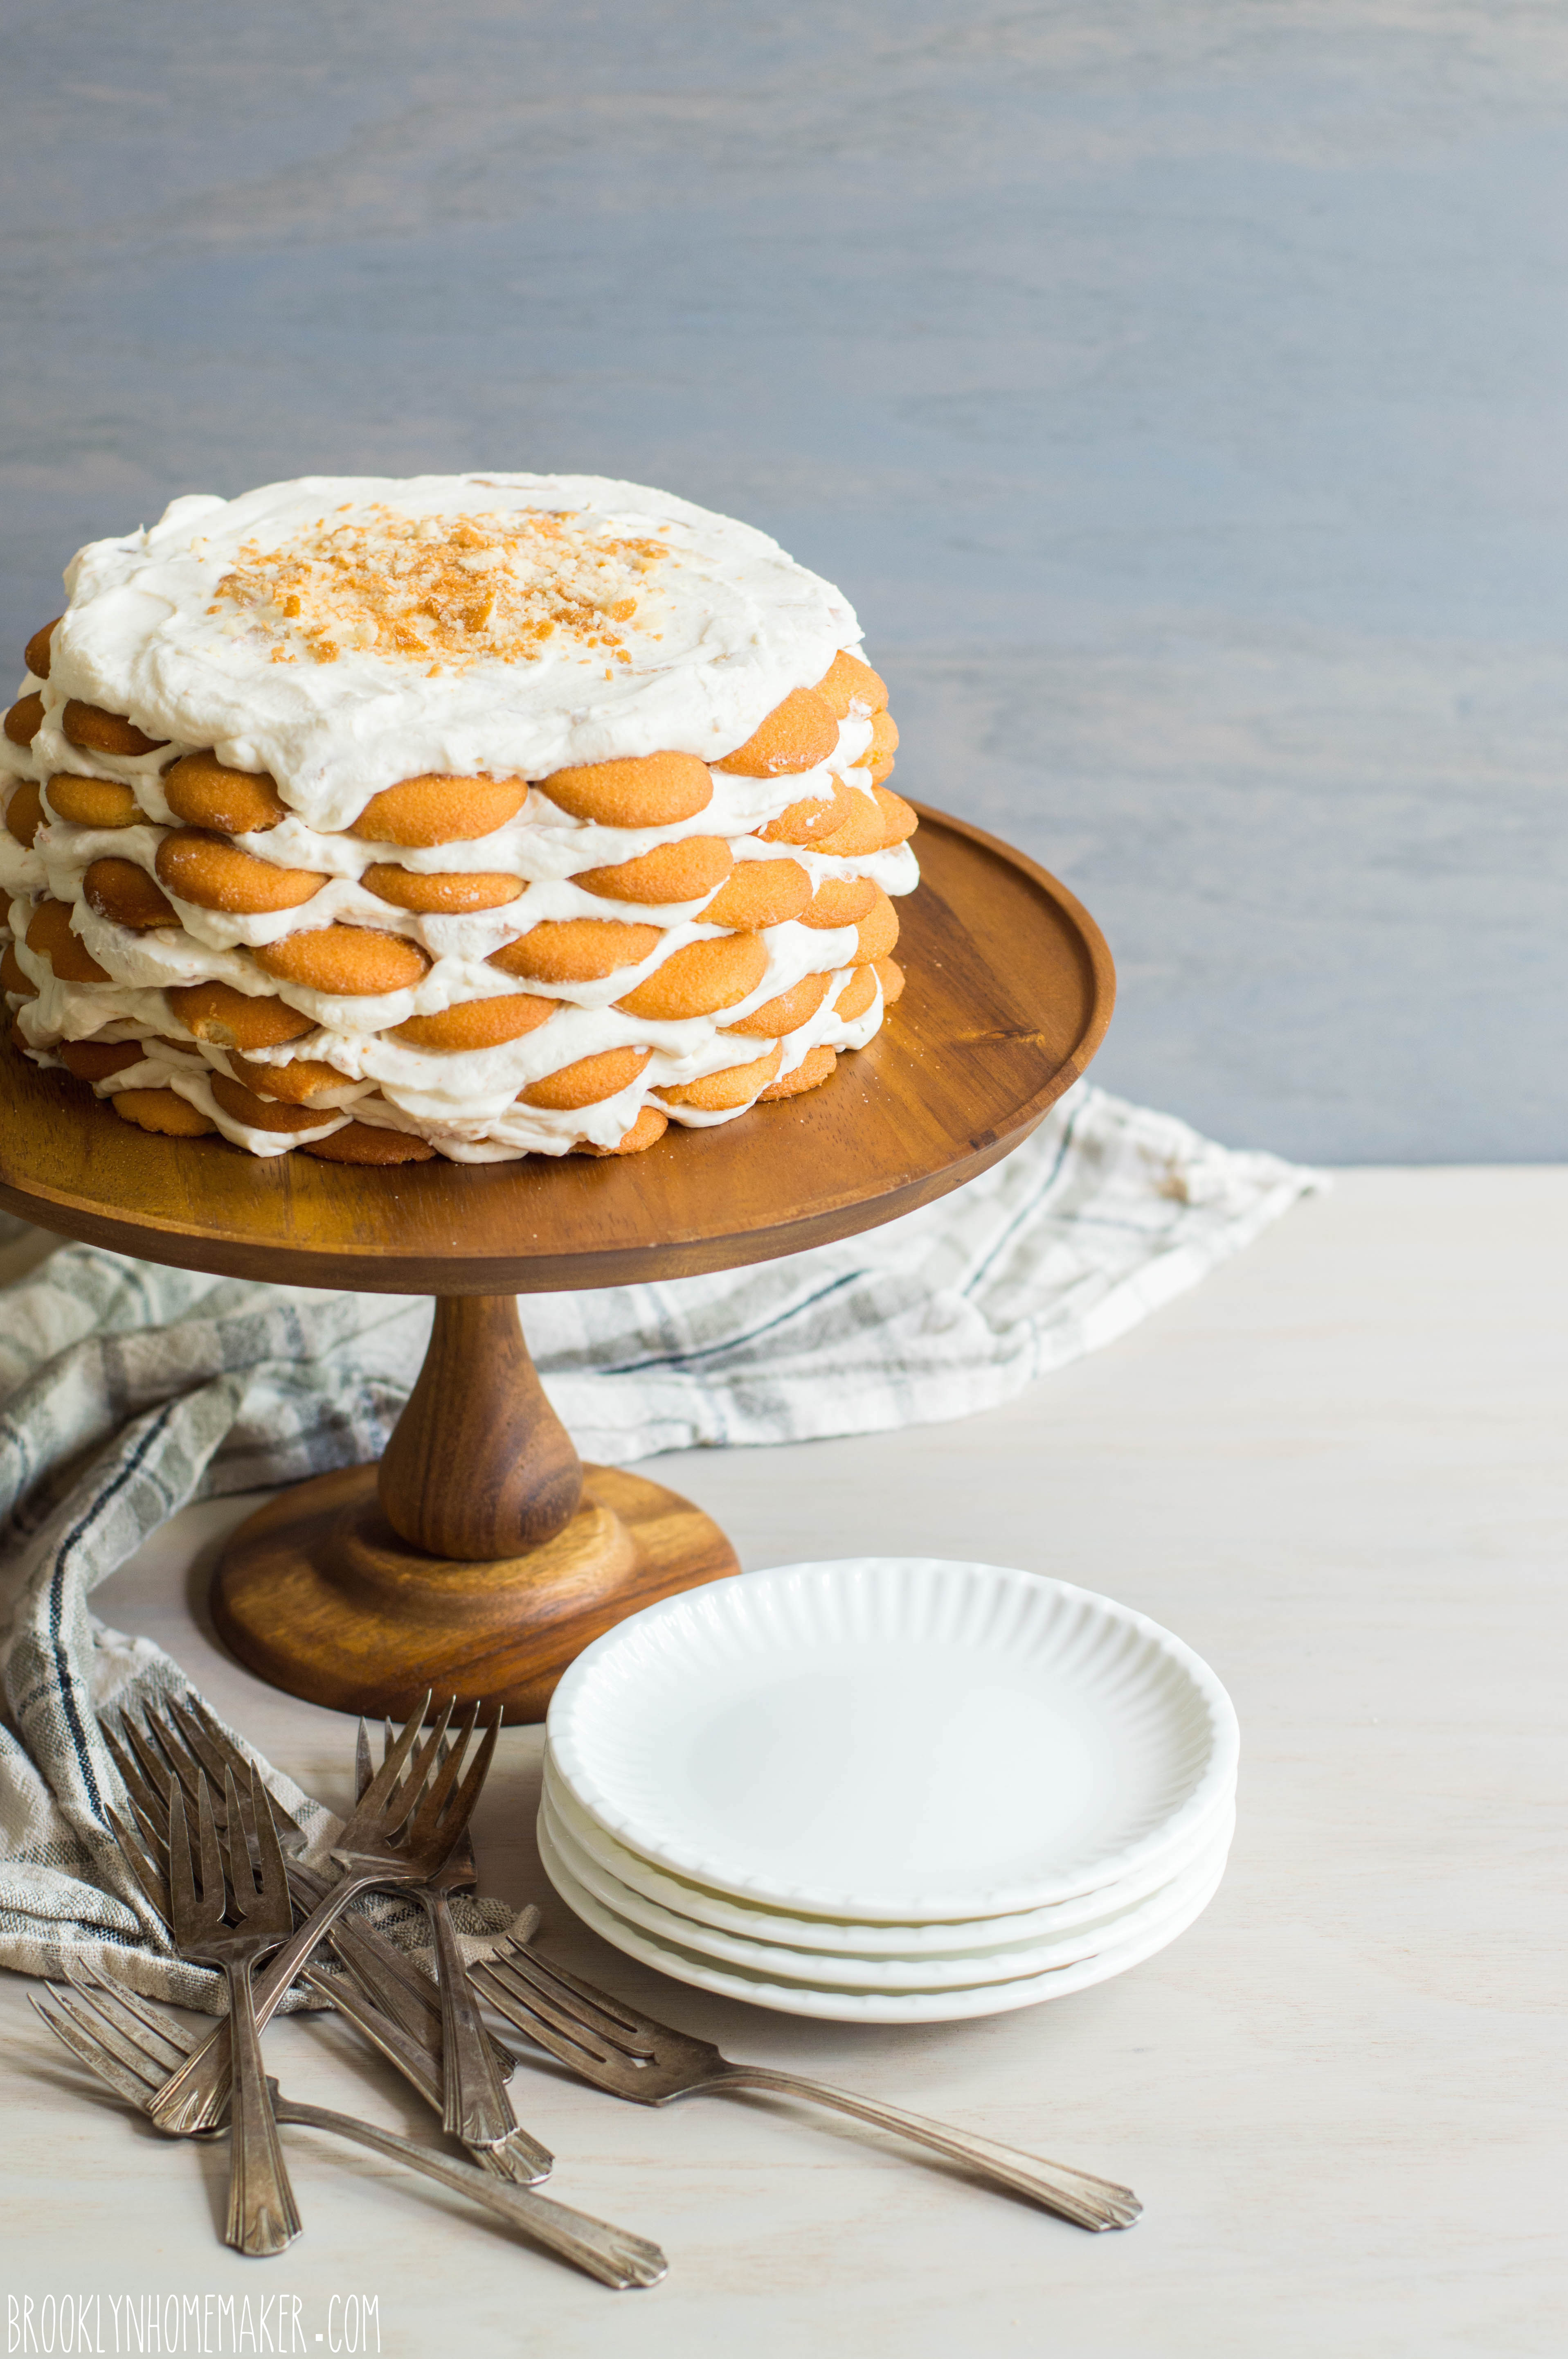
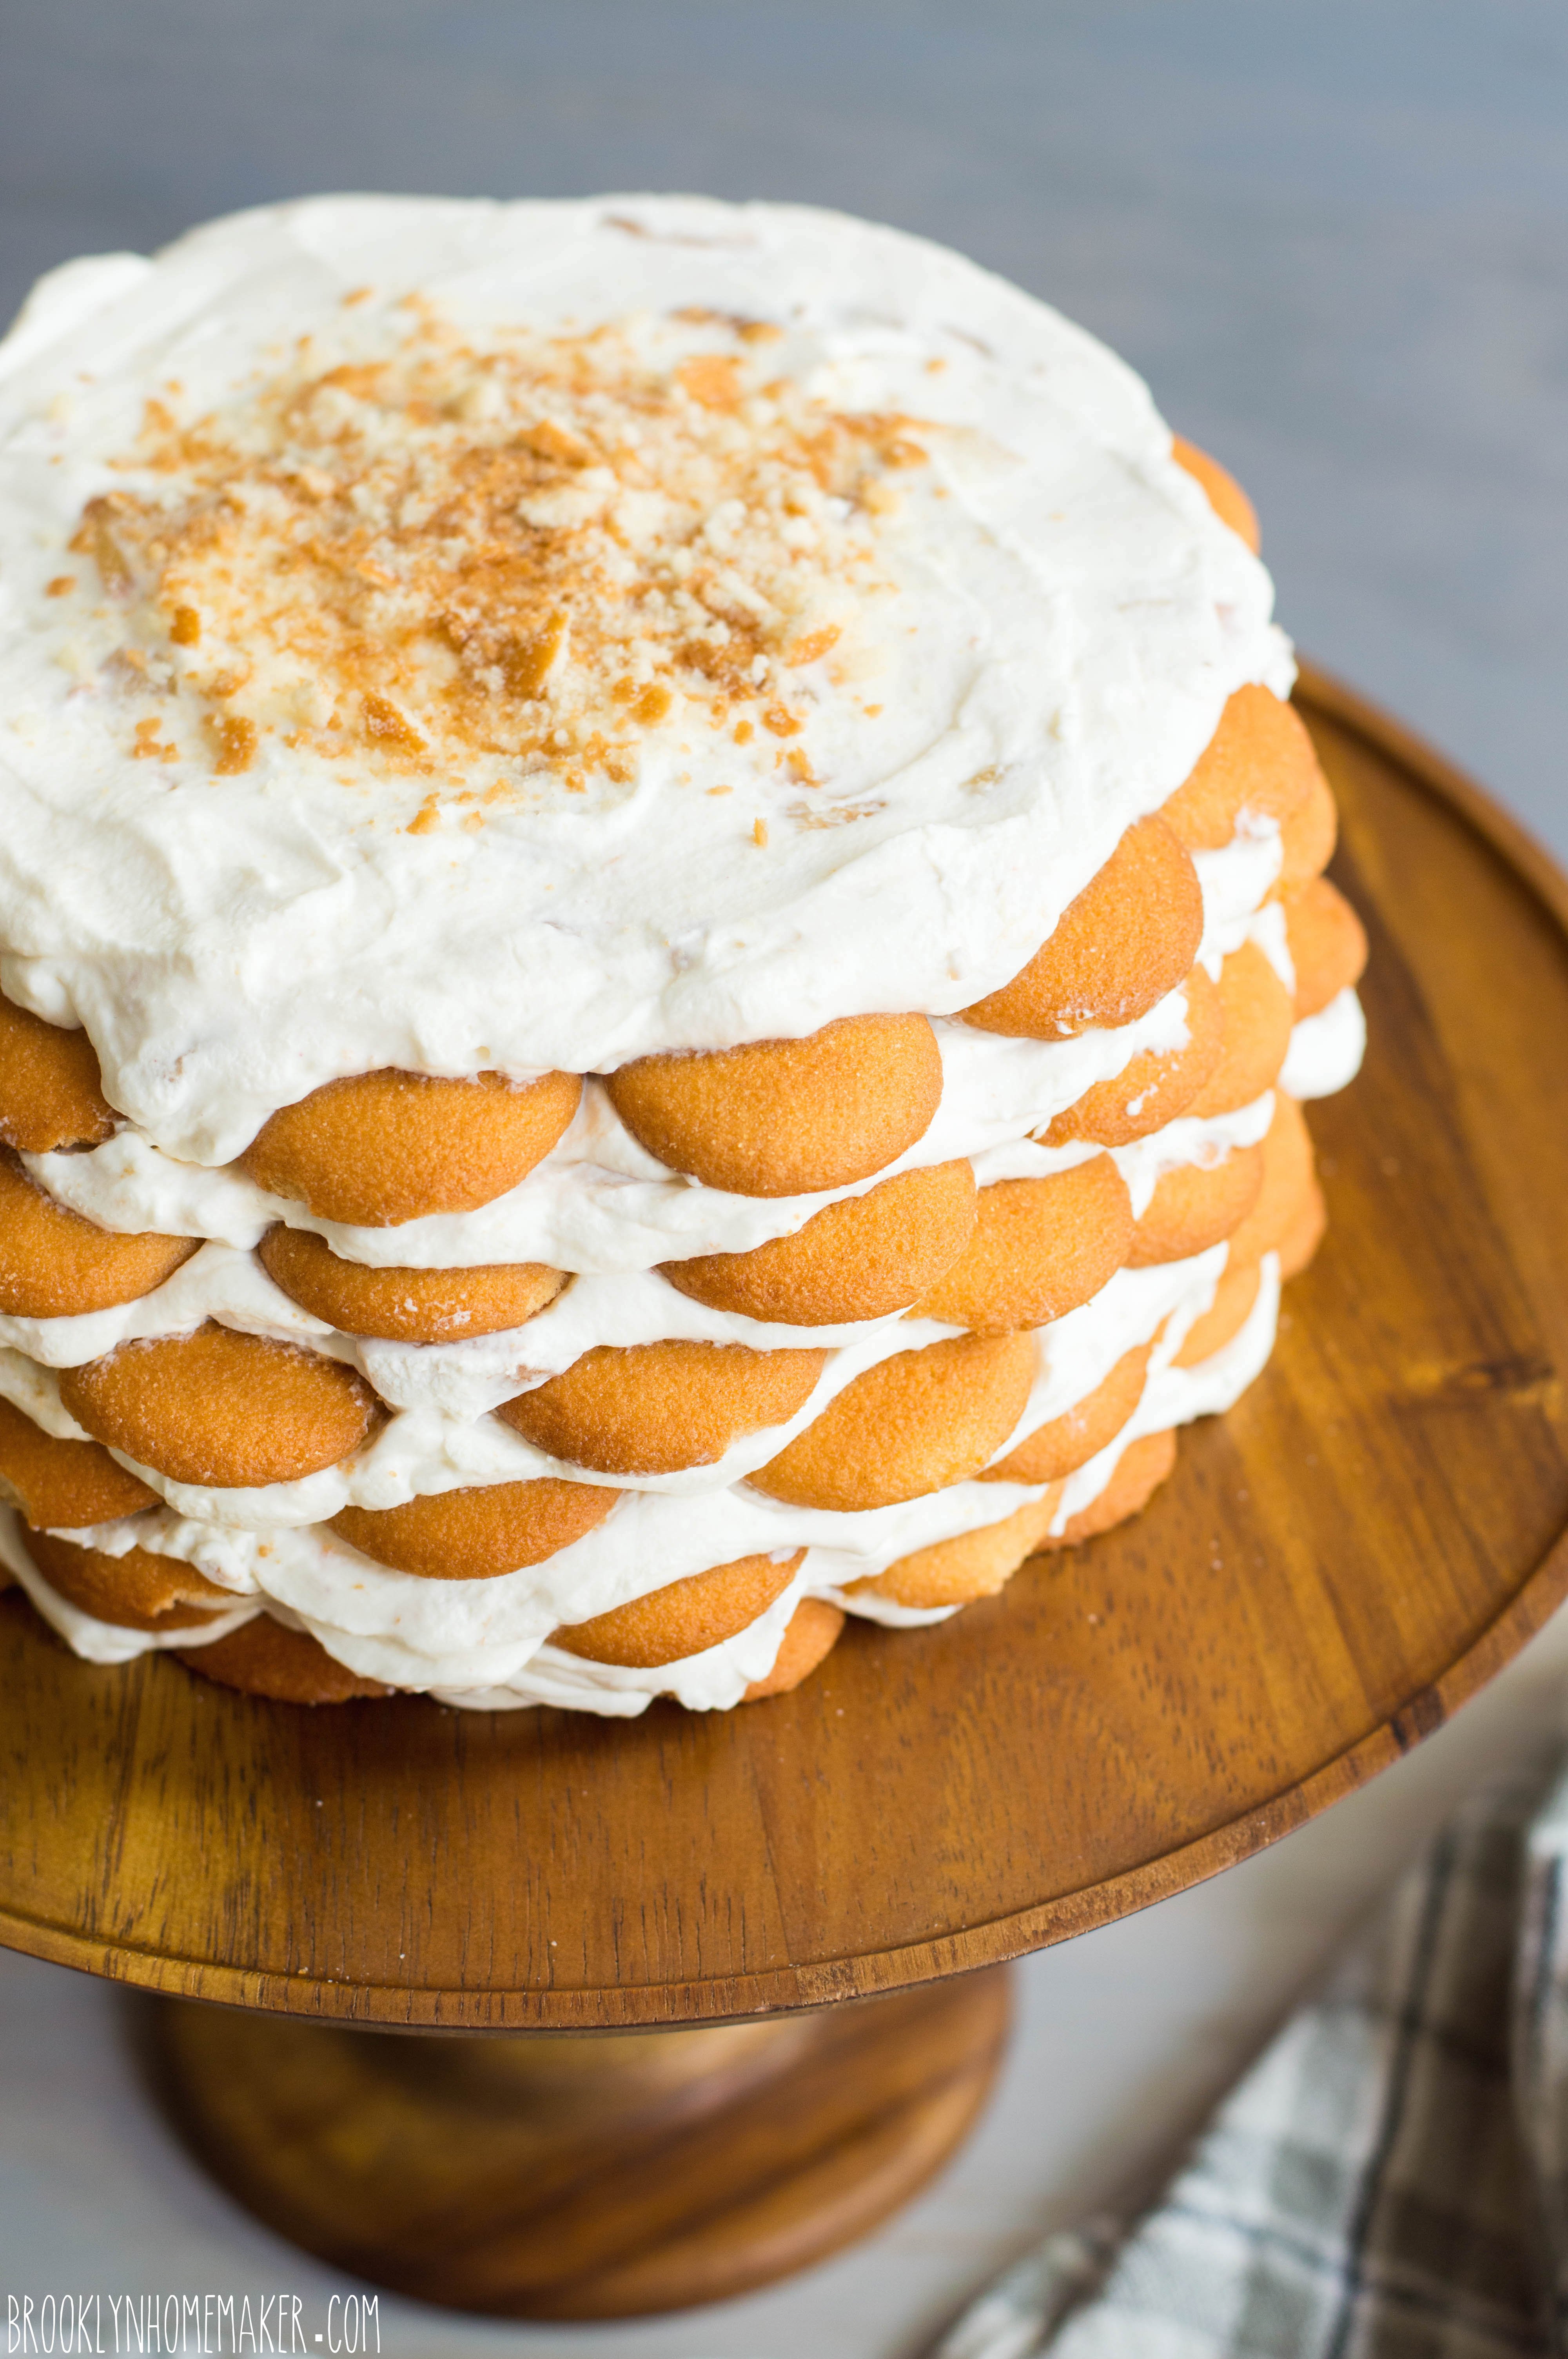
On an 8″ cake board, or a cake stand or serving plate, arrange a layer of vanilla wafer cookies into three tight circles. I used 19 cookies per layer, with 1 cookie in the center, then one circle of 6 cookies and another circle of 12, but that’ll depend on the size of the cookie you use. Once you’ve arranged your first layer of cookies, place about a cup of cream over them and smooth it out with an offset icing spatula. Spread the cream almost to the outer edge, leaving just a small edge of cookies showing. Arrange another layer of cookies, trying to alternate the layers so they appear staggered above one another. Repeat another layer of cream and then another layer of cookies, again and again until you have as many layers as you desire or until you run out of cookies or cream. Finish the top of the cake with a final layer of cream. My cake was 8 layers tall, but again, this may depend on the size of the cookies you use.

If you have a cookie or two left over, garnish the cake by crumbling them in the center of the top if desired.

Try to delicately tent the cake with plastic wrap or cover with a large inverted bowl or cake dome before transferring to the refrigerator to set up.
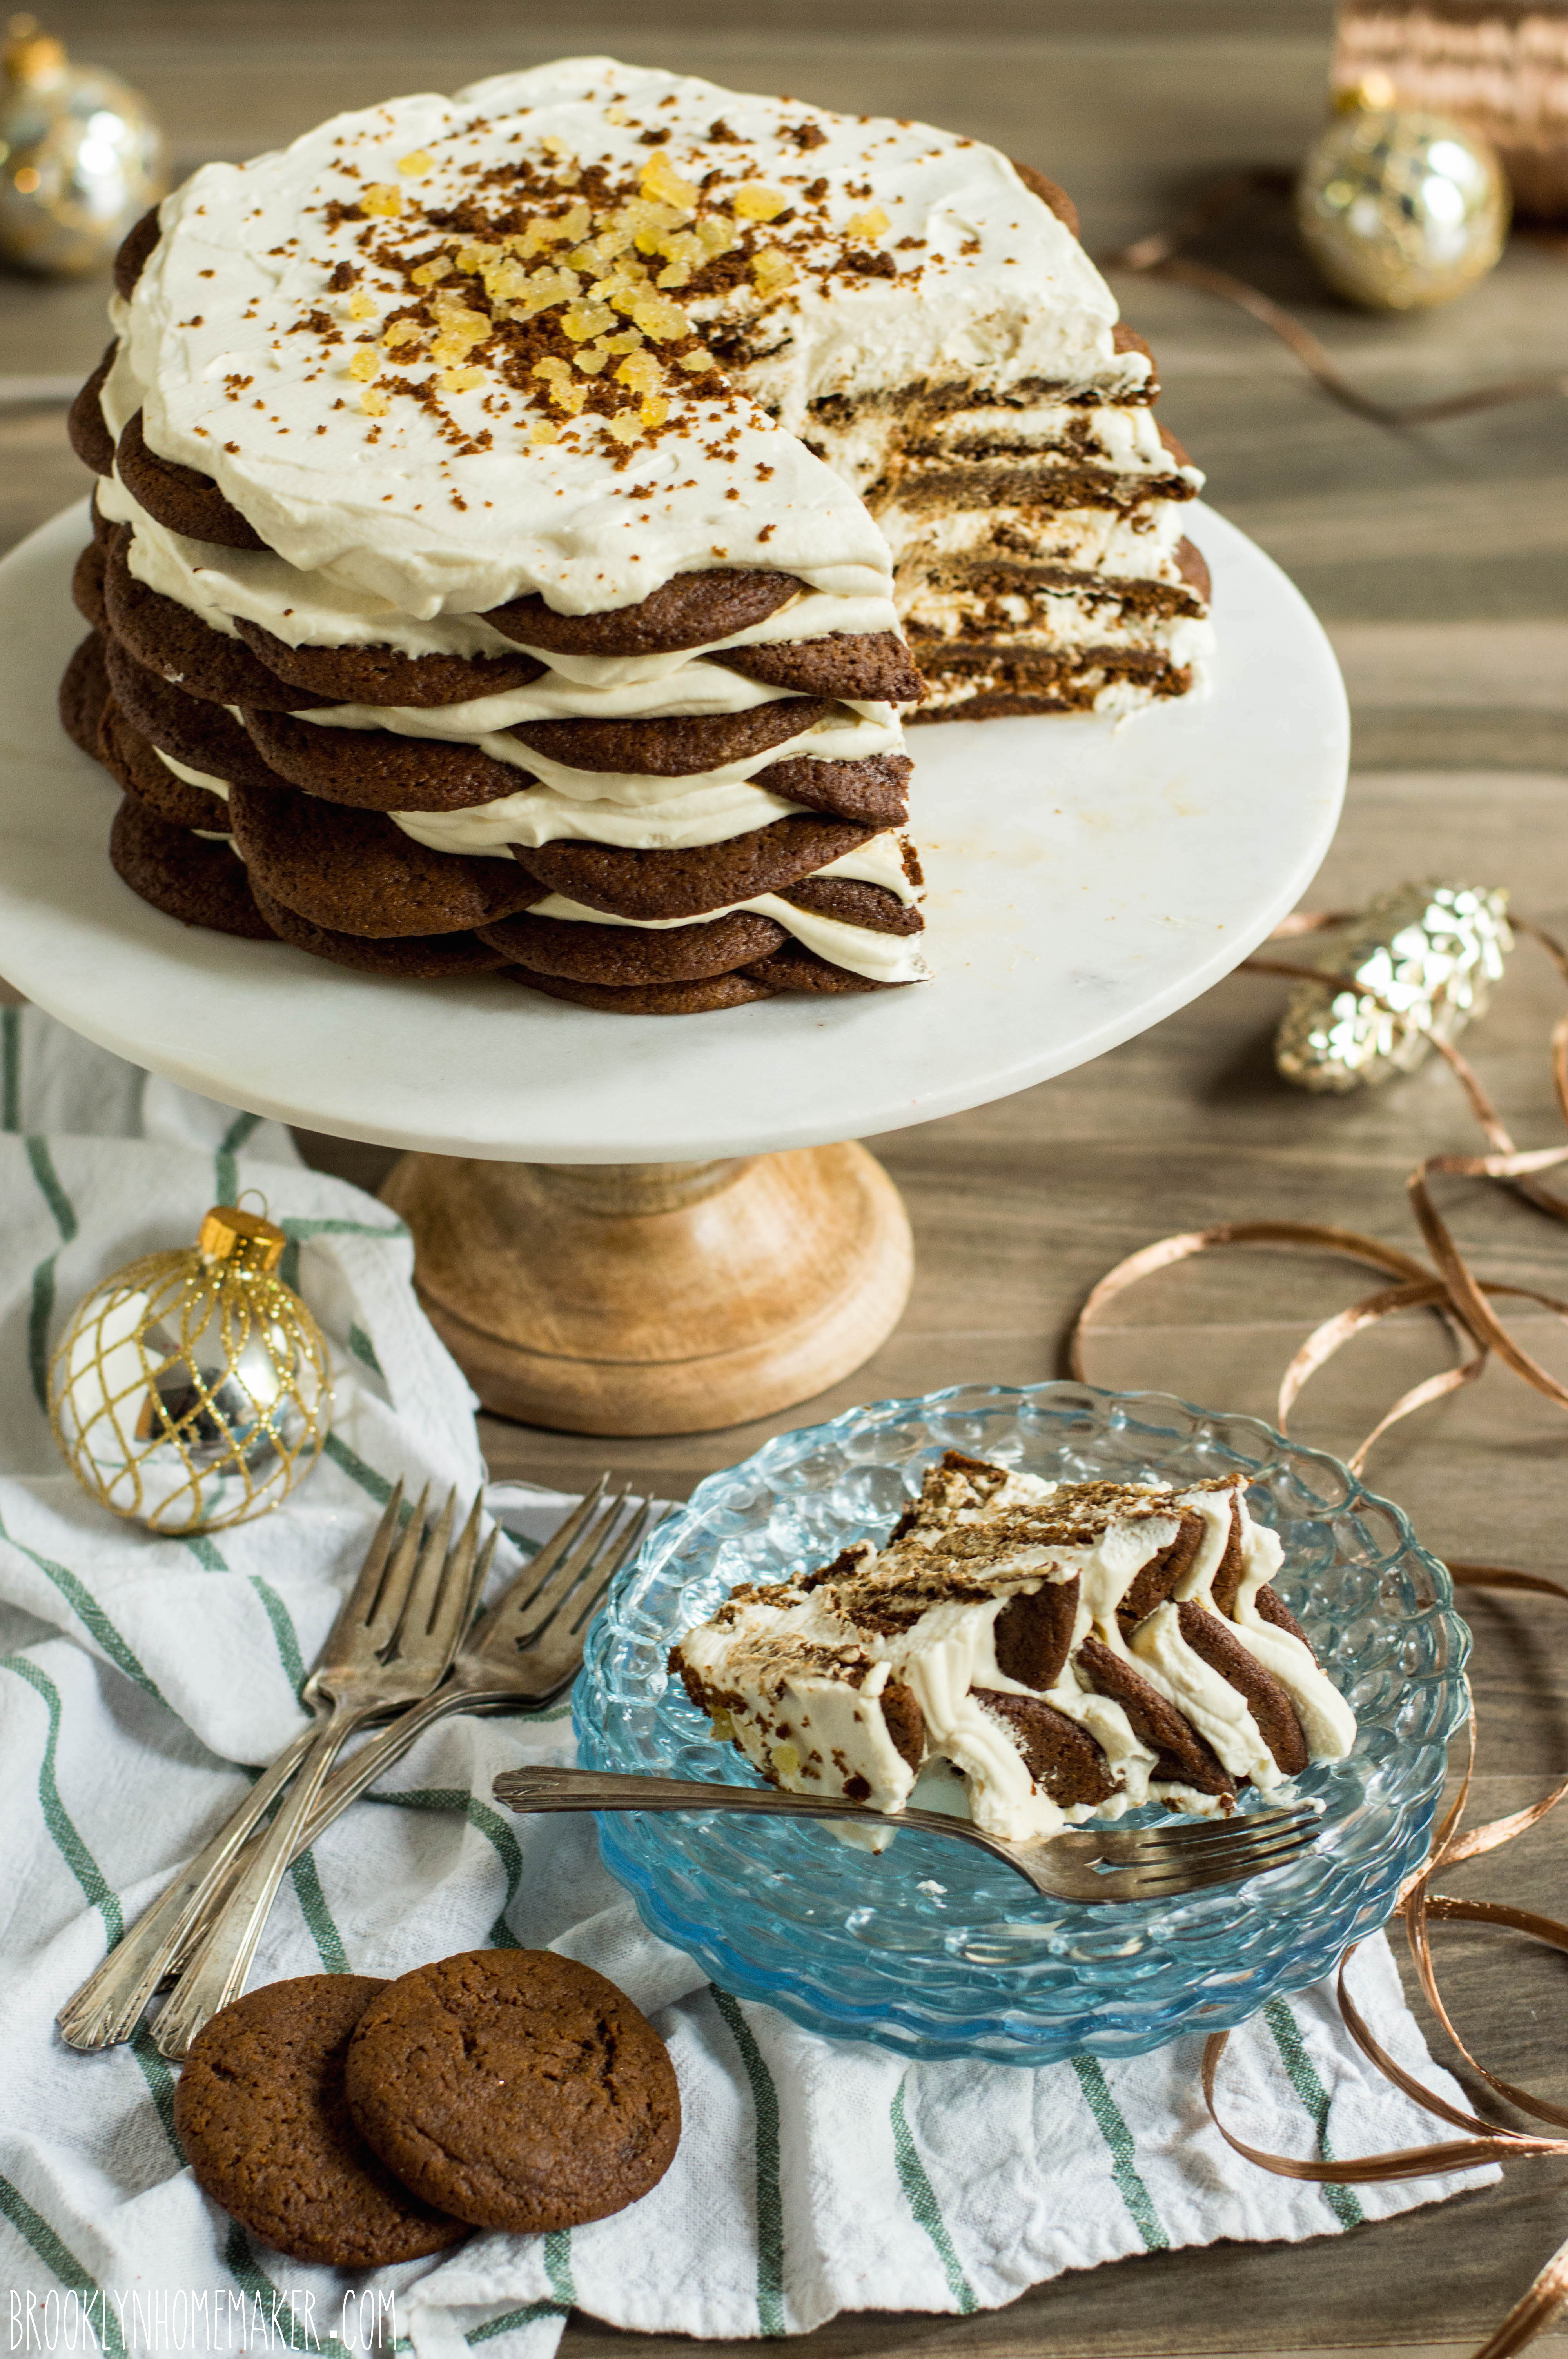
Place cake to refrigerator for an absolute minimum of 6 hours (but ideally 12 to 24 hours) before serving. This cake will continue to improve the longer you can wait. As it sets, the cream will get firmer as the cookies get softer, and the flavors will distribute more evenly. Patience is a virtue!

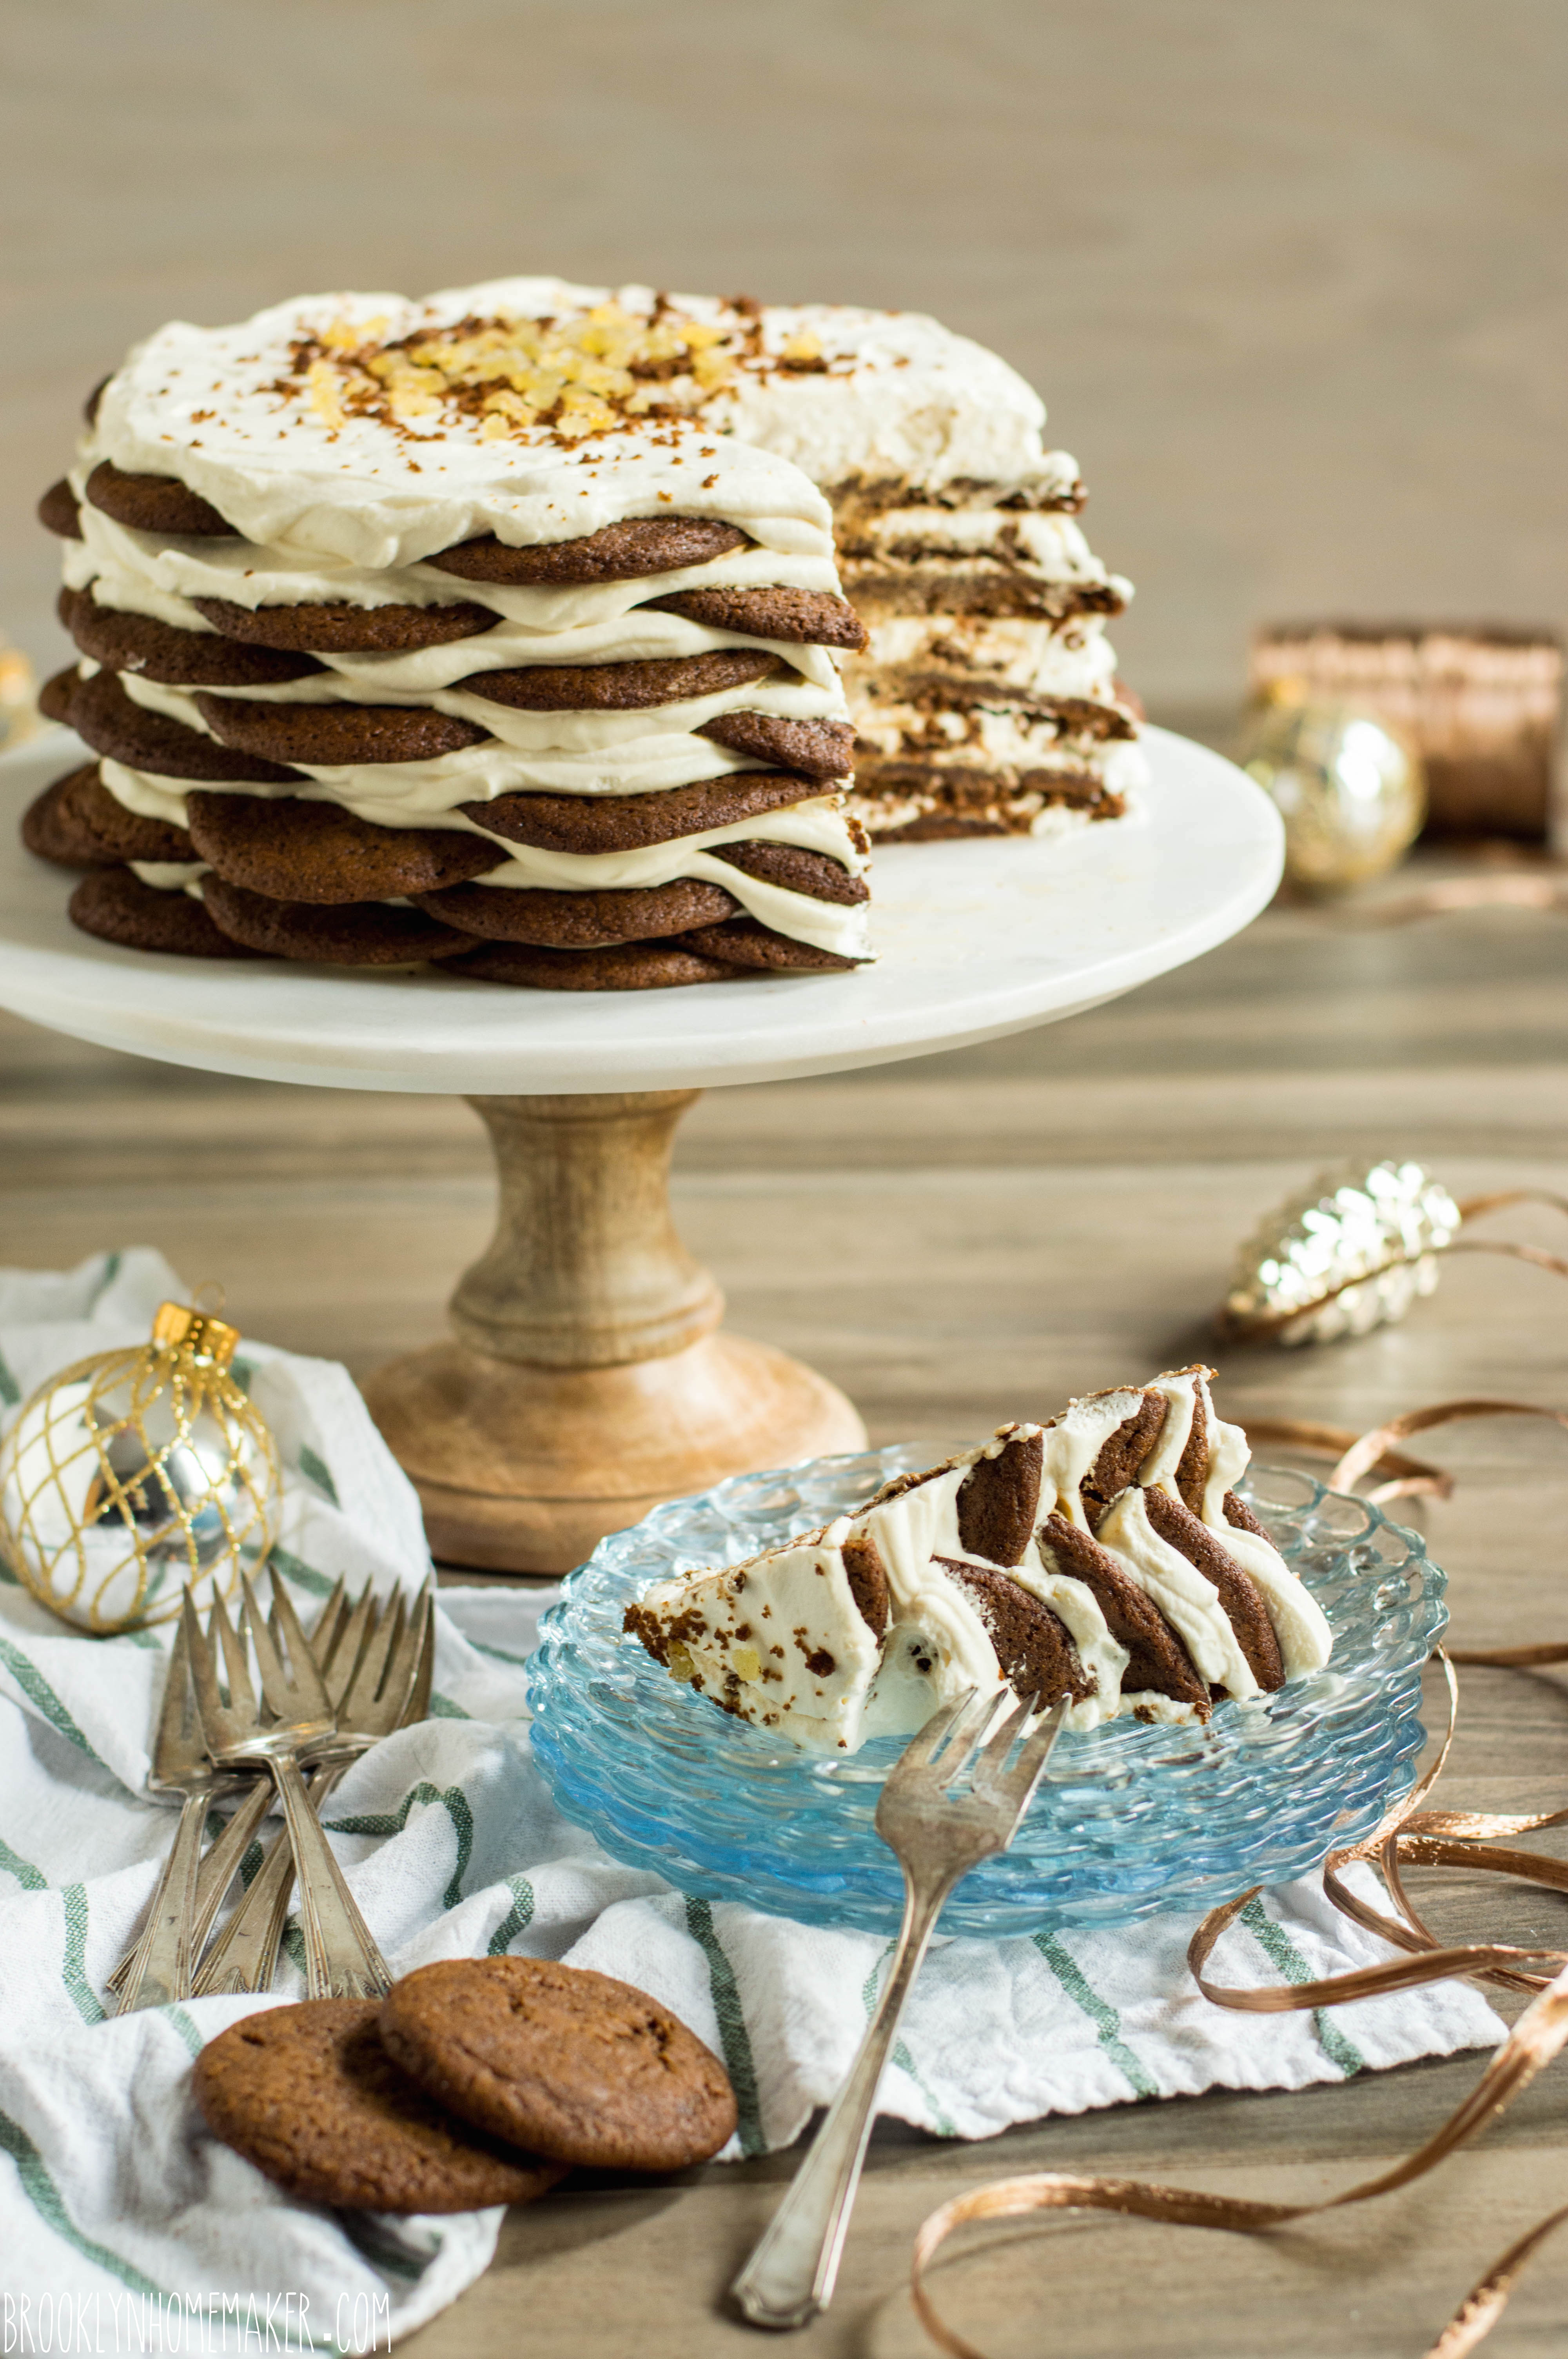
Once set, the cake can be sliced and served much like a regular cake. If possible, it’s best to use a sharp serrated knife with a gentle sawing motion to avoid smooshing the cake and to get the best looking slices possible. Really though, you could dish it into bowls with a spoon if you wanted, and everyone would love it just as much.
Cake can be stored in the fridge in an airtight container for 3 or 4 days.

*Note:
Peach schnapps would be great too if you have it, or you could also substitute rum or bourbon for a bit of extra warmth.
If you’d prefer to keep it completely non-alcoholic, a teaspoon or two of orange blossom water or rose water would be a lovely substitution. That stuff is potent though so start with just a little and taste to see if you’d like to add more.

Advertisement

chocolate tuxedo cake with strawberry mascarpone icing

Like sands through the hourglass, so are the days of our lives.

chocolate tuxedo cake with strawberry mascarpone icing | Brooklyn Homemaker

Forgive me.

My mother watched a lot of soaps when I was growing up.

chocolate tuxedo cake with strawberry mascarpone icing | Brooklyn Homemaker

What I’m trying to say is, time is marching on and I’m officially older now than I was when I wrote my last post.

About two weeks ago I celebrated my birthday.

chocolate tuxedo cake with strawberry mascarpone icing | Brooklyn Homemaker

Those of you who’ve been reading along with me for a bit probably know that I look at my birthday as an excuse to make a big ass fancy layer cake.
I’ve heard it all before about how I’m not “supposed to” bake my own birthday cake, but the fact of the matter is that I enjoy baking a good cake almost as much as I enjoy eating one. A grocery store birthday cake pales in comparison to what I can bake myself, and I’d rather bake my own cake than shell out good money for something I’m not going to love.

I bake so many bundt cakes around here that I also relish the opportunity to go all out with sky high layers of cake stacked up with fillings and icings and glazes and decorations and candles, so that kind of seals the deal for me. I bake my own birthday cake, and I like it. So there.

chocolate tuxedo cake with strawberry mascarpone icing | Brooklyn Homemaker

You’ll also know, if you’ve been reading along with me for a while, that I have a tendency to get inside my own head and overthink things. Like seriously overthink things.

To that end, I’ll be the first to confess that I’ve been planning this cake for at least 6 months. Initially I was thinking about posting this cake, or at least a version of it, around Christmas. When that didn’t work out I thought I’d make it for Russell’s birthday in January. That didn’t end up happening either, so I’ve been sitting on the idea ever since.

chocolate tuxedo cake with strawberry mascarpone icing | Brooklyn Homemaker

My initial thought was a high contrast black and white cake with layers of deep dark chocolate cake, bright white icing, and glossy dark chocolate ganache. In some circles on the internet this contrasting black on white on black cake is called a “Tuxedo Cake”. Considering my name is Tux, I was all over that business.

Thing is, something magical happened along the way that made me rethink the white in my “tuxedo”.

chocolate tuxedo cake with strawberry mascarpone icing | Brooklyn Homemaker

A few months ago some friends came to visit us, one of whom happens to be from England and also happened to be celebrating a birthday while he was here. Before his wife finished the sentence, “Tomorrow’s his birth…”, I was in the kitchen preheating the oven.

They were out of the house a lot while they were here, off doing the tourist circuit, and since I didn’t know exactly when they’d be around I opted for cupcakes rather than a big formal layer cake. Since I was baking cupcakes, and since our friend is British, I wanted to go for a kind of American kid’s birthday party theme.
I decided to reimagine my funfetti cake recipe as cupcakes, but wanted to skip the American buttercream frosting and go for something a bit more subtle and a bit less sugary. I thought I’d adapt the mascarpone icing from the gingersnap icebox cake I made last December, but add some strawberries to it to make it fit better with the funfetti cake.
(Have I mentioned that I have a tendency to overthink things sometimes?)

To concentrate the flavor of the strawberries and make them less watery I decided to cook them down a bit with some sugar before mixing them into the icing.
At first I worried that I’d cooked the strawberries too long and was disappointed that they ended up tasting kind of jammy rather than super fresh like I’d hoped, but I forged ahead anyway and once I’d mixed them into the mascarpone and whipped cream…
HOLY SHIT.

chocolate tuxedo cake with strawberry mascarpone icing | Brooklyn Homemaker

Where do I begin?

This icing basically tastes like the freshest, creamiest strawberry ice cream you’ve ever had, but with the texture of fluffy whipped cream. It’s stable enough to be used as a cake icing as well, and just sweet enough to bring out the sweetness of the strawberries without being overly sugary or cloying.

After one bite, all of my big birthday cake plans changed.

My black and white tuxedo cake would be getting a chichi pink makeover.

chocolate tuxedo cake with strawberry mascarpone icing | Brooklyn Homemaker

As much as I’d like to, you can’t have an entire birthday party and serve nothing but cake, so with the cake as the pièce de résistance we decided to have a barbecue. An amazing sustainably sourced organic butcher recently opened near us, so we got a bunch of homemade bratwurst for the grill and called the whole shindig a “sausage party”.

Still on our German kick after our recent trip to Berlin, we went all out with German potato salad, and gurkensalit (cucumber salad), sauerkraut, and whole grain german mustard. I even drank beer for the night! (I usually stick to wine or whiskey).

The food was a huge hit, and while the bratwurst put up a good fight trying to be the star of the (sausage) party, my foppish pink tuxedo cake definitely stole the show!

chocolate tuxedo cake with strawberry mascarpone icing | Brooklyn Homemaker

The tender layers of devil’s food cake are nothing less than super rich and incredibly moist slices of dark chocolate heaven. The strawberry mascarpone icing is ethereally fluffy and impossibly creamy, and even though the strawberries are cooked down, the icing tastes bright and fresh and summery. The dark chocolate ganache is velvety and perfectly rich and bittersweet, with a lovely glossy finish thanks to a touch of honey.

To top it all off and make it feel even fancier and ever-so-slightly gaudy, I added some white candy beads in varying sizes to the top of the shiny dark ganache. You don’t have to if you don’t want to, but why on earth wouldn’t you want to?

chocolate tuxedo cake with strawberry mascarpone icing | Brooklyn Homemaker

Chocolate Tuxedo Cake with Strawberry Mascarpone Icing and Glossy Ganache

  • Servings: 16 to 24-ish
  • Print
Devil’s Food Cake
adapted from Brooklyn Homemaker
makes three 8-inch layers

butter and flour for pans
1 1/2 cups unsweetened natural cocoa powder (I used Double Dutch Process)
1 1/2 cups hot water (or hot brewed coffee for a richer flavor)
3 1/4 cups cake flour
1 1/4 teaspoons coarse salt
1 teaspoon baking powder
1 teaspoon baking soda
1 cup (2 sticks) unsalted butter, melted and slightly cooled
1 cups peanut oil or vegetable oil
1 cup granulated sugar
1 1/4 cup packed brown sugar
4 large eggs
4 teaspoons vanilla extract
1 cup buttermilk

Preheat oven to 350 degrees.

Butter three 8 inch round cake pans, line bottoms with parchment paper, butter paper, and dust pans with flour.
Whisk together cocoa powder and hot water (or coffee) until smooth and set aside.
Sift together flour, salt, baking powder, and baking soda; set aside.
Beat melted butter, oil, and sugars together on medium-low speed until combined.
Add eggs, one at a time, beating after each addition.
Beat in vanilla and cocoa mixture. Reduce speed to low.
Add flour mixture in three batches, alternating with buttermilk and beginning and ending with flour. Beat until just combined.
Divide batter between pans, and bake until a cake tester inserted into centers comes out clean, 40 to 45 minutes.

Transfer pans to a wire rack to cool for 30 minutes. Invert cakes onto rack, peel off parchment, and let cool completely.
To achieve a perfectly flat, professional looking cake, you’ll want to slice the very tops of the cakes off to make each layer completely flat and level. You can do this using a very sharp bread knife, or a cake leveler.

If you’re not assembling cakes right away, individually wrap each layer tightly in plastic wrap to prevent drying. Layers can be stored in the refrigerator for a day or two, or frozen (wrapped in plastic wrap first, then aluminum foil) for up to two weeks.

Simple Syrup: (optional)
1/2 cup water
1/2 cup sugar

Combine both ingredients in a small saucepan and heat over high heat, stirring until sugar dissolves completely. Remove from heat and cool completely.

Strawberry Mascarpone Icing:
1 lb ripe strawberries
3/4 cup sugar
3 cups cold heavy cream
1 tablespoon vanilla extract
8 oz mascarpone cheese
pinch of salt

Hull and finely chop strawberries and place in a medium saucepan with sugar. Stir to combine and once the strawberries begin to give off liquid, transfer pan to the stovetop over medium high heat. Bring to a rolling boil and reduce to a low boil. Cook for about 30 minutes, stirring occasionally, until thick and syrupy and reduced by about half.
Transfer to a heatproof bowl, cover and refrigerate until completely cool. You can place it in the freezer if you’re in a hurry, but stir often and don’t let it actually freeze.
If preferred, you can substitute 1 1/2 cups good quality store bought strawberry jam to save yourself some time.

Whip cream with a mixer on high just until stiff peaks form. Add vanilla, salt, mascarpone, and strawberry mixture and beat until well combined and mixture stiffens back up. This should only take about 30 to 60 seconds. Don’t over mix or the mascarpone can become grainy. If you’re not using your icing right away you can store it in the refrigerator, but you may want to whip it for another 30 seconds just before icing the cake.

Glossy Ganache Drizzle:
4 oz good quality dark chocolate (60% works well)
1/2 cup + 2 tablespoons heavy cream
1 tablespoon honey
pinch salt

Chop chocolate into small, easily melted pieces and place in a heat proof bowl.
Heat heavy cream, honey, & salt in a small saucepan just until it comes to a light boil, and immediately pour directly over chocolate. Wait 2 to 3 minutes before stirring until completely smooth and melted and free of lumps. If the mixture seems very hot still it may melt the icing as you pour it so wait a few minutes for it to cool slightly. Do not let it get too cool or it will not drizzle nicely and may look messy.

*Do not make the ganache until the cake is completely iced and ready to decorate.

Decorations: (optional)
Various sizes of white candy beads, including:
white sixlets
white candy pearls (sometimes called dragees)
white nonpareils

Assemble cake: 
Place the first cake layer on an 8″ cardboard cake round, serving plate, or cake stand. Using a cake round will make it easier to ice and decorate, especially if you have a revolving turntable for decorating (I use a lazy suzan, but you can also just spin your plate or cake stand while you work).

Using a squeeze bottle or pastry brush, evenly distribute 2 or 3 tablespoons of simple syrup over the top of the cake layer. This step isn’t completely necessary but helps ensure the cake stays incredibly moist. It’s especially helpful if you’re using cake you stored in the fridge or freezer for a few days, or if you plan to wait a day or two before serving the cake.

Once the syrup has absorbed into the cake, place about 2 cups or so of icing on the first layer and spread it smooth and even using an icing spatula. It’s okay if it spreads out past the edge of the cake layer a bit. Add the next layer of cake, looking from directly over the top and from eye level at the cake to make sure each layer is directly one above the other, rotating the cake to be certain. Repeat with the simple syrup and icing again, then add the third and final layer and repeat again. Using the same amount of icing as before, start with the top of the cake but spread the icing thinner and work some of it down the sides of the cake to completely cover the whole cake in a thin, smooth, even coat of icing. This first layer of icing is called the crumb coat, and it seals the cake and keeps crumbs from being visible in the outer layer of icing.

Place the cake in the refrigerator for about 30 minutes to help set the icing and firm up the cake.
After 30 minutes top the cake with about 3 to 4 cups more icing and spread it over the whole cake the same way you did the crumb coat. Start by smoothing the top and slowly work the icing down the sides to cover the cake completely. Try to get the icing as completely smooth as possible with straight sides and a flat, level top. You may have some icing left over, and I couldn’t blame you if you ate some of it with a spoon. Refrigerate the cake again for another 30 minutes (or up to a day).

Make your ganache just before you’re ready to remove the cake from the fridge.

I find it easier to get an even, professional looking drizzle by slowly pouring the ganache just around the outer edge of the top of the cake, while slowing rotating the cake. Once you’re happy with the amount of drizzle coming down the sides, use the remaining ganache to fill in the center of the top of the cake, smoothing it flat with a clean icing spatula before the ganache sets.

If you’d like to add decorations to the top of the cake, be sure to add them before the ganache sets. I used a mix a mix of multiple sizes of white candy beads, about 2 to 3 tablespoons of each, starting with the largest size and finishing with the smallest.

This cake will keep well in a cake saver at room temperature for a day or two if the weather is not too hot or humid. Otherwise, cover tightly and store in the refrigerator for up to 3 days.

If refrigerating, bring cake to room temperature at least an hour before serving.

gingersnap icebox cake with maple mascarpone cream

Why hello there! It’s so nice to see you again!

gingersnap icebox cake with maple mascarpone cream | Brooklyn Homemaker

First, I want to say that I hope you all had a perfectly wonderful (and delicious) Thanksgiving day. I know I did!

Second, I want to let you know that the pressure and the stress of making and testing and photographing and posting eight Thanksgiving recipes and making two actual Thanksgiving dinners (not to mention working at a kitchenware store leading up to the biggest food holiday in the US of A) was just too much for me. I promise that it was all worth it, but it actually killed me. I hate to be the bearer of bad news, but I’ve passed away.

gingersnap icebox cake with maple mascarpone cream | Brooklyn Homemaker

Despite my untimely demise, there’s no rest for the weary, and here I am again posting from the great unknown.

The holidays are fast approaching so I know that I need to get my blogging butt in gear and get baking! Being that I’m recently deceased though, I wanted to try to do something sort of easy(ish). Easy doesn’t mean that it shouldn’t also be really fun and impressive and totally delicious though!

gingersnap icebox cake with maple mascarpone cream | Brooklyn Homemaker

Thing is,
I don’t really do “easy”.

A while back I saw Martha (yes, THE Martha) on TV promoting her new entertaining cookbook and she made an icebox cake with thin, crisp homemade chocolate chip cookies. I’d never had an icebox cake, but her version sounded amazing and actually pretty simple (especially for Martha).

gingersnap icebox cake with maple mascarpone cream | Brooklyn Homemaker

A traditional icebox cake is make with thin, store bought crisp wafer cookies sandwiched and stacked together with whipped cream. You do a layer of cookies, a layer of cream, a layer of cookies, a layer of cream, and so on and so forth until you suddenly have a round, cake shaped stack.

It doesn’t seem like this should work, but it does. You’d think that the cream would separate and wilt and the cookies would turn to mush and the whole thing would just fall apart and be weird and gross. But that’s not what happens. Magic happens.

gingersnap icebox cake with maple mascarpone cream | Brooklyn Homemaker

The crisp cookies soften as they absorb some of the liquid from the cream and so, rather than separating and wilting, the whipped cream actually thickens even more as the cookies soften up. When left for several hours (or overnight) the whole thing sort of takes on one perfect smooth, sliceable texture, just like a rich silky cake.

Like I said.
Magic.

gingersnap icebox cake with maple mascarpone cream | Brooklyn Homemaker

I decided that if it was good enough for Martha, it was good enough for me.

Rather than Martha’s chocolate chips, or the traditional chocolate wafer cookies, I wanted to do something a little more “holiday-y”. To me, growing up with German grandparents, the holidays were always filled with molasses and spice. Gingerbread and gingersnaps and the like. You know.

So I thought that a gingersnap icebox cake was just the ticket to kick off the holiday baking season. Like I said before though, I don’t really do “easy”. I know I set out to do an easy dessert, but once I got inspired and excited I decided that it would be more fun to make my own gingersnaps rather than using store bought. This is totally unnecessary, but I’m a weirdo so I totally enjoyed the process. If you do want to make your own though, I’d suggest using a little extra ginger in the cookies. The spice is mellowed out a bit by the cream so a little extra will kick it back up to where you’d expect a gingersnap to be.

gingersnap icebox cake with maple mascarpone cream | Brooklyn Homemaker

To add a little extra depth and richness to the standard whipped cream I added mascarpone and a touch of maple syrup. A splash of bourbon was a nice touch too but could easily be left out if you’re serving this to the under 21 crowd.

The ginger and molasses in the gingersnaps pairs perfectly with the sweet mascarpone maple whipped cream. The combination is like a rich velvety gingerbread flavored mousse. A sprinkle of chopped crystalized ginger adds a nice touch of extra spice and lets your guests know that rather than simple chocolate, this cake is made with sugar and spice and everything nice.

This cake is seriously amazing. Like, totally unbelievable. Russell has been raving about it ever since the last bite disappeared and keeps saying how he wasn’t expecting something so simple to taste so delicious. But, again, this cake is made of magic. You might even say that it’s special powers were strong enough to bring me back to life!

gingersnap icebox cake with maple mascarpone cream | Brooklyn Homemaker

Gingersnap Icebox Cake with Maple Mascarpone Cream

Maple Mascarpone Cream Icing:
2 1/2 cups cold heavy cream
1/4 cup sugar
1/4 cup real maple syrup
2 tablespoons bourbon or rum (optional)
1 tablespoon vanilla extract
8 oz mascarpone at room temperature
pinch of salt

At least 63 gingersnaps, for nine layers of seven cookies each
(I made my own using a double batch of smitten kitchen‘s recipe)
A tablespoon or two of finely chopped crystalized ginger, optional

In the bowl of an electric mixer fitted with the whisk attachment, whip the heavy cream until it begins to thicken and form soft peaks. In a separate bowl, stir together the mascarpone, sugar, maple syrup, bourbon, vanilla, & salt until smooth and well combined. Transfer mascarpone mixture to bowl with thickened cream and beat on low speed until almost smooth, 30 to 60 seconds. Scrape down the sides and fold to incorporate. Increase the speed to medium high and beat until the mixture is thick and holds firm peaks, another 30 to 60 seconds. Do NOT overbeat or the icing will become grainy.

On an 8″ cake board, cake stand, or serving plate, arrange a layer of cookies into tight a circle. You’ll want one cookie in the center with a ring of cookies surrounding it with as little space between them as possible. With the size of the cookies I used I could fit 7 cookies per layer. Place about 3/4 to a cup of icing over the first layer of cookies and smooth it out with a small offset icing spatula. Spread the icing almost to the outer edge of the cookies, leaving just a small edge of cookies showing. Arrange another layer of cookies, alternating the layers so they appear staggered above one another. Repeat another layer of icing and then another layer of cookies, again and again until you have as many layers as you desire or until you run out of icing or cookies. Finish the top of the cake with a final layer of icing. My cake was 9 layers tall.

If you have a cookie or two left over, crumble it over the top and sprinkle with crystalized ginger if desired.

Transfer cake to refrigerator for a minimum of 6 hours (or overnight) before serving.